Slovak Caraway Soup

April 26, 2017

Growing up with an ethnically Italian mother and an ethnically Slovak father, we mostly ate Italian food with Slovak food appearing on the table every week or two.  On Sundays we usually went to visit my father’s parents and got a bit more Slovak food.

There were some classic American dishes that appeared on our table, too.  But, honestly, not that often.  The only thing my mother made that I didn’t like was hamburgers.  Well, that and liver.

But even my mother didn’t like liver.  She made it because my father liked it.  There was never the expectation that anyone else would eat it.

When she made liver…and that process involved running from the living room, through the dining room, to the kitchen to turn the liver as it sautéed and then running back to the living room to avoid the smell…she always made something else for the rest of us.  Well, that wasn’t so unusual either.  Remember…Southern Italian mother…food is important…everyone needs to eat.  There were nights when she would make one meal for my father, one for my sister, and one for me.  She would eat one of the three.

We always ate dinner together as a family and, despite the comment above, we usually at the same meal.  Sometimes, though, we each got individually catered food.

But back to hamburgers for a moment.  My mother was a great cook.  I know she used really good beef for her hamburgers.  She usually picked out a whole cut and had the butcher grind it.  She never bought ground beef that I recall.  I still follow the basic blueprint of her hamburger recipe today and enjoy it.  So, I can’t really tell you why I thought her hamburgers were awful.  But I did.

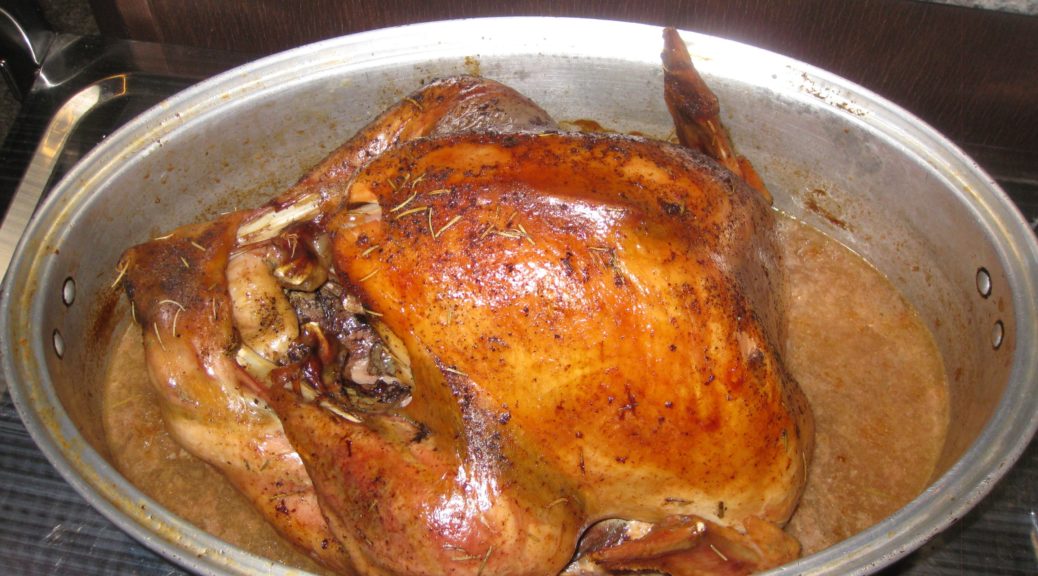
Soup was a big deal in our house.  My father really liked soup.  Interestingly, I don’t remember having Caraway Soup more than a few times while growing up.  I do know, however, that while I was in college I got the recipe from my mother after it appeared on our table one day.  It seemed like a revelation.

It has been a regular on my table ever since.

Print Recipe
Slovak Caraway Soup
This is a light, refreshing soup based on a vegetable broth for which the ingredients are almost always on hand. I like serving it as a first course though it works equally well for lunch or as a light supper. Grating the vegetables on the large holes of a box grater was one of my mother’s tricks. It makes fast work of prep and the small pieces quickly flavor the broth.
Votes: 0
Rating: 0
You:
Rate this recipe!
Cuisine Slovak
Prep Time 15 minutes
Cook Time 1 hour
Passive Time 45 minutes
Servings
people
Ingredients
Cuisine Slovak
Prep Time 15 minutes
Cook Time 1 hour
Passive Time 45 minutes
Servings
people
Ingredients
Votes: 0
Rating: 0
You:
Rate this recipe!
Instructions
  1. Shred the carrots on the teardrop holes of a box grater.
  2. Shred the celery on the teardrop holes of a box grater.
  3. Thinly slice half an onion.
  4. Combine carrots, celery, sliced onion, 2 teaspoons of salt, ½ teaspoon of black pepper and 2 quarts of water in a stock pot. Cover. Bring to a boil then reduce heat and simmer for 30 minutes.
  5. Add the caraway seeds. Cover and simmer another 25 minutes.
  6. Strain the broth. Discard the solids.
  7. Return the broth to the stock pot. The soup can be made several hours ahead to this point.
  8. When your ready to finish the soup, return the broth to a bare simmer.
  9. In a heavy-bottomed stock pot large enough to hold the soup, sauté the minced onion in butter until soft but not brown, about 3-4 minutes.
  10. Add the flour to the sautéed onions and cook until lightly colored, about 2 minutes, stirring almost constantly.
  11. Stir the hot broth into the onion-flour mixture a ladleful at a time, stirring well while adding the broth to avoid lumps.
  12. After about one-third of the broth has been added, the remainder can be added all at once.
  13. Bring to a boil and boil gently for 1-2 minutes to thicken. Adjust salt and pepper.
  14. While the soup is boiling, beat the eggs with 1/3 cup of water. Season the eggs with salt.
  15. While constantly whisking the stock, drizzle in the eggs to create shreds of egg.
  16. Serve immediately.
Recipe Notes

Copyright © 2017 by VillaSentieri.com. All rights reserved.

Share this Recipe

Italian Slow-Roasted Chicken or Turkey

April 21, 2017

For two countries that are geographically so close, Italy and France couldn’t be further apart on views of how to roast poultry.

The French typically roast quickly and at high temperature.

Italians are masters of the low and slow approach.

Italian roast chicken (or turkey, for that matter) literally falls apart.  The French version does not.  It’s a matter of style and technique, not quality or skill.

The usual style in the United States leans more toward France than Italy.  It’s the basis of the style of roasting described in most modern cookbooks and cooking magazines; higher temperatures rather than lower temperatures and yanking the bird out of the oven as soon as it reaches the minimum acceptable temperature to be “cooked” and “safe.”  Even when these magazines try to champion the approach of low and slow, they almost always miss the boat.  They miss the boat because they are still focused on the thermometer approach.

You can’t do low and slow if you’re focused on getting the bird out of the oven as soon as it hits the “safe” temperature.  Italian roast chicken is more like “pulled” chicken than the minimally cooked French version.  The whole mouthfeel is different.  So is the taste.

What I didn’t understand growing up is that my mother’s roast chicken and turkey drew from a broader Italian approach.

A few years ago we were in Tuscany having lunch with my husband’s Great Uncle Beppe and his family.

When the roast chicken was served, it was just like my mother’s!  Seasoned with garlic, rosemary, salt and pepper and roasted slowly, till it basically fell apart.

My mother’s mother came to the United States from Calabria around the turn of the 20th century at four years of age.  Here I was, nearly a century later in a province at the other end of the Italian peninsula eating chicken that could have been my mother’s, the way she learned it from her mother, who learned it from her mother.

I think that was a turning point for me in wanting to better understand Italian food traditions throughout the country and even throughout the Italian diaspora around the world.

Another amazing thing, when I think about it, is that my mother brined her chicken for an hour before cooking.  We’re talking the 1960’s here (probably the 1950’s too but I’m too young to remember that) way before brining was ever mentioned in cooking circles.  I can’t tell you why she did it or how it started but when I was learning to cook under her guidance, brining was always the first step for any recipe that included chicken.

Print Recipe
Italian Slow-Roasted Chicken or Turkey
This is a no-recipe recipe. I never measure the seasonings. It’s really pretty hard to use an inappropriate amount. The cooking time is pretty forgiving, too. Until you get the hang of it, I suggest planning on the longer cooking time and the higher temperature. If the chicken or turkey is falling-apart tender before you’re ready for it, just reduce the oven to 150°F to keep the bird warm. My mother would usually brine the bird for about an hour before cooking. Time permitting, I do the same. This basic recipe works for everything from a three pound chicken to an 18 pound turkey. Just for a point of reference, the pictures feature a 12 pound turkey.
Votes: 0
Rating: 0
You:
Rate this recipe!
Course Mains, Poultry
Cuisine Italian
Prep Time 10 minutes
Cook Time 40 minutes per pound
Servings
people
Ingredients
Course Mains, Poultry
Cuisine Italian
Prep Time 10 minutes
Cook Time 40 minutes per pound
Servings
people
Ingredients
Votes: 0
Rating: 0
You:
Rate this recipe!
Instructions
  1. Brine the bird, if you like, for about an hour.
  2. Thoroughly rinse and dry the bird.
  3. Prop the bird with the cavity facing up. Generously season the inside of the bird with garlic powder, rosemary black pepper and salt. As a matter of habit, if I'm using dried rosemary, I always crust it with my fingers before sprinkling it on the bird.
  4. Put the bird in a roasting pan, breast up, preferably one able to hold the bird rather snugly. The roasting pan should have a tight-fitting cover.
  5. Generously season the outside of the bird with garlic powder, rosemary, black pepper and salt.
  6. Add water (or wine) to the bottom of the roasting pan not over the top of the bird. You don't want to displace the seasonings.
  7. Cover and roast at 350°F for 30 minutes. Reduce heat to 275°F to 300°F.
  8. After the first hour, baste the bird with the juices in the roasting pan about every 30-45 minutes. Be sure to tip the bird, or use a basting bulb, to remove the juices from the cavity and add them to the juices in the bottom of the roasting pan.
  9. Roast for a total of 30-40 minutes per pound (including the first half hour). The bird should just about be falling off the bone.
  10. If there is too much liquid in the bottom of the pan or if the bird is not brown enough, uncover the pan for the last 30 minutes or so.
Recipe Notes

Poultry cooked this way will not submit to carving in a photogenic Norman Rockwell manner. It’s just a different style. It would be like trying to cut delicate slices from pulled pork. It’s not going to happen. That said, the joints will usually separate easily and you can cut along the grain rather than against the grain to portion appropriate-sized pieces for serving.

Copyright © 2017 by VillaSentieri.com. All rights reserved.

Share this Recipe

Home-Rendered Lard

April 18, 2017

Blame Upton Sinclair and Crisco.

The quality of baked goods hasn’t been as good since we abandoned lard in a wholesale way in the early 20th century in favor of partially hydrogenated vegetable shortening, with Crisco being the most recognized brand.

And our health has been the worse for it.

Study after study has shown that partially hydrogenated vegetable shortening, because of trans-fats, creates more cardiovascular disease than the animal fats, like lard and butter, it was meant to replace.

Most vegetable shortening was reformulated in the first decade of the 21st century to reduce the amount of partially hydrogenated fat but this still has not resolved all the health-related concerns.  There are two main reasons.  Many products still contain some partially hydrogenated fat.  It’s just that if there is less than half a gram per “serving” the manufacturer can list the amount as zero on the label.  The other reason is that the fully hydrogenated fats that have replaced most of the partially hydrogenated fats have been shown to alter metabolism in unpredictable ways.  It will likely take us decades to determine their true health consequences.

Several years ago I took a weeklong course at the Culinary Institute of America at Greystone in St. Helena, California.  Called “Healthy Kitchens, Healthy Lives” it was sponsored by Harvard University and the Culinary Institute of America.  It was a week of hands-on cooking, cooking demonstrations, and lectures aimed at health care professionals.  A major take-away point for me was one of the Harvard faculty emphasizing that there was “zero tolerance” for trans-fats.  It was as clear a statement on the issue as I had ever heard.

My solution (and it’s been my solution since the early 1980’s when there were enough studies about the effects of partially hydrogenated fats to convince me) is to only use either vegetable oils and fats, like olive oil, corn oil, canola oil or coconut oil, among others, or animal fats, like lard and butter.

I also try to maintain fidelity to the types of fats and oils that would be used traditionally in a given cuisine.  Thus, while I cook with coconut oil when making Indonesian food, for example, I won’t use it when I’m cooking Italian food.  For the same reason, I won’t use olive oil when I’m cooking Sri Lankan food.

As a youngster, I remember looking at a lot of hand-written recipes.  It was amazing to me to see how Crisco (and it really was Crisco at the time) came to replace what would obviously have been lard in a more traditional version of the recipe.  This is true for Totos, the Italian Chocolate Spice Cookies that were the subject of one of my first blog posts.

If I’ve convinced you that you don’t want to use solid vegetable shortening and you really want to try lard, you might ask why I’m suggesting that you render it rather than just buy lard from the supermarket.

Have you looked at the label of a block or tub of lard at the supermarket lately?

Well, it’s not just pure old lard any longer.  It’s lard and…you guessed it…hydrogenated lard!  There are also a number of preservatives thrown in for “good measure.”

You can, however, buy artisanal lard that only contains pure, rendered lard.  You may have a difficult time finding these products depending on where you live.  You’ll also pay dearly for them; something in the range of $20 to $24 per pound!

So, while I didn’t make a big deal out of the lard called for in my post on Totos, I’m suggesting now that you may want to render your own lard as a replacement for the solid vegetable shortening you’re currently using (both for your health and for the quality of your food) and because I will be posting a number of recipes where lard will be a key ingredient in the coming months.

I understand that rendering your own lard isn’t sexy.  Nobody is going to wax poetic about food containing lard the way they might for the perfect long-simmered Southern Italian ragu.  But it’s really not that difficult or time-consuming and having the best ingredients, not just the most convenient, will “up” your cooking game!

I started rendering lard for cooking my junior year in college.  (Kind of geeky, I know.)  I used it with abandon.  I had fried foods several times per week and every now and then I would make a complete meal of fried foods, what Italians call Frito Misto.

Unfortunately, I now accumulate extra weight in a way I didn’t in college.  So, I eat less fried food but when I do, I want it to taste great.  For that, there’s always lard.

Print Recipe
Home-Rendered Lard
Leaf fat is the best for rendering into lard but can be difficult to obtain. The next best is fatback. I’m lucky enough that I can buy good-quality pork fat from my local supermarket but I don’t really get to specify leaf fat versus fatback. However, an easy rule of thumb is, the firmer the fat, the better the lard. Don’t use soft caul fat for rendering lard. You want firm pieces of fat. Starting with some water in the pan allows the fat to begin to render without risk of browning. Rendering lard can take a few hours but it is mostly hands-off and yields a product that is superior to what is commercially available in supermarkets.
Votes: 0
Rating: 0
You:
Rate this recipe!
Course Miscellaneous
Cuisine General
Prep Time 20 minutes
Cook Time 3 hours
Passive Time 2 3/4 hours
Servings
Ingredients
Course Miscellaneous
Cuisine General
Prep Time 20 minutes
Cook Time 3 hours
Passive Time 2 3/4 hours
Servings
Ingredients
Votes: 0
Rating: 0
You:
Rate this recipe!
Instructions
  1. Remove any meat that is clinging to the fat as well as any discolored areas of fat.
  2. Cut the fat into long strips approximately ½ inch wide.
  3. Run the strips of fat through a meat grinder. If you don’t have a meat grinder, you can chop the fat by hand but this is very tedious.
  4. Put the ground fat and water into a heavy-bottomed pot.
  5. Cover the pot. Heat on low till some of the fat begins to render.
  6. Uncover the pot. Increase the heat to medium-low and cook, uncovered, stirring every 20 minutes or so until the fat is mostly rendered and the remaining bits of unrendered fat are just beginning to turn golden. This can take 2-3 hours.
  7. For the best quality pure white lard, do not brown any of the “cracklings” though a slight golden color is fine.
  8. Strain the lard into a metal container while still hot. Allow to cool uncovered then cover tightly and refrigerate.
  9. Lard will keep a very, very long time in the refrigerator.
Recipe Notes

Copyright © 2017 by VillaSentieri.com. All rights reserved.

Share this Recipe

Farfalle con Salsa di Piselli (Bowtie Pasta with Peas)

April 13, 2017

I’ve been silent for a while.  It wasn’t planned or anticipated.  Life just got in the way.  Mostly it was good stuff, though.  For example…

My husband’s birthday…a momentous one that ends in a zero…held at Trio Restaurant in Palm Springs.

A wedding (complete with a photo shoot using vintage hats!)  Congratulations Suzanne and Bob!!

A visit to the Trinity Site on one of the two days per year that it is open to the public.

Cooking at Palm Desert Food and Wine Festival.  Yep!  I got to cook at the Palm Desert Food and Wine Festival!!

That was a hoot!

The main events of the food and wine festival are held in a series of large tents on the top of a parking garage in Palm Desert.  The festival starts off on Friday with a multi-course, wine-paired James Beard Luncheon prepared by celebrity chefs.  The festival continues on Saturday and Sunday with The Grand Tasting and Chef Demonstrations.  There are other related events, such as special dinners, in the area, too.

There are three tents devoted to chef demonstrations.  Each demonstration runs for about an hour.  One demonstration per hour in each of three tents for two days is a lot of demonstrations.

Local chefs bring their own ingredients for their demonstrations and also prepare samples of the finished dish for about 100 audience participants.  Mostly what the local chefs really bring is their restaurant kitchen staff to do the work.

Celebrity Chefs have a whole different deal.  They submit their recipes.  The ingredients get purchased.  The commercial kitchen, set up in a tent on top of the parking garage, preps all the ingredients for their demonstrations and also prepares between 75 and 175 portions of the dish to be distributed to the audience.

I got to prepare food for The Beekman Boys, Stuart O’Keeffe, Zac Young, and Aarti Sequeira, among others.  The Beekman Boys, Josh and Brent, were gracious enough to come into the kitchen and chat with me during their Facebook Live post!  The post is below.

Hey everyone…we're live at the Palm Desert Food & Wine Show. Come take a peek behind the scenes…

Posted by Beekman 1802 Boys on Saturday, March 25, 2017


So, while I wasn’t posting recipes, for which I apologize, I was further pursuing my cooking goals.

After being in Palm Desert, where it was definitely spring, and returning to Santa Fe where it was definitely winter, I felt the need for something spring-like.  This pasta, with a sauce of spring-like peas, was exactly the thing!  Unless you have absolutely glorious peas from a local farmers’ market, I suggest using frozen peas.  This is exactly what I did to create a taste of spring in the Santa Fe winter!

Print Recipe
Farfalle con Salsa di Piselli (Bowtie Pasta with Peas)
If you have access to fresh peas from a farmers’ market please give them a try. If not, frozen peas work well. I’ve never had good luck with the “fresh” shelled peas in the supermarket. They always seem too starchy, and sometimes even musty tasting. Each pound of peas in the pod yields about 1 cup of shelled peas. For the 2 ¼ cups of peas needed for this recipe, I’d start with at least 2 ¼ pounds of peas in the pod. The vermouth adds an herbal quality and its slight bitterness balances the sweetness of the peas.
Votes: 0
Rating: 0
You:
Rate this recipe!
Prep Time 30 minutes
Cook Time 30 minutes
Servings
people
Ingredients
Prep Time 30 minutes
Cook Time 30 minutes
Servings
people
Ingredients
Votes: 0
Rating: 0
You:
Rate this recipe!
Instructions
  1. Combine the peas, thyme and water. Season with salt. Bring to a boil. If you are using frozen peas remove from the heat as soon as the water comes to a boil and continue with the next step. If you are using fresh peas, cook until the skins pop when bitten into and the peas are just cooked. This will take just a few minutes. The time is dependent on the peas so you’ll have to taste a pea about every 30 seconds so that you don’t overcook them.
  2. Remove ½ cup of the cooked peas from the cooking liquid. Rinse the peas under cool water to stop the cooking. Reserve the peas.
  3. Puree the remaining peas with the cooking liquid in a blender. Reserve the pea puree.
  4. Cut the pancetta into ¼ inch dice.
  5. In a wide, heavy-bottomed pan large enough to hold the cooked pasta comfortably, cook the pancetta over medium-low heat until crisp and brown. If the oil from the pancetta starts to smoke reduce the heat and add a tablespoon of water to quickly lower the temperature. It is important to brown the pancetta well, and to create browned bits in the bottom of the pan (without burning) to build flavor for the sauce.
  6. Remove the pancetta and reserve.
  7. Thinly slice the onion.
  8. Add the butter to the pan you just used to cook the pancetta. leaving in the rendered fat and browned bits. As soon as the butter melts, add the thinly-sliced onion and sauté until the onion is soft and golden brown.
  9. Add the vermouth to the sautéed onions. (Note, the recipe can be prepared several hours in advance up to this point. If doing so, as soon as you add the vermouth, remove the pan from the heat and cover tightly.)
  10. Bring the onion-vermouth mixture to a boil and boil rapidly until the vermouth has evaporated.
  11. Add the pureed peas, reduce heat to low, and gently warm the onion-pea puree mixture.
  12. Meanwhile cook the pasta in three quarts of heavily-salted, rapidly-boiling water. When the pasta is al dente, remove one cup of the cooking liquid and reserve.
  13. Drain the pasta and immediately add it to the warm onion-pea puree mixture.
  14. Increase heat to medium. Add the whole cooked peas, the pancetta, freshly ground black pepper to taste, and enough of the reserved pasta cooking liquid to make a sauce that just clings to the pasta. Cook for a minute or two to allow the sauce to bubble and thicken, stirring occasionally. Add more pasta cooking liquid as needed.
  15. Off the heat, add the Parmesan cheese. Stir well. Add a bit more pasta cooking water if the sauce becomes too thick after adding the Parmesan cheese.
  16. Add the fruity extra virgin olive oil, if using. Stir. Taste and adjust salt and pepper, if necessary.
Recipe Notes

Browning the pancetta and onions is critical to building flavor for the sauce.  It is better to use low heat than heat that is too high.  The starch in the pasta-cooking liquid helps to add body to the sauce.

Copyright © 2017 by VillaSentieri.com. All rights reserved.

Share this Recipe