Risotto with Asparagus

May 29, 2017

Risotto is not a Southern Italian dish.  Neither is polenta, for that matter.

I never had either until college when I started cooking from Marcella Hazan’s The Classic Italian Cookbook published in 1973.  I still use the dog-eared copy I bought in college the year it was published.

It was a magnificent introduction to Northern Italian cooking which I knew little about as a kid of 18 from a small town in Western Pennsylvania in my sophomore year of college.

My knowledge of Northern Italian cooking expanded rapidly though.  Marcella was only the beginning.  There was a true restaurant renaissance in Philadelphia in the 1970’s.  Not only magnificent French restaurants like Le Bec Fin and La Panetiere, but wonderful Northern Italian restaurants like the Monte Carlo Living Room and a bevy of others whose names I can’t recall.  I ate at all of them…often.  I still remember one dinner at the Monte Carlo Living Room where, after being served a very simple spaghetti with garlic and oil, the waiter (they weren’t called servers back then) came by with a black truffle and shaved large quantities of it onto my pasta.  Heaven!

I also learned about Northern Italian cooking from the aunts of my college advisor Eugene (Gene) d’Aquili.  Well, it was Roman cooking, actually, which is in central Italy but still pretty far north from where my mother’s family hailed.

Auntie Helen (Zia Elena) and Auntie Louise (Zia Luigia) (they Anglicized their names after coming to America) were born in Rome in the early years of the 20th century.  They came to America as children.  Of the two, Auntie Helen was the cook.  From her I learned to make many classic Roman dishes.  Some of Auntie Helen’s dishes are slated to make it into the blog, including a Roman Chicken Cacciatore flavored with anchovies.

So, by the time I got absorbed into my husband’s Northern Italian family (his father is from Tuscany and his mother from Friuli) I had a good grasp of Northern Italian cooking.

We have risotto often.  Probably at least once every two weeks.  It’s usually made with a vegetable, though occasionally I’ll make Risotto alla Milanese flavored with saffron and not a vegetable in sight.  In the spring risotto usually includes asparagus or peas.  In the summer it is likely to be zucchini.  The fall brings butternut squash risotto and mushroom risotto.  Mushroom risotto pretty much carries us through the winter, too, with the occasional risotto made with meat sauce.

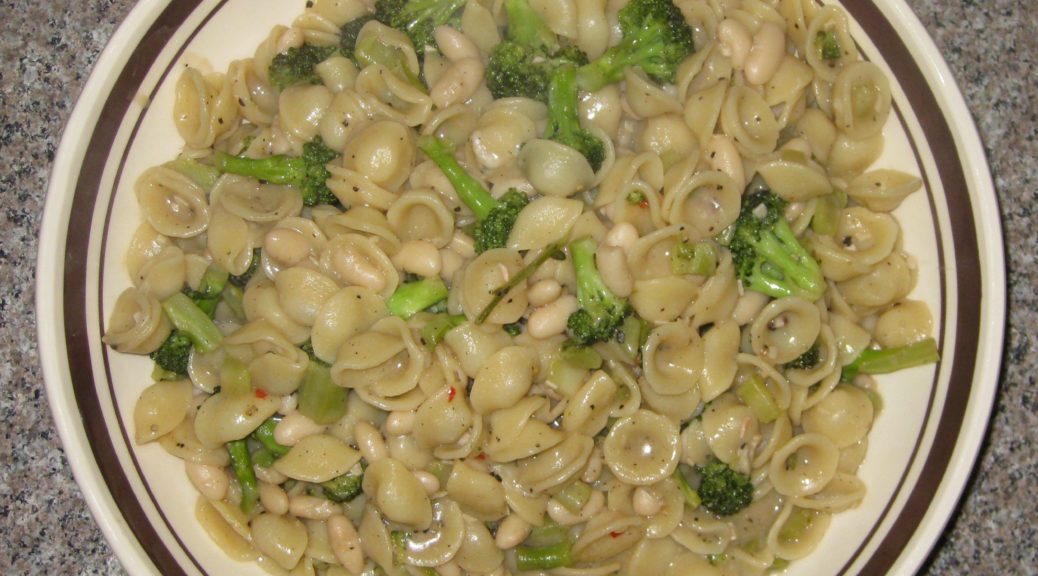
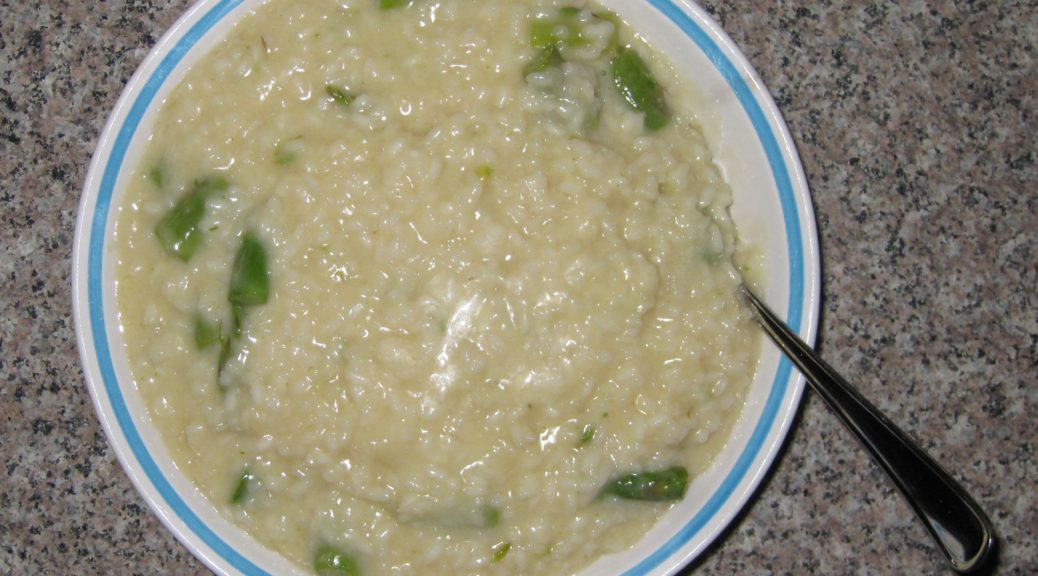
Since it’s spring, I’m doing risotto agli asparagi, risotto with asparagus.

Print Recipe
Risotto with Asparagus
Risotto is a classic Northern Italian dish. The goal is to have rice grains that are still al dente (but not crunchy) in the middle surrounded by a creamy liquid. More often than not I find that risotto served in America is overly rich with butter, cheese, and sometimes cream. An Italian-style risotto should be creamy from the starch in the rice, augmented with a very modest amount of butter and cheese. Risotto rice is a short grain rice that cooks slowly, making it much easier to achieve an al dente texture because it takes a while to actually overcook it. The three types of rice for risotto are Arborio, Carnaroli, and Vialone Nano. Arborio is the easiest one to find though the other two are more forgiving than Arborio when it comes to overcooking. I recommend buying good quality rice imported from Italy. It really isn’t priced that differently from domestic. Do not wash the rice. I don’t buy shallots unless I have a specific recipe in mind. Since risotto is often something that I make with little advance planning based on the fresh vegetables that are in my refrigerator, I usually use onion and garlic in place of shallot. I honestly don’t think one could reliably tell the difference so feel free to use onion and garlic as noted in the recipe if shallots aren’t handy.
Votes: 0
Rating: 0
You:
Rate this recipe!
Prep Time 15 minutes
Cook Time 45 minutes
Servings
people
Ingredients
Prep Time 15 minutes
Cook Time 45 minutes
Servings
people
Ingredients
Votes: 0
Rating: 0
You:
Rate this recipe!
Instructions
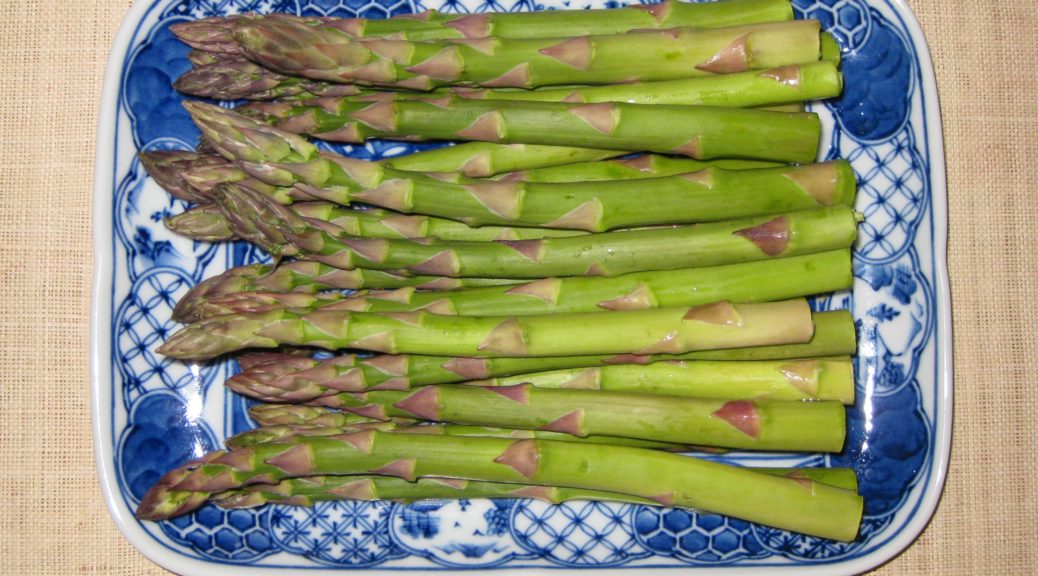
  1. Trim off the tough bottom of the asparagus spears. The standard way to do this is to bend the spear and let it crack naturally where the spear is less tough and woody.
  2. Finely dice the shallot.
  3. Cut the tips off each spear, approximately the top 2 inches. Reserve the asparagus tips.
  4. Cut the remaining spears into 1 inch pieces. Reserve the cut spears separately from the tips.
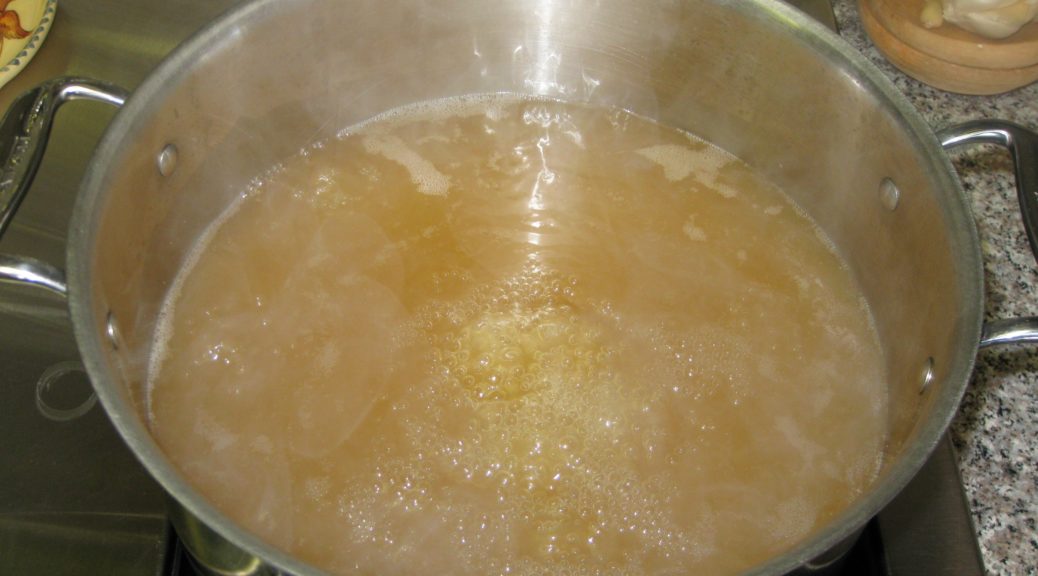
  5. Bring the chicken broth to a boil.
  6. Cook the asparagus tips in chicken broth for 2-4 minutes. They should be “toothy” but not crunchy.
  7. Using a spider or large slotted spoon, remove the tips from the boiling broth and put them into a bowl of ice water to stop further cooking.
  8. Cook the cut asparagus spears in the chicken broth for 4-6 minutes. Like the tips, they should be toothy but not crunchy.
  9. Add the partially cooked cut spears to the ice water with the tips.
  10. Reduce the heat so the broth remains at a simmer.
  11. Heat a two or three quart heavy-bottomed saucepan over medium high heat. Add the olive oil.
  12. When the oil is hot, add the finely chopped shallot (or onion and garlic if you are using that instead).
  13. Sauté, stirring frequently until the shallot softens and turns translucent. Do not brown the shallot. You may need to reduce the heat.
  14. When the shallot is soft, return the heat to medium high and add the rice.
  15. Continue cooking, stirring frequently, until the rice starts to smell toasty. Do not brown the rice.
  16. The outer portion of the rice grains will get translucent while the inside will stay opaque white.
  17. Add the wine. Stir frequently, but not constantly, until the wine has totally evaporated. You will begin to see some starch leaching out of the rice. More and more of the starch will leach out as you cook the rice. This is what will make a creamy sauce.
  18. When the wine has evaporated, add a scant ½ cup of simmering broth. Stir thoroughly paying particular attention to loosening any spots where the starch seems to be sticking to the bottom of the pan. You don’t want to brown (or worse yet, burn) the starch.
  19. Stir frequently, but not constantly, until the broth has evaporated.
  20. If the broth is unsalted, as I recommend, you can add a teaspoon of salt to the rice as you begin to add broth. If the broth contains salt, I recommend not adding salt until the end.
  21. Keep repeating the process with a scant ½ cup of broth, cooking, stirring, and loosening any spots that are sticking until each addition of broth evaporates. The heat should stay as close as possible to medium high. The moderate boiling of the liquid will coax starch out of the rice to create the creaminess that is the hallmark of a good risotto.
  22. While the rice is cooking, drain the partially cooked asparagus.
  23. Begin tasting the rice after about 20 minutes of cooking. It will probably still be quite crunchy at the very core. Until you get the hang of it, I suggest testing a rice grain each time you add more broth so you develop a sense of how quickly the texture changes.
  24. When you think you’re only one or two additions of broth away from having perfectly al dente rice, add the partially cooked asparagus.
  25. Continue cooking, adding simmering broth or water as needed, until the rice is al dente.
  26. Remove the rice from the heat and stir in enough simmering broth or water to create a creamy “sauce.” The starch that you have coaxed out of the rice should absorb at least ½ cup of liquid, possibly more.
  27. Stir in the butter and Parmesan cheese. This will probably thicken the “sauce” so you will need to add a bit more simmering liquid to loosen it.
  28. Taste and add salt and freshly ground black pepper to taste.
  29. Serve immediately.
Recipe Notes

I think the standard method used to decide where to trim asparagus wastes too much.   For a quick tutorial on how I prep asparagus, check out my Preparing Asparagus post.

It will likely take more than 4 cups of broth to cook the rice. If you don’t have more broth, just use plain water. I do that very frequently. Except for the initial addition of wine, all liquid added to the risotto should be simmering.  As I’m getting near the end of the broth, I always put a couple of cups of water on to boil so that I have simmering water to add if needed.

Although the broth used for risotto should be flavorful, it should not be overly concentrated. The flavor of the asparagus should come through and not be muddled because the broth tastes assertively like chicken or herbs. Because you will be cooking down a fair amount of broth, it is best that it not be salted otherwise you run the risk of the risotto being too salty.

Copyright © 2017 by VillaSentieri.com. All rights reserved.

Share this Recipe

Turkey Noodle Soup

May 24, 2017

Soup!

If my mother said she was making “soup” without any qualifiers, it meant her beef noodle soup.

She would cook a good-sized piece of beef in her soup pot along with large pieces of carrot, celery and potato till the meat was falling apart.

She would cook thin egg noodles separately.

To serve the soup, everyone would get a bowl of broth with pieces of carrot, celery and potato.  The large piece of beef would be in its own serving bowl and the noodles in another.

At the table, everyone added beef (shredding it with a serving fork) and noodles to their bowl of broth for the ultimate customization.

I haven’t had soup this way since my mother died.  I actually don’t ever remember being served soup in the same manner by anyone else, anywhere, ever.  If you’ve ever heard of, or had, soup being served this way, I’d really like to hear about it.

The other soup my mother made frequently was what is sometimes called “Italian Wedding Soup.”  It is a rich chicken broth with pieces of chicken, small meatballs, carrots, celery, pasta (typically, acini de pepe), and escarole.

Occasionally my mother would make Slovak Mushroom Soup, with dried mushrooms and potatoes, or Potato Soup with potatoes, milk and onions.  More often, however, we’d get these when visiting my grandparents.  Early on, my grandmother would make soup, but when she got older, Aunt Ann or Aunt Mary would make it and bring it to my grandparents’ house.

On a Sunday, when my father, his six brothers, and all of their spouses and children would visit my grandparents, a lot of soup could be consumed.  Mind you, there was no guarantee that there would be soup, but if there was, it needed to be an industrial quantity.

In the winter, my grandmother would keep the soup in a big pot in the root cellar in the basement.  It was the same root cellar where she would make sour cabbage but that was before I was born.  I know because my father and all of my uncles never tired of talking about my grandmother’s sour cabbage soup, or kissel.  They bemoaned the fact that nobody made it any longer.  I don’t have her recipe and while I can find recipes for soups that sound similar, none of them sounds exactly like the soup my father described.

Today’s soup, however, is not one that I grew up eating.  As I mentioned in an earlier post, my mother thought the carcass of a roasted turkey wasn’t intended to be reused.  I first had turkey noodle soup, made with roasted turkey leftovers, when I was in college.  The soup was made by Mary Lou d’Aquili, the wife of my college advisor and, many years later, the person with whom I went into psychiatric practice, Eugene d’Aquili.

Ever since then, I’ve turned the bones of most roasts into broth.

We have an array of fresh herbs year round thanks to the greenhouse.  I have totally given up dried bay leaves in favor of fresh ones.  They’re really easy to grow and the taste is incredible.  California bay leaves are stronger than Mediterranean bay leaves so if the balance of flavors in a dish is critical, and you’re using the former, opt for about half the amount called for in the recipe.  For most dishes, it’s not a critical distinction, however, and you can just substitute California for Mediterranean bay leaves.

Here’s a picture of our Bay Laurel plant, pruned down and ready to start its seasonal growth spurt.  In the fall I’ll harvest the leaves to make an Italian Bay Laurel Liqueur, Liquore al Lauro or Liquore Alloro.

The following recipe for Turkey Noodle Soup starts with the Roasted Turkey Broth I posted a few weeks ago.

Print Recipe
Turkey Noodle Soup
Save the bones, skin and shreds of meat from a roast turkey to make broth for soup. You can freeze the bones and make the broth later. You can also make the broth and freeze for future use. What you don’t want to do is to freeze the turkey noodle soup. I prefer not to freeze the soup, as the vegetables become too soft. If you must, however, freeze it before adding the noodles and peas. I keep a container of Parmesan cheese rinds in the freezer so that I always have them available to add to soup or other dishes to amplify the savoriness.
Votes: 0
Rating: 0
You:
Rate this recipe!
Cuisine American
Prep Time 15 minutes
Cook Time 1 hour
Servings
people
Ingredients
Cuisine American
Prep Time 15 minutes
Cook Time 1 hour
Servings
people
Ingredients
Votes: 0
Rating: 0
You:
Rate this recipe!
Instructions
  1. Bring the broth to a boil.
  2. Meanwhile, slice the carrots.
  3. Slice the celery.
  4. Dice the onions.
  5. Mince the garlic.
  6. Dig a Parmesan cheese rind out of your freezer.
  7. To the broth, add sliced celery, carrots, onions, minced garlic, bay leaf, marjoram, cheese rind, and salt and pepper to taste.
  8. Return to a low boil and cook, partially covered for 30 minutes.
  9. Taste and adjust seasoning.
  10. Add cooked turkey and tomato paste. Cook at a low boil for another 15 minutes.
  11. Taste and adjust seasoning to your preference then add an additional ½ teaspoon of salt. (Remember, you’re about to add unseasoned peas and noodles.)
  12. Add the noodles. Bring to a boil.
  13. Add the peas. Boil gently till noodles are done.
  14. When noodles are cooked, taste and adjust seasoning. Stir in chopped parsley.
  15. Serve immediately.
  16. Pass grated Parmigiano Reggiano or Pecorino Romano cheese at the table.
Recipe Notes

Here is the recipe for Roasted Turkey Broth.  You should have 3 quarts of broth.

Copyright © 2017 by VillaSentieri.com. All rights reserved.

Share this Recipe

Homemade Dumplings

May 19, 2017

It is unfathomable to me that someone could voluntarily go on a low carbohydrate diet.

Avoiding gluten, short of having full-blown celiac disease, is equally unthinkable.

All of my most favorite foods start with flour.

Some contain flour and potatoes.

Roughly in order these are Potato Gnocchi, my Slovak Grandmother’s Potato Cakes and a three-way tie between Pasta (of almost any sort), Dumplings, and my Aunt Mary’s Bread Rolls Stuffed with Mashed Potatoes and rubbed with garlic and oil.

Of those five foods, the only one I get on a regular basis is pasta.  I have pasta 3 or 4 (or 5 or 6) times per week.  I could probably have it every day and never tire of it.  A few days without pasta and I begin to have serious cravings.

Until just recently, I had a frenetic travel schedule for work.  One of the first things I would do upon landing in a city that I was likely to return to over and over for work was to find a really good restaurant, preferably an Italian restaurant or one with a goodly number of Italian dishes on the menu.  Failing that, I would look for a restaurant with an ingredient-driven menu that was not into precious or pretentious presentation!

Sometimes finding that restaurant was elusive and my pasta cravings would be in full swing by the time I got home.

Over the years, my mother-in-law has learned that the best thing she could make for dinner on a day when I’m returning from a trip is pasta.  Even if I’m not having pasta withdrawal symptoms, there are few foods that I would rather have.  Actually, there’s only one:  gnocchi, which truth be told, is just the Italian word for dumpling, which as you’ve noticed is on my list in its English form, too!

Sometimes the restaurants I’d find were so spot-on perfect that I would just work my way down the menu over successive trips.  In this category are the recently closed Dish Osteria in Pittsburgh, Bari Ristorante in Memphis, Antico in Chicago, and, until the recent change in the menu, Tre Soldi in Chicago.

Sometimes I’d find a chef whose cooking I really enjoyed, as happened with Bruce Bogartz in Knoxville a number of years ago.  My business partner and I followed Bruce through at least three different restaurants.  Sometimes we’d just walk in and sit down and Bruce would come over and say: “Can I just cook for you this evening?”  That would be the sum-total of ordering.

Sometimes my business partner and I would find a restaurant that would accommodate our cravings as happened in Harrisburg, Pennsylvania.  We’d usually get to the restaurant late on the day we came into town.  After a few trips, we got bold and asked for something that wasn’t on the menu.  Something simple.  Something Italian.  As I recall it was spaghetti with anchovies, garlic, olive oil and red pepper.  The chef accommodated us.  From then on, at least once during every trip to Harrisburg we asked for the same thing, sometimes we’d mix it up by asking for a bit of fennel seed to be added.  A salad of arugula with olive oil and lemon juice always rounded out the meal.

While it’s easy to find pasta on restaurant menus, it’s pretty difficult to find dumplings unless you’re in a dumpling culture like Eastern Europe.

After two trips to Prague, I discovered that it was basically impossible to just order dumplings.  I frequently found myself ordering some sort of “Hunter’s Plate” which had an array of cooked meats and, you guessed it, dumplings.

I ate the dumplings first.

Dumplings are a breeze to make.  And don’t even think about packaged baking mix.  (For the reasons why, see my post about hydrogenated fats.)

Unless you are seriously trying to avoid carbohydrates or gluten, give these a try.  They honestly take less than 10 minutes to whip up.  You could get a serious paper cut opening up a box of Bisq…er, biscuit mix, in less time!

Print Recipe
Homemade Dumplings
In order for the dumplings to cook properly, they need to be placed on top of food that is just submerged in the cooking liquid. A little bit of the dumpling will sink below the liquid but, basically, the dumplings should sit on top of the food and steam, rather than boil in the liquid itself. Growing up, the “food” below the dumplings was often kielbasa and sauerkraut. For this post it was turkey with mushrooms and peas in a light cream sauce due to the presence of leftover roast turkey in the fridge. Stir the contents of the pot before adding the dumplings as you won’t be able to do it afterwards. Prior to adding the dumplings, be certain that the heat keeps the liquid at a steady low boil with the lid tightly on the pot.
Votes: 0
Rating: 0
You:
Rate this recipe!
Course Sides
Cuisine American, Slovak
Prep Time 15 minutes
Cook Time 20 minutes
Servings
people
Ingredients
Course Sides
Cuisine American, Slovak
Prep Time 15 minutes
Cook Time 20 minutes
Servings
people
Ingredients
Votes: 0
Rating: 0
You:
Rate this recipe!
Instructions
  1. Lightly beat the egg and ¼ cup of milk. Reserve.
  2. Whisk together the flour, baking powder and salt.
  3. Using a pastry blender, cut the butter into the dry ingredients until there are “lumps” no bigger than flakes of oatmeal.
  4. Make a well in the center of the flour mixture. Add the beaten egg-milk mixture.
  5. Using a fork, gradually incorporate the flour into the liquid by starting in the center of the bowl and stirring in a circular manner, gradually widening the circle to incorporate more and more of the flour.
  6. When the batter will not incorporate more flour, add a few tablespoons of the remaining milk.
  7. Continue stirring and adding milk a few tablespoons at a time, until all the flour is incorporated and you have a fairly stiff but still somewhat sticky batter.
  8. Drop by rounded tablespoonsful on top of whatever you’re cooking in the liquid, such as sauerkraut, pot pie, etc.
  9. Cover tightly and cook 20 minutes without opening the lid. The contents of the pot should stay at a steady, low boil.
  10. Carefully scoop the dumplings onto a serving platter.
Recipe Notes

Copyright © 2017 by VillaSentieri.com. All rights reserved.

Share this Recipe

Pasta al Pesto

May 15, 2017

Gardening at 8000 feet is challenging.  Even more so when you consider that we are sitting on almost solid rock.

There’s not much soil to begin with, just the barest of covering on a rocky foundation.  The piñon and juniper that surround us work their roots through little crevices in the rock that sits just inches below the surface.

What little soil there was in the area immediately surrounding our house was removed to level the building site.  The excavation was almost exclusively rock, one hundred truck loads were taken away.  Some rock was kept on site to create retaining walls around the property.

The corollary, however, is that there’s no dirt around the house to dig into to plant much of anything.  The landscaping that was done was exclusively within rock retaining walls or our front enclosed courtyard, where topsoil was brought in.  The first load of topsoil for the courtyard arrived April 2007, before we were ready to plant anything.  April is a windy month in New Mexico.  The winds started up one day and before evening every last speck of topsoil was blown to West Texas!

We could consider raised bed gardening but that would just invite the rabbits and deer to munch their way through our garden.  As it is, we’ve offered up several stands of ornamental grasses on the periphery of our landscaped area to the critters.  We seem to have reached a truce of some sort.  We let them eat the ones around the edges and, for the most part, they let the others alone.

We installed a greenhouse that allows us to extend the growing season by many months.  It also allows us to winter over a number of plants that would not survive in this climate.  The greenhouse also allows us to grow fig trees in large pots.  The first year we grew figs, they didn’t ripen.  It turns out that even though summer days are warm, the nights are cool enough that the fruit doesn’t ripen.  The following year we left the fig trees in the greenhouse throughout the summer, convinced that it would be too warm for them to thrive even with the automatic ventilation system.

Luckily, we were wrong.  The fig trees loved the heat.  Picking a ripe fig off of the tree and eating it immediately is amazing.  The only fresh fruit experience that would be superior, in my estimation, is a fresh-picked mango…and those trees won’t fit in our greenhouse!

We have one row of planter boxes outside the greenhouse.  We use these for plants, like tomatoes, that are not very attractive to deer and rabbits.  Salad greens, such as arugula, radicchio, and leaf lettuce grows in shallow trays on a raised shelf in the greenhouse.  Many pots of herbs also remain in the greenhouse year-round.  Everything else is planted in our interior courtyard, either in pots or in another row of planter boxes.

Depending on the type of plants, we start planting seeds in February.  Seedlings are transplanted once the risk of frost is minimal.

This year, we started too much basil from seed.  It needed to be thinned.  This created the opportunity for us to have pesto much earlier than would otherwise have been the case.  Usually it’s June before the basil plants have grown large enough that we can harvest leaves for pesto.

We had this pesto on April 30th, a day that measured more than 8 inches of snow at Villa Sentieri.  It was winter’s last hurrah and fresh pesto was a perfect way to welcome spring and say good-bye to winter.


Print Recipe
Pasta al Pesto
The classic basil-based pesto is Pesto alla Genovese. However, because the recipe and ingredients for Pesto alla Genovese are tightly regulated (for example, the basil must be grown in Genoa, Italy), I’ll refrain from calling this Pesto alla Genovese since it can’t meet those strict regulations. Try to use young, small basil leaves. If you must use larger ones, tear them into smaller pieces so they measure approximately the same way. Using olive oil from Liguria, where Pesto alla Genovese originated, is another of those difficult-to-meet requirements. Nonetheless, try to use a sweet, fruity olive oil rather than one that is spicy and pungent. Make the pesto as close to serving time as possible. I like to have all the ingredients measured, making the pesto after the pasta starts to a boil. If you’re wondering about the use of a food processor, that would not be permitted either but I doubt there are many of us that would make pesto if we had to use the traditional marble mortar and wooden pestle!
Votes: 0
Rating: 0
You:
Rate this recipe!
Prep Time 30 minutes
Cook Time 15 minutes
Passive Time 30 minutes
Servings
people
Ingredients
For the pesto
For the pasta
Prep Time 30 minutes
Cook Time 15 minutes
Passive Time 30 minutes
Servings
people
Ingredients
For the pesto
For the pasta
Votes: 0
Rating: 0
You:
Rate this recipe!
Instructions
  1. Pluck the basil leaves from the stems and measure 2 cups, lightly packed.
  2. Measure all the other ingredients. Pine nuts.
  3. Garlic.
  4. Parmigiano Reggiano and Pecorino Romano cheeses.
  5. Don't forget the extra-virgin olive oil and salt.
  6. Bring three quarts of water and 1/3 cup of salt to a rolling boil.
  7. While water comes to a boil and the pasta cooks, heat the serving bowl by placing it in a 150°F oven or partially filling it with boiling water.
  8. When the water comes to a boil, add the pasta. Return to a boil, stirring frequently.
  9. As the pasta boils, put the basil leaves, olive oil, pine nuts, garlic, and salt in a food processor. Puree the basil mixture, scraping down the sides of the bowl occasionally.
  10. When the pasta is almost al dente, pour the basil puree into the warmed serving bowl.
  11. Add the Parmigiano and Romano cheeses. Stir to combine.
  12. Remove ¼ of the boiling pasta-cooking water from the pot and stir into the pesto to loosen it.
  13. When the pasta is al dente, remove and reserve a cup of pasta cooking water.
  14. Drain the pasta. Do not rinse. Add the pasta to the serving bowl and toss to coat each strand.
  15. If the pesto seems a little thick, add a tablespoon or two of the reserved pasta-cooking water.
  16. Taste and adjust salt if necessary.
  17. The finished dish.
Recipe Notes

Copyright © 2017 by VillaSentieri.com. All rights reserved.

Share this Recipe

Technique: Prepping Asparagus

May 13, 2015

Spring is here.  In our house that means lots of asparagus.

It seems like a good time to show you my twist on prepping asparagus.

Usually the bottom portion of an asparagus spear is tough and needs to be removed.  A common method of determining how much to remove is to bend the spear and allow it to snap.  I believe that the standard “bend and snap” method wastes too much asparagus.

I like to put the asparagus on a cutting board and gently bounce a chef’s knife off the spear working up from the bottom.  If you do it gently enough you will hit a spot where the knife suddenly goes just a bit deeper into the spear.  That’s the spot to cut.  Even the sound the knife makes as it moves from the tougher bottom to the more tender portion of the stalk changes.  Sometimes the sound is all I need to know that the next bounce will be the place to cut the spear.

I’ve attached a few video clips of this technique.  Watch for the place where the knife suddenly goes a little deeper and listen to how the sound changes as the knife travels up the stalk.

Prepping Asparagus 1

Prepping Asparagus 2

Prepping Asparagus 3

Prepping Asparagus 4

Orecchiette with Broccoli and Anchovies

May 10, 2017

A few times in my life I’ve been lucky enough to cook with my husband’s Great Aunt Fidalma.  It’s always been in my kitchen, though I keep hoping to make a trip to Tuscany to cook with her in her kitchen.

Zia Fidalma speaks Italian and German.  I speak English.  Though I studied German in high school and college, and at one point was passably able to translate scientific German, my command of spoken German (and at this point, scientific German) is hopeless.  I studied Italian for a while too, but the best I can do is read a menu, order in a restaurant, and find out where the restroom is.

So, cooking with Zia Fidalma starts with a language barrier but it doesn’t seem to matter.  Somehow we communicate.

Mostly that means Zia Fidalma speaks slowly in Italian emphasizing the words I am likely to understand most.

Like the time we were in my kitchen in Santa Fe preparing dinner for twelve.  The first course was spaghetti al pesto.  A pile of basil stalks from my father-in-law’s (Zia Fidalma’s nephew) garden were on the kitchen counter.  Zia Fidalma was plucking off basil leaves one at a time, inspecting each one.  At one point, she looked up at me holding a leaf and said “è brutta” (it’s ugly), clearly wanting my agreement to discard the less-than-perfect leaf.

One day at our home in Chicago, she was making risotto for lunch.  It had a very similar flavor profile to this pasta in that it contained broccoli, garlic and anchovies.

Zia Fidalma cranked up the 15,000 BTU burner to high.  She sizzled some minced garlic for a moment.  There was a vague hint of smoke coming from the pan.  She added the anchovies and stirred them about.  Smoke started to billow up.  She smiled knowingly.  She added the broccoli, undeterred.  Smoke continued.  She stirred.  I stood there horrified.  Then she lightly charred the broccoli.  I was even more horrified.  At long last some liquid went in and the rest of the risotto-making followed a familiar pattern.

I try to avoid smoking oil at all cost when cooking.  I was more than a little concerned about how the risotto would taste.

However, I have never had anything but fabulous food from Zia Fidalma, so I had to trust that this would be OK, too.

This wasn’t her first rodeo.  She’d been making risotto since before I was born.

In the end, all I can say is that the risotto was wonderful.  It had layers of flavor.  It provided an important lesson about how techniques different from what one would typically use can create incredible flavors.

So, if you see wisps of smoke coming from the pan as you singe the broccoli for this recipe, don’t fret.  Just raise a toast to Zia Fidalma, and enjoy!

Print Recipe
Orecchiette with Broccoli and Anchovies
My husband’s Great Aunt Fidalma, who lives in Tuscany, showed me how to cook the broccoli in this manner. Previously, I parboiled the florets and added them and the beans to the sautéed garlic and anchovies. This method adds layers of flavor that cannot be obtained by just boiling the broccoli. I prefer to use home-cooked kidney beans following my recipe for Cannellini alla Toscana. You can use either red or white (cannellini) beans but the red ones add more color contrast. As an alternative you can use one 15 ounce can of beans. Do not discard the liquid in the can as it will improve the body of the sauce.
Votes: 0
Rating: 0
You:
Rate this recipe!
Prep Time 15 minutes
Cook Time 30 minutes
Passive Time 15 minutes
Servings
people
Ingredients
Prep Time 15 minutes
Cook Time 30 minutes
Passive Time 15 minutes
Servings
people
Ingredients
Votes: 0
Rating: 0
You:
Rate this recipe!
Instructions
  1. Put 3 quarts of water and 1/3 cup salt in a 5 quart stockpot or Dutch oven. Bring to a boil over high heat.
  2. Meanwhile, cut the thick stems off the broccoli just below where the stems start to branch into individual florets.
  3. Cut the individual florets off the broccoli by cutting lengthwise through the stalk from top to bottom.
  4. Cut off any remaining stalk just below the floret. These tender stalks can be cut crosswise into one-half inch pieces and added to the florets.
  5. You can use some of the thicker stalks as well, if you wish. To do so, use a vegetable peeler to remove the tough outer skin. Dice the peeled stems into 1/3 inch cubes. Reserve these diced stalks separately from the florets and diced tender stalks.
  6. When the salted water comes to a boil, add the diced, peeled stalks, if using. Return to a boil and cook for 2-3 minutes until they just begin to get tender. Using a spider or large slotted spoon, remove the stalks from the water and plunge them into a bowl of ice water to stop cooking. When cool, drain in a colander.
  7. Keep the water on low heat so you can return it to a boil quickly when needed to cook the pasta.
  8. In a heavy-bottomed pan large enough to hold the finished dish, sauté the garlic over medium high heat until it turns fragrant, about 30 seconds.
  9. Add the anchovies and their oil and continue to sauté, breaking up the anchovies till they turn to a paste.
  10. Continue to cook until the anchovies darken slightly, about 1-2 minutes.
  11. Add the broccoli florets and diced tender stems. If using, add the partially cooked peeled stems. Season with salt and freshly ground black pepper.
  12. Sauté on high heat, stirring very frequently, until some of the broccoli florets just begin to singe, about 5 minutes.
  13. Add the crushed red pepper. Stir to combine.
  14. Add the wine and cover with a tight fitting lid. Cook over medium high heat till the florets are cooked through but not mushy, shaking the pan occasionally.
  15. If all the wine evaporates before the broccoli is cooked, ladle in a bit of the pasta cooking liquid and continue.
  16. When the broccoli is cooked, add the beans and their cooking liquid along with the oregano. Bring to a simmer over gentle heat.
  17. Meanwhile, return the pasta-cooking water to a rolling boil and add the pasta. Cook until the pasta is slightly shy of al dente. The pasta will finish cooking in the sauce.
  18. Put about ¾ cup of pasta cooking liquid into the beans. Reserve another cup of the liquid.
  19. Quickly drain the pasta and add to the beans. Stir well. Bring to a gentle boil, uncovered. Cook stirring occasionally until the pasta is al dente. Add as much of the reserved pasta-cooking liquid as needed to have enough sauce to coat the pasta and broccoli.
  20. The starch in the pasta-cooking liquid will add body to the sauce. One way to incorporate more of the pasta-cooking liquid is to cook the pasta over higher heat so that you can add, and boil off, more of the liquid, leaving the starch behind.
  21. When the pasta is cooked, remove the pan from the heat and stir in the Parmesan cheese and 1 teaspoon freshly ground black pepper. Taste and adjust salt after adding the cheese.
  22. Stir in the finishing extra-virgin olive oil. This will make the sauce glossy and add additional flavor.
  23. The starch from the pasta water and bean-cooking liquid along with the cheese should create an emulsion with the oil. You may need to add more of the reserved pasta-cooking liquid to loosen the sauce.
  24. Serve immediately. Pass extra Parmesan cheese at the table.
Recipe Notes

Copyright © 2017 by VillaSentieri.com. All rights reserved.

Share this Recipe

Roasted Turkey Broth

May 5, 2017

I grew up in a house where there was absolutely no use for the carcass from a roasted turkey.  Other than my sister and I fighting over who got the crispy skin from the turkey breast, the skin went into the trash heap too.

You might imagine my surprise when, in college, I discovered that people actually did things with carcasses from roast turkey, like make broth to be used for turkey noodle soup.

To be sure, my recipe for turkey noodle soup will be posted later this month but in the meantime I would encourage you to make broth from the bones of most any roast, be it turkey, chicken, duck, pork, or beef.  Then, be creative with how to use it.

Broths made from roasted meat bones and bits of meat have a really savory quality that you won’t get from a broth made with uncooked meat.  You can’t always use them interchangeably so think about how the roasted-meat savoriness will play off the other flavors in the dish.

Roasted meat broths usually work well in hearty soups, for example, or as the liquid in a pot of Southwestern style cooked beans.  Frozen in small containers or ice cube trays, you can use the broth as the liquid for a quick pan sauce or to enrich gravy.

In fact, when I make gravy for Thanksgiving, I start by roasting a couple of Cornish game hens or a few pounds of chicken or turkey wings until they are very, very brown.  I use the roasted meat and some vegetables to make a rich, dark brown broth.  I concentrate the broth even more by boiling it down to about 3-4 cups.  While the turkey is roasting, I use the broth to make gravy, which I simmer for a couple of hours until it’s silky.  When the turkey is cooked, I deglaze the pan, skim the fat off, strain out the solids, and add the liquid to the gravy that has been bubbling away for a couple of hours.  By the time the turkey has rested and been carved, the gravy has reduced, again, to the right consistency.  The gravy is rich and savory and, more importantly, there’s enough to smother everyone’s mashed potatoes and turkey.  Doing it this way also removes the last-minute rush of actually making gravy on-the-spot from the pan drippings while you’re trying to get the meal on the table.

You might ask why I am dealing with a roasted turkey in spring rather than November.  Easter Dinner!  In addition to ham, I always make turkey since some of our friends don’t eat critters with more than two legs.  So, just for fun, here are a few pictures from Easter, complete with the bleeding lamb cake we always have for dessert.

I have a couple of different types of fat separators.  One is the more common style that resembles a small watering can with a spout that draws from the bottom of the liquid.  My preferred one, however, has an opening on the very bottom.  You just pour in the liquid, allow the fat to rise to the top, and squeeze the handle.  The opening opens and out pours the fat-free liquid from the bottom.  You can find a picture of it on my equipment page.

Print Recipe
Roasted Turkey Broth
Unless I need an absolutely clear broth, I prefer to use the pressure cooker. It gets the job done in an hour of cooking and makes a more flavorful broth than simmering it on the stove. However, the broth is somewhat cloudy. If you don’t want to use a pressure cooker and you don’t want to have to think about a pot on the stove, make the broth in a slow-cooker for 6-8 hours. If your pressure cooker or slow-cooker won’t accommodate 3½ quarts of water, use as much as you can and then dilute the final product to 3 quarts.
Votes: 0
Rating: 0
You:
Rate this recipe!
Course Miscellaneous
Cuisine American
Prep Time 15 minutes
Cook Time 5 hours
Passive Time 4 3/4 hours
Servings
quarts
Ingredients
Course Miscellaneous
Cuisine American
Prep Time 15 minutes
Cook Time 5 hours
Passive Time 4 3/4 hours
Servings
quarts
Ingredients
Votes: 0
Rating: 0
You:
Rate this recipe!
Instructions
  1. Thinly slice the carrots, celery and onion.
  2. Combine all the ingredients in a stockpot.
  3. Bring to a boil, reduce the heat, and simmer for 4-6 hours, stirring occasionally. Alternatively, cook at 10 pounds pressure for one hour or in a slow-cooker on low for 6-8 hours.
  4. Strain the broth.
  5. Because the broth will likely develop a gelatin-like quality on cooling, I suggest removing the fat using a fat separator while the broth is still warm.
  6. Add water to make three quarts.
Recipe Notes

I never add salt to any broth that I make unless I am making it for a specific purpose and I can plan for the final product. Broth with salt can make a dish too salty if the liquid needs to be reduced. The salt in a broth can also slow down the tenderization of dried beans. This might not be much of an issue at lower elevations but at 8000 feet getting dried beans to soften can be a challenge and anything that hinders the process is to be avoided.

Copyright © 2017 by VillaSentieri.com. All rights reserved.

Share this Recipe

Croquetas de Jamon (Cuban Ham Croquettes)

May 1, 2017

In early 2014, my husband and I were lucky enough to go to Cuba with two close friends.  This was prior to the loosening up of restrictions on travel by Americans to the island nation.

Because of the guidelines governing such travel, we had to spend a significant portion of our time interacting with Cubans, not being tourists.  We visited a schools for the arts and music, toured cultural sites, attended lectures, saw a cigar factory, and met with some Cubans in their homes, among other activities.

All of Cuba is divided up into small units that are under the watchful eye of a trusted local who reports any unusual activities to the authorities.  These units could be a section of a street, for example, or a multi-unit building.  What turned out to be one of the most memorable events was meeting with the residents of one such building one evening in Cienfuegos.

The children put on a small performance, we had refreshments, then spent several hours chatting with the building’s residents.  It seemed to us that everyone was quite open, talking about the challenges, as well as the benefits (such as free education and health care) of life in Cuba.  In fact, while it seems that most Cubans we met were in favor of a more open society they were understandably very protective of their access to education and health care.

One man, seemed particularly open about the difficulties of life in Cuba.  This was surprising to us as his wife was the designated party operative responsible for overseeing this particular building.  Our suspicions seemed to be confirmed when he disappeared into their apartment shortly before the evening ended after his wife gave him “the look.”  As our vehicle was pulling away from the building, he ran out and waved us good-bye.  Clearly he had been banished from the meeting but kept a watchful eye from his apartment, exiting at just the right moment.

In addition to spending the major portion of our trip interacting with Cubans we were prohibited from actually going to the beach!  This was supposed to be an educational and cultural interchange, not fun.

Even more interesting is that, at the time, Americans were prohibited from buying Cuban cigars and rum.  Mind you, I’m not talking about bringing these items back to the United States which was definitely forbidden, but buying and using them while in Cuba.

This would seem to be a singularly difficult rule to enforce and I can’t say that anybody paid particular attention to it.  One of our most pleasant experiences was sitting at a park on the waterfront in Cienfuegos sipping rum (from plastic cups) smoking cigars and watching the sun set.

We ate a lot of croquetas in Cuba and drank a lot of rum punch, mojitos, and cariocas.  After we got back we pulled together a Cuban dinner with a few other friends.  I made the traditional finger-sized croquetas—seven dozen of them, actually!  Here is a picture of me frying them as well as a platter full of cooked ones along with some plantain chips and mojitos.

For this post, since I was cooking them as an entrée rather than as a nibble with cocktails, I made them larger.

Print Recipe
Croquetas de Jamon (Cuban Ham Croquettes)
Instead of ham, croquetas can be made with cooked fish, salted cod, or potatoes among other ingredients. Cracker crumbs are the standard coating used in Cuba but fine dry breadcrumbs will work fine. I really like using plain panko crumbs whizzed in the food processor to finely pulverize them. They give an amazing crunch! If you are making these to serve as nibbles, you should get seven dozen. If you are making larger croquetas to serve as a main course, this recipe will make 16. Two or three of the larger croquetas will serve one person depending on what else is being served.
Votes: 0
Rating: 0
You:
Rate this recipe!
Prep Time 1 hour
Cook Time 20 minutes
Passive Time 9 hours
Servings
people
Ingredients
Prep Time 1 hour
Cook Time 20 minutes
Passive Time 9 hours
Servings
people
Ingredients
Votes: 0
Rating: 0
You:
Rate this recipe!
Instructions
  1. If the ham was cooked with a sweet glaze, rinse the glaze off using warm water.
  2. Cut the ham into one-inch cubes.
  3. Finely grind the ham in a food processor or meat grinder. Reserve the ground ham.
  4. Over medium heat, warm the milk in a small saucepan.
  5. Meanwhile, in a two-quart heavy bottomed pan, sauté the onion in butter on medium heat until soft, approximately 4-5 minutes.
  6. Add the flour to the onion-butter mixture and cook for about two minutes, stirring constantly. Do not brown the flour.
  7. Note, the flour will appear golden from the combination of the butter and the onions.
  8. Add about three tablespoons of the warm milk to the flour mixture. Stir well to fully incorporate. Continue adding about three tablespoons of warm milk at a time, stirring well after each addition, until all the milk has been incorporated. The mixture will form a rather heavy dough.
  9. Continue to cook the dough for 2-3 minutes, stirring constantly, without browning.
  10. Reduce the heat to low and stir in the ham. Keeping the mixture warm makes it much easier to blend the ham into the dough which would otherwise seize up with the addition of cold ham.
  11. Off the heat, stir in the nutmeg and parsley. Taste and adjust salt and pepper.
  12. Spread the mixture into a small oblong pan. Cool to room temperature uncovered.
  13. Cover and refrigerate until very cold, about six hours or overnight.
  14. Form the croquetas. If making small ones, roll portions of the dough into ½ inch diameter cylinders. Cut the cylinders into pieces about 2 inches long. If making larger croquetas, divide the mixture into 16 pieces. Roll each piece into a ball then flatten into a patty about ½ inch thick. Put the croquetas in a single layer on a cookie sheets. Refrigerate the croquetas until very cold.
  15. To bread the croquetas, beat 3 eggs seasoned with ½ teaspoon of salt. Dip the croquettes in the beaten egg then roll in crumbs.
  16. Put the croquetas onto cookie sheets once again. Refrigerate until cold.
  17. Repeat the egg and crumb coating a second time. The second coating is necessary to get the traditional crunch. Refrigerate several hours or overnight.
  18. Cook the croquetas in a deep fryer at 350°F until deep brown. Alternatively, put ½ inch of oil in a heavy bottomed frying pan. Bring the oil to 350°F. Fry the croquetas, turning once, until deeply browned. Drain briefly on absorbent paper. Keep the croquetas warm in a low oven until they are all fried.
  19. The croquetas ready to serve.
Recipe Notes

Copyright © 2017 by VillaSentieri.com. All rights reserved.

Share this Recipe