Cabbage and Noodles (Halushki)

November 27, 2017

One of the interesting consequences of working on this blog is that it is getting me to cook more Slovak food.

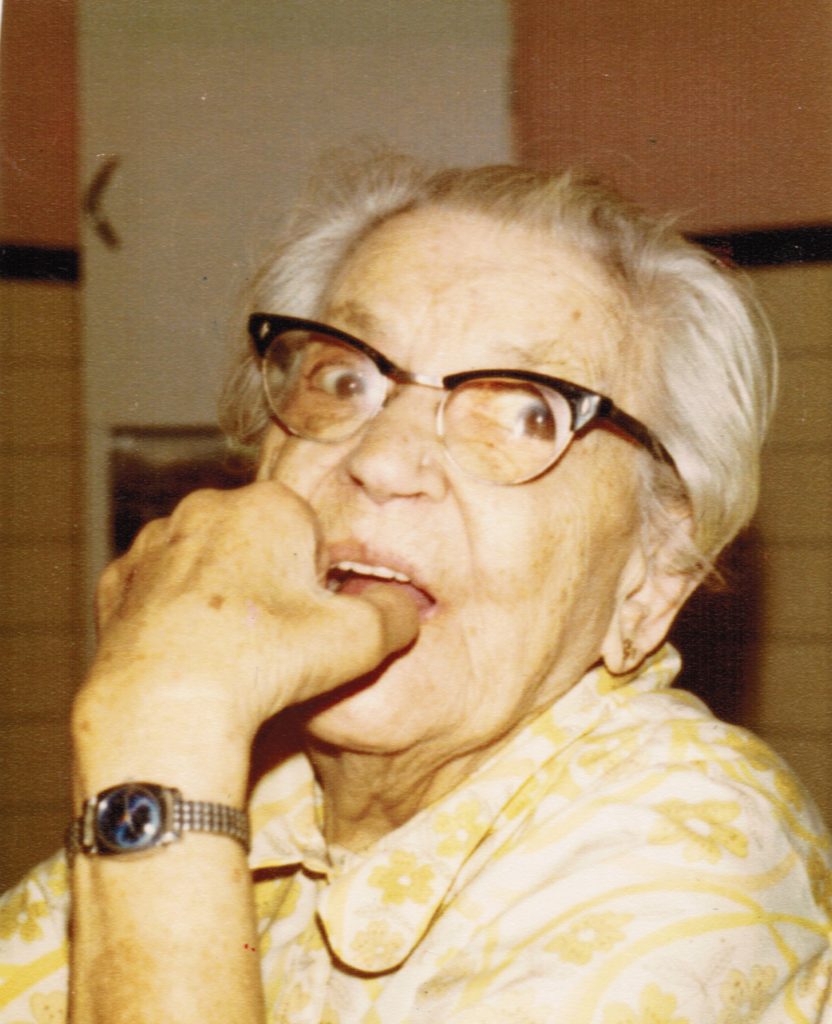
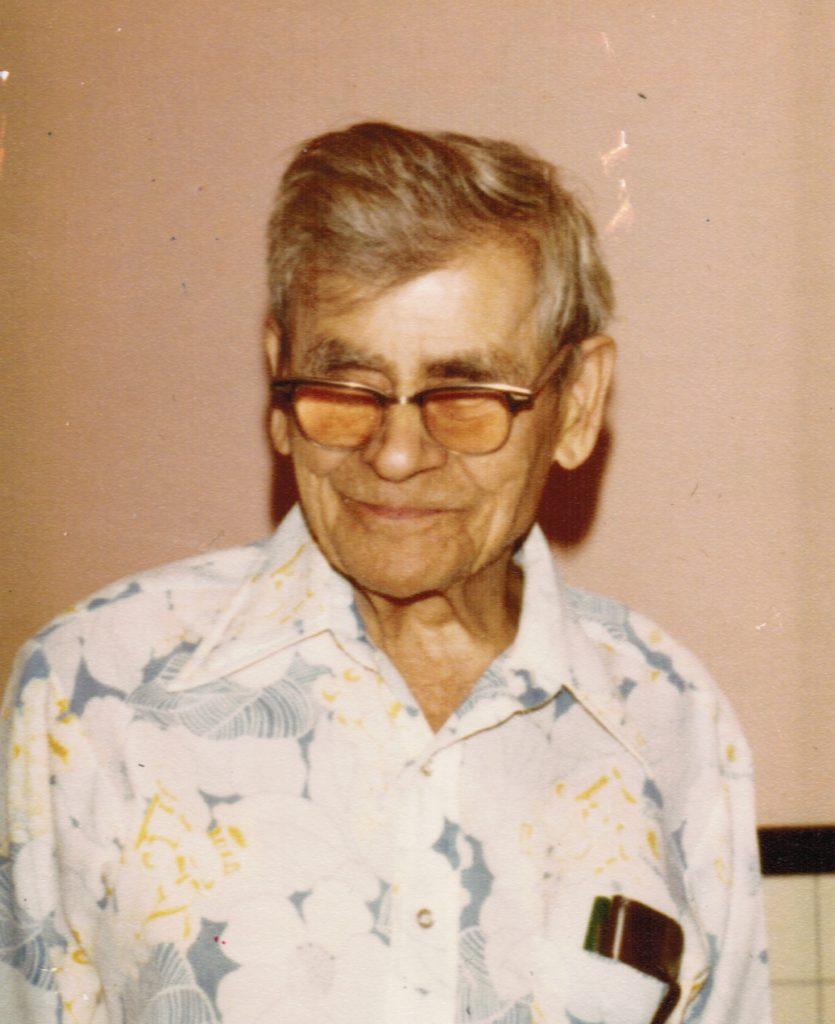
We ate way more Italian food than Slovak food when I was growing up but, nonetheless, Slovak food was a significant presence on our table.

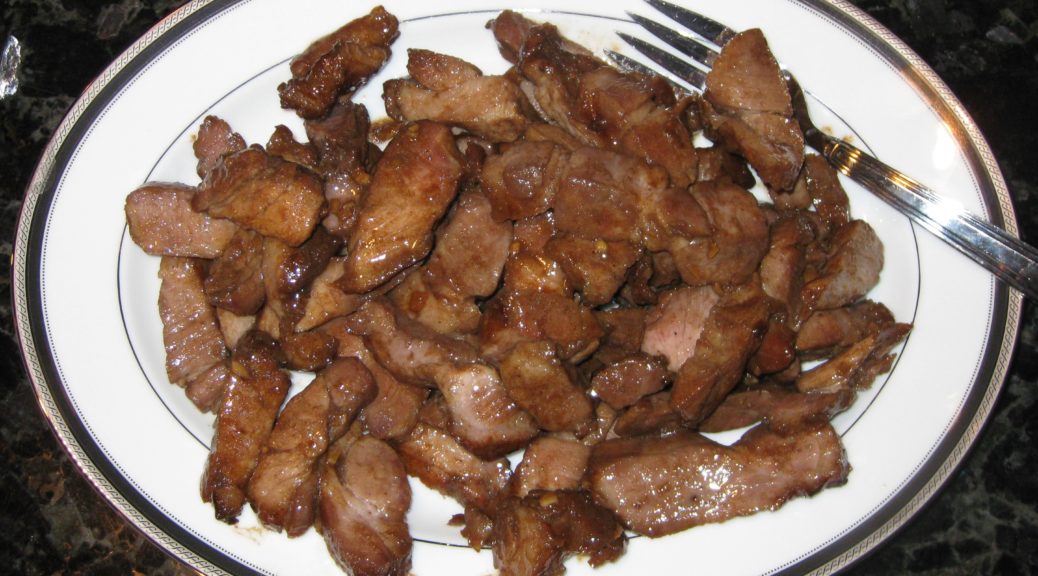
Things that only lived in my memory, like the Chicken Paprikash that I posted a few weeks ago, and my Grandma Mihalik’s Butter Cookies that are coming up in a week or two, are now real. And it’s not only the Slovak food. The Chinese Five-Spice Roast Pork from last week hasn’t been on my table in more than 40 years!


Click HERE to follow us on Instagram


Part of the reason is that, as much as I enjoy cooking, I hadn’t devoted as much time to planning what I was going to cook as I did when I was younger.  That is, until I got deep into this blog (and the restaurant cookbook I’ve been asked to write).

In Junior and Senior years of college there was a plan for dinner for every day of every week. Sometimes there was a plan for lunch, too!

Good provisions weren’t conveniently located to the University of Pennsylvania campus except for some specialty items from the ethnic markets near campus or the occasional very basic item from one of two nearby (in-super) supermarkets. Grocery shopping was done weekly and involved a trip to Ninth Street (sometimes called the Italian Market), and to the Pathmark supermarket in Broomall, PA.

Every meal got planned and a shopping list was created.

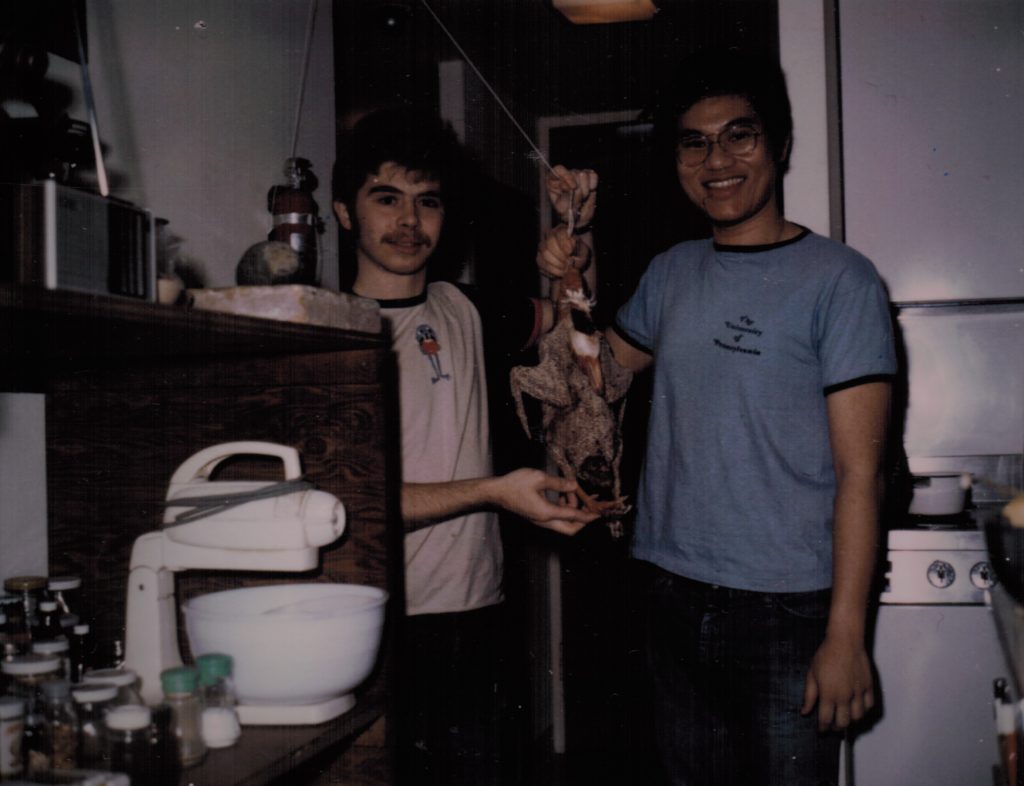
The planning was usually done in the evenings when I needed a break from studying (which I know some of you think I never did!). I would sit down with a cookbook or two, or my box of recipes handwritten on 3” x 5” index cards, or the typewritten recipes from Mrs. Hugh, my roommate’s mother and, over the course of the week, generate a list of what my roommate and I were going to have for dinner each night. Some were favorites but many were new, like the whole poached fish I made from Marcella Hazan’s first cookbook or Mrs. Hugh’s Crispy Duck (see the photo embedded in this blog post).

One of my favorite books was a slim volume by Charmaine Solomon. Charmaine was from Sri Lanka and two of the resident advisors in my college house, Reggie and Nanacy Rajapakse, were also from Sri Lanka and knew Charmaine. Charmaine’s Far Eastern Cookbook was copyrighted in 1972 (the year I started college). The edition I have was printed in 1973 so it was quite new when I bought it in 1974 shortly after entering the International Residence Project. I read that book cover to cover, like a novel, many times. I could sit for hours and pore over Charmaine’s recipes.

My dog-eared and much beloved copy of Charmaine Solomon’s Far Eastern Cookbook

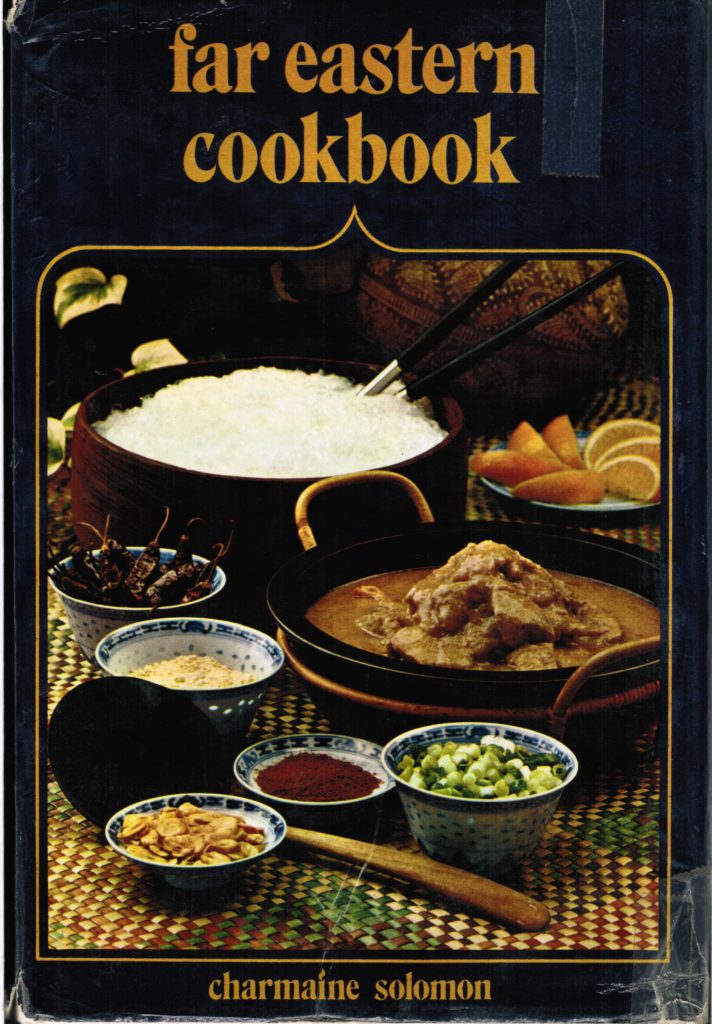
In 1976, when I graduated college, Reggie and Nanacy bought me another of Charmaine’s cookbooks as a present, The Complete Asian Cookbook.

Another favorite cookbook was the [Ceylon] Daily News Cookery Book which was in the collection of the Van Pelt library at the University of Pennsylvania. I would check it out, keep it as long as I could, return it, and then check it out again. It was a hardcover book with a red cloth cover. It was simply titled the Daily News Cookery Book.  Reference to Ceylon was nowhere to be found in the title.  Many years later, on a trip to Sri Lanka, I was able to get a reprint of the book (with the word Ceylon added to the title).

My point, though, is that my cooking repertoire expanded because I worked at it. Ray and I planned every meal, we went grocery shopping, we cooked, and we most certainly ate. I was still able to keep up a good cooking pace through medical school but after that, as I got busier and busier, it became harder and harder.

While I can put food on the table any given night without much thought, recreating past favorites or trying out new recipes requires more planning. I now have a calendar specifically devoted to cooking. Dishes get planned out weeks, if not months, in advance. It’s a lot of work, yes, but it’s tremendously rewarding to prepare my favorite foods, many of which I haven’t had in many years, and introduce them to others.

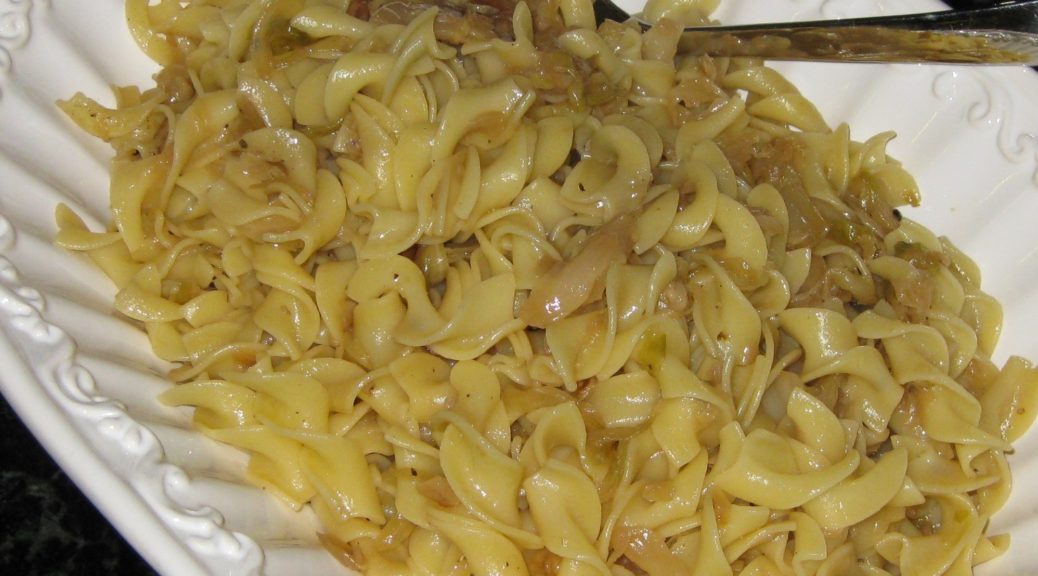
Cabbage and Noodles, sometimes called Halushki, was frequently on our table. I remember it particularly being served with Salmon Patties, one of my favorite Friday meals when we didn’t eat meat. We had it other times, too, but the association of Cabbage and Noodles with Salmon Patties is very strong.


Follow us


Click HERE to join our mailing list and you’ll never miss a recipe again!

Print Recipe
Cabbage and Noodles (Halushki)
Although three pounds of cabbage sounds like a lot, it cooks down a tremendous amount. If you wish, you can add a teaspoon or two of caraway seed to the cabbage during the last 20 minutes of cooking. Though my family did not do that, it is not unusual to do so.
Votes: 0
Rating: 0
You:
Rate this recipe!
Prep Time 15 minutes
Cook Time 2 hours
Servings
people
Ingredients
Prep Time 15 minutes
Cook Time 2 hours
Servings
people
Ingredients
Votes: 0
Rating: 0
You:
Rate this recipe!
Instructions
  1. Quarter and core the cabbage.
  2. Slice each quarter crosswise into ½ inch wide ribbons.
  3. In a heavy-bottomed pot large enough to hold the cabbage comfortably melt four tablespoons of the butter.
  4. Sauté the onion in the butter until golden.
  5. Add the cabbage. Season generously with salt and pepper.
  6. Sauté on medium heat, stirring often, until the cabbage wilts.
  7. Reduce the heat if the cabbage starts to stick to the pot.
  8. Continue to cook on medium low, partially covered and stirring often, until the cabbage is silky, golden, and sweet. This will take 1 ½ to 2 hours total from start to finish.
  9. The cabbage can be cooked several hours in advance to this point. Warm the cabbage before proceeding.
  10. Bring 3 quarts of water to a rolling boil. Add 1/3 cup of salt.
  11. Cook the egg noodles in the salted water until just done. They should be slightly toothy and definitely not mushy.
  12. Drain the noodles.
  13. Add the noodles to the cooked cabbage along with the remaining 2 tablespoons of butter. Toss well.
  14. Taste and adjust salt and pepper.
Recipe Notes

Copyright © 2017 by VillaSentieri.com. All rights reserved.

Share this Recipe

Chinese Five-Spice Roast Pork

November 22, 2017

My food horizons expanded slowly during freshman and sophomore years in college. I was exposed to Chinese food through Dennis and Martha Law, a graduate student couple from Hong Kong who were the resident advisors in my college house during freshman year. I got exposed to Indian food thanks to the proximity to my dorm of the now long-gone Maharaja Indian Restaurant.

As sophomore year came to a close things were about to get kicked up a notch, to steal a phrase from Emeril Lagasse.


Click HERE to follow us on Facebook


In spring of sophomore year I applied to live in the International Residence Project, another of the University of Pennsylvania’s college houses, during my junior year.

I was accepted into the program and invited to a “meet and greet” with the other students later that semester. The resident advisors were Ambrose and Najma Davis and Reginald (Reggie) and Nanacy Rajapakse. Ambrose was from Jamaica, Najma from Bangladesh and Reggie and Nanacy (whose name was often Anglicized to Nancy) from Sri Lanka.

At the “meet and greet” I was introduced to Ray Hugh, who was to be my roommate. Ray, of Hakka Chinese ancestry, hailed from Guyana. We started hanging out together for the remainder of the semester and then, since we were both staying in Philadelphia for the summer, decided to find a summer sublet together.

Ray and his father, Dr. Hugh, in Georgetown, Guyana, 1974

As I had done the previous summer, we sublet an apartment in Graduate Towers (as discussed in my post on Homemade Applesauce).


Click HERE to join our mailing list and you’ll never miss a recipe again!


Then we started cooking! Guyanese food. Chinese food. Italian food. Indian food. The list went on.

The number of cuisines we cooked exploded beginning in junior year when we moved into the International Residence Project. We got recipes from other residents in the Project who came from all around the world. I (very tentatively) started my cookbook collection which now numbers close to 5000 volumes.

Ray (front center) with from right to left, his mother, sister Fay, sister Shelly, and Shelly’s boyfriend Clive in the suburbs of London, 1975

Some dishes we made became regulars (like this roast pork). Others we made once for the sheer challenge.

Ray’s mom’s Crispy Duck was in the latter camp. Mrs. Hugh sent us a sheaf of recipes carefully typed out on onion skin paper. Her recipe for plain white rice, included in those pages, was my tutorial on making steamed white rice.  I followed that recipe consistently, with unfailingly perfect results, until we moved to Santa Fe where the elevation, and its effect on cooking, rendered the directions unusable.

Included in that same sheaf of recipes was Crispy Duck. We started with a whole duck, head and feet included, which we purchased on Ninth Street in Philadelphia. The duck was hung for 24 hours from a hook we screwed into the ceiling while we carefully lacquered it, repeatedly, with a mixture of soy sauce and other ingredients, before roasting.

Me (left) and Ray with Crispy Duck in the early stage, hanging from the ceiling in our dorm apartment, 1975

Compared to the duck, this pork is a breeze. Though Ray, with whom I am still in contact, now recommends marinating it for a day (refrigerated!) if possible, when we were in college the marinating occurred in an hour as the meat was coming to room temperature. I also think that he often used garlic powder rather than fresh garlic. Actually, I think garlic powder works really well to season chicken to be roasted or steaks to be broiled. As I recall, it was pretty tasty on this pork, too.

Everything in this pork is classically Chinese, except, of course, the rum! Likely a rice-based spirit would be used in China but in Guyana the Chinese used rum. Let’s face it, fusion food happens everywhere! Besides, the rum “plays” really nicely with the five spice powder and brown sugar.

Five spice powder is the main flavor and it is important that you use a good quality brand. Not all five-spice powders are created equal. If you don’t have a Chinatown near you, there’s always Amazon. That’s what I did. Despite the existence of a good Asian grocery store in Santa Fe, the five-spice powder that I bought there was not up to my standards.


Follow us


Print Recipe
Chinese Five-Spice Roast Pork
Boneless pork shoulder steaks work well because they contain some fat to keep the meat moist. However, because shoulder steaks contain different muscle groups the texture can change from bite to bite. Well-marbled pork chops with a little fat cap around the edge would work, too. If using bone-in chops, I would use 3 pounds rather than 2 ½ pounds. Be sure to use a good quality five spice powder.
Votes: 0
Rating: 0
You:
Rate this recipe!
Course Mains, Meats
Cuisine Chinese, West Indian
Prep Time 15 minutes
Cook Time 20 minutes
Passive Time 24 hours
Servings
people
Ingredients
Course Mains, Meats
Cuisine Chinese, West Indian
Prep Time 15 minutes
Cook Time 20 minutes
Passive Time 24 hours
Servings
people
Ingredients
Votes: 0
Rating: 0
You:
Rate this recipe!
Instructions
  1. Five spice powder
  2. Combine all ingredients except the pork. Mix well.
  3. Boneless pork shoulder steaks
  4. Add the pork and toss to coat with the marinade.
  5. Marinate the pork in the refrigerator for 24 hours if possible. Turn the pork once or twice while marinating.
  6. One hour before cooking the pork, remove it from the marinade and put it in a single layer in a heavy roasting pan.
  7. Allow the pork to come to room temperature for an hour.
  8. Meanwhile, boil the marinade quickly until it is reduced to approximately 4 tablespoons.
  9. Cool the marinade and pour it over the pork.
  10. Preheat the broiler.
  11. Put the pan with the meat approximately 8 inches below the broiler.
  12. Cook the pork, turning once or twice, until just cooked through, 15-20 minutes.
  13. Allow the pork to rest 10 minutes before carving into bite-size pieces.
Recipe Notes

Unlike the brown sugar typically available in the United States, which is a mixture of white sugar and molasses, the brown sugar available in Guyana is actually a less refined sugar, hence the brown color.  There's not enough brown sugar in this recipe to make a difference so feel free to use standard American brown sugar.  Closer to what is available in Guyana is this brown sugar packaged for the Korean market that I bought in an Asian grocery store, and this brown sugar that I purchased in Ecuador.

Brown sugar packaged for the Korean market but bought in the United States

Brown sugar purchased in Ecuador

Copyright © 2017 by VillaSentieri.com. All rights reserved.

Share this Recipe

Salsa Friulana d’Ivana (Ivana’s Friulan Tomato Sauce)

November 17, 2017

My mother-in-law grew up in the town of Treppo Grande in the Italian province of Friuli. Friuli is in northeastern Italy. It is the major portion of the region of Friuli-Venezia Giulia.

Her father and two uncles lived with their families in three houses that wrapped around a courtyard. Her grandmother lived in the same complex. The extended family included numerous cousins.

Another uncle moved to the United States with his wife and their son early on.  Two more children were born to them in the US.


Follow us on Twitter:  click HERE


At the age of 12, shortly after the end of World War II my mother-in-law, her brother (our Uncle Ray), and mother came to the States. Her father had been in the US working with the intention of bringing over the family but then the war broke out and the family could not be reunited until it ended.

One set of cousins stayed in Treppo Grande.  Another set of cousins moved to France.

In 1990 the “cousins,” as the US contingent called themselves, hatched a plan to organize a group trip to their hometown of Treppo Grande and to Digoin, France where the other set of “courtyard cousins” lived.

Naturally, planning for the trip required many “meetings” among the cousins; meetings that were fueled with copious amounts of food and alcohol interspersed with a little “business!”

The trip happened in August 1991. My husband and I went along with the “cousins” and their spouses.

The “United States” cousins and three of four spouses in Treppo Grande along with Carolina Fabbro, a friend of my mother-in-law’s mother.  She died a few years ago at more than 100 years of age.

We first met up in Paris for a day or two and did some sightseeing.

Afterwards, we were picked up in a small bus that had been arranged by Olvino, one of the original “courtyard cousins” who lived in Digoin. As I recall, the driver only spoke French. Among us we spoke English, Italian, Friulan (the language of Friuli), and a smattering of Spanish and German, but no French. Thankfully the driver knew where he was going and, for all other needs, we managed to communicate in some rudimentary, but effective, manner.

Interesting to me was that the vehicle had graph paper that kept a running record of the bus’s speed. Apparently the driver could be asked to produce the graph paper by the police and could be fined if it showed that he had exceeded the speed limit. Can you imagine that happening in the United States???

I was also fascinated when we stopped for lunch. The driver had a glass of wine. I will repeat that.  This professional bus driver had a glass of wine with lunch then got behind the wheel. Apparently, he was legally permitted to have one, just one, glass of wine and still drive.

Admittedly, one glass of wine is not going to get anyone’s blood alcohol level close to a level that produces intoxication but it pointed out that 1) the French are highly (overly?) regulated and 2) Europeans have a more relaxed approach to alcohol (probably to life in general, actually!).

I had a similar experience in 1994 when I did several consulting gigs in Europe. I frequently had lunch with physicians from the hospitals where I was consulting. Everyone (yes, everyone) had a glass of wine or beer with lunch and then went back to the hospital to work.

But I digress.

We spent several fun days in Digoin, where the local cousins had rented out a small hall, with a kitchen, because none of them had a house big enough to host all of us, and all of them, for meals.

There must have been six banquet tables shaped into a “U” around which we all sat. The crowd included not only those of us from the States, but the cousins who lived in Digoin along with their significant others, their children, and their children’s significant others.

Conversations frequently included four languages. The “cousins” typically spoke Friulan with each other. From there, the conversation would get translated into Italian, English, and French so that everyone could understand anything of interest to the group.

I don’t remember what we ate for dinner the first night except for the pasta which was sauced with a red sauce made by Ivana, Olvino’s wife.

I was transported by that sauce.

Tomato sauces in Friuli are different from the rest of Italy in that they have noticeable amounts of “warm” spices such as cinnamon, cloves, and nutmeg.  My mother-in-law makes a sauce similar to the one that Ivana makes but there are differences. For example, hers includes only beef. Today’s recipe, however, is a tribute to Ivana.

This is my interpretation of Ivana’s recipe. Since the original recipe contained a list of ingredients but no quantities, I had to figure out what worked.


Follow us


Click HERE to join our mailing list and you’ll never miss a recipe again!

Print Recipe
Salsa Friulana d'Ivana (Ivana's Friulan Tomato Sauce)
There should be a little bit of red-tinged oil floating on top of the sauce to improve the mouthfeel of the pasta—just a little. If you cannot find lean ground pork, you may want to grind your own. An actual meat grinder will work better than a food processor but if you’re using a food processor be careful not to grind the meat too finely. For the beef, I suggest using 93% lean. This recipe makes enough sauce for approximately 4 pounds of pasta. Extra sauce freezes well.
Votes: 0
Rating: 0
You:
Rate this recipe!
Prep Time 30 minutes
Cook Time 3 hours
Servings
cups
Ingredients
Prep Time 30 minutes
Cook Time 3 hours
Servings
cups
Ingredients
Votes: 0
Rating: 0
You:
Rate this recipe!
Instructions
  1. If using canned tomatoes rather than crushed tomatoes or tomato puree, pass the tomatoes through a food mill and reserve.
  2. Grind the pork if you cannot get ground pork in your market.
  3. Grind the garlic, onion, and parsley in a food processor. If you used a food processor for the pork, there is no need to clean it. Alternatively, chop them very, very finely by hand.
  4. Heat the olive oil in a heavy bottomed Dutch oven.
  5. Add the garlic-onion-parsley mixture. Sauté until the raw smell is gone.
  6. Add the ground beef and pork and sauté on high heat until the meat is browned.
  7. Add the tomato puree or crushed tomatoes.
  8. Add all remaining ingredients.
  9. Sage
  10. Rosemary
  11. Basil
  12. Bay leaves
  13. Cinnamon
  14. Cloves
  15. Nutmeg
  16. Simmer gently, partially covered, stirring frequently for approximately 2 ½ hours.
  17. Adjust salt and pepper during cooking.
  18. Toss approximately 1/4 of the sauce with one pound of cooked pasta.
Recipe Notes

Copyright © 2017 by VillaSentieri.com. All rights reserved.

Share this Recipe

Chicken Paprikash (Chicken with Paprika-Sour Cream Sauce)

November 13, 2017

I really don’t remember my Slovak grandmother doing much cooking. By the time I was old enough to pay attention to who was cooking, she was mostly just making the occasional pot of soup.

My Grandmother

My grandparents owned a semi-detached house and Uncle Frankie and Aunt Mary lived next door. Although they had separate front porches, they shared a back porch. Going back and forth was easy.


Follow us on Facebook:  Click HERE


Aunt Mary kept my grandparents well-supplied with food. My Aunt Ann pitched in from time to time as well.

My Grandfather

My grandparents were really keen on soup. I guess when you’re raising a family of seven sons through the Great Depression and its aftermath, on a steelworker’s income, preparing filling and budget-friendly food becomes a necessity.

After the early 1960s when my Uncle Gusty moved back to the United States from Japan with his wife and their children, all seven of my grandparents’ sons lived in Johnstown with their wives and children. Most of us would visit on Sunday afternoons arriving sometime after lunch and leaving before dinner.

My Grandfather and Father in the late 1960s. I used to wear the tie my dad is wearing to high school. I still have it! My father insisted that I tie a Full Windsor. Now I know where he got his preference!

Very frequently a large pot of soup would appear for anyone who needed a little something to hold him or her over till dinner. Often it would be potato soup or sour mushroom soup (made with dried mushrooms and spiked with a little vinegar). My father talked longingly about a sour cabbage soup called kissel which nobody was making any longer.

Other than soup, baba (sometimes written bubba), and sweets at the holidays, I don’t remember eating much at my grandparents’ house though I do remember my grandfather and my uncles consuming a fair amount of beer, and, on special holidays, shots of whiskey.

Me with my Grandparents in 1976

Most of the Slovak food that I ate was at home or at one of my uncle and aunt’s houses.

Chicken Paprikash is considered a Hungarian dish but it was common on the Slovak side of my family.  My grandfather was born in 1890 in a small town, Nitrianske Sucany, not too far from Bratislava, in what is now Slovakia.  My grandmother was born a few years later.  In 1909 when my grandfather came to America, he left what was then the Austro-Hungarian Empire.  Slovakia did not exist as a country.  Food diffuses with cultural contact (think about the popularity of Spam in both Hawaii and Korea which can be traced to the presence of the US military).  I suspect that’s how Chicken Paprikash became something made by my Slovak grandparents.

My version of Chicken Paprikash is a combination of my mother’s and my Aunt Ann’s. When I went to look up the recipe to make in preparation for this blog I discovered that I had never written it down! Luckily I remembered just how to do it.


Follow us


Click HERE to join our mailing list and you’ll never miss a recipe again!

Print Recipe
Chicken Paprikash
Using bone-in chicken with skin improves the flavor of the final dish. Flabby skin from braised chicken is not appetizing, however, so remove it near the end of cooking before putting the chicken in the finished sauce. Since paprika is the major flavor in this dish be sure to use fresh, high-quality paprika, preferably Hungarian. Sweet paprika was the norm in my family, not hot, and certainly not smoked which would totally change the flavor. You can use whatever chicken parts you prefer but I think the texture of slowly braised thighs is superior. Serve the chicken with buttered noodles or mashed potatoes, both of which go really well with the sour-cream-enhanced sauce.
Votes: 2
Rating: 5
You:
Rate this recipe!
Course Mains, Poultry
Cuisine Slovak
Prep Time 20 minutes
Cook Time 2 1/2 hours
Servings
people
Ingredients
Course Mains, Poultry
Cuisine Slovak
Prep Time 20 minutes
Cook Time 2 1/2 hours
Servings
people
Ingredients
Votes: 2
Rating: 5
You:
Rate this recipe!
Instructions
  1. Pat the chicken dry and season liberally with salt and pepper.
  2. Heat the oil in a large, heavy-bottomed sauté pan.
  3. Sauté the chicken on both sides, starting skin-side-down, until brown on both sides. Do not crowd the chicken. Do this in batches if necessary.
  4. Remove the browned chicken to a platter.
  5. Empty the oil from the pan and wipe clean.
  6. Add two tablespoons of butter. Sauté the diced onion until golden.
  7. Add the garlic and sauté until fragrant, approximately 1 minute.
  8. Add 3 tablespoons of paprika and sauté for approximately 15 seconds (paprika burns very easily).
  9. Add one cup of broth and mix well.
  10. Add the bay leaf, browned chicken pieces and any accumulated juices to the pan. Add additional salt and pepper to taste. Cover and braise on low until very tender, approximately 1 ½ hours being sure to taste for salt occasionally. Add additional broth if needed to keep the pan from drying out.
  11. About 15 minutes before the chicken is done, remove the skin and discard.
  12. When the chicken is fully cooked, remove it to a platter.
  13. Remove the bay leaf.
  14. Pour the cooking liquid, without straining, into a small pot and keep it warm on low heat. You can skim fat from the top of the cooking liquid if you would like.
  15. Wash and dry the pot used to cook the chicken. Melt the remaining 6 tablespoons of butter in that pot.
  16. Add the finely diced onion and sauté until golden.
  17. Add the flour and cook 2-3 minutes, until no longer raw.
  18. Add the remaining 1 tablespoon of paprika and sauté 15 seconds.
  19. With the flour-onion-paprika mixture on medium heat, begin to ladle in the reserved cooking liquid a little at a time, stirring well after each addition to avoid lumps.
  20. When all the cooking liquid has been incorporated, add any remaining chicken broth, if all of the original 2 cups was not used to braise the chicken.
  21. Bring to a boil and cook for one minute. The sauce should be quite thick. It will thin with the addition of sour cream. If the sauce is too thin, boil it longer as you will not be able to boil it once the sour cream has been added.
  22. Stir in the sour cream. Adjust salt and pepper. Add the chicken and heat gently without boiling.
Recipe Notes

Copyright © 2017 by VillaSentieri.com. All rights reserved.

Share this Recipe

Spaghetti Aglio, Olio, e Pepperoncino (Spaghetti with Garlic, Oil and Red Pepper)

November 8, 2017

How many Italian pasta sauces can you think of that do not include olive oil and garlic?

Precious few, I would guess!

This dish, classically Roman, elevates those two ingredients to center stage. You cannot hide bad olive oil or poorly cooked garlic in this dish. There are very few other flavors.

But simplicity has its virtues. It’s really hard to go wrong with this dish unless you use bad olive oil or not-so-stellar cheese or you burn the garlic.


Follow us on Facebook:  Click HERE


You can make a case for cooking the garlic for a whole range of times, from mere seconds up until it is dark brown. For many years I even cooked three different batches of garlic, one until brown, one until golden, and one until just fragrant. There is an interesting depth of flavor from doing so but it’s not the classic technique.

My point is, unless you burn the garlic and make it bitter, you won’t ruin the dish. You may prefer the flavor of the garlic when it is more or less brown but that’s just a preference not an absolute.

These little Italian peppers (“pepperoncino”) pack a nice flavor, not just heat

My recipe diverges from the classic Roman recipe in two places.

While making dinner, I’m usually chatting…with my in-laws (on most nights), with my husband (when he’s not away on business), or with guests. While I know I can time everything to be ready at exactly the right moment, I ask, why stress about it? So, yes, I can time the sautéing of the garlic to be just right when the pasta is ready but there’s an easier way.

I get the garlic to exactly the spot I want and then stop the cooking by taking the pan off the heat and adding a splash of wine (or water, if you must). That’s not classically Roman but it sure makes it much easier to have a conversation and a cocktail or three while making dinner. As soon as I plan on draining the pasta, I turn the heat on under the garlic oil and boil away the liquid I’ve added. Let’s face it, how often do we get to stop time with no consequences?

The second divergence from classic technique is that I add cheese to the pasta while mixing it with the garlic oil rather than just adding it at the table. In my mind there is no doubt that this pasta needs cheese. Adding it at the final stage of preparation allows me to create a glossy sauce where there would otherwise only be garlic oil. Not that that is bad, but I’ve made a bit of a reputation for myself by turning out glossy sauces where there would often only be oil.

It’s not hard. It just takes a bit of practice and some understanding (minimal) of the chemistry involved. And let’s face it, if the sauce isn’t glossy, you’re the only one who’s going to know. Again, there’s no penalty involved!

A brand of pasta that I really like

In Italy this pasta is often prepared and eaten after a night of over-indulging in alcohol. At least that’s the reputation it has. However, this was a common dish put on the dinner table when I was growing up. It’s easy, quick, filling, and darn good. Oh, and for an entirely different flavor, try butter in place of the olive oil!


Follow us


Click HERE to join our mailing list and you’ll never miss a recipe again!

Print Recipe
Spaghetti Aglio, Olio, e Pepperoncino (Spaghetti with Garlic, Oil and Red Pepper)
I like to reduce last minute work, so I prep the garlic oil in advance and stop the cooking with a splash of wine. You can use water, if you wish, or, if you are sautéing the garlic as the pasta is cooking, some of the pasta-cooking liquid. As the pasta is nearing completion, I reheat the garlic oil, quickly boiling off the wine, and proceed. Use more or less garlic, to your taste. The same is true with the red pepper. For myself, I would use at least double this amount but that would be way too much for other folks.
Votes: 0
Rating: 0
You:
Rate this recipe!
Prep Time 15 minutes
Cook Time 20 minutes
Servings
people
Ingredients
Prep Time 15 minutes
Cook Time 20 minutes
Servings
people
Ingredients
Votes: 0
Rating: 0
You:
Rate this recipe!
Instructions
  1. Slice off the hard base of each garlic clove.
  2. Cut the cloves in half top to bottom.
  3. Cut each half-clove of garlic crosswise into very thin slivers.
  4. In a sauté pan large enough to hold all the cooked spaghetti comfortably heat 1/3 cup of olive oil over gentle heat.
  5. Add the slivered garlic and sauté slowly and gently until golden brown. This should take 10-15 minutes if the heat is low enough.
  6. Add the red pepper and black pepper and sauté for another minute.
  7. Add the wine to stop cooking and remove the pan from the heat.
  8. Bring 2 ½ quarts of water to a boil. Season with ¼ cup of salt.
  9. Boil the spaghetti about two minutes less than the package indicates is needed for al dente.
  10. As the pasta is nearing completion, reheat the garlic oil.
  11. Just before removing the pasta from the boiling water, add 1 cup of pasta-cooking liquid to the garlic oil and turn the heat to medium high.
  12. Reserve another cup of pasta-cooking liquid then drain the pasta.
  13. Add the drained pasta to the pan with the garlic oil.
  14. Cook over medium to medium-high heat, stirring frequently, until the pasta is al dente. Add some of the reserved pasta-cooking liquid from time to time as needed.
  15. When the pasta is al dente, remove the pan from the heat. Sprinkle the parmesan cheese and parsley on top.
  16. Mix well to create a sauce by melting the cheese and emulsifying the oil and water. Add more of the pasta-cooking water, if needed, to coat the pasta.
  17. Stir in the 3 tablespoons of fruity or peppery extra-virgin olive oil for finishing.
  18. Serve immediately with extra Parmesan cheese.
Recipe Notes

Since olive oil loses much of its distinctive flavor from heating, adding some at the end, when the dish is off the heat, improves the flavor. Usually I keep several types of olive oil that I just use for finishing in this way. They tend to have different flavor profiles. Usually I have a peppery one and a buttery one on hand. These oils are used in small quantities so their higher price tag is worth the flavor they add.

Copyright © 2017 by VillaSentieri.com. All rights reserved.

Share this Recipe

Homemade Applesauce

November 3, 2017

I made applesauce for the first time the summer after my freshman year in college. Don’t ask me how or why I remember making applesauce that summer but the whole process is very clear in my mind. Cooking was still pretty new for me back then. Other than baking cakes, I doubt I cooked more than about four times before my freshman year.

I cooked about once a week throughout freshman year, usually on Sundays. As a freshman, I was required to use the dining service for 10 meals per week, which usually meant lunch and dinner, Monday through Friday. Saturdays I went to restaurants and cooked. It was truly a year of experimenting, not only with cooking but with entirely new cuisines and flavor profiles.


Follow us on Twitter:  Click HERE


A hand-crank food mill is a pretty unusual piece of equipment for a college student to have. I don’t remember where or when I bought it, possibly I bought it specifically to test out an applesauce recipe that had caught my attention. You can actually see the very same food mill in the pictures below. I still use it

Much to my mother’s dismay I did not go home for the summer after my freshman year. I landed a great summer job in a research lab working for Dr. Mary Catherine Glick (aka Susy), a very well-known researcher. I worked in that lab for the remainder of my undergraduate years.

Students could not stay in undergraduate dorms at the University of Pennsylvania during the summer, so staying in Philadelphia meant I had to find a place to sublet. One of the most common choices was to sublet in Graduate Towers. The graduate students who lived in Grad Towers had to rent for a full calendar year, even if they were not going to be in Philadelphia for the summer.

I sublet one bedroom of a two-bedroom apartment in Grad Towers. Other than a bathroom the apartment had a very small Pullman kitchen and a kitchen table with two chairs. There was nothing that resembled living room furniture, nor would there have been any place to put it.

Graduate Towers still standing but renamed to Sansom Place

The other occupant of the apartment was a graduate student who used the kitchen to “cook” exactly three things for dinner. One was a can of tuna fish with pickle relish (ok, so no cooking involved). The second was a single chicken breast boiled in unsalted water and doused with pickle relish. The third was boiled hot dogs with, you guessed it, pickle relish. He ate the same three foods for dinner, in strict rotation, for the entire summer as he had done for months (years?) leading up to that summer.

I on the other hand, freed from the obligation to eat at the University food service and with an almost totally unused kitchen, was making my mother’s long-cooked pasta sauce, baking fish, and making applesauce among other things.

Over the next few years I experimented with the applesauce, changing up the sweetener (white sugar, brown sugar, honey) and spices (nutmeg, cinnamon, allspice, cloves). In the end, I decided that simple was best to let the apple flavor shine through: white sugar (not too much) and cinnamon.


Here’s a short video of me making applesauce.


Little did I know, when I left home at the age of 17 to go to college that I would never spend a significant amount of time in the home I grew up in again. I worked for Susy for four summers in a row as well as most of the academic years in between. During my first year in medical school, I received a full scholarship for medical school and graduate school in anthropology, which I attended simultaneously. (Actually, I was awarded two scholarships and was able to return the one that had less-generous terms so that it could be awarded to another student.) The scholarship, however, stipulated that I could not take summers off, so I was in school eleven months per year. (I insisted on taking time for myself each August.)

Knowing I would never have a chance to be at my parents’ house for more than a few days at a time for the indefinite future, I was able to arrange my last 4-week medical school clinical rotation at the hospital in the town where I grew up. It was an anesthesia rotation. As it turns out, the Friday before the Monday I started there, the Anesthesia Department at the hospital held a retirement party for the nurse anesthetist who taught “open drop ether insufflation” to Robert Dunning Dripps.  Dr. Dripps was, a physician who subsequently became the first chairman of Anesthesiology at the University of Pennsylvania, where I was a student. Anesthesiology was not a recognized specialty in the 1940s when Dr. Dripps became chair. He was in the vanguard; one of a very small group of physicians who established the medical specialty of Anesthesiology.

I honestly wonder how my life would have been different had I not landed that first summer job with Susy. It’s the reason I stayed in Philadelphia rather than returning to Johnstown for the summer. It started a whole cascade of events that got me integrated in Philadelphia society, a very different scenario from being a transient student.

Let’s make some applesauce as we ponder the unknowable.


Follow us


Click HERE to join our mailing list and you’ll never miss a recipe again!

Print Recipe
Homemade Applesauce
The amount of sugar and cinnamon is up to personal taste, and partially dependent on the sweetness of the apples chosen. I used Rome and Golden Delicious apples, both are great for applesauce as they break down with cooking and have a very good apple fragrance. Feel free to substitute what is available. Apples that are good for applesauce include McIntosh, Jonathan, Jonagold, and Gravenstein. Leaving the peels on is not only easier but, if some of the apples have red skin, gives the applesauce a beautiful rosy color. The stems and seeds will give the applesauce a bitter taste and must be removed.
Votes: 0
Rating: 0
You:
Rate this recipe!
Course Fruit-based, Sides
Cuisine American
Prep Time 10 minutes
Cook Time 45 minutes
Servings
cups
Ingredients
Course Fruit-based, Sides
Cuisine American
Prep Time 10 minutes
Cook Time 45 minutes
Servings
cups
Ingredients
Votes: 0
Rating: 0
You:
Rate this recipe!
Instructions
  1. Wash the apples.
  2. Quarter the apples.
  3. Remove core and stems but do not peel.
  4. Cut each quarter into four pieces. The pieces should roughly be about an inch on a side.
  5. Put apples and apple juice in a heavy-bottomed pot.
  6. Cover and bring to a boil over high heat.
  7. Reduce heat to medium-high and continue to cook, stirring periodically, until the apples are soft, 20-40 minutes. Do not overcook the apples or they will begin to lose their flavor.
  8. There should only be the barest amount of liquid in the pot when the apples are finished cooking.
  9. Pass apples through a food mill.
  10. Add sugar and cinnamon to taste while the applesauce is still hot.
  11. Cool completely and refrigerate or freeze.
Recipe Notes

If you’re not certain if the apples are cooked enough, try to run a spoonful through the food mill. If they don’t crush easily, return the “test” apples to the pot and continue to cook the batch a little longer.

In the United States, cassia, a spice different from cinnamon, can legally be labeled cinnamon.  While cassia is good in its own right, it is much more assertive than true cinnamon.  If you can find whole Ceylon cinnamon give it a try.

Ceylon cinnamon

Copyright © 2017 by VillaSentieri.com. All rights reserved.

Share this Recipe