Gnocchi di Patate (Potato Gnocchi)

April 4, 2018

My father didn’t like gnocchi.

As far as I know, it is the only food he refused to eat.

It was all about the texture.  Mind you, this is from a man who’s comfort food was a BIG bowl of cold mashed potatoes with buttermilk poured over top.

I understand the texture thing but for me the offending texture is slimy…like Jello (or cold mashed potatoes with buttermilk).

The next worst texture is hot cereal.  It’s not as bad as Jello but it’s not a favorite.  It took a long time for me to enjoy polenta because it has a texture just like hot cereal.  I think my dislike for hot cereal has diminished as I’ve gotten older and I can probably now keep Jello down, which as a kid wasn’t always the case.


Click HERE to join our mailing list and you’ll never miss a recipe again!


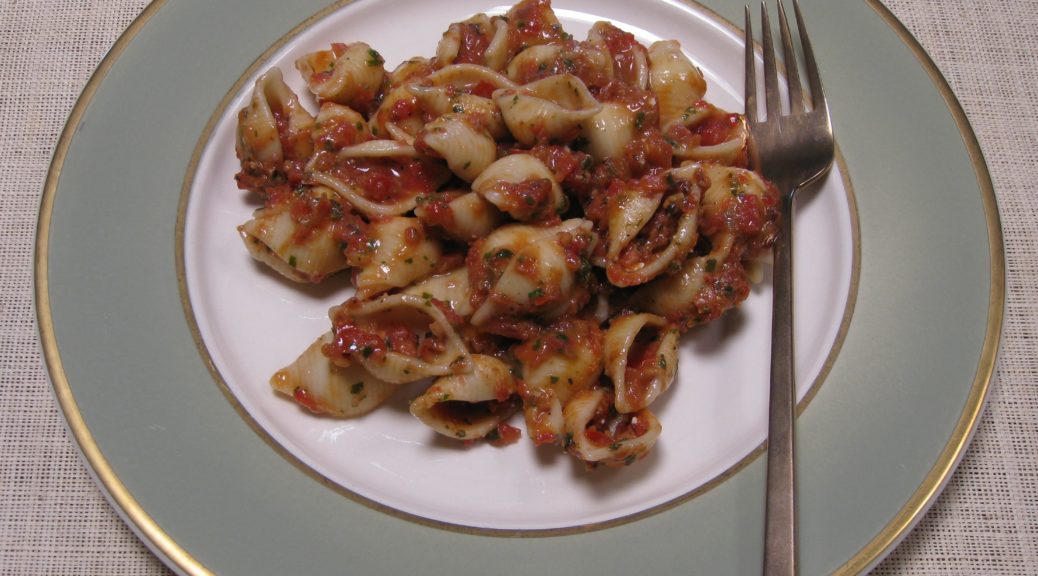
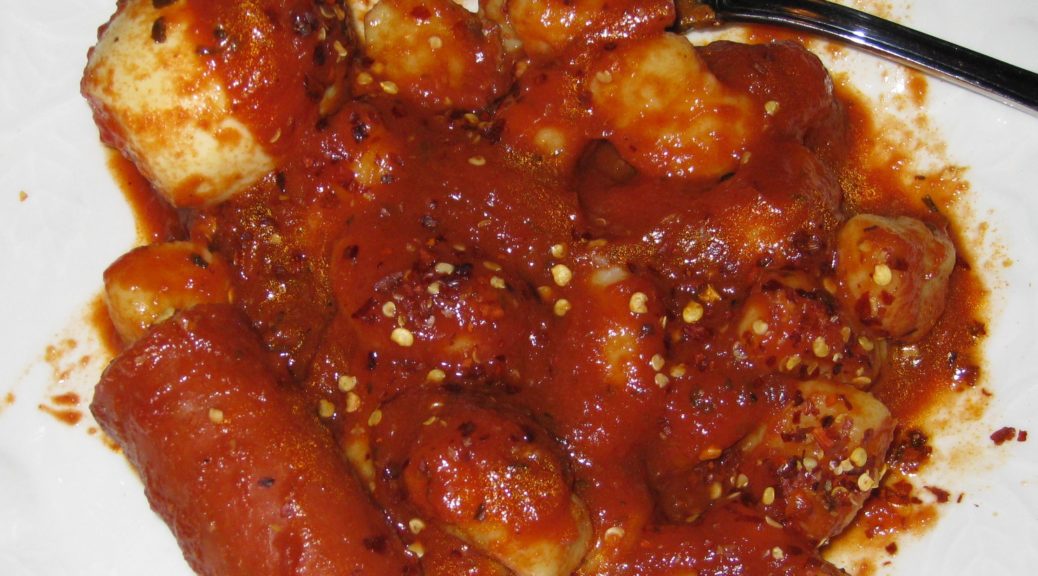
But gnocchi?  In the pantheon of foods, gnocchi reign supreme.  They are my favorite food.  Not to be morose, but they would be my death row meal (assuming a prison chef could make them like my mother with her pepperoni sauce!).

The pepperoni sauce is an interesting twist.

Since my father didn’t like gnocchi, we didn’t have them when he was home for dinner.  My father worked out of town from time to time, so there were weeknight meals where he wasn’t around.

The back of a fork is commonly used to imprint ridges on gnocchi but a gnocchi board does a much better job

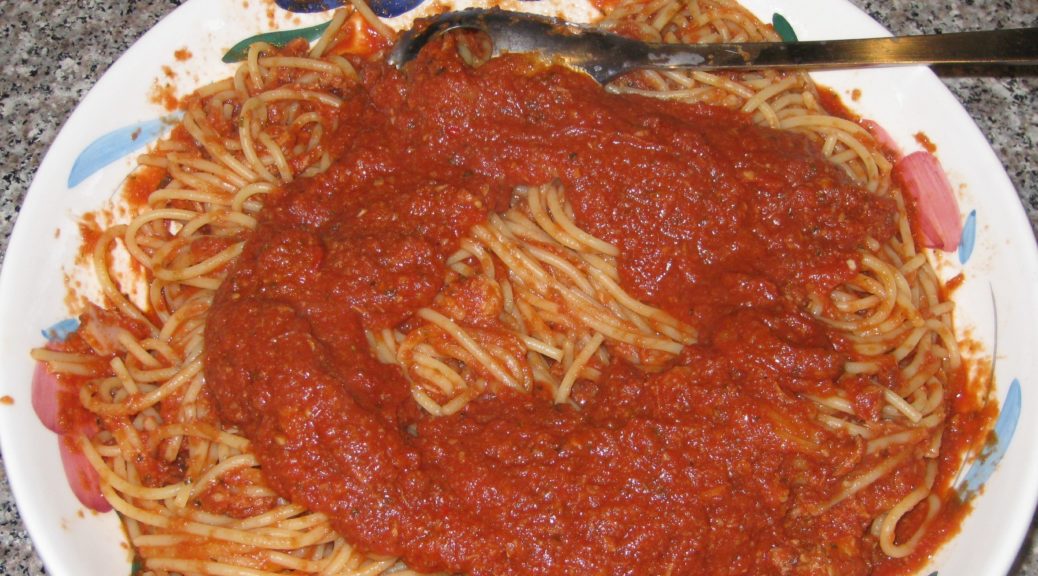
My mother would freeze her Sunday sauce, which was made with large pieces of pork.  Sometimes a container of sauce wouldn’t have any meat.  A common Italian approach to adding a bit of protein to a meal of pasta with red sauce is to simmer some shelled hard-boiled eggs in the sauce for a little while and serve them with the pasta.

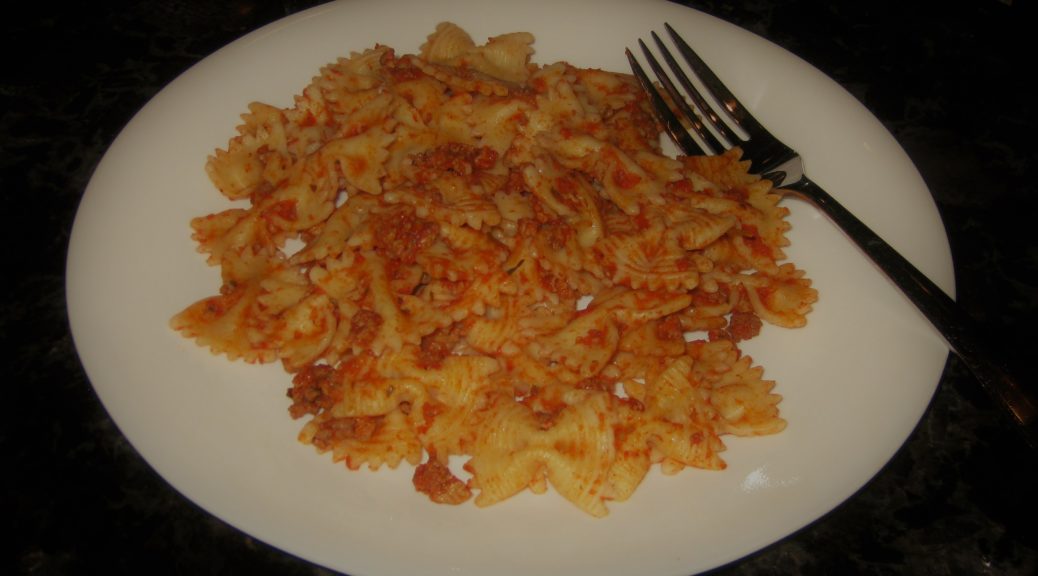
My mother did that, but she also would take pieces of pepperoni, pierce them with a fork in a few places, boil them for about 20 minutes to render some of the fat and to soften the meat, and then add them to sauce to simmer for half-an-hour or so.

That sauce, which only appeared on weeknights from leftover Sunday sauce is my favorite sauce for my favorite food!


Follow us on your social media platform of choice


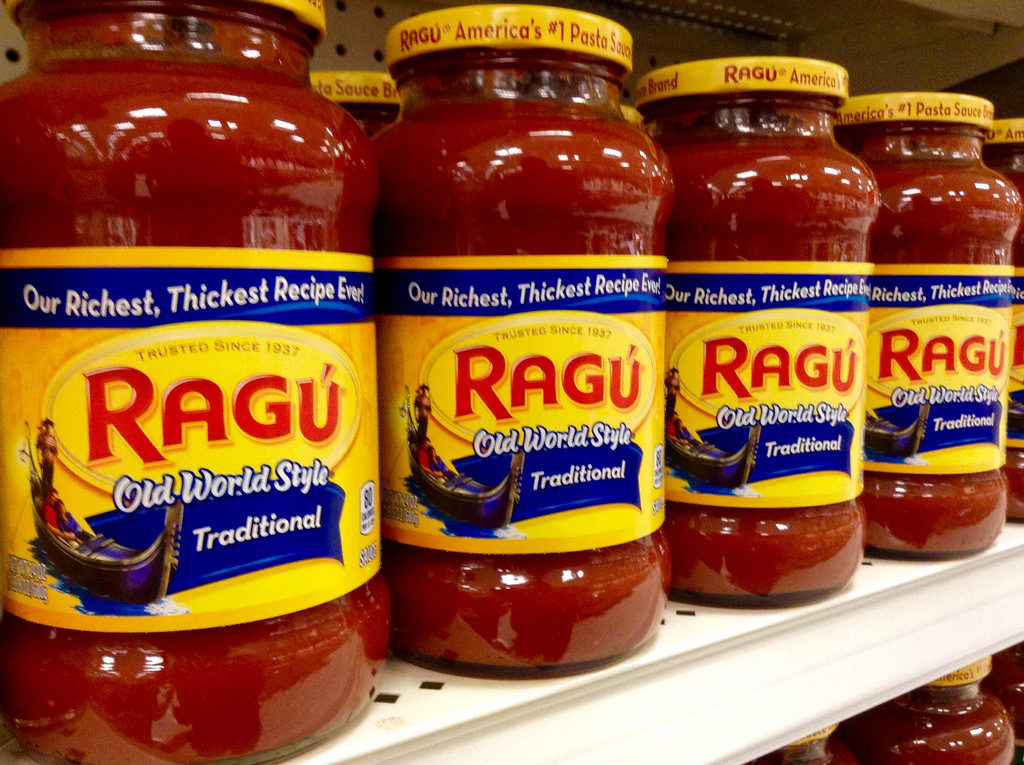
Let’s face it, pepperoni is an American creation.  To be sure, it’s a riff on any number of Italian regional salame piccante (hot salami).  In fact, you can’t get a pepperoni pizza in Italy but you can get a pizza with slices of salame piccante.

It took a while for our Italian relatives to wrap their heads around pepperoni.  In Italian, pepperoni are peppers not a cured meat product.  The word is also plural, not singular.  Americans often adopt the plural form of an Italian word (whether changing the meaning or not) and then treat it like it’s singular.

Consider panini.  One sandwich is panino.  More than one are panini.  The same is true with gnoccho and gnocchi or raviolo and ravioli.  Americans tend to say paninis and raviolis (fingers on blackboard screeching sound) if they mean more than one.  We don’t really have a rule about this as far as I know.  It’s just random.  Or so it appears to me.

Italian, on the other hand, has a very clear rule when adopting foreign words.  The singular form of the word becomes the Italian word.  That word is use for both the singular and the plural, with the adjective changing to indicate more than one.

Take bar, for example.  The “Italian” word for bar is bar.  (This is a critical bit of information that one learns early when taking Italian lessons.)  If you’re going to the bar, in Italian you would say “il bar” (the bar).  If you’re going out for a night of pub-crawling to many bars you would say “i bar” (the bars).

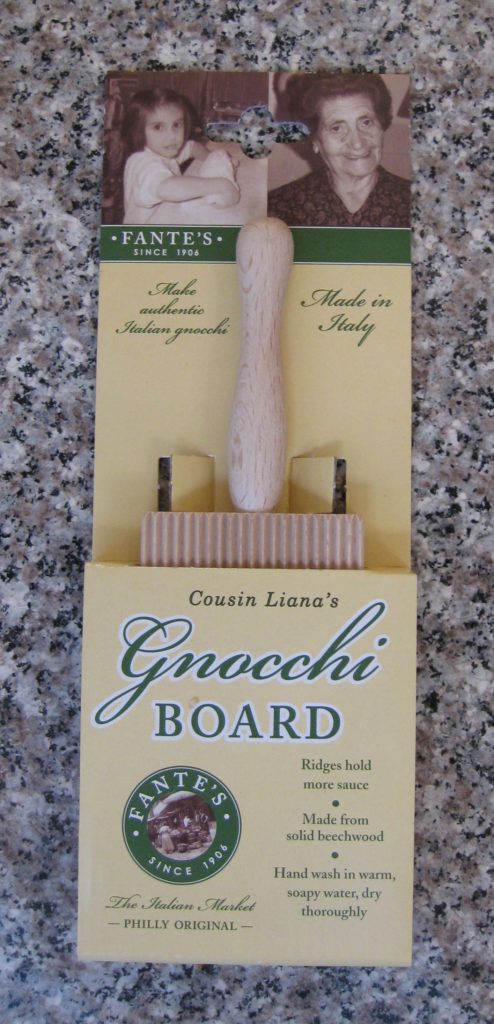
Now, you might ask yourself, when you would ever eat just one gnoccho.  Gnocchi translates as dumplings.  So if you had a large American or Eastern European dumpling, it would be a gnoccho, and you might have just one.  Today, however, we are making small gnocchi, and one is never enough.


If you have a favorite family recipe and a bit of a story to tell, please email me at santafecook@villasentieri.com and we can discuss including it in the blog. I am expanding the scope of my blog to include traditional recipes from around the country and around the world. If you haven’t seen Bertha’s Flan or Melinda’s Drunken Prunes, take a look.  They will give you an idea of what I’m looking for.


Print Recipe
Gnocchi di Patate (Potato Gnocchi)
There are some very strong opinions about making gnocchi. The first is whether they should be very soft or somewhat firm. That preference tends to drive other decisions but sometimes in different directions. My husband’s Great Aunt Juliana liked soft gnocchi so she did not use eggs. She insisted that the gnocchi should be mixed while the potatoes were still hot, though other folks who like soft gnocchi use the potatoes after they’ve cooled and lost some of their moisture so less flour is needed. I like firmer gnocchi, so I use eggs. I also let the potatoes cool (as my mother did) because 1) it’s easier on the fingertips and 2) the trivial amount of moisture lost or not by cooling or not is no competition for the addition of eggs.
Votes: 0
Rating: 0
You:
Rate this recipe!
Prep Time 5 minutes
Cook Time 1 hour
Servings
people
Ingredients
Prep Time 5 minutes
Cook Time 1 hour
Servings
people
Ingredients
Votes: 0
Rating: 0
You:
Rate this recipe!
Instructions
  1. Scrub the potatoes.
  2. Put the potatoes in a large stockpot and cover with a generous amount of cold water. Bring to a rolling boil and cook until a knife can be easily inserted, approximately 20 minutes. This will depend on the potatoes and the altitude so begin testing after about 15-17 minutes.
  3. Remove the potatoes from the water and allow them to cool enough to peel, about 15 minutes.
  4. Meanwhile, put three cups of flour on the counter or a pasta board.
  5. Pass the peeled, but still warm, potatoes, through a ricer on top of the flour. Note: it is very difficult to rice cold potatoes so this step should be completed as quickly as possible after the potatoes have been removed from the water.
  6. Allow the potatoes to cool completely.
  7. Sprinkle the salt on the potatoes.
  8. Using your fingers, begin to mix in the flour.
  9. Add two eggs. Work in the eggs, incorporating more flour.
  10. Add the remaining two eggs and work in enough flour to make a dough that is just very slightly tacky. It will firm up a bit as the flour completely hydrates.
  11. Cut off a small piece of dough and roll it into a cylinder approximately 1/2 inch in diameter.
  12. After all the gnocchi have been rolled and cut bring a large pot of abundantly salted water to a rolling boil.
  13. Add some of the gnocchi, maybe 18-24 depending on the amount of water.
  14. As soon as the water returns to a full boil. Remove the gnocchi with a spider or slotted spoon.
  15. Put them in a serving bowl with a small amount of whatever sauce you are using on the bottom.
  16. Add more gnocchi to the boiling water.
  17. Meanwhile drizzle a bit more sauce on the gnocchi in the bowl and sprinkle with a bit of Parmigiano Reggiano cheese, if desired.
  18. Add each batch of gnocchi to the serving bowl, keeping it warm in a low oven and sprinkling each later with some sauce (and cheese, if desired).
  19. Once all the gnocchi have been added, gently stir the gnocchi to distribute the sauce and cheese.
  20. Serve immediately.
Recipe Notes

Copyright © 2018 by VillaSentieri.com. All rights reserved.

Share this Recipe

Spaghetti with Tuna Sauce

January 17, 2018

Tomatoes…and tuna…not clams or squid…as a sauce for pasta…quite a challenge for me as a young adult!

Although pasta (spaghetti, really) with red sauce and clams or squid was in my wheelhouse as an adolescent, the idea of a red sauce with tuna was, most definitely, not!

My undergraduate advisor, and later my business partner when I set up my psychiatric practice in Philadelphia, Gene d’Aquili, was a first-generation American of Italian and French descent.  I frequently cooked at his home in Berwyn on Philadelphia’s Main Line.  (If you read the obituary link above, you will notice a comment about a sign that read “Fantasyland.”  I was the person who had that sign painted after years of Gene referring to his estate by that name.  I had the sign painted in Guyana on a trip when I was doing research for my doctoral dissertation and ended up on the Guyana Airways float for the Mashramani parade but that’s a whole other story!)

The 1981 Guyana Airways Mashramani float. I was supposed to represent one of the Canadian pilots.

Click HERE to join our mailing list and you’ll never miss a recipe again!


Gene’s father’s family was from Rome.  Gene’s grandparents emigrated to the United States with their four children, Gene’s father Guido, and Guido’s three sisters, very early in the 20th century.  One of the sisters died not long after coming to the United States.  The other two, Auntie Helen and Auntie Louise, are the reasons I now drink bourbon (Auntie Louise) and know a lot about traditional Roman cuisine (Auntie Helen).

The family home is now part of the American Embassy in Rome.  There are several buildings that are part of the American Embassy but I believe the palazzo pictured below was the one the d’Aquili family owned before coming to the United States.

One of the American Embassy buildings in Rome that I believe was the d’Aquili palazzo.

Follow us on your social media platform of choice


Gene’s father, Guido, was a fine artist of the New Hope School.  In a previous post, I included some pictures of some of the Old King Cole murals that he painted for a private club in Trenton, NJ.  Those murals ended up in the dining room of the carriage house I rented on the d’Aquili estate in Berwyn, PA when I was in medical school.

One of Gene’s ancestors was Antoniazzo Romano, a famous artist of the 15th century.  His father’s artistic bent is part of a long family tradition.

The Annunciation by Antoniazzo Romano

For one dinner at “Fantasyland,” really known as “Salus House,” Gene and his wife, Mary Lou, wanted to serve spaghetti with tuna sauce; a classically Italian dish but completely unknown to me at the time.

I winged it based on his description.  It was basically a simple tomato sauce (what we as Americans might call Marinara but what Italians would call Pomodoro) with tuna simmered into it.

It was good, and although many years went by before I made it again, it stuck in my memory.

I’ve tweaked the recipe over the years but it really hasn’t varied much from my initial foray into making spaghetti with tuna sauce based on Gene’s description.


If you have a favorite family recipe and a bit of a story to tell, please email me at santafecook@villasentieri.com and we can discuss including it in the blog. I am expanding the scope of my blog to include traditional recipes from around the country and around the world. If you haven’t seen Bertha’s Flan or Melinda’s Drunken Prunes, take a look.  They will give you an idea of what I’m looking for.


Print Recipe
Spaghetti with Tuna Sauce
Although mushrooms are not strictly traditional, their presence is not really noticeable and I think they add a bit of savoriness to the sauce. You can omit them if you wish. It is important to use good quality tuna to avoid any “tinny” taste. Italian Tonno is ideal but a good American brand will work fine. The small amount of sugar is intended to counteract the sourness that some canned tomatoes can have. Adjust up or down to your taste. The presence of the sugar should not be detectable, however.
Votes: 0
Rating: 0
You:
Rate this recipe!
Prep Time 15 minutes
Cook Time 1 hour
Servings
people
Ingredients
Prep Time 15 minutes
Cook Time 1 hour
Servings
people
Ingredients
Votes: 0
Rating: 0
You:
Rate this recipe!
Instructions
  1. Coarsely chop the carrot, celery, onion, mushrooms, garlic, and parsley.
  2. In a food processor finely mince the chopped vegetables.
  3. Heat the olive oil in a heavy-bottomed saucepan.
  4. Add the minced vegetables and sauté on medium high heat, stirring often, until golden.
  5. Add the red pepper and sauté a minute or two more.
  6. Add the wine and quickly evaporate, stirring often.
  7. Add the basil and oregano. Stir well.
  8. Add the tomato puree, water, sugar, 1 ½ teaspoons salt and black pepper to taste.
  9. Simmer uncovered approximately 30 minutes, stirring occasionally.
  10. Add the tuna and simmer 10 minutes more.
  11. Adjust seasoning.
  12. This makes enough to generously sauce one pound of spaghetti.
Recipe Notes

Copyright © 2018 by VillaSentieri.com. All rights reserved.

Share this Recipe

Roman Beans and Kale

January 12, 2018

I don’t remember my mother making Roman Beans and Kale till I was in my late teens.

The first time she made it, I remember her talking about her mother making it.  For something she really liked, she waited an awfully long time to make it.  But then, again, I did the same thing with her pasta è fagioli.

There were some dishes from her childhood that she talked about but never made.  Tiella is the one that I remember most.  It took me multiple tries over many years to recreate it from her description.

Roman beans and kale might seem a little unusual to many American palates due to the length of time the kale is cooked.  There is a point where it becomes silky but most definitely not mushy.  Southerners, though, would find the kale in this recipe cooked in a familiar way.  It is much like the Southern low-and-slow style of cooking greens of various types, such as collards or mustard greens, until they achieve the requisite tenderness.

A bunch of kale

Follow us on your social media platform of choice


Texture is an important part of this dish. The beans should yield but not be falling apart.  The kale should not provide any resistance the way it would if it were just quickly sautéed.  The pasta, however, should be al dente.

Roman beans

Beans, kale and pasta are all pretty mellow-tasting in my estimation.  The garlic, olive oil, and Parmesan cheese are what give this dish its flavor oomph!  At the table, I add crushed red pepper but it shouldn’t be cooked into the dish.

Roman beans are also called Borlotti or Cranberry beans.  Depending on where you live you might have to order them.  In a pinch, though, you could use pinto beans or Anasazi beans.  (If you’re a bean savant, you’ll notice that I used Anasazi beans as I was unable to find Roman beans after searching market shelves in two different cities for a couple of months.  Though I could have gotten them online, I didn’t think the huge price premium was worth it.)

Anasazi beans

My mother’s approach to cooking most foods was definitely low and slow.  It’s classically Italian and so NOT French, which often aims for “high and fast!”  Though culinary education is now more inclusive and not so heavily French, we have a strong cultural bias away from slow, leisurely cooking due to the strong French influence of the past decades.  There are exceptions however, largely based on strong regional traditions, barbecue, for example.  But for the most part, mainstream America, and certainly mainstream American food and cooking publications, just don’t “get” low and slow.


Click HERE to join our mailing list and you’ll never miss a recipe again!


There are some foods that don’t benefit from low and slow, at least when cooked traditionally; steaks for instance.  My mother’s approach to these was that they should be well done, even though that state was achieved quickly.  In our house steaks were most often seasoned with olive oil, garlic, oregano, basil, salt and pepper and broiled.  I think it’s a wonderful flavor combination.  But it wasn’t until my late teens that I developed an appreciation for rare beef.

I remember one meal where my sister and I cooked the steaks for ourselves and our dad.  They were medium rare, as I recall.  Even though our mom didn’t have a hand in cooking them (and cooked her own steak well done) she spent the entire meal feeling like she had served us bad food.  The fact that we liked it didn’t seem to matter.  She had very definite opinions about what constituted good food, and something that was bleeding onto the plate didn’t fit!


If you have a favorite family recipe and a bit of a story to tell, please email me at santafecook@villasentieri.com and we can discuss including it in the blog. I am expanding the scope of my blog to include traditional recipes from around the country and around the world. If you haven’t seen Bertha’s Flan or Melinda’s Drunken Prunes, take a look.  They will give you an idea of what I’m looking for.


Recently I bought sous vide equipment.  I haven’t tried it yet but I’m itching to do so.  Steaks will be first.  The food gets vacuum sealed and then cooked slowly…for hours…in a hot water bath that is maintained at the temperature one wants the food to achieve.  The meat is cooked uniformly throughout…low and slow!  For steaks, one would want to quickly sear the outside before serving but many foods, like fish, poached eggs, and even hollandaise sauce can be used right out of the water bath.

For now, though, let’s try a slow-cooked pot of beans and greens…Italian style!!

Print Recipe
Roman Beans and Kale
The beans should be cooked through but not falling apart. The kale should take on a silky texture but not be mushy. The pasta should still be a bit “toothy." This is even better if made a day or two in advance and refrigerated. If you are doing this, you will want to undercook the pasta so that it is not too soft after the dish is reheated for serving. Alternately, you can omit the pasta when mixing the beans and kale, then add it when reheating. Depending on where you live, you might not be able to find Roman beans. Roman beans are also called Cranberry or Borlotti beans. If you can’t find Roman beans, you can substitute Pinto or Anasazi beans.
Votes: 1
Rating: 5
You:
Rate this recipe!
Prep Time 15 minutes
Cook Time 2 1/2 hours
Servings
people
Ingredients
Prep Time 15 minutes
Cook Time 2 1/2 hours
Servings
people
Ingredients
Votes: 1
Rating: 5
You:
Rate this recipe!
Instructions
  1. Rinse and pick over the beans.
  2. Cover the beans with six cups of water.
  3. Simmer the beans until almost fully cooked, adding 2 teaspoons of salt and black pepper to taste after the beans have cooked for an hour. If necessary, add a bit of boiling water from time to time to keep the beans just submerged. The beans will cook for about 10-15 minutes more after the kale is added so don't overcook them.
  4. Meanwhile, cut out the center ribs of the kale.
  5. Kale ribs about to be discarded.
  6. Cut the leaves crosswise into large pieces.
  7. Rinse and drain the kale.
  8. Bring a quart of salted water to a boil.
  9. Add the kale. The kale should quickly wilt enough to be covered by water. If not add a bit more water to just cover the kale.
  10. Simmer the kale, covered, stirring occasionally, until cooked to a silky texture, approximately 1 hour.
  11. While the kale is cooking, crush the garlic with the side of a chef's knife.
  12. Slowly brown the garlic in the olive oil.
  13. Once the garlic has browned, remove the oil from the heat. Discard the garlic. Reserve the garlic-infused oil.
  14. If using pasta, bring two quarts of water seasoned with 1/4 cup of salt to a rolling boil.
  15. When the pasta-cooking water comes to a boil, add the pasta. At the same time, add the kale and its cooking water to the beans. Keep the beans and kale at a simmer.
  16. Cook the pasta in boiling water until it is still a little crunchy on the inside.
  17. Drain the pasta and add it to the pot with the beans and kale.
  18. Add the garlic-infused oil.
  19. Taste and adjust seasoning.
  20. Cook everything, uncovered, until the pasta is al dente, just a few minutes longer.
  21. Serve with grated Parmigiano Reggiano cheese.
Recipe Notes

Copyright © 2018 by VillaSentieri.com. All rights reserved.

Share this Recipe

Spaghettini con Acciughe (Spaghettini with Anchovies)

January 1, 2018

In our house pasta mostly was dressed with a red sauce, specifically my mother’s long-simmered Southern Italian-style sauce.  In Western Pennsylvania, we called it “sauce” or sometimes “spaghetti sauce” though it was used on much more than spaghetti.  Further east, in Philadelphia, New York, and New Jersey the term “gravy” was common, but not where I lived.

Now I mostly use the Italian word “sugo” which is a general term for sauce, though commonly used for a tomato-based sauce.  The word ragù definitely connotes a tomato-based sauce, specifically with meat.  It also happens to be a trademarked name, though with a different accent mark on the last letter:  Ragú.

I found it interesting that Ragú was started in 1937 in Rochester, New York by Assunta and Giovanni Cantisano, Italian immigrants who sold the sauce from their front porch.  In 1969, the company was sold to Chesebrough-Pond’s.  The brand became the best-selling pasta sauce in the country and ultimately achieved a reported 60% share of the pasta sauce market in the United States.


Click HERE to join our mailing list and you’ll never miss a recipe again!


Purchased pasta sauce was something that NEVER entered our house!

When pasta wasn’t served with a red sauce, it was typically served as Pasta è Fagioli (Pasta and Beans) and, once a year, on Christmas Eve, with crispy breadcrumbs and anchovies.  You can find my mother’s recipe for Pasta è Fagioli here and mine here.  In the coming months you’ll get my Aunt Margie’s recipe and Louis Evangelista’s recipe for Pasta è Fagioli.

Although not something I grew up with, a simple sauce of anchovies, garlic and olive oil is now a favorite in my household.

My recipe is adapted from one by G. J. Gillotti (whose family also hails from Calabria) in Our Most Treasured Recipes, published in 1993 by the Morning Star Lodge of the Order of Italian Sons and Daughters of America.  The sauce comes together from pantry staples in the time it takes to bring the pasta water to a boil.


Follow us on your social media platform of choice


Morning Star Lodge is in Pittsburgh, about 70 miles from my hometown of Johnstown, PA.  If you’ve been following my blog, you know I have both Italian and Slovak roots.  There are lots of people of Italian and Eastern European extraction in Western Pennsylvania.  I found it interesting to peruse the pages of this ostensibly Italian cookbook.  Among many Italian and Italian-American favorites are Eastern European dishes like holubki (stuffed cabbage), sweet sour kielbasa, and pierogi casserole.  This speaks to the melting pot that is Western Pennsylvania!


If you’ve gotten this far, I hope you’re interested in trying this recipe but I fear there are many of you who hear the word anchovy and stop cold in your tracks.  If any of you are still reading, however, I would encourage you to try this recipe.  The anchovies provide a background savory note but really are not front and center!


If you have a favorite family recipe and a bit of a story to tell, please email me at santafecook@villasentieri.com and we can discuss including it in the blog. I am expanding the scope of my blog to include traditional recipes from around the country and around the world. If you haven’t seen Bertha’s Flan or Melinda’s Drunken Prunes, take a look.  They will give you an idea of what I’m looking for.


Print Recipe
Spaghettini con Acciughe (Spaghettini with Anchovies)
Buy good quality anchovies packed in olive oil. The difference in price between low-end and high-end anchovies is not that much but the difference in taste is astounding. Good anchovies will have only the slightest smell “of the sea” when you open the can. After cooking, they will fade into the background leaving a savory (umami) note without any fishiness. Italians rarely use cheese in dishes that contain fish. I prefer spaghettini in this dish. Spaghettini is thinner than spaghetti but thicker than angel hair (vermicelli).
Votes: 0
Rating: 0
You:
Rate this recipe!
Prep Time 15 minutes
Cook Time 40 minutes
Servings
people
Ingredients
Prep Time 15 minutes
Cook Time 40 minutes
Servings
people
Ingredients
Votes: 0
Rating: 0
You:
Rate this recipe!
Instructions
  1. In a small frying pan gently sauté garlic in olive oil until golden brown.
  2. Add the fennel seed, red pepper, oregano, and basil and cook for approximately 30 seconds.
  3. Add the anchovies and their oil.
  4. Cook gently, stirring frequently, until anchovies disintegrate. This will only take a few minutes.
  5. Add white wine and simmer gently till most of the wine has evaporated and the anchovies have thoroughly disintegrated. Remove the pan from the heat.
  6. Meanwhile cook pasta in 3 quarts of boiling water seasoned with 1/3 cup of salt until just al dente.
  7. As the pasta nears completion, use some of the pasta water to warm the serving bowl. This is important as the egg will cook in the hot pasta and if the bowl is cold, the pasta will lose too much heat to do this effectively.
  8. Just before draining the pasta, reheat the olive oil-anchovy mixture on medium-low.
  9. Drain pasta, reserving at least one cup of the pasta-cooking water.
  10. Drain and quickly dry the warmed serving bowl.
  11. Put half of the olive oil-anchovy mixture in the warmed serving bowl.
  12. Add the drained pasta.
  13. Top with the remaining olive-oil anchovy mixture.
  14. Toss pasta.
  15. Add black pepper and beaten egg. Toss until well mixed.
  16. In a leap of faith, add about ½ cup of the reserved (still hot) pasta-cooking water. Toss well.
  17. Drizzle in approximately ¼ cup of finishing olive oil. Toss well.
  18. Add more pasta-cooking water, if needed, to make a glossy sauce. You probably can’t go wrong with adding at least another ¼ cup of pasta-cooking water.
Recipe Notes

Copyright © 2018 by VillaSentieri.com. All rights reserved.

Share this Recipe

Cabbage and Noodles (Halushki)

November 27, 2017

One of the interesting consequences of working on this blog is that it is getting me to cook more Slovak food.

We ate way more Italian food than Slovak food when I was growing up but, nonetheless, Slovak food was a significant presence on our table.

Things that only lived in my memory, like the Chicken Paprikash that I posted a few weeks ago, and my Grandma Mihalik’s Butter Cookies that are coming up in a week or two, are now real. And it’s not only the Slovak food. The Chinese Five-Spice Roast Pork from last week hasn’t been on my table in more than 40 years!


Click HERE to follow us on Instagram


Part of the reason is that, as much as I enjoy cooking, I hadn’t devoted as much time to planning what I was going to cook as I did when I was younger.  That is, until I got deep into this blog (and the restaurant cookbook I’ve been asked to write).

In Junior and Senior years of college there was a plan for dinner for every day of every week. Sometimes there was a plan for lunch, too!

Good provisions weren’t conveniently located to the University of Pennsylvania campus except for some specialty items from the ethnic markets near campus or the occasional very basic item from one of two nearby (in-super) supermarkets. Grocery shopping was done weekly and involved a trip to Ninth Street (sometimes called the Italian Market), and to the Pathmark supermarket in Broomall, PA.

Every meal got planned and a shopping list was created.

The planning was usually done in the evenings when I needed a break from studying (which I know some of you think I never did!). I would sit down with a cookbook or two, or my box of recipes handwritten on 3” x 5” index cards, or the typewritten recipes from Mrs. Hugh, my roommate’s mother and, over the course of the week, generate a list of what my roommate and I were going to have for dinner each night. Some were favorites but many were new, like the whole poached fish I made from Marcella Hazan’s first cookbook or Mrs. Hugh’s Crispy Duck (see the photo embedded in this blog post).

One of my favorite books was a slim volume by Charmaine Solomon. Charmaine was from Sri Lanka and two of the resident advisors in my college house, Reggie and Nanacy Rajapakse, were also from Sri Lanka and knew Charmaine. Charmaine’s Far Eastern Cookbook was copyrighted in 1972 (the year I started college). The edition I have was printed in 1973 so it was quite new when I bought it in 1974 shortly after entering the International Residence Project. I read that book cover to cover, like a novel, many times. I could sit for hours and pore over Charmaine’s recipes.

My dog-eared and much beloved copy of Charmaine Solomon’s Far Eastern Cookbook

In 1976, when I graduated college, Reggie and Nanacy bought me another of Charmaine’s cookbooks as a present, The Complete Asian Cookbook.

Another favorite cookbook was the [Ceylon] Daily News Cookery Book which was in the collection of the Van Pelt library at the University of Pennsylvania. I would check it out, keep it as long as I could, return it, and then check it out again. It was a hardcover book with a red cloth cover. It was simply titled the Daily News Cookery Book.  Reference to Ceylon was nowhere to be found in the title.  Many years later, on a trip to Sri Lanka, I was able to get a reprint of the book (with the word Ceylon added to the title).

My point, though, is that my cooking repertoire expanded because I worked at it. Ray and I planned every meal, we went grocery shopping, we cooked, and we most certainly ate. I was still able to keep up a good cooking pace through medical school but after that, as I got busier and busier, it became harder and harder.

While I can put food on the table any given night without much thought, recreating past favorites or trying out new recipes requires more planning. I now have a calendar specifically devoted to cooking. Dishes get planned out weeks, if not months, in advance. It’s a lot of work, yes, but it’s tremendously rewarding to prepare my favorite foods, many of which I haven’t had in many years, and introduce them to others.

Cabbage and Noodles, sometimes called Halushki, was frequently on our table. I remember it particularly being served with Salmon Patties, one of my favorite Friday meals when we didn’t eat meat. We had it other times, too, but the association of Cabbage and Noodles with Salmon Patties is very strong.


Follow us


Click HERE to join our mailing list and you’ll never miss a recipe again!

Print Recipe
Cabbage and Noodles (Halushki)
Although three pounds of cabbage sounds like a lot, it cooks down a tremendous amount. If you wish, you can add a teaspoon or two of caraway seed to the cabbage during the last 20 minutes of cooking. Though my family did not do that, it is not unusual to do so.
Votes: 0
Rating: 0
You:
Rate this recipe!
Prep Time 15 minutes
Cook Time 2 hours
Servings
people
Ingredients
Prep Time 15 minutes
Cook Time 2 hours
Servings
people
Ingredients
Votes: 0
Rating: 0
You:
Rate this recipe!
Instructions
  1. Quarter and core the cabbage.
  2. Slice each quarter crosswise into ½ inch wide ribbons.
  3. In a heavy-bottomed pot large enough to hold the cabbage comfortably melt four tablespoons of the butter.
  4. Sauté the onion in the butter until golden.
  5. Add the cabbage. Season generously with salt and pepper.
  6. Sauté on medium heat, stirring often, until the cabbage wilts.
  7. Reduce the heat if the cabbage starts to stick to the pot.
  8. Continue to cook on medium low, partially covered and stirring often, until the cabbage is silky, golden, and sweet. This will take 1 ½ to 2 hours total from start to finish.
  9. The cabbage can be cooked several hours in advance to this point. Warm the cabbage before proceeding.
  10. Bring 3 quarts of water to a rolling boil. Add 1/3 cup of salt.
  11. Cook the egg noodles in the salted water until just done. They should be slightly toothy and definitely not mushy.
  12. Drain the noodles.
  13. Add the noodles to the cooked cabbage along with the remaining 2 tablespoons of butter. Toss well.
  14. Taste and adjust salt and pepper.
Recipe Notes

Copyright © 2017 by VillaSentieri.com. All rights reserved.

Share this Recipe

Salsa Friulana d’Ivana (Ivana’s Friulan Tomato Sauce)

November 17, 2017

My mother-in-law grew up in the town of Treppo Grande in the Italian province of Friuli. Friuli is in northeastern Italy. It is the major portion of the region of Friuli-Venezia Giulia.

Her father and two uncles lived with their families in three houses that wrapped around a courtyard. Her grandmother lived in the same complex. The extended family included numerous cousins.

Another uncle moved to the United States with his wife and their son early on.  Two more children were born to them in the US.


Follow us on Twitter:  click HERE


At the age of 12, shortly after the end of World War II my mother-in-law, her brother (our Uncle Ray), and mother came to the States. Her father had been in the US working with the intention of bringing over the family but then the war broke out and the family could not be reunited until it ended.

One set of cousins stayed in Treppo Grande.  Another set of cousins moved to France.

In 1990 the “cousins,” as the US contingent called themselves, hatched a plan to organize a group trip to their hometown of Treppo Grande and to Digoin, France where the other set of “courtyard cousins” lived.

Naturally, planning for the trip required many “meetings” among the cousins; meetings that were fueled with copious amounts of food and alcohol interspersed with a little “business!”

The trip happened in August 1991. My husband and I went along with the “cousins” and their spouses.

The “United States” cousins and three of four spouses in Treppo Grande along with Carolina Fabbro, a friend of my mother-in-law’s mother.  She died a few years ago at more than 100 years of age.

We first met up in Paris for a day or two and did some sightseeing.

Afterwards, we were picked up in a small bus that had been arranged by Olvino, one of the original “courtyard cousins” who lived in Digoin. As I recall, the driver only spoke French. Among us we spoke English, Italian, Friulan (the language of Friuli), and a smattering of Spanish and German, but no French. Thankfully the driver knew where he was going and, for all other needs, we managed to communicate in some rudimentary, but effective, manner.

Interesting to me was that the vehicle had graph paper that kept a running record of the bus’s speed. Apparently the driver could be asked to produce the graph paper by the police and could be fined if it showed that he had exceeded the speed limit. Can you imagine that happening in the United States???

I was also fascinated when we stopped for lunch. The driver had a glass of wine. I will repeat that.  This professional bus driver had a glass of wine with lunch then got behind the wheel. Apparently, he was legally permitted to have one, just one, glass of wine and still drive.

Admittedly, one glass of wine is not going to get anyone’s blood alcohol level close to a level that produces intoxication but it pointed out that 1) the French are highly (overly?) regulated and 2) Europeans have a more relaxed approach to alcohol (probably to life in general, actually!).

I had a similar experience in 1994 when I did several consulting gigs in Europe. I frequently had lunch with physicians from the hospitals where I was consulting. Everyone (yes, everyone) had a glass of wine or beer with lunch and then went back to the hospital to work.

But I digress.

We spent several fun days in Digoin, where the local cousins had rented out a small hall, with a kitchen, because none of them had a house big enough to host all of us, and all of them, for meals.

There must have been six banquet tables shaped into a “U” around which we all sat. The crowd included not only those of us from the States, but the cousins who lived in Digoin along with their significant others, their children, and their children’s significant others.

Conversations frequently included four languages. The “cousins” typically spoke Friulan with each other. From there, the conversation would get translated into Italian, English, and French so that everyone could understand anything of interest to the group.

I don’t remember what we ate for dinner the first night except for the pasta which was sauced with a red sauce made by Ivana, Olvino’s wife.

I was transported by that sauce.

Tomato sauces in Friuli are different from the rest of Italy in that they have noticeable amounts of “warm” spices such as cinnamon, cloves, and nutmeg.  My mother-in-law makes a sauce similar to the one that Ivana makes but there are differences. For example, hers includes only beef. Today’s recipe, however, is a tribute to Ivana.

This is my interpretation of Ivana’s recipe. Since the original recipe contained a list of ingredients but no quantities, I had to figure out what worked.


Follow us


Click HERE to join our mailing list and you’ll never miss a recipe again!

Print Recipe
Salsa Friulana d'Ivana (Ivana's Friulan Tomato Sauce)
There should be a little bit of red-tinged oil floating on top of the sauce to improve the mouthfeel of the pasta—just a little. If you cannot find lean ground pork, you may want to grind your own. An actual meat grinder will work better than a food processor but if you’re using a food processor be careful not to grind the meat too finely. For the beef, I suggest using 93% lean. This recipe makes enough sauce for approximately 4 pounds of pasta. Extra sauce freezes well.
Votes: 0
Rating: 0
You:
Rate this recipe!
Prep Time 30 minutes
Cook Time 3 hours
Servings
cups
Ingredients
Prep Time 30 minutes
Cook Time 3 hours
Servings
cups
Ingredients
Votes: 0
Rating: 0
You:
Rate this recipe!
Instructions
  1. If using canned tomatoes rather than crushed tomatoes or tomato puree, pass the tomatoes through a food mill and reserve.
  2. Grind the pork if you cannot get ground pork in your market.
  3. Grind the garlic, onion, and parsley in a food processor. If you used a food processor for the pork, there is no need to clean it. Alternatively, chop them very, very finely by hand.
  4. Heat the olive oil in a heavy bottomed Dutch oven.
  5. Add the garlic-onion-parsley mixture. Sauté until the raw smell is gone.
  6. Add the ground beef and pork and sauté on high heat until the meat is browned.
  7. Add the tomato puree or crushed tomatoes.
  8. Add all remaining ingredients.
  9. Sage
  10. Rosemary
  11. Basil
  12. Bay leaves
  13. Cinnamon
  14. Cloves
  15. Nutmeg
  16. Simmer gently, partially covered, stirring frequently for approximately 2 ½ hours.
  17. Adjust salt and pepper during cooking.
  18. Toss approximately 1/4 of the sauce with one pound of cooked pasta.
Recipe Notes

Copyright © 2017 by VillaSentieri.com. All rights reserved.

Share this Recipe

Spaghetti Aglio, Olio, e Pepperoncino (Spaghetti with Garlic, Oil and Red Pepper)

November 8, 2017

How many Italian pasta sauces can you think of that do not include olive oil and garlic?

Precious few, I would guess!

This dish, classically Roman, elevates those two ingredients to center stage. You cannot hide bad olive oil or poorly cooked garlic in this dish. There are very few other flavors.

But simplicity has its virtues. It’s really hard to go wrong with this dish unless you use bad olive oil or not-so-stellar cheese or you burn the garlic.


Follow us on Facebook:  Click HERE


You can make a case for cooking the garlic for a whole range of times, from mere seconds up until it is dark brown. For many years I even cooked three different batches of garlic, one until brown, one until golden, and one until just fragrant. There is an interesting depth of flavor from doing so but it’s not the classic technique.

My point is, unless you burn the garlic and make it bitter, you won’t ruin the dish. You may prefer the flavor of the garlic when it is more or less brown but that’s just a preference not an absolute.

These little Italian peppers (“pepperoncino”) pack a nice flavor, not just heat

My recipe diverges from the classic Roman recipe in two places.

While making dinner, I’m usually chatting…with my in-laws (on most nights), with my husband (when he’s not away on business), or with guests. While I know I can time everything to be ready at exactly the right moment, I ask, why stress about it? So, yes, I can time the sautéing of the garlic to be just right when the pasta is ready but there’s an easier way.

I get the garlic to exactly the spot I want and then stop the cooking by taking the pan off the heat and adding a splash of wine (or water, if you must). That’s not classically Roman but it sure makes it much easier to have a conversation and a cocktail or three while making dinner. As soon as I plan on draining the pasta, I turn the heat on under the garlic oil and boil away the liquid I’ve added. Let’s face it, how often do we get to stop time with no consequences?

The second divergence from classic technique is that I add cheese to the pasta while mixing it with the garlic oil rather than just adding it at the table. In my mind there is no doubt that this pasta needs cheese. Adding it at the final stage of preparation allows me to create a glossy sauce where there would otherwise only be garlic oil. Not that that is bad, but I’ve made a bit of a reputation for myself by turning out glossy sauces where there would often only be oil.

It’s not hard. It just takes a bit of practice and some understanding (minimal) of the chemistry involved. And let’s face it, if the sauce isn’t glossy, you’re the only one who’s going to know. Again, there’s no penalty involved!

A brand of pasta that I really like

In Italy this pasta is often prepared and eaten after a night of over-indulging in alcohol. At least that’s the reputation it has. However, this was a common dish put on the dinner table when I was growing up. It’s easy, quick, filling, and darn good. Oh, and for an entirely different flavor, try butter in place of the olive oil!


Follow us


Click HERE to join our mailing list and you’ll never miss a recipe again!

Print Recipe
Spaghetti Aglio, Olio, e Pepperoncino (Spaghetti with Garlic, Oil and Red Pepper)
I like to reduce last minute work, so I prep the garlic oil in advance and stop the cooking with a splash of wine. You can use water, if you wish, or, if you are sautéing the garlic as the pasta is cooking, some of the pasta-cooking liquid. As the pasta is nearing completion, I reheat the garlic oil, quickly boiling off the wine, and proceed. Use more or less garlic, to your taste. The same is true with the red pepper. For myself, I would use at least double this amount but that would be way too much for other folks.
Votes: 0
Rating: 0
You:
Rate this recipe!
Prep Time 15 minutes
Cook Time 20 minutes
Servings
people
Ingredients
Prep Time 15 minutes
Cook Time 20 minutes
Servings
people
Ingredients
Votes: 0
Rating: 0
You:
Rate this recipe!
Instructions
  1. Slice off the hard base of each garlic clove.
  2. Cut the cloves in half top to bottom.
  3. Cut each half-clove of garlic crosswise into very thin slivers.
  4. In a sauté pan large enough to hold all the cooked spaghetti comfortably heat 1/3 cup of olive oil over gentle heat.
  5. Add the slivered garlic and sauté slowly and gently until golden brown. This should take 10-15 minutes if the heat is low enough.
  6. Add the red pepper and black pepper and sauté for another minute.
  7. Add the wine to stop cooking and remove the pan from the heat.
  8. Bring 2 ½ quarts of water to a boil. Season with ¼ cup of salt.
  9. Boil the spaghetti about two minutes less than the package indicates is needed for al dente.
  10. As the pasta is nearing completion, reheat the garlic oil.
  11. Just before removing the pasta from the boiling water, add 1 cup of pasta-cooking liquid to the garlic oil and turn the heat to medium high.
  12. Reserve another cup of pasta-cooking liquid then drain the pasta.
  13. Add the drained pasta to the pan with the garlic oil.
  14. Cook over medium to medium-high heat, stirring frequently, until the pasta is al dente. Add some of the reserved pasta-cooking liquid from time to time as needed.
  15. When the pasta is al dente, remove the pan from the heat. Sprinkle the parmesan cheese and parsley on top.
  16. Mix well to create a sauce by melting the cheese and emulsifying the oil and water. Add more of the pasta-cooking water, if needed, to coat the pasta.
  17. Stir in the 3 tablespoons of fruity or peppery extra-virgin olive oil for finishing.
  18. Serve immediately with extra Parmesan cheese.
Recipe Notes

Since olive oil loses much of its distinctive flavor from heating, adding some at the end, when the dish is off the heat, improves the flavor. Usually I keep several types of olive oil that I just use for finishing in this way. They tend to have different flavor profiles. Usually I have a peppery one and a buttery one on hand. These oils are used in small quantities so their higher price tag is worth the flavor they add.

Copyright © 2017 by VillaSentieri.com. All rights reserved.

Share this Recipe

Mom’s Ravioli

September 27, 2017

My strongest olfactory memory of childhood is gradually waking up on Sunday morning to the smell (perfume is a better characterization as far as I’m concerned) of garlic being sautéed in olive oil.

That was how most Sundays started.

My mother would get up early and start making her long-simmered Southern Italian Tomato Sauce (referred to as Ragu or Sugo if one’s Italian roots were close, “Gravy” if one grew up in New York or nearby, and often just “Sauce”). We unceremoniously called it “Spaghetti Sauce” though it was used on much more than spaghetti!

I think the better part of my culinary-cultural history is represented by that sauce. Every Italian family’s sauce is different, even if stylistic similarities can be identified. The sauces made by my mother and her two sisters that I knew, Aunt Margie and Aunt Mamie, were clearly related but also different. Each was good but it’s not as if they didn’t deviate from my Grandmother’s recipe. They were similar in that garlic and meat were browned in oil; tomato products, water, and seasonings were added; and the whole thing simmered for hours. The meats varied, the tomato products (tomato paste, tomato puree, whole canned tomatoes, etc.) and the proportions of them definitely varied as did the seasonings and other aromatics.

My mother’s “Spaghetti Sauce” to call it by its “historic” name, a name that I no longer use, is, without doubt, my most precious culinary treasure. I have only ever given the recipe out twice. In the 1970’s I gave it to John Bowker and his wife Margaret Roper Bowker. John was the dean of Trinity College in Cambridge, England. Recently I gave it to Robert Reddington and John O’Malley in Palm Springs after Bob lamented the loss of the recipe for the long-simmered tomato sauce he learned to make while living in Chicago.

With my mother’s sauce as the near-constant backdrop to our Sunday dinners, the rest of the meal varied. The sauce could be served with spaghetti or some other cut of dry pasta, or with my mother’s home-made fettuccine, or with ravioli. Although my favorite pasta is gnocchi, we never had those on Sundays as my father didn’t like them. Gnocchi (always home-made) were reserved for a weeknight meal during the times that my father worked out of town.

The sauce has an abundant amount of meat in it, pork, always cut in big pieces, never ground or chopped. Nonetheless, the pasta was often accompanied by my mother’s slow-cooked roast pork or maybe a roast chicken.

It seems incongruous now, but in the 1960s, before the widespread use of antibiotics, chickens were expensive! (I’m not in favor of the prophylactic use of antibiotics but I’m just saying that’s why chickens are relatively inexpensive now.) I still have a handful of my mother’s “City Chicken” sticks from the 1960s. They are round, pointed sticks slimmer than a pencil but thicker than bamboo skewers. Pieces of pork and veal would be skewered in alternating fashion on the sticks, breaded, and fried like chicken drumsticks. This was less expensive than chicken!!

City Chicken sticks

But back to Sundays…

Sometimes, after the sauce was bubbling away, my mother would make ravioli. Next to gnocchi, they are my favorite pasta, but manicotti and lasagna aren’t far behind.

We would eat our big meal around 1 PM on Sunday and my mother would get all of this done in time for that meal, including taking time to go to church, during which my Aunt Mamie, who lived upstairs, would be tasked with stirring the “Spaghetti Sauce.”

My mother’s (now my) ravioli mold.

Making ravioli in a group is a lot more fun. I also find that making the ravioli on a different day from the day they are cooked and eaten means that I am not as tired and I enjoy them more. The pictures in this post are from a Sunday when I got together with Rich DePippo, Susan Vinci-Lucero, and my in-laws, Marisa and Frank Pieri, to make ravioli. I think we made about 30 dozen ravioli!


Follow us


Click HERE to join our mailing list and you’ll never miss a recipe again!

Print Recipe
Mom's Ravioli
The filling can be made a day in advance and refrigerated, tightly covered. Ravioli freeze well. To do so, lightly flour a sheet pan that will fit in your freezer and put the ravioli in a single layer. Freeze about 30-45 minutes, until firm. Quickly put the ravioli in a zipper-lock bag and return to the freezer. Repeat with the remaining ravioli. My mother always made her dough by hand but I use a kitchen mixer and the beater, not the dough hook. Years ago, ground meat was not labeled with the percent fat. My mother would select a cut of sirloin, have the butcher trim off all visible fat and then grind it. I find that 93% lean ground beef replicates the experience.
Votes: 0
Rating: 0
You:
Rate this recipe!
Prep Time 2 hours
Passive Time 30 minutes
Servings
people
Ingredients
Filling
Dough
Prep Time 2 hours
Passive Time 30 minutes
Servings
people
Ingredients
Filling
Dough
Votes: 0
Rating: 0
You:
Rate this recipe!
Instructions
Filling
  1. Put the frozen spinach in a small saucepan. Add a few tablespoons of water. Cover and cook, stirring occasionally, until the spinach is completely thawed.
  2. Pour the spinach into a large sieve.
  3. After the spinach has cooled enough to handle, squeeze handfuls of the spinach to remove as much liquid as possible.
  4. Heat the olive oil in a 12-inch sauté pan until shimmering. Add the beef.
  5. Cook over high heat until the liquid has evaporated, breaking up the meat while cooking.
  6. Reduce the heat to medium and add the garlic, 1 teaspoon of salt, and black pepper to taste. Continue to sauté for 2-3 minutes more.
  7. Add the spinach to the beef.
  8. Continue to cook over medium to medium-low heat while breaking up the spinach and completely combining it with the beef.
  9. When the beef and spinach are well combined and no obvious liquid remains in the pan, add the beaten egg. Stir well and cook two minutes more. The egg should completely incorporate into the filling and no longer be visible.
  10. Adjust salt and pepper.
  11. On low heat, add 1/4-1/3 cup of breadcrumbs and combine well to absorb any remaining liquid or oil. If necessary to absorb any remaining liquid, add another tablespoon or two of breadcrumbs. If you cooked off all the liquid when browning the beef, and used lean beef, 1/3 cup of breadcrumbs should be enough.
  12. Cool the filling to room temperature before filling the ravioli.
Dough
  1. Put the flour, egg, and egg whites in the bowl of an electric mixer outfitted with a paddle.
  2. Mix on low until combined.
  3. Add the water, a little at a time, until the dough just comes together. The dough should not be the slightest bit tacky. You may not need all the water.
  4. Remove the dough from the mixer and roll into a log. Cover with a kitchen towel and allow to rest for 15 to 30 minutes before rolling out.
Assembly
  1. Set up your pasta machine, either a hand crank version or an attachment for your mixer.
  2. Cut off a small handful of dough.
  3. Flatten the dough, dust with flour, and run it through the pasta machine on the thickest setting.
  4. If the dough is catching on the rollers it may be too wet. Sprinkle liberally with flour.
  5. Run the dough through the same setting one more time.
  6. Run the dough through the pasta machine narrowing the setting by one notch each time. If the dough is getting too long to cover much more than two lengths of the ravioli mold, cut off the excess and continue.
  7. When rolling out the dough, use slow, even motion. If the dough is not rolling out to the full width of the machine, or at least wide enough to cover the width of the ravioli mold, fold it in half crosswise and run it through the machine again on whatever the last setting was.
  8. If the dough is not rolling out smoothly, and the issue is not that it is too damp, run the dough through the machine again on the same setting.
  9. On most pasta machines with five settings for thickness, you will want to stop rolling out the dough on the next-to-thinnest setting.
  10. Put the rolled out dough on a lightly floured surface and cover with a kitchen towel. Repeat with 2 or 3 more portions of dough.
  11. Allow the remaining dough to rest, covered, while filling and cutting the first batch of ravioli.
  12. To fill the ravioli, take the rolled out dough and lay it across the ravioli mold.
  13. Add a slightly rounded teaspoonful of filling to each ravioli. Do not overfill or the ravioli may break when being cooked.
  14. Fold the dough over the top.
  15. Lightly pat the top sheet of dough.
  16. Using a rolling pin, cut the dough along the zig-zag edges. Be careful to fully cut through the dough around the edges as well as between each raviolo.
  17. Remove the ravioli and place on a lightly floured surface. Cover lightly with a kitchen towel.
  18. Repeat with the remaining dough and filling.
  19. Cook, refrigerate, or freeze the ravioli.
Recipe Notes

Copyright © 2017 by VillaSentieri.com. All rights reserved.

Share this Recipe

Pasta con Salsa Cruda (Pasta with Uncooked Tomato Sauce)

September 8, 2017

Pasta with a sauce of uncooked tomatoes, herbs and aromatics is one of the delights of late summer. While this is very easy to make, and only a few tomatoes are needed, the tomatoes must be vine-ripened.

If you have just one tomato plant you’ll probably have enough tomatoes to make a batch of Salsa Cruda. Farmers Market tomatoes are a good option this time of year, too.

Some of our tomato plants in front of the greenhouse and behind mesh to protect them from deer

I make this with our home-grown tomatoes which are always red but using some of the amazing heirloom tomatoes in colors of yellow, green, or purple available in farmers markets would make a dramatic sauce.

Colorful heirloom tomatoes on the bar at The Kirby Hotel in Douglas, Michigan: @thekirbyhotel

If you can’t get vine-ripe tomatoes, or you want to make a similar sauce at a time other than late summer, you can use two or three roasted red peppers in place of the tomatoes. I’ll be posting a recipe for roasted peppers next month, after tomato season is over. In a pinch, you can buy a jar of good-quality roasted peppers.

Although this recipe is not a traditional “family of origin” recipe it is one that I have been making for almost 30 years. I consider it to be one of my traditions.

While you can still get vine-ripened tomatoes, give this easy and delicious recipe a try.


Follow us


Click HERE to join our mailing list and you’ll never miss a recipe again!

Print Recipe
Pasta con Salsa Cruda (Pasta with Uncooked Tomato Sauce)
This makes enough sauce for one pound of pasta. Use pasta with a shape that will hold the sauce, such a small shells or fusilli. Although you can make the sauce in the time it takes the pasta water to come to a boil, it is better if the sauce is allowed to sit at room temperature for about an hour to allow the flavors to meld. Since the sauce is not hot, it is important to warm the serving bowl with boiling water just before using. I usually put some of the pasta-cooking water to warm the bowl. The optional aromatics (hot peppers, kalamata olives, and blue cheese) are really optional but definitely help to round out the flavor.
Votes: 0
Rating: 0
You:
Rate this recipe!
Prep Time 15 minutes
Cook Time 15 minutes
Passive Time 1 hour
Servings
people
Ingredients
Prep Time 15 minutes
Cook Time 15 minutes
Passive Time 1 hour
Servings
people
Ingredients
Votes: 0
Rating: 0
You:
Rate this recipe!
Instructions
  1. Coarsely chop the hot pepper.
  2. Coarsely chop the garlic.
  3. Combine olive oil, garlic, and hot peppers, if using, in the food processor.
  4. Process until finely chopped.
  5. Add basil, parsley, Parmesan cheese and Kalamata olives, if using.
  6. Pulse a few times to chop.
  7. Add tomatoes, blue cheese, if using, salt, and black pepper and pulse until finely chopped, but not pureed.
  8. There should definitely be some texture to the sauce.
  9. Bring three quarts of water to a rolling boil.
  10. Season the water with 1/3 cup of salt.
  11. Add the pasta and cook until al dente.
  12. When the pasta is done, reserve about ½ cup of the pasta-cooking liquid to thin the sauce if needed.
  13. Drain the pasta.
  14. Drain the hot water from the serving bowl. Add the pasta and sauce to the warmed bowl. Toss well.
  15. If needed, thin the sauce with some of the reserved pasta water. This will likely not be the case but it is always a good idea to have some pasta-cooking water available just in case.
Recipe Notes

Copyright © 2017 by VillaSentieri.com. All rights reserved.

Share this Recipe

Pasta with Silky Zucchini Sauce

July 5, 2017

Pasta tossed with a sauce of some sort of vegetable cooked in olive oil is an Italian classic.  My mother frequently used either eggplant or zucchini, cooked them until they became very soft, and then tossed them with pasta.

I have one very vivid memory of this dish and it goes back to the summer of 1992.

After my mother was diagnosed with metastatic lung cancer in early summer 1992, she came to live with us.  Until the last few days of her life in early January 1993, she took over our kitchen, a very comfortable role for her.

Over the years prior to her diagnosis, she had become friendly with our next door neighbor, Carla.  During the last six months of her life she and Carla spent hours every day visiting and chatting.  This was a wonderful arrangement as my husband, Frank, and I were working long hours.  (It also led, through a number of interesting steps, to Frank and I becoming the god-parents for one of Carla and Billy’s children a few years later.  But that’s a story for a different day.)

Frank had very long work hours a couple days per week.  He rarely got home before 10 PM on those days.  My mother and I would eat dinner earlier and then she would set aside his food.

But she did more than that.

When he got home, she always warmed up his dinner and then sat with him at the table while he ate.  She never let him eat alone.  Most likely, I was upstairs in bed.  Since I got up earlier than Frank, I tried to be in bed by 10 PM to watch the news and go to sleep.

For some reason, the plate of pasta with zucchini sitting on the counter one evening to be warmed up for Frank’s dinner, knowing my mother would sit with him as he ate, is the mental image I have of this dish.  I can’t make this without that image appearing in my mind.  I think somehow that dish, made of very humble ingredients, came to represent the best of my mother’s nurturing characteristics.

She was a fierce advocate for her children.  My sister and I both started school a year early because my mother thought we were intellectually ready (she was right) and she wasn’t going to take “no” for an answer from the school authorities.

Once, in second grade, my sister arrived home with the hem of her school uniform let down because one of the nuns thought it was too short.  My mother promptly hemmed it, even shorter, and sent my sister to school the next day without ever saying a word.  The hemline stayed put.

You didn’t mess with my mother where her children were concerned.

She continued cooking for us until less than a week before she died.

In those years we always gave a New Year’s Day party, a casual affair where people could come and relax and chat and eat.  The Soviet Union was officially dissolved December 25, 1991.  Most of 1992 saw the effects of the dissolution so the theme of our January 1, 1993 party was the dissolution of the Soviet Union.

For the party, my mother made 14 dozen stuffed cabbage rolls and 17 dozen potato pancakes!

She sat on the sofa throughout the entire party, chatting with everyone and being the life of the party.  The next day she took a turn for the worse and on the morning of January 6th she died.

Some of my best memories involve food, most of which was cooked by family and friends who are no longer with us.  Capturing and preserving those recipes is the way that I pay homage to them and to the culture and values they passed on to me.


Click HERE to join our mailing list and you’ll never miss a recipe again!

Print Recipe
Pasta with Silky Zucchini Sauce
Zucchini are cooked to a silky softness to make a luscious sauce for pasta. Finishing the pasta in the pan with the zucchini and adding some pasta-cooking liquid, Parmesan cheese, and a couple of glugs of olive oil creates glossy sauce with a wonderful mouthfeel. When choosing zucchini, pick small ones, preferably not more than about six inches long. They should be firm and have glossy skin. It will take about 4 or 5 to yield four cups of sliced zucchini. Crushed red pepper is completely optional. If you have fresh basil you can omit the dry basil and toss in a tablespoon or so of basil chiffonade when you combine the pasta with the zucchini.
Votes: 0
Rating: 0
You:
Rate this recipe!
Prep Time 15 minutes
Cook Time 1 hour
Servings
people
Ingredients
Prep Time 15 minutes
Cook Time 1 hour
Servings
people
Ingredients
Votes: 0
Rating: 0
You:
Rate this recipe!
Instructions
  1. Dice the onion.
  2. Peel the zucchini and slice approximately ¼ inch thick.
  3. Mince the garlic.
  4. In a large, heavy-bottomed sauté pan large enough to hold the pasta and sauce, sauté the onion and crushed red pepper, if using, over medium heat until the onion is golden and soft. Do not brown the onion.
  5. Add the zucchini. Toss to coat with oil. Season liberally with salt and freshly ground black pepper.
  6. Sauté on medium to medium high heat, adjusting from time to time to avoid browning the zucchini.
  7. Add the dry oregano and dry basil, if using, after about 20 minutes.
  8. Continue to sauté, stirring often, until the zucchini is quite soft, but still intact. It can turn golden but should not brown. Taste and adjust salt and pepper while the zucchini is cooking.
  9. Add the minced garlic and cook until fragrant, about 5 minutes longer.
  10. The dish can be prepared several hours in advance to this point. Simply take the sauté pan off the heat and cover it.
  11. Bring three quarts of water to a rolling boil. Add 1/3 cup salt. Add the pasta and cook at a full boil until the pasta is almost al dente. It should still be just the tiniest bit hard in the center.
  12. Reserve at least one cup of pasta-cooking liquid.
  13. Drain the pasta and add it to the zucchini in the sauté pan. Add about ½ cup of reserved pasta-cooking liquid and fresh basil, if using, and cook over medium heat at a light boil until the pasta is al dente. Add more pasta-cooking water as needed. There should be some liquid in the pan when the pasta is finished.
  14. Off the heat, stir in the Parmigiano Reggiano cheese and 2 tablespoons of extra virgin olive oil. Add a bit more pasta-cooking liquid if needed to emulsify the cheese and olive oil to create a glossy sauce that just clings to the pasta.
  15. Taste and adjust salt and pepper.
Recipe Notes

Copyright © 2017 by VillaSentieri.com. All rights reserved.

Share this Recipe