Cuban Black Beans

December 1, 2017

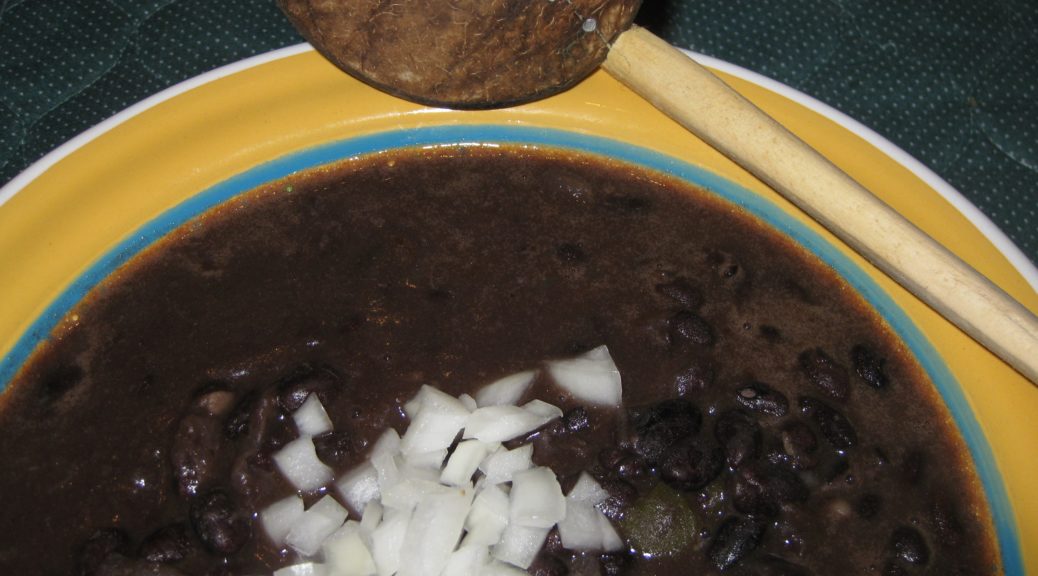
Black beans are ubiquitous on tables in Cuba.

Getting beans to the right texture and the liquid to the right thickness is almost an art form.

Food is scarce in Cuba…at least if you’re a Cuban paying in Cuban Pesos. Not so much if you’re paying in CUCs (Cuban Convertible Pesos), which is what foreigners use. The CUC is pegged to the US Dollar but if you change Dollars for CUCs you pay a 10% penalty as opposed to exchanging another currency, say the Euro, for CUCs.


Click HERE to follow us on Twitter


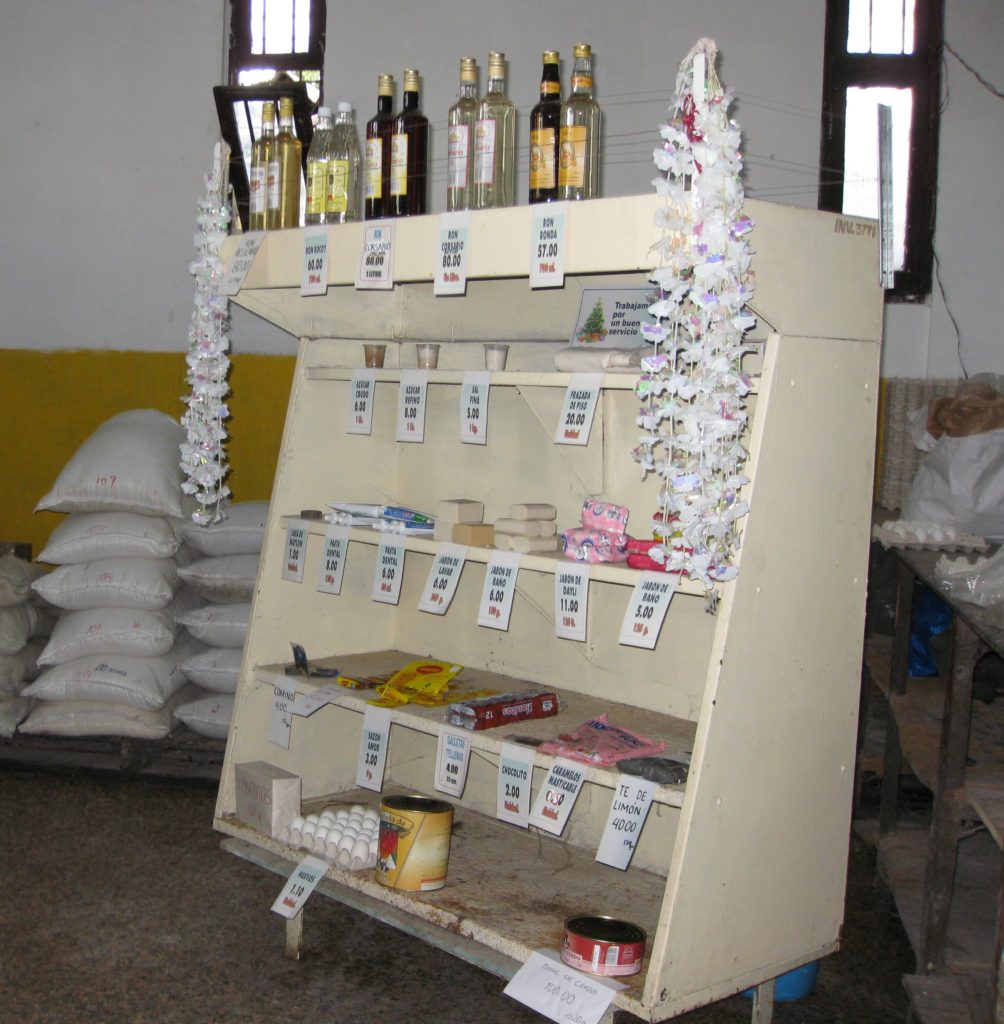
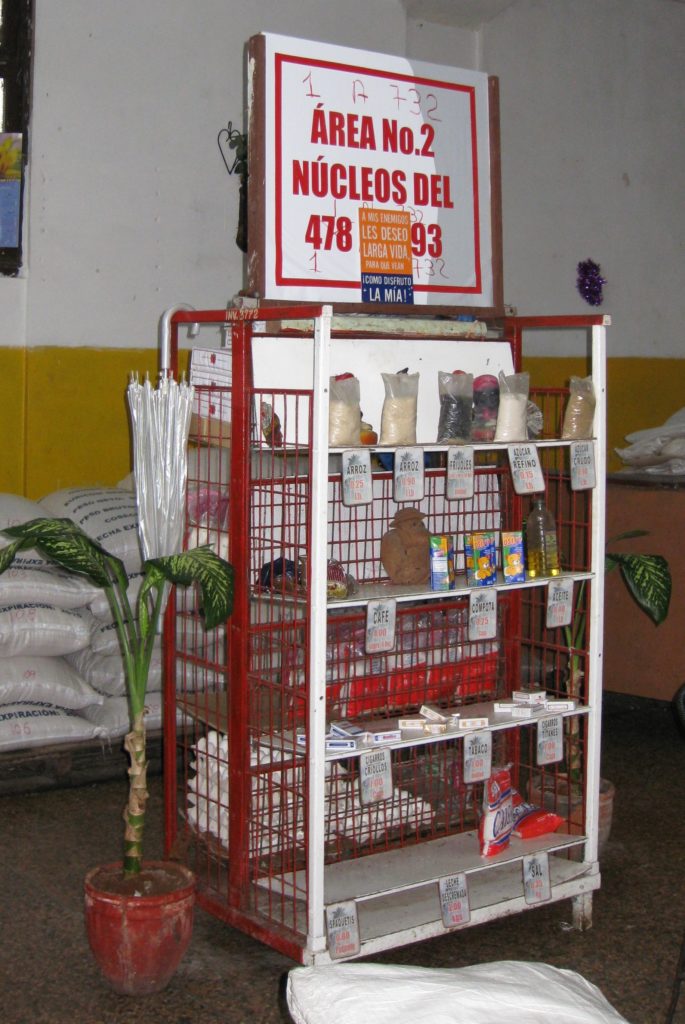
Prices in Cuban Pesos at a locals’ only market

One view of a locals’ only market
Another view of a locals’ only market

I visited a butcher shop in Havana which pretty much now only sells chicken; when chicken is available, that is. If you notice the door to the cooler is open. That’s because the cooler isn’t on because there’s no inventory.

A butcher shop in Havana

The butcher is just waiting around for chicken to arrive.

When that chicken does arrive, it will likely be frozen Tyson chicken from the United States. Even though, when this picture was taken, the US embargo of Cuba was in full force.

Most of the chicken in Cuba is frozen Tyson chicken from the United States

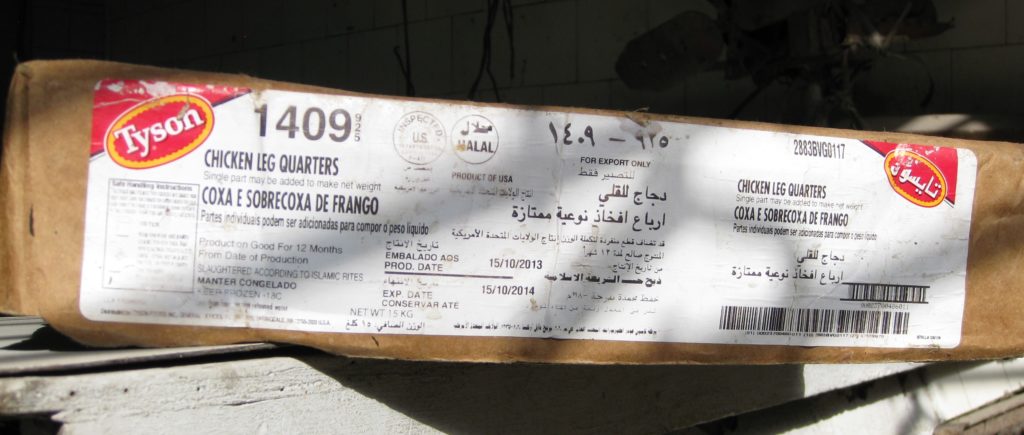
The same is true of hot sauce. If one asks for hot sauce at a restaurant in Cuba one is likely to get a bottle of Tabasco shipped in from Avery Island, Louisiana. Clearly there are exceptions to the embargo for some American companies!

If you pay in CUCs, the food available increases dramatically.

One stall in a multi-vendor market where prices are denominated in CUCs
Another stall in the same market
Locally prepared beverages in the CUC-denominated market

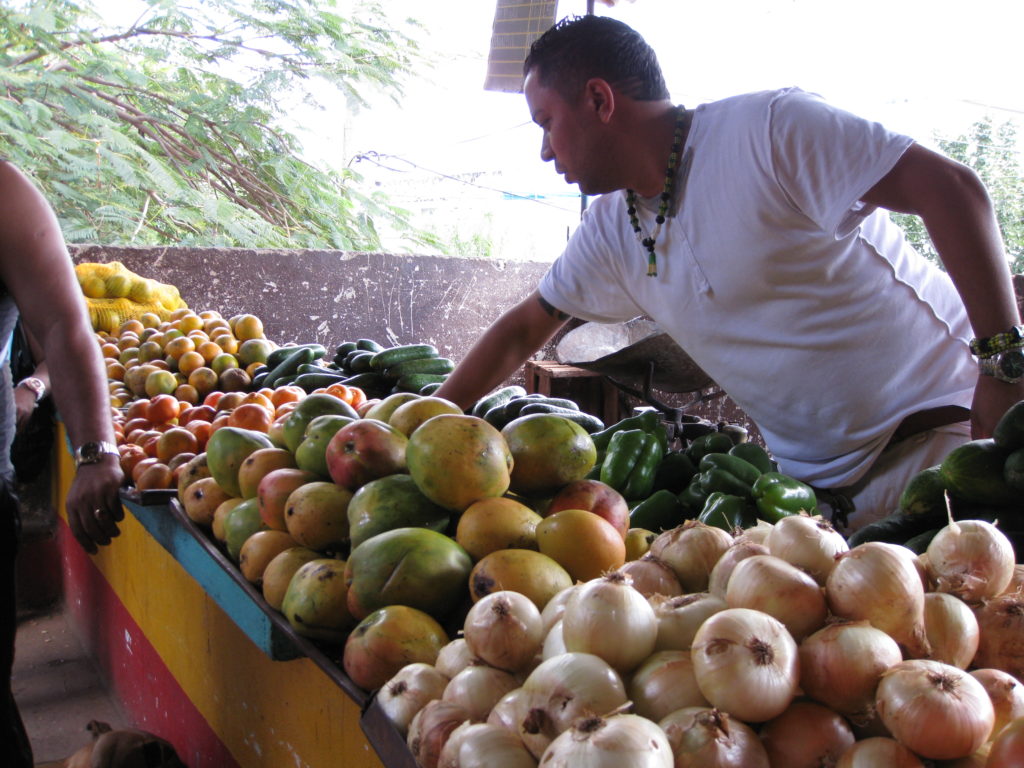
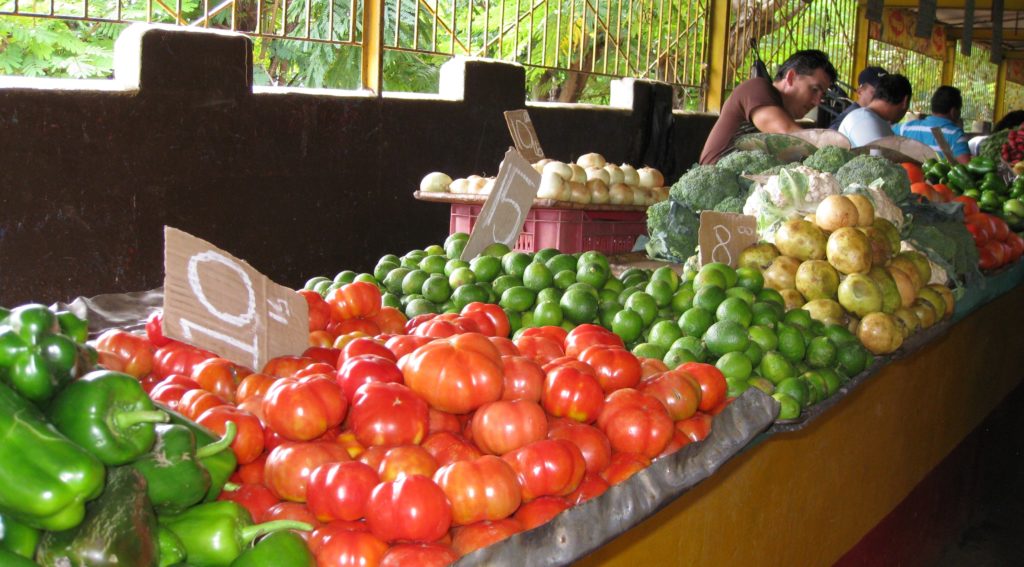
The disparity in prices for food purchased with Pesos vs CUCs is so large that average Cubans cannot afford to buy food with CUCs, even if they can get them. It takes 25 Cuban Pesos to buy one CUC. Paying in Pesos limits one to shopping in pretty-much locals’ only stores, with limited inventory where the products, like rice and beans, are sold at subsidized prices.

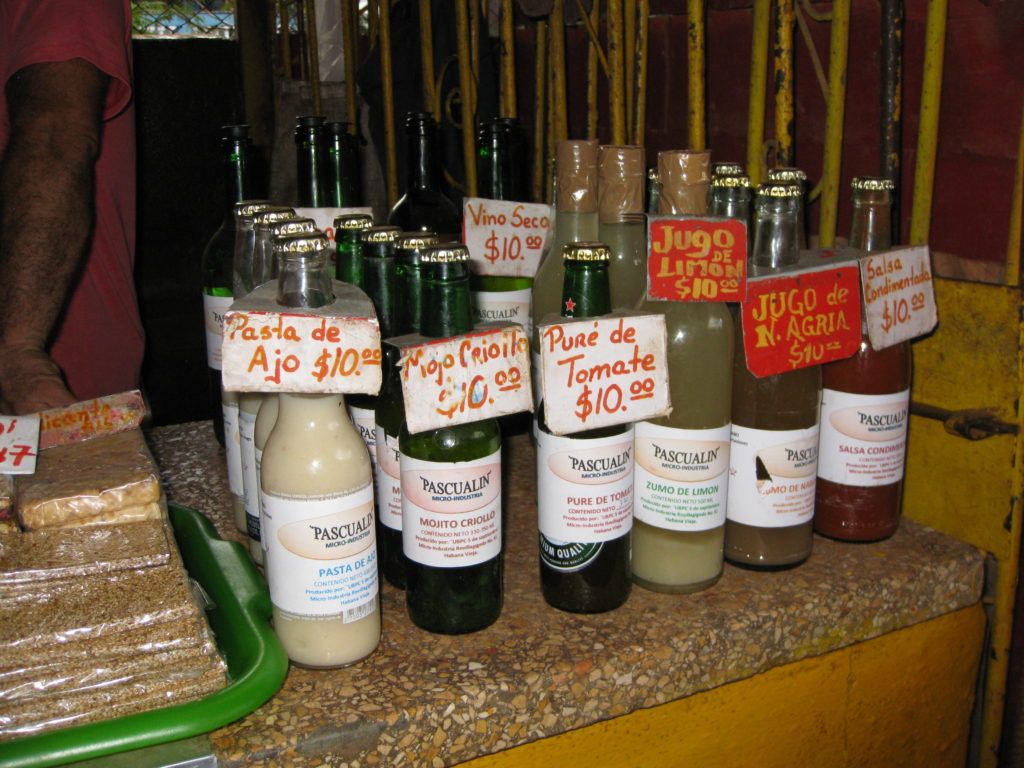
Rum is widely available regardless of the currency.  You’ll pay more if you’re a foreigner, however.

Havana Club is a popular brand of rum in Cuba
A well-stocked bar ready for the day’s customers
Cuban cigars for sale at the bar

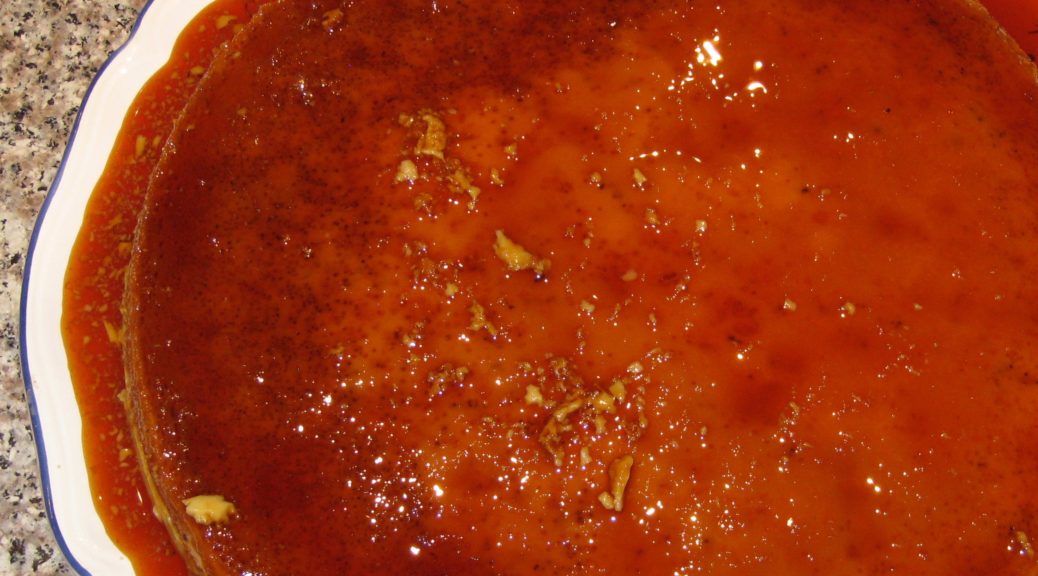
After returning from the trip to Cuba in 2014, I tried but couldn’t get the texture of my “Cuban” black beans right. But then, my mother-in-law got a recipe from Beatriz (Betty) Scannapieco. Betty is from Cuba. She was in the exercise group my in-laws attend. Betty’s recipe, using a pressure cooker as is common in Cuba, works like a dream. It’s really pretty effortless, too. The green pepper, onion, and garlic add tremendous flavor but are removed after cooking leaving just beans and the silky cooking liquid.

I made three changes to Betty’s recipe. She called for 1 teaspoon of white wine. I use 1 tablespoon. Betty didn’t use tomato paste or black pepper but both are common ingredients in many Cuban black bean recipes.


Follow us


Click HERE to join our mailing list and you’ll never miss a recipe again!

Print Recipe
Cuban Black Beans
This recipe came from Beatriz (Betty) Scannapieco in my in-law’s exercise group. Betty is from Cuba. I added the tomato paste and black pepper to Betty’s recipe. I also increased the wine from 1 teaspoon to 1 tablespoon. It can be challenging to get the bell pepper, onion, and garlic out of the beans as they very soft after cooking. If you want to make it easier, you could tie them in cheesecloth.
Votes: 0
Rating: 0
You:
Rate this recipe!
Prep Time 10 minutes
Cook Time 1 1/4 hours
Servings
people
Ingredients
Prep Time 10 minutes
Cook Time 1 1/4 hours
Servings
people
Ingredients
Votes: 0
Rating: 0
You:
Rate this recipe!
Instructions
  1. Wash the beans.
  2. Cover beans with water by a couple of inches and soak overnight in the refrigerator.
  3. The next day, cut the bell pepper in half and remove ribs and seeds.
  4. Cut the onion into 4 or 6 wedges, but do not cut the whole way through the root end.
  5. Bruise the garlic by laying the blade of a chef's knife on top and gently pounding the knife blade.
  6. Drain the beans. Put the beans in a pressure cooker along with 3 ¼ cups of fresh water.
  7. Bring the beans to a boil, uncovered.
  8. Skim the foam from the beans then remove the pot from heat.
  9. Add the green pepper, onion, garlic and bay leaves to the beans.
  10. Put the lid on the pressure cooker and bring to 10 pounds pressure.
  11. Reduce heat and cook for 30 minutes.
  12. Remove the pressure cooker from heat and allow pressure to dissipate naturally.
  13. Uncover the pressure cooker.
  14. Add the olive oil, tomato paste (if using), wine, vinegar, salt and black pepper (if using).
  15. Bring to a boil uncovered and boil for 5 minutes.
  16. Remove from heat. Cool slightly and remove bell pepper, onion, bay leaves, and garlic.
  17. The beans can be served immediately but are better if refrigerated overnight.
  18. Serve the beans in a shallow bowl with pieces of finely diced raw onion in the center. Black beans are customarily accompanied by white rice.
Recipe Notes

Copyright © 2017 by VillaSentieri.com. All rights reserved.

Share this Recipe

Bertha’s Flan

October 11, 2017

Bertha Kravicas left Lithuania in 1927 with her family. They were hoping to get to America but when the quota was full they went to the closest place they could.

They thought their sojourn in Cuba would be brief but as the months turned into years, Bertha made a trip back to the Old Country where she met Victor Ashman in Latvia.

They married and returned to live in Cuba in 1931. Over the years, they became Cubans in the way that immigrants to the United States become Americans no matter their background.

Bertha in Matanzas, Cuba in the 1940s

Victor even decided to run for public office. Because his name was not Cuban enough he officially changed it to Victor A. Larriga, in honor of his birthplace, Riga, Latvia.

One of the ways that Bertha adapted to her new country was through cooking.

Flan is made throughout the Spanish-speaking world but is especially popular in Cuba where it is the most common dessert. Flan is a source of family pride with each family believing that its flan is the best. (This sounds very familiar to me coming from a Southern Italian background where the same belief attaches to tomato sauce).

Flan recipes are passed down from generation to generation and fall into two general categories, those that contain canned milk and those that do not. Cubans smile approvingly when hearing that flan contains canned milk. After all, that’s how it should be!

Bertha’s flan is made entirely from canned milk; two kinds actually. That, and the generous amount of egg, makes a substantial flan.

After the Cuban Revolution Bertha and Victor took advantage of President Eisenhower’s offer for Cubans to immigrate to the United States. They arrived in late 1960 along with their son, Stuart.

Bertha and Victor on their Harley in the 1940s

Stuart is now the Executive Director of the Center for Contemporary Arts in Santa Fe. It was at a CCA event earlier this summer that I tasted this remarkable flan made by Stuart’s wife Peggy Gaustad. Peggy is now the flan maker in the family, having taken over from Stuart. For the CCA event, Peggy made flan for 100 people but she recalls once making it for 150!

Stuart remembers that as a child, when his mother would make flan, he would be given the empty can of condensed milk and a chopped up banana to sop up the last bit of sweetness!

This recipe is actually double Bertha’s original. It’s the way Peggy makes it because there never seems to be enough from the original.


Follow us


Click HERE to join our mailing list and you’ll never miss a recipe again!

Print Recipe
Bertha's Flan
Before caramelizing the sugar in the pan you’re going to use for the flan, put the empty pan inside of the larger one that you’re going to use for the water bath then add water to the large pan to come at least one inch up the side of the pan that will hold the flan. Remove the pan that you’ll use for the flan.
Votes: 0
Rating: 0
You:
Rate this recipe!
Cuisine Cuban
Prep Time 10 minutes
Cook Time 1 1/2 hours
Passive Time 30 minutes
Servings
people
Ingredients
Cuisine Cuban
Prep Time 10 minutes
Cook Time 1 1/2 hours
Passive Time 30 minutes
Servings
people
Ingredients
Votes: 0
Rating: 0
You:
Rate this recipe!
Instructions
  1. For the flan, choose a 12-inch diameter pan with straight sides that can be heated on the stove and put in the oven.
  2. Put enough water into a pan large enough to hold the pan with the flan so that the water comes one-inch up the sides of the pan with the flan.
  3. Put the sugar into the pan selected for the flan.
  4. Heat the pan with the sugar on medium heat until the sugar melts and turns dark brown. (A series of pictures follows showing the progression of the caramelization.)
  5. Do not stir the sugar or caramel. Simply swirl the pan from time to time to mix the caramel. Rotate the pan on the heat occasionally to reduce hot-spots.
  6. If the pan has a very heavy bottom, the retained heat will continue to brown the sugar off the heat. Stop caramelizing the sugar a little before you think it’s done otherwise it might burn. If it turns out that the caramel is not quite dark enough, you can heat the pan again briefly.
  7. Remove the pan from the heat and allow it to cool during which time the caramelized sugar will harden on the bottom.
  8. While the caramel is cooling, bring the water in the water bath to a simmer on the stovetop then put the pan into a 350°F oven.
  9. Meanwhile, combine the condensed milk, evaporated milk, eggs, vanilla extract, and salt. Mix well.
  10. When the caramel is hardened, pour the milk-egg mixture on top.
  11. Cover the pan tightly, either with foil or with a lid.
  12. Put the pan into the water bath in the 350°F oven.
  13. Bake for 1 hour 15 minutes at 350°F.
  14. A knife inserted in the center of the flan should come out clean. If not, cook a few minutes longer.
  15. Remove the flan from the oven and cool to room temperature.
  16. Refrigerate at least 8 hours. Overnight is best.
  17. When ready to serve, run a knife around the edge of the flan.
  18. Put a large platter upside down on top of the pan with the flan. Quickly flip the entire set-up over. The flan should come out of the pan in one piece. Pour any remaining caramel syrup onto the flan.
  19. Serve very cold.
Recipe Notes

Copyright © 2017 by VillaSentieri.com. All rights reserved.

Share this Recipe

Croquetas de Jamon (Cuban Ham Croquettes)

May 1, 2017

In early 2014, my husband and I were lucky enough to go to Cuba with two close friends.  This was prior to the loosening up of restrictions on travel by Americans to the island nation.

Because of the guidelines governing such travel, we had to spend a significant portion of our time interacting with Cubans, not being tourists.  We visited a schools for the arts and music, toured cultural sites, attended lectures, saw a cigar factory, and met with some Cubans in their homes, among other activities.

All of Cuba is divided up into small units that are under the watchful eye of a trusted local who reports any unusual activities to the authorities.  These units could be a section of a street, for example, or a multi-unit building.  What turned out to be one of the most memorable events was meeting with the residents of one such building one evening in Cienfuegos.

The children put on a small performance, we had refreshments, then spent several hours chatting with the building’s residents.  It seemed to us that everyone was quite open, talking about the challenges, as well as the benefits (such as free education and health care) of life in Cuba.  In fact, while it seems that most Cubans we met were in favor of a more open society they were understandably very protective of their access to education and health care.

One man, seemed particularly open about the difficulties of life in Cuba.  This was surprising to us as his wife was the designated party operative responsible for overseeing this particular building.  Our suspicions seemed to be confirmed when he disappeared into their apartment shortly before the evening ended after his wife gave him “the look.”  As our vehicle was pulling away from the building, he ran out and waved us good-bye.  Clearly he had been banished from the meeting but kept a watchful eye from his apartment, exiting at just the right moment.

In addition to spending the major portion of our trip interacting with Cubans we were prohibited from actually going to the beach!  This was supposed to be an educational and cultural interchange, not fun.

Even more interesting is that, at the time, Americans were prohibited from buying Cuban cigars and rum.  Mind you, I’m not talking about bringing these items back to the United States which was definitely forbidden, but buying and using them while in Cuba.

This would seem to be a singularly difficult rule to enforce and I can’t say that anybody paid particular attention to it.  One of our most pleasant experiences was sitting at a park on the waterfront in Cienfuegos sipping rum (from plastic cups) smoking cigars and watching the sun set.

We ate a lot of croquetas in Cuba and drank a lot of rum punch, mojitos, and cariocas.  After we got back we pulled together a Cuban dinner with a few other friends.  I made the traditional finger-sized croquetas—seven dozen of them, actually!  Here is a picture of me frying them as well as a platter full of cooked ones along with some plantain chips and mojitos.

For this post, since I was cooking them as an entrée rather than as a nibble with cocktails, I made them larger.

Print Recipe
Croquetas de Jamon (Cuban Ham Croquettes)
Instead of ham, croquetas can be made with cooked fish, salted cod, or potatoes among other ingredients. Cracker crumbs are the standard coating used in Cuba but fine dry breadcrumbs will work fine. I really like using plain panko crumbs whizzed in the food processor to finely pulverize them. They give an amazing crunch! If you are making these to serve as nibbles, you should get seven dozen. If you are making larger croquetas to serve as a main course, this recipe will make 16. Two or three of the larger croquetas will serve one person depending on what else is being served.
Votes: 0
Rating: 0
You:
Rate this recipe!
Prep Time 1 hour
Cook Time 20 minutes
Passive Time 9 hours
Servings
people
Ingredients
Prep Time 1 hour
Cook Time 20 minutes
Passive Time 9 hours
Servings
people
Ingredients
Votes: 0
Rating: 0
You:
Rate this recipe!
Instructions
  1. If the ham was cooked with a sweet glaze, rinse the glaze off using warm water.
  2. Cut the ham into one-inch cubes.
  3. Finely grind the ham in a food processor or meat grinder. Reserve the ground ham.
  4. Over medium heat, warm the milk in a small saucepan.
  5. Meanwhile, in a two-quart heavy bottomed pan, sauté the onion in butter on medium heat until soft, approximately 4-5 minutes.
  6. Add the flour to the onion-butter mixture and cook for about two minutes, stirring constantly. Do not brown the flour.
  7. Note, the flour will appear golden from the combination of the butter and the onions.
  8. Add about three tablespoons of the warm milk to the flour mixture. Stir well to fully incorporate. Continue adding about three tablespoons of warm milk at a time, stirring well after each addition, until all the milk has been incorporated. The mixture will form a rather heavy dough.
  9. Continue to cook the dough for 2-3 minutes, stirring constantly, without browning.
  10. Reduce the heat to low and stir in the ham. Keeping the mixture warm makes it much easier to blend the ham into the dough which would otherwise seize up with the addition of cold ham.
  11. Off the heat, stir in the nutmeg and parsley. Taste and adjust salt and pepper.
  12. Spread the mixture into a small oblong pan. Cool to room temperature uncovered.
  13. Cover and refrigerate until very cold, about six hours or overnight.
  14. Form the croquetas. If making small ones, roll portions of the dough into ½ inch diameter cylinders. Cut the cylinders into pieces about 2 inches long. If making larger croquetas, divide the mixture into 16 pieces. Roll each piece into a ball then flatten into a patty about ½ inch thick. Put the croquetas in a single layer on a cookie sheets. Refrigerate the croquetas until very cold.
  15. To bread the croquetas, beat 3 eggs seasoned with ½ teaspoon of salt. Dip the croquettes in the beaten egg then roll in crumbs.
  16. Put the croquetas onto cookie sheets once again. Refrigerate until cold.
  17. Repeat the egg and crumb coating a second time. The second coating is necessary to get the traditional crunch. Refrigerate several hours or overnight.
  18. Cook the croquetas in a deep fryer at 350°F until deep brown. Alternatively, put ½ inch of oil in a heavy bottomed frying pan. Bring the oil to 350°F. Fry the croquetas, turning once, until deeply browned. Drain briefly on absorbent paper. Keep the croquetas warm in a low oven until they are all fried.
  19. The croquetas ready to serve.
Recipe Notes

Copyright © 2017 by VillaSentieri.com. All rights reserved.

Share this Recipe