Maraschino Cherry Cake

July 18, 2018

In  September 2012, at a wine paring dinner at The Compound Restaurant in Santa Fe during the holy days of Santa Fe Wine and Chile Fiesta, a group of us hatched an idea to start a dinner group.

After a lot of discussion and email exchanges, we decided to name the group Santa Fe Ate, both for what we do and for the (play on the words regarding the) number of people in the group.

From the “Things You Can Cook in a Wood-Burning Oven” dinner: Roasted Cauliflower with whipped Goat Cheese, Ricotta, and Olive Oil Dip and Cannellini alla Toscana

We had our first dinner in January 2013 and we’ve been going strong ever since.  We meet about once every three months, rotating houses.  At each dinner we decide the theme for the next dinner.  This may not be the best time to make such a consequential decision given the amount of alcohol typically consumed.  For example, one of our themes was French Indo-China 1920s to 1930s!

Join our mailing list and you’ll never miss a recipe again!

Frank and Doug don’t really cook so their group assignment is always to come up with a signature cocktail and appropriate wine pairings for each course.  They have leeway to be creative in finding or creating a cocktail, which they have to do for even for cultures where drinking alcohol is not really common.  If the theme of the dinner relates to a wine producing region, the wines are generally from that region to the extent feasible.

From the French Indo-China 1920s to 1930s dinner: Cambodian Fish Amok (Fish and Coconut Milk Curry Baked in Banana Leaves)

The other six of us do successive rounds of emails refining the list of dishes to be prepared and organizing them into courses.  Our task is to be as authentic to the theme as possible.

French Indo-China 1920s to 1930s was probably our most narrow theme.  Others have included, for example, Summer in Provence, Winter in Friuli, Along the Silk Road, Persia (not Iran but Persia), Comfort Food, and Things You Can Cook in a Wood-Burning Oven (for which the entire meal was cooked in our outdoor wood-burning oven).

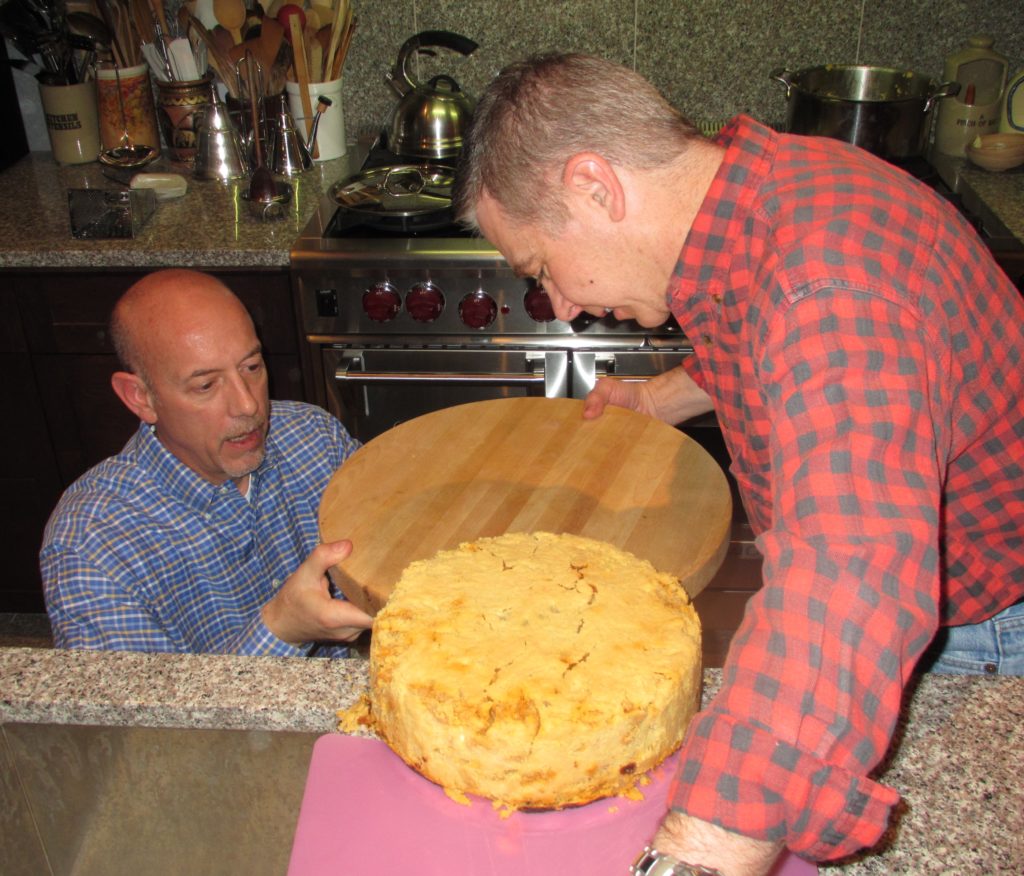
The only meal we’ve had which strayed from the basic plan was Timballo.  Timballo is a (typically large) pastry-encased and baked dish of layered pasta, hardboiled eggs, cheese, meatballs, and other meats, all moistened with tomato sauce.  Each of the cooks was assigned one or more components of the timballo to make at home.  We got together to assemble and bake the final dish.  This was a multi-hour process, even with all the prep work done in advance.

Unmolding the timballo

To help pass the time, Frank and Doug devised a blind wine-tasting in which we had to try to identify the varietal and provenance of each wine.  I believe the eight of us tasted six bottles of wine.  After we finished those, we opened some more.  This was the dinner at which we decided the theme of French Indo-China 1920s to 1930s.  You may notice a correlation between alcohol intake and unusual dinner themes!

Follow us on your social media platform of choice


Earlier this year, our theme was Betty Crocker’s Picture Cook Book, first edition, published in 1950.  Every dish had to come from the cookbook with no changes, substitutions or updating unless absolutely necessary.  One of the appetizers was anchovies rolled around cornichons!

Betty Crocker’s Picture Cook Book, 1950, First Edition

The food was actually surprisingly good.  I suspect part of that was related to how each of us selected our dish or dishes (Becky, who did appetizers selected three!).  The wines were, undoubtedly, fabulous.  In the United States, if you were drinking wine in the 1950s you were likely drinking French wine, and good French wine, at that!  On that night, so were we!

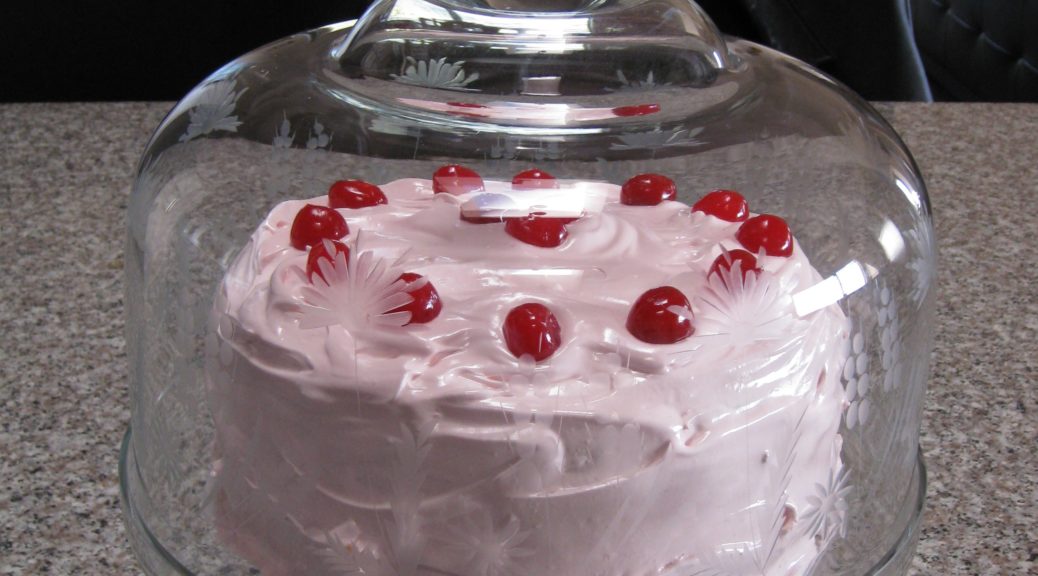
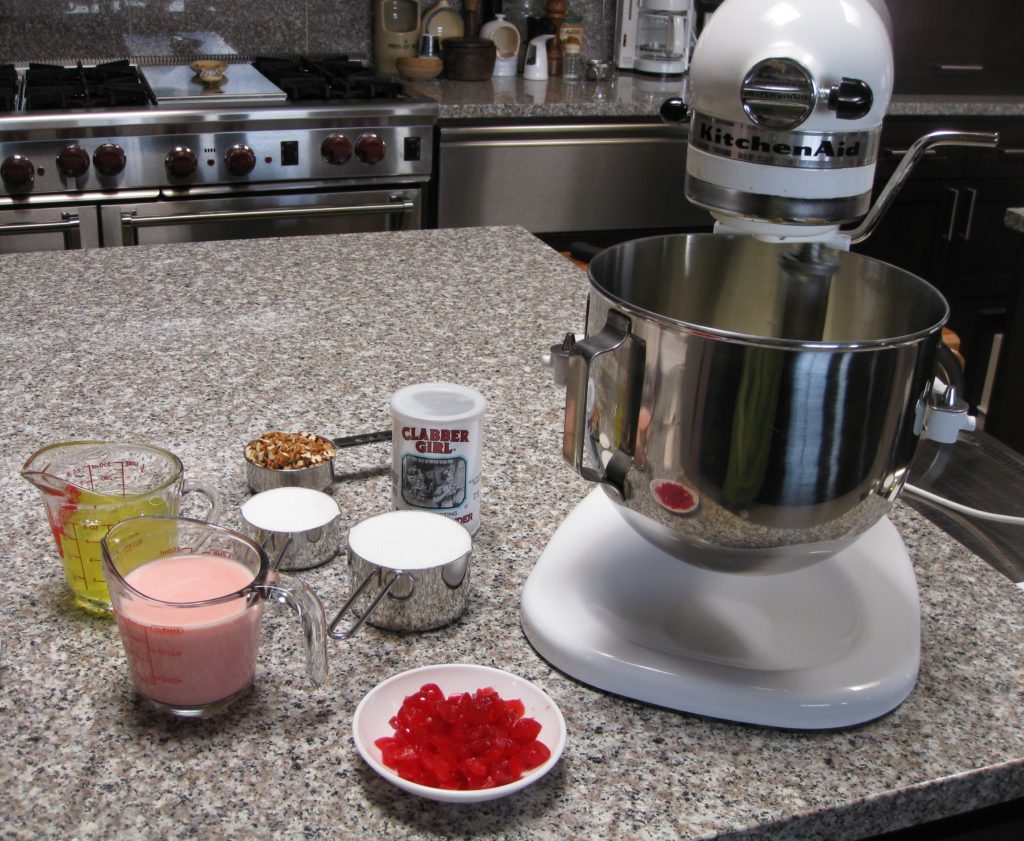
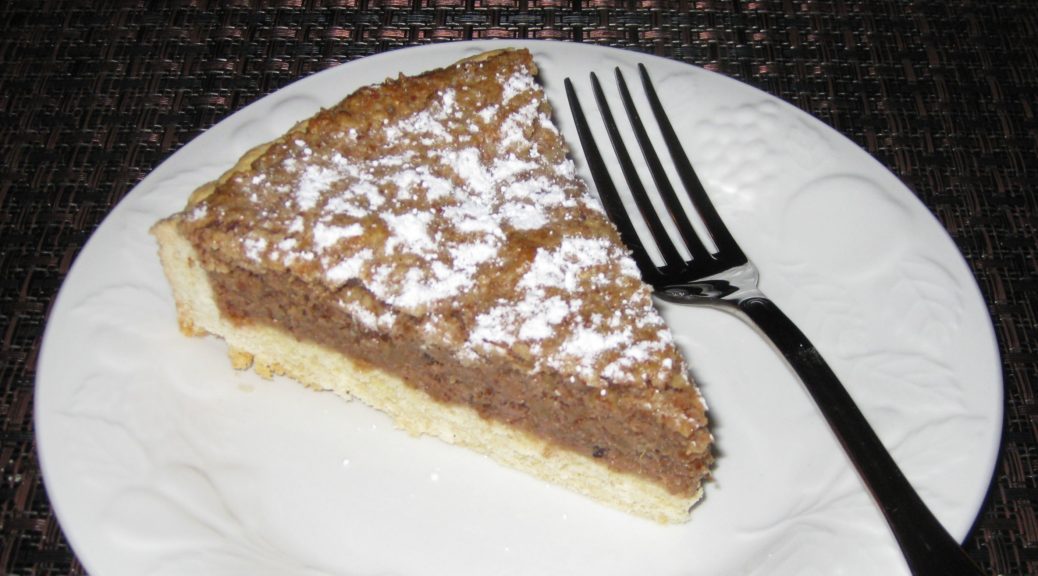
I made a Maraschino Cherry Cake with Almond Crème Filling and Maraschino Boiled Frosting.  Though if I were making the cake again, I would probably substitute my recipe for Italian Pastry Cream for Betty’s Crème Filling, I really wouldn’t make any other changes.

Here’s the recipe directly from the first edition of the Betty Crocker Picture Cookbook with a few minor adaptions of the technique by me.  For you bakers out there, I’m providing the original sea-level measurements as published in the cookbook.  Since I baked this at nearly 8000 feet in elevation, I followed Betty’s recommendations for adjusting for high altitude.

Getting ready to make Maraschino Cherry Cake
Print Recipe
Maraschino Cherry Cake
You can divide the work for this cake over several days. The filling can be made up to three days in advance and refrigerated, tightly covered. Stir in the toasted almonds just before using. The cake layers can be made a day in advance, wrapped tightly and refrigerated. The frosting should be made when you’re ready to frost the cake. The original recipe called for “rich milk” in the almond crème filling. Remember, this recipe was published before the advent of homogenized milk. Half-and-half is a good substitute. Except in professional recipes, it is rare to see egg whites measured in volume but it is a very good idea as the white, much more than the yolk, varies with the size of the egg.
Votes: 0
Rating: 0
You:
Rate this recipe!
Prep Time 1 hour
Cook Time 1 1/2 hours
Passive Time 6 hours
Servings
people
Ingredients
Maraschino Cherry Cake
Almond Crème Filling
Maraschino Cherry Cooked Frosting
Prep Time 1 hour
Cook Time 1 1/2 hours
Passive Time 6 hours
Servings
people
Ingredients
Maraschino Cherry Cake
Almond Crème Filling
Maraschino Cherry Cooked Frosting
Votes: 0
Rating: 0
You:
Rate this recipe!
Instructions
Maraschino Cherry Cake
  1. Sift together the flour, baking powder and salt. Reserve.
  2. Combine milk and Maraschino cherry liquid. Reserve.
  3. Cream butter.
  4. Cream in sugar until fluffy.
  5. Add dry ingredients in four additions, alternating with milk-juice mixture in three additions. Mix lightly, but well, after each addition.
  6. Stir in nuts and Maraschino cherries.
  7. In a separate bowl, beat egg whites until stiff.
  8. Fold beaten egg whites into batter, using about ¼ of the egg whites first to loosen the batter.
  9. Pour into two greased and floured 9” cake pans.
  10. Bake 350°F approximately 30-35 minutes, until a tester inserted in the center comes out clean.
  11. Cool the pans on a rack approximately 10 minutes.
  12. Remove layers from pans and cool completely.
Almond Crème Filling
  1. Combine the sugar, cornstarch, salt and half-and-half in a heavy-bottomed saucepan.
  2. Bring to a boil, stirring constantly.
  3. Slowly pour about half of the boiling half-and-half mixture into the egg yolks, whisking constantly, to temper the yolks.
  4. Put the saucepan with the remaining half-and-half mixture back on the heat.
  5. Pour the tempered yolks back into the saucepan, whisking constantly.
  6. Bring the mixture to a boil. Boil 1 minute, stirring constantly.
  7. Remove from the heat and stir in the almond and vanilla extracts.
  8. Pour the pastry cream into a bowl. Cover with plastic wrap, putting the wrap directly on the pastry cream to avoid a skin.
  9. Refrigerate until cold.
  10. Stir in chopped almonds just before using.
  11. Just before making the frosting, put one cake layer on a serving platter. Top with Almond Crème Filling.
  12. Top with second layer.
Maraschino Cherry Cooked Frosting
  1. Combine the egg whites, sugar, cream of tartar and Maraschino cherry liquid in a double boiler.
  2. Cook over boiling water, beating constantly with an electric mixer until a spreadable consistency, approximately 5-7 minutes. The top of the double boiler should not touch the boiling water in the bottom.
  3. Beat in the vanilla and almond extracts.
  4. Immediately frost sides and top of cake.
  5. Decorate the top with whole Maraschino cherries
Recipe Notes

Copyright © 2018 by Villa Sentieri, LLC. All rights reserved.

Share this Recipe

Crostata di Noci (Italian Walnut Tart)

December 20, 2017

One evening in 1996 my husband and I were sitting with his parents in a dimly-lit bar in Venice. We were all chatting. I was drinking grappa, as was my father-in-law. Then the desire for dessert hit me. If you’ve spent any time in Italy you know that at no point in the day are you actually hungry. There’s just too much wonderful food around to not partake in it. So the desire for dessert had absolutely nothing to do with the need for more calories.

Going for something new, I selected Crostata di Noci. I was absolutely amazed by what I got.

The pastry was standard-issue Italian pasta frolla, a slightly sweet leavened crust that’s like a cross between shortbread cookies and a dense cake. The filling, however, tasted for all the world like nut roll, one of my favorite pastries but one that is also very time-consuming and frustrating to make.

In that instant, it all made sense. Nut roll hails from Eastern and Central Europe (as does another of my favorites, the poppy seed roll).  In northeast in Italy there is a lot of Eastern European influence. Suddenly, taking nut roll filling and putting it in a pasta frolla case meant I could have something that tasted just like a nut roll but without all the frustration of actually making nut roll.


Click HERE to join our mailing list and you’ll never miss a recipe again!


Now, Crostata di Noci will never actually replace “real” nut roll just like making bread in my bread machine won’t replace making bread by hand. But, with a bread machine, I have homemade bread every day which wouldn’t be the case if I had to make every loaf by hand. With less than half-an-hour’s active time, I can indulge my taste for nut roll any time I want!

Around the holidays nut rolls were ubiquitous in my home town but my mother and my Aunt Margie made the best nut rolls I have ever had. Largely this is because they both put in a large proportion of sweetened nuts to dough. Honestly, there was just enough dough to roll pinwheel fashion and hold the whole thing together. Many other nut rolls were bready by comparison.

To be sure, my mother’s filling differed from my Aunt Margie’s. I’m not sure how each of them came by their respective recipes but my suspicion is that Aunt Margie’s came from her mother or another Italian relative or friend because it contained orange juice. The use of citrus in various pastries is common in Italy. Pasta frolla, for example, is traditionally flavored with lemon zest and vanilla. I am guessing my mother’s recipe came from my father’s mother or someone on the Slovak side of my family because the liquid in the nuts was milk and not orange juice.


Follow us on your social media platform of choice


Separate from actually eating nut roll, there was this whole aura around making them (at least there was when I was young!). Buying shelled walnuts and using a food processor make quick work of preparing the nuts but in the 1960s, making nut roll started with my mother buying a large quantity of whole walnuts. We would sit around the table and crack the nuts open then extract the nutmeats. I still have the nutcracker and picks that we used.

My parents’ nutcracker and picks

After all the nuts were shelled, they needed to be ground. We did this in a hand-crank grinder of the same type used to grind meat for sausage. As a kid, I got to turn the crank on the grinder! I no longer have my mother’s grinder as it got rusty from being stored in the basement but I have my own that is pretty much identical. I got it when I was in college.

The hand-crank grinder I got while in college

After the excitement (well, as a kid it was pretty exciting!) of shelling and grinding the nuts we all kind of abandoned my mother who started the laborious process of actually making the nut rolls. That is definitely not a job for amateurs. The dough had to be very thin but just thick enough to contain the nuts. The nuts had to be moist, sweet, and generous in quantity compared to the amount of dough. Then the whole thing had to be rolled up and baked.

After my mother died, Aunt Margie started sending me nut roll every year. After Aunt Margie died, my cousin Donna (Aunt Margie’s daughter) picked up the nut roll mantle. The two nut rolls that I got this year will be carefully doled out over a few weeks, befitting their preciousness, starting on Christmas Eve!

This year’s nut roll from my cousin Donna.  Notice the large proportion of nuts to dough.

If you have a favorite family recipe and a bit of a story to tell, please email me at santafecook@villasentieri.com and we can discuss it. I am expanding the scope of my blog to include traditional recipes from around the country and around the world. Take a look at Bertha’s Flan.  It will give you an idea of what I’m looking for.


After returning from that trip to Venice I was determined to recreate Crostata di Noci. I whipped up a batch of Zia Fidalma’s pasta frolla and made a simple walnut filling with orange juice in a nod to the Italian origins of this particular pastry.

The first try was a winner and I haven’t really made any substantive changes in the recipe since. If one wanted a creamier filling, one could add a few tablespoons of butter but, honestly, the crostata is so rich that I haven’t felt the need to make it more so.

Until I tackle nut roll making 101 (which I swear I’m going to do one day soon!), I’ll have to settle for crostata di noci, and the occasional nut roll care package from my cousin!

Print Recipe
Crostata di Noci (Italian Walnut Tart)
Lightly sweetened ground walnuts fill an Italian pasta frolla crust in this Venetian dessert. If you’re not a fan of walnuts you could use other nuts. If you want to make the crostata extra festive, put a paper doily on top and sprinkle it with powdered sugar to get a pattern.
Votes: 0
Rating: 0
You:
Rate this recipe!
Cuisine Italian
Prep Time 40 minutes
Cook Time 45 minutes
Passive Time 30 minutes, plus cooling
Servings
people
Ingredients
Pasta Frolla
Nut Filling
Cuisine Italian
Prep Time 40 minutes
Cook Time 45 minutes
Passive Time 30 minutes, plus cooling
Servings
people
Ingredients
Pasta Frolla
Nut Filling
Votes: 0
Rating: 0
You:
Rate this recipe!
Instructions
Pasta Frolla
  1. Blend flour, sugar, baking powder, vanilla powder, salt and lemon zest in a food processor until combined.
  2. Add the cold butter, cut in pieces.
  3. Blend till well combined. The mixture in the food processor will appear to move as one mass though when you stop the processor you will see that it is not.
  4. Add the eggs and vanilla extract if you are using that instead of vanilla powder and blend till it almost forms a ball.
  5. Remove the pastry from the food processor and incorporate the final bits of flour by hand.
  6. Wrap the dough in waxed paper and refrigerate for about 30 minutes before using.
Nut Filling
  1. Combine all ingredients and mix well.
  2. Cover the nut filling and keep it at room temperature while rolling out the pasta frolla.
Assembly
  1. Roll out pasta frolla between sheets of waxed paper until it is just large enough to come up the sides of a 10" diameter by 1” tall tart pan with a removable bottom.
  2. Trim the edges of pastry even with the top of the tart pan.
  3. Add the filling and spread it out evenly.
  4. The filling should come just to the top of the tart pan.
  5. Bake the crostata at 350°F for approximately 45 minutes or until crust is golden brown.
  6. Cool and remove the sides of the tart pan.
  7. The crostata can be sprinkled with powdered sugar for serving and/or accompanied by lightly sweetened whipped cream.
Recipe Notes

Copyright © 2017 by VillaSentieri.com. All rights reserved.

Share this Recipe