Well, according to Wikipedia, lots of famous people said that but the first, perhaps, is John Arbuthnot Fisher, a British Admiral of the Victorian and Edwardian eras.
I’m about to do both!
It’s been nearly a year since my last blog post. And many months had elapsed between my next-to-last blog post and that one. I’m sorry!
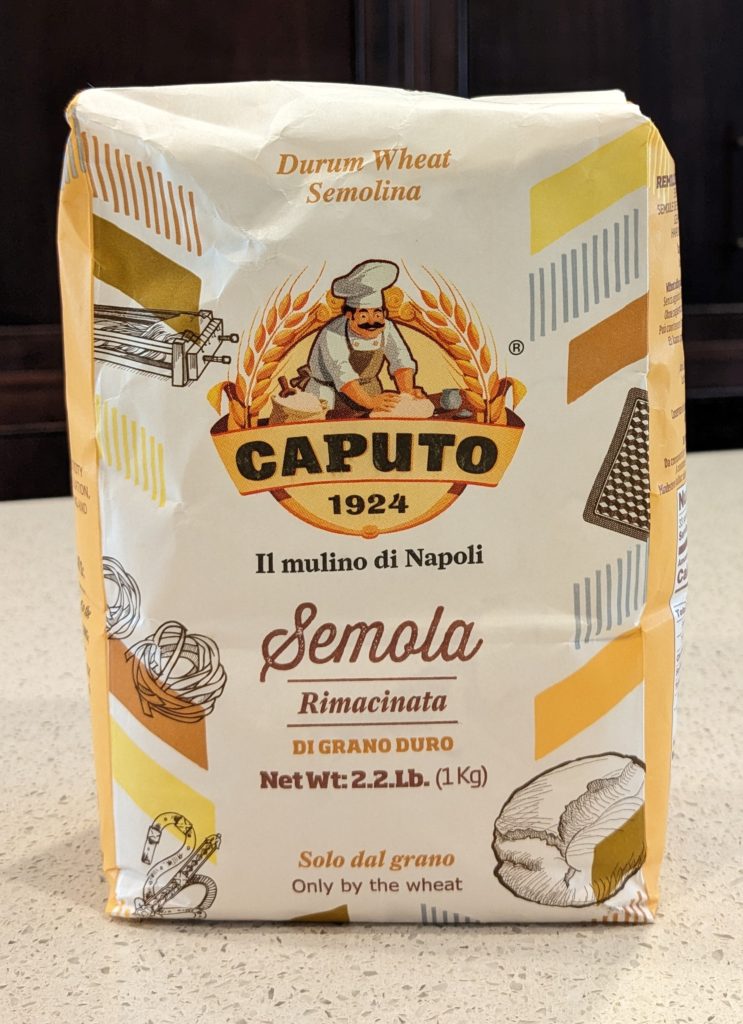
Semola Remacinata, the finest grind of durum wheat flour in Italy.
It amazes, and gratifies me, however, that during that long dry spell I continued to get messages from new readers of the blog and new subscribers to my emails.
Join our mailing list and you’ll never miss a recipe again!
Now let me explain.
Since August 2021 I have been working on a book about how to make artisan Italian gelato. All the time that I would have devoted to testing recipes and writing blog posts, and more, went to testing recipes for and, ultimately, writing the book.
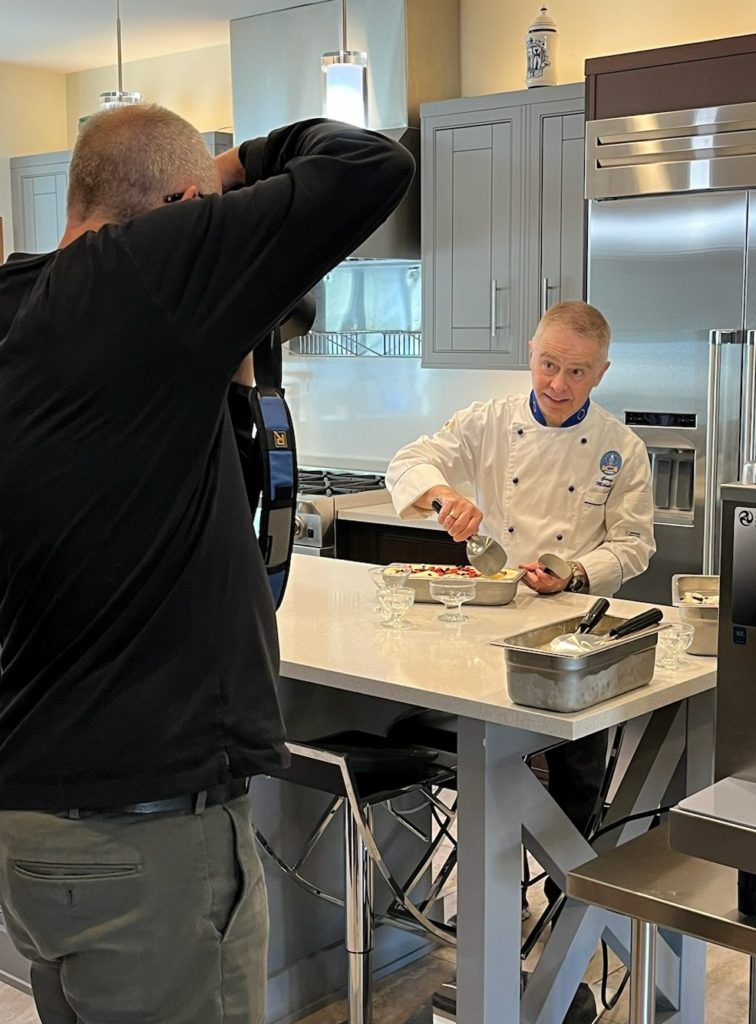
I sent the manuscript to the publisher on November 1st. I’ve since revised the manuscript based on multiple rounds of feedback from the developmental editor. The text is now undergoing line editing. The photoshoot was completed a few weeks ago and photos were tentatively selected for the book.
A shot of the photoshoot for my upcoming book on artisan Italian gelato.
I’m anxiously awaiting options for page layout and cover design. And not-so-anxiously awaiting feedback from the line editor.
Finding myself with more flexibility, I am planning on doing more baking than gelato-making for the next few months. Winter in Palm Springs is the time to use the oven!
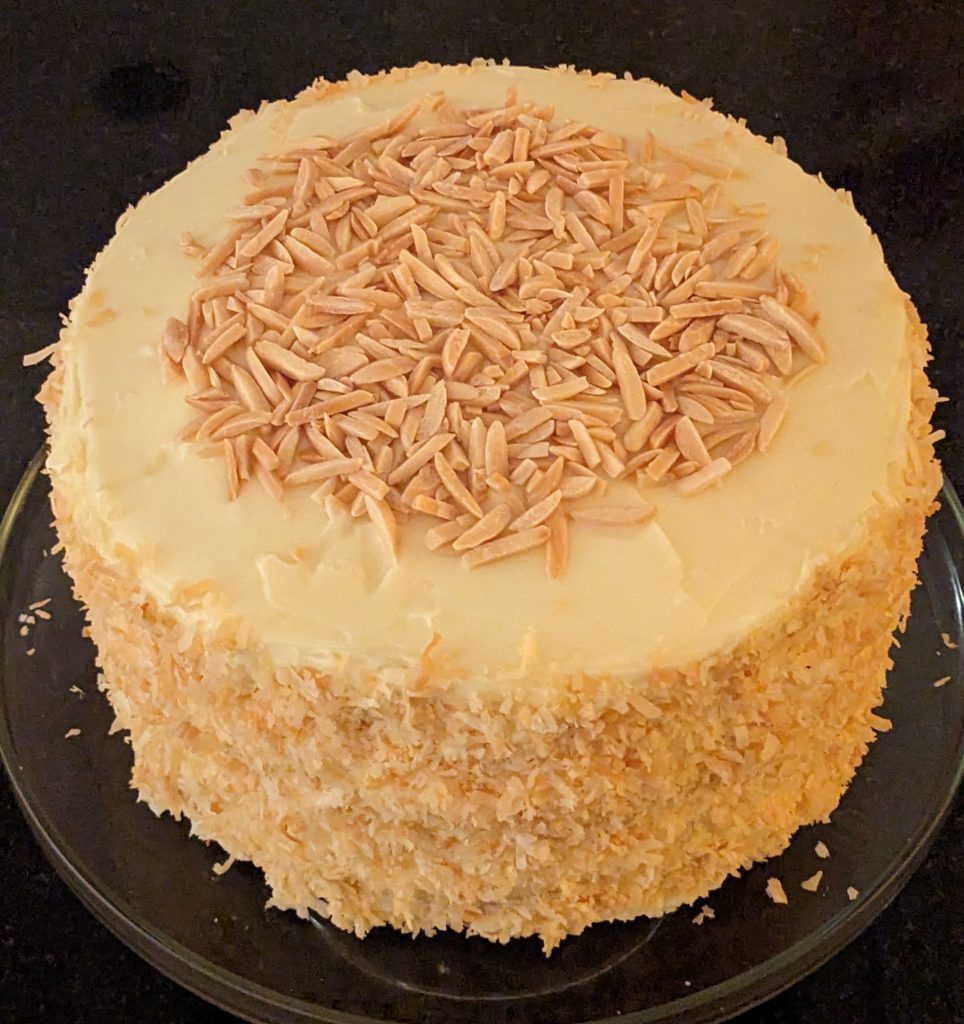
In fact, I had planned to make a coconut almond cake today, my second in less than two weeks. My goal is to keep at it until I reproduce a taste memory of a coconut almond cake that I ate, one and only one time, in 1967 (or summer arrives in Palm Springs, whichever comes first). It’s probably a fool’s errand but it is giving focus to my baking efforts.
My first coconut almond cake of the winter baking season.
Follow us on social media
A water leak last evening, while I was making dinner, means that the water to the house is shut off until the plumber gets here later today. No water means no baking. No baking means that I can repurpose my time to do my first blog post in nearly a year.
I promise to do my best to be more regular in posting.
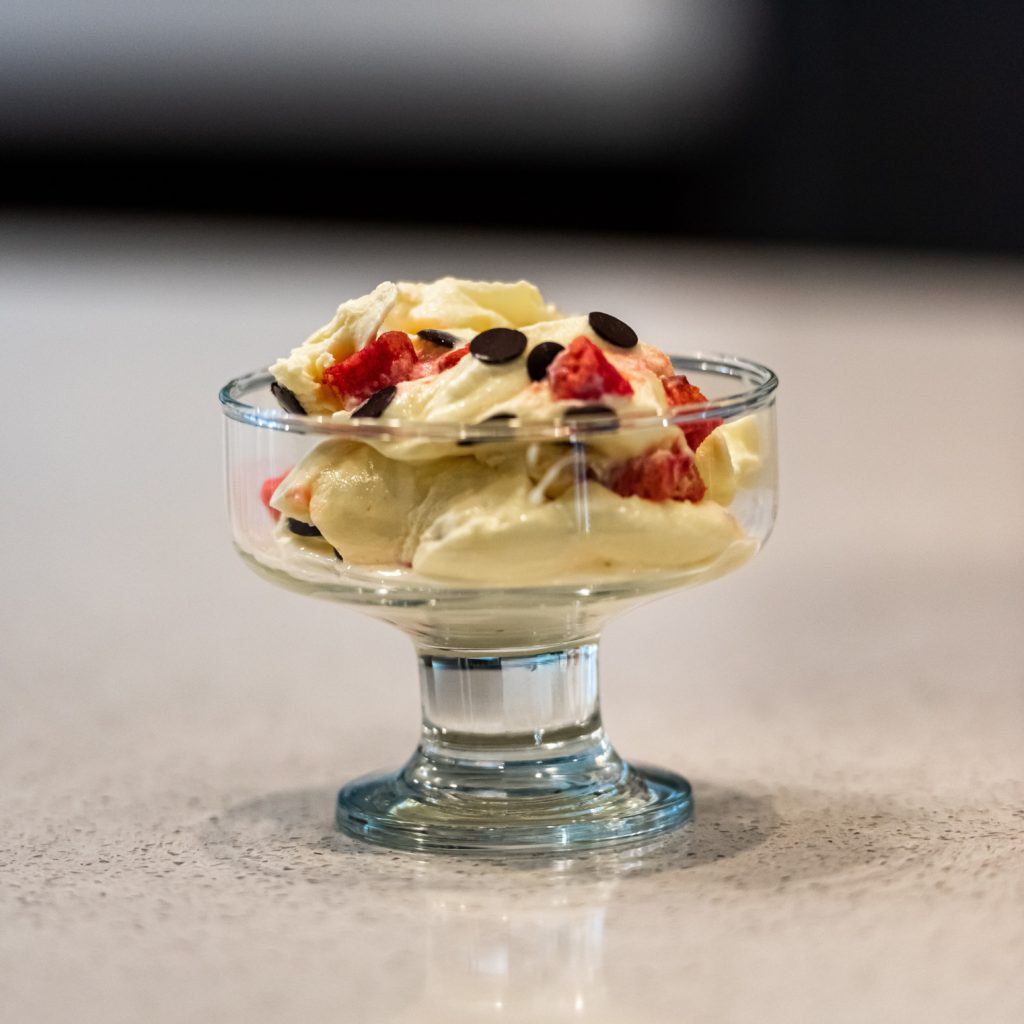
Gelato alla Zuppa Inglese, one of over 75 gelato recipes in my upcoming book. This is an egg-based gelato studded with cake soaked in Italian Alkermes liquore and dark chocolate chips.
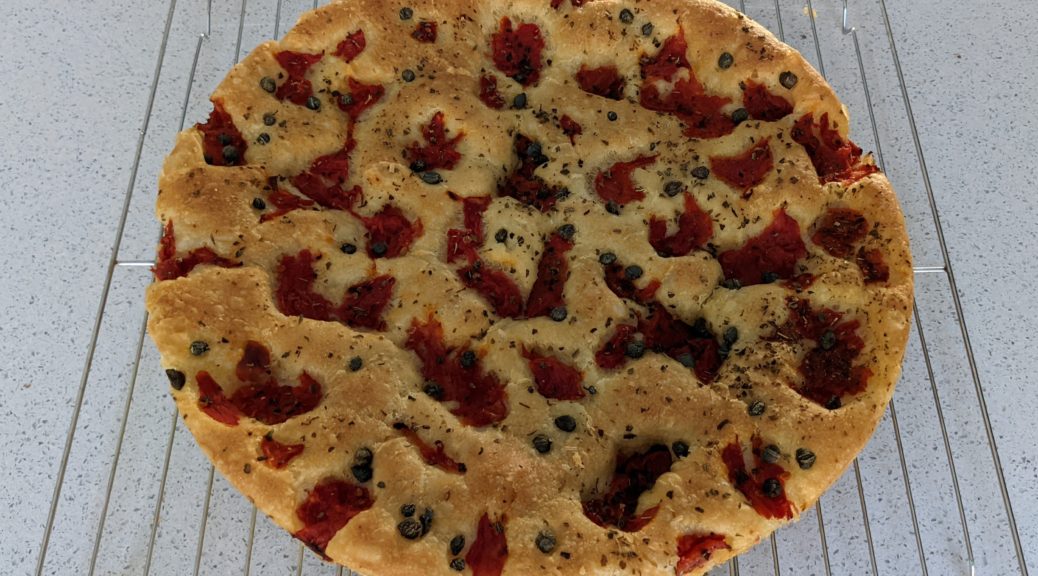
Now, let’s pivot to a recipe: Focaccia Barese (Focaccia from Bari).
I like to serve homemade bread with dinner as much as possible. This is a recipe that I turn to over and over to put a really tasty bread on the table with minimal active time and often little advance planning.
Print Recipe
Focaccia Barese (Focaccia from Bari)
Focaccia is a yeast-risen bread that is made from a dough that has such a high proportion of water that it is almost a batter. Crushed tomatoes as well as capers and/or olives are strewn on top. A good sprinkling of dried oregano and a few glugs of good olive oil round out the flavor. In Italy, flour made from durum wheat comes in three grinds: fine, medium, and coarse, called semola (or semola remacinata, meaning “twice ground”), semolina, and semolino respectively. I usually use semola imported from Italy for this bread. If buying domestic semolina (in English, we use the same word, regardless of the grind) look for one that is finely ground.
Put flour, semola, and yeast in the bowl of a stand mixer. Using the paddle, NOT the dough hook, begin to mix on low.
Slowly drizzle in the water. When the water is fully mixed in, sprinkle in the sugar.
Add the salt and beat on medium high you see strings of gluten form in the dough, approximately 4-5 minutes. The dough will get stretchy and if you pull a bit, it should look stringy.
Drizzle in the extra-virgin olive oil and mix on medium until well combined.
Cover the bowl with plastic wrap and allow to rise for about two hours.
Meanwhile, drain the canned tomatoes through a sieve. If the tomatoes are whole, coarsely crush them by hand and allow to drain further. If you are using diced tomatoes, crushing is not needed.
Oil a circular baking pan, 12” in diameter x 2” high with more extra-virgin olive oil.
Pour in the dough. Lightly oil your fingertips and press into the dough, without stretching, until it is evenly spread out in the pan.
Arrange crushed tomatoes, capers, and olives, if using, on top. Drizzle with more extra-virgin olive oil. Sprinkle with oregano.
Cover the pan and allow to rise. If you have another baking pan of the same size, turn it upside down and use it as a cover. If not, invert a large bowl over the baking pan. Whatever you do, be sure there is some space above the rim of the pan so that the dough has room to rise.
When the dough reaches the top of the pan, carefully transfer it to the oven so it doesn’t deflate.
Bake at 375°F with convection (or 400°F without convection) for approximately 35 minutes, turning once or twice, until browned and just beginning to pull away from the sides of the pan.
Cool the bread in the pan set on a rack before removing it.
It’s for all of you, too, but especially for Mike.
Mike dutifully reads all of my posts and recipes but says he’ll never make any of them despite the fact that he’s a good cook.
I challenged myself to post a recipe that Mike COULD make if Mike CHOSE to make it. (Hint: that means it’s fast and easy!)
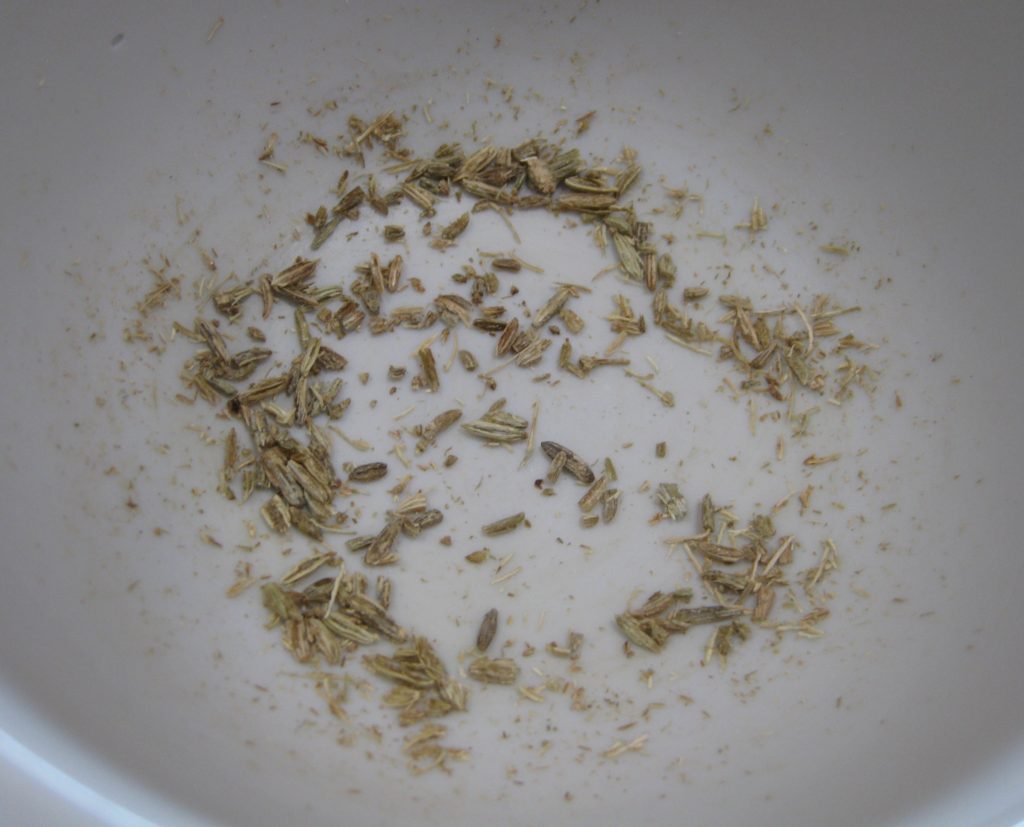
Crushed fennel seed.
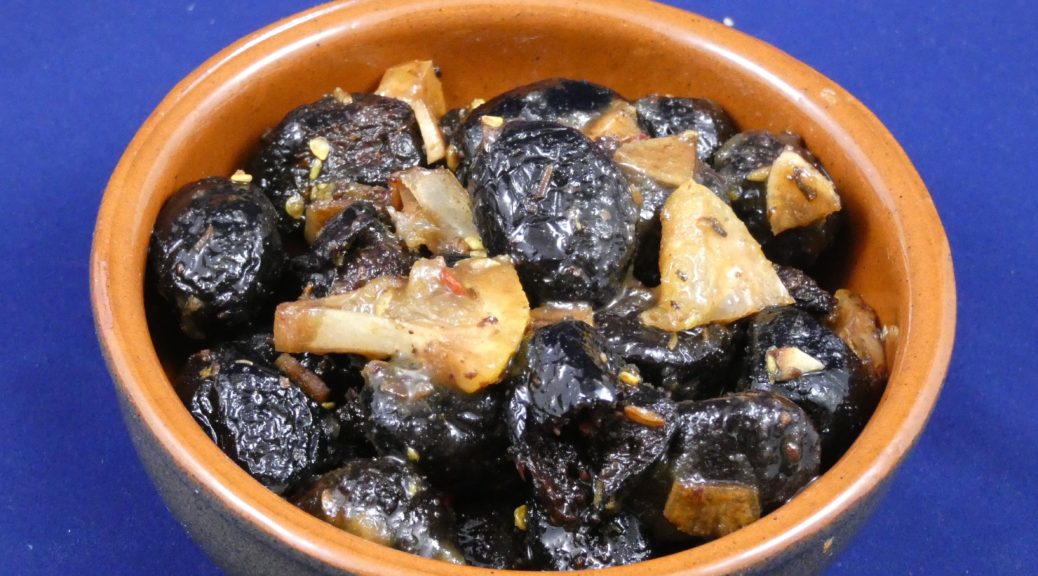
Most of us are not going to cure our own olives. Even in Italy that’s true. But starting with good quality cured olives and seasoning them to make them unique is quite another thing.
Join our mailing list and you’ll never miss a recipe again!
Many years ago, when we were living in Chicago, and had a very productive garden plot, fall “harvest” season saw lots of foods being made and preserved for the coming months. One of the ways we made use of abundant fresh herbs was to put up gallons of olives with herbs and a light vinegar brine. It was a technique I learned from a friend in Santa Fe, Joe Hoffman.
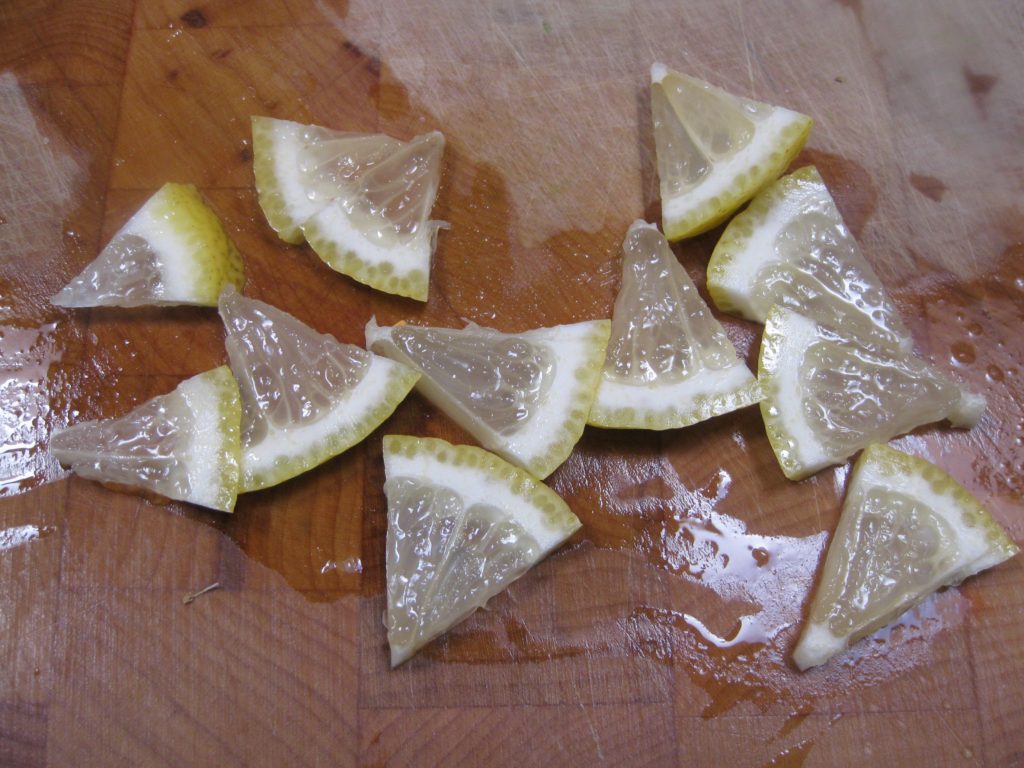
Tiny lemon wedges, about the size of an olive.
The vinegar allowed the olives to be kept for months and months without deterioration. Done right, they weren’t sour. In fact, I thought the vinegar treatment mellowed some of the bitterness that olives can have.
“Joe Hoffman’s Marinated Olives” were a staple nibble during cocktail hour for most of our dinner parties for many years.
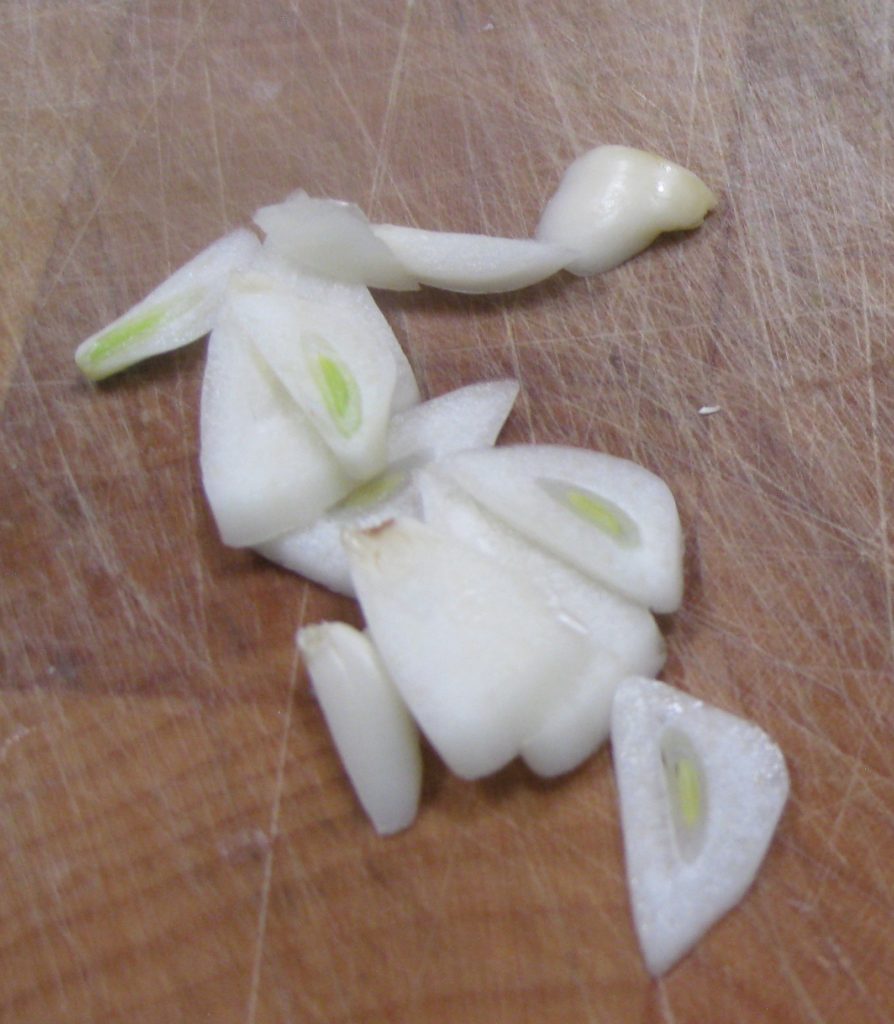
Garlic slivers.
Our herb harvest since moving to Santa Fe hasn’t been as abundant as it was in Chicago so I haven’t made these olives in a while. What I do make is an utterly different style of marinated olive that can be prepared just a few hours before serving time. These olives will last in the refrigerator for several weeks, though not as long as Joe Hoffman’s olives.
Follow us on your social media platform of choice
The original recipe, which I have since modified, came from Jo Bettoja’sIn a Roman Kitchen.
These olives pack a major flavor punch and never cease to get raves from dinner guests.
Print Recipe
Roman-Style Olives (Olive alla Romana)
These olives only need to marinate a few hours before serving. They will keep in the refrigerator, tightly covered, for several weeks.
I will forever remember Ferragosto as the day the music died.
Ferragosto is celebrated on the fifteenth of August throughout Italy. Originating during the Roman Empire, apparently in 18 BCE by Emperor Augustus, Ferragosto was originally held on August 1st. Ultimately, the Catholic Church moved the date to August 15th to coincide with the Assumption, a “holy day of obligation,” thus imposing a secular holiday on a religious holy day.
Ferragosto is a day to feast. It is also the day that the late-night revelry in the piazza of Bagni di Lucca comes to an end.
Join our mailing list and you’ll never miss a recipe again!
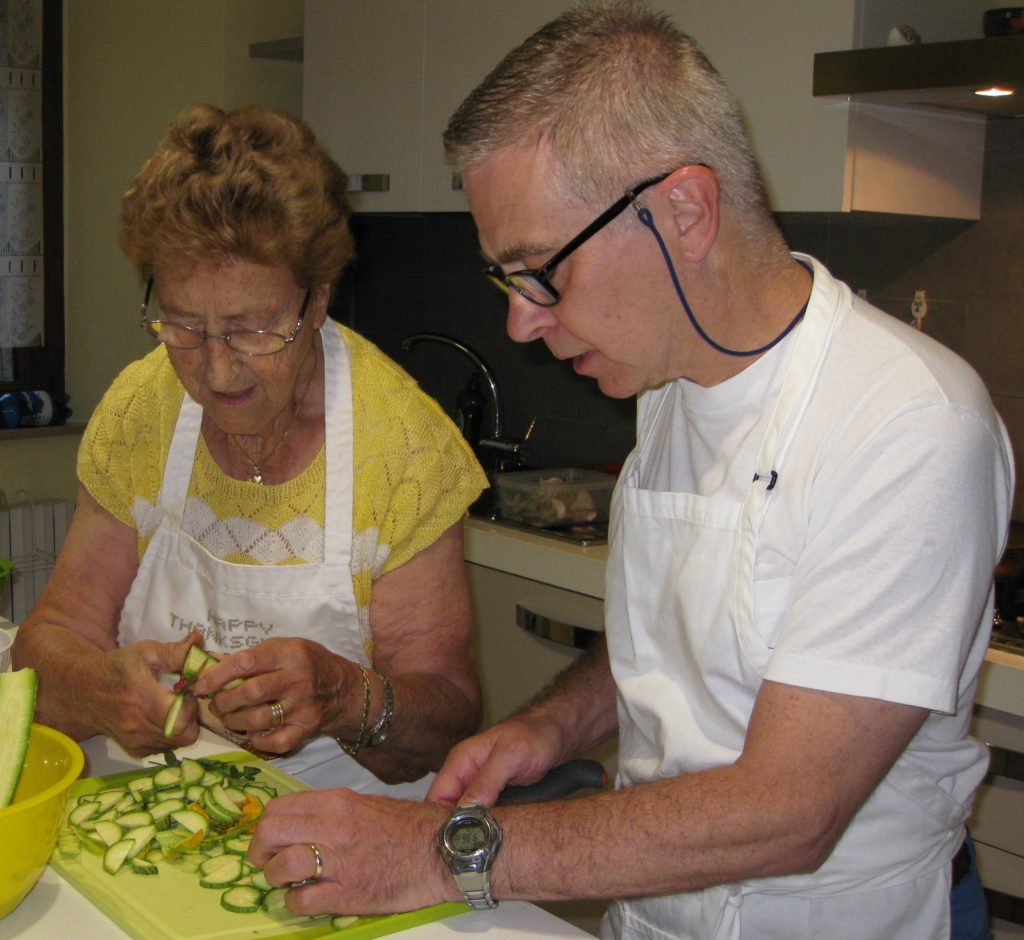
Those of you who have been following my blog for a while know that I spent the month of August 2019 in Tuscany cooking with Great Aunt Fidalma.
Cutting zucchini with Great Aunt Fidalma in her kitchen in Benabbio.
I rented a charming little apartment overlooking the piazza in Bagni di Lucca, a town near the village of Benabbio where Aunt Fidalma lives.
The piazza becomes the locus of loud music (70’s disco, karaoke, Italian pop) late into the night (or early into the morning depending on your perspective) on the weekends in August as well as during several August festival days.
A view from my terrace of the late-night revelry in the piazza of Bagni di Lucca.
The music precludes sleep. Even if one could find ear plugs sufficient to drown out the sound, the building, and thus the bed, vibrate to the bass.
Ferragosto, August 15th, is the end of the late-night music.
Follow us on your social media platform of choice
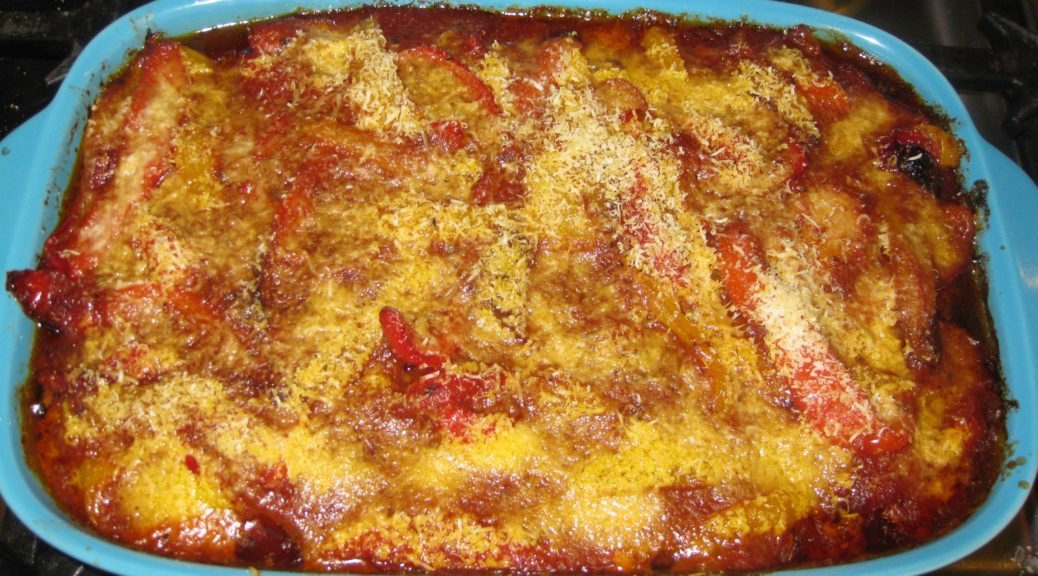
Today, January 15th, marks five months since Ferragosto. Pollo alla Romana (also known as pollo con i peperoni [chicken with sweet peppers]) is traditionally served on Ferragosto. Given the five-month anniversary, today seems like an appropriate day to post the recipe.
As you might guess from the name, Pollo alla Romana is from the area around Rome. It is a simple dish made with chicken, sweet peppers (traditionally red and yellow ones) and tomatoes. It can be cooked in the morning and served at room temperature later in the day making it a perfect summer dish.
It has become one of my go-to dishes for entertaining when I don’t want a lot of last-minute fuss to distract from enjoying cocktails with my guests. Made earlier in the day, the dish reheats beautifully in the time it takes to drink a bourbon.
Print Recipe
Pollo alla Romana (Chicken with Sweet Peppers)
Traditionally this dish would be made with a cut-up chicken. I prefer to use just thighs as I think they take well to braising, which breasts don’t. You can use cut-up chicken parts if you prefer. When a dish says something should be fall-apart tender, I take that literally. It’s the way I grew up eating chicken cooked by my Italian-American mother. That means, for me, the chicken should braise in the liquid for at least 90 minutes if you’re close to sea level and longer if you're at a higher elevation. You can short-circuit that if you want but I think the texture of the dish will suffer.
Pass the can of tomatoes through a food mill to remove seeds and hard bits of tomato. Reserve the tomato puree.
Slice the peppers into triangular pieces or thick strips.
Using a large heavy-bottomed sauté pan, sauté the garlic in the olive oil over medium heat until medium brown. Discard the garlic.
Sauté the chicken in the garlic-flavored oil over high heat, starting skin side down to render additional fat from the skin, flipping twice, until well browned. Remove and reserve chicken.
Add the peppers to the oil and sauté briefly over high heat to put a light char on some of them. Remove and reserve peppers.
Add the wine to the sauté pan, bring to a boil, and scrape up all the brown bits.
After the wine evaporates, add the broth, tomato puree and oregano. Mix well.
Add the chicken, skin side down, along with any accumulated juices. Season with salt and pepper.
Simmer, partially covered, approximately 30 minutes (or, if you live at high altitude as I do, 60 minutes). Turn the chicken over. Remove and discard the skin (the skin adds lots of flavor as well as collagen to the sauce for a great mouth-feel so please use bone-in and skin-on thighs).
Add the peppers and continue to braise, partially covered, for approximately another hour until the chicken is literally fall-apart tender. During cooking, taste and adjust salt, pepper, and oregano.
Transfer the chicken and peppers to an oven-proof casserole.
If the sauce is not thick, boil quickly to reduce it. Pour the sauce over the chicken.
Sprinkle the top with Pecorino Romano cheese.
Bake at 350°F to brown the top, approximately 15-20 minutes.
After driving a circuitous route for two days (I’ll explain why in a minute), I got home to Santa Fe from Palm Springs last Wednesday to a surprise.
My husband and I had plans to attend the holiday party for the Department of Psychiatry at the University of New Mexico, where he is Associate Professor, on Friday. The surprise was that the party was a potluck and we had to bring a dish.
So, there I was on Wednesday evening, exhausted after two days of driving, with no prior knowledge that I had to produce a dish for a Friday event, coupled with the logistic challenge that I had to leave home around noon on Friday and ultimately make it to the party in Albuquerque by 7:00 PM with a dish in tow that I could neither refrigerate nor heat up!
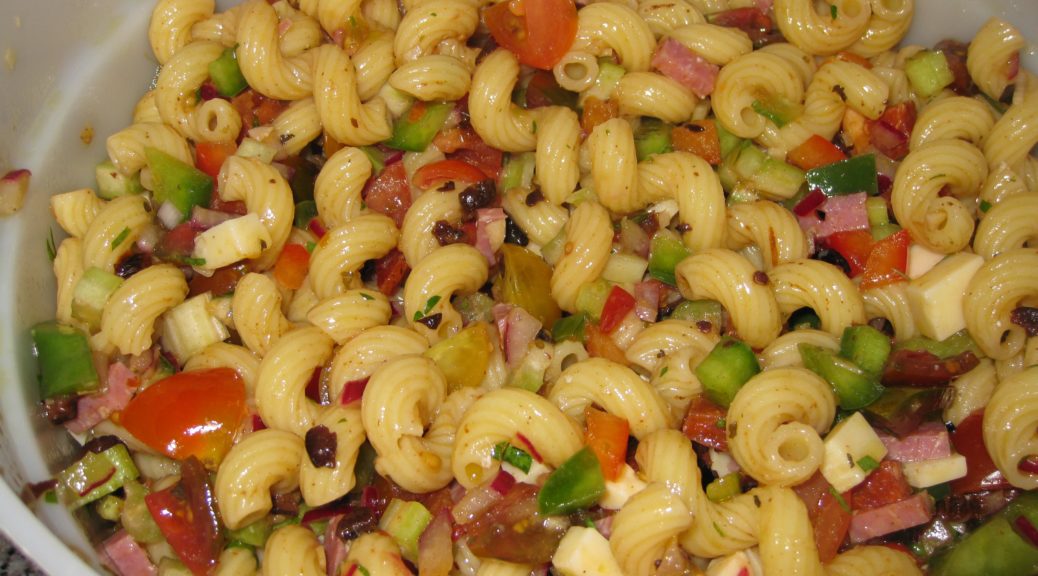
It didn’t take long before I settled on my cousin Angie Catanese’s Marinated Pasta Salad. This is a recipe that I’ve been making for about 45 years and it never fails to please. It has so much stuff in it besides pasta that it’s almost a misnomer to just refer to it as a pasta salad!
Join our mailing list and you’ll never miss a recipe again!
I went grocery shopping on Thursday morning, assembled the salad Thursday afternoon, and the rest is history!
The availability of pasta in many different shapes has ballooned over the decades. Cavatappi makes a great replacement for shells in this pasta salad.
Now, for an explanation as to why you haven’t heard from me in two months and what will be coming up for the blog…
In early October I went to Palm Springs to complete recipe testing for the Trio Restaurant Cookbook. One can’t really test recipes for a cookbook at 8,000 feet in elevation so I spent five weeks in Palm Springs testing and finalizing over 125 recipes for the cookbook. I had intended to continue posting to the blog during this time but very quickly found it impossible to fit in anything other than grocery shopping, recipe testing, and note-taking!
I got back to Santa Fe a few days before Thanksgiving then, less than a week after Thanksgiving was back on my way to California to go to the Consulate General of Italy in Los Angeles to apply for a visa.
In early January I am going to Italy to attend a three-month intensive course in Italian cuisine geared toward professional chefs at the Italian Culinary Institute. Because I’ll be in Italy more than 90 days I need a visa.
Follow us on your social media platform of choice
My visa appointment was Friday and I was planning on spending the weekend in Palm Springs then driving back to Santa Fe on Tuesday. The consular official said my visa would be ready by Tuesday so, rather than trust my luck (and my passport) to FedEx, I decided to drive back to Los Angeles to retrieve my passport.
It took me 3 hours and 45 minutes to drive the 122 miles from our home in Palm Springs to the consulate! I got my passport in about 5 minutes then did some shopping at Eataly, conveniently located across the street from the Italian Consulate. (I’d love to know who was responsible for securing THAT location!) I then reversed course and started the drive back to Santa Fe, passing within a few miles of our home in Palm Springs where I had started the day. I spent the night in Payson, Arizona then finished the drive Wednesday (which is when this story began).
The entrance to the Consulate General of Italy in Los Angeles which is conveniently located across the street from Eataly!
While I’m in Italy I will most likely be posting fewer recipes than usual. I hope to chronicle some of my experiences at the Institute and pass on some tips and pointers on Italian food. I hope you’ll stick with me during that time. When I return, I’ll be back to my regular schedule of posting recipes.
Oh, and by the way, judging from how the pasta salad disappeared at the party, I think it was a hit!
Print Recipe
Angie’s Marinated Pasta Salad
There is so much “stuff” in this that it could easily be the basis of a light meal with just some bread and cheese. Angie’s original recipe called for shells but other types of medium-size pasta work just as well. In fact, I think the cavatappi are especially nice given their unusual shape. If you are making this when tomatoes are at their peak, use three medium-sized tomatoes in place of the cherry and grape tomatoes. You can use 2 cups of purchased Italian salad dressing instead of the homemade dressing if you’re so inclined, though the flavor will obviously be somewhat different.
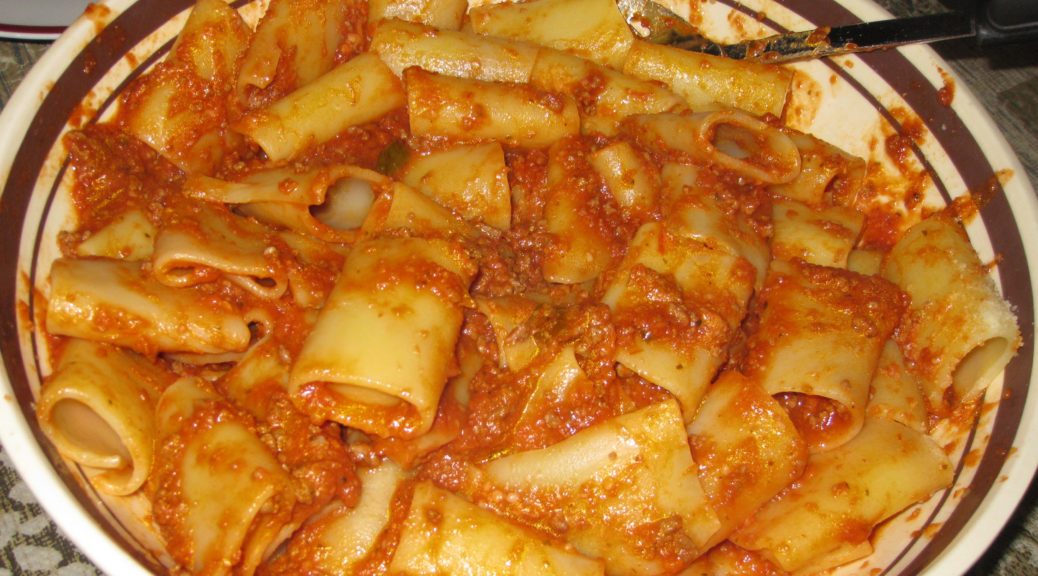
Ma’s spaghetti sauce. That’s what my husband calls it.
That’s pretty similar to what most of us of Italian heritage who grew up in the United States called the sauce that our mothers (yes, it was almost always the mothers) made most frequently.
It isn’t as if there aren’t more pasta sauces than one can count. It’s just that for everyone I know of Italian heritage, there’s one that stands out above the rest.
For my husband’s family, this is the one.
Join our mailing list and you’ll never miss a recipe again!
It’s actually quite similar to Ivana’s sauce. Ivana is married to my mother-in-law’s cousin Olvino. Ivana grew up in Friuli but in a different town. There are subtle differences in her sauce and my mother-in-law’s sauce, but if you read both recipes you’ll certainly see the similarities.
My mother-in-law doesn’t remember when she learned to make this sauce, or even if she learned from her mother or her aunt. She does remember, however, that her father asked her how she could get married (she was engaged to my father-in-law) without knowing how to cook.
My mother- and father-in-law on their wedding day (apparently before she knew how to cook)
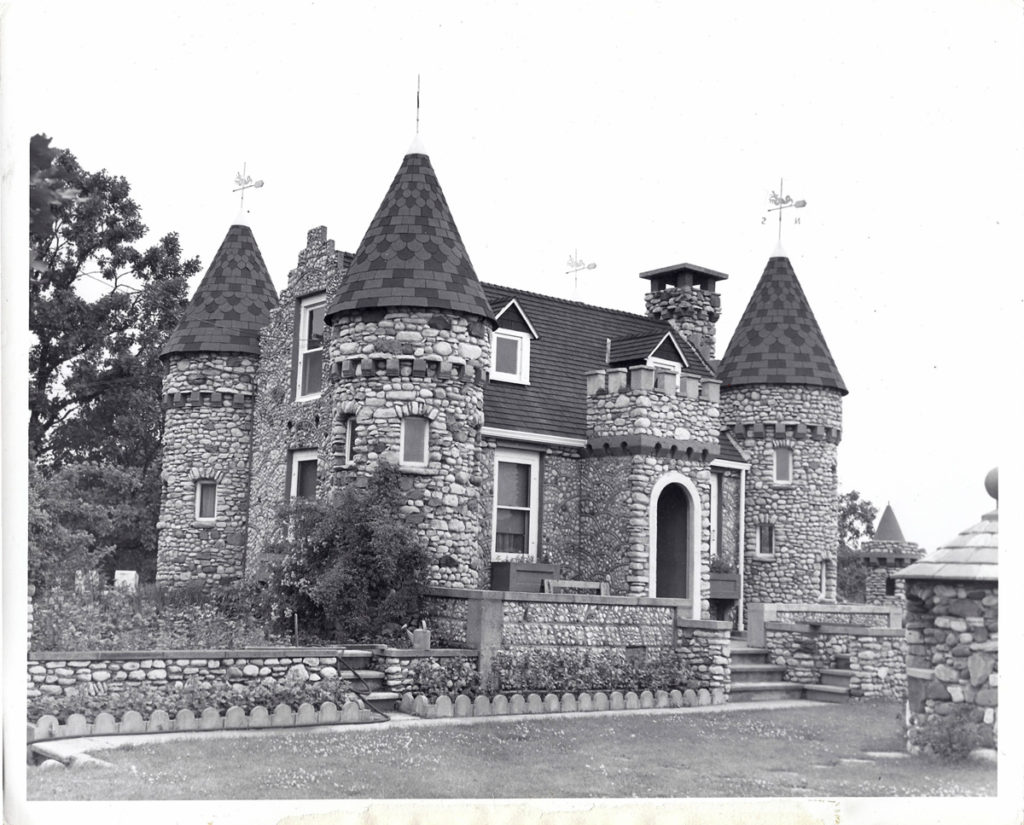
She got married, ultimately learned to cook, and then headed up the kitchen in Castleview, the restaurant that she and my father-in-law owned in Fox River Grove, Illinois. The restaurant was named Castleview because it had a view of an adjacent…you guessed it…castle…well, sort of a castle. For more information on the castle, you can look here.
The Bettendorf Castle in Fox River Grove, Illinois
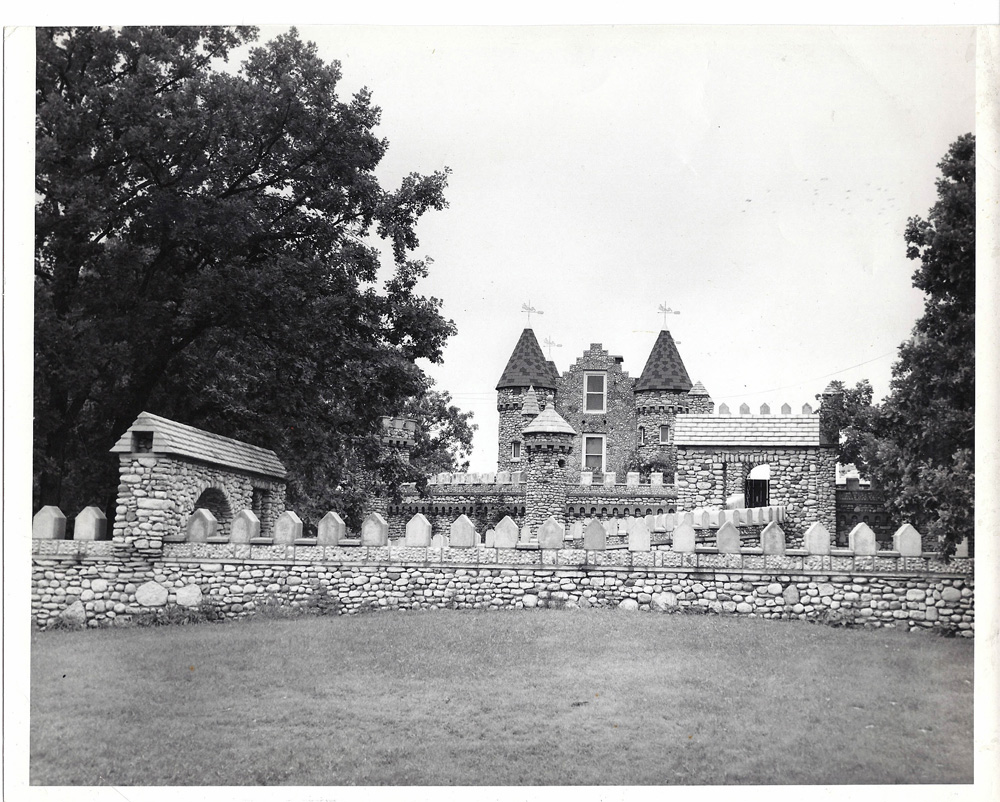
By the time I came on the scene, it was difficult to catch more than a glimpse of the castle from the restaurant due to the growth of trees and other vegetation.
Another view of the Bettendorf Castle
My mother-in-law thought my version of her sauce was “pretty good.” She did note that it was thicker than hers; probably because I cook it longer but also potentially due to a different brand of tomatoes. If you want it thinner, cook it less or (my preference) just add more water or put a splash of pasta-cooking water in the bowl with the pasta and the sauce. (Just between you and me, when I’m putting dinner on the table using my mother-in-law’s sauce, I usually boil it down a bit because it seems a little thin to me!)
Follow us on your social media platform of choice
In a few weeks I’ll be posting a recipe for Friulan Risotto that incorporates this sauce. Stay tuned.
Print Recipe
Salsa Friulana di Marisa (Marisa's Friulan Tomato Sauce)
The amount of water needed will vary based on how thick the tomato puree is, how much liquid evaporates during cooking, and how thick or thin you like your sauce. Feel free to add more water during cooking if the mixture is becoming too thick. If the sauce is too thin uncover near the end of cooking and increase the heat to cook off more water.
Like many psychiatry residents, I used to moonlight to make extra money.
The money was good and the work was usually not difficult. Many moonlighting jobs required being on-premises overnight. Most of the time, this usually just involved sleeping but, again, not always.
One of my easier moonlighting jobs was at a private psychiatric hospital in the Philadelphia suburbs. I had to do the histories, physicals, and psychiatric evaluations on the newly admitted patients and then be available for any issues that came up during my shift. Usually I got to sleep all night.
This was in stark contrast to one of my other moonlighting jobs at the crisis service that covered a swath of northeast Philadelphia. The patients were more acute and admissions unplanned. Sleep was elusive.
Follow us on your social media platform of choice
One morning as I was finishing up some work on one of the units at the private psychiatric hospital I spied a pizza box in the staff lounge, clearly intended for anyone who wanted to have some.
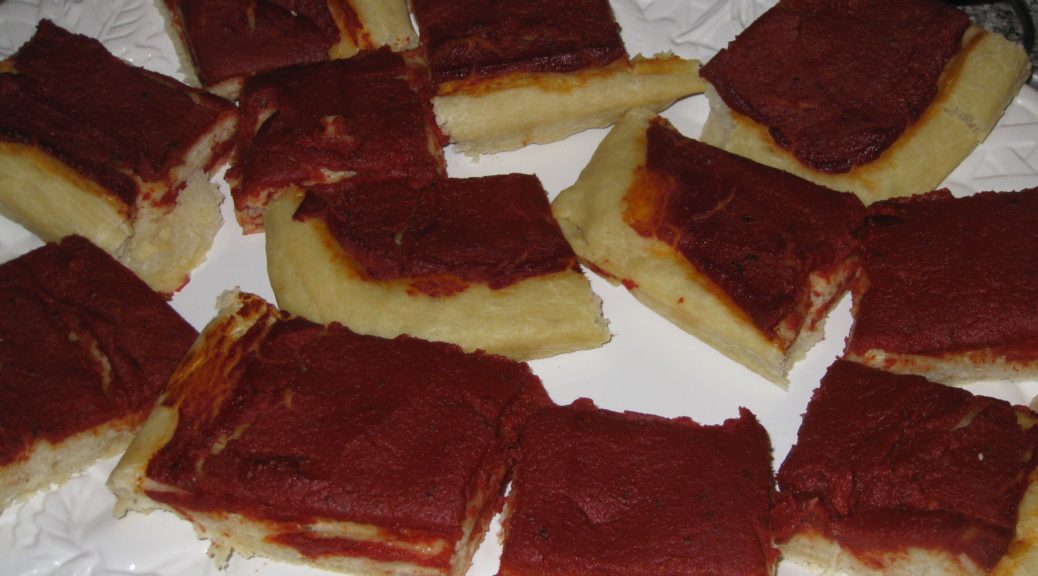
I opened the box and was presented with my first tomato pie, basically a focaccia topped with a prodigious amount of a jam-like tomato sauce. There was no cheese and there were no toppings.
I had never heard of tomato pie like this. Sometimes the term tomato pie was applied to a run-of-the mill pizza, usually by my Uncle Joe, but this was a whole different creation.
Not only was it naked, except for the tomato sauce, the sauce was very dense (almost like tomato paste) and thickly applied to the dough.
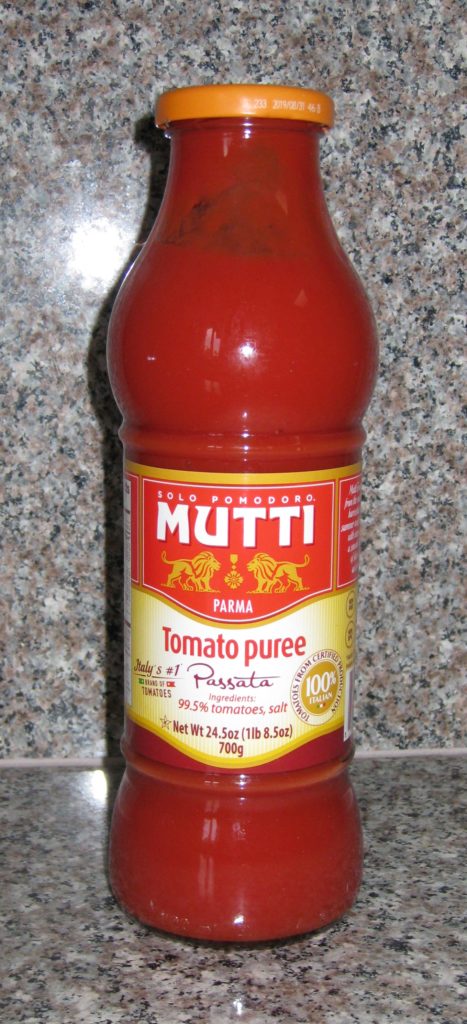
Good quality tomato puree is essential for this sauce. I prefer imported Italian tomato puree, called passato (or passata) (both are correct) di pomodoro
Growing up, a regular mid-morning Sunday snack (after church and before our major meal of the day around 1:00 or so) was a bowl of my mother’s long-simmered tomato sauce that was almost always bubbling away on the stove on Sunday mornings and a stack of bread to dip into it. Italian bread was preferred but I’d make do with American “slice” bread if need be…often six slices…to hold me over until mealtime.
Tomato pie was heaven-made for someone like me. It was bread and sauce in an easy-to-eat package. No bowl or dipping required.
Click HERE to join our mailing list and you’ll never miss a recipe again!
It’s pretty astounding to realize that I had lived in Philadelphia for about 11 years before encountering my first tomato pie. I don’t really understand why. Two of the bastions of Philadelphia tomato pie are on Ninth Street, an area that I started going to my freshman year in college.
I’m a big fan of making dough for pizza and focaccia in my bread machine. If you don’t have a bread machine, use a mixer with a dough hook. Failing that, some elbow grease and a smooth kitchen counter will do the trick.
If you have a favorite family recipe and a bit of a story to tell, please email me at santafecook@villasentieri.com and we can discuss including it in the blog. I am expanding the scope of my blog to include traditional recipes from around the country and around the world. If you haven’t seen Bertha’s Flan or Melinda’s Drunken Prunes, take a look. They will give you an idea of what I’m looking for.
Print Recipe
Philadelphia-Style Tomato Pie
Tomato Pie is a thick crust pizza dough topped with copious amounts of very thick tomato sauce. No cheese is put on the pie before baking. Some folks sprinkle grated Pecorino on the finished pie. It is usually served at room temperature. If the garlic taste in the sauce is too strong for you, the garlic can be sautéed in a small amount of olive oil before mixing into the tomato puree mixture. It is best to make the sauce a day in advance and refrigerate it. If you don’t have a bread machine, mix the dough in a mixer with a dough hook for about 10 minutes after the dough comes together. You can also mix it by hand which will give you a bit of an upper-body workout.
Grate the garlic on a Microplane grater or crush to a paste.
Combine all the ingredients for the sauce.
Cover the sauce and refrigerate overnight.
Before using, taste and adjust seasoning.
Dough
Prepare the dough using the dough cycle of the bread machine.
At the end of the cycle put the dough into an oiled bowl or covered container and allow to rise until doubled.
Assembly
Oil a half-sheet pan (13" x 18") with a few tablespoons of olive oil.
Stretch dough into the pan.
The dough will spring back. Stretch it out then allow it to rest a few minutes. Stretch more, then allow it to rest a few minutes. With resting in between stretches, the gluten will relax and the dough won't spring back.
Cover the pan. I invert another half-sheet pan on top.
Allow to rise until doubled, approximately 30 minutes.
Spread all of the sauce on top.
Bake at 350°F until crust is browned and sauce is thick, approximately 35-45 minutes.
Cool in the pan.
Cut into squares and serve at room temperature.
Sprinkle with grated Pecorino cheese, if desired, once cool.
Tomatoes…and tuna…not clams or squid…as a sauce for pasta…quite a challenge for me as a young adult!
Although pasta (spaghetti, really) with red sauce and clams or squid was in my wheelhouse as an adolescent, the idea of a red sauce with tuna was, most definitely, not!
My undergraduate advisor, and later my business partner when I set up my psychiatric practice in Philadelphia, Gene d’Aquili, was a first-generation American of Italian and French descent. I frequently cooked at his home in Berwyn on Philadelphia’s Main Line. (If you read the obituary link above, you will notice a comment about a sign that read “Fantasyland.” I was the person who had that sign painted after years of Gene referring to his estate by that name. I had the sign painted in Guyana on a trip when I was doing research for my doctoral dissertation and ended up on the Guyana Airways float for the Mashramani parade but that’s a whole other story!)
The 1981 Guyana Airways Mashramani float. I was supposed to represent one of the Canadian pilots.
Click HERE to join our mailing list and you’ll never miss a recipe again!
Gene’s father’s family was from Rome. Gene’s grandparents emigrated to the United States with their four children, Gene’s father Guido, and Guido’s three sisters, very early in the 20th century. One of the sisters died not long after coming to the United States. The other two, Auntie Helen and Auntie Louise, are the reasons I now drink bourbon (Auntie Louise) and know a lot about traditional Roman cuisine (Auntie Helen).
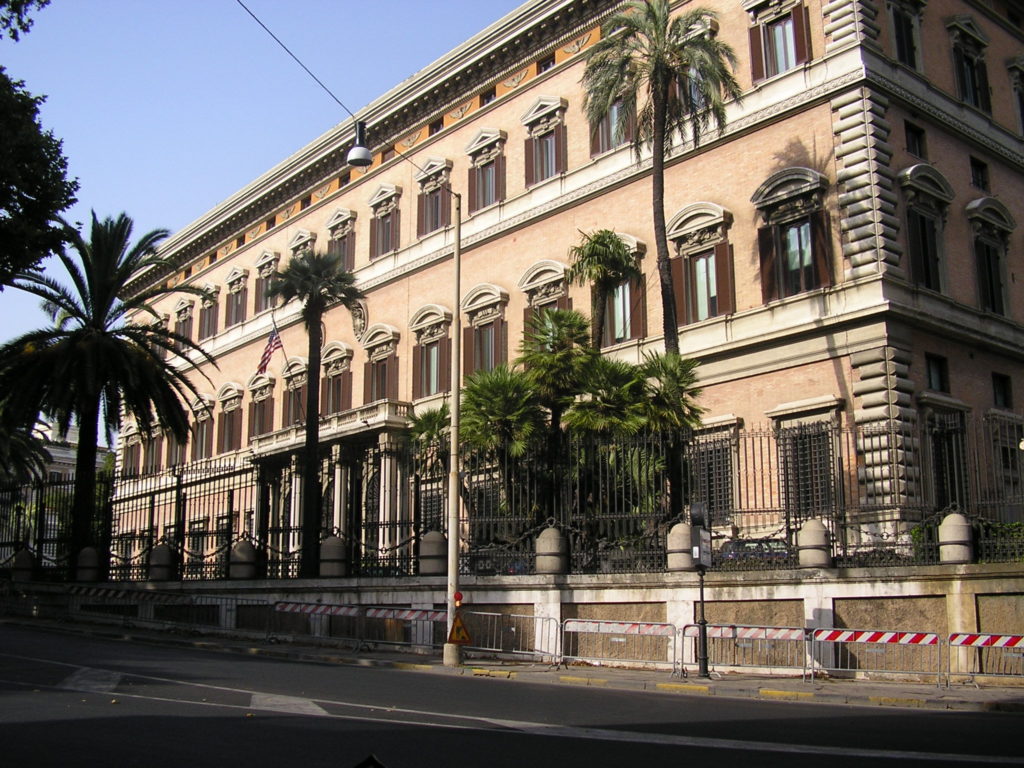
The family home is now part of the American Embassy in Rome. There are several buildings that are part of the American Embassy but I believe the palazzo pictured below was the one the d’Aquili family owned before coming to the United States.
One of the American Embassy buildings in Rome that I believe was the d’Aquili palazzo.
Follow us on your social media platform of choice
Gene’s father, Guido, was a fine artist of the New Hope School. In a previous post, I included some pictures of some of the Old King Cole murals that he painted for a private club in Trenton, NJ. Those murals ended up in the dining room of the carriage house I rented on the d’Aquili estate in Berwyn, PA when I was in medical school.
One of Gene’s ancestors was Antoniazzo Romano, a famous artist of the 15th century. His father’s artistic bent is part of a long family tradition.
The Annunciation by Antoniazzo Romano
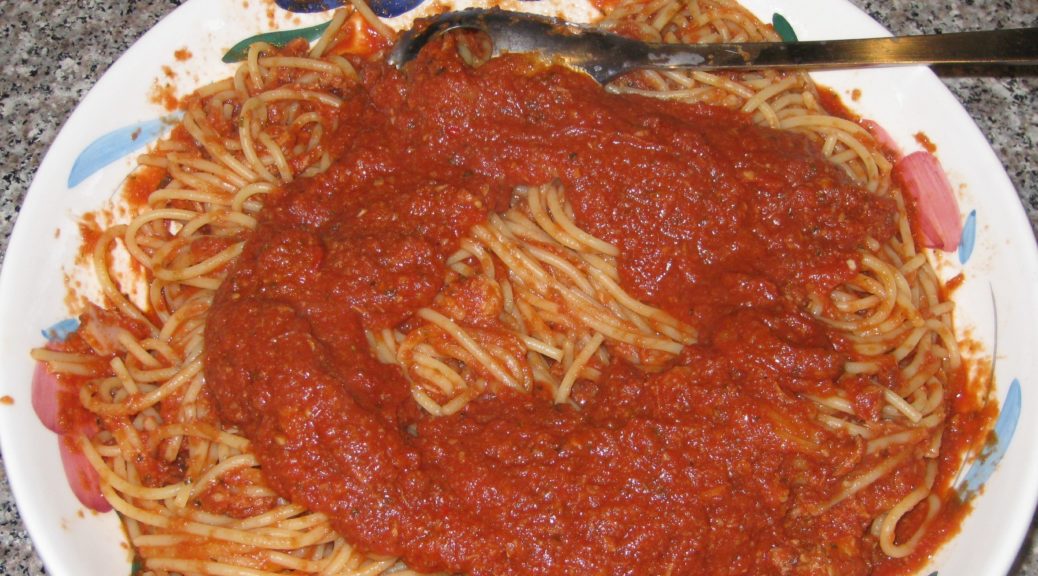
For one dinner at “Fantasyland,” really known as “Salus House,” Gene and his wife, Mary Lou, wanted to serve spaghetti with tuna sauce; a classically Italian dish but completely unknown to me at the time.
I winged it based on his description. It was basically a simple tomato sauce (what we as Americans might call Marinara but what Italians would call Pomodoro) with tuna simmered into it.
It was good, and although many years went by before I made it again, it stuck in my memory.
I’ve tweaked the recipe over the years but it really hasn’t varied much from my initial foray into making spaghetti with tuna sauce based on Gene’s description.
If you have a favorite family recipe and a bit of a story to tell, please email me at santafecook@villasentieri.com and we can discuss including it in the blog. I am expanding the scope of my blog to include traditional recipes from around the country and around the world. If you haven’t seen Bertha’s Flan or Melinda’s Drunken Prunes, take a look. They will give you an idea of what I’m looking for.
Print Recipe
Spaghetti with Tuna Sauce
Although mushrooms are not strictly traditional, their presence is not really noticeable and I think they add a bit of savoriness to the sauce. You can omit them if you wish. It is important to use good quality tuna to avoid any “tinny” taste. Italian Tonno is ideal but a good American brand will work fine. The small amount of sugar is intended to counteract the sourness that some canned tomatoes can have. Adjust up or down to your taste. The presence of the sugar should not be detectable, however.
With one set of grandparents and many relatives hailing from Southern Italy, hot peppers and foods containing hot peppers were staple features of the cuisine I grew up eating.
Hot sausage, with fennel seed, was frequently on our table and, since it was often homemade by Uncle Joe Medile, it could be as hot as we wanted. When it wasn’t Uncle Joe’s sausage, it would typically have been from Lopresti’s Market in Geistown, a suburb of Johnstown, PA.
Spicy foods more often showed up at lunch, though. There was spicy salumi, including Calabrese salami, capocollo (of which there are several types but in our house it was always the spicy one), and sopressata, among others.
There were hot banana peppers fried until tender, usually with onions. The fried peppers could be a condiment or they could be used as the filling for a sandwich. Fried hot pepper sandwiches are still one of my favorite lunchtime treats!
There were various pickled, spicy vegetables like giardineria and pickled peppers of various types. These were usually store-bought except for my cousin Angie’s pickled hot peppers.
Angie is the daughter of my mother’s oldest sister. Angie, however, was born six months before my mother. It’s kind of interesting to think about the fact that my grandmother was pregnant with my mother at the same time that my grandmother’s daughter was pregnant with Angie.
Despite their inverted ages, Angie always called my mother Aunt Theresa.
Angie’s mom, my Aunt Rosie, died at a young age. I never knew her. Aunt Rosie’s husband, Uncle Dominic lived with their other daughter, Marie.
Uncle Dominic grew vegetables, including hot peppers, in the back yard. He’s the one who taught me about fried hot pepper sandwiches for which I am eternally grateful!
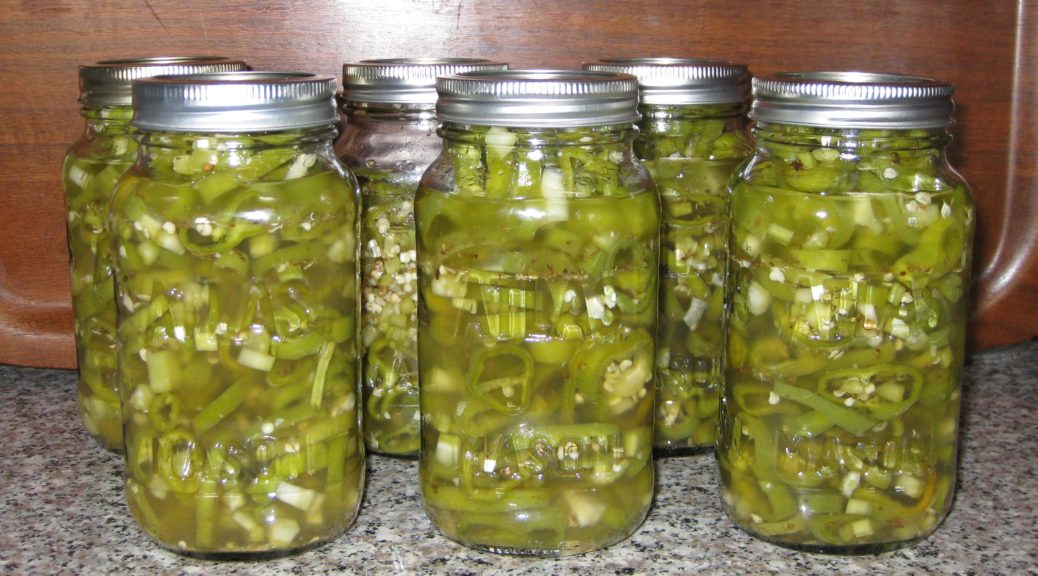
Usually I would make Angie’s Pickled Hot Peppers with Italian Banana Peppers but fresh New Mexico Green Chile is far more abundant in Santa Fe than Banana Peppers and the substitution works just fine. Years past, when we lived in Chicago and grew lots of peppers, I would even make these with jalapeno peppers.
These peppers are a breeze to make, just some slicing and dicing and pulling together a quick pickle. No actual canning or processing is required. They will keep for months and months in the refrigerator.
The recipe calls for a peck of peppers. A peck is an interesting measure. It is eight dry quarts. A dry quart, however, is not the same as a liquid quart (unless you use the British Imperial system in which case a dry quart and a liquid quart are the same volume but not the same volume as any quart used in America).
Confused? Oh how I wish we used the metric system!!!
A dry quart is slightly larger than a liquid quart. Eight dry quarts equals 9 1/3 liquid quarts. If you go to a farmers market, chances are you’ve seen produce displayed in baskets that are one peck in size. Not to worry, though. First off, the measurements aren’t that critical for this recipe, so plus or minus a quart (dry or liquid) isn’t a big deal. Second, if you have any type of large container, pot, or bucket marked in liquid measure, just fill it up a little beyond the 9 (liquid) quart mark and you’ll be good to go.
If you’re buying peppers in the supermarket and don’t want to carry a bucket to measure a peck, I suggest buying approximately four pounds of banana peppers. I found that amount of New Mexico Green Chile came very close to a peck when I measured it out.
Follow us
Click HERE to join our mailing list and you’ll never miss a recipe again!
Print Recipe
Angie's Pickled Hot Peppers
Though usually made with hot Italian Banana Peppers, I made this batch with hot New Mexico Green Chile which is far easier to source in Santa Fe than are large quantities of Banana Peppers. Four pounds of peppers should come pretty close to a peck. A peck is 8 dry quarts which is the equivalent of 9 1/3 liquid quarts. If there isn’t enough pickling liquid to fully submerge the peppers, make a little extra following the proportions in the recipe. These peppers will keep well in the refrigerator for many months. Try to let them mellow at least a couple of days before eating them…if you can!
Cut the peppers crosswise into rings a little more than 1/8 inch thick.
Cut the celery into ¼ inch dice.
In a non-reactive container large enough to hold all the ingredients, combine the vinegar, water, oil, garlic, salt, and oregano. Mix well.
Add the sliced peppers and diced celery.
Mix thoroughly. Cover and allow to sit at room temperature for 8 hours or overnight.
Using a slotted spoon, ladle the peppers and celery into clean jars.
Once the jars are filled, ladle the pickling liquid into the jars. Mix the liquid well with each ladleful so that you get the right proportions of vinegar/water and oil.
If there is not quite enough liquid to cover the peppers make a small amount more using the same proportions.
Pasta tossed with a sauce of some sort of vegetable cooked in olive oil is an Italian classic. My mother frequently used either eggplant or zucchini, cooked them until they became very soft, and then tossed them with pasta.
I have one very vivid memory of this dish and it goes back to the summer of 1992.
After my mother was diagnosed with metastatic lung cancer in early summer 1992, she came to live with us. Until the last few days of her life in early January 1993, she took over our kitchen, a very comfortable role for her.
Over the years prior to her diagnosis, she had become friendly with our next door neighbor, Carla. During the last six months of her life she and Carla spent hours every day visiting and chatting. This was a wonderful arrangement as my husband, Frank, and I were working long hours. (It also led, through a number of interesting steps, to Frank and I becoming the god-parents for one of Carla and Billy’s children a few years later. But that’s a story for a different day.)
Frank had very long work hours a couple days per week. He rarely got home before 10 PM on those days. My mother and I would eat dinner earlier and then she would set aside his food.
But she did more than that.
When he got home, she always warmed up his dinner and then sat with him at the table while he ate. She never let him eat alone. Most likely, I was upstairs in bed. Since I got up earlier than Frank, I tried to be in bed by 10 PM to watch the news and go to sleep.
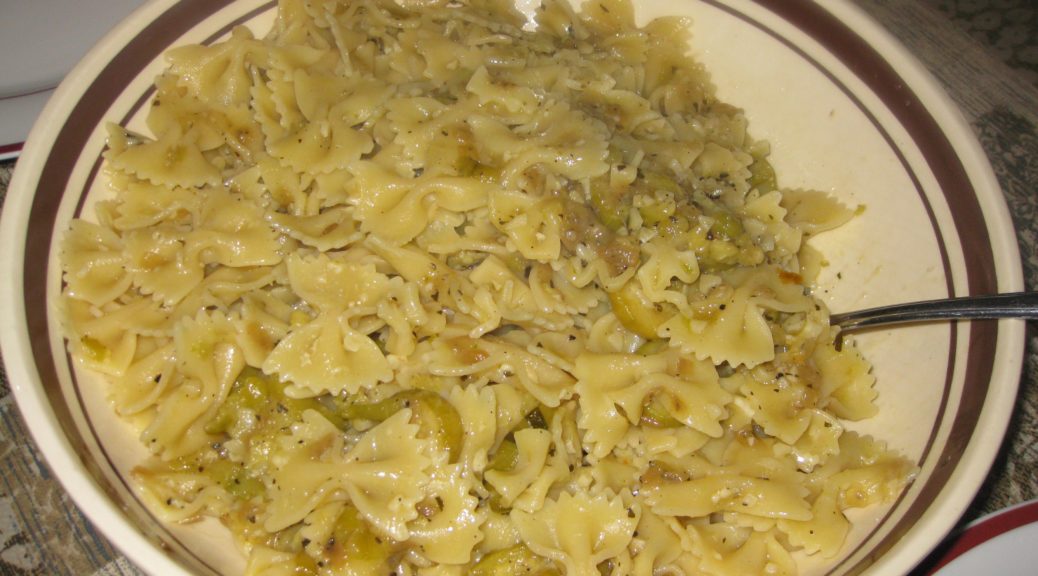
For some reason, the plate of pasta with zucchini sitting on the counter one evening to be warmed up for Frank’s dinner, knowing my mother would sit with him as he ate, is the mental image I have of this dish. I can’t make this without that image appearing in my mind. I think somehow that dish, made of very humble ingredients, came to represent the best of my mother’s nurturing characteristics.
She was a fierce advocate for her children. My sister and I both started school a year early because my mother thought we were intellectually ready (she was right) and she wasn’t going to take “no” for an answer from the school authorities.
Once, in second grade, my sister arrived home with the hem of her school uniform let down because one of the nuns thought it was too short. My mother promptly hemmed it, even shorter, and sent my sister to school the next day without ever saying a word. The hemline stayed put.
You didn’t mess with my mother where her children were concerned.
She continued cooking for us until less than a week before she died.
In those years we always gave a New Year’s Day party, a casual affair where people could come and relax and chat and eat. The Soviet Union was officially dissolved December 25, 1991. Most of 1992 saw the effects of the dissolution so the theme of our January 1, 1993 party was the dissolution of the Soviet Union.
For the party, my mother made 14 dozen stuffed cabbage rolls and 17 dozen potato pancakes!
She sat on the sofa throughout the entire party, chatting with everyone and being the life of the party. The next day she took a turn for the worse and on the morning of January 6th she died.
Some of my best memories involve food, most of which was cooked by family and friends who are no longer with us. Capturing and preserving those recipes is the way that I pay homage to them and to the culture and values they passed on to me.
Click HERE to join our mailing list and you’ll never miss a recipe again!
Print Recipe
Pasta with Silky Zucchini Sauce
Zucchini are cooked to a silky softness to make a luscious sauce for pasta. Finishing the pasta in the pan with the zucchini and adding some pasta-cooking liquid, Parmesan cheese, and a couple of glugs of olive oil creates glossy sauce with a wonderful mouthfeel. When choosing zucchini, pick small ones, preferably not more than about six inches long. They should be firm and have glossy skin. It will take about 4 or 5 to yield four cups of sliced zucchini. Crushed red pepper is completely optional. If you have fresh basil you can omit the dry basil and toss in a tablespoon or so of basil chiffonade when you combine the pasta with the zucchini.
Peel the zucchini and slice approximately ¼ inch thick.
Mince the garlic.
In a large, heavy-bottomed sauté pan large enough to hold the pasta and sauce, sauté the onion and crushed red pepper, if using, over medium heat until the onion is golden and soft. Do not brown the onion.
Add the zucchini. Toss to coat with oil. Season liberally with salt and freshly ground black pepper.
Sauté on medium to medium high heat, adjusting from time to time to avoid browning the zucchini.
Add the dry oregano and dry basil, if using, after about 20 minutes.
Continue to sauté, stirring often, until the zucchini is quite soft, but still intact. It can turn golden but should not brown. Taste and adjust salt and pepper while the zucchini is cooking.
Add the minced garlic and cook until fragrant, about 5 minutes longer.
The dish can be prepared several hours in advance to this point. Simply take the sauté pan off the heat and cover it.
Bring three quarts of water to a rolling boil. Add 1/3 cup salt. Add the pasta and cook at a full boil until the pasta is almost al dente. It should still be just the tiniest bit hard in the center.
Reserve at least one cup of pasta-cooking liquid.
Drain the pasta and add it to the zucchini in the sauté pan. Add about ½ cup of reserved pasta-cooking liquid and fresh basil, if using, and cook over medium heat at a light boil until the pasta is al dente. Add more pasta-cooking water as needed. There should be some liquid in the pan when the pasta is finished.
Off the heat, stir in the Parmigiano Reggiano cheese and 2 tablespoons of extra virgin olive oil. Add a bit more pasta-cooking liquid if needed to emulsify the cheese and olive oil to create a glossy sauce that just clings to the pasta.
Before my bread machine it was my Kitchen Aid stand mixer. Before my Kitchen Aid stand mixer it was my hands. I have always enjoyed making bread.
Junior year in college was when my bead making got started in earnest. That was the year that I lived in the International Residence Project at the University of Pennsylvania. I was notified of my acceptance into the Project, a College House arrangement that occupied two floors of a high-rise dorm, late in my sophomore year. Current and incoming residents of the Project met at a social event where I was introduced to the roommate to whom I had been assigned for the coming school year, Ray Hugh from Georgetown, Guyana.
Ray and I started hanging out together for the last part of sophomore year and found that we really hit it off. Since we were both staying in Philadelphia for the summer, and since students could not stay in undergraduate dorms during the summer, we did what most undergrads did during the summer. We sublet an apartment in Graduate Towers from graduate students who were not staying in Philadelphia for the summer but who, as graduate students, had year-long leases.
I had pretty regular hours working in a research lab for the summer but that left evenings and weekends free to explore cooking which Ray and I did together. It quickly became clear that the kitchen in our apartment in the International Residence Project, which we would begin occupying in September, was going to need an upgrade.
At my request, my father made a five-foot long kitchen counter with a laminate top. There was in integrated pull-out table that would seat two in the regular configuration but four when pulled out. That counter became the epicenter of our cooking universe. Set opposite the Pullman kitchen (three electric burners, an oven, an under-counter refrigerator, and an integrated sink) we had a very efficient kitchen set-up. A deep shelving unit that I made housed equipment and several stacks of plastic milk crates held ingredients for which there otherwise would have been no space.
I made bread on that counter every week, kneading it by hand.
I made bread the way my Italian grandmother did. Flour, water, salt, and yeast went into a big bowl. The yeast was not proofed. I mixed the ingredients by hand, adding more flour as needed. Periodically I would rub the inside of the bowl with lard. After enough flour had been added, I would put the dough on the counter and knead it for about ten minutes. The dough would always rise twice, getting punched down and kneaded lightly after each rise, before being put in bread pans for the third and final rise before being baked.
Decades later I got my first Kitchen Aid stand mixer and started using that to make bread. Good thing, too, because I was starting to have trouble with my joints from all the kneading necessary.
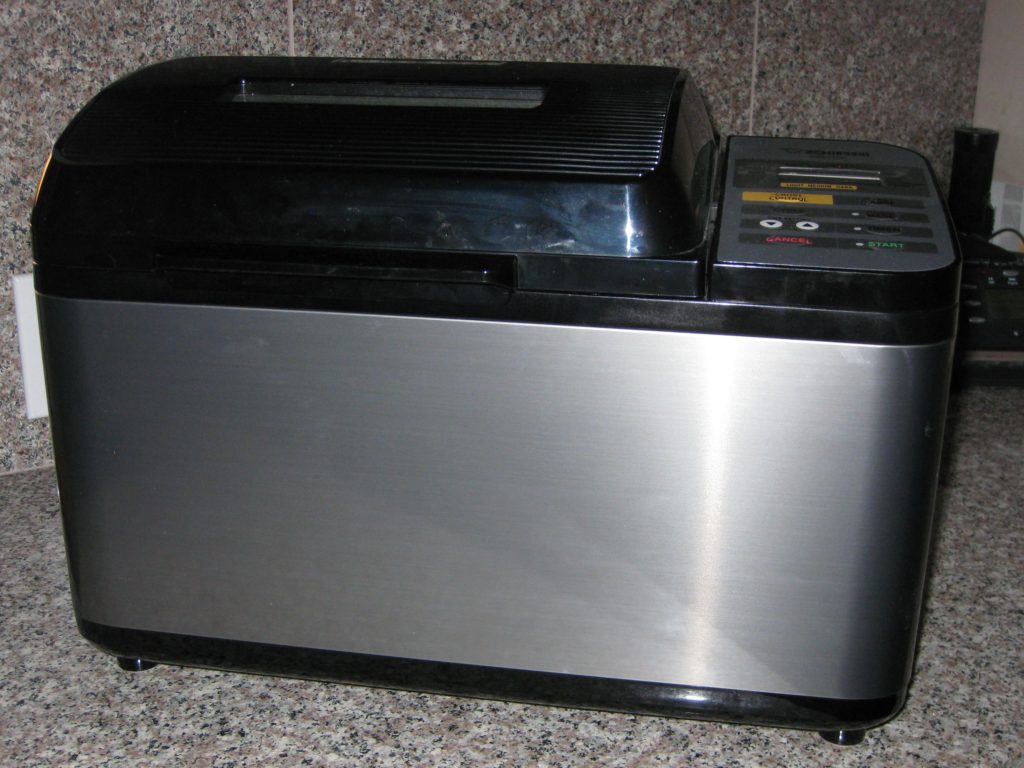
A few years ago I got my first bread machine, a Zojirushi BB-PAC20. While I have no doubt that bread baked in an oven is better I also have no doubt that we would not eat anywhere as much homemade bread if I had to do all the mixing, rising, shaping, and baking unaided.
With less than five minutes’ work spent measuring ingredients, I can push a button and have bread a few hours later. And I am completely at peace with the ingredients in my bread. No sugar. No high fructose corn syrup. No dough conditioners. No preservatives. Nothing but flour, water, salt, olive oil and yeast! The bread machine has more than paid for itself in savings.
My Zojirushi BB-PAC20 bread machine
I especially like the dough cycle. As noted in a previous blog post, I use the dough cycle to make the dough for my focaccia. A quick final rise after being shaped and the focaccia is ready for the oven. The dough cycle also makes pizza dough in a snap. I like to make it at least one day in advance and allow it to rise in the refrigerator. Two days in advance is even better.
I still pretty much use the same recipe for bread dough that I followed in college though I’ve swapped out the lard for olive oil and modified the directions to suit mechanization instead of hands. (Every now and then, I just get the urge to do it by hand, though!)
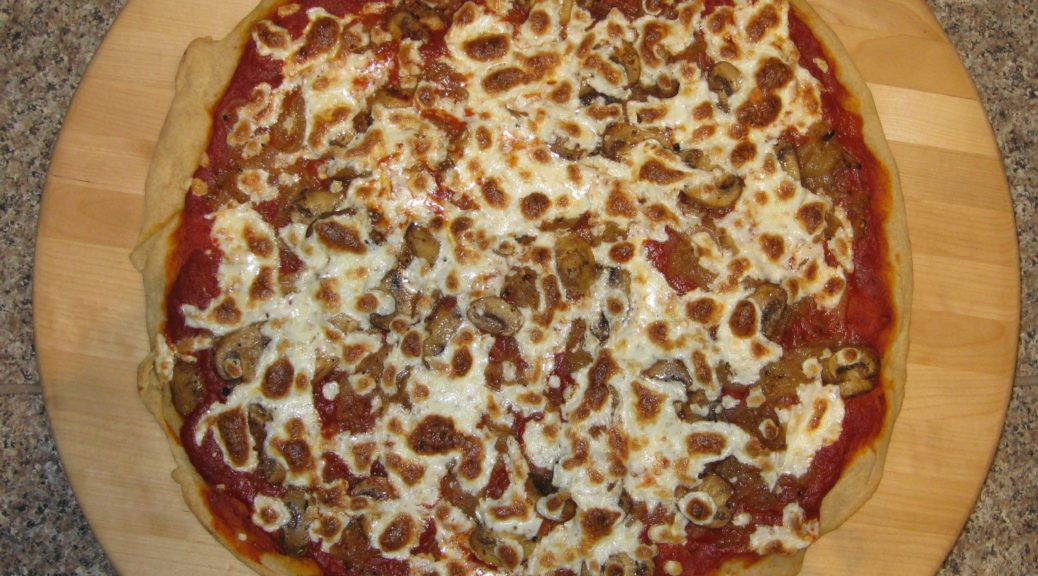
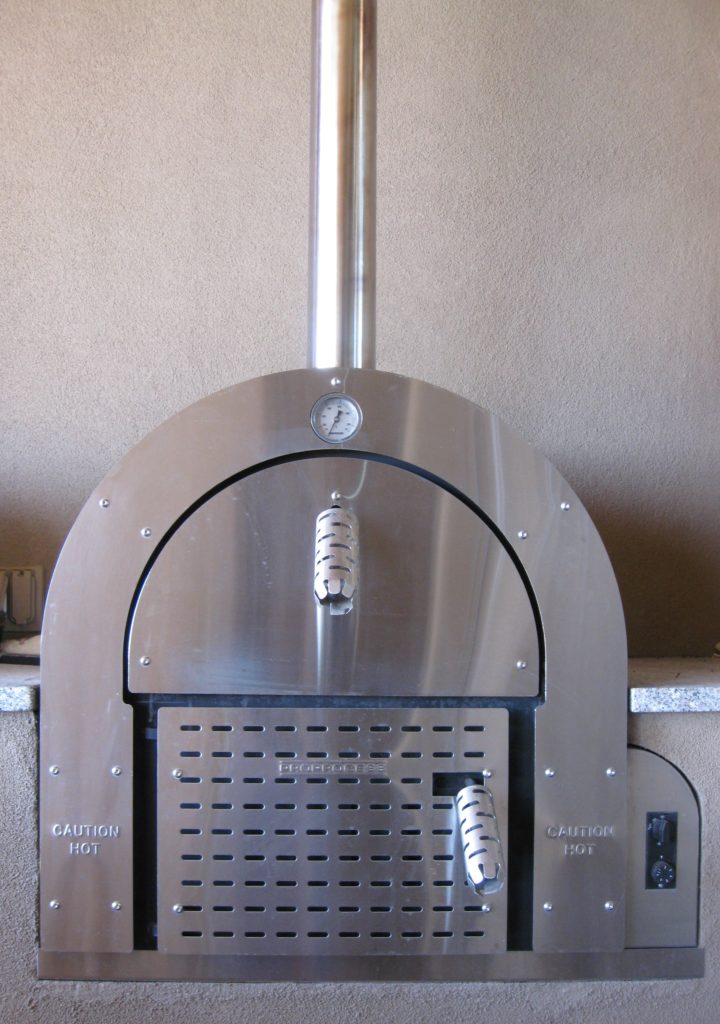
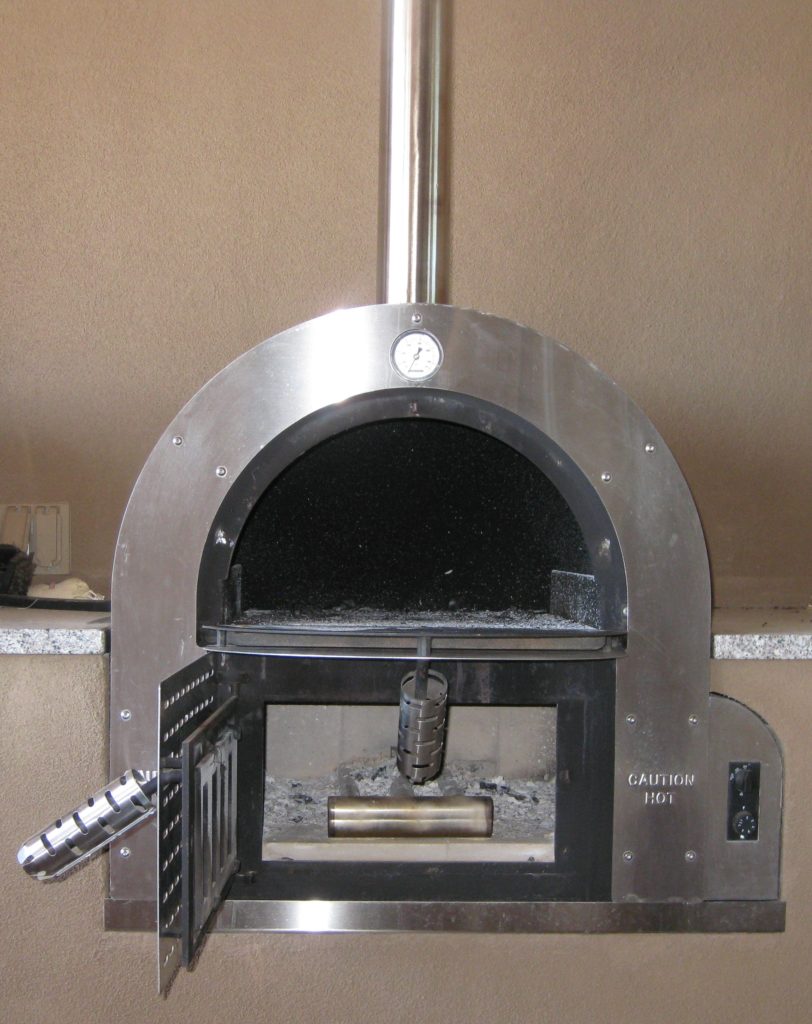
Usually I bake pizza in a wood-burning oven. Since wood-burning ovens are not very common, the pizza featured in this post was baked in a conventional oven. I don’t have a pizza stone since I don’t usually bake pizza in the oven. All the better though, since I know few people who have pizza stones. I simply went old school and used heavy aluminum pizza pans. I didn’t even use the convection feature!
Our DoughPro wood-burning oven from AustraliaBaking chamber above and fire chamber below
Until a few years ago I always cooked my pizza sauce. Then I tried uncooked sauce as is often done in Naples and found that I really prefer it. It has a fresher taste and it is really easy to make. (Sorry mom!)
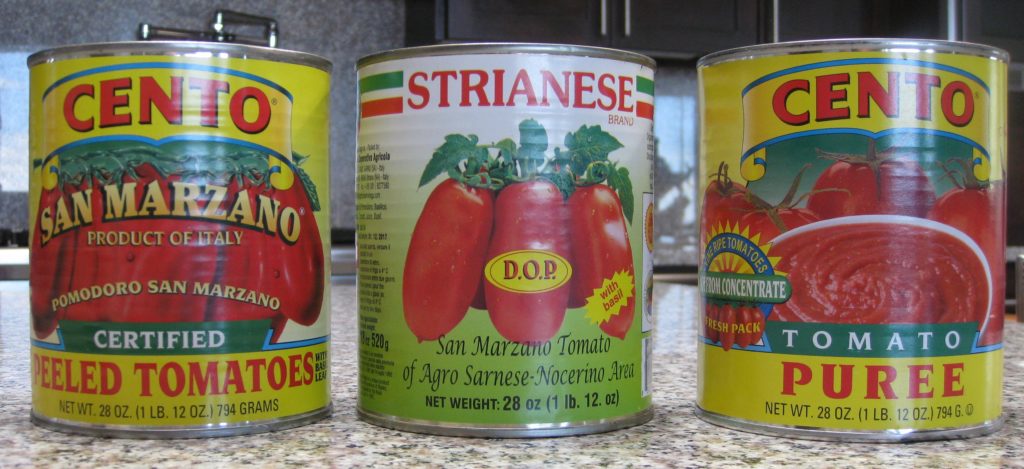
I usually use tomato puree because I like a smooth sauce but crushed tomatoes work well if you prefer a chunkier sauce. You can also just whizz a can of whole peeled tomatoes in the blender or food processor to whatever degree of chunkiness or smoothness you want.
An array of tomato products
Print Recipe
Homemade Pizza
Make the dough at least one day before you plan to bake the pizzas. The dough will benefit from the slow rise in the refrigerator. Two days is even better. Be sure to put the balls of dough in containers that seal well to keep the dough from drying out and that are large enough to hold the dough after it rises. Remove the dough from the refrigerator the morning of the day you plan on making pizza. It will take 3-5 hours to warm up and rise. If you’re not ready to make pizza when the dough has doubled in bulk, just punch it down and allow it to rise again. The dough recipe makes enough for two 16 inch pizzas but the sauce is enough for four. Extra sauce will keep in the refrigerator for 4-5 days. Since I make so much bread, I buy dry yeast in bulk. You can substitute one envelop of yeast for the two teaspoons of yeast called for in the recipe. For the sauce, use tomato puree if you prefer a smoother sauce and crushed tomatoes if you prefer a slightly chunkier sauce. In either case, really good tomatoes are called for. Buy genuine San Marzano tomatoes imported from Italy, if possible. I find Cento to be a good brand and generally available in the markets in my area.
One or two days before you plan to bake the pizza, prepare the dough.
You can use the dough cycle of a bread machine, the dough hook of a stand mixer, or you can make the dough by hand following the directions in the blog post.
If using a bread machine, follow the manufacturer’s directions for the dough cycle.
If using a stand mixer, put warm, not hot, water in the bowl of the mixer. Add four cups of flour, the yeast, and salt and begin to mix. Gradually pour in the olive oil. Add enough of the remaining flour to make a slightly tacky dough. Chances are you will need all of it. Allow the dough hook to knead the dough for 8-10 minutes.
If making the dough by mixer or hand, oil the dough and place in an oiled bowl. Allow the dough to rise at room temperature until doubled in bulk, covered lightly with a kitchen towel.
After the dough has doubled, or when the bread machine has completed the dough cycle, remove the dough and punch it down.
Divide the dough in half and shape into two balls. Rub the surface of each ball with oil and put each one into a separate oiled bowl or LARGE plastic container.
Cover tightly using plastic wrap if needed.
Put the dough in the refrigerator until the morning of the day you plan to bake the pizza.
On baking day, remove the dough from the refrigerator in the morning and allow it to sit at room temperature until doubled in bulk. This will take 3-5 hours (or maybe a bit longer if your refrigerator is really cold). If you are not ready to bake the pizza, just punch the dough down again and let it rest. It is better to err on the side of taking it out of the refrigerator too early rather than too late!
Pizza Sauce
Mince the garlic.
Combine all the ingredients for the sauce.
Cover and refrigerate overnight to allow the flavors to mellow.
Some brands of tomatoes can be a bit tart. Taste the sauce right before you use it and, if necessary, add up to ½ teaspoon of sugar but no more. (Some people consider this heresy but it is a common Italian technique to counter tomatoes that are too tart. Remember agricultural products vary and sometimes you need to use your judgment to correct a situation that is not addressed by the recipe.)
Assembly of Pizza
Shred the mozzarella on the tear-drop shaped holes of a box grater. Reserve.
Lightly dust a 16 inch round pizza pan with cornmeal.
Put the dough on a metal pastry "board" or a second pizza pan and gently stretch it by pressing on it and moving your hands apart. The dough will spring back. Each time it will stay stretched a little more. After six to eight stretching motions, allow the dough to rest for several minutes to permit the gluten to relax. This will make it easier to stretch. I usually allow two or three such rest periods.
Stretch dough into a 16” round.
Flip the dough over onto the cornmeal-dusted pizza pan. (OK, I don't have the skill to stretch the dough by tossing it in the air and putting it on the pan so this is my hack. If you can toss pizza dough in the air, please give me a lesson!)
Spread the sauce on dough to within one inch of the edge.
Add toppings of your choice, if desired.
Evenly sprinkle with shredded mozzarella.
Bake the pizza at approximately 450°F until the edges are golden brown and the dough is fully cooked, approximately 12-15 minutes.


")
")
")
")
")
")
")
")
")
")
")
")
")
")
")
")
")
")


")
")
")
")
")
")
")
")
")
")
")
")
")
")