Gary’s Barbecue Rub

June 15, 2018

As summer approaches, my thoughts of cooking turn to the outside.  Luckily, at 8000 feet, it’s not a problem to use the stove or the oven inside, even for extended periods of time, as the outdoor temperature is usually quite moderate and the house doesn’t really heat up.

Even so, summer instigates a more leisurely style of cooking for me.

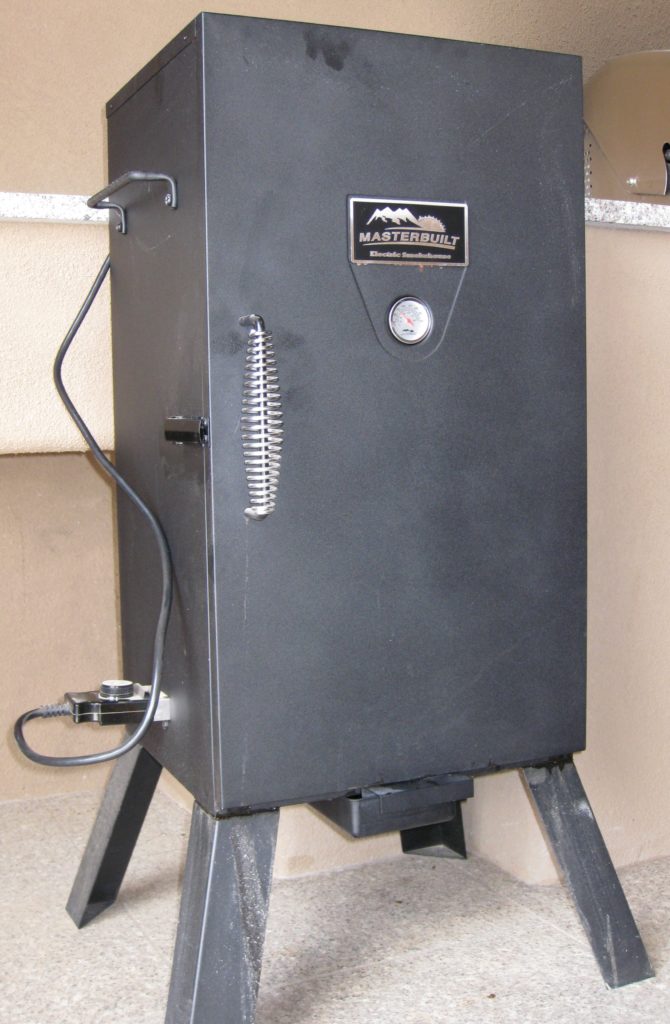
I like using my smoker, or grill, or wood-burning oven.

My smoker  has an adjustment for the heat output but not temperature, per se. If the wind or external temperature change, the internal smoker temperature changes, too.

There is no doubt that I have more of an Italian palate: more savory, less sweet.  In contrast, an American palate generally accepts much more sweetness in an array of foods.


Join our mailing list and you’ll never miss a recipe again!


Once, when my husband’s Great Uncle Duilio (born and raised in Italy but then residing in Argentina) was visiting, we made an American breakfast of pancakes and bacon.  He totally got into using maple syrup on the pancakes, and loved the bacon, but couldn’t understand the concept of allowing the sweet syrup to touch his bacon.  It just wasn’t right.

By European standards, American barbecue is sweet.  Even when we, as Americans, think it isn’t.

My wood-burning oven can also run on natural gas. It is great for pizza.

I guess I’ve developed an appreciation for a sweeter, more American approach to certain foods…barbecue, baked beans, bacon with maple syrup, and so forth.  Definitely, though, I still prefer foods less sweet than many of my friends would find acceptable.

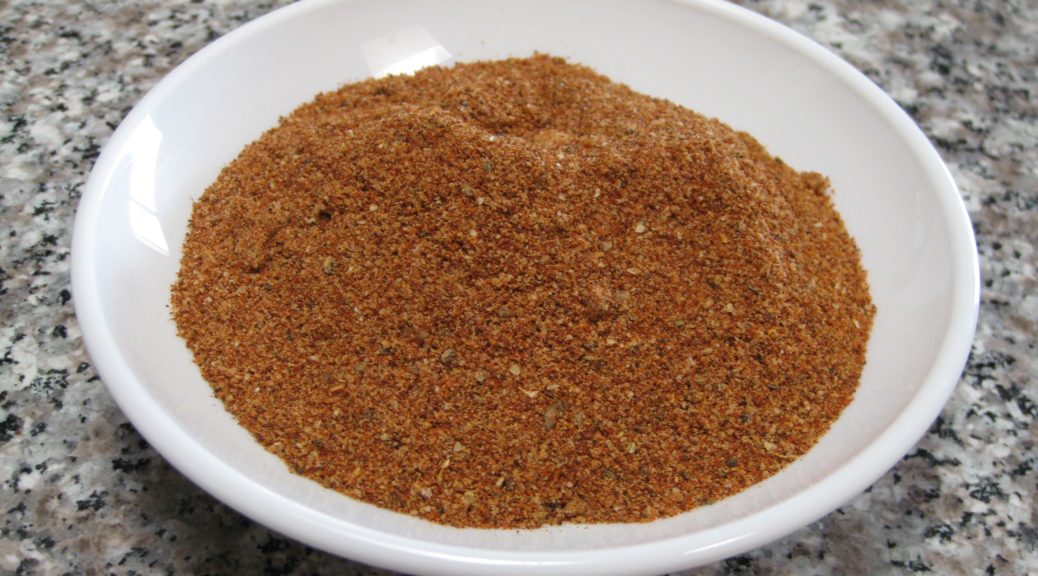
Today’s recipe is quite simple.  It’s a barbecue rub.  I developed it and have successfully used it on chicken, turkey, pork and beef.

In an upcoming post, I will describe my method for preparing skin-on, bone-in chicken thighs with both barbecue rub and barbecue sauce.


Follow us on your social media platform of choice


My DCS grill has a wood chip container with its own flame for precisely controlled smoking, whether low temperature or high temperature

If you’re at all interested and, like me, want to be able to replicate you cooking over and over again, you need to develop your own barbecue rub rather than relying on a pre-mixed, store-bought version.  This recipe is as good a starting point as I can think of.  Honestly, it only takes a few minutes to mix enough for a summer of barbecuing!

Print Recipe
Gary's Barbecue Rub
If you can’t find dried New Mexican chile molido, substitute a mixture of cayenne and paprika, half and half or to taste. Chile molido is pure ground dried red chile. There are no additional herbs or spices. It is NOT chili powder!! There aren’t really any pictures for this recipe. All they would show is measuring out dry ingredients. Enjoy the simplicity.
Votes: 0
Rating: 0
You:
Rate this recipe!
Prep Time 10 minutes
Servings
cups
Ingredients
Prep Time 10 minutes
Servings
cups
Ingredients
Votes: 0
Rating: 0
You:
Rate this recipe!
Instructions
  1. Combine chile, paprika, garlic powder, onion powder, salt, and celery seed in a jar.
  2. Grind black pepper in a coffee grinder.
  3. Add oregano to black pepper and grind again.
  4. Add pepper-oregano mixture to the contents of the jar.
  5. Pulverize the brown sugar in the coffee grinder.
  6. Add the brown sugar to the other ingredients. Mix well.
Recipe Notes

Copyright © 2018 by Villa Sentieri, LLC. All rights reserved.

Share this Recipe

Pear, Celery and Arugula Salad with Lemon Dressing

December 26, 2016

I grew up in a family that put salad on the table at the same time as the rest of the meal.  I married into a family that does the same.  However, in the years between leaving home to go to college and getting married I most definitely converted to serving salad after the main part of the meal was over.  Notice, I didn’t say main course because the other change I made was thinking of the meal as comprising an antipasto (even if it is just a nibble of cheese and a cracker for a family meal) followed by, what Italians would call, the first course (il primo piatto) followed by a second course (il secondo piatto).

In an Italian meal, the first course is usually pasta, or soup, or risotto.  The second course  usually consists of meat or fish with several side dishes (contorni).  After that comes the salad.  Granted, there are exceptions to this sequence, even in Italy.  One of the most classic exceptions is serving Risotto alla Milanese with a breaded and fried veal chop.  OK, so these days, I try not to eat baby animals, so veal is pretty much off the menu at our house, but the point is Risotto alla Milanese is typically served with the meat, not before the meat.

The general rule that the sequence is antipasto, then first course, then second course, then salad was made abundantly clear when my Italian tutor had dinner at our house a few years ago.  For some reason, even though my in-laws grew up in Italy, we served spaghetti and meatballs (very good spaghetti and meatballs, mind you!).  Where it got interesting, however, is that we all ate the spaghetti and meatballs at the same time (for full disclosure, I didn’t touch my salad until afterwards).  My tutor, hailing from Italy however, ate her pasta first.  Only then did she put a meatball or two on her plate for her second course.  Only after that did she touch her salad!

When I am serving dinner for company, the salad always comes after the second course.  I’d rather not serve salad than serve it with the rest of the meal.  Salads, by design, have sharp dressings meant to cleanse the palate.  You can’t go back and forth between a subtly seasoned dish (whether it be pasta or fish or meat) and salad and do justice to the subtlety of the first.  The vinegar and/or lemon juice and/or mustard (and/or whatever else you put in your salad dressing) doesn’t allow that.  Forget what it does to the wine that you’ve paired with the dish!  If it’s just family, however, in the interest of domestic harmony, the salad goes on the table at the beginning.  I still don’t eat mine till the end but I can’t say the same for others.

Print Recipe
Pear, Celery and Arugula Salad with Lemon Dressing
Pears add a welcome freshness to this salad that is a perfect antidote to winter when so little really good fresh produce is available. This may be a lot of pear for some but the sweet juicy taste is a great contrast to the crunch of the celery and the peppery bite of the arugula.
Votes: 0
Rating: 0
You:
Rate this recipe!
Prep Time 15 minutes
Servings
people
Ingredients
Prep Time 15 minutes
Servings
people
Ingredients
Votes: 0
Rating: 0
You:
Rate this recipe!
Instructions
  1. Squeeze about half a fresh lemon to make 2 ½ tablespoons of juice. Allow the juice to sit, uncovered, at room temperature for about an hour before using it to dress the salad. The flavor of the juice will improve.
  2. Remove the top of the celery stalks, the part where the center stalk gets much thinner and smaller stalks come off the sides. Reserve these pieces for another use. Cut the remaining celery stalks on a long diagonal to create thin long pieces.
  3. Using a sharp knife or cheese paring knife, cut about 18 curls of Pecorino Romano cheese.
  4. Peel the pears and cut into quarters lengthwise. Core the pears. Slice into thin wedges.
  5. Combine the lemon juice and olive oil. Shake well to combine.
  6. Toss the arugula and celery with about 2/3 of the lemon-olive oil dressing. Season with salt and pepper to taste and toss again.
  7. Divide the arugula and celery onto six plates.
  8. Toss the pears in the remaining lemon-olive oil dressing. Arrange the pear slices and Pecorino Romano cheese on top of the arugula. Season with freshly ground black pepper. Serve immediately.
Recipe Notes

Copyright © 2016 by VillaSentieri.com.  All rights reserved.

Share this Recipe

Cannellini alla Toscana (Tuscan-Style White Kidney Beans)

December 16, 2016

These Tuscan-style white kidney beans are deceptively simple.  A lot of flavor is coaxed out of a few ingredients.  They are great on their own as a side dish or a vegetarian main dish.  They make wonderful pasta e fagioli (pasta and beans).  They freeze well so you can always have them on hand.  The flavor is so good, you won’t resort to canned beans again!

Quite typically, these beans would have been made in the fading embers of a fire, often left to cook overnight.  Although the contemporary version uses a standard kitchen oven, I made them in our wood-burning oven a while back.  It was a challenge to keep the temperature at 250-275ºF but in the end it was worth it.  There was a very subtle smoky flavor to the beans.

Buy the best quality and freshest dried cannellini beans you can find.  If the beans are old they may never completely tenderize.  I particularly like the Marcella Beans from Rancho Gordo.

Print Recipe
Cannellini alla Toscana
Votes: 0
Rating: 0
You:
Rate this recipe!
Cuisine Italian
Prep Time 15 minutes
Cook Time 3-5 hours
Passive Time 12 hours
Servings
people
Ingredients
Cuisine Italian
Prep Time 15 minutes
Cook Time 3-5 hours
Passive Time 12 hours
Servings
people
Ingredients
Votes: 0
Rating: 0
You:
Rate this recipe!
Instructions
  1. Pick over and wash the cannellini beans. Soak them in abundant water to cover, under refrigeration, for 6-8 hours or overnight.
  2. Drain the beans and put them in an earthenware bean pot or ovenproof casserole with a lid. Add water to just reach top of beans then add another 2 cups of water.
  3. Using the side of chef's knife, bruise the garlic.
  4. Add garlic, sage, bay leaf, peppercorns and olive oil to the beans. Cover and bake at 250ºF for 2 hours.
  5. Add the salt and stir well. Cover and cook the beans, stirring every 30-45 minutes, until they are creamy and not at all chalky. Do not overcook the beans or they will blow apart. This could take another one to three hours depending on the beans and your elevation.
Recipe Notes

The beans are best made a day or two in advance.  If not serving immediately, cool the beans to room temperature and refrigerate or freeze.  When ready to serve, warm the beans in a 250ºF oven.

Copyright © 2016 by VillaSentieri.com.  All rights reserved.

Share this Recipe