Green Beans with Tomato Sauce and Bacon

February 27, 2017

Earlier this month I wrote about my “crunchy vegetable” phase of cooking back in the 1970’s.  One of the dishes I was reacting to was my mother’s green beans with tomato sauce and bacon.  Honestly, though, I can’t tell you why.  It was, bar none, my favorite vegetable dish growing up.  Why, when I started cooking in my late teens, I thought I could make it better by cooking the beans until they were just crunchy is beyond me.

Chalk it up to youthful indiscretion.

Americans served a lot of mushy vegetables back then, no doubt, but the reaction shouldn’t be to turn every vegetable crunchy.  But I was just learning to cook and had a lot to learn, not only about technique, but about understanding the essence of a dish.

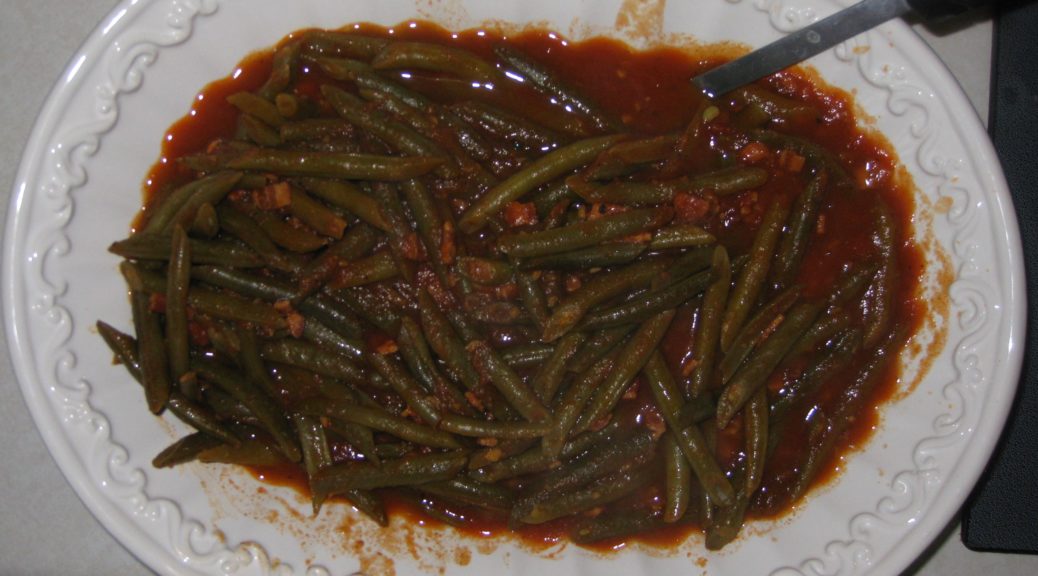
The essence of this dish is the silky texture (most definitely not mushy) of the beans cooked for a couple of hours in tomato sauce.  The textural change is accompanied by a flavor change that is unobtainable by quickly cooking the ingredients.

It’s actually pretty difficult to turn these beans mushy unless you boil them too long before adding them to the tomato sauce.  The tomato sauce reacts with the beans to somehow inhibit the development of mushiness.  I’m not sure, but it think it might be the acid in the tomatoes.

That first four minute boil is critical, however.  One time, thinking I could eliminate a step, I tried putting the cut up beans in the sauce without parboiling them first.  Mistake!  Four hours later the beans were still not cooked properly!

Green beans cooked in tomato sauce is a classic Italian combination.  The use of bacon clearly signals that this is Italian-American, however.  Italian recipes might use pancetta but not bacon.  Smoked foods are uncommon in traditional Italian cuisine.  The few that appear really stand out.

Pancetta and bacon are made from the same cut, pork belly.  Both are cured but only bacon is smoked.  Although I’ve made other versions of green beans in tomato sauce that are traditional Italian, rather than Italian-American, I keep coming back to this one as my favorite.

Print Recipe
Green Beans with Tomato Sauce and Bacon
These long-simmered green beans in tomato sauce with bacon are an Italian-American favorite. The long, slow cooking is really essential to achieving the right texture and flavor. Although I've specified the amount of water in cups, when cooking with tomato paste my mother always measured water by the can. This dish would have had five tomato paste cans of water. She didn't quite fill them to the top so each can held about 5 1/2 ounces of water, or a little over three cups total. You may need to add more water, or to boil some away, to get a thick sauce.
Votes: 0
Rating: 0
You:
Rate this recipe!
Course Vegetables
Cuisine Italian
Prep Time 25 minutes
Cook Time 3 hours
Servings
people
Ingredients
Course Vegetables
Cuisine Italian
Prep Time 25 minutes
Cook Time 3 hours
Servings
people
Ingredients
Votes: 0
Rating: 0
You:
Rate this recipe!
Instructions
  1. Cut the bacon into matchstick-sized pieces.
  2. Mince the garlic.
  3. In a heavy-bottomed pot, large enough to ultimately hold the beans, gently sauté the bacon until golden brown.
  4. Add the minced garlic to the bacon and bacon drippings and sauté until fragrant and just beginning to turn golden, about one minute.
  5. Add the tomato paste and sauté until it turns a shade darker and smells sweet.
  6. Add the water, stirring to combine. Cover and bring to a boil.
  7. Reduce to a simmer. Add salt, freshly ground black pepper to taste, oregano and sugar. Simmer, partially covered, for 45-60 minutes, stirring occasionally.
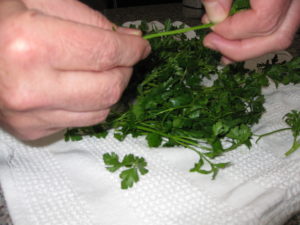
  8. Meanwhile, cut the tips off the beans at a diagonal. Cut the beans into pieces about 2 to 2 ½ inches long, also on the diagonal.
  9. Wash the beans in several changes of cold water. Cover with water and allow the beans to soak for 15 to 20 minutes, to fully plump up with water before cooking.
  10. Bring a large pot of heavily salted water (at least 4 quarts of water and ¼ cup of salt) to a boil.
  11. Drain the beans, add to the boiling water, and return to a boil as quickly as possible.
  12. Boil until the beans are just beginning to get tender, approximately 4 minutes. They will cook much longer in the sauce so be careful not to overcook them at this point.
  13. Drain the beans and add to the tomato sauce, which should have been cooking for 45-60 minutes by this point.
  14. Simmer until the beans are silky, but not mushy. This can take 2 hours, plus or minus. Go by texture, not time. The beans should be silky but still have some body.
  15. Taste once or twice while cooking and adjust salt, pepper and, if you wish, oregano.
Recipe Notes

You can make the sauce and partially cook the beans in advance. After the beans have been boiled, quickly chill them in a bowl of ice water. Cool the cooked sauce to room temperature.  Drain and add the partially cooked beans to the sauce.  Refrigerate until ready to complete cooking.

Copyright © 2017 by VillaSentieri.com. All rights reserved.

Share this Recipe

Mom’s Pasta e Fagioli (Mom’s Pasta and Beans)

February 22, 2017

We didn’t eat a lot of prepared foods growing up.  In fact we almost never did.  OK, there were a few times in the early 60’s where I got to try out those recently-invented “TV Dinners.”

I was well into adulthood before I had a real appreciation for the quality of the homemade food that was put on our table every day.

My mother made putting great food on the table seem effortless.  I remember many Sunday mornings when I’d wake up to find her making ravioli from scratch for our big midday meal: cooking the beef and spinach filling, preparing the dough, rolling and filling the ravioli, all the while a big pot of tomato sauce bubbling away on the stove.  It was just a family Sunday dinner!

Weekday meals were usually less elaborate but no less delicious; maybe homemade sausage, pan-fried potatoes, and a vegetable or two or maybe pasta with sauce leftover from Sunday.  It was always fun to walk into the kitchen to find her making something I’d never had before; something that her mother used to make.  Sometimes that wasn’t even at a defined meal time.

Now I think I understand.  My mother died in 1993 and I bet I didn’t make her version of pasta e fagioli for 20 years after her death.  Then one day, the desire for it just struck me and there I was, in the kitchen, cooking.

It’s become part of my regular routine again after that long hiatus.  Sitting down to a bowl of my mother’s pasta e fagioli is comforting; almost as comforting as if she had made it for me.  There’s just something about the combination of pasta, beans and red sauce that I can’t explain.  It triggers an emotional bridge to what feels like an earlier time in my life.  I’m guessing something similar prompted my mother to occasionally whip up dishes from her youth that she hadn’t made in decades, if ever.

Print Recipe
Mom's Pasta e Fagioli (Mom's Pasta and Beans)
Follow the directions for Cannelini alla Toscana but use dried lima beans instead of cannellini and substitute ½ teaspoon of dried oregano and a sprig of fresh rosemary for the sage. There will be leftover beans that you can freeze or refrigerate for another use. You can also use two 15 ounce cans of Butter Beans in place of the home-cooked lima beans. Mom always used ditalini for this dish. These days, when you can find them (and it can be challenging) they have usually been upgraded from ditalini to ditali, though they are exactly what she used. More frequently, I use a slightly larger, but still rather small, pasta such as the mezzi rigatoni shown here.
Votes: 0
Rating: 0
You:
Rate this recipe!
Prep Time 15 minutes
Cook Time 1 1/2 hours
Servings
people
Ingredients
Prep Time 15 minutes
Cook Time 1 1/2 hours
Servings
people
Ingredients
Votes: 0
Rating: 0
You:
Rate this recipe!
Instructions
  1. Finely dice the onion. Sauté the onion in ¼ cup of olive oil until soft and golden.
  2. Add the crushed red pepper and sauté another minute.
  3. Add the tomato paste and sauté, stirring frequently until the tomato paste turns a shade darker and smells sweet, 2-3 minutes.
  4. Add the water, oregano, basil and salt and pepper to taste. Stir well to fully incorporate the tomato paste.
  5. Bring to a very low boil, partially covered, and cook 30-45 minutes stirring occasionally. Adjust seasoning as needed, tasting several times as the sauce cooks.
  6. Meanwhile, sauté the garlic in the remaining ¼ cup of olive oil very slowly until browned. Remove from the heat and reserve.
  7. The dish can be cooked several hours ahead to this point.
  8. Bring three quarts of water and three tablespoons of salt to a boil.
  9. While the water is heating, add the beans and their liquid to the tomato sauce, return to a simmer, and cook, partially covered till the pasta is ready.
  10. Cook pasta until it still has a small bit of chewy center. It will cook more in the sauce. Scoop out and reserve two cups of the pasta cooking liquid.
  11. Drain the pasta. Add the pasta to the tomato-bean mixture. Add the browned garlic and olive oil. Stir well, cover and cook on very low heat until the pasta is cooked but al dente and the sauce has thickened. Add some of the pasta cooking liquid as needed from time to time to create a smooth sauce.
  12. Off the heat stir in the Parmigiano Reggiano cheese. Taste and adjust seasoning.
  13. It is not unheard of for me to add an extra glug or two of olive oil at this point to get a luscious sauce. Stir and decide if another dash of pasta-cooking water is needed, as well.
Recipe Notes

Mezzi Rigatoni


Copyright © 2017 by VillaSentieri.com. All rights reserved.

Share this Recipe

Cavolfiore alla Friulana (Cauliflower Friuli-Style)

February 1, 2017

I started cooking in the early 1970’s when most cooking authorities were trying to convince us that vegetables needed to be crunchy to be good.  No doubt, many vegetables served on American tables were gray, mushy and lifeless but not all vegetables, and certainly not all vegetable dishes, are meant to be toothy, let along crunchy.

I was having a conversation with friends over dinner in Palm Springs just last week about cooking .  They asked me when I started cooking and when I told them, the muscles on their faces froze ever so briefly which made me do a quick calculation.  I started cooking before they were born!  Which means, basically, I’ve seen a lot of food fads and crazes.  I try to avoid them.

I embrace new ingredients or, as is more often the case with “new” ingredients, old ingredients that are finally finding their way to our markets and are, therefore, new to us.  When I think about the ingredients that are available to me now compared to when I started cooking, the difference is staggering.

Honestly, though, the core of my cooking hasn’t changed.  I still focus on traditional foods.  I try to find dishes that have stood the test of time; dishes that have been made for a generation or two, if not a century or two.

Sometimes, though, food crazes get us to think about how we cook and cause us to make changes for the better.  Take crunchy vegetables.  I think American vegetable cookery started getting better when “everyone” was hyping crunchy vegetables.  It got us to think about what was on our plates and whether the essence of a particular vegetable dish was best presented with soft vegetables, crunchy vegetables, or something in between.

Not every vegetable dish is better with crunchy vegetables.  That took me a while to learn as a novice cook in the 1970s when I tried to convert every vegetable recipe to one with toothy vegetables.  They were not all successful.  Not only does texture change with more cooking, flavor does too.  Sometimes those flavor changes “make” the dish as much as the textural change.

This recipe is a good example, though it is not one that I was making in the 70’s.  The essence of the dish is slow-cooked cauliflower and onions that become sweet as the natural sugars caramelize and the cauliflower softens.

I learned to make this from my mother-in-law, who is from Friuli.  Friuli is northeast of Venice, adjacent to Slovenia.  The food definitely shows the influence of Eastern and Central Europe but more on that in upcoming posts.

Print Recipe
Cavolfiore alla Friulana (Cauliflower Friuli-Style)
This dish goes really well with roasted meat. It is a little on the sweet side because the sugars in the onion and cauliflower caramelize during the long, slow cooking. I especially like it with roast chicken or roast pork. Experiment with the cooking time to achieve different textures, but never crunchy. The cauliflower should be soft but not mushy. You can keep the florets more intact during the cooking by being gentle. You can also press down on them every now and then causing them to break up. Both styles are equally traditional. As you will see in the pictures, I opted for longer cooking to create more caramelization and the pressing motion to break the florets into small pieces.
Votes: 0
Rating: 0
You:
Rate this recipe!
Course Sides, Vegetables
Cuisine Italian
Prep Time 20 minutes
Cook Time 2 hours
Servings
people
Ingredients
Course Sides, Vegetables
Cuisine Italian
Prep Time 20 minutes
Cook Time 2 hours
Servings
people
Ingredients
Votes: 0
Rating: 0
You:
Rate this recipe!
Instructions
  1. Bring a large pot of heavily salted water to a boil.
  2. Meanwhile, cut off the base of stem of the cauliflower and remove the green leaves.
  3. Add the cauliflower to the boiling water and cook, uncovered, until it shows just a little resistance when pierced with the point of a knife. This will take between 6 and 10 minutes depending on the cauliflower and how far above sea level you are. When in doubt, opt for less cooking rather than more as you can compensate during the slow-cooking phase.
  4. Using a large slotted spoon, remove the cauliflower. Place it in a colander to drain.
  5. Meanwhile, in a large sauté pan, sauté the diced onion in olive oil (or butter) over medium-high heat. Season with salt. The salt will draw out moisture from the onion. As the moisture evaporates you will need to reduce the heat to medium-low to prevent the onion from browning.
  6. When the liquid has evaporated and the onion is beginning to soften, add the minced garlic, if you are using it. Continue to cook over low heat until the onion turns golden but not brown. This can easily take another 20-30 minutes.
  7. As the onion is cooking, cut the cooked cauliflower into florets.
  8. When the onion is golden, add the cauliflower. Season with salt and freshly ground black pepper. Cover and cook, stirring occasionally.
  9. Add a little wine or water from time to time, as needed, to keep the cauliflower from sticking. There really shouldn’t be any appreciable liquid in the bottom of the pan. Should that happen, uncover the pan slightly till the liquid evaporates.
  10. The florets will break apart as the cauliflower cooks. If you want small pieces, press down on the cauliflower from time to time while cooking. As the cauliflower cooks, taste a few times to adjust salt and pepper.
  11. The cauliflower will slowly darken through caramelization. How far you want to go is up to you. I went fairly far when cooking the cauliflower in these pictures. The cauliflower gets softer the longer it cooks but it also caramelizes more. Figure out the balance of texture and taste you like best.
Recipe Notes

Copyright © 2017 by VillaSentieri.com. All rights reserved.

Share this Recipe

Pasta ai Funghi (Pasta with Mushrooms)

January 27, 2017

Growing up, pasta was almost always served with a long-cooked Southern Italian ragu.  Yes, there was the occasional sauce of vegetables sautéed in olive oil till they softened enough to make a sauce but those sauces were the exception to the rule.

These days, a long-cooked ragu is still the epitome of pasta cooking for me but far more often I make quicker sauces.  Pasta with mushrooms is one of them.

In my last post, I introduced nepita, an herb used in Italy that is really not commonly available in the US.  Nepita pairs really well with mushrooms.  The nepita that I use is from plants that we grow from seeds we brought back from Italy in 1996.  I’m so concerned that one day our nepita won’t make it through the winter and reappear in the spring that we’ve taken to backing it up the way other folks back up their data.

Over the years we’ve gifted nepita plants to friends who like to garden.  Should a disaster ever befall our nepita, there should still be a clone of it somewhere with enough seeds that we can germinate another plant or two.  For an herb that I’ve only known for 20 years, it’s become an integral part of my kitchen.

While there’s no real substitute for nepita, there are lots of herbs that go well with mushrooms.  In this rendition, I’ve called for basil and oregano, the combination that I usually use when I don’t have nepita.  Marjoram also works well, with or without a pinch of thyme, but marjoram is a relatively uncommon herb in Italian cooking.

Herbs are not a major player in this dish.  Though nepita is distinctive, there are so many layers of flavor from the dried porcini, onion, garlic, and marsala that the lack of nepita isn’t really a big deal.  Basil and oregano work well and, in fact, are what I used before that 1996 trip to Tuscany where I discovered nepita.

Pasta ai Funghi was one of the courses I served at my father-in-law’s birthday dinner last week.  Here are a couple of pictures of that dinner from our home in Palm Springs.


My father-in-law (left) and mother-in-law. Good friend, Gino Barcone is in between.
From left to right, John Berl, Bill Hoadley, and Bob Bauernschmitt.


Print Recipe
Pasta ai Funghi (Pasta with Mushrooms)
While many mushroom-based sauces for pasta contain cream and butter, this one uses only olive oil. It creates a beautiful, glossy sauce. The mushrooms can be prepared several hours in advance making this an ideal dish if you are cooking for company.
Votes: 0
Rating: 0
You:
Rate this recipe!
Prep Time 25 minutes
Cook Time 35 minutes
Servings
people
Ingredients
Prep Time 25 minutes
Cook Time 35 minutes
Servings
people
Ingredients
Votes: 0
Rating: 0
You:
Rate this recipe!
Instructions
  1. Soak porcini in enough warm water to just cover. When soft, about 15 minutes, squeeze excess water out of the mushrooms. Reserve the liquid. Finely chop the porcini.
  2. Clean the mushrooms by wiping them with a damp cloth.
  3. If you are using common white mushrooms, slice off the very bottom of the stem as it is usually a bit dry. There is no need to remove the rest of the stem, though.
  4. Turn each mushroom upside down and cut into 1/8 inch thick slices. If the mushrooms are really large, you might have to make a crosswise cut as well.
  5. Slice or cut other mushrooms into similar sized pieces. For example, cut large portobello mushrooms into long strips approximately 1/8 inch thick and then cut each strip into smaller pieces.
  6. If you are using oyster and/or enoki mushrooms cut them into slightly larger pieces and keep them separate as they require less cooking than most other mushrooms.
  7. Finely chop the onion and reserve.
  8. In a sauté pan large enough to hold the mushrooms and cooked pasta, heat the ¼ cup of olive oil, over high heat. When the oil is hot, add the finely chopped porcini. Sauté a minute or two until the porcini becomes aromatic, being careful not to burn them.
  9. Add the reserved porcini soaking liquid. Over high heat, quickly evaporate the liquid, stirring often.
  10. Once the liquid is evaporated, add all the cut-up mushrooms to the sauté pan, except for quick cooking types like enoki and oyster mushrooms. Sauté the mushrooms, still on high heat, stirring often until they have absorbed all the olive oil.
  11. Season liberally with salt and reduce the heat to medium low.
  12. Stir the mushrooms often until they begin to release their liquid. When they do, turn the heat to high and cook until all the liquid is evaporated, stirring often. Add freshly ground black pepper to taste.
  13. Continue sautéing the mushrooms until they just begin to brown. Now is the time to add any quick-cooking varieties of mushrooms, such as oyster and enoki, you may be using.
  14. Continue to sauté until of the mushrooms are nicely browned.
  15. When the mushrooms are brown, add the onion and crushed red pepper.
  16. Over medium heat, cook until the onion is soft and golden.
  17. Stir in the garlic and sauté for about one minute until it becomes fragrant.
  18. Stir in the oregano and basil, or, if you are lucky enough to have a stash, about 1 teaspoon of fresh nepita or ½ teaspoon of dried. Add the marsala. It will evaporate almost immediately.
  19. Remove the sauté pan from the heat until the pasta is ready. The mushrooms can be made several hours ahead to this point.
  20. Cook the pasta in well-salted water until al dente. Meanwhile gently warm the mushrooms if they were made ahead.
  21. When the pasta is cooked, remove about 1 cup of pasta-cooking liquid and reserve. Quickly drain the pasta. Do not rinse. Add the pasta to the warm mushrooms along with about ¼ cup of the reserved pasta-cooking liquid. Cook over low heat, stirring often for about one minute.
  22. Remove the pasta and mushrooms from the heat. Add the Parmigiano Reggiano cheese and stir to combine. Add 2 tablespoons of extra virgin olive oil and the truffle oil, if using. Stir to combine. The cheese and the starch in the pasta cooking liquid should help to emulsify the olive oil and water, creating a glossy sauce.
  23. If the pasta is too dry, add more pasta-cooking liquid, just don’t make it watery. The cheese, olive oil and water should hold together.
  24. Taste and adjust seasoning, if needed.
  25. Serve immediately, preferably in warmed pasta bowls. Pass additional freshly grated Parmesan cheese at the table.
Recipe Notes

I most often make this with ordinary white button mushrooms, especially if I am going to add the truffle oil. Using an array of different mushrooms, such as cremini, baby bella, oyster, and enoki makes a visually and texturally interesting dish, however.

When I make pasta, I always pour some of the pasta-cooking liquid into the serving bowl to warm it.

Copyright © 2017 by VillaSentieri.com. All rights reserved.

Share this Recipe

Pollo all’Uccelleto (Chicken Little Bird Style)

January 23, 2017

I first tasted this dish in Tuscany in the little hill town of Benabbio, in September 1996.  My husband’s great Great Aunt Fidalma, Zia Fidalma, made it with little birds, sparrows actually, that her husband, Faliero, had shot.

That was one of my most memorable meals in Italy.  My husband and I had traveled to Italy with his parents.  We stayed in a little hotel in the town of Fornoli where my father-in-law grew up.  We alternated meals at the homes of numerous relatives throughout the area.

It was wonderful sitting in Zia Fidalma’s kitchen watching her put together components of the meal in that seemingly effortless way that happens in homes throughout Italy.  We had sautéed mushroom caps.  Zia Fidalma foraged the mushrooms.  I remember them sitting in a shallow box on the kitchen counter.  She plucked a few out of the box, cleaned them.  They were quickly sautéed and seasoned with salt, pepper, and nepita.

I can’t get a consensus on the spelling of nepita.  I’ve seen it as gnebita, gnepita, and nepeta, among others.  It is a variety of catmint.  Zia Fidalma uses it to season mushrooms.  It is a magical combination.

We smuggled nepita seeds back from Tuscany on that visit, along with heirloom tomato seeds, both from Zio Faliero’s garden.  We’ve grown both ever since.  For 20-plus years we’ve had nepita; first in our garden in Chicago (at the Rohkam House, where we lived starting in January 1996) and then subsequently at Villa Sentieri, in Santa Fe.

The Rohkam House when we lived there.
The Rohkam House shortly after it was built in 1887.

There are only three components of that meal that I remember clearly, the mushrooms, the little birds, and the wedge of Parmigiano Reggiano brought out at the end of the meal for us to eat with fruit.  I know there was a pasta but I can’t remember what it was.  The same is true for the side dishes (contorni, in Italian).

My mother-in-law was in heaven with the little birds.  She was sitting across the table from me. The meal had become languorous by then and it wasn’t, somehow, inappropriate for me to pull out my video camera.  Remember those?  I’m talking about dedicated video cameras with cassettes for recording, not phones or cameras with video capability.

As she was reveling in her little birds (uccelleti, in Italian) I used my video camera to focus in on her.  First on her face, but then ultimately on just her lips.  Her lips filled the screen like the lips in the opening moments of the Rocky Horror Picture Show.  There were those lips, sucking in little bird parts then extruding cleaned bones.  Every now and then there was the occasional bit of bird shot that needed to be eliminated.

To this day, that video footage is a kind of kompromat in our family.  Thanks to President Trump for making that term common knowledge.  My mother-in-law hates that video footage.  I occasionally mention its existence and (vaguely) threaten to allow it to surface…as I did for this post but, in the end, in the interest of domestic harmony, did not.

Print Recipe
Pollo all'Uccelleto (Chicken Little Bird Style)
I first had this dish in Tuscany. It was made, literally, with little birds (blackbirds) bagged by my husband’s Great Uncle Faliero. Since little birds are not easily available in the US, I rendered the dish using chicken after returning from the 1996 trip to Italy. I called it “Chicken Little Bird Style” or “Pollo all’Uccelleto.” Much to my surprise, years later, I discovered that Italians do, in fact, refer to this preparation as “all’Uccelleto,” and use it on things other than little birds (chicken, for example). What simply started out as Uccelleti, “Little Birds,” became for me "Pollo all’Uccelleto," or “Chicken Little Bird Style.” From Great Aunt Fidalma’s kitchen to you is Chicken Little Bird Style. If you actually have little birds, by all means, give them a try. If not, chicken thighs are a great, if less gamey, substitute. Use good quality olives for this dish. If you don’t have access to an Italian market, I suggest using olives from the olive and antipasto bar that is common in many supermarkets these days. I usually use half oil-cured black olives and half green olives, such as castelvetrano. I prefer using olives with pits.
Votes: 0
Rating: 0
You:
Rate this recipe!
Course Poultry
Cuisine Italian
Prep Time 20 minutes
Cook Time 2 1/2 hours
Servings
people
Ingredients
Course Poultry
Cuisine Italian
Prep Time 20 minutes
Cook Time 2 1/2 hours
Servings
people
Ingredients
Votes: 0
Rating: 0
You:
Rate this recipe!
Instructions
  1. Remove the leaves from the rosemary and oregano.
  2. Mince the sage, rosemary, and oregano leaves. Reserve.
  3. Remove the skin from the chicken thighs and any large pieces of fat.
  4. Using the broad side of a chef’s knife, bruise (smash, really) the garlic cloves.
  5. In a heavy skillet large enough to hold the chicken thighs in a single layer, heat the olive oil.
  6. When the oil is hot, add the chicken thighs and garlic. Season the chicken with salt and freshly ground black pepper to taste.
  7. Brown the chicken, turning several times. As the garlic cloves get dark brown, remove and discard them before they burn.
  8. When the chicken is brown, and all garlic has been removed, add the tomato sauce, bay leaves, minced herbs (rosemary, sage, and oregano) and crushed red pepper.
  9. Cover and cook over low heat, stirring occasionally and turning chicken over every 30 minutes or so, for approximately 1 hour.
  10. If the sauce gets too dry add a little white wine (or water) from time to time.
  11. After an hour, add the olives, cover, and continue cooking over low heat, stirring occasionally and turning chicken over every 30 minutes or so, for approximately 1 more hour.
  12. Taste and adjust salt and black pepper during the last half hour of cooking. The olives will be salty, so it's best to wait till they've cooked a while before adding more salt.
  13. When finished, the chicken should truly be “fall-apart” tender and the sauce should be mostly a red colored olive oil with just a tiny bit of tomato sauce.
Recipe Notes

I don’t usually use canned tomato sauce. I prefer to use tomato paste and water. For this dish I use tomato sauce because so little is needed and it’s consistent with what Great Aunt Fidalma did. If you want to use tomato paste, mix 1½ tablespoons of tomato paste with 6 tablespoons of water and use in place of the tomato sauce.

Copyright © 2017 by VillaSentieri.com. All rights reserved.

Share this Recipe

Sformato di Spinaci (Spinach Casserole)

January 13, 2017

The word sformato in Italian means deformed or shapeless.  When applied to food, standard Italian-English dictionaries often translate it as pie or soufflé. It is none of the above.

A sformato is most definitely not deformed or shapeless.  In fact, a food historian described a sformato as “something that was cooked in the mould [sic] and then extracted from it” (Alexandra Grigorieva, Naming Authenticity and Regional Italian Cuisine in Authenticity in the Kitchen: Proceedings of the Oxford Symposium on Food and Cookery 2005, edited by Richard Hosking).  Nor is a sformato really a pie or a soufflé as those terms are usually used.  It has no crust of any sort, as would a pie.  It is not puffy like a souffle.  Sometimes it doesn’t even contain eggs.

A sformato is most often made of vegetables, usually bound with some combination of eggs, cream, cheese, and/or béchamel (balsamella or besciamella in Italian), and cooked in a baking dish.  I think the best English translation of the word is casserole.

Sformato di Spinaci, spinach sformato (or, reluctantly, spinach casserole), is one of those dishes that has iconic status in my husband’s family.  Like Merluzzo in Umido, the recipe came from Italy with his grandmother whom we called Nonni.  Nonni is one of those made up words that sometimes take hold in a family based on the mispronunciations of little kids.  The Italian word for grandmother is Nonna.  However, Nonni is to Nonna as Gramma is to Grandmother.

Just as Pasta Ascuitta has only one meaning in my family, Sformato has only one meaning in my husband’s.  If you simply say “sformato,” everyone knows you mean spinach sformato, and not, for example, cauliflower sformato.

I first had sformato at Christmas Dinner at my in-law’s house in 1989.  Although I had been cooking northern Italian food since 1973 based largely on Marcella Hazan’s wonderful cookbooks, that Christmas was really the beginning of my learning to make some of my husband’s family’s northern Italian favorites.  It’s really a whole different taste profile from the southern Italian dishes I grew up with.

I’ve actually taken a heretical twist with my interpretation of Nonni’s sformato. I’ve added a little balsamella for moisture. This was most definitely not in the original, though it is not an uncommon addition to sformato. If you want to make the original version, just leave out the balsamella.  It will be a little drier.  You might want to not squeeze the spinach quite as tightly if you don’t include the balsamella.

Print Recipe
Sformato di Spinaci (Spinach Sformato or Spinach Casserole)
Nonni always made this with ground beef but Italian sausage, casing removed and crumbled, works really well (a bit of southern Italian heresy creeping in!). It can also be made without meat, but the amount of spinach should be increased by an additional 10 oz. to a total of 30 oz. I have occasionally used fresh spinach but, honestly, frozen chopped spinach works just fine. I doubt you could reliably tell the difference in a side-by-side comparison of fresh vs. frozen spinach in this dish.
Votes: 0
Rating: 0
You:
Rate this recipe!
Course Vegetables
Cuisine Italian
Prep Time 45 minutes
Cook Time 1 hour
Passive Time 15 minutes
Servings
people
Ingredients
For the spinach mixture
For the balsamella
Course Vegetables
Cuisine Italian
Prep Time 45 minutes
Cook Time 1 hour
Passive Time 15 minutes
Servings
people
Ingredients
For the spinach mixture
For the balsamella
Votes: 0
Rating: 0
You:
Rate this recipe!
Instructions
For the spinach mixture
  1. Cook the frozen spinach in a heavy bottomed sauce pan tightly covered until thawed, breaking up the spinach from time to time.
  2. As soon as the spinach is thawed, pour the contents of the pan into a fine mesh sieve and allow the spinach to drain and cool.
  3. When the spinach is cool enough to handle, squeeze small handfuls of the spinach to remove excess water.
  4. Cut through the mass of squeezed spinach about eight or ten times with a knife then rub it through your fingers to loosen it. It will be pretty tightly wadded up from squeezing out the liquid.
  5. Brown the ground beef or sausage in olive oil over medium heat. You want to get some really browned bits of meat for the flavor. Don't make the mistake of just cooking the meat until it is no longer pink.
  6. When the meat is nicely browned, add the onion and cook until golden and soft. Add the garlic and sauté until fragrant, about 1-2 minutes.
  7. Combine the meat mixture and spinach in a large mixing bowl. Season with salt and pepper and allow to cool briefly.
  8. Meanwhile, make the breadcrumbs by removing the crusts from a slice of two-day old home-style white bread. Tear the bread into pieces and whiz in a food processor until processed into evenly sized crumbs. Reserve.
  9. Melt the butter and toss with the breadcrumbs. Reserve.
  10. Make the balsamella (see directions below).
  11. Add the balsamella to the cooled meat and spinach mixture. Stir well, loosening up the spinach. When well combined, stir in the eggs. Be certain that the mixture is not so hot that it cooks the eggs.
  12. Reserve two tablespoons of the Parmesan cheese and mix the remainder into the spinach-meat-balsamella mixture.
  13. Pour the spinach mixture into a buttered 9-inch round or 8-inch square baking dish. Sprinkle top with the buttered crumbs and reserved Parmesan cheese.
  14. Bake at 350°F for approximately 60 minutes or until golden brown.
  15. Cool about 10 minutes before cutting and serving.
For the balsamella
  1. Heat the milk in a small heavy-bottomed saucepan until bubbles begin to form around the edges. Do not bring the milk to a boil.
  2. Meanwhile, melt the butter in a saucepan and add the flour when the foam subsides. Cook for several minutes without browning.
  3. Add the milk, approximately two tablespoonsful at a time, mixing well after each addition. Adding the milk in small amounts should allow you to stir out any lumps before adding the next bit of milk.
  4. After all the milk has been added, bring to a boil and cook for one minute, until thickened.
  5. Remove from the heat and stir in the nutmeg.
Recipe Notes

This recipe doubles well.  If you want to cook a double recipe in a single pan, use a 9-inch by 13-inch baking dish.  Bake at 325°F rather than 350°F as it will brown too much around the outside before the inside is cooked.  If necessary, raise the heat to 375°F at the very end, and put the sformato on the top shelf of the oven, to brown the top.

If you want to use fresh spinach, use 2 pounds instead of the 20 ounces of frozen spinach.  Remove the stems.  Wash the spinach, shaking off most of the water.  Put the spinach in a heavy-bottomed Dutch oven with just the liquid clinging to the leaves.  Cook covered, over medium heat till fully wilted.  Drain and proceed as above with the exception that you will need to do much more chopping of the cooked and squeezed spinach than the eight to ten cuts suggested above.

Copyright © 2017 by VillaSentieri.com. All rights reserved.

Share this Recipe

Merluzzo in Umido (Cod in Light Tomato Sauce)

January 4, 2017

The first time I had Merluzzo in Umido was November 1992.  My husband and I took my mother, his mother, and his fraternal grandmother to Santa Fe for a week over Thanksgiving.  At the time, we were living in Chicago.  We rented an ancient adobe house off Garcia Street.  The house didn’t have any central heat though it did have a frightening array of heating devices that included a kiva fireplace, a direct-vent gas heater in the living room, a portable electric heater in one of the bedrooms, wall-mounted electric radiant heaters in the bathrooms, and nothing in the kitchen.  If the oven wasn’t on, the kitchen was the coldest room in the house as it had three outside walls and a door that didn’t seal very well.

Of course, it was reported to be the coldest winter that Santa Fe had experienced in 100 years! In addition to cold, there was lots of snow. And there we were, in a drafty old adobe house with no central heat enjoying a week with the likes of The Golden Girls!

We had a blast.

We had been house hunting in Santa Fe since April of that year.  On that November trip we saw several houses we liked.  We spent a few evenings rating each of the houses on an array of factors using a spreadsheet.  (In my professional life, we would have called this a prioritization matrix or selection grid. It’s a technique I’ve taught to hundreds of health care professionals over several decades.)  One afternoon we all piled into the car to look at the two finalists in the property hunt.  We were uncertain which one to buy.  Not so the women.  A little house on Griffin Street was the undisputed, hands-down favorite.  Deal done!

We put in an offer and closed in January.  For most of December my mother kept saying that she wanted to go back to Santa Fe and stay in the house in the spring.  We did a bit of remodeling and moved into the house in March.  Unfortunately, my mother died in January, shortly before we closed on the house.  She never got to experience her dream of returning to Santa Fe.  We had that house for more than nine years before we moved into a much larger Santa Fe property in Ricardo-Legorreta-designed Zocalo.  After Zocalo, we built and moved into Villa Sentieri overlooking the city.

I frequently think of that trip.  It was memorable in so many ways.  We found our first house in Santa Fe.  I got to spend quality time with my mother in the last weeks of her life.  My husband and I had interviews to get our medical licenses in New Mexico.  (It’s the only time either of us has been personally interviewed for a medical license!).   And, I learned how to make Merluzzo in Umido, one of many recipes that my husband’s grandmother brought with her from Italy.

Print Recipe
Merluzzo in Umido (Cod in Light Tomato Sauce)
If possible, by large filets of cod and portion them at home. Three pounds is enough for eight people. The advantage of portioning the fish at home is that you can make some smaller pieces for individuals with smaller appetites. Cod is a perfect fish for this dish because it is forgiving in terms of being overcooked. However, any firm, white, non-oily fish will taste great. I used a 15-inch rondeau to cook the cod. It held the fish in a single layer. If you don’t have a pan large enough to hold the fish in one layer, make the sauce in a single sauté pan then divide it among two different pans to cook the fish.
Votes: 0
Rating: 0
You:
Rate this recipe!
Cuisine Italian
Prep Time 20 minutes
Cook Time 1 hour
Servings
people
Ingredients
Cuisine Italian
Prep Time 20 minutes
Cook Time 1 hour
Servings
people
Ingredients
Votes: 0
Rating: 0
You:
Rate this recipe!
Instructions
  1. Cut the cod into 8 to 10 serving pieces. Though you can cook whole filets, it will be easier to get the fish out of the pan if cut into portions.
  2. In rondeau large enough to hold the fish in one layer, sauté the onion and a sprinkling of salt in the olive oil until transparent and slightly golden but not brown.
  3. Add the garlic and sauté until fragrant, about 1 minute.
  4. Add parsley and some freshly ground black pepper. Sauté for a minute or two. The smell of parsley should become noticeably more potent. Do not brown the ingredients of the pan.
  5. Add the wine and cook briskly until the wine evaporates.
  6. Add the tomato paste. Sauté, stirring frequently, until it gets ever so slightly darker and begins to smell sweet. This will take 2-3 minutes.
  7. Add the water, oregano, basil and additional salt and pepper to taste. Boil gently, with the cover slightly askew for 20-30 minutes. The sauce will thicken. If it becomes too thick, add a little additional water. However, the juices from the fish will thin the sauce so it is better for the sauce to start out too thick rather than two thin. The sauce can be made ahead to this point.
  8. With the sauce at a medium boil, add the fish, skin side down. Season with salt and pepper. Cover the pot tightly and cook for approximately 20 minutes until the fish cooks through an flakes easily. The length of time will depend on the type of fish, thickness of the portions, and elevation. Do not turn the fish but occasionally spoon some of the sauce over the top of the cooking fish.
  9. Taste the sauce and adjust seasoning. If the sauce it too thick thin with a little water. If it is too thin, boil it briskly after removing the fish.
  10. Put the fish on a deep serving platter. Pour the sauce over the fish and serve.
Recipe Notes

Parsley stems can be bitter.  When adding parsley to a recipe, I only use the leaves and very tender stems.  To do this, I hold the end of the parsley stem in one hand and slide the stem between the thumb and finger of the other hand.  When my fingers reach the leaves, I pinch off the stem and discard it.  This makes quick work of the parsley and removes any chance of bitterness from the stems.

Copyright © 2017 by VillaSentieri.com.  All rights reserved.

Share this Recipe

Pear, Celery and Arugula Salad with Lemon Dressing

December 26, 2016

I grew up in a family that put salad on the table at the same time as the rest of the meal.  I married into a family that does the same.  However, in the years between leaving home to go to college and getting married I most definitely converted to serving salad after the main part of the meal was over.  Notice, I didn’t say main course because the other change I made was thinking of the meal as comprising an antipasto (even if it is just a nibble of cheese and a cracker for a family meal) followed by, what Italians would call, the first course (il primo piatto) followed by a second course (il secondo piatto).

In an Italian meal, the first course is usually pasta, or soup, or risotto.  The second course  usually consists of meat or fish with several side dishes (contorni).  After that comes the salad.  Granted, there are exceptions to this sequence, even in Italy.  One of the most classic exceptions is serving Risotto alla Milanese with a breaded and fried veal chop.  OK, so these days, I try not to eat baby animals, so veal is pretty much off the menu at our house, but the point is Risotto alla Milanese is typically served with the meat, not before the meat.

The general rule that the sequence is antipasto, then first course, then second course, then salad was made abundantly clear when my Italian tutor had dinner at our house a few years ago.  For some reason, even though my in-laws grew up in Italy, we served spaghetti and meatballs (very good spaghetti and meatballs, mind you!).  Where it got interesting, however, is that we all ate the spaghetti and meatballs at the same time (for full disclosure, I didn’t touch my salad until afterwards).  My tutor, hailing from Italy however, ate her pasta first.  Only then did she put a meatball or two on her plate for her second course.  Only after that did she touch her salad!

When I am serving dinner for company, the salad always comes after the second course.  I’d rather not serve salad than serve it with the rest of the meal.  Salads, by design, have sharp dressings meant to cleanse the palate.  You can’t go back and forth between a subtly seasoned dish (whether it be pasta or fish or meat) and salad and do justice to the subtlety of the first.  The vinegar and/or lemon juice and/or mustard (and/or whatever else you put in your salad dressing) doesn’t allow that.  Forget what it does to the wine that you’ve paired with the dish!  If it’s just family, however, in the interest of domestic harmony, the salad goes on the table at the beginning.  I still don’t eat mine till the end but I can’t say the same for others.

Print Recipe
Pear, Celery and Arugula Salad with Lemon Dressing
Pears add a welcome freshness to this salad that is a perfect antidote to winter when so little really good fresh produce is available. This may be a lot of pear for some but the sweet juicy taste is a great contrast to the crunch of the celery and the peppery bite of the arugula.
Votes: 0
Rating: 0
You:
Rate this recipe!
Prep Time 15 minutes
Servings
people
Ingredients
Prep Time 15 minutes
Servings
people
Ingredients
Votes: 0
Rating: 0
You:
Rate this recipe!
Instructions
  1. Squeeze about half a fresh lemon to make 2 ½ tablespoons of juice. Allow the juice to sit, uncovered, at room temperature for about an hour before using it to dress the salad. The flavor of the juice will improve.
  2. Remove the top of the celery stalks, the part where the center stalk gets much thinner and smaller stalks come off the sides. Reserve these pieces for another use. Cut the remaining celery stalks on a long diagonal to create thin long pieces.
  3. Using a sharp knife or cheese paring knife, cut about 18 curls of Pecorino Romano cheese.
  4. Peel the pears and cut into quarters lengthwise. Core the pears. Slice into thin wedges.
  5. Combine the lemon juice and olive oil. Shake well to combine.
  6. Toss the arugula and celery with about 2/3 of the lemon-olive oil dressing. Season with salt and pepper to taste and toss again.
  7. Divide the arugula and celery onto six plates.
  8. Toss the pears in the remaining lemon-olive oil dressing. Arrange the pear slices and Pecorino Romano cheese on top of the arugula. Season with freshly ground black pepper. Serve immediately.
Recipe Notes

Copyright © 2016 by VillaSentieri.com.  All rights reserved.

Share this Recipe