Thanksgiving Gravy

November 7, 2019

I’m not much of a turkey person.

If it were up to me, I’d probably never make turkey, except for the fact that turkey is a GREAT excuse to make killer stuffing and gravy.

OK, OK, those of you who know me know that I’m enough of a traditionalist that I’d probably still make turkey on Thanksgiving, with or without stuffing and gravy, because it’s, well, traditional.

Turkey aside, though, I absolutely LOVE stuffing and I LOVE gravy.

After Thanksgiving, I carefully hide the leftover stuffing in the fridge and keep it all for myself.  There usually isn’t much leftover so I get maybe two days of snacking on cold stuffing.  And it has to be cold, not warm, with a bit of added salt because the taste of salt is dulled by the coldness of the stuffing.


Click HERE to join our mailing list and you’ll never miss a recipe again!


As for the gravy, when I was a kid, I liked gravy so much that I would stir enough into my mashed potatoes that they became runny and spread out over my plate!  I don’t do that anymore but I still love gravy.

I love gravy so much that I roast poultry specifically to make gravy then discard the poultry because I’ve browned it to a fare-thee-well to get a really flavorful gravy.  But I only do that once a year—on Thanksgiving—hence the name Thanksgiving gravy.

When I was growing up, my parents hosted Thanksgiving dinner.  My Aunt Margie and Uncle Joe hosted Christmas Eve dinner.

On Thanksgiving, while my mother and Aunt Margie were getting everything ready to bring to the table (everything included a full Italian meal with sausage, meatballs, lasagna, etcetera alongside a full traditional American Thanksgiving meal!) my Aunt Mamie would make gravy from the pan drippings.


Follow us on your social media platform of choice


From my current vantage point, however, there is a very limited amount of gravy that can be made that way, otherwise it doesn’t have enough meaty goodness.  Though I have to say that Aunt Mamie did a great job of making gravy.  Hers was the one that I most often stirred into my mashed potatoes.

The search for lots of meaty-tasting gravy is what got me started on the path of roasting poultry a few days in advance simply to make a brown stock to use as the base for my gravy.

I guess, in reality, my gravy is more of a variation on French brown sauce (Sauce Espagnole) with added pan drippings than traditional American-style gravy but it packs the flavor that I expect from good gravy.

If there’s any leftover gravy, I warm it with some cream and sautéed mushrooms and then gently reheat leftover turkey in the sauce.
Print Recipe
Thanksgiving Gravy
Roasting poultry to make a flavorful stock creates a gravy with an extra punch of flavor. Turkey wings and necks are ideal but chicken and Cornish hen work very well, too. Whatever poultry you use, cut it into lots of pieces to create more surface area for browning. I use a lot of Parmigiano Reggiano cheese and I put all the rinds in a container in the freezer. I use one whenever I make stock or broth, as I do for the stock for this gravy. It is not necessary to peel the onions and garlic.
Votes: 0
Rating: 0
You:
Rate this recipe!
Prep Time 30 minutes
Cook Time 11 hours
Passive Time 12 hours
Servings
cups
Ingredients
Brown Stock
Prep Time 30 minutes
Cook Time 11 hours
Passive Time 12 hours
Servings
cups
Ingredients
Brown Stock
Votes: 0
Rating: 0
You:
Rate this recipe!
Instructions
Brown Stock
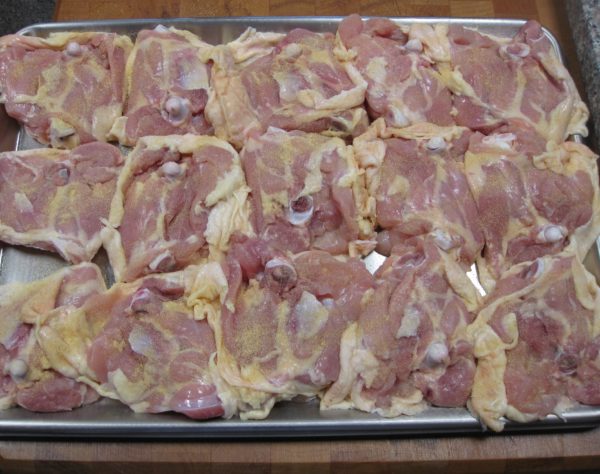
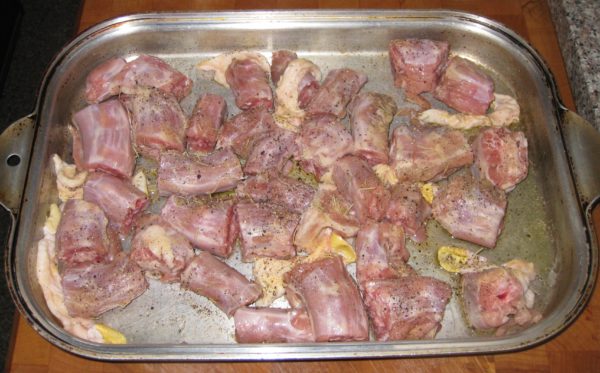
  1. Cut the turkey or other poultry into chunks. Put the cut-up turkey into a heavy roasting pan. Mix with ¼ cup of extra-virgin olive oil. Season generously with garlic powder and salt.
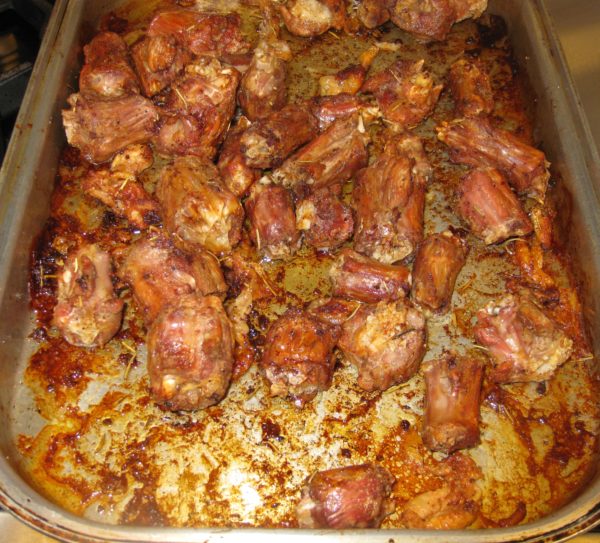
  2. Roast the turkey at 425°F until dark brown, turning often, 1½ to 2 hours.
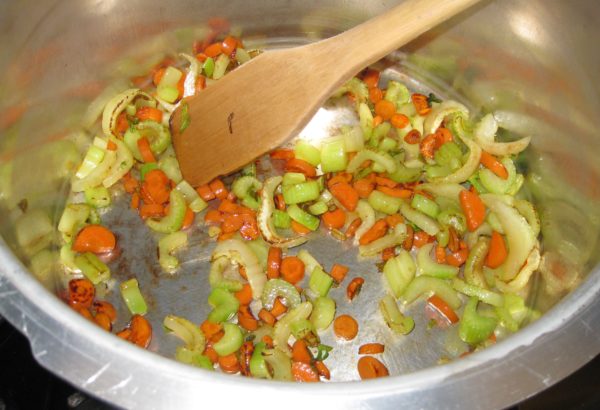
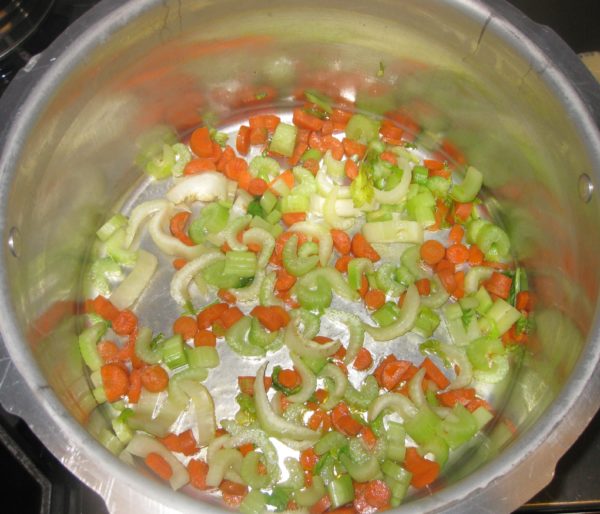
  3. Meanwhile, in a heavy-bottomed stock pot, large enough to hold all the ingredients, sauté the carrots and celery in ¼ cup of extra-virgin olive oil over high heat.
  4. As the carrots and celery begin to brown, add the onions and garlic.
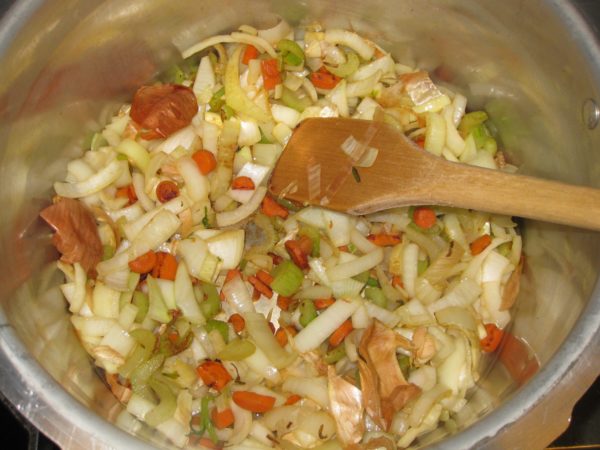
  5. Continue cooking, adjusting heat to medium if necessary, to create nicely browned vegetables and fond without burning.
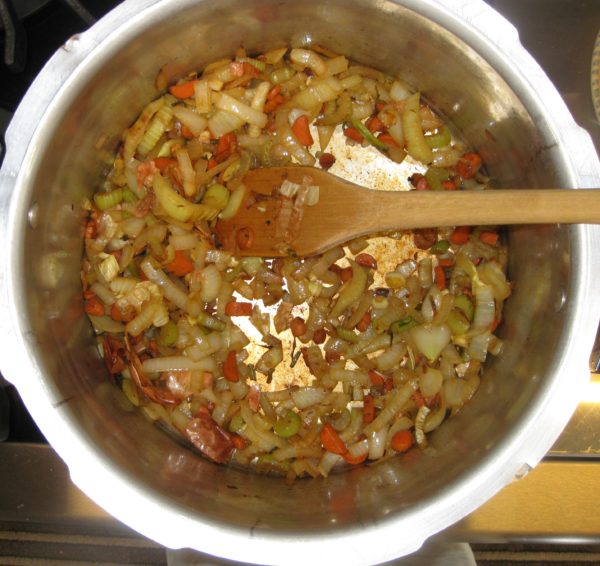
  6. When the vegetables are brown, add 1/2 cup of red wine and 1 cup of water to stop the cooking and set the pot aside until the turkey is ready.
  7. When the turkey is brown, add it and any pan drippings to the stockpot with the vegetables.
  8. Using some of the water, deglaze roasting pan and add the liquid to the stockpot. All these brown bits are important for flavor.
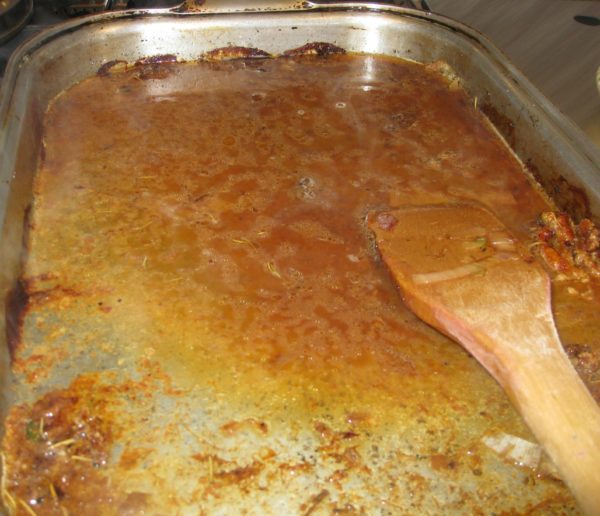
  9. Add the bay leaf, rosemary, sage, parsley, whole cloves, Parmigiano Reggiano cheese rind, if using, black pepper, and enough water to cover generously. Bring to a simmer and simmer, partially covered for six hours, stirring occasionally.
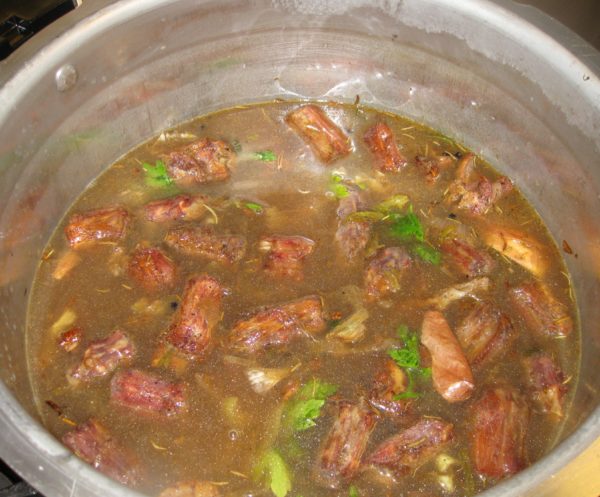
  10. Strain and refrigerate the stock. The stock may be made up to three days in advance.
Gravy
  1. Skim the fat from the top of the stock. Heat the fat to cook off any water. Measure ¾ cup of melted fat and reserve. Add butter, if necessary, to make ¾ cup.
  2. Gently boil the skimmed stock to reduce it to about six cups, if necessary.
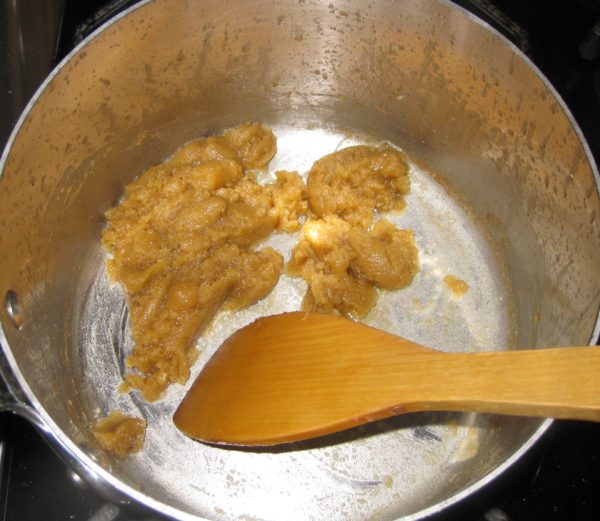
  3. Meanwhile, in a heavy-bottomed saucepan, gently brown the flour in the fat from the stock.
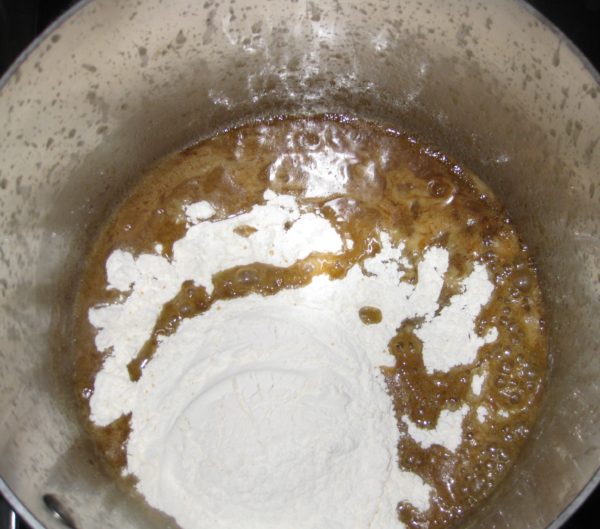
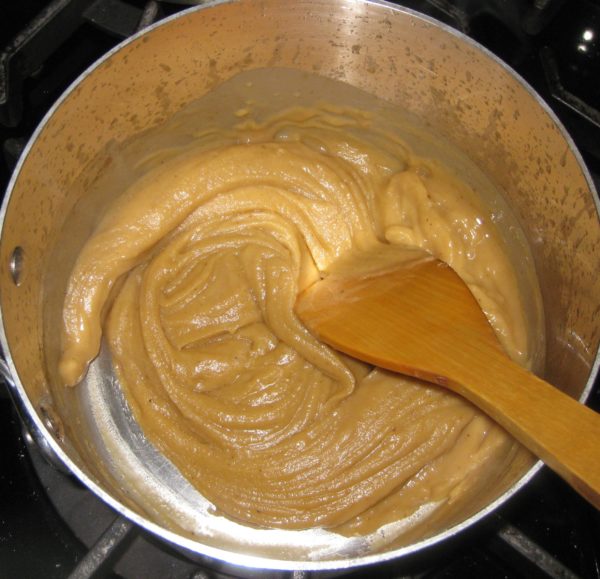
  4. Add the six cups of hot stock, approximately ¾ cup at a time, stirring well after each addition, to avoid lumps.
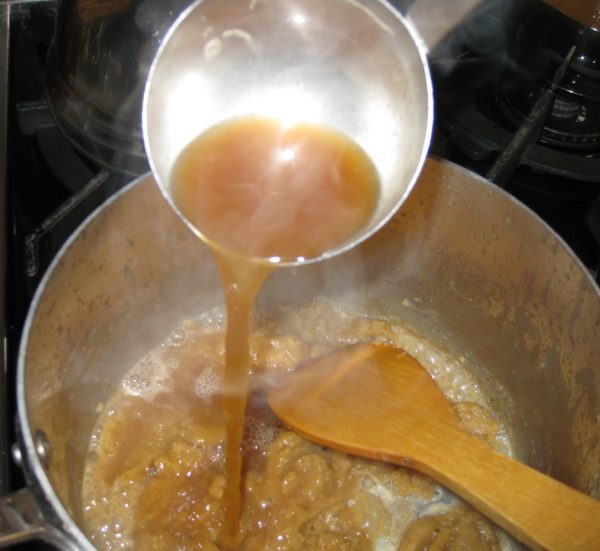
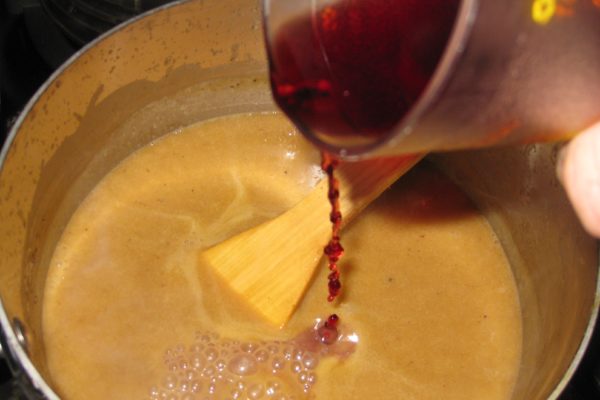
  5. After all the stock has been added, bring to a simmer. Add the wine. Season with 1 teaspoon salt and pepper to taste. (The drippings from the turkey can be fairly salty so the gravy should be under-salted until the final adjustment of seasoning.)
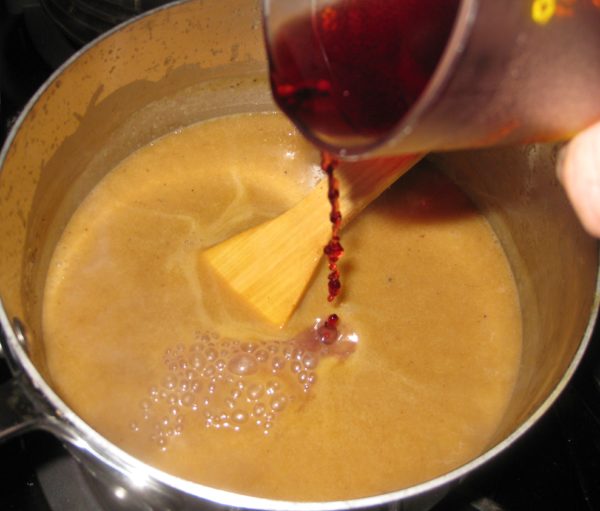
  6. Simmer gently till thick, approximately 2 hours, stirring frequently. Set aside, covered, until the turkey is ready.
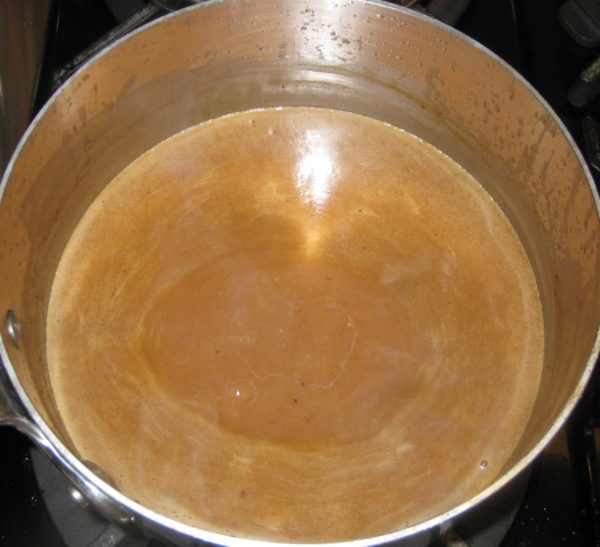
  7. After removing the turkey from the oven, deglaze the roasting pan with water. Skim the fat from the deglazing liquid. Pour the defatted drippings into gravy and simmer briefly to achieve the desired consistency. Adjust seasoning.
Recipe Notes

Copyright © 2019 by Villa Sentieri, LLC. All rights reserved.

Share this Recipe

Barbecued Chicken Thighs

July 25, 2018

For someone who tries to eat lower on the food chain, I sure love using my smoker.

Granted, I could smoke things like cheese and even some vegetables but meat is where the smoker really shines!

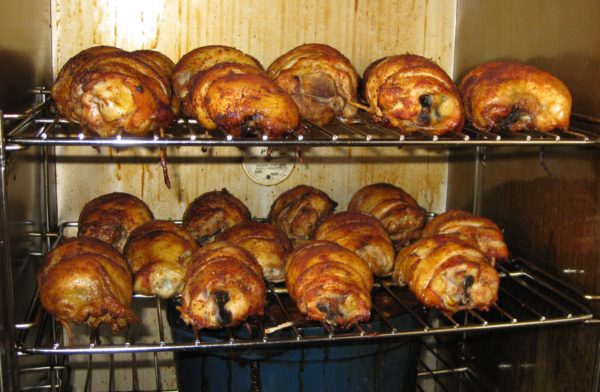
I’ve smoked pork shoulders, ribs, and turkey breasts, and I continue to expand my repertory, but I really enjoy smoking chicken thighs.

Smoking is often an all-day affair.  Sometimes it’s an all-night affair if one is smoking large enough pieces of meat.  So far, I’ve limited myself to smoking things that can go into the smoker at a reasonable time of the day.  I’m not one of those guys who wants to sit beside his smoker through the night with a cooler of beer at his side!

Join our mailing list and you’ll never miss a recipe again!

Chicken thighs cook in a relatively short period of time so they’re great when you want to limit attending to the smoker to just a few hours before dinnertime.

My smoker has an adjustment for the heat output but not temperature, per se. If the wind or external temperature change, the internal smoker temperature changes, too. Some day I’ll get a smoker with an actual thermostat but so far this one has served me well.

If you get a smoker with an automatic thermostat there would be almost no need to attend to the chicken thighs.  While I have a nice smoker, it doesn’t have a thermostat.  It has a control that puts out an adjustable but then constant amount of heat based on the setting similar to the way car heaters used to work before cars had real thermostats.  If the outdoor temperature or wind changes, the temperature inside the smoker will change due to the constant heat output.

Before I had a smoker, I used my gas grill to smoke.  It has a separate burner just for creating smoke from wood chips.  It has three other burners to actually cook the food plus a rotisserie burner.  Under many circumstances, the burner for the wood chips puts out enough heat to keep the grill at the proper smoking temperature.  When the weather turns cold, like the time I smoked a turkey on Thanksgiving, a little heat from one of the other burners is needed…just not a burner that’s actually under the food.

I sometimes use my gas grill to smoke things, including a whole turkey once.

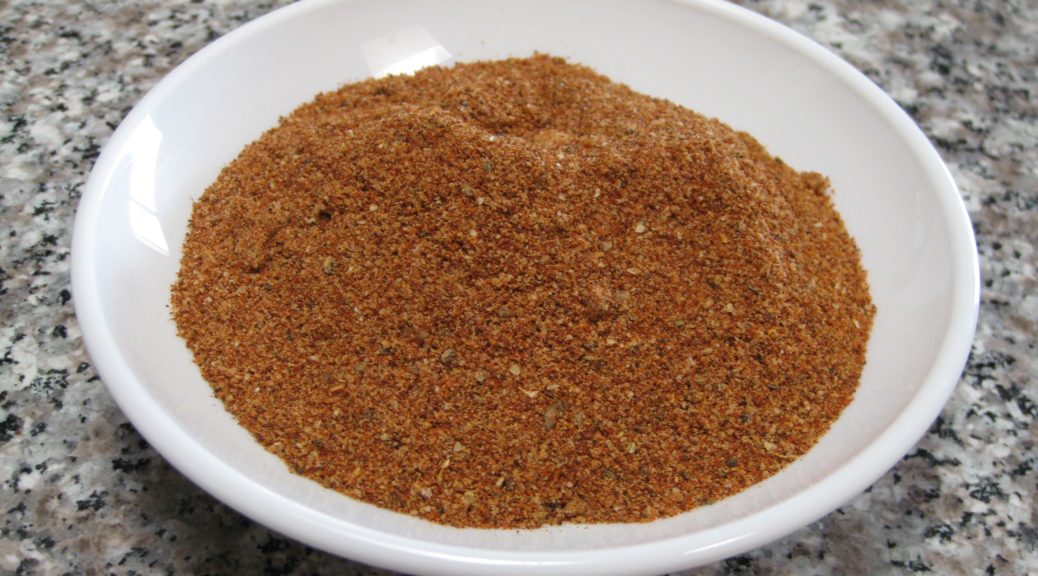
This recipe makes use of two of my previously published recipes, my barbecue rub and my barbecue sauce.

Follow us on your social media platform of choice


If you don’t have a smoker (and I realize that most people don’t) you really can do these on a grill with indirect heat, either gas or charcoal.

Put on oven thermometer on the grate where you intend to put the chicken.  There should not be any heat coming from under that grate.  Heat up the opposite side of the grill using either gas or charcoal.  With a little experimentation, you’ll be able to keep the side of the grill, where the chicken will go, at the proper smoking temperature.  If your grill doesn’t have a separate place for wood chips, add some wood chips, soaked in water for 30 minutes, to the hot part of the grill from time to time.

Happy smoking!!! (Oh, and don’t forget the beer!)

Print Recipe
Barbecued Chicken Thighs
These chicken thighs are moist and fall-apart tender. See the Notes section for links to my recipes for barbecue rub and barbecue sauce. Professional kitchens often weigh liquids, hence the 4000 grams of water. 4000 grams would essentially be the same as 4 liters. The advantage of weighing the water, though, is that you can add ice to cool the brine down while still being exact about the quantity of water. This recipe scales easily.
Votes: 0
Rating: 0
You:
Rate this recipe!
Course Mains, Poultry
Cuisine American
Prep Time 40 minutes
Cook Time 4 hours
Passive Time 2 hours
Servings
people
Ingredients
Course Mains, Poultry
Cuisine American
Prep Time 40 minutes
Cook Time 4 hours
Passive Time 2 hours
Servings
people
Ingredients
Votes: 0
Rating: 0
You:
Rate this recipe!
Instructions
  1. Dissolve the salt in the water.
  2. Refrigerate the brine until cold. If you are weighing the water, you can add ice cubes to cool the brine quickly.
  3. Add the chicken thighs and weigh them down with a plate or a zipper lock bag full of water. Brine for two hours in the refrigerator.
  4. Remove the chicken thighs and pat them dry.
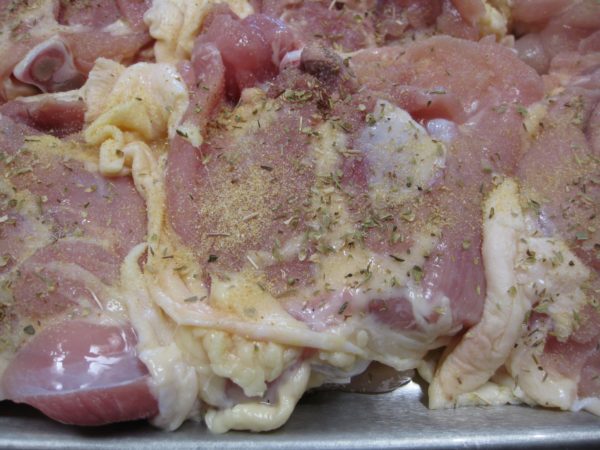
  5. Lay the chicken thighs skin-side down.
  6. Sprinkle liberally with garlic powder.
  7. Sprinkle with oregano.
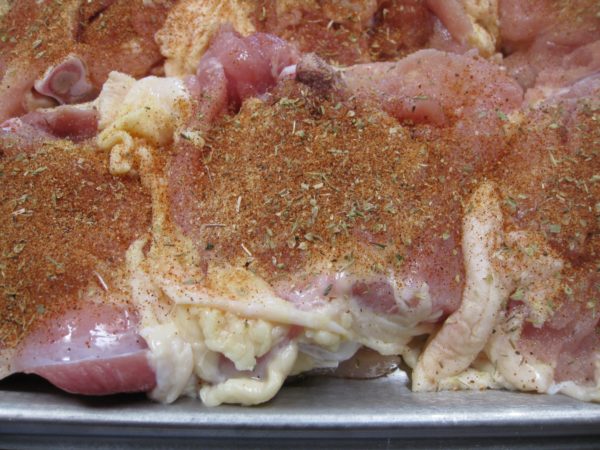
  8. Sprinkle with barbecue rub.
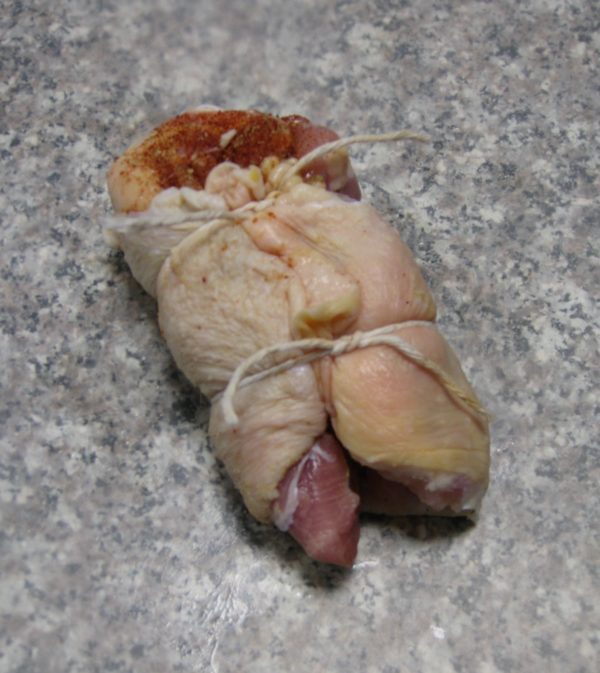
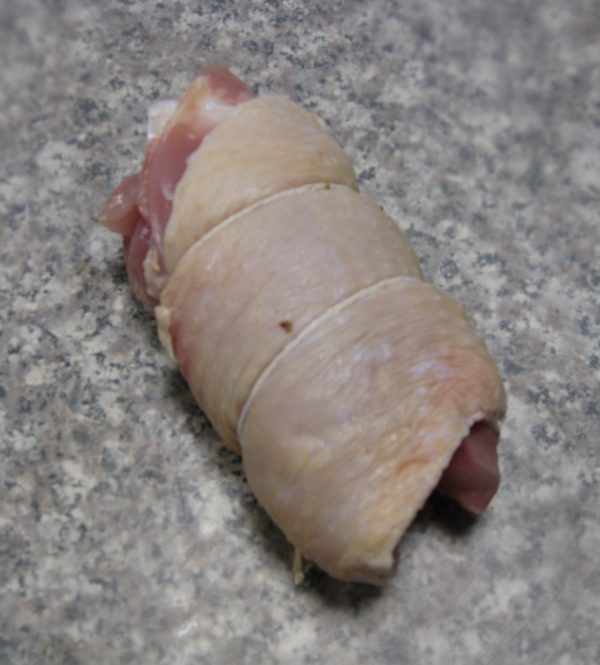
  9. Wrap the skin around thigh, trying to enclose the meat as much as possible. Tie with twine.
  10. Rub the thighs generously with barbecue rub.
  11. Smoke at 225°F for 4 hours.
  12. Fifteen minutes before thighs are done, brush with barbecue sauce. Continue cooking for 15 more minutes.
Recipe Notes

Here is where you will find my recipe for barbecue rub and my recipe for barbecue sauce.

Copyright © 2018 by Villa Sentieri, LLC. All rights reserved.
Share this Recipe

Gary’s Barbecue Rub

June 15, 2018

As summer approaches, my thoughts of cooking turn to the outside.  Luckily, at 8000 feet, it’s not a problem to use the stove or the oven inside, even for extended periods of time, as the outdoor temperature is usually quite moderate and the house doesn’t really heat up.

Even so, summer instigates a more leisurely style of cooking for me.

I like using my smoker, or grill, or wood-burning oven.

My smoker  has an adjustment for the heat output but not temperature, per se. If the wind or external temperature change, the internal smoker temperature changes, too.

There is no doubt that I have more of an Italian palate: more savory, less sweet.  In contrast, an American palate generally accepts much more sweetness in an array of foods.


Join our mailing list and you’ll never miss a recipe again!


Once, when my husband’s Great Uncle Duilio (born and raised in Italy but then residing in Argentina) was visiting, we made an American breakfast of pancakes and bacon.  He totally got into using maple syrup on the pancakes, and loved the bacon, but couldn’t understand the concept of allowing the sweet syrup to touch his bacon.  It just wasn’t right.

By European standards, American barbecue is sweet.  Even when we, as Americans, think it isn’t.

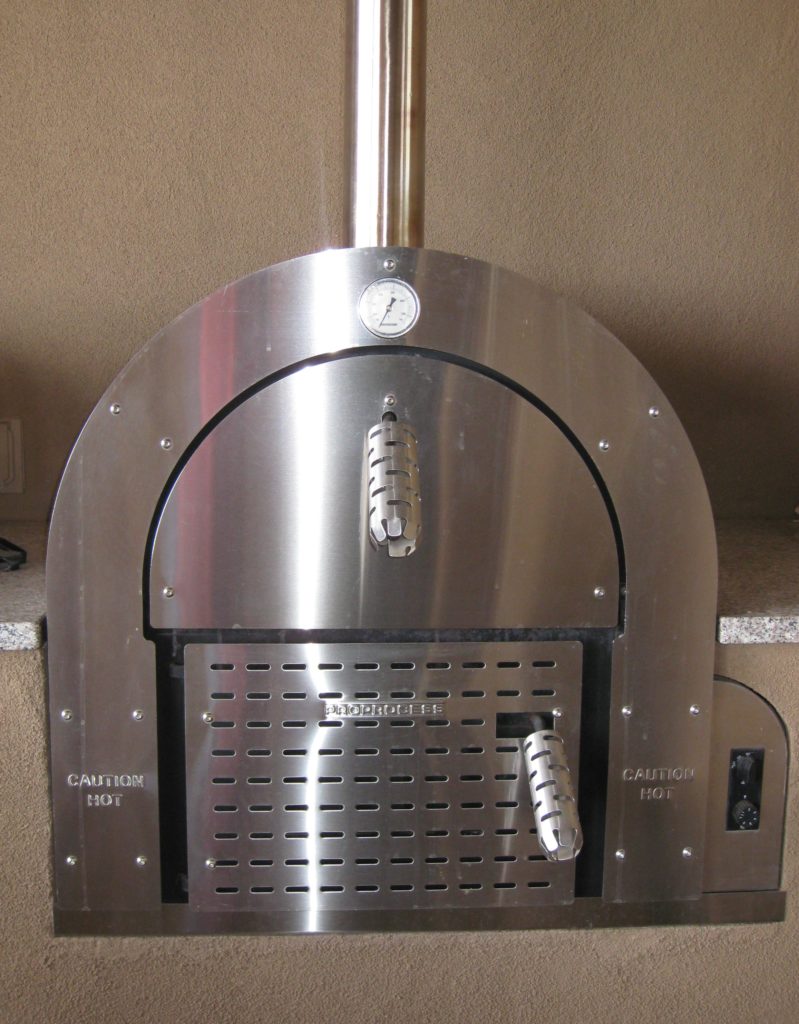
My wood-burning oven can also run on natural gas. It is great for pizza.

I guess I’ve developed an appreciation for a sweeter, more American approach to certain foods…barbecue, baked beans, bacon with maple syrup, and so forth.  Definitely, though, I still prefer foods less sweet than many of my friends would find acceptable.

Today’s recipe is quite simple.  It’s a barbecue rub.  I developed it and have successfully used it on chicken, turkey, pork and beef.

In an upcoming post, I will describe my method for preparing skin-on, bone-in chicken thighs with both barbecue rub and barbecue sauce.


Follow us on your social media platform of choice


My DCS grill has a wood chip container with its own flame for precisely controlled smoking, whether low temperature or high temperature

If you’re at all interested and, like me, want to be able to replicate you cooking over and over again, you need to develop your own barbecue rub rather than relying on a pre-mixed, store-bought version.  This recipe is as good a starting point as I can think of.  Honestly, it only takes a few minutes to mix enough for a summer of barbecuing!

Print Recipe
Gary's Barbecue Rub
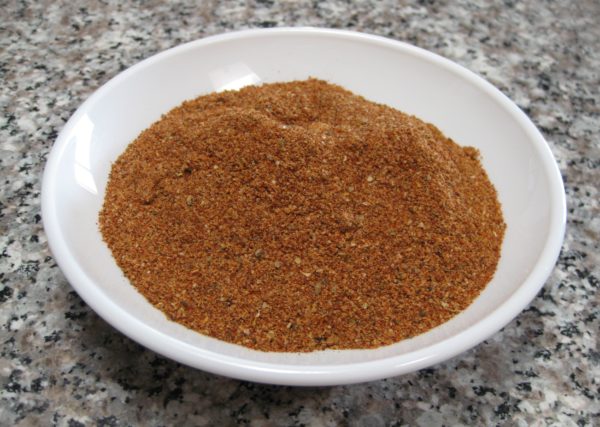
If you can’t find dried New Mexican chile molido, substitute a mixture of cayenne and paprika, half and half or to taste. Chile molido is pure ground dried red chile. There are no additional herbs or spices. It is NOT chili powder!! There aren’t really any pictures for this recipe. All they would show is measuring out dry ingredients. Enjoy the simplicity.
Votes: 0
Rating: 0
You:
Rate this recipe!
Prep Time 10 minutes
Servings
cups
Ingredients
Prep Time 10 minutes
Servings
cups
Ingredients
Votes: 0
Rating: 0
You:
Rate this recipe!
Instructions
  1. Combine chile, paprika, garlic powder, onion powder, salt, and celery seed in a jar.
  2. Grind black pepper in a coffee grinder.
  3. Add oregano to black pepper and grind again.
  4. Add pepper-oregano mixture to the contents of the jar.
  5. Pulverize the brown sugar in the coffee grinder.
  6. Add the brown sugar to the other ingredients. Mix well.
Recipe Notes

Copyright © 2018 by Villa Sentieri, LLC. All rights reserved.

Share this Recipe

Bertha’s Salsa

April 16, 2018

Bertha was born and raised in Duran, New Mexico.  She was one of 15 children.

If her family lived in Duran now they would constitute 50% of the population of 33 people (35 according to some reports).

With a few dozen residents, Duran doesn’t qualify as an actual ghost town but many of its buildings are abandoned.

One of many abandoned buildings in Duran. This was a general store and hotel adjacent to the railroad tracks.

Duran popped up in the very early 1900’s thanks to the railroad, a common occurrence in New Mexico.  Twenty years later the railroad moved it operations (repair shops, etc.) south to Carrizozo, dealing Duran, population 300 at its peak, a blow.


Click HERE to join our mailing list and you’ll never miss a recipe again!


In the 1930’s US 54 came right through Duran.  The highway traffic revived the town a bit.  In the early 1960’s however, I-25 opened about 60 miles away.  Traffic on US 54 dropped precipitously and Duran entered a downward spiral.

A sign without a purpose

Bertha has been our housekeeper in Alamogordo for the last five years.  As you may know, my husband is the Medical Director for Behavioral Health at the Gerald Champion Regional Medical Center in Alamogordo.

He’s in Alamogordo during the week and back home in Santa Fe on the weekends.

The fastest way from Santa Fe to Alamogordo involves US 54, so Frank and I know Duran well.  It’s almost the halfway point of the trip.

Another abandoned building

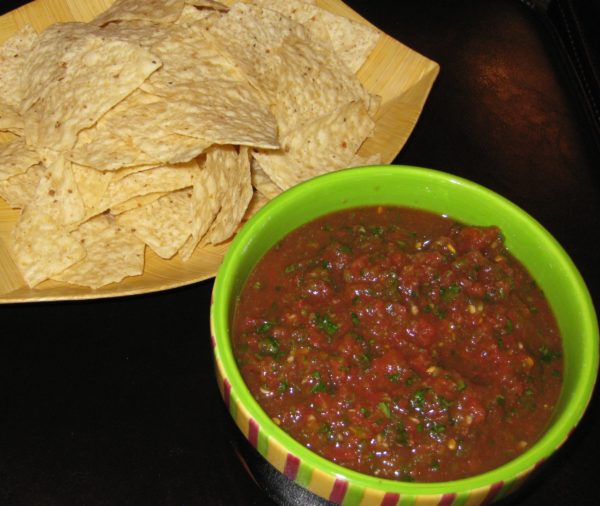
Bertha loves to cook.  She periodically leaves goodies in the fridge in Alamogordo.  This salsa appears frequently.  It’s an interesting recipe using canned tomatoes and garlic powder.  The canned tomatoes mean that it’s a year-round treat which does not require the red-ripe tomatoes of late summer.


Follow us on your social media platform of choice


I’m not sure why the garlic powder instead of fresh garlic but there are several dishes that I make that turn out better with garlic powder than with fresh garlic (like my mother’s roast turkey and chicken).  So, I didn’t play with Bertha’s recipe.

And yet another

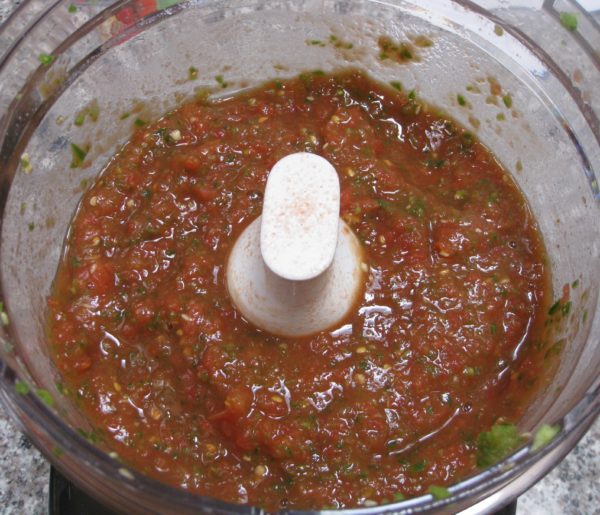
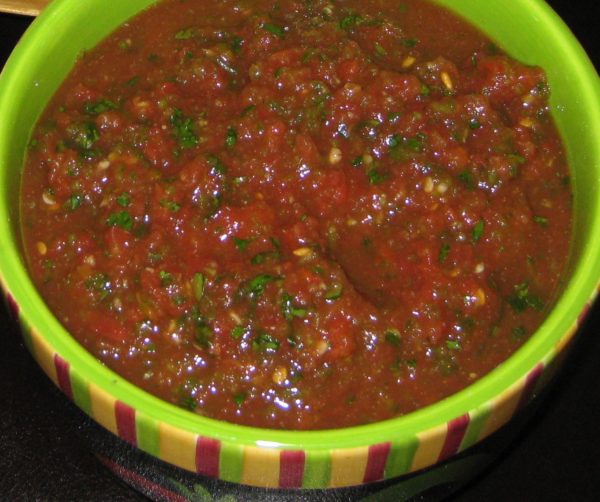
Just whizz everything in the food processor and refrigerate for several hours for the flavors to blend and you’ve got an amazing salsa with almost no work.

The fire department is still in operation

Frank is leaving Alamogordo at the end of June.  We’re going to miss Bertha, her husband Miguel, and the surprise treats that occasionally appear in our refrigerator!

Print Recipe
Bertha's Salsa
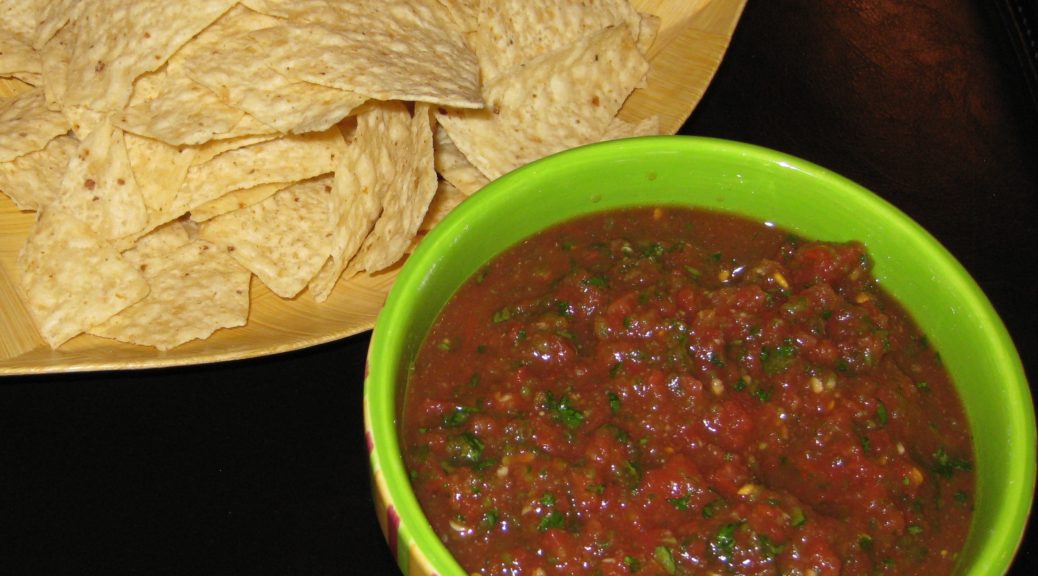
Since this salsa doesn’t use fresh tomatoes it can be made year-round. Despite the use of canned tomatoes and garlic powder it tastes bright and fresh.
Votes: 0
Rating: 0
You:
Rate this recipe!
Prep Time 5 minutes
Passive Time 2 hours
Servings
cups
Ingredients
Prep Time 5 minutes
Passive Time 2 hours
Servings
cups
Ingredients
Votes: 0
Rating: 0
You:
Rate this recipe!
Instructions
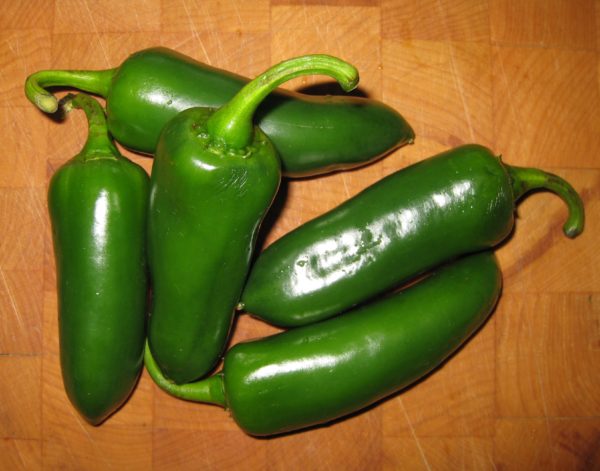
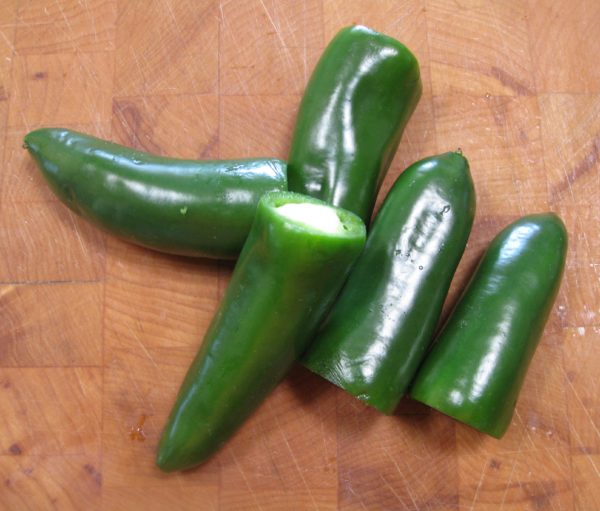
  1. Cut the tops off the jalapenos.
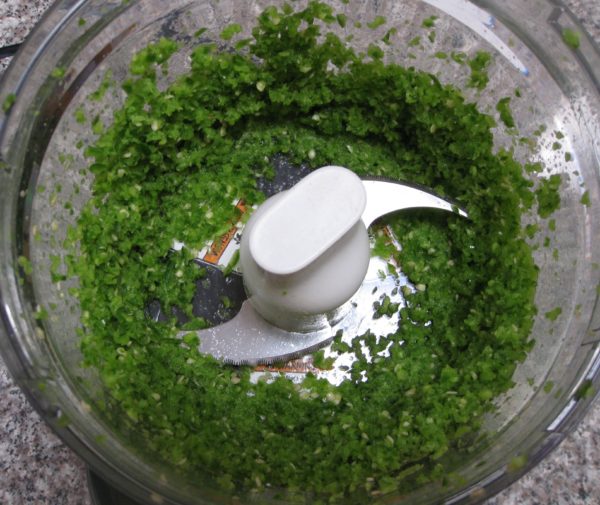
  2. Put the jalapenos in a food processor and chop finely.
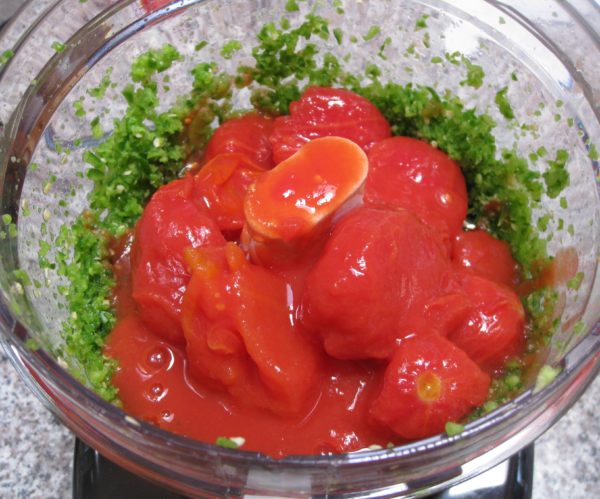
  3. Add the tomatoes and pulse until chunky.
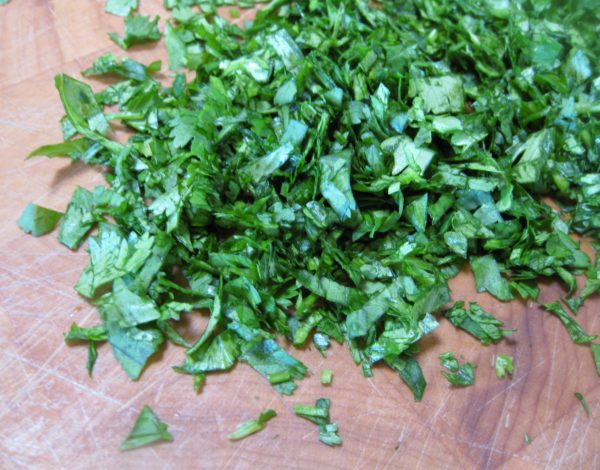
  4. Remove from the food processor and add cilantro, salt, and garlic powder. Mix well.
  5. Add a bit of lemon or lime juice to perk up the flavor. The amount will depend on the tomatoes.
  6. Adjust salt and garlic powder.
  7. Refrigerate several hours to allow the flavors to blend.
Recipe Notes

Copyright © 2018 by VillaSentieri.com. All rights reserved.

Share this Recipe

Carne Adovada (Pork Braised in Red Chile Sauce)

July 14, 2017

I am a chile head.

I also like coaxing a tremendous amount of flavor out of a small number of ingredients (though I don’t shy away from recipes with long ingredient lists either!).

I am a big fan of dishes that can be made in advance and warmed up for serving.  Carne Adovada actually tastes better if it is refrigerated for a day or two.

For all of these reasons, Carne Adovada is an ideal dish for me.  It is, bar none, my favorite New Mexican dish.

However, it isn’t necessary to use hot or extra-hot red chile.  If you’re not a fan of spicy foods, use mild or medium-hot chile.  What is critical is that you use actual New Mexico dried red chile.

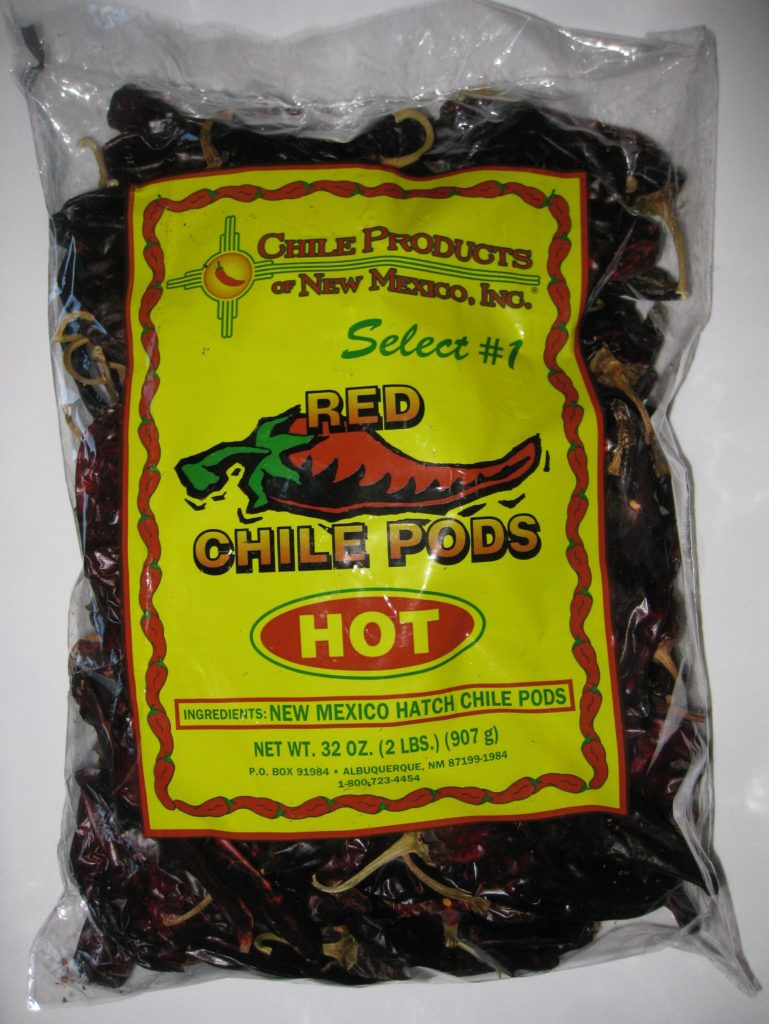
New Mexican Red Chile Pods

Although I rode in a car along route 66 in the 1960s to visit an uncle in Los Angeles, I never spent any appreciable time in New Mexico until August 1991.   Just days into that week-long visit to Santa Fe, I had Carne Adovada at Maria’s Restaurant.

I was hooked!

I was also enchanted by Santa Fe, as was my husband.  By late 1992 we put in an offer on our first house in Santa Fe.  The offer was accepted and we closed in January 1993.  Thus began our love affair with Santa Fe.

We moved to Santa Fe full time in 2012 but we spent considerable time in Santa Fe every year until then (about ten times per year including all major holidays).

I was never happy with any Carne Adovada recipe that I tried, and I tried plenty, until I stumbled on a recipe from Al Lucero, the former owner of Maria’s Restaurant, in the program book for Santa Fe Wine and Chile Fiesta a number of years ago.

In times past, when a hog was butchered in the fall, some of the meat was preserved in red chile.  This chile-infused meat was later braised to become Carne Adovada.  I don’t know of anyone who cures pork this way any longer but many recipes for Carne Adovada call for marinating the pork overnight in the red chile.  This would seem to be closer to the traditional method, though simply marinating the meat would not produce the additional flavor that would come from actually curing the pork in the chile.  Some recipes, though a minority in my experience, call for the addition of vinegar to the marinade to try to achieve more of a “cured” or “fermented” flavor.

Al Lucero’s approach is different but definitely creates an extra layer of flavor.  The pork cubes are roasted first then braised in red chile.  Refrigerating the completed Carne Adovada for a day or two before serving improves the flavor even more.

What I especially like about Al’s method is that it does not introduce any non-traditional ingredients to the Carne Adovada.  Until I can taste Carne Adovada made from pork that is actually cured in red chile, I’m sticking with my tweaked version of Al’s method.

Click HERE to join our mailing list and you’ll never miss a recipe again!

Print Recipe
Carne Adovada (Braised Pork with Red Chile)
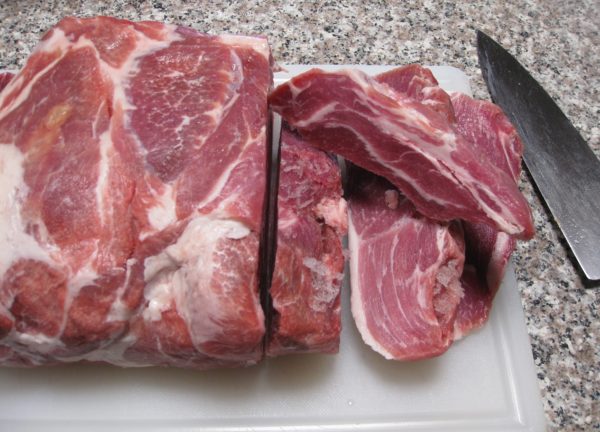
The purity of the chile flavor is key to Carne Adovada so I avoid putting in other seasonings such as onion and oregano that are sometimes called for. This recipe, based on a recipe of Al Lucero, the former owner of Maria’s Restaurant in Santa Fe, roasts the pork first for a depth of flavor not obtainable otherwise. Remove any large pieces of fat from the pork but thin layers of fat between the meat are needed to ensure moist and tender pork, so don’t remove it all. I frequently buy a bone-in pork shoulder (aka pork butt) and use the bone to make broth.
Votes: 0
Rating: 0
You:
Rate this recipe!
Course Mains, Meats
Prep Time 30 minutes
Cook Time 5 hours
Servings
people
Ingredients
Pork
Red Chile Sauce
Course Mains, Meats
Prep Time 30 minutes
Cook Time 5 hours
Servings
people
Ingredients
Pork
Red Chile Sauce
Votes: 0
Rating: 0
You:
Rate this recipe!
Instructions
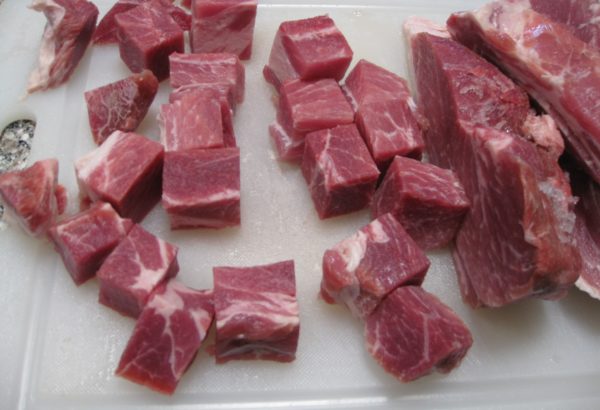
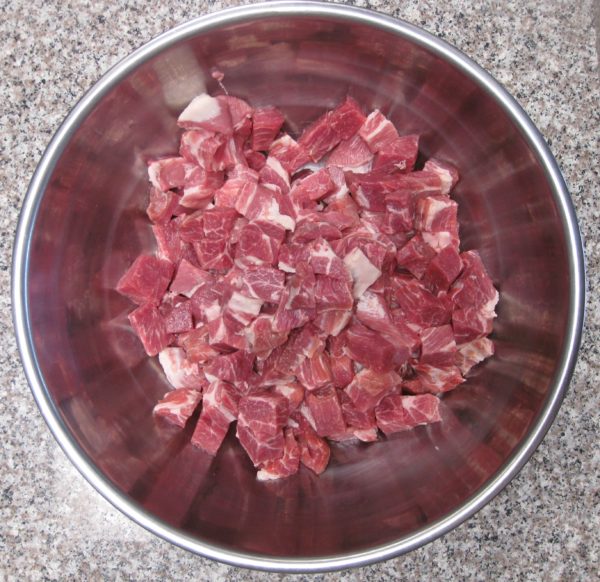
  1. Cut the pork into one inch cubes.
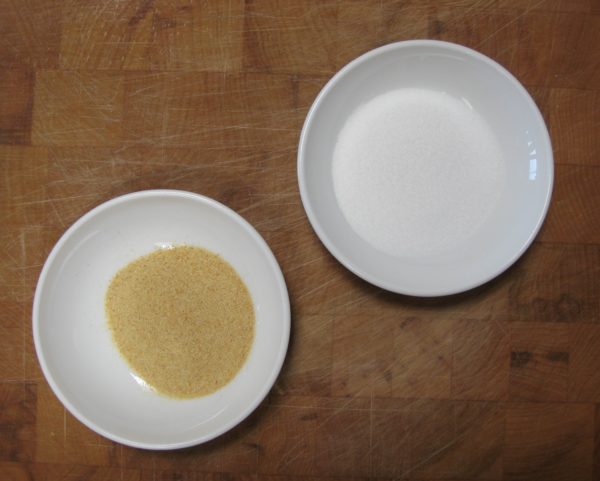
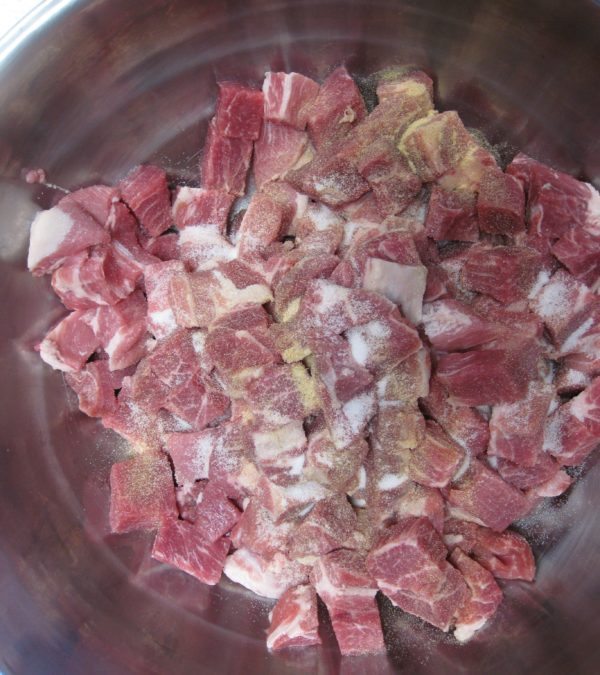
  2. Toss the pork with the garlic powder, and salt.
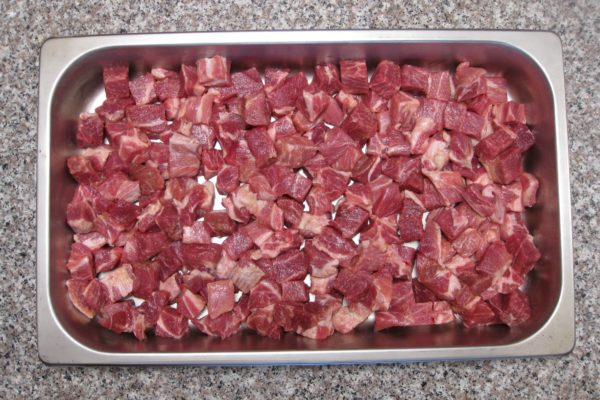
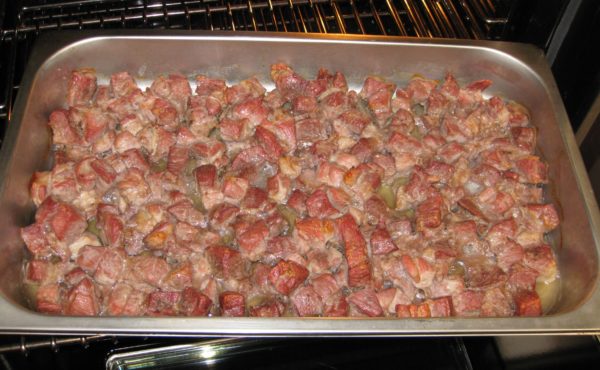
  3. Put the meat in a wide shallow baking/roasting pan that has a lid and roast at 450°F, uncovered, until well browned, turning every 20 minutes or so, approximately 90 minutes.
  4. While the pork is roasting, make the red chile sauce using the proportions of ingredients called for above and following the directions in the Red Chile blog post. See the "Notes" section below for the link. There is some rendered fat in the pan. Do not discard the fat, it carries lots of flavor and improves the mouth feel of the sauce.
  5. Beginning to brown.
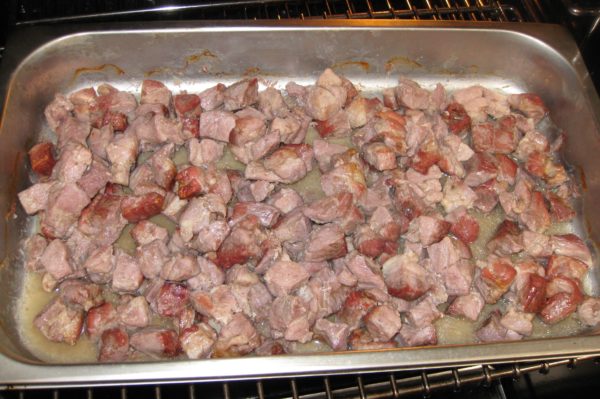
  6. Tossed after the top has browned.
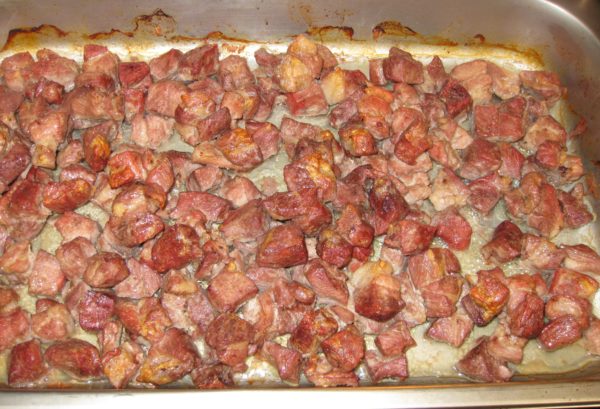
  7. Almost brown enough.
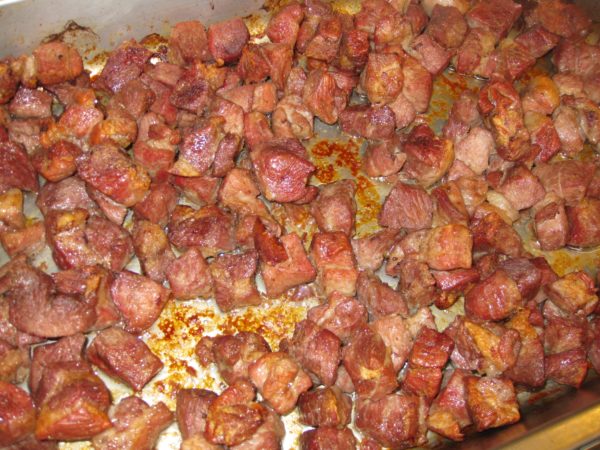
  8. Browned and ready for the chile. Note that the liquid has all evaporated and created a brown fond in the pan. This gives extra flavor.
  9. When pork is browned, add all the red chile sauce without draining any of the juices out of the pan.
  10. Cook, covered, at 250°F for approximately 3-4 hours or until meat is very tender, stirring occasionally.
  11. Remove the meat from the oven. Allow it to cool to room temperature.
  12. Cover tightly and refrigerate overnight.
  13. Reheat the carne adovada, covered, at 250°F for approximately 2 hours. If the sauce is not thick enough, reheat uncovered at a somewhat higher temperature until the sauce is thickened.
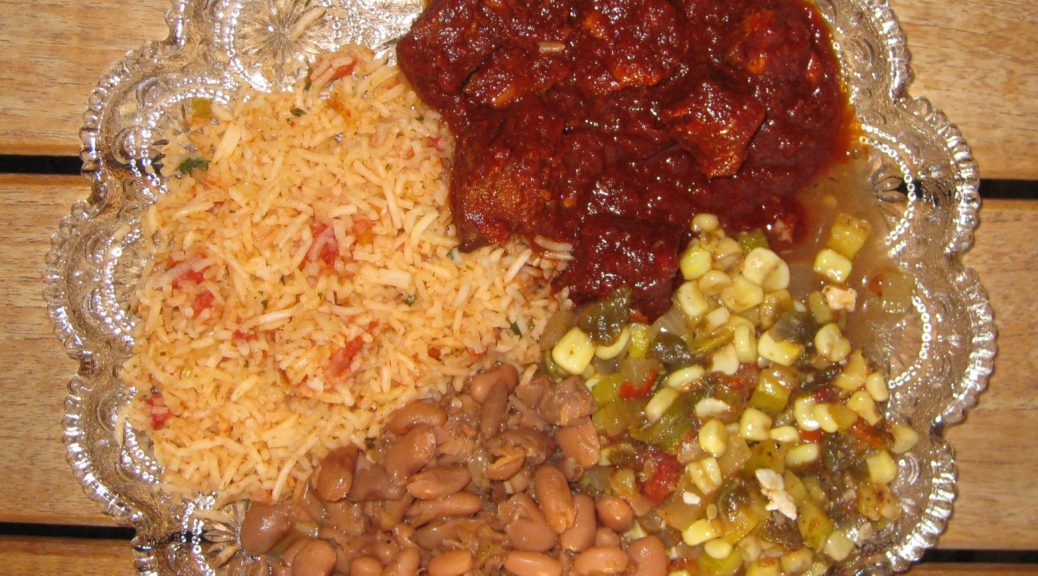
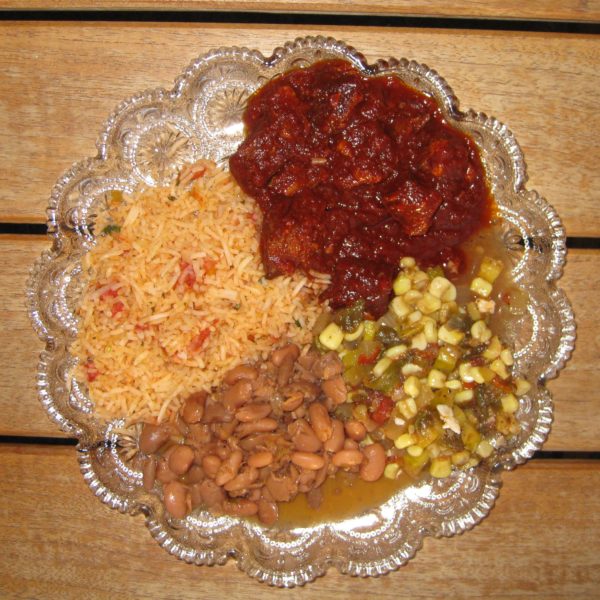
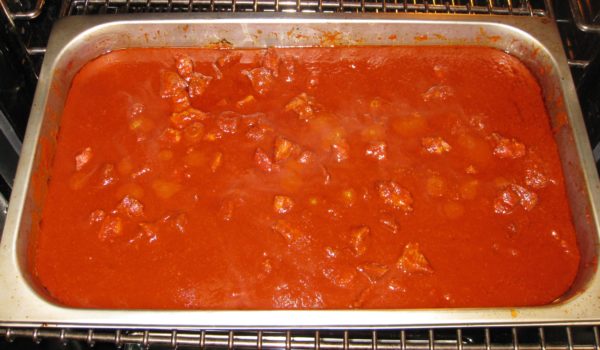
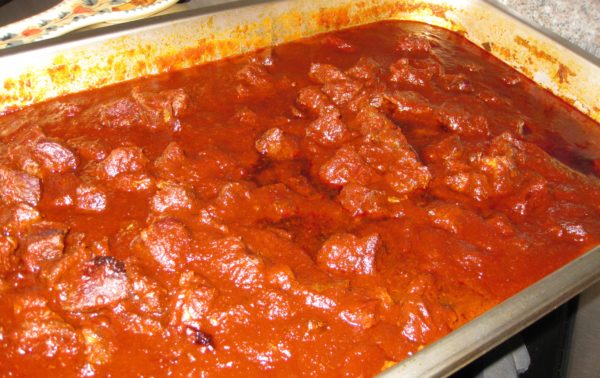
  14. This plate contains carne adovada, red rice, frijoles (beans), and calabacitas) (zucchini, corn, and roasted green chile).
Recipe Notes

Here's where you can find the directions for making Red Chile Sauce.

Copyright © 2017 by VillaSentieri.com. All rights reserved.
Share this Recipe

Mom’s Slow-Braised Pork Chops

June 16, 2017

Just last week my mother-in-law breaded and quickly pan-fried pork chops for dinner.  They were tender, juicy and truly wonderful.

Now that grilling weather has finally reached Santa Fe, we’ll have pork chops quickly cooked on the grill throughout the summer.  I’ll even grill the occasional pork tenderloin seasoned with olive oil, garlic, lemon juice and rosemary.

I really enjoy juicy, quickly-cooked pork.  However, I also really, really enjoy the style of pork chops that I at while growing up:  thin-cut pork chops cooked slowly in a sauté pan until they are deep brown.

No doubt, this is an entirely different dish from cooking the chops just enough to reach that “magic” temperature of 140°F that the USDA says is “safe.”  It won’t be to everyone’s taste (what is?) but in the interest of presenting an array of very traditional dishes I’m including it.

Just a few nights ago while in Palm Springs, I was served thick-cut braised pork chops cooked by a good friend, John O’Malley, following a recipe from Marcella Hazan.  I use the same recipe from Marcella when I want to cook thick-cut chops for company (ever since John turned me onto it a while back).

Marcella was from Northern Italy, my mother’s family from far Southern Italy, but the two dishes share a style that highlights a common feature of traditional Italian cuisine.  That is, a cut of meat that could be cooked quickly is, instead, cooked slowly coaxing out more flavor and changing the texture in the process.

The realization of the similarity of these two dishes is like the experience I wrote about in April 2017 describing roast chicken I ate in Tuscany that tasted, for all the world, like the falling-apart roast chicken seasoned with garlic and rosemary that my mother made.

Quick cooking is just one style but reading contemporary recipes one would think it’s the only way to cook many cuts of meat.  We all agree that there are cuts that must be cooked long and slow for optimum texture: think Southern Pulled-Pork Barbecue, Hawaiian Roast Pig, Beef Brisket, or Pot Roast, for example.  I challenge you to find a contemporary recipe for roast chicken or sautéed pork chops that doesn’t call for the minimum cooking time and final temperature.  It’s as if we’ve forgotten that these meats can also be cooked low and slow for a qualitatively different dish.

Recording this kind of diversity traditional foodways is one of my main goals for this blog.

As I describe on the About page of this website, I’ve had the very good fortune to cook alongside incredible cooks from many different parts of the world but even that only begins to scratch the surface of traditional foods.  And while I’ve got recipes planned well into next year, I think it’s time to bring in other voices, other stories.

From time to time I am going to feature a blog post, and accompanying recipe, based on interviews with folks who have chosen to share a treasured family recipe and a story to go along with it.  There are several individuals who have volunteered to be in the vanguard of this effort.

If you have a family recipe that you’d like to share, send me an email or add a comment and I’ll follow up.

Click HERE to join our mailing list and you’ll never miss a recipe again!

Print Recipe
Mom's Slow-Braised Pork Chops
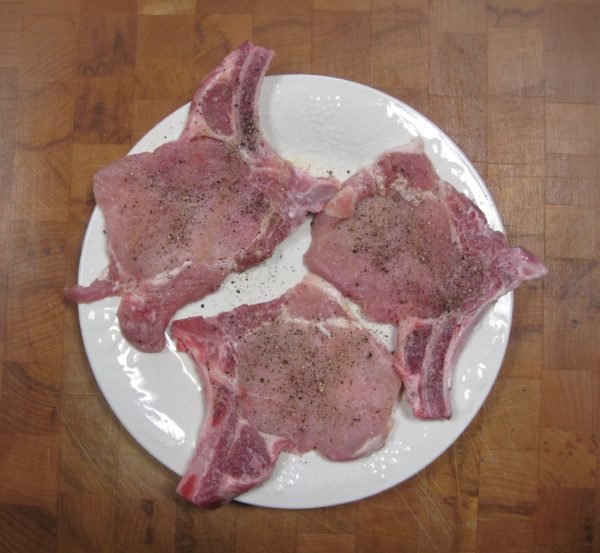
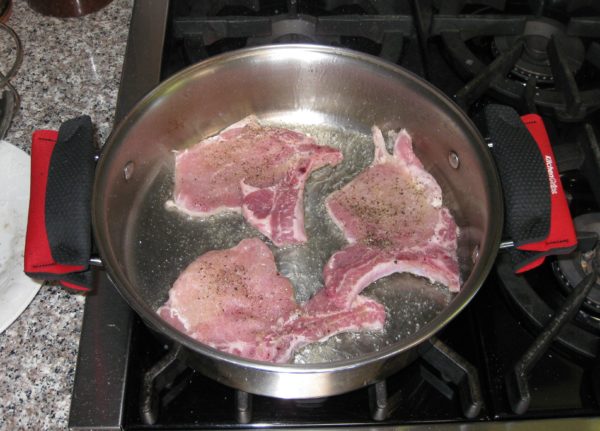
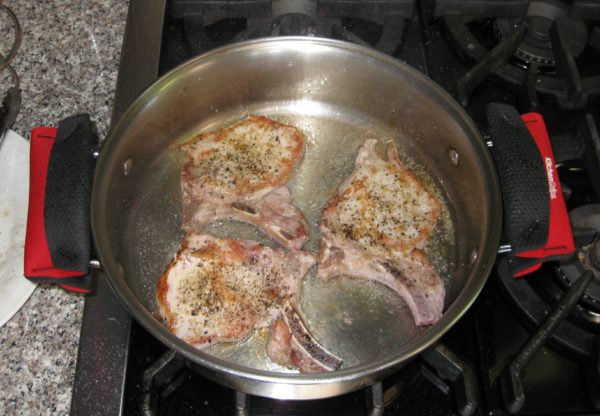
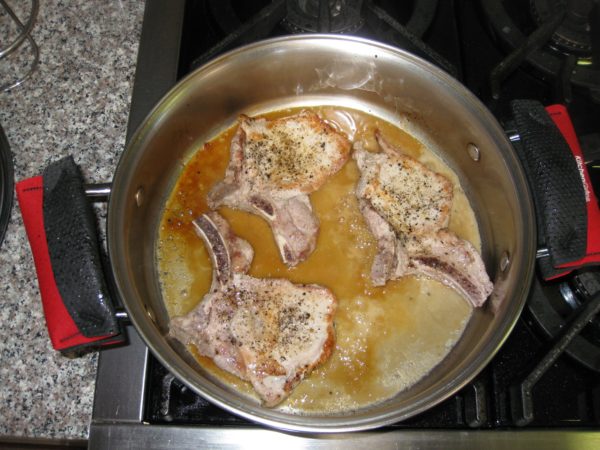
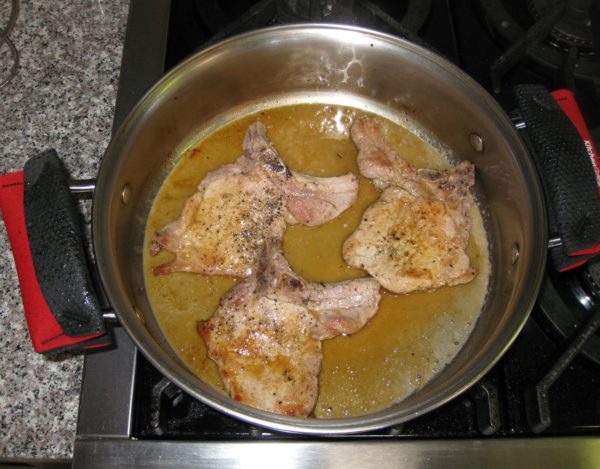
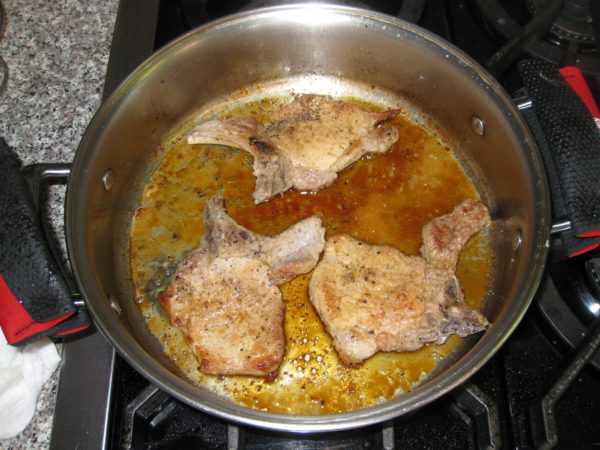
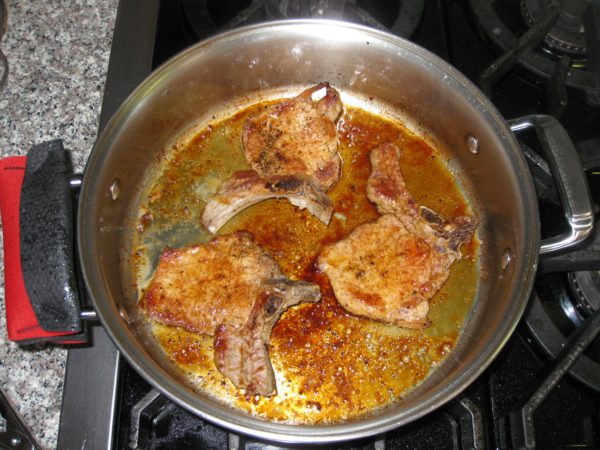
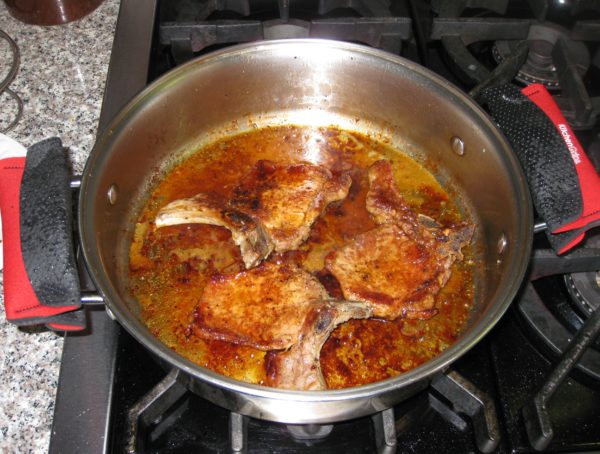
If these chops are being served as part of an Italian-style meal, preceded by pasta, rice or soup, and accompanied by several side dishes, one per person should be enough. Without a pasta course, an average eater could easily consume two of these and someone with a hearty appetite could eat three or four! A sauté pan with a very heavy bottom is needed to avoid hot spots. The chops will be cooked on low heat for most of the time and it is important that the pan conduct the heat well to avoid hot and cool spots for optimum browning. I prefer center-cut pork loin chops, these have a bit of loin and a bit of tenderloin, essentially the same cut as a T-bone steak. Loin chops (without the tenderloin), as shown in the pictures, work well too.
Votes: 0
Rating: 0
You:
Rate this recipe!
Course Mains, Meats
Cuisine Italian
Prep Time 5 minutes
Cook Time 2 hours
Servings
people
Ingredients
Course Mains, Meats
Cuisine Italian
Prep Time 5 minutes
Cook Time 2 hours
Servings
people
Ingredients
Votes: 0
Rating: 0
You:
Rate this recipe!
Instructions
  1. Season the chops generously with salt, pepper and garlic powder.
  2. Using a sauté pan that has a very heavy bottom and that is large enough to hold the chops without crowding, heat the oil until it just begins to smoke over high heat.
  3. Add the chops and reduce heat to medium high.
  4. Cook the chops, undisturbed, until nicely browned, approximately 2 minutes.
  5. Turn the chops over. If the oil was very hot when the chops were added and if you didn't disturb them while they browned, they should easily release from the pan without sticking.
  6. Brown other side. Approximately 2 minutes.
  7. Turn the chops over. Have the cover ready. Add the wine, immediately cover the pan, and turn the heat to low.
  8. Cook, covered, until the wine evaporates, 15 minutes more or less.
  9. After the wine evaporates the pan juices will start to brown. When they do, add 2-3 tablespoons of water and turn the chops over. Cook, covered, until the water evaporates and pan juices get a little bit darker.
  10. Repeat this process until the chops are falling apart tender and the pan juices are a deep brown. This will take 1 ½ to 2 hours.
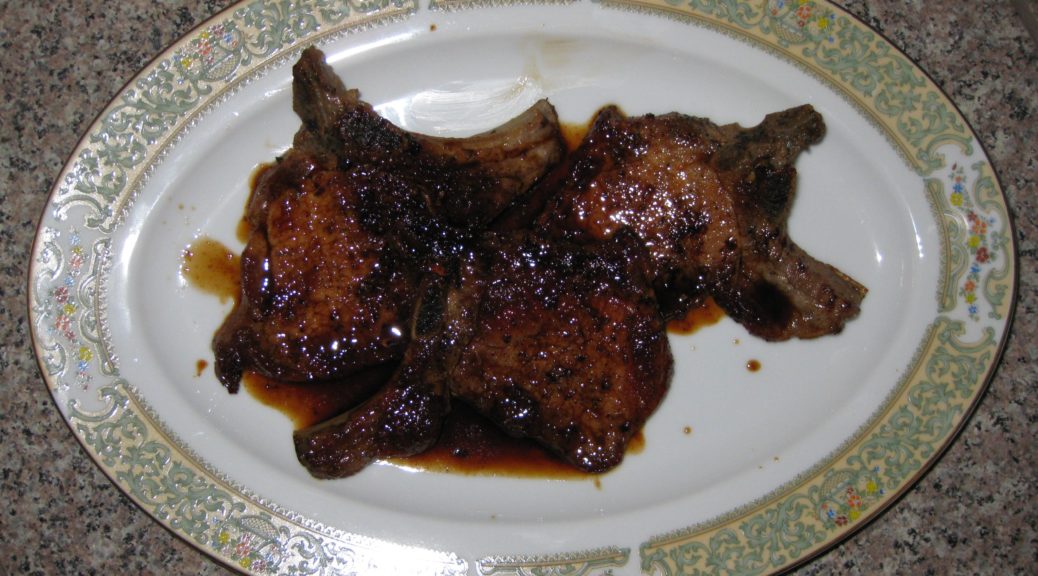
  11. At the end there should only be a couple of tablespoons of water plus the oil in the pan. Pour this sauce over the chops when serving. It should have a rich umami porky flavor.
Recipe Notes

I rarely use garlic powder. The dishes for which I consistently use garlic powder instead of fresh garlic are Italian slow-roasted poultry, the pork chops featured in this recipe, and steaks. I find that I just can’t get the flavor that I want from fresh garlic in these instances.

Copyright © 2017 by VillaSentieri.com. All rights reserved.
Share this Recipe

Italian Slow-Roasted Chicken or Turkey

April 21, 2017

For two countries that are geographically so close, Italy and France couldn’t be further apart on views of how to roast poultry.

The French typically roast quickly and at high temperature.

Italians are masters of the low and slow approach.

Italian roast chicken (or turkey, for that matter) literally falls apart.  The French version does not.  It’s a matter of style and technique, not quality or skill.

The usual style in the United States leans more toward France than Italy.  It’s the basis of the style of roasting described in most modern cookbooks and cooking magazines; higher temperatures rather than lower temperatures and yanking the bird out of the oven as soon as it reaches the minimum acceptable temperature to be “cooked” and “safe.”  Even when these magazines try to champion the approach of low and slow, they almost always miss the boat.  They miss the boat because they are still focused on the thermometer approach.

You can’t do low and slow if you’re focused on getting the bird out of the oven as soon as it hits the “safe” temperature.  Italian roast chicken is more like “pulled” chicken than the minimally cooked French version.  The whole mouthfeel is different.  So is the taste.

What I didn’t understand growing up is that my mother’s roast chicken and turkey drew from a broader Italian approach.

A few years ago we were in Tuscany having lunch with my husband’s Great Uncle Beppe and his family.

When the roast chicken was served, it was just like my mother’s!  Seasoned with garlic, rosemary, salt and pepper and roasted slowly, till it basically fell apart.

My mother’s mother came to the United States from Calabria around the turn of the 20th century at four years of age.  Here I was, nearly a century later in a province at the other end of the Italian peninsula eating chicken that could have been my mother’s, the way she learned it from her mother, who learned it from her mother.

I think that was a turning point for me in wanting to better understand Italian food traditions throughout the country and even throughout the Italian diaspora around the world.

Another amazing thing, when I think about it, is that my mother brined her chicken for an hour before cooking.  We’re talking the 1960’s here (probably the 1950’s too but I’m too young to remember that) way before brining was ever mentioned in cooking circles.  I can’t tell you why she did it or how it started but when I was learning to cook under her guidance, brining was always the first step for any recipe that included chicken.

Print Recipe
Italian Slow-Roasted Chicken or Turkey
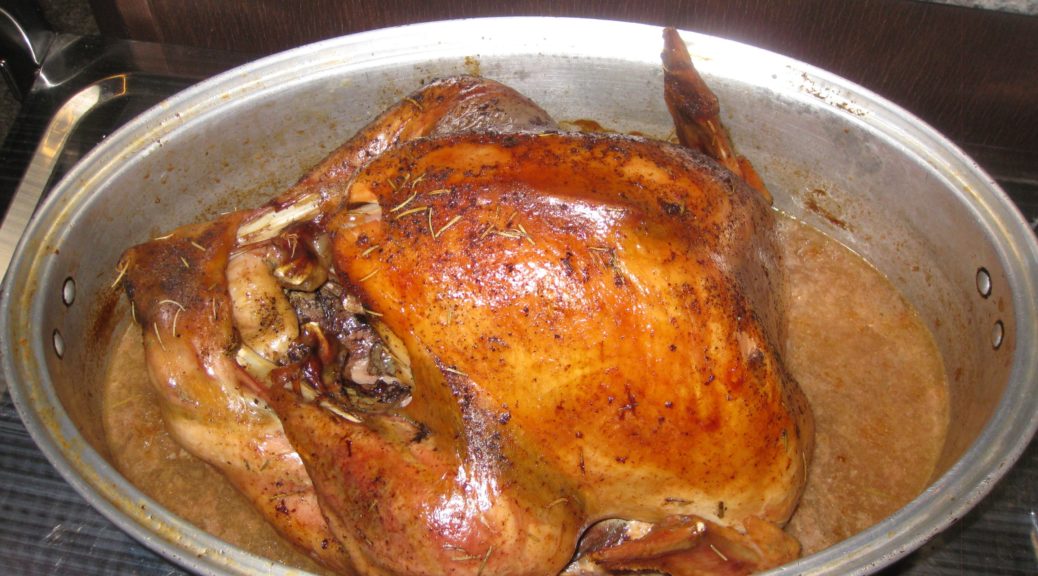
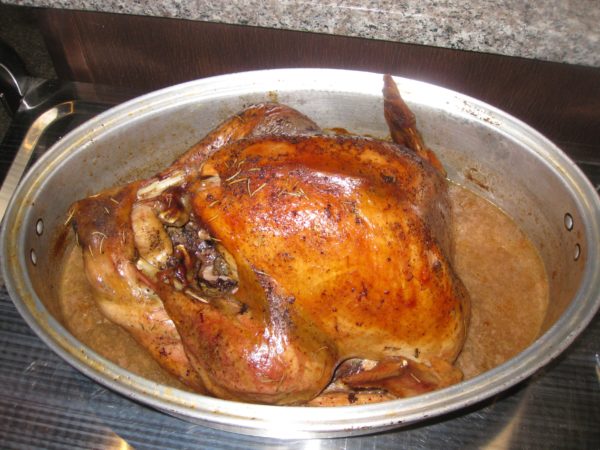
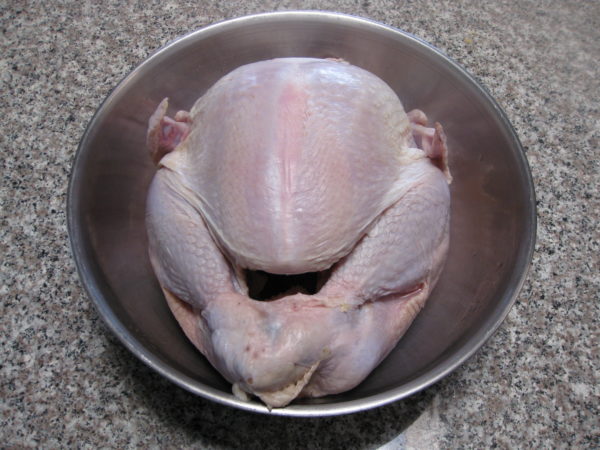
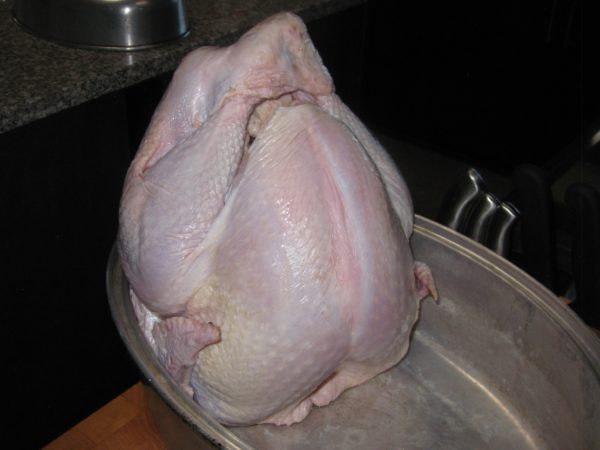
This is a no-recipe recipe. I never measure the seasonings. It’s really pretty hard to use an inappropriate amount. The cooking time is pretty forgiving, too. Until you get the hang of it, I suggest planning on the longer cooking time and the higher temperature. If the chicken or turkey is falling-apart tender before you’re ready for it, just reduce the oven to 150°F to keep the bird warm. My mother would usually brine the bird for about an hour before cooking. Time permitting, I do the same. This basic recipe works for everything from a three pound chicken to an 18 pound turkey. Just for a point of reference, the pictures feature a 12 pound turkey.
Votes: 0
Rating: 0
You:
Rate this recipe!
Course Mains, Poultry
Cuisine Italian
Prep Time 10 minutes
Cook Time 40 minutes per pound
Servings
people
Ingredients
Course Mains, Poultry
Cuisine Italian
Prep Time 10 minutes
Cook Time 40 minutes per pound
Servings
people
Ingredients
Votes: 0
Rating: 0
You:
Rate this recipe!
Instructions
  1. Brine the bird, if you like, for about an hour.
  2. Thoroughly rinse and dry the bird.
  3. Prop the bird with the cavity facing up. Generously season the inside of the bird with garlic powder, rosemary black pepper and salt. As a matter of habit, if I'm using dried rosemary, I always crust it with my fingers before sprinkling it on the bird.
  4. Put the bird in a roasting pan, breast up, preferably one able to hold the bird rather snugly. The roasting pan should have a tight-fitting cover.
  5. Generously season the outside of the bird with garlic powder, rosemary, black pepper and salt.
  6. Add water (or wine) to the bottom of the roasting pan not over the top of the bird. You don't want to displace the seasonings.
  7. Cover and roast at 350°F for 30 minutes. Reduce heat to 275°F to 300°F.
  8. After the first hour, baste the bird with the juices in the roasting pan about every 30-45 minutes. Be sure to tip the bird, or use a basting bulb, to remove the juices from the cavity and add them to the juices in the bottom of the roasting pan.
  9. Roast for a total of 30-40 minutes per pound (including the first half hour). The bird should just about be falling off the bone.
  10. If there is too much liquid in the bottom of the pan or if the bird is not brown enough, uncover the pan for the last 30 minutes or so.
Recipe Notes

Poultry cooked this way will not submit to carving in a photogenic Norman Rockwell manner. It’s just a different style. It would be like trying to cut delicate slices from pulled pork. It’s not going to happen. That said, the joints will usually separate easily and you can cut along the grain rather than against the grain to portion appropriate-sized pieces for serving.

Copyright © 2017 by VillaSentieri.com. All rights reserved.

Share this Recipe