Aunt Margie’s Pasta è Ceci (Pasta and Chickpeas)

May 4, 2018

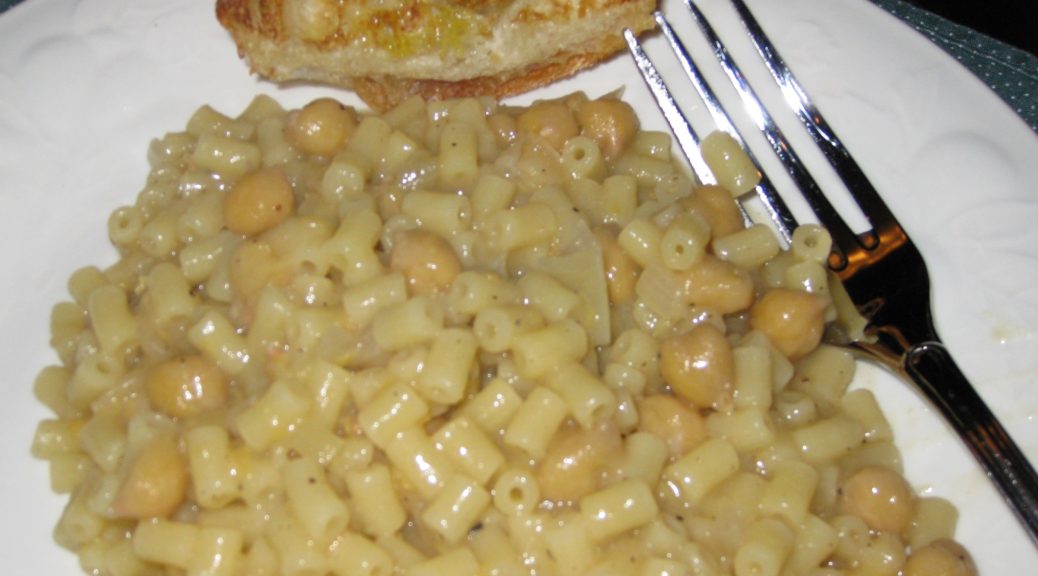
Beans and Macaroni. Pasta è Fagioli.  Even Pasta Fazool to quote Dean Martin.

It’s a classic combination and there are as many variations as there are cooks!  (Google returned 6,300,000 entries for “beans and macaroni,” 588,000 for “pasta è fagioli,” and 57,900 for “pasta fazool!”)

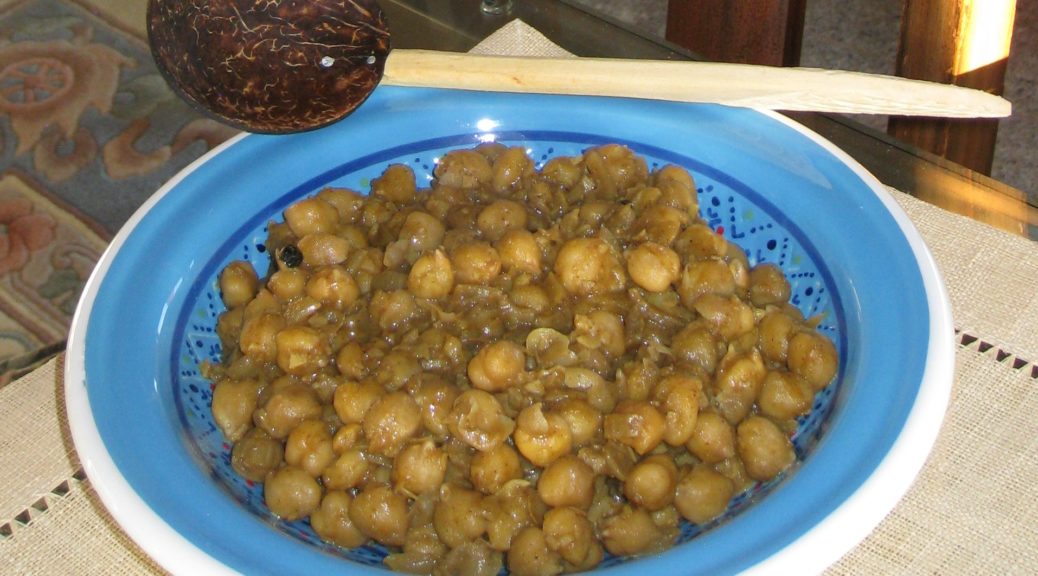
This is my interpretation of Aunt Margie’s, which she made with chickpeas.

At Aunt Margie’s 90th birthday party in September 2010.  From left to right, Aunt Margie’s grandson, Jim, me, Aunt Margie, my cousin Donna (Aunt Margie’s daughter)

It couldn’t be more different from my mother’s which was made with baby lima beans.

Aunt Margie’s was made with water and oil.  My mother’s had tomato sauce.


Follow us on your social media platform of choice


Aunt Margie’s was quite soupy.  My mother’s was just slightly “saucy.”

They grew up in the same house and learned to cook from the same mother.  I wish I had thought to ask either of them where their respective recipes came from and why they were so different.

My cousin Donna and I in the lobby of the Hilton Plaza in Miami Beach, 1970

One thing that both versions had in common, though, is that they were frequently served on Fridays, which our families observed as meatless back then.  (When Fridays were no longer meatless, my father joked that it was because the Vatican sold its fisheries.)

But Friday or no, pasta è fagioli, or, in this case, more specifically pasta è ceci (ceci means chickpeas), is consummate comfort food.  Admittedly, pasta è fagioli does not need to be meatless but it very often is.  (Actually, I made a non-meatless version earlier this week with guanciale, cured pork jowl.)


Click HERE to join our mailing list and you’ll never miss a recipe again!


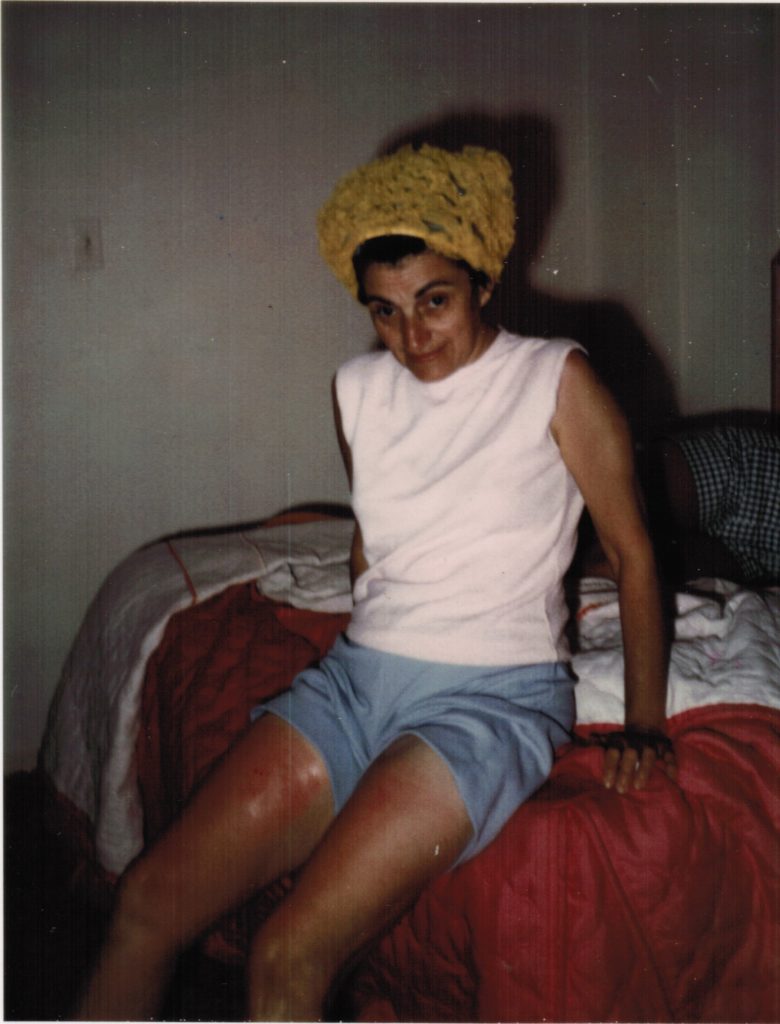
Aunt Margie and Uncle Joe were like second parents to me.  I spent many (most?) summer days at Aunt Margie’s, getting there in the morning and staying until dinnertime or later.  My cousin, Donna, is nine months younger than I am.  Her neighbor Ricky Slivosky is nine months younger than she is.  The three of us hung out pretty much all summer.  That made Aunt Margie’s house the logical choice.

Aunt Margie got a little too much sun while we were staying at the Beau Rivage Resort in Miami Beach, 1971

Our families often vacationed together.  Florida was a favorite destination.  Once every 5 years Uncle Joe had 13 weeks of vacation (ahh, the glory days of American steel manufacturing…and collective bargaining).  Those years were likely to include a trip to California.

Aunt Margie really didn’t like vacations.  Several times I witnessed what I believe was an annual ritual.  Uncle Joe would be loading the suitcases in the trunk of the car and Aunt Margie would be standing beside him still trying to convince him to cancel the vacation.  Aunt Margie never won.

Beau Rivage Resort, Bal Harbour, Florida

Those vacations were always by car; two days to Florida and four days to California.  Aunt Margie ate the same lunch every day of every trip: bacon, lettuce, and tomato sandwiches on white toast, hold the mayo.  Only after we reached our destination did she resume a “regular” diet!

We always had fun and even Aunt Margie seemed to enjoy herself (a minor episode of seasickness, notwithstanding).

Aunt Margie getting seasick on the boat trip from Miami to the Bahamas, 1970

My father didn’t always go on vacation with us due to his work schedule.  He made it on the 1970 trip to Florida, which included several days in the Bahamas which we reached by boat from Miami.  The only food memory I have of that trip is going to an Italian restaurant in Freeport where the garlic bread was so garlicky that it was bitter.  The food itself must have been pretty good as we went back again.  Unfortunately, the garlic bread was just as bad the second time around.

Print Recipe
Aunt Margie's Pasta è Ceci (Pasta and Chickpeas)
Aunt Margie’s Pasta è Ceci was more soupy than my mother’s Pasta è Fagioli. It had no tomato sauce. This is my interpretation. I have made the liquid a little thicker by emulsifying the cheese and oil at the end. Aunt Margie never used wine. That is my addition. To prepare dry chickpeas, combine 1 pound of dry chickpeas, 7 cups of water, 1 tablespoon salt, 2 bruised garlic cloves, one bay leaf, ½ teaspoon whole black pepper, and a piece of Parmesan cheese rind. Cook in the Instant Pot for 15 minutes or simmer, partially covered, adding more water if needed, till tender but not mushy. If not using the Instant Pot, add the salt after about 15 minutes of simmering. Measure out 3 ½ cups of cooked chickpeas. Reserve the remainder for another use. Use the cooking liquid as described below. Aunt Margie's pasta è ceci was usually so soupy that it was served in bowls. Feel free to make yours as loose as you would like.
Votes: 1
Rating: 5
You:
Rate this recipe!
Prep Time 10 minutes
Cook Time 45 minutes
Servings
people
Ingredients
Prep Time 10 minutes
Cook Time 45 minutes
Servings
people
Ingredients
Votes: 1
Rating: 5
You:
Rate this recipe!
Instructions
  1. Measure out three cups of chickpea-cooking liquid or use the liquid from canned chickpeas adding water to make three cups.
  2. Combine chickpea liquid, white wine, diced onion, oregano and black pepper in a Dutch oven large enough to hold the cooked pasta comfortably. Bring to a boil and simmer approximately 20 minutes, until the onion is tender.
  3. Meanwhile, brown the garlic in 1/3 cup of olive oil over gentle heat.
  4. When the garlic is brown, remove it and reserve the oil.
  5. Cook the pasta in two quarts of heavily salted, boiling water until the pasta retains just a little crunch at the very center.
  6. Reserve at least two cups of the pasta-cooking water.
  7. Pour some of the remaining pasta-cooking water into the serving bowl to warm it while proceeding with the recipe.
  8. Drain the pasta and immediately add it to the seasoned chickpea-cooking liquid along with the chickpeas.
  9. Add the garlic-infused oil and salt and black pepper to taste.
  10. Simmer gently, covered, until the pasta is just al dente. Add some of the reserved pasta-cooking water as needed.
  11. When the pasta is al dente, add more of the reserved pasta-cooking water, if necessary, to make a slightly soupy mixture.
  12. Remove from the heat.
  13. Stir in the Romano cheese and 1/4 cup of olive oil to create a glossy sauce.
  14. Add a bit more of the pasta-cooking water if needed to thin the sauce as the combination of cheese and olive oil will create an emulsion that will thicken the sauce.
  15. Taste and adjust salt and pepper.
  16. Serve immediately with additional freshly grated Pecorino Romano cheese.
Recipe Notes

Copyright © 2018 by VillaSentieri.com. All rights reserved.

Share this Recipe

Guyanese Curried Chickpeas (Channa Masala)

April 30, 2018

The largest ethnic group in Guyana is comprised of those of (East) Indian descent.  When I was there in the 1970s and 1980s, Indians represented just over half of the population.  As of the 2002 census, those of Indian descent represent just over 43 percent of the population.

Other demographic groups in Guyana include those of African, Chinese, Western European, and mixed descent.  Amerindians are now a very small percentage of the population.

The cuisine of Guyana reflects its multicultural population.  Curry is very popular as is roti, Indian-style flatbread.  Chinese-style fried rice is a restaurant staple.  A typical Sunday dish is Portuguese-derived garlic pork.  British-style baked goods are popular, especially black cake around Christmastime.

The Guyana Supreme Court building (CC BY-SA 3.0, https://commons.wikimedia.org/w/index.php?curid=475676)

A quick internet search demonstrated to me that the restaurant scene in Guyana has changed dramatically since my visits there.  In the 70s and 80s, restaurants were, for the most part, very basic affairs.  There were just a few that rose above “basic” but even they were challenged to produce really good food because of the limitation on imported foodstuffs.


Click HERE to join our mailing list and you’ll never miss a recipe again!


Food prepared at home was generally of a better quality, and certainly displayed more variety, than what was available in restaurants “back then.”  And, while in any given household there may be more foods reflective of the particular demographics of that household, popular dishes like curry, fried rice, garlic pork, and black cake are prepared in pretty much every household.  They have really become Guyanese dishes, regardless of their ethnic origins.

My last trip to Guyana was in early 1981.  I finished medical school around the end of January and went to Guyana to work on the psychiatric unit at the public hospital in Georgetown, the capital, before beginning my internship at the Hospital of the University of Pennsylvania in mid-June.  At that time there was one psychiatrist who worked for the government of Guyana and one psychiatrist in private practice.  The government psychiatrist, who lived a significant distance from Georgetown, was also responsible for overseeing the long-term psychiatric unit in Fort Canje, now referred to as the National Psychiatric Hospital.


Follow us on your social media platform of choice


The day I arrived at the public hospital in Georgetown, the psychiatrist was a no-show.  He then made it clear that he had no intention of coming to the hospital for the duration of my stay.  At the age of 26, just having finished medical school and not having done an internship, let alone a residency, I became the de-facto psychiatrist for the public hospital!

The Guyana Parliament Building (CC BY-SA 3.0, https://commons.wikimedia.org/w/index.php?curid=475699)

The psychiatric unit consisted of four rooms (plus two bathrooms) on the upper floor above the morgue.  The psychiatrist’s office (my office) was the entry point to the unit.  Behind the office was a very small nurses’ station.  There were two large wards, one on each side of the nurses’ station.  Each has eleven beds and no privacy.  One ward was for men and one for women.  Though we only had 22 beds, our census was often double that.  There was no option to add beds so patients often slept two to a bed.

In general, male patients were attended to by male nurses and female patients by female nurses.

There was also a very, very busy outpatient clinic staffed by myself and three social workers.

The male nurses started including me in some of their evening social gatherings.  I remember a few held at the home of one of the nurses who was of Indian descent.  We basically sat around talking, drinking rum, and eating.  My love of spicy Indian food was met with amazement.  The fact that I could eat incendiary atchar was sort of beyond belief.

Whenever these gatherings happened, it was just us guys.  Wives and girlfriends stayed away, even the wife of whomever was hosting the party (even though she would have prepared most if not all the food!).

When I was in Guyana, pre-mixed curry powder was the norm in cooking.  This recipe reflects that tendency.  When I made Indian food frequently, I would keep one or two types of homemade curry powders on hand as a quick solution to a weeknight meal.  For this recipe, feel free to use a good quality commercial curry powder.

Print Recipe
Guyanese Curried Chickpeas
Two cans of chickpeas can be used instead of the 3 to 3 ½ cups of home cooked beans but home-cooked are so good, and so much better. If using canned chickpeas, taste the canning liquid to decide whether to use it or discard it and rinse the chickpeas. The curry should be basically dry at the end so do not put in too much liquid at the beginning. Although not strictly Guyanese, adding a tablespoon or so of minced ginger with the garlic is a welcome taste treat.
Votes: 8
Rating: 4.5
You:
Rate this recipe!
Prep Time 10 minutes
Cook Time 30 minutes
Servings
people
Ingredients
Prep Time 10 minutes
Cook Time 30 minutes
Servings
people
Ingredients
Votes: 8
Rating: 4.5
You:
Rate this recipe!
Instructions
  1. Sauté the onion in butter until translucent.
  2. Add the garlic and minced hot pepper.
  3. Continue sautéeing until the onion is golden and the garlic is fragrant.
  4. Add the curry powder.
  5. Sauté 2-3 minutes, stirring frequently, until the raw smell is gone.
  6. Add the liquid.
  7. Bring to a boil and simmer approximately 20 minutes to develop flavor.
  8. Add the chickpeas.
  9. Simmer 10-15 minutes, stirring frequently. The chickpeas should be almost dry by the end.
  10. Adjust salt and pepper while cooking.
  11. Off the heat and stir in the lime juice and serve
Recipe Notes

Copyright © 2018 by VillaSentieri.com. All rights reserved.

Share this Recipe

Chinese Roast Pork

April 25, 2018

Throughout junior year in college I predominantly ate Chinese, West Indian, and Sri Lankan food.  To be sure, I made Italian and a smattering of other cuisines but that year was really an intensive study in three cuisines.

My roommate, Ray Hugh, was from Guyana.  His grandparents emigrated from China to Guyana around 1870.  My grandparents emigrated from Italy (on my mother’s side) and Slovakia (on my father’s side) to the United States a few decades later.

Ray Hugh in 1975 from the first page of my 1975 scrapbook

I learned a lot about Chinese food, especially Hakka Chinese, from Ray.  We also went to Chinese restaurants regularly so my palate got accustomed to the different regional cuisines of China.  We spent six weeks the summer after junior year staying with his mother outside of London.  I learned a lot about Chinese (and West Indian) food from her.


Click HERE to join our mailing list and you’ll never miss a recipe again!


As for West Indian, my primary influences were, again, Ray Hugh, Valrie Tracey, and Gloria Lannaman.  Though located on the South American mainland, Guyana was administered (then called British Guiana) as part of the British West Indies and it definitely has a West Indian cultural heritage.

Valrie and Gloria were from Jamaica.  I posted my version of a recipe for Valrie’s Easter Bun a few weeks ago.  If I get in the right frame of mind, I’ll post my interpretations of her recipes for curry goat and for home-salted mackerel cooked in coconut milk.  Admittedly, these may be a stretch for most of my readers but they fulfill the blog’s goal of highlighting traditional recipes from around the world.

From Gloria, I got a wonderful pot roast recipe with allspice (called pimento in Jamaica) and a shockingly pink rum punch recipe.  I still use her technique for sautéing baked ham with caramelized onions and Scotch Bonnet peppers for a quick supper or served on crackers with cocktails.   These will all appear in due course.

Valrie Tracey in 1975, also from the first page of my 1975 scrapbook

As I’ve described several times, Nanacy and Reggie Rajapakse were my primary instructors in the art of Sri Lankan cooking…along with a couple of cookbooks by Charmaine Solomon, who Nanacy and Reggie knew.

For much of the summer that Ray and I spent with his mother near London, we explored the city almost every day.  We’d have breakfast, walk to the train station in New Malden, and take the train to London.  We’d be home for dinner, usually.  Lunch was frequently at a restaurant in Chinatown—you know, the Cantonese ones with roast pork, roast ducks, and other roasted animal parts hanging in the window.  That was where I honed my taste for Cantonese roast pork—minus the bright red food coloring.


Follow us on your social media platform of choice


In these restaurants, lunch was a bowl of rice and some sort of roasted meat, hacked to bite-size bits with a very heavy cleaver.  There was nary a vegetable in sight.  When I mentioned to Ray, once, that a vegetable would be nice, he walked over to the chef, who was putting together everyone’s lunch right inside the front window of the store, with rows of glistening roasted meat on hooks hanging in front of him.  The chef pulled a few greens from somewhere, dipped them in a bubbling cauldron of broth momentarily, and put them in my bowl along with the rice and roast pork.  He was very gracious about it but I realized that vegetables were not the point of a restaurant like this.  From then on I was happy to eat rice and roasted meat for lunch, choosing to balance out my diet at the other two meals of the day.

The third and final picture on the first page of one of my 1975 scrap book is this picture of me

Friday, July 4, 1975 was one of the days we did not go into London from Ray’s mother’s house.  Instead, we stayed home and made hamburgers and hot dogs (well, that being England and then being then, they were bangers, really) and a few of the usual trimmings.  Ray and I along with his mother and two sisters, and his younger sister’s boyfriend, Clive, sat outside in the charming little backyard (what the Brits call a “garden”) eating.  Clive asked what we were celebrating.  I told him we were celebrating the independence of the United States from Britain.  That didn’t go over really well but he was a good sport about it.

From that summer of eating Cantonese Roast Pork in London’s Chinatown, I got home wanting to be able to make it.  Ray and I roomed together senior year as well.  That’s when I perfected my recipe for roast pork.  It involves marinating strips of pork overnight then hanging them from hooks in the oven and roasting them.  It sounds fussy, but it’s really quite easy.

Stainless steel “s” hooks are the best for hanging the pork in the oven

This Cantonese-style roast pork is totally different from Ray’s Five Spice Roast Pork, which I like equally well.

Print Recipe
Chinese Roast Pork
This roast pork is not as red as the roast pork often seen in Chinese restaurants as it does not use artificial coloring. Thick-cut boneless pork chops work well. It is best for the meat to have a layer of fat to provide some moisture while roasting. The thin fat cap should not be removed. The difference in taste between Chinese rice wine, sake, and pale dry sherry is not really noticeable in this dish given the other very flavorful ingredients. Good quality Chinese rice wine can be difficult to find. I prefer a reasonably-priced, good-quality domestic Sake, such as Sho Chiku Bai. Do not use the unfiltered (nigori) sake, however.
Votes: 0
Rating: 0
You:
Rate this recipe!
Course Mains, Meats
Cuisine Chinese
Prep Time 15 minutes
Cook Time 1 hour
Passive Time 24 hours
Servings
people
Ingredients
Course Mains, Meats
Cuisine Chinese
Prep Time 15 minutes
Cook Time 1 hour
Passive Time 24 hours
Servings
people
Ingredients
Votes: 0
Rating: 0
You:
Rate this recipe!
Instructions
  1. Cut pork into 1½ x 1½ x 4 inch strips.
  2. Mince the garlic.
  3. Grate the ginger.
  4. Crush the star anise in a mortar.
  5. Combine the ginger, garlic, hoi sin sauce, crushed star anise, sake, soy sauce and honey. Mix well.
  6. Add the pork strips and toss to coat.
  7. Marinate the pork at least 2 hours, but preferably overnight turning once or twice.
  8. To roast, put one oven rack in the top position and another in the bottom position. Preheat the oven to 350°F.
  9. Hang each strip of pork from an "S" shaped hook on the top rack. Put a roasting pan below the pork, filled with water, to catch the drippings.
  10. Roast at 350°F for 30 minutes. Increase the temperature to 450°F and cook for another 20-25 minutes.
  11. Remove the pork strips from the oven. Slice them crosswise, approximately 1/3 inch thick. Pile the pork on a platter to serve.
Recipe Notes

Sho Chiku Bai sake is reasonably priced and good to drink as well as to cook with.

Hoisin sauce is available in Asian markets and many well-stocked supermarkets.

Copyright © 2018 by VillaSentieri.com. All rights reserved.

Share this Recipe

Piselli in Umido (Peas in Tomato Sauce)

April 11, 2018

Italians have knack for combining a modest array of vegetables into an almost endless cannon of dishes, each of which is distinctive, even if the interrelationships of the various parts are obvious.

This dish of peas cooked in tomato sauce is from my husband’s paternal grandmother, Amerina Pieri.

I learned to make this from my mother-in-law, Marisa, Amerina’s daughter-in-law.


Follow us on your social media platform of choice


Everyone who makes it adds his or her own signature.  Mine is not exactly like my mother-in-law’s and I’m sure hers is not just like Zia (Aunt) Ida’s, Amerina’s daughter.

Interestingly, Nonni (as we all called her) used canned peas.  In talking with my father-in-law (who grew up eating this) and my mother-in-law, they were pretty sure Nonni would not have used canned peas in Italy unless she possibly canned them herself.  Somehow canned peas became the norm in America.

Amerina Pieri (aka Nonni or Nonni’merina) Christmas 2005

And, while canned peas produce a pretty good dish, I prefer something a little fresher.  Because really good fresh peas are available for only a few weeks a year at the Farmers Market in Santa Fe, I usually use frozen peas.

If the frozen peas haven’t been in your freezer so long that they start to dry out and freeze into a block they are superior to “fresh” peas except during the few weeks a year when they are really locally-grown and truly fresh.


Click HERE to join our mailing list and you’ll never miss a recipe again!


My mother-in-law usually uses canned tomato sauce when making this, as did Nonni (at least when she made it on this side of the Atlantic Ocean!).

I use tomato paste and water.  If you read the ingredient lists on cans of tomato sauce that you can buy in the United States, you will find that most are made from tomato paste and water, so why not just do it yourself?  Those few brands of tomato sauce that are not made from diluted tomato paste are a little too sour for my taste.  I would opt for a good-quality tomato puree instead.

My favorite brand of domestically produced tomato paste

Tomato paste has a richer flavor than tomato sauce or tomato puree.  I attribute this to the extra cooking that is needed to concentrate the tomatoes.  Those little cans provide the foundation of a taste that could otherwise only be achieved with hours of simmering.

Homemade tomato puree would be another good option if you want a fresher, more summery taste.  Here’s where you can find my recipe.


If you have a favorite family recipe and a bit of a story to tell, please email me at santafecook@villasentieri.com and we can discuss including it in the blog. I am expanding the scope of my blog to include traditional recipes from around the country and around the world. If you haven’t seen Bertha’s Flan or Melinda’s Drunken Prunes, take a look.  They will give you an idea of what I’m looking for.


Print Recipe
Piselli in Umido (Peas in Tomato Sauce)
Fresh or canned peas can be used in place of frozen. Fresh peas will take longer to cook. The canned peas should be cooked briefly to avoid overcooking. I like to rinse off frozen vegetables to remove any ice crystals on the exterior. I find the ice crystals can carry a “freezer” taste.
Votes: 0
Rating: 0
You:
Rate this recipe!
Course Sides, Vegetables
Cuisine Italian
Prep Time 10 minutes
Cook Time 75 minutes
Servings
people
Ingredients
Course Sides, Vegetables
Cuisine Italian
Prep Time 10 minutes
Cook Time 75 minutes
Servings
people
Ingredients
Votes: 0
Rating: 0
You:
Rate this recipe!
Instructions
  1. Sauté the onion, garlic, sage, parsley and ½ teaspoon of salt in the olive oil in a heavy-bottomed saucepan till the onion is translucent.
  2. Add the wine and cook, stirring frequently, until it evaporates.
  3. Add the tomato paste and sauté until it becomes slightly darker, 3-4 minutes.
  4. Add the water, sugar, bay leaf, rosemary, oregano, and salt and pepper to taste.
  5. Simmer, partially covered, until thickened, approximately 45 minutes.
  6. Adjust seasoning.
  7. Rinse the frozen peas under cool water to remove any ice crystals.
  8. Add the frozen peas to the sauce.
  9. Simmer approximately 15 minutes, adjusting seasoning once again, if needed.
Recipe Notes

Copyright © 2018 by VillaSentieri.com. All rights reserved.

Share this Recipe

Philadelphia-Style Tomato Pie

March 14, 2018

Like many psychiatry residents, I used to moonlight to make extra money.

The money was good and the work was usually not difficult.  Many moonlighting jobs required being on-premises overnight.  Most of the time, this usually just involved sleeping but, again, not always.

One of my easier moonlighting jobs was at a private psychiatric hospital in the Philadelphia suburbs.  I had to do the histories, physicals, and psychiatric evaluations on the newly admitted patients and then be available for any issues that came up during my shift.  Usually I got to sleep all night.

This was in stark contrast to one of my other moonlighting jobs at the crisis service that covered a swath of northeast Philadelphia.  The patients were more acute and admissions unplanned.  Sleep was elusive.


Follow us on your social media platform of choice


One morning as I was finishing up some work on one of the units at the private psychiatric hospital I spied a pizza box in the staff lounge, clearly intended for anyone who wanted to have some.

I opened the box and was presented with my first tomato pie, basically a focaccia topped with a prodigious amount of a jam-like tomato sauce.  There was no cheese and there were no toppings.

I had never heard of tomato pie like this.  Sometimes the term tomato pie was applied to a run-of-the mill pizza, usually by my Uncle Joe, but this was a whole different creation.

Not only was it naked, except for the tomato sauce, the sauce was very dense (almost like tomato paste) and thickly applied to the dough.

Good quality tomato puree is essential for this sauce. I prefer imported Italian tomato puree, called passato (or passata) (both are correct) di pomodoro

Growing up, a regular mid-morning Sunday snack (after church and before our major meal of the day around 1:00 or so) was a bowl of my mother’s long-simmered tomato sauce that was almost always bubbling away on the stove on Sunday mornings and a stack of bread to dip into it.   Italian bread was preferred but I’d make do with American “slice” bread if need be…often six slices…to hold me over until mealtime.

Tomato pie was heaven-made for someone like me.  It was bread and sauce in an easy-to-eat package.  No bowl or dipping required.


Click HERE to join our mailing list and you’ll never miss a recipe again!


It’s pretty astounding to realize that I had lived in Philadelphia for about 11 years before encountering my first tomato pie.  I don’t really understand why.  Two of the bastions of Philadelphia tomato pie are on Ninth Street, an area that I started going to my freshman year in college.

This article provides some interesting background on Philly-style Tomato Pie.

I’m a big fan of making dough for pizza and focaccia in my bread machine.  If you don’t have a bread machine, use a mixer with a dough hook.  Failing that, some elbow grease and a smooth kitchen counter will do the trick.


If you have a favorite family recipe and a bit of a story to tell, please email me at santafecook@villasentieri.com and we can discuss including it in the blog. I am expanding the scope of my blog to include traditional recipes from around the country and around the world. If you haven’t seen Bertha’s Flan or Melinda’s Drunken Prunes, take a look.  They will give you an idea of what I’m looking for.


Print Recipe
Philadelphia-Style Tomato Pie
Tomato Pie is a thick crust pizza dough topped with copious amounts of very thick tomato sauce. No cheese is put on the pie before baking. Some folks sprinkle grated Pecorino on the finished pie. It is usually served at room temperature. If the garlic taste in the sauce is too strong for you, the garlic can be sautéed in a small amount of olive oil before mixing into the tomato puree mixture. It is best to make the sauce a day in advance and refrigerate it. If you don’t have a bread machine, mix the dough in a mixer with a dough hook for about 10 minutes after the dough comes together. You can also mix it by hand which will give you a bit of an upper-body workout.
Votes: 2
Rating: 5
You:
Rate this recipe!
Prep Time 15 minutes
Cook Time 35 minutes
Passive Time 24 hours
Servings
pieces
Ingredients
Sauce
Dough
Assembly
Prep Time 15 minutes
Cook Time 35 minutes
Passive Time 24 hours
Servings
pieces
Ingredients
Sauce
Dough
Assembly
Votes: 2
Rating: 5
You:
Rate this recipe!
Instructions
Sauce
  1. Grate the garlic on a Microplane grater or crush to a paste.
  2. Combine all the ingredients for the sauce.
  3. Cover the sauce and refrigerate overnight.
  4. Before using, taste and adjust seasoning.
Dough
  1. Prepare the dough using the dough cycle of the bread machine.
  2. At the end of the cycle put the dough into an oiled bowl or covered container and allow to rise until doubled.
Assembly
  1. Oil a half-sheet pan (13" x 18") with a few tablespoons of olive oil.
  2. Stretch dough into the pan.
  3. The dough will spring back. Stretch it out then allow it to rest a few minutes. Stretch more, then allow it to rest a few minutes. With resting in between stretches, the gluten will relax and the dough won't spring back.
  4. Cover the pan. I invert another half-sheet pan on top.
  5. Allow to rise until doubled, approximately 30 minutes.
  6. Spread all of the sauce on top.
  7. Bake at 350°F until crust is browned and sauce is thick, approximately 35-45 minutes.
  8. Cool in the pan.
  9. Cut into squares and serve at room temperature.
  10. Sprinkle with grated Pecorino cheese, if desired, once cool.
Recipe Notes

Copyright © 2018 by VillaSentieri.com. All rights reserved.

Share this Recipe

Frittata di Spaghetti (Frittata with Spaghetti)

March 9, 2018

Although I typically heat up left over pasta and have it for lunch, it definitely pales in comparison to the freshly made dish.

In the pre-microwave days of my youth, leftover pasta was heated gently in a sauté pan with a little bit of water added.  Now, the microwave makes quick work of the same task.

If you have leftover pasta, though, consider turning it into a frittata.  I think it constitutes an entirely new dish, and not leftovers, because it’s being turned into something totally different.

A slice of frittata with a few Calabrian oil-cured peppers on the side

We eat so much pasta in our house that if we turned the leftovers into frittate (the plural of frittata) our dinners would alternate between pasta and frittata almost every day of the week!  That’s why some of the leftover pasta is simply heated up for lunch.


Follow us on your social media platform of choice


A frittata is often referred to as an Italian omelet.  But an omelet it most definitely is not.  It is cooked using a different technique with a different intended outcome.

Calling a frittata an Italian omelet is like calling everything made from ground beef a hamburger.  (OK, off my soapbox for now.)

You can use most any combination of pasta and sauce for a frittata but you don’t want there to be lots of extra sauce or it will be difficult to get the eggs to set.

Most often, I’ll use a long thin pasta, like spaghetti or spaghettini with either a tomato sauce or anchovies and garlic.  They both work well.  That said, I’ve made frittate from a wide array of leftover types of pasta.  Shape is no object!

If you happen to know somebody who raises chickens or if you have access to freshly laid eggs at a farm stand or farmers’ market this is an excellent use for them.  There’s little that stands between you and the eggs, so using really good, fresh eggs is noticeable.

Crushed red pepper is a good alternative to Calabrian oil-cured peppers, but definitely not as flavorful

As I mentioned earlier this week, I’m losing the battle to raise chickens at our house.


Click HERE to join our mailing list and you’ll never miss a recipe again!


A frittata is cooked slowly in a sauté pan until the eggs set and turn golden brown on the bottom.  I prefer to do this with the pan covered as it aids in setting the top of the eggs, too.

Once the bottom is set, there are two methods to finish the frittata.  One is to put the frittata under the broiler or in the oven.  The good folks at Wikipedia think this is the only way to do it.  In fact, I would suggest that most Italians do not do that.  They simply flip the frittata over.  (OK, I was back on the soapbox for a moment there.)

If you’re going to finish the frittata by flipping, however, you need to be sure that the top of the frittata is not runny.  It should be just barely set.

In case you missed it, I previously published a recipe for an onion frittata.  Although it uses a large quantity of onions, they cook down into sweet, golden deliciousness before the eggs are added.

And…before we leave the subject of leftovers…leftover frittata makes a great filling for a sandwich, especially with a few oil-cured Calabrian peppers!


If you have a favorite family recipe and a bit of a story to tell, please email me at santafecook@villasentieri.com and we can discuss including it in the blog. I am expanding the scope of my blog to include traditional recipes from around the country and around the world. If you haven’t seen Bertha’s Flan or Melinda’s Drunken Prunes, take a look.  They will give you an idea of what I’m looking for.


Print Recipe
Frittata di Spaghetti (Spaghetti Frittata)
This is a wonderful Italian way to use leftover pasta by turning it into something completely different. The proportions are approximate and will depend on how much pasta is leftover. The pictures show this being made with about half a pound (uncooked weight) of spaghettini with anchovy and garlic (see the Notes section below for a link to the recipe) but it works equally well with most pastas and sauces, including tomato sauce. Use 8 eggs if you have a larger amount of leftover pasta or if you need to stretch the dish to feed more. Use either onion or garlic as the aromatic. Which you choose will depend on which better compliments the pasta. In this case, because the sauce had a lot of garlic, I chose onion to add a bit of a sweet note. If using a tomato sauce, I would have chosen garlic. Whether or not to use Parmesan cheese follows the same logic. Italians feel that cheese rarely goes with fish, like the anchovies in this sauce, so I didn’t use it.
Votes: 0
Rating: 0
You:
Rate this recipe!
Prep Time 10 minutes
Cook Time 1 hour
Servings
people
Ingredients
Prep Time 10 minutes
Cook Time 1 hour
Servings
people
Ingredients
Votes: 0
Rating: 0
You:
Rate this recipe!
Instructions
  1. Heat the oil in a 12 inch (preferably non-stick) sauté pan.
  2. Add the onion or garlic and sauté over medium heat until the onion is soft and caramelized or the garlic is fragrant.
  3. Add the pasta and sauce and heat gently.
  4. Toss the pasta a few times to be sure it heats evenly.
  5. Meanwhile, beat the eggs with salt and pepper to taste.
  6. When the pasta is heated through, spread it evenly on the bottom of the pan.
  7. If you cannot clearly see enough of a slick of oil on the bottom of the pan to protect the eggs from sticking, add a bit more. (Some sauces sop up the oil more than others.)
  8. Pour the eggs over the pasta, being careful to distribute them evenly.
  9. If using cheese, sprinkle it over the top of the eggs.
  10. Cover the pan and reduce the heat to low.
  11. Keep the eggs covered the whole time and move the pan around on the stove, even putting it off-center much of the time, to be sure the heat is evenly distributed around the bottom of the pan.
  12. Cook until the top of the eggs is just set. That is, there is no runny egg left. This will take approximately 25-30 minutes.
  13. When the eggs are set, slide them out of the pan onto a cookie sheet or pizza pan.
  14. Put the sauté pan upside down on the eggs and then flip the whole set-up over.
  15. Return the eggs to the heat, uncovered, for approximately 5 minutes to lightly brown the bottom.
  16. Slide on to a serving platter and cut in wedges to serve.
Recipe Notes

This is where you can find my recipe for Spaghettini with Anchovy and Garlic.

Copyright © 2018 by VillaSentieri.com. All rights reserved.

Share this Recipe

Mom’s Slow-Roasted Pork

February 14, 2018

Growing up, Sunday dinner almost always included some sort of pasta with my mother’s long-simmered Southern Italian sugo.

The sauce was made with large pieces of pork which were always served on the side.  In addition, there might be meatballs, simmered in the sauce after being fried to a deep brown.  Sometimes, actually, much more often than sometimes, there would be veal cutlets.  This was back in the day when people didn’t really think about how veal was produced…or maybe it was produced more humanely back then.  I’m not sure.

Sometimes a pork roast would accompany the pasta.  Occasionally, though not often, the pork roast would be accompanied by potatoes and there wouldn’t be pasta on the table.

A Sunday without pasta, though, was quite unusual in my parents’ house.


Click HERE to join our mailing list and you’ll never miss a recipe again!


The pasta could have been homemade linguine or fettuccine, which my mother and her sister, my Aunt Margie, made on a regular basis and then dried and stored in large rectangular aluminum tins that once held baccala (salted cod).

Those tins had a myriad of uses, from protecting pasta and cookies to storing recipes and papers.  Even though they were made of an inert metal, they had to be thoroughly scrubbed and allowed to air out, uncovered, for weeks to rid them of the smell of baccala.

My mother learned her style of Southern Italian cooking from her mother, Angelina (far left). No doubt she learned it from her mother (center).

Sometimes the Sunday pasta was homemade ravioli, never was it gnocchi as my father didn’t like gnocchi.  Those were reserved for dinners when my father was out of town.

Usually, though, the pasta was dried pasta from a box: spaghetti, rigatoni, wagon wheels, fettuccine, and so forth.  Dried pasta is really a different sort of pasta with some different uses than fresh pasta (even if the fresh pasta is dried before use as mom and Aunt Margie often did).


Follow us on your social media platform of choice


I know many of you have heard me say this, but roasts in our house were much more similar in texture to pulled pork than the typical French-American style of “just-how-little-can-we-cook-this-hunk-of-meat-and-say-it’s-done” type of roast.

A huge advantage of this style of cooking is that you can know in advance when it will be done because it’s really the clock that counts, not the thermometer.  I don’t like making an American style roast for a dinner party.  It makes me crazy.

I don’t get to enjoy cocktails and I don’t get to enjoy the first course because I’m focused on when the thermometer might say the roast is done.  While the temperature to be achieved is precise, the time is not.

On the other hand, the Italian style of roasting eliminates all of these problems because the meat is not “just barely cooked enough.”  The collagen begins to liquefy and the roast becomes unctuous.

If you haven’t experienced this style of roast, give it a try.  If you like it, look up my recipe for Italian Slow-Roasted Chicken or Turkey for the poultry equivalent.


If you have a favorite family recipe and a bit of a story to tell, please email me at santafecook@villasentieri.com and we can discuss including it in the blog. I am expanding the scope of my blog to include traditional recipes from around the country and around the world. If you haven’t seen Bertha’s Flan or Melinda’s Drunken Prunes, take a look.  They will give you an idea of what I’m looking for.


Print Recipe
Mom's Slow-Roasted Pork
I have an assortment of blue spatterware roasting pans which are perfect for this type of roast. I also have an array of heavy stainless steel, aluminum, and enameled cast-iron roasters. The more important issue is using a roasting pan of the right size to hold the roast without crowding (it shouldn’t touch the sides or top of the roaster) or without too much empty space. The initial cooking at higher temperature not only browns the roast, it helps it to reach the optimum temperature for collagen to break down to produce that pull-apart texture. You can easily increase the size of the roast. With a 4 to 5 pound roast, you would probably need to add another 45 minutes to 1 ½ hours to the roasting time.
Votes: 0
Rating: 0
You:
Rate this recipe!
Course Mains, Meats
Cuisine Italian
Prep Time 15 minutes
Cook Time 4 hours
Servings
people
Ingredients
Course Mains, Meats
Cuisine Italian
Prep Time 15 minutes
Cook Time 4 hours
Servings
people
Ingredients
Votes: 0
Rating: 0
You:
Rate this recipe!
Instructions
  1. Cut the garlic cloves into 3 to 4 slivers each.
  2. Plunge a paring knife into the pork at intervals to make small pockets about 1 inch deep. Space the pockets out around the roast.
  3. Put a piece of garlic and some of the fresh rosemary into each pocket.
  4. Some of the rosemary will invariably stick to the fat cap. Don’t sweat it, just try to get most of it in the slits.
  5. Put the roast into a roasting pan that is just large enough to hold it.
  6. Generously season the roast with salt and pepper.
  7. Pour the wine (or water) into the bottom of the roasting pan.
  8. Roast, uncovered, at 375°F until the roast is browned a little, 45-60 minutes.
  9. Baste with pan juices.
  10. Cover and continue to roast at 275-300°F for about another three hours, basting with the pan juices every 30-45 minutes or so.
  11. The pan juices will dry up. Be careful not to burn the bits on the bottom of the pan, but allow them to brown before adding another ¼ cup of water or so. After two or three cycles of this, the pan juices will be a luscious dark brown.
  12. Remove the roast from the pan. Allow to cool for 10 minutes.
  13. To serve, pull the roast into large pieces. Don’t even try to slice it. It’s not supposed to slice.
  14. Pour a little of the pan juices on top. Pass the rest.
Recipe Notes

Copyright © 2018 by VillaSentieri.com. All rights reserved.

Share this Recipe

Marisa’s Mystical Meatballs

February 9, 2018

These meatballs are really mystical if you consider the sway they hold on my husband, his brother, and his father.  They go wild for these meatballs.

Well, wild in that very restrained Northern Italian way.

If they were Southern Italian, where a dinner conversation can seem like a minor riot, their meatball response would barely register on the scale.  It would signal almost utter disregard for the meatballs.

But that, in fact, is not the case.  The meatballs hold some sort of magical, mystical charm.

Marisa, of course, is my mother-in-law and these are her meatballs.  She considers them quite unusual, having learned to make them from her mother and basically not remembering any other relatives or friends making something similar.

And, as meatballs, they ARE unusual!

An old-fashioned ricer is still an indispensable piece of kitchen equipment. Make sure yours is very sturdy. Many new ones are not.

Click HERE to join our mailing list and you’ll never miss a recipe again!


But here’s a secret that I haven’t told anyone yet.  They really AREN’T meatballs.  They’re croquettes!  Crocchette in Italian.

There, I said it.  Marisa’s Mystical Meatballs aren’t really meatballs.  But everybody in the family calls them “Ma’s Meatballs.”  “Ma’s Croquettes” doesn’t have the same alliterative allure, even if it’s more accurate.

My mother-in-law and father-in-law celebrating his birthday.

When I did a Google search for crocchette, Google turned up about 1,730,000 results in 0.51 seconds.  When I searched for crocchette patate e carne (potato and meat croquettes), Google returned 1,500,000 results in 0.72 seconds.

And that was doing searches in Italian!

I found a Japanese woman who seems to have the same relationship to her mother’s meat and potato croquettes (korokke) as my husband and his family have to his mother’s.


Follow us on your social media platform of choice


The meat for these “meatballs” (a word I’ll use in deference to my husband and his family of origin) is boiled before being finely chopped.  This presents a perfect opportunity to make a really nice beef broth.  You don’t have to do that, of course, but since you’re going to be boiling the meat anyhow, and since it only takes a few extra minutes to throw some aromatics into the pot, why not!

The broth from the meat for the specific batch of meatballs shown in this blog is sitting in the freezer ready to be turned into Auntie Helen’s Stracciatella, which will be coming up on the blog next month.


If you have a favorite family recipe and a bit of a story to tell, please email me at santafecook@villasentieri.com and we can discuss including it in the blog. I am expanding the scope of my blog to include traditional recipes from around the country and around the world. If you haven’t seen Bertha’s Flan or Melinda’s Drunken Prunes, take a look.  They will give you an idea of what I’m looking for.


Print Recipe
Marisa's Mystical Meatballs
Marisa says she usually uses cross-cut beef shank for the meatballs. When we made them, she also had a piece of beef she bought for soup so we used both. In the end, we got ½ pound of cooked beef, with fat and gristle removed. Adjust the proportion of the other ingredients if you get substantially more or less cooked beef. If you want to use just cross-cut beef shank, I would try about 2 ½-3 lbs. The beef is boiled and then finely chopped to make the meatballs, giving you the opportunity to make a really nice beef broth with just a few minutes more work.
Votes: 0
Rating: 0
You:
Rate this recipe!
Prep Time 30 minutes
Cook Time 6 hours
Servings
meatballs
Ingredients
Beef and Broth
Meatballs
Prep Time 30 minutes
Cook Time 6 hours
Servings
meatballs
Ingredients
Beef and Broth
Meatballs
Votes: 0
Rating: 0
You:
Rate this recipe!
Instructions
Beef and Broth
  1. Cross-cut beef shank.
  2. Put the meat and all other broth ingredients in a large stock pot.
  3. Cover with abundant cold water.
  4. Bring to a boil, reduce heat and simmer, partially covered, for 4-6 hours, until the meat is very tender.
  5. Remove and cool the beef.
  6. Strain the broth and reserve for another use.
Meatballs
  1. Remove fat, gristle and bone from beef. You should have approximately ½ pound of cooked beef.
  2. Cook the unpeeled potatoes in boiling water until you can easily pierce them with the tines of a long fork or paring knife, 20-25 minutes.
  3. Remove the potatoes from the water and allow to cool for about 10 minutes.
  4. Meanwhile, mince the garlic or grate it on a microplane grater.
  5. Combine beef, parsley and garlic in a food processor. Process until finely chopped.
  6. Peel the slightly cooled potatoes. If they are too cool it will be difficult to rice them.
  7. Pass the potatoes through a ricer.
  8. Combine the beef mixture with the potatoes, nutmeg, allspice, salt and black pepper.
  9. Mix well with a large spoon or your hands.
  10. Add the lightly beaten eggs.
  11. Mix well using your hands.
  12. Form the mixture into 16 balls and then flatten them slightly.
  13. Lightly roll the meatballs in fine dry breadcrumbs.
  14. Pour ⅛ inch of oil into a large sauté pan.
  15. Heat the oil on medium-high heat.
  16. Fry the meatballs in two batches, on medium-high, flipping once, until brown.
  17. Drain on paper towels.
  18. Serve warm or at room temperature.
Recipe Notes

Copyright © 2018 by VillaSentieri.com. All rights reserved.

Share this Recipe

Italian Wedding Soup

February 5, 2018

Growing up I never really understood why this was called Wedding Soup.  It was NEVER served at weddings.

It was mostly served at home, unceremoniously.

The fact that it was unceremonious is a shame.  It is a wonderful soup and, being honest, takes a bit of work to pull together.  Both the soup, and the soup-maker, in my estimation, deserve a bit of attention.

Although it takes some work, it doesn’t require much in the way of heard-earned skills like frosting a cake or making pie crust.  It’s just a bit of slogging through a series of steps.

This is a beloved soup among Americans of Italian descent.  Interestingly, my in-laws who are actually from Italy had never heard of it until I made it for this blog!


Click HERE to join our mailing list and you’ll never miss a recipe again!


But back to the “wedding” part.  I did a bit of internet research (thanks Google!).  Actually, I hesitate to call it “research.”  I’m old school.  I remember when doing research meant hours upon hours spent in libraries looking at actual hardcopy materials.  It almost doesn’t seem fair to sit on my sofa with my laptop and read materials served up by Google based on natural language questions and call it research.

The “natural language” part is interesting too.  In the “old” days, if you found an article that was relevant to the research topic, you would look at the articles referenced by the author and find, potentially, other relevant articles.  But they would all be older than the first article.  This is where the “Science Citation Index” came into play.

The Index was a series of periodically published volumes that listed all the articles that cited a particular article in their bibliography.  With the Science Citation Index, you could start with a relevant article and then work forwards finding all the newer articles that had cited that article.

Now I just tell Google what I’m interested in and I get a bunch of (almost always) relevant “hits!”  Google is even nice enough to tell me how many hits there are and what fraction of a second it took Google to identify them.

Even when I’m researching a biomedical topic I sit on my sofa with my laptop and search the National Library of Medicine.  The search language is a bit more arcane than the natural language used by Google but it still feels like cheating compared to slogging around a library.  I can even have the full article delivered to my laptop so I don’t have to figure out what library has the publication I need.


Follow us on your social media platform of choice


So, what did I learn from my Google search?

It appears (at least it’s a plausible theory) that Wedding Soup is an inaccurate translation of Minestra Maritata or Married Soup; apparently so-named because of the way the different ingredients marry together so well.

I’m guessing that many Americans with no affiliation to Italy have never had escarole.

Interestingly, my husband’s Tuscan grandmother would use up small amounts of different types of dried pasta, perhaps putting them into a soup or serving them with a simple sauce.  She referred to this as Pasta Maritata because she was marrying the different types of pasta to create a dish.

If this theory is correct, I am perplexed by the inaccurate translation but, be that as it may, the soup is wonderful.  I urge you to give it a try.

I like breaking up the work over two days, especially since I like to make a long-simmered broth as the base of the soup.  My mother didn’t do this.  Once the chicken was cooked, it was removed and shredded and the broth was used without additional simmering to make the soup.  It shaves about 3 hours off of the prep time.  But, since making broth is mostly hands off, and the improvement in flavor is dramatic, I simmer everything a bit longer before straining and discarding the solids.


If you have a favorite family recipe and a bit of a story to tell, please email me at santafecook@villasentieri.com and we can discuss including it in the blog. I am expanding the scope of my blog to include traditional recipes from around the country and around the world. If you haven’t seen Bertha’s Flan or Melinda’s Drunken Prunes, take a look.  They will give you an idea of what I’m looking for.


Print Recipe
Italian Wedding Soup
If you don’t want to use the white center of the escarole, start with two heads and just use the dark green parts. The pale inner portion can be served in a salad or cooked in a number of ways. I like to divide up the work over two days, making the broth on the first day and the remainder on the second day. It’s perfectly feasible to do it all on the same day, however. I always keep a stash of rinds from Parmigiano Reggiano and Pecorino cheeses in the freezer. They add great flavor to broths, beans, and an array of other dishes.
Votes: 0
Rating: 0
You:
Rate this recipe!
Cuisine Italian
Prep Time 1 hour
Cook Time 5 hours
Passive Time 2 hours
Servings
people
Ingredients
Broth and Chicken
Meatballs
Final assembly
Cuisine Italian
Prep Time 1 hour
Cook Time 5 hours
Passive Time 2 hours
Servings
people
Ingredients
Broth and Chicken
Meatballs
Final assembly
Votes: 0
Rating: 0
You:
Rate this recipe!
Instructions
Broth and Chicken
  1. Cut the chicken into breast halves, legs, thighs, and wings. Cut the back into 2 or three pieces. Reserve the liver for another use but chop the remaining giblets.
  2. Slice the onions. There's really no need to peel them first.
  3. Same with the garlic, no need to peel. It all gets strained out in the end.
  4. Combine all ingredients in a large stock pot. Cover and bring to a boil. Reduce heat, and simmer, partially covered for two hours.
  5. After two hours, remove the breasts, legs, and thighs. Continue to simmer the broth.
  6. Remove the meat from the bones. Return the chicken bones and skin to the broth.
  7. Continue to simmer the broth for another two hours, adjusting seasoning as needed.
  8. Meanwhile, shred the breast meat and refrigerate.
  9. Reserve the leg and thigh meat for another use.
  10. After the broth has finished cooking, cool it for several hours. Strain and discard the solids. Allow the broth to come to room temperature and refrigerate.
  11. Alternatively, immediately strain and discard the solids and proceed as below.
Meatballs
  1. Put all the ingredients except the bread into a mixing bowl.
  2. Cut the crusts from the bread.
  3. Cover the bread with warm water for 3-4 minutes.
  4. Squeeze some of the water from the bread.
  5. Add the bread to the mixing bowl.
  6. Mix with your hands, until thoroughly combined and no streaks of white from the bread remain visible.
  7. As you are mixing add a bit of the bread soaking water from time to time (about a quarter cup or so total) to keep the mixture moist but not wet.
  8. The mixture should become tacky from the effects of the water and the mixing on the proteins in the meat. The tackiness will help the meatballs hold together for the same reason that sausage doesn’t fall apart when the casing is removed.
  9. With damp hands, roll the mixture into approximately 50 meatballs. Keeping your hands moist will enable you to create a smooth surface on the meatballs. If there are visible cracks, the meatballs will split when cooking.
Final assembly
  1. Skim the fat from the broth. Add water to make 6 quarts of broth. Bring the broth to a boil.
  2. Meanwhile, coarsely chop the escarole.
  3. As the broth comes to a boil, adjust the salt and pepper.
  4. Add the chopped escarole. Return to a boil and cook at a moderate boil for approximately 5 minutes.
  5. Add the meatballs. Return to a boil and boil gently, so the meatballs don’t break, for 10-12 minutes.
  6. Add the shredded white meat chicken and return to a gentle boil.
  7. Adjust salt and pepper. At this point, slightly over-salt the soup as the dry pasta will reduce the saltiness of the soup. The soup can be made ahead to this point. Return to a boil and add the pasta just before serving.
  8. Add the pasta and boil gently until pasta is cooked, approximately 10 minutes.
  9. Adjust salt and pepper.
  10. Serve with freshly grated Parmigiano Reggiano cheese.
Recipe Notes

Copyright © 2018 by VillaSentieri.com. All rights reserved.

Share this Recipe

Mom’s Lentil Soup

January 26, 2018

My father liked soup.  Actually, my father really, really liked soup.  Every few weeks my mother would make beef noodle soup as it was one of my dad’s favorites.  Beef noodle is the soup we had most often.  Goulash was the “stew” we had most often.  In fact, I don’t remember my mother ever making an American-style beef stew.

The first American-style beef stew that I ever made was from a recipe that my sister started using after she got married.  It was definitely not one of our family recipes, though it was good.

After the beef noodle soup that my mother made on a regular basis, other soups were just occasional affairs, though soups of various types appeared often on our table.


Click HERE to join our mailing list and you’ll never miss a recipe again!


Italian “Wedding” Soup was a favorite but not something that we had more than a three or four times a year.  Everyone in the family really loved Wedding Soup but, honestly, it’s a lot of work.  It’s coming to the blog next month but today we have my Mom’s Lentil Soup.

My parents in 1981

Let’s face it, lentil soup isn’t something people swoon over.  At best it is good comfort food.  That’s exactly what this is for me.

It’s also easy to make.  A few minutes of chopping and some stirring off-and-on are rewarded with a really good pot of soup.

My mother’s lentil soup was unusual in that she put enough black pepper into it to create a distinct bite.  The first time I tasted it, as an adolescent, I was surprised by how peppery it was but I loved it.   Whether or not you add that much black pepper is entirely your choice but, in my mind, it’s the black pepper that sets my mother’s lentil soup apart from the pack.


Follow us on your social media platform of choice


Consistent with my mom’s low-and-slow philosophy, this soup is cooked longer that would be typical, for the average American cook at least.  Despite the long cooking, the lentils remain intact though soft.  They don’t really fall apart the way that dry beans might.

This soup freezes well so a big batch shouldn’t be a problem.

While a ham bone makes great lentil soup, it’s not something that most households have on a regular basis but a handful of baked ham or a few ounces of bacon make an awfully tasty soup.


If you have a favorite family recipe and a bit of a story to tell, please email me at santafecook@villasentieri.com and we can discuss including it in the blog. I am expanding the scope of my blog to include traditional recipes from around the country and around the world. If you haven’t seen Bertha’s Flan or Melinda’s Drunken Prunes, take a look.  They will give you an idea of what I’m looking for.


Print Recipe
Mom's Lentil Soup
When my mother made this soup, she added enough black pepper to give it a distinct bite. The addition of a bay leaf is my only modification of the original recipe.
Votes: 0
Rating: 0
You:
Rate this recipe!
Cuisine American
Prep Time 10 minutes
Cook Time 2 1/2 hours
Servings
people
Ingredients
Cuisine American
Prep Time 10 minutes
Cook Time 2 1/2 hours
Servings
people
Ingredients
Votes: 0
Rating: 0
You:
Rate this recipe!
Instructions
  1. Wash and pick over the lentils then drain.
  2. Shred the carrot on the tear-drop side of a box grater.
  3. Put all the ingredients in a large stock pot.
  4. Cover and bring to a boil.
  5. Reduce heat and simmer partially covered for 2 to 2½ hours.
  6. Adjust salt and pepper to taste.
  7. The soup should be thick and the lentils soft but intact.
Recipe Notes

Copyright © 2018 by VillaSentieri.com. All rights reserved.

Share this Recipe