Crostata di Amaretti (Amaretti Tart)

July 21, 2020

You can keep the chocolate!

It’s not that I don’t like chocolate.  It’s just that I’m not one of those people who thinks chocolate is the absolute best flavor for sweets.

My favorite flavors are almond and coconut.  Preferably together.

I remember a cake I ate when I was 12 years old.  It was an absurdly moist yellow cake that tasted of almond and coconut.

A bottle of Amaretto di Saronno before it was rebranded.

In memory of that cake, which I had only once, I have an entire stash of coconut-almond cake recipes.  I’m building up to the day when I head to my kitchen in Palm Springs (so I can bake without contending with the nearly 8000-foot elevation of Villa Sentieri) and bake coconut-almond cakes every day till I create one that tastes the way I remember it.


Follow us on your social media platform of choice


In the meantime, I make lots of coconut- and almond-based desserts including almond gelato, maraschino cherry cake with almond filling (from the first edition Betty Crocker Picture Cookbook), raspberry bars with almond crust, coconut pistachio crumb cake, Brazilian coconut pudding, coconut pie, Marcona almond blondies, and wattalappam (a coconut custard from Sri Lanka) among many, many others.

Zia Fidalma selecting produce at a supermarket.

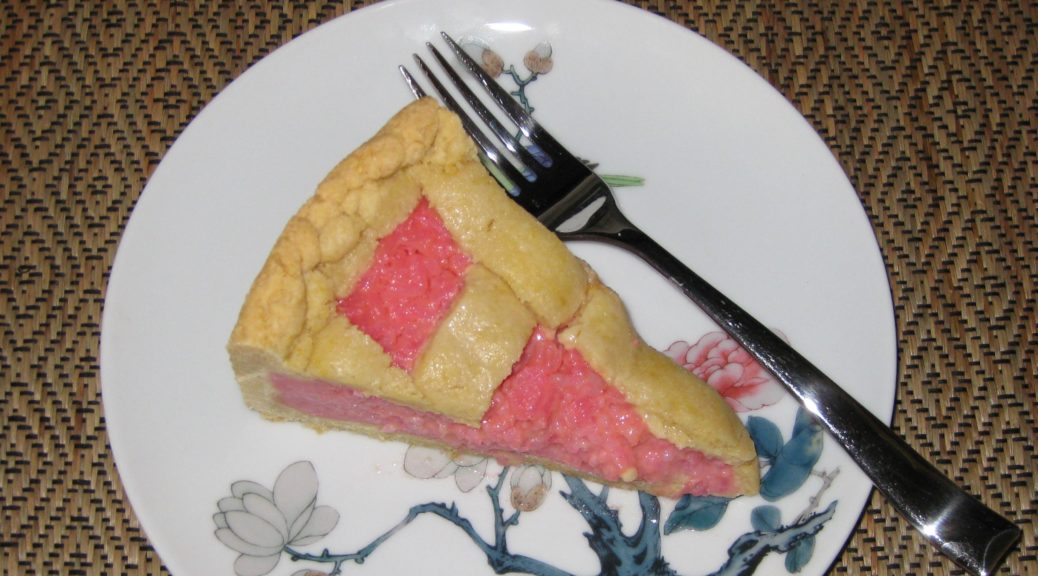
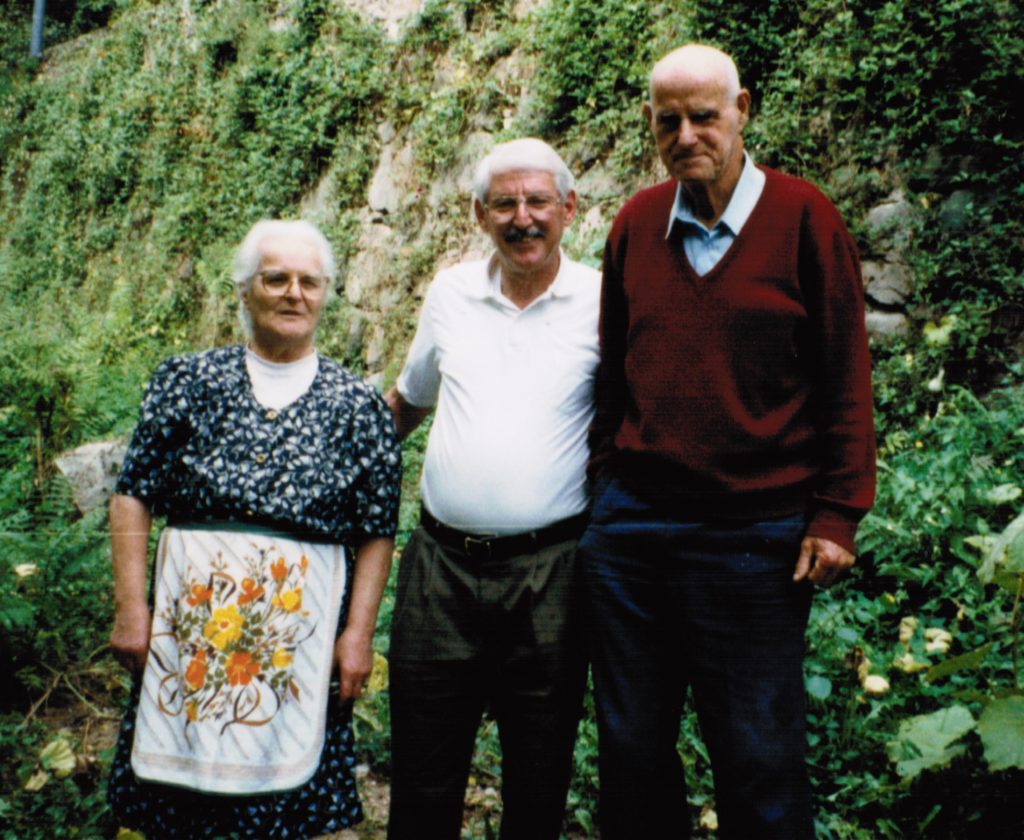
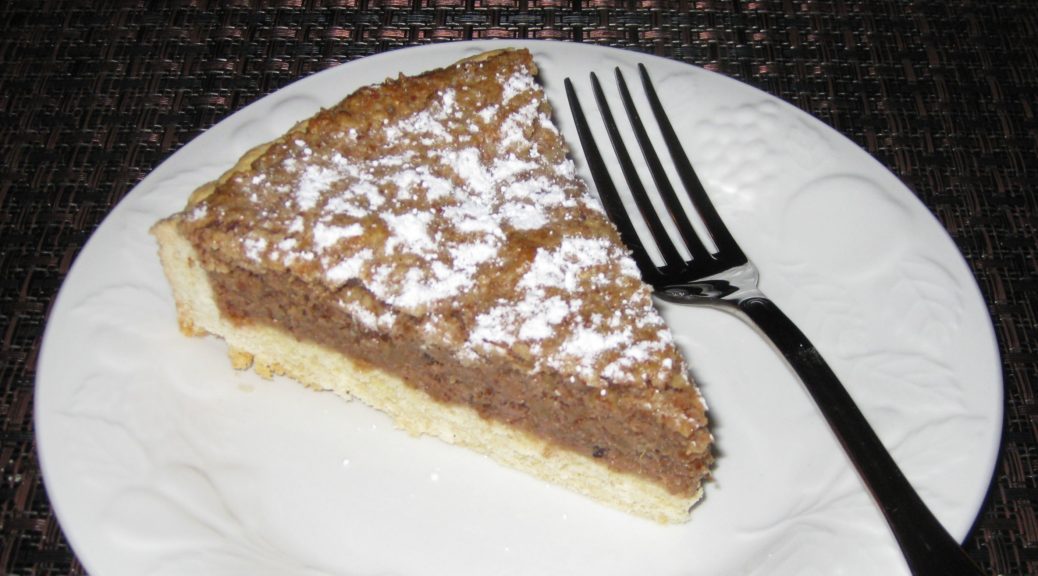
One of my favorites, is an improbable recipe I got from Great Aunt Fidalma in Tuscany nearly 20 years ago for a crostata (tart) with a filling of crushed amaretti cookies and amaretto liqueur.

I know, I know, amaretti and amaretto only pretend to be almond.  They’re really made from apricot pits.  At least the commercial versions are made from apricot pits.

You knew that, right?


Join our mailing list and you’ll never miss a recipe again!


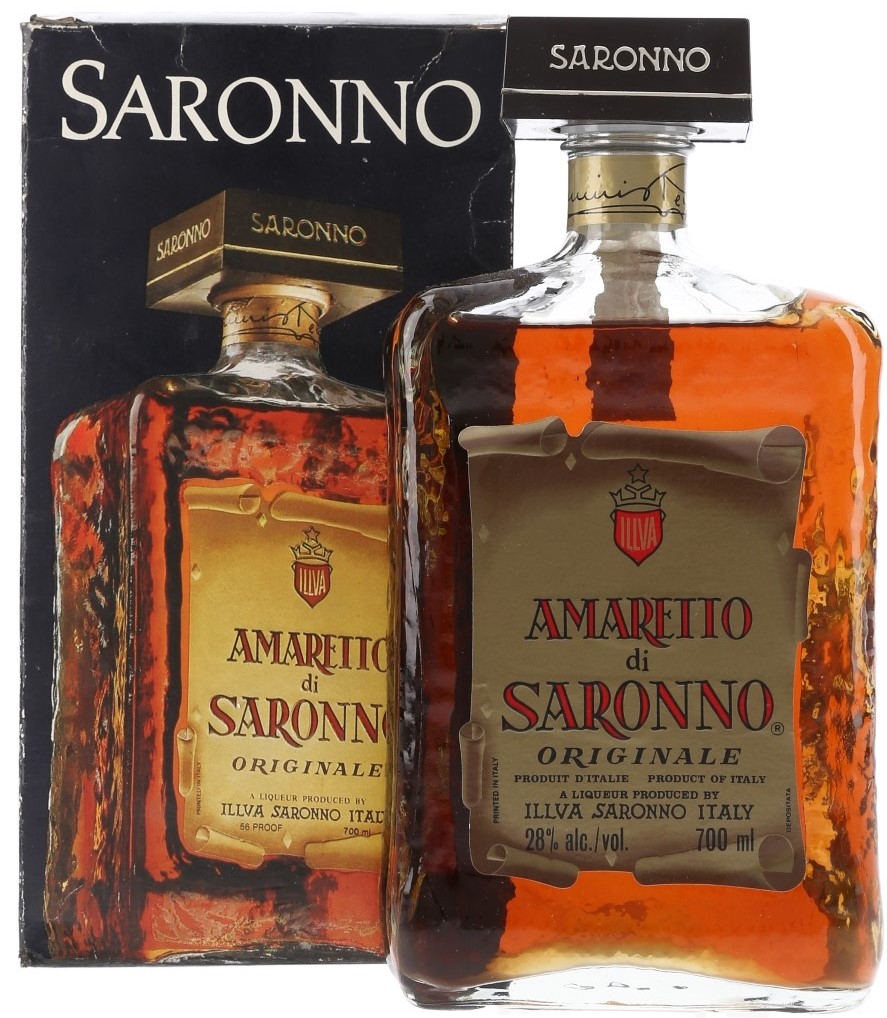
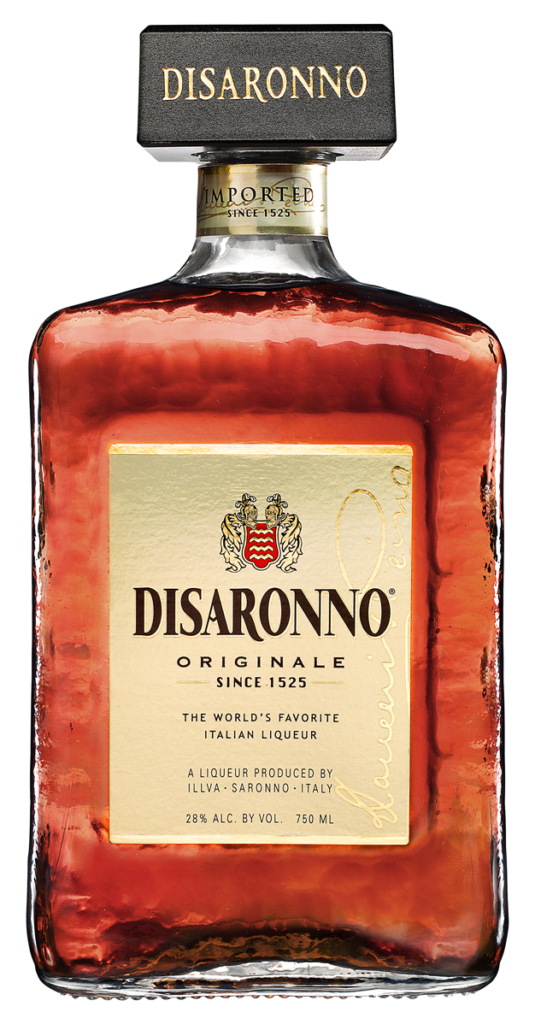
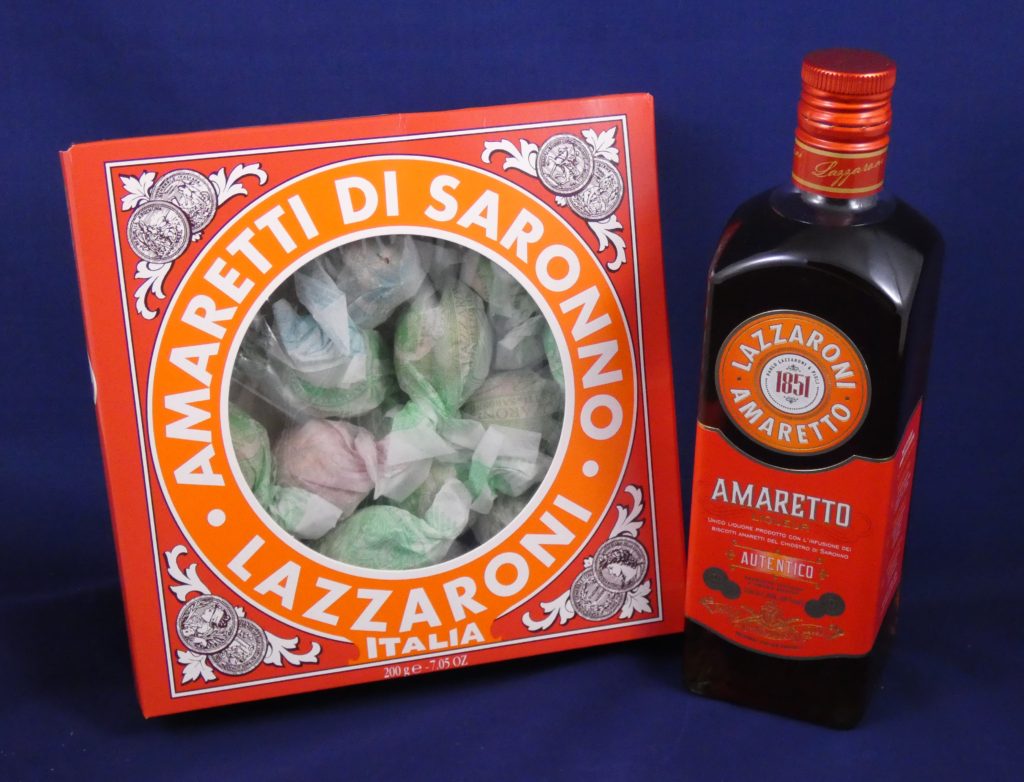
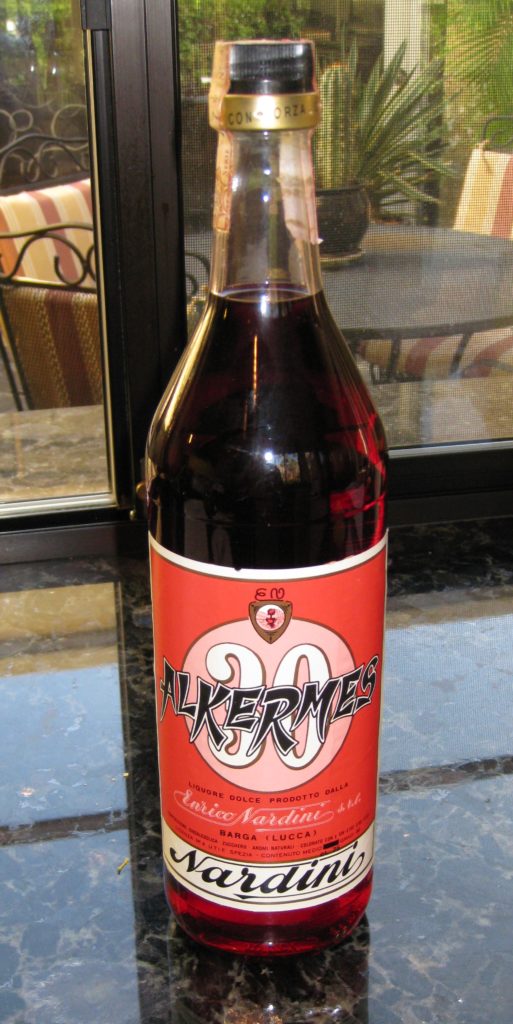
The brand of amaretti I typically buy is Lazzaroni.  It’s the one that comes in the red tin.  Until recently, the brand of liqueur I bought was Amaretto di Saronno.  In 2001 Amaretto di Saronno was rebranded to Disaronno Originale.

Amaretto di Saronno after it was rebranded Disaronno in 2001.

When I went to buy the Amaretto to make this crostata, I found an unfamiliar one from the makers of the cookies, Lazzaroni Amaretto.

While Amaretto di Saronno is made from infusing apricot pits, the good folks at Lazzaroni say that they infuse their famous cookies (which, of course, contain apricot pits).

Lazzaroni amaretti and an amaretto liqueur by the same company.

Since the flavor of this crostata is entirely dependent on the amaretti and the amaretto, I suggest you buy good quality ones.

Print Recipe
Crostata di Amaretti (Amaretti Tart)
Use very good quality amaretti cookies and amaretto liqueur as the taste of the crostata is completely dependent on them. You can buy amaretti in packages of 200 grams, if you buy a larger quantity, weight out 200 grams or 7 ounces. Most home cooks in Italy buy little envelopes of powered (artificial) vanilla flavoring. These are not common in the United States, so I’ve substituted vanilla extract. You can use one envelope of Italian vanilla flavor instead of one teaspoon of vanilla extract.
Votes: 0
Rating: 0
You:
Rate this recipe!
Cuisine Italian
Prep Time 1 hour
Cook Time 30 minutes
Servings
people
Ingredients
Pasta Frolla
Cuisine Italian
Prep Time 1 hour
Cook Time 30 minutes
Servings
people
Ingredients
Pasta Frolla
Votes: 0
Rating: 0
You:
Rate this recipe!
Instructions
Pasta Frolla
  1. Blend the flour, sugar, baking powder, vanilla powder, if using, salt and lemon zest in a food processor until combined.
  2. Add the butter, cut in pieces, and vanilla extract, if using, then blend till well combined.
  3. Add the eggs and blend till the pastry almost forms a ball.
  4. Remove the pastry from the food processor and use your hands to press everything into a single ball.
  5. Wrap the pastry in waxed paper and refrigerate for an hour before using.
  6. Roll the pasta frolla into a 13-inch circle.
  7. Line a greased 10" deep dish tart pan with a removable bottom with Pasta Frolla going about 1 inch up the sides. Trim the excess and use it to patch the crust if necessary.
Filling and Assembly
  1. Reserve six amaretti for garnish.
  2. Crush the remaining amaretti and combine with liqueur, and vanilla extract, if using.
  3. Soak, occasionally crushing the amaretti further, until thick and batter-like.
  4. Combine sugar, lemon zest and vanilla powder, if using.
  5. Combine the egg yolk and the sugar mixture with the amaretti mixture. Mix well.
  6. Beat the three egg whites and cream of tartar until stiff.
  7. Fold a spoonful of the egg whites into the amaretti mixture to lighten it.
  8. Gently fold in the remainder of the whites, in two portions.
  9. Pour the filling into the tart pan lined with pasta frolla.
  10. Garnish the top with the reserved whole amaretti.
  11. Bake at 350°F approximately 30 minutes, until golden brown.
  12. Cool in pan for about 10 minutes then gently remove the sides of the pan. (I like to do this by setting the pan on a large can then gently jiggling the pan apart.)
  13. Cool thoroughly on a rack.
  14. The crostata should be stable enough to slide off the bottom of the tart pan and onto a serving platter.
  15. Serve with whipped cream, if desired.
Recipe Notes

Copyright © 2020 by Villa Sentieri, LLC. All rights reserved.

Share this Recipe

Torta di Riso (Italian Rice Tart)

January 31, 2018

Torta di Riso is an Italian specialty.  It is basically a rice pudding baked inside of a pastry crust; a Rice Tart, so to speak.

I first had Torta di Riso more than 20 years ago while visiting Italy with my husband and his parents.

We ate meals at the homes of many relatives.  I often arrived with a spiral-bound notebook to jot down the inevitable recipes that would be discussed around the table or the recipes I begged for after being served something wonderful.  That notebook is a mashup of American and Metric measures and English and Italian words for ingredients.  It became a bible of sorts for recreating many of the dishes I ate on that trip.


Click HERE to join our mailing list and you’ll never miss a recipe again!


My father-in-law’s Zia (Aunt) Mery made the first Torta di Riso that I ever tasted.  Her recipe is below (adapted for American measures).

After having it at Zio (Uncle) Beppe and Zia Mery’s house, I started noticing Torta di Riso in many places in Tuscany.

My father-in-law with his Uncle Beppe and Aunt Mery, from whom this recipe for Torta di Riso originated in their garden in Tuscany, 1994.

Alkermes liqueur originated in Tuscany so it is particularly appropriate to use it as the liqueur in Torta di Riso.  Alkermes is nearly impossible to find in the United States, however.  One can make a perfectly traditional Torta di Riso using rum in place of Alkermes but the resulting confection won’t be pink.

According to CooksInfo, “Alchermes was invented in the Frati Convent at Santa Maria Novella in Florence. Its making was kept secret, but the recipe was reputedly stolen by spies from the nearby city of Siena, which Florence was often at war with.”


Follow us on your social media platform of choice


Recipes for alkermes (also spelled alchermes) are closely guarded but the process basically involves infusing alcohol with spices and flavorings like cinnamon, cloves, vanilla, nutmeg, mace, cardamom, star anise, rosewater, and orange zest.  The red color comes from cochineal, an insect that is the foundation for natural red food coloring.  The resulting infused alcohol is sweetened and diluted with water.

The pastry crust is pasta frolla, a slightly sweetened pastry, leavened with baking powder, and often flavored with vanilla and lemon zest.  This is Mery’s recipe for pasta frolla but I also have one from Zia Fidalma that makes about half the quantity.

Torta di Riso was a big hit at my father-in-law’s birthday dinner last week. So were the cocktails, wine, and champagne!

If you don’t have access to Alkermes, you can use rum.  In fact, torta di riso is not always pink.  Many that I saw in Italy were white.

If you want to try to make your own Alkermes you can find a recipe here.  Amazon even sells the dried cochineal insects that provide the traditional scarlet color.


If you have a favorite family recipe and a bit of a story to tell, please email me at santafecook@villasentieri.com and we can discuss including it in the blog. I am expanding the scope of my blog to include traditional recipes from around the country and around the world. If you haven’t seen Bertha’s Flan or Melinda’s Drunken Prunes, take a look.  They will give you an idea of what I’m looking for.


Print Recipe
Torta di Riso (Italian Rice Tart)
This classic Italian dessert is basically a rice pudding baked inside of a pastry crust. Alkermes is a traditional Tuscan liqueur used in a number of sweets, including torta di riso, for its color and spice-like flavor. If you don’t have Alkermes, use rum. Not all versions of torta di riso are brightly colored. Vanilla powder is a natural vanilla product, not artificial. Use vanilla extract if vanilla powder is not available.
Votes: 0
Rating: 0
You:
Rate this recipe!
Cuisine Italian
Prep Time 30 minutes
Cook Time 75 minutes
Passive Time 30 minutes
Servings
people
Ingredients
Pasta Frolla
Rice
Cuisine Italian
Prep Time 30 minutes
Cook Time 75 minutes
Passive Time 30 minutes
Servings
people
Ingredients
Pasta Frolla
Rice
Votes: 0
Rating: 0
You:
Rate this recipe!
Instructions
Pasta Frolla
  1. Blend the flour, sugar, baking powder, vanilla powder, salt and lemon zest in a food processor until combined.
  2. Add the butter, cut in pieces, and blend till well combined.
  3. Add the eggs and blend till the pastry almost forms a ball.
  4. Remove the pastry from the food processor and use your hands to press everything into a single ball.
  5. Wrap the pastry in waxed paper and refrigerate for an hour before using.
Rice
  1. Wash and drain the rice.
  2. Combine the rice, water and milk in a heavy-bottomed sauce pan.
  3. Bring the rice to a boil.
  4. Cover the rice and simmer, stirring frequently, until cooked and the liquid is almost completely absorbed. If the rice does not have the consistency of thick oatmeal, add a bit more milk at the end to make it creamy.
  5. Mix the sugar, lemon zest, and Alkermes and/or rum into the rice.
  6. Pour the rice into a bowl and cool, uncovered, stirring occasionally.
Assembly and Baking
  1. Cut off a small piece of the pastry to make a lattice top and refrigerate.
  2. Roll the remaining pastry between waxed paper, turning often, until it is large enough to cover the bottom and sides of a 10 inch springform pan.
  3. Line a 10" springform pan with the pasta frolla.
  4. Cut the pastry even with the top of the pan. Add the scraps to the pastry you have reserved for the lattice.
  5. Beat the egg and egg yolks to combine.
  6. Stir the beaten eggs into the cooled rice.
  7. Pour the rice into the pastry lined pan.
  8. Roll out the pastry reserved for the lattice.
  9. Cut seven or eight strips, approximately 1/2 inch wide.
  10. Arrange the strips into a lattice on top of the rice. Cut off the excess.
  11. Roll the pastry lining the sides of the pan down to the top of the rice and form a decorative edge.
  12. Bake at 350°F until the crust is lightly browned and the rice is barely jiggley in the center, approximately 30-45 minutes.
  13. Cool on a rack for approximately 20 minutes.
  14. Remove the side of the pan and cool completely.
Recipe Notes

Copyright © 2018 by VillaSentieri.com. All rights reserved.

Share this Recipe

Crostoli (Italian Fried Pastries)

December 26, 2017

I didn’t grow up eating crostoli.

That doesn’t mean we didn’t have our own version of fried dough.

Unlike crostoli, which are thin and crispy and leavened with baking powder, I grew up eating ovals of fried yeasted bread dough sprinkled with granulated sugar.

Frying bread dough and sprinkling it with granulated sugar is a common among Southern Italians. My mother had a name for it that I’ve never heard anywhere, it sounded something like “pitla.” I started doing some research. The word “pitta” is still used in Calabria, where my mother’s family originated, for various types of dough-based foods, including some that are quite flat. The word “pitta,” which I believe derives from the Greek word “pita,” became the word “pizza” in standard Italian. I’m guessing that “pitla” is a dialectical variation of “pitta.”


Click HERE to join our mailing list and you’ll never miss a recipe again!


One of the positive outcomes of doing research on Italian fried dough products is that I came across a wonderful Wikipedia page on fried dough from around the world.  Check it out here.

Crostoli (or crostui in the Friuli-Venezia-Giulia region of Italy where my mother-in-law was born) are traditionally served at Christmastime. My mother-in-law says that they would sometimes have them at other times of the year when they “wanted something sweet” that was simple to make.

My mother-in-law’s zig-zag pastry cutter

Not growing up eating crostoli, I asked my husband to tell me what he remembered.

I got two sentences:
“We always had them at Christmas.”
“They’re not my favorite.”

There you have it, the entirety of the crostoli story in 10 words.

I even waited a couple of days and asked him again if he remembered anything else about crostoli. “Nope” was the answer.

Now we’re up to 11 words.


Follow us on your social media platform of choice


That might have been the end had it not been for Christmas Eve. The morning of Christmas Eve, after I mixed dough for panettone, my mother-in-law and I made up a batch of crostoli to take to Christmas Eve dinner at the home of our friends Rich DePippo and Doug Howe.

Rich’s grandfather was from Domegge di Cadore in the Veneto region of Italy, just next door to Friuli-Venezia-Giulia where my mother-in-law was born. In fact, Domegge is about 100 kilometers from Treppo Grande, my mother-in-law’s home town.

As it turns out, Rich and his mother, visiting for Christmas, also made crostoli the morning of Christmas Eve.

Using a Microplane grater makes fast work of zesting lemons

There were dueling crostoli served for dessert (along with pizzelle, nut roll, and biscochitos).

Rich’s were long and thin, with a slit cut in the middle through which one end of the dough was twisted before frying. This seems to be the most traditional shape that I’ve seen in my research, though Lidia Bastianich, who is also from very near where my mother-in-law was born, ties hers in a knot.

Having seen pictures of crostoli twisted and tied before embarking on making them with my mother-in-law, I asked her why hers were just left as irregular squares (well, quadrilaterals, really) of dough. That’s the way her mother made them was, of course, the first response. After which she added that she liked them to puff up, which they don’t do if they’re twisted or tied.

The other difference in the crostoli is that Rich used anisette to flavor his whereas my mother-in-law used lemon zest and vanilla.

The anisette was definitely a new twist. In researching crostoli, I’ve seen citrus, usually lemon or orange, as the most common flavoring.  Often vanilla is added; sometimes brandy or rum. Never have I run into a recipe with anisette. Hopefully Rich will weigh in on his family’s recipe for crostoli and how they came to use anisette for flavoring.

Meanwhile, enjoy!


If you have a favorite family recipe and a bit of a story to tell, please email me at santafecook@villasentieri.com and we can discuss including it in the blog. I am expanding the scope of my blog to include traditional recipes from around the country and around the world. If you haven’t seen Bertha’s Flan, it will give you an idea of what I’m looking for.


Print Recipe
Crostoli (Italian Fried Pastries)
Crostoli are pastries that re rolled thin, fried, and dusted with granulated sugar. Powdered sugar melts and becomes sticky so granulated sugar is traditional. Crostoli are usually larger than the ones shown here, something like 1 ½ inches by 3 or 4 inches. We made these smaller because they were being served as part of a dessert buffet at the end of a large meal.
Votes: 0
Rating: 0
You:
Rate this recipe!
Cuisine Italian
Prep Time 30 minutes
Cook Time 45 minutes
Servings
Cuisine Italian
Prep Time 30 minutes
Cook Time 45 minutes
Servings
Votes: 0
Rating: 0
You:
Rate this recipe!
Instructions
  1. Combine flour, sugar, baking powder, lemon zest and salt in a large bowl. Mix well.
  2. Make a well in the center and add eggs. Using a fork, begin to incorporate the flour.
  3. Add vanilla extract, lemon juice and incorporate.
  4. Add melted butter.
  5. Mix to form a soft, non-sticky dough.
  6. When the dough becomes too stiff to mix with a fork, use your hand. Do not over knead.
  7. Cut into four or five pieces.
  8. Roll out less than 1/8 inch thick, dusting with a little flour as needed to keep the dough from sticking.
  9. Cut into rectangles, approximately 1 1/2 inches by 3 inches, with a zig-zag cutter.
  10. When all are cut, deep fry until brown. If you are not comfortable doing this from experience, use a thermometer and keep the oil at about 350 degrees Farenheit.
  11. Sprinkle with granulated sugar as soon as they are removed from the oil so the sugar sticks.
  12. They are best the same day but will stay fresh at least one day at room temperature, loosely covered.
Recipe Notes

Copyright © 2017 by VillaSentieri.com. All rights reserved.

Share this Recipe

Crostata di Noci (Italian Walnut Tart)

December 20, 2017

One evening in 1996 my husband and I were sitting with his parents in a dimly-lit bar in Venice. We were all chatting. I was drinking grappa, as was my father-in-law. Then the desire for dessert hit me. If you’ve spent any time in Italy you know that at no point in the day are you actually hungry. There’s just too much wonderful food around to not partake in it. So the desire for dessert had absolutely nothing to do with the need for more calories.

Going for something new, I selected Crostata di Noci. I was absolutely amazed by what I got.

The pastry was standard-issue Italian pasta frolla, a slightly sweet leavened crust that’s like a cross between shortbread cookies and a dense cake. The filling, however, tasted for all the world like nut roll, one of my favorite pastries but one that is also very time-consuming and frustrating to make.

In that instant, it all made sense. Nut roll hails from Eastern and Central Europe (as does another of my favorites, the poppy seed roll).  In northeast in Italy there is a lot of Eastern European influence. Suddenly, taking nut roll filling and putting it in a pasta frolla case meant I could have something that tasted just like a nut roll but without all the frustration of actually making nut roll.


Click HERE to join our mailing list and you’ll never miss a recipe again!


Now, Crostata di Noci will never actually replace “real” nut roll just like making bread in my bread machine won’t replace making bread by hand. But, with a bread machine, I have homemade bread every day which wouldn’t be the case if I had to make every loaf by hand. With less than half-an-hour’s active time, I can indulge my taste for nut roll any time I want!

Around the holidays nut rolls were ubiquitous in my home town but my mother and my Aunt Margie made the best nut rolls I have ever had. Largely this is because they both put in a large proportion of sweetened nuts to dough. Honestly, there was just enough dough to roll pinwheel fashion and hold the whole thing together. Many other nut rolls were bready by comparison.

To be sure, my mother’s filling differed from my Aunt Margie’s. I’m not sure how each of them came by their respective recipes but my suspicion is that Aunt Margie’s came from her mother or another Italian relative or friend because it contained orange juice. The use of citrus in various pastries is common in Italy. Pasta frolla, for example, is traditionally flavored with lemon zest and vanilla. I am guessing my mother’s recipe came from my father’s mother or someone on the Slovak side of my family because the liquid in the nuts was milk and not orange juice.


Follow us on your social media platform of choice


Separate from actually eating nut roll, there was this whole aura around making them (at least there was when I was young!). Buying shelled walnuts and using a food processor make quick work of preparing the nuts but in the 1960s, making nut roll started with my mother buying a large quantity of whole walnuts. We would sit around the table and crack the nuts open then extract the nutmeats. I still have the nutcracker and picks that we used.

My parents’ nutcracker and picks

After all the nuts were shelled, they needed to be ground. We did this in a hand-crank grinder of the same type used to grind meat for sausage. As a kid, I got to turn the crank on the grinder! I no longer have my mother’s grinder as it got rusty from being stored in the basement but I have my own that is pretty much identical. I got it when I was in college.

The hand-crank grinder I got while in college

After the excitement (well, as a kid it was pretty exciting!) of shelling and grinding the nuts we all kind of abandoned my mother who started the laborious process of actually making the nut rolls. That is definitely not a job for amateurs. The dough had to be very thin but just thick enough to contain the nuts. The nuts had to be moist, sweet, and generous in quantity compared to the amount of dough. Then the whole thing had to be rolled up and baked.

After my mother died, Aunt Margie started sending me nut roll every year. After Aunt Margie died, my cousin Donna (Aunt Margie’s daughter) picked up the nut roll mantle. The two nut rolls that I got this year will be carefully doled out over a few weeks, befitting their preciousness, starting on Christmas Eve!

This year’s nut roll from my cousin Donna.  Notice the large proportion of nuts to dough.

If you have a favorite family recipe and a bit of a story to tell, please email me at santafecook@villasentieri.com and we can discuss it. I am expanding the scope of my blog to include traditional recipes from around the country and around the world. Take a look at Bertha’s Flan.  It will give you an idea of what I’m looking for.


After returning from that trip to Venice I was determined to recreate Crostata di Noci. I whipped up a batch of Zia Fidalma’s pasta frolla and made a simple walnut filling with orange juice in a nod to the Italian origins of this particular pastry.

The first try was a winner and I haven’t really made any substantive changes in the recipe since. If one wanted a creamier filling, one could add a few tablespoons of butter but, honestly, the crostata is so rich that I haven’t felt the need to make it more so.

Until I tackle nut roll making 101 (which I swear I’m going to do one day soon!), I’ll have to settle for crostata di noci, and the occasional nut roll care package from my cousin!

Print Recipe
Crostata di Noci (Italian Walnut Tart)
Lightly sweetened ground walnuts fill an Italian pasta frolla crust in this Venetian dessert. If you’re not a fan of walnuts you could use other nuts. If you want to make the crostata extra festive, put a paper doily on top and sprinkle it with powdered sugar to get a pattern.
Votes: 0
Rating: 0
You:
Rate this recipe!
Cuisine Italian
Prep Time 40 minutes
Cook Time 45 minutes
Passive Time 30 minutes, plus cooling
Servings
people
Ingredients
Pasta Frolla
Nut Filling
Cuisine Italian
Prep Time 40 minutes
Cook Time 45 minutes
Passive Time 30 minutes, plus cooling
Servings
people
Ingredients
Pasta Frolla
Nut Filling
Votes: 0
Rating: 0
You:
Rate this recipe!
Instructions
Pasta Frolla
  1. Blend flour, sugar, baking powder, vanilla powder, salt and lemon zest in a food processor until combined.
  2. Add the cold butter, cut in pieces.
  3. Blend till well combined. The mixture in the food processor will appear to move as one mass though when you stop the processor you will see that it is not.
  4. Add the eggs and vanilla extract if you are using that instead of vanilla powder and blend till it almost forms a ball.
  5. Remove the pastry from the food processor and incorporate the final bits of flour by hand.
  6. Wrap the dough in waxed paper and refrigerate for about 30 minutes before using.
Nut Filling
  1. Combine all ingredients and mix well.
  2. Cover the nut filling and keep it at room temperature while rolling out the pasta frolla.
Assembly
  1. Roll out pasta frolla between sheets of waxed paper until it is just large enough to come up the sides of a 10" diameter by 1” tall tart pan with a removable bottom.
  2. Trim the edges of pastry even with the top of the tart pan.
  3. Add the filling and spread it out evenly.
  4. The filling should come just to the top of the tart pan.
  5. Bake the crostata at 350°F for approximately 45 minutes or until crust is golden brown.
  6. Cool and remove the sides of the tart pan.
  7. The crostata can be sprinkled with powdered sugar for serving and/or accompanied by lightly sweetened whipped cream.
Recipe Notes

Copyright © 2017 by VillaSentieri.com. All rights reserved.

Share this Recipe