Olive Oil Cake (Torta all’Olio d’Oliva)

January 27, 2021

“Can’t you come up with another name?”

That was my husband’s response when I said I was going to post a recipe for olive oil cake.

I suggested the Italian, Torta all’Olio d’Oliva.  He wasn’t amused.

I guess he thinks the idea of olive oil in cake isn’t appetizing.

Nonetheless, the cake is a staple in regions surrounding the Mediterranean Sea.  And a delicious one, at that!
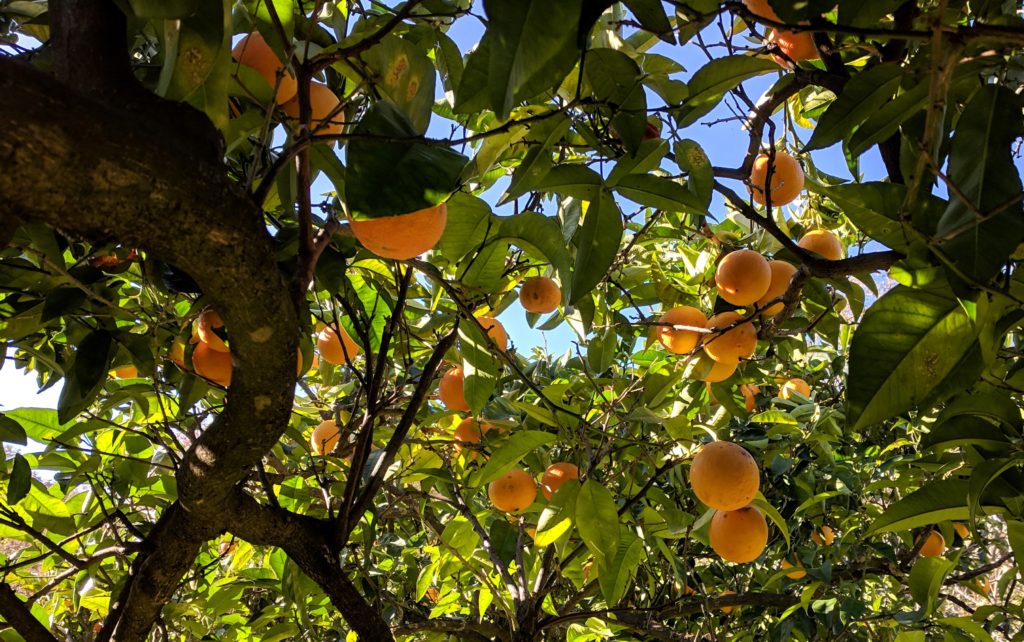
Oranges at a biodynamic citrus grove in Calabria near the Italian Culinary Institute

There are endless variations.  Some are thin, barely an inch tall.  Some are savory-sweet.  Some barely reveal the presence of olive oil.  Others proclaim the flavor of olive oil loudly.  Some are good for snacking (with tea or coffee).  And a few are actually good enough to serve for dessert with no embellishment.


Join our mailing list and you’ll never miss a recipe again!


Then there’s the olive oil to consider.  Even among really good extra-virgin olive oils, and I do suggest you use really good extra-virgin olive oil, there is a range of flavor profiles.  Words like grassy, bitter, peppery, fruity, and buttery come to mind.

Which you use will influence the flavor of the cake.  All will be good but some may be more to your liking than others.

Freshly grated orange zest is key to the flavor of this olive oil cake

Honestly, though, does the world need another recipe for Torta all’Olio d’Oliva?

That’s a rhetorical question, right?

I mean, really, we wouldn’t ask if the world needed another recipe for chocolate cake.  We’d just lean into it and make it happen.

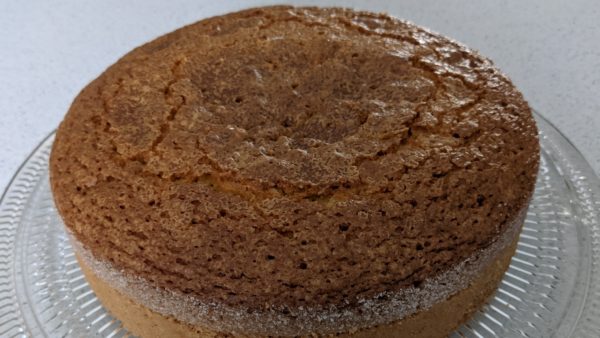
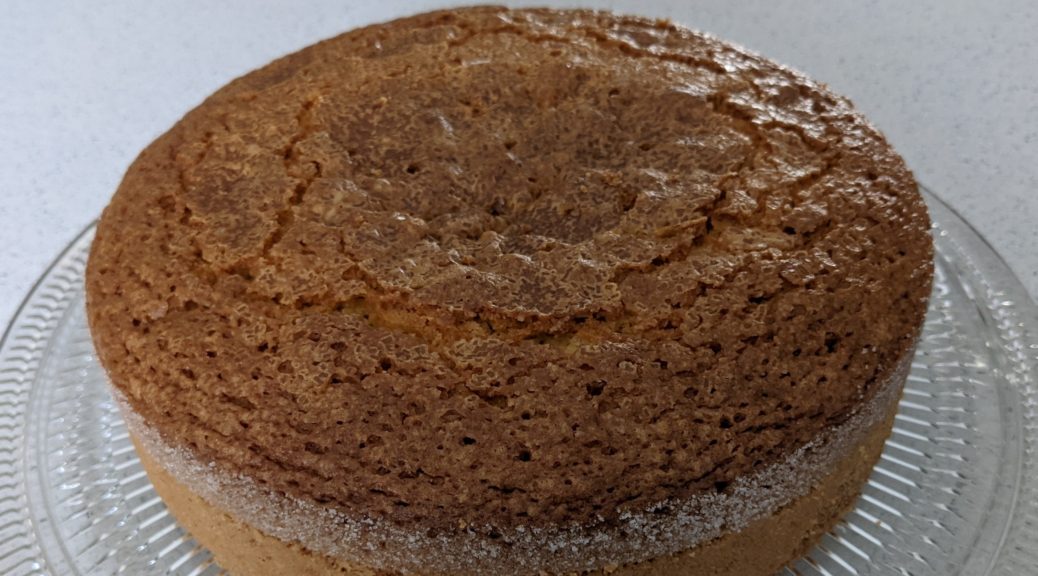
If you’ve never had olive oil cake, and if you like to bake, I suggest giving this version a try.  It has a moist crumb, crunchy top (from brown sugar), and a hint of orange from orange zest and orange liqueur.


Follow us on your social media platform of choice


This cake is suitable as dessert, not just snacking.  It’s not going to be a spectacle of a dessert, like the Maraschino Cherry Cake I made from the first edition Betty Crocker Picture Cookbook, but I believe it will surprise many of your guests with just how good it is.
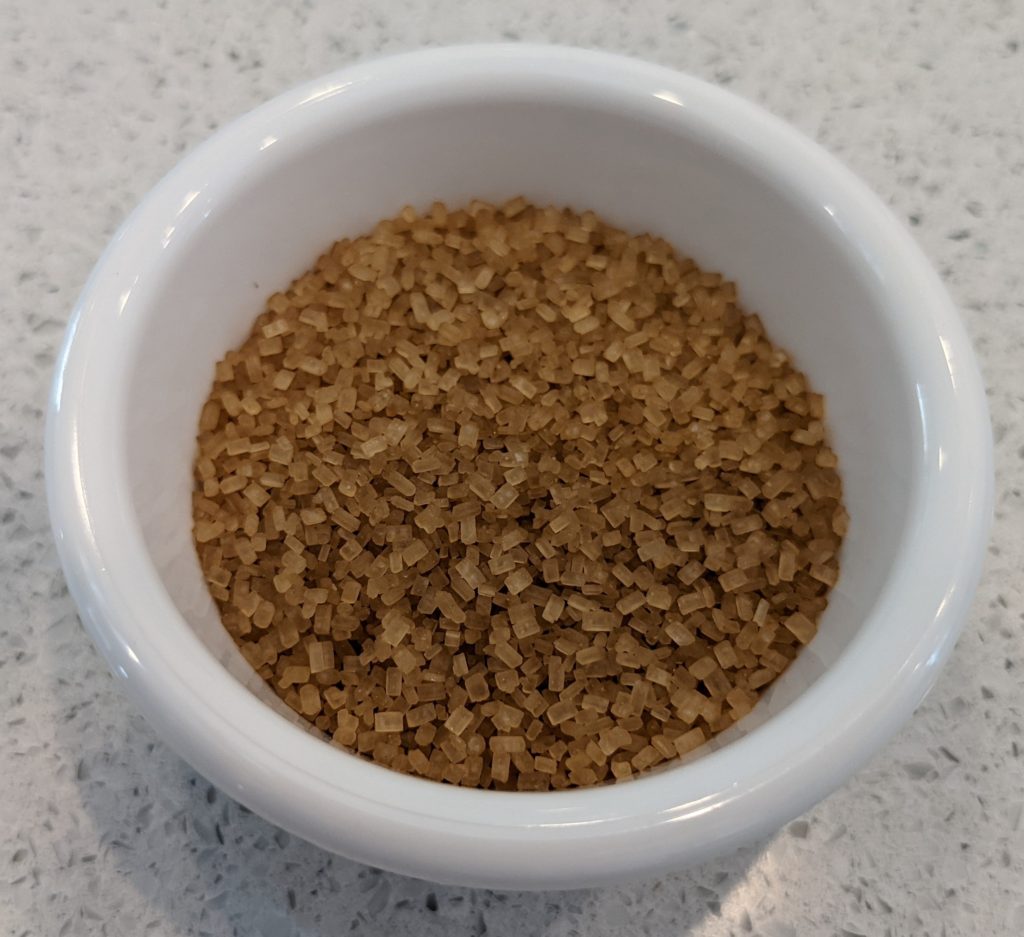
Large crystals of brown sugar, such as Turbinado or Zucchero di Canna add crunch to the top of the cake

Now for the apology:  I prefer to cook, and I DEFINITELY prefer to bake, using the metric system.  It’s just so much easier to scale recipes up and down.  Also, among professional bakers, most ingredients are weighed, even liquids.  Without a scale that measures in fractions of a gram, however, it is not practical to weigh small amounts of ingredients like baking powder and salt.  For these, I stick to teaspoons and tablespoons when I publish recipes though I often weigh these ingredients, too.  Remember, though, that a standard teaspoon is now treated as if it were 5 ml, and a tablespoon 15 ml, even though both are just a smidge less, at least in America.
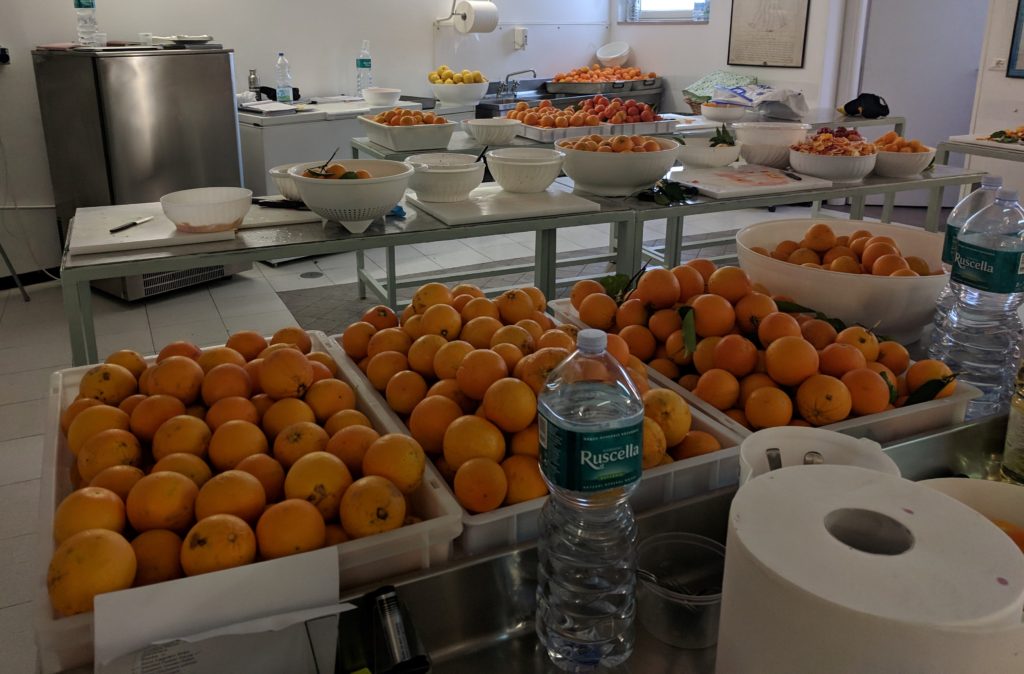
We picked a few oranges for a course on preserves at the Italian Culinary Institute

Although the recipe app will convert metric measures to non-metric, I’ll be happy to supply anyone with ingredient quantities in the typical volume-based American system upon request.
Print Recipe
Olive Oil Cake (Torta all’Olio d’Oliva)
This is a cake which definitely benefits from sitting, tightly covered, at room temperature for two days before serving. The flavors mellow and the olive oil diffuses throughout the cake. For the topping, use a brown sugar that is not soft and moist but rather granular. Use a good quality orange liqueur such as Arancello (sometimes called orangecello in the United States) or Grand Marnier.
Votes: 0
Rating: 0
You:
Rate this recipe!
Cuisine Italian
Prep Time 20 minutes
Cook Time 60 minutes
Passive Time 2 hours
Servings
people
Ingredients
Cuisine Italian
Prep Time 20 minutes
Cook Time 60 minutes
Passive Time 2 hours
Servings
people
Ingredients
Votes: 0
Rating: 0
You:
Rate this recipe!
Instructions
  1. Oil a 9” springform pan with olive oil.
  2. Cover the bottom with parchment and oil the parchment.
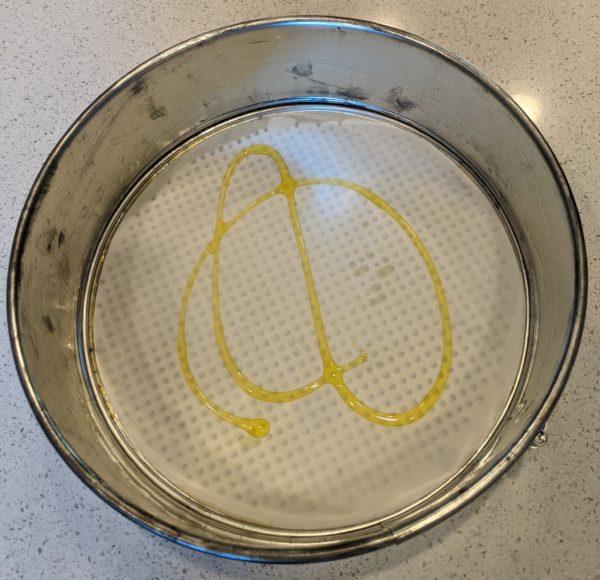
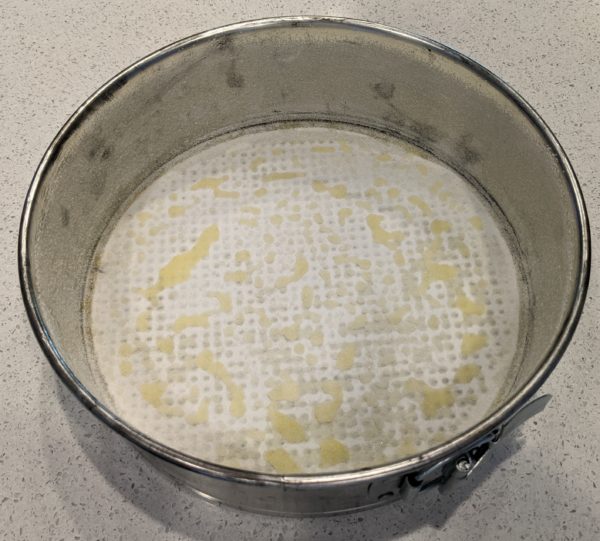
  3. Sprinkle the pan with sugar and dump out the excess. Even if you spread out the oil precisely it will tend to bead up, unlike butter, so there will be some sugar clumps. Don't be concerned.
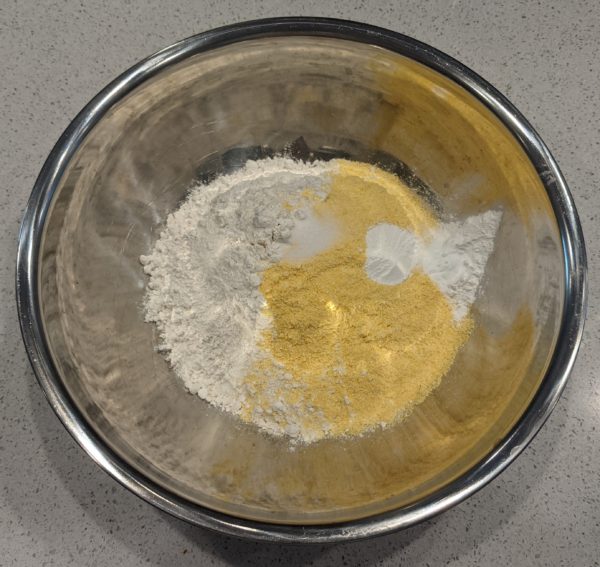
  4. Combine the flour, cornmeal, baking powder, baking soda and salt. Mix well and reserve.
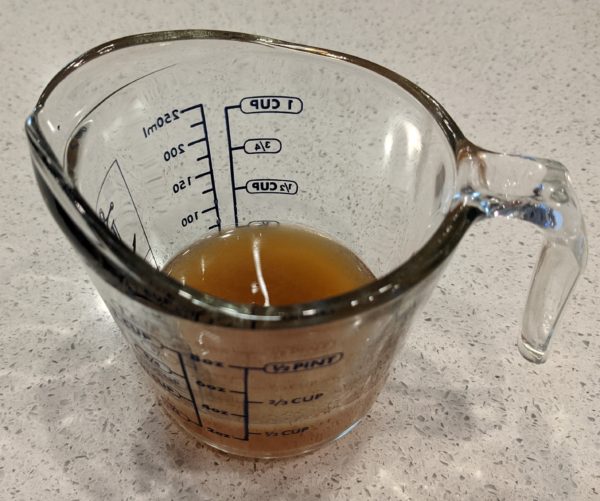
  5. Combine the liqueur, lemon juice and vanilla. Reserve.
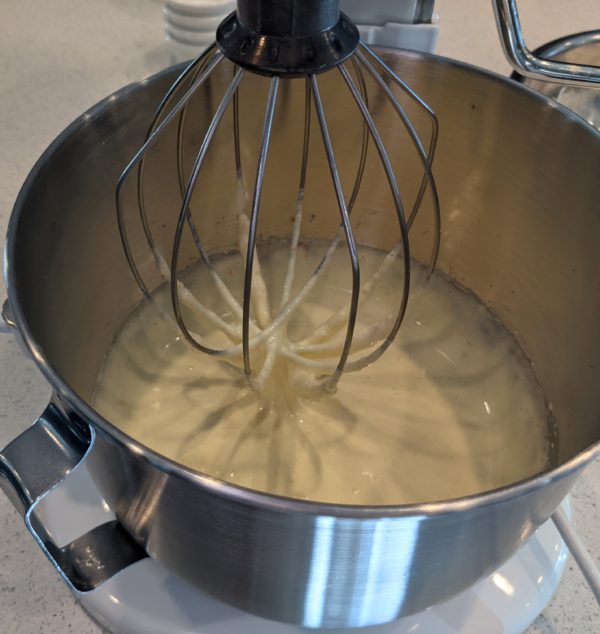
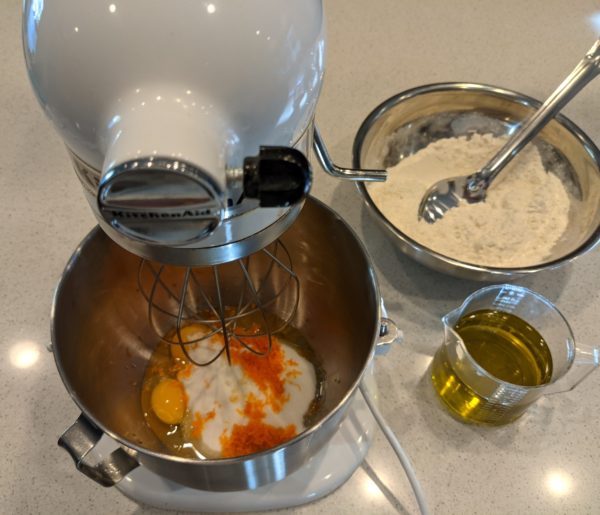
  6. In a planetary mixer, using the whisk, beat the sugar, eggs and orange zest on high speed until thick and ribbon-like, approximately 3-4 minutes.
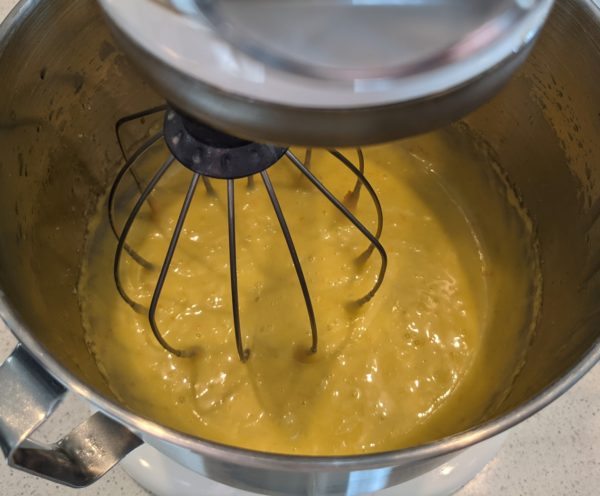
  7. Still on high speed, slowly drizzle in the olive oil and beat until fully incorporated.
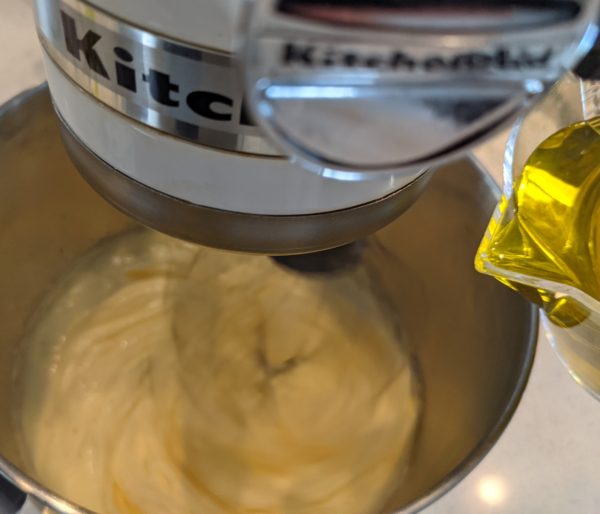
  8. The batter should get thicker.
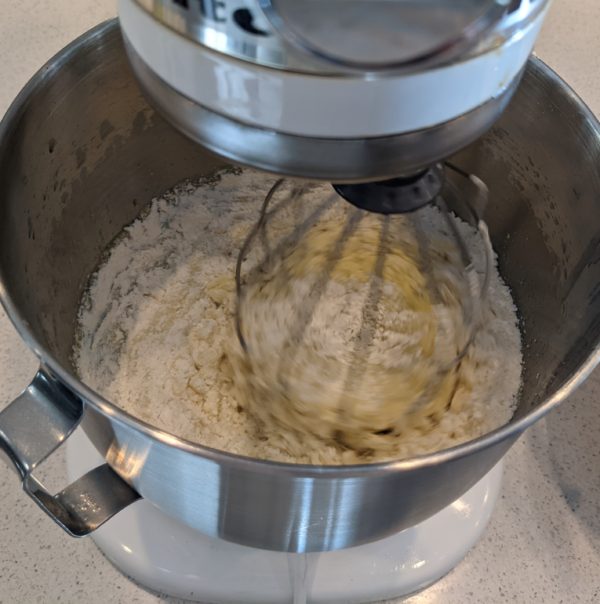
  9. On low speed, add the flour mixture, in three additions, alternating with the liquid mixture, in two additions, starting and ending with flour. Scrape the bowl once or twice to ensure an even mix.
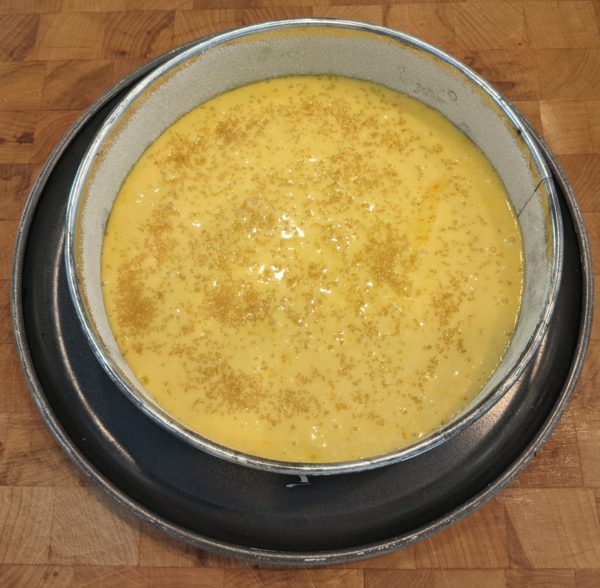
  10. Pour into the prepared springform pan.
  11. Sprinkle the top with brown sugar.
  12. Bake at 350°F until brown, firm on top, and a cake tester comes out clean; approximately 60 minutes. Do not underbake the cake or it will fall as it cools.
  13. Cool the cake for 15 minutes in the pan then poke the top all over with a skewer.
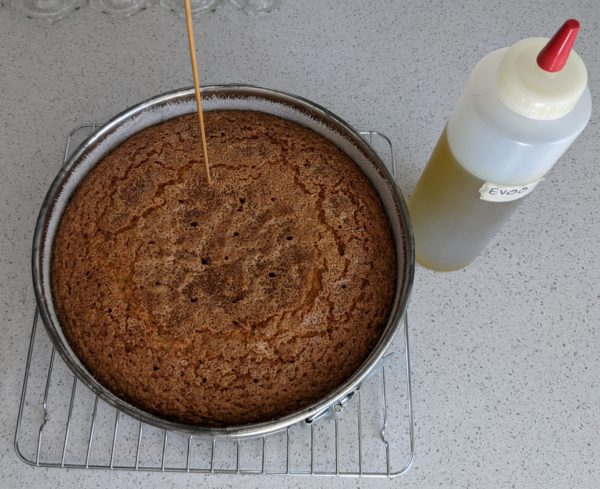
  14. Drizzle 2 tablespoons of olive oil on the cake and allow it to absorb.
  15. Remove the side of the pan and cool completely.
  16. When the cake is cool, remove it from the base of the springform pan. Wrap it in plastic and allow to rest at room temperature for at least one day, preferably two, before serving.
Recipe Notes

Copyright © 2021 by Villa Sentieri, LLC. All rights reserved.

Share this Recipe

Crostini with Fava Beans and Arugula

March 18, 2020

A few weeks ago, our dinner group decided that the theme of our dinner would be dishes from my blog.  For complete disclosure, I recused myself from that decision.

Dating back to the beginning of our group, Santa Fe Ate, the name being both a play on what we do and how many we are [though recently we’ve been six due to a move out of state], Becky Gould has bid on appetizers.  There is the occasional exception but one can count on Becky to sate our hunger at the beginning of an evening with some artfully created appetizers.

Santa Fe Ate (minus two) our current configuration. (left to right: Pat Assimakis, Doug Howe, Gary Mihalik, Frank Pieri, Rich DePippo, Becky Gould)

Becky went through every one of my blog posts and came to the conclusion that I had not posted very many recipes for appetizers.


Join our mailing list and you’ll never miss a recipe again!


My review confirmed the same.

This post is the beginning of trying to rectify that situation.

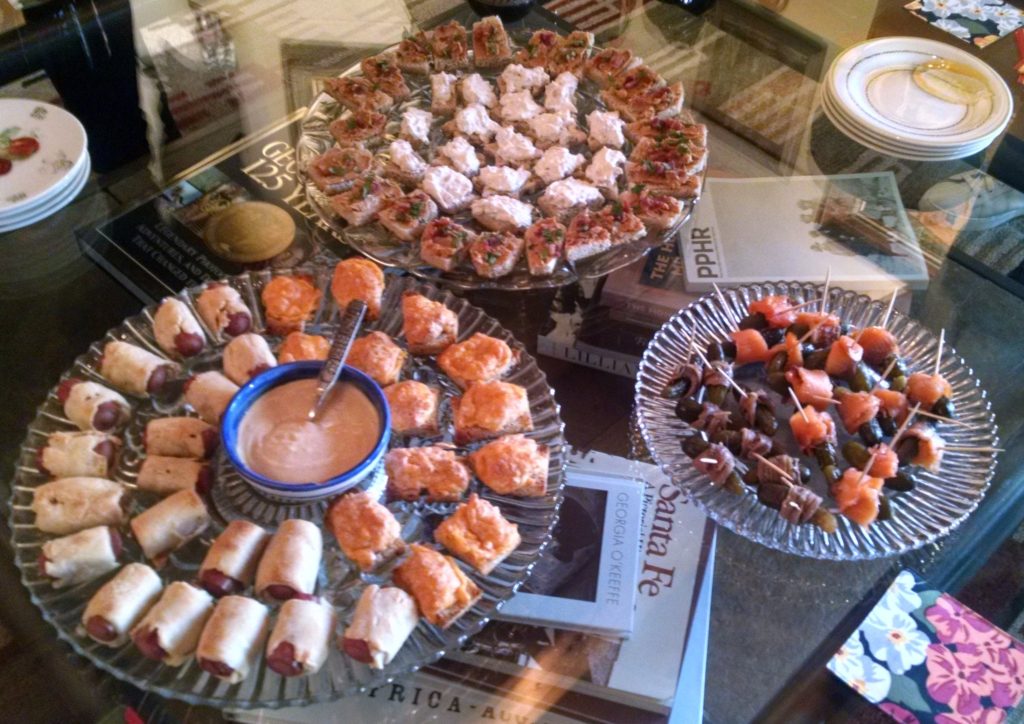
Appetizers that Becky whipped up from the first edition 1950 Betty Crocker Cookbook for a dinner where all dishes had to come from that book.

Crostini are a favorite appetizer in our house.  The formula is infinitely adaptable.  It goes something like this:

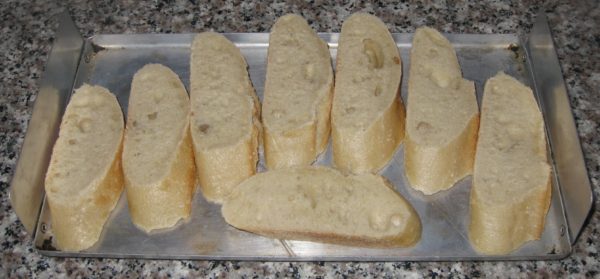
  1. Toast bread, preferably a rustic Italian-style loaf or a baguette.
  2. Drizzle with good extra-virgin olive oil.
  3. Rub with the cut side of a clove of garlic.
  4. Add a topping of your choice.

Often, I stop at step three.  Toasted bread rubbed with garlic and extra-virgin olive oil is good without any embellishment.

If I’m not making many crostini, I’ll toast the bread in my 1967 General Electric Toast-R-Oven using the aluminum tray and the “top brown only” setting, flipping the bread once to toast both sides.  [Yes! I really do use a 53-year-old toaster oven.]

My 1967 General Electric Toast-R-Oven.

When making crostini for a crowd, I use the broiler and follow the same process of flipping the bread.


Follow us on your social media platform of choice


Choose toppings to suit your whim and the season.  Chopped fresh in-season tomatoes with a hint of basil is a classic topping as is coarsely mashed cooked cannellini beans with an extra drizzle of extra-virgin olive oil.

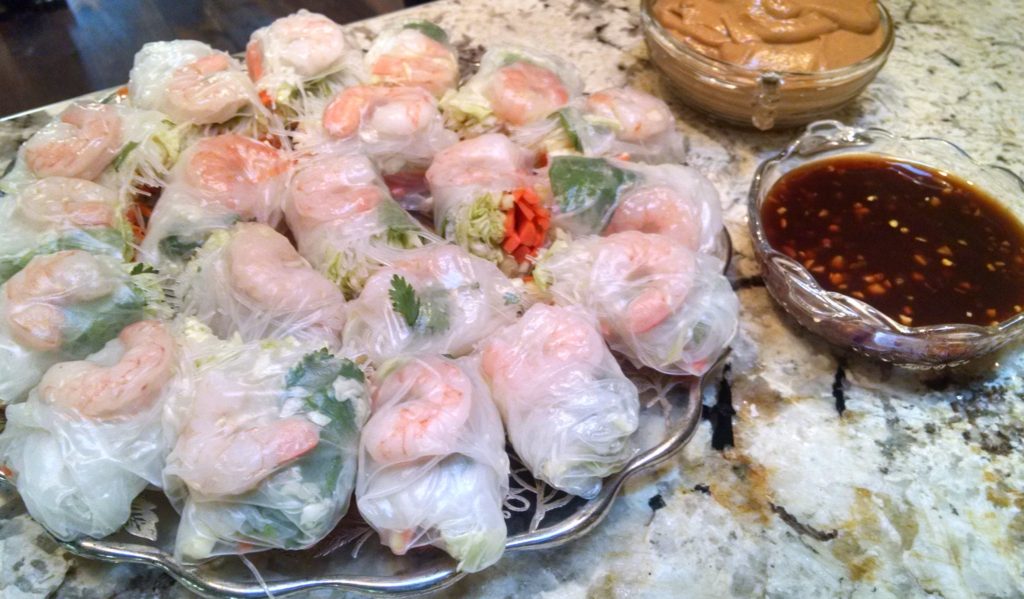
Becky’s spring rolls for a meal focused on “French Indochina 1920’s to 1930’s.”

Just last week I made crostini topped with goat cheese and spicy eggplant preserved in extra-virgin olive oil (melanzane piccante sott’olio) that I had made a few days earlier.

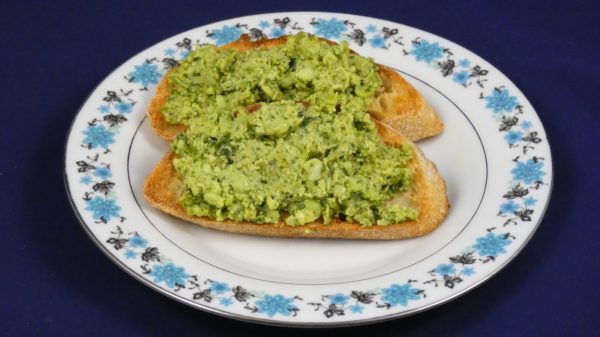
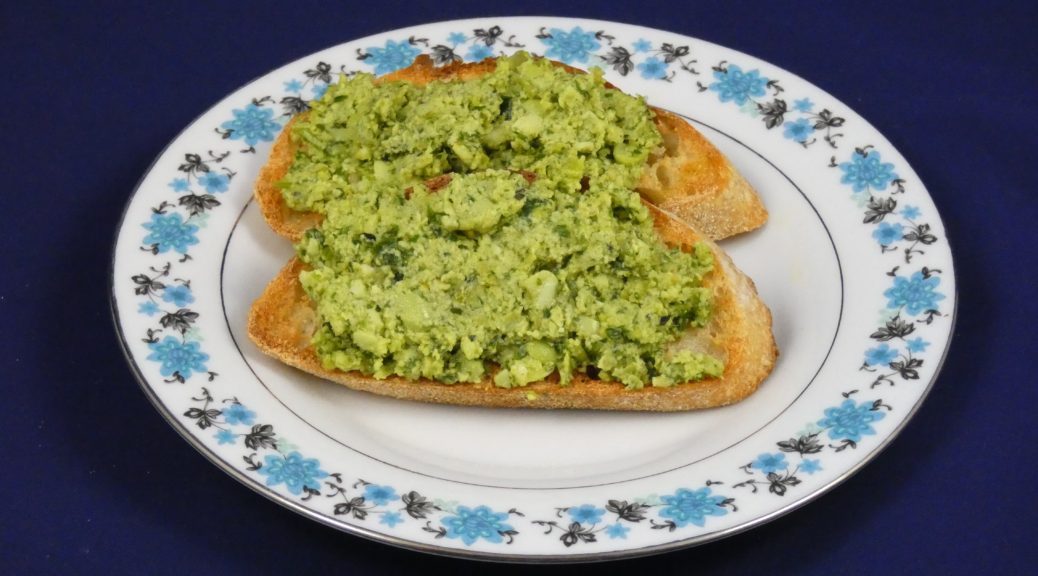
This particular combination of beans and arugula, zipped up with lemon, is very refreshing and a reminder that spring is not far away.


Print Recipe
Crostini with Fava Beans and Arugula
Frozen fava beans work well in this recipe. If you cannot get fava beans, substitute edamame. If using fava beans, you will need to start with more than one cup of shelled beans to have one cup of peeled beans after cooking.
Votes: 0
Rating: 0
You:
Rate this recipe!
Prep Time 20 minutes
Cook Time 10 minutes
Passive Time 6 hours
Servings
persons
Ingredients
Prep Time 20 minutes
Cook Time 10 minutes
Passive Time 6 hours
Servings
persons
Ingredients
Votes: 0
Rating: 0
You:
Rate this recipe!
Instructions
  1. Cook fava beans or edamame till tender, approximately 3-4 minutes. Drain and shock in ice water.
  2. If using fava beans, peel them.
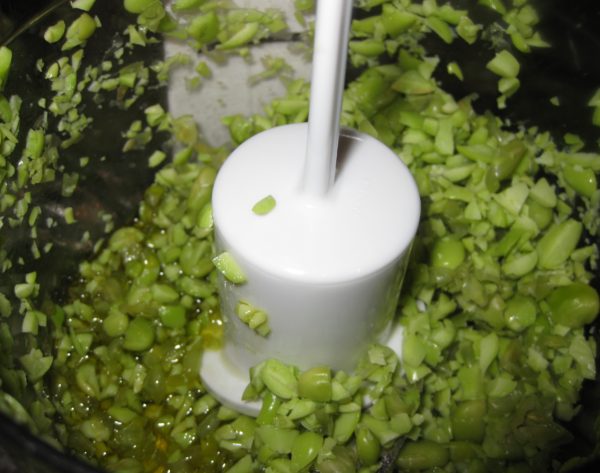
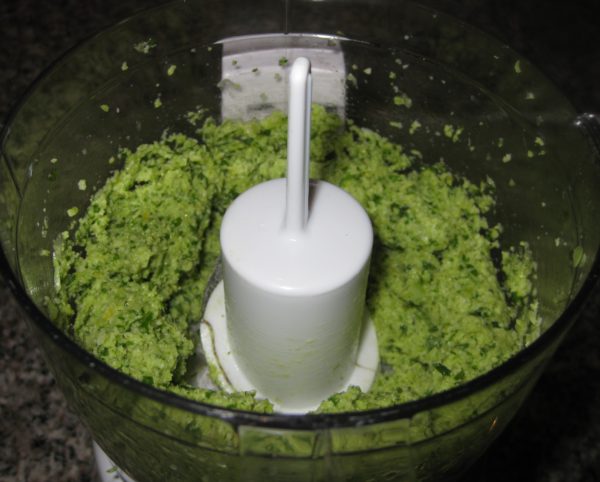
  3. Coarsely chop the cooked beans in a small food processor.
  4. Remove half the beans and reserve.
  5. Coarsely chop 1/2 ounce of arugula by hand. Reserve.
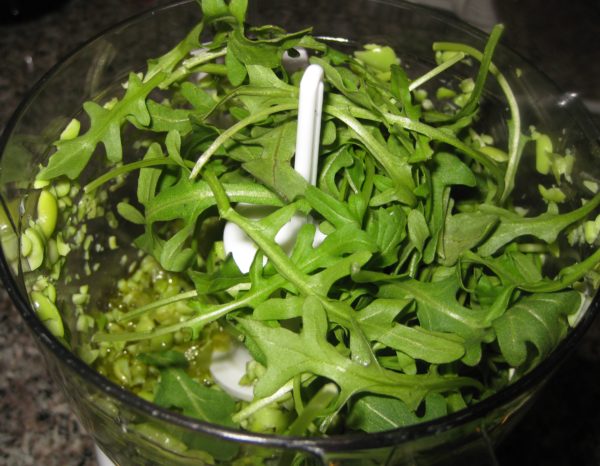
  6. To the beans in the food processor, add 1/4 cup of olive oil, the remaining 1/2 ounce of arugula, mint leaves (if using), Pecorino Romano cheese, lemon zest, and lemon juice.
  7. Process until almost smooth.
  8. Combine puree with the coarsely chopped beans and arugula and mix by hand.
  9. Adjust salt, pepper, and lemon juice. Refrigerate several hours, or overnight, to allow flavors to blend.
  10. Return to room temperature before using.
  11. To serve, toast slices of baguette. Drizzle one side of the toasted bread with extra-virgin olive oil. Rub the bread with the cut side of a garlic clove, distributing the oil.
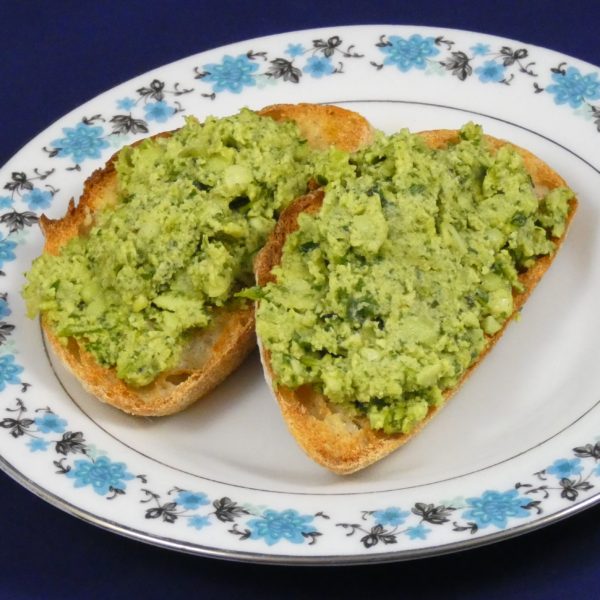
  12. Top each slice of bread with some of the bean mixture.
Recipe Notes

Copyright © 2020 by Villa Sentieri, LLC. All rights reserved.
Share this Recipe

Chicken Braised with Lemon, Sage and Olives

June 20, 2018

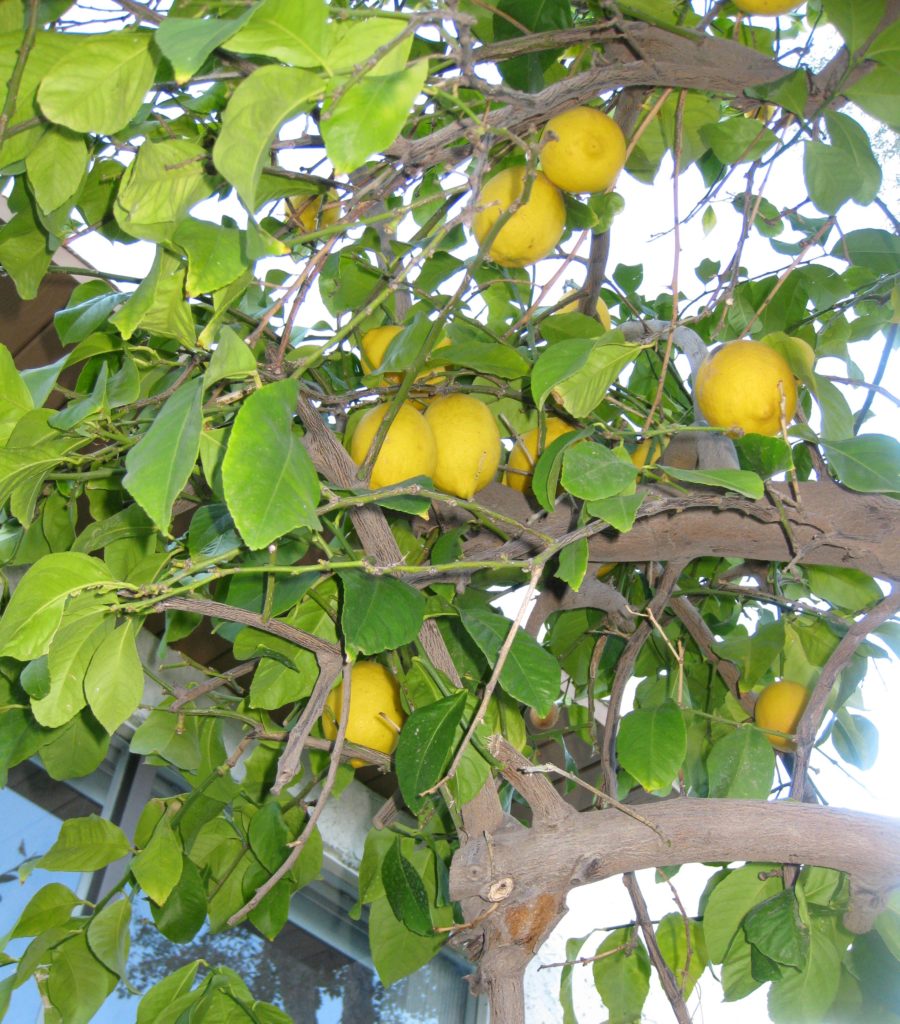
When we’re in Palm Springs in the winter, surrounded by an abundance of citrus trees, I feel like citrus ought to be featured in every meal.

Being able to walk out the door and pick lemons, limes, oranges, grapefruit and tangerines, and NOT doing it, seems like such a grand missed opportunity.  Even if the ingredients for the rest of the meal don’t come from within a few feet of my door, the citrus fruits and herbs can.

With that in mind, and the prospect of cooking a multi-course dinner for 15 people in a kitchen that’s about 8’ x 10’ got me to thinking.  Individually lemons, sage, and olives pair well with chicken so why not all of them together in the same dish?

Looking up into a lemon tree in Palm Springs

Next came the method.  With fifteen people I needed at least 15 pieces of chicken.  I was pretty sure that with all the other courses, one piece of chicken per person would be enough.  I added a few more for good measure.


Follow us on your social media platform of choice


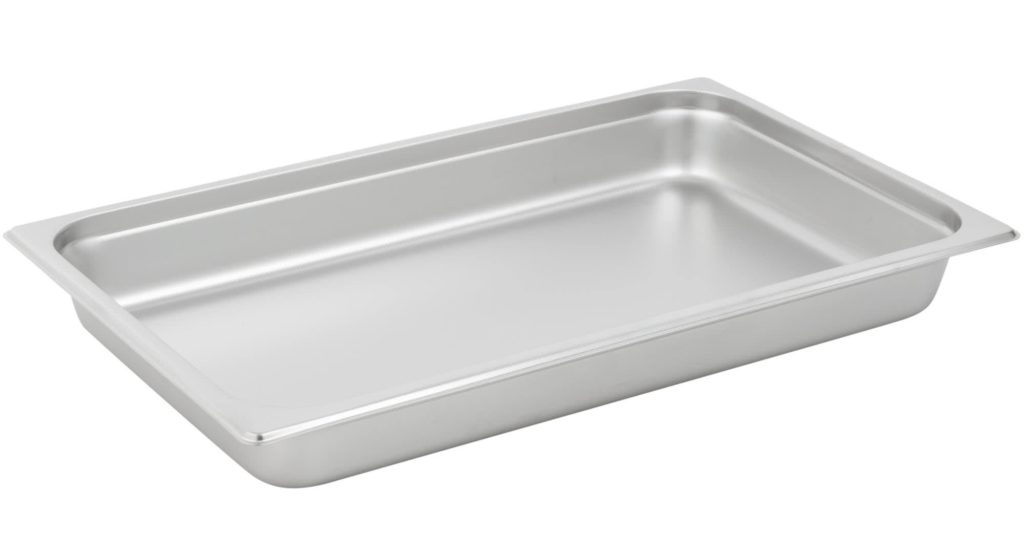
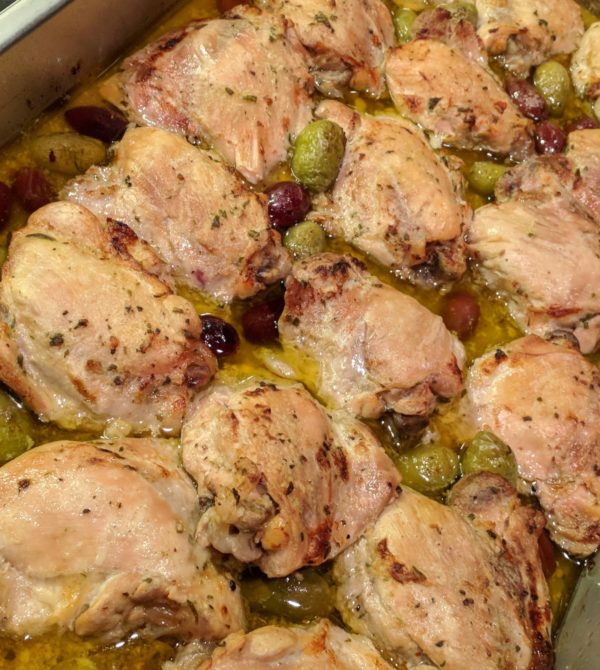
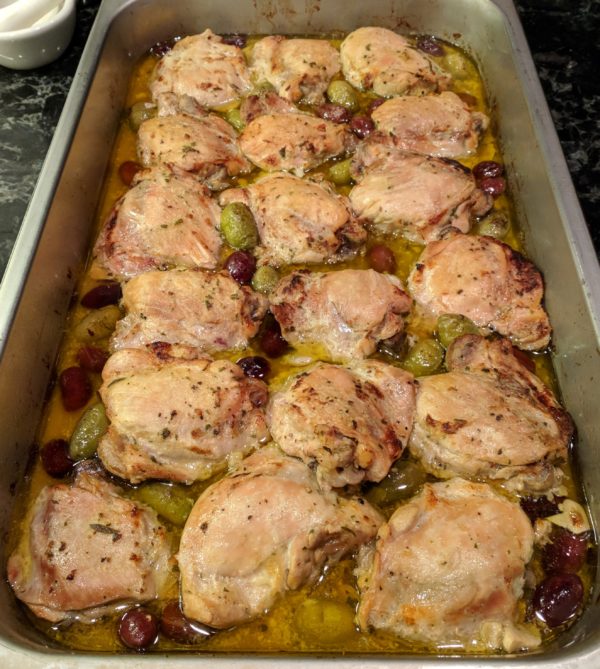
Braising 18 pieces of chicken on the stove top would have consumed a good deal of space so I opted for the oven and a “hotel pan,” sometimes called a steam table tray.  You know, those cafeteria-style rectangular pans.  I have a mess of them in an array of sizes.  Made of stainless steel, they’re non-reactive.  You can cook and store food in them, simplifying the preparation process.  Shallow roasting pans are a good substitute.  Don’t use aluminum pans or other reactive materials due to the lemon juice in this dish.

To keep it simple, I decided not to brown the chicken first, but rather to do it at the end by turning up the oven.  I made a marinade by buzzing the ingredients in a blender, so even that is super-easy.

A hotel pan is a great way to prepare large quantities of food

Which part of the chicken to use was never in question.  I like what happens to chicken thighs with long, slow braising.  Keeping the bone in adds flavor and structure so I suggest avoiding boneless thighs.

If you keep the skin on you’ll have to remove it before browning and serving the chicken because it will be rubbery from the moist heat.  I usually prefer to keep the skin on as it helps keep the meat moist but the combination of low and slow cooking and a tight cover meant the effect of the skin would be marginal.  Removing the skin in the beginning makes the dish even simpler to prepare.  Besides, the skin is a great addition to the stock pot when making chicken stock or broth.


Join our mailing list and you’ll never miss a recipe again!


I keep a zipper lock bag in my freezer into which I put chicken skin and other bits that I trim off chicken then add the contents to the stock pot with backs and wings.  Skin contains a lot of fat but since it will be skimmed off at the end it’s not really a concern.  The collagen in the skin, however, will greatly improve the mouthfeel of the broth.  In the “old days” adding chicken feet to the stock pot served the same purpose but finding chicken feet is challenging.

A Palm Springs orange tree, in the distance, full of ripe oranges

While this dish was created in the Palm Springs winter, it works well year-round thanks to the non-stop availability of lemons.  The next time you’re cooking for a crowd, give it a try and let me know what you think.

Print Recipe
Chicken Braised with Lemon, Sage and Olives
I created this recipe for my father-in-law’s birthday, January 2018. The lemons came from the trees outside of our house in Palm Springs. Though not essential, I prefer to put a sheet of baking parchment over the chicken before covering with aluminum foil to keep the reactive aluminum completely out of contact with the acid in the lemon juice.
Votes: 0
Rating: 0
You:
Rate this recipe!
Course Mains, Poultry
Cuisine Italian
Prep Time 30 minutes
Cook Time 2 hours
Servings
people
Ingredients
Course Mains, Poultry
Cuisine Italian
Prep Time 30 minutes
Cook Time 2 hours
Servings
people
Ingredients
Votes: 0
Rating: 0
You:
Rate this recipe!
Instructions
  1. Make marinade by pureeing the olive oil, lemon juice, 6 cloves garlic, rosemary, salt, and pepper in a blender.
  2. Pour the marinade over the chicken thighs and mix well.
  3. Marinate chicken thighs overnight in the refrigerator.
  4. Lightly oil a non-reactive hotel pan or shallow roasting pan.
  5. Arrange lemon slices on the bottom of the pan.
  6. Put a sage leaf on each lemon slice.
  7. Put a chicken thigh on each sage-topped lemon slice, reserving the marinade.
  8. Scatter olives around the chicken.
  9. Smash the remaining 8 garlic cloves and scatter around the chicken.
  10. Pour the marinade over the chicken. Cover the pan tightly with foil. (If possible, cover the pan with a sheet of parchment before the aluminum foil.)
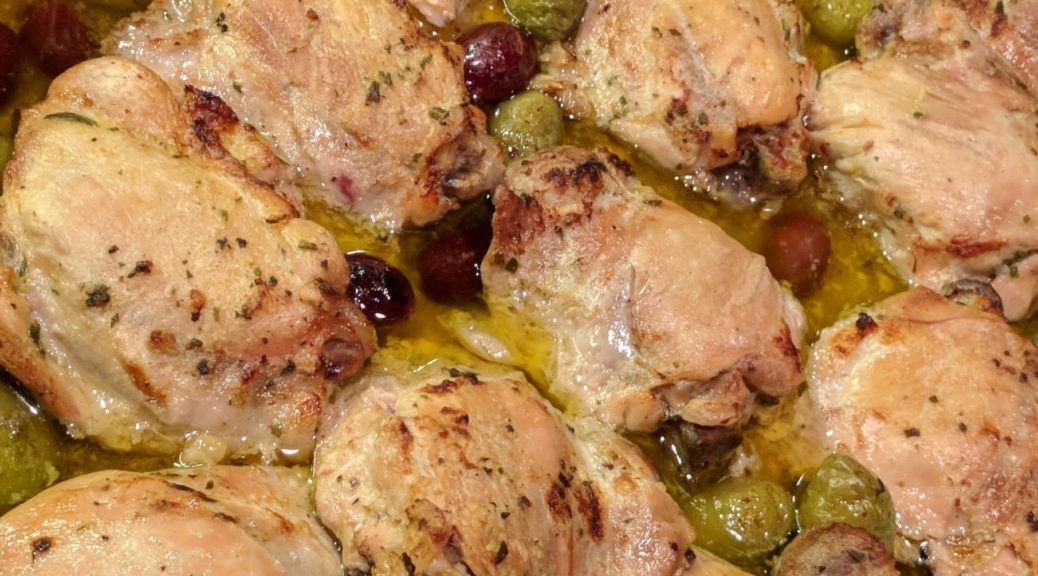
  11. Put the chicken into a preheated 350°F oven. Cook until the chicken is nearly fall-apart tender, 90-120 minutes.
  12. Using a turkey baster, remove most of the liquid from the pan. Put the liquid into a fat separator.
  13. Turn the heat as high as the oven goes. Put the pan of chicken on the top rack until it takes on some color, approximately 10-15 minutes. You can also use the broiler for this, though many broilers do not have enough heated surface area to brown the contents of a large pan.
  14. While the chicken is browning, skim the fat from the pan juices.
  15. Carefully move the chicken thighs, with lemon slices intact, to a serving platter or individual plates.
  16. Scatter the olives over the chicken.
  17. Pour some of the defatted pan juices over the chicken.
  18. Pass the remaining defatted pan juices at the table.
Recipe Notes

Copyright © 2018 by Villa Sentieri, LLC. All rights reserved.
Share this Recipe

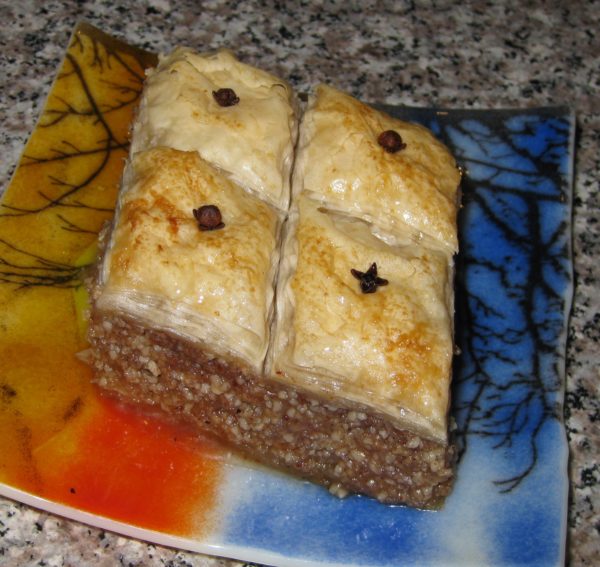
Baklava with Walnuts and Almonds

February 23, 2018

Syrup desserts are popular from the Eastern Mediterranean through the Arabian Peninsula.  Among syrup desserts, baklava is one of my favorites.

I rarely make baklava but the first time I did was junior year in college.  That same recipe is the one that I still make.

Styles of baklava vary.  More nuts.  Less nuts.  More syrup.  Less syrup.  Different aromatics.  While I like them all, I tend towards the more Arabic preparations which, in my experience, include more nuts and syrup than their more restrained Greek counterparts.

Perhaps that’s why a friend, of Greek heritage, said that my baklava didn’t look like anything a Greek ever made!  Admittedly, however, the recipe came from a Greek and I think I have been true to the recipe but, hey, I’m not Greek so who am I to say what could have come out of a Greek kitchen.


Click HERE to join our mailing list and you’ll never miss a recipe again!


I spent much of 2010 living in Dubai.  The consulting company that I started in the mid 1990’s landed a contract with the United Arab Emirates Ministry of Health in late 2009.  In January 2010 I moved to Dubai.

A view of one part of the kitchen in my Dubai apartment

Shopping for food in Dubai is just amazing.  The sheer number of expats (at the time it was estimated that 95% of the people living in Dubai were expats!) means that the supermarkets are truly multinational affairs, even the relatively small ones.

It was rare that I could not find brands with which I was familiar.  I’m sure expats from almost every country had the same experience.  The supermarkets were stocked with brands from around the world.  It truly was the most amazing grocery shopping I have ever experienced outside of the food halls at Harrods and KaDeWe.  But remember, Harrods and KaDeWe are most decidedly upscale affairs.  In Dubai I was just going to the (plain, ordinary) supermarket!

A small section of the food hall at KaDeWe in Berlin (By Blorg (Own work) [GFDL (http://www.gnu.org/copyleft/fdl.html), CC-BY-SA-3.0 (http://creativecommons.org/licenses/by-sa/3.0/)], via Wikimedia Commons)
I spend a week in Germany during the summer of 2010, right in the middle of my Dubai experience.  I found shopping in German supermarkets to be a much more “foreign” affair than shopping in the supermarkets in Dubai.  Rarely was there a brand I recognized in Germany.  Shopping involved intense reading of labels because I was not familiar with the products and their contents…or their quality.

A view of the Arabian Gulf and the man-made Palm Jumeriah Island in the distance from my apartment

Produce in Dubai could be hit or miss due to the distance most of it traveled.  Although there was a nascent horticultural industry in Dubai, I could never find truly local produce.  On several occasions I tried to find a store that purported to sell local produce but my driver could never locate it, even with the address!


Follow us on your social media platform of choice


The closest we had to “local” produce was from Iran, the source of Romaine lettuce and cauliflower, as I recall, among other produce.  Considering that Iran and the United Arab Emirates are only 90 miles away at their closest point, and considering how far produce can travel in North America from fields in California to the Northeast, 90 miles really counts as local, even if there is an international border among two not-so-friendly countries involved!

Another view from the apartment looking at Dubai Marina

In the supermarkets, prepared food counters overflowed with Middle Eastern items and my fridge was always stocked with hummus, pita with zatar, olives, and other meze.

I also had access to world-class syrup desserts, including baklava!!!

Another fascinating aspect of most of larger supermarkets in Dubai was the existence of a room at the back that was usually labeled with something like “Pork for Non-Muslims.”  In this space once could find the most amazing cured pork products from Italy, Spain, and Europe in general!

Dubai Marina at ground level

Alas, items containing alcohol were difficult to obtain.  This included vanilla extract.  The available non-alcohol-based “extract” was just not the same.  Luckily vinegar was just as good, even if it was labeled “Grape Vinegar” rather than “Wine Vinegar!”

I hope you enjoy this baklava.  Just don’t make it for a Greek friend!


If you have a favorite family recipe and a bit of a story to tell, please email me at santafecook@villasentieri.com and we can discuss including it in the blog. I am expanding the scope of my blog to include traditional recipes from around the country and around the world. If you haven’t seen Bertha’s Flan or Melinda’s Drunken Prunes, take a look.  They will give you an idea of what I’m looking for.


Print Recipe
Baklava with Walnuts and Almonds
Try to find phyllo that is either 9” x 13” or 18” x 13”. If it’s the latter, cut the stack of sheets in half to make them all 9” x 13”. I have found that covering the stack of phyllo with a damp towel, as some authors recommend, after you remove every sheet isn’t necessary if you move quickly. However, before you start, moisten a dish towel and keep it handy in case there are any breaks in the action, in which case you should definitely cover the stack of unused phyllo. While it is not essential to clarify the butter, removing the milk solids will prevent uneven browning of the top of the baklava.
Votes: 0
Rating: 0
You:
Rate this recipe!
Prep Time 1 hour
Cook Time 1 1/2 hours
Passive Time 24 hours
Servings
pieces
Ingredients
Bakalva
Syrup
Prep Time 1 hour
Cook Time 1 1/2 hours
Passive Time 24 hours
Servings
pieces
Ingredients
Bakalva
Syrup
Votes: 0
Rating: 0
You:
Rate this recipe!
Instructions
Baklava
  1. Clarify the butter.
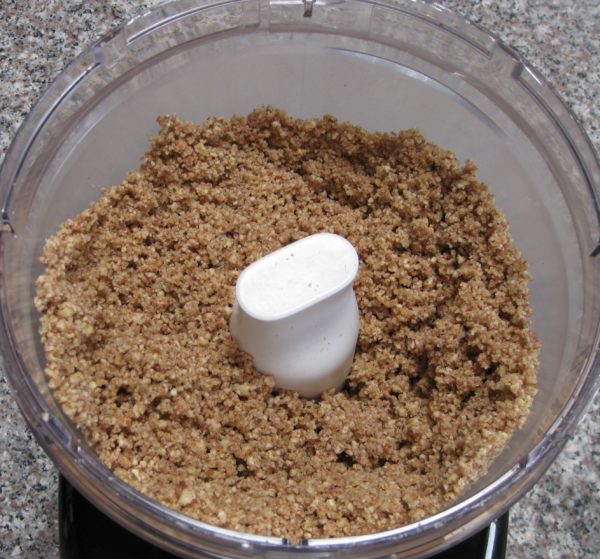
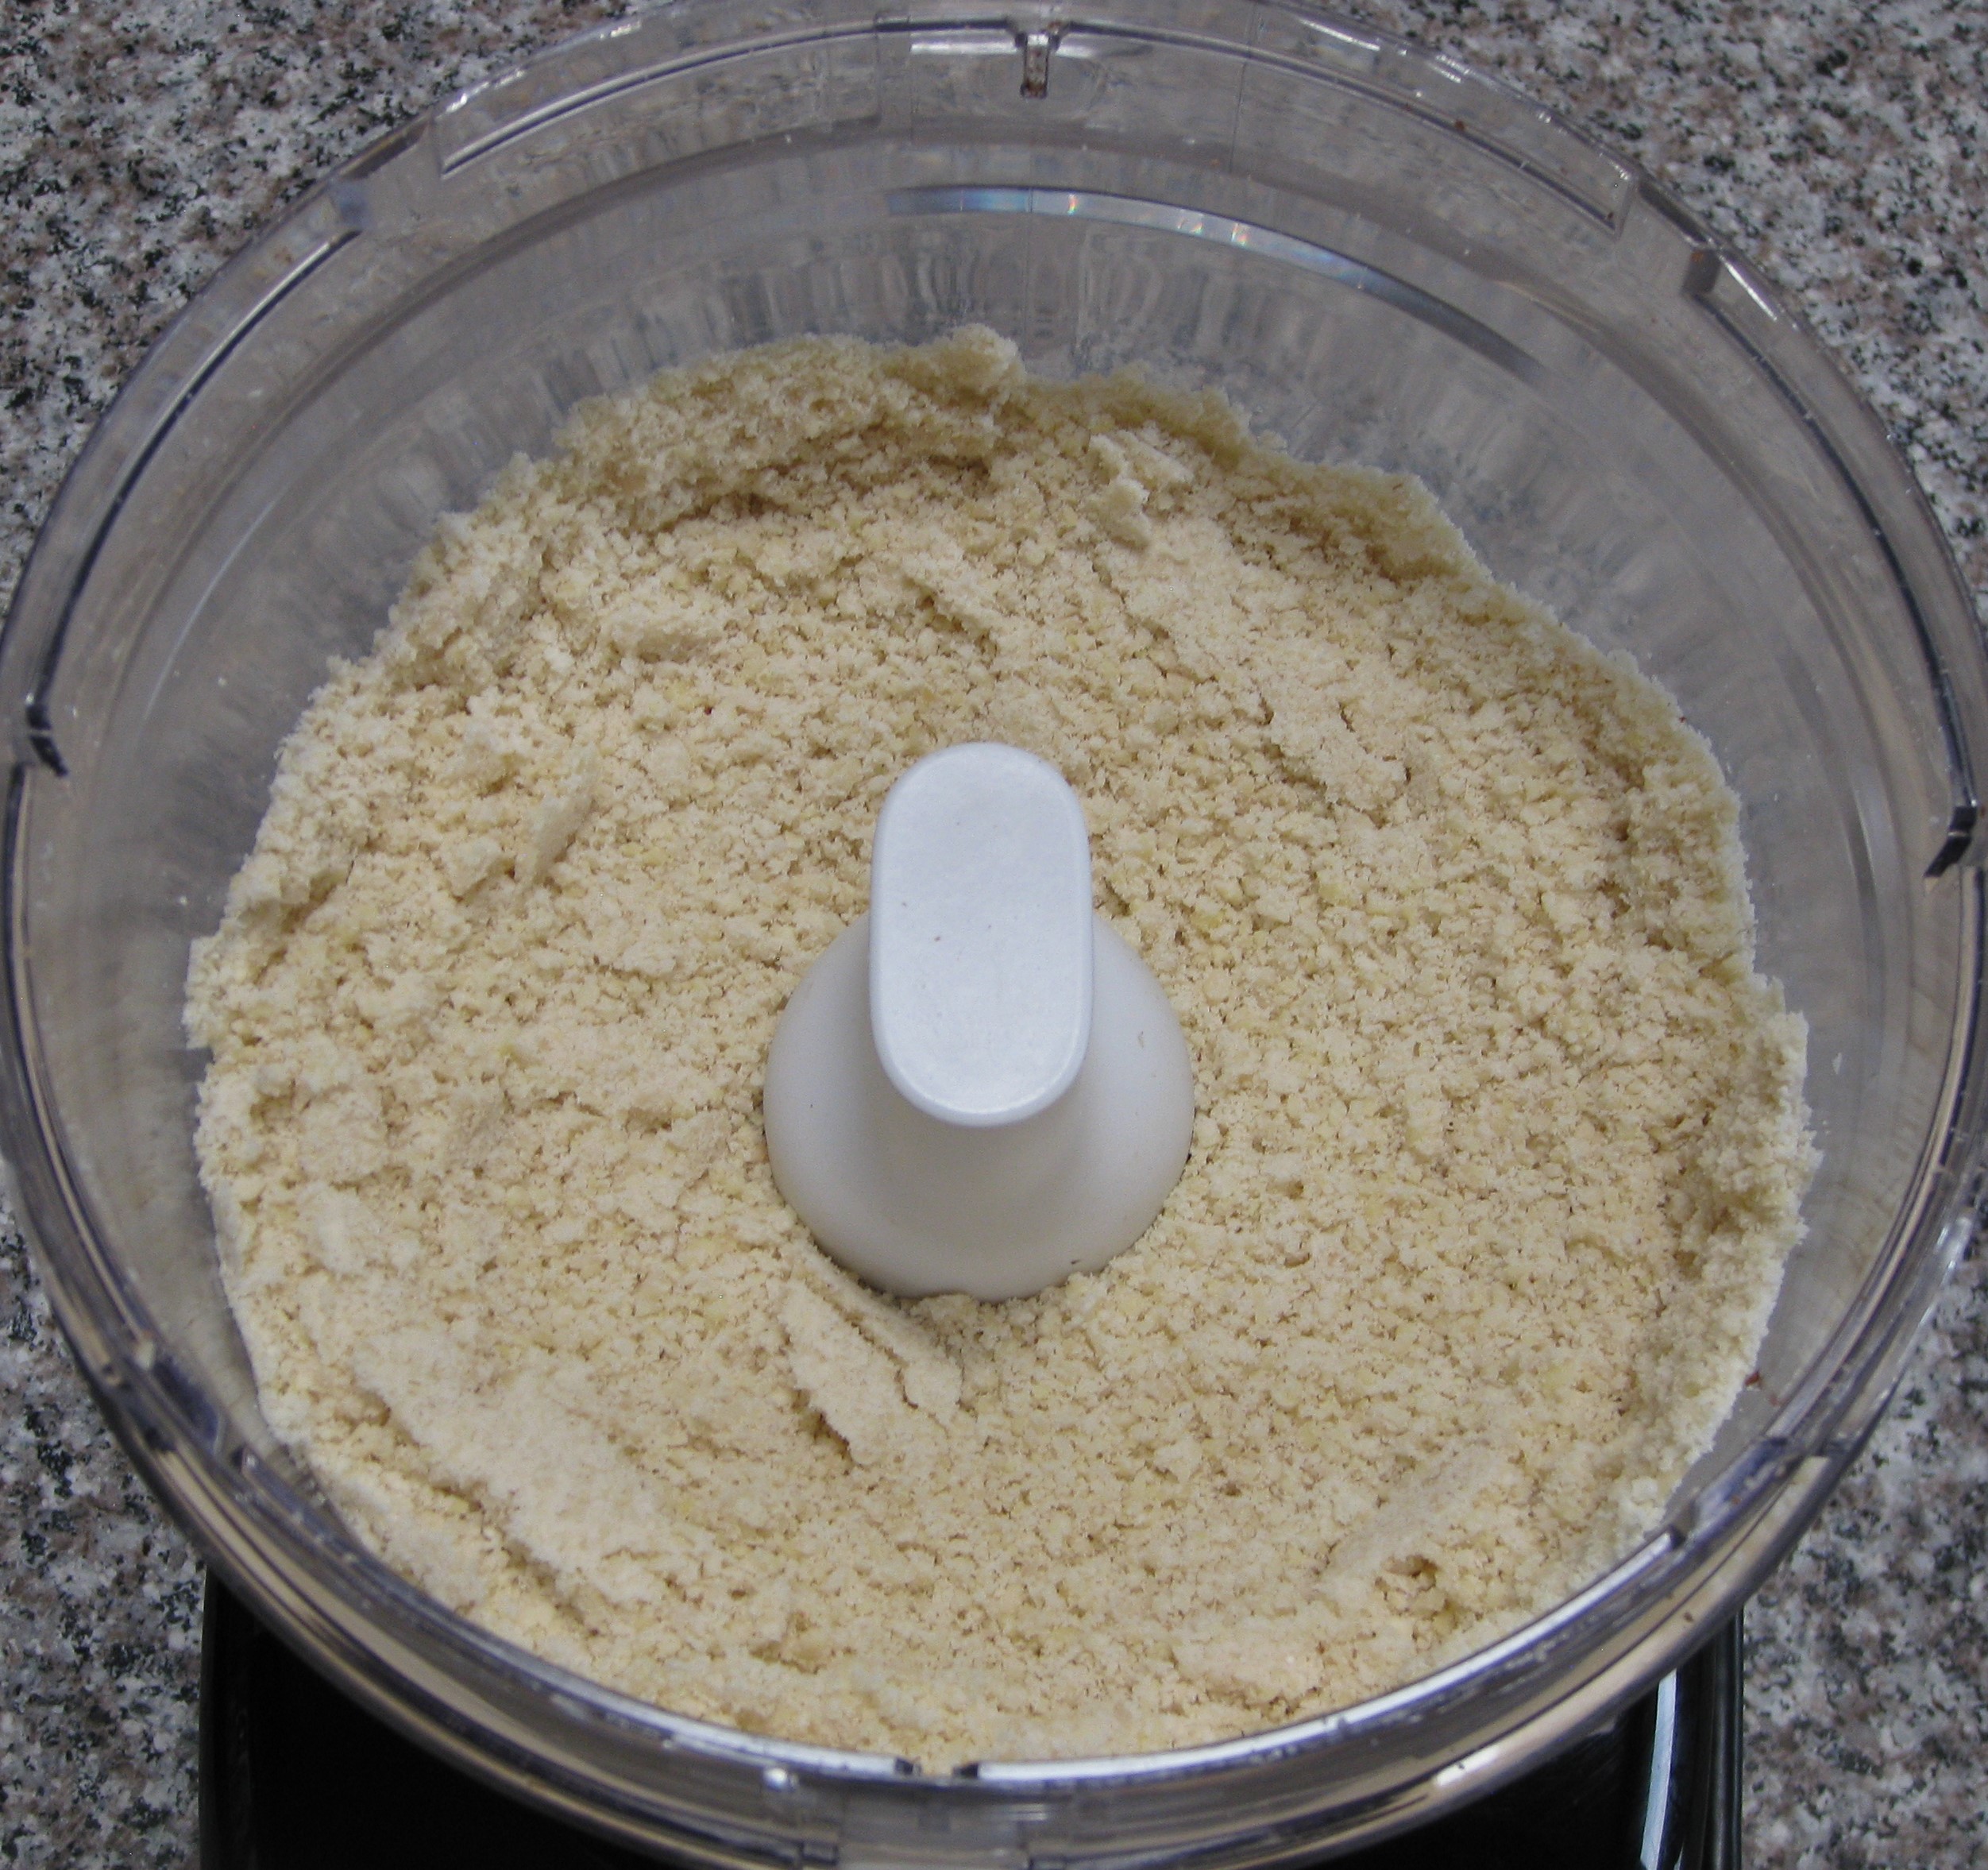
  2. Finely grind the almonds and walnuts.
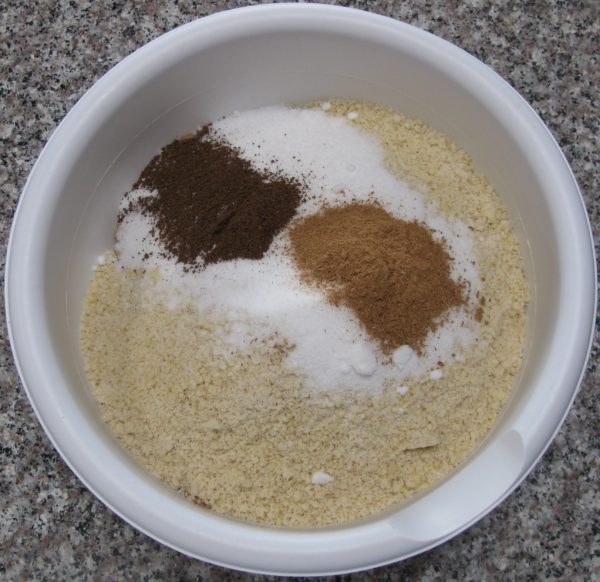
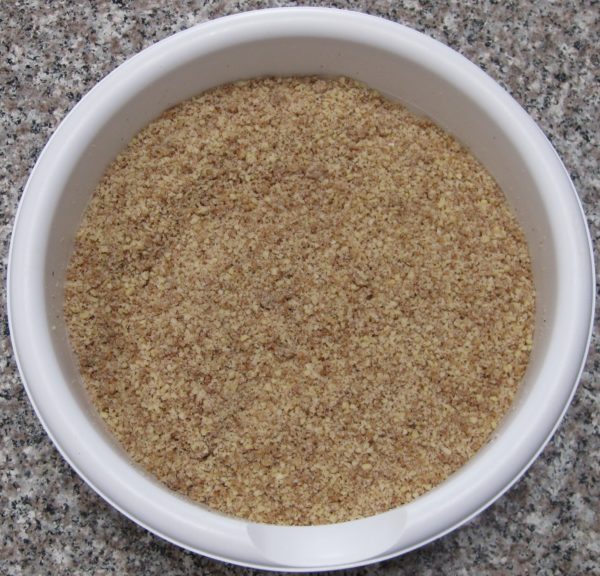
  3. Mix nuts, cinnamon, allspice and sugar.
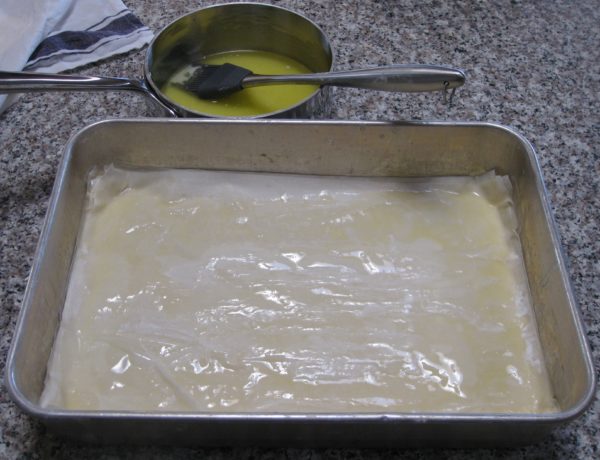
  4. Brush a 9-inch b 13-inch baking pan with butter.
  5. Lay a sheet of phyllo and brush it with butter.
  6. Repeat until 12 sheets have been used.
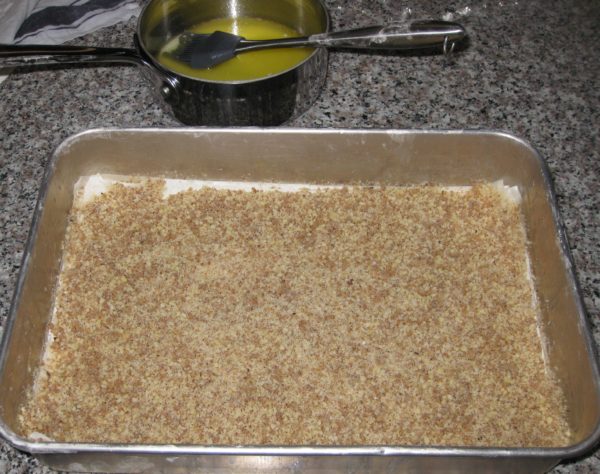
  7. Spread a layer of nuts, approximately 1 cup, on top of the phyllo.
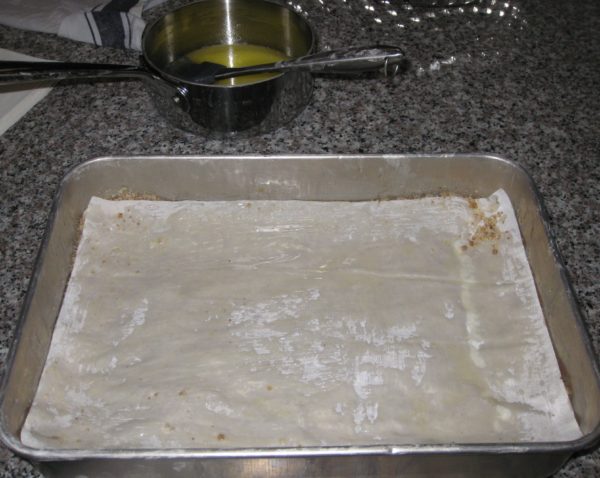
  8. Cover with a sheet of phyllo, brushing it with butter.
  9. Repeat 1 cup of nuts covered with one sheet of phyllo until all the nuts have been used up.
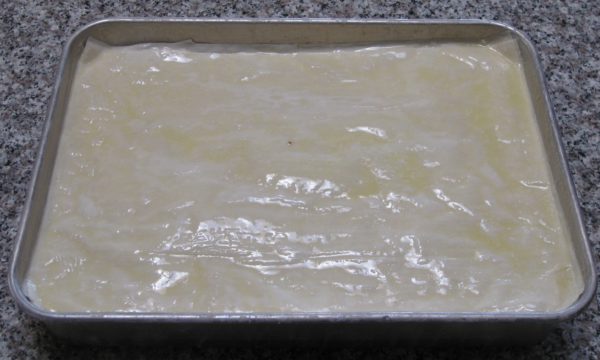
  10. Top with all the remaining sheets of phyllo individually adding them and brushing each sheet with butter.
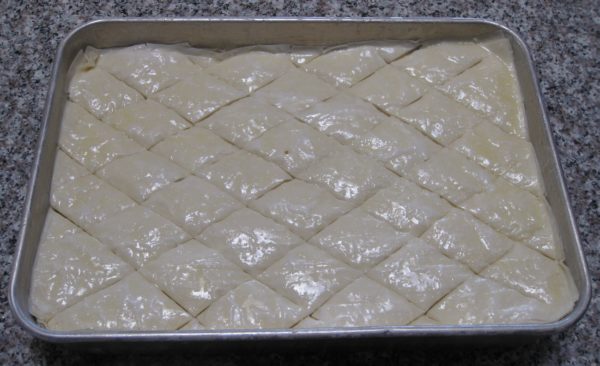
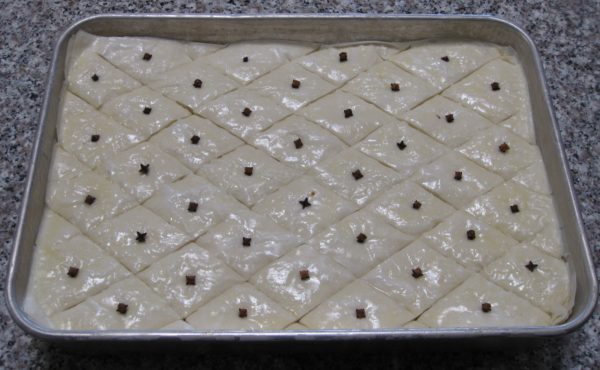
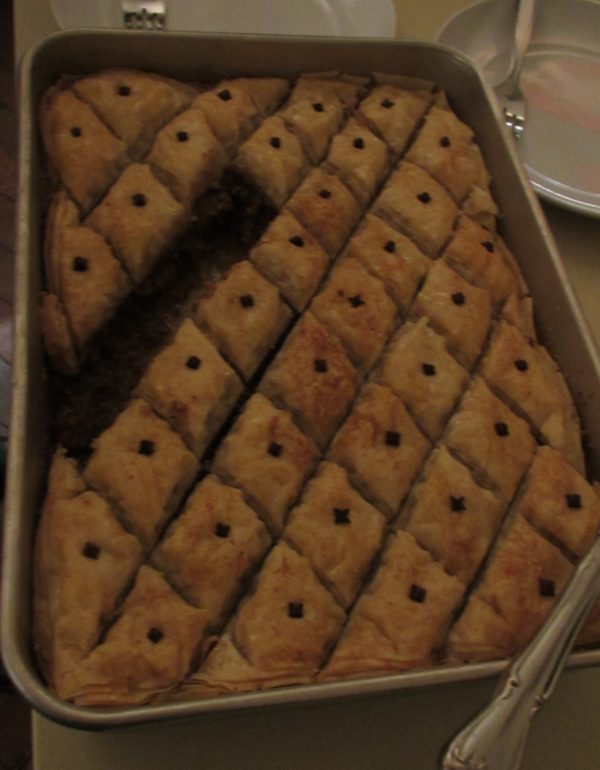
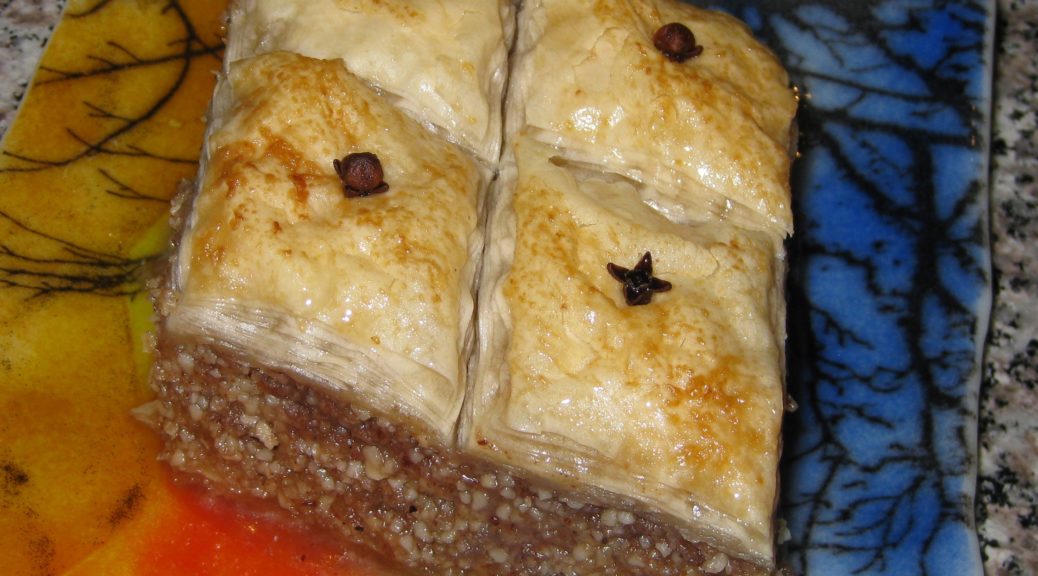
  11. Score the top few sheets of phyllo in a diamond pattern. Cut from one corner to the opposite corner.
  12. Make three more rows of cuts, evenly spaced, in each direction parallel to the first cut for a total of 7 cuts.
  13. Repeat in the opposite direction.
  14. Put a clove in the center of each diamond.
  15. Sprinkle the top lightly with water to reduce curling while baking.
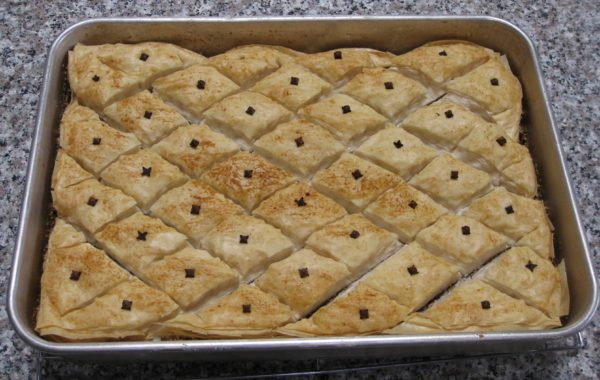
  16. Bake 350°F for 1½ hours, until golden.
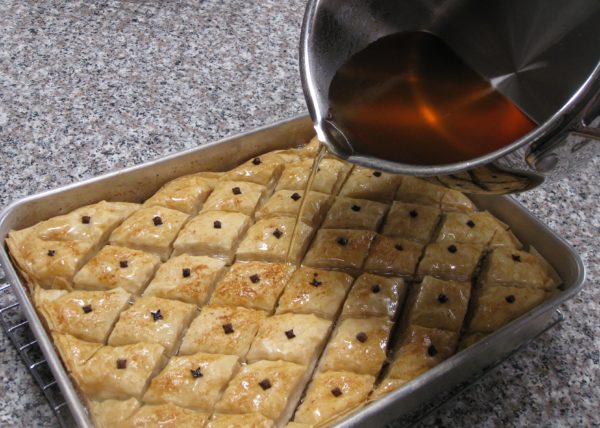
  17. Pour hot honey syrup over the hot baklava as it comes from the oven.
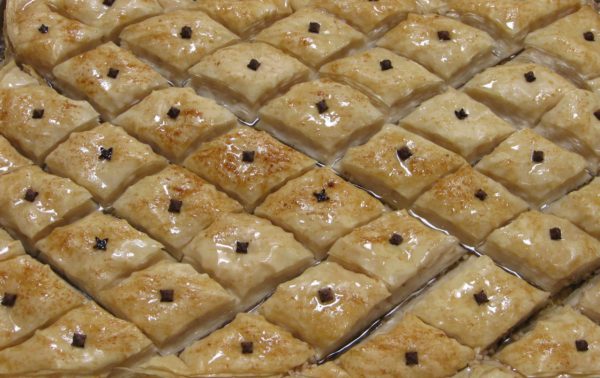
  18. The baklava is best if allowed to sit at room temperature, uncovered for about a day before serving.
Syrup
  1. As the baklava is nearing completion, make the syrup.
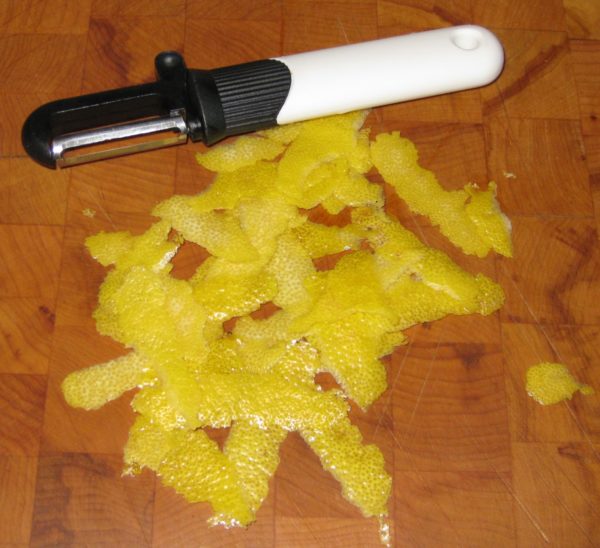
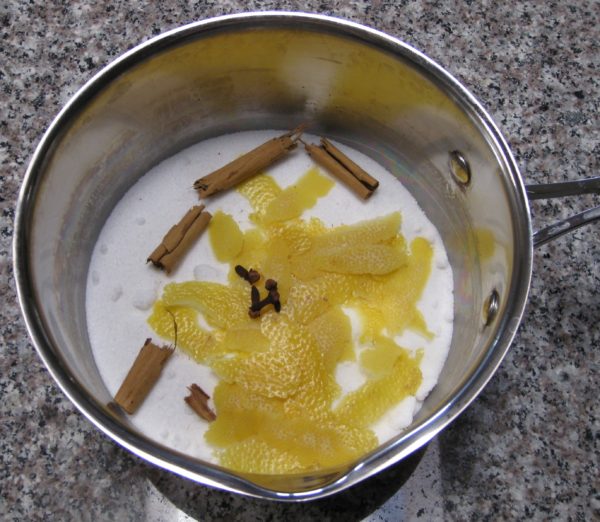
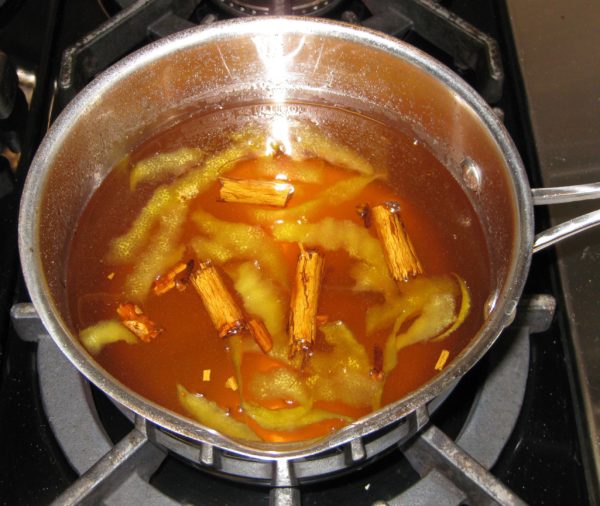
  2. Combine lemon zest, sugar, water, cinnamon, and cloves in a heavy-bottomed sauce pan.
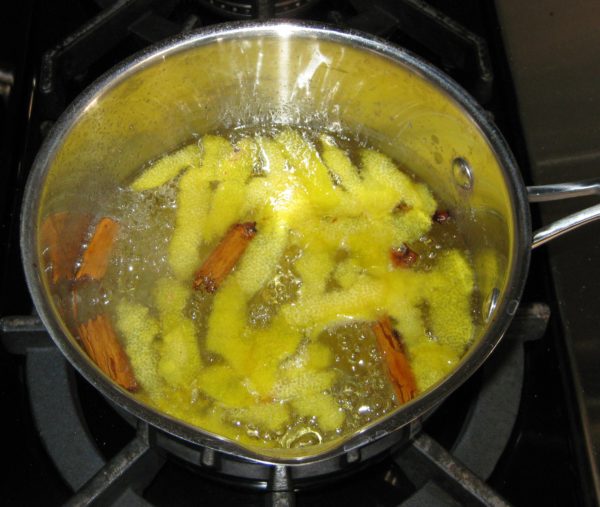
  3. Bring to a boil, lower heat and continue cooking without stirring until syrupy, approximately 15 minutes. (218°F to 220°F if you want to measure using a candy thermometer.)
  4. Stir honey into hot syrup.
  5. Remove from the heat.
  6. Using a small strainer, remove the solids.
  7. Reheat the syrup immediately before removing the baklava from the oven.
  8. Stir in lemon juice and rum or brandy.
Recipe Notes

Copyright © 2018 by VillaSentieri.com. All rights reserved.

Share this Recipe

Crostoli (Italian Fried Pastries)

December 26, 2017

I didn’t grow up eating crostoli.

That doesn’t mean we didn’t have our own version of fried dough.

Unlike crostoli, which are thin and crispy and leavened with baking powder, I grew up eating ovals of fried yeasted bread dough sprinkled with granulated sugar.

Frying bread dough and sprinkling it with granulated sugar is a common among Southern Italians. My mother had a name for it that I’ve never heard anywhere, it sounded something like “pitla.” I started doing some research. The word “pitta” is still used in Calabria, where my mother’s family originated, for various types of dough-based foods, including some that are quite flat. The word “pitta,” which I believe derives from the Greek word “pita,” became the word “pizza” in standard Italian. I’m guessing that “pitla” is a dialectical variation of “pitta.”


Click HERE to join our mailing list and you’ll never miss a recipe again!


One of the positive outcomes of doing research on Italian fried dough products is that I came across a wonderful Wikipedia page on fried dough from around the world.  Check it out here.

Crostoli (or crostui in the Friuli-Venezia-Giulia region of Italy where my mother-in-law was born) are traditionally served at Christmastime. My mother-in-law says that they would sometimes have them at other times of the year when they “wanted something sweet” that was simple to make.

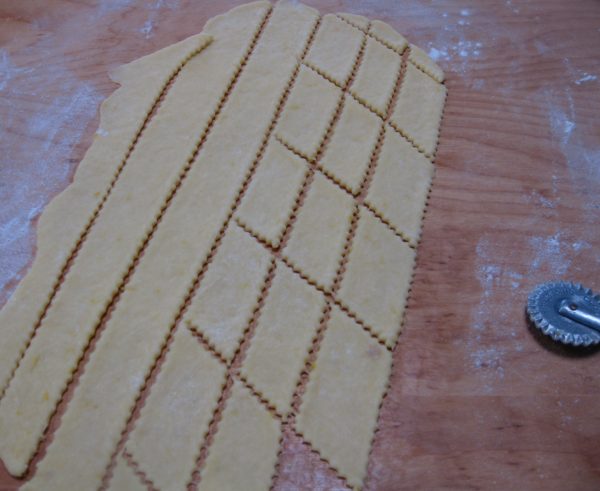
My mother-in-law’s zig-zag pastry cutter

Not growing up eating crostoli, I asked my husband to tell me what he remembered.

I got two sentences:
“We always had them at Christmas.”
“They’re not my favorite.”

There you have it, the entirety of the crostoli story in 10 words.

I even waited a couple of days and asked him again if he remembered anything else about crostoli. “Nope” was the answer.

Now we’re up to 11 words.


Follow us on your social media platform of choice


That might have been the end had it not been for Christmas Eve. The morning of Christmas Eve, after I mixed dough for panettone, my mother-in-law and I made up a batch of crostoli to take to Christmas Eve dinner at the home of our friends Rich DePippo and Doug Howe.

Rich’s grandfather was from Domegge di Cadore in the Veneto region of Italy, just next door to Friuli-Venezia-Giulia where my mother-in-law was born. In fact, Domegge is about 100 kilometers from Treppo Grande, my mother-in-law’s home town.

As it turns out, Rich and his mother, visiting for Christmas, also made crostoli the morning of Christmas Eve.

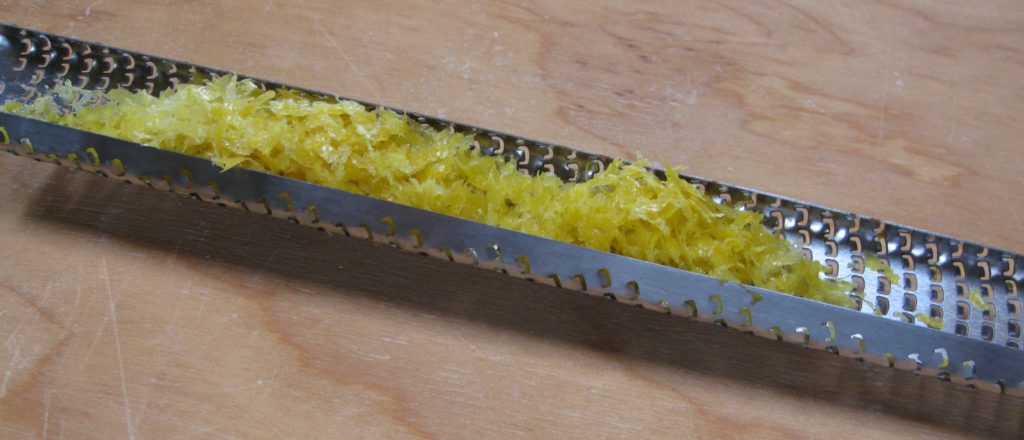
Using a Microplane grater makes fast work of zesting lemons

There were dueling crostoli served for dessert (along with pizzelle, nut roll, and biscochitos).

Rich’s were long and thin, with a slit cut in the middle through which one end of the dough was twisted before frying. This seems to be the most traditional shape that I’ve seen in my research, though Lidia Bastianich, who is also from very near where my mother-in-law was born, ties hers in a knot.

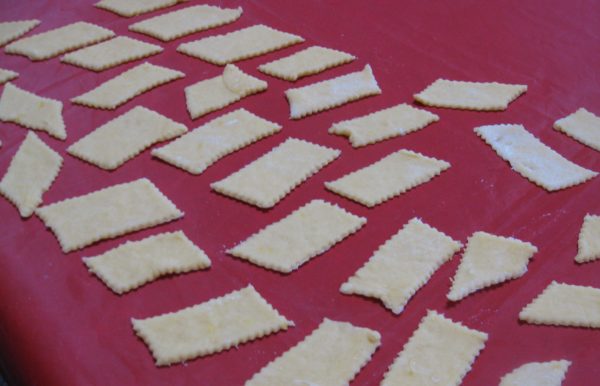
Having seen pictures of crostoli twisted and tied before embarking on making them with my mother-in-law, I asked her why hers were just left as irregular squares (well, quadrilaterals, really) of dough. That’s the way her mother made them was, of course, the first response. After which she added that she liked them to puff up, which they don’t do if they’re twisted or tied.

The other difference in the crostoli is that Rich used anisette to flavor his whereas my mother-in-law used lemon zest and vanilla.

The anisette was definitely a new twist. In researching crostoli, I’ve seen citrus, usually lemon or orange, as the most common flavoring.  Often vanilla is added; sometimes brandy or rum. Never have I run into a recipe with anisette. Hopefully Rich will weigh in on his family’s recipe for crostoli and how they came to use anisette for flavoring.

Meanwhile, enjoy!


If you have a favorite family recipe and a bit of a story to tell, please email me at santafecook@villasentieri.com and we can discuss including it in the blog. I am expanding the scope of my blog to include traditional recipes from around the country and around the world. If you haven’t seen Bertha’s Flan, it will give you an idea of what I’m looking for.


Print Recipe
Crostoli (Italian Fried Pastries)
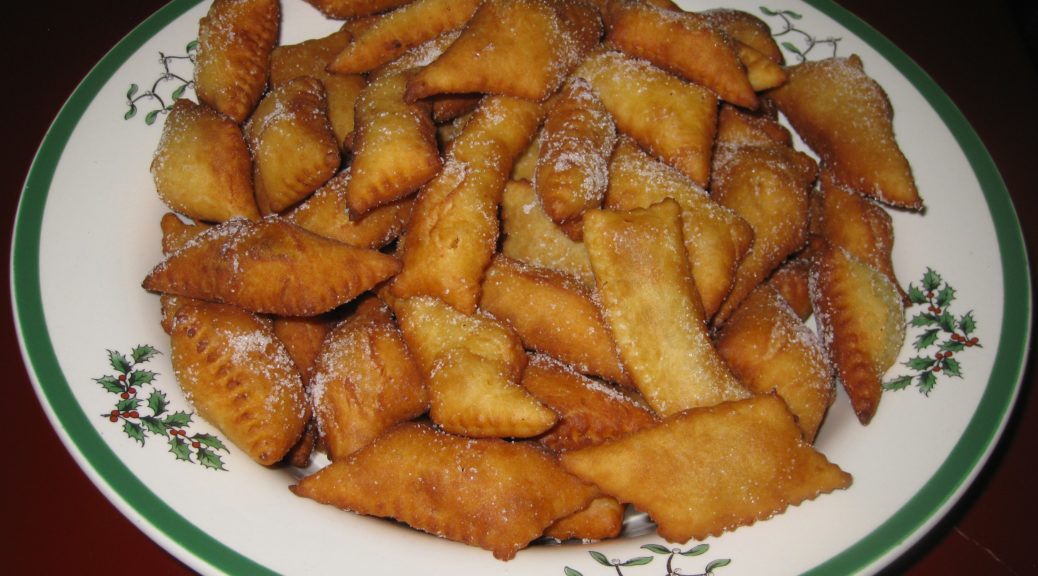
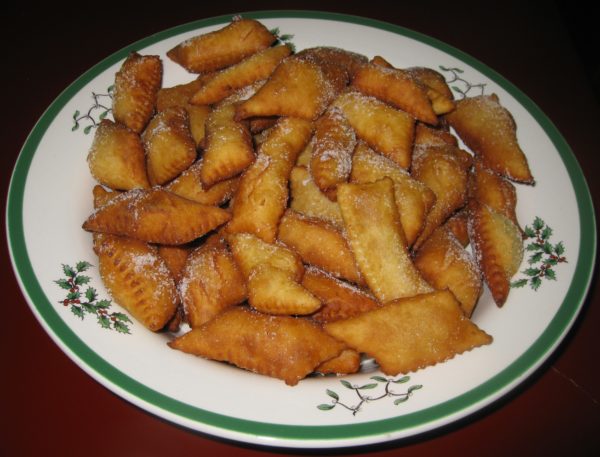
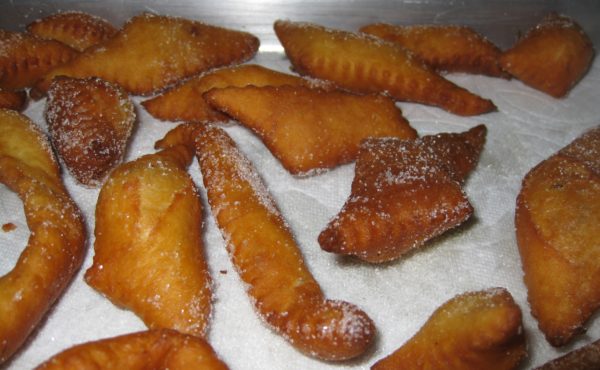
Crostoli are pastries that re rolled thin, fried, and dusted with granulated sugar. Powdered sugar melts and becomes sticky so granulated sugar is traditional. Crostoli are usually larger than the ones shown here, something like 1 ½ inches by 3 or 4 inches. We made these smaller because they were being served as part of a dessert buffet at the end of a large meal.
Votes: 0
Rating: 0
You:
Rate this recipe!
Cuisine Italian
Prep Time 30 minutes
Cook Time 45 minutes
Servings
Cuisine Italian
Prep Time 30 minutes
Cook Time 45 minutes
Servings
Votes: 0
Rating: 0
You:
Rate this recipe!
Instructions
  1. Combine flour, sugar, baking powder, lemon zest and salt in a large bowl. Mix well.
  2. Make a well in the center and add eggs. Using a fork, begin to incorporate the flour.
  3. Add vanilla extract, lemon juice and incorporate.
  4. Add melted butter.
  5. Mix to form a soft, non-sticky dough.
  6. When the dough becomes too stiff to mix with a fork, use your hand. Do not over knead.
  7. Cut into four or five pieces.
  8. Roll out less than 1/8 inch thick, dusting with a little flour as needed to keep the dough from sticking.
  9. Cut into rectangles, approximately 1 1/2 inches by 3 inches, with a zig-zag cutter.
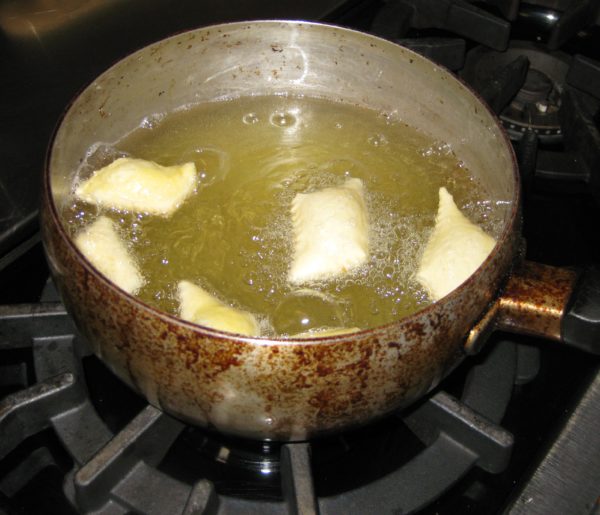
  10. When all are cut, deep fry until brown. If you are not comfortable doing this from experience, use a thermometer and keep the oil at about 350 degrees Farenheit.
  11. Sprinkle with granulated sugar as soon as they are removed from the oil so the sugar sticks.
  12. They are best the same day but will stay fresh at least one day at room temperature, loosely covered.
Recipe Notes

Copyright © 2017 by VillaSentieri.com. All rights reserved.
Share this Recipe

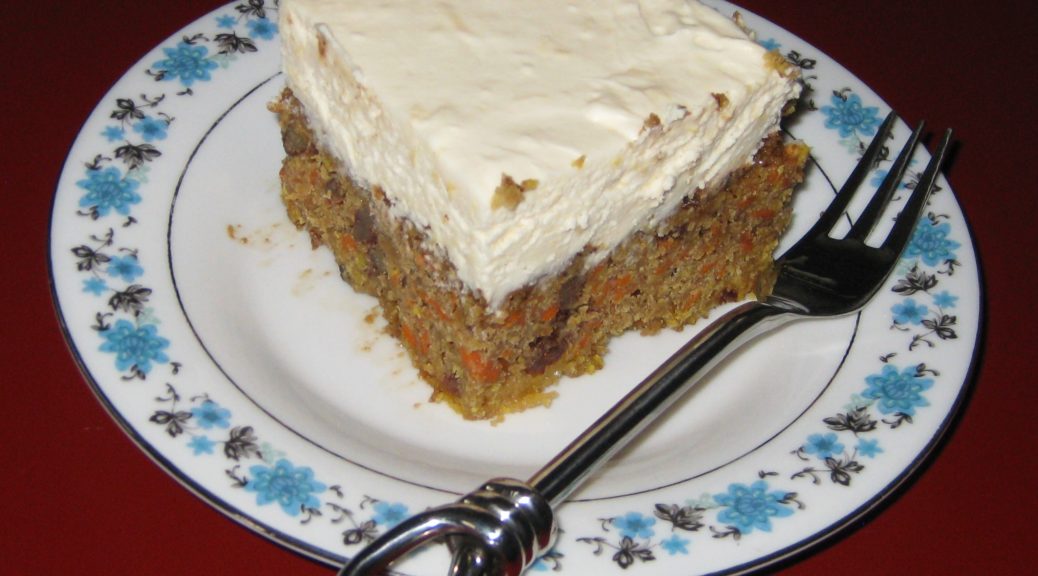
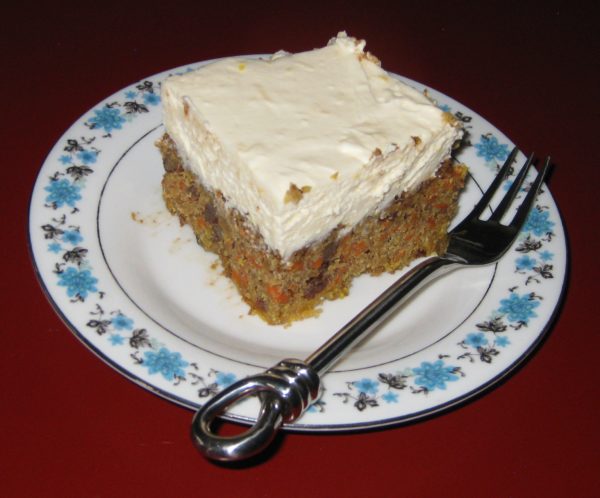
Mike’s (Justifiably Famous) Carrot Cake

August 25, 2017

Mike Abramson says his carrot cake is the best ever.

Janet Carlson doesn’t necessarily agree.

For now, the controversy will need to simmer as I only have Mike’s (Justifiably Famous) Carrot Cake recipe, though I have suggested to Janet that she and Mike have a carrot cake bake-off.

Mike makes no apologies for having stolen the recipe from Tom Grier, originally of Grier, Georgia.

The story goes something like this…

In the 1970’s a group of four friends from San Francisco bought a weekend house, they named Aros, near Sebastopol, California. The four owners rotated use of the house, each getting it for a week at a time but also sometimes showing up there together to host parties as in the photo below.

Mike Abramson, second row far right

Over the years, ownership of the house shifted as some individuals sold their interest and others bought in.

At one point, Tom Grier was the youngest owner.

The group met on a quarterly basis in San Francisco to discuss maintenance issues related to the house. As with use of the house, these meetings were held in rotation at the owners’ homes in San Francisco.

Whenever Tom hosted the meeting, he served carrot cake, which Mike believes originated as a Grier family recipe. Tom shared the recipe with Mike and the rest is history. Mike’s (Justifiably Famous) Carrot Cake was born.

But for Janet’s assertion that Mike’s might not be the best carrot cake in the world, well, we’ll just have to wait for the bake-off.

From left to right: Janet Carlson, Richard Valantasis, and Gino Barcone

Follow us


Click HERE to join our mailing list and you’ll never miss a recipe again!

Print Recipe
Mike's (Justifiably Famous) Carrot Cake
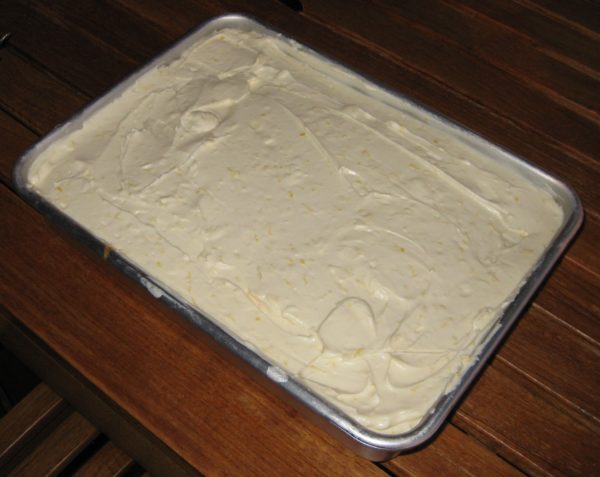
This is almost a cross between a spice cake and a carrot cake. The frosting is generous and could easily be reduced by one-third. This recipe is for sea level. If there is interest in adjustments for high altitude, let me know and I’ll post them.
Votes: 0
Rating: 0
You:
Rate this recipe!
Cuisine American
Prep Time 1 hour
Cook Time 40 minutes
Passive Time 2 hours
Servings
people
Ingredients
Cake
Frosting
Cuisine American
Prep Time 1 hour
Cook Time 40 minutes
Passive Time 2 hours
Servings
people
Ingredients
Cake
Frosting
Votes: 0
Rating: 0
You:
Rate this recipe!
Instructions
Cake
  1. Butter and flour a 9” x 13” baking pan.
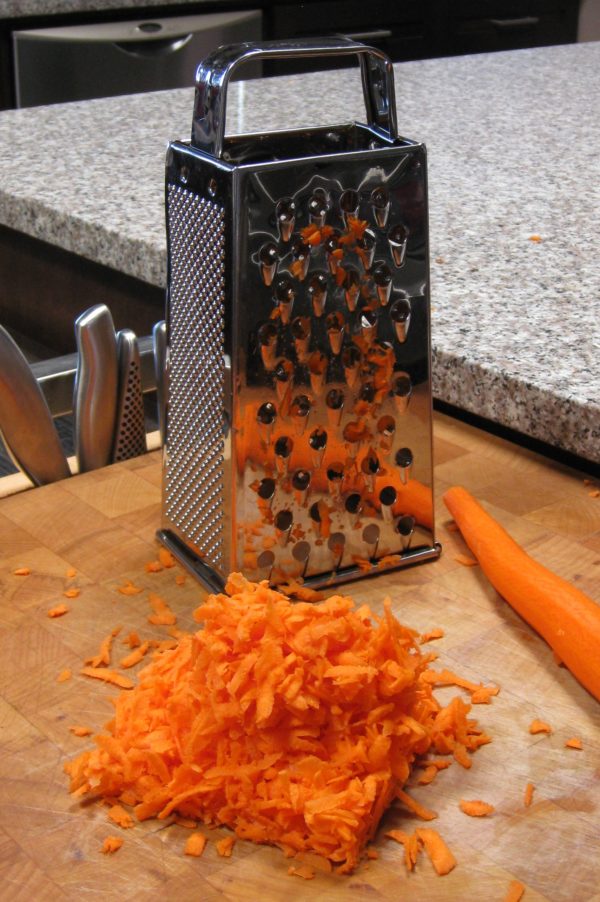
  2. Grate the carrots on the tear-drop holes of a box grater.
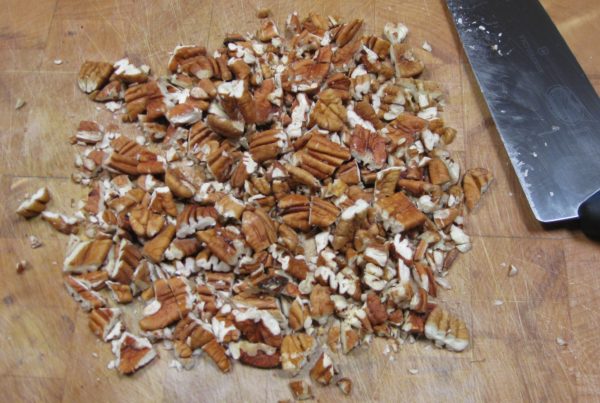
  3. Coarsely chop the nuts.
  4. Combine the flour, baking powder, baking soda, salt, cinnamon, cloves, allspice, nutmeg, and brown sugar in the bowl of a stand mixer. Mix with the paddle.
  5. Add the oil and eggs to the flour mixture. Blend until combined.
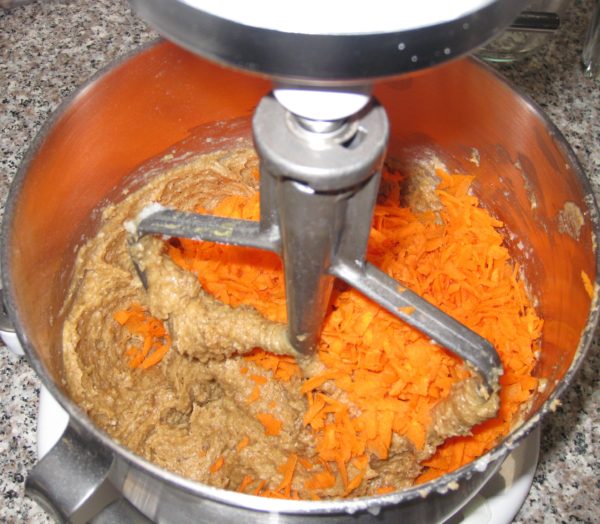
  6. Add the carrots and crushed pineapple with the juice. Mix thoroughly.
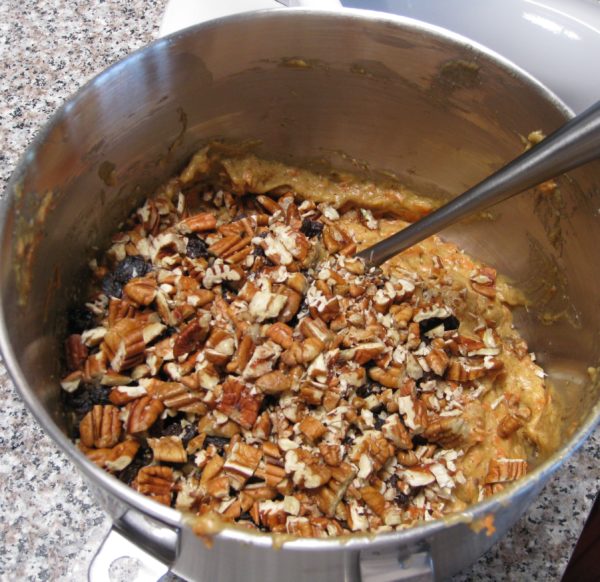
  7. Add the walnuts and raisins. Stir to combine.
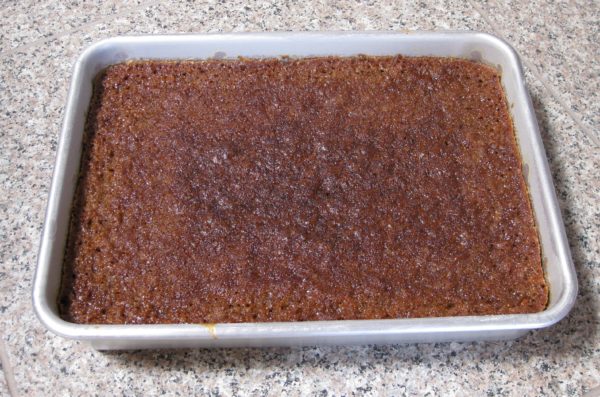
  8. Pour into the prepared pan. Bake at 350°F for 35-40 minutes or until the center springs back when lightly touched.
  9. Cool completely in the pan before frosting.
Frosting
  1. Beat cream cheese and butter until light using the paddle of a stand mixer.
  2. Beat in all other ingredients.
  3. Frost cake when cool.
Recipe Notes

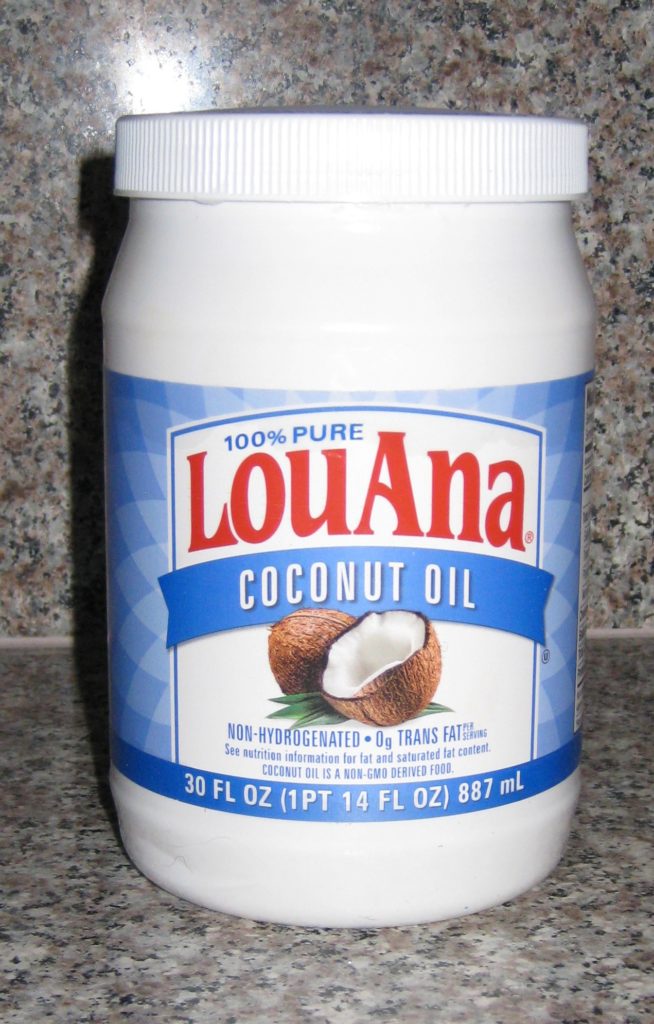
For recipes that call for solid vegetable shortening, such as Crisco, I use coconut oil is due to concerns about the negative health effects of hydrogenated fats.

Copyright © 2017 by VillaSentieri.com. All rights reserved.
Share this Recipe

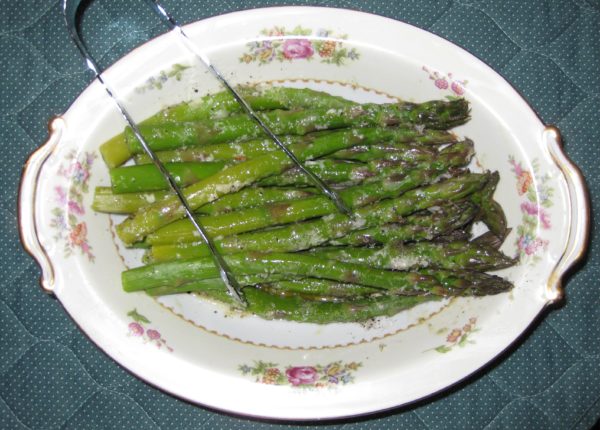
Asparagus with Parmesan Cheese

June 12, 2017

I am writing this sitting on a beach in Akumal, Mexico about an hour south of Cancun by car.

On the beach in Akumal
Iguanas enjoying the beach in Akumal

Just a few days ago, I was at home in Santa Fe where the weather was just beginning to turn spring-like.  The week before that I was in Hawaii.

The view from our lanai in Kauai

By the time you’ll be reading this, I’ll be in Palm Springs, where, even today, the temperature is hitting 100°F!

On the patio in Palm Springs before the heat of the day

Needless to say, my sense of seasonality is out of whack at this point.

No matter the temperature or the weather, asparagus says spring!

Just a few days ago, I was eating grilled asparagus in Santa Fe.  Days before that I made an asparagus frittata, before that I cooked the asparagus that is featured in this post.

Asparagus isn’t something I remember much of before college and usually it was the mushy white stuff out of a can.  White asparagus can certainly be a delicacy but when it comes out of a can that’s an impossibility as far as I’m concerned.

College was a time of incredible culinary growth for me.  Growing up I ate wonderful food as my mother was a great cook.  Mostly, though, it was Italian, Slovak, and the American dishes that every kid in the United States grows up eating.

I didn’t learn to cook until freshman year in college.  I was lucky enough to live in a college house at the University of Pennsylvania that was housed on two floors of an otherwise upper class dormitory made up of apartments with kitchens.  The typical freshman dorms either had no kitchens whatsoever or had the most rudimentary cooking facilities shared by large numbers of students.  Since I had a kitchen, I only took out the minimum required meal contract: 10 meals per week.  Usually this meant I ate lunch and dinner in one of the dining halls Monday through Friday.  On weekends I cooked…and baked!

I called home every Sunday from the day I went away to college.  Occasionally there was a lapse, like the time when I was 31 and hadn’t called home in a couple weeks.  The first words out of my mother’s mouth when she heard me on the other end of the line were, “I was just about to put your picture on a milk carton.”  Point made!  [You may or may not know that “back then” the pictures of missing children were put on milk cartons in the hope that someone would recognize them and call the authorities.]

Besides just catching up on our lives, I got advice.  My father gave me advice on how to handle alcohol, what to do if I had too much (don’t lie down and don’t close your eyes, for example), sex, and other topics.

My mother walked me through the steps of how to cook whatever it was I planned on making for dinner that evening.  By the end of freshman year, I was a credible cook.

My gastronomic circle was not very big, however.  Early my freshman year the resident advisors, Dennis and Martha Law from Hong Kong, took a group of us to dinner in Chinatown.  It was exciting, having grown up in a town without a Chinese restaurant.  The tastes, however, were so…well…foreign that I didn’t like much of what was served.  I tasted everything but rarely had more than one bite till something landed on my plate that struck me the right way.  The serving platter made it down the table past two or three other people till Dennis saw me eating.  He commandeered the plate and put it in front of me to be sure I had enough to eat.

By the end of the year I was not only eating, and loving, Chinese food, I had developed a rudimentary understanding of the regional differences and learned the basics of Chinese cooking from Martha.

After my taste buds got over the shock of Chinese food, I started exploring other cuisines.  A favorite became Indian food at Maharaja just a few blocks from my dorm.  It turns out the restaurant was owned by the aunt of someone I now work with!  I believe it was the first Indian restaurant in Philadelphia.

Sophomore year I was not in the college house but had one roommate in a similar upper class dorm with a kitchen.  Meal contracts were only required of freshmen and I saw no point in eating in the dining hall.  The arrangement I struck with my roommate was that I would cook and he would clean up.  It turns out he would eat, and like, most anything so I was free to explore and experiment.

That set the stage for my junior year when I was admitted to another college house, the International Residence Project.  Half of the students were from the USA and half from anywhere else in the world.

My roommate, and best friend for many years, Ray Hugh, hailed from Guyana.  Valrie Tracey from Jamaica became the third member of a triumvirate that was pretty much inseparable for the rest of college.

Two married couples were our resident advisors, Ambrose and Najma Davis, and Reginald and Nanacy Rajapakese.  Ambrose was from Jamaica, Najma from Bangladesh, and Reggie and Nanacy from Sri Lanka.

Nanacy taught me how to make Sri Lankan food and I’m almost as comfortable making that as I am Italian.  I remained close friends with Nanacy and Reggie, even making several trips to Sri Lanka with Nanacy in the last few years, after Reggie’s death.

Ray and I have reconnected on Facebook which is rekindling many memories of the trips I made to Guyana and my experiences in learning to make Guyanese and Chinese food from Ray and his mother.  Ray’s grandparents on both sides emigrated from China to Guyana in the 1800’s.

Ray and I packed an incredible amount of cooking power into a tiny dormitory kitchen.  Without enough cabinet space to store ingredients, we had stacks and stacks of plastic milk delivery crates packed with an unimaginable assortment of ingredients from international food markets.

Our apartment became known as the place for midnight snacks and folks always came knocking on the door around then to see what we’d whipped up to nibble on.

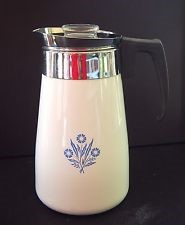
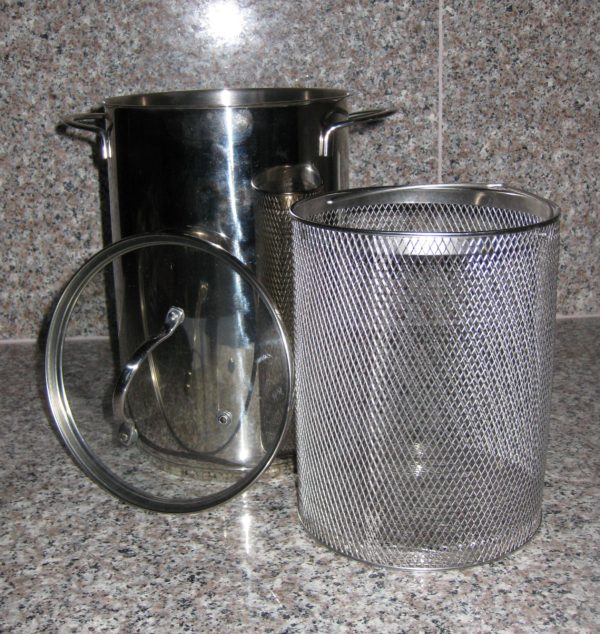
That was the year I discovered that my stovetop Corning percolator made a serviceable stand-in for an asparagus steamer.


Asparagus steamer in a pinch!

Click HERE to join our mailing list and you’ll never miss a recipe again!

Print Recipe
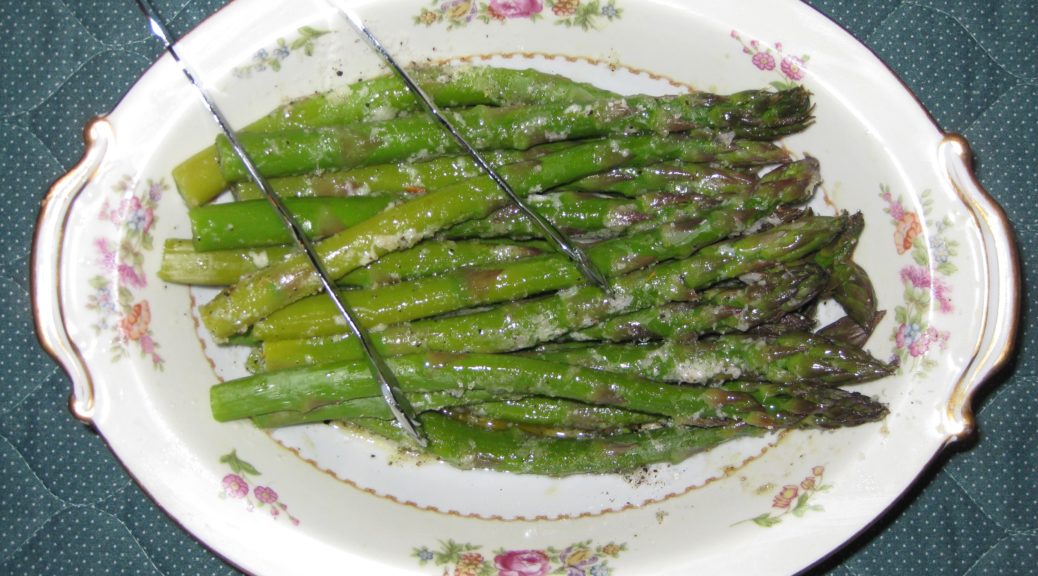
Asparagus with Parmesan Cheese
Asparagus is best cooked in an asparagus steamer. This small-diameter, tall pot allows the bottom of the asparagus spears to boil in the water while the tender tips cook by steaming. When I was a college student and didn’t have an asparagus steamer I used my stovetop Corning Ware percolator. If you don’t have a steamer, or a reasonable substitute, I find it preferable to cook the asparagus in a microwave oven rather than to boil them. After rinsing off the asparagus, put the spears and whatever water clings to them in a microwave-safe dish with a cover. Cook in 1-2 minute increments, moving the spears around after each bout of zapping, until cooked but still a little “toothy” (and certainly not mushy).
Votes: 0
Rating: 0
You:
Rate this recipe!
Course Sides, Vegetables
Cuisine Italian
Prep Time 10 minutes
Cook Time 15 minutes
Servings
people
Ingredients
Course Sides, Vegetables
Cuisine Italian
Prep Time 10 minutes
Cook Time 15 minutes
Servings
people
Ingredients
Votes: 0
Rating: 0
You:
Rate this recipe!
Instructions
  1. Trim the tough ends off the asparagus. The “Notes” section below contains a link to a blog post describing how to do this.
  2. Crush the garlic with the side of a chef’s knife.
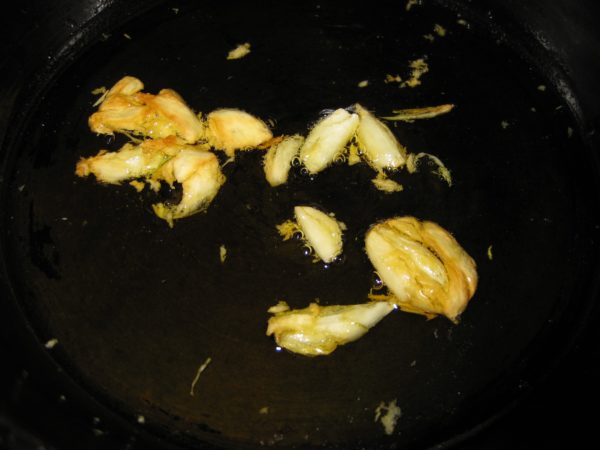
  3. Heat the olive oil in a small sauté pan over low heat. Add the garlic and sauté slowly until brown, pressing down on the garlic occasionally.
  4. Discard the garlic. Reserve the oil.
  5. Cook the asparagus until toothy, neither crunchy nor mushy. If you do this in an asparagus steamer, put about two inches of water in the bottom and bring to a boil. Lower in the basket with the asparagus. It will take 5-10 minutes, depending on the asparagus and your elevation, to cook the asparagus properly.
  6. Put the cooked asparagus in a warmed serving bowl.
  7. Add the garlic-infused olive oil and mix.
  8. Add the Parmigiano Reggiano cheese and the salt and freshly ground black pepper to taste. Mix well.
  9. Drizzle with lemon juice and serve.
Recipe Notes

You can find videos of prepping asparagus here.

Copyright © 2017 by VillaSentieri.com. All rights reserved.
Share this Recipe

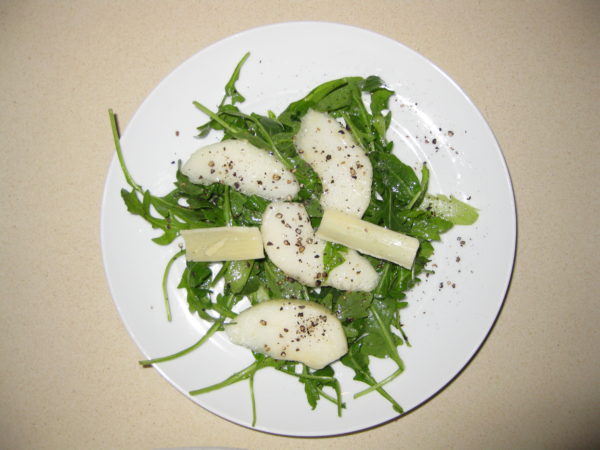
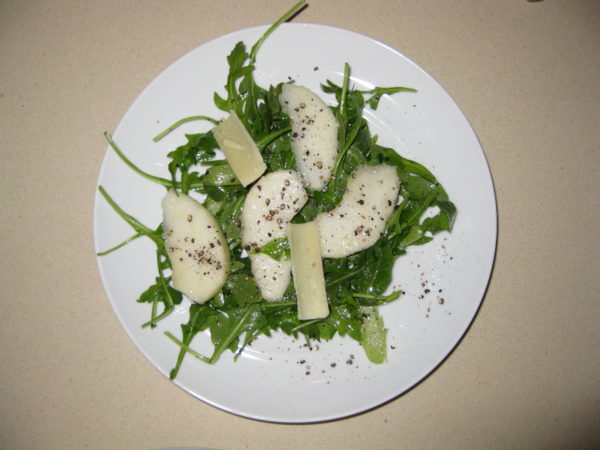
Pear, Celery and Arugula Salad with Lemon Dressing

December 26, 2016

I grew up in a family that put salad on the table at the same time as the rest of the meal.  I married into a family that does the same.  However, in the years between leaving home to go to college and getting married I most definitely converted to serving salad after the main part of the meal was over.  Notice, I didn’t say main course because the other change I made was thinking of the meal as comprising an antipasto (even if it is just a nibble of cheese and a cracker for a family meal) followed by, what Italians would call, the first course (il primo piatto) followed by a second course (il secondo piatto).

In an Italian meal, the first course is usually pasta, or soup, or risotto.  The second course  usually consists of meat or fish with several side dishes (contorni).  After that comes the salad.  Granted, there are exceptions to this sequence, even in Italy.  One of the most classic exceptions is serving Risotto alla Milanese with a breaded and fried veal chop.  OK, so these days, I try not to eat baby animals, so veal is pretty much off the menu at our house, but the point is Risotto alla Milanese is typically served with the meat, not before the meat.

The general rule that the sequence is antipasto, then first course, then second course, then salad was made abundantly clear when my Italian tutor had dinner at our house a few years ago.  For some reason, even though my in-laws grew up in Italy, we served spaghetti and meatballs (very good spaghetti and meatballs, mind you!).  Where it got interesting, however, is that we all ate the spaghetti and meatballs at the same time (for full disclosure, I didn’t touch my salad until afterwards).  My tutor, hailing from Italy however, ate her pasta first.  Only then did she put a meatball or two on her plate for her second course.  Only after that did she touch her salad!

When I am serving dinner for company, the salad always comes after the second course.  I’d rather not serve salad than serve it with the rest of the meal.  Salads, by design, have sharp dressings meant to cleanse the palate.  You can’t go back and forth between a subtly seasoned dish (whether it be pasta or fish or meat) and salad and do justice to the subtlety of the first.  The vinegar and/or lemon juice and/or mustard (and/or whatever else you put in your salad dressing) doesn’t allow that.  Forget what it does to the wine that you’ve paired with the dish!  If it’s just family, however, in the interest of domestic harmony, the salad goes on the table at the beginning.  I still don’t eat mine till the end but I can’t say the same for others.

Print Recipe
Pear, Celery and Arugula Salad with Lemon Dressing
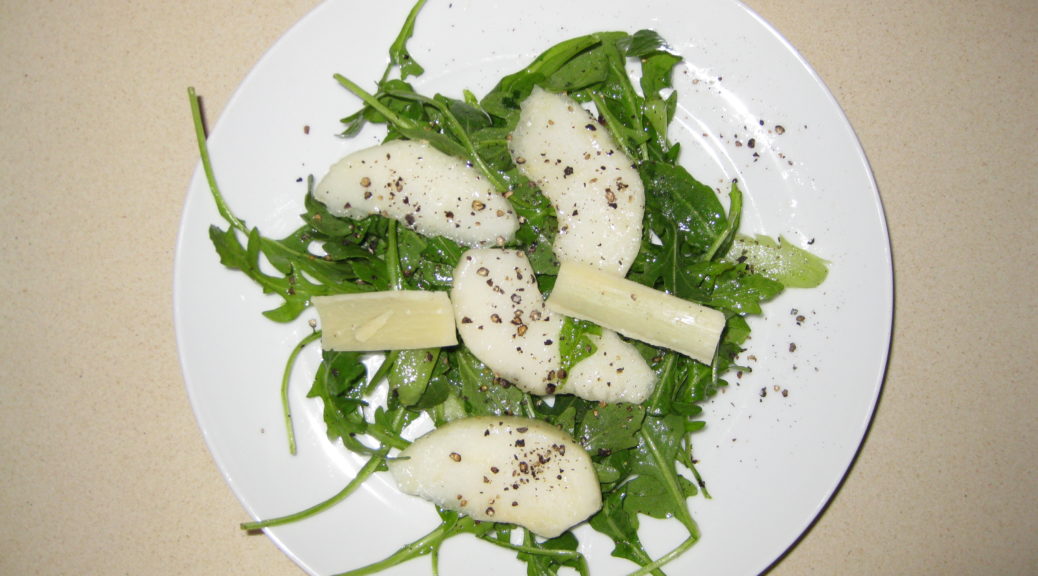
Pears add a welcome freshness to this salad that is a perfect antidote to winter when so little really good fresh produce is available. This may be a lot of pear for some but the sweet juicy taste is a great contrast to the crunch of the celery and the peppery bite of the arugula.
Votes: 0
Rating: 0
You:
Rate this recipe!
Prep Time 15 minutes
Servings
people
Ingredients
Prep Time 15 minutes
Servings
people
Ingredients
Votes: 0
Rating: 0
You:
Rate this recipe!
Instructions
  1. Squeeze about half a fresh lemon to make 2 ½ tablespoons of juice. Allow the juice to sit, uncovered, at room temperature for about an hour before using it to dress the salad. The flavor of the juice will improve.
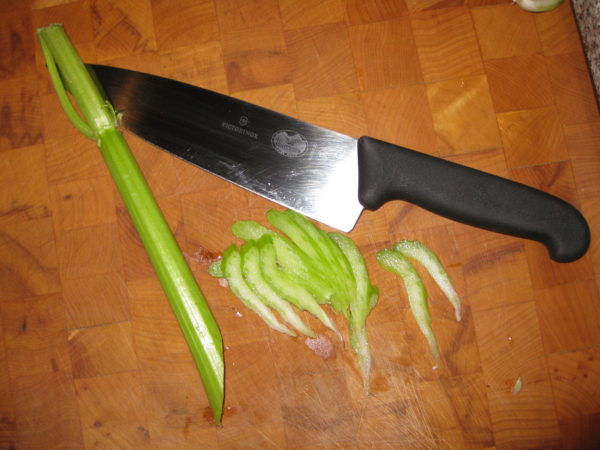
  2. Remove the top of the celery stalks, the part where the center stalk gets much thinner and smaller stalks come off the sides. Reserve these pieces for another use. Cut the remaining celery stalks on a long diagonal to create thin long pieces.
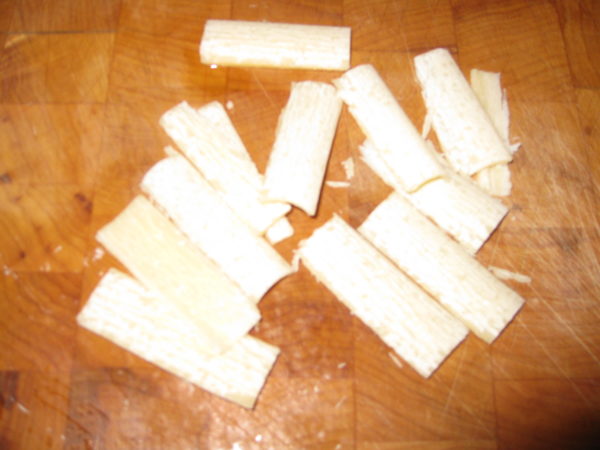
  3. Using a sharp knife or cheese paring knife, cut about 18 curls of Pecorino Romano cheese.
  4. Peel the pears and cut into quarters lengthwise. Core the pears. Slice into thin wedges.
  5. Combine the lemon juice and olive oil. Shake well to combine.
  6. Toss the arugula and celery with about 2/3 of the lemon-olive oil dressing. Season with salt and pepper to taste and toss again.
  7. Divide the arugula and celery onto six plates.
  8. Toss the pears in the remaining lemon-olive oil dressing. Arrange the pear slices and Pecorino Romano cheese on top of the arugula. Season with freshly ground black pepper. Serve immediately.
Recipe Notes

Copyright © 2016 by VillaSentieri.com.  All rights reserved.

Share this Recipe