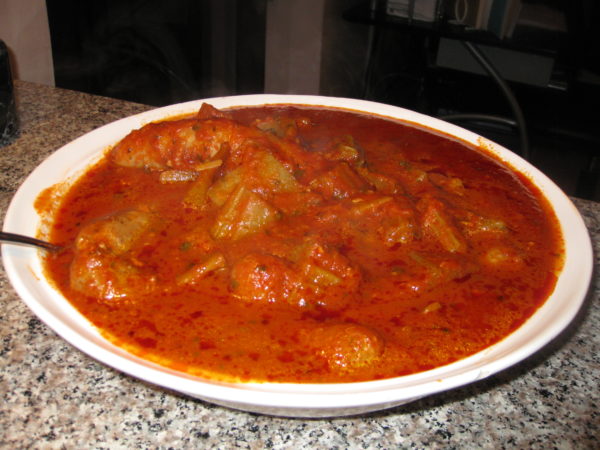
Polpette di Tonno (Tuna Croquettes)

6 March 2024

Polpette!

The usual translation of the Italian word polpette is “meatballs.”

But polpette are so much more.  Italians use the word polpette to refer to any “balls” made of chopped or ground up stuff including meat, fish, vegetables… you name it!

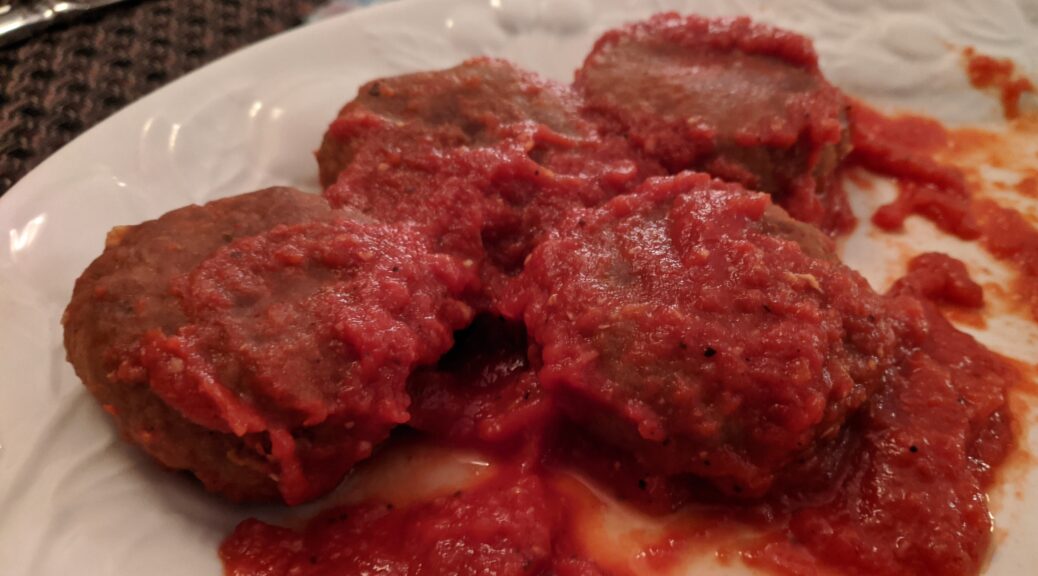
That leaves the translation a bit up in the air.  If the “balls” are made of meat I usually translate polpette as meatballs but if they’re made of other ingredients, as in this recipe, I usually translate it as croquettes.  Tuna meatballs just doesn’t sound right!  And eggplant meatballs is even worse!


Join our mailing list and you’ll never miss a recipe again!


By the way, the singular of polpette is polpetta but who ever had just ONE meatball… or croquette!

I have other polpetta recipes coming in future blog posts but in the meantime, if you’re up for more meatball recipes, take a look at these two:

Marisa’s Mystical Meatballs

Italian Wedding Soup

The meatball mixture in the Wedding Soup makes scrumptious meatballs that can be fried and then simmered in tomato sauce rather than put into soup!


Once again, I find myself apologizing for a prolonged absence from my blog.  I have been working diligently on my latest cookbook, due out this spring, called
Dispatches from Calabria: Eating My Way Through Culinary School in Italy.

In the meantime, if you haven’t seen my first book,
Mastering Artisan Italian Gelato: Recipes and Techniques,
you can read about it HERE.


In the typical progression of an Italian meal, these croquettes would be served as a “secondo,”  what we Americans might call the main course except that in a full-on Italian meal the secondo would be preceded with a “primo,” which is usually pasta, soup or a rice dish.  A secondo is usually accompanied by one or more side dishes, “contorni.”

You might consider starting a meal with:

Pear, Celery and Arugula Salad with Lemon Dressing

For a pasta course, any of these would go well:

Pasta with Silky Zucchini Sauce

Bowtie Pasta with Peas

Angel Hair Pasta with Crispy Breadcrumbs

Along with the croquettes, you could select from the following side dishes:

Argentine Marinated Eggplant

Roasted Sweet Peppers

Green Beans with Parmesan Cheese

Rapini with Olive Oil, Garlic, and Red Pepper

Happy eating!


Follow us on social media


Print Recipe
Polpette di Tonno (Tuna Croquettes)
This recipe is from the Italian region of Molise. It can be made with fresh tuna instead of canned, if you desire. Gently cook and flake the fresh tuna. You’ll need about 12 ounces of flaked tuna to equal the amount in two 7-ounce cans. Simmer the croquettes in a simple, meatless tomato sauce. If you need a suggestion, try my Basic Tomato Sauce. A link to the recipe in the Notes below.
Votes: 0
Rating: 0
You:
Rate this recipe!
Cuisine Italian
Prep Time 20 minutes
Cook Time 25 minutes
Passive Time 1 hour
Servings
people
Ingredients
Cuisine Italian
Prep Time 20 minutes
Cook Time 25 minutes
Passive Time 1 hour
Servings
people
Ingredients
Votes: 0
Rating: 0
You:
Rate this recipe!
Instructions
  1. Drain the tuna and squeeze out excess oil.
  2. Soak the bread in water. Squeeze out excess water.
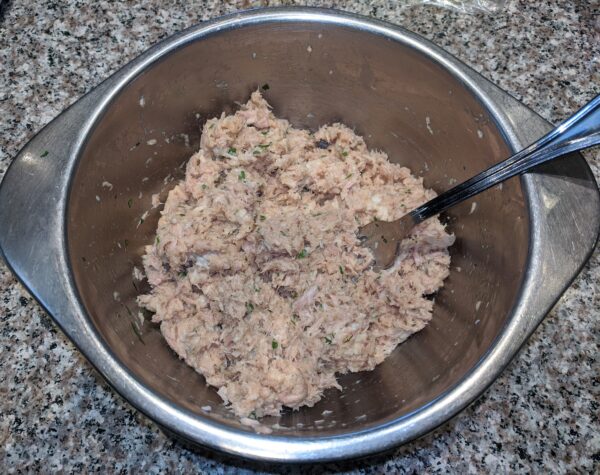
  3. Combine all ingredients and mix with your fingers until you get a uniform mixture.
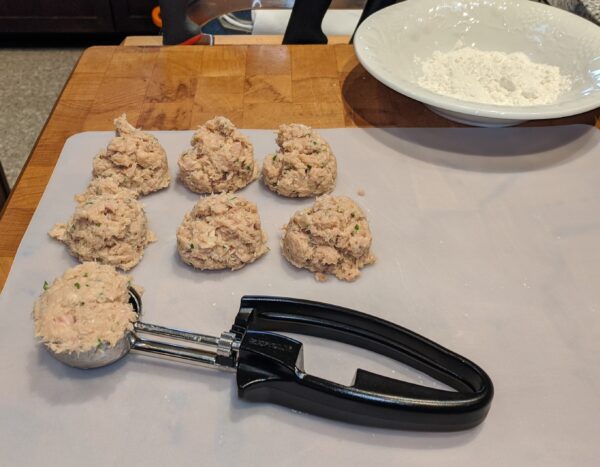
  4. Form into 14 portions.
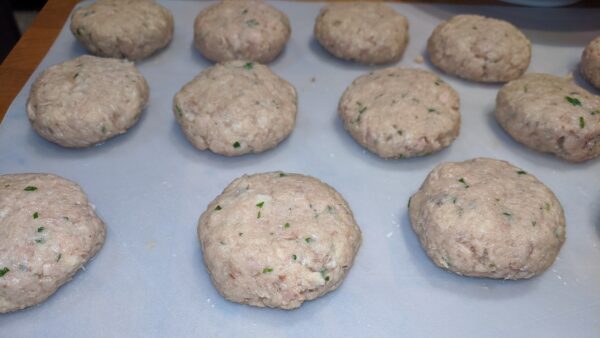
  5. Roll into balls then flatten slightly.
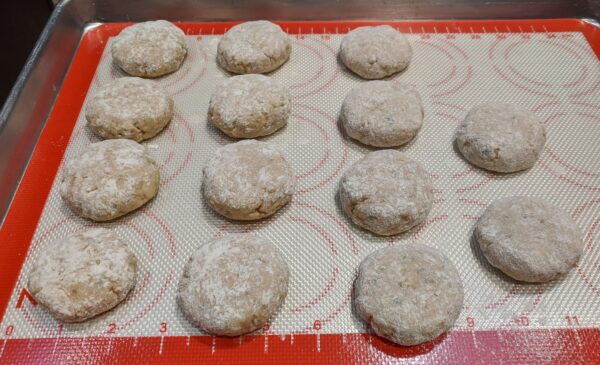
  6. Dredge in flour then refrigerate one hour, if possible.
  7. Deep fry the croquettes then simmer in tomato sauce for about 10 minutes.
Recipe Notes

You can find the recipe for Basic Tomato Sauce HERE.

Copyright © 2024 by Gary J Mihalik. All rights reserved.

Share this Recipe

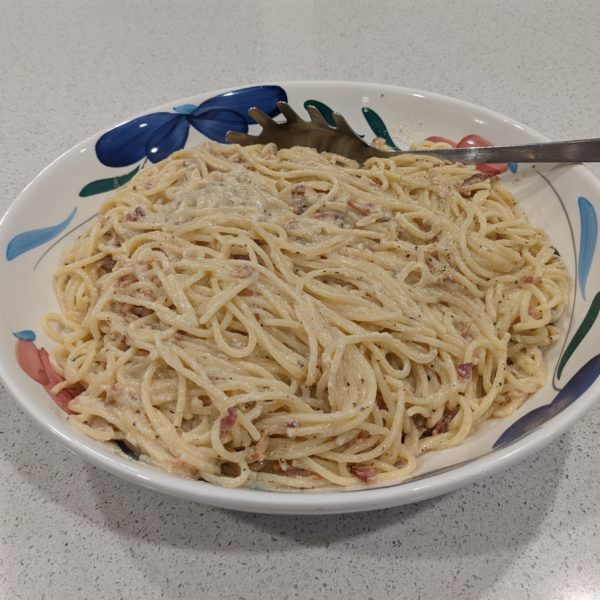
Spaghetti alla Carbonara

21 March 2023

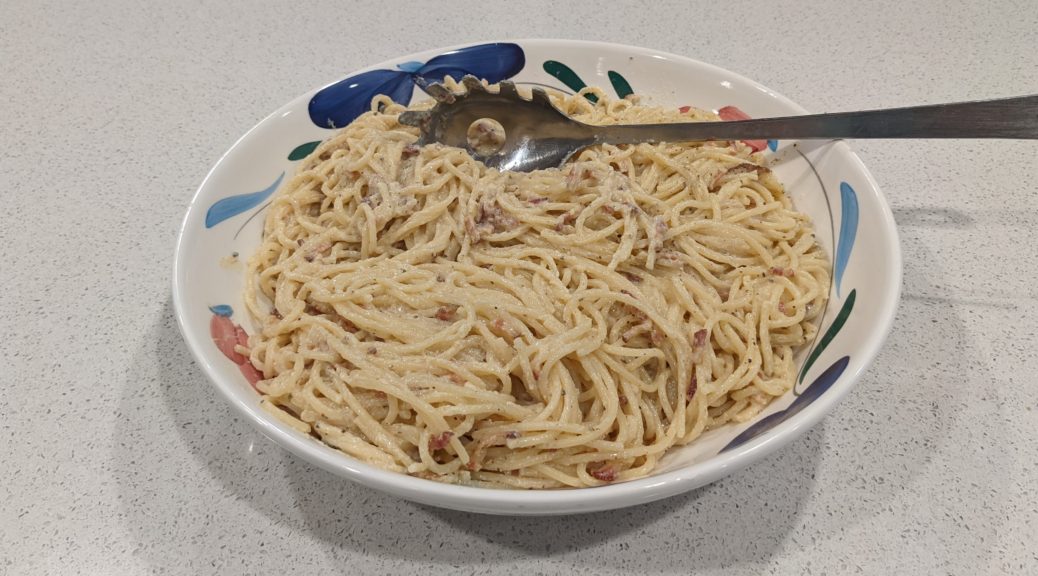
Cacio e Pepe, Pasta alla Gricia, Spaghetti all’Amatriciana, and Spaghetti alla Carbonara are the Holy Quaternity of Roman pasta dishes.

The sauce for Cacio e Pepe is little more than Pecorino Romano cheese emulsified into some of the pasta-cooking water to make a glossy sauce.  Pasta alla Gricia adds cured pork, usually guanciale, to Cacio e Pepe.  Amatriciana adds tomato to Gricia while  Carbonara adds egg to Gricia.

And there you have it, arguably the four most important pasta dishes of Roman cuisine.

The origins of Spaghetti alla Carbonara are murky.  Given the obvious relationship between these four pasta dishes one might think that there’s not much to talk about, one just naturally leading into the other.  However, there is some intriguing evidence, and a little speculation, about the origins of Carbonara.


Join our mailing list and you’ll never miss a recipe again!


The evidence and speculation go like this.  During the Allied liberation of Rome during WWII, the bacon and (powdered) eggs of American GI rations were combined with pasta to make a proto-Carbonara.  Some Italians agree with this, and some do not.  Those who do not usually insist that the cured pork product of choice is guanciale (cured pork jowl) not pancetta (cured pork belly) let alone American bacon.

But think about it.  How likely is it that the Romans had any cured pork hanging around near the end of WWII?  It’s more likely that they consumed anything that was consumable by then.  The existence of guanciale in any significant quantity is unlikely.  In addition, the first reference to Spaghetti alla Carbonara appeared in the newspaper La Stampa in 1950, indicating it was a favorite of American GIs.

Of course, it’s entirely possible that Spaghetti alla Carbonara existed prior to WWII and was made with guanciale.  After the Allied liberation of Rome, it’s reasonable to see how GI rations of (powdered) egg and bacon could have been substituted for fresh eggs and guanciale.  It’s also possible, even probable, that if it existed before the 1940s, Carbonara wasn’t written about because it was part of the cuisine of the poor (cucina povera).  Despite our current fascination with traditional cuisine, until recently culinary history largely focused on foods eaten by the upper classes, not the poor.


Follow us on social media


Unless more evidence comes to light, we may never know the origins of Spaghetti alla Carbonara.  Even so, there are some things we can say definitively:

  1. Adding cream to Carbonara is an abomination!
  2. If not the original meat, American bacon has a legitimate place in the history of Carbonara.
  3. Carbonara is delicious, whether made with guanciale, bacon, or pancetta.  Yes, each is different but each is delicious!  I’ve used all of them.  I prefer bacon but I’ll never turn down a well-made dish (or three) of Spaghetti alla Carbonara regardless of what cured pork product went into it.

The most challenging part of making carbonara is to incorporate the eggs, getting them to thicken into a sauce without either remaining raw or turning into scrambled eggs.  I’ve got a little trick that eliminates these concerns.

Read on!

Print Recipe
Spaghetti alla Carbonara
Spaghetti alla Carbonara is one of the four classic Roman pasta dishes, along with Cacio e Pepe, Pasta alla Gricia, and Spaghetti all’Amatriciana. It can be made with guanciale, American bacon, or pancetta though guanciale and bacon probably have the greatest claim on tradition. My preference is bacon. If using guanciale, I sometimes decrease the amount by 10% because it usually has more fat than either bacon or pancetta.
Votes: 0
Rating: 0
You:
Rate this recipe!
Prep Time 15 minutes
Cook Time 20 minutes
Servings
people
Ingredients
Prep Time 15 minutes
Cook Time 20 minutes
Servings
people
Ingredients
Votes: 0
Rating: 0
You:
Rate this recipe!
Instructions
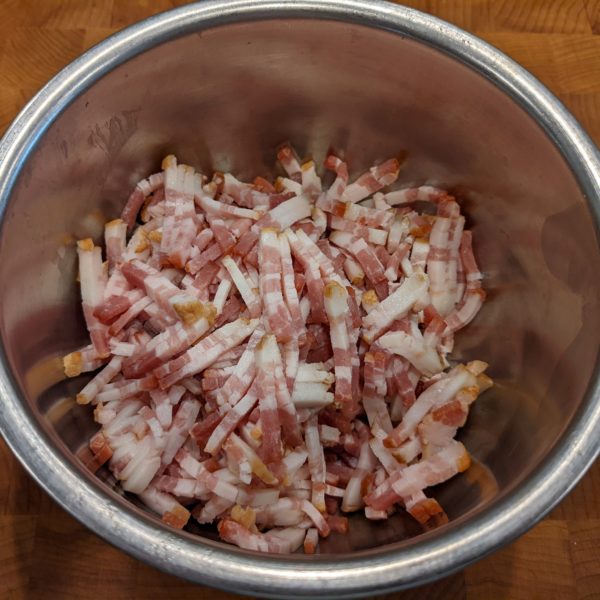
  1. Cut the bacon into matchstick-size pieces.
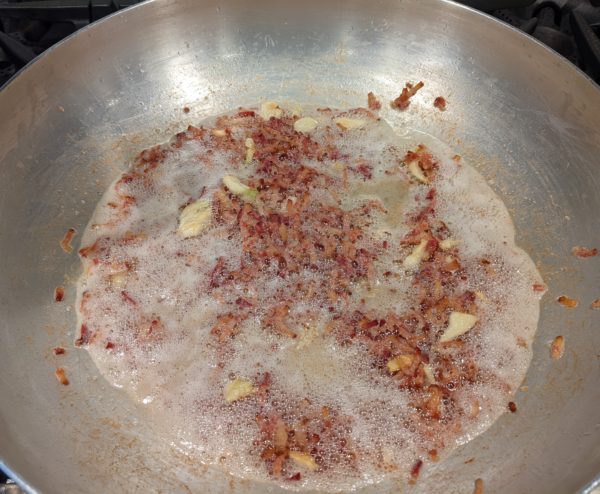
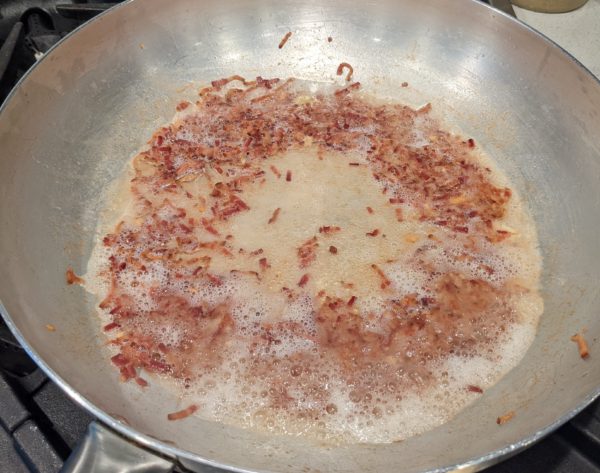
  2. Sauté the bacon in a dry sauté pan until some fat renders.
  3. Add the garlic and sauté until the garlic is quite golden, but not brown. Remove the garlic and reserve. If the bacon is not well browned, continue cooking.
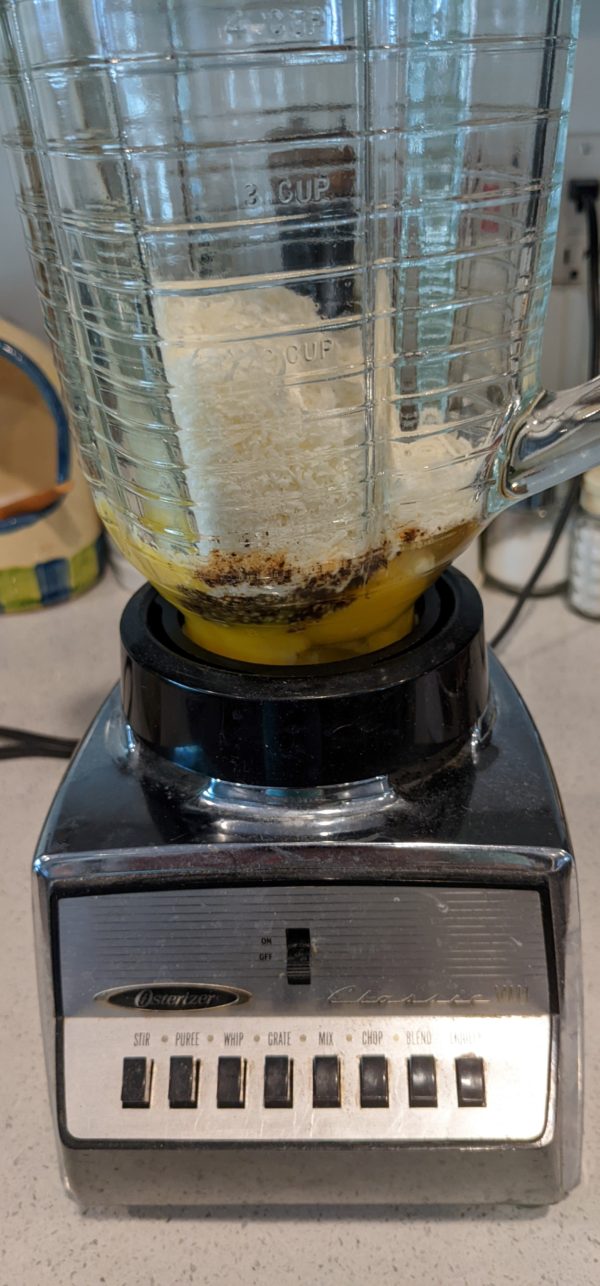
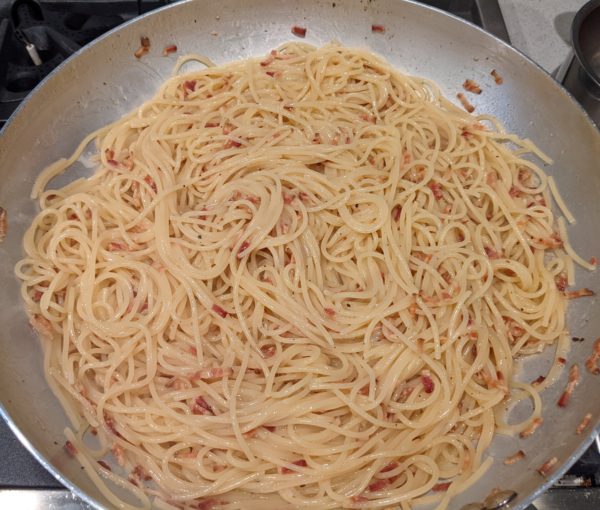
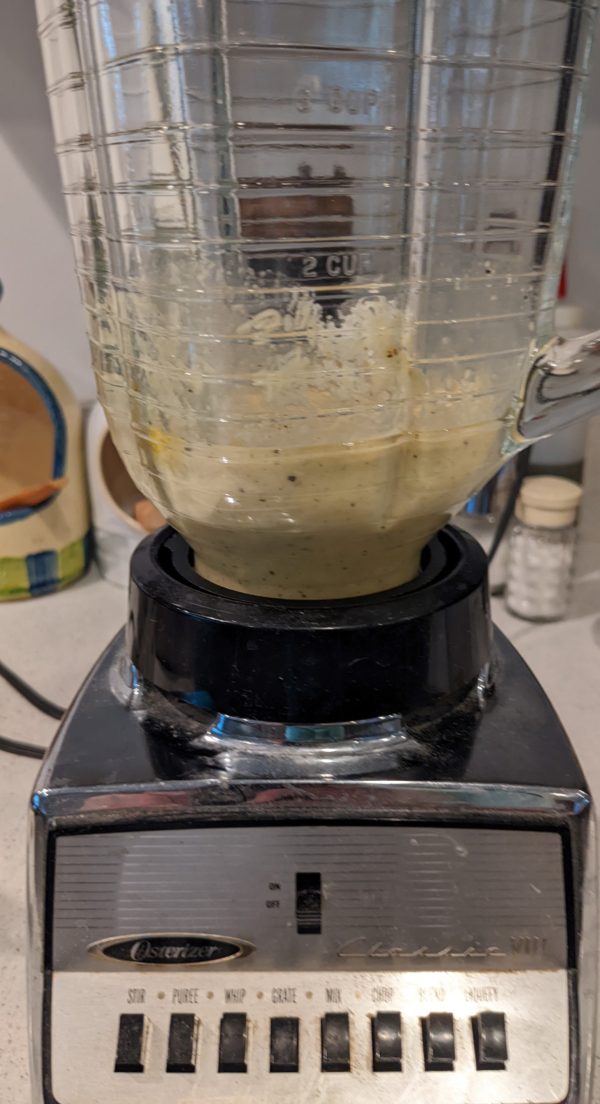
  4. Meanwhile, combine the eggs, egg yolks, Pecorino Romano cheese, 2 teaspoons black pepper, and reserved cooked garlic in a blender jar. Reserve.
  5. When the bacon is brown, add the wine and remove from the heat unless you are adding the pasta immediately. The dish can be made several hours ahead to this point.
  6. Cook the spaghetti in salted water until just shy of al dente.
  7. Just before draining the pasta, reheat the bacon and cook off the wine.
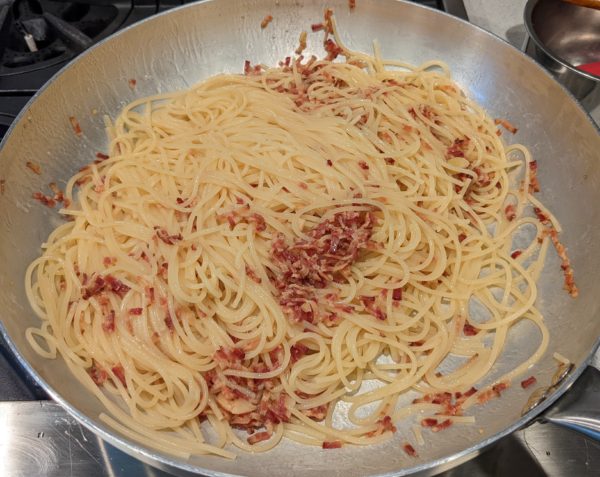
  8. Add the pasta to the bacon and sauté on medium to medium-high heat.
  9. Add pasta-cooking water, about one ladleful at a time, and continue cooking the pasta, stirring frequently, until al-dente. There should be enough liquid to coat the pasta in a thick "sauce."
  10. Just as the pasta reaches al dente, turn on the blender. Blend the contents thoroughly and then add about 120 ml (½ cup) of the hot pasta cooking liquid while the blender is still running.
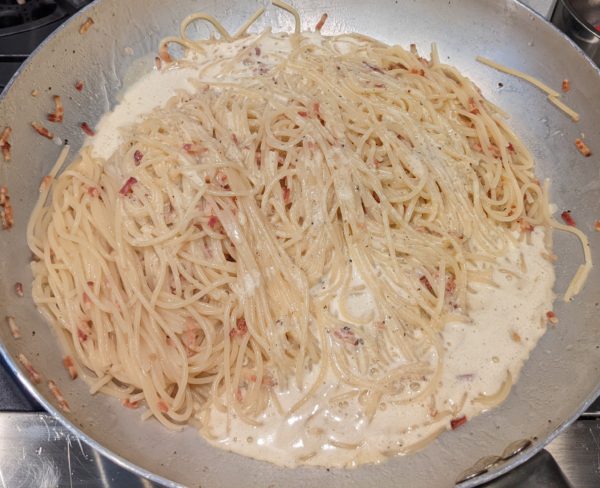
  11. Off the heat, add the blended egg mixture to the pasta along with the parsley, if using, and even more freshly ground black pepper.
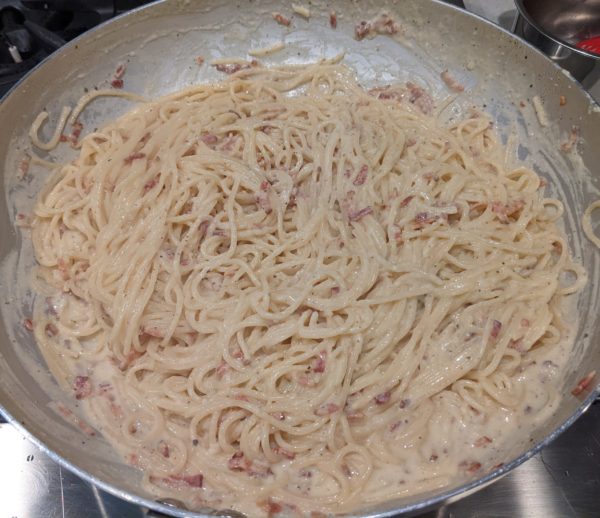
  12. Mix well to turn the eggs into a creamy sauce, adding pasta-cooking water if needed. Taste and adjust salt and pepper.
  13. Pour into a warmed serving bowl and serve immediately.
Recipe Notes

Copyright © 2023 by Villa Sentieri, LLC. All rights reserved.

Share this Recipe

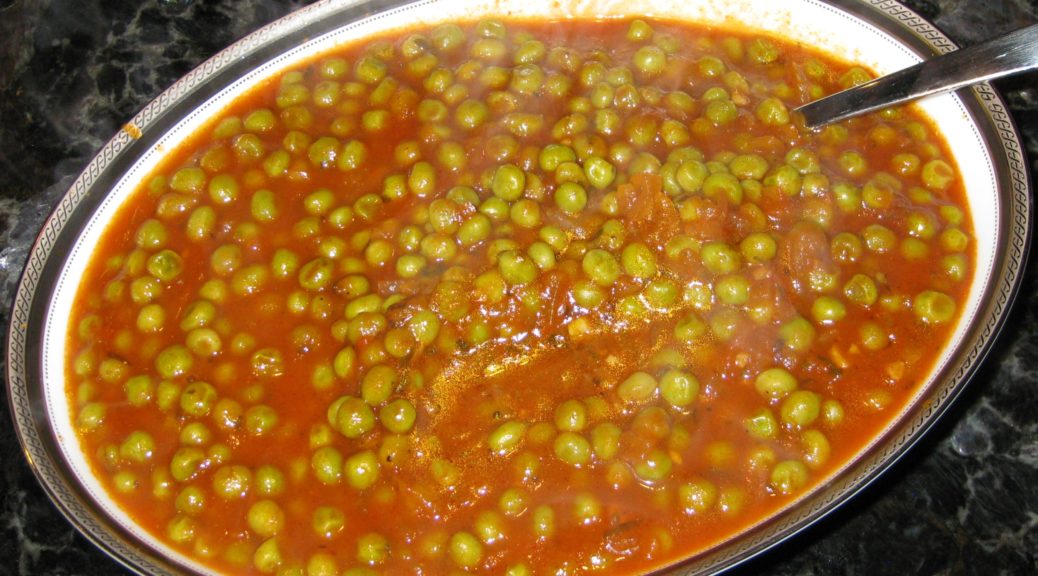
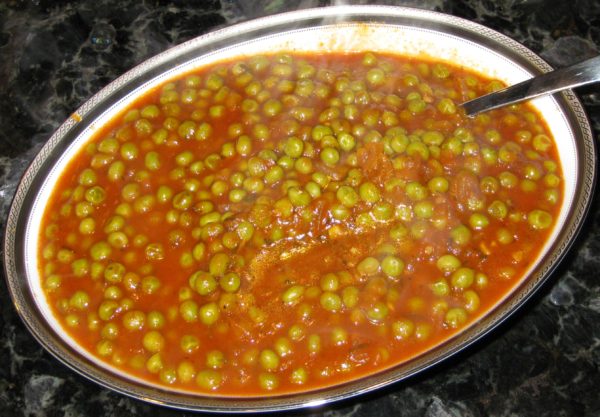
Piselli in Umido (Peas in Tomato Sauce)

April 11, 2018

Italians have knack for combining a modest array of vegetables into an almost endless cannon of dishes, each of which is distinctive, even if the interrelationships of the various parts are obvious.

This dish of peas cooked in tomato sauce is from my husband’s paternal grandmother, Amerina Pieri.

I learned to make this from my mother-in-law, Marisa, Amerina’s daughter-in-law.


Follow us on your social media platform of choice


Everyone who makes it adds his or her own signature.  Mine is not exactly like my mother-in-law’s and I’m sure hers is not just like Zia (Aunt) Ida’s, Amerina’s daughter.

Interestingly, Nonni (as we all called her) used canned peas.  In talking with my father-in-law (who grew up eating this) and my mother-in-law, they were pretty sure Nonni would not have used canned peas in Italy unless she possibly canned them herself.  Somehow canned peas became the norm in America.

Amerina Pieri (aka Nonni or Nonni’merina) Christmas 2005

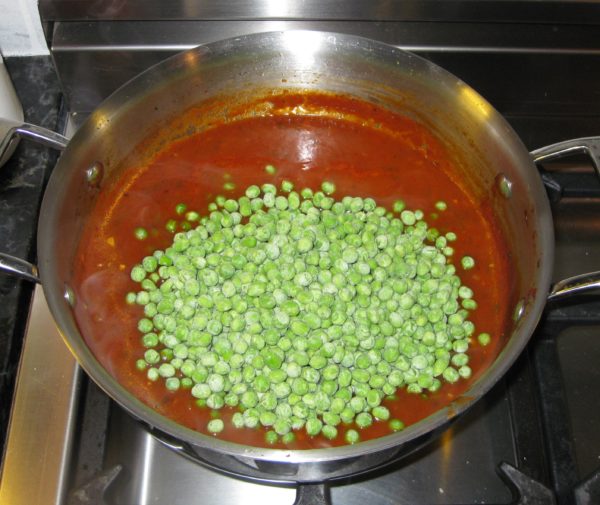
And, while canned peas produce a pretty good dish, I prefer something a little fresher.  Because really good fresh peas are available for only a few weeks a year at the Farmers Market in Santa Fe, I usually use frozen peas.

If the frozen peas haven’t been in your freezer so long that they start to dry out and freeze into a block they are superior to “fresh” peas except during the few weeks a year when they are really locally-grown and truly fresh.


Click HERE to join our mailing list and you’ll never miss a recipe again!


My mother-in-law usually uses canned tomato sauce when making this, as did Nonni (at least when she made it on this side of the Atlantic Ocean!).

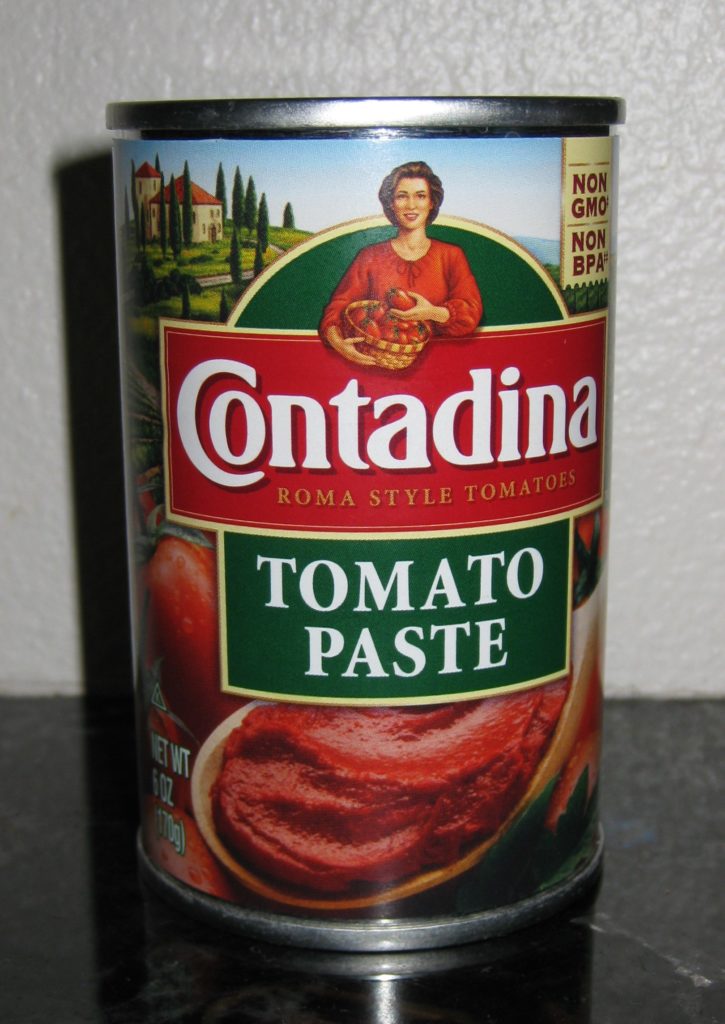
I use tomato paste and water.  If you read the ingredient lists on cans of tomato sauce that you can buy in the United States, you will find that most are made from tomato paste and water, so why not just do it yourself?  Those few brands of tomato sauce that are not made from diluted tomato paste are a little too sour for my taste.  I would opt for a good-quality tomato puree instead.

My favorite brand of domestically produced tomato paste

Tomato paste has a richer flavor than tomato sauce or tomato puree.  I attribute this to the extra cooking that is needed to concentrate the tomatoes.  Those little cans provide the foundation of a taste that could otherwise only be achieved with hours of simmering.

Homemade tomato puree would be another good option if you want a fresher, more summery taste.  Here’s where you can find my recipe.


If you have a favorite family recipe and a bit of a story to tell, please email me at santafecook@villasentieri.com and we can discuss including it in the blog. I am expanding the scope of my blog to include traditional recipes from around the country and around the world. If you haven’t seen Bertha’s Flan or Melinda’s Drunken Prunes, take a look.  They will give you an idea of what I’m looking for.


Print Recipe
Piselli in Umido (Peas in Tomato Sauce)
Fresh or canned peas can be used in place of frozen. Fresh peas will take longer to cook. The canned peas should be cooked briefly to avoid overcooking. I like to rinse off frozen vegetables to remove any ice crystals on the exterior. I find the ice crystals can carry a “freezer” taste.
Votes: 0
Rating: 0
You:
Rate this recipe!
Course Sides, Vegetables
Cuisine Italian
Prep Time 10 minutes
Cook Time 75 minutes
Servings
people
Ingredients
Course Sides, Vegetables
Cuisine Italian
Prep Time 10 minutes
Cook Time 75 minutes
Servings
people
Ingredients
Votes: 0
Rating: 0
You:
Rate this recipe!
Instructions
  1. Sauté the onion, garlic, sage, parsley and ½ teaspoon of salt in the olive oil in a heavy-bottomed saucepan till the onion is translucent.
  2. Add the wine and cook, stirring frequently, until it evaporates.
  3. Add the tomato paste and sauté until it becomes slightly darker, 3-4 minutes.
  4. Add the water, sugar, bay leaf, rosemary, oregano, and salt and pepper to taste.
  5. Simmer, partially covered, until thickened, approximately 45 minutes.
  6. Adjust seasoning.
  7. Rinse the frozen peas under cool water to remove any ice crystals.
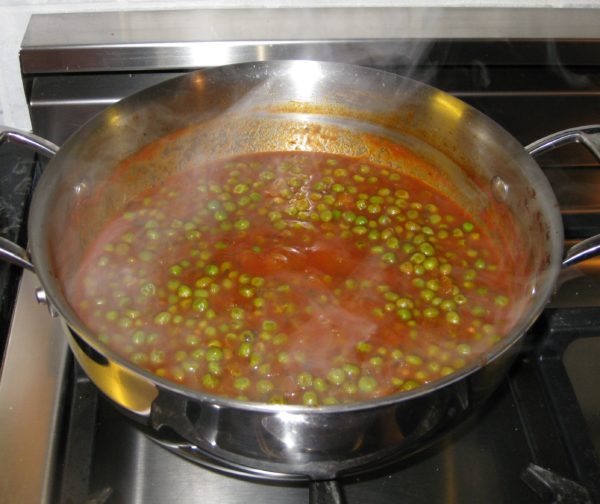
  8. Add the frozen peas to the sauce.
  9. Simmer approximately 15 minutes, adjusting seasoning once again, if needed.
Recipe Notes

Copyright © 2018 by VillaSentieri.com. All rights reserved.

Share this Recipe

Spaghetti Aglio, Olio, e Pepperoncino (Spaghetti with Garlic, Oil and Red Pepper)

November 8, 2017

How many Italian pasta sauces can you think of that do not include olive oil and garlic?

Precious few, I would guess!

This dish, classically Roman, elevates those two ingredients to center stage. You cannot hide bad olive oil or poorly cooked garlic in this dish. There are very few other flavors.

But simplicity has its virtues. It’s really hard to go wrong with this dish unless you use bad olive oil or not-so-stellar cheese or you burn the garlic.


Follow us on Facebook:  Click HERE


You can make a case for cooking the garlic for a whole range of times, from mere seconds up until it is dark brown. For many years I even cooked three different batches of garlic, one until brown, one until golden, and one until just fragrant. There is an interesting depth of flavor from doing so but it’s not the classic technique.

My point is, unless you burn the garlic and make it bitter, you won’t ruin the dish. You may prefer the flavor of the garlic when it is more or less brown but that’s just a preference not an absolute.

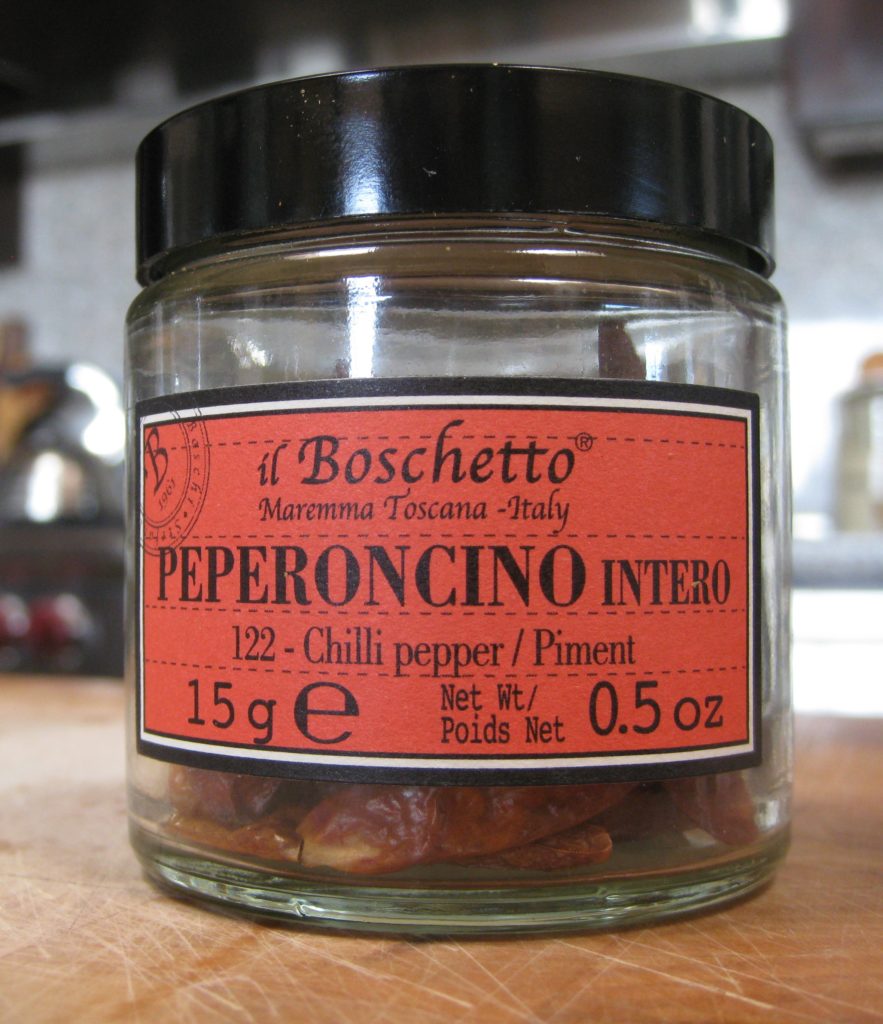
These little Italian peppers (“pepperoncino”) pack a nice flavor, not just heat

My recipe diverges from the classic Roman recipe in two places.

While making dinner, I’m usually chatting…with my in-laws (on most nights), with my husband (when he’s not away on business), or with guests. While I know I can time everything to be ready at exactly the right moment, I ask, why stress about it? So, yes, I can time the sautéing of the garlic to be just right when the pasta is ready but there’s an easier way.

I get the garlic to exactly the spot I want and then stop the cooking by taking the pan off the heat and adding a splash of wine (or water, if you must). That’s not classically Roman but it sure makes it much easier to have a conversation and a cocktail or three while making dinner. As soon as I plan on draining the pasta, I turn the heat on under the garlic oil and boil away the liquid I’ve added. Let’s face it, how often do we get to stop time with no consequences?

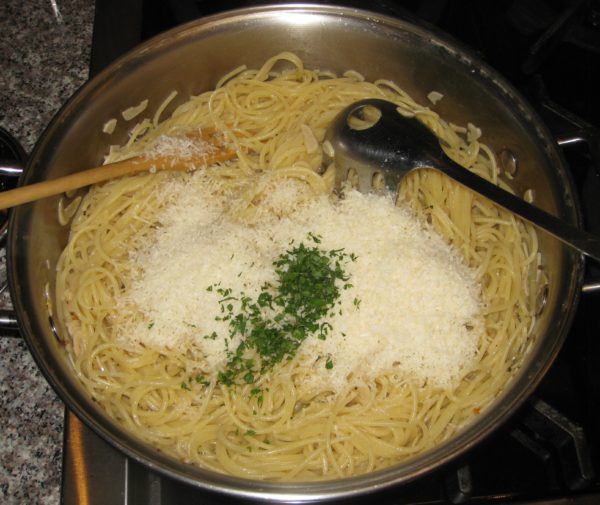
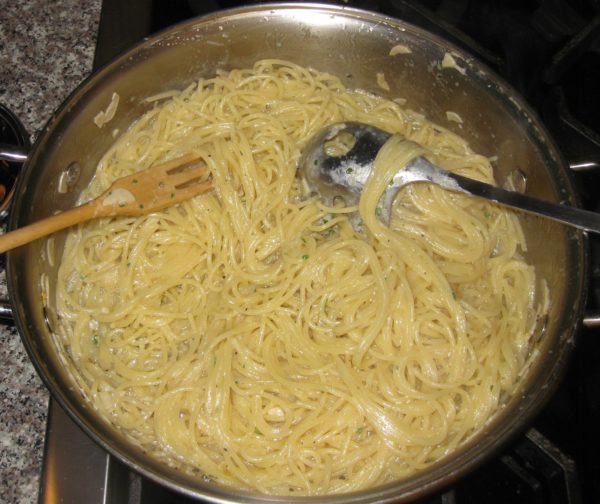
The second divergence from classic technique is that I add cheese to the pasta while mixing it with the garlic oil rather than just adding it at the table. In my mind there is no doubt that this pasta needs cheese. Adding it at the final stage of preparation allows me to create a glossy sauce where there would otherwise only be garlic oil. Not that that is bad, but I’ve made a bit of a reputation for myself by turning out glossy sauces where there would often only be oil.

It’s not hard. It just takes a bit of practice and some understanding (minimal) of the chemistry involved. And let’s face it, if the sauce isn’t glossy, you’re the only one who’s going to know. Again, there’s no penalty involved!

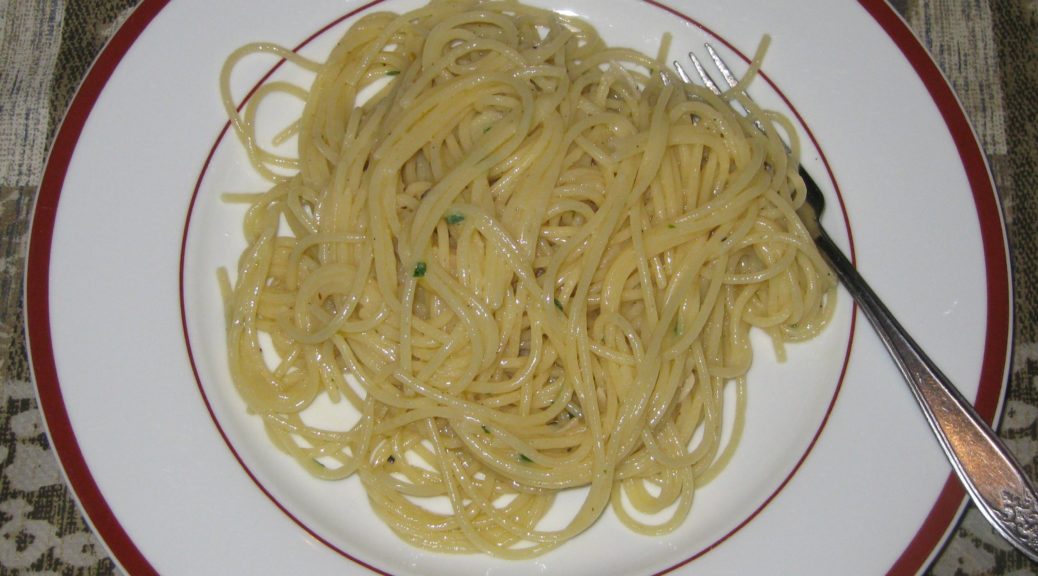
A brand of pasta that I really like

In Italy this pasta is often prepared and eaten after a night of over-indulging in alcohol. At least that’s the reputation it has. However, this was a common dish put on the dinner table when I was growing up. It’s easy, quick, filling, and darn good. Oh, and for an entirely different flavor, try butter in place of the olive oil!


Follow us


Click HERE to join our mailing list and you’ll never miss a recipe again!

Print Recipe
Spaghetti Aglio, Olio, e Pepperoncino (Spaghetti with Garlic, Oil and Red Pepper)
I like to reduce last minute work, so I prep the garlic oil in advance and stop the cooking with a splash of wine. You can use water, if you wish, or, if you are sautéing the garlic as the pasta is cooking, some of the pasta-cooking liquid. As the pasta is nearing completion, I reheat the garlic oil, quickly boiling off the wine, and proceed. Use more or less garlic, to your taste. The same is true with the red pepper. For myself, I would use at least double this amount but that would be way too much for other folks.
Votes: 0
Rating: 0
You:
Rate this recipe!
Prep Time 15 minutes
Cook Time 20 minutes
Servings
people
Ingredients
Prep Time 15 minutes
Cook Time 20 minutes
Servings
people
Ingredients
Votes: 0
Rating: 0
You:
Rate this recipe!
Instructions
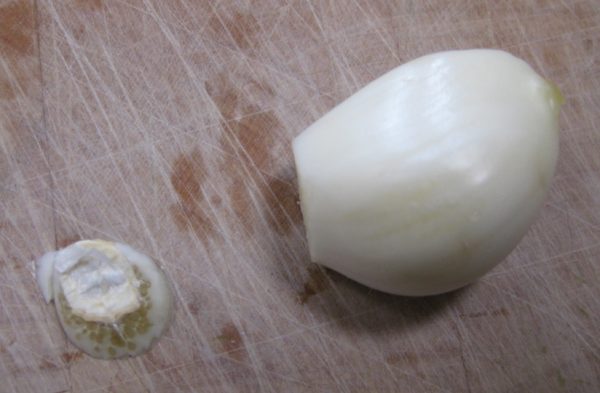
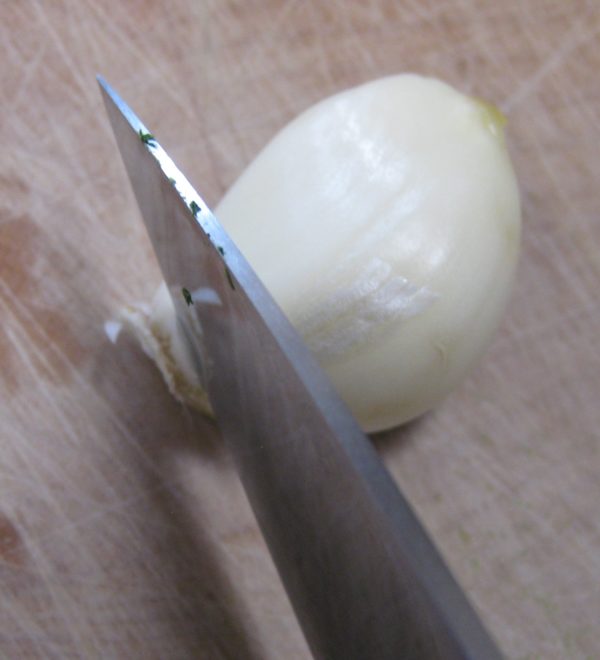
  1. Slice off the hard base of each garlic clove.
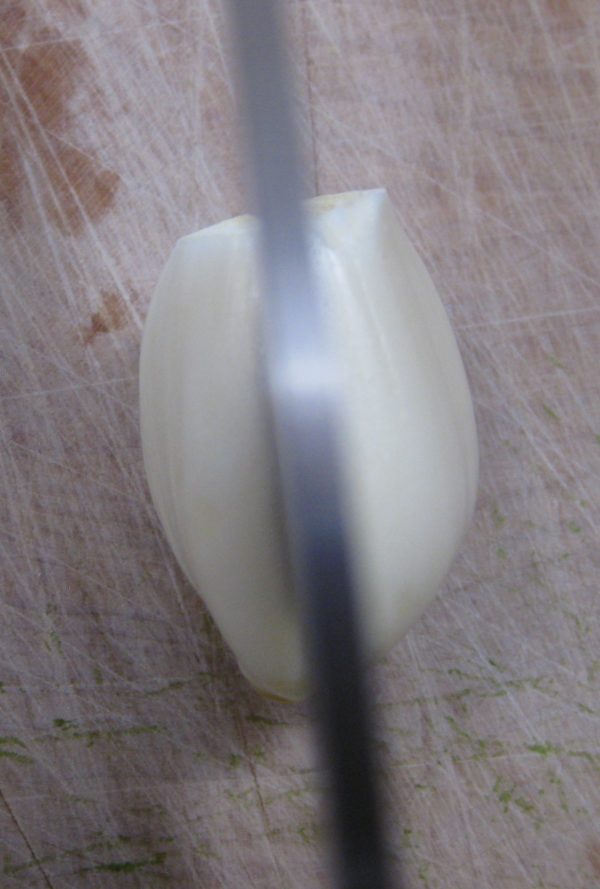
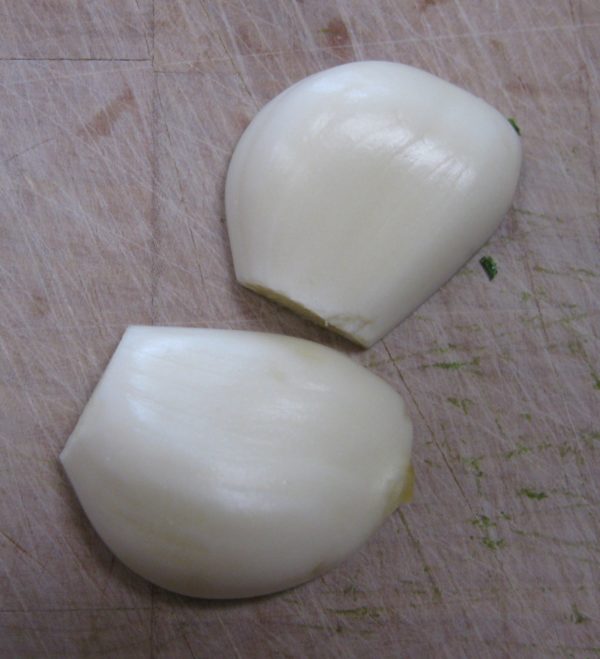
  2. Cut the cloves in half top to bottom.
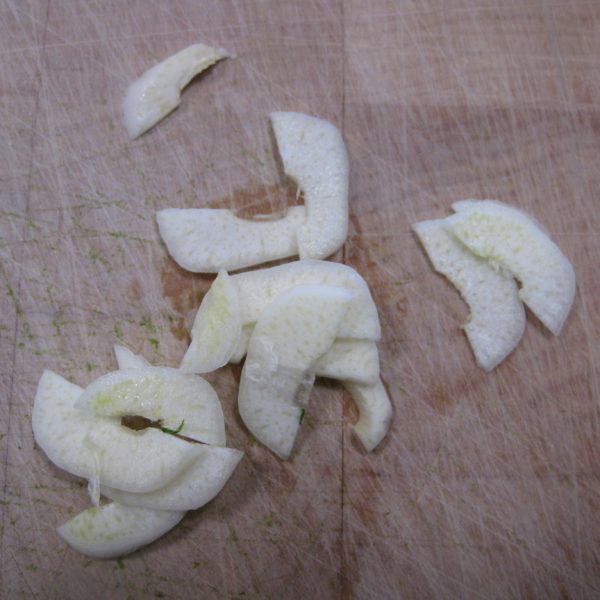
  3. Cut each half-clove of garlic crosswise into very thin slivers.
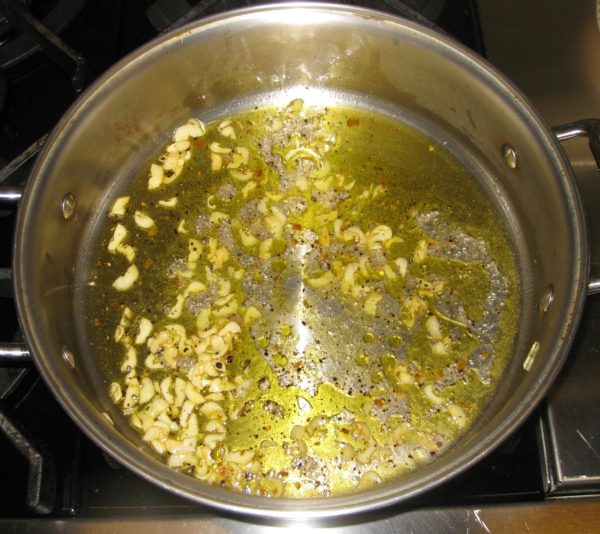
  4. In a sauté pan large enough to hold all the cooked spaghetti comfortably heat 1/3 cup of olive oil over gentle heat.
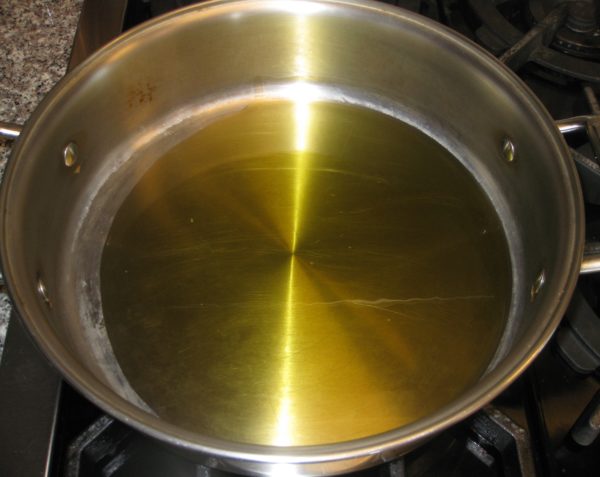
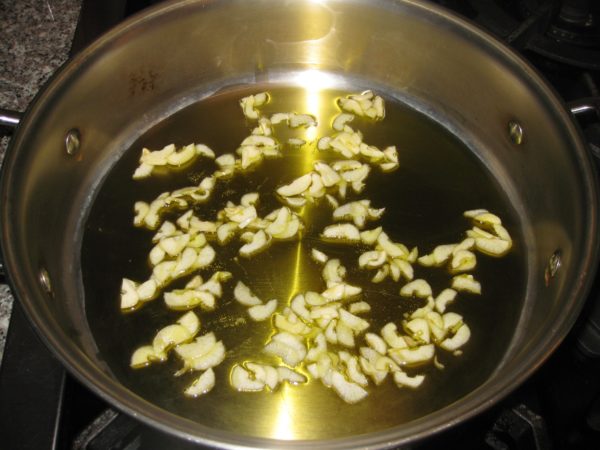
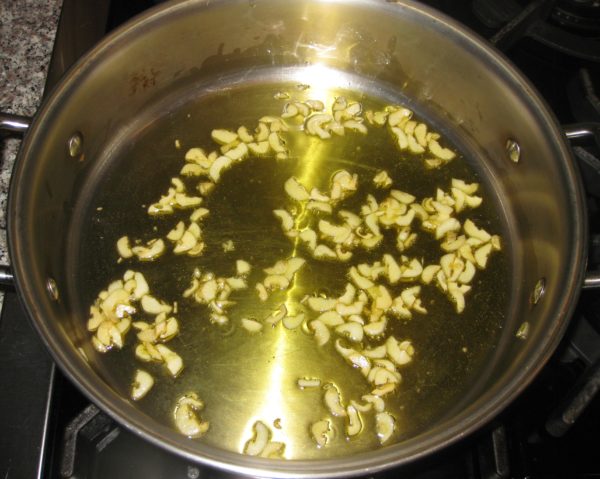
  5. Add the slivered garlic and sauté slowly and gently until golden brown. This should take 10-15 minutes if the heat is low enough.
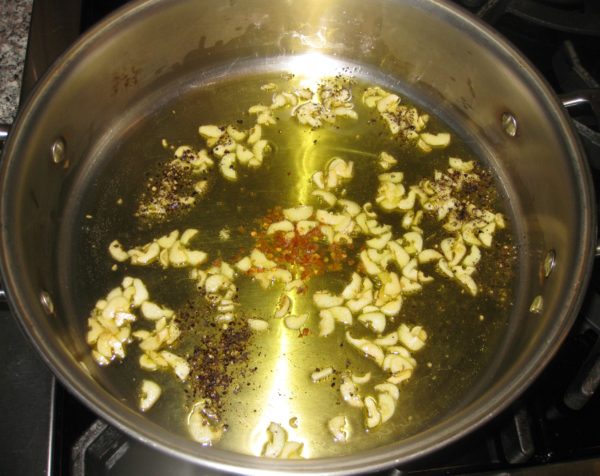
  6. Add the red pepper and black pepper and sauté for another minute.
  7. Add the wine to stop cooking and remove the pan from the heat.
  8. Bring 2 ½ quarts of water to a boil. Season with ¼ cup of salt.
  9. Boil the spaghetti about two minutes less than the package indicates is needed for al dente.
  10. As the pasta is nearing completion, reheat the garlic oil.
  11. Just before removing the pasta from the boiling water, add 1 cup of pasta-cooking liquid to the garlic oil and turn the heat to medium high.
  12. Reserve another cup of pasta-cooking liquid then drain the pasta.
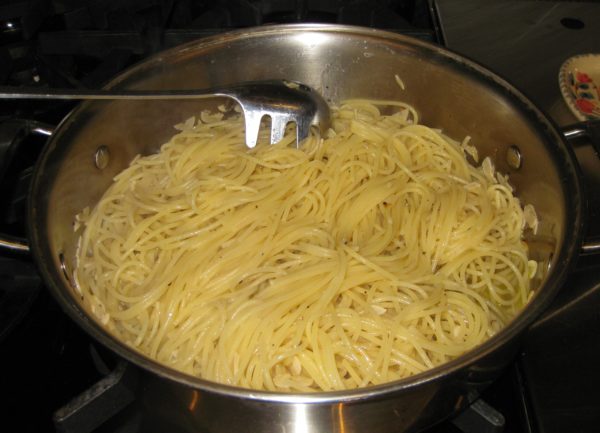
  13. Add the drained pasta to the pan with the garlic oil.
  14. Cook over medium to medium-high heat, stirring frequently, until the pasta is al dente. Add some of the reserved pasta-cooking liquid from time to time as needed.
  15. When the pasta is al dente, remove the pan from the heat. Sprinkle the parmesan cheese and parsley on top.
  16. Mix well to create a sauce by melting the cheese and emulsifying the oil and water. Add more of the pasta-cooking water, if needed, to coat the pasta.
  17. Stir in the 3 tablespoons of fruity or peppery extra-virgin olive oil for finishing.
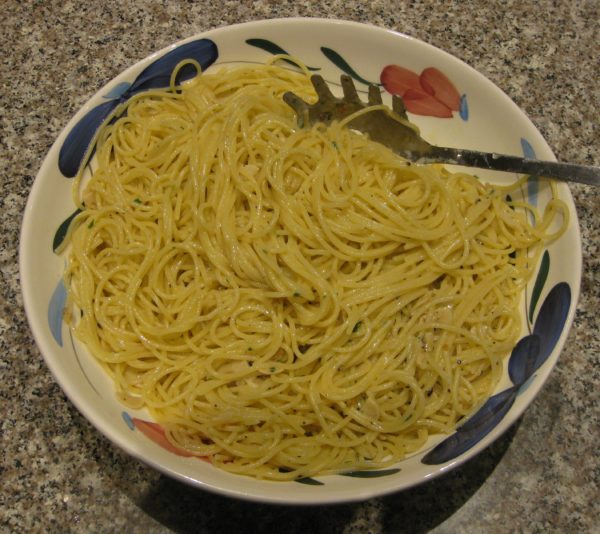
  18. Serve immediately with extra Parmesan cheese.
Recipe Notes

Since olive oil loses much of its distinctive flavor from heating, adding some at the end, when the dish is off the heat, improves the flavor. Usually I keep several types of olive oil that I just use for finishing in this way. They tend to have different flavor profiles. Usually I have a peppery one and a buttery one on hand. These oils are used in small quantities so their higher price tag is worth the flavor they add.

Copyright © 2017 by VillaSentieri.com. All rights reserved.

Share this Recipe

Tiella (Southern Italian Vegetable and Pasta Casserole)

September 18, 2017

When I was growing up, we mostly socialized within the extended family plus a very few close family friends (that’s you, Joe and Betty Slivosky!).

It was a time (the 60’s) and place (small-town Western Pennsylvania) where it was rare to call in advance of a visit. One just showed up. This usually happened in the evening after dinner, though almost never on Monday or Thursday when the stores downtown were open until 9 PM and we dressed and went shopping after dinner.

Everyone would sit around (usually in the kitchen) drinking coffee (with caffeine), chatting…and smoking. Oh, the smoking! Occasionally the men would drink beer but unless it was a holiday or celebration of some sort, hard liquor was a rarity.

On Sundays, visiting frequently occurred (or at least started) in the afternoon and there might be two or three stops before heading home.

I can’t tell you how many times I heard the same stories. It’s one of the ways I developed a connection with family members, like my maternal grandparents, who died when I was very young.

To be sure, sometimes my cousin Donna and I would abandon the adults and pursue some childhood activity but we still hung out in the kitchen much of the time.

Often times the conversation would veer towards food; things my grandmother would make, the huge platters of cannoli one of my great aunts would make, what was eaten on holidays, and on and on.

There was the oft-repeated reminder of how my grandfather could come home late at night with a group of friends and how my grandmother would cook for them near midnight. There were stories of my grandmother cleaning and cooking chicken feet. My mother would talk about the time she killed a chicken in the basement and it got away from her and ran, headless, around the room. My father would remind everyone that the only food he didn’t like was gnocchi.

Food was a central feature of our lives.

So was conversation.

There were also times I would just sit in the kitchen and chat with my mother for hours. Relatives and food were common topics of conversation. There were dishes my grandmother made that I heard about over and over but never tasted because my mother never made them for some inexplicable reason. One of them was a quickly sautéed veal chop with a pan sauce made of the drippings in the pan, crushed canned tomatoes, peas, and seasonings. Back in the days when I cooked veal, I actually made it. Now I do it with pork chops.

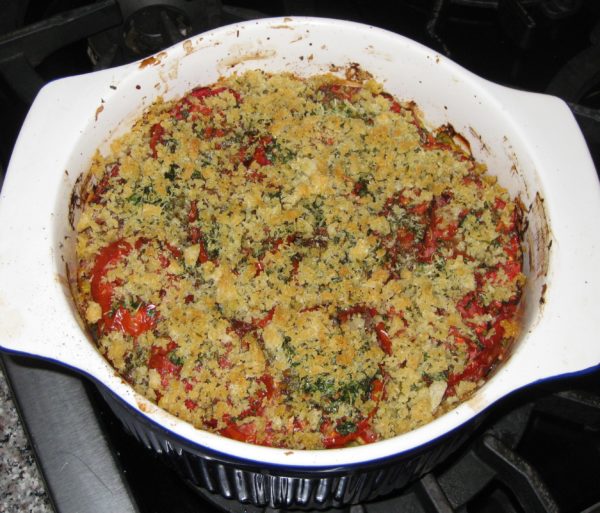
The other dish that stands out in my memory from these conversations is Tiella. My mother talked of it frequently but never made it. The instructions were basic, a layer of pasta, a layer of potatoes, a layer of zucchini, and a can of tomatoes crushed by hand and poured on top. The whole thing was then baked. There wasn’t much of a discussion of which seasonings to use or proportions of ingredients. It was just assumed it would have garlic (of course it would have garlic) and the herbs that were commonly used in our family. Proportions…well…it just needed to look “right.”

For the number of times my mother rhapsodized about this dish, I can’t figure out why she never made it.

The first time I tried to make it was in the early 1990’s at our little house on Griffin Street in Santa Fe. That first time around, it didn’t live up to the hype, for sure, but it christened the house in an odd way.

In November 1992 my mother, my husband’s mother, and my husband’s grandmother traveled to Santa Fe with us for Thanksgiving week. We looked at property and fell for a little (1151 square foot) house on Griffin Street. My mother was terminally ill at the time. When we got back home, my mother insisted that we use her money for the down payment, which we did. She kept saying that she wanted to live long enough to return to that house in the spring. It didn’t happen. She died in early January.

All of the kitchen gear, china, and glassware for the house on Griffin came from my mother’s house. So, it was fitting that I should make this dish for the first time using my mother’s kitchenware in a house that we owned thanks to her.

It took me many years of working (off and on) on the seasonings and proportions to get it to taste great. (Well, I think it does.) The only real liberty I took with the dish is to use fresh tomatoes rather than canned when I make this in the summer.


Follow us


Click HERE to join our mailing list and you’ll never miss a recipe again!

Print Recipe
Tiella (Southern Italian Vegetable and Pasta Casserole)
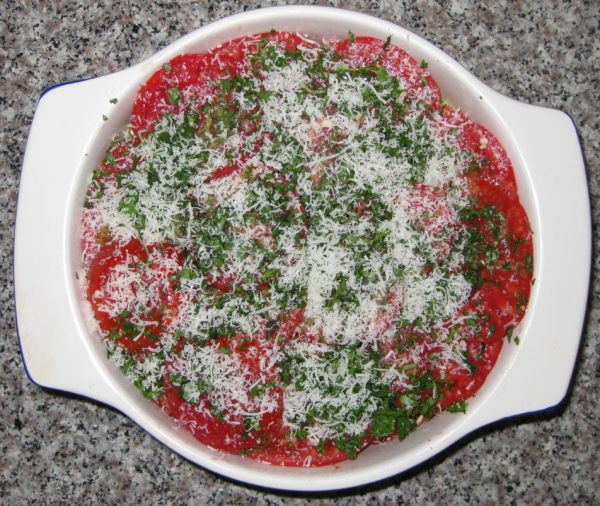
This is a wonderful late summer dish when tomatoes are at their peak. If you make it at other times, use a 28 ounce can of whole tomatoes in place of the tomato puree and fresh tomatoes. Pour the liquid in the can over the potatoes instead of the puree. Crush the tomatoes by hand, add the seasonings described for fresh tomatoes, and arrange the crushed tomatoes on top.
Votes: 0
Rating: 0
You:
Rate this recipe!
Prep Time 1 hour
Cook Time 2 hours
Passive Time 30 minutes
Servings
people
Ingredients
Prep Time 1 hour
Cook Time 2 hours
Passive Time 30 minutes
Servings
people
Ingredients
Votes: 0
Rating: 0
You:
Rate this recipe!
Instructions
  1. Preheat the oven to 350°F.
  2. Combine the olive oil and crushed garlic in a small sauté pan. Sauté garlic until lightly browned. Remove the garlic and reserve the oil.
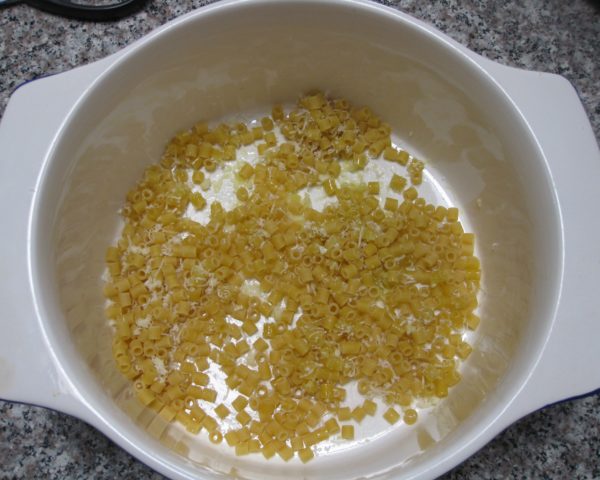
  3. Put the raw ditalini in the bottom of a deep, circular casserole, approximately 10 inches in diameter. The pasta should form a single layer with a fair amount of extra room for it to expand.
  4. Add 2 tablespoons of Parmesan cheese, ¼ of the minced garlic, and 2 tablespoons of the garlic oil and mix well.
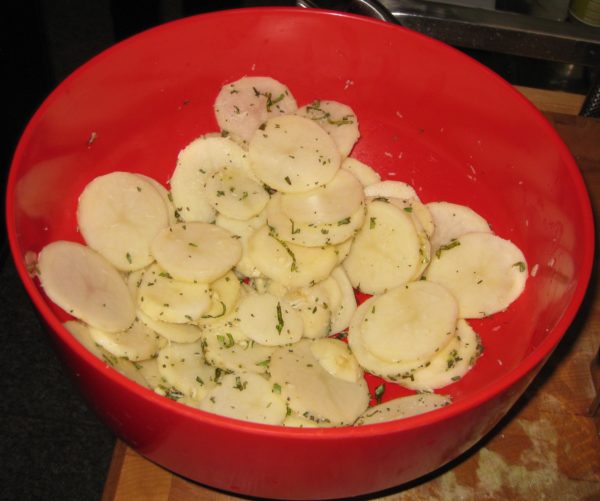
  5. In a bowl, toss the sliced potatoes with half the rosemary, ⅓ of the oregano, ¼ of the basil, 2 tablespoons of Parmesan cheese, ¼ of the minced garlic, 2 tablespoons of the garlic oil, and a generous amount of salt and pepper.
  6. Arrange the potatoes neatly in overlapping layers on top of the ditalini. Do not wash the bowl.
  7. Season the tomato puree with salt and pour over the potatoes.
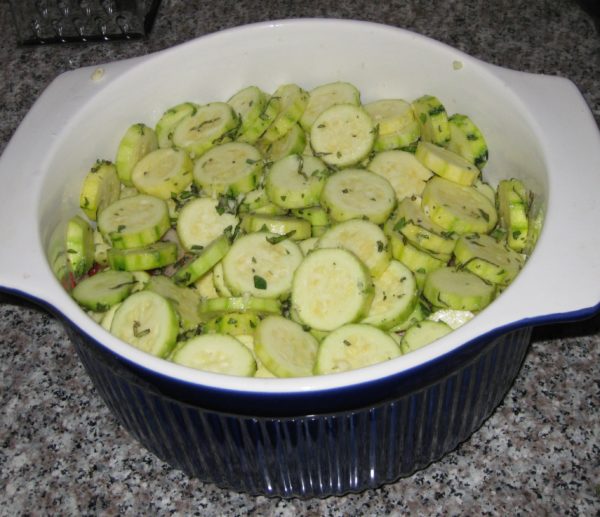
  8. In the same bowl used for the potatoes, toss the zucchini with the remaining oregano, ¼ of the basil, the remaining rosemary, 2 tablespoons of Parmesan cheese, ¼ of the minced garlic, 2 tablespoons of the garlic oil, and a generous amount of salt and pepper.
  9. Arrange the zucchini on top of the potatoes. Do not wash the bowl.
  10. Neatly arrange half the tomatoes on top of the zucchini. Season with half the remaining minced garlic, half the remaining basil, and salt and pepper.
  11. Arrange the remaining tomatoes on top and season with salt and pepper as well as the remaining garlic, basil, and all the parsley.
  12. Put the tiella in the preheated oven.
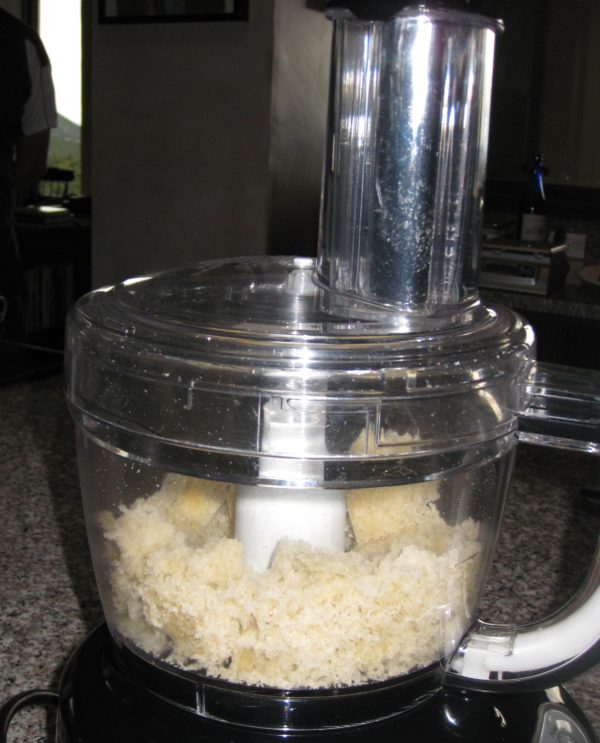
  13. Remove the crusts from several slices of day-old Italian or French bread. Whiz the bread in a food processor to make coarse crumbs.
  14. While the tiella bakes, toss the breadcrumbs with the remaining garlic oil in the bowl used for the potatoes and zucchini.
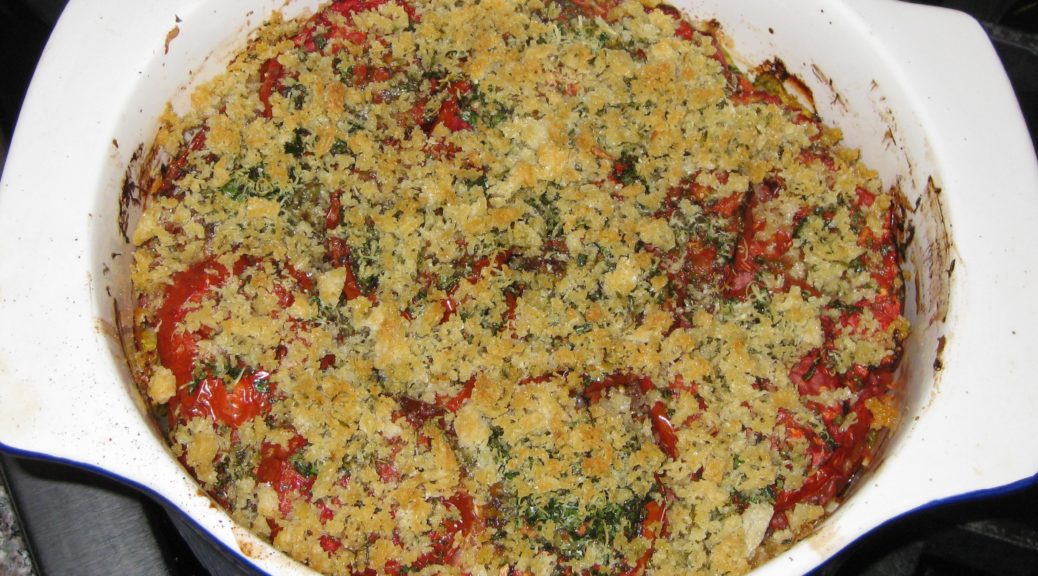
  15. After the tiella has baked for 90 minutes, sprinkle the oiled crumbs on top and bake till golden, approximately 30 minutes more.
  16. Allow to rest at least 30 minutes before serving. The tiella can be served warm or at room temperature. It can also be reheated in the oven briefly before serving, if desired.
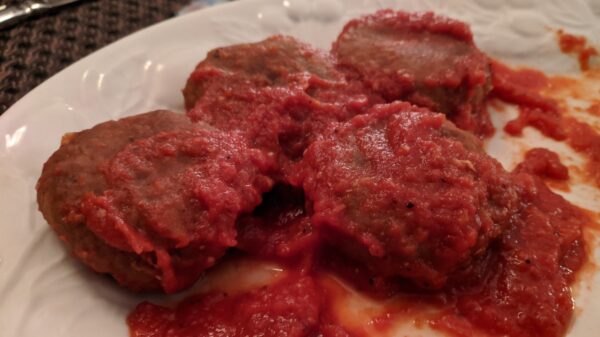
Recipe Notes

Here’s the link for my recipe for homemade tomato puree (passata di pomodoro).

Copyright © 2017 by VillaSentieri.com. All rights reserved.
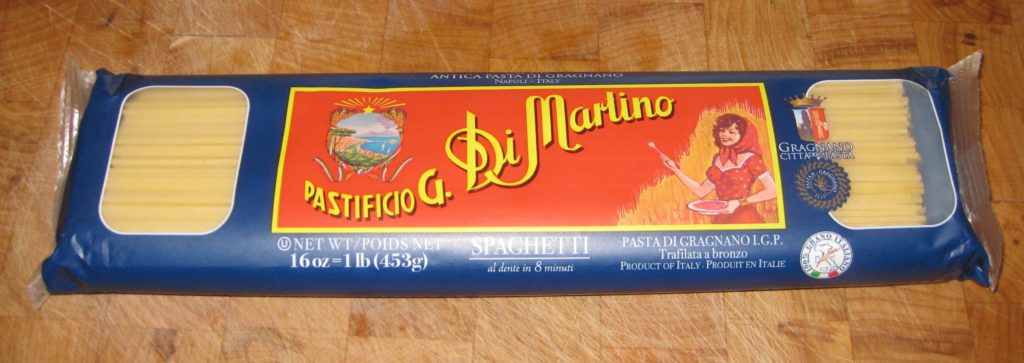
Share this Recipe

Salsicce con Cardone (Sausage with Cardoons)

February 17, 2017

We made our move to multi-generational living in 1998 when my husband’s parents moved into the Coach House at our estate in Chicago, The Henry Rohkam House.  (There are a couple pictures of the main house in a prior post.)

Pretty quickly we settled into a routine of having meals together.  When we went to work, the dogs went to Grandma and Grandpa’s (21 feet away in the Coach House) for the day.

My husband started gardening with his father.  A large piece of our one-third-of-an-acre property in Chicago’s Lakeview neighborhood was turned over to cultivation.  We had grapes, strawberries, corn, tomatoes, eggplant, sweet peppers, radicchio, arugula, leaf lettuce, Swiss chard, okra, hot peppers of various types, an array of herbs and other vegetables that varied year by year.  The fruit trees never did very well.  The kiwi thrived but never bore fruit.  One of the four kiwi was accidentally injured and died.  In retrospect, it was probably the male plant (there were three female and one male plant), hence no fruit.
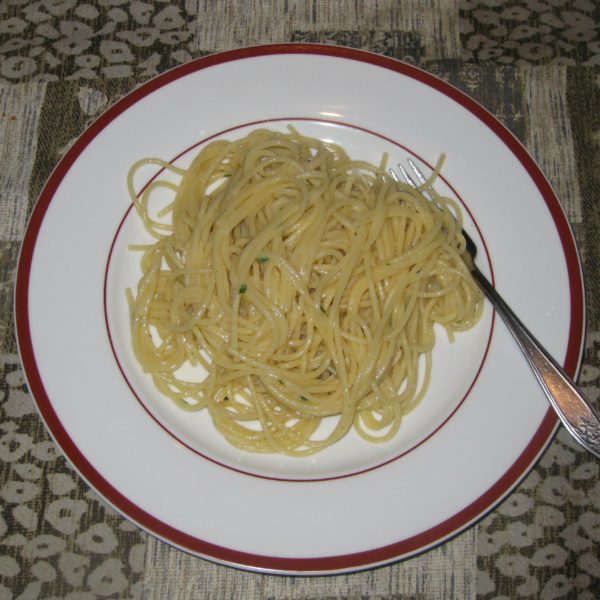
Every fall we canned and preserved foods in various ways.  We made jars of olives marinated in red wine vinegar and herbs from the garden.  We made herb-infused vinegar and olive oil.  We dried herbs for the winter.  We froze vats of tomato sauce.  I’ll admit to even freezing pesto which, while it doesn’t taste like its fresh-made cousin, is pretty awesome in the dead of a Chicago winter!

Some years there were enough strawberries to put up jam.  City squirrels can be quite bold, however.  I was standing alongside the garden one spring day when a squirrel, who had gone grocery shopping in our strawberry patch, literally ran over the top of my foot with a strawberry in his mouth on his way out of the produce isle.

The birds had Houdini-like skills.  Despite wrapping the grape arbor in yards of netting, the birds found their way in, decimated the grapes, and escaped.   The few grapes we were able to harvest were very sweet!

We built a temperature-controlled wine cellar in the basement of the Coach House.  My husband made wine for a few years but stopped when work got too busy.

I started cooking more often with my mother-in-law.  Every month or so, my husband’s grandmother, Noni, would come to visit for a weekend.  Noni was a marvelous cook.  Some dish always appeared during those weekends that I had never had before.  Sausage with Cardone was one of them.

For a vegetable that has been popular since the ancient Romans, I’m surprised I’d never hear of it.  I grew up eating sausage with peppers and onions.  Sometimes the sausage was cooked in a tomato sauce, sometimes not.  Cardone was a whole new thing!

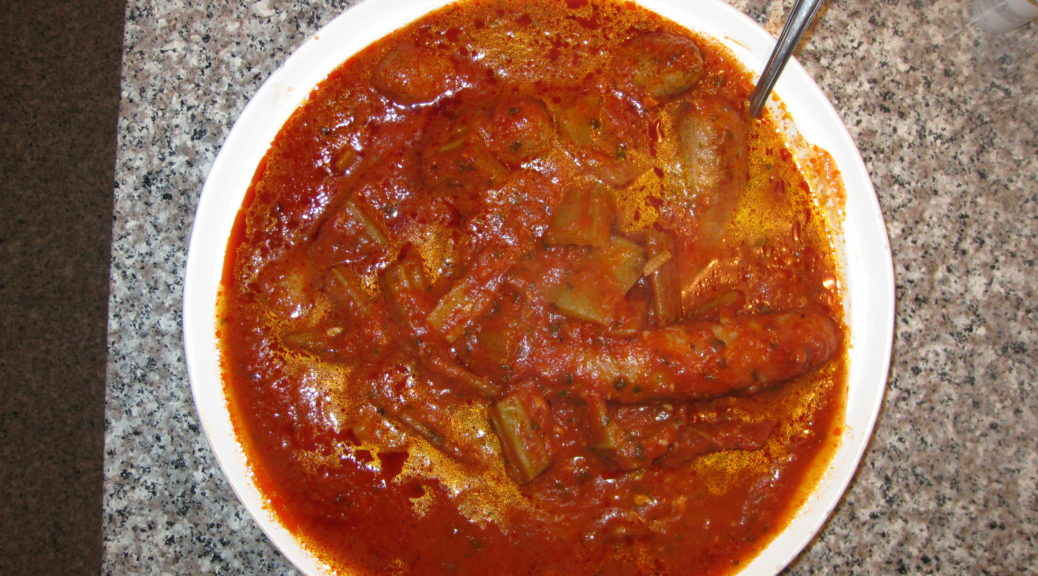
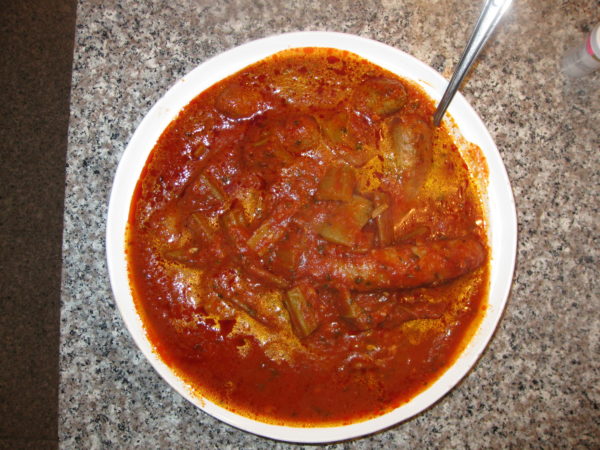
This goes really well with polenta but it’s equally good on its own.  Leftover sauce can be put on pasta or can accompany a frittata.  You may notice from the pictures that we didn’t use as much sausage as called for in the recipe.  We didn’t want leftover sausage but that didn’t mean we didn’t want leftover sauce!  Sadly, the cardone usually all gets eaten on the first go-around but on those rare occasions where it doesn’t, I like to use it as a sandwich filling for lunch.

Print Recipe
Salsicce con Cardone (Sausage with Cardoons)
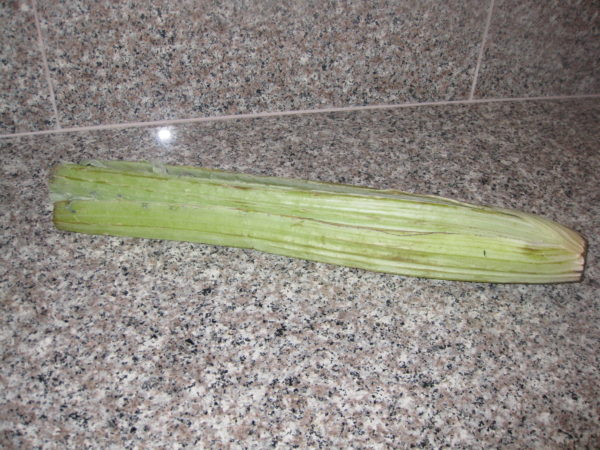
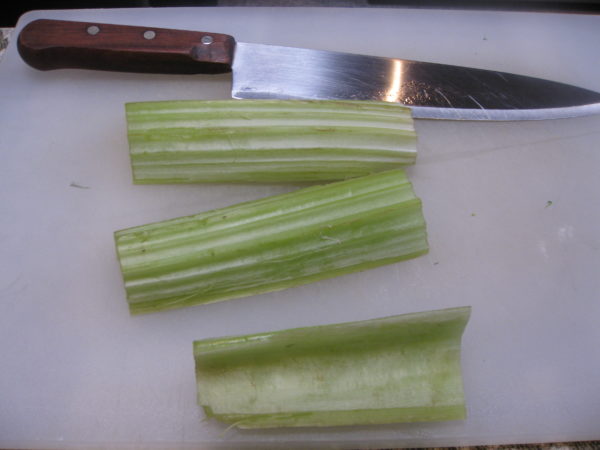
Cardone looks like oversized celery. It is giant, about 2 feet long as sold trimmed in the grocery store. It is related to the artichoke and was popular among the ancient Romans. Cardone should always be served cooked. Leaves should be removed and not eaten.
Votes: 0
Rating: 0
You:
Rate this recipe!
Course Mains, Meats
Cuisine Italian
Prep Time 15 minutes
Cook Time 2 1/2 hours
Servings
people
Ingredients
Course Mains, Meats
Cuisine Italian
Prep Time 15 minutes
Cook Time 2 1/2 hours
Servings
people
Ingredients
Votes: 0
Rating: 0
You:
Rate this recipe!
Instructions
  1. The starting point: cardone from the market.
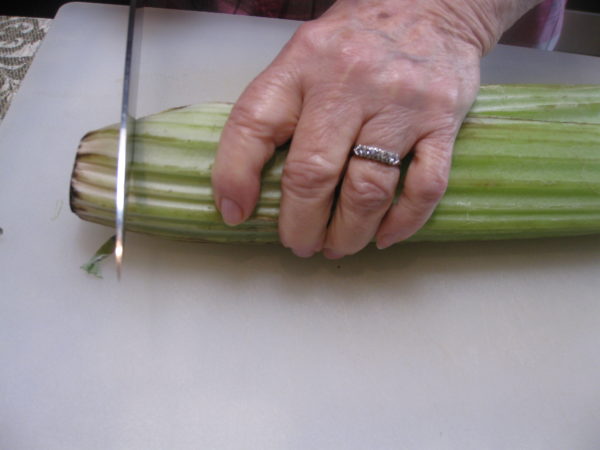
  2. Cut off the bottom of the cardone.
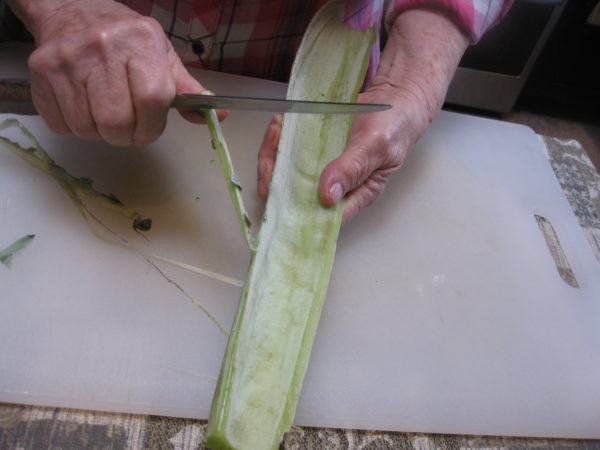
  3. Using a vegetable peeler (or knife if you are my mother-in-law), remove the leafy edges of the cardone.
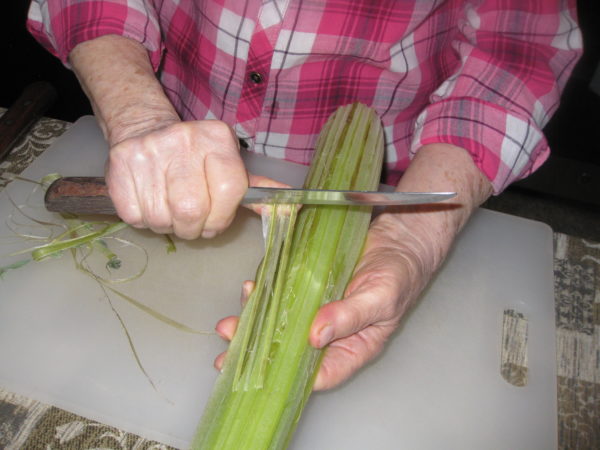
  4. Remove any stringy parts of each rib.
  5. Cut the ribs into pieces approximately 4 inch long. Wash well.
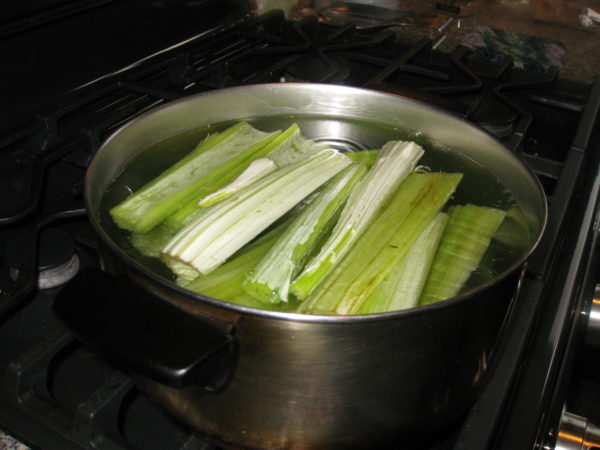
  6. Bring 3 quarts of water to a boil. Add 3 tablespoons of salt and a pinch of baking soda. Add the cardone and boil until you can pierce it relatively easily with the point of a sharp knife. Do not overcook the cardone as it will be cooked further with the sausage.
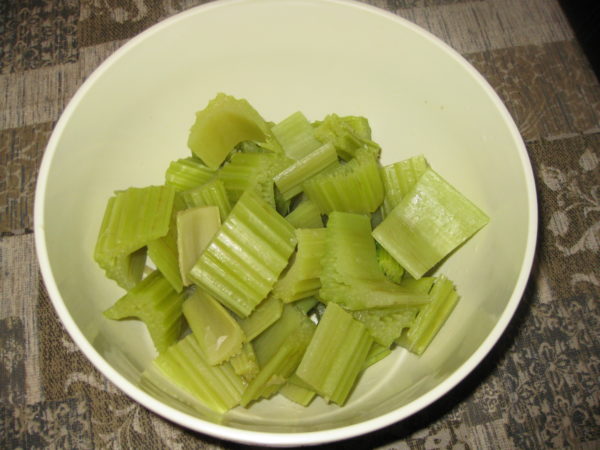
  7. Remove the cardone from the water. Stop cooking by putting the cardone in a bowl of ice water. When cold, cut into pieces approximately 1 ½ inches long and reserve.
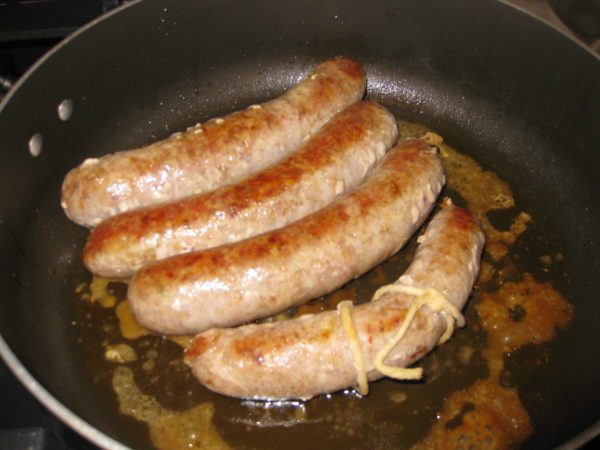
  8. If the sausage is not in links, cut into pieces approximately 4-5 inches in length. Using the tines of a fork, pierce the skin of each piece of sausage in several places.
  9. Heat the olive oil in a large, heavy-bottomed sauté pan or a wide, shallow casserole. Add the sausage and brown well on all sides.
  10. Remove the sausage from the pan.
  11. Add the onions, garlic, parsley, and rosemary to the sausage drippings in the pan. Sauté until the onions are soft and golden.
  12. Add the wine, if using. Allow wine to mostly cook away then add tomato puree and water.
  13. Return the sausage to the pot with the sauce. Season with salt and freshly ground pepper. Simmer, partially covered, for about an hour.
  14. Add the cardone. Taste for seasoning. Simmer, partially covered, until the cardone is tender, approximately 30-45 minutes.
  15. Pour into a serving dish and bring to the table.
Recipe Notes

Copyright © 2017 by VillaSentieri.com. All rights reserved.

Share this Recipe

Merluzzo in Umido (Cod in Light Tomato Sauce)

January 4, 2017

The first time I had Merluzzo in Umido was November 1992.  My husband and I took my mother, his mother, and his fraternal grandmother to Santa Fe for a week over Thanksgiving.  At the time, we were living in Chicago.  We rented an ancient adobe house off Garcia Street.  The house didn’t have any central heat though it did have a frightening array of heating devices that included a kiva fireplace, a direct-vent gas heater in the living room, a portable electric heater in one of the bedrooms, wall-mounted electric radiant heaters in the bathrooms, and nothing in the kitchen.  If the oven wasn’t on, the kitchen was the coldest room in the house as it had three outside walls and a door that didn’t seal very well.

Of course, it was reported to be the coldest winter that Santa Fe had experienced in 100 years! In addition to cold, there was lots of snow. And there we were, in a drafty old adobe house with no central heat enjoying a week with the likes of The Golden Girls!

We had a blast.

We had been house hunting in Santa Fe since April of that year.  On that November trip we saw several houses we liked.  We spent a few evenings rating each of the houses on an array of factors using a spreadsheet.  (In my professional life, we would have called this a prioritization matrix or selection grid. It’s a technique I’ve taught to hundreds of health care professionals over several decades.)  One afternoon we all piled into the car to look at the two finalists in the property hunt.  We were uncertain which one to buy.  Not so the women.  A little house on Griffin Street was the undisputed, hands-down favorite.  Deal done!

We put in an offer and closed in January.  For most of December my mother kept saying that she wanted to go back to Santa Fe and stay in the house in the spring.  We did a bit of remodeling and moved into the house in March.  Unfortunately, my mother died in January, shortly before we closed on the house.  She never got to experience her dream of returning to Santa Fe.  We had that house for more than nine years before we moved into a much larger Santa Fe property in Ricardo-Legorreta-designed Zocalo.  After Zocalo, we built and moved into Villa Sentieri overlooking the city.

I frequently think of that trip.  It was memorable in so many ways.  We found our first house in Santa Fe.  I got to spend quality time with my mother in the last weeks of her life.  My husband and I had interviews to get our medical licenses in New Mexico.  (It’s the only time either of us has been personally interviewed for a medical license!).   And, I learned how to make Merluzzo in Umido, one of many recipes that my husband’s grandmother brought with her from Italy.

Print Recipe
Merluzzo in Umido (Cod in Light Tomato Sauce)
If possible, by large filets of cod and portion them at home. Three pounds is enough for eight people. The advantage of portioning the fish at home is that you can make some smaller pieces for individuals with smaller appetites. Cod is a perfect fish for this dish because it is forgiving in terms of being overcooked. However, any firm, white, non-oily fish will taste great. I used a 15-inch rondeau to cook the cod. It held the fish in a single layer. If you don’t have a pan large enough to hold the fish in one layer, make the sauce in a single sauté pan then divide it among two different pans to cook the fish.
Votes: 0
Rating: 0
You:
Rate this recipe!
Cuisine Italian
Prep Time 20 minutes
Cook Time 1 hour
Servings
people
Ingredients
Cuisine Italian
Prep Time 20 minutes
Cook Time 1 hour
Servings
people
Ingredients
Votes: 0
Rating: 0
You:
Rate this recipe!
Instructions
  1. Cut the cod into 8 to 10 serving pieces. Though you can cook whole filets, it will be easier to get the fish out of the pan if cut into portions.
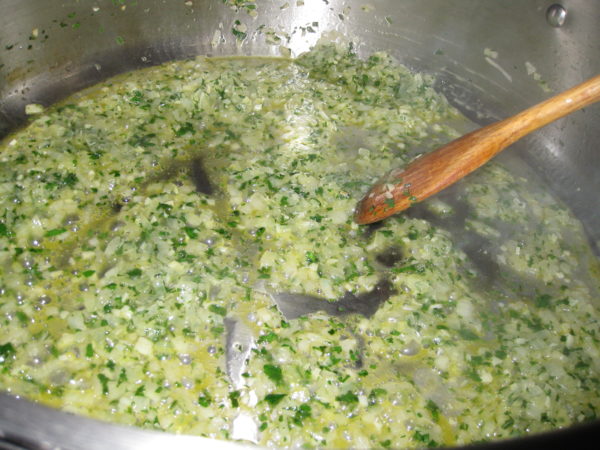
  2. In rondeau large enough to hold the fish in one layer, sauté the onion and a sprinkling of salt in the olive oil until transparent and slightly golden but not brown.
  3. Add the garlic and sauté until fragrant, about 1 minute.
  4. Add parsley and some freshly ground black pepper. Sauté for a minute or two. The smell of parsley should become noticeably more potent. Do not brown the ingredients of the pan.
  5. Add the wine and cook briskly until the wine evaporates.
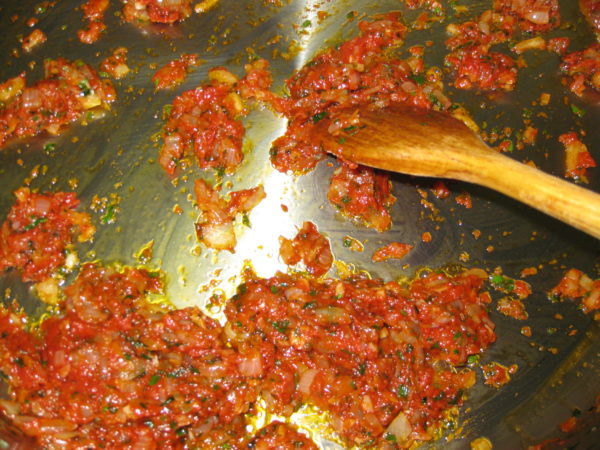
  6. Add the tomato paste. Sauté, stirring frequently, until it gets ever so slightly darker and begins to smell sweet. This will take 2-3 minutes.
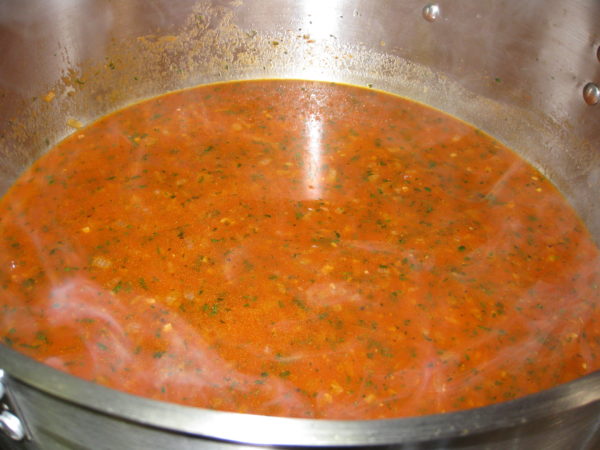
  7. Add the water, oregano, basil and additional salt and pepper to taste. Boil gently, with the cover slightly askew for 20-30 minutes. The sauce will thicken. If it becomes too thick, add a little additional water. However, the juices from the fish will thin the sauce so it is better for the sauce to start out too thick rather than two thin. The sauce can be made ahead to this point.
  8. With the sauce at a medium boil, add the fish, skin side down. Season with salt and pepper. Cover the pot tightly and cook for approximately 20 minutes until the fish cooks through an flakes easily. The length of time will depend on the type of fish, thickness of the portions, and elevation. Do not turn the fish but occasionally spoon some of the sauce over the top of the cooking fish.
  9. Taste the sauce and adjust seasoning. If the sauce it too thick thin with a little water. If it is too thin, boil it briskly after removing the fish.
  10. Put the fish on a deep serving platter. Pour the sauce over the fish and serve.
Recipe Notes

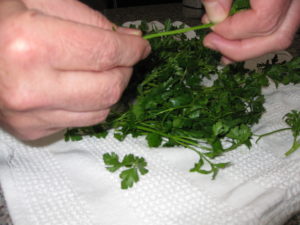
Parsley stems can be bitter.  When adding parsley to a recipe, I only use the leaves and very tender stems.  To do this, I hold the end of the parsley stem in one hand and slide the stem between the thumb and finger of the other hand.  When my fingers reach the leaves, I pinch off the stem and discard it.  This makes quick work of the parsley and removes any chance of bitterness from the stems.

Copyright © 2017 by VillaSentieri.com.  All rights reserved.

Share this Recipe