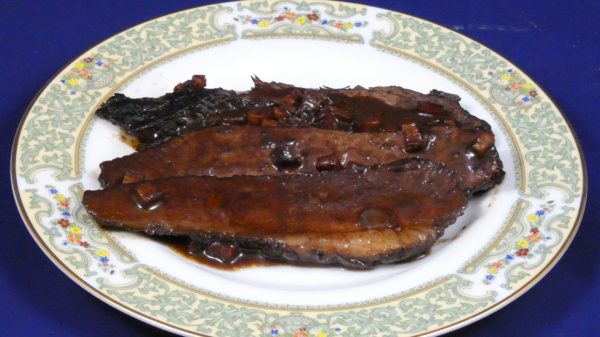
Brasato al Barolo (Beef Braised in Red Wine)

January 21, 2021

Pre-pandemic my husband randomly chose a region of Italy.  Most of our meals for the month were traditional foods of that region.

In response to the pandemic, I reduced my marketing, with rare exception, to one supermarket trip once a week.  Obtaining the ingredients to create very specific regional Italian cuisine became difficult with such a shopping regimen.  Meal planning, though still Italian, reverted to dishes for which I could obtain the necessary ingredients at the supermarket supplemented by deliveries from Amazon.
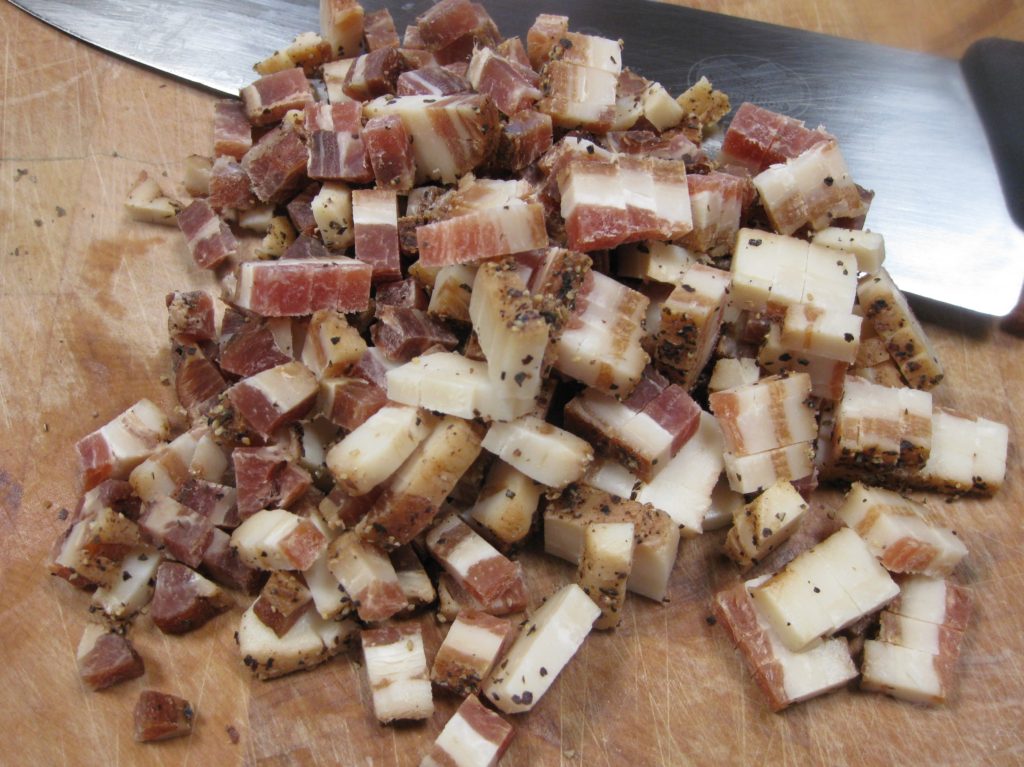
Home-cured pancetta diced and ready to be cooked. Good quality pancetta can be purchased. Be sure to have it sliced thickly.

Amazon is my source for Italian flour, several types of which I use for making pasta, bread, pizza and cake.  Carnaroli rice can be difficult to obtain under the best of circumstances but is available on Amazon.  Some of the ingredients for gelato are impossible to find in retail shops making Amazon the go-to source.

Other items, like specific types of cheeses or cured meats or olives, can only reasonably come from local retail markets.  The same is true for produce and an array of other ingredients.  One marketing trip a week to a general supermarket made it impossible to gather many of the required ingredients so the one-region-a-month-cooking-and-eating regimen fell victim to the pandemic, at least temporarily.


Follow us on your social media platform of choice


I made food from Piemonte (Piedmont) while our region-a-month plan was still active.  Piemonte has cows, so beef and dairy figure prominently in the cuisine.  Piemonte is also home to Barolo, among other wonderful wines.

Piemontese food does not shy away from calories or flavor!

This dish makes use of two of the stars of Piemontese cuisine, beef and wine.  The most traditional recipes call for a whole filet.  The wine is traditionally Barolo.
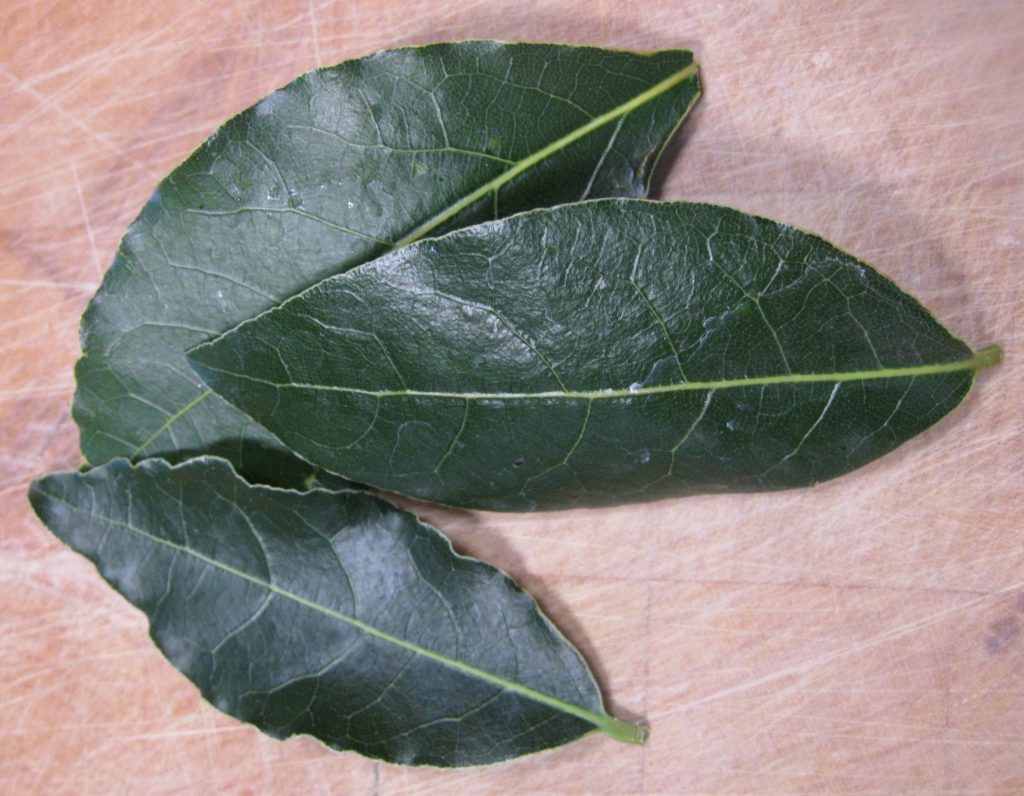
Fresh bay leaves have tremendously more aroma than dried ones.

There was a time when Barolo was affordable.  It is no longer a budget-friendly wine and certainly not one that I would use to braise beef in, even if it’s filet.  If you’re interested in how Barolo became so well-known, watch the movie Barolo Boys.

It’s rare to find a modern recipe that simply specifies Barolo as the red wine.  Even when the traditional name of the dish, Brasato al Barolo, is used, the wine is rarely Barolo.  Calling this Brasato al Vino would be more accurate but that name doesn’t really convey the historic context of the dish.


Join our mailing list and you’ll never miss a recipe again!


I’ve made this with filet that I dutifully larded with my home-cured pancetta.  While the taste was good, the texture of filet after braising was not good, even with the larding.

After that first attempt, I decided to use a cut more commonly used for long, slow, moist cooking even if it was not as high-brow as filet.  Once I made that decision, I started doing recipe research that stretched beyond my several very traditional multi-volume sets of Italian regional cuisine published in Italy in Italian.  I discovered that other (iconoclastic English-speaing) cooks had made the same shift to “lesser” cuts of meat.

I particularly like brisket that’s been braised though a nicely marbled chuck roast would work too.
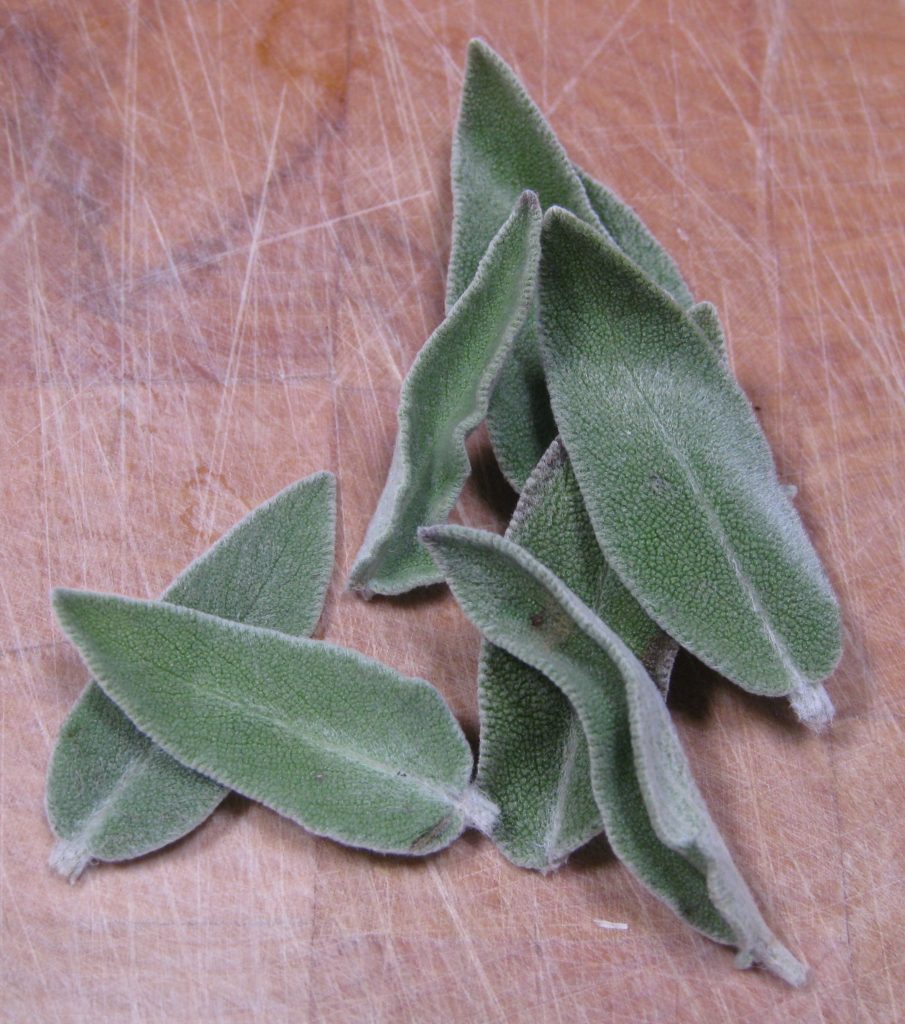
Fresh sage leaves are better than dried when it comes to flavor.

The dish was a hit when made with brisket.  Truth be told, the family didn’t care to ever have it again when I made it with filet.  With the textural change from the brisket it’s become part of our standard menu rotation.

This is a perfect dish for winter.  It’s great for entertaining as it is actually better if made the day before and reheated just before serving.

Oh, and if you actually make it with Barolo, please invite me to dinner!
Print Recipe
Brasato al Barolo (Beef Braised in Red Wine)
Since Barolo is so expensive, most contemporary recipes call for another full-bodied red wine. I have used Zinfandel as well as an Argentine wine that was 60% Merlot and 40% Syrah with great success. The meat can be served without refrigerating first but refrigeration makes it easier to get neat slices. If not refrigerating, pour the hot sauce on the sliced meat and serve immediately. If you don’t have a stash of garlic oil on hand, smash two cloves of garlic and sauté in the olive oil until golden then remove the garlic.
Votes: 0
Rating: 0
You:
Rate this recipe!
Course Mains, Meats
Cuisine Italian
Prep Time 30 minutes
Cook Time 4 hours
Passive Time 24 hours
Servings
people
Ingredients
Course Mains, Meats
Cuisine Italian
Prep Time 30 minutes
Cook Time 4 hours
Passive Time 24 hours
Servings
people
Ingredients
Votes: 0
Rating: 0
You:
Rate this recipe!
Instructions
  1. Combine beef with the onion, carrot, celery, garlic, and wine. Cover and refrigerate overnight.
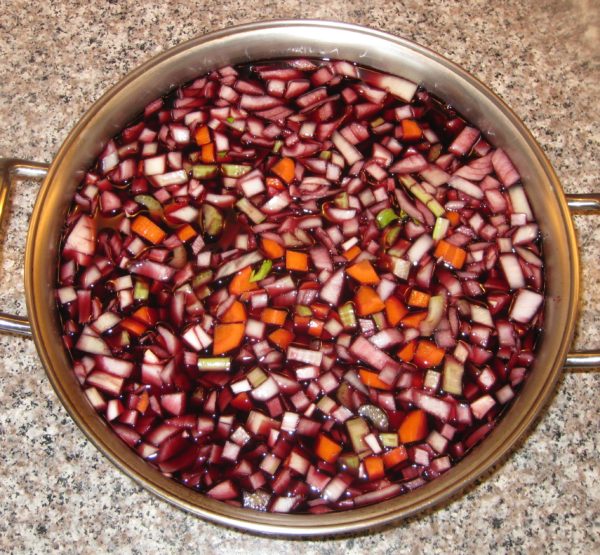
  2. The next day, remove the beef and wipe dry.
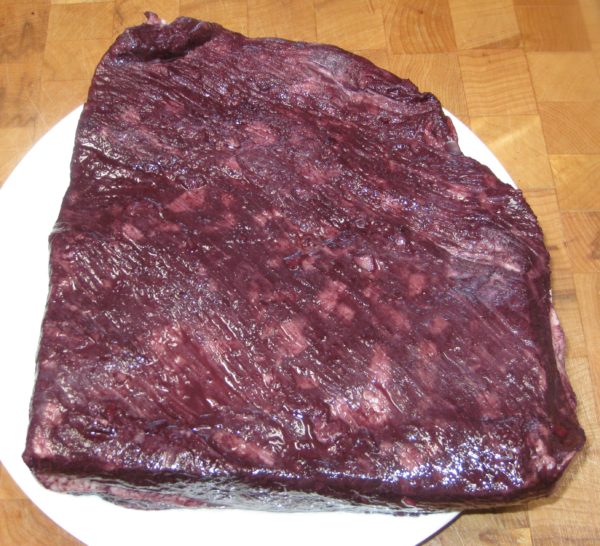
  3. Strain the marinade. Reserve the solids and liquid separately.
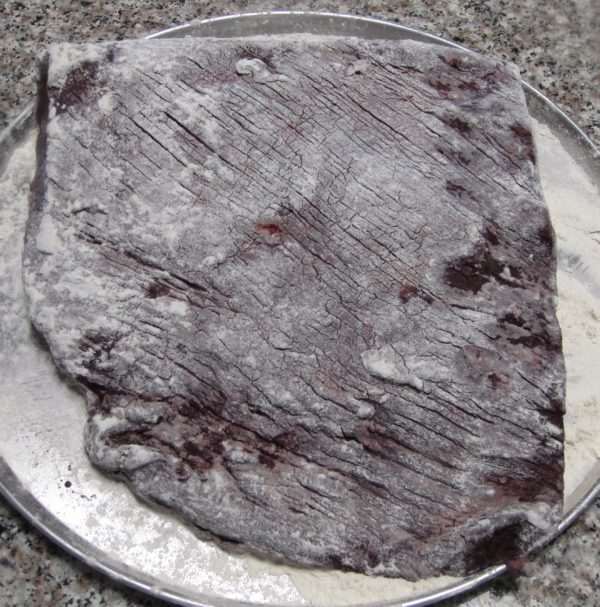
  4. Dredge the beef in flour.
  5. Sauté pancetta in garlic oil over low heat until it renders its fat and browns. Remove pancetta and reserve.
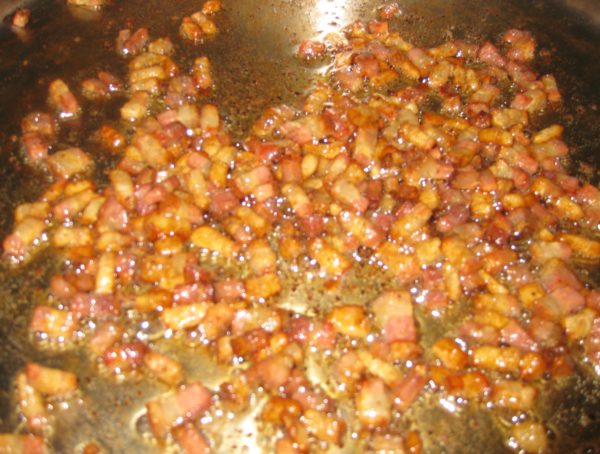
  6. Brown the beef in the rendered fat. Remove the beef.
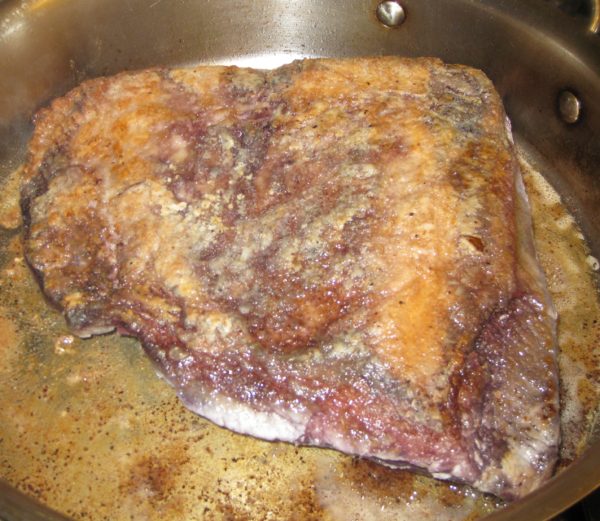
  7. Add the vegetables to the pan and sauté until softened and the onions are translucent.
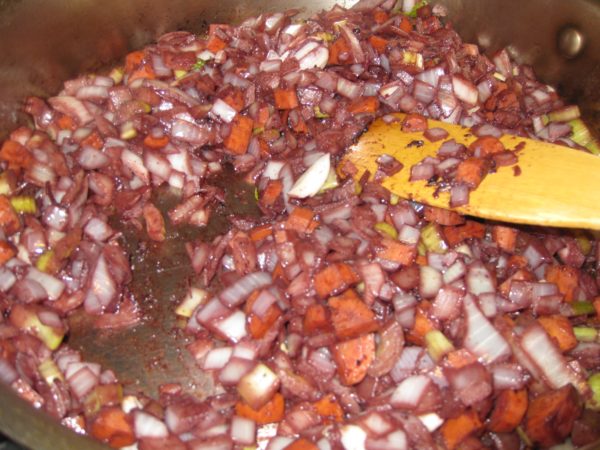
  8. Add the tomato paste. Sauté the tomato paste briefly to darken and sweeten it.
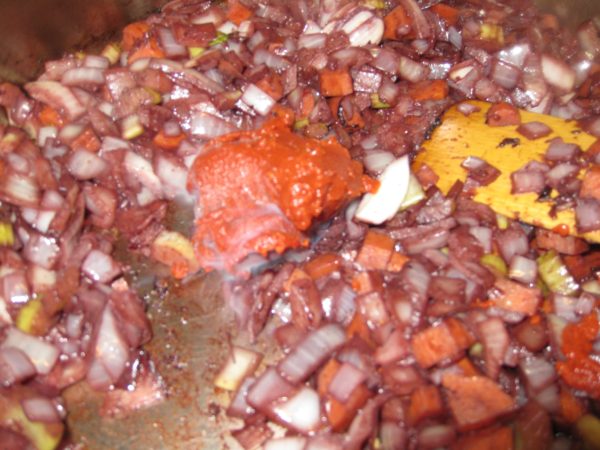
  9. Add the reserved marinade to the pan along with the bay leaves, cloves, rosemary, sage leaves, cinnamon, juniper berries and peppercorns. Bring to a boil, scraping up any browned bits.
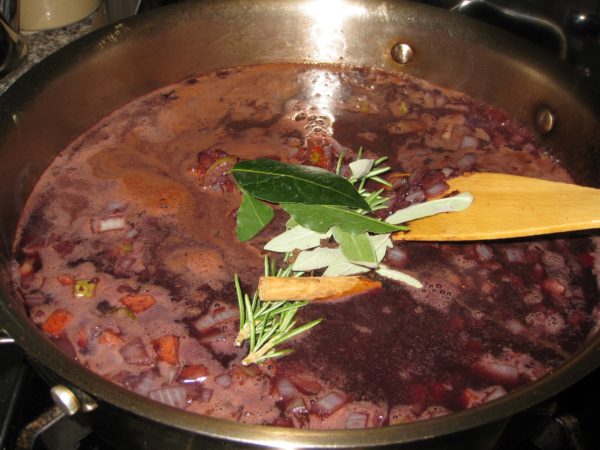
  10. Add the beef. Season with salt. Braise till tender, partially covered, approximately 3 hours.
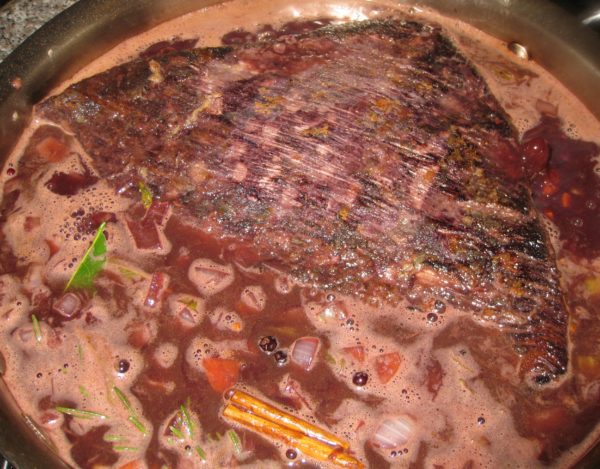
  11. Remove the beef and refrigerate, tightly covered.
  12. Strain the braising liquid. Discard the solids and refrigerate the liquid.
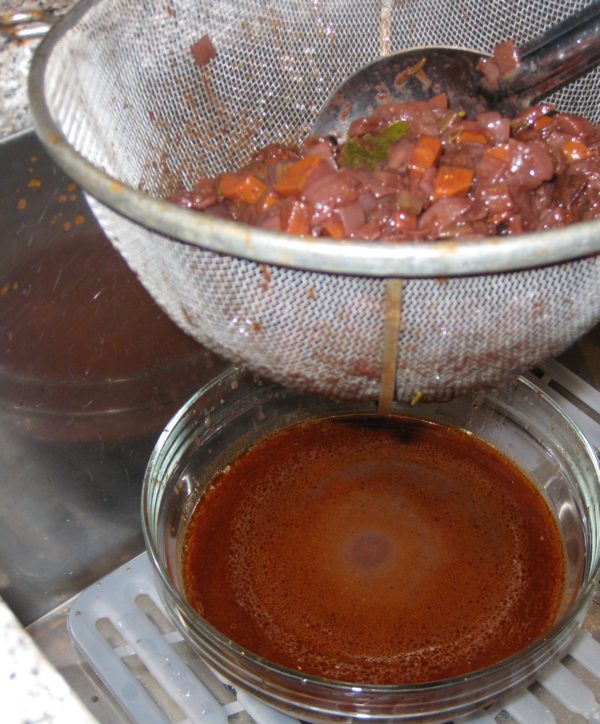
  13. When the beef is cold, slice it against the grain and put in an ovenproof pan or casserole.
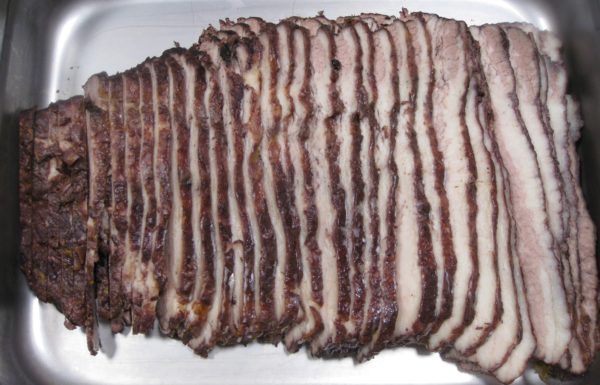
  14. Skim the chilled braising liquid.
  15. Heat the de-fatted braising liquid with the reserved fried pancetta.
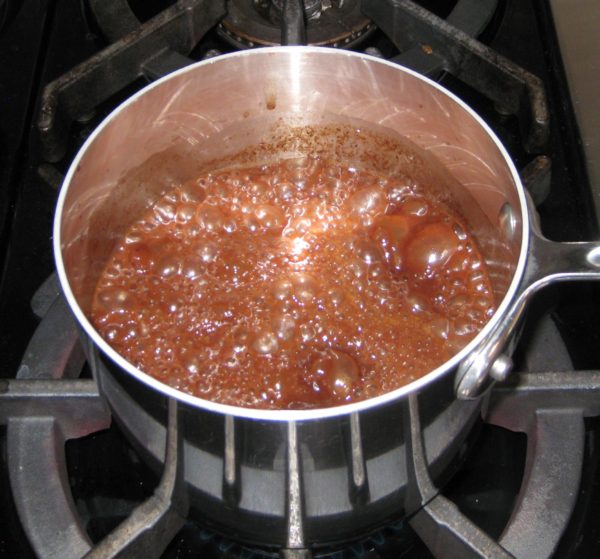
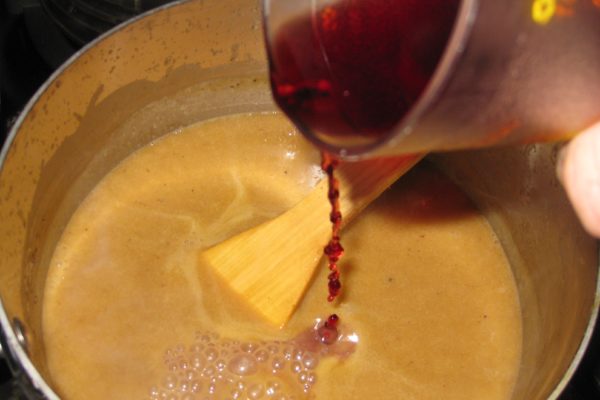
  16. When the braising liquid comes to a boil, remove from heat and add the Marsala. Pour the liquid over the beef, cover the pan, and heat at 350°F for approximately 1 hour.
Recipe Notes

Copyright © 2021 by Villa Sentieri, LLC. All rights reserved.

Share this Recipe

Thanksgiving Gravy

November 7, 2019

I’m not much of a turkey person.

If it were up to me, I’d probably never make turkey, except for the fact that turkey is a GREAT excuse to make killer stuffing and gravy.

OK, OK, those of you who know me know that I’m enough of a traditionalist that I’d probably still make turkey on Thanksgiving, with or without stuffing and gravy, because it’s, well, traditional.

Turkey aside, though, I absolutely LOVE stuffing and I LOVE gravy.

After Thanksgiving, I carefully hide the leftover stuffing in the fridge and keep it all for myself.  There usually isn’t much leftover so I get maybe two days of snacking on cold stuffing.  And it has to be cold, not warm, with a bit of added salt because the taste of salt is dulled by the coldness of the stuffing.


Click HERE to join our mailing list and you’ll never miss a recipe again!


As for the gravy, when I was a kid, I liked gravy so much that I would stir enough into my mashed potatoes that they became runny and spread out over my plate!  I don’t do that anymore but I still love gravy.

I love gravy so much that I roast poultry specifically to make gravy then discard the poultry because I’ve browned it to a fare-thee-well to get a really flavorful gravy.  But I only do that once a year—on Thanksgiving—hence the name Thanksgiving gravy.

When I was growing up, my parents hosted Thanksgiving dinner.  My Aunt Margie and Uncle Joe hosted Christmas Eve dinner.

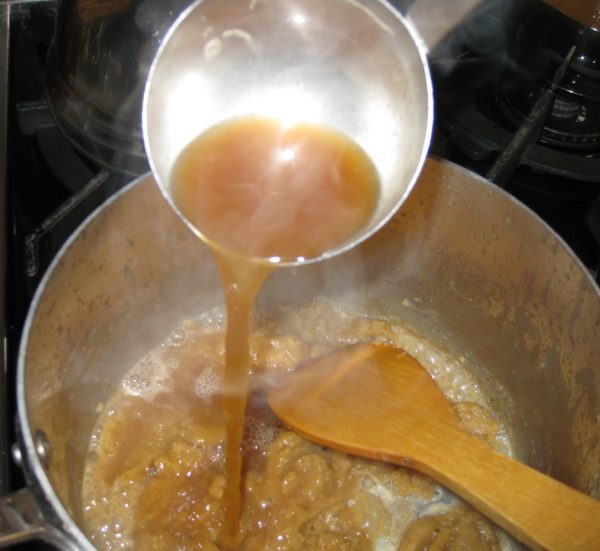
On Thanksgiving, while my mother and Aunt Margie were getting everything ready to bring to the table (everything included a full Italian meal with sausage, meatballs, lasagna, etcetera alongside a full traditional American Thanksgiving meal!) my Aunt Mamie would make gravy from the pan drippings.


Follow us on your social media platform of choice


From my current vantage point, however, there is a very limited amount of gravy that can be made that way, otherwise it doesn’t have enough meaty goodness.  Though I have to say that Aunt Mamie did a great job of making gravy.  Hers was the one that I most often stirred into my mashed potatoes.

The search for lots of meaty-tasting gravy is what got me started on the path of roasting poultry a few days in advance simply to make a brown stock to use as the base for my gravy.

I guess, in reality, my gravy is more of a variation on French brown sauce (Sauce Espagnole) with added pan drippings than traditional American-style gravy but it packs the flavor that I expect from good gravy.

If there’s any leftover gravy, I warm it with some cream and sautéed mushrooms and then gently reheat leftover turkey in the sauce.

Print Recipe
Thanksgiving Gravy
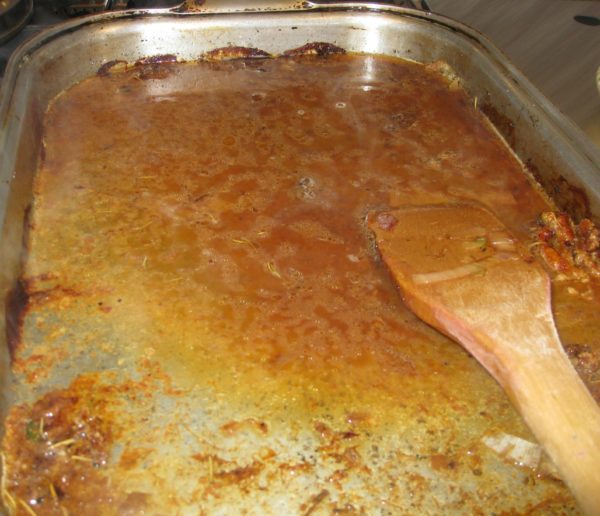
Roasting poultry to make a flavorful stock creates a gravy with an extra punch of flavor. Turkey wings and necks are ideal but chicken and Cornish hen work very well, too. Whatever poultry you use, cut it into lots of pieces to create more surface area for browning. I use a lot of Parmigiano Reggiano cheese and I put all the rinds in a container in the freezer. I use one whenever I make stock or broth, as I do for the stock for this gravy. It is not necessary to peel the onions and garlic.
Votes: 0
Rating: 0
You:
Rate this recipe!
Prep Time 30 minutes
Cook Time 11 hours
Passive Time 12 hours
Servings
cups
Ingredients
Brown Stock
Prep Time 30 minutes
Cook Time 11 hours
Passive Time 12 hours
Servings
cups
Ingredients
Brown Stock
Votes: 0
Rating: 0
You:
Rate this recipe!
Instructions
Brown Stock
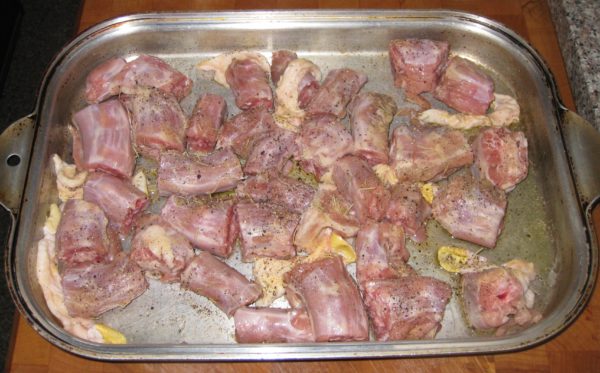
  1. Cut the turkey or other poultry into chunks. Put the cut-up turkey into a heavy roasting pan. Mix with ¼ cup of extra-virgin olive oil. Season generously with garlic powder and salt.
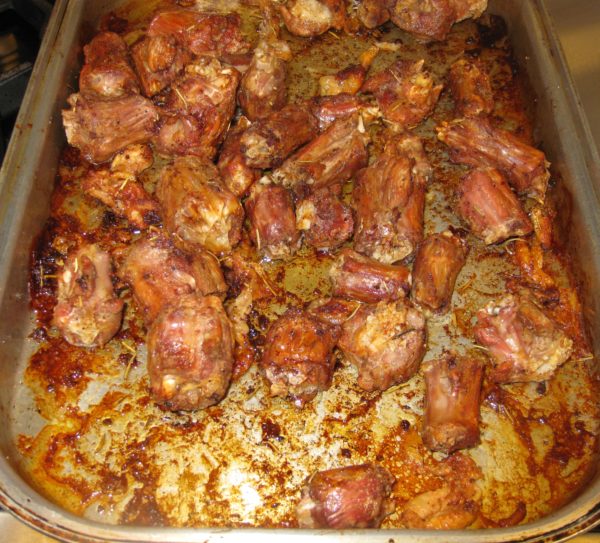
  2. Roast the turkey at 425°F until dark brown, turning often, 1½ to 2 hours.
  3. Meanwhile, in a heavy-bottomed stock pot, large enough to hold all the ingredients, sauté the carrots and celery in ¼ cup of extra-virgin olive oil over high heat.
  4. As the carrots and celery begin to brown, add the onions and garlic.
  5. Continue cooking, adjusting heat to medium if necessary, to create nicely browned vegetables and fond without burning.
  6. When the vegetables are brown, add 1/2 cup of red wine and 1 cup of water to stop the cooking and set the pot aside until the turkey is ready.
  7. When the turkey is brown, add it and any pan drippings to the stockpot with the vegetables.
  8. Using some of the water, deglaze roasting pan and add the liquid to the stockpot. All these brown bits are important for flavor.
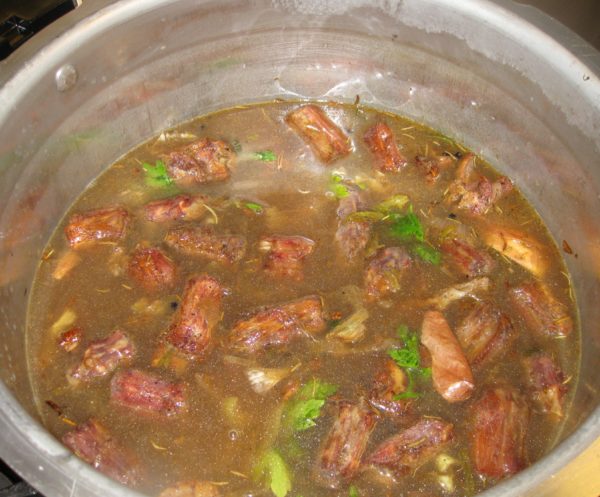
  9. Add the bay leaf, rosemary, sage, parsley, whole cloves, Parmigiano Reggiano cheese rind, if using, black pepper, and enough water to cover generously. Bring to a simmer and simmer, partially covered for six hours, stirring occasionally.
  10. Strain and refrigerate the stock. The stock may be made up to three days in advance.
Gravy
  1. Skim the fat from the top of the stock. Heat the fat to cook off any water. Measure ¾ cup of melted fat and reserve. Add butter, if necessary, to make ¾ cup.
  2. Gently boil the skimmed stock to reduce it to about six cups, if necessary.
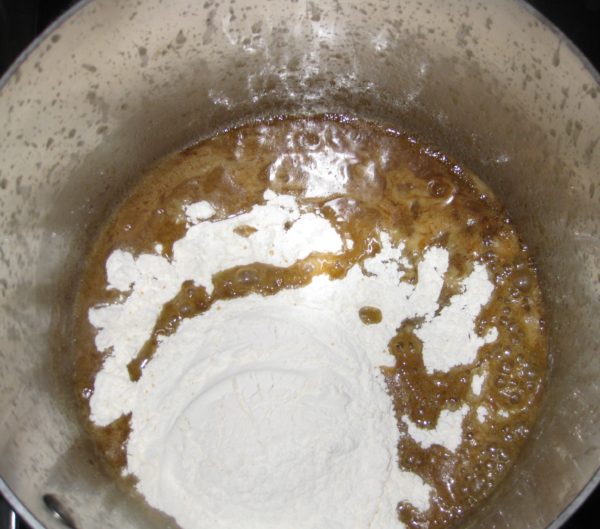
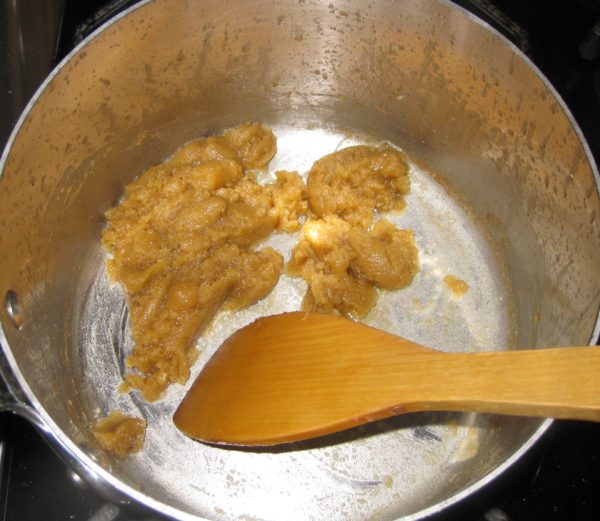
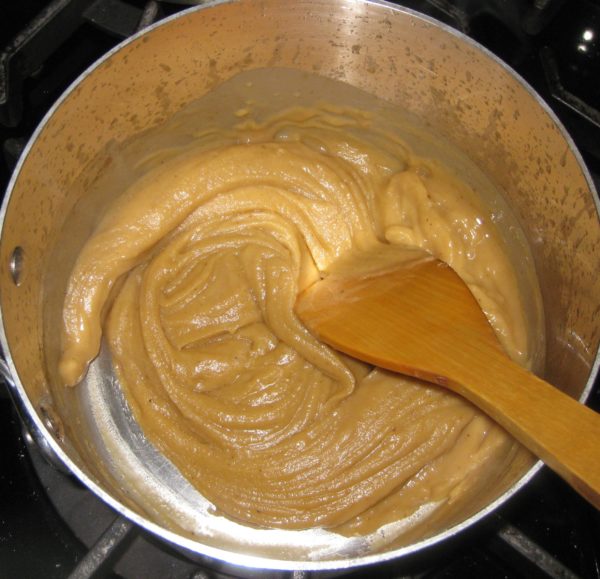
  3. Meanwhile, in a heavy-bottomed saucepan, gently brown the flour in the fat from the stock.
  4. Add the six cups of hot stock, approximately ¾ cup at a time, stirring well after each addition, to avoid lumps.
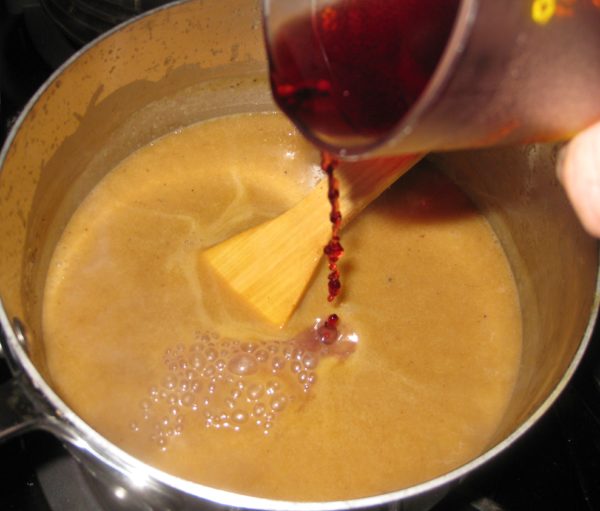
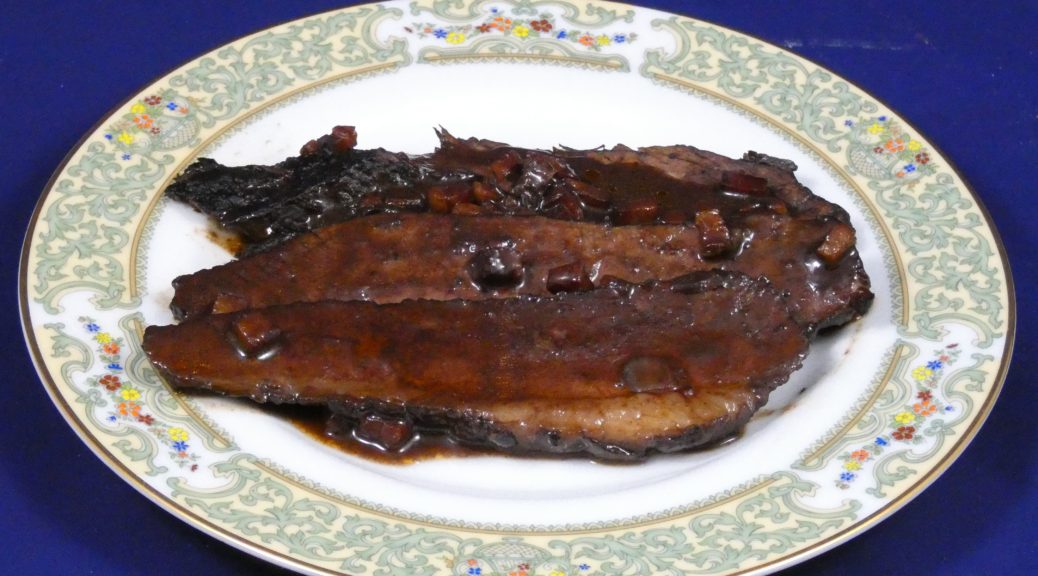
  5. After all the stock has been added, bring to a simmer. Add the wine. Season with 1 teaspoon salt and pepper to taste. (The drippings from the turkey can be fairly salty so the gravy should be under-salted until the final adjustment of seasoning.)
  6. Simmer gently till thick, approximately 2 hours, stirring frequently. Set aside, covered, until the turkey is ready.
  7. After removing the turkey from the oven, deglaze the roasting pan with water. Skim the fat from the deglazing liquid. Pour the defatted drippings into gravy and simmer briefly to achieve the desired consistency. Adjust seasoning.
Recipe Notes

Copyright © 2019 by Villa Sentieri, LLC. All rights reserved.
Share this Recipe

Sri Lankan Fish Croquettes

December 26, 2018

OK, I’m going out on a limb again posting another Sri Lankan recipe.

Whenever I do that, fewer people open the email and even fewer look at the recipe.  Sri Lankan food just doesn’t garner the interest (among my readers, at least) that Italian food does.  Interestingly (or not, perhaps) my cousin’s Marinated Pasta Salad from two weeks ago got the largest response ever!

Although a majority of my recipes are Italian, I am reluctant to post ONLY Italian recipes.  There are just so many things that I like to cook…and therefore want to share…that I want to keep my options open.  What happens, if for example if I choose to post only Italian recipes and then want to post my recipe for Bourbon Brown Sugar Apricot Jam?  That most certainly is NOT Italian.  (But it is so, so good!)


Join our mailing list and you’ll never miss a recipe again!


One possibility, I guess, would be to focus this blog on Italian food exclusively and to start a second blog that includes all the other foods I like to cook.  The majority of that food would end up being Asian with a smattering of Western Cuisines.  Bourbon Brown Sugar Apricot Jam would be just as out of place there as it would in an exclusively Italian-food-oriented blog. (And, I’m not sure I could keep two blogs going.)

Here’s my request:  Use the comment feature to let me know what you think about the options, or even come up with alternative suggestions, for how to focus the blog.  I plan to continue posting while I am in Italy for three months but that would be a great time to redesign the focus of the blog, if need be, and start fresh when I return.

Nanacy Rajapakse (left), who taught me the fundamentals of Sri Lankan cuisine, and her sister Thilaka in 2005.

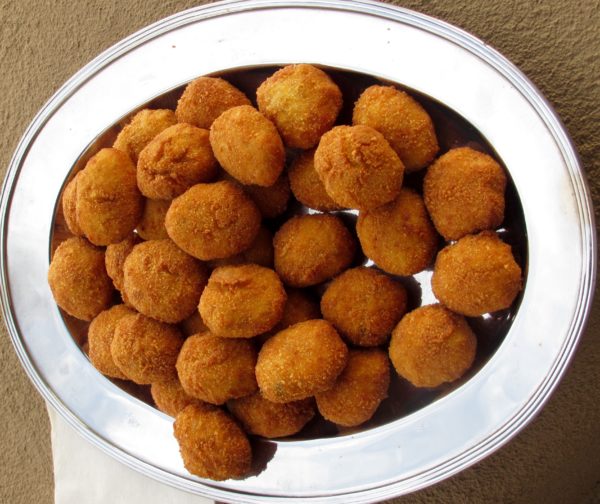
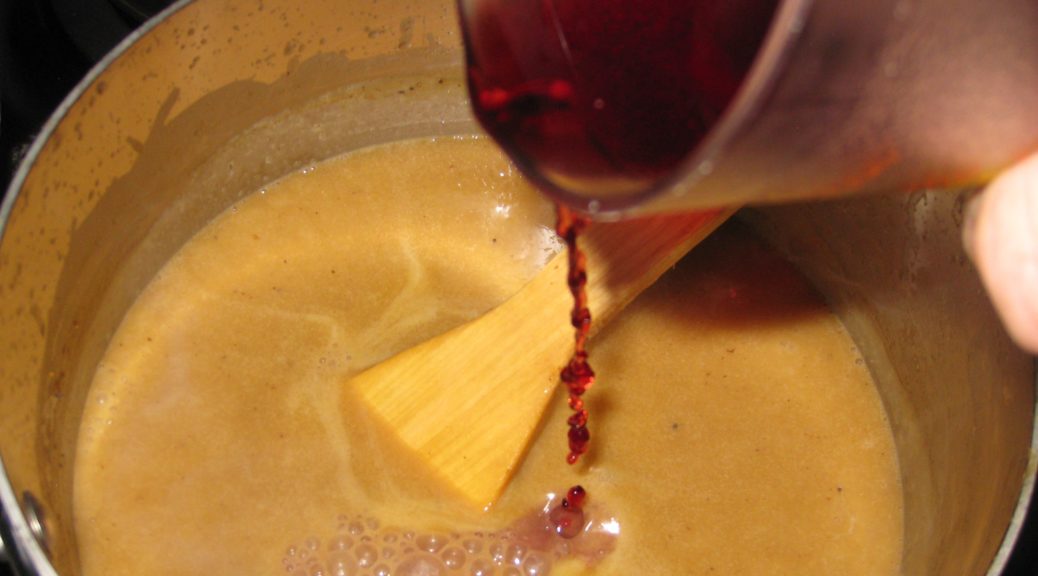
As for the Fish Croquettes, these are actually called Fish Cutlets in Sri Lanka but croquettes would be a more common term in the West.  I think you’ll find that they go really well with cocktails and, if you didn’t tell anyone they were Sri Lankan, nobody would be the wiser.


Follow us on your social media platform of choice


Over the next few months, I will post a few more of my favorite Sri Lankan recipes.  When I started doing this in the late summer, my plan was to post enough recipes for my readers to be able to put together a credible Sri Lankan meal, not that every dish I posted would need to be included but that I would have posted enough of an assortment of recipes to provide a good basis for selection.

Fishing boats in Sri Lanka

I am going to follow through on that plan in the coming months.  Upcoming recipes might include Beef Smoore, Devilled Cashews, Ghee Rice, Pol Sambol, Pork Badun, Beet Curry, Fish Curry, Pickled Lime, Pumpkin Curry, Tempered Cabbage and Peppers, and Wattalappam.  If you’ve got a favorite that you want me to post just let me know!

The blog will be an interesting juxtaposition over the next few months as I chronicle my culinary experience in Italy interspersed with Sri Lankan recipes.

Print Recipe
Sri Lankan Fish Croquettes
Although Tuna is a traditional fish used for cutlets, almost any type of fish will work. Good quality frozen tuna can be used in place of fresh. Curry leaves can be found in many Asian markets. There really is no substitute for them in terms of taste but if not having access to curry leaves is the only thing preventing you from trying this recipe, use another fresh green herb such as basil, thyme, or oregano. These may be served warm or at room temperature.
Votes: 0
Rating: 0
You:
Rate this recipe!
Prep Time 1 hour
Cook Time 1 1/2 hours
Passive Time 4 hours
Servings
croquettes
Ingredients
For the croquettes
For dredging and frying
Prep Time 1 hour
Cook Time 1 1/2 hours
Passive Time 4 hours
Servings
croquettes
Ingredients
For the croquettes
For dredging and frying
Votes: 0
Rating: 0
You:
Rate this recipe!
Instructions
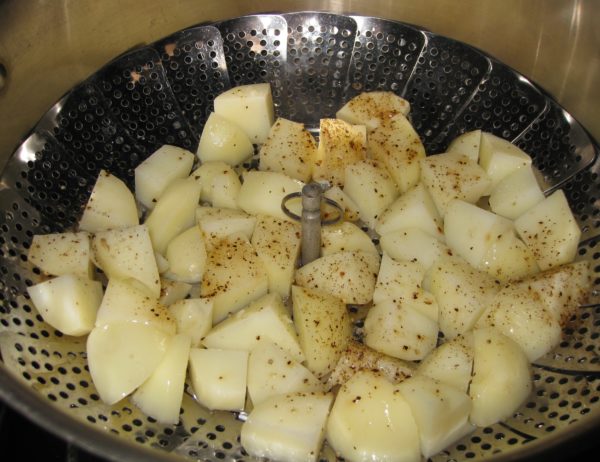
  1. Peel the potatoes. Cut them into pieces approximately ¾ inch on a side.
  2. Put the cut potatoes in a steamer basket. Sprinkle with ground black pepper to taste.
  3. Steam the potatoes over boiling water until tender, 15-25 minutes.
  4. Put the cooked potatoes into a mixing bowl.
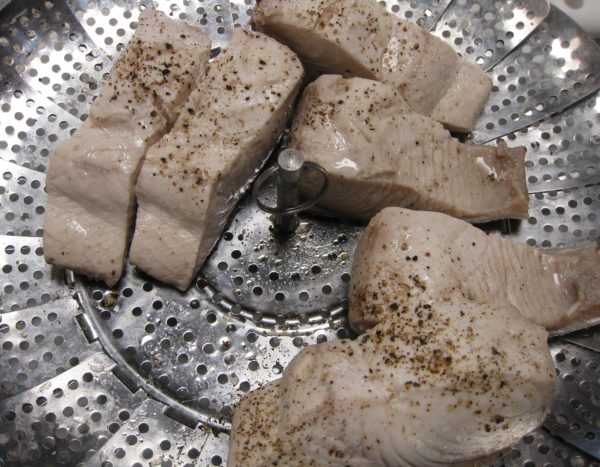
  5. Cut the fish into strips approximately 1 ½ inches wide.
  6. Put the fish in the steamer basket. Sprinkle with ground black pepper to taste.
  7. Steam the fish over boiling water until fully cooked and flaky, 10-20 minutes. If the fish has skin, remove it after steaming.
  8. Put the fish on a plate to cool.
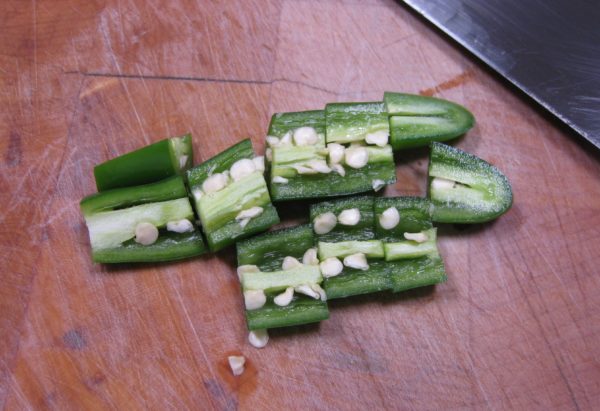
  9. Coarsely chop the green chiles
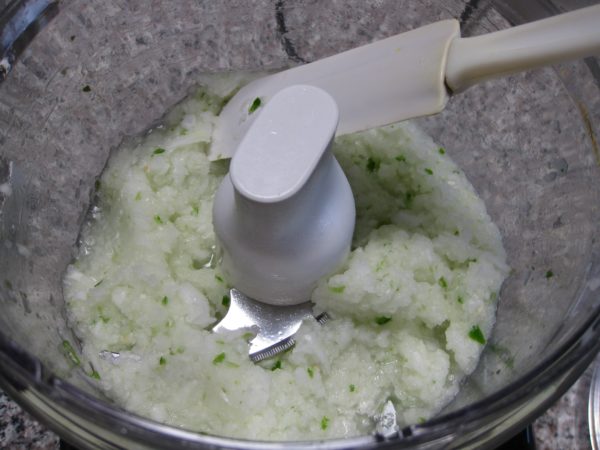
  10. Grind the onions and green chile in a food processor.
  11. Sauté the ground onion mixture, curry leaves, and cumin in the oil until the onion is soft but not brown, 6-8 minutes.
  12. Coarsely mash the partially cooled potato.
  13. Add the fish to the potato and mash again. The mixture should not be completely smooth but there should not be any really large chunks.
  14. Add the onion mixture and salt to the mashed potatoes and fish. Mix well.
  15. Add the eggs and then enough breadcrumbs to bind the mixture. The amount of breadcrumbs needed will vary based on the moisture content. Use your judgement and opt for making the mixture a little loose rather than overly stiff.
  16. Refrigerate, covered, for several hours for the breadcrumbs to fully hydrate.
  17. Taste and adjust salt (and chile if you wish).
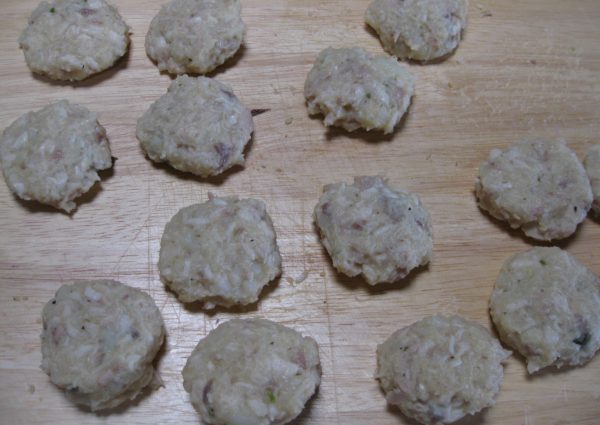
  18. Divide into 50 portions. Shape each into a slightly flattened oval shape.
Final Assembly
  1. Season the flour with salt and freshly ground black pepper to taste.
  2. Beat the four eggs lightly and season with salt and freshly ground black pepper to taste.
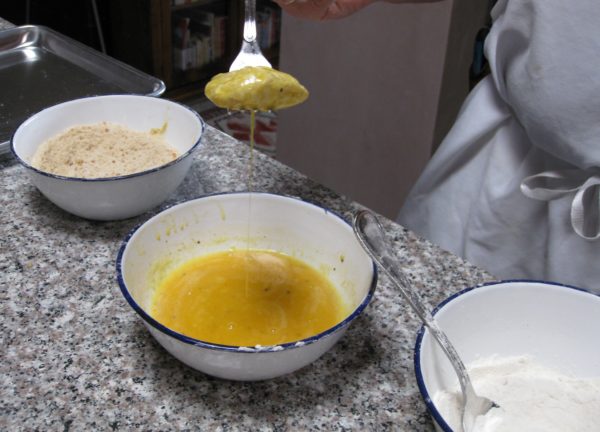
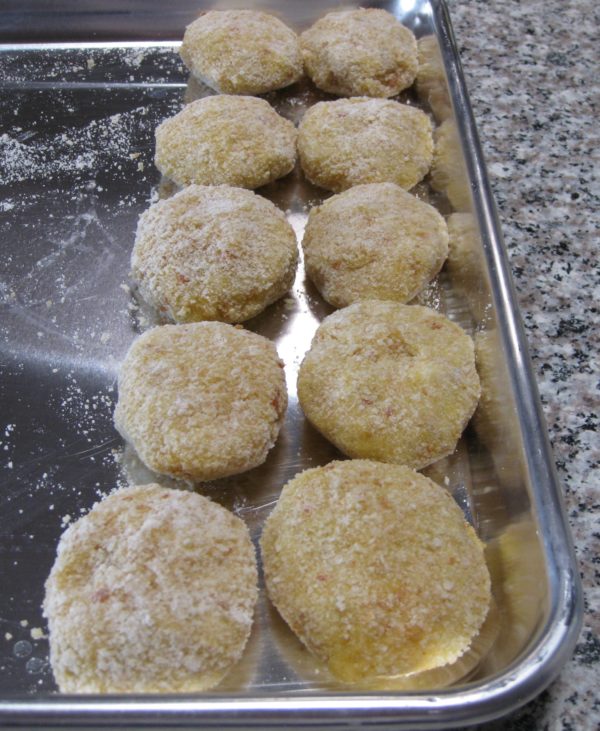
  3. Dredge each croquette in flour, then dip in the beaten egg, then roll in the breadcrumbs.
  4. Refrigerate, uncovered, at least one hour before frying.
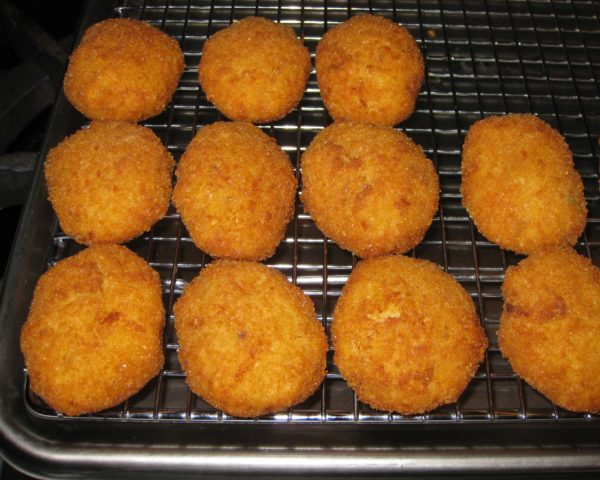
  5. Deep fry the croquettes at 350°F to 375°F until golden brown.
  6. Drain on a rack set in a rimmed baking sheet.
Recipe Notes

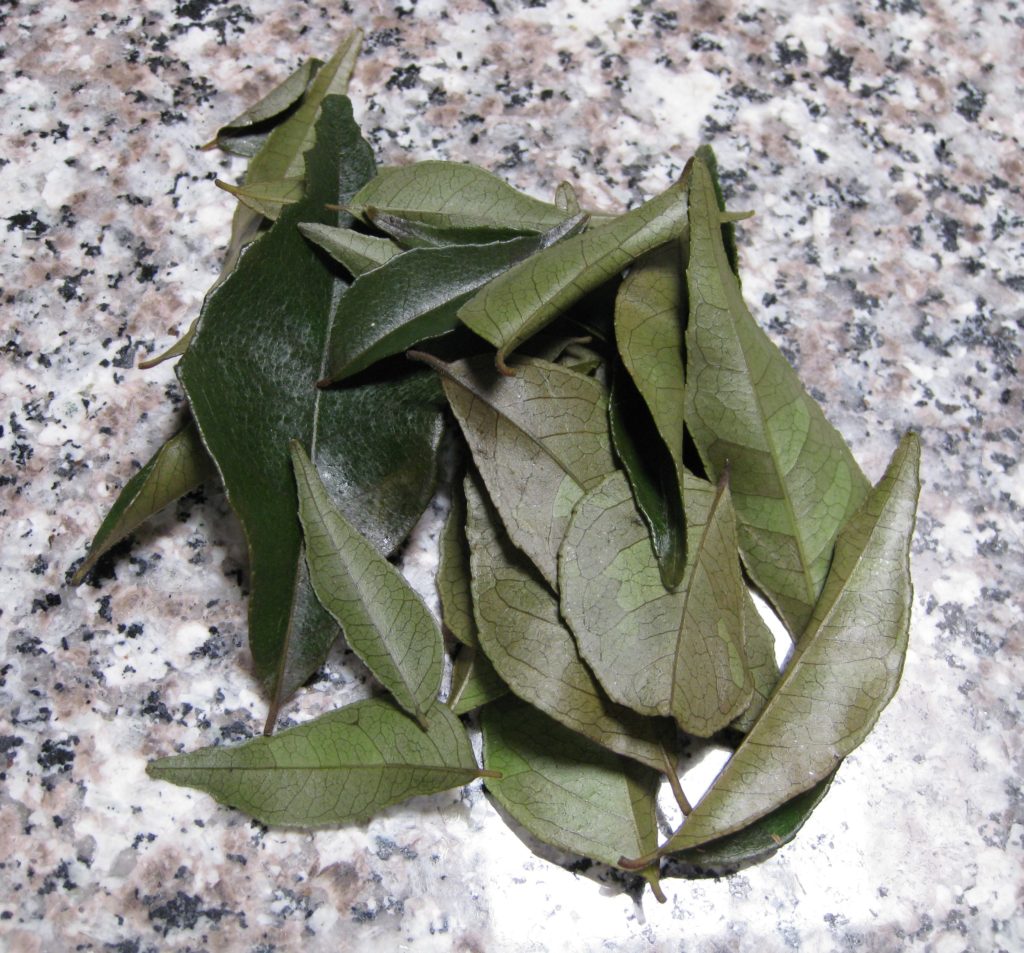
Curry leaves have an alluring flavor that isn't really comparable to any other herb.  I recommend that you try to find them.  You will probably have extra left.  I suggest adding the whole fresh leaves to eggs before scrambling.

Fresh curry leaves

Copyright © 2018 by Villa Sentieri, LLC. All rights reserved.
Share this Recipe

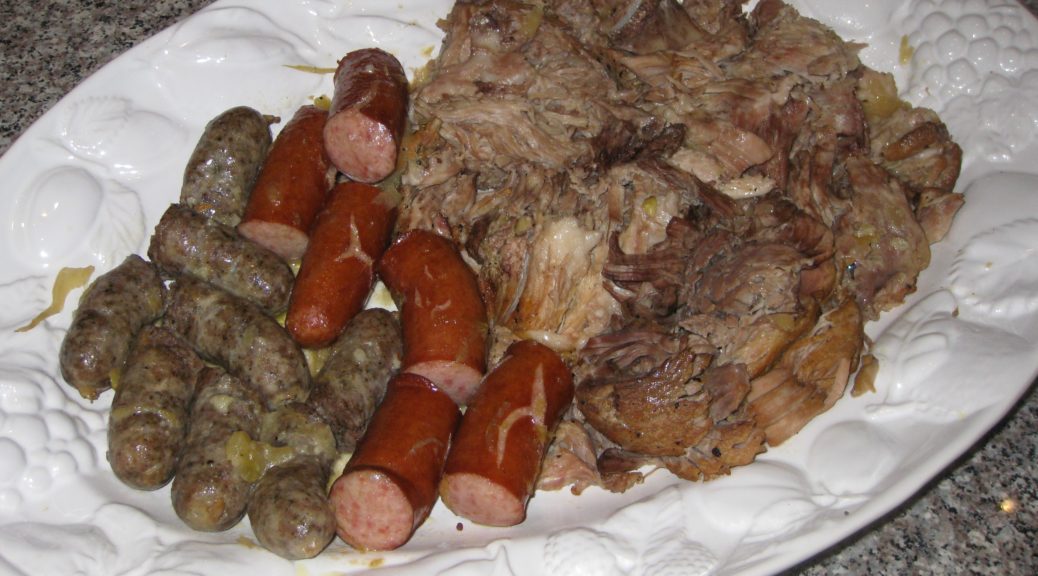
Slow-Cooked Pork Roast with Sauerkraut and Sausage

December 29, 2017

I grew up in Johnstown, PA. The town was founded by a Swiss German immigrant, Joseph Schantz in 1800. Over the years, in various documents, recorders anglicized his last name, most commonly rendering it “Johns,” a name the family ultimately adopted. The name of the town was ultimately changed from Schantzstadt to Johnstown.

Johnstown Panorama (Photo by Greg Hume)

I can’t say there was much of a noticeable German influence when I was growing up in the 1950s to 1970s, except for one: New Year’s Day dinner.

Regardless of one’s ethnic background, the most common dinner on New Year’s Day was “Pork and Sauerkraut.” It was commonly acknowledged that this was a nod to Johnstown’s German heritage. And, much like black-eyed peas in the South, was viewed as a way to bring good luck to the coming year.

As you might expect, recipes for pork and sauerkraut vary. Sauerkraut and a large cut of pork are, obviously, essential. Sausages of some sort are common, as are dumplings.


Click HERE to join our mailing list and you’ll never miss a recipe again!


The recipe that I use is close to what my mother made except that I enhance the seasonings in the sauerkraut along more Germanic lines, with onion, carrot, apple, and juniper berries. My mother’s was more basic and similar to the way the Slovak side of my family prepared sauerkraut. My cousin Angie, of Italian heritage, added a brown gravy to hers, which also has Germanic roots.

The Inclined Plane goes from downtown Johnstown to the suburb of Westmont (Photo by Greg Hume)

Long and slow cooking is essential as much for pull-apart-tender pork as it is to mellow out the sauerkraut. Among Central and Eastern Europeans, sauerkraut tends to be cooked for several hours to tenderize it and tame its sour bite.

Kielbasa was a favorite sausage in our house and was always included in pork and sauerkraut. It was always locally made and never procured from large national meatpackers. Often times, other sausages, such as bockwurst or bratwurst, would also be added. But kielbasa was king in pork and sauerkraut and, in the sausage pantheon, second only to hot Italian sausage in our house.


Follow us on your social media platform of choice


The kielbasa that we ate on a regular basis was made from pork, or pork and beef, but venison kielbasa was common too. The first day of deer-hunting season was a public school holiday. You can imagine the importance of venison.

Some of the hunters would have their venison (or some of it, at least) turned into kielbasa, flavored with garlic and smoked. I remember on several occasions going with my father to have work done on the car in late December. The service station had a big platter of meats, cheeses, and pickles laid out for customers to nibble on. Among the offerings was venison kielbasa made from a deer that the owner of the service station had shot.

One of my resolutions for the new year is to find a small, artisanal purveyor of kielbasa that’s as good as what I remember from childhood.


If you have a favorite family recipe and a bit of a story to tell, please email me at santafecook@villasentieri.com and we can discuss including it in the blog. I am expanding the scope of my blog to include traditional recipes from around the country and around the world. If you haven’t seen the post on Melinda’s Drunken Prunes, it will give you an idea of what I’m looking for.


Print Recipe
Slow-Cooked Pork Roast with Sauerkraut and Sausage
Saueraut from the refrigerated section of the market is usually of better quality than canned, especially if the sauerkraut is from an artisinal producer. Draining the sauerkraut and rinsing it well under cool water will produce a more mellow taste. If you want dumplings with this (and who wouldn't?), remove the meat from the pan and keep warm while cooking dumplings on top of the sauerkraut on the stovetop. See the notes section below for my recipe for dumplings.
Votes: 0
Rating: 0
You:
Rate this recipe!
Course Mains, Meats
Cuisine German
Prep Time 20 m
Cook Time 6 1/2 hours
Servings
people
Ingredients
Course Mains, Meats
Cuisine German
Prep Time 20 m
Cook Time 6 1/2 hours
Servings
people
Ingredients
Votes: 0
Rating: 0
You:
Rate this recipe!
Instructions
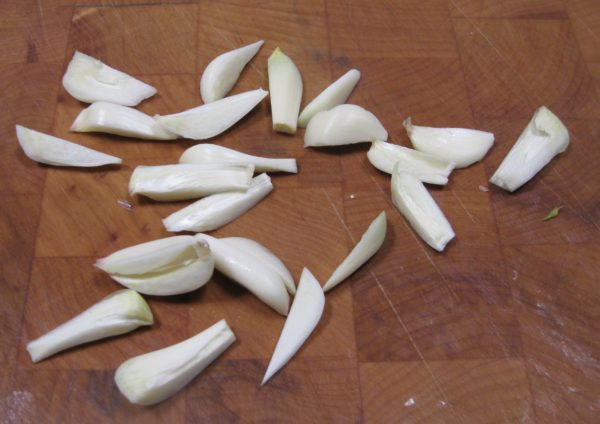
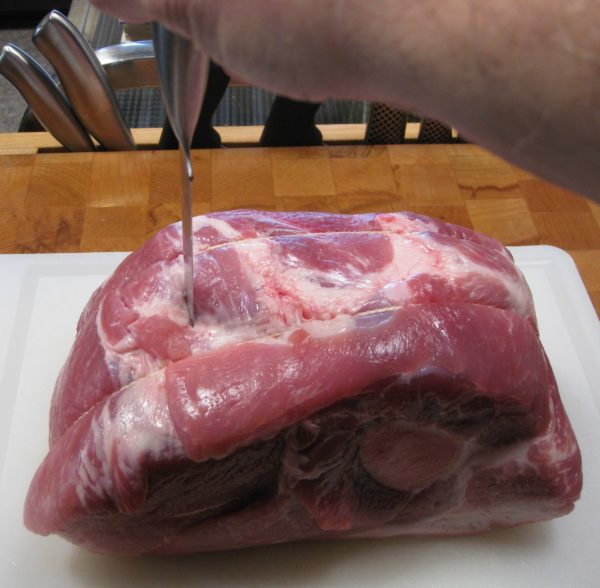
  1. Cut the cloves of garlic, top to bottom, into approximately 4-6 slivers each.
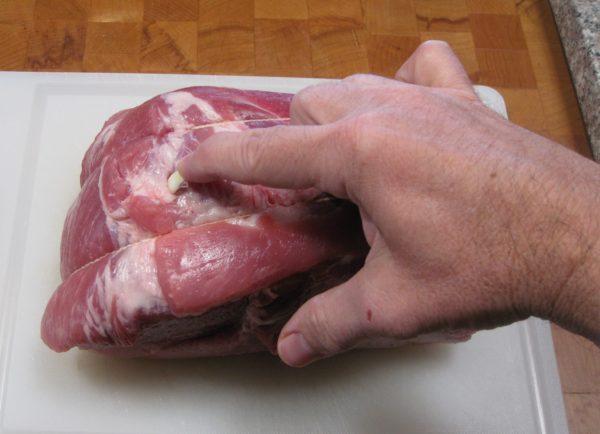
  2. Pierce the pork around the outside about 1 inch deep with the tip of a sharp knife.
  3. Insert slivers of garlic into the slits
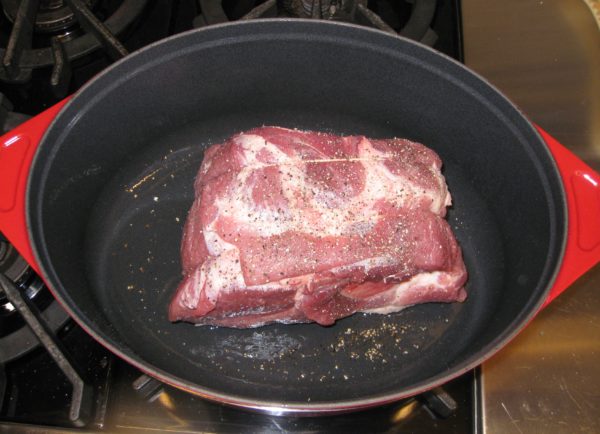
  4. Season the pork generously with salt and pepper.
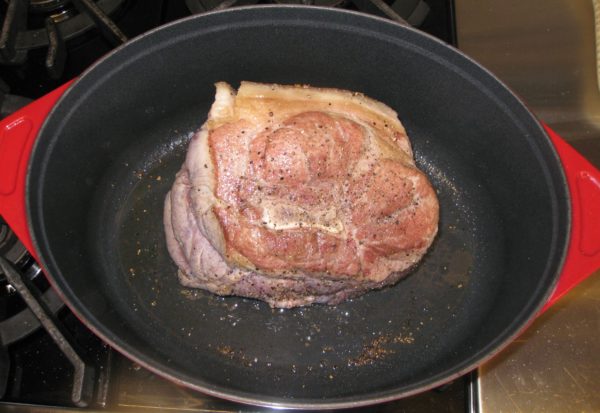
  5. Brown the pork in a heavy Dutch oven using the oil.
  6. Add white wine, cover tightly, and transfer to oven at 350°F.
  7. After one hour, reduce heat to 225°F.
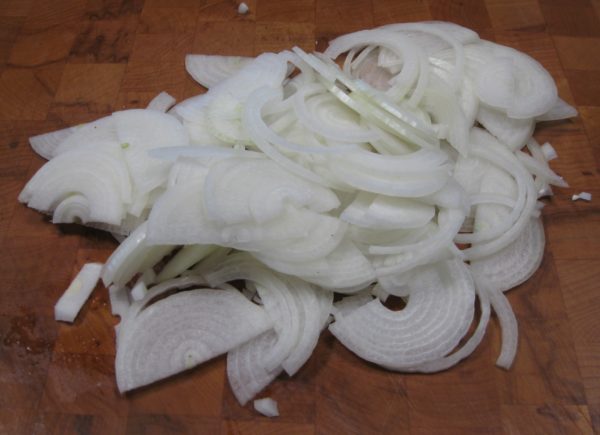
  8. Slice the onions in half top-to-bottom then cut crosswise into thin slices.
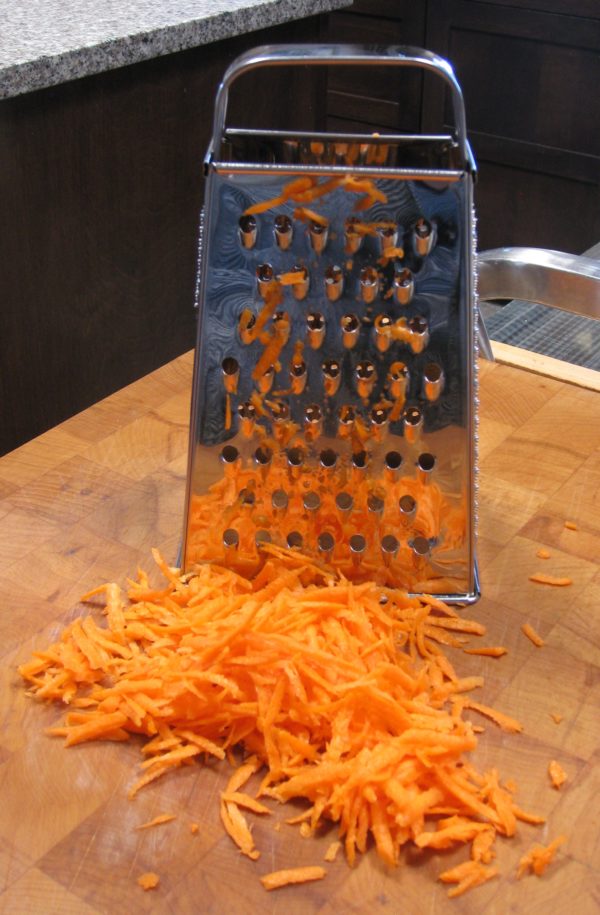
  9. Shred the carrot on the tear-drop side of a box grater.
  10. Cut the apple into small dice.
  11. After the pork has been cooking for a total of about 3 hours, drain and rinse the sauerkraut.
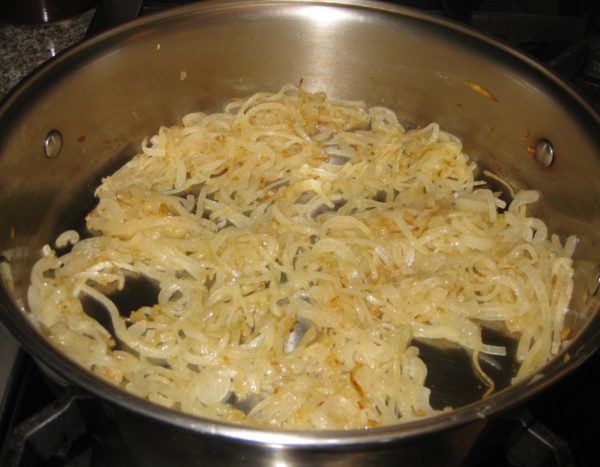
  12. Slowly sauté the onion in the butter or bacon fat until caramelized, approximately 20 minutes.
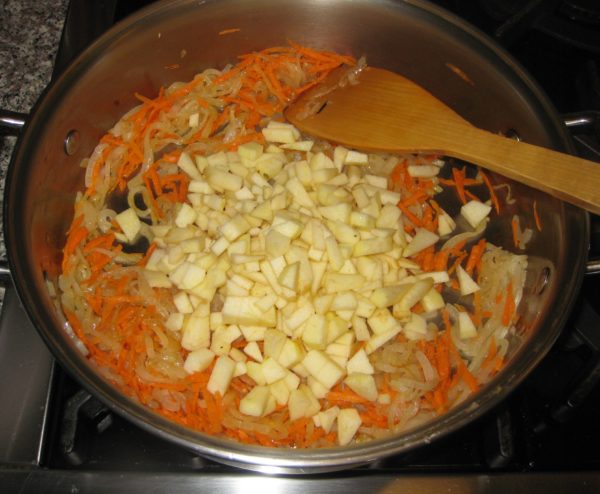
  13. Add the shredded carrot and diced apple and sauté until heated through.
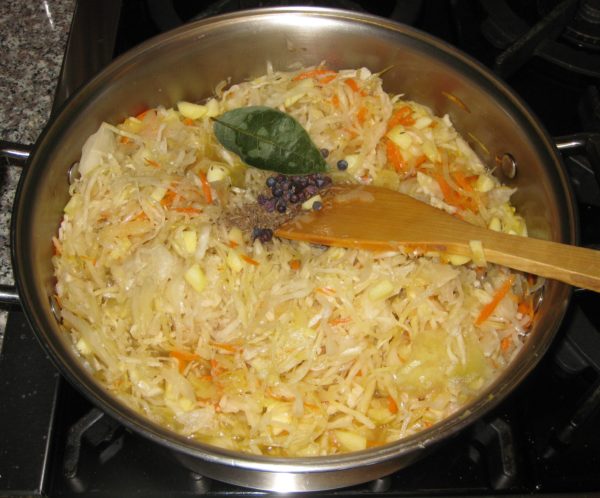
  14. Add sauerkraut, juniper berries, caraway seeds, bay leaf, and black pepper to taste.
  15. Add water and bring to a boil.
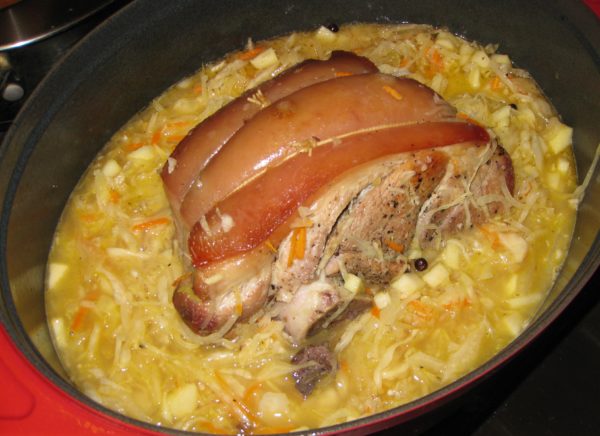
  16. Add the boiling sauerkraut to the pork after the pork has cooked for a total of four hours (1 hour at 350°F plus 3 hours at 225°F).
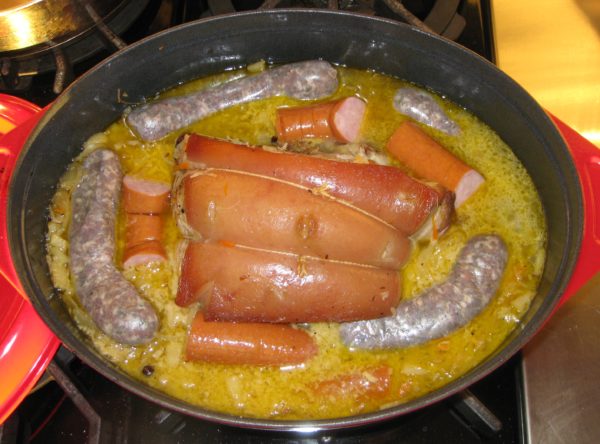
  17. An hour later nestle the kielbasa and other sausage into the sauerkraut.
  18. Continue to cook, covered, until the pork is fall-off-the-bone tender. Approximately 1-2 more hours.
  19. Remove the pork and sausages.
  20. Skim fat from the top of the sauerkraut.
  21. Put the Dutch oven on the stove and cook dumplings on top of the sauerkraut if desired.
  22. Meanwhile, pull the pork into big chunks. Keep the pork and sausages warm.
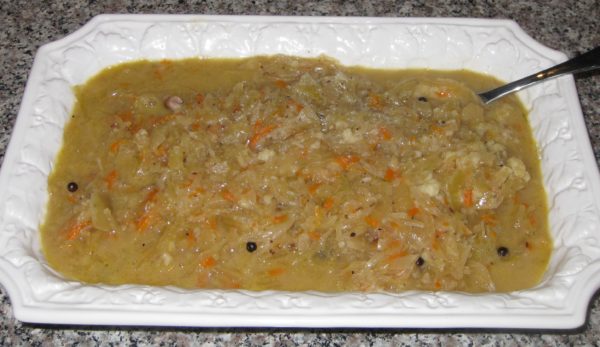
  23. Serve the sauerkraut in a separate bowl, or use it to surround the pork and sausages.
Recipe Notes

This is where you can find my recipe for dumplings.

Copyright © 2017 by VillaSentieri.com. All rights reserved.
Share this Recipe

Calabacitas: A New Mexican Classic

August 21, 2017

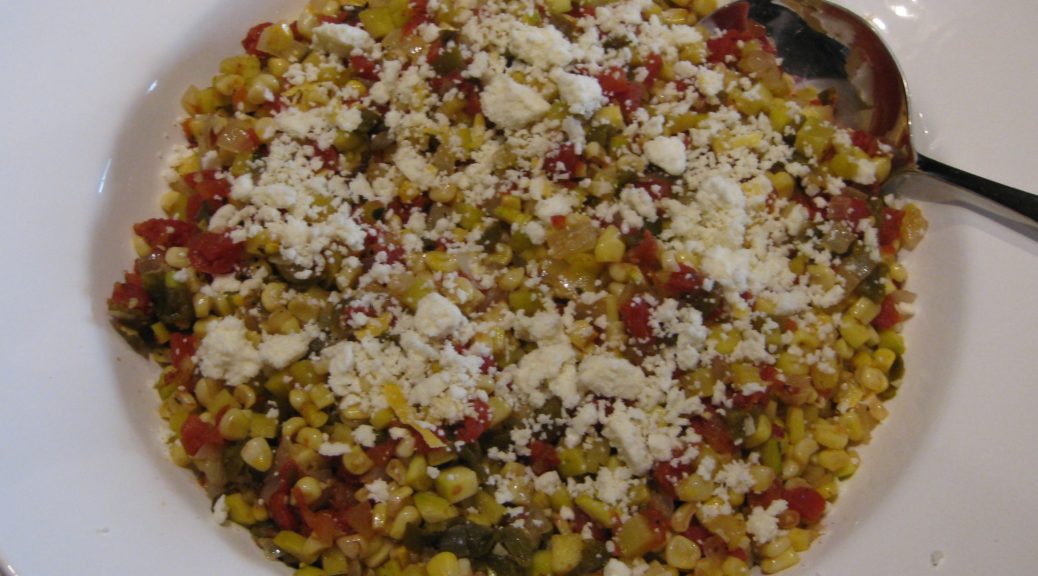
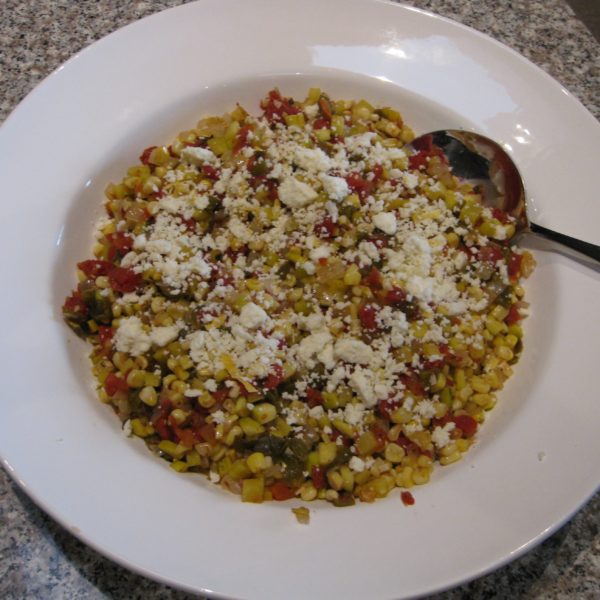
Talk about a dish that simply wouldn’t exist in any recognizable form without new world crops, calabacitas is it! Squash, corn, and chile are all new world plants.

Calabacitas is Spanish for zucchini but is also the name given to a dish of zucchini, corn, and (usually) green chile.

Often served as a side dish, calabacitas makes an awesome burrito, too. Accompany it with some frijoles (and probably a tortilla or three) and you’ve got a great high-protein vegetarian dinner. Leave out the cheese and it’s vegan! Truth be told, I’m plus-minus on the cheese in any case. When serving this for company I usually sprinkle cheese on top as in this recipe, but if it’s just for “us,” cheese isn’t usually even a thought.

This is the time of year to serve the most sublime calabacitas possible as zucchini, corn, green chile, and tomatoes are all in the farmers’ market. But calabacitas is too good to be had only a few weeks a year and, honestly, versions made with frozen corn, canned tomatoes, and roasted green chile that you’ve squirreled away in your freezer along with the ever-present zucchini in the produce aisle are too good to pass up any time of year.

For me, calabacitas shares a serious failing with succotash. They are both great ideas in my estimation but the execution often falls flat.

When I set out to finally perfect a version of calabacitas that I felt comfortable serving, I thought back on all the less-than-perfect renditions I’d had since I first set foot in New Mexico in 1991.

The litany of offenses includes being too watery, being too rich, having huge chunks of zucchini that seem mismatched next to corn kernels, being under-seasoned and being aggressively seasoned.

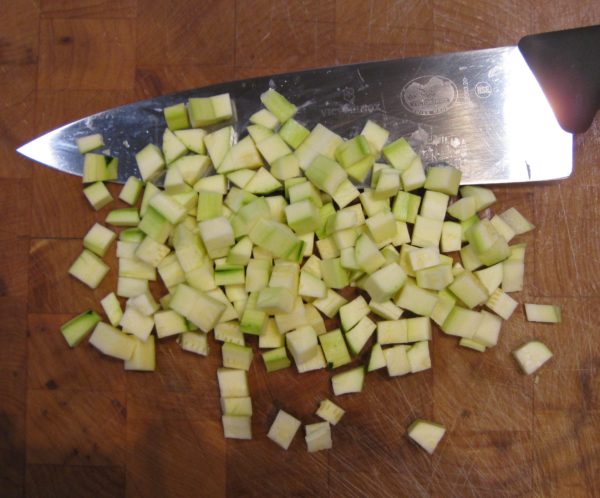
That set out a plan of action for me. The zucchini should be cut approximately the same size as corn kernels. There needed to be a minimum amount of liquid in the finished dish. Loads of cream or butter or cheese were out of the question. The seasoning should complement the vegetables, not assume control of the dish.

Zucchini (the namesake vegetable) and corn were a given. Pretty much everything else was up for grabs. Tomatoes, which are sometimes included, seemed right for color and a bit of acidic brightness that the zucchini and corn lack. They have the added bonus of being another New World crop. Roasted green chile, also sometimes included, was right for several reasons. It screamed “New Mexico,” it would add a bit of complimentary smokiness to the blend, and, honestly, I’m a chile-head.

My preference was for hot or extra-hot chile. This is wrong for several reasons. First, calabacitas is not traditionally a spicy dish. Second, after one of the dinners where I tested out my evolving recipe, one of the guests said that it was unfortunate that the entire “calabacitas conversation” that evening centered on how hot it was and not on how good it was.

In cooking I prefer to bow to tradition but if there’s ever a place where I butt heads with tradition, it’s in making dishes spicy. But I decided there and then that I should follow tradition and use mild chile in my calabacitas.

Finally I was on to the aromatics and seasoning. Onion and garlic are my go-to combination unless there is some compelling reason for one or the other (usually based on tradition). The herbs eluded me for a while. I really wanted to use Mexican Oregano (which isn’t actually oregano) because of its New World origins but it just seemed to overpower the dish. In the end, I decided that a modest amount of Mediterranean Oregano played best in the sandbox with the other ingredients.

Let me know what you think of my rendition of a New Mexico classic.


Follow us


Click HERE to join our mailing list and you’ll never miss a recipe again!

Print Recipe
Calabacitas: A New Mexican Classic
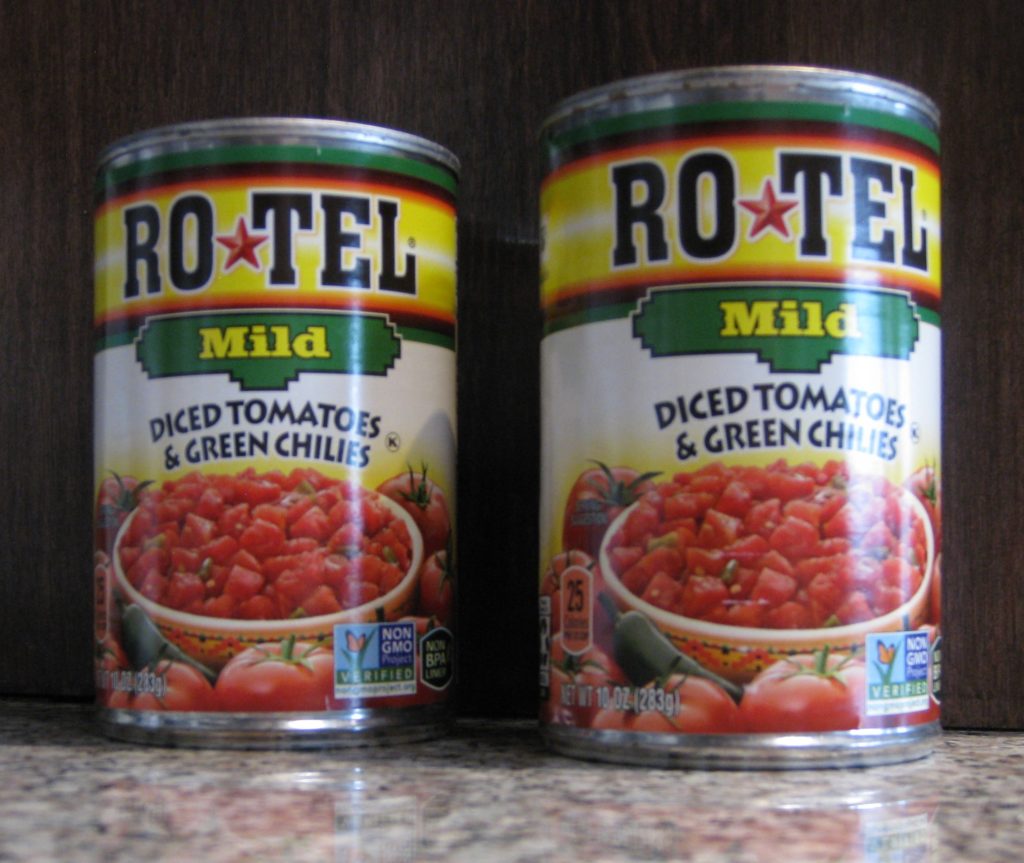
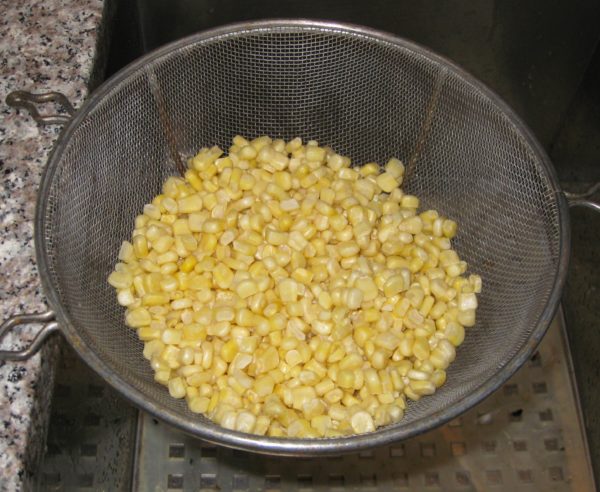
Traditionally calabacitas is not a spicy dish so it is best to use mild roasted green chile unless you and all your eaters are chile heads. Bacon fat gives a great flavor but olive oil or other vegetable oil is fine, too. Frozen corn works well as there are so many other flavors in the dish but using fresh corn cut off the cob is a definite treat. I prefer to thaw frozen corn before cooking. Ice crystals can sometimes carry a "freezer" taste and rinsing them off can eliminate it. Also, it is easier to time the cooking of the corn in combination with other ingredients if it is not frozen when cooking starts. Rotel packs tomatoes in 10 ounce cans and they’re a bit of a Southwestern classic in and of themselves. In a pinch feta cheese can be used instead of Cotija
Votes: 0
Rating: 0
You:
Rate this recipe!
Prep Time 40 minutes
Cook Time 30 minutes
Servings
people
Ingredients
Prep Time 40 minutes
Cook Time 30 minutes
Servings
people
Ingredients
Votes: 0
Rating: 0
You:
Rate this recipe!
Instructions
  1. Dice the zucchini.
  2. Thaw the corn under running water.
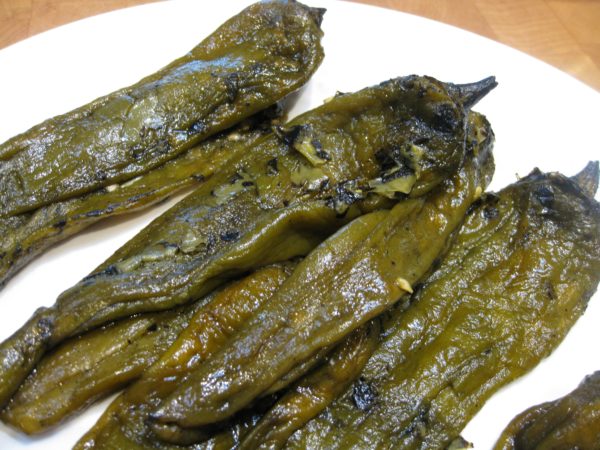
  3. Roasted New Mexico green chile.
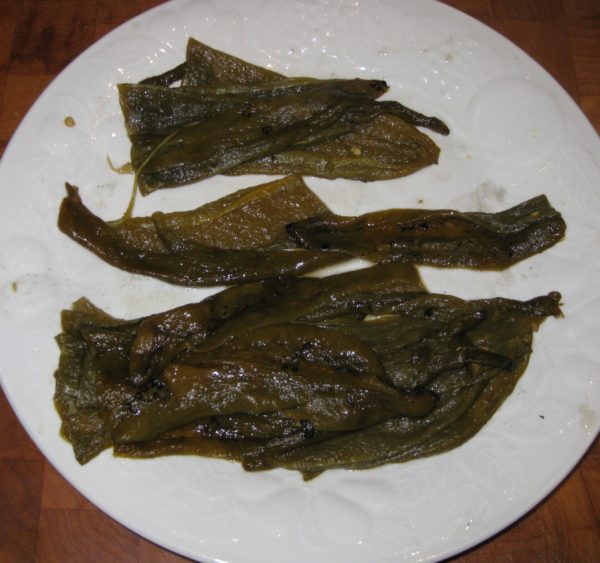
  4. Peeled and seeded chile, ready to be chopped.
  5. Sauté the onion until translucent.
  6. Add the garlic and continue to cook until the onion is golden but not brown.
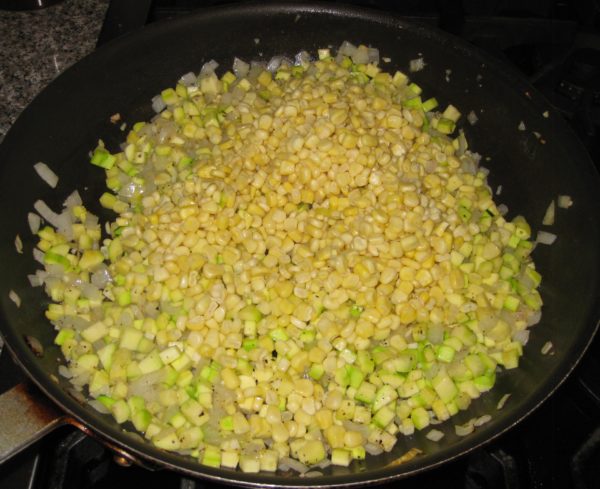
  7. Add the zucchini and sauté until the zucchini is hot.
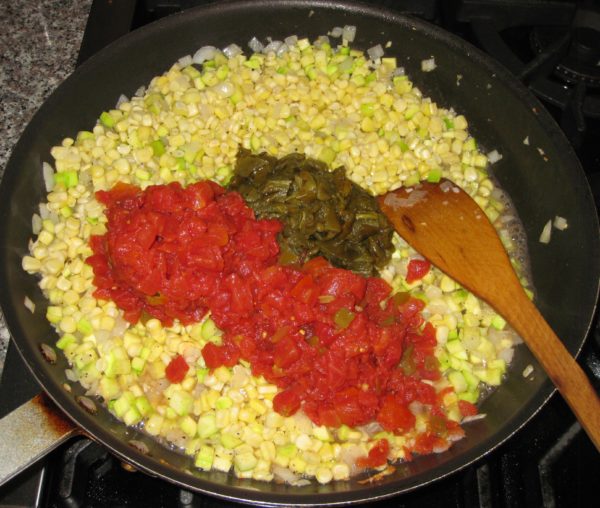
  8. Add the corn, green chile, tomatoes, oregano, salt, and pepper.
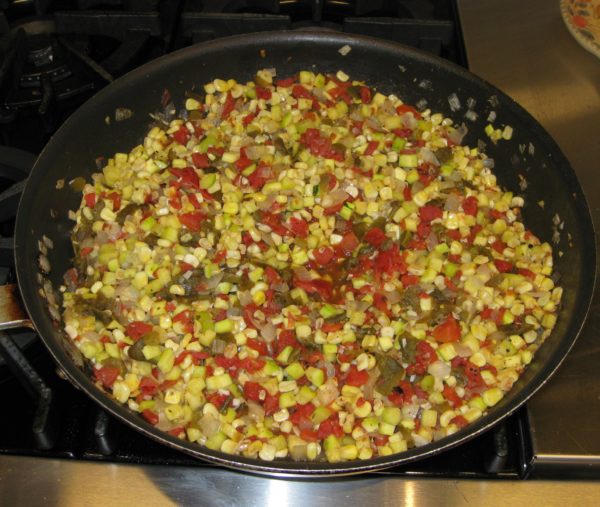
  9. Simmer until the liquid has evaporated and the zucchini and corn are cooked, about 10-15 minutes, depending on your preference.
  10. Adjust oregano, salt and pepper in the last few minutes of cooking.
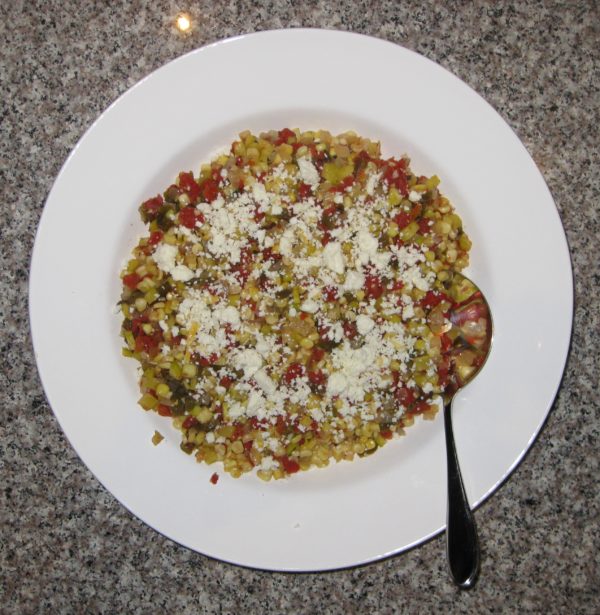
  11. Serve sprinkled with crumbled Cotija cheese.
Recipe Notes

Copyright © 2017 by VillaSentieri.com. All rights reserved.
Share this Recipe

Frittata con Cipolle (Frittata with Onions)

July 10, 2017

American chefs frequently do not understand Italian food.  Many can produce technically excellent dishes that lack the Italian sensibility.

One common error is putting in too much.  Too much of most anything into most anything.  To be sure, there are many restaurants headed by American chefs that serve excellent Italian food but there are far more that just don’t get it.

The usual culprit is what Italians would call the First Course, Il Primo Piatto.  This is soup, pasta or rice that is served as a separate course before the the Second Course, Il Secondo Piatto (usually meat, fish, or other protein), which is usually accompanied by side dishes, Contorni, in Italian.

Pasta “specials” are quite prone to this phenomenon.  There are many otherwise excellent restaurants that think that if a little is good, more is better, when it comes to their pasta “specials.”  Because I love pasta, if I’m at a restaurant that has a pasta special I always ask what it is.  More often than not, I start yawning (well, not really) part way through the list of ingredients added to the pasta.  After more than 2 or 3 main ingredients (not counting things like garlic, olive oil, and a few herbs) it’s too much.  You don’t need shrimp, artichoke hearts, chopped tomato, diced onion, roasted peppers, capers, and olives.  It’s simply too much.  The distinctiveness of the ingredients is lost.

I’m ragging on pasta because that is the most common culprit at American restaurants featuring “Italian” food.  Risotto and polenta are prone to the same phenomenon, however.  The most common offense is that both of these dishes are turned into vehicles for butter, cream, and cheese.  That is not what an Italian would do.  In a typical Italian household, polenta is cornmeal, water and salt.  That’s it.  There’s not usually a pat of butter or a spoon of cheese in sight unless added at the table to the diner’s preference but even that is rare.  The polenta is a foil for whatever is served with it.  It is not meant to scream, “Look at me!”  That doesn’t mean it isn’t supposed to, or doesn’t, taste good.  It’s not intended to be so rich and filling that it tries to steal the spotlight or dampen one’s appetite for the rest of the meal.

Unlike polenta, which is meant to accompany other dishes, risotto is meant to stand on its own as a First Course before the Second Course.  Risotto alla Milanese is the only exception.  Traditionally Risotto alla Milanese accompanies a veal cutlet (in Milan, of course).  No other risotto would be served with the second course in an Italian meal.

I realize that most of the time we do not eat a formal Italian meal, even in a restaurant.  Most of us have either what would be the first course (pasta or risotto, usually) or the second course (meat or fish plus a side dish or two), preceded by some sort of antipasto (appetizer), which literally means “before the pasta.”  Even so a risotto that is a fat “bomb” overly laden with butter, cream and/or cheese, might be American but it is simply not Italian in its sensibility.

Frequently, the issue is clouded even more but the addition of too many ingredients to the risotto.  Look at the asparagus risotto from a few weeks ago.  There are no competing flavors:  a light broth to add some savoriness, a bit of Parmigiano Reggiano, and a dollop of butter.  This is a classically Italian risotto.

I guess I’m really beating this one.  I clearly have strong feelings about Italian food and what passes for Italian food in America.  Think purity of flavor and simplicity of ingredients.  If an ingredient doesn’t support the main ingredient it shouldn’t be added.  I believe Italian food is the original “ingredient-driven” cuisine.

Ok, off my soap box an on to a recipe; one that is the essence of simplicity.

I’m going to guess that most of you have not had a frittata.  It is a fluffy but firm egg dish, usually with some sort of vegetable included.  Sometimes a sprinkling of Parmigiano Reggiano or Pecorino Romano cheese is added but only if it supports the vegetable that is the star of the show.

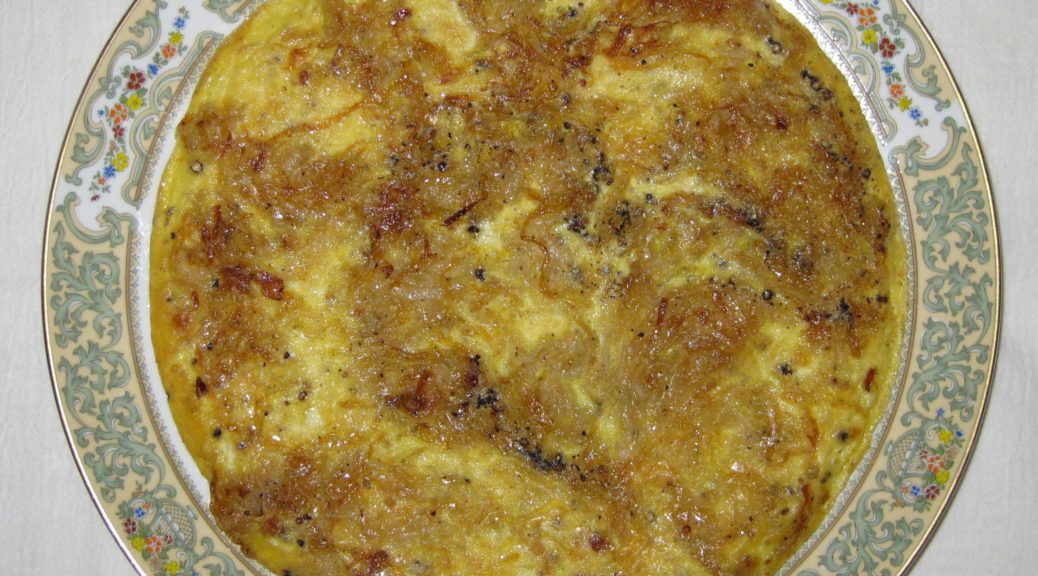
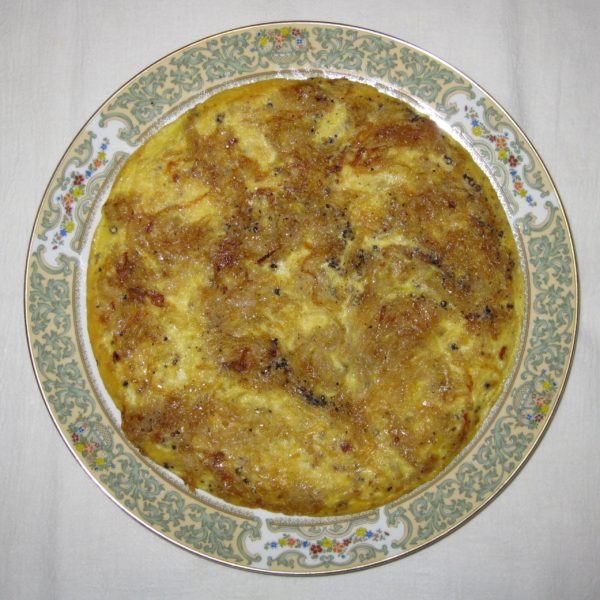
Today’s frittata is onion.  That’s it, onion.  Plus a little olive oil and salt and pepper.  The onion is cooked slowly until it caramelizes.  The onion in this recipe was cooked for 50 minutes.  You should plan on 45-50.  It is mostly hands off, though you do need to stir every few minutes.

Once the eggs are added, they are cooked slowly.  Unlike a French omelet where the eggs are barely set and there isn’t (supposed to be) a touch of brown, a frittata is intended to be firm, slightly brown, and puffed up and airy from the cooking style.

Although I have converted to making, almost exclusively, a classic Italian frittata, when I was in college I did it the way my Italian Grandmother did.  She included a pinch of baking powder and a bit of flour.  It was a little firmer than a classic frittata; more like a savory eggy cake.

That frittata, alternating with sandwiches of butter, onion and blue cheese on homemade bread (not on the same day), constitute my lunchtime memories from my junior year in college.


Click HERE to join our mailing list and you’ll never miss a recipe again!

Print Recipe
Frittata con Cipolle (Frittata with Onions)
I recommend NOT finishing the frittata under the broiler as called for by a number of food writers. First, it isn’t traditional. Second, if the frittata doesn’t slide out of the pan easily so that it can be flipped, you won’t be able to get it out of the pan to serve it after putting it under the broiler. I like using a good quality, heavy-bottomed, non-stick pan though a well-seasoned cast iron pan would work too. It is easier to get the frittata out of the pan if it has sloping sides rather that sides that are completely vertical. You can caramelize the onions several hours in advance and then complete the frittata later.
Votes: 0
Rating: 0
You:
Rate this recipe!
Prep Time 10 minutes
Cook Time 1 1/2 hours
Servings
people
Ingredients
Prep Time 10 minutes
Cook Time 1 1/2 hours
Servings
people
Ingredients
Votes: 0
Rating: 0
You:
Rate this recipe!
Instructions
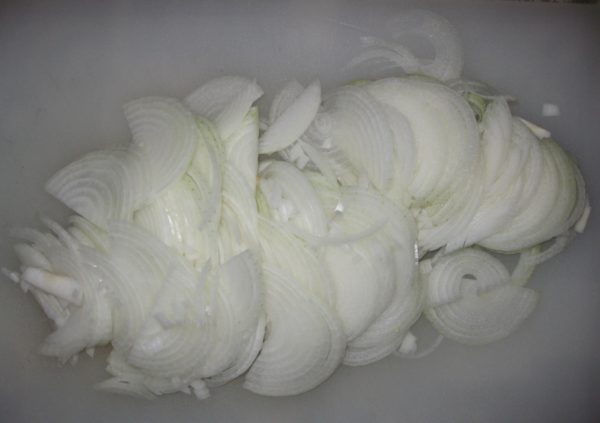
  1. Slice the onion in half from top to bottom then across into 1/8 inch thick half-rounds.
  2. Warm the olive oil in a 12 inch heavy-bottomed sauté pan with sloping sides.
  3. Add the sliced onion and ½ teaspoon of salt.
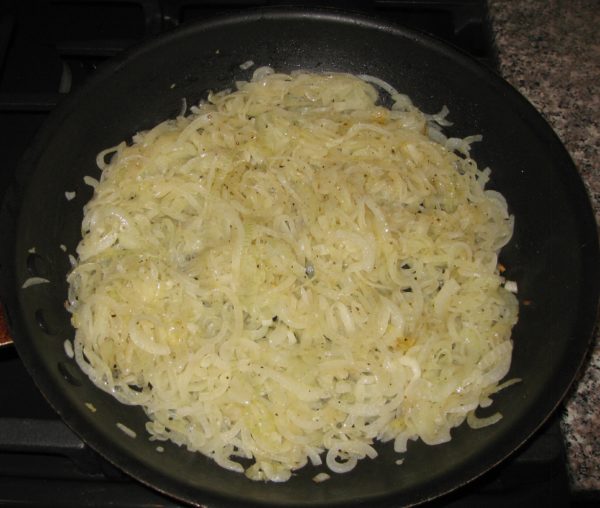
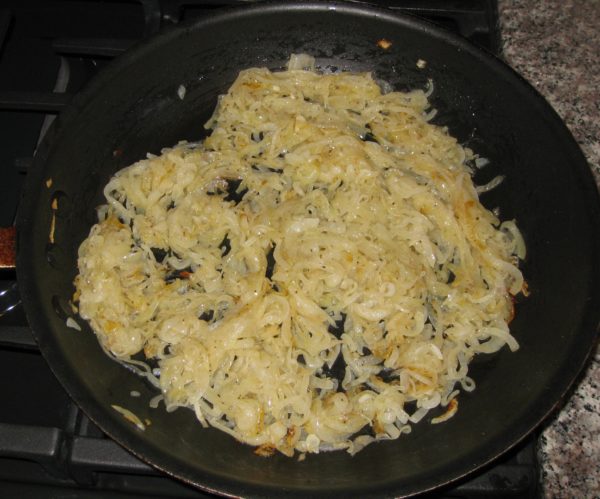
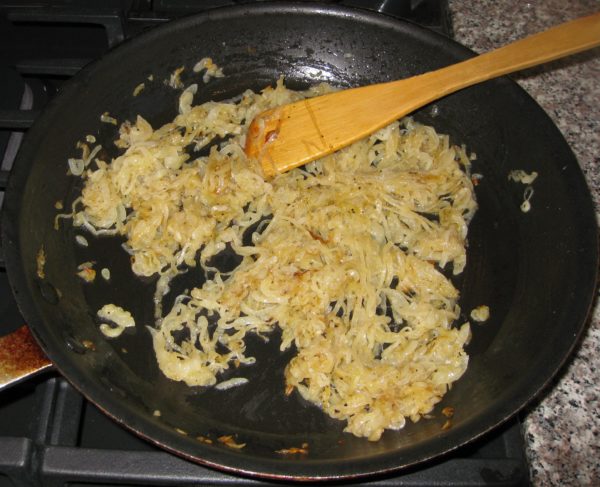
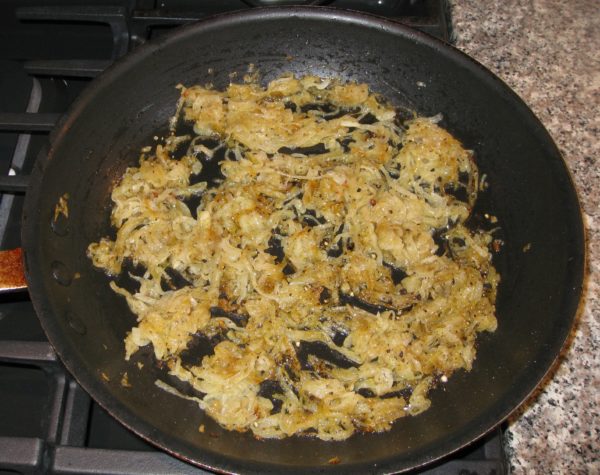
  4. Cook over medium heat, stirring often until the onions are soft and caramelized. The onions should take on a uniform golden, then light brown, color. There should not be any dark brown or dry spots. This will take between 45 and 50 minutes. If it takes longer don’t worry. If it seems to happen in less time, the heat is probably too high.
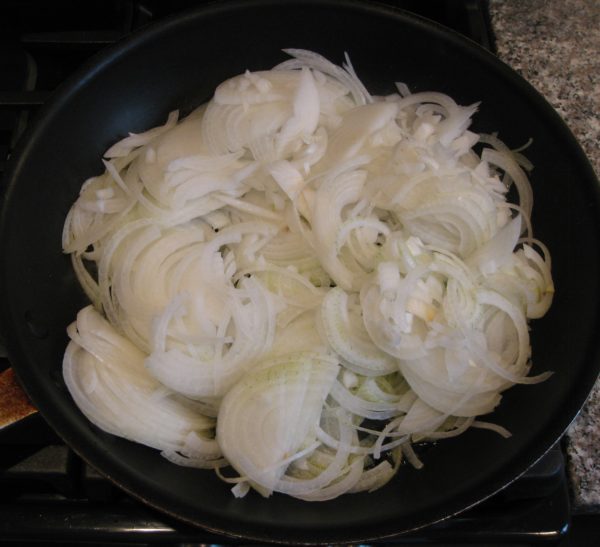
  5. This picture was taken 15 minutes after the onions were added.
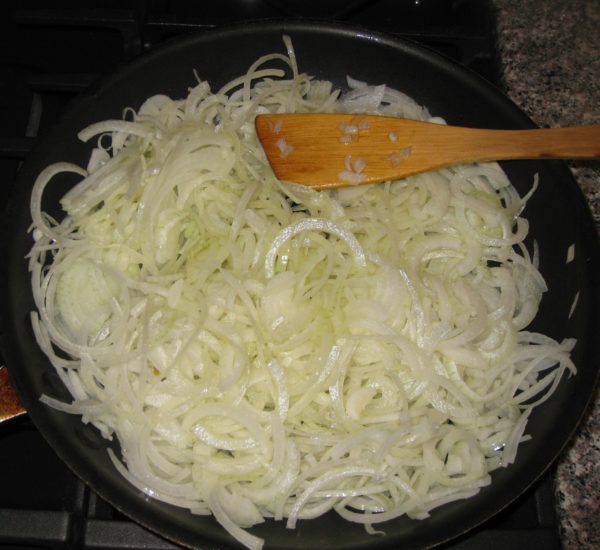
  6. This picture was taken 30 minutes after the onions were added.
  7. This picture was taken 45 minutes after the onions were added.
  8. This picture was taken 50 minutes after the onions were added. They are appropriately caramelized.
  9. While the onions are cooking, beat the eggs with a fork. Do not use an egg whip. The idea is not to beat in air but to uniformly combine the whites and yolks. Season with the remaining ¼ teaspoon of salt and freshly ground black pepper to taste.
  10. When the onions are fully caramelized, be sure there is an even slick of oil in the bottom of the pan. If not, add a tablespoon or so more.
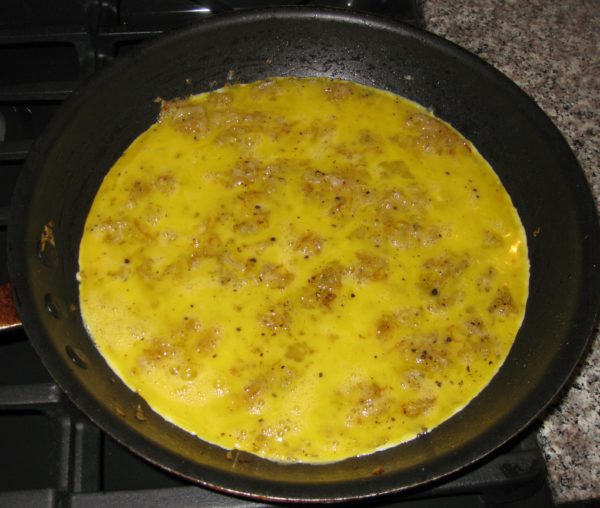
  11. Turn the heat to medium high and evenly distribute the caramelized onions on the bottom of the sauté pan.
  12. Pour the beaten eggs on top of the onions, being sure to distribute the eggs evenly. DO NOT STIR THE EGGS once they are added to the pan. Immediately cover the pan and turn the heat to low.
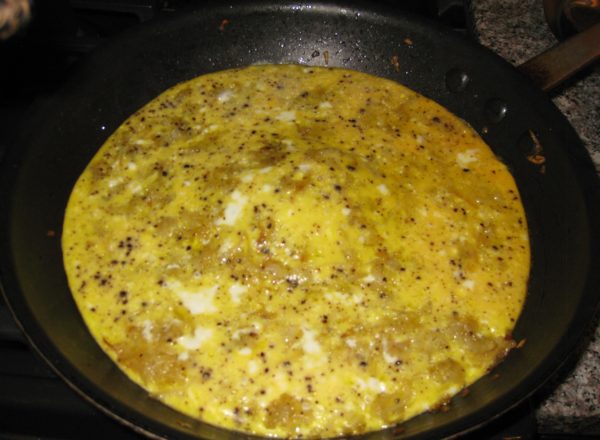
  13. Cook until the eggs are just set in the middle and golden brown on the bottom, approximately 30 minutes. Move the pan around so that the heat is evenly distributed, including putting the pan off-center occasionally so there is heat directly on the edges of the pan, not just concentrated in the middle.
  14. When the eggs are just set in the center, the frittata should release easily from the pan. Sometimes it is helpful to run a silicone spatula around the edge of the frittata to help it release.
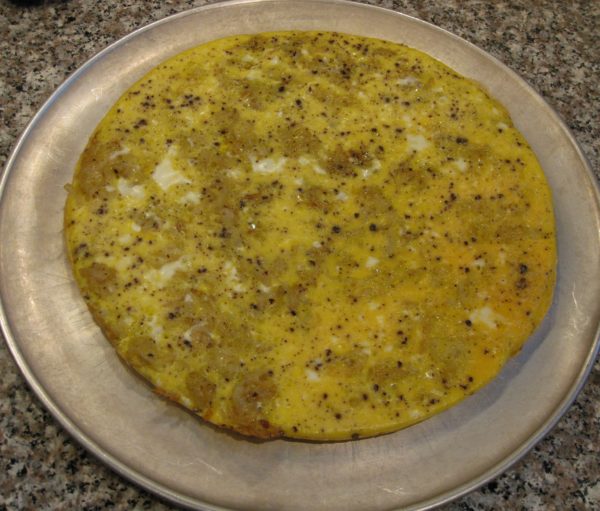
  15. Slide the frittata out of the pan and onto a large pizza pan.
  16. Invert the pan over the frittata.
  17. Grasp the sauté pan and pizza pan with both hands and flip them over in one quick motion.
  18. Put the sauté pan, with the now-upside-down frittata, back on the heat, uncovered, for about 5 minutes until the bottom of the frittata is golden brown.
  19. Slide the frittata onto a serving platter.
Recipe Notes

Copyright © 2017 by VillaSentieri.com. All rights reserved.

Share this Recipe