New Mexican Green Chile Sauce

September 22, 2017

Those of you who haven’t spent time in New Mexico may not know that chile (definitely spelled with an “e”) has cult status in the state.

New Mexican food wouldn’t be the same without “red” or “green.” Chile, that is. Those are the standard sauces used in New Mexican cuisine.

When ordering most dishes in a New Mexican restaurant in Santa Fe, the first question from the server, if the customer hasn’t specified, is “Red or Green or Christmas?”

Just 70 miles away in Taos, the question is “Red or Green or Caribe?”

It’s not that you can’t get Christmas in Taos, which as you might have guessed is half red chile sauce and half green chile sauce, it’s that never, ever is Caribe an option in Santa Fe. It just isn’t. I believe this speaks to the development of related, but different, foodways in the historically isolated towns and villages of New Mexico.

The most famous of all New Mexico chile is Hatch. There are about six varieties of chile grown in Hatch but, if they’re grown there, they can all be labeled as Hatch Chile. The tiny village of Chimayó, just under 30 miles from Santa Fe in northern New Mexico, grows good chile, too.

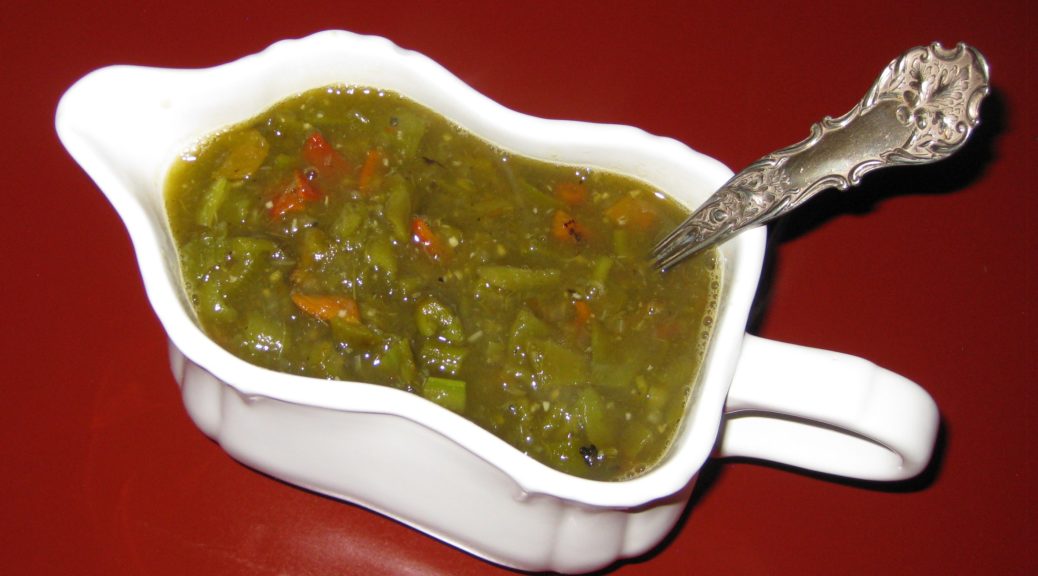
When I buy roasted green chile at the Santa Fe Farmers Market, I usually head for the vendor selling chile from Chimayó. That’s exactly what I did last week to make a batch of Green Chile for this blog post (honestly, we don’t add the word “sauce” to the end as the context indicates whether one is talking about the sauce or the fruit. And, yes, chile is a fruit!). Chimayó has a multi-hundred year history of growing heirloom chile and I feel good supporting that history, if even in a very small way.

A typical chile-roasting set-up found throughout parking lots in New Mexico in the late summer.

I served that chile during a dinner party for a group of close friends. Among the ten of us, only one was born and raised in New Mexico, Pat Assimakis (aka Pat Paris if you’re a maître d’ and she’s ever made a reservation at your restaurant). I gave Pat a taste of my green chile, she thought for a second and said, “Chimayó?” She nailed it! It’s got a slightly different taste from Hatch chile.

New Mexicans have strong opinions about their chile, be it red or green. The usual divide is between those who put almost nothing but chile in their chile (see, you knew the first meant the fruit and the second meant the sauce, right?) except for a bit of onion and/or garlic and those who add herbs (like oregano) and spices (like cumin). I am firmly in the former camp. Onion and garlic help to round out the flavor but, to my taste, herbs and spices detract from the pure chile goodness.

The other divide is degree of heat. Back to the restaurant scenario above, a frequent question from the customer after the server says “Red or Green?” is “Which is hotter?” Restaurants stake out their territory, not only in how they make their chile, but in terms of which is hotter.

Since I’m a bit of a chile-head, given a choice between the medium-hot and the hot Chimayó chile at the Farmers Market, I opted for the hot. So, I was more than a little concerned when Doug Howe, one of the other friends at our dinner, and the first to ladle some green chile onto his plate, took three large spoonsful. Before I could warn him, he took a bite and was in agony. I relieved him of his green chile, putting it on my plate, instead. Pat and I sure enjoyed the chile, Doug not so much. As for the other seven diners, I’m not sure.

In case you missed it, here is my recipe for Red Chile.


Follow us


Click HERE to join our mailing list and you’ll never miss a recipe again!

Print Recipe
New Mexican Green Chile Sauce
This is classic New Mexican Green Chile. There are just a few aromatics and no herbs and spices to muddy the flavor. Removing the skin and seeds can be a chore as they want to stick to your fingers. Dipping the chile and your fingers in water makes the task a breeze however, you want to use that water as part of the sauce because all of the tasty liquid that collects inside the chile as it roasts would be lost otherwise.
Votes: 0
Rating: 0
You:
Rate this recipe!
Prep Time 30 minutes
Cook Time 45 minutes
Servings
cups
Ingredients
Prep Time 30 minutes
Cook Time 45 minutes
Servings
cups
Ingredients
Votes: 0
Rating: 0
You:
Rate this recipe!
Instructions
  1. Roasted green chile ready to be cleaned.
  2. Put two cups of water in a small bowl.
  3. Holding the chile over a bowl to catch any juice, use your fingers to remove the skin of the roasted chile. Most of the skin should slide off easily. You may need to work on a few bits here and there. Remove as much skin as possible but a few bits of stubbornly sticking skin aren’t a problem.
  4. Shake whatever skin you can from your fingers (it has a tendency to cling desperately to your fingers) then dip your fingers and the chile in the bowl of water to remove the clinging skin.
  5. Still holding the chile over a bowl, remove the stem end. You can usually do this by pinching the top of the chile but a pair of kitchen shears works well, too.
  6. Discard the stem end and any seeds that cling to it.
  7. Split the chile in half lengthwise. Again, this is pretty easy to do with a fingernail.
  8. Dip the chile into the bowl of water and scrape away the seeds.
  9. Put the cleaned chile into a clean bowl and repeat the process with the remaining chile.
  10. Cut the chile into long strips.
  11. Cut the chile crosswise into small squares
  12. Add any liquid that has collected in the bottom of the bowl from the chopped chile to the bowl of water.
  13. Strain out seeds and bits of flesh from the water using a three step process. Strain the water through a large sieve.
  14. Strain the liquid through a fine, small sieve.
  15. Strain the liquid through several layers of cheesecloth or a paper filter.
  16. Chop the onion.
  17. Mince the garlic.
  18. Combine ½ cup of chopped chile, onion, garlic, strained water, and salt in a saucepan. Bring the mixture to a boil and simmer for 20 minutes.
  19. Using an immersion blender or a regular blender puree the chile mixture. This will help to thicken the chile sauce without using a thickening agent.
  20. Add the remaining diced chile and two cups of water to the puree and simmer until the chile is soft to the bite, but not mushy, approximately 15-20 minutes, adjusting salt approximately 10 minutes into the simmer. If you used a regular blender in the previous step, use the water to rinse out the blender jar before adding it to the pot.
  21. The green chile can be refrigerated or frozen. It will become softer if frozen so best to cook it for a shorter time if it is going to be frozen.
Recipe Notes

Copyright © 2017 by VillaSentieri.com. All rights reserved.

Share this Recipe

Calabacitas: A New Mexican Classic

August 21, 2017

Talk about a dish that simply wouldn’t exist in any recognizable form without new world crops, calabacitas is it! Squash, corn, and chile are all new world plants.

Calabacitas is Spanish for zucchini but is also the name given to a dish of zucchini, corn, and (usually) green chile.

Often served as a side dish, calabacitas makes an awesome burrito, too. Accompany it with some frijoles (and probably a tortilla or three) and you’ve got a great high-protein vegetarian dinner. Leave out the cheese and it’s vegan! Truth be told, I’m plus-minus on the cheese in any case. When serving this for company I usually sprinkle cheese on top as in this recipe, but if it’s just for “us,” cheese isn’t usually even a thought.

This is the time of year to serve the most sublime calabacitas possible as zucchini, corn, green chile, and tomatoes are all in the farmers’ market. But calabacitas is too good to be had only a few weeks a year and, honestly, versions made with frozen corn, canned tomatoes, and roasted green chile that you’ve squirreled away in your freezer along with the ever-present zucchini in the produce aisle are too good to pass up any time of year.

For me, calabacitas shares a serious failing with succotash. They are both great ideas in my estimation but the execution often falls flat.

When I set out to finally perfect a version of calabacitas that I felt comfortable serving, I thought back on all the less-than-perfect renditions I’d had since I first set foot in New Mexico in 1991.

The litany of offenses includes being too watery, being too rich, having huge chunks of zucchini that seem mismatched next to corn kernels, being under-seasoned and being aggressively seasoned.

That set out a plan of action for me. The zucchini should be cut approximately the same size as corn kernels. There needed to be a minimum amount of liquid in the finished dish. Loads of cream or butter or cheese were out of the question. The seasoning should complement the vegetables, not assume control of the dish.

Zucchini (the namesake vegetable) and corn were a given. Pretty much everything else was up for grabs. Tomatoes, which are sometimes included, seemed right for color and a bit of acidic brightness that the zucchini and corn lack. They have the added bonus of being another New World crop. Roasted green chile, also sometimes included, was right for several reasons. It screamed “New Mexico,” it would add a bit of complimentary smokiness to the blend, and, honestly, I’m a chile-head.

My preference was for hot or extra-hot chile. This is wrong for several reasons. First, calabacitas is not traditionally a spicy dish. Second, after one of the dinners where I tested out my evolving recipe, one of the guests said that it was unfortunate that the entire “calabacitas conversation” that evening centered on how hot it was and not on how good it was.

In cooking I prefer to bow to tradition but if there’s ever a place where I butt heads with tradition, it’s in making dishes spicy. But I decided there and then that I should follow tradition and use mild chile in my calabacitas.

Finally I was on to the aromatics and seasoning. Onion and garlic are my go-to combination unless there is some compelling reason for one or the other (usually based on tradition). The herbs eluded me for a while. I really wanted to use Mexican Oregano (which isn’t actually oregano) because of its New World origins but it just seemed to overpower the dish. In the end, I decided that a modest amount of Mediterranean Oregano played best in the sandbox with the other ingredients.

Let me know what you think of my rendition of a New Mexico classic.


Follow us


Click HERE to join our mailing list and you’ll never miss a recipe again!

Print Recipe
Calabacitas: A New Mexican Classic
Traditionally calabacitas is not a spicy dish so it is best to use mild roasted green chile unless you and all your eaters are chile heads. Bacon fat gives a great flavor but olive oil or other vegetable oil is fine, too. Frozen corn works well as there are so many other flavors in the dish but using fresh corn cut off the cob is a definite treat. I prefer to thaw frozen corn before cooking. Ice crystals can sometimes carry a "freezer" taste and rinsing them off can eliminate it. Also, it is easier to time the cooking of the corn in combination with other ingredients if it is not frozen when cooking starts. Rotel packs tomatoes in 10 ounce cans and they’re a bit of a Southwestern classic in and of themselves. In a pinch feta cheese can be used instead of Cotija
Votes: 0
Rating: 0
You:
Rate this recipe!
Prep Time 40 minutes
Cook Time 30 minutes
Servings
people
Ingredients
Prep Time 40 minutes
Cook Time 30 minutes
Servings
people
Ingredients
Votes: 0
Rating: 0
You:
Rate this recipe!
Instructions
  1. Dice the zucchini.
  2. Thaw the corn under running water.
  3. Roasted New Mexico green chile.
  4. Peeled and seeded chile, ready to be chopped.
  5. Sauté the onion until translucent.
  6. Add the garlic and continue to cook until the onion is golden but not brown.
  7. Add the zucchini and sauté until the zucchini is hot.
  8. Add the corn, green chile, tomatoes, oregano, salt, and pepper.
  9. Simmer until the liquid has evaporated and the zucchini and corn are cooked, about 10-15 minutes, depending on your preference.
  10. Adjust oregano, salt and pepper in the last few minutes of cooking.
  11. Serve sprinkled with crumbled Cotija cheese.
Recipe Notes

Copyright © 2017 by VillaSentieri.com. All rights reserved.

Share this Recipe