The Best Cheesecake… Ever!!

July 30, 2020

I apologize!

This isn’t an Italian recipe.


Join our mailing list and you’ll never miss a recipe again!


I’ve had a taste for cheesecake for months now.  A few weeks ago, I bought cream cheese and sour cream in anticipation of making cheesecake.

Well, yesterday was the day.

I pulled out a recipe that I stumbled upon more than twenty years ago.

It was from a coffee shop in Santa Fe, The Three Cities of Spain, that closed in the mid 1970s!  Apparently, the coffee shop was quite an interesting place!


Follow us on your social media platform of choice


I can’t tell you much more about the recipe, though now that I’ve looked, I’ve found a number of versions on the web.

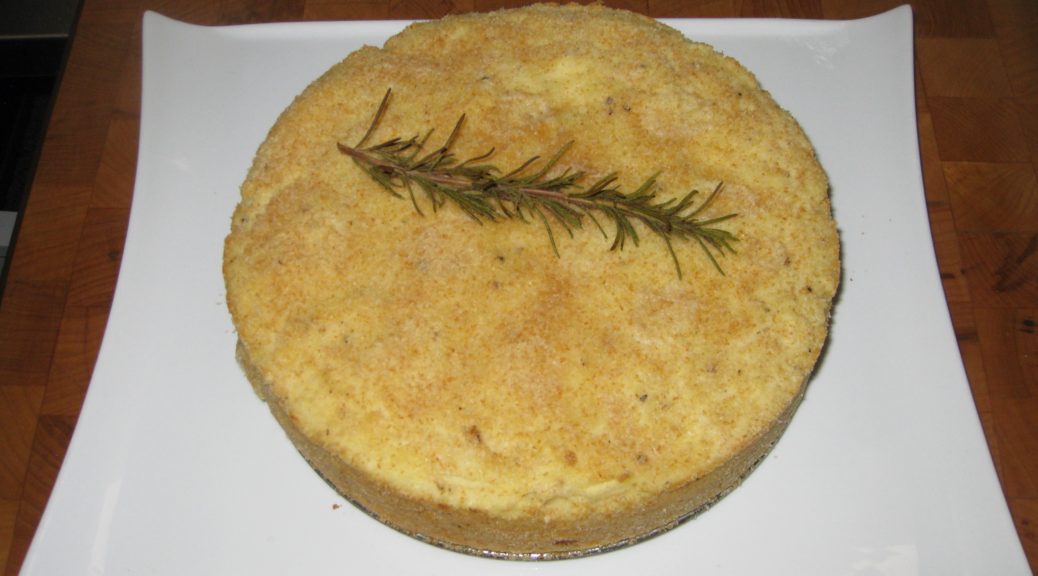
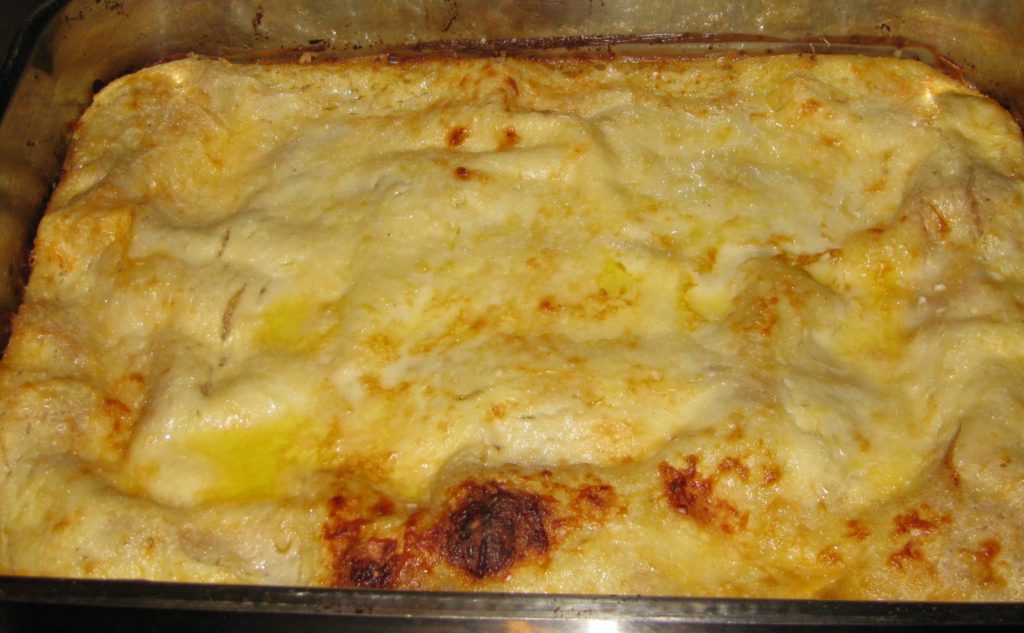
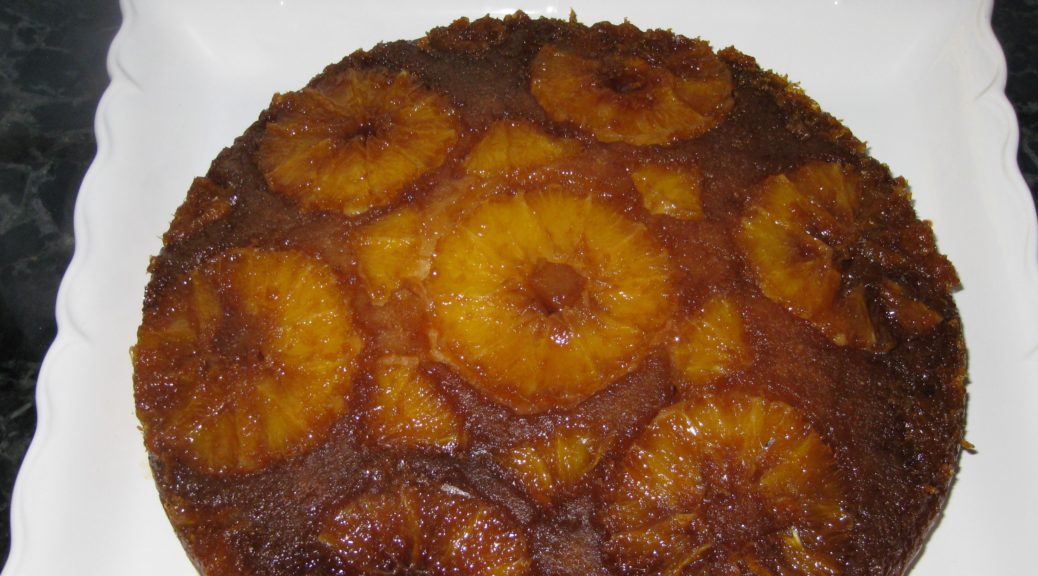
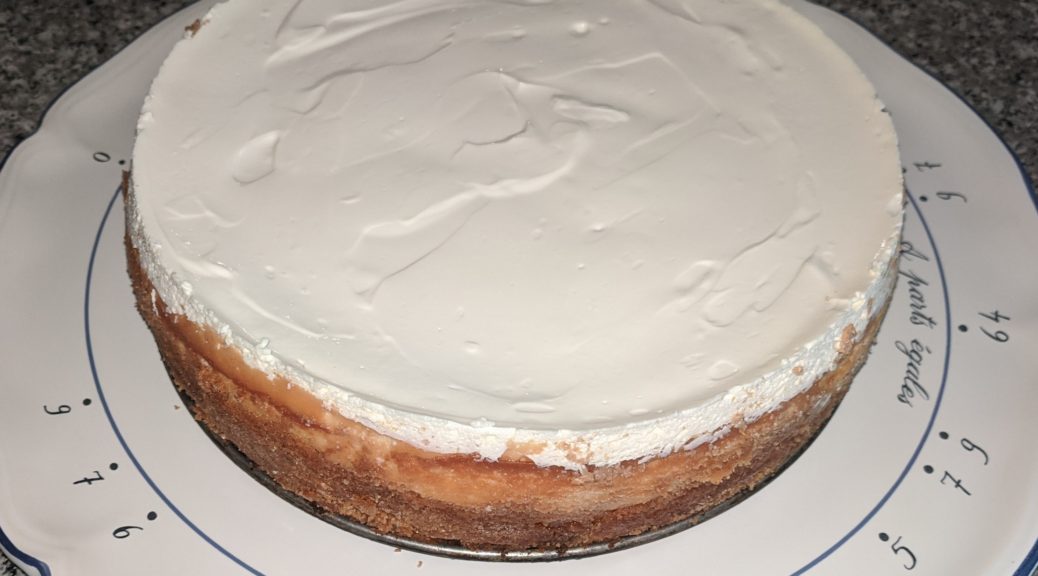
What I can tell you is that if you like cheesecake, MAKE THIS CAKE NOW!

Print Recipe
The Best Cheesecake... Ever!!
The very short and simple ingredient list belies the deliciousness of this cheesecake. Make it the day before you want to serve it so that it has time to chill and set.
Votes: 1
Rating: 5
You:
Rate this recipe!
Cuisine American
Prep Time 40 minutes
Cook Time 60 minutes
Passive Time 10 hours
Servings
people
Ingredients
Crust
Filling
Topping
Cuisine American
Prep Time 40 minutes
Cook Time 60 minutes
Passive Time 10 hours
Servings
people
Ingredients
Crust
Filling
Topping
Votes: 1
Rating: 5
You:
Rate this recipe!
Instructions
Crust
  1. Butter the bottom and sides of a 9 1/2 inch (24 centimeter) springform pan.
  2. Combine all crust ingredients. Press into the bottom and about one inch up the sides of the buttered springform pan.
Filling
  1. Beat the cream cheese until light and fluffy, preferably using the paddle of a planetary mixer. Scrape the bowl several times to be sure the cream cheese is well blended.
  2. Beat in the eggs, one at a time, beating very well after each addition, and scraping down the bowl.
  3. Add the sugar and blend. Add the vanilla. Turn the mixer to high and beat until very light and fluffy, approximately one minute.
  4. Pour the filling into the prepared springform pan. The filling should come over the top of the graham cracker crust.
  5. Bake 350°F for 40-45 minutes or until the cake is jiggly in the center but set about three inches in from the edge.
  6. Remove the cake from the oven and allow to rest for five minutes. Do not turn the oven off.
  7. Prepare the topping.
Topping
  1. Blend all ingredients thoroughly.
  2. After the cake has been out of the oven for five minutes, put the topping on the firm part of the cake, around the edges, then carefully spread it evenly over the entire top of the cake.
  3. Return the cheesecake to the oven for 10 minutes.
  4. About 10 minutes after removing the cake from the oven, run a knife around the side to loosen the crust but do not unmold the cake. Allow the cake to cool to room temperature then cover loosely and refrigerate at least six hours.
  5. About three hours before serving, remove the cake from the refrigerator. Remove the side of the springform pan. Allow the cake to come to room temperature before serving.
Recipe Notes

Copyright © 2020 by Villa Sentieri, LLC. All rights reserved.

Share this Recipe

Crostata di Amaretti (Amaretti Tart)

July 21, 2020

You can keep the chocolate!

It’s not that I don’t like chocolate.  It’s just that I’m not one of those people who thinks chocolate is the absolute best flavor for sweets.

My favorite flavors are almond and coconut.  Preferably together.

I remember a cake I ate when I was 12 years old.  It was an absurdly moist yellow cake that tasted of almond and coconut.

A bottle of Amaretto di Saronno before it was rebranded.

In memory of that cake, which I had only once, I have an entire stash of coconut-almond cake recipes.  I’m building up to the day when I head to my kitchen in Palm Springs (so I can bake without contending with the nearly 8000-foot elevation of Villa Sentieri) and bake coconut-almond cakes every day till I create one that tastes the way I remember it.


Follow us on your social media platform of choice


In the meantime, I make lots of coconut- and almond-based desserts including almond gelato, maraschino cherry cake with almond filling (from the first edition Betty Crocker Picture Cookbook), raspberry bars with almond crust, coconut pistachio crumb cake, Brazilian coconut pudding, coconut pie, Marcona almond blondies, and wattalappam (a coconut custard from Sri Lanka) among many, many others.

Zia Fidalma selecting produce at a supermarket.

One of my favorites, is an improbable recipe I got from Great Aunt Fidalma in Tuscany nearly 20 years ago for a crostata (tart) with a filling of crushed amaretti cookies and amaretto liqueur.

I know, I know, amaretti and amaretto only pretend to be almond.  They’re really made from apricot pits.  At least the commercial versions are made from apricot pits.

You knew that, right?


Join our mailing list and you’ll never miss a recipe again!


The brand of amaretti I typically buy is Lazzaroni.  It’s the one that comes in the red tin.  Until recently, the brand of liqueur I bought was Amaretto di Saronno.  In 2001 Amaretto di Saronno was rebranded to Disaronno Originale.

Amaretto di Saronno after it was rebranded Disaronno in 2001.

When I went to buy the Amaretto to make this crostata, I found an unfamiliar one from the makers of the cookies, Lazzaroni Amaretto.

While Amaretto di Saronno is made from infusing apricot pits, the good folks at Lazzaroni say that they infuse their famous cookies (which, of course, contain apricot pits).

Lazzaroni amaretti and an amaretto liqueur by the same company.

Since the flavor of this crostata is entirely dependent on the amaretti and the amaretto, I suggest you buy good quality ones.

Print Recipe
Crostata di Amaretti (Amaretti Tart)
Use very good quality amaretti cookies and amaretto liqueur as the taste of the crostata is completely dependent on them. You can buy amaretti in packages of 200 grams, if you buy a larger quantity, weight out 200 grams or 7 ounces. Most home cooks in Italy buy little envelopes of powered (artificial) vanilla flavoring. These are not common in the United States, so I’ve substituted vanilla extract. You can use one envelope of Italian vanilla flavor instead of one teaspoon of vanilla extract.
Votes: 0
Rating: 0
You:
Rate this recipe!
Cuisine Italian
Prep Time 1 hour
Cook Time 30 minutes
Servings
people
Ingredients
Pasta Frolla
Cuisine Italian
Prep Time 1 hour
Cook Time 30 minutes
Servings
people
Ingredients
Pasta Frolla
Votes: 0
Rating: 0
You:
Rate this recipe!
Instructions
Pasta Frolla
  1. Blend the flour, sugar, baking powder, vanilla powder, if using, salt and lemon zest in a food processor until combined.
  2. Add the butter, cut in pieces, and vanilla extract, if using, then blend till well combined.
  3. Add the eggs and blend till the pastry almost forms a ball.
  4. Remove the pastry from the food processor and use your hands to press everything into a single ball.
  5. Wrap the pastry in waxed paper and refrigerate for an hour before using.
  6. Roll the pasta frolla into a 13-inch circle.
  7. Line a greased 10" deep dish tart pan with a removable bottom with Pasta Frolla going about 1 inch up the sides. Trim the excess and use it to patch the crust if necessary.
Filling and Assembly
  1. Reserve six amaretti for garnish.
  2. Crush the remaining amaretti and combine with liqueur, and vanilla extract, if using.
  3. Soak, occasionally crushing the amaretti further, until thick and batter-like.
  4. Combine sugar, lemon zest and vanilla powder, if using.
  5. Combine the egg yolk and the sugar mixture with the amaretti mixture. Mix well.
  6. Beat the three egg whites and cream of tartar until stiff.
  7. Fold a spoonful of the egg whites into the amaretti mixture to lighten it.
  8. Gently fold in the remainder of the whites, in two portions.
  9. Pour the filling into the tart pan lined with pasta frolla.
  10. Garnish the top with the reserved whole amaretti.
  11. Bake at 350°F approximately 30 minutes, until golden brown.
  12. Cool in pan for about 10 minutes then gently remove the sides of the pan. (I like to do this by setting the pan on a large can then gently jiggling the pan apart.)
  13. Cool thoroughly on a rack.
  14. The crostata should be stable enough to slide off the bottom of the tart pan and onto a serving platter.
  15. Serve with whipped cream, if desired.
Recipe Notes

Copyright © 2020 by Villa Sentieri, LLC. All rights reserved.

Share this Recipe

Sformato di Patate (Italian Potato “Cake”)

July 13, 2020

I published a photo for this dish on my Facebook feed last week and got so much attention that I decided to actually post the recipe.

Sformato di Spinaci (spinach sformato or, if you must, spinach casserole) is a dish that garners great reverence in my husband’s family.  A while ago, I published my adaptation of the family recipe.

I make sformati out of lots of different vegetables besides spinach, including Swiss chard, zucchini, and cauliflower, among others.

Sometimes I swap out the ground beef in my husband’s grandmother’s recipe for sausage or Calabrese salame, or mushrooms.  This is a heretical act in his family but everyone still eats the sformato.  This is compounded  by the blasphemy of adding besciamella to the mix.


Join our mailing list and you’ll never miss a recipe again!


Although I make several versions of potato “cakes” I never thought of them as sformati until I stumbled upon the genre while perusing Italian-language food websites.

Although I had mixed meat, such as salame or prosciutto, and cheese into the potato mixture before baking it, I had never made a layer of filling in the middle.  Doing so changes the whole character of the dish.  It really feels like a main course (or what would be a secondo in an Italian meal) rather than gussied up potatoes that should be served as a side dish (contorno)!


Follow us on your social media platform of choice


When serving sformato di patate, I often start with soup and end with a salad… unless it’s a meal for which I developed a new gelato flavor to try! (This happens once, if not twice, per week… the gelato, not the sformato!)

This recipe calls for prosciutto cotto (cooked ham).  This is not the cured ham that we simply call “prosciutto” in English.  It really is just a cooked ham.  Typically, it would not be smoked.  I have successfully made this with good quality ham from the deli counter as well a fully-cooked lightly-smoked ham from the meat counter.

Since the cheese is smoked, I find that smoked ham works as well as un-smoked ham though the former is more traditional.

Print Recipe
Sformato di Patate (Italian Potato "Cake")
Italian prosciutto cotto is not smoked so the most traditional ham would be unsmoked but since the cheese is smoky, I’ve occasionally used a lightly smoked ham and gotten fantastic results. If the ham is not sliced very, very thinly, cut it into batons about the size of wooden matchsticks. I’ve chosen to keep this recipe in the metric measures that I use. You can click the button below to change to American measures. Feel free to round the quantities up or down a bit.
Votes: 0
Rating: 0
You:
Rate this recipe!
Course Meats
Cuisine Italian
Prep Time 30 minutes
Cook Time 90 minutes
Passive Time 15 minutes
Servings
people
Ingredients
Course Meats
Cuisine Italian
Prep Time 30 minutes
Cook Time 90 minutes
Passive Time 15 minutes
Servings
people
Ingredients
Votes: 0
Rating: 0
You:
Rate this recipe!
Instructions
  1. Peel the potatoes. Dice and cook in salted water until they can be easily pierced with a fork but are not falling apart.
  2. While still hot, pass the potatoes through a ricer and allow to cool until they are comfortable to touch.
  3. Combine potatoes with eggs, Parmigiano and milk. Mix well. Add salt and pepper to taste.
  4. Butter a 22 cm springform pan and coat with fine dry breadcrumbs.
  5. Press about 60% of the potato mixture onto the bottom and up the sides of the pan.
  6. Layer the prosciutto and scamorza inside, making two alternating layers of each.
  7. Top with the remaining potato mixture and smooth the top.
  8. Sprinkle the top with breadcrumbs and dot generously with butter.
  9. Bake at 350°F for approximately one hour, until golden, adding the rosemary sprig to the top of the sformato after about 20 minutes of baking.
  10. After an hour, the internal temperature should be close enough to 165°F that it will reach that temperature while it rests.
  11. Remove from the oven and allow to cool approximately 15 minutes before removing the sides of the pan and serving.
Recipe Notes

Copyright © 2020 by Villa Sentieri, LLC. All rights reserved.

Share this Recipe

Crostini with Fava Beans and Arugula

March 18, 2020

A few weeks ago, our dinner group decided that the theme of our dinner would be dishes from my blog.  For complete disclosure, I recused myself from that decision.

Dating back to the beginning of our group, Santa Fe Ate, the name being both a play on what we do and how many we are [though recently we’ve been six due to a move out of state], Becky Gould has bid on appetizers.  There is the occasional exception but one can count on Becky to sate our hunger at the beginning of an evening with some artfully created appetizers.

Santa Fe Ate (minus two) our current configuration. (left to right: Pat Assimakis, Doug Howe, Gary Mihalik, Frank Pieri, Rich DePippo, Becky Gould)

Becky went through every one of my blog posts and came to the conclusion that I had not posted very many recipes for appetizers.


Join our mailing list and you’ll never miss a recipe again!


My review confirmed the same.

This post is the beginning of trying to rectify that situation.

Appetizers that Becky whipped up from the first edition 1950 Betty Crocker Cookbook for a dinner where all dishes had to come from that book.

Crostini are a favorite appetizer in our house.  The formula is infinitely adaptable.  It goes something like this:

  1. Toast bread, preferably a rustic Italian-style loaf or a baguette.
  2. Drizzle with good extra-virgin olive oil.
  3. Rub with the cut side of a clove of garlic.
  4. Add a topping of your choice.

Often, I stop at step three.  Toasted bread rubbed with garlic and extra-virgin olive oil is good without any embellishment.

If I’m not making many crostini, I’ll toast the bread in my 1967 General Electric Toast-R-Oven using the aluminum tray and the “top brown only” setting, flipping the bread once to toast both sides.  [Yes! I really do use a 53-year-old toaster oven.]

My 1967 General Electric Toast-R-Oven.

When making crostini for a crowd, I use the broiler and follow the same process of flipping the bread.


Follow us on your social media platform of choice


Choose toppings to suit your whim and the season.  Chopped fresh in-season tomatoes with a hint of basil is a classic topping as is coarsely mashed cooked cannellini beans with an extra drizzle of extra-virgin olive oil.

Becky’s spring rolls for a meal focused on “French Indochina 1920’s to 1930’s.”

Just last week I made crostini topped with goat cheese and spicy eggplant preserved in extra-virgin olive oil (melanzane piccante sott’olio) that I had made a few days earlier.

This particular combination of beans and arugula, zipped up with lemon, is very refreshing and a reminder that spring is not far away.


Print Recipe
Crostini with Fava Beans and Arugula
Frozen fava beans work well in this recipe. If you cannot get fava beans, substitute edamame. If using fava beans, you will need to start with more than one cup of shelled beans to have one cup of peeled beans after cooking.
Votes: 0
Rating: 0
You:
Rate this recipe!
Prep Time 20 minutes
Cook Time 10 minutes
Passive Time 6 hours
Servings
persons
Ingredients
Prep Time 20 minutes
Cook Time 10 minutes
Passive Time 6 hours
Servings
persons
Ingredients
Votes: 0
Rating: 0
You:
Rate this recipe!
Instructions
  1. Cook fava beans or edamame till tender, approximately 3-4 minutes. Drain and shock in ice water.
  2. If using fava beans, peel them.
  3. Coarsely chop the cooked beans in a small food processor.
  4. Remove half the beans and reserve.
  5. Coarsely chop 1/2 ounce of arugula by hand. Reserve.
  6. To the beans in the food processor, add 1/4 cup of olive oil, the remaining 1/2 ounce of arugula, mint leaves (if using), Pecorino Romano cheese, lemon zest, and lemon juice.
  7. Process until almost smooth.
  8. Combine puree with the coarsely chopped beans and arugula and mix by hand.
  9. Adjust salt, pepper, and lemon juice. Refrigerate several hours, or overnight, to allow flavors to blend.
  10. Return to room temperature before using.
  11. To serve, toast slices of baguette. Drizzle one side of the toasted bread with extra-virgin olive oil. Rub the bread with the cut side of a garlic clove, distributing the oil.
  12. Top each slice of bread with some of the bean mixture.
Recipe Notes

Copyright © 2020 by Villa Sentieri, LLC. All rights reserved.

Share this Recipe

Ragù alla Bolognese

March 11, 2020

I grew up eating exactly one type of tomato sauce for pasta: my mother’s long-simmered, Italian-American-but-based-on-Southern-Italian (Calabrese, to be exact) ragù.

OK, OK, I sometimes ate Aunt Margie’s or Aunt Mamie’s version of the same sauce but we’re talking very minor variations on a theme.

My mother made pasta other ways than with ragù, most commonly with beans as in pasta e fagioli.  But if we were going to eat pasta for pasta’s sake, not mixed with beans or in soup, it was ALWAYS served with her ragù.

My recipe for Lasagna Bolognese will be posted in a few weeks. Get ready by making Ragù alla Bolognese and putting it in the freezer!

When I went away to university at the age of 17 this is one of the first things that I learned to cook.  Well, sort of.  There’s a bit of a learning curve but even my first attempt was respectable.


Join our mailing list and you’ll never miss a recipe again!


I now make scores of tomato-based sauces on a regular basis but I keep going back to three of them over and over:

  1.   My mother’s ragù.
  2.   Ragù alla Bolognese.
  3.  Ragù del macellaio (the butcher’s ragù).

There are so many childhood memories attached to my mother’s ragù that I can’t imagine a time when it wouldn’t be my favorite.

As far as I’m concerned, Ragù alla Bolognese is the gold standard for those tomato-based pasta sauces made with ground meat.  (My mother’s ragù, on the other hand, is made with large pieces of pork.  Other meats can be added but the pork is always there.)

It is really important that the vegetables for Ragù alla Bolognese be cut in tiny dice, 1/8 on a side, often called brunoise.

Ragù del macellaio is very good but, as you might expect for a sauce linked to a butcher, it is made with an array of meats—pretty much anything you have.  I always end up with odds and ends of meat in my freezer, a bit of beef, a bit of pork, some sausage, a piece of chicken, some pancetta, and so forth.  I grind them all up and make the sauce.  The fact that it cooks, unattended, in a slow-cooker all day is an added bonus.

Just as there is an official Pesto alla Genovese recipe, there is an official Ragù alla Bolognese recipe that was codified in the 1980’s.  The ingredients go something like this:

  • 300 grams ground beef, preferably thin flank aka skirt (finta cartella in Italian)
  • 150 grams pancetta, minced
  • 50 grams carrot, minced
  • 50 grams celery, minced
  • 50 grams onion, minced
  • 30 grams triple-concentrated tomato paste
  • 1/2 glass red or white wine
  • 180 ml milk
  • olive oil
  • salt and pepper

Every family in Bologna probably has a slightly different version.


Follow us on your social media platform of choice


Some aspects of the recipe are notable.  There is no garlic.  There are no herbs.  The amount of tomato is quite modest.  Probably the biggest differences I see in credible recipes for Ragù alla Bolognese is whether or not to add milk or cream.  The official version clearly includes it but many otherwise solid recipes do not.

This is not a “tomatoey” sauce.  It’s really ground meat held together with a bit of tomato “binder.”

The version that I make most often varies somewhat from the official one.  I add a hint of garlic and more tomato.  I don’t typically use pancetta though it’s a great addition.  I never add milk or cream.

So, I’ve done it, I’ve laid down a gauntlet.  I’m advocating a recipe that’s not the official one.  I can tell you, however, that it’s darn good.

Give it a try and let me know what you think.

Print Recipe
Ragù alla Bolognese
I make garlic oil and keep it in a squeeze bottle by the stove. It comes in really handy for cooking and for flavoring finished dishes. You can use plain extra-virgin olive oil if you wish. In fact, that would be more traditional than garlic. For added flavor, sauté 150 grams of minced pancetta in the olive oil until the fat is rendered. Remove the cooked pancetta. Brown the meat in the oil. Add the cooked pancetta to the meat just before adding the wine. Ragù alla Bolognese should be served with a wide long pasta such as mafalde or linguine.
Votes: 0
Rating: 0
You:
Rate this recipe!
Prep Time 30 minutes
Cook Time 5 hours, mostly unattended
Servings
liters
Ingredients
Prep Time 30 minutes
Cook Time 5 hours, mostly unattended
Servings
liters
Ingredients
Votes: 0
Rating: 0
You:
Rate this recipe!
Instructions
  1. Heat the butter in a heavy-bottomed sauté pan. Add the celery, carrot, and onion.
  2. Sauté the celery, carrot, and onion in the butter until soft without browning. Reserve.
  3. Heat the garlic oil, or extra-virgin olive oil, in a heavy-bottomed sauce pan. Add the beef and pork, if using.
  4. While the meat is cooking, break it up into small bits.
  5. Sauté the beef and pork, if using, in the garlic oil until a lot of fond develops.
  6. Add the wine and boil it all away, loosening the fond from the bottom of the pan.
  7. Pass the canned tomatoes through a food mill.
  8. Add the sautéed vegetables, the tomatoes that have been passed through a food mill, and bay leaf, if using.
  9. Season with salt and pepper.
  10. Simmer 3 to 4 hours partially covered, stirring frequently, until reduced by 50%.
Recipe Notes

Copyright © 2020 by Villa Sentieri, LLC. All rights reserved.

Share this Recipe

Torta all’Arancia (Orange Polenta Upside-Down Cake)

March 4, 2020

Italy is lavished with citrus, more so in Southern Italy than Northern Italy.  Even in Tuscany, though, families traditionally use a limonaia to winter-over lemon trees grown in pots.

Potted lemon trees at a house in the village of Benabbio in Tuscany.

Citrus fruits feature prominently in Italian cuisine, especially in Southern Italy.  Calabria is responsible for about 25% of the citrus fruit produced in Italy.


Join our mailing list and you’ll never miss a recipe again!


A very short list of Italian foods that contain, or are made from citrus includes the famous limoncello liqueur and its orange-based cousin, arancello; panettone that is traditionally made with candied citron; lemon sorbetto (sorbet); an array of marmalades and jams; candied citrus peels of various types eaten as sweetmeats, sometimes coated in chocolate, as well as diced and incorporated into cakes; citrus salads, including an amazing Sicilian salad of oranges, fennel, onions and black olives; and the endless dishes where lemon juice is the basis of a pan sauce or salad dressing or, in lesser quantities, perks up other flavors without making itself known.

A rustic limonaia at a home in the village of Benabbio in Tuscany. It may be simple but it works beautifully.

Bergamot, most of which (and certainly the highest quality) comes from Calabria, is the defining flavor of Earl Grey Tea.  It is also used in an array of cosmetics and fragrances.

Maestro Paolo Caridi teaching a class at the Italian Culinary Institute.

Bergamot is also one of several citrus fruits used by Maestro Paolo Caridi to concoct the scrumptious citrus flavoring he uses in some of his pastries.  I’m itching to find a source of bergamot, which I understand grows in Palm Springs, California, to make a batch, having gotten his formula when I studied at the Italian Culinary Institute.


Follow us on your social media platform of choice


Being surrounded with citrus at our home in Palm Springs, I try to find ways to use the bounty.  It took me a while to come up with an orange cake (torta alle arance) that was everything I though an orange cake should be: a moist, not to sweet cake with a sturdy crumb and a distinct orange flavor.

A potted lemon tree on Great Aunt Fidalma’s terrace in Tuscany.

Print Recipe
Torta all'Arancia (Orange Polenta Upside-Down Cake)
Instead of cutting the oranges in slices, you can supreme them if you prefer the look of sections rather than slices. If possible, use the metric measures for the best results.
Votes: 0
Rating: 0
You:
Rate this recipe!
Cuisine Italian
Prep Time 45 minutes
Cook Time 1 hour
Passive Time 1 hour
Servings
people
Ingredients
Topping
Cake and Assembly
Cuisine Italian
Prep Time 45 minutes
Cook Time 1 hour
Passive Time 1 hour
Servings
people
Ingredients
Topping
Cake and Assembly
Votes: 0
Rating: 0
You:
Rate this recipe!
Instructions
Topping
  1. Grease a 10-inch x 2-inch circular cake pan with butter.
  2. Finely grate the zest of the three oranges without any of the white pith. A microplane grater work well. Reserve the zest and oranges separately.
  3. Combine brown sugar, butter, white sugar, and orange juice in a small pan. Heat, stirring frequently till butter is melted and sugar is dissolved. Raise heat and boil for 2 minutes, without stirring, until slightly thickened.
  4. Remove caramel syrup from the heat. Stir in the zest of three oranges. Pour the caramel on the bottom of the prepared pan. Allow to set for approximately 5 minutes, until cool.
  5. Meanwhile, slice the oranges approximately ¼ inch thick. Cut off all pith and rind. Remove the tough core from any slices that have it. Scissors work well for doing this.
  6. After the caramel has cooled for about 5 minutes, arrange orange slices over the caramel without overlapping. Cut slices as needed to fill in the larger gaps between the full slices.
Cake and Assembly
  1. Stir together the flour, cornmeal, baking powder and salt. Reserve.
  2. Beat the butter in an electric mixer until lightly creamed.
  3. Add the white sugar, then beat at high speed until light and fluffy, approximately 4 minutes.
  4. Add eggs, one at a time, beating on medium after each addition until the egg is combined.
  5. Mix in sour cream then vanilla and orange zest.
  6. With the mixer on low, add the flour mixture a little at a time and mix until almost combined. Finish mixing by hand.
  7. Spoon the batter over the orange slices in the prepared pa. Spread the batter and tap the pan to remove air bubbles.
  8. Bake at 350°F until a cake tester comes out clean, 50-55 minutes. Cool for 10 minutes in the pan.
  9. Using a knife, loosen the cake from the sides of the pan. Invert onto a serving dish. Cool completely.
Recipe Notes

Copyright © 2020 by Villa Sentieri, LLC. All rights reserved.

Share this Recipe

Caponata: A Taste of Sunny Sicily

January 22, 2020

The origins of both caponata and its name are unknown but that doesn’t keep some “authorities” from making definitive statements about both its origins and its name.  Other authors are more cautious about how they approach the topic.  There are many theories.  There are perhaps more theories about the origins of the dish and its name than there are versions of caponata itself, and that’s saying a lot.

Leaving the skin on the eggplant improves the texture of the caponata.

What we do know is that caponata, as we now know it, is Sicilian though there are traditional Neapolitan versions as well.


Join our mailing list and you’ll never miss a recipe again!


At its most basic caponata is a vegetable dish (though some versions include fish) with eggplant typically being the predominant ingredient (though there are other versions, such as one with artichokes) in a lightly sweet and sour sauce that usually contains some tomato product (fresh tomatoes or tomato sauce of some sort) and capers.

Beyond the basics, caponata has numerous traditional regional variations from different areas of Sicily.  There are also the endless variations introduced by individual cooks.

Onions are a common addition to caponata.

One could add or subtract celery, sweet peppers, zucchini, olives, pine nuts, almonds, and raisins (to name a few).

The eggplant can be fried, sautéed, or steamed (but almost always with the skin on).

Caponata can be served on a slice of toasted bread (crostino), as (part of) an antipasto, as a side dish (contorno), or as a main dish (secondo).  Though not traditional, I like tossing it with pasta.

Capers are in virtually every traditional version of caponata. Some authorities suggest the name “caponata” may be related to the word “caper.”

I prefer caponata that is neither aggressively sweet nor sour and, while the vegetables should not be mushy, I don’t want to hear a crunch when I bite down.


Follow us on your social media platform of choice


If I were drowning in home-grown tomatoes during harvest season, I’d probably work on perfecting a version that uses fresh tomatoes.  Since that’s not the case, my version uses tomato sauce.  The advantage is that I can make it year-round as the necessary vegetables are always available and of good quality.

Though it should not be frozen, caponata can be canned.  In fact, one of the demonstrations that I did for students at the Italian Culinary Institute this past September was how to can caponata.

Sweet peppers are traditional in some versions of caponata.

Unlike Italy, where the best eggplants and peppers are available only “in season” that’s not true in the United States.  Rather than canning a large batch of caponata, I just make it whenever I want some.

I hope you enjoy this version of caponata.

Turbinado or Demerara sugars are good substitutes for Italian “cane sugar” (zucchero di canna).

If you want to get more into the fray about the origins of caponata or its name, or the different versions, you can look here, here, here, here, here, or here.

Print Recipe
Caponata: A Taste of Sunny Sicily
There is a link to the recipe for Basic Tomato Sauce in the Notes section below. Any simple tomato sauce, or even tomato puree, could be substituted. If vegetable broth is not available water can be used. To my American readers, I apologize for the metric measures. You can convert to American measures by using the dropdown menu below. Turbinado and Demerara sugars are most similar to the “cane sugar” used in Italy. American light brown sugar would work in this recipe since the quantity is small. You can use either vinegar-packed or salt-packed capers.
Votes: 0
Rating: 0
You:
Rate this recipe!
Prep Time 30 minutes
Cook Time 45 minutes
Servings
cups
Ingredients
Prep Time 30 minutes
Cook Time 45 minutes
Servings
cups
Ingredients
Votes: 0
Rating: 0
You:
Rate this recipe!
Instructions
  1. Sauté the peppers and onions in olive oil with a pinch of salt until the onions become translucent.
  2. Add the eggplant and sauté until most, but not all, of the eggplant has become translucent.
  3. Add the vegetable stock and salt and pepper to taste. Cover and cook until just tender, 5-10 minutes.
  4. Remove cover. Quickly evaporate any remaining liquid.
  5. Add sugar and vinegar. Cook over moderately high heat until almost dry.
  6. Add the capers and pine nuts.
  7. Add the tomato sauce. Simmer briefly to blend flavors, 5-10 minutes.
  8. Adjust salt and pepper while cooking.
  9. Refrigerate.
  10. Bring to room temperature for serving.
Recipe Notes

The recipe for Basic Tomato Sauce can be found here.

Copyright © 2020 by Villa Sentieri, LLC. All rights reserved.

Share this Recipe

Pollo alla Romana (Chicken with Sweet Peppers)

January 15, 2020

I will forever remember Ferragosto as the day the music died.

Ferragosto is celebrated on the fifteenth of August throughout Italy.  Originating during the Roman Empire, apparently in 18 BCE by Emperor Augustus, Ferragosto was originally held on August 1st.  Ultimately, the Catholic Church moved the date to August 15th to coincide with the Assumption, a “holy day of obligation,” thus imposing a secular holiday on a religious holy day.

Ferragosto is a day to feast.  It is also the day that the late-night revelry in the piazza of Bagni di Lucca comes to an end.


Join our mailing list and you’ll never miss a recipe again!


Those of you who have been following my blog for a while know that I spent the month of August 2019 in Tuscany cooking with Great Aunt Fidalma.

Cutting zucchini with Great Aunt Fidalma in her kitchen in Benabbio.

I rented a charming little apartment overlooking the piazza in Bagni di Lucca, a town near the village of Benabbio where Aunt Fidalma lives.

The piazza becomes the locus of loud music (70’s disco, karaoke, Italian pop) late into the night (or early into the morning depending on your perspective) on the weekends in August as well as during several August festival days.

A view from my terrace of the late-night revelry in the piazza of Bagni di Lucca.

The music precludes sleep.  Even if one could find ear plugs sufficient to drown out the sound, the building, and thus the bed, vibrate to the bass.

Ferragosto, August 15th, is the end of the late-night music.


Follow us on your social media platform of choice


Today, January 15th, marks five months since Ferragosto.  Pollo alla Romana (also known as pollo con i peperoni [chicken with sweet peppers]) is traditionally served on Ferragosto.  Given the five-month anniversary, today seems like an appropriate day to post the recipe.

As you might guess from the name, Pollo alla Romana is from the area around Rome.  It is a simple dish made with chicken, sweet peppers (traditionally red and yellow ones) and tomatoes.  It can be cooked in the morning and served at room temperature later in the day making it a perfect summer dish.

It has become one of my go-to dishes for entertaining when I don’t want a lot of last-minute fuss to distract from enjoying cocktails with my guests.  Made earlier in the day, the dish reheats beautifully in the time it takes to drink a bourbon.

Print Recipe
Pollo alla Romana (Chicken with Sweet Peppers)
Traditionally this dish would be made with a cut-up chicken. I prefer to use just thighs as I think they take well to braising, which breasts don’t. You can use cut-up chicken parts if you prefer. When a dish says something should be fall-apart tender, I take that literally. It’s the way I grew up eating chicken cooked by my Italian-American mother. That means, for me, the chicken should braise in the liquid for at least 90 minutes if you’re close to sea level and longer if you're at a higher elevation. You can short-circuit that if you want but I think the texture of the dish will suffer.
Votes: 0
Rating: 0
You:
Rate this recipe!
Course Mains, Poultry
Cuisine Italian
Prep Time 30 minutes
Cook Time 2 1/2 hours
Servings
people
Ingredients
Course Mains, Poultry
Cuisine Italian
Prep Time 30 minutes
Cook Time 2 1/2 hours
Servings
people
Ingredients
Votes: 0
Rating: 0
You:
Rate this recipe!
Instructions
  1. Pass the can of tomatoes through a food mill to remove seeds and hard bits of tomato. Reserve the tomato puree.
  2. Slice the peppers into triangular pieces or thick strips.
  3. Using a large heavy-bottomed sauté pan, sauté the garlic in the olive oil over medium heat until medium brown. Discard the garlic.
  4. Sauté the chicken in the garlic-flavored oil over high heat, starting skin side down to render additional fat from the skin, flipping twice, until well browned. Remove and reserve chicken.
  5. Add the peppers to the oil and sauté briefly over high heat to put a light char on some of them. Remove and reserve peppers.
  6. Add the wine to the sauté pan, bring to a boil, and scrape up all the brown bits.
  7. After the wine evaporates, add the broth, tomato puree and oregano. Mix well.
  8. Add the chicken, skin side down, along with any accumulated juices. Season with salt and pepper.
  9. Simmer, partially covered, approximately 30 minutes (or, if you live at high altitude as I do, 60 minutes). Turn the chicken over. Remove and discard the skin (the skin adds lots of flavor as well as collagen to the sauce for a great mouth-feel so please use bone-in and skin-on thighs).
  10. Add the peppers and continue to braise, partially covered, for approximately another hour until the chicken is literally fall-apart tender. During cooking, taste and adjust salt, pepper, and oregano.
  11. Transfer the chicken and peppers to an oven-proof casserole.
  12. If the sauce is not thick, boil quickly to reduce it. Pour the sauce over the chicken.
  13. Sprinkle the top with Pecorino Romano cheese.
  14. Bake at 350°F to brown the top, approximately 15-20 minutes.
Recipe Notes

Copyright © 2020 by Villa Sentieri, LLC. All rights reserved.

Share this Recipe

Melanzane al Forno (Eggplant Baked with Parmesan Cheese)

January 4, 2020

Growing up I didn’t like eggplant.  I didn’t much care for zucchini, either.  Or kale.

Things are a whole lot different now.

As an adult, I basically haven’t met a vegetable I don’t like, though, naturally, I like some more than others.

As with zucchini, eggplants seem to defy the season.  They’re available year-round and the quality is consistent.  Just look for firm, shiny ones with no soft spots or wrinkled skin and you’re basically guaranteed of getting a good eggplant.

Eggplants on the vine (Photo: Joydeep / Wikimedia Commons / CC BY-SA 3.0).

Eggplant is a versatile vegetable.  It can be braised, baked, sautéed, fried and steamed … and probably cooked by any other method you can think of.


Join our mailing list and you’ll never miss a recipe again!


Eggplant will sop up any flavor that you pair with it.  It will also sop up large amounts of oil so one needs to be cautious about frying large pieces of eggplant in abundant oil.  Thin slices of eggplant can be floured and fried to great advantage, however.

Years ago, eggplant could be bitter but that trait has basically been bred out of the modern varieties one commonly encounters.  The bitterness led cooks to salt and drain the eggplant to remove bitter juices.  While this is no longer strictly necessary for control of bitterness it is still a great technique to reduce moisture content which is useful for some preparations.

Eggplants at the market in Italy.

America’s Test Kitchen (the organization behind Cook’s Illustrated and Cook’s Country) has developed a method for removing water from eggplant using the microwave.  I have lots of cooking equipment and have no qualms about using newer technology in place of older technology to simplify food prep.  However, I want the newer technology be a natural evolution from the older technology as a way to preserve (but improve) traditional food preparation.  For example, before food processors, one would “mush up” food as much as possible then put it through a sieve.  Food processors do a much better (and faster) job of “mushing,” sometimes to the point that the sieving step isn’t necessary.


Follow us on your social media platform of choice


To me, that’s evolutionary.  It’s a more efficient way of getting to the same outcome but staying true to the traditional method.  Blasting eggplant in the microwave in place of salting it is not.

Beautiful eggplants ready to be made into something yummy.

While I have great respect for the rigor of America’s Test Kitchen, some of their hacks and shortcuts really trouble me from the standpoint of maintaining and transmitting traditional foodways.  Using V-8 juice in minestrone in place of tomato is an example.

With salting, rather than microwaving, we’ll proceed to today’s recipe,  It’s a very straightforward baked eggplant with Parmigiano Reggiano cheese.  Somehow it manages to be WAY more than the sum of its parts.  I urge you to try it, even if you think you don’t like eggplant.

Print Recipe
Melanzane al Forno (Eggplant Baked with Parmesan Cheese)
Eggplant can absorb huge quantities of oil. This method of cooking limits the amount of oil the eggplant absorbs, making it lighter. The eggplant finishes its cooking in the oven, which eliminates last minute frying just before serving dinner. Individual portions can be made by cutting the eggplant into rounds that fit inside of small ramekins.
Votes: 0
Rating: 0
You:
Rate this recipe!
Course Sides, Vegetables
Cuisine Italian
Prep Time 30 minutes
Cook Time 1 hour
Passive Time 1 hour
Servings
people
Ingredients
Course Sides, Vegetables
Cuisine Italian
Prep Time 30 minutes
Cook Time 1 hour
Passive Time 1 hour
Servings
people
Ingredients
Votes: 0
Rating: 0
You:
Rate this recipe!
Instructions
  1. Peel the eggplant and cut crosswise into rounds ½ inch thick.
  2. Liberally salt the eggplant slices on both slides and put them in a colander.
  3. Set a weight on top of the egglant (such as a plate with a heavy can on top) and allow to drain for one hour.
  4. Meanwhile, gently sauté the garlic in the olive oil on low heat until the garlic is golden brown.
  5. Remove the oil from the heat. Discard the garlic and reserve the oil.
  6. Rinse the eggplant. Blot dry.
  7. Butter an ovenproof serving dish (or individual ramekins if making individual portions).
  8. Coat the bottom of a large sauté pan with 1-2 tablespoons of the garlic-flavored oil. A non-stick pan works best but a well-seasoned ordinary sauté pan will work fine. When the oil is very hot add one layer of eggplant slices. Cook until nicely browned being careful not to burn the eggplant which will make it bitter.
  9. When browned on one side turn the eggplant slices over. You may need to drizzle a little oil into the pan to keep the eggplant from sticking. The eggplant should still be firm in the center. It will complete its cooking in the oven.
  10. When the second side is brown put the eggplant in a buttered ovenproof serving dish, preferably one with a cover.
  11. Lightly salt the eggplant. Sprinkle with freshly ground black pepper to taste and some of the grated Parmigiano. Repeat layering eggplant, pepper and cheese until all the eggplant is used up.
  12. Finish with grated Parmigiano. Drizzle with the melted butter.
  13. Cover and bake at 350°F for approximately 30 minutes. Uncover and continue baking for 10-15 minutes to brown the top.
Recipe Notes

Copyright © 2020 by Villa Sentieri, LLC. All rights reserved.

Share this Recipe

Zucchini in Umido

December 19, 2019

I try to cook seasonally.

That means no stone fruit or corn on the cob in the winter.  For the most part that means no tomatoes either, though I do make an exception for cherry and grape tomatoes which seem to taste about the same year-round and provide a burst of color and sweetness—if not a robust tomato taste—in the dead of winter.

Certain things defy the season.  Take zucchini.  Yes, they’re the quintessential summer crop (sometimes growing to the size of baseball bats in the hands of inattentive growers) but they show up all year-round, much like bananas do.

Zucchini in Umido bubbling away on Zia Fidalma’s stove in Tuscany.

I know that means they get shipped from “somewhere else” when they’re not in season locally but, for the most part, they taste good all year (unlike, say, peaches which don’t usually taste good if not grown locally and in season).

There’s also a limit to the number of cold-season vegetables that one can eat through the winter.


Join our mailing list and you’ll never miss a recipe again!


Part of the problem is solved by canning, preserving, and freezing and, if not your own or a friend’s, commercially available canned, preserved, and frozen produce.  Let’s face it, eating seasonally traditionally included consuming all those products that were “put up” when they were at the height of season.

Maria making a large batch of tomato puree (passata) at her home in Calabria.

Though some of us conserve produce, few of us do enough to meet our needs throughout the lean winter months.  I have no objection to using good quality commercially “conserved” foods.  What I don’t use are convenience or premade foods.

Though I enjoy and prefer to make my own tomato puree (passata), we don’t produce enough of our own tomatoes to make a year’s supply (and I haven’t been overly impressed with what’s available in the market in sufficient and affordable quantity to make up the difference).

I do what I can, however, for example making passata when our tomatoes are at their best; candying citrus peels from the trees in our neighborhood in Palm Springs in the winter; making cherry leaf aperitif in the fall; and, in those rare years when Santa Fe has an abundance of peaches and apricots, making jam.

The early stages of making cherry leaf aperitif.

I “conserve” other produce as well like making hot chile oil (“olio santo”) when we have enough peperoncini, making limoncello and arancello from oranges and lemons in Palm Springs, and putting fresh (like cherries) and dried (like prunes) fruits in various types of spirits.


Follow us on your social media platform of choice


My prohibition on using “prepared foods,” though is pretty definite.  I’ll use good quality canned, peeled tomatoes from Italy but (unless my back is up against the wall as sometimes happens when I have limited shopping venues like when we’re on Fire Island) I don’t use canned commercial diced or crushed tomatoes or tomato puree.  My view, and, granted, it might be wrong, is that the best quality tomatoes go into the cans of “whole, peeled” tomatoes, not into the ones that are ground, diced, or pureed.

Making limoncello.

In a matter of minutes, a can of whole peeled tomatoes can be turned into any of the other products.  It also means that, other than tomato paste, I only need to stock up on one tomato product.  OK, OK, so I have two types of peeled, whole tomatoes.  Both are from Italy but one is San Marzano and the other is a plum tomato that’s not San Marzano.  I use the less expensive non-San-Marzano-but-still-Italian tomatoes when the dish I am making would be indistinguishable with either type.

In December, zucchini are a welcome addition to mealtime, a situation that is difficult to imagine during the fall harvest season when zucchini seem to be coming from all directions.

Print Recipe
Zucchini in Umido
Pommarola, a simple tomato sauce made with tomatoes, basil and garlic is ideal in this dish. See the notes section for a link to my Basic Tomato Sauce. If pommarola, or a similar simple tomato sauce is not available, substitute good-quality tomato puree. If using puree, I suggest adding a few basil leaves, finely chopped. Niepita is difficult to obtain outside of Italy but if you want to try to find seeds, look for it using the southern Italian name of "Mentuccia Romana" rather than the Tuscan name of niepita. Though the flavor is different, 1 teaspoon of dried oregano is a good alternative.
Votes: 0
Rating: 0
You:
Rate this recipe!
Course Sides, Vegetables
Cuisine Italian
Prep Time 15 minutes
Cook Time 30 minutes
Servings
persons
Ingredients
Course Sides, Vegetables
Cuisine Italian
Prep Time 15 minutes
Cook Time 30 minutes
Servings
persons
Ingredients
Votes: 0
Rating: 0
You:
Rate this recipe!
Instructions
  1. Partially peel the zucchini, leaving alternating stripes of peel and no peel.
  2. Cut the zucchini into largish pieces. You can do this by quartering them lengthwise and then cutting crosswise or by doing a rotating angular cut. You should have approximately 2 pounds of cut-up zucchini.
  3. Sauté the garlic in olive oil until it begins to color.
  4. Add zucchini. Season with salt, and pepper. Increase the heat to high and sauté until the garlic golden brown and the zucchini has turned from white to creamy in color, approximately 5 minutes.
  5. Add the tomato sauce, water, niepita, and salt and pepper to taste.
  6. Cook at a moderate boil, uncovered, until the sauce is thick and the zucchini is tender but not mushy. Adjust salt and pepper while cooking.
Recipe Notes

You can find my recipe for Basic Tomato Sauce here.

Copyright © 2019 by Villa Sentieri, LLC. All rights reserved.

Share this Recipe