Marisa’s Mystical Meatballs

February 9, 2018

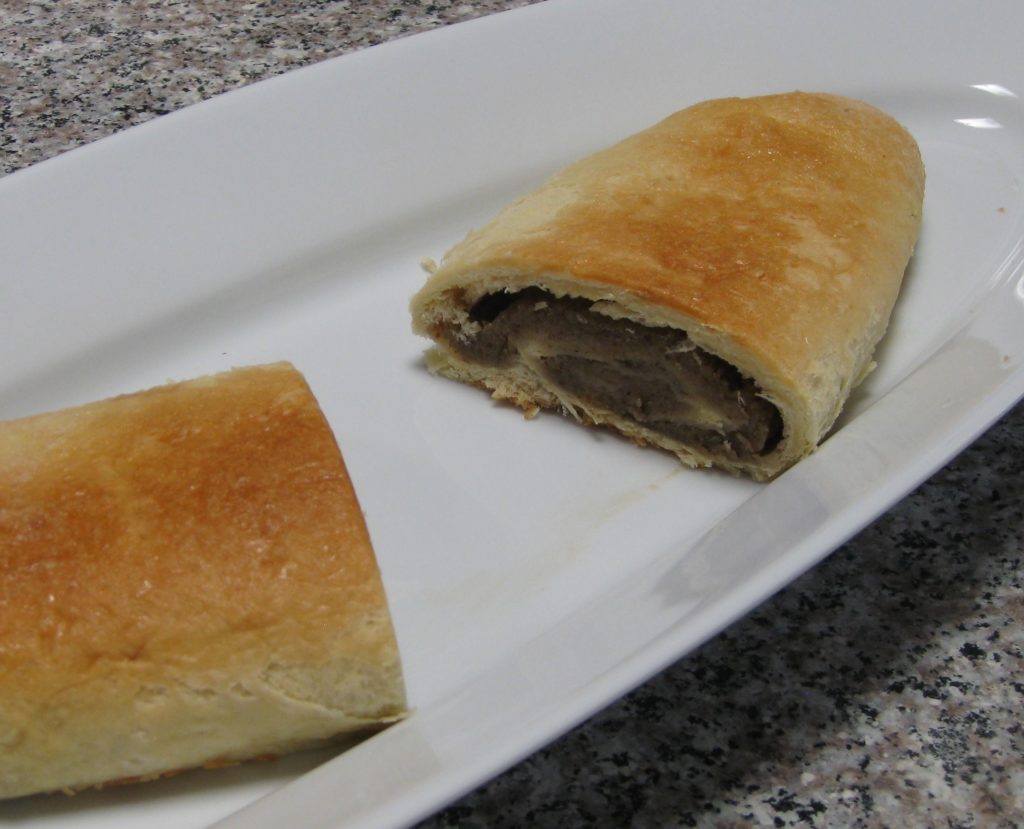
These meatballs are really mystical if you consider the sway they hold on my husband, his brother, and his father.  They go wild for these meatballs.

Well, wild in that very restrained Northern Italian way.

If they were Southern Italian, where a dinner conversation can seem like a minor riot, their meatball response would barely register on the scale.  It would signal almost utter disregard for the meatballs.

But that, in fact, is not the case.  The meatballs hold some sort of magical, mystical charm.

Marisa, of course, is my mother-in-law and these are her meatballs.  She considers them quite unusual, having learned to make them from her mother and basically not remembering any other relatives or friends making something similar.

And, as meatballs, they ARE unusual!

An old-fashioned ricer is still an indispensable piece of kitchen equipment. Make sure yours is very sturdy. Many new ones are not.

Click HERE to join our mailing list and you’ll never miss a recipe again!


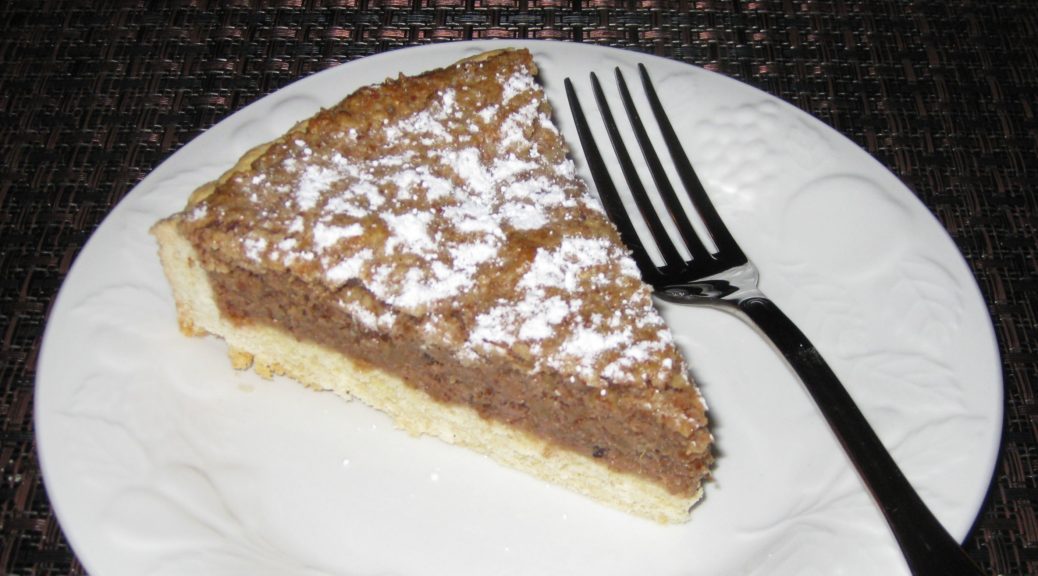
But here’s a secret that I haven’t told anyone yet.  They really AREN’T meatballs.  They’re croquettes!  Crocchette in Italian.

There, I said it.  Marisa’s Mystical Meatballs aren’t really meatballs.  But everybody in the family calls them “Ma’s Meatballs.”  “Ma’s Croquettes” doesn’t have the same alliterative allure, even if it’s more accurate.

My mother-in-law and father-in-law celebrating his birthday.

When I did a Google search for crocchette, Google turned up about 1,730,000 results in 0.51 seconds.  When I searched for crocchette patate e carne (potato and meat croquettes), Google returned 1,500,000 results in 0.72 seconds.

And that was doing searches in Italian!

I found a Japanese woman who seems to have the same relationship to her mother’s meat and potato croquettes (korokke) as my husband and his family have to his mother’s.


Follow us on your social media platform of choice


The meat for these “meatballs” (a word I’ll use in deference to my husband and his family of origin) is boiled before being finely chopped.  This presents a perfect opportunity to make a really nice beef broth.  You don’t have to do that, of course, but since you’re going to be boiling the meat anyhow, and since it only takes a few extra minutes to throw some aromatics into the pot, why not!

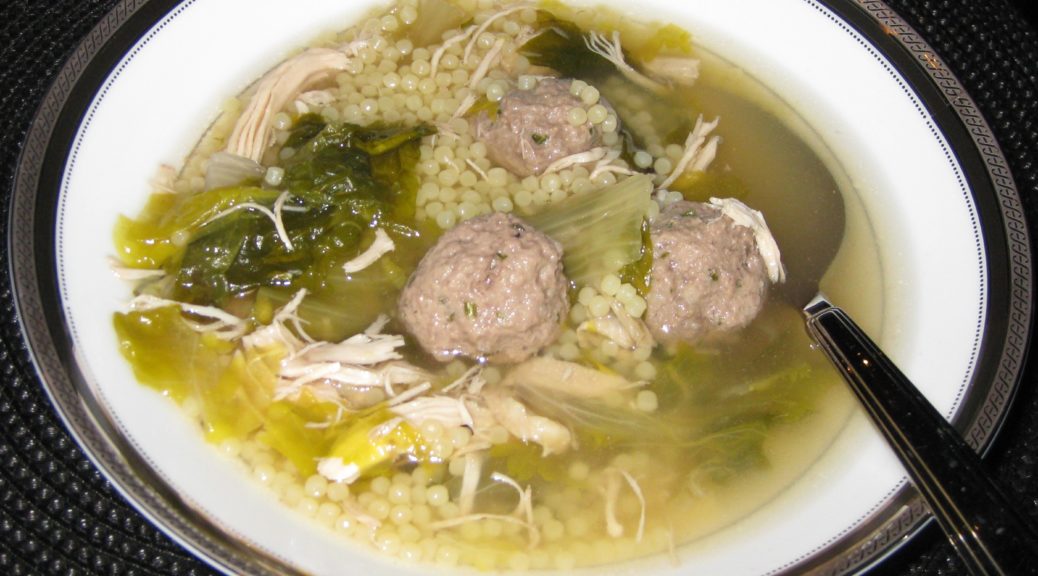
The broth from the meat for the specific batch of meatballs shown in this blog is sitting in the freezer ready to be turned into Auntie Helen’s Stracciatella, which will be coming up on the blog next month.


If you have a favorite family recipe and a bit of a story to tell, please email me at santafecook@villasentieri.com and we can discuss including it in the blog. I am expanding the scope of my blog to include traditional recipes from around the country and around the world. If you haven’t seen Bertha’s Flan or Melinda’s Drunken Prunes, take a look.  They will give you an idea of what I’m looking for.


Print Recipe
Marisa's Mystical Meatballs
Marisa says she usually uses cross-cut beef shank for the meatballs. When we made them, she also had a piece of beef she bought for soup so we used both. In the end, we got ½ pound of cooked beef, with fat and gristle removed. Adjust the proportion of the other ingredients if you get substantially more or less cooked beef. If you want to use just cross-cut beef shank, I would try about 2 ½-3 lbs. The beef is boiled and then finely chopped to make the meatballs, giving you the opportunity to make a really nice beef broth with just a few minutes more work.
Votes: 0
Rating: 0
You:
Rate this recipe!
Prep Time 30 minutes
Cook Time 6 hours
Servings
meatballs
Ingredients
Beef and Broth
Meatballs
Prep Time 30 minutes
Cook Time 6 hours
Servings
meatballs
Ingredients
Beef and Broth
Meatballs
Votes: 0
Rating: 0
You:
Rate this recipe!
Instructions
Beef and Broth
  1. Cross-cut beef shank.
  2. Put the meat and all other broth ingredients in a large stock pot.
  3. Cover with abundant cold water.
  4. Bring to a boil, reduce heat and simmer, partially covered, for 4-6 hours, until the meat is very tender.
  5. Remove and cool the beef.
  6. Strain the broth and reserve for another use.
Meatballs
  1. Remove fat, gristle and bone from beef. You should have approximately ½ pound of cooked beef.
  2. Cook the unpeeled potatoes in boiling water until you can easily pierce them with the tines of a long fork or paring knife, 20-25 minutes.
  3. Remove the potatoes from the water and allow to cool for about 10 minutes.
  4. Meanwhile, mince the garlic or grate it on a microplane grater.
  5. Combine beef, parsley and garlic in a food processor. Process until finely chopped.
  6. Peel the slightly cooled potatoes. If they are too cool it will be difficult to rice them.
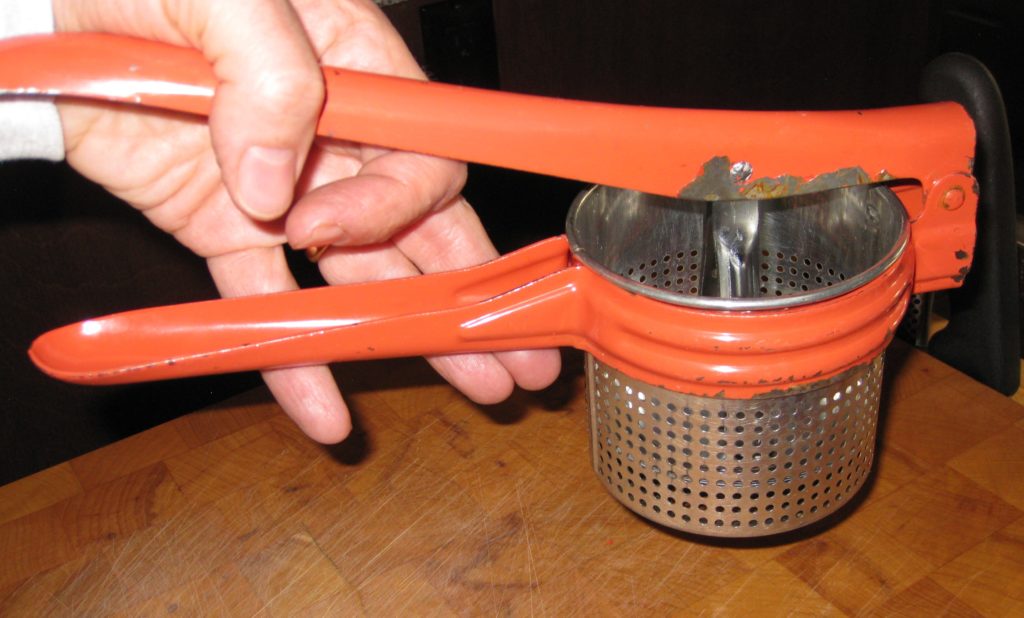
  7. Pass the potatoes through a ricer.
  8. Combine the beef mixture with the potatoes, nutmeg, allspice, salt and black pepper.
  9. Mix well with a large spoon or your hands.
  10. Add the lightly beaten eggs.
  11. Mix well using your hands.
  12. Form the mixture into 16 balls and then flatten them slightly.
  13. Lightly roll the meatballs in fine dry breadcrumbs.
  14. Pour ⅛ inch of oil into a large sauté pan.
  15. Heat the oil on medium-high heat.
  16. Fry the meatballs in two batches, on medium-high, flipping once, until brown.
  17. Drain on paper towels.
  18. Serve warm or at room temperature.
Recipe Notes

Copyright © 2018 by VillaSentieri.com. All rights reserved.

Share this Recipe

Italian Wedding Soup

February 5, 2018

Growing up I never really understood why this was called Wedding Soup.  It was NEVER served at weddings.

It was mostly served at home, unceremoniously.

The fact that it was unceremonious is a shame.  It is a wonderful soup and, being honest, takes a bit of work to pull together.  Both the soup, and the soup-maker, in my estimation, deserve a bit of attention.

Although it takes some work, it doesn’t require much in the way of heard-earned skills like frosting a cake or making pie crust.  It’s just a bit of slogging through a series of steps.

This is a beloved soup among Americans of Italian descent.  Interestingly, my in-laws who are actually from Italy had never heard of it until I made it for this blog!


Click HERE to join our mailing list and you’ll never miss a recipe again!


But back to the “wedding” part.  I did a bit of internet research (thanks Google!).  Actually, I hesitate to call it “research.”  I’m old school.  I remember when doing research meant hours upon hours spent in libraries looking at actual hardcopy materials.  It almost doesn’t seem fair to sit on my sofa with my laptop and read materials served up by Google based on natural language questions and call it research.

The “natural language” part is interesting too.  In the “old” days, if you found an article that was relevant to the research topic, you would look at the articles referenced by the author and find, potentially, other relevant articles.  But they would all be older than the first article.  This is where the “Science Citation Index” came into play.

The Index was a series of periodically published volumes that listed all the articles that cited a particular article in their bibliography.  With the Science Citation Index, you could start with a relevant article and then work forwards finding all the newer articles that had cited that article.

Now I just tell Google what I’m interested in and I get a bunch of (almost always) relevant “hits!”  Google is even nice enough to tell me how many hits there are and what fraction of a second it took Google to identify them.

Even when I’m researching a biomedical topic I sit on my sofa with my laptop and search the National Library of Medicine.  The search language is a bit more arcane than the natural language used by Google but it still feels like cheating compared to slogging around a library.  I can even have the full article delivered to my laptop so I don’t have to figure out what library has the publication I need.


Follow us on your social media platform of choice


So, what did I learn from my Google search?

It appears (at least it’s a plausible theory) that Wedding Soup is an inaccurate translation of Minestra Maritata or Married Soup; apparently so-named because of the way the different ingredients marry together so well.

I’m guessing that many Americans with no affiliation to Italy have never had escarole.

Interestingly, my husband’s Tuscan grandmother would use up small amounts of different types of dried pasta, perhaps putting them into a soup or serving them with a simple sauce.  She referred to this as Pasta Maritata because she was marrying the different types of pasta to create a dish.

If this theory is correct, I am perplexed by the inaccurate translation but, be that as it may, the soup is wonderful.  I urge you to give it a try.

I like breaking up the work over two days, especially since I like to make a long-simmered broth as the base of the soup.  My mother didn’t do this.  Once the chicken was cooked, it was removed and shredded and the broth was used without additional simmering to make the soup.  It shaves about 3 hours off of the prep time.  But, since making broth is mostly hands off, and the improvement in flavor is dramatic, I simmer everything a bit longer before straining and discarding the solids.


If you have a favorite family recipe and a bit of a story to tell, please email me at santafecook@villasentieri.com and we can discuss including it in the blog. I am expanding the scope of my blog to include traditional recipes from around the country and around the world. If you haven’t seen Bertha’s Flan or Melinda’s Drunken Prunes, take a look.  They will give you an idea of what I’m looking for.


Print Recipe
Italian Wedding Soup
If you don’t want to use the white center of the escarole, start with two heads and just use the dark green parts. The pale inner portion can be served in a salad or cooked in a number of ways. I like to divide up the work over two days, making the broth on the first day and the remainder on the second day. It’s perfectly feasible to do it all on the same day, however. I always keep a stash of rinds from Parmigiano Reggiano and Pecorino cheeses in the freezer. They add great flavor to broths, beans, and an array of other dishes.
Votes: 0
Rating: 0
You:
Rate this recipe!
Cuisine Italian
Prep Time 1 hour
Cook Time 5 hours
Passive Time 2 hours
Servings
people
Ingredients
Broth and Chicken
Meatballs
Final assembly
Cuisine Italian
Prep Time 1 hour
Cook Time 5 hours
Passive Time 2 hours
Servings
people
Ingredients
Broth and Chicken
Meatballs
Final assembly
Votes: 0
Rating: 0
You:
Rate this recipe!
Instructions
Broth and Chicken
  1. Cut the chicken into breast halves, legs, thighs, and wings. Cut the back into 2 or three pieces. Reserve the liver for another use but chop the remaining giblets.
  2. Slice the onions. There's really no need to peel them first.
  3. Same with the garlic, no need to peel. It all gets strained out in the end.
  4. Combine all ingredients in a large stock pot. Cover and bring to a boil. Reduce heat, and simmer, partially covered for two hours.
  5. After two hours, remove the breasts, legs, and thighs. Continue to simmer the broth.
  6. Remove the meat from the bones. Return the chicken bones and skin to the broth.
  7. Continue to simmer the broth for another two hours, adjusting seasoning as needed.
  8. Meanwhile, shred the breast meat and refrigerate.
  9. Reserve the leg and thigh meat for another use.
  10. After the broth has finished cooking, cool it for several hours. Strain and discard the solids. Allow the broth to come to room temperature and refrigerate.
  11. Alternatively, immediately strain and discard the solids and proceed as below.
Meatballs
  1. Put all the ingredients except the bread into a mixing bowl.
  2. Cut the crusts from the bread.
  3. Cover the bread with warm water for 3-4 minutes.
  4. Squeeze some of the water from the bread.
  5. Add the bread to the mixing bowl.
  6. Mix with your hands, until thoroughly combined and no streaks of white from the bread remain visible.
  7. As you are mixing add a bit of the bread soaking water from time to time (about a quarter cup or so total) to keep the mixture moist but not wet.
  8. The mixture should become tacky from the effects of the water and the mixing on the proteins in the meat. The tackiness will help the meatballs hold together for the same reason that sausage doesn’t fall apart when the casing is removed.
  9. With damp hands, roll the mixture into approximately 50 meatballs. Keeping your hands moist will enable you to create a smooth surface on the meatballs. If there are visible cracks, the meatballs will split when cooking.
Final assembly
  1. Skim the fat from the broth. Add water to make 6 quarts of broth. Bring the broth to a boil.
  2. Meanwhile, coarsely chop the escarole.
  3. As the broth comes to a boil, adjust the salt and pepper.
  4. Add the chopped escarole. Return to a boil and cook at a moderate boil for approximately 5 minutes.
  5. Add the meatballs. Return to a boil and boil gently, so the meatballs don’t break, for 10-12 minutes.
  6. Add the shredded white meat chicken and return to a gentle boil.
  7. Adjust salt and pepper. At this point, slightly over-salt the soup as the dry pasta will reduce the saltiness of the soup. The soup can be made ahead to this point. Return to a boil and add the pasta just before serving.
  8. Add the pasta and boil gently until pasta is cooked, approximately 10 minutes.
  9. Adjust salt and pepper.
  10. Serve with freshly grated Parmigiano Reggiano cheese.
Recipe Notes

Copyright © 2018 by VillaSentieri.com. All rights reserved.

Share this Recipe

Torta di Riso (Italian Rice Tart)

January 31, 2018

Torta di Riso is an Italian specialty.  It is basically a rice pudding baked inside of a pastry crust; a Rice Tart, so to speak.

I first had Torta di Riso more than 20 years ago while visiting Italy with my husband and his parents.

We ate meals at the homes of many relatives.  I often arrived with a spiral-bound notebook to jot down the inevitable recipes that would be discussed around the table or the recipes I begged for after being served something wonderful.  That notebook is a mashup of American and Metric measures and English and Italian words for ingredients.  It became a bible of sorts for recreating many of the dishes I ate on that trip.


Click HERE to join our mailing list and you’ll never miss a recipe again!


My father-in-law’s Zia (Aunt) Mery made the first Torta di Riso that I ever tasted.  Her recipe is below (adapted for American measures).

After having it at Zio (Uncle) Beppe and Zia Mery’s house, I started noticing Torta di Riso in many places in Tuscany.

My father-in-law with his Uncle Beppe and Aunt Mery, from whom this recipe for Torta di Riso originated in their garden in Tuscany, 1994.

Alkermes liqueur originated in Tuscany so it is particularly appropriate to use it as the liqueur in Torta di Riso.  Alkermes is nearly impossible to find in the United States, however.  One can make a perfectly traditional Torta di Riso using rum in place of Alkermes but the resulting confection won’t be pink.

According to CooksInfo, “Alchermes was invented in the Frati Convent at Santa Maria Novella in Florence. Its making was kept secret, but the recipe was reputedly stolen by spies from the nearby city of Siena, which Florence was often at war with.”


Follow us on your social media platform of choice


Recipes for alkermes (also spelled alchermes) are closely guarded but the process basically involves infusing alcohol with spices and flavorings like cinnamon, cloves, vanilla, nutmeg, mace, cardamom, star anise, rosewater, and orange zest.  The red color comes from cochineal, an insect that is the foundation for natural red food coloring.  The resulting infused alcohol is sweetened and diluted with water.

The pastry crust is pasta frolla, a slightly sweetened pastry, leavened with baking powder, and often flavored with vanilla and lemon zest.  This is Mery’s recipe for pasta frolla but I also have one from Zia Fidalma that makes about half the quantity.

Torta di Riso was a big hit at my father-in-law’s birthday dinner last week. So were the cocktails, wine, and champagne!

If you don’t have access to Alkermes, you can use rum.  In fact, torta di riso is not always pink.  Many that I saw in Italy were white.

If you want to try to make your own Alkermes you can find a recipe here.  Amazon even sells the dried cochineal insects that provide the traditional scarlet color.


If you have a favorite family recipe and a bit of a story to tell, please email me at santafecook@villasentieri.com and we can discuss including it in the blog. I am expanding the scope of my blog to include traditional recipes from around the country and around the world. If you haven’t seen Bertha’s Flan or Melinda’s Drunken Prunes, take a look.  They will give you an idea of what I’m looking for.


Print Recipe
Torta di Riso (Italian Rice Tart)
This classic Italian dessert is basically a rice pudding baked inside of a pastry crust. Alkermes is a traditional Tuscan liqueur used in a number of sweets, including torta di riso, for its color and spice-like flavor. If you don’t have Alkermes, use rum. Not all versions of torta di riso are brightly colored. Vanilla powder is a natural vanilla product, not artificial. Use vanilla extract if vanilla powder is not available.
Votes: 0
Rating: 0
You:
Rate this recipe!
Cuisine Italian
Prep Time 30 minutes
Cook Time 75 minutes
Passive Time 30 minutes
Servings
people
Ingredients
Pasta Frolla
Rice
Cuisine Italian
Prep Time 30 minutes
Cook Time 75 minutes
Passive Time 30 minutes
Servings
people
Ingredients
Pasta Frolla
Rice
Votes: 0
Rating: 0
You:
Rate this recipe!
Instructions
Pasta Frolla
  1. Blend the flour, sugar, baking powder, vanilla powder, salt and lemon zest in a food processor until combined.
  2. Add the butter, cut in pieces, and blend till well combined.
  3. Add the eggs and blend till the pastry almost forms a ball.
  4. Remove the pastry from the food processor and use your hands to press everything into a single ball.
  5. Wrap the pastry in waxed paper and refrigerate for an hour before using.
Rice
  1. Wash and drain the rice.
  2. Combine the rice, water and milk in a heavy-bottomed sauce pan.
  3. Bring the rice to a boil.
  4. Cover the rice and simmer, stirring frequently, until cooked and the liquid is almost completely absorbed. If the rice does not have the consistency of thick oatmeal, add a bit more milk at the end to make it creamy.
  5. Mix the sugar, lemon zest, and Alkermes and/or rum into the rice.
  6. Pour the rice into a bowl and cool, uncovered, stirring occasionally.
Assembly and Baking
  1. Cut off a small piece of the pastry to make a lattice top and refrigerate.
  2. Roll the remaining pastry between waxed paper, turning often, until it is large enough to cover the bottom and sides of a 10 inch springform pan.
  3. Line a 10" springform pan with the pasta frolla.
  4. Cut the pastry even with the top of the pan. Add the scraps to the pastry you have reserved for the lattice.
  5. Beat the egg and egg yolks to combine.
  6. Stir the beaten eggs into the cooled rice.
  7. Pour the rice into the pastry lined pan.
  8. Roll out the pastry reserved for the lattice.
  9. Cut seven or eight strips, approximately 1/2 inch wide.
  10. Arrange the strips into a lattice on top of the rice. Cut off the excess.
  11. Roll the pastry lining the sides of the pan down to the top of the rice and form a decorative edge.
  12. Bake at 350°F until the crust is lightly browned and the rice is barely jiggley in the center, approximately 30-45 minutes.
  13. Cool on a rack for approximately 20 minutes.
  14. Remove the side of the pan and cool completely.
Recipe Notes

Copyright © 2018 by VillaSentieri.com. All rights reserved.

Share this Recipe

Mom’s Lentil Soup

January 26, 2018

My father liked soup.  Actually, my father really, really liked soup.  Every few weeks my mother would make beef noodle soup as it was one of my dad’s favorites.  Beef noodle is the soup we had most often.  Goulash was the “stew” we had most often.  In fact, I don’t remember my mother ever making an American-style beef stew.

The first American-style beef stew that I ever made was from a recipe that my sister started using after she got married.  It was definitely not one of our family recipes, though it was good.

After the beef noodle soup that my mother made on a regular basis, other soups were just occasional affairs, though soups of various types appeared often on our table.


Click HERE to join our mailing list and you’ll never miss a recipe again!


Italian “Wedding” Soup was a favorite but not something that we had more than a three or four times a year.  Everyone in the family really loved Wedding Soup but, honestly, it’s a lot of work.  It’s coming to the blog next month but today we have my Mom’s Lentil Soup.

My parents in 1981

Let’s face it, lentil soup isn’t something people swoon over.  At best it is good comfort food.  That’s exactly what this is for me.

It’s also easy to make.  A few minutes of chopping and some stirring off-and-on are rewarded with a really good pot of soup.

My mother’s lentil soup was unusual in that she put enough black pepper into it to create a distinct bite.  The first time I tasted it, as an adolescent, I was surprised by how peppery it was but I loved it.   Whether or not you add that much black pepper is entirely your choice but, in my mind, it’s the black pepper that sets my mother’s lentil soup apart from the pack.


Follow us on your social media platform of choice


Consistent with my mom’s low-and-slow philosophy, this soup is cooked longer that would be typical, for the average American cook at least.  Despite the long cooking, the lentils remain intact though soft.  They don’t really fall apart the way that dry beans might.

This soup freezes well so a big batch shouldn’t be a problem.

While a ham bone makes great lentil soup, it’s not something that most households have on a regular basis but a handful of baked ham or a few ounces of bacon make an awfully tasty soup.


If you have a favorite family recipe and a bit of a story to tell, please email me at santafecook@villasentieri.com and we can discuss including it in the blog. I am expanding the scope of my blog to include traditional recipes from around the country and around the world. If you haven’t seen Bertha’s Flan or Melinda’s Drunken Prunes, take a look.  They will give you an idea of what I’m looking for.


Print Recipe
Mom's Lentil Soup
When my mother made this soup, she added enough black pepper to give it a distinct bite. The addition of a bay leaf is my only modification of the original recipe.
Votes: 0
Rating: 0
You:
Rate this recipe!
Cuisine American
Prep Time 10 minutes
Cook Time 2 1/2 hours
Servings
people
Ingredients
Cuisine American
Prep Time 10 minutes
Cook Time 2 1/2 hours
Servings
people
Ingredients
Votes: 0
Rating: 0
You:
Rate this recipe!
Instructions
  1. Wash and pick over the lentils then drain.
  2. Shred the carrot on the tear-drop side of a box grater.
  3. Put all the ingredients in a large stock pot.
  4. Cover and bring to a boil.
  5. Reduce heat and simmer partially covered for 2 to 2½ hours.
  6. Adjust salt and pepper to taste.
  7. The soup should be thick and the lentils soft but intact.
Recipe Notes

Copyright © 2018 by VillaSentieri.com. All rights reserved.

Share this Recipe

Roman Beans and Kale

January 12, 2018

I don’t remember my mother making Roman Beans and Kale till I was in my late teens.

The first time she made it, I remember her talking about her mother making it.  For something she really liked, she waited an awfully long time to make it.  But then, again, I did the same thing with her pasta è fagioli.

There were some dishes from her childhood that she talked about but never made.  Tiella is the one that I remember most.  It took me multiple tries over many years to recreate it from her description.

Roman beans and kale might seem a little unusual to many American palates due to the length of time the kale is cooked.  There is a point where it becomes silky but most definitely not mushy.  Southerners, though, would find the kale in this recipe cooked in a familiar way.  It is much like the Southern low-and-slow style of cooking greens of various types, such as collards or mustard greens, until they achieve the requisite tenderness.

A bunch of kale

Follow us on your social media platform of choice


Texture is an important part of this dish. The beans should yield but not be falling apart.  The kale should not provide any resistance the way it would if it were just quickly sautéed.  The pasta, however, should be al dente.

Roman beans

Beans, kale and pasta are all pretty mellow-tasting in my estimation.  The garlic, olive oil, and Parmesan cheese are what give this dish its flavor oomph!  At the table, I add crushed red pepper but it shouldn’t be cooked into the dish.

Roman beans are also called Borlotti or Cranberry beans.  Depending on where you live you might have to order them.  In a pinch, though, you could use pinto beans or Anasazi beans.  (If you’re a bean savant, you’ll notice that I used Anasazi beans as I was unable to find Roman beans after searching market shelves in two different cities for a couple of months.  Though I could have gotten them online, I didn’t think the huge price premium was worth it.)

Anasazi beans

My mother’s approach to cooking most foods was definitely low and slow.  It’s classically Italian and so NOT French, which often aims for “high and fast!”  Though culinary education is now more inclusive and not so heavily French, we have a strong cultural bias away from slow, leisurely cooking due to the strong French influence of the past decades.  There are exceptions however, largely based on strong regional traditions, barbecue, for example.  But for the most part, mainstream America, and certainly mainstream American food and cooking publications, just don’t “get” low and slow.


Click HERE to join our mailing list and you’ll never miss a recipe again!


There are some foods that don’t benefit from low and slow, at least when cooked traditionally; steaks for instance.  My mother’s approach to these was that they should be well done, even though that state was achieved quickly.  In our house steaks were most often seasoned with olive oil, garlic, oregano, basil, salt and pepper and broiled.  I think it’s a wonderful flavor combination.  But it wasn’t until my late teens that I developed an appreciation for rare beef.

I remember one meal where my sister and I cooked the steaks for ourselves and our dad.  They were medium rare, as I recall.  Even though our mom didn’t have a hand in cooking them (and cooked her own steak well done) she spent the entire meal feeling like she had served us bad food.  The fact that we liked it didn’t seem to matter.  She had very definite opinions about what constituted good food, and something that was bleeding onto the plate didn’t fit!


If you have a favorite family recipe and a bit of a story to tell, please email me at santafecook@villasentieri.com and we can discuss including it in the blog. I am expanding the scope of my blog to include traditional recipes from around the country and around the world. If you haven’t seen Bertha’s Flan or Melinda’s Drunken Prunes, take a look.  They will give you an idea of what I’m looking for.


Recently I bought sous vide equipment.  I haven’t tried it yet but I’m itching to do so.  Steaks will be first.  The food gets vacuum sealed and then cooked slowly…for hours…in a hot water bath that is maintained at the temperature one wants the food to achieve.  The meat is cooked uniformly throughout…low and slow!  For steaks, one would want to quickly sear the outside before serving but many foods, like fish, poached eggs, and even hollandaise sauce can be used right out of the water bath.

For now, though, let’s try a slow-cooked pot of beans and greens…Italian style!!

Print Recipe
Roman Beans and Kale
The beans should be cooked through but not falling apart. The kale should take on a silky texture but not be mushy. The pasta should still be a bit “toothy." This is even better if made a day or two in advance and refrigerated. If you are doing this, you will want to undercook the pasta so that it is not too soft after the dish is reheated for serving. Alternately, you can omit the pasta when mixing the beans and kale, then add it when reheating. Depending on where you live, you might not be able to find Roman beans. Roman beans are also called Cranberry or Borlotti beans. If you can’t find Roman beans, you can substitute Pinto or Anasazi beans.
Votes: 1
Rating: 5
You:
Rate this recipe!
Prep Time 15 minutes
Cook Time 2 1/2 hours
Servings
people
Ingredients
Prep Time 15 minutes
Cook Time 2 1/2 hours
Servings
people
Ingredients
Votes: 1
Rating: 5
You:
Rate this recipe!
Instructions
  1. Rinse and pick over the beans.
  2. Cover the beans with six cups of water.
  3. Simmer the beans until almost fully cooked, adding 2 teaspoons of salt and black pepper to taste after the beans have cooked for an hour. If necessary, add a bit of boiling water from time to time to keep the beans just submerged. The beans will cook for about 10-15 minutes more after the kale is added so don't overcook them.
  4. Meanwhile, cut out the center ribs of the kale.
  5. Kale ribs about to be discarded.
  6. Cut the leaves crosswise into large pieces.
  7. Rinse and drain the kale.
  8. Bring a quart of salted water to a boil.
  9. Add the kale. The kale should quickly wilt enough to be covered by water. If not add a bit more water to just cover the kale.
  10. Simmer the kale, covered, stirring occasionally, until cooked to a silky texture, approximately 1 hour.
  11. While the kale is cooking, crush the garlic with the side of a chef's knife.
  12. Slowly brown the garlic in the olive oil.
  13. Once the garlic has browned, remove the oil from the heat. Discard the garlic. Reserve the garlic-infused oil.
  14. If using pasta, bring two quarts of water seasoned with 1/4 cup of salt to a rolling boil.
  15. When the pasta-cooking water comes to a boil, add the pasta. At the same time, add the kale and its cooking water to the beans. Keep the beans and kale at a simmer.
  16. Cook the pasta in boiling water until it is still a little crunchy on the inside.
  17. Drain the pasta and add it to the pot with the beans and kale.
  18. Add the garlic-infused oil.
  19. Taste and adjust seasoning.
  20. Cook everything, uncovered, until the pasta is al dente, just a few minutes longer.
  21. Serve with grated Parmigiano Reggiano cheese.
Recipe Notes

Copyright © 2018 by VillaSentieri.com. All rights reserved.

Share this Recipe

Crostata di Noci (Italian Walnut Tart)

December 20, 2017

One evening in 1996 my husband and I were sitting with his parents in a dimly-lit bar in Venice. We were all chatting. I was drinking grappa, as was my father-in-law. Then the desire for dessert hit me. If you’ve spent any time in Italy you know that at no point in the day are you actually hungry. There’s just too much wonderful food around to not partake in it. So the desire for dessert had absolutely nothing to do with the need for more calories.

Going for something new, I selected Crostata di Noci. I was absolutely amazed by what I got.

The pastry was standard-issue Italian pasta frolla, a slightly sweet leavened crust that’s like a cross between shortbread cookies and a dense cake. The filling, however, tasted for all the world like nut roll, one of my favorite pastries but one that is also very time-consuming and frustrating to make.

In that instant, it all made sense. Nut roll hails from Eastern and Central Europe (as does another of my favorites, the poppy seed roll).  In northeast in Italy there is a lot of Eastern European influence. Suddenly, taking nut roll filling and putting it in a pasta frolla case meant I could have something that tasted just like a nut roll but without all the frustration of actually making nut roll.


Click HERE to join our mailing list and you’ll never miss a recipe again!


Now, Crostata di Noci will never actually replace “real” nut roll just like making bread in my bread machine won’t replace making bread by hand. But, with a bread machine, I have homemade bread every day which wouldn’t be the case if I had to make every loaf by hand. With less than half-an-hour’s active time, I can indulge my taste for nut roll any time I want!

Around the holidays nut rolls were ubiquitous in my home town but my mother and my Aunt Margie made the best nut rolls I have ever had. Largely this is because they both put in a large proportion of sweetened nuts to dough. Honestly, there was just enough dough to roll pinwheel fashion and hold the whole thing together. Many other nut rolls were bready by comparison.

To be sure, my mother’s filling differed from my Aunt Margie’s. I’m not sure how each of them came by their respective recipes but my suspicion is that Aunt Margie’s came from her mother or another Italian relative or friend because it contained orange juice. The use of citrus in various pastries is common in Italy. Pasta frolla, for example, is traditionally flavored with lemon zest and vanilla. I am guessing my mother’s recipe came from my father’s mother or someone on the Slovak side of my family because the liquid in the nuts was milk and not orange juice.


Follow us on your social media platform of choice


Separate from actually eating nut roll, there was this whole aura around making them (at least there was when I was young!). Buying shelled walnuts and using a food processor make quick work of preparing the nuts but in the 1960s, making nut roll started with my mother buying a large quantity of whole walnuts. We would sit around the table and crack the nuts open then extract the nutmeats. I still have the nutcracker and picks that we used.

My parents’ nutcracker and picks

After all the nuts were shelled, they needed to be ground. We did this in a hand-crank grinder of the same type used to grind meat for sausage. As a kid, I got to turn the crank on the grinder! I no longer have my mother’s grinder as it got rusty from being stored in the basement but I have my own that is pretty much identical. I got it when I was in college.

The hand-crank grinder I got while in college

After the excitement (well, as a kid it was pretty exciting!) of shelling and grinding the nuts we all kind of abandoned my mother who started the laborious process of actually making the nut rolls. That is definitely not a job for amateurs. The dough had to be very thin but just thick enough to contain the nuts. The nuts had to be moist, sweet, and generous in quantity compared to the amount of dough. Then the whole thing had to be rolled up and baked.

After my mother died, Aunt Margie started sending me nut roll every year. After Aunt Margie died, my cousin Donna (Aunt Margie’s daughter) picked up the nut roll mantle. The two nut rolls that I got this year will be carefully doled out over a few weeks, befitting their preciousness, starting on Christmas Eve!

This year’s nut roll from my cousin Donna.  Notice the large proportion of nuts to dough.

If you have a favorite family recipe and a bit of a story to tell, please email me at santafecook@villasentieri.com and we can discuss it. I am expanding the scope of my blog to include traditional recipes from around the country and around the world. Take a look at Bertha’s Flan.  It will give you an idea of what I’m looking for.


After returning from that trip to Venice I was determined to recreate Crostata di Noci. I whipped up a batch of Zia Fidalma’s pasta frolla and made a simple walnut filling with orange juice in a nod to the Italian origins of this particular pastry.

The first try was a winner and I haven’t really made any substantive changes in the recipe since. If one wanted a creamier filling, one could add a few tablespoons of butter but, honestly, the crostata is so rich that I haven’t felt the need to make it more so.

Until I tackle nut roll making 101 (which I swear I’m going to do one day soon!), I’ll have to settle for crostata di noci, and the occasional nut roll care package from my cousin!

Print Recipe
Crostata di Noci (Italian Walnut Tart)
Lightly sweetened ground walnuts fill an Italian pasta frolla crust in this Venetian dessert. If you’re not a fan of walnuts you could use other nuts. If you want to make the crostata extra festive, put a paper doily on top and sprinkle it with powdered sugar to get a pattern.
Votes: 0
Rating: 0
You:
Rate this recipe!
Cuisine Italian
Prep Time 40 minutes
Cook Time 45 minutes
Passive Time 30 minutes, plus cooling
Servings
people
Ingredients
Pasta Frolla
Nut Filling
Cuisine Italian
Prep Time 40 minutes
Cook Time 45 minutes
Passive Time 30 minutes, plus cooling
Servings
people
Ingredients
Pasta Frolla
Nut Filling
Votes: 0
Rating: 0
You:
Rate this recipe!
Instructions
Pasta Frolla
  1. Blend flour, sugar, baking powder, vanilla powder, salt and lemon zest in a food processor until combined.
  2. Add the cold butter, cut in pieces.
  3. Blend till well combined. The mixture in the food processor will appear to move as one mass though when you stop the processor you will see that it is not.
  4. Add the eggs and vanilla extract if you are using that instead of vanilla powder and blend till it almost forms a ball.
  5. Remove the pastry from the food processor and incorporate the final bits of flour by hand.
  6. Wrap the dough in waxed paper and refrigerate for about 30 minutes before using.
Nut Filling
  1. Combine all ingredients and mix well.
  2. Cover the nut filling and keep it at room temperature while rolling out the pasta frolla.
Assembly
  1. Roll out pasta frolla between sheets of waxed paper until it is just large enough to come up the sides of a 10" diameter by 1” tall tart pan with a removable bottom.
  2. Trim the edges of pastry even with the top of the tart pan.
  3. Add the filling and spread it out evenly.
  4. The filling should come just to the top of the tart pan.
  5. Bake the crostata at 350°F for approximately 45 minutes or until crust is golden brown.
  6. Cool and remove the sides of the tart pan.
  7. The crostata can be sprinkled with powdered sugar for serving and/or accompanied by lightly sweetened whipped cream.
Recipe Notes

Copyright © 2017 by VillaSentieri.com. All rights reserved.

Share this Recipe

Aunt Margie’s Colored Cookies

December 15, 2017

We called them “Colored Cookies.”

I’ve never seen them anywhere but in my hometown of Johnstown, Pennsylvania though I can’t believe they are unique to there.

Truth be told, I don’t think I’ve ever had them made by anyone besides Aunt Margie until I made them from her recipe.

Aunt Margie in 2004 with me on an architectural tour of Chicago by boat

Many of the Italian and Italian-American cookies that I grew up with were cake-like. A stiff batter of flour, sugar, eggs, and fat (lard and butter were the most common), leavened with baking powder, flavored in some way (vanilla, lemon, chocolate and spice, sesame, and so forth), rolled or shaped and baked, and usually iced with a thin powdered sugar-milk icing that would harden to a glaze.


Follow us on your social media platform of choice


Totos are a perfect example of the chocolate and spice variety.

Anginetti (Genets, as we called them in Italian-American-dialect-slang) also referred to as Lemon Knots, are lemon flavored. Although I’m devoting most of December to posting Italian-American pastry recipes, Anginetti won’t appear until next year.

Sesame Seed Cookies (which certain members of my family like to dip in wine) have no flavoring other than the sesame seeds they are rolled in before baking. These are coming next December, too.


Click HERE to join our mailing list and you’ll never miss a recipe again!


Colored Cookies are flavored with vanilla despite the riot of color that might suggest otherwise. There was a brief period of time, however, when Aunt Margie got creative (read iconoclastic) and used coconut extract instead of vanilla. Coconut and almond are my two favorite flavors when it comes to sweets, leagues beyond chocolate and vanilla as far as I’m concerned, but coconut-flavored colored cookies strayed too far from tradition for my taste. It didn’t keep me from eating them, however!

Colored Cookies

This is Aunt Margie’s original recipe. And if you flavor them with anything other than vanilla, please don’t tell me…just kidding!


If you have a favorite family recipe and a bit of a story to tell, please email me at santafecook@villasentieri.com and we can discuss it. I am expanding the scope of my blog to include traditional recipes from around the country and around the world. If you haven’t seen Bertha’s Flan, it will give you an idea of what I’m looking for.


I don’t use a lot of food coloring.  The only other exception in recent memory (other than these cookies) was Jim’s Hawaiian Guava Cake.  Take a look at my box of food coloring.  The number 39 is the price:  39 cents!  I’ve had it a long time, though I used up the red making the Guava Cake.


Print Recipe
Aunt Margie's Colored Cookies
Use a very good quality vanilla extract, not artificial vanilla flavoring, as that is the predominant flavor. The best way to mix these is using your hand. If you don’t start there, you’ll end up there so just use your hand from the beginning. Although Aunt Margie’s original instructions were to ice the cookies while still warm, that is very difficult to accomplish without assistance. You can ice them after you have baked all of them with no noticeable difference. It is best to use medium-weight shiny aluminum cookie sheets. Dark metal makes the bottoms too dark before the cookies have completely cooked. You can divide the dough into five parts and color the last one yellow. If you do so, you will need to use slightly less of each dough to make a cookie.
Votes: 0
Rating: 0
You:
Rate this recipe!
Cuisine Italian
Prep Time 1 hour
Cook Time 2 hours
Servings
dozen
Ingredients
Cookies
Icing
Cuisine Italian
Prep Time 1 hour
Cook Time 2 hours
Servings
dozen
Ingredients
Cookies
Icing
Votes: 0
Rating: 0
You:
Rate this recipe!
Instructions
Cookies
  1. Measure all the ingredients.
  2. Combine butter and sugar.
  3. Mix well using your hands.
  4. Add eggs one at a time mixing after each.
  5. Mix in salt and baking powder then add milk and vanilla.
  6. Combine well.
  7. Add flour and mix until a dough forms.
  8. Divide dough into four parts.
  9. Leave one part of dough white.
  10. Color the others pink, blue, and green.
  11. Take approximately 1 teaspoon of each dough and roll into a ball the “size of a walnut” according to Aunt Margie’s recipe. You will need to apply a bit of pressure, without smashing the colors together, to be sure that the different colored doughs have joined into one cookie. If not, the cookies will split during baking.
  12. Bake 350°F for 17-20 minutes until very light brown on the bottom and the top does not depress when touched lightly.
  13. Remove cookies from cookie sheet and put on a cooling rack.
  14. Using your finger, ice with powdered sugar icing while still warm.
Icing
  1. Combine powdered sugar, vanilla and milk. Stir to combine.
  2. Stir to combine.
  3. Thin with a small amount of milk if needed. The icing should be of a spreading consistency.
Recipe Notes

Copyright © 2017 by VillaSentieri.com. All rights reserved.

Share this Recipe

Pizzelle (Italian Anise-Flavored Wafer Cookies)

December 6, 2017

Pizzelle punctuated my childhood.

Pizzelle were present at every holiday, birthday, wedding, and festive event as well as at random times throughout the year.

They usually came from Aunt Margie, though other folks made pizzelle, too.

My mother never did. Though she liked to bake, and made some wonderful pastries, pizzelle were not part of her repertoire.

The classic flavor is anise, though vanilla, and to a lesser extent lemon and orange, are common as well.

Aunt Margie would use pizzelle to make ice cream sandwiches. She would roll them around a tube to make faux cannoli. She would even roll them into ice cream cones. Of all the permutations, though, my favorite is just the classic, flat, crispy anise-flavored cookie.


Click HERE to join our mailing list and never miss another recipe again!


I don’t know anybody who doesn’t use an electric pizzelle iron these days but originally Aunt Margie used one of cast iron that was heated on the stove. It came from Berarducci Brothers in McKeesport, Pennsylvania and is most definitely iron, not aluminum. I have the pizzelle maker in its original box.

Aunt Margie’s original cast iron pizzelle maker

The original box for the pizzelle maker

Unfortunately Berarducci Brothers is no longer around. Not only did they manufacture stove-top and electric pizzelle irons, they made ravioli molds, crank-handle vegetable strainers, and an array of other culinary tools.

A modern pizzelle maker

In my experience, anise oil is essential. Anise extract simply does not pack enough flavor to give pizzelle the punch they need.

When I was young, anise oil came from the pharmacy. It was not uncommon in those days for pharmacies to routinely compound medications to a physician’s specific instructions. Compounding is now limited to a few specialty pharmacies but not so back then. Anise oil was commonly used to flavor what might otherwise be a noxious medication.

It was common practice among the Italian families in my hometown to go to the pharmacy to buy a bottle of anise oil. One upside, besides the easy availability of the stuff, is that it was pharmaceutical grade and, therefore, very pure.


Follow us


I tried that in Santa Fe after my mother-in-law kept failing to get enough anise flavor out of anise extract. We even have actual compounding pharmacies in Santa Fe as well as pharmacies that specialize in herbal and homeopathic medications that also make up their own medications. No dice. Not one of them carried anise oil.

Amazon to the rescue. There are other on-line sources, too, like the King Arthur Flour people. So, if you want to try your hand at pizzelle, get anise oil, not anise extract.  If you don’t like anise you could give vanilla, lemon, or orange a try.  If you do, I suggest the lemon and orange oils from Boyajian rather than extract.

The brand of Anise oil I have been using lately

Print Recipe
Pizzelle
Anise extract does not work well. Anise oil is an absolute requirement for the authentic taste. As with many "old Italian recipes" in my collection, this one provided a range of amounts of flour. 1 3/4 cups of all-purpose flour worked well and was pretty much right in the middle of the range. The batter will be quite stiff until the melted butter is stirred in.
Votes: 0
Rating: 0
You:
Rate this recipe!
Cuisine Italian
Prep Time 15 minutes
Cook Time 30 minutes
Passive Time 15 minutes
Servings
dozen
Ingredients
Cuisine Italian
Prep Time 15 minutes
Cook Time 30 minutes
Passive Time 15 minutes
Servings
dozen
Ingredients
Votes: 0
Rating: 0
You:
Rate this recipe!
Instructions
  1. Combine flour, salt, and baking powder.
  2. Mix well. Reserve.
  3. Combine eggs and sugar.
  4. Mix until well combined.
  5. Stir in vanilla and anise oil.
  6. Stir dry ingredients into egg-sugar mixture.
  7. Stir in melted butter.
  8. Lightly grease the pizzelle maker (with lard, preferably) before the first ones are baked. After the first, additional greasing is not needed.
  9. Add a rounded tablespoon of batter to the center of each shape, depending on the size of your iron.
  10. Cover and cook until light golden but not really brown. The length of time will vary based on the specifics of your pizzelle iron. With mine, it took 30-45 seconds per batch.
  11. Cool the pizzelle on racks.
  12. You can dust with powdered sugar if you'd like but I rarely do unless it's a really festive occasion.
Recipe Notes

Copyright © 2017 by VillaSentieri.com. All rights reserved.

Share this Recipe

Cuban Black Beans

December 1, 2017

Black beans are ubiquitous on tables in Cuba.

Getting beans to the right texture and the liquid to the right thickness is almost an art form.

Food is scarce in Cuba…at least if you’re a Cuban paying in Cuban Pesos. Not so much if you’re paying in CUCs (Cuban Convertible Pesos), which is what foreigners use. The CUC is pegged to the US Dollar but if you change Dollars for CUCs you pay a 10% penalty as opposed to exchanging another currency, say the Euro, for CUCs.


Click HERE to follow us on Twitter


Prices in Cuban Pesos at a locals’ only market

One view of a locals’ only market
Another view of a locals’ only market

I visited a butcher shop in Havana which pretty much now only sells chicken; when chicken is available, that is. If you notice the door to the cooler is open. That’s because the cooler isn’t on because there’s no inventory.

A butcher shop in Havana

The butcher is just waiting around for chicken to arrive.

When that chicken does arrive, it will likely be frozen Tyson chicken from the United States. Even though, when this picture was taken, the US embargo of Cuba was in full force.

Most of the chicken in Cuba is frozen Tyson chicken from the United States

The same is true of hot sauce. If one asks for hot sauce at a restaurant in Cuba one is likely to get a bottle of Tabasco shipped in from Avery Island, Louisiana. Clearly there are exceptions to the embargo for some American companies!

If you pay in CUCs, the food available increases dramatically.

One stall in a multi-vendor market where prices are denominated in CUCs
Another stall in the same market
Locally prepared beverages in the CUC-denominated market

The disparity in prices for food purchased with Pesos vs CUCs is so large that average Cubans cannot afford to buy food with CUCs, even if they can get them. It takes 25 Cuban Pesos to buy one CUC. Paying in Pesos limits one to shopping in pretty-much locals’ only stores, with limited inventory where the products, like rice and beans, are sold at subsidized prices.

Rum is widely available regardless of the currency.  You’ll pay more if you’re a foreigner, however.

Havana Club is a popular brand of rum in Cuba
A well-stocked bar ready for the day’s customers
Cuban cigars for sale at the bar

After returning from the trip to Cuba in 2014, I tried but couldn’t get the texture of my “Cuban” black beans right. But then, my mother-in-law got a recipe from Beatriz (Betty) Scannapieco. Betty is from Cuba. She was in the exercise group my in-laws attend. Betty’s recipe, using a pressure cooker as is common in Cuba, works like a dream. It’s really pretty effortless, too. The green pepper, onion, and garlic add tremendous flavor but are removed after cooking leaving just beans and the silky cooking liquid.

I made three changes to Betty’s recipe. She called for 1 teaspoon of white wine. I use 1 tablespoon. Betty didn’t use tomato paste or black pepper but both are common ingredients in many Cuban black bean recipes.


Follow us


Click HERE to join our mailing list and you’ll never miss a recipe again!

Print Recipe
Cuban Black Beans
This recipe came from Beatriz (Betty) Scannapieco in my in-law’s exercise group. Betty is from Cuba. I added the tomato paste and black pepper to Betty’s recipe. I also increased the wine from 1 teaspoon to 1 tablespoon. It can be challenging to get the bell pepper, onion, and garlic out of the beans as they very soft after cooking. If you want to make it easier, you could tie them in cheesecloth.
Votes: 0
Rating: 0
You:
Rate this recipe!
Prep Time 10 minutes
Cook Time 1 1/4 hours
Servings
people
Ingredients
Prep Time 10 minutes
Cook Time 1 1/4 hours
Servings
people
Ingredients
Votes: 0
Rating: 0
You:
Rate this recipe!
Instructions
  1. Wash the beans.
  2. Cover beans with water by a couple of inches and soak overnight in the refrigerator.
  3. The next day, cut the bell pepper in half and remove ribs and seeds.
  4. Cut the onion into 4 or 6 wedges, but do not cut the whole way through the root end.
  5. Bruise the garlic by laying the blade of a chef's knife on top and gently pounding the knife blade.
  6. Drain the beans. Put the beans in a pressure cooker along with 3 ¼ cups of fresh water.
  7. Bring the beans to a boil, uncovered.
  8. Skim the foam from the beans then remove the pot from heat.
  9. Add the green pepper, onion, garlic and bay leaves to the beans.
  10. Put the lid on the pressure cooker and bring to 10 pounds pressure.
  11. Reduce heat and cook for 30 minutes.
  12. Remove the pressure cooker from heat and allow pressure to dissipate naturally.
  13. Uncover the pressure cooker.
  14. Add the olive oil, tomato paste (if using), wine, vinegar, salt and black pepper (if using).
  15. Bring to a boil uncovered and boil for 5 minutes.
  16. Remove from heat. Cool slightly and remove bell pepper, onion, bay leaves, and garlic.
  17. The beans can be served immediately but are better if refrigerated overnight.
  18. Serve the beans in a shallow bowl with pieces of finely diced raw onion in the center. Black beans are customarily accompanied by white rice.
Recipe Notes

Copyright © 2017 by VillaSentieri.com. All rights reserved.

Share this Recipe

Cabbage and Noodles (Halushki)

November 27, 2017

One of the interesting consequences of working on this blog is that it is getting me to cook more Slovak food.

We ate way more Italian food than Slovak food when I was growing up but, nonetheless, Slovak food was a significant presence on our table.

Things that only lived in my memory, like the Chicken Paprikash that I posted a few weeks ago, and my Grandma Mihalik’s Butter Cookies that are coming up in a week or two, are now real. And it’s not only the Slovak food. The Chinese Five-Spice Roast Pork from last week hasn’t been on my table in more than 40 years!


Click HERE to follow us on Instagram


Part of the reason is that, as much as I enjoy cooking, I hadn’t devoted as much time to planning what I was going to cook as I did when I was younger.  That is, until I got deep into this blog (and the restaurant cookbook I’ve been asked to write).

In Junior and Senior years of college there was a plan for dinner for every day of every week. Sometimes there was a plan for lunch, too!

Good provisions weren’t conveniently located to the University of Pennsylvania campus except for some specialty items from the ethnic markets near campus or the occasional very basic item from one of two nearby (in-super) supermarkets. Grocery shopping was done weekly and involved a trip to Ninth Street (sometimes called the Italian Market), and to the Pathmark supermarket in Broomall, PA.

Every meal got planned and a shopping list was created.

The planning was usually done in the evenings when I needed a break from studying (which I know some of you think I never did!). I would sit down with a cookbook or two, or my box of recipes handwritten on 3” x 5” index cards, or the typewritten recipes from Mrs. Hugh, my roommate’s mother and, over the course of the week, generate a list of what my roommate and I were going to have for dinner each night. Some were favorites but many were new, like the whole poached fish I made from Marcella Hazan’s first cookbook or Mrs. Hugh’s Crispy Duck (see the photo embedded in this blog post).

One of my favorite books was a slim volume by Charmaine Solomon. Charmaine was from Sri Lanka and two of the resident advisors in my college house, Reggie and Nanacy Rajapakse, were also from Sri Lanka and knew Charmaine. Charmaine’s Far Eastern Cookbook was copyrighted in 1972 (the year I started college). The edition I have was printed in 1973 so it was quite new when I bought it in 1974 shortly after entering the International Residence Project. I read that book cover to cover, like a novel, many times. I could sit for hours and pore over Charmaine’s recipes.

My dog-eared and much beloved copy of Charmaine Solomon’s Far Eastern Cookbook

In 1976, when I graduated college, Reggie and Nanacy bought me another of Charmaine’s cookbooks as a present, The Complete Asian Cookbook.

Another favorite cookbook was the [Ceylon] Daily News Cookery Book which was in the collection of the Van Pelt library at the University of Pennsylvania. I would check it out, keep it as long as I could, return it, and then check it out again. It was a hardcover book with a red cloth cover. It was simply titled the Daily News Cookery Book.  Reference to Ceylon was nowhere to be found in the title.  Many years later, on a trip to Sri Lanka, I was able to get a reprint of the book (with the word Ceylon added to the title).

My point, though, is that my cooking repertoire expanded because I worked at it. Ray and I planned every meal, we went grocery shopping, we cooked, and we most certainly ate. I was still able to keep up a good cooking pace through medical school but after that, as I got busier and busier, it became harder and harder.

While I can put food on the table any given night without much thought, recreating past favorites or trying out new recipes requires more planning. I now have a calendar specifically devoted to cooking. Dishes get planned out weeks, if not months, in advance. It’s a lot of work, yes, but it’s tremendously rewarding to prepare my favorite foods, many of which I haven’t had in many years, and introduce them to others.

Cabbage and Noodles, sometimes called Halushki, was frequently on our table. I remember it particularly being served with Salmon Patties, one of my favorite Friday meals when we didn’t eat meat. We had it other times, too, but the association of Cabbage and Noodles with Salmon Patties is very strong.


Follow us


Click HERE to join our mailing list and you’ll never miss a recipe again!

Print Recipe
Cabbage and Noodles (Halushki)
Although three pounds of cabbage sounds like a lot, it cooks down a tremendous amount. If you wish, you can add a teaspoon or two of caraway seed to the cabbage during the last 20 minutes of cooking. Though my family did not do that, it is not unusual to do so.
Votes: 0
Rating: 0
You:
Rate this recipe!
Prep Time 15 minutes
Cook Time 2 hours
Servings
people
Ingredients
Prep Time 15 minutes
Cook Time 2 hours
Servings
people
Ingredients
Votes: 0
Rating: 0
You:
Rate this recipe!
Instructions
  1. Quarter and core the cabbage.
  2. Slice each quarter crosswise into ½ inch wide ribbons.
  3. In a heavy-bottomed pot large enough to hold the cabbage comfortably melt four tablespoons of the butter.
  4. Sauté the onion in the butter until golden.
  5. Add the cabbage. Season generously with salt and pepper.
  6. Sauté on medium heat, stirring often, until the cabbage wilts.
  7. Reduce the heat if the cabbage starts to stick to the pot.
  8. Continue to cook on medium low, partially covered and stirring often, until the cabbage is silky, golden, and sweet. This will take 1 ½ to 2 hours total from start to finish.
  9. The cabbage can be cooked several hours in advance to this point. Warm the cabbage before proceeding.
  10. Bring 3 quarts of water to a rolling boil. Add 1/3 cup of salt.
  11. Cook the egg noodles in the salted water until just done. They should be slightly toothy and definitely not mushy.
  12. Drain the noodles.
  13. Add the noodles to the cooked cabbage along with the remaining 2 tablespoons of butter. Toss well.
  14. Taste and adjust salt and pepper.
Recipe Notes

Copyright © 2017 by VillaSentieri.com. All rights reserved.

Share this Recipe