Carne Adovada (Pork Braised in Red Chile Sauce)

July 14, 2017

I am a chile head.

I also like coaxing a tremendous amount of flavor out of a small number of ingredients (though I don’t shy away from recipes with long ingredient lists either!).

I am a big fan of dishes that can be made in advance and warmed up for serving.  Carne Adovada actually tastes better if it is refrigerated for a day or two.

For all of these reasons, Carne Adovada is an ideal dish for me.  It is, bar none, my favorite New Mexican dish.

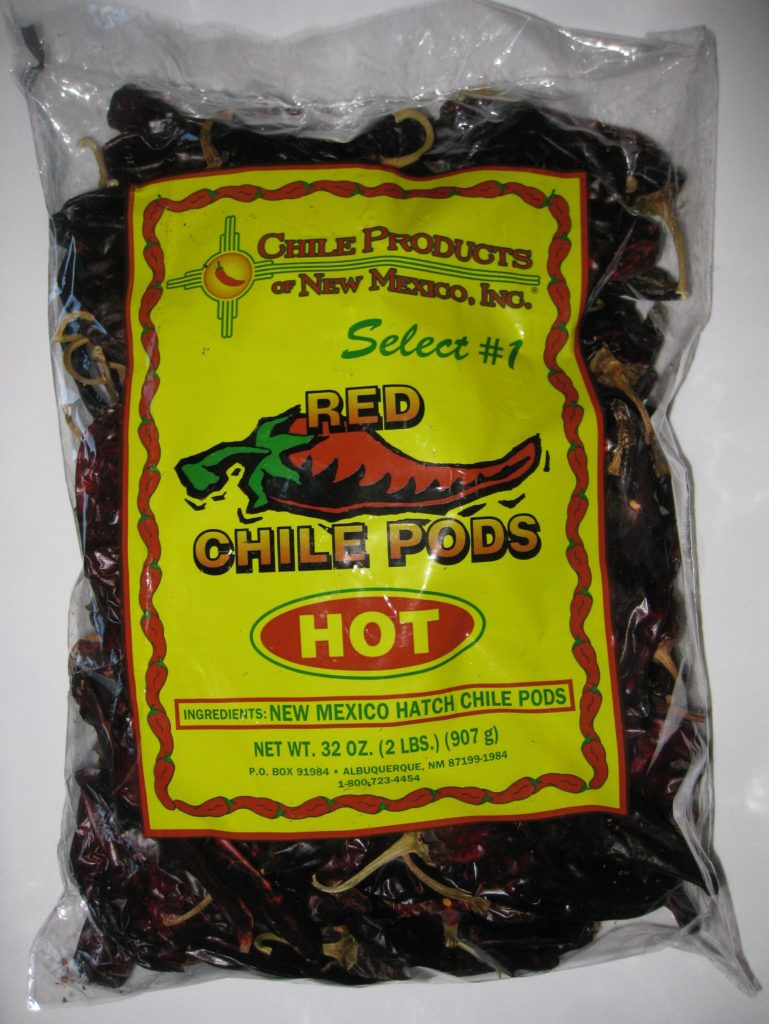
However, it isn’t necessary to use hot or extra-hot red chile.  If you’re not a fan of spicy foods, use mild or medium-hot chile.  What is critical is that you use actual New Mexico dried red chile.

New Mexican Red Chile Pods

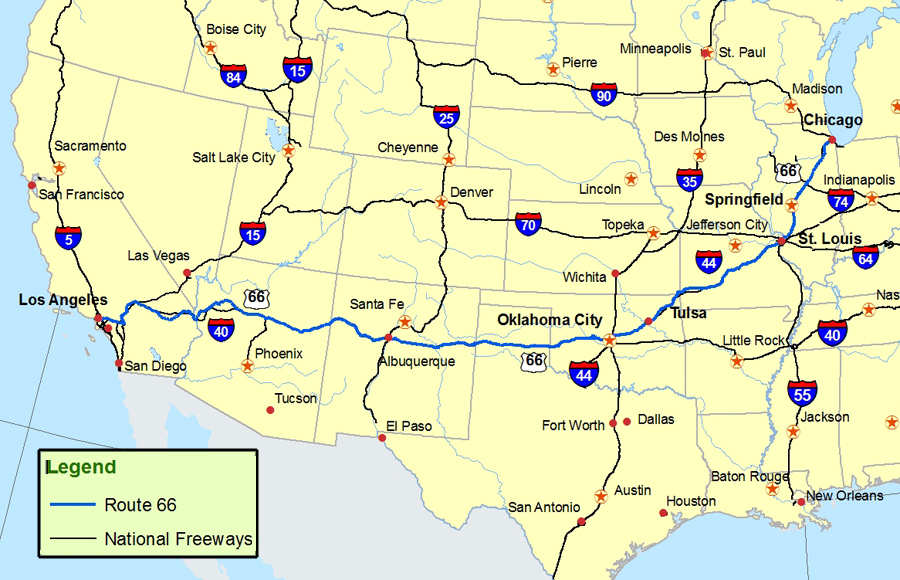
Although I rode in a car along route 66 in the 1960s to visit an uncle in Los Angeles, I never spent any appreciable time in New Mexico until August 1991.   Just days into that week-long visit to Santa Fe, I had Carne Adovada at Maria’s Restaurant.

I was hooked!

I was also enchanted by Santa Fe, as was my husband.  By late 1992 we put in an offer on our first house in Santa Fe.  The offer was accepted and we closed in January 1993.  Thus began our love affair with Santa Fe.

We moved to Santa Fe full time in 2012 but we spent considerable time in Santa Fe every year until then (about ten times per year including all major holidays).

I was never happy with any Carne Adovada recipe that I tried, and I tried plenty, until I stumbled on a recipe from Al Lucero, the former owner of Maria’s Restaurant, in the program book for Santa Fe Wine and Chile Fiesta a number of years ago.

In times past, when a hog was butchered in the fall, some of the meat was preserved in red chile.  This chile-infused meat was later braised to become Carne Adovada.  I don’t know of anyone who cures pork this way any longer but many recipes for Carne Adovada call for marinating the pork overnight in the red chile.  This would seem to be closer to the traditional method, though simply marinating the meat would not produce the additional flavor that would come from actually curing the pork in the chile.  Some recipes, though a minority in my experience, call for the addition of vinegar to the marinade to try to achieve more of a “cured” or “fermented” flavor.

Al Lucero’s approach is different but definitely creates an extra layer of flavor.  The pork cubes are roasted first then braised in red chile.  Refrigerating the completed Carne Adovada for a day or two before serving improves the flavor even more.

What I especially like about Al’s method is that it does not introduce any non-traditional ingredients to the Carne Adovada.  Until I can taste Carne Adovada made from pork that is actually cured in red chile, I’m sticking with my tweaked version of Al’s method.

Click HERE to join our mailing list and you’ll never miss a recipe again!

Print Recipe
Carne Adovada (Braised Pork with Red Chile)
The purity of the chile flavor is key to Carne Adovada so I avoid putting in other seasonings such as onion and oregano that are sometimes called for. This recipe, based on a recipe of Al Lucero, the former owner of Maria’s Restaurant in Santa Fe, roasts the pork first for a depth of flavor not obtainable otherwise. Remove any large pieces of fat from the pork but thin layers of fat between the meat are needed to ensure moist and tender pork, so don’t remove it all. I frequently buy a bone-in pork shoulder (aka pork butt) and use the bone to make broth.
Votes: 0
Rating: 0
You:
Rate this recipe!
Course Mains, Meats
Prep Time 30 minutes
Cook Time 5 hours
Servings
people
Ingredients
Pork
Red Chile Sauce
Course Mains, Meats
Prep Time 30 minutes
Cook Time 5 hours
Servings
people
Ingredients
Pork
Red Chile Sauce
Votes: 0
Rating: 0
You:
Rate this recipe!
Instructions
  1. Cut the pork into one inch cubes.
  2. Toss the pork with the garlic powder, and salt.
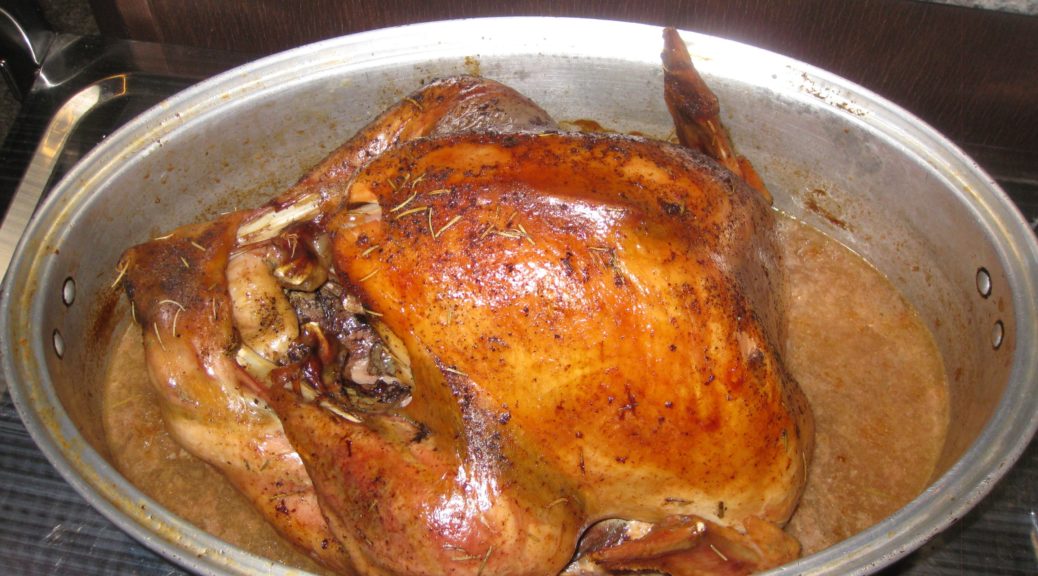
  3. Put the meat in a wide shallow baking/roasting pan that has a lid and roast at 450°F, uncovered, until well browned, turning every 20 minutes or so, approximately 90 minutes.
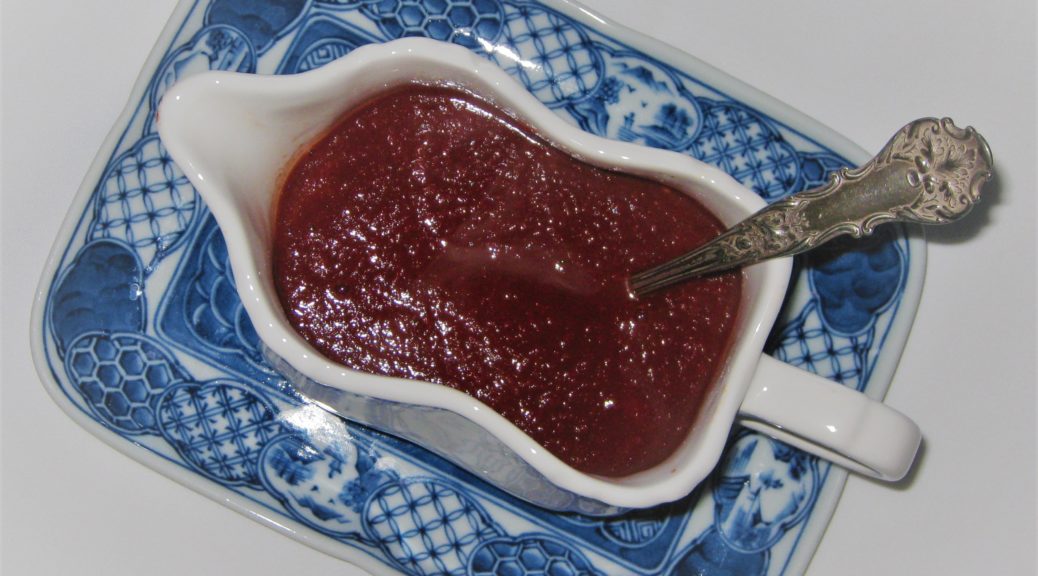
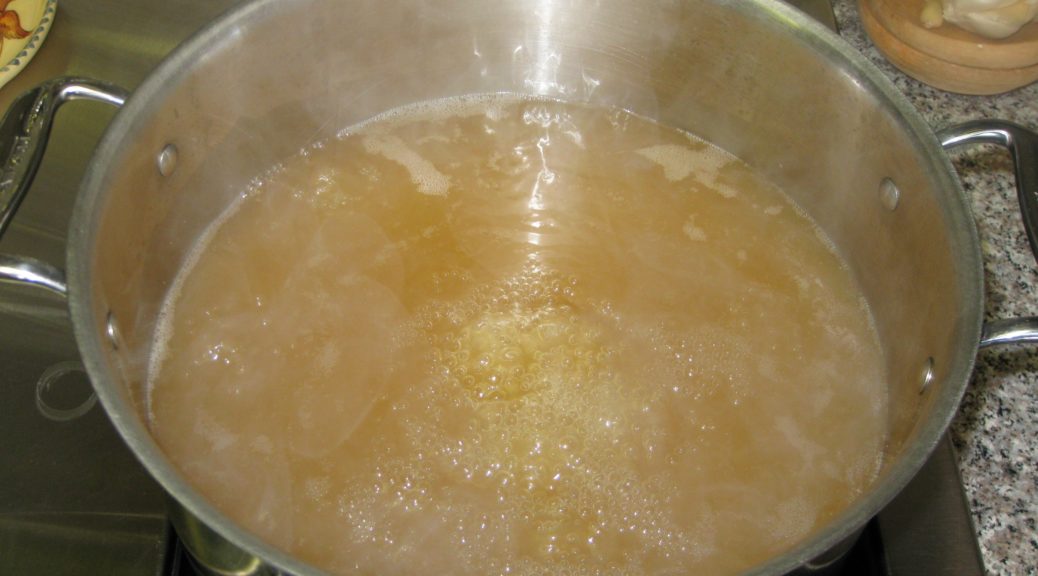
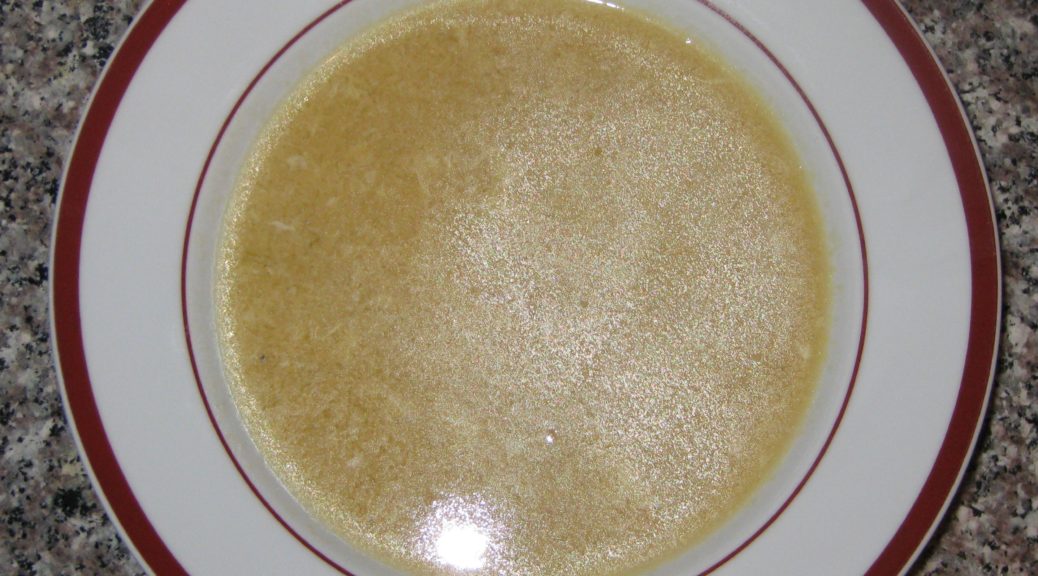
  4. While the pork is roasting, make the red chile sauce using the proportions of ingredients called for above and following the directions in the Red Chile blog post. See the "Notes" section below for the link. There is some rendered fat in the pan. Do not discard the fat, it carries lots of flavor and improves the mouth feel of the sauce.
  5. Beginning to brown.
  6. Tossed after the top has browned.
  7. Almost brown enough.
  8. Browned and ready for the chile. Note that the liquid has all evaporated and created a brown fond in the pan. This gives extra flavor.
  9. When pork is browned, add all the red chile sauce without draining any of the juices out of the pan.
  10. Cook, covered, at 250°F for approximately 3-4 hours or until meat is very tender, stirring occasionally.
  11. Remove the meat from the oven. Allow it to cool to room temperature.
  12. Cover tightly and refrigerate overnight.
  13. Reheat the carne adovada, covered, at 250°F for approximately 2 hours. If the sauce is not thick enough, reheat uncovered at a somewhat higher temperature until the sauce is thickened.
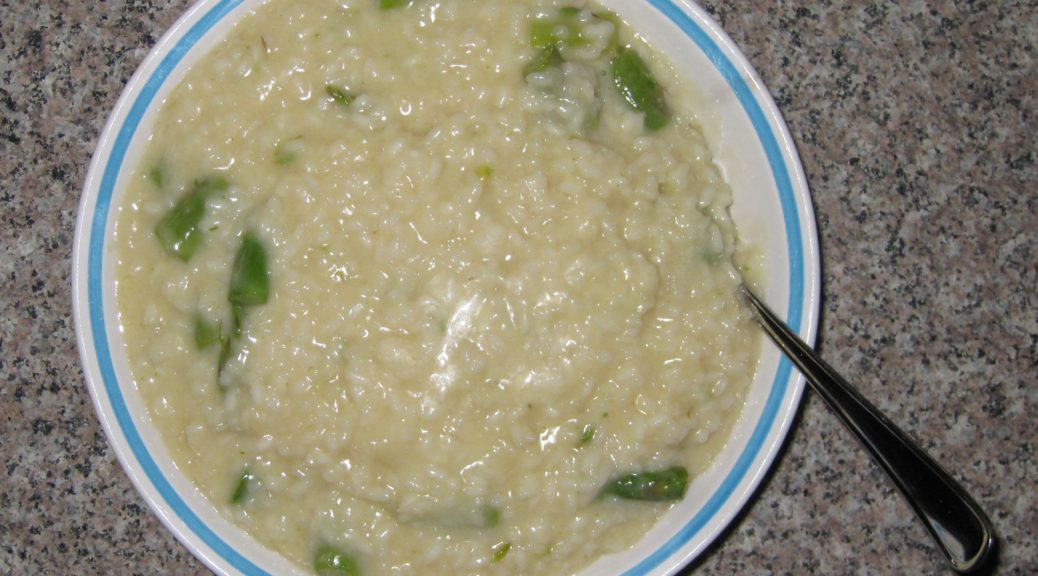
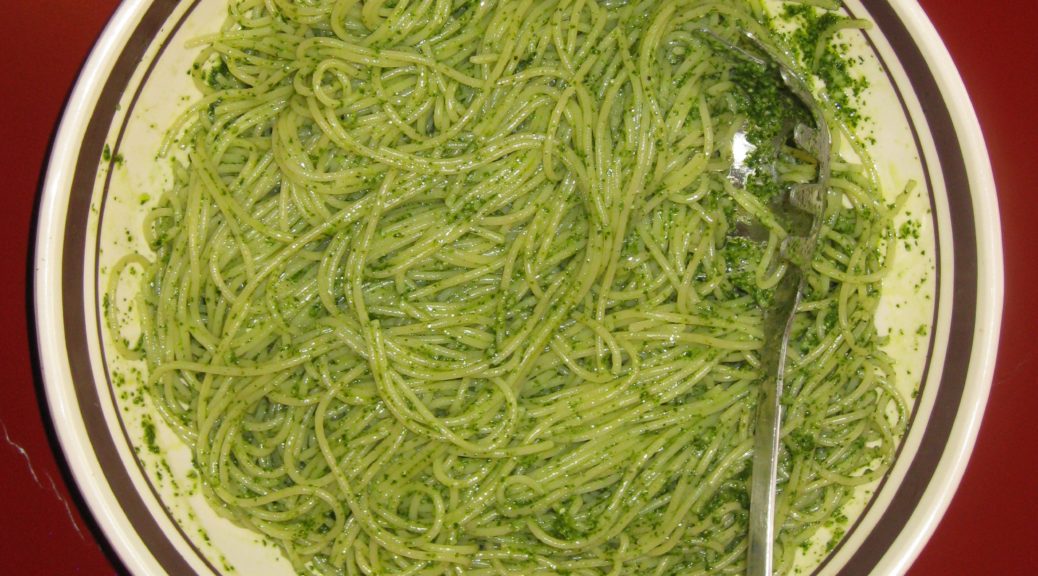
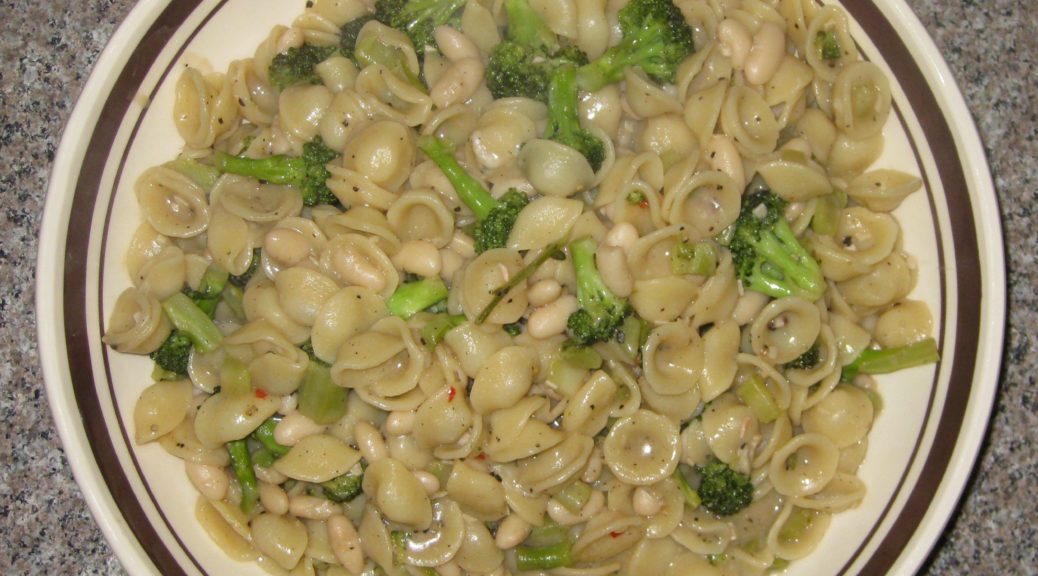
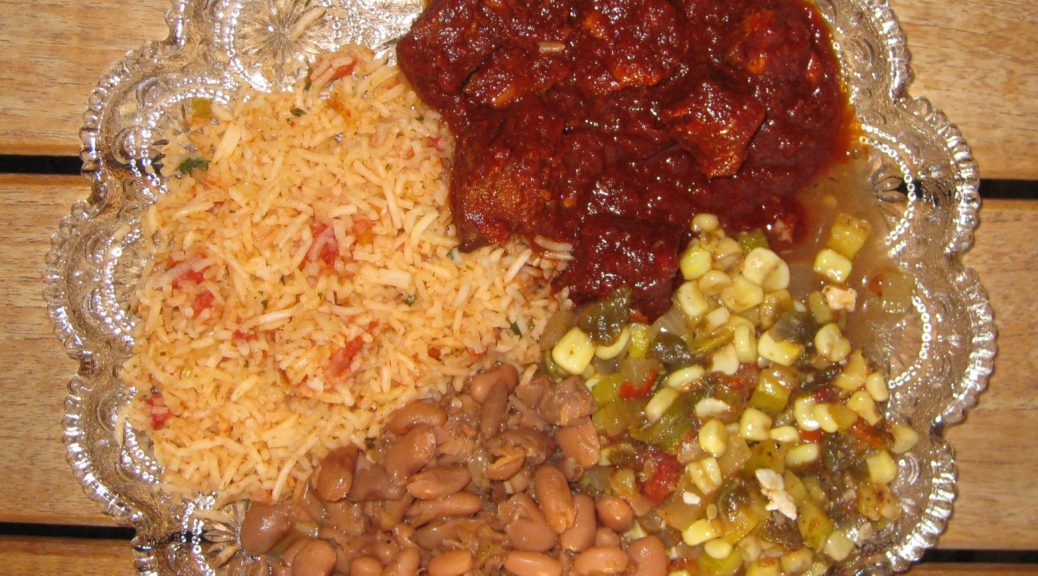
  14. This plate contains carne adovada, red rice, frijoles (beans), and calabacitas) (zucchini, corn, and roasted green chile).
Recipe Notes

Here's where you can find the directions for making Red Chile Sauce.

Copyright © 2017 by VillaSentieri.com. All rights reserved.

Share this Recipe

Homemade Pizza

June 26, 2017

Before my bread machine it was my Kitchen Aid stand mixer.  Before my Kitchen Aid stand mixer it was my hands.  I have always enjoyed making bread.

Junior year in college was when my bead making got started in earnest.  That was the year that I lived in the International Residence Project at the University of Pennsylvania.  I was notified of my acceptance into the Project, a College House arrangement that occupied two floors of a high-rise dorm, late in my sophomore year.  Current and incoming residents of the Project met at a social event where I was introduced to the roommate to whom I had been assigned for the coming school year, Ray Hugh from Georgetown, Guyana.

Ray and I started hanging out together for the last part of sophomore year and found that we really hit it off.  Since we were both staying in Philadelphia for the summer, and since students could not stay in undergraduate dorms during the summer, we did what most undergrads did during the summer.  We sublet an apartment in Graduate Towers from graduate students who were not staying in Philadelphia for the summer but who, as graduate students, had year-long leases.

I had pretty regular hours working in a research lab for the summer but that left evenings and weekends free to explore cooking which Ray and I did together.  It quickly became clear that the kitchen in our apartment in the International Residence Project, which we would begin occupying in September, was going to need an upgrade.

At my request, my father made a five-foot long kitchen counter with a laminate top.  There was in integrated pull-out table that would seat two in the regular configuration but four when pulled out.  That counter became the epicenter of our cooking universe.  Set opposite the Pullman kitchen (three electric burners, an oven, an under-counter refrigerator, and an integrated sink) we had a very efficient kitchen set-up.  A deep shelving unit that I made housed equipment and several stacks of plastic milk crates held ingredients for which there otherwise would have been no space.

I made bread on that counter every week, kneading it by hand.

I made bread the way my Italian grandmother did.  Flour, water, salt, and yeast went into a big bowl.  The yeast was not proofed.  I mixed the ingredients by hand, adding more flour as needed.  Periodically I would rub the inside of the bowl with lard.  After enough flour had been added, I would put the dough on the counter and knead it for about ten minutes.  The dough would always rise twice, getting punched down and kneaded lightly after each rise, before being put in bread pans for the third and final rise before being baked.

Decades later I got my first Kitchen Aid stand mixer and started using that to make bread.  Good thing, too, because I was starting to have trouble with my joints from all the kneading necessary.

A few years ago I got my first bread machine, a Zojirushi BB-PAC20.  While I have no doubt that bread baked in an oven is better I also have no doubt that we would not eat anywhere as much homemade bread if I had to do all the mixing, rising, shaping, and baking unaided.

With less than five minutes’ work spent measuring ingredients, I can push a button and have bread a few hours later.  And I am completely at peace with the ingredients in my bread.  No sugar.  No high fructose corn syrup.  No dough conditioners.  No preservatives.  Nothing but flour, water, salt, olive oil and yeast!  The bread machine has more than paid for itself in savings.

My Zojirushi BB-PAC20 bread machine

I especially like the dough cycle.  As noted in a previous blog post, I use the dough cycle to make the dough for my focaccia.  A quick final rise after being shaped and the focaccia is ready for the oven.  The dough cycle also makes pizza dough in a snap.  I like to make it at least one day in advance and allow it to rise in the refrigerator.  Two days in advance is even better.

I still pretty much use the same recipe for bread dough that I followed in college though I’ve swapped out the lard for olive oil and modified the directions to suit mechanization instead of hands.  (Every now and then, I just get the urge to do it by hand, though!)

Usually I bake pizza in a wood-burning oven.  Since wood-burning ovens are not very common, the pizza featured in this post was baked in a conventional oven.  I don’t have a pizza stone since I don’t usually bake pizza in the oven.  All the better though, since I know few people who have pizza stones.   I simply went old school and used heavy aluminum pizza pans.  I didn’t even use the convection feature!

Our DoughPro wood-burning oven from Australia
Baking chamber above and fire chamber below

Until a few years ago I always cooked my pizza sauce.  Then I tried uncooked sauce as is often done in Naples and found that I really prefer it.  It has a fresher taste and it is really easy to make.  (Sorry mom!)

I usually use tomato puree because I like a smooth sauce but crushed tomatoes work well if you prefer a chunkier sauce.  You can also just whizz a can of whole peeled tomatoes in the blender or food processor to whatever degree of chunkiness or smoothness you want.

An array of tomato products

Print Recipe
Homemade Pizza
Make the dough at least one day before you plan to bake the pizzas. The dough will benefit from the slow rise in the refrigerator. Two days is even better. Be sure to put the balls of dough in containers that seal well to keep the dough from drying out and that are large enough to hold the dough after it rises. Remove the dough from the refrigerator the morning of the day you plan on making pizza. It will take 3-5 hours to warm up and rise. If you’re not ready to make pizza when the dough has doubled in bulk, just punch it down and allow it to rise again. The dough recipe makes enough for two 16 inch pizzas but the sauce is enough for four. Extra sauce will keep in the refrigerator for 4-5 days. Since I make so much bread, I buy dry yeast in bulk. You can substitute one envelop of yeast for the two teaspoons of yeast called for in the recipe. For the sauce, use tomato puree if you prefer a smoother sauce and crushed tomatoes if you prefer a slightly chunkier sauce. In either case, really good tomatoes are called for. Buy genuine San Marzano tomatoes imported from Italy, if possible. I find Cento to be a good brand and generally available in the markets in my area.
Votes: 0
Rating: 0
You:
Rate this recipe!
Prep Time 40 minutes
Cook Time 15 minutes (for each)
Passive Time 24 hours
Servings
pizzas
Ingredients
Pizza Dough
Pizza Sauce
Prep Time 40 minutes
Cook Time 15 minutes (for each)
Passive Time 24 hours
Servings
pizzas
Ingredients
Pizza Dough
Pizza Sauce
Votes: 0
Rating: 0
You:
Rate this recipe!
Instructions
Pizza Dough
  1. One or two days before you plan to bake the pizza, prepare the dough.
  2. You can use the dough cycle of a bread machine, the dough hook of a stand mixer, or you can make the dough by hand following the directions in the blog post.
  3. If using a bread machine, follow the manufacturer’s directions for the dough cycle.
  4. If using a stand mixer, put warm, not hot, water in the bowl of the mixer. Add four cups of flour, the yeast, and salt and begin to mix. Gradually pour in the olive oil. Add enough of the remaining flour to make a slightly tacky dough. Chances are you will need all of it. Allow the dough hook to knead the dough for 8-10 minutes.
  5. If making the dough by mixer or hand, oil the dough and place in an oiled bowl. Allow the dough to rise at room temperature until doubled in bulk, covered lightly with a kitchen towel.
  6. After the dough has doubled, or when the bread machine has completed the dough cycle, remove the dough and punch it down.
  7. Divide the dough in half and shape into two balls. Rub the surface of each ball with oil and put each one into a separate oiled bowl or LARGE plastic container.
  8. Cover tightly using plastic wrap if needed.
  9. Put the dough in the refrigerator until the morning of the day you plan to bake the pizza.
  10. On baking day, remove the dough from the refrigerator in the morning and allow it to sit at room temperature until doubled in bulk. This will take 3-5 hours (or maybe a bit longer if your refrigerator is really cold). If you are not ready to bake the pizza, just punch the dough down again and let it rest. It is better to err on the side of taking it out of the refrigerator too early rather than too late!
Pizza Sauce
  1. Mince the garlic.
  2. Combine all the ingredients for the sauce.
  3. Cover and refrigerate overnight to allow the flavors to mellow.
  4. Some brands of tomatoes can be a bit tart. Taste the sauce right before you use it and, if necessary, add up to ½ teaspoon of sugar but no more. (Some people consider this heresy but it is a common Italian technique to counter tomatoes that are too tart. Remember agricultural products vary and sometimes you need to use your judgment to correct a situation that is not addressed by the recipe.)
Assembly of Pizza
  1. Shred the mozzarella on the tear-drop shaped holes of a box grater. Reserve.
  2. Lightly dust a 16 inch round pizza pan with cornmeal.
  3. Put the dough on a metal pastry "board" or a second pizza pan and gently stretch it by pressing on it and moving your hands apart. The dough will spring back. Each time it will stay stretched a little more. After six to eight stretching motions, allow the dough to rest for several minutes to permit the gluten to relax. This will make it easier to stretch. I usually allow two or three such rest periods.
  4. Stretch dough into a 16” round.
  5. Flip the dough over onto the cornmeal-dusted pizza pan. (OK, I don't have the skill to stretch the dough by tossing it in the air and putting it on the pan so this is my hack. If you can toss pizza dough in the air, please give me a lesson!)
  6. Spread the sauce on dough to within one inch of the edge.
  7. Add toppings of your choice, if desired.
  8. Evenly sprinkle with shredded mozzarella.
  9. Bake the pizza at approximately 450°F until the edges are golden brown and the dough is fully cooked, approximately 12-15 minutes.
Recipe Notes

Copyright © 2017 by VillaSentieri.com.  All rights reserved.

Share this Recipe

New Mexican Red Chile Sauce

June 21, 2017

I come by a love of spicy food honestly.   I grew up in a family with a strong Southern Italian heritage and a love of spicy foods.  There was usually one, if not two, types of hot salami in the fridge.  My Uncle Joe Medile made the hot Italian sausage that we ate frequently and when my father said it wasn’t spicy enough, as he always did, the next batch was spicier still.  My cousin Angie put up hot peppers (her recipe is coming in the autumn).  Another Uncle ate sandwiches of fried hot peppers from his garden.  I still have hot salami in my fridge, and I make sausage and jarred hot peppers and eat fried pepper sandwiches!

I could go on but you get the picture.

In college, I fell in with a crowd of friends from all around the world, quite a number of whom were into fiery foods; foods so hot that they made anything with a European sensibility (like Italian food) seem like child’s play.

It wasn’t surprising that when I first ate New Mexican food in 1991, I was hooked by Red Chile and Green Chile.

New Mexican chile (and it is spelled chile, with an “e” on the end) at the most basic is a sauce.  Go into any New Mexican restaurant and order a burrito and the wait person, without missing a beat, will say “Red or Green?” unless you are in the know enough to have made your choice of chile part of the order in the first place.  The sauce will be poured over the burrito before serving.  If you are indecisive, you can have “Christmas” which will get you half red chile and half green chile.

New Mexican Chile has nothing in common with chili, whether it’s Tex-Mex, Cincinnati, or any other version.  There is Green Chile Stew which contains pork (usually) and is served in a bowl like, well, a stew.  But you won’t get Green Chile Stew if you ask for Green Chile.  You’ll get a sauce.

I’ve collected lots of Red Chile recipes from friends; eaten Red Chile scores, if not hundreds of times in restaurants; and researched Red Chile in old cookbooks.  I take a very traditional approach to what goes into my Red Chile, and it’s not much.

I think a traditional Red Chile should be made with ingredients that would have been available in the small, isolated farming communities in Northern New Mexico where the dish was perfected.  When I see recipes that purport to taste traditional, if not be traditional, that contain things like raisins, chipotle in adobo, and Asian fish sauce, I sigh.

Mind you, those ingredients, and other equally incongruous ingredients (like frozen orange juice concentrate!), might make a tasty sauce but it would not be New Mexican Red Chile!

Red Chile should taste of chile with other ingredients used in small quantities to complement the chile.   In my case those ingredients are garlic and salt.  Period!

New Mexican Red Chile Pods

Before the advent of refrigeration, Red Chile, which is made from dried fully ripened, i.e. red, chile pods, was eaten most of the year.  Green Chile, made from roasted, freshly harvested green chile pods, was eaten at harvest time.

Next month I’m going to post my favorite New Mexican recipe, Carne Adovada, slow-cooked pork cubes in an abundant amount of red chile sauce.  The Red Chile in this post is an integral part of the process.  If you want to give the Carne Adovada a try you might want to practice making Red Chile.  If you’re at a loss for what to do with it, consider using it as a sauce on steak, chops or scrambled eggs.  Pour it over mashed potatoes.  Make burritos and smother them in red chile.

Before moving to New Mexico full time, we spent almost every holiday in Santa Fe.  We always invited a large crowd of friends over for Thanksgiving dinner.  Since we would leave Santa Fe to return to Chicago on the Saturday or Sunday after Thanksgiving, leftovers became a problem.  We quickly developed the tradition of having all of our Thanksgiving guests back for dinner on Friday which consisted of leftovers.  The only new addition to the meal, though, was red chile which some of us, at least, used in place of gravy!

The uses for red chile are limited only by your imagination.


Click HERE to join our mailing list and you’ll never miss a recipe again!

Print Recipe
New Mexican Red Chile Sauce
Commercially available red chile pods are categorized by heat level: mild, medium, hot, and extra hot. As with any agricultural product, there is some variability. Look for certified New Mexico grown chile. The town of Hatch in Southern New Mexico is probably the most well know chile-growing region but Chimayo in Northern New Mexico grows some pretty awesome chile, too. If you can’t find New Mexican chile in the markets near you, you can order it on line. I think that using whole pods rather than ground chile (chile molido…NOT to be confused with chili powder!!!) makes for a better texture. See the note at the bottom for a method using ground red chile. Remember, ground New Mexico Red Chile only contains chile pods, nothing else!!! Recipes for Red Chile usually start by specifying a particular number of chile pods. However, many of the pods in any batch of chile are broken. My solution was to weigh the pods, after removing seeds and stems, so that I no longer had to guess about how much broken up chile pod equals one whole pod.
Votes: 0
Rating: 0
You:
Rate this recipe!
Prep Time 15 minutes
Cook Time 40 minutes
Passive Time 20 minutes
Servings
cups
Ingredients
Prep Time 15 minutes
Cook Time 40 minutes
Passive Time 20 minutes
Servings
cups
Ingredients
Votes: 0
Rating: 0
You:
Rate this recipe!
Instructions
  1. The starting point: whole dried chile pods.
  2. Break off the stem of each chile pod and empty out the seeds and pith. You might have to break the pod in one or two places to get out the seeds. Try not to break it into small pieces, however.
  3. The stems, seeds, and pith ready for the compost heap!
  4. Weigh out 1 ½ ounces of chile pods after stem, seeds, and pith have been removed.
  5. Put the chile in a bowl.
  6. Cover the chiles with very hot tap water.
  7. Steep the chiles in the hot water until softened, 15- 20 minutes.
  8. Lift the chiles out of the water and into a colander, attempting to leave as many of the seeds behind as possible. Despite your best efforts, there will still be some!
  9. Discard the water used to soften the chiles.
  10. Put the softened chiles, garlic, and 1 ¼ cups of fresh water in a blender.
  11. Puree until smooth, one to two minutes.
  12. Pour the chile puree into a saucepan.
  13. Use the remaining ¼ cup of water to rinse out the blender jar. Add this to the saucepan.
  14. Add the salt to the chile puree.
  15. Bring to a boil, reduce heat, and simmer uncovered till thickened, about 20-30 minutes.
  16. Adjust salt near the end of cooking.
Recipe Notes

Some cooks like to toast the chile pods in the oven. I have done this but I don’t believe it adds enough flavor to justify the extra work.

The water used to soak the chile can be bitter so I always discard it and use fresh water for making the sauce. The seeds and pith can also add a bitter note.  You’ll never get rid of all the seeds but eliminate as many as possible.

Chile Molido (Ground Chile or Chile Powder, not to be confused with Chili Powder!)

If you want to use ground New Mexico red chile pods (chile molido) rather than whole pods, first puree the garlic with some of the water. Add the garlic puree to the ground chile. Add the remaining water a little at a time, stirring well, to avoid lumps. Add the salt and proceed with simmering as described above.

Copyright © 2017 by VillaSentieri.com. All rights reserved.

Share this Recipe

Mom’s Slow-Braised Pork Chops

June 16, 2017

Just last week my mother-in-law breaded and quickly pan-fried pork chops for dinner.  They were tender, juicy and truly wonderful.

Now that grilling weather has finally reached Santa Fe, we’ll have pork chops quickly cooked on the grill throughout the summer.  I’ll even grill the occasional pork tenderloin seasoned with olive oil, garlic, lemon juice and rosemary.

I really enjoy juicy, quickly-cooked pork.  However, I also really, really enjoy the style of pork chops that I at while growing up:  thin-cut pork chops cooked slowly in a sauté pan until they are deep brown.

No doubt, this is an entirely different dish from cooking the chops just enough to reach that “magic” temperature of 140°F that the USDA says is “safe.”  It won’t be to everyone’s taste (what is?) but in the interest of presenting an array of very traditional dishes I’m including it.

Just a few nights ago while in Palm Springs, I was served thick-cut braised pork chops cooked by a good friend, John O’Malley, following a recipe from Marcella Hazan.  I use the same recipe from Marcella when I want to cook thick-cut chops for company (ever since John turned me onto it a while back).

Marcella was from Northern Italy, my mother’s family from far Southern Italy, but the two dishes share a style that highlights a common feature of traditional Italian cuisine.  That is, a cut of meat that could be cooked quickly is, instead, cooked slowly coaxing out more flavor and changing the texture in the process.

The realization of the similarity of these two dishes is like the experience I wrote about in April 2017 describing roast chicken I ate in Tuscany that tasted, for all the world, like the falling-apart roast chicken seasoned with garlic and rosemary that my mother made.

Quick cooking is just one style but reading contemporary recipes one would think it’s the only way to cook many cuts of meat.  We all agree that there are cuts that must be cooked long and slow for optimum texture: think Southern Pulled-Pork Barbecue, Hawaiian Roast Pig, Beef Brisket, or Pot Roast, for example.  I challenge you to find a contemporary recipe for roast chicken or sautéed pork chops that doesn’t call for the minimum cooking time and final temperature.  It’s as if we’ve forgotten that these meats can also be cooked low and slow for a qualitatively different dish.

Recording this kind of diversity traditional foodways is one of my main goals for this blog.

As I describe on the About page of this website, I’ve had the very good fortune to cook alongside incredible cooks from many different parts of the world but even that only begins to scratch the surface of traditional foods.  And while I’ve got recipes planned well into next year, I think it’s time to bring in other voices, other stories.

From time to time I am going to feature a blog post, and accompanying recipe, based on interviews with folks who have chosen to share a treasured family recipe and a story to go along with it.  There are several individuals who have volunteered to be in the vanguard of this effort.

If you have a family recipe that you’d like to share, send me an email or add a comment and I’ll follow up.

Click HERE to join our mailing list and you’ll never miss a recipe again!

Print Recipe
Mom's Slow-Braised Pork Chops
If these chops are being served as part of an Italian-style meal, preceded by pasta, rice or soup, and accompanied by several side dishes, one per person should be enough. Without a pasta course, an average eater could easily consume two of these and someone with a hearty appetite could eat three or four! A sauté pan with a very heavy bottom is needed to avoid hot spots. The chops will be cooked on low heat for most of the time and it is important that the pan conduct the heat well to avoid hot and cool spots for optimum browning. I prefer center-cut pork loin chops, these have a bit of loin and a bit of tenderloin, essentially the same cut as a T-bone steak. Loin chops (without the tenderloin), as shown in the pictures, work well too.
Votes: 0
Rating: 0
You:
Rate this recipe!
Course Mains, Meats
Cuisine Italian
Prep Time 5 minutes
Cook Time 2 hours
Servings
people
Ingredients
Course Mains, Meats
Cuisine Italian
Prep Time 5 minutes
Cook Time 2 hours
Servings
people
Ingredients
Votes: 0
Rating: 0
You:
Rate this recipe!
Instructions
  1. Season the chops generously with salt, pepper and garlic powder.
  2. Using a sauté pan that has a very heavy bottom and that is large enough to hold the chops without crowding, heat the oil until it just begins to smoke over high heat.
  3. Add the chops and reduce heat to medium high.
  4. Cook the chops, undisturbed, until nicely browned, approximately 2 minutes.
  5. Turn the chops over. If the oil was very hot when the chops were added and if you didn't disturb them while they browned, they should easily release from the pan without sticking.
  6. Brown other side. Approximately 2 minutes.
  7. Turn the chops over. Have the cover ready. Add the wine, immediately cover the pan, and turn the heat to low.
  8. Cook, covered, until the wine evaporates, 15 minutes more or less.
  9. After the wine evaporates the pan juices will start to brown. When they do, add 2-3 tablespoons of water and turn the chops over. Cook, covered, until the water evaporates and pan juices get a little bit darker.
  10. Repeat this process until the chops are falling apart tender and the pan juices are a deep brown. This will take 1 ½ to 2 hours.
  11. At the end there should only be a couple of tablespoons of water plus the oil in the pan. Pour this sauce over the chops when serving. It should have a rich umami porky flavor.
Recipe Notes

I rarely use garlic powder. The dishes for which I consistently use garlic powder instead of fresh garlic are Italian slow-roasted poultry, the pork chops featured in this recipe, and steaks. I find that I just can’t get the flavor that I want from fresh garlic in these instances.

Copyright © 2017 by VillaSentieri.com. All rights reserved.

Share this Recipe

Risotto with Asparagus

May 29, 2017

Risotto is not a Southern Italian dish.  Neither is polenta, for that matter.

I never had either until college when I started cooking from Marcella Hazan’s The Classic Italian Cookbook published in 1973.  I still use the dog-eared copy I bought in college the year it was published.

It was a magnificent introduction to Northern Italian cooking which I knew little about as a kid of 18 from a small town in Western Pennsylvania in my sophomore year of college.

My knowledge of Northern Italian cooking expanded rapidly though.  Marcella was only the beginning.  There was a true restaurant renaissance in Philadelphia in the 1970’s.  Not only magnificent French restaurants like Le Bec Fin and La Panetiere, but wonderful Northern Italian restaurants like the Monte Carlo Living Room and a bevy of others whose names I can’t recall.  I ate at all of them…often.  I still remember one dinner at the Monte Carlo Living Room where, after being served a very simple spaghetti with garlic and oil, the waiter (they weren’t called servers back then) came by with a black truffle and shaved large quantities of it onto my pasta.  Heaven!

I also learned about Northern Italian cooking from the aunts of my college advisor Eugene (Gene) d’Aquili.  Well, it was Roman cooking, actually, which is in central Italy but still pretty far north from where my mother’s family hailed.

Auntie Helen (Zia Elena) and Auntie Louise (Zia Luigia) (they Anglicized their names after coming to America) were born in Rome in the early years of the 20th century.  They came to America as children.  Of the two, Auntie Helen was the cook.  From her I learned to make many classic Roman dishes.  Some of Auntie Helen’s dishes are slated to make it into the blog, including a Roman Chicken Cacciatore flavored with anchovies.

So, by the time I got absorbed into my husband’s Northern Italian family (his father is from Tuscany and his mother from Friuli) I had a good grasp of Northern Italian cooking.

We have risotto often.  Probably at least once every two weeks.  It’s usually made with a vegetable, though occasionally I’ll make Risotto alla Milanese flavored with saffron and not a vegetable in sight.  In the spring risotto usually includes asparagus or peas.  In the summer it is likely to be zucchini.  The fall brings butternut squash risotto and mushroom risotto.  Mushroom risotto pretty much carries us through the winter, too, with the occasional risotto made with meat sauce.

Since it’s spring, I’m doing risotto agli asparagi, risotto with asparagus.

Print Recipe
Risotto with Asparagus
Risotto is a classic Northern Italian dish. The goal is to have rice grains that are still al dente (but not crunchy) in the middle surrounded by a creamy liquid. More often than not I find that risotto served in America is overly rich with butter, cheese, and sometimes cream. An Italian-style risotto should be creamy from the starch in the rice, augmented with a very modest amount of butter and cheese. Risotto rice is a short grain rice that cooks slowly, making it much easier to achieve an al dente texture because it takes a while to actually overcook it. The three types of rice for risotto are Arborio, Carnaroli, and Vialone Nano. Arborio is the easiest one to find though the other two are more forgiving than Arborio when it comes to overcooking. I recommend buying good quality rice imported from Italy. It really isn’t priced that differently from domestic. Do not wash the rice. I don’t buy shallots unless I have a specific recipe in mind. Since risotto is often something that I make with little advance planning based on the fresh vegetables that are in my refrigerator, I usually use onion and garlic in place of shallot. I honestly don’t think one could reliably tell the difference so feel free to use onion and garlic as noted in the recipe if shallots aren’t handy.
Votes: 0
Rating: 0
You:
Rate this recipe!
Prep Time 15 minutes
Cook Time 45 minutes
Servings
people
Ingredients
Prep Time 15 minutes
Cook Time 45 minutes
Servings
people
Ingredients
Votes: 0
Rating: 0
You:
Rate this recipe!
Instructions
  1. Trim off the tough bottom of the asparagus spears. The standard way to do this is to bend the spear and let it crack naturally where the spear is less tough and woody.
  2. Finely dice the shallot.
  3. Cut the tips off each spear, approximately the top 2 inches. Reserve the asparagus tips.
  4. Cut the remaining spears into 1 inch pieces. Reserve the cut spears separately from the tips.
  5. Bring the chicken broth to a boil.
  6. Cook the asparagus tips in chicken broth for 2-4 minutes. They should be “toothy” but not crunchy.
  7. Using a spider or large slotted spoon, remove the tips from the boiling broth and put them into a bowl of ice water to stop further cooking.
  8. Cook the cut asparagus spears in the chicken broth for 4-6 minutes. Like the tips, they should be toothy but not crunchy.
  9. Add the partially cooked cut spears to the ice water with the tips.
  10. Reduce the heat so the broth remains at a simmer.
  11. Heat a two or three quart heavy-bottomed saucepan over medium high heat. Add the olive oil.
  12. When the oil is hot, add the finely chopped shallot (or onion and garlic if you are using that instead).
  13. Sauté, stirring frequently until the shallot softens and turns translucent. Do not brown the shallot. You may need to reduce the heat.
  14. When the shallot is soft, return the heat to medium high and add the rice.
  15. Continue cooking, stirring frequently, until the rice starts to smell toasty. Do not brown the rice.
  16. The outer portion of the rice grains will get translucent while the inside will stay opaque white.
  17. Add the wine. Stir frequently, but not constantly, until the wine has totally evaporated. You will begin to see some starch leaching out of the rice. More and more of the starch will leach out as you cook the rice. This is what will make a creamy sauce.
  18. When the wine has evaporated, add a scant ½ cup of simmering broth. Stir thoroughly paying particular attention to loosening any spots where the starch seems to be sticking to the bottom of the pan. You don’t want to brown (or worse yet, burn) the starch.
  19. Stir frequently, but not constantly, until the broth has evaporated.
  20. If the broth is unsalted, as I recommend, you can add a teaspoon of salt to the rice as you begin to add broth. If the broth contains salt, I recommend not adding salt until the end.
  21. Keep repeating the process with a scant ½ cup of broth, cooking, stirring, and loosening any spots that are sticking until each addition of broth evaporates. The heat should stay as close as possible to medium high. The moderate boiling of the liquid will coax starch out of the rice to create the creaminess that is the hallmark of a good risotto.
  22. While the rice is cooking, drain the partially cooked asparagus.
  23. Begin tasting the rice after about 20 minutes of cooking. It will probably still be quite crunchy at the very core. Until you get the hang of it, I suggest testing a rice grain each time you add more broth so you develop a sense of how quickly the texture changes.
  24. When you think you’re only one or two additions of broth away from having perfectly al dente rice, add the partially cooked asparagus.
  25. Continue cooking, adding simmering broth or water as needed, until the rice is al dente.
  26. Remove the rice from the heat and stir in enough simmering broth or water to create a creamy “sauce.” The starch that you have coaxed out of the rice should absorb at least ½ cup of liquid, possibly more.
  27. Stir in the butter and Parmesan cheese. This will probably thicken the “sauce” so you will need to add a bit more simmering liquid to loosen it.
  28. Taste and add salt and freshly ground black pepper to taste.
  29. Serve immediately.
Recipe Notes

I think the standard method used to decide where to trim asparagus wastes too much.   For a quick tutorial on how I prep asparagus, check out my Preparing Asparagus post.

It will likely take more than 4 cups of broth to cook the rice. If you don’t have more broth, just use plain water. I do that very frequently. Except for the initial addition of wine, all liquid added to the risotto should be simmering.  As I’m getting near the end of the broth, I always put a couple of cups of water on to boil so that I have simmering water to add if needed.

Although the broth used for risotto should be flavorful, it should not be overly concentrated. The flavor of the asparagus should come through and not be muddled because the broth tastes assertively like chicken or herbs. Because you will be cooking down a fair amount of broth, it is best that it not be salted otherwise you run the risk of the risotto being too salty.

Copyright © 2017 by VillaSentieri.com. All rights reserved.

Share this Recipe

Pasta al Pesto

May 15, 2017

Gardening at 8000 feet is challenging.  Even more so when you consider that we are sitting on almost solid rock.

There’s not much soil to begin with, just the barest of covering on a rocky foundation.  The piñon and juniper that surround us work their roots through little crevices in the rock that sits just inches below the surface.

What little soil there was in the area immediately surrounding our house was removed to level the building site.  The excavation was almost exclusively rock, one hundred truck loads were taken away.  Some rock was kept on site to create retaining walls around the property.

The corollary, however, is that there’s no dirt around the house to dig into to plant much of anything.  The landscaping that was done was exclusively within rock retaining walls or our front enclosed courtyard, where topsoil was brought in.  The first load of topsoil for the courtyard arrived April 2007, before we were ready to plant anything.  April is a windy month in New Mexico.  The winds started up one day and before evening every last speck of topsoil was blown to West Texas!

We could consider raised bed gardening but that would just invite the rabbits and deer to munch their way through our garden.  As it is, we’ve offered up several stands of ornamental grasses on the periphery of our landscaped area to the critters.  We seem to have reached a truce of some sort.  We let them eat the ones around the edges and, for the most part, they let the others alone.

We installed a greenhouse that allows us to extend the growing season by many months.  It also allows us to winter over a number of plants that would not survive in this climate.  The greenhouse also allows us to grow fig trees in large pots.  The first year we grew figs, they didn’t ripen.  It turns out that even though summer days are warm, the nights are cool enough that the fruit doesn’t ripen.  The following year we left the fig trees in the greenhouse throughout the summer, convinced that it would be too warm for them to thrive even with the automatic ventilation system.

Luckily, we were wrong.  The fig trees loved the heat.  Picking a ripe fig off of the tree and eating it immediately is amazing.  The only fresh fruit experience that would be superior, in my estimation, is a fresh-picked mango…and those trees won’t fit in our greenhouse!

We have one row of planter boxes outside the greenhouse.  We use these for plants, like tomatoes, that are not very attractive to deer and rabbits.  Salad greens, such as arugula, radicchio, and leaf lettuce grows in shallow trays on a raised shelf in the greenhouse.  Many pots of herbs also remain in the greenhouse year-round.  Everything else is planted in our interior courtyard, either in pots or in another row of planter boxes.

Depending on the type of plants, we start planting seeds in February.  Seedlings are transplanted once the risk of frost is minimal.

This year, we started too much basil from seed.  It needed to be thinned.  This created the opportunity for us to have pesto much earlier than would otherwise have been the case.  Usually it’s June before the basil plants have grown large enough that we can harvest leaves for pesto.

We had this pesto on April 30th, a day that measured more than 8 inches of snow at Villa Sentieri.  It was winter’s last hurrah and fresh pesto was a perfect way to welcome spring and say good-bye to winter.


Print Recipe
Pasta al Pesto
The classic basil-based pesto is Pesto alla Genovese. However, because the recipe and ingredients for Pesto alla Genovese are tightly regulated (for example, the basil must be grown in Genoa, Italy), I’ll refrain from calling this Pesto alla Genovese since it can’t meet those strict regulations. Try to use young, small basil leaves. If you must use larger ones, tear them into smaller pieces so they measure approximately the same way. Using olive oil from Liguria, where Pesto alla Genovese originated, is another of those difficult-to-meet requirements. Nonetheless, try to use a sweet, fruity olive oil rather than one that is spicy and pungent. Make the pesto as close to serving time as possible. I like to have all the ingredients measured, making the pesto after the pasta starts to a boil. If you’re wondering about the use of a food processor, that would not be permitted either but I doubt there are many of us that would make pesto if we had to use the traditional marble mortar and wooden pestle!
Votes: 0
Rating: 0
You:
Rate this recipe!
Prep Time 30 minutes
Cook Time 15 minutes
Passive Time 30 minutes
Servings
people
Ingredients
For the pesto
For the pasta
Prep Time 30 minutes
Cook Time 15 minutes
Passive Time 30 minutes
Servings
people
Ingredients
For the pesto
For the pasta
Votes: 0
Rating: 0
You:
Rate this recipe!
Instructions
  1. Pluck the basil leaves from the stems and measure 2 cups, lightly packed.
  2. Measure all the other ingredients. Pine nuts.
  3. Garlic.
  4. Parmigiano Reggiano and Pecorino Romano cheeses.
  5. Don't forget the extra-virgin olive oil and salt.
  6. Bring three quarts of water and 1/3 cup of salt to a rolling boil.
  7. While water comes to a boil and the pasta cooks, heat the serving bowl by placing it in a 150°F oven or partially filling it with boiling water.
  8. When the water comes to a boil, add the pasta. Return to a boil, stirring frequently.
  9. As the pasta boils, put the basil leaves, olive oil, pine nuts, garlic, and salt in a food processor. Puree the basil mixture, scraping down the sides of the bowl occasionally.
  10. When the pasta is almost al dente, pour the basil puree into the warmed serving bowl.
  11. Add the Parmigiano and Romano cheeses. Stir to combine.
  12. Remove ¼ of the boiling pasta-cooking water from the pot and stir into the pesto to loosen it.
  13. When the pasta is al dente, remove and reserve a cup of pasta cooking water.
  14. Drain the pasta. Do not rinse. Add the pasta to the serving bowl and toss to coat each strand.
  15. If the pesto seems a little thick, add a tablespoon or two of the reserved pasta-cooking water.
  16. Taste and adjust salt if necessary.
  17. The finished dish.
Recipe Notes

Copyright © 2017 by VillaSentieri.com. All rights reserved.

Share this Recipe

Orecchiette with Broccoli and Anchovies

May 10, 2017

A few times in my life I’ve been lucky enough to cook with my husband’s Great Aunt Fidalma.  It’s always been in my kitchen, though I keep hoping to make a trip to Tuscany to cook with her in her kitchen.

Zia Fidalma speaks Italian and German.  I speak English.  Though I studied German in high school and college, and at one point was passably able to translate scientific German, my command of spoken German (and at this point, scientific German) is hopeless.  I studied Italian for a while too, but the best I can do is read a menu, order in a restaurant, and find out where the restroom is.

So, cooking with Zia Fidalma starts with a language barrier but it doesn’t seem to matter.  Somehow we communicate.

Mostly that means Zia Fidalma speaks slowly in Italian emphasizing the words I am likely to understand most.

Like the time we were in my kitchen in Santa Fe preparing dinner for twelve.  The first course was spaghetti al pesto.  A pile of basil stalks from my father-in-law’s (Zia Fidalma’s nephew) garden were on the kitchen counter.  Zia Fidalma was plucking off basil leaves one at a time, inspecting each one.  At one point, she looked up at me holding a leaf and said “è brutta” (it’s ugly), clearly wanting my agreement to discard the less-than-perfect leaf.

One day at our home in Chicago, she was making risotto for lunch.  It had a very similar flavor profile to this pasta in that it contained broccoli, garlic and anchovies.

Zia Fidalma cranked up the 15,000 BTU burner to high.  She sizzled some minced garlic for a moment.  There was a vague hint of smoke coming from the pan.  She added the anchovies and stirred them about.  Smoke started to billow up.  She smiled knowingly.  She added the broccoli, undeterred.  Smoke continued.  She stirred.  I stood there horrified.  Then she lightly charred the broccoli.  I was even more horrified.  At long last some liquid went in and the rest of the risotto-making followed a familiar pattern.

I try to avoid smoking oil at all cost when cooking.  I was more than a little concerned about how the risotto would taste.

However, I have never had anything but fabulous food from Zia Fidalma, so I had to trust that this would be OK, too.

This wasn’t her first rodeo.  She’d been making risotto since before I was born.

In the end, all I can say is that the risotto was wonderful.  It had layers of flavor.  It provided an important lesson about how techniques different from what one would typically use can create incredible flavors.

So, if you see wisps of smoke coming from the pan as you singe the broccoli for this recipe, don’t fret.  Just raise a toast to Zia Fidalma, and enjoy!

Print Recipe
Orecchiette with Broccoli and Anchovies
My husband’s Great Aunt Fidalma, who lives in Tuscany, showed me how to cook the broccoli in this manner. Previously, I parboiled the florets and added them and the beans to the sautéed garlic and anchovies. This method adds layers of flavor that cannot be obtained by just boiling the broccoli. I prefer to use home-cooked kidney beans following my recipe for Cannellini alla Toscana. You can use either red or white (cannellini) beans but the red ones add more color contrast. As an alternative you can use one 15 ounce can of beans. Do not discard the liquid in the can as it will improve the body of the sauce.
Votes: 0
Rating: 0
You:
Rate this recipe!
Prep Time 15 minutes
Cook Time 30 minutes
Passive Time 15 minutes
Servings
people
Ingredients
Prep Time 15 minutes
Cook Time 30 minutes
Passive Time 15 minutes
Servings
people
Ingredients
Votes: 0
Rating: 0
You:
Rate this recipe!
Instructions
  1. Put 3 quarts of water and 1/3 cup salt in a 5 quart stockpot or Dutch oven. Bring to a boil over high heat.
  2. Meanwhile, cut the thick stems off the broccoli just below where the stems start to branch into individual florets.
  3. Cut the individual florets off the broccoli by cutting lengthwise through the stalk from top to bottom.
  4. Cut off any remaining stalk just below the floret. These tender stalks can be cut crosswise into one-half inch pieces and added to the florets.
  5. You can use some of the thicker stalks as well, if you wish. To do so, use a vegetable peeler to remove the tough outer skin. Dice the peeled stems into 1/3 inch cubes. Reserve these diced stalks separately from the florets and diced tender stalks.
  6. When the salted water comes to a boil, add the diced, peeled stalks, if using. Return to a boil and cook for 2-3 minutes until they just begin to get tender. Using a spider or large slotted spoon, remove the stalks from the water and plunge them into a bowl of ice water to stop cooking. When cool, drain in a colander.
  7. Keep the water on low heat so you can return it to a boil quickly when needed to cook the pasta.
  8. In a heavy-bottomed pan large enough to hold the finished dish, sauté the garlic over medium high heat until it turns fragrant, about 30 seconds.
  9. Add the anchovies and their oil and continue to sauté, breaking up the anchovies till they turn to a paste.
  10. Continue to cook until the anchovies darken slightly, about 1-2 minutes.
  11. Add the broccoli florets and diced tender stems. If using, add the partially cooked peeled stems. Season with salt and freshly ground black pepper.
  12. Sauté on high heat, stirring very frequently, until some of the broccoli florets just begin to singe, about 5 minutes.
  13. Add the crushed red pepper. Stir to combine.
  14. Add the wine and cover with a tight fitting lid. Cook over medium high heat till the florets are cooked through but not mushy, shaking the pan occasionally.
  15. If all the wine evaporates before the broccoli is cooked, ladle in a bit of the pasta cooking liquid and continue.
  16. When the broccoli is cooked, add the beans and their cooking liquid along with the oregano. Bring to a simmer over gentle heat.
  17. Meanwhile, return the pasta-cooking water to a rolling boil and add the pasta. Cook until the pasta is slightly shy of al dente. The pasta will finish cooking in the sauce.
  18. Put about ¾ cup of pasta cooking liquid into the beans. Reserve another cup of the liquid.
  19. Quickly drain the pasta and add to the beans. Stir well. Bring to a gentle boil, uncovered. Cook stirring occasionally until the pasta is al dente. Add as much of the reserved pasta-cooking liquid as needed to have enough sauce to coat the pasta and broccoli.
  20. The starch in the pasta-cooking liquid will add body to the sauce. One way to incorporate more of the pasta-cooking liquid is to cook the pasta over higher heat so that you can add, and boil off, more of the liquid, leaving the starch behind.
  21. When the pasta is cooked, remove the pan from the heat and stir in the Parmesan cheese and 1 teaspoon freshly ground black pepper. Taste and adjust salt after adding the cheese.
  22. Stir in the finishing extra-virgin olive oil. This will make the sauce glossy and add additional flavor.
  23. The starch from the pasta water and bean-cooking liquid along with the cheese should create an emulsion with the oil. You may need to add more of the reserved pasta-cooking liquid to loosen the sauce.
  24. Serve immediately. Pass extra Parmesan cheese at the table.
Recipe Notes

Copyright © 2017 by VillaSentieri.com. All rights reserved.

Share this Recipe

Roasted Turkey Broth

May 5, 2017

I grew up in a house where there was absolutely no use for the carcass from a roasted turkey.  Other than my sister and I fighting over who got the crispy skin from the turkey breast, the skin went into the trash heap too.

You might imagine my surprise when, in college, I discovered that people actually did things with carcasses from roast turkey, like make broth to be used for turkey noodle soup.

To be sure, my recipe for turkey noodle soup will be posted later this month but in the meantime I would encourage you to make broth from the bones of most any roast, be it turkey, chicken, duck, pork, or beef.  Then, be creative with how to use it.

Broths made from roasted meat bones and bits of meat have a really savory quality that you won’t get from a broth made with uncooked meat.  You can’t always use them interchangeably so think about how the roasted-meat savoriness will play off the other flavors in the dish.

Roasted meat broths usually work well in hearty soups, for example, or as the liquid in a pot of Southwestern style cooked beans.  Frozen in small containers or ice cube trays, you can use the broth as the liquid for a quick pan sauce or to enrich gravy.

In fact, when I make gravy for Thanksgiving, I start by roasting a couple of Cornish game hens or a few pounds of chicken or turkey wings until they are very, very brown.  I use the roasted meat and some vegetables to make a rich, dark brown broth.  I concentrate the broth even more by boiling it down to about 3-4 cups.  While the turkey is roasting, I use the broth to make gravy, which I simmer for a couple of hours until it’s silky.  When the turkey is cooked, I deglaze the pan, skim the fat off, strain out the solids, and add the liquid to the gravy that has been bubbling away for a couple of hours.  By the time the turkey has rested and been carved, the gravy has reduced, again, to the right consistency.  The gravy is rich and savory and, more importantly, there’s enough to smother everyone’s mashed potatoes and turkey.  Doing it this way also removes the last-minute rush of actually making gravy on-the-spot from the pan drippings while you’re trying to get the meal on the table.

You might ask why I am dealing with a roasted turkey in spring rather than November.  Easter Dinner!  In addition to ham, I always make turkey since some of our friends don’t eat critters with more than two legs.  So, just for fun, here are a few pictures from Easter, complete with the bleeding lamb cake we always have for dessert.

I have a couple of different types of fat separators.  One is the more common style that resembles a small watering can with a spout that draws from the bottom of the liquid.  My preferred one, however, has an opening on the very bottom.  You just pour in the liquid, allow the fat to rise to the top, and squeeze the handle.  The opening opens and out pours the fat-free liquid from the bottom.  You can find a picture of it on my equipment page.

Print Recipe
Roasted Turkey Broth
Unless I need an absolutely clear broth, I prefer to use the pressure cooker. It gets the job done in an hour of cooking and makes a more flavorful broth than simmering it on the stove. However, the broth is somewhat cloudy. If you don’t want to use a pressure cooker and you don’t want to have to think about a pot on the stove, make the broth in a slow-cooker for 6-8 hours. If your pressure cooker or slow-cooker won’t accommodate 3½ quarts of water, use as much as you can and then dilute the final product to 3 quarts.
Votes: 0
Rating: 0
You:
Rate this recipe!
Course Miscellaneous
Cuisine American
Prep Time 15 minutes
Cook Time 5 hours
Passive Time 4 3/4 hours
Servings
quarts
Ingredients
Course Miscellaneous
Cuisine American
Prep Time 15 minutes
Cook Time 5 hours
Passive Time 4 3/4 hours
Servings
quarts
Ingredients
Votes: 0
Rating: 0
You:
Rate this recipe!
Instructions
  1. Thinly slice the carrots, celery and onion.
  2. Combine all the ingredients in a stockpot.
  3. Bring to a boil, reduce the heat, and simmer for 4-6 hours, stirring occasionally. Alternatively, cook at 10 pounds pressure for one hour or in a slow-cooker on low for 6-8 hours.
  4. Strain the broth.
  5. Because the broth will likely develop a gelatin-like quality on cooling, I suggest removing the fat using a fat separator while the broth is still warm.
  6. Add water to make three quarts.
Recipe Notes

I never add salt to any broth that I make unless I am making it for a specific purpose and I can plan for the final product. Broth with salt can make a dish too salty if the liquid needs to be reduced. The salt in a broth can also slow down the tenderization of dried beans. This might not be much of an issue at lower elevations but at 8000 feet getting dried beans to soften can be a challenge and anything that hinders the process is to be avoided.

Copyright © 2017 by VillaSentieri.com. All rights reserved.

Share this Recipe

Slovak Caraway Soup

April 26, 2017

Growing up with an ethnically Italian mother and an ethnically Slovak father, we mostly ate Italian food with Slovak food appearing on the table every week or two.  On Sundays we usually went to visit my father’s parents and got a bit more Slovak food.

There were some classic American dishes that appeared on our table, too.  But, honestly, not that often.  The only thing my mother made that I didn’t like was hamburgers.  Well, that and liver.

But even my mother didn’t like liver.  She made it because my father liked it.  There was never the expectation that anyone else would eat it.

When she made liver…and that process involved running from the living room, through the dining room, to the kitchen to turn the liver as it sautéed and then running back to the living room to avoid the smell…she always made something else for the rest of us.  Well, that wasn’t so unusual either.  Remember…Southern Italian mother…food is important…everyone needs to eat.  There were nights when she would make one meal for my father, one for my sister, and one for me.  She would eat one of the three.

We always ate dinner together as a family and, despite the comment above, we usually at the same meal.  Sometimes, though, we each got individually catered food.

But back to hamburgers for a moment.  My mother was a great cook.  I know she used really good beef for her hamburgers.  She usually picked out a whole cut and had the butcher grind it.  She never bought ground beef that I recall.  I still follow the basic blueprint of her hamburger recipe today and enjoy it.  So, I can’t really tell you why I thought her hamburgers were awful.  But I did.

Soup was a big deal in our house.  My father really liked soup.  Interestingly, I don’t remember having Caraway Soup more than a few times while growing up.  I do know, however, that while I was in college I got the recipe from my mother after it appeared on our table one day.  It seemed like a revelation.

It has been a regular on my table ever since.

Print Recipe
Slovak Caraway Soup
This is a light, refreshing soup based on a vegetable broth for which the ingredients are almost always on hand. I like serving it as a first course though it works equally well for lunch or as a light supper. Grating the vegetables on the large holes of a box grater was one of my mother’s tricks. It makes fast work of prep and the small pieces quickly flavor the broth.
Votes: 0
Rating: 0
You:
Rate this recipe!
Cuisine Slovak
Prep Time 15 minutes
Cook Time 1 hour
Passive Time 45 minutes
Servings
people
Ingredients
Cuisine Slovak
Prep Time 15 minutes
Cook Time 1 hour
Passive Time 45 minutes
Servings
people
Ingredients
Votes: 0
Rating: 0
You:
Rate this recipe!
Instructions
  1. Shred the carrots on the teardrop holes of a box grater.
  2. Shred the celery on the teardrop holes of a box grater.
  3. Thinly slice half an onion.
  4. Combine carrots, celery, sliced onion, 2 teaspoons of salt, ½ teaspoon of black pepper and 2 quarts of water in a stock pot. Cover. Bring to a boil then reduce heat and simmer for 30 minutes.
  5. Add the caraway seeds. Cover and simmer another 25 minutes.
  6. Strain the broth. Discard the solids.
  7. Return the broth to the stock pot. The soup can be made several hours ahead to this point.
  8. When your ready to finish the soup, return the broth to a bare simmer.
  9. In a heavy-bottomed stock pot large enough to hold the soup, sauté the minced onion in butter until soft but not brown, about 3-4 minutes.
  10. Add the flour to the sautéed onions and cook until lightly colored, about 2 minutes, stirring almost constantly.
  11. Stir the hot broth into the onion-flour mixture a ladleful at a time, stirring well while adding the broth to avoid lumps.
  12. After about one-third of the broth has been added, the remainder can be added all at once.
  13. Bring to a boil and boil gently for 1-2 minutes to thicken. Adjust salt and pepper.
  14. While the soup is boiling, beat the eggs with 1/3 cup of water. Season the eggs with salt.
  15. While constantly whisking the stock, drizzle in the eggs to create shreds of egg.
  16. Serve immediately.
Recipe Notes

Copyright © 2017 by VillaSentieri.com. All rights reserved.

Share this Recipe

Italian Slow-Roasted Chicken or Turkey

April 21, 2017

For two countries that are geographically so close, Italy and France couldn’t be further apart on views of how to roast poultry.

The French typically roast quickly and at high temperature.

Italians are masters of the low and slow approach.

Italian roast chicken (or turkey, for that matter) literally falls apart.  The French version does not.  It’s a matter of style and technique, not quality or skill.

The usual style in the United States leans more toward France than Italy.  It’s the basis of the style of roasting described in most modern cookbooks and cooking magazines; higher temperatures rather than lower temperatures and yanking the bird out of the oven as soon as it reaches the minimum acceptable temperature to be “cooked” and “safe.”  Even when these magazines try to champion the approach of low and slow, they almost always miss the boat.  They miss the boat because they are still focused on the thermometer approach.

You can’t do low and slow if you’re focused on getting the bird out of the oven as soon as it hits the “safe” temperature.  Italian roast chicken is more like “pulled” chicken than the minimally cooked French version.  The whole mouthfeel is different.  So is the taste.

What I didn’t understand growing up is that my mother’s roast chicken and turkey drew from a broader Italian approach.

A few years ago we were in Tuscany having lunch with my husband’s Great Uncle Beppe and his family.

When the roast chicken was served, it was just like my mother’s!  Seasoned with garlic, rosemary, salt and pepper and roasted slowly, till it basically fell apart.

My mother’s mother came to the United States from Calabria around the turn of the 20th century at four years of age.  Here I was, nearly a century later in a province at the other end of the Italian peninsula eating chicken that could have been my mother’s, the way she learned it from her mother, who learned it from her mother.

I think that was a turning point for me in wanting to better understand Italian food traditions throughout the country and even throughout the Italian diaspora around the world.

Another amazing thing, when I think about it, is that my mother brined her chicken for an hour before cooking.  We’re talking the 1960’s here (probably the 1950’s too but I’m too young to remember that) way before brining was ever mentioned in cooking circles.  I can’t tell you why she did it or how it started but when I was learning to cook under her guidance, brining was always the first step for any recipe that included chicken.

Print Recipe
Italian Slow-Roasted Chicken or Turkey
This is a no-recipe recipe. I never measure the seasonings. It’s really pretty hard to use an inappropriate amount. The cooking time is pretty forgiving, too. Until you get the hang of it, I suggest planning on the longer cooking time and the higher temperature. If the chicken or turkey is falling-apart tender before you’re ready for it, just reduce the oven to 150°F to keep the bird warm. My mother would usually brine the bird for about an hour before cooking. Time permitting, I do the same. This basic recipe works for everything from a three pound chicken to an 18 pound turkey. Just for a point of reference, the pictures feature a 12 pound turkey.
Votes: 0
Rating: 0
You:
Rate this recipe!
Course Mains, Poultry
Cuisine Italian
Prep Time 10 minutes
Cook Time 40 minutes per pound
Servings
people
Ingredients
Course Mains, Poultry
Cuisine Italian
Prep Time 10 minutes
Cook Time 40 minutes per pound
Servings
people
Ingredients
Votes: 0
Rating: 0
You:
Rate this recipe!
Instructions
  1. Brine the bird, if you like, for about an hour.
  2. Thoroughly rinse and dry the bird.
  3. Prop the bird with the cavity facing up. Generously season the inside of the bird with garlic powder, rosemary black pepper and salt. As a matter of habit, if I'm using dried rosemary, I always crust it with my fingers before sprinkling it on the bird.
  4. Put the bird in a roasting pan, breast up, preferably one able to hold the bird rather snugly. The roasting pan should have a tight-fitting cover.
  5. Generously season the outside of the bird with garlic powder, rosemary, black pepper and salt.
  6. Add water (or wine) to the bottom of the roasting pan not over the top of the bird. You don't want to displace the seasonings.
  7. Cover and roast at 350°F for 30 minutes. Reduce heat to 275°F to 300°F.
  8. After the first hour, baste the bird with the juices in the roasting pan about every 30-45 minutes. Be sure to tip the bird, or use a basting bulb, to remove the juices from the cavity and add them to the juices in the bottom of the roasting pan.
  9. Roast for a total of 30-40 minutes per pound (including the first half hour). The bird should just about be falling off the bone.
  10. If there is too much liquid in the bottom of the pan or if the bird is not brown enough, uncover the pan for the last 30 minutes or so.
Recipe Notes

Poultry cooked this way will not submit to carving in a photogenic Norman Rockwell manner. It’s just a different style. It would be like trying to cut delicate slices from pulled pork. It’s not going to happen. That said, the joints will usually separate easily and you can cut along the grain rather than against the grain to portion appropriate-sized pieces for serving.

Copyright © 2017 by VillaSentieri.com. All rights reserved.

Share this Recipe