Ragù Bolognese: The Official Recipe

February 11, 2022

I’m a little more than halfway through a week’s visit to Bologna.  Bologna is referred to as la dotta, la grassa, la rossa: the learned, the fat, the red.

“The learned” relates to Bologna as the seat of the oldest university in the western world and the top-rated university in Italy.  It has a highly educated population.

“The red” refers to the color of the terra cotta tiles on many of the roofs.

“The fat” is well earned based on the food.  This is the land of mortadella, ragù Bolognese, tagliatelle, tortellini, lasagna al forno (aka lasagna Bolognese), prosciutto, parmigiano reggiano, and balsamic vinegar of Modena among other traditional, and dare I say, famous foods.


Join our mailing list and you’ll never miss a recipe again!


Let’s not forget gelato.  While I don’t think Bologna can claim title to the originator of gelato, they have perfected a style made with eggs that is consummately smooth.  A gelateria is often referred to as a cremeria in Bologna.
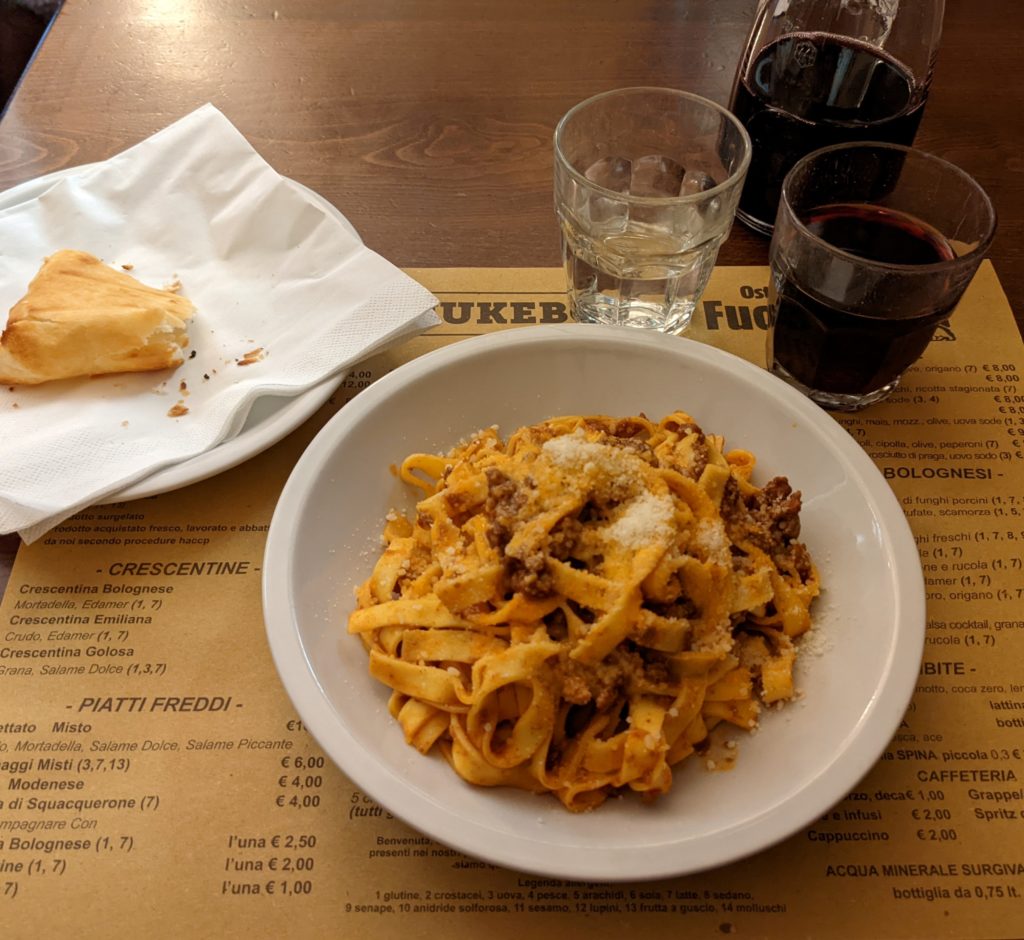
Tagliatelle al Ragu at at Osteria dell’Orsa in Bologna.

My main goal being here is to eat.  I want to taste some of the iconic foods of the region in the cathedral to food that is Bologna.  To that end, I’ve had dishes with ragù Bolognese three times in the last three days.  Though there were slight differences, the preparations tasted amazingly similar.  That got me to thinking about consistency.

I know that there’s an official recipe for Pesto alla Genovese which I reference in my post on pesto.  That got me to thinking about other official recipes.  After some internet sleuthing, I discovered that there’s an Italian Academy that, after substantial research, codifies and registers what it considers to be the official recipes for traditional dishes.  (Of course there is!  This is Italy.  Food is paramount.) Access to these recipes is quite limited.  (Of course it is!  This is Italy.  Food is rigorously protected.)


Follow us on social media


My primary culinary interest is traditional recipes.  Discovering the existence of this academy has been a revelation for me.  So much so that I decided to occasionally post their recipes, translated into English with notes on ingredients and techniques as appropriate to enable my readers to recreate the taste of the original.

So much of what passes for Italian food in the States is far from the original.
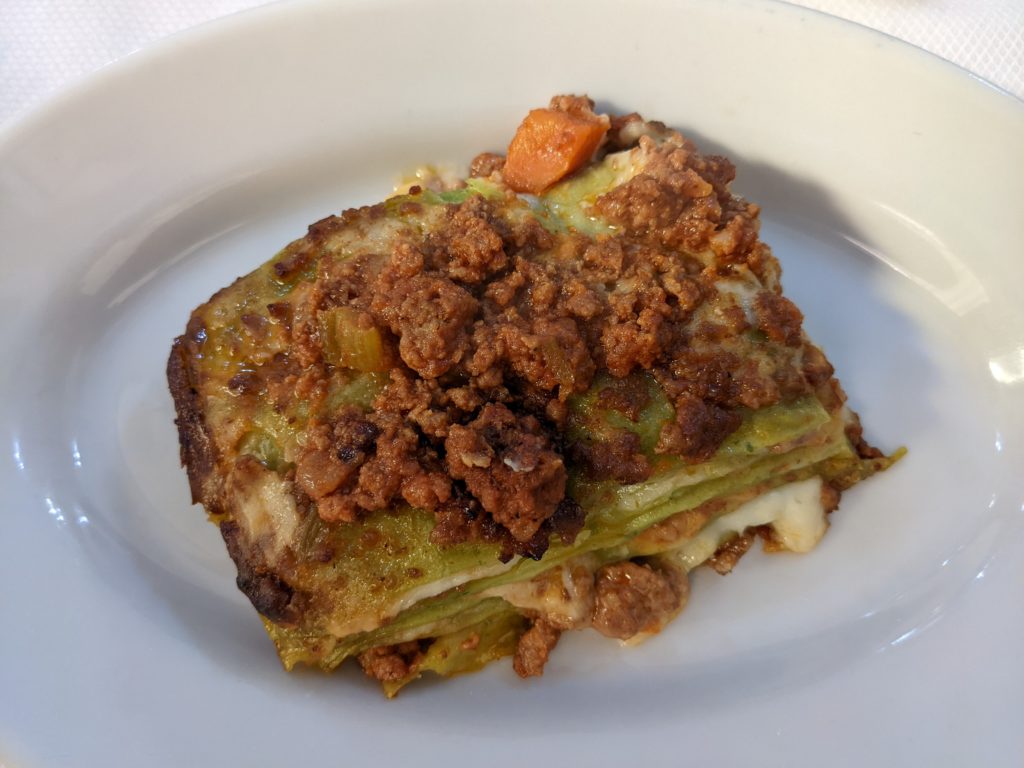
Lasagna al Forno (aka Lasagna Bolognese) at Trattoria Anna Maria in Bologna.

I’ll be quick to add that credible variations on these official recipes exist but the very existence of the official ones sets a standard of comparison.  Several years ago, I posted a recipe for Ragù Bolognese.  You will see the similarity.  The main differences in my version are a greater proportion of tomatoes and the absence of dairy.  It is a very good ragù, and one that I continue to make on a regular basis.  But today, I’m giving you the official recipe.

Enjoy!

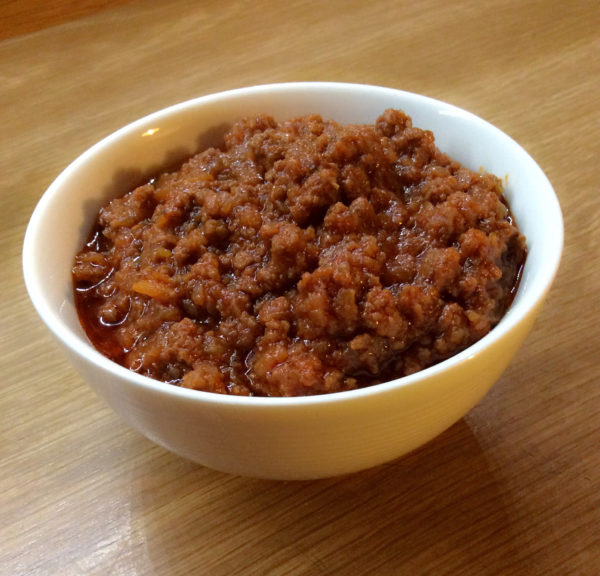
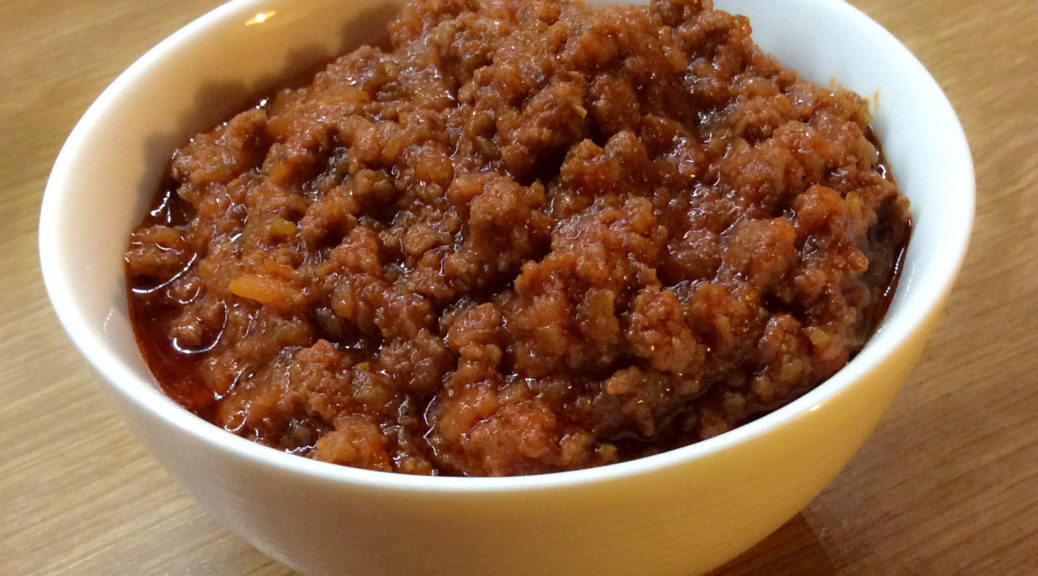
(Photo: Erikatrioschi, CC BY-SA 4.0 <https://creativecommons.org/licenses/by-sa/4.0>, via Wikimedia Commons)
Print Recipe
Ragù Bolognese: The Official Recipe
Butchering in Italy produces different cuts from butchering in the United States. I’ve noted some US cuts of beef that would be appropriate based on the recommended Italian cuts. For those of you who want to try your hand at this, the original cuts of meat listed are cartella, panica, fesone di spalla, and fusillo. Broth in Italy is light. It is not an intensely flavored stock as might be common in much of French cooking.
Votes: 0
Rating: 0
You:
Rate this recipe!
Prep Time 15 minutes
Cook Time 2 1/2 hours
Servings
people
Ingredients
Prep Time 15 minutes
Cook Time 2 1/2 hours
Servings
people
Ingredients
Votes: 0
Rating: 0
You:
Rate this recipe!
Instructions
  1. Sauté the pancetta in a heavy-bottomed pot, approximately 7-8 inches in diameter (20 cm). Render as much fat as possible without browning the pancetta. A little gold color is fine.
  2. Add the olive oil or butter along with the carrot, celery, and onion. Sauté gently until softened, without browning, approximately 10 minutes.
  3. Add the beef and mix well. Sauté until it sizzles (that is, until all liquid has evaporated and the beef begins to cook in the fat).
  4. Add the wine and cook gently until it completely evaporates.
  5. Add the tomato puree. Season with salt and pepper. Cover and simmer for two hours, adding broth as needed when the ragù becomes too thick.
  6. During the last few minutes add the milk. This will counteract the acidity of the tomatoes.
  7. Taste and adjust the seasoning.
  8. If the ragù is going to be used for dried pasta (instead of fresh pasta or lasagna), it is customary to add the cream, otherwise not.
Recipe Notes

Copyright © 2022 by Villa Sentieri, LLC.  All rights reserved.

Share this Recipe

Sformato di Patate (Italian Potato “Cake”)

July 13, 2020

I published a photo for this dish on my Facebook feed last week and got so much attention that I decided to actually post the recipe.

Sformato di Spinaci (spinach sformato or, if you must, spinach casserole) is a dish that garners great reverence in my husband’s family.  A while ago, I published my adaptation of the family recipe.

I make sformati out of lots of different vegetables besides spinach, including Swiss chard, zucchini, and cauliflower, among others.

Sometimes I swap out the ground beef in my husband’s grandmother’s recipe for sausage or Calabrese salame, or mushrooms.  This is a heretical act in his family but everyone still eats the sformato.  This is compounded  by the blasphemy of adding besciamella to the mix.


Join our mailing list and you’ll never miss a recipe again!


Although I make several versions of potato “cakes” I never thought of them as sformati until I stumbled upon the genre while perusing Italian-language food websites.

Although I had mixed meat, such as salame or prosciutto, and cheese into the potato mixture before baking it, I had never made a layer of filling in the middle.  Doing so changes the whole character of the dish.  It really feels like a main course (or what would be a secondo in an Italian meal) rather than gussied up potatoes that should be served as a side dish (contorno)!


Follow us on your social media platform of choice


When serving sformato di patate, I often start with soup and end with a salad… unless it’s a meal for which I developed a new gelato flavor to try! (This happens once, if not twice, per week… the gelato, not the sformato!)

This recipe calls for prosciutto cotto (cooked ham).  This is not the cured ham that we simply call “prosciutto” in English.  It really is just a cooked ham.  Typically, it would not be smoked.  I have successfully made this with good quality ham from the deli counter as well a fully-cooked lightly-smoked ham from the meat counter.

Since the cheese is smoked, I find that smoked ham works as well as un-smoked ham though the former is more traditional.

Print Recipe
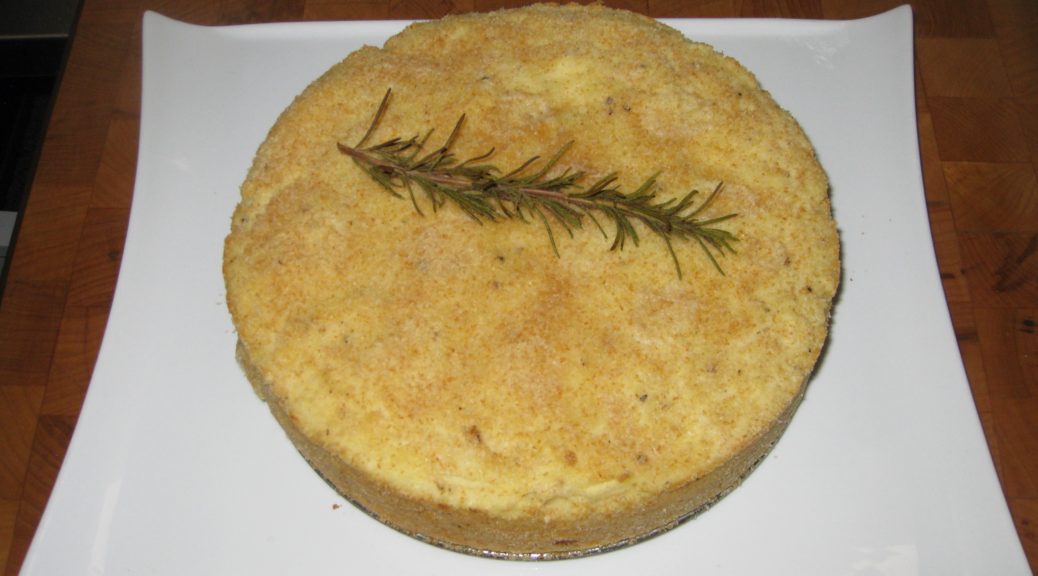
Sformato di Patate (Italian Potato "Cake")
Italian prosciutto cotto is not smoked so the most traditional ham would be unsmoked but since the cheese is smoky, I’ve occasionally used a lightly smoked ham and gotten fantastic results. If the ham is not sliced very, very thinly, cut it into batons about the size of wooden matchsticks. I’ve chosen to keep this recipe in the metric measures that I use. You can click the button below to change to American measures. Feel free to round the quantities up or down a bit.
Votes: 0
Rating: 0
You:
Rate this recipe!
Course Meats
Cuisine Italian
Prep Time 30 minutes
Cook Time 90 minutes
Passive Time 15 minutes
Servings
people
Ingredients
Course Meats
Cuisine Italian
Prep Time 30 minutes
Cook Time 90 minutes
Passive Time 15 minutes
Servings
people
Ingredients
Votes: 0
Rating: 0
You:
Rate this recipe!
Instructions
  1. Peel the potatoes. Dice and cook in salted water until they can be easily pierced with a fork but are not falling apart.
  2. While still hot, pass the potatoes through a ricer and allow to cool until they are comfortable to touch.
  3. Combine potatoes with eggs, Parmigiano and milk. Mix well. Add salt and pepper to taste.
  4. Butter a 22 cm springform pan and coat with fine dry breadcrumbs.
  5. Press about 60% of the potato mixture onto the bottom and up the sides of the pan.
  6. Layer the prosciutto and scamorza inside, making two alternating layers of each.
  7. Top with the remaining potato mixture and smooth the top.
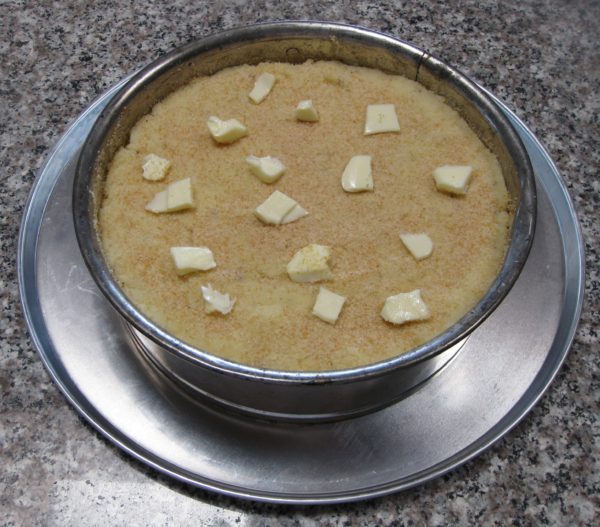
  8. Sprinkle the top with breadcrumbs and dot generously with butter.
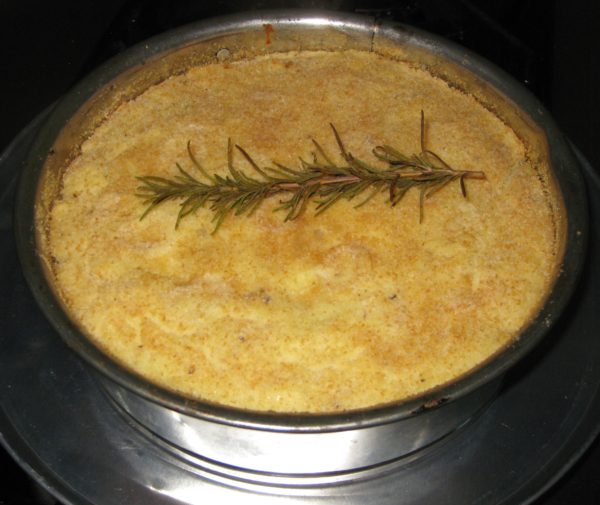
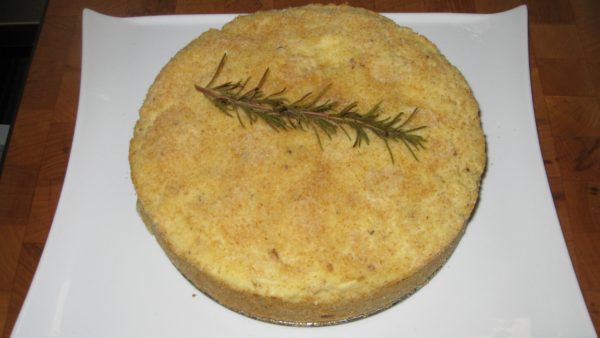
  9. Bake at 350°F for approximately one hour, until golden, adding the rosemary sprig to the top of the sformato after about 20 minutes of baking.
  10. After an hour, the internal temperature should be close enough to 165°F that it will reach that temperature while it rests.
  11. Remove from the oven and allow to cool approximately 15 minutes before removing the sides of the pan and serving.
Recipe Notes

Copyright © 2020 by Villa Sentieri, LLC. All rights reserved.
Share this Recipe

Ricotta Fatta in Casa (Home-Made Ricotta)

March 25, 2020

I’ve been at home now for more than two weeks with just a weekly shopping trip to take me “off the mountain” as we say in our house.

This has given me ample time to catch up on some projects and start others.  It certainly gives me a lot more leeway to plan out a lot of cooking adventures.

Three days ago, I made 19 pounds of ‘ndjua.  It was a great project for a Sunday.  Well, these days, almost every day is like Sunday.

‘Nduja hanging in our wine room to age.

Making the ‘nduja, which is roughly 25% red pepper, wiped me out of the supply of peperoncino piccante in polvere (ground hot red pepper) that I brought back from Calabria in September.  In fact, I had to supplement with red pepper from India that I bought at an international food store in Las Vegas, NV a couple of months ago for just such an eventuality.


Join our mailing list and you’ll never miss a recipe again!


I’ve used up half of my supply of nero di seppia (cuttlefish ink… what, in America, we call squid ink except that it’s not from squid…it’s from cuttlefish), also brought back from Calabria.

The same is true for my lievito madre, powdered mother yeast.  It’s a combination of commercial yeast and “natural” yeast.  It’s sort of like a sourdough starter except that it’s not sour and you don’t keep the culture going.  You just use the powdered stuff as needed.

These are all common supermarket or open-air market items in Italy.

A view from the villa where we hope to spend the month of September.

We have plans to spend a month in a villa in Calabria this fall.  I have been honing my shopping list for months but I’m now concerned that the trip might not happen as planned.  It’s still a bit too early to know for sure but I’m getting myself mentally prepared for cancellation.

Meanwhile, I do what I love.  I cook.  Even if it means that I might use up precious supplies with the prospect that there may be no reasonable means of restocking in the near future.


Follow us on your social media platform of choice


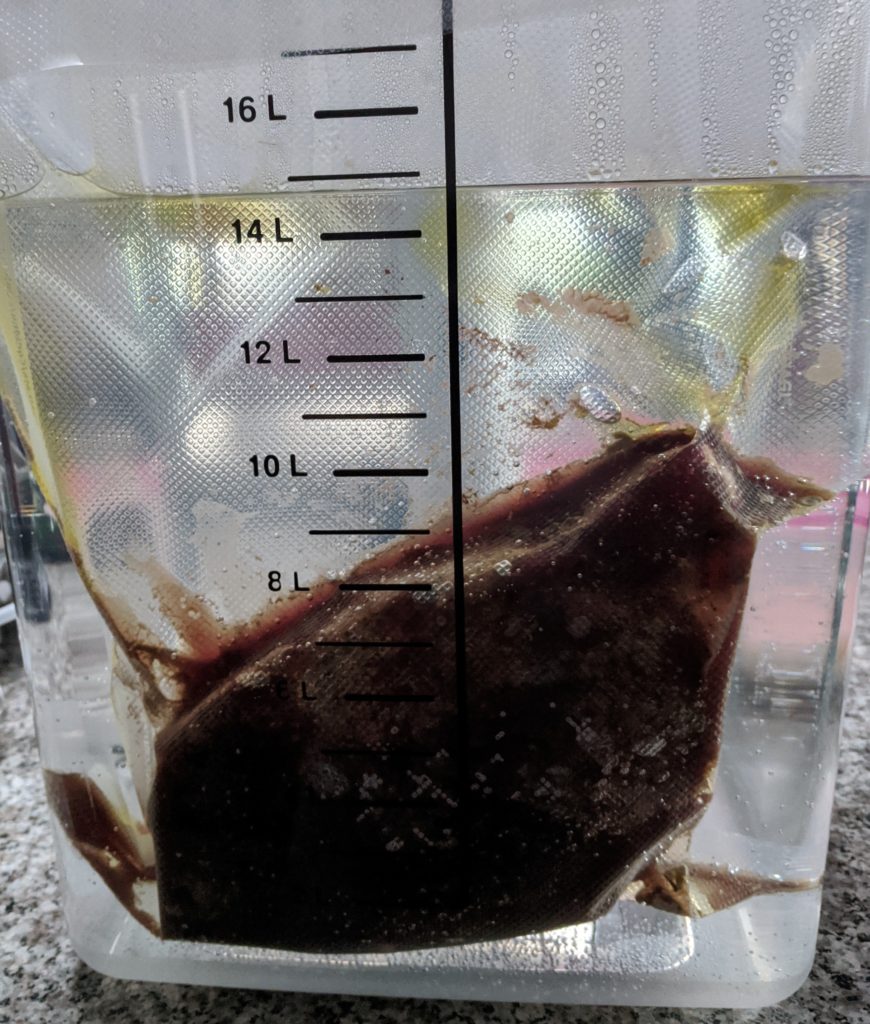
Two days ago, I made stuffed and rolled flank steak.  One day last week I made a batch of black pasta (with, ahem, cuttlefish ink) that I tossed with fresh scallops and mushrooms. I made a killer sous vide rib eye roast on Sunday.  It bobbed along, all seasoned up, in a vacuum sealed bag with my sous vide doing all the hard work while I made ‘nduja.

The ‘nduja was done, and hung, in time for me to pour a bourbon, take the roast out of the bag and sear it, and cook some veggies.

Rib eye cooked unattended sous vide while I made ‘nduja.

I’m comforted to know that in about two months there’ll be lots of ‘ndjua to enjoy.

If you’re stuck at home, why not consider making something new—like ricotta.  All you need is milk, vinegar and salt (and, if you wish, a little cream).  Once you’ve made ricotta, you can drizzle it with honey and serve it for dessert or turn it into Sancarlin and serve it with some garlicky crostini.

Print Recipe
Ricotta Fatta in Casa (Home-made Ricotta)
You can replace the cream with an equal amount of whole milk but using cream improves the yield. Because the boiling point of water (and thus milk) is much lower where I live in Santa Fe, I target a temperature between 192°F and 195°F. At sea level, you can go up to 203°F. What you don’t want to do is to have bubbles break the surface of the milk, though there will be some foaming around the edges.
Votes: 0
Rating: 0
You:
Rate this recipe!
Cuisine Italian
Prep Time 15 minutes
Cook Time 20 minutes
Passive Time 30 minutes
Servings
pounds
Ingredients
Cuisine Italian
Prep Time 15 minutes
Cook Time 20 minutes
Passive Time 30 minutes
Servings
pounds
Ingredients
Votes: 0
Rating: 0
You:
Rate this recipe!
Instructions
  1. Warm the milk, cream, and salt in a heavy bottomed pan over medium heat.
  2. Stir occasionally until it reaches 170°F. Stir more frequently after that, and almost constantly once it reaches 185°F until the targt temperature is reached, 192°F or higher as described in the headnote.
  3. When it reaches the target temperature, add the vinegar and stir well. Turn off the heat and move the pot off the heating element. Even if you’re using a gas stove the grate will remain hot and can increase the temperature of the milk too much.
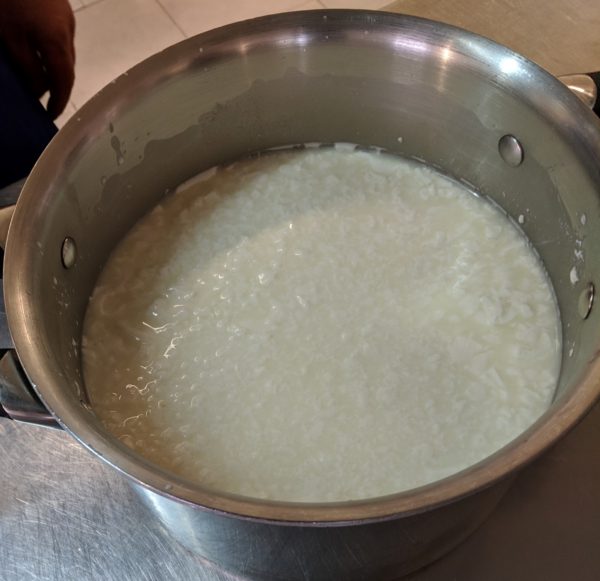
  4. Allow the milk to sit undisturbed. Curds should form a raft floating on top in 10 minutes. If curds do not form, add 1 tablespoon more vinegar, stir well, and wait 5-10 minutes more.
  5. Cut the curds into one-inch cubes with a knife.
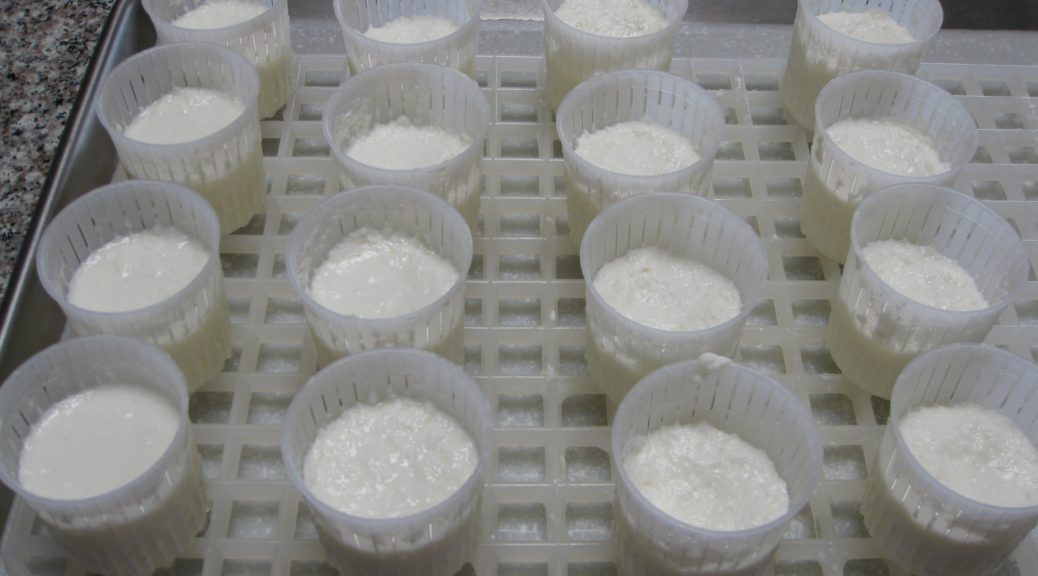
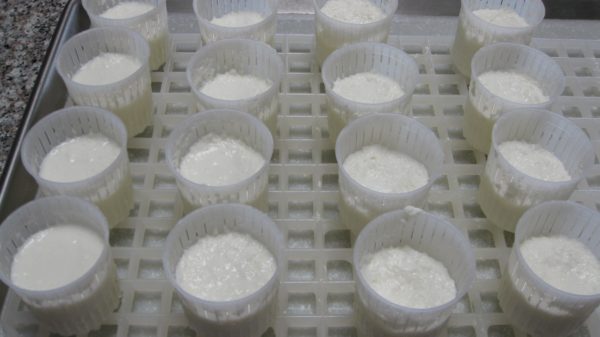
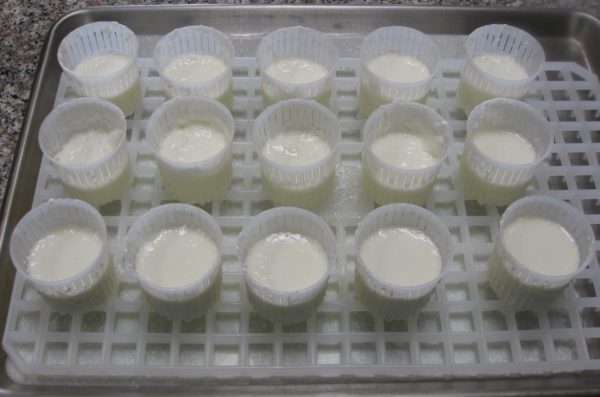
  6. Lift the curds into cheese molds set on a grate to drain.
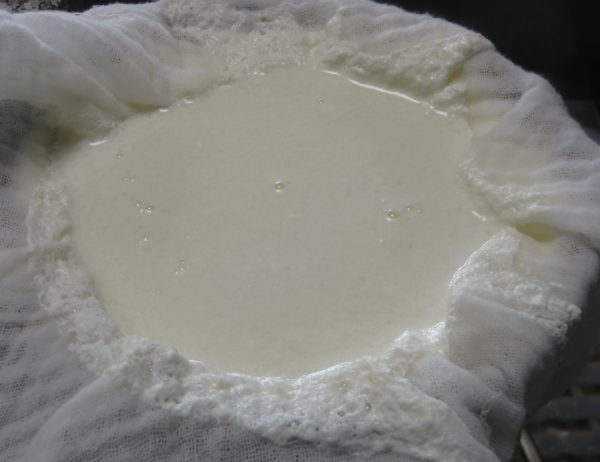
  7. Alternatively put the curds into a strainer lined with a double thickness of cheesecloth.
  8. Drain until the ricotta is as dry as desired based on how you plan to use it. The ricotta will be slightly stiffer once it is chilled so do not drain it too much.
  9. Once drained, the ricotta can be stored with the bottom sitting in a little of the whey to keep it moist. It will not reabsorb liquid once it has drained out.
Recipe Notes

Copyright © 2020 by Villa Sentieri, LLC. All rights reserved.
Share this Recipe

Bread Pudding

July 3, 2019

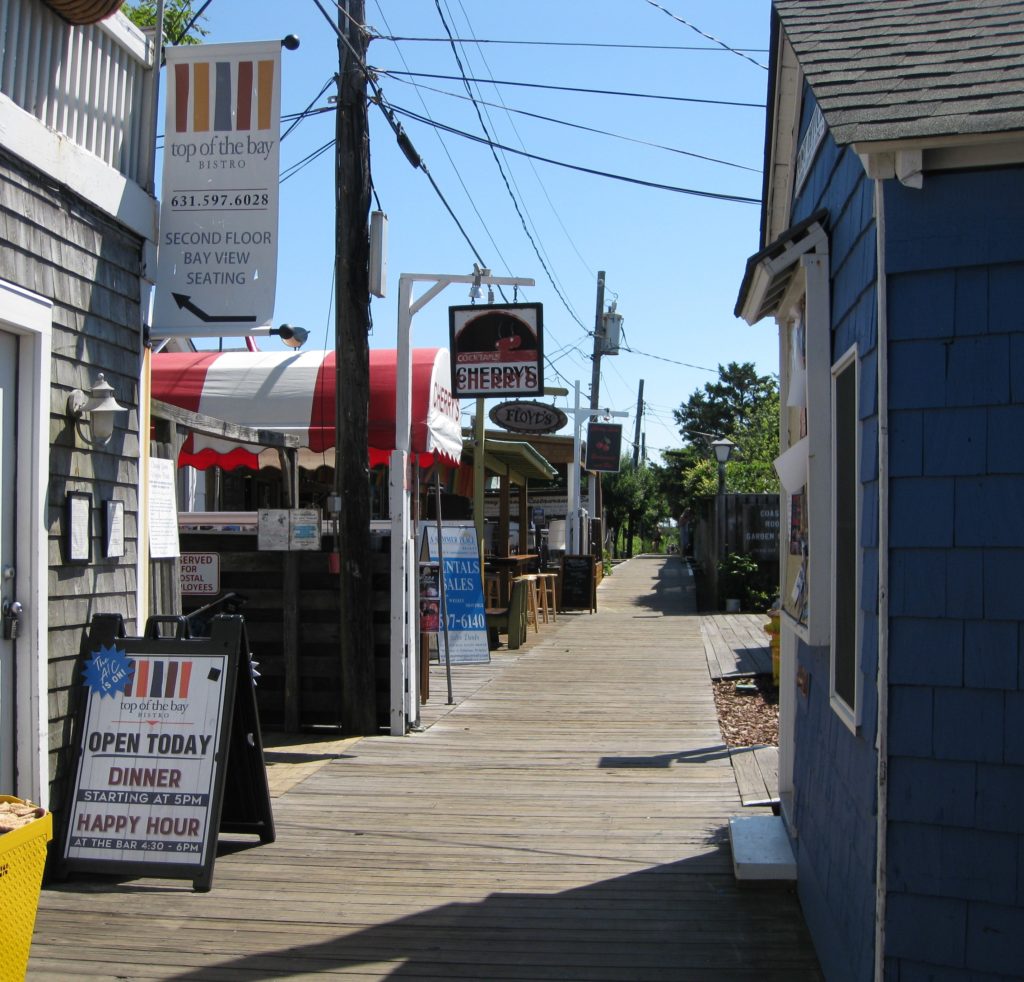
It’s a Sunday morning in June.  I’m on the East Coast; Fire Island, New York to be exact.  I’m one-third of the way through a three-week stay on this slip of land south of Long Island.  To the north of Fire Island is the Great South Bay, which separates it from Long Island.  To the south is the Atlantic Ocean.

The Cherry Grove dock. It’s about 4 1/2 miles across the Great South Bay to Sayville on Long Island.

Whenever I’m here, I seem to channel my childhood as far as cooking goes.  I find myself turning (though not exclusively, mind you) to the foods I grew up eating and loving.  A few days ago for dinner I made Italian (OK, Italian-American) sausage with peppers and onions.

A view of downtown Cherry Grove.

Today I’m making my mother’s long-simmered Southern Italian Ragu (or Sugo or Tomato Sauce…or, because I’m in New York, Sunday Gravy).  Growing up, we NEVER called Tomato Sauce of any sort “Gravy!”  It was usually just “Sauce,” which we all knew meant mom’s or Aunt Margie’s or Aunt Mamie’s or some other Italian-American woman’s slow-cooked meat-and-tomato-based sauce for pasta.  And we NEVER EVER used the word “Sunday” as a modifier for “Sauce!”

A tortoise greeted me on a walk from Cherry Grove to The Pines one morning.

Join our mailing list and you’ll never miss a recipe again!

Sauce was Sauce, it was sacrosanct.  It wasn’t better or different or more elaborate because it was being made on Sunday.  If by some chance it were to be made on Thursday (which it usually wasn’t) it would still be made the same way.  To be sure, there was some variability in the meats that were used.  In my family’s version there were always big pieces of pork, preferably bone-in.  There could also be sausage (preferably hot), meatballs, and occasionally (and just for the cook) one chicken thigh (to “sweeten the sauce” as my mother would say).  Other than that, and the occasional appearance (or not) of an additional aromatic, like a small amount of minced onion or a hot pepper, the rest of the process was invariable.

Though there are some larger houses, many of the houses in Cherry Grove are small cottages.

I’m making Sauce today because, well, it’s Sunday and I’m on the East Coast, and because I LOVE it.  If I could, I’d find an AM radio and tune it to a station playing Polkas (Is that even possible?).  Aunt Mamie always did that on Sunday (despite being of Italian descent).  It’s one of those experiences from childhood that has had an outsized impact on me for some reason.  The memory is quite simple:  summertime, doors open , Aunt Mamie cooking, and her big green box radio sitting on a white enamel-topped free-standing kitchen cabinet near the door to her porch blaring out polka tunes.

The Tiki Bar can be a happening place during 2-4-1 happy hour!

Many of my fondest memories are in the summer with the doors open, what can I say?  It’s not like Aunt Mamie didn’t tune to polkas in the winter but that’s not what comes to mind!

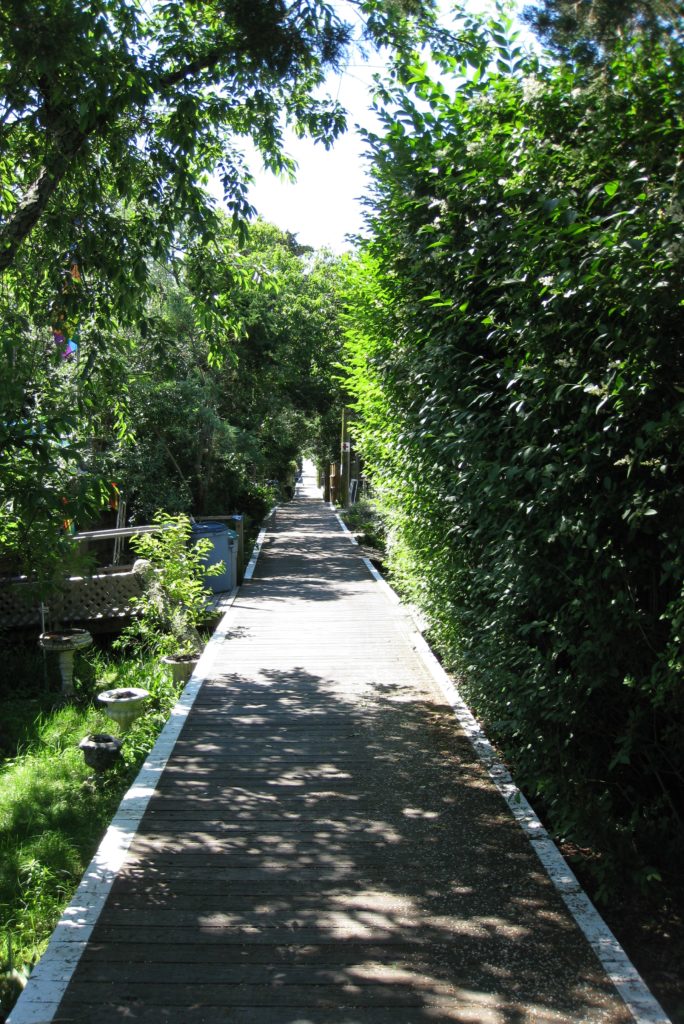
One of the many boardwalks that make navigating Cherry Grove possible.

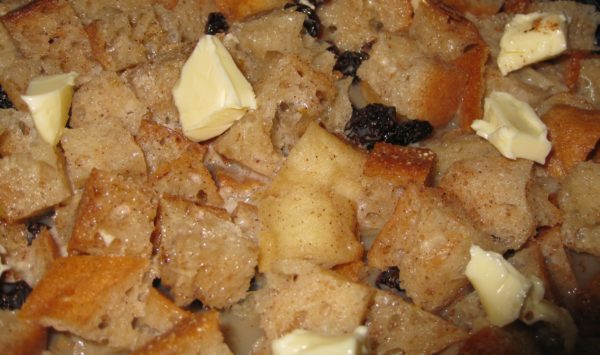
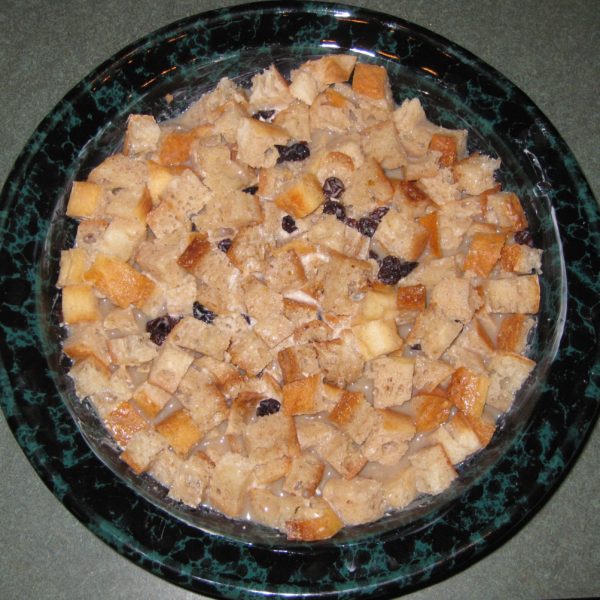
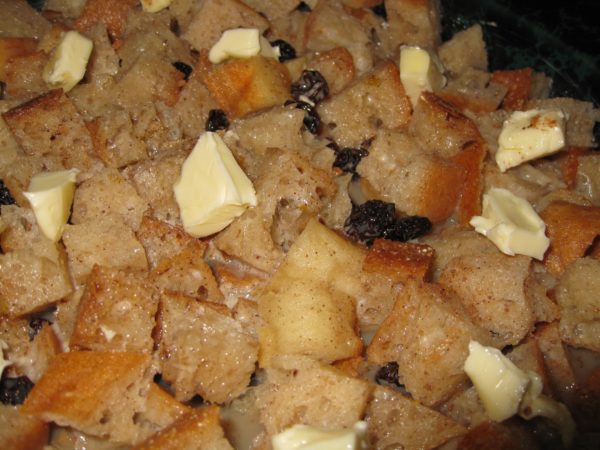
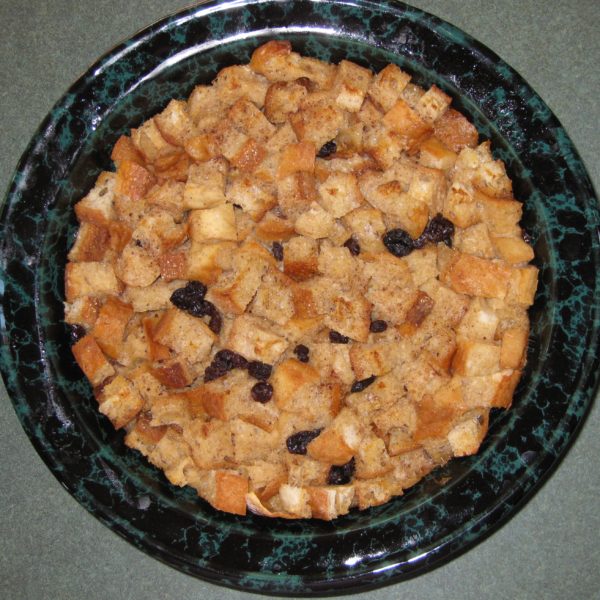
I’m also making Bread Pudding today.  One of those comfort-food desserts that I really enjoy.  I know I’ve mentioned this a time or three, but all of my favorite foods are carbohydrates.  All of my favorite desserts are based on moderately complex carbohydrates (flour and rice, usually) without lots of extra fat (like butter) and without being overly sweet.  Bread Pudding and Rice Pudding are near the top of the list.

Getting ready for the Fourth of July, a “house cat” is decked out with patriotic sunglasses.

Follow us on your social media platform of choice
         

Neither would be considered fit for company but I’m foisting the bread pudding on our dinner guests today with the option of some heavy cream poured on top.  I can always do a run to the store for gelato if I have a last-minute change of heart.  And, it would be a “run.”  There are no cars on this part of the island.  There are some motorized carts that ply the boardwalks that crisscross the community, providing the only means of navigating the town.  The carts are mostly used by contractors, businesses, trash pickup, the fire department, and the EMS.  Although a few residents use small carts or electric scooters to get around, the rest of us walk and use wagons to cart things that are too heavy to carry.

Looking south toward the Atlantic Ocean with deer in the distance.

It’s a pretty idyllic place to spend part of the summer.

A view toward the dock and Great South Bay from the Tiki Bar.

It can also be an exciting and unpredictable place.  Sunday afternoon an intense storm hit Long Island and Fire Island.  Trees and power lines were downed.  The storm put an end to internet service for more than forty-eight hours.  That’s the reason that this blog is getting posted a few days later than planned.

Part of the Cherry Grove Fire Department, an all-volunteer force.

Meanwhile, I’m eagerly anticipating the arrival of the next urge to cook something from my childhood!

Print Recipe
Bread Pudding
If the raisins or currants are not absolutely fresh and soft, cover them with hot water to plump up before adding them to the mixture. It is best if the bread is a few days old so that it has lost some of its moisture.
Votes: 0
Rating: 0
You:
Rate this recipe!
Cuisine American
Prep Time 15 minutes
Cook Time 80 minutes
Passive Time 60 minutes
Servings
people
Ingredients
Cuisine American
Prep Time 15 minutes
Cook Time 80 minutes
Passive Time 60 minutes
Servings
people
Ingredients
Votes: 0
Rating: 0
You:
Rate this recipe!
Instructions
  1. Beat eggs, sugar, vanilla, and cinnamon.
  2. Add milk and rum to the egg mixture and whisk to combine.
  3. Butter a three-quart ovenproof covered dish.
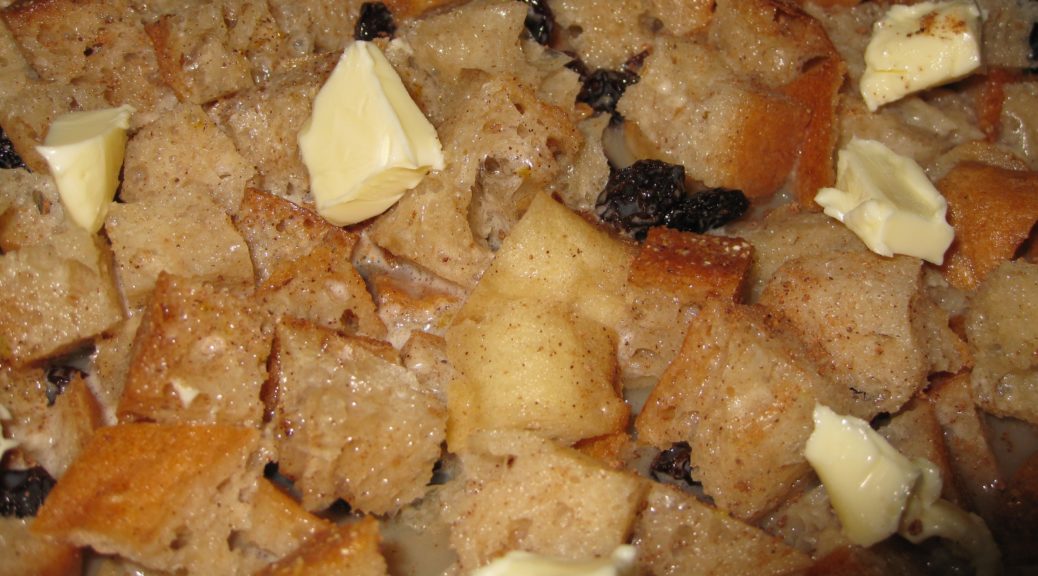
  4. Toss the bread cubes and raisins if using. Put the bread into the buttered dish. Pour milk and egg mixture on top.
  5. Grate nutmeg over the top. Dot lightly with butter.
  6. Cover and allow to sit at room temperature 30-60 minutes.
  7. Bake at 350°F, covered, for approximately 60 minutes. Uncover and bake an additional 20 minutes, or until brown on top.
  8. Serve warm or at room temperature. Pour a little heavy cream on top if desired.
Recipe Notes

Copyright © 2019 by Villa Sentieri, LLC. All rights reserved.
Share this Recipe

Maraschino Cherry Cake

July 18, 2018

In  September 2012, at a wine paring dinner at The Compound Restaurant in Santa Fe during the holy days of Santa Fe Wine and Chile Fiesta, a group of us hatched an idea to start a dinner group.

After a lot of discussion and email exchanges, we decided to name the group Santa Fe Ate, both for what we do and for the (play on the words regarding the) number of people in the group.

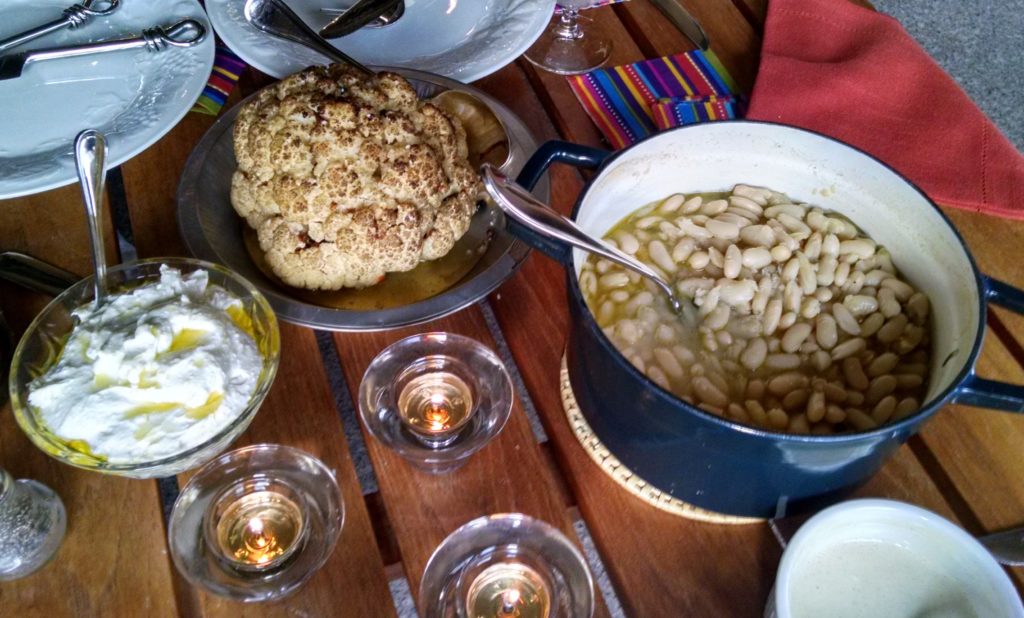
From the “Things You Can Cook in a Wood-Burning Oven” dinner: Roasted Cauliflower with whipped Goat Cheese, Ricotta, and Olive Oil Dip and Cannellini alla Toscana

We had our first dinner in January 2013 and we’ve been going strong ever since.  We meet about once every three months, rotating houses.  At each dinner we decide the theme for the next dinner.  This may not be the best time to make such a consequential decision given the amount of alcohol typically consumed.  For example, one of our themes was French Indo-China 1920s to 1930s!

Join our mailing list and you’ll never miss a recipe again!

Frank and Doug don’t really cook so their group assignment is always to come up with a signature cocktail and appropriate wine pairings for each course.  They have leeway to be creative in finding or creating a cocktail, which they have to do for even for cultures where drinking alcohol is not really common.  If the theme of the dinner relates to a wine producing region, the wines are generally from that region to the extent feasible.

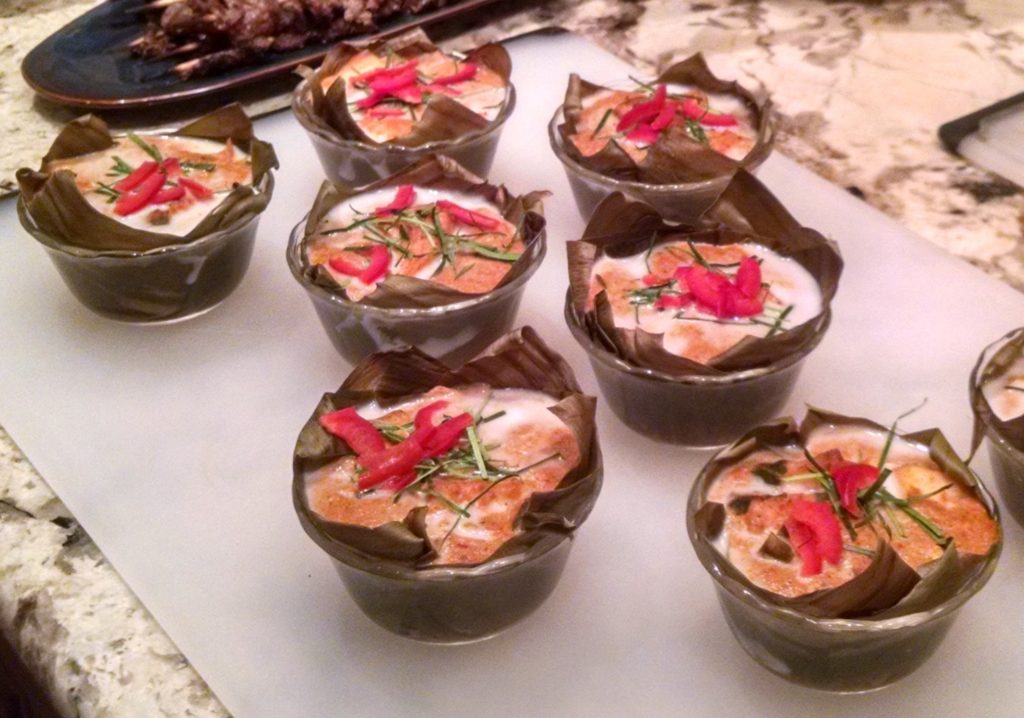
From the French Indo-China 1920s to 1930s dinner: Cambodian Fish Amok (Fish and Coconut Milk Curry Baked in Banana Leaves)

The other six of us do successive rounds of emails refining the list of dishes to be prepared and organizing them into courses.  Our task is to be as authentic to the theme as possible.

French Indo-China 1920s to 1930s was probably our most narrow theme.  Others have included, for example, Summer in Provence, Winter in Friuli, Along the Silk Road, Persia (not Iran but Persia), Comfort Food, and Things You Can Cook in a Wood-Burning Oven (for which the entire meal was cooked in our outdoor wood-burning oven).

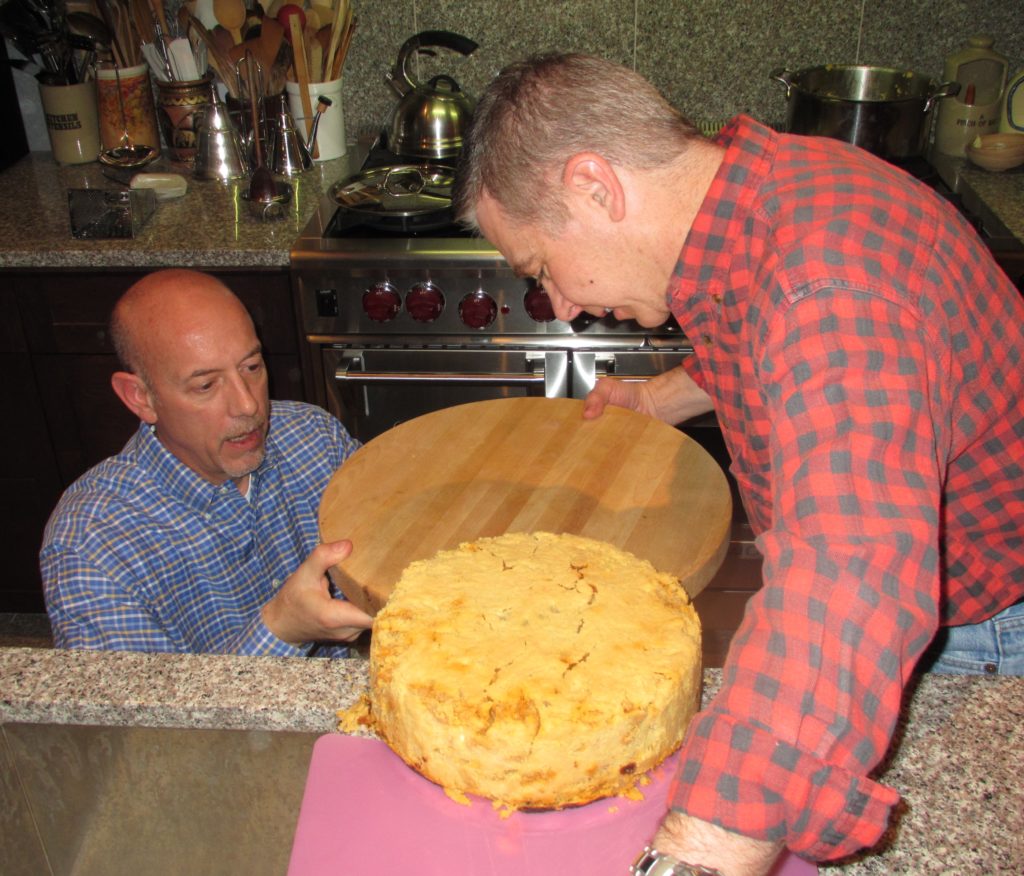
The only meal we’ve had which strayed from the basic plan was Timballo.  Timballo is a (typically large) pastry-encased and baked dish of layered pasta, hardboiled eggs, cheese, meatballs, and other meats, all moistened with tomato sauce.  Each of the cooks was assigned one or more components of the timballo to make at home.  We got together to assemble and bake the final dish.  This was a multi-hour process, even with all the prep work done in advance.

Unmolding the timballo

To help pass the time, Frank and Doug devised a blind wine-tasting in which we had to try to identify the varietal and provenance of each wine.  I believe the eight of us tasted six bottles of wine.  After we finished those, we opened some more.  This was the dinner at which we decided the theme of French Indo-China 1920s to 1930s.  You may notice a correlation between alcohol intake and unusual dinner themes!

Follow us on your social media platform of choice


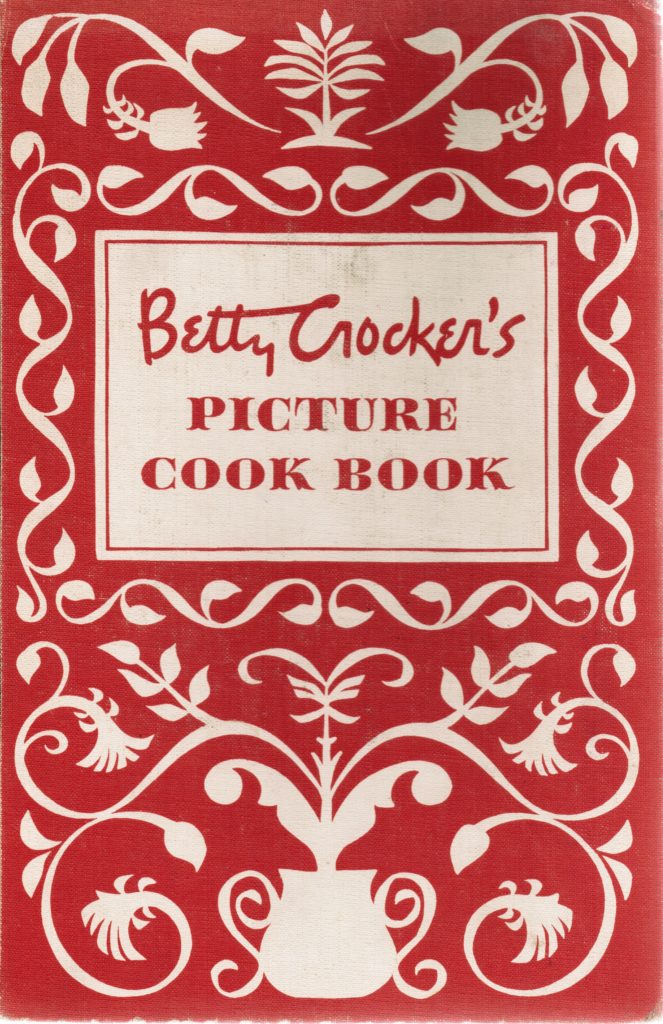
Earlier this year, our theme was Betty Crocker’s Picture Cook Book, first edition, published in 1950.  Every dish had to come from the cookbook with no changes, substitutions or updating unless absolutely necessary.  One of the appetizers was anchovies rolled around cornichons!

Betty Crocker’s Picture Cook Book, 1950, First Edition

The food was actually surprisingly good.  I suspect part of that was related to how each of us selected our dish or dishes (Becky, who did appetizers selected three!).  The wines were, undoubtedly, fabulous.  In the United States, if you were drinking wine in the 1950s you were likely drinking French wine, and good French wine, at that!  On that night, so were we!

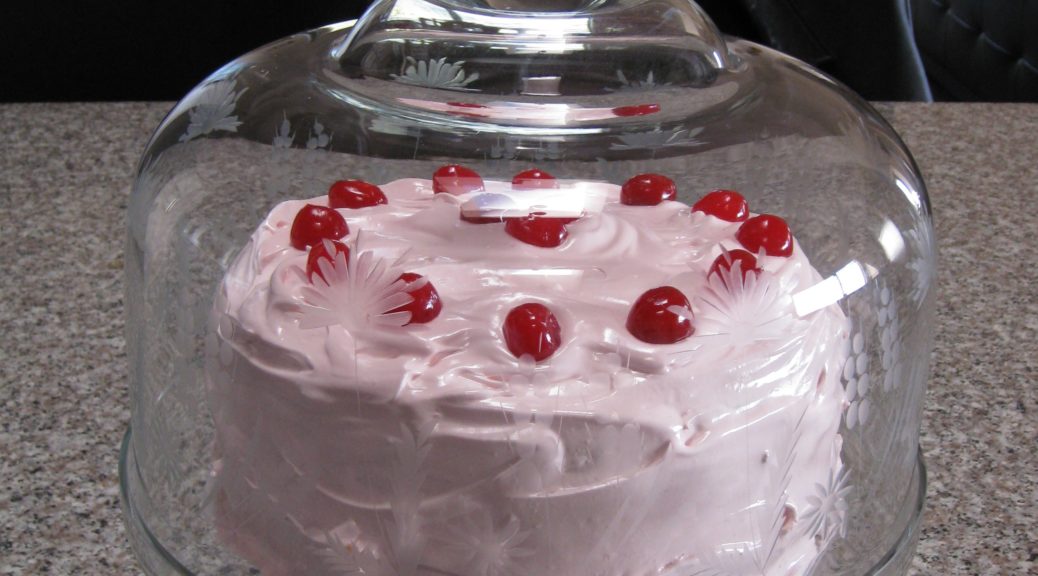
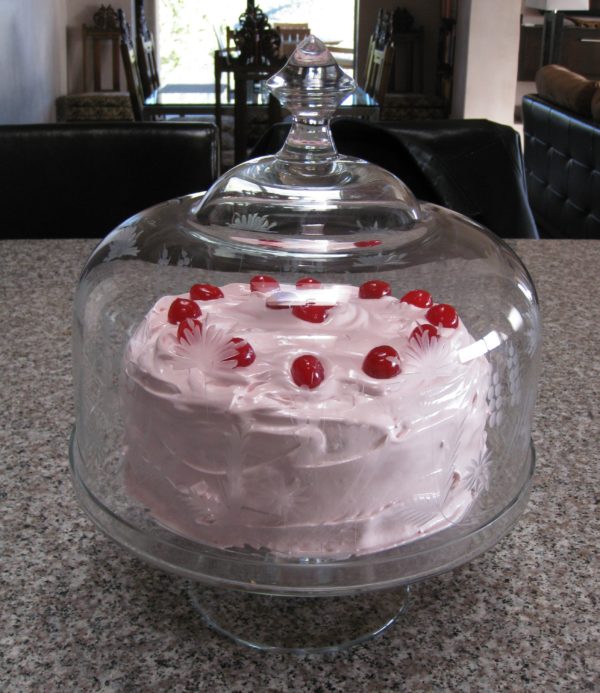
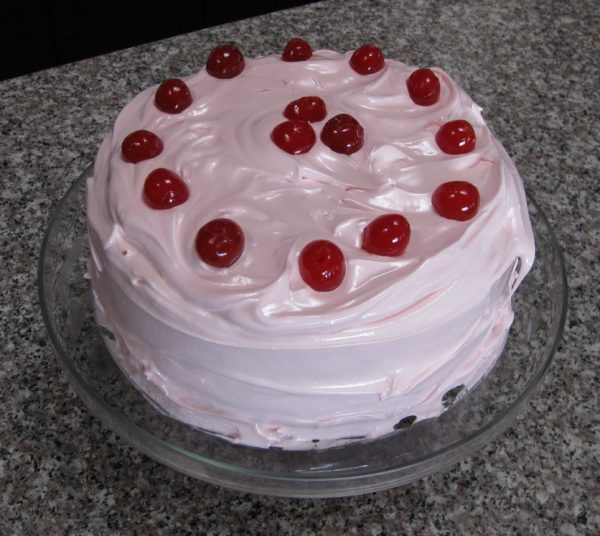
I made a Maraschino Cherry Cake with Almond Crème Filling and Maraschino Boiled Frosting.  Though if I were making the cake again, I would probably substitute my recipe for Italian Pastry Cream for Betty’s Crème Filling, I really wouldn’t make any other changes.

Here’s the recipe directly from the first edition of the Betty Crocker Picture Cookbook with a few minor adaptions of the technique by me.  For you bakers out there, I’m providing the original sea-level measurements as published in the cookbook.  Since I baked this at nearly 8000 feet in elevation, I followed Betty’s recommendations for adjusting for high altitude.

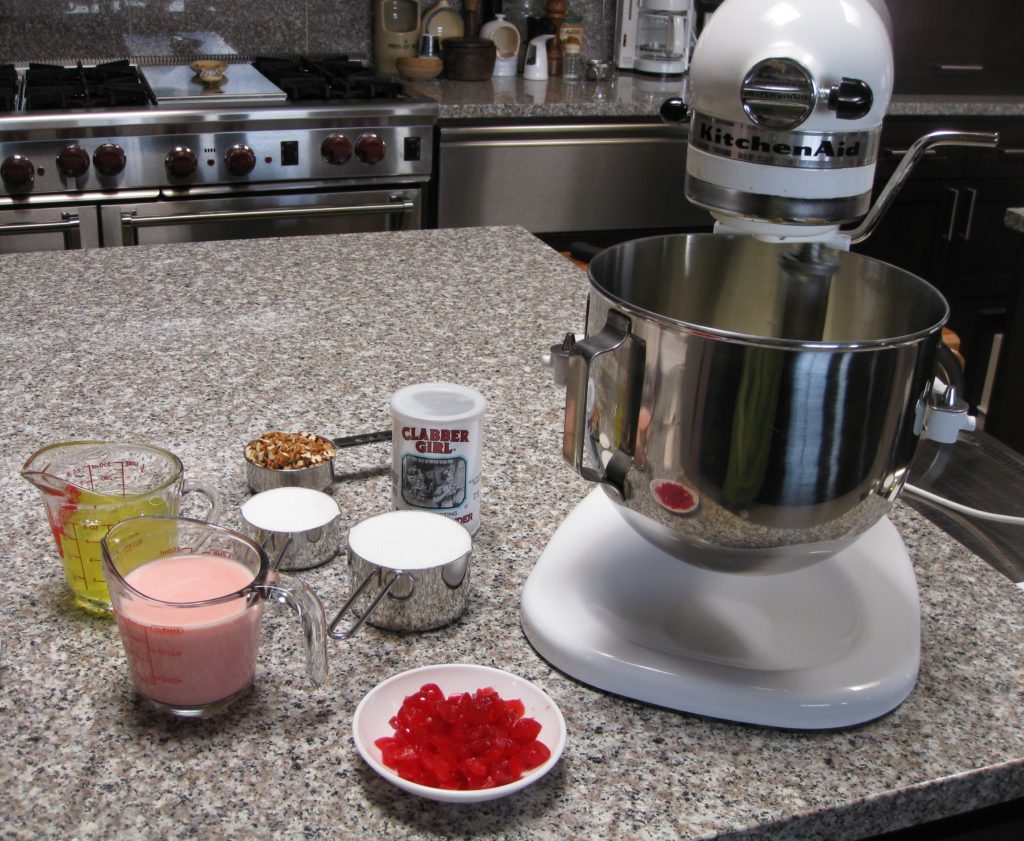
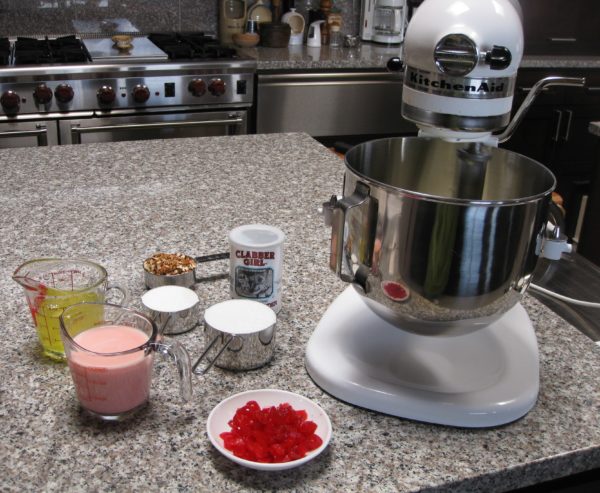
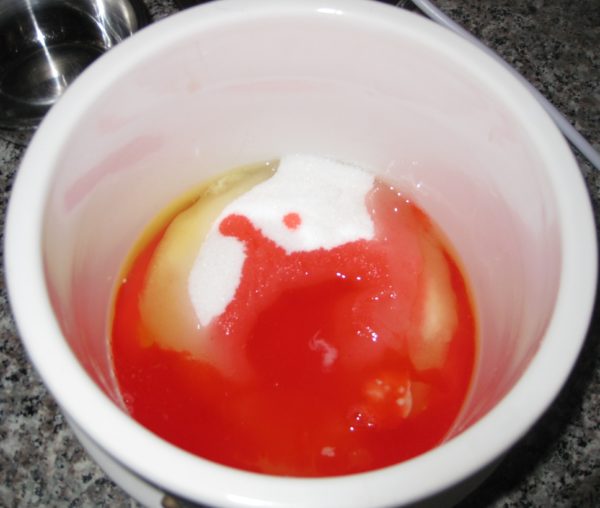
Getting ready to make Maraschino Cherry Cake
Print Recipe
Maraschino Cherry Cake
You can divide the work for this cake over several days. The filling can be made up to three days in advance and refrigerated, tightly covered. Stir in the toasted almonds just before using. The cake layers can be made a day in advance, wrapped tightly and refrigerated. The frosting should be made when you’re ready to frost the cake. The original recipe called for “rich milk” in the almond crème filling. Remember, this recipe was published before the advent of homogenized milk. Half-and-half is a good substitute. Except in professional recipes, it is rare to see egg whites measured in volume but it is a very good idea as the white, much more than the yolk, varies with the size of the egg.
Votes: 0
Rating: 0
You:
Rate this recipe!
Prep Time 1 hour
Cook Time 1 1/2 hours
Passive Time 6 hours
Servings
people
Ingredients
Maraschino Cherry Cake
Almond Crème Filling
Maraschino Cherry Cooked Frosting
Prep Time 1 hour
Cook Time 1 1/2 hours
Passive Time 6 hours
Servings
people
Ingredients
Maraschino Cherry Cake
Almond Crème Filling
Maraschino Cherry Cooked Frosting
Votes: 0
Rating: 0
You:
Rate this recipe!
Instructions
Maraschino Cherry Cake
  1. Sift together the flour, baking powder and salt. Reserve.
  2. Combine milk and Maraschino cherry liquid. Reserve.
  3. Cream butter.
  4. Cream in sugar until fluffy.
  5. Add dry ingredients in four additions, alternating with milk-juice mixture in three additions. Mix lightly, but well, after each addition.
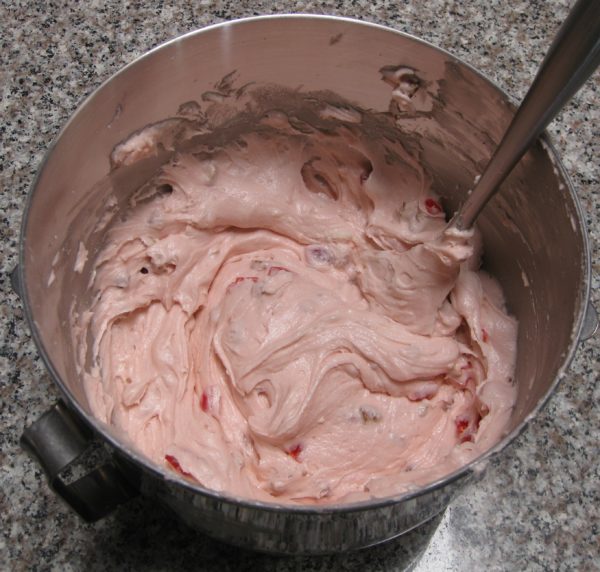
  6. Stir in nuts and Maraschino cherries.
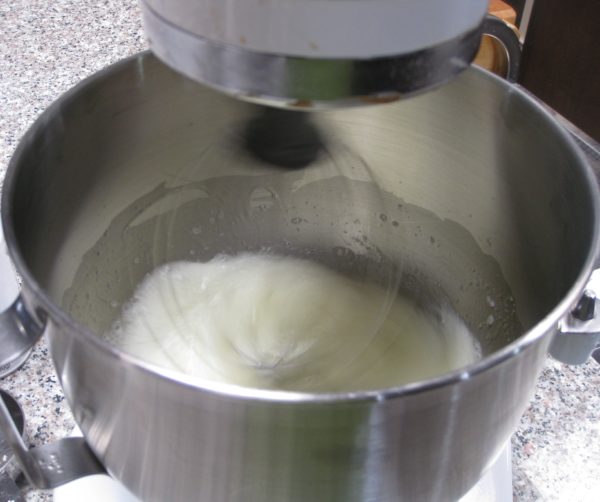
  7. In a separate bowl, beat egg whites until stiff.
  8. Fold beaten egg whites into batter, using about ¼ of the egg whites first to loosen the batter.
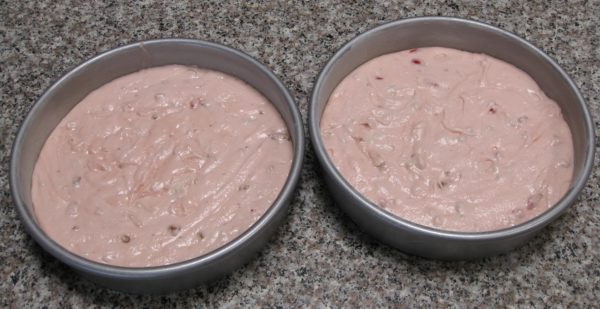
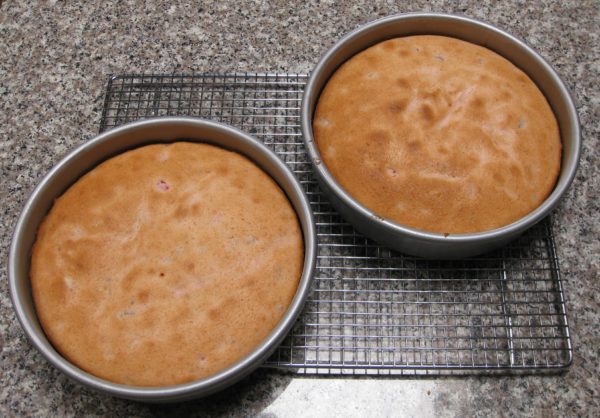
  9. Pour into two greased and floured 9” cake pans.
  10. Bake 350°F approximately 30-35 minutes, until a tester inserted in the center comes out clean.
  11. Cool the pans on a rack approximately 10 minutes.
  12. Remove layers from pans and cool completely.
Almond Crème Filling
  1. Combine the sugar, cornstarch, salt and half-and-half in a heavy-bottomed saucepan.
  2. Bring to a boil, stirring constantly.
  3. Slowly pour about half of the boiling half-and-half mixture into the egg yolks, whisking constantly, to temper the yolks.
  4. Put the saucepan with the remaining half-and-half mixture back on the heat.
  5. Pour the tempered yolks back into the saucepan, whisking constantly.
  6. Bring the mixture to a boil. Boil 1 minute, stirring constantly.
  7. Remove from the heat and stir in the almond and vanilla extracts.
  8. Pour the pastry cream into a bowl. Cover with plastic wrap, putting the wrap directly on the pastry cream to avoid a skin.
  9. Refrigerate until cold.
  10. Stir in chopped almonds just before using.
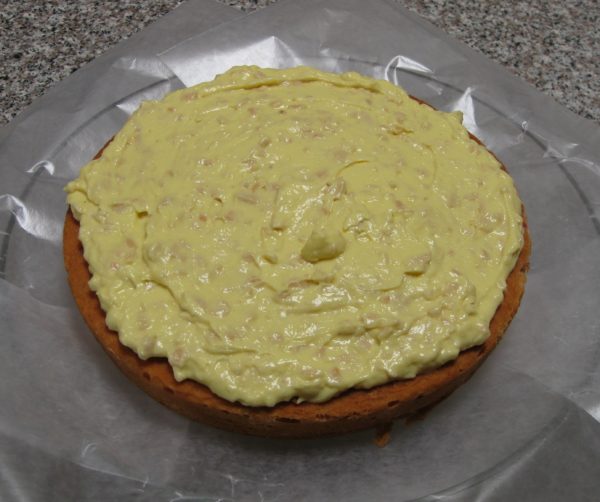
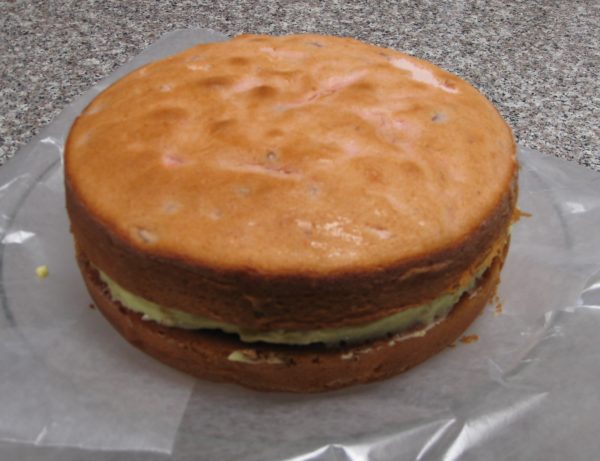
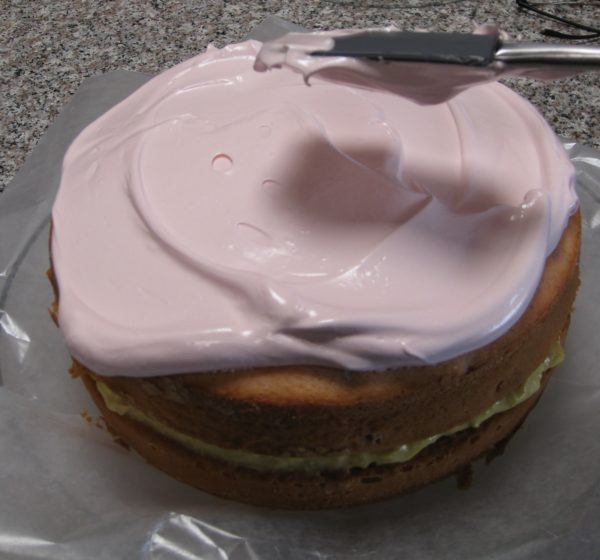
  11. Just before making the frosting, put one cake layer on a serving platter. Top with Almond Crème Filling.
  12. Top with second layer.
Maraschino Cherry Cooked Frosting
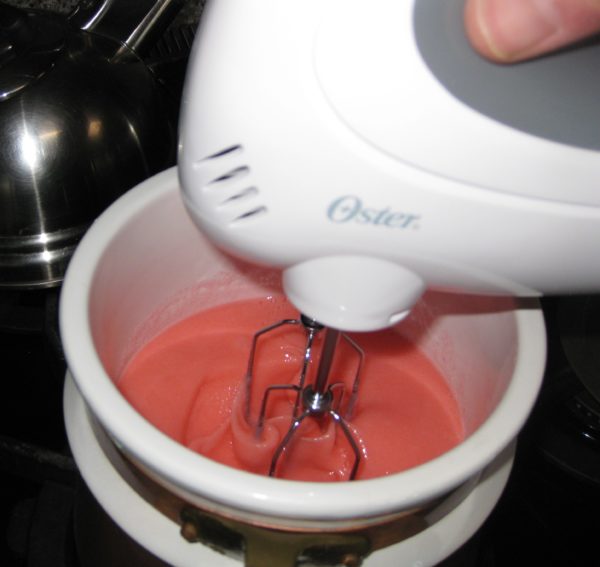
  1. Combine the egg whites, sugar, cream of tartar and Maraschino cherry liquid in a double boiler.
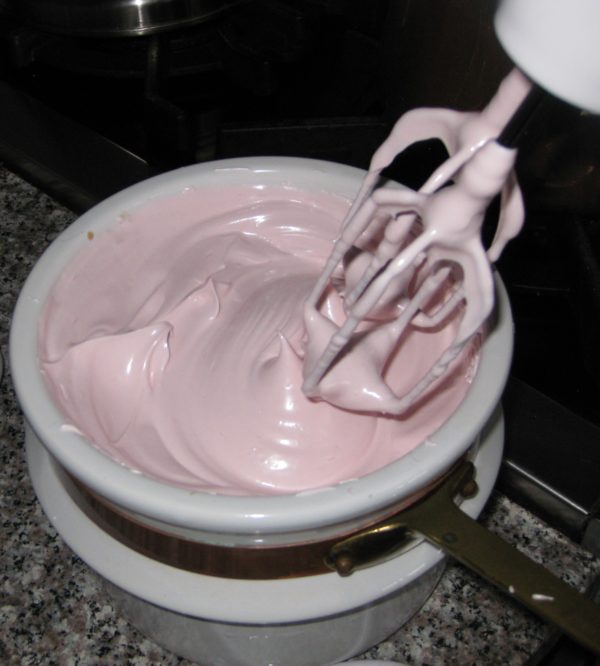
  2. Cook over boiling water, beating constantly with an electric mixer until a spreadable consistency, approximately 5-7 minutes. The top of the double boiler should not touch the boiling water in the bottom.
  3. Beat in the vanilla and almond extracts.
  4. Immediately frost sides and top of cake.
  5. Decorate the top with whole Maraschino cherries
Recipe Notes

Copyright © 2018 by Villa Sentieri, LLC. All rights reserved.
Share this Recipe

Penne with Roasted Garlic Cream Sauce

May 14, 2018

I apologize!

In my inaugural messages, I clearly stated that I would publish traditional recipes, many (though not all) of them Italian, but with the emphasis on traditional.

I get really stoked by the idea of preserving traditional recipes in written form (even if it’s a bunch of zeroes and ones on a cloud server somewhere)!

I also truly appreciate new and innovative dishes…especially cakes, for some reason.  But my very strong preference if I’m going to work on perfecting and publishing a recipe is to focus on traditional recipes.  (I’m happy to eat good food of any type, traditional or not, that someone wants to serve me, however.)


Follow us on your social media platform of choice


My editorial calendar for this blog, including what I’ve published and what I currently have planned to publish, numbers 212 recipes.  The number keeps growing.  Most of these recipes are ones I listed (off the top of my head, so to speak) when I was planning the launch of the blog in late 2016.  The list came from simply thinking about my favorite recipes.  As I trawl through my recipe archive periodically, looking for recipes for particular events, or even just dinner, I usually come upon at least a few more recipes that get added to the list.

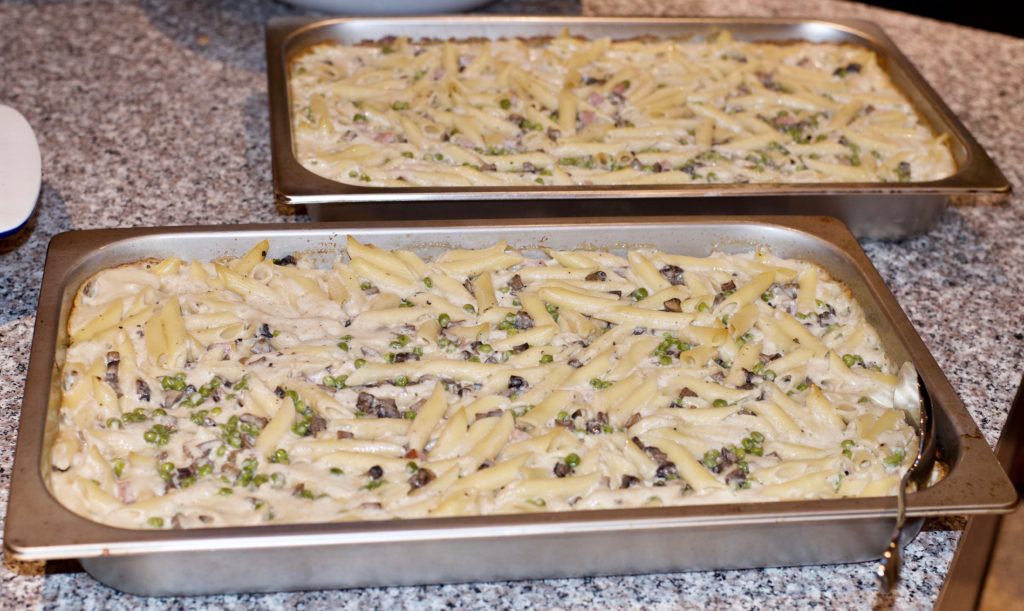
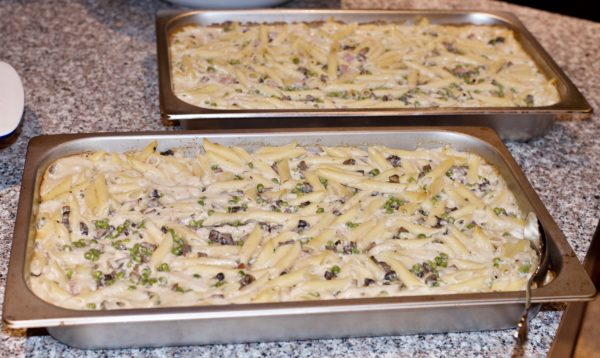
Two hotel pans hold a double batch, 4 pounds of penne, for a summer dinner party for the family from Tuscany

Windows says I have 4133 recipes saved in my recipe directory.  That does not count the hundreds of hand-written ones that I’ve not scanned in yet.

But I have to admit, not EVERYTHING I make is traditional.  I have this killer salmon recipe that I got from the New York Times that is now a regular on our table.  Almost any vegetable recipe by David Tanis is a winner in my book, well really ANY recipe by David Tanis, but he has a way with vegetables.  He has many make-ahead-and-heat-up-in-the-oven options that remove a lot of last minute work when putting dinner on the table, whether it be for 2 or 20!

In my defense, these are recipes that I think will become classics in a few decades just as many of the recipes that I started cooking 45 years ago in college have become classics for me.  I think if a recipe still tastes good after half a century it can be considered a classic…which is getting pretty close to traditional.

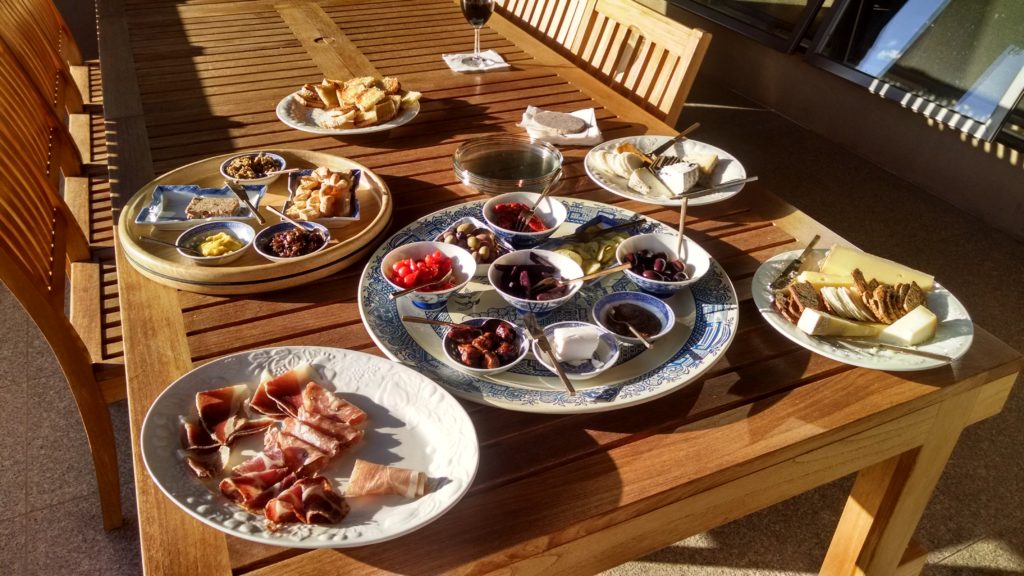
This is just a portion of the antipasto for the dinner for our Tuscan relatives

Think about all the things you ate 50 years ago that you don’t make any more, like fried bologna simmered in ketchup!  That actually is something that my very traditional mother put on the table in the 1960s!  Granted, it was a main course (and I use the term lightly) that could be whipped up in under half an hour after a day’s work.  The truth is, I actually liked it at the time.

I differentiate the fried bologna category of foods that I don’t make any more from the fried salami category of foods that I still love but that just have fallen off my rotation.  Have you ever had a sandwich of pan-fried salami?  If not, give it a try.  (Thinly slice the salami.  Make a cut from the middle to one edge, like the first cut of a pie, to reduce puckering.  Cook in a skillet over medium heat till lightly browned on each side.  No oil needed.  Pile on bread.  Enjoy…dripping fat and all!)


Join our mailing list and you’ll never miss a recipe again!


So why the apologia?

Today’s recipe isn’t traditional.  I developed it about four years ago for dinner for a large group of people.  It was such a hit, that I kept making it.  I even made it last summer for a dinner party for the family from Tuscany!  So, while it’s not really traditional (which I take to mean something with a cultural history, something that individuals from a particular culture and location make or made on a regular basis), it has a very traditional FLAVOR.

I made this penne for my father-in-law’s birthday party this past January. Everyone had clean plates!

In my mind it’s not a REAL (i.e. traditional) dish because I made it up.  On the other hand, the flavor profile makes it fit into an established canon of northern Italian food.  Italians would recognize it as Italian food, just not traditional Italian food.

Because it isn’t traditional, I hadn’t planned on publishing it.  I got a number of requests for the recipe after I mentioned it in one of my emails and decided that I should reconsider my initial decision.  There aren’t many photographs but the steps are not really complicated.  I know you can do it without all the usual photos.

Who knows, maybe in another 45 years it’ll become a classic!

Print Recipe
Penne with Roasted Garlic Cream Sauce
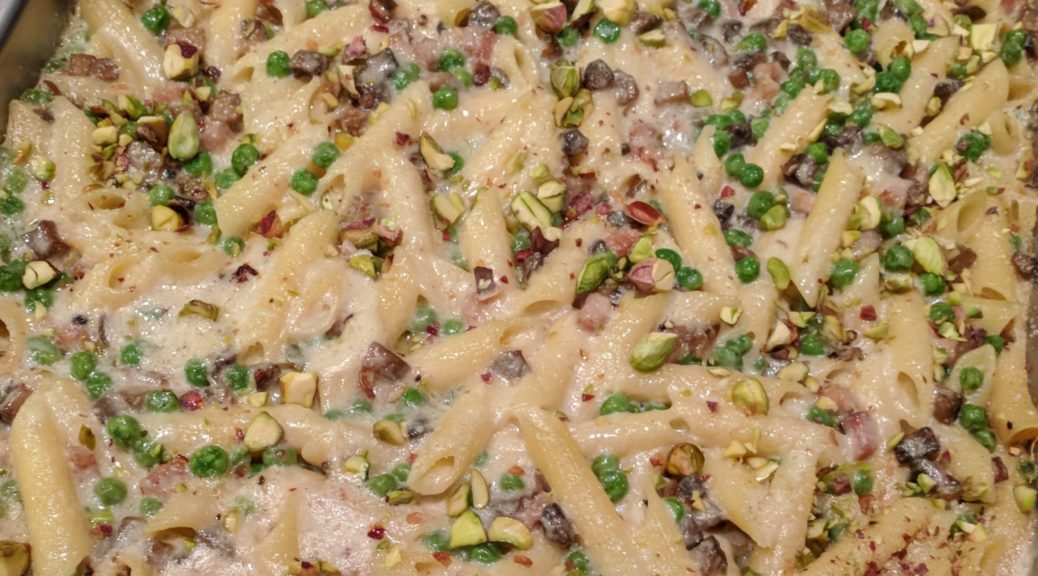
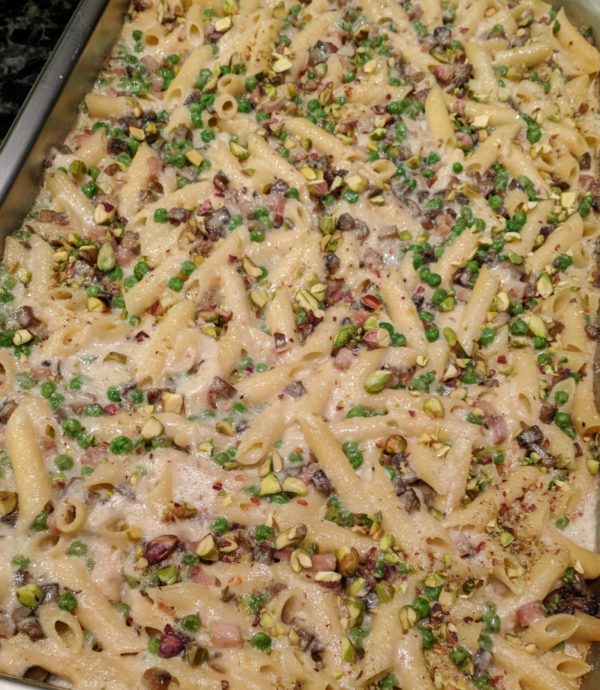
This takes some time to put together but once it’s assembled you can spend time with your guests while it cooks. The sauce has a luxurious amount of butter, about twice what would typically be used based on the amount of flour. This improves the flavor and mouth-feel of the sauce. Because I originally created this dish for an event in Alamogordo, New Mexico, I topped it with pistachios which are grown there. Chopped walnuts or whole pine nuts could be substituted. If you want to prepare the dish in advance, be sure to cool the pasta in a bowl of ice water. Mix the cooled pasta with cold white sauce and the other ingredients. Pour into a baking dish, cover tightly, and refrigerate. Allow the covered dish to sit at room temperature 60-90 minutes before baking.
Votes: 0
Rating: 0
You:
Rate this recipe!
Prep Time 2 hours
Cook Time 2 hours
Passive Time 2 hours
Servings
people
Ingredients
Balsamella (White Sauce)
Final Assembly
Prep Time 2 hours
Cook Time 2 hours
Passive Time 2 hours
Servings
people
Ingredients
Balsamella (White Sauce)
Final Assembly
Votes: 0
Rating: 0
You:
Rate this recipe!
Instructions
Balsamella (White Sauce)
  1. Put the garlic in a single layer in a small oven-proof dish with a tight-fitting lid. Alternatively, put the garlic on a sheet of heavy-duty aluminum foil.
  2. Sprinkle the garlic with olive oil.
  3. Put the lid on the dish, or fold up and seal the aluminum foil.
  4. Roast the garlic at 300°F until soft and golden brown, approximately 45 minutes, stirring occasionally.
  5. Put the garlic and any olive oil you can scrape out of the dish into a blender jar.
  6. Add 1 cup of the milk.
  7. Puree the garlic and milk. Reserve.
  8. Warm the remaining milk in a heavy-bottomed saucepan.
  9. Melt the butter in another heavy-bottomed saucepan over medium heat. Stir the flour into the butter.
  10. Cook for a few minutes on medium heat but do not allow flour to color.
  11. Stir in the warm milk, one ladleful at a time, incorporating well after each addition to avoid lumps.
  12. After about half the warm milk has been incorporated, add the pureed garlic mixture.
  13. Use some of the warm milk to rinse out the blender jar and add it to the pot. Stir well.
  14. Add the remaining milk to the pot along with the bay leaves, rosemary sprigs, and lemon zest.
  15. Bring to a boil over medium high heat stirring (nearly) constantly and cook until the sauce reaches the thickness of heavy cream, approximately 5 minutes.
  16. Strain the white sauce through a fine-mesh sieve.
  17. If not using the sauce immediately, cover it with plastic wrap, putting the plastic directly on the surface to prevent the formation of a skin, and refrigerate. [If you are going to prepare the casserole in advance, make sure the balsamella is cold before combining with the other ingredients.]
Final Assembly
  1. Put the frozen peas in a large sieve. Rinse with cool water to thaw the peas. Allow the peas to drain and completely thaw while proceeding with the recipe.
  2. Heat the olive oil in a large sauté pan over high heat.
  3. When the oil is hot, but not smoking, add the diced mushroom caps. Toss well.
  4. When the mushrooms have absorbed the oil, add 1 teaspoon of fine salt. Mix well.
  5. Turn the heat to medium low until the mushrooms begin to sweat.
  6. Turn the heat to high and continue sautéing until the liquid evaporates.
  7. Continue to cook until the mushroom pieces are browned in places.
  8. Season with black pepper. Add ham and cook 2-3 minutes.
  9. Remove from the heat and reserve.
  10. Bring a large pot of heavily salted water to a rolling boil. Add the pasta.
  11. Boil until the pasta is partially cooked. It should still be a little crunchy on the inside.
  12. If you are going to cook the casserole immediately, drain the pasta but do not rinse. If you are going to assemble the casserole in advance, drain the pasta and chill it in a bowl of ice water. When cold, drain well.
  13. Combine pasta, peas, mushroom and ham mixture, and balsamella. Mix well.
  14. Pour into a large buttered casserole. For this quantity, I use a full-size steam-table tray, also called a “hotel pan.”
  15. Put a sheet of parchment on top then cover the pan tightly with heavy-duty aluminum foil. You can skip the parchment if you are going to cook the casserole immediately. Food should not stay in extended contact with aluminum, hence the parchment paper if the dish is being assembled in advance.
  16. Either refrigerate or bake at 350°F until bubbly. Baking time will depend on whether the ingredients are hot or previously refrigerated and brought to room temperature, 1 ½ to 2 hours.
  17. Remove the foil and parchment. Sprinkle the top with Parmesan cheese and nuts.
  18. Place under the broiler, or on the top rack of an oven heated to 500°F, until the top is golden brown.
  19. Allow the casserole to rest at least 15 minutes before serving.
Recipe Notes

Copyright © 2018 by VillaSentieri.com. All rights reserved.

Share this Recipe

Mom’s Biscotti (aka Anise Toasts or Slice Cookies)

April 20, 2018

Growing up biscotti were not ubiquitous the way they are now.

Remember, this was before the coffee shop craze swept the country and when Italian food was viewed as “foreign.”

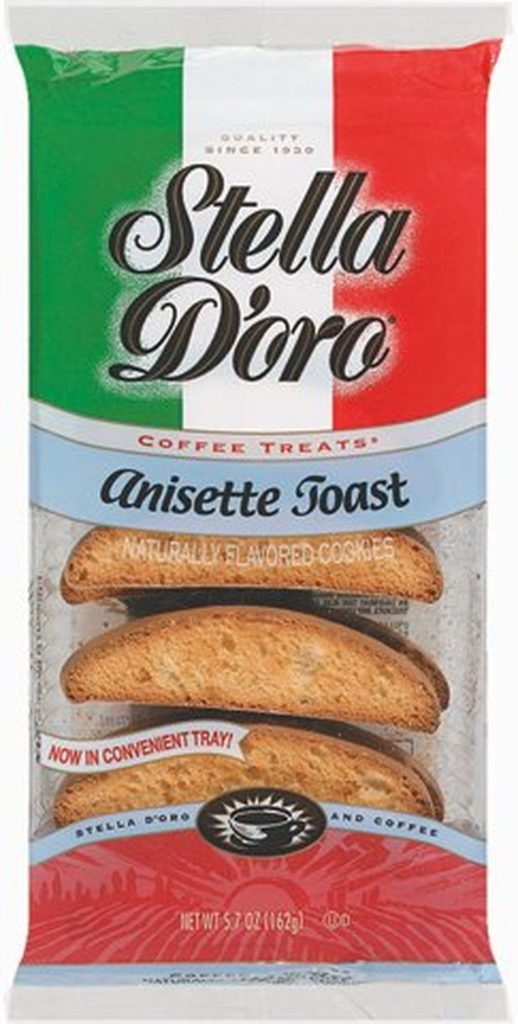
Sure, one could get biscotti in Italian specialty stores.  There was even a marginally passable supermarket version from Stella d’Oro.  (It still exists though the company has been sold many times.)

Stella d’Oro Biscotti (I just can’t bring myself to spell it incorrectly with an uppercase “D” and a lowercase “o”)

But mostly, biscotti were homemade.


Follow us on your social media platform of choice


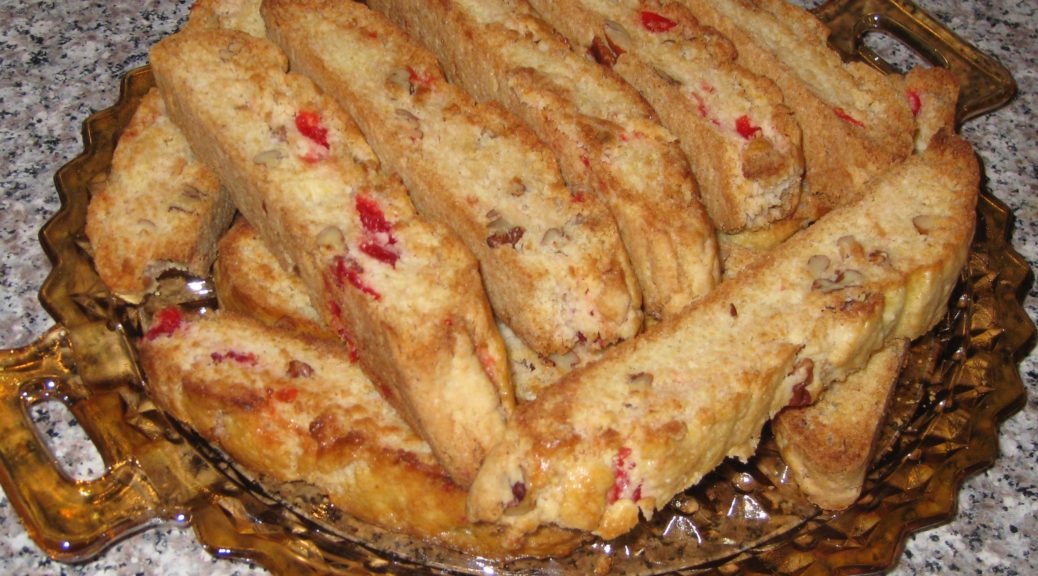
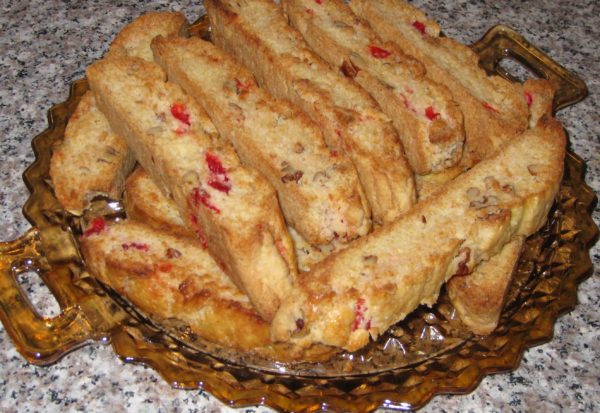
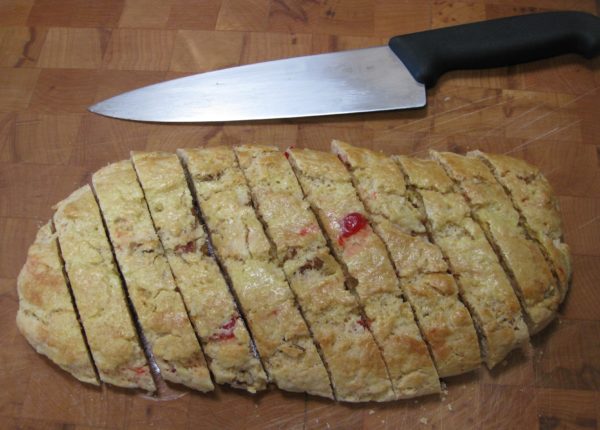
My mother’s biscotti are a little softer on the inside than the standard biscotti today, which seem to have a crunch the whole way through.  She also made them much smaller than is now common, maybe three inches or so in length as opposed to six or eight.

The interesting ingredient in these biscotti is maraschino cherries.  The maraschino cherry as we Americans know it was a product of food science from the 1920’s and 30’s.  “Real” maraschino cherries, Marasca cherries from the Dalmatian coast of Croatia, pickled in salt water and preserved in Maraschino liqueur, are actually quite rare.  There are many versions of cherries preserved in liquor from throughout Europe, some clearly developed as substitutes for authentic maraschino cherries.

I remember eating these biscotti in the 1960’s so the recipe is at least that old, probably older.  It is unlikely, however, that these biscotti ever saw real maraschino cherries due to their rarity.

If this recipe dates to pre-prohibition, in which case it would have been from my grandmother or someone in her generation, it’s possible that some sort of cherry preserved in alcohol (on the order of a real maraschino cherry) was originally used.  I have no idea if the recipe is that old.

Since liquor-soaked cherries were outlawed during prohibition they would have been eliminated from this recipe even if it is that old.  Which brings us to a dichotomy in thinking about recipes that I often consider:  the difference between authentic and traditional.


Click HERE to join our mailing list and you’ll never miss a recipe again!


Is food authentically Italian if it’s prepared in Italy by an Italian but does not follow any traditional recipe?

If cioppino is made following a longstanding traditional Italian regional recipe but the cook substitutes seafood available in the United States for that available in Italy, is it authentic?

There is no doubt that these biscotti are traditional in my family, having been made for more than 50 years.  But what would make them authentic?  And for that matter, would it be authentically Italian or authentically Italian-American?

I suggest you mull that over while dunking biscotti in your morning caffe latte.

Print Recipe
Biscotti
In my family, these biscotti are traditionally made much shorter (after being cut crosswise) that is commonly the case now. For longer biscotti, form 6 logs approximately 9 ½ to 10 inches long before baking. For shorter biscotti, form 10-12 logs of the same length. The recipe is easily cut in half (which is what I did when making this batch).
Votes: 0
Rating: 0
You:
Rate this recipe!
Prep Time 45 minutes
Cook Time 2 hours
Passive Time 30 minutes
Servings
dozen large biscotti
Ingredients
Prep Time 45 minutes
Cook Time 2 hours
Passive Time 30 minutes
Servings
dozen large biscotti
Ingredients
Votes: 0
Rating: 0
You:
Rate this recipe!
Instructions
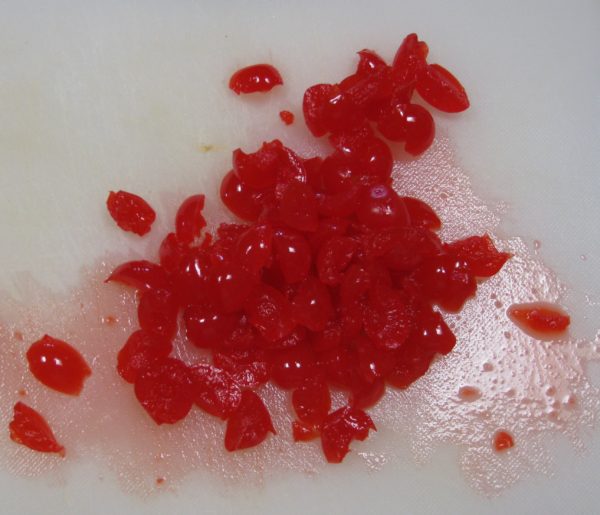
  1. Drain the cherries.
  2. Cut the cherries in quarters.
  3. Squeeze out excess liquid by gently pressing a small handful of cut cherries between your flat palms. Do not make a fist and do not smash the cherries. Reserve the cherries.
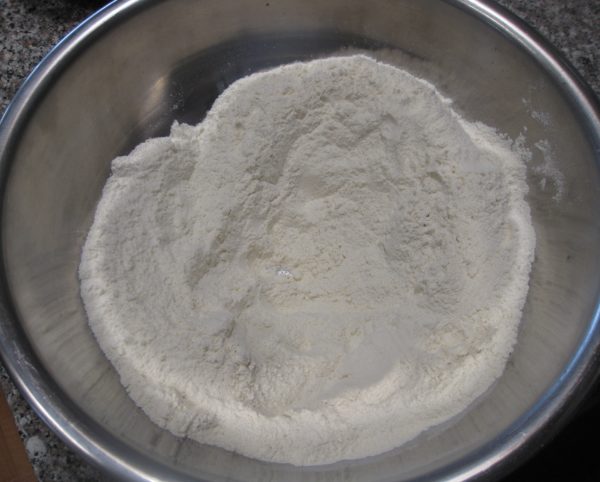
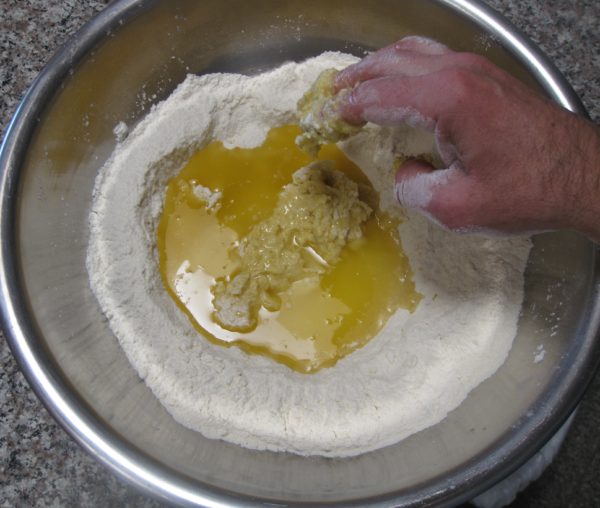
  4. In a very large bowl, mix flour, sugar, and baking powder using your hands.
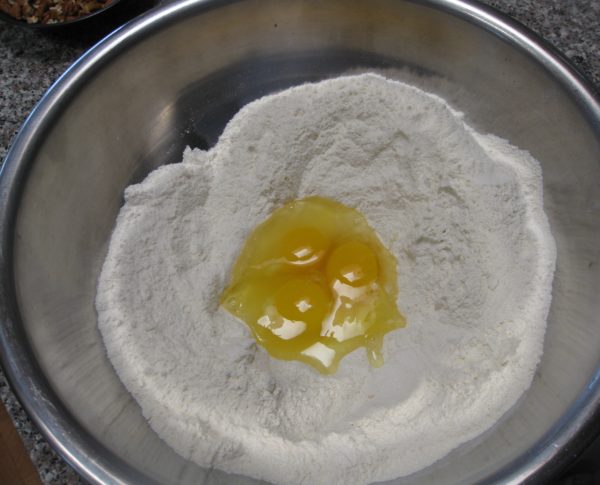
  5. Make a well in the center.
  6. Add the eggs.
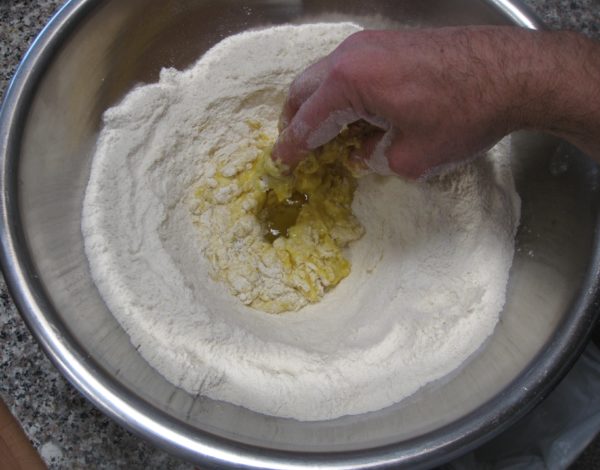
  7. Begin to incorporate some of the flour into the eggs working in a circular motion using your hands.
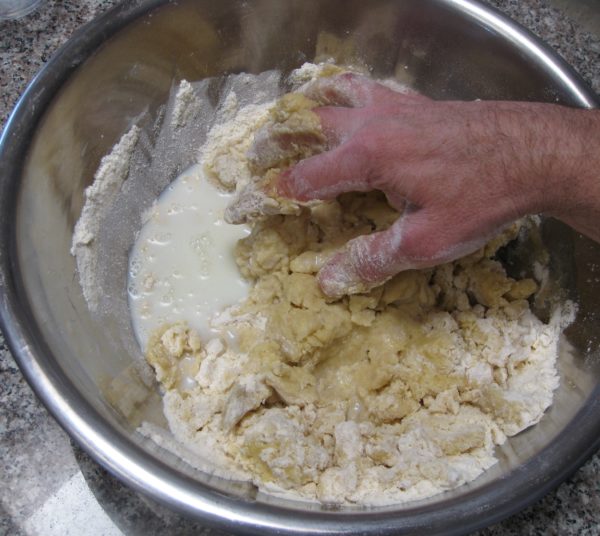
  8. Add the oil and butter and continue mixing.
  9. Add the milk and anise extract. Mix thoroughly.
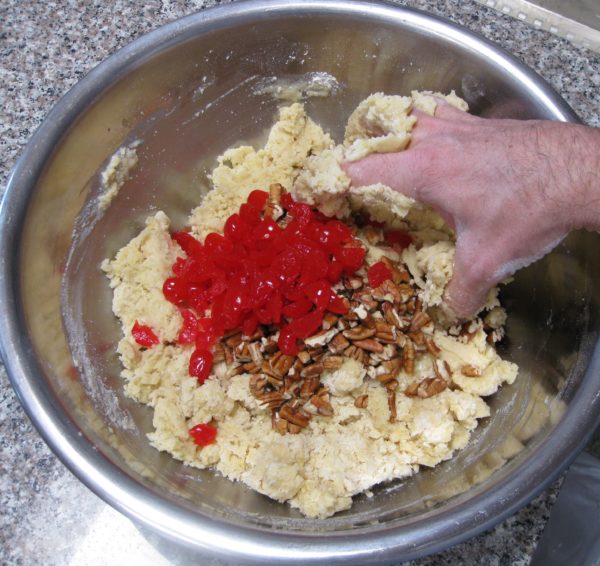
  10. Add the cherries and nuts, if using.
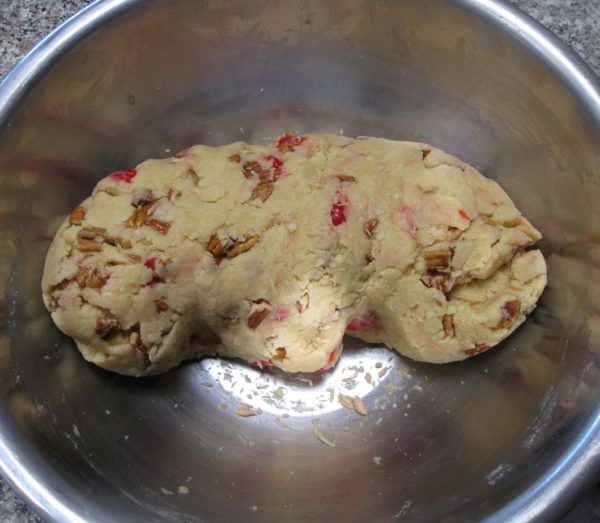
  11. Fully incorporate the cherries and nuts.
  12. Form into six or twelve cylinders approximately 9 ½ inches long. Six cylinders will make biscotti that are quite long once cut crosswise. Twelve cylinders will make shorter biscotti.
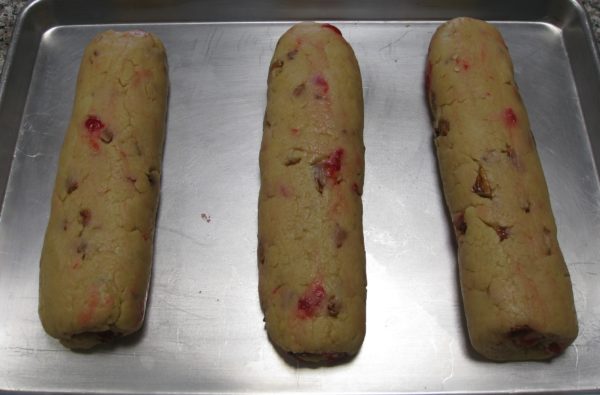
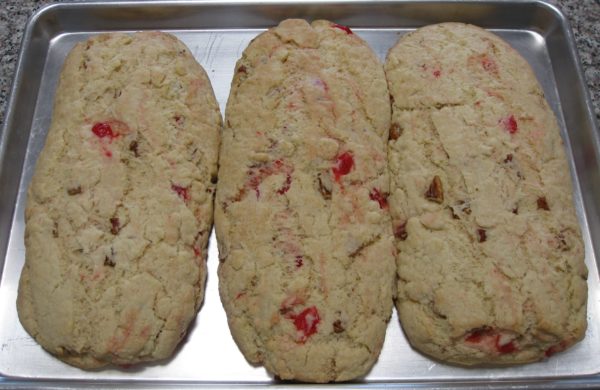
  13. Bake the cylinders for 30 minutes at 350°F. You can line the sheet pan with parchment if you prefer.
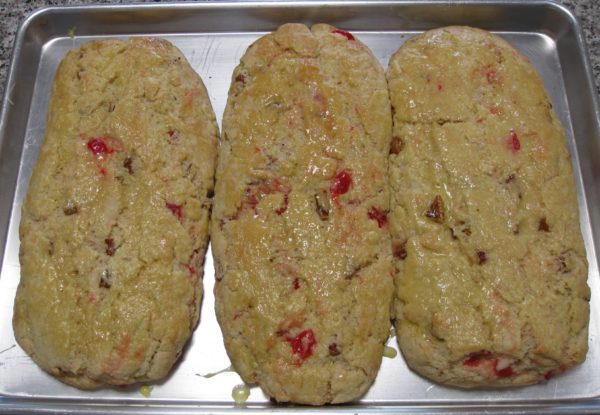
  14. Brush the tops with beaten egg.
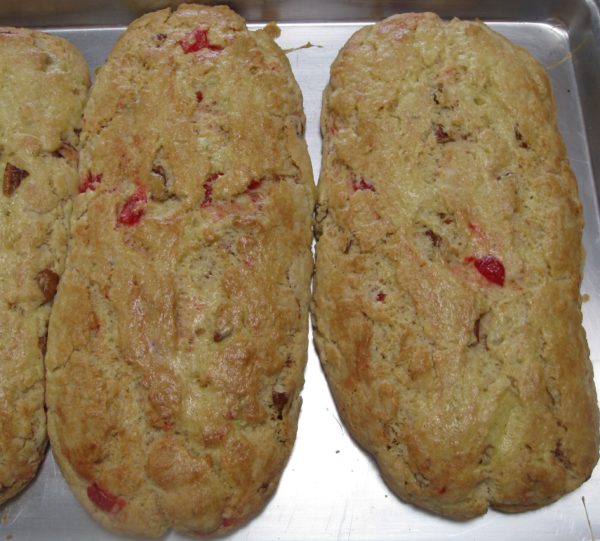
  15. Bake 5 to 10 minutes longer, until golden brown and the cylinders are cooked through. Larger cylinders will take longer to bake.
  16. Cool the baked cylinders on the baking pan on a cooling rack for approximately 10 minutes.
  17. Cut the baked cylinders crosswise on the diagonal into slices approximately 1 inch thick.
  18. Cool the slices completely.
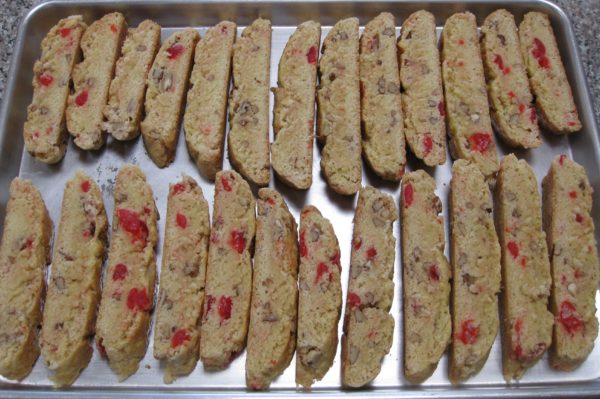
  19. Lay the slices cut side down on a baking pan.
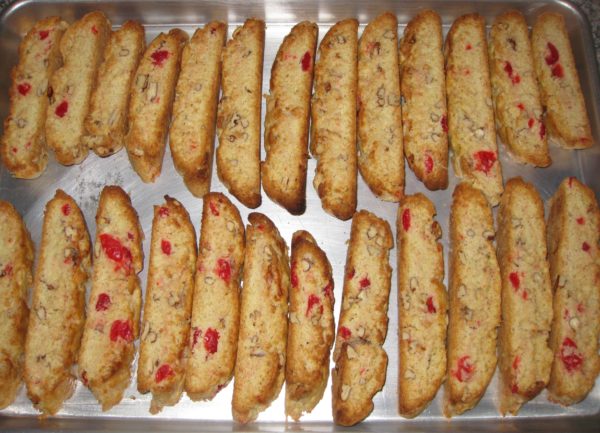
  20. Toast in the top rack of the oven at 450°F.
  21. Turn and toast the other side.
  22. Remove biscotti to a rack to cool.
Recipe Notes

Copyright © 2018 by VillaSentieri.com. All rights reserved.

Share this Recipe

Jamaican Easter Bread (Bun)

March 23, 2018

Google and Wikipedia and Bing have all let me down!

Often when I’m writing a blog, I’ll do a search or two to shore up some facts.

In this instance, I was trying to find a picture of a product and to confirm my understanding of exactly what it is.  That product is New Sugar.

My searches turned up nothing.

Back in college, I would buy new sugar on trips to the West Indies.  The stuff I bought was sold in cans.  It was dark brown, partially crystalized and partially a thick liquid.  It was not as dark or as thick as molasses.  My recollection is that new sugar is basically sugar cane juice boiled down until it thickens and some of the sugar crystallizes.

It’s what my recipe for Jamaican Easter Bread (aka “Bun”) calls for.


Click HERE to join our mailing list and you’ll never miss a recipe again!


Long ago, when my meager supplies of new sugar were exhausted and I was no longer going to the West Indies on a regular basis, I created a substitute for new sugar that fooled even my Jamaican friends.  (Hint, it’s in the recipe below.)

If my recipes contain a substitute for a difficult-to-find ingredient, I like to make the substitution clear and to provide directions on how to use the original ingredient if available.

In my blog entries, I try to provide some sort of personal or cultural or social context for each recipe.  In this instance, I wanted to highlight new sugar.

I was about to give up when I tried different search terms.  I had only known it as New Sugar, but, finally, searching on “Wet Sugar” got me one website that had what I was looking for.

The website confirmed my understanding of what new sugar, aka wet sugar, is:  boiled sugar cane juice.  It also confirmed that it is much more difficult to find than it was 30-50 years ago.  I hate to admit it, but I was buying new sugar more than 40 years ago!

My recipe for Bun (that’s really what it’s called in Jamaica…just Bun) came from Valrie Tracey a Jamaican friend from college.  Valrie and I and my roommate, Ray Hugh from Guyana, were close friends in college.  Though I’ve lost touch with Valrie, Ray and I are still in touch via Facebook.  And, yes, her name is spelled Valrie, apparently due to an error on her birth certificate as her parents intended for her name to be Valerie!


Follow us on your social media platform of choice


In addition to new sugar, Valrie’s recipe called for “Mixed Spice,” a commonly used mixture in the cooking of Britain and many former British colonies.  I don’t like using spice combinations that I haven’t made myself, like pumpkin pie spice or curry powder.  If the brand goes out of existence or changes its formula one can’t recreate the dish exactly the same way again.  For that reason, starting in college, I worked out my own formulas for spice mixtures that I used on a regular basis.

Valrie Tracey in 1975

Rather than have you make a batch of Mixed Spice before making a batch of Bun, I added the individual spices, in the correct amounts, to the recipe.

After resurrecting this recipe from one of my two 5 x 7 metal index card boxes of recipes that I started back in college and sharing the Bun with a number of friends, I began to seriously wonder why I hadn’t made it in over 40 years!

I can assure you, I won’t wait long to make it again.

I like to toast the Bun and add some butter and jam but in Jamaica it would often be served with a wedge of cheese.  However you serve it, I’m certain you’ll enjoy it.


If you have a favorite family recipe and a bit of a story to tell, please email me at santafecook@villasentieri.com and we can discuss including it in the blog. I am expanding the scope of my blog to include traditional recipes from around the country and around the world. If you haven’t seen Bertha’s Flan or Melinda’s Drunken Prunes, take a look.  They will give you an idea of what I’m looking for.


Print Recipe
Jamaican Easter Bread (Bun)
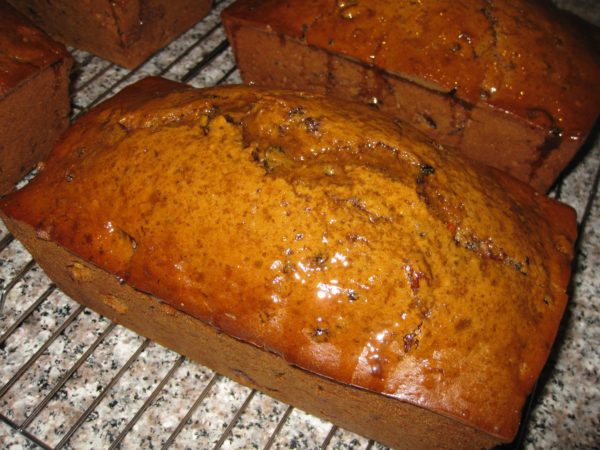
If you can find new sugar (also known as wet sugar) you can use 2 ½ cups of new sugar in place of the brown sugar and molasses. The dough for this version of Bun is quite wet, more like cake batter than bread dough. When I was making this back in college days and had to mix it by hand, I added enough flour to make a dough that could be kneaded. With a stand mixer, I allow the mixture to be wet. You might want to try both variations and see which you prefer.
Votes: 0
Rating: 0
You:
Rate this recipe!
Course Sweet Breads
Cuisine West Indian
Prep Time 30 minutes
Cook Time 90 minutes
Passive Time 2 hours
Servings
loaves
Ingredients
Bread
Glaze
Course Sweet Breads
Cuisine West Indian
Prep Time 30 minutes
Cook Time 90 minutes
Passive Time 2 hours
Servings
loaves
Ingredients
Bread
Glaze
Votes: 0
Rating: 0
You:
Rate this recipe!
Instructions
Bread
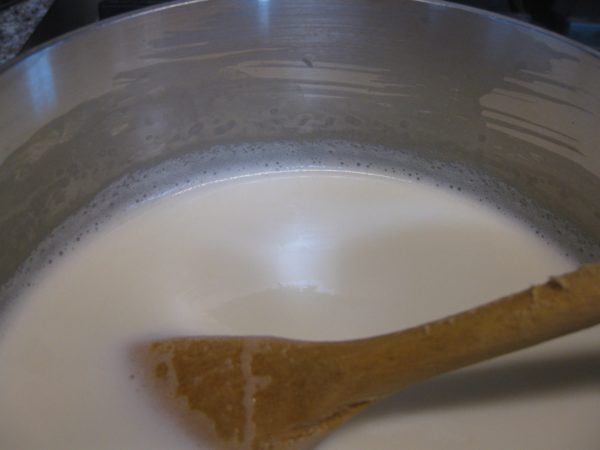
  1. Scald the milk by heating over medium high heat, stirring frequently to prevent a skin from forming, until bubbles begin to foam up around the side.
  2. Allow the milk to become lukewarm (approximately 110°F).
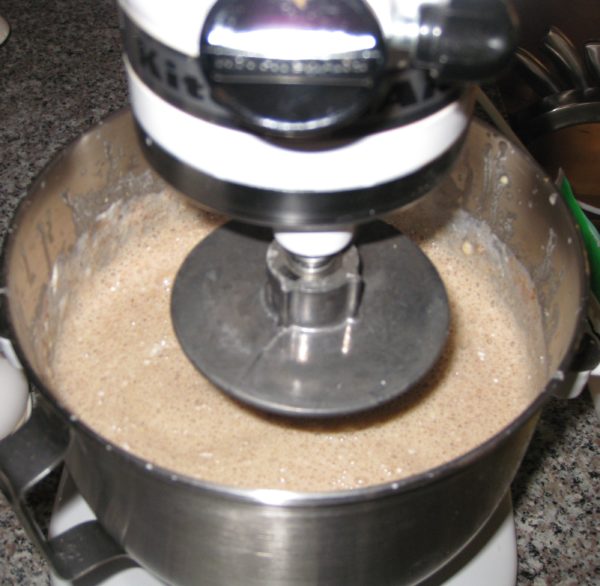
  3. Combine lukewarm milk, yeast, 1 teaspoon of sugar from the amount above, and 1 pound of flour in the bowl of a mixer.
  4. Using the paddle, mix well then allow the sponge to sit, covered, until it doubles in bulk.
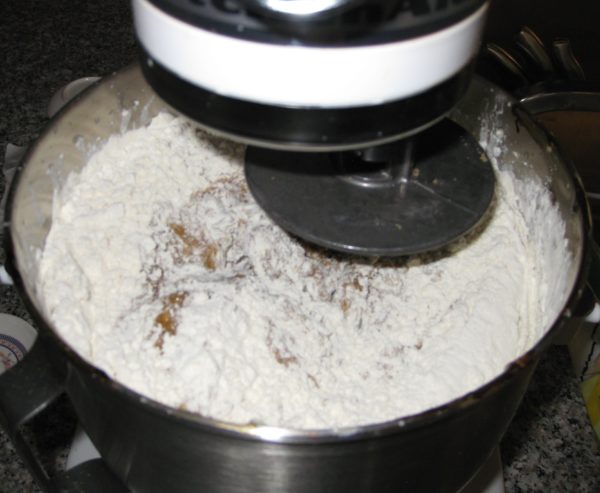
  5. After the sponge has doubled, mix in 1/3 of the remaining flour and 1/3 of the remaining sugar.
  6. When combined, add the butter, molasses and all the spices and flavorings. Mix well.
  7. Add ½ of the remaining flour and ½ of the remaining sugar. Mix well.
  8. Add the eggs and mix well.
  9. Add the remaining flour and sugar. Mix for about 10 minutes on medium speed.
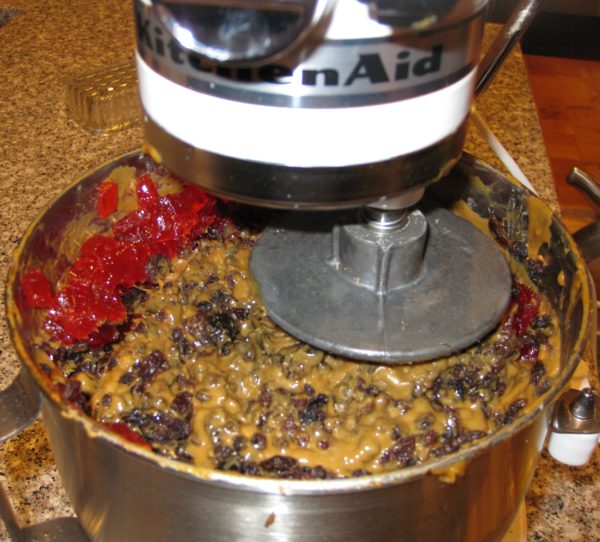
  10. Mix in the fruit.
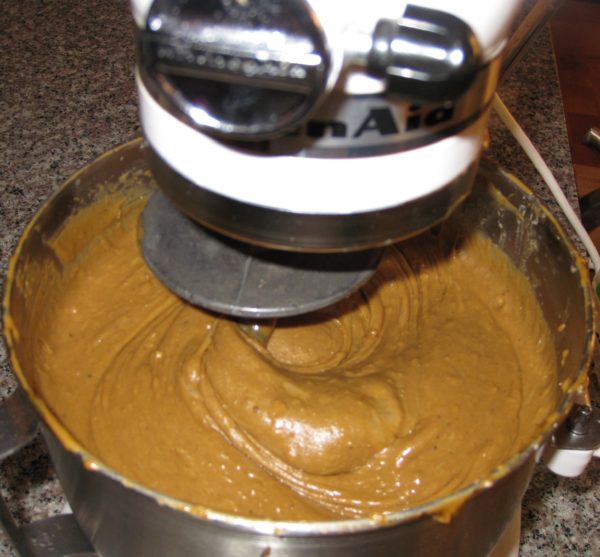
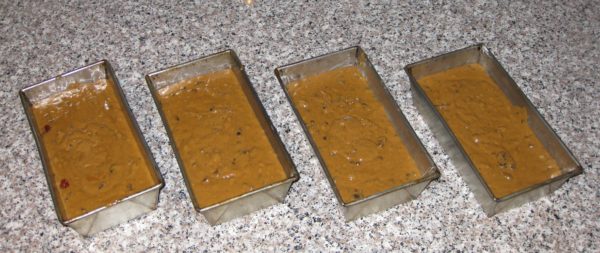
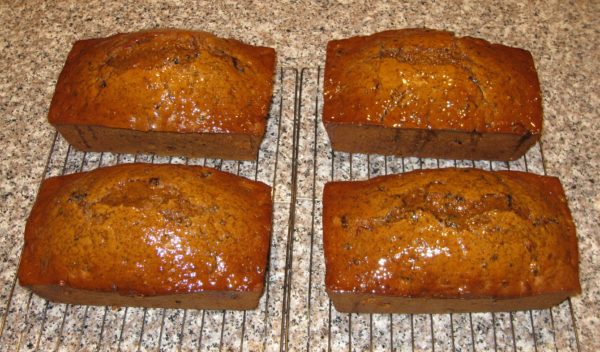
  11. Divide the batter into 4 well-buttered 8” x 4” bread pans. Cover and sit at room temperature for about an hour. The batter will not really rise but the yeast is the only leavening so it needs to have time to make air bubbles that can expand and leaven the bread.
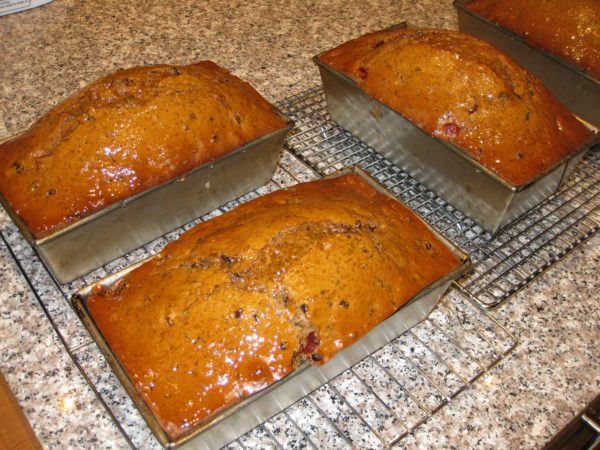
  12. Bake at 300°F for approximately 90 minutes, until a tester comes out clean.
Glaze
  1. When the bread is nearing completion, make the glaze by bringing the sugar and water to a boil and simmering a few minutes until syrupy.
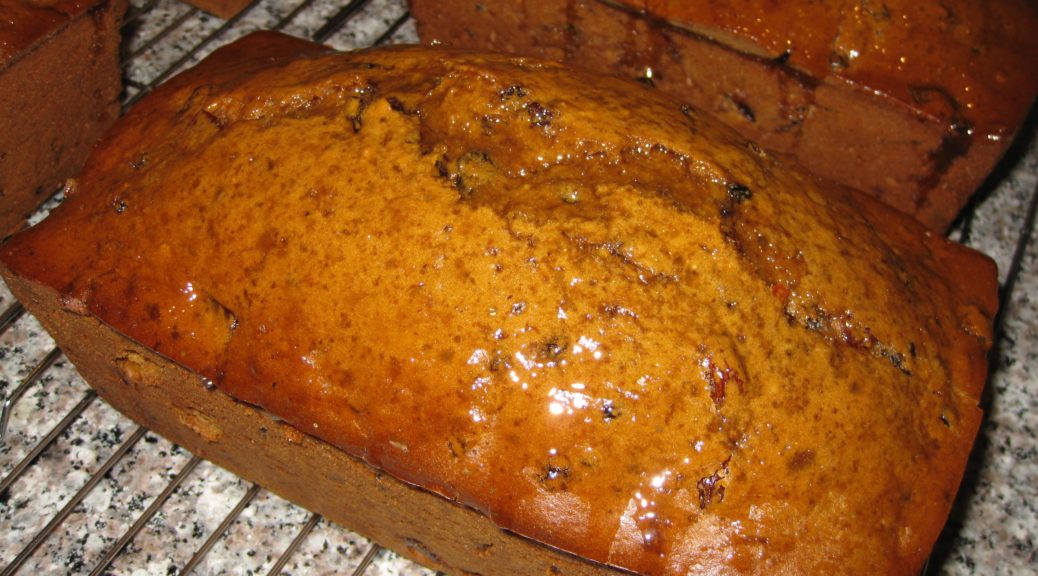
  2. As soon as the bun comes out of the oven, brush some of the glaze on top. Allow to cool 10 minutes in the pans.
  3. Remove the bun from the pans and brush with more glaze. Allow to cool another 10 minutes.
  4. Brush with remaining glaze and cool completely.
Recipe Notes

Copyright © 2018 by VillaSentieri.com. All rights reserved.

Share this Recipe

Torta di Riso (Italian Rice Tart)

January 31, 2018

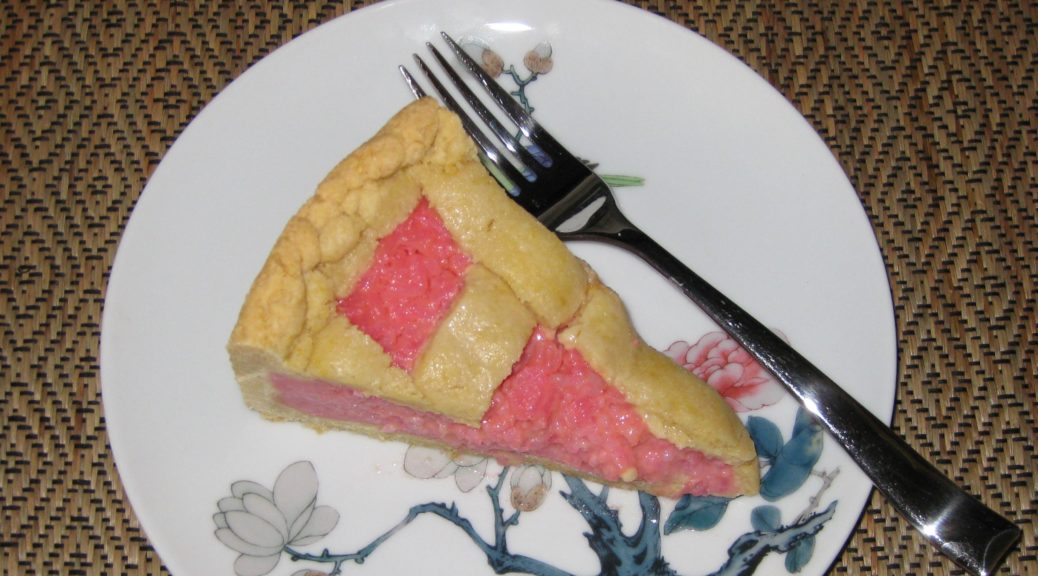
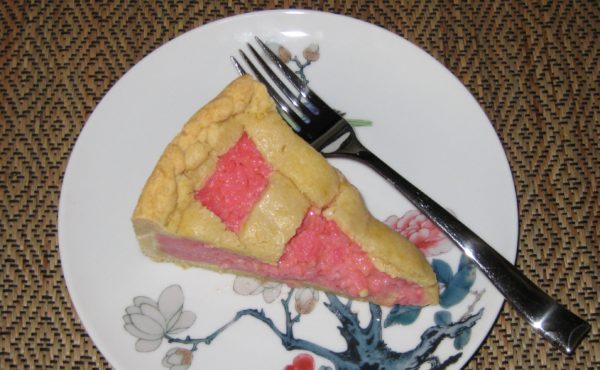
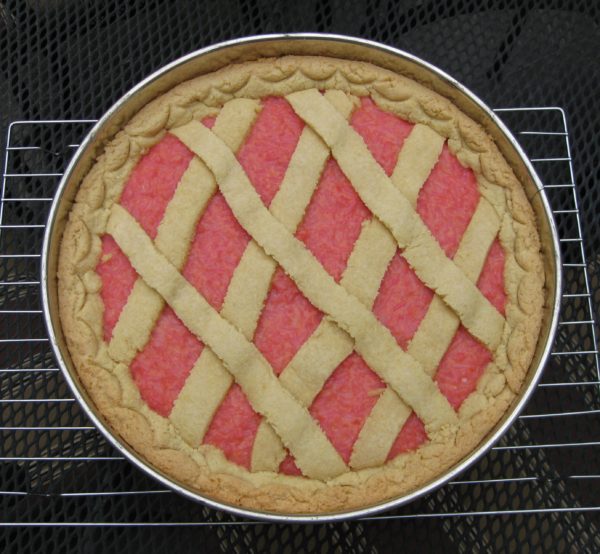
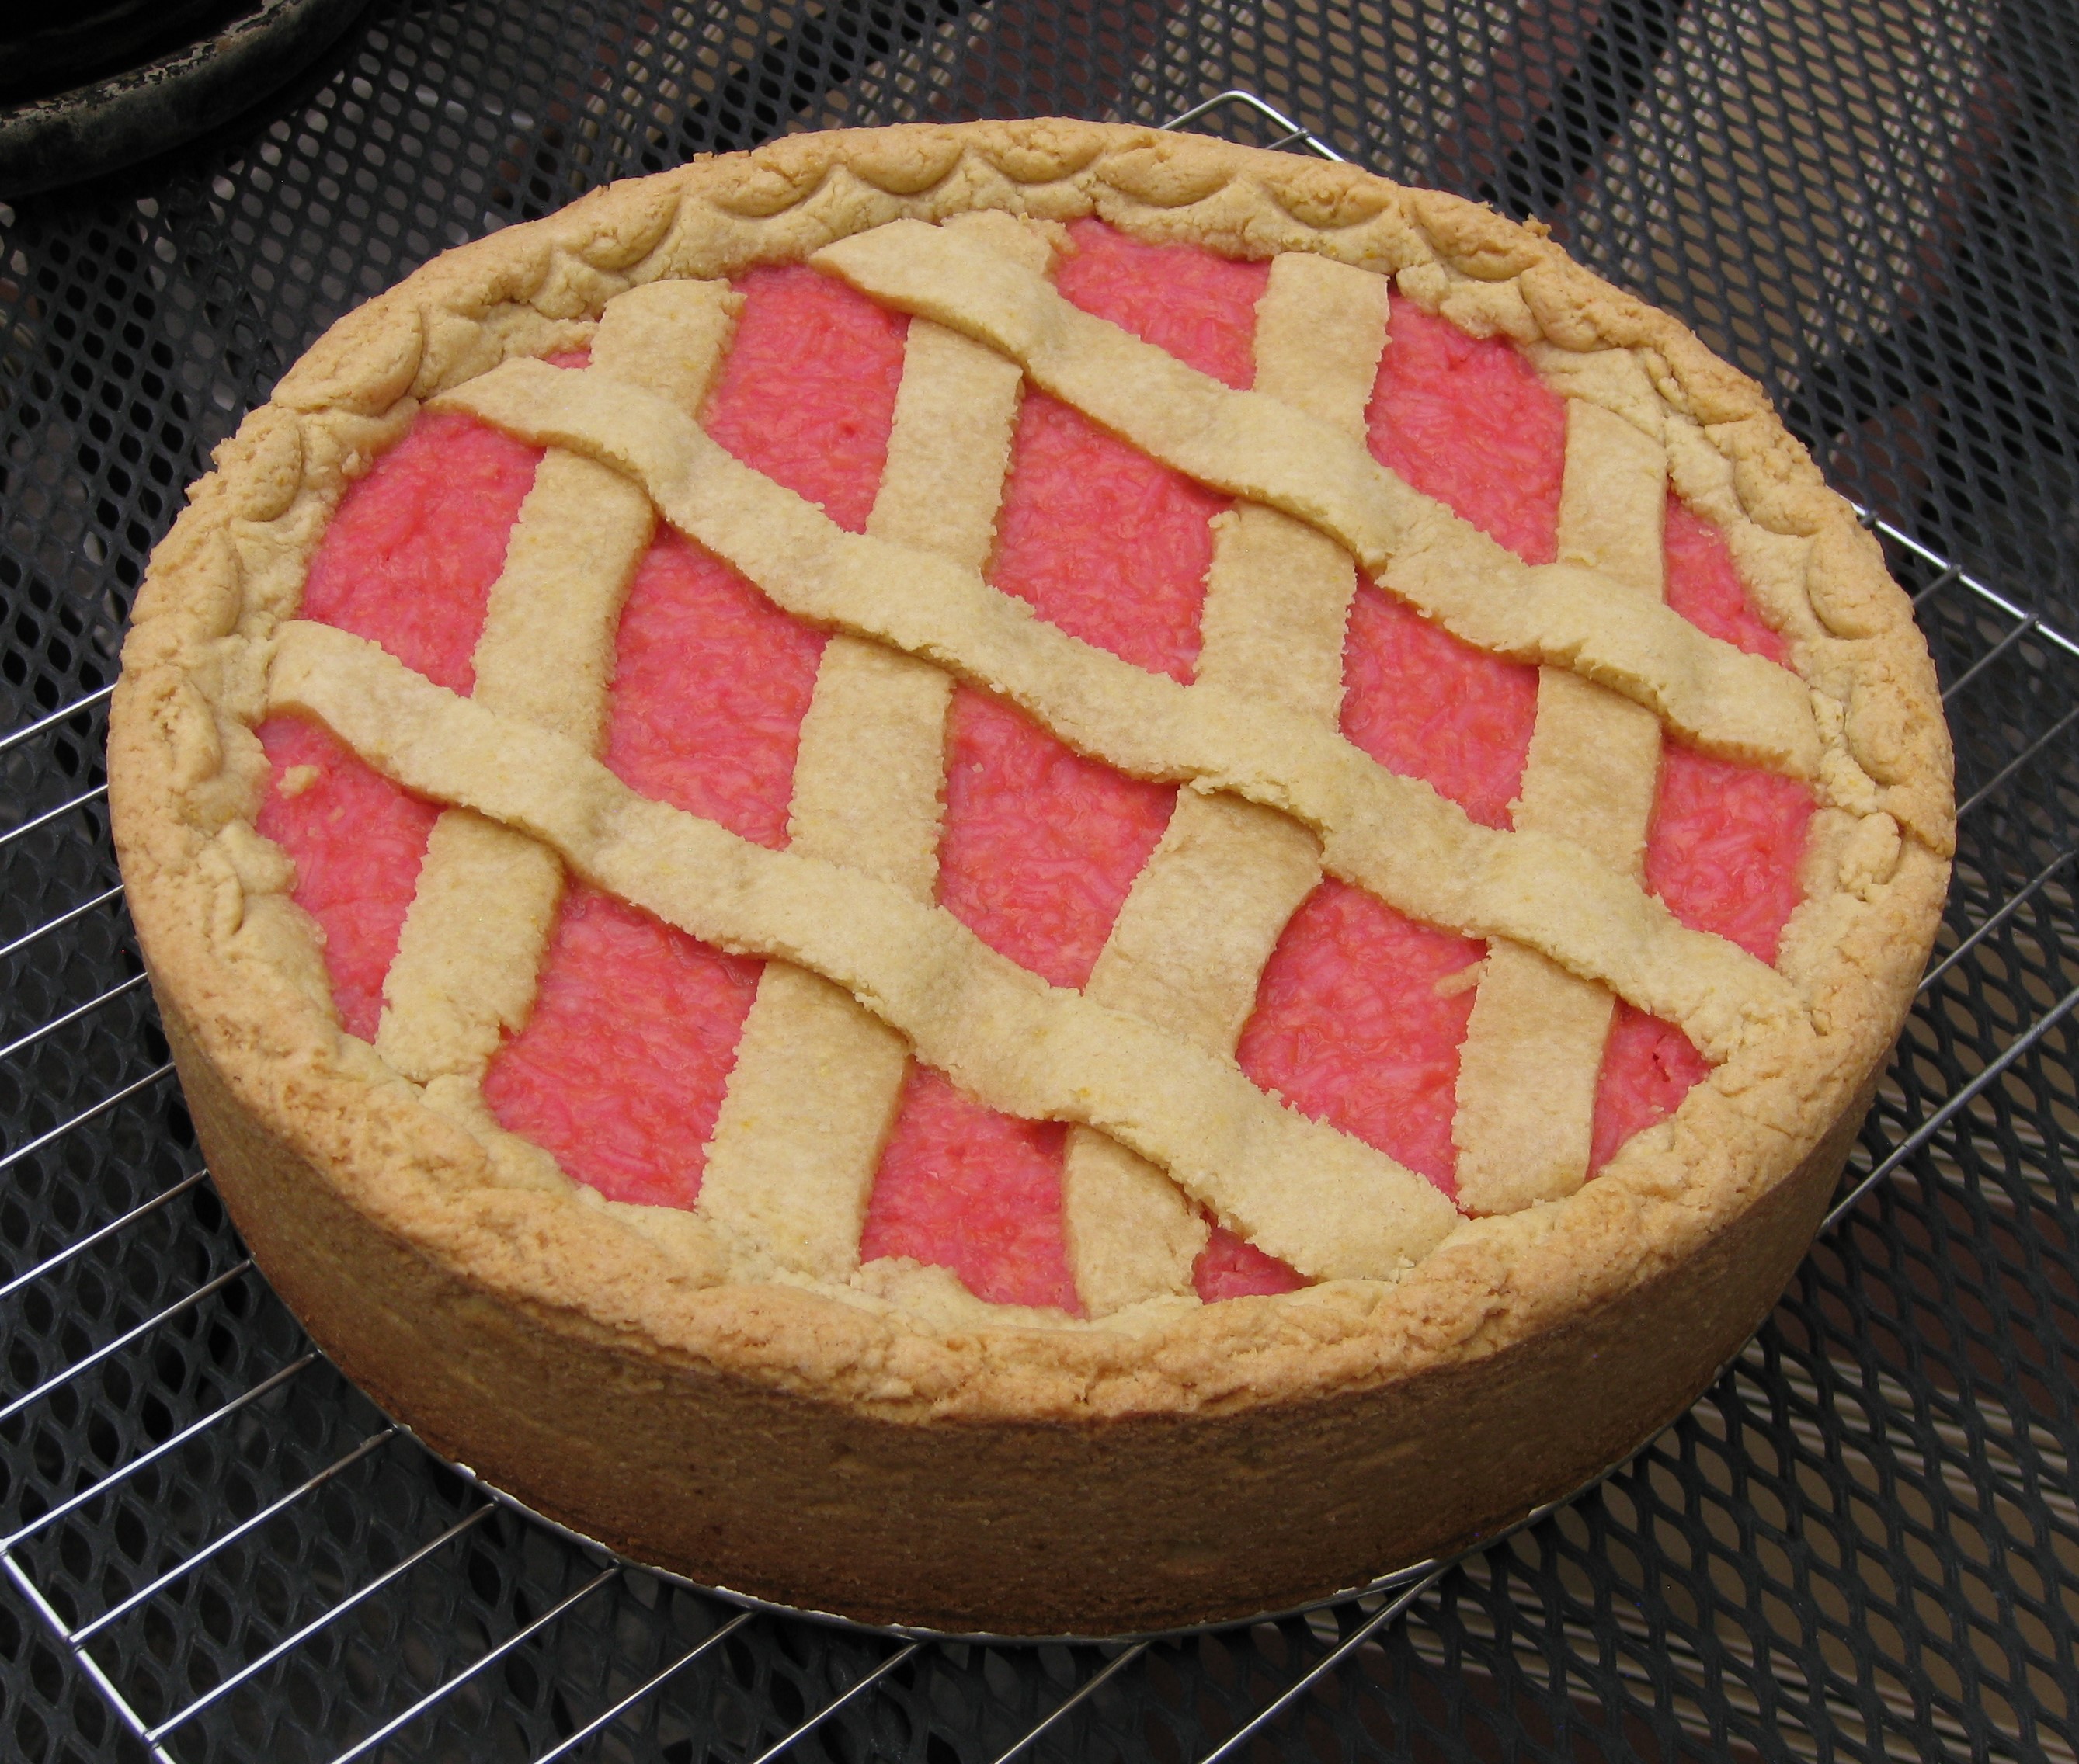
Torta di Riso is an Italian specialty.  It is basically a rice pudding baked inside of a pastry crust; a Rice Tart, so to speak.

I first had Torta di Riso more than 20 years ago while visiting Italy with my husband and his parents.

We ate meals at the homes of many relatives.  I often arrived with a spiral-bound notebook to jot down the inevitable recipes that would be discussed around the table or the recipes I begged for after being served something wonderful.  That notebook is a mashup of American and Metric measures and English and Italian words for ingredients.  It became a bible of sorts for recreating many of the dishes I ate on that trip.


Click HERE to join our mailing list and you’ll never miss a recipe again!


My father-in-law’s Zia (Aunt) Mery made the first Torta di Riso that I ever tasted.  Her recipe is below (adapted for American measures).

After having it at Zio (Uncle) Beppe and Zia Mery’s house, I started noticing Torta di Riso in many places in Tuscany.

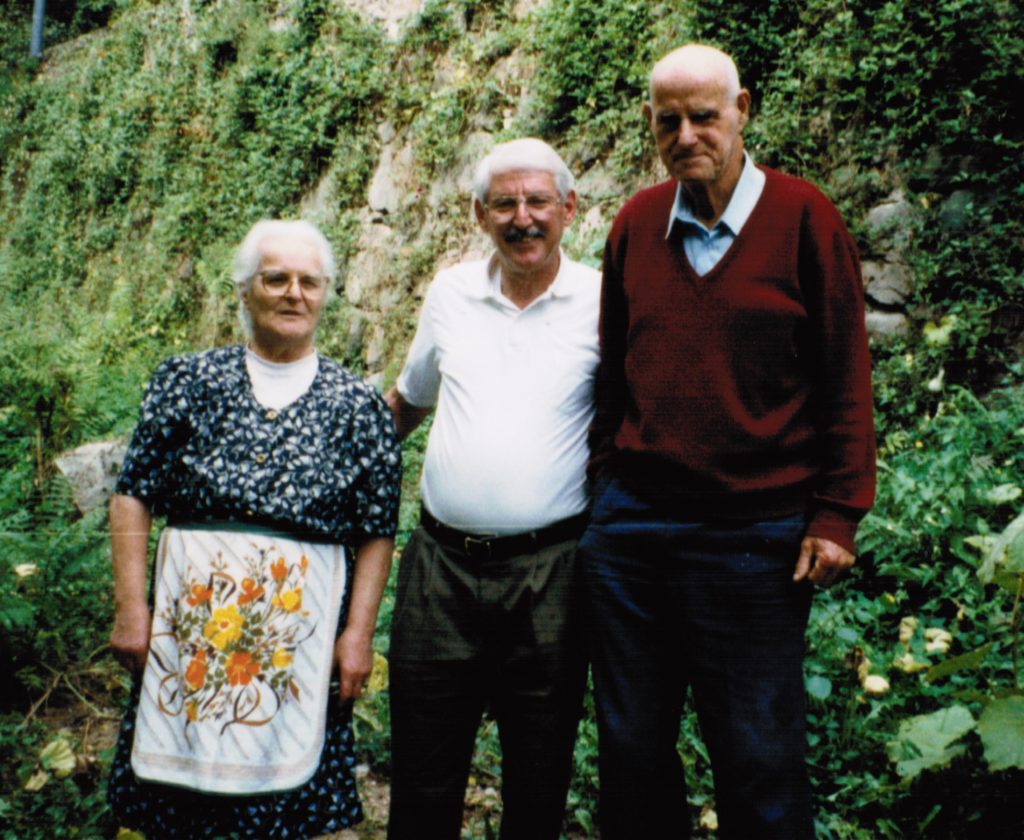
My father-in-law with his Uncle Beppe and Aunt Mery, from whom this recipe for Torta di Riso originated in their garden in Tuscany, 1994.

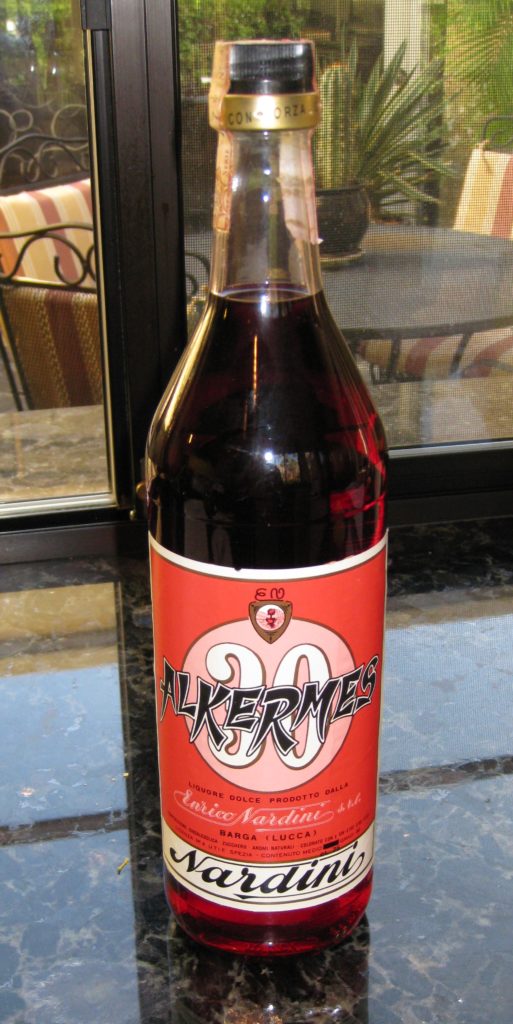
Alkermes liqueur originated in Tuscany so it is particularly appropriate to use it as the liqueur in Torta di Riso.  Alkermes is nearly impossible to find in the United States, however.  One can make a perfectly traditional Torta di Riso using rum in place of Alkermes but the resulting confection won’t be pink.

According to CooksInfo, “Alchermes was invented in the Frati Convent at Santa Maria Novella in Florence. Its making was kept secret, but the recipe was reputedly stolen by spies from the nearby city of Siena, which Florence was often at war with.”


Follow us on your social media platform of choice


Recipes for alkermes (also spelled alchermes) are closely guarded but the process basically involves infusing alcohol with spices and flavorings like cinnamon, cloves, vanilla, nutmeg, mace, cardamom, star anise, rosewater, and orange zest.  The red color comes from cochineal, an insect that is the foundation for natural red food coloring.  The resulting infused alcohol is sweetened and diluted with water.

The pastry crust is pasta frolla, a slightly sweetened pastry, leavened with baking powder, and often flavored with vanilla and lemon zest.  This is Mery’s recipe for pasta frolla but I also have one from Zia Fidalma that makes about half the quantity.

Torta di Riso was a big hit at my father-in-law’s birthday dinner last week. So were the cocktails, wine, and champagne!

If you don’t have access to Alkermes, you can use rum.  In fact, torta di riso is not always pink.  Many that I saw in Italy were white.

If you want to try to make your own Alkermes you can find a recipe here.  Amazon even sells the dried cochineal insects that provide the traditional scarlet color.


If you have a favorite family recipe and a bit of a story to tell, please email me at santafecook@villasentieri.com and we can discuss including it in the blog. I am expanding the scope of my blog to include traditional recipes from around the country and around the world. If you haven’t seen Bertha’s Flan or Melinda’s Drunken Prunes, take a look.  They will give you an idea of what I’m looking for.


Print Recipe
Torta di Riso (Italian Rice Tart)
This classic Italian dessert is basically a rice pudding baked inside of a pastry crust. Alkermes is a traditional Tuscan liqueur used in a number of sweets, including torta di riso, for its color and spice-like flavor. If you don’t have Alkermes, use rum. Not all versions of torta di riso are brightly colored. Vanilla powder is a natural vanilla product, not artificial. Use vanilla extract if vanilla powder is not available.
Votes: 0
Rating: 0
You:
Rate this recipe!
Cuisine Italian
Prep Time 30 minutes
Cook Time 75 minutes
Passive Time 30 minutes
Servings
people
Ingredients
Pasta Frolla
Rice
Cuisine Italian
Prep Time 30 minutes
Cook Time 75 minutes
Passive Time 30 minutes
Servings
people
Ingredients
Pasta Frolla
Rice
Votes: 0
Rating: 0
You:
Rate this recipe!
Instructions
Pasta Frolla
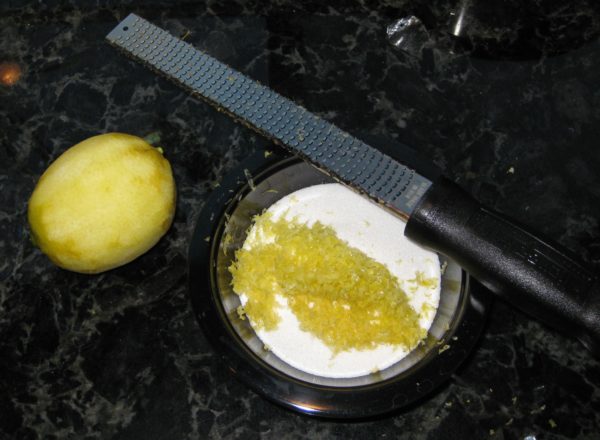
  1. Blend the flour, sugar, baking powder, vanilla powder, salt and lemon zest in a food processor until combined.
  2. Add the butter, cut in pieces, and blend till well combined.
  3. Add the eggs and blend till the pastry almost forms a ball.
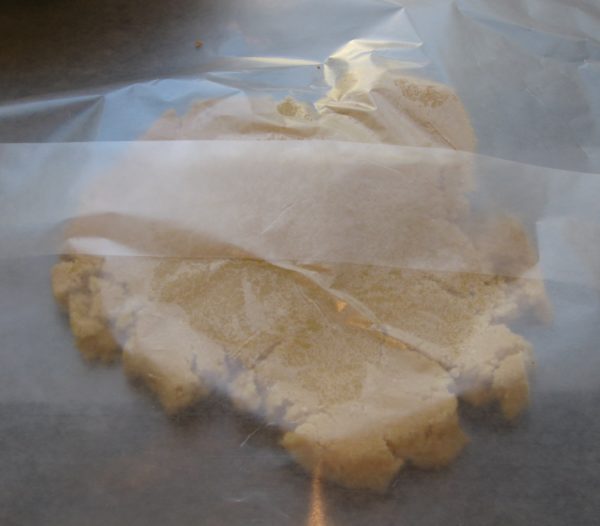
  4. Remove the pastry from the food processor and use your hands to press everything into a single ball.
  5. Wrap the pastry in waxed paper and refrigerate for an hour before using.
Rice
  1. Wash and drain the rice.
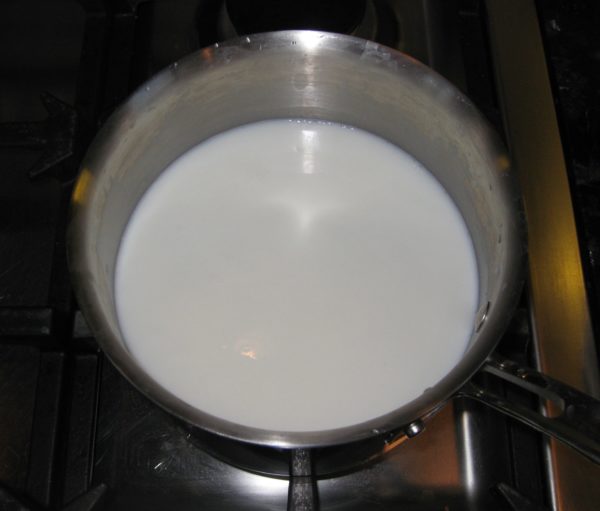
  2. Combine the rice, water and milk in a heavy-bottomed sauce pan.
  3. Bring the rice to a boil.
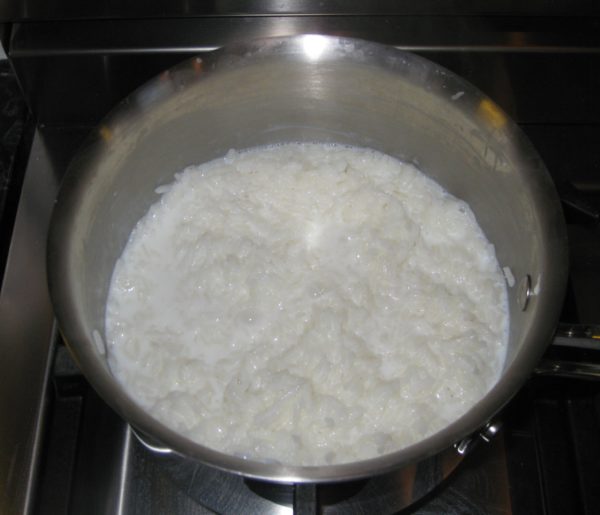
  4. Cover the rice and simmer, stirring frequently, until cooked and the liquid is almost completely absorbed. If the rice does not have the consistency of thick oatmeal, add a bit more milk at the end to make it creamy.
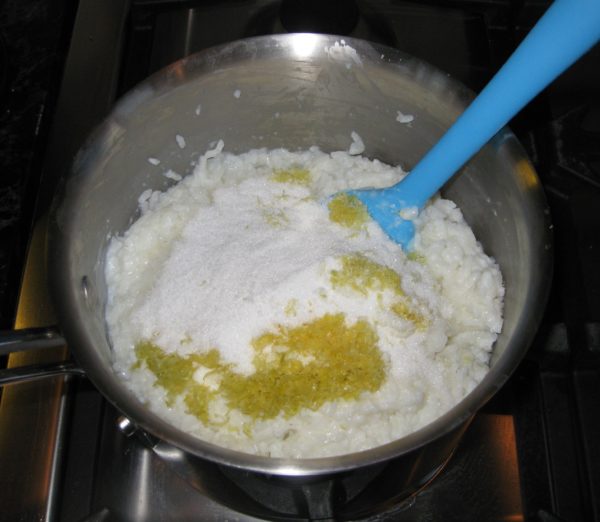
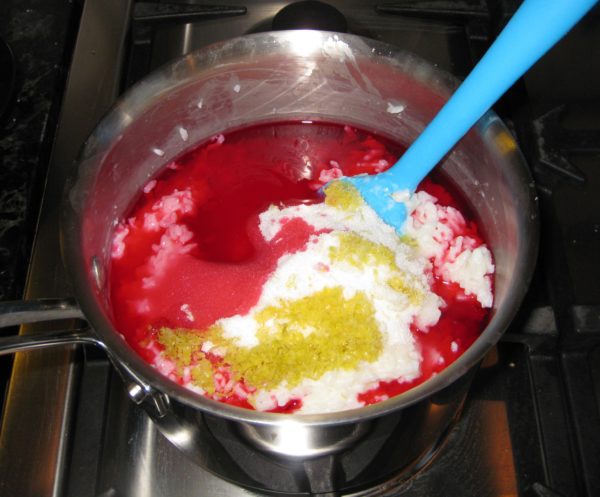
  5. Mix the sugar, lemon zest, and Alkermes and/or rum into the rice.
  6. Pour the rice into a bowl and cool, uncovered, stirring occasionally.
Assembly and Baking
  1. Cut off a small piece of the pastry to make a lattice top and refrigerate.
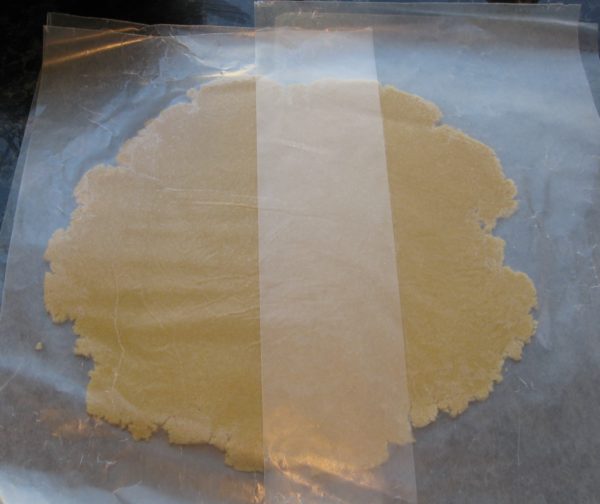
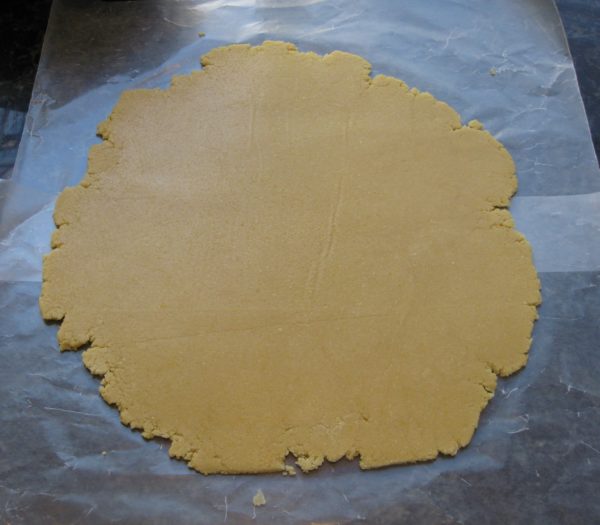
  2. Roll the remaining pastry between waxed paper, turning often, until it is large enough to cover the bottom and sides of a 10 inch springform pan.
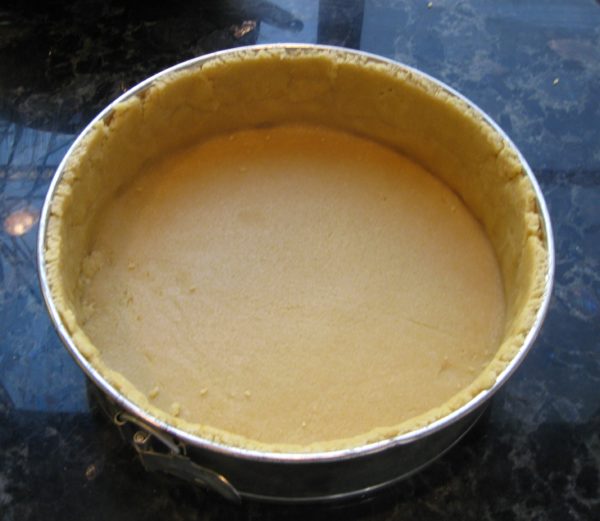
  3. Line a 10" springform pan with the pasta frolla.
  4. Cut the pastry even with the top of the pan. Add the scraps to the pastry you have reserved for the lattice.
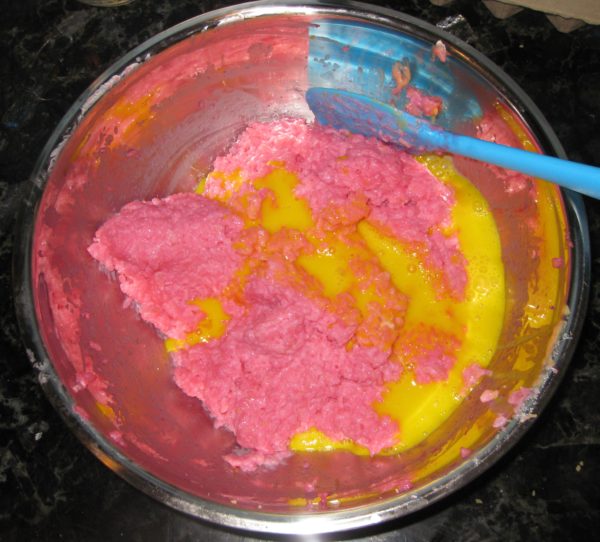
  5. Beat the egg and egg yolks to combine.
  6. Stir the beaten eggs into the cooled rice.
  7. Pour the rice into the pastry lined pan.
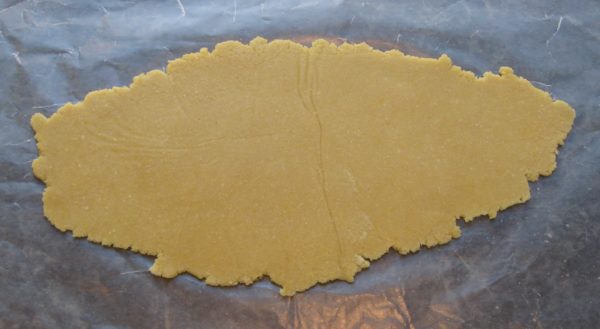
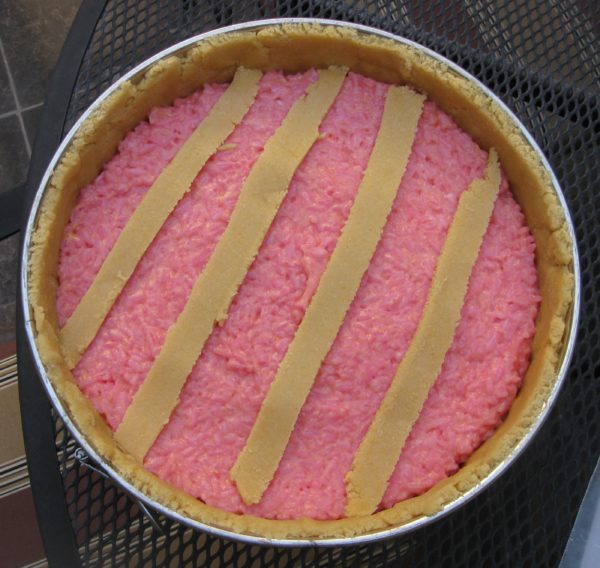
  8. Roll out the pastry reserved for the lattice.
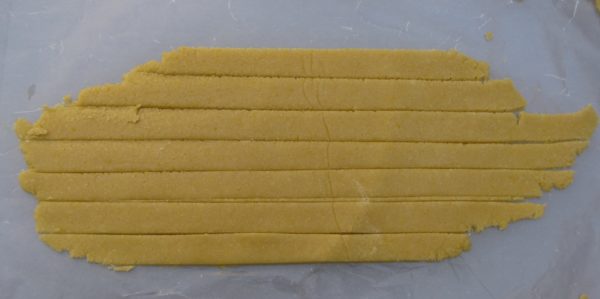
  9. Cut seven or eight strips, approximately 1/2 inch wide.
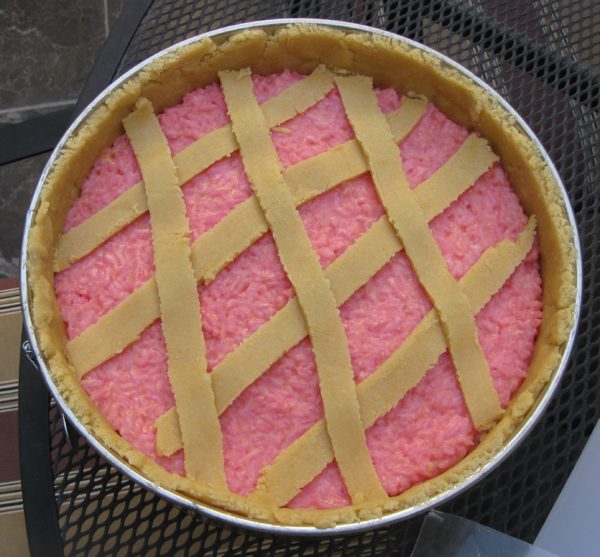
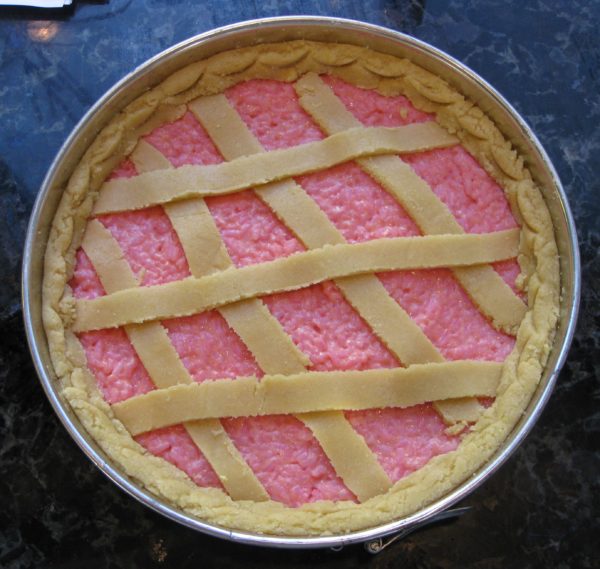
  10. Arrange the strips into a lattice on top of the rice. Cut off the excess.
  11. Roll the pastry lining the sides of the pan down to the top of the rice and form a decorative edge.
  12. Bake at 350°F until the crust is lightly browned and the rice is barely jiggley in the center, approximately 30-45 minutes.
  13. Cool on a rack for approximately 20 minutes.
  14. Remove the side of the pan and cool completely.
Recipe Notes

Copyright © 2018 by VillaSentieri.com. All rights reserved.
Share this Recipe

Aunt Ann’s Pineapple Cream Cheese Pie

June 30, 2017

I grew up at a time, and in a town, where people just dropped in, unannounced, to visit family and friends.

Some evenings we’d stay home.  Some evenings we’d go to town.  This was pretty much every Monday and Thursday when the stores were open until 9:00 PM.  And, mind you, we dressed to go to town!  Other evenings we’d visit family and friends.

Around the age of 5 or 6, when we went to Aunt Ann’s, I’d play with food.  Really.  And not at the table.  I don’t honestly know how this got started but Aunt Ann would spread out a vinyl tablecloth on the beige wall-to-wall carpet in her living room.  (Remember, this was around 1960!)  I would pull pots and pans and mixing bowls and other equipment (like box graters and spoons) out of her kitchen cabinets and haul my stash to the living room.

Aunt Ann circa 1965 at Grandma and Grandpa’s house

Then I’d raid the refrigerator for things like carrots, celery, and so forth.

I’d sit in the living room, on the tablecloth, grating vegetables and mixing things in the various pots and bowls.

My love of cooking has deep roots.

My love of peanut butter not so much.

For some reason, I despised peanut butter at that age.  (I know, that’s almost un-American!)  But just to keep things from being too quiet, Uncle Jano would sometimes walk towards me holding a jar of peanut butter and I would run like a vampire running from a wooden stake.

I don’t know what I thought was going to happen, but I had to escape from the peanut butter.

The ordeal usually ended with me face down on the sofa until Uncle Jano retreated…sometimes only to start again after I pulled my face out of the pillow.

Aunt Ann and Uncle Jano were great fun.  But they were only Aunt Ann and Uncle Jano if you were related to them through Uncle Jano.  If you were related to them through Aunt Ann, they were Aunt Honey and Uncle John.

From left to right: Uncle Jano, my Grandfather, Uncle “Booty” and my Dad, circa 1965 on a Sunday at my Grandparent’s house

Aunt Ann was a great cook.  She was ethnically Russian and made lots of Russian and Eastern European food like mushroom soup, potato soup, kielbasa, chicken paprikash, pierogi, stuffed cabbage, and so forth.

She also made Italian food, which she learned from the wife of the local Mafia Boss who lived down the street.  (I had a colorful childhood.  What can I say?)

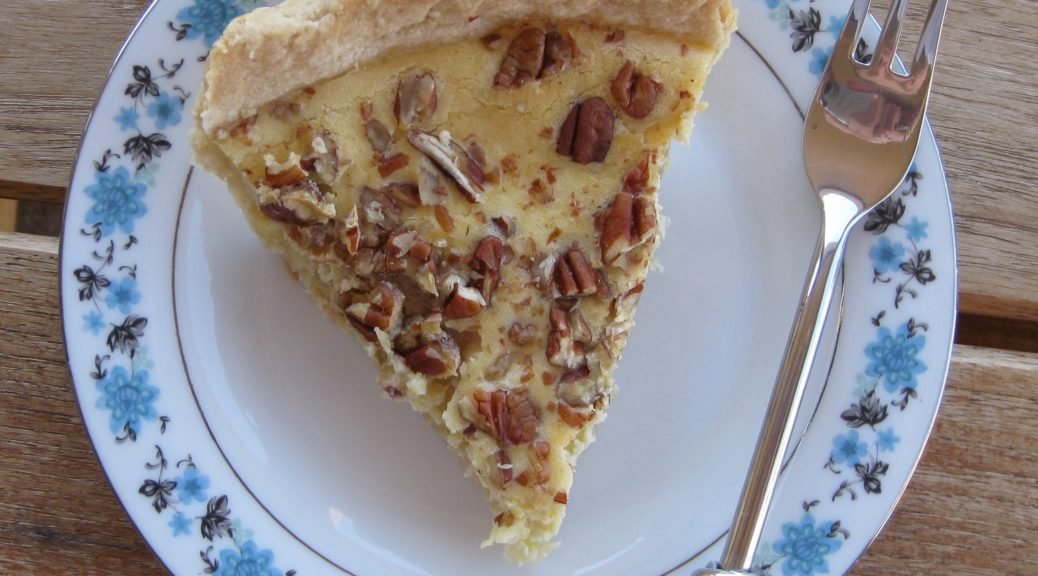
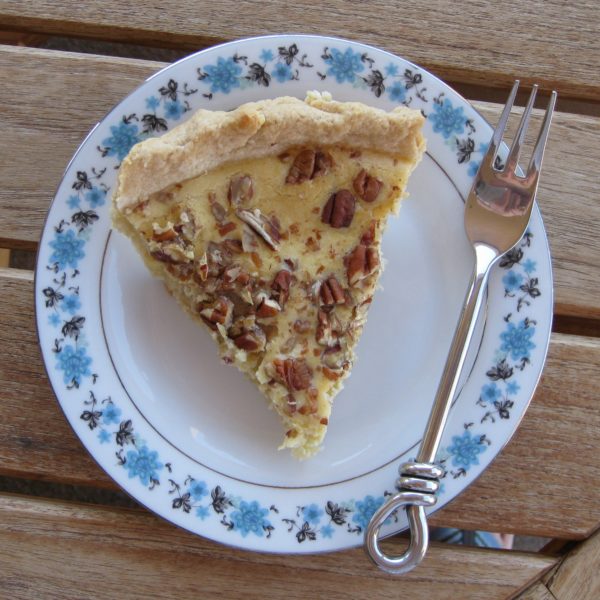
There were the occasional American dishes, like Rum Balls and Pineapple Cream Cheese Pie, too.

Years after those episodes of “cooking” on Aunt Ann’s living room floor, when I was in my teens and twenties, I was always on the lookout for pineapple cream cheese pie when we went to visit.

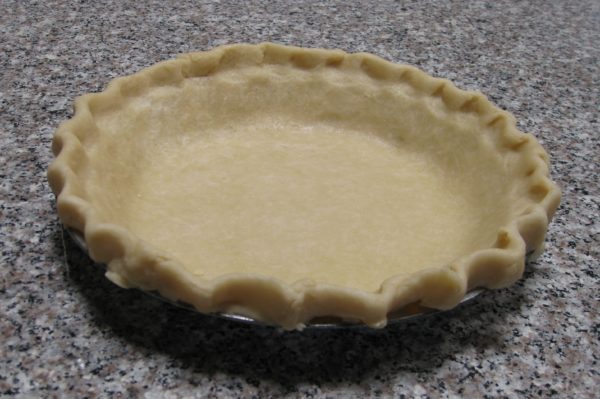
In an attempt to keep this manageable, I am not posting a recipe for pie crust just yet, but I will at a future date.  If you have a favorite pie crust recipe, by all means, make your own.  If not, buy prepared pie crust from the grocery store.  But whatever you do, give this recipe a try if it appeals to you.  It’s always a hit!

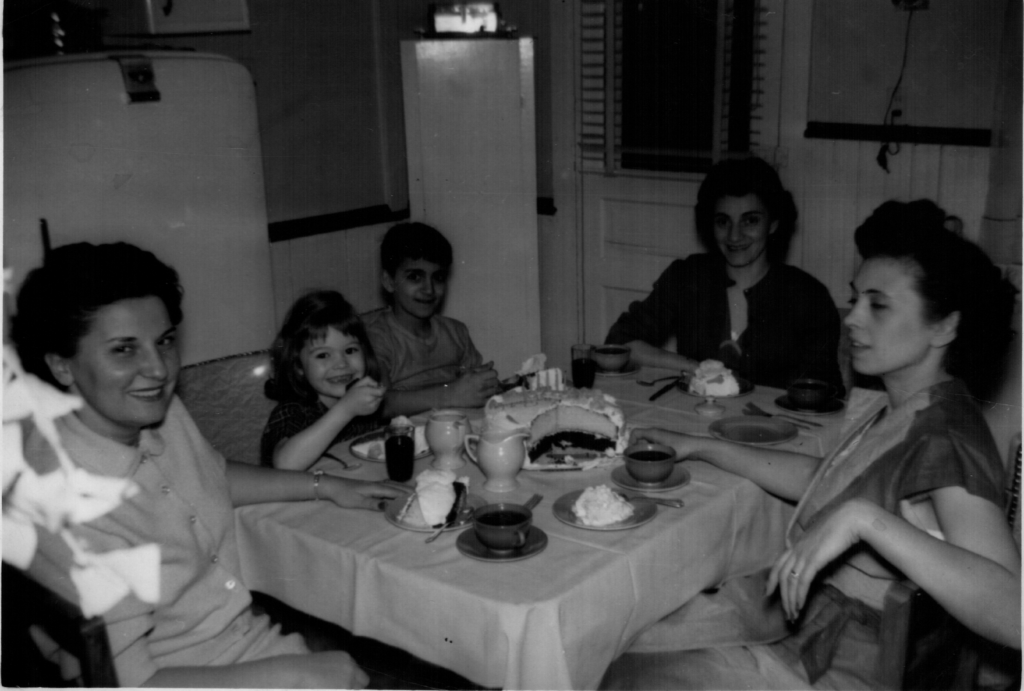
This one is just for fun: Aunt Ann (far left), Aunt Margie (in the back), my mom (far right), my sister and my cousin “Rocky” circa 1950

Click HERE to join our mailing list and you’ll never miss a recipe again!

Print Recipe
Aunt Ann's Pineapple Cream Cheese Pie
If you don’t have a favorite pie crust recipe, or if you aren’t comfortable making pie crust, buy prepared pie crust. Be sure to purchase NINE INCH DEEP DISH pie crust, however. If you are making your own pie crust, you can use a standard nine inch pie pan, deep dish is not necessary. The cream cheese filling is easier to make in a food processor though an electric mixer works, too. If you are using a mixer, the cream cheese will be much easier to mix if it is at room temperature. This is not critical if you are using a food processor.
Votes: 0
Rating: 0
You:
Rate this recipe!
Cuisine American
Prep Time 30 minutes
Cook Time 1 hour
Servings
pies
Ingredients
Cuisine American
Prep Time 30 minutes
Cook Time 1 hour
Servings
pies
Ingredients
Votes: 0
Rating: 0
You:
Rate this recipe!
Instructions
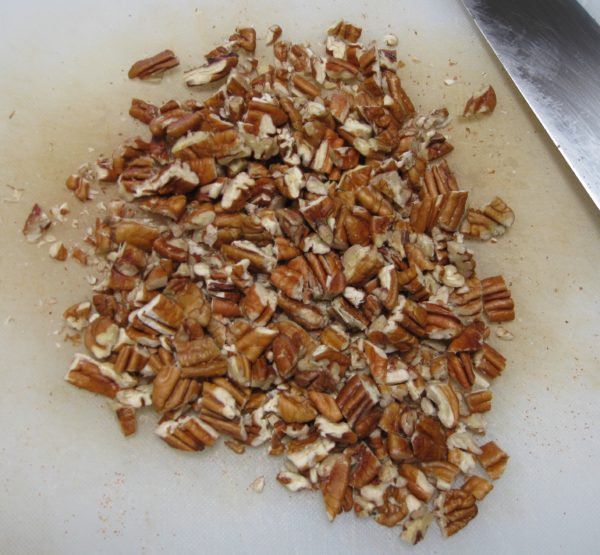
  1. Chop the nuts and reserve.
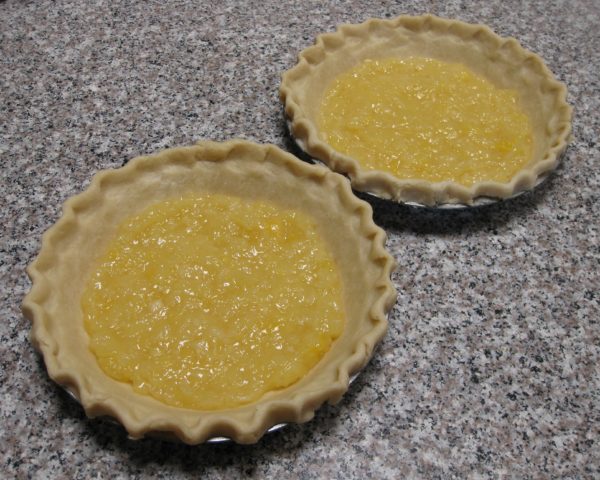
  2. If making your own crust, prepare and line two nine-inch pie pans. Refrigerate the crust-lined pans until the fillings are prepared.
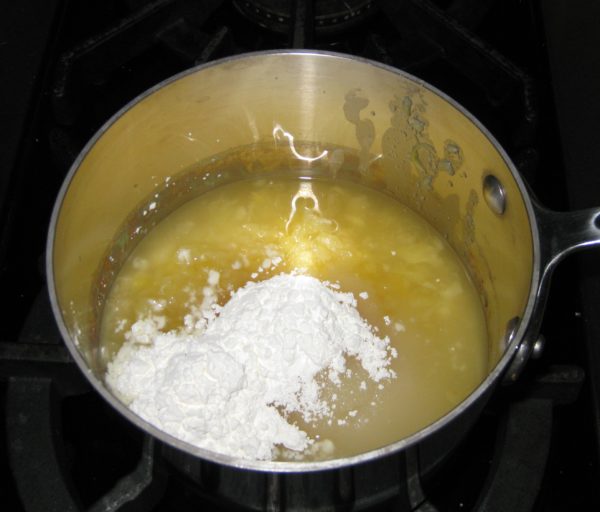
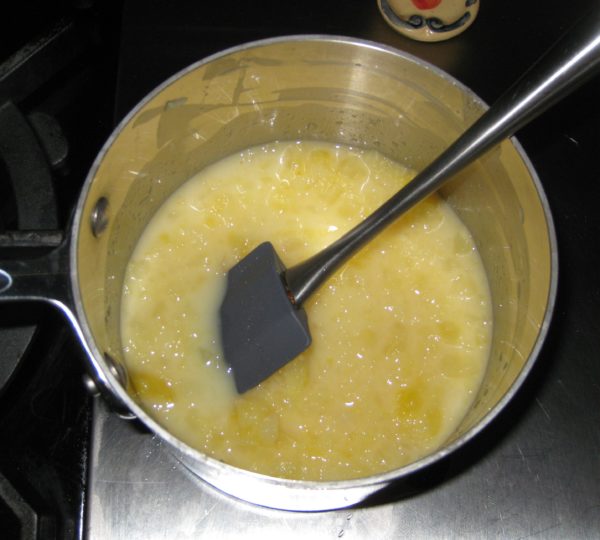
  3. In a small heavy-bottomed saucepan, combine the crushed pineapple, cornstarch, and 1/2 cup of sugar.
  4. Stir until the lumps are gone. The mixture will become cloudy from the cornstarch but will become clear once cooked.
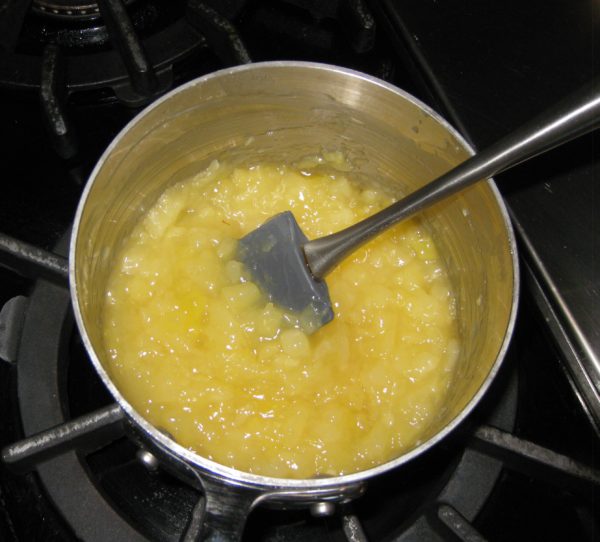
  5. Bring to a boil over medium-high heat, stirring constantly.
  6. Boil for approximately one minute, until thickened.
  7. Take the pan off the heat and allow the pineapple mixture to cool slightly.
  8. In a food processor or electric mixer, beat the cream cheese well.
  9. Add the remaining 1/2 cup sugar, milk, eggs and vanilla. Mix until the cream cheese is thoroughly combined, all the sugar is dissolved, and there are no lumps.
  10. Divide the pineapple filling between the two pie-crust-lined pie pans.
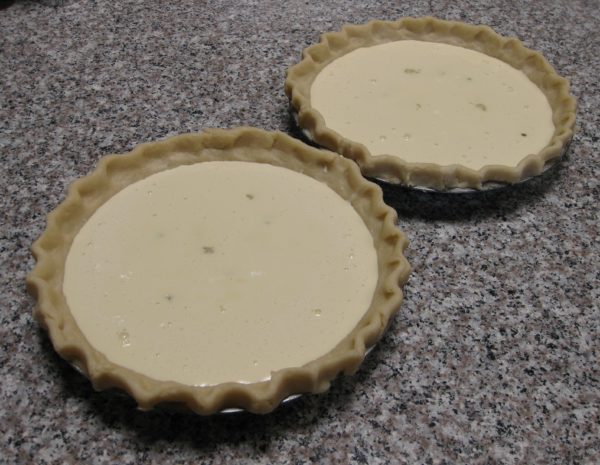
  11. Top each pie with half the cream cheese mixture.
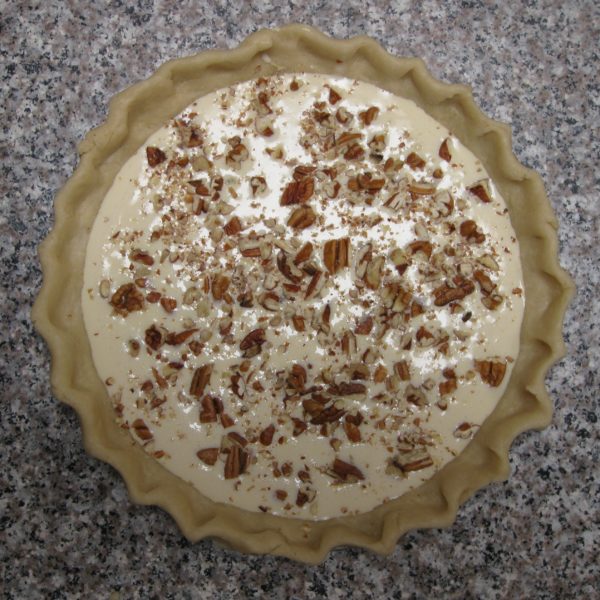
  12. Scatter the chopped nuts on the pies.
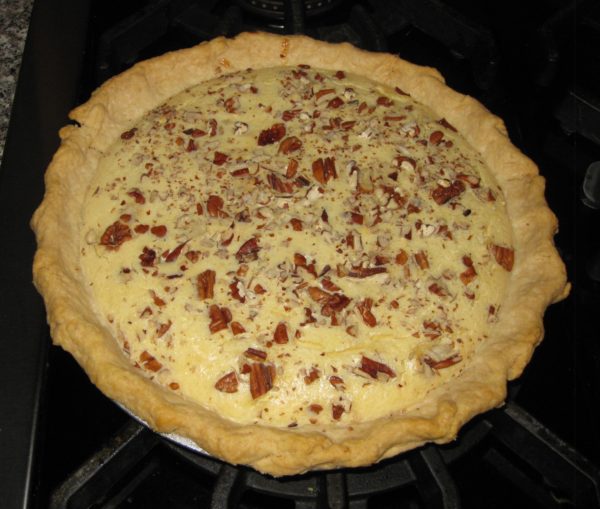
  13. Bake at 350°F for approximately 60 to 65 minutes until the tops of the pies are just beginning to turn golden and the filling is set.
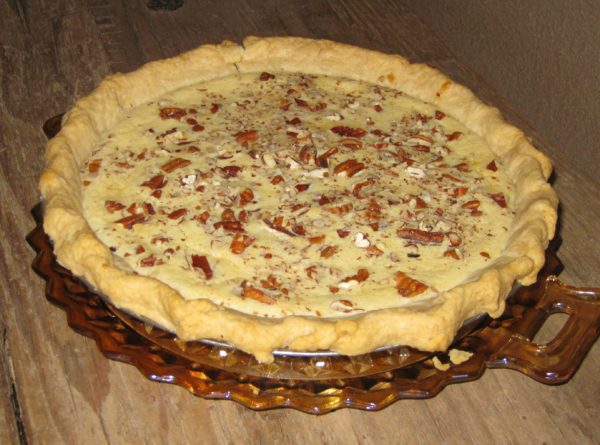
  14. Cool to room temperature before serving. The pies will sink somewhat as they cool.
Recipe Notes

Copyright © 2017 by VillaSentieri.com. All rights reserved.

Share this Recipe