Calabacitas: A New Mexican Classic

August 21, 2017

Talk about a dish that simply wouldn’t exist in any recognizable form without new world crops, calabacitas is it! Squash, corn, and chile are all new world plants.

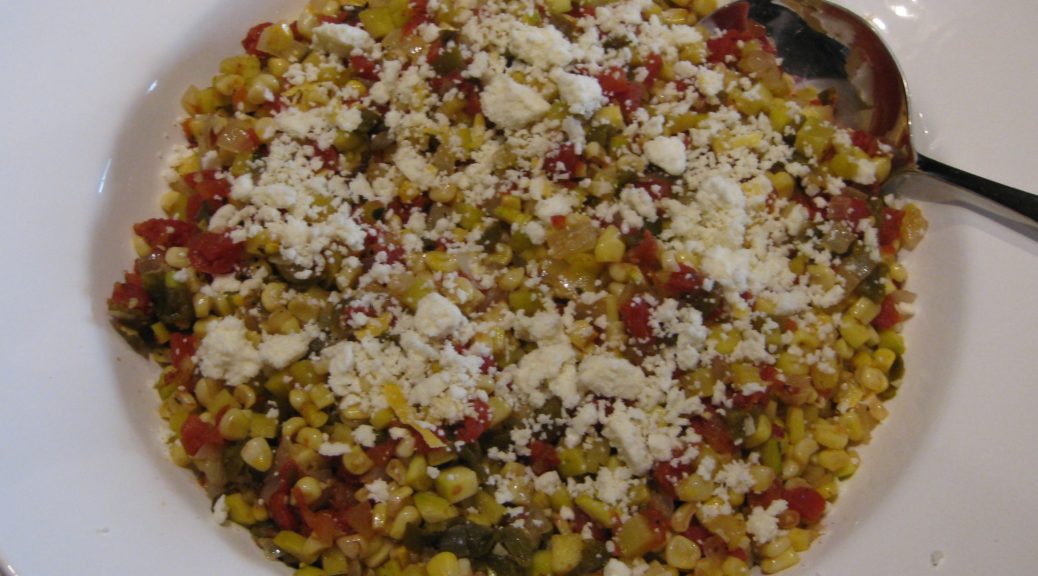
Calabacitas is Spanish for zucchini but is also the name given to a dish of zucchini, corn, and (usually) green chile.

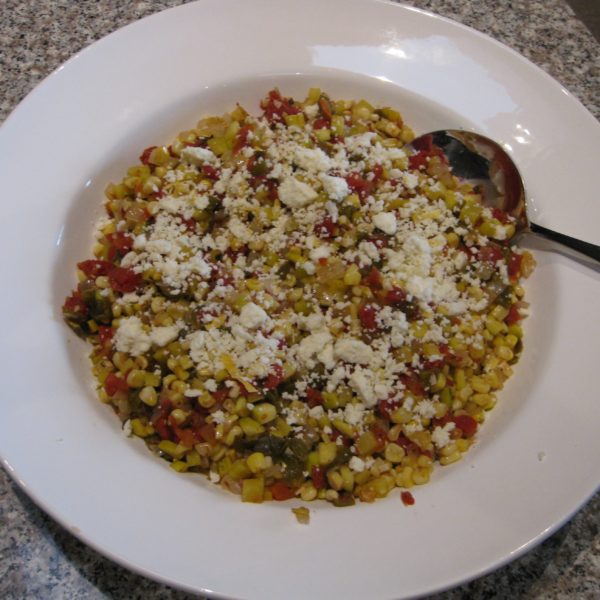
Often served as a side dish, calabacitas makes an awesome burrito, too. Accompany it with some frijoles (and probably a tortilla or three) and you’ve got a great high-protein vegetarian dinner. Leave out the cheese and it’s vegan! Truth be told, I’m plus-minus on the cheese in any case. When serving this for company I usually sprinkle cheese on top as in this recipe, but if it’s just for “us,” cheese isn’t usually even a thought.

This is the time of year to serve the most sublime calabacitas possible as zucchini, corn, green chile, and tomatoes are all in the farmers’ market. But calabacitas is too good to be had only a few weeks a year and, honestly, versions made with frozen corn, canned tomatoes, and roasted green chile that you’ve squirreled away in your freezer along with the ever-present zucchini in the produce aisle are too good to pass up any time of year.
For me, calabacitas shares a serious failing with succotash. They are both great ideas in my estimation but the execution often falls flat.

When I set out to finally perfect a version of calabacitas that I felt comfortable serving, I thought back on all the less-than-perfect renditions I’d had since I first set foot in New Mexico in 1991.

The litany of offenses includes being too watery, being too rich, having huge chunks of zucchini that seem mismatched next to corn kernels, being under-seasoned and being aggressively seasoned.

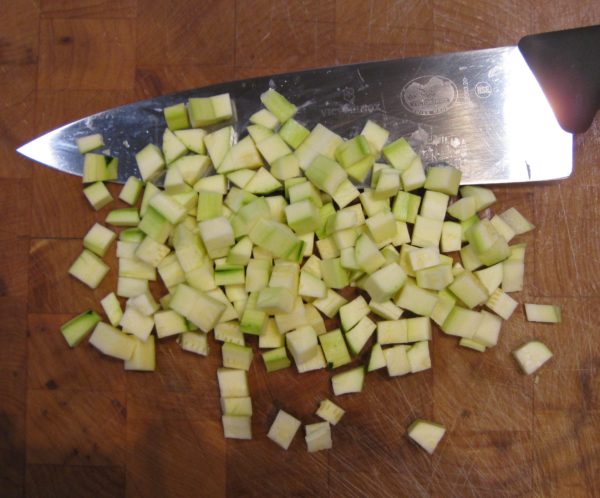
That set out a plan of action for me. The zucchini should be cut approximately the same size as corn kernels. There needed to be a minimum amount of liquid in the finished dish. Loads of cream or butter or cheese were out of the question. The seasoning should complement the vegetables, not assume control of the dish.

Zucchini (the namesake vegetable) and corn were a given. Pretty much everything else was up for grabs. Tomatoes, which are sometimes included, seemed right for color and a bit of acidic brightness that the zucchini and corn lack. They have the added bonus of being another New World crop. Roasted green chile, also sometimes included, was right for several reasons. It screamed “New Mexico,” it would add a bit of complimentary smokiness to the blend, and, honestly, I’m a chile-head.

My preference was for hot or extra-hot chile. This is wrong for several reasons. First, calabacitas is not traditionally a spicy dish. Second, after one of the dinners where I tested out my evolving recipe, one of the guests said that it was unfortunate that the entire “calabacitas conversation” that evening centered on how hot it was and not on how good it was.

In cooking I prefer to bow to tradition but if there’s ever a place where I butt heads with tradition, it’s in making dishes spicy. But I decided there and then that I should follow tradition and use mild chile in my calabacitas.

Finally I was on to the aromatics and seasoning. Onion and garlic are my go-to combination unless there is some compelling reason for one or the other (usually based on tradition). The herbs eluded me for a while. I really wanted to use Mexican Oregano (which isn’t actually oregano) because of its New World origins but it just seemed to overpower the dish. In the end, I decided that a modest amount of Mediterranean Oregano played best in the sandbox with the other ingredients.

Let me know what you think of my rendition of a New Mexico classic.


Follow us


Click HERE to join our mailing list and you’ll never miss a recipe again!
Print Recipe
Calabacitas: A New Mexican Classic
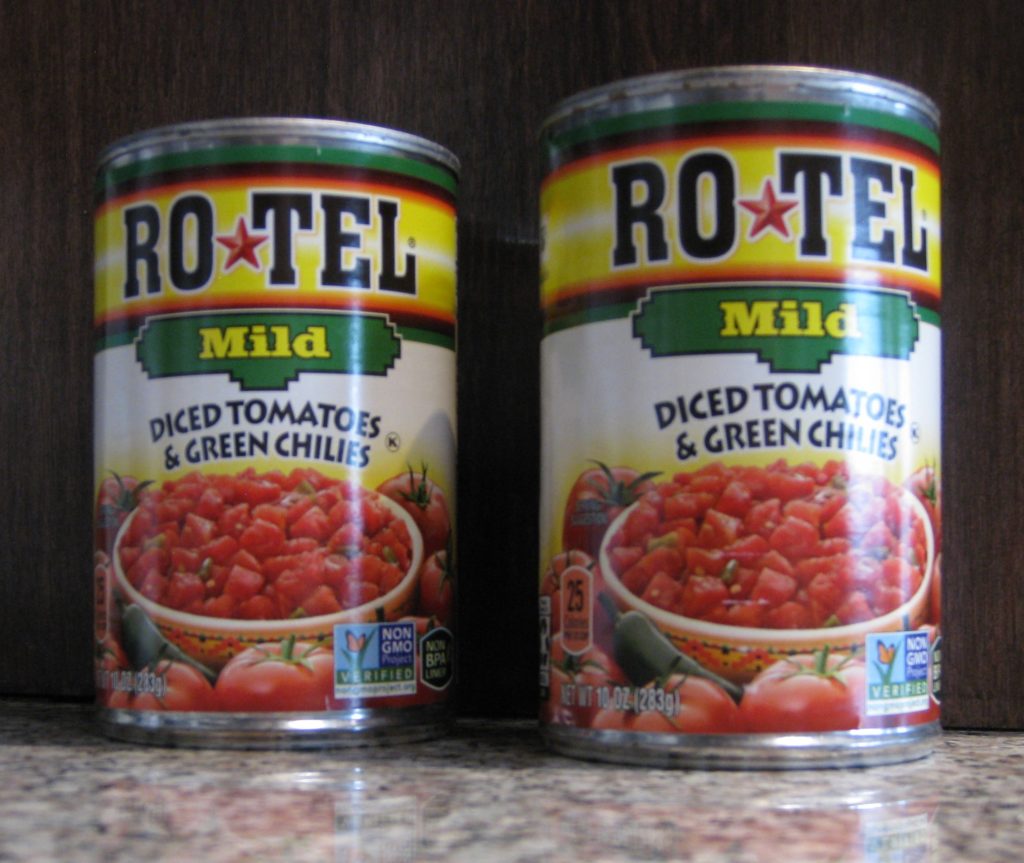
Traditionally calabacitas is not a spicy dish so it is best to use mild roasted green chile unless you and all your eaters are chile heads. Bacon fat gives a great flavor but olive oil or other vegetable oil is fine, too. Frozen corn works well as there are so many other flavors in the dish but using fresh corn cut off the cob is a definite treat. I prefer to thaw frozen corn before cooking. Ice crystals can sometimes carry a "freezer" taste and rinsing them off can eliminate it. Also, it is easier to time the cooking of the corn in combination with other ingredients if it is not frozen when cooking starts. Rotel packs tomatoes in 10 ounce cans and they’re a bit of a Southwestern classic in and of themselves. In a pinch feta cheese can be used instead of Cotija
Votes: 0
Rating: 0
You:
Rate this recipe!
Prep Time 40 minutes
Cook Time 30 minutes
Servings
people
Ingredients
Prep Time 40 minutes
Cook Time 30 minutes
Servings
people
Ingredients
Votes: 0
Rating: 0
You:
Rate this recipe!
Instructions
  1. Dice the zucchini.
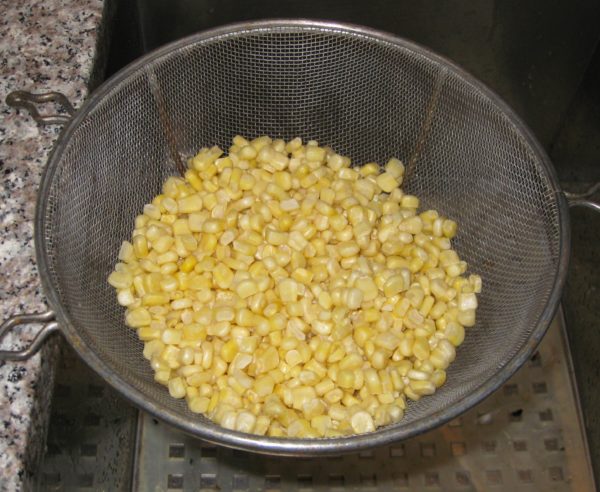
  2. Thaw the corn under running water.
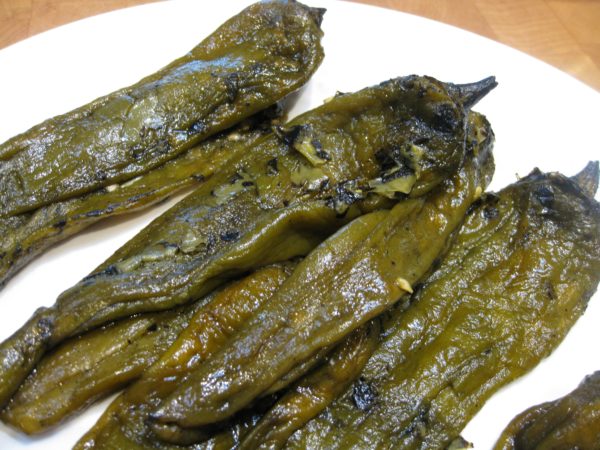
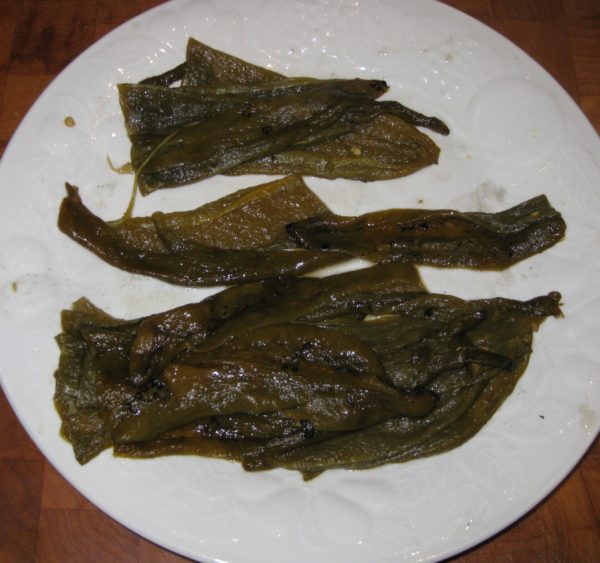
  3. Roasted New Mexico green chile.
  4. Peeled and seeded chile, ready to be chopped.
  5. Sauté the onion until translucent.
  6. Add the garlic and continue to cook until the onion is golden but not brown.
  7. Add the zucchini and sauté until the zucchini is hot.
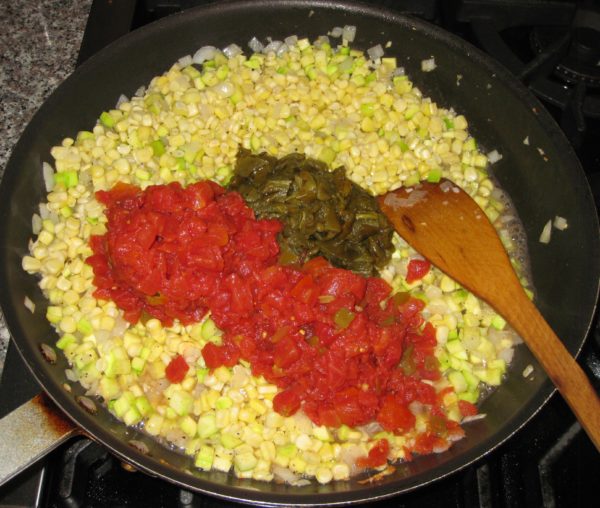
  8. Add the corn, green chile, tomatoes, oregano, salt, and pepper.
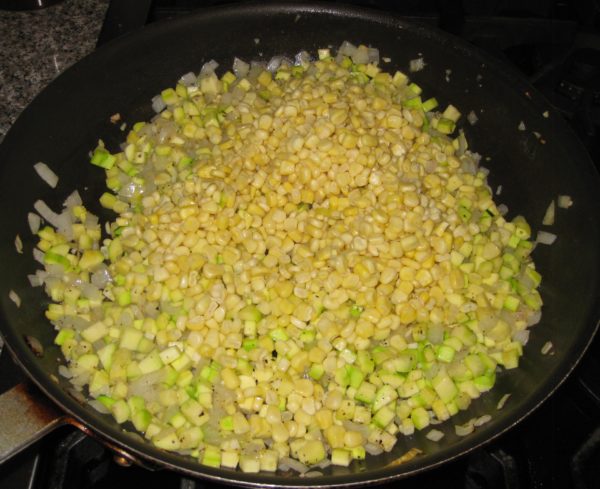
  9. Simmer until the liquid has evaporated and the zucchini and corn are cooked, about 10-15 minutes, depending on your preference.
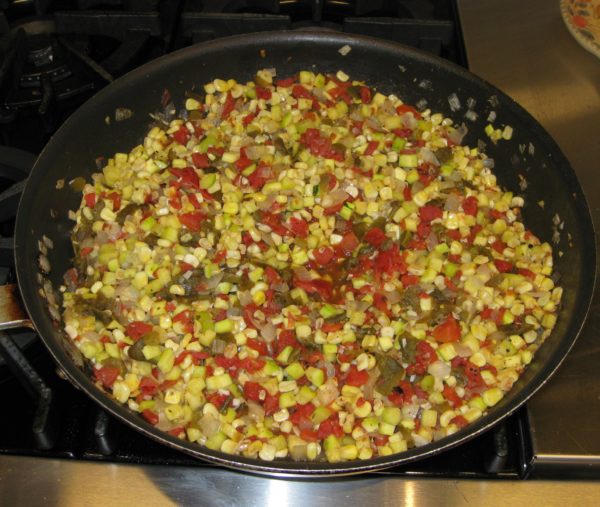
  10. Adjust oregano, salt and pepper in the last few minutes of cooking.
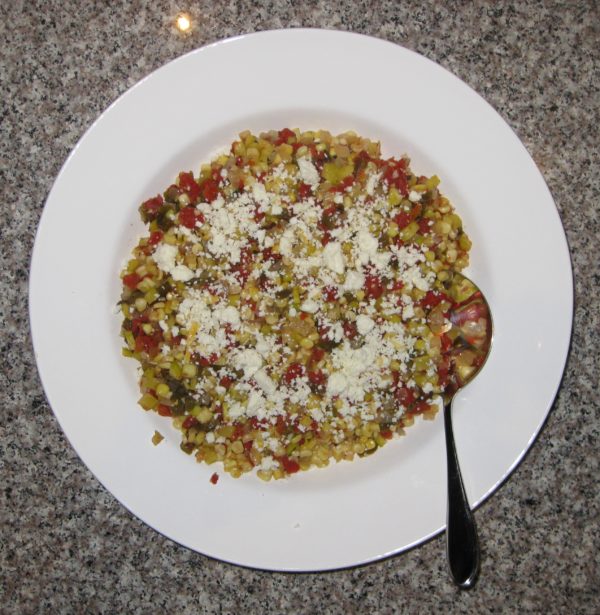
  11. Serve sprinkled with crumbled Cotija cheese.
Recipe Notes

Copyright © 2017 by VillaSentieri.com. All rights reserved.

Share this Recipe

Frittata con Cipolle (Frittata with Onions)

July 10, 2017

American chefs frequently do not understand Italian food.  Many can produce technically excellent dishes that lack the Italian sensibility.

One common error is putting in too much.  Too much of most anything into most anything.  To be sure, there are many restaurants headed by American chefs that serve excellent Italian food but there are far more that just don’t get it.

The usual culprit is what Italians would call the First Course, Il Primo Piatto.  This is soup, pasta or rice that is served as a separate course before the the Second Course, Il Secondo Piatto (usually meat, fish, or other protein), which is usually accompanied by side dishes, Contorni, in Italian.

Pasta “specials” are quite prone to this phenomenon.  There are many otherwise excellent restaurants that think that if a little is good, more is better, when it comes to their pasta “specials.”  Because I love pasta, if I’m at a restaurant that has a pasta special I always ask what it is.  More often than not, I start yawning (well, not really) part way through the list of ingredients added to the pasta.  After more than 2 or 3 main ingredients (not counting things like garlic, olive oil, and a few herbs) it’s too much.  You don’t need shrimp, artichoke hearts, chopped tomato, diced onion, roasted peppers, capers, and olives.  It’s simply too much.  The distinctiveness of the ingredients is lost.

I’m ragging on pasta because that is the most common culprit at American restaurants featuring “Italian” food.  Risotto and polenta are prone to the same phenomenon, however.  The most common offense is that both of these dishes are turned into vehicles for butter, cream, and cheese.  That is not what an Italian would do.  In a typical Italian household, polenta is cornmeal, water and salt.  That’s it.  There’s not usually a pat of butter or a spoon of cheese in sight unless added at the table to the diner’s preference but even that is rare.  The polenta is a foil for whatever is served with it.  It is not meant to scream, “Look at me!”  That doesn’t mean it isn’t supposed to, or doesn’t, taste good.  It’s not intended to be so rich and filling that it tries to steal the spotlight or dampen one’s appetite for the rest of the meal.

Unlike polenta, which is meant to accompany other dishes, risotto is meant to stand on its own as a First Course before the Second Course.  Risotto alla Milanese is the only exception.  Traditionally Risotto alla Milanese accompanies a veal cutlet (in Milan, of course).  No other risotto would be served with the second course in an Italian meal.

I realize that most of the time we do not eat a formal Italian meal, even in a restaurant.  Most of us have either what would be the first course (pasta or risotto, usually) or the second course (meat or fish plus a side dish or two), preceded by some sort of antipasto (appetizer), which literally means “before the pasta.”  Even so a risotto that is a fat “bomb” overly laden with butter, cream and/or cheese, might be American but it is simply not Italian in its sensibility.

Frequently, the issue is clouded even more but the addition of too many ingredients to the risotto.  Look at the asparagus risotto from a few weeks ago.  There are no competing flavors:  a light broth to add some savoriness, a bit of Parmigiano Reggiano, and a dollop of butter.  This is a classically Italian risotto.

I guess I’m really beating this one.  I clearly have strong feelings about Italian food and what passes for Italian food in America.  Think purity of flavor and simplicity of ingredients.  If an ingredient doesn’t support the main ingredient it shouldn’t be added.  I believe Italian food is the original “ingredient-driven” cuisine.

Ok, off my soap box an on to a recipe; one that is the essence of simplicity.

I’m going to guess that most of you have not had a frittata.  It is a fluffy but firm egg dish, usually with some sort of vegetable included.  Sometimes a sprinkling of Parmigiano Reggiano or Pecorino Romano cheese is added but only if it supports the vegetable that is the star of the show.

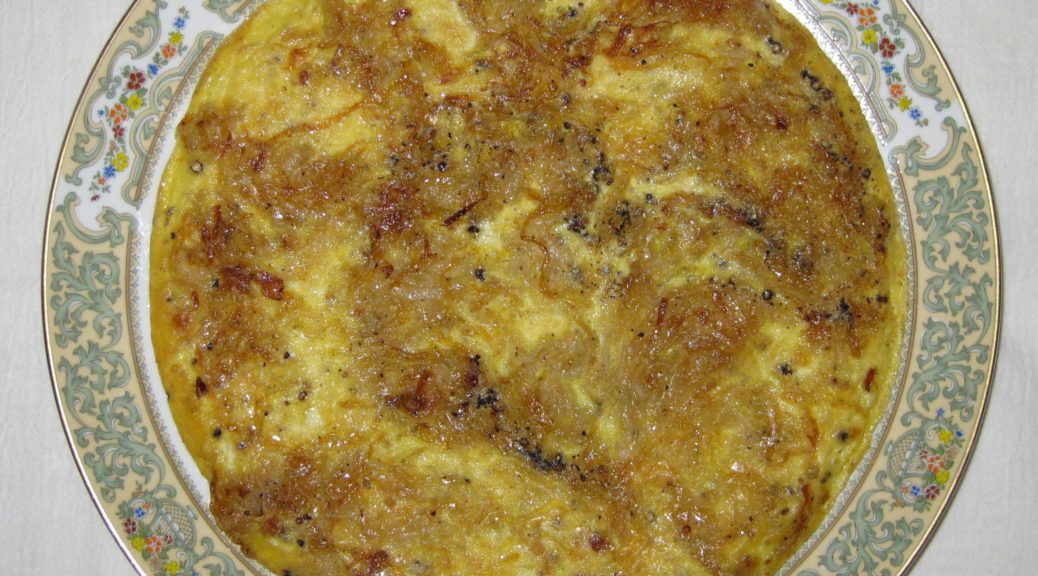
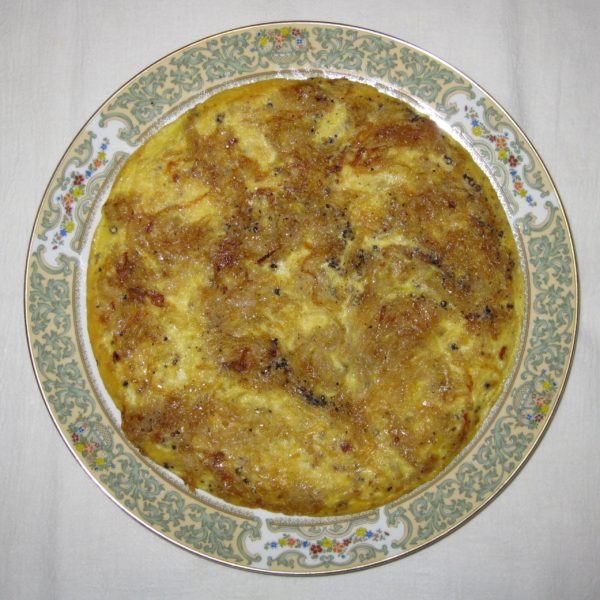
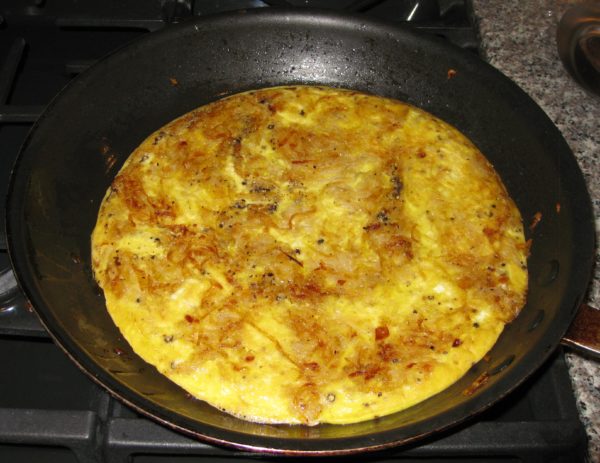
Today’s frittata is onion.  That’s it, onion.  Plus a little olive oil and salt and pepper.  The onion is cooked slowly until it caramelizes.  The onion in this recipe was cooked for 50 minutes.  You should plan on 45-50.  It is mostly hands off, though you do need to stir every few minutes.

Once the eggs are added, they are cooked slowly.  Unlike a French omelet where the eggs are barely set and there isn’t (supposed to be) a touch of brown, a frittata is intended to be firm, slightly brown, and puffed up and airy from the cooking style.

Although I have converted to making, almost exclusively, a classic Italian frittata, when I was in college I did it the way my Italian Grandmother did.  She included a pinch of baking powder and a bit of flour.  It was a little firmer than a classic frittata; more like a savory eggy cake.

That frittata, alternating with sandwiches of butter, onion and blue cheese on homemade bread (not on the same day), constitute my lunchtime memories from my junior year in college.


Click HERE to join our mailing list and you’ll never miss a recipe again!

Print Recipe
Frittata con Cipolle (Frittata with Onions)
I recommend NOT finishing the frittata under the broiler as called for by a number of food writers. First, it isn’t traditional. Second, if the frittata doesn’t slide out of the pan easily so that it can be flipped, you won’t be able to get it out of the pan to serve it after putting it under the broiler. I like using a good quality, heavy-bottomed, non-stick pan though a well-seasoned cast iron pan would work too. It is easier to get the frittata out of the pan if it has sloping sides rather that sides that are completely vertical. You can caramelize the onions several hours in advance and then complete the frittata later.
Votes: 0
Rating: 0
You:
Rate this recipe!
Prep Time 10 minutes
Cook Time 1 1/2 hours
Servings
people
Ingredients
Prep Time 10 minutes
Cook Time 1 1/2 hours
Servings
people
Ingredients
Votes: 0
Rating: 0
You:
Rate this recipe!
Instructions
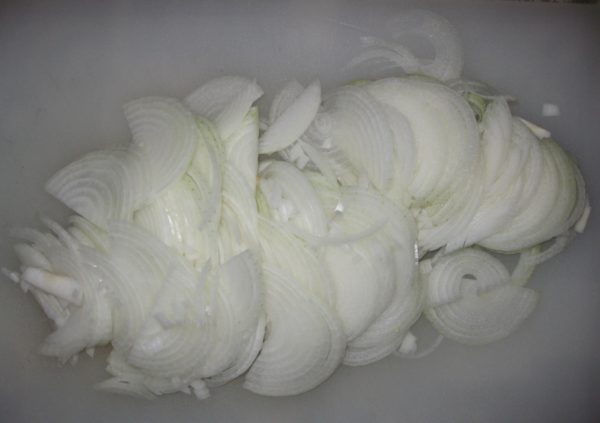
  1. Slice the onion in half from top to bottom then across into 1/8 inch thick half-rounds.
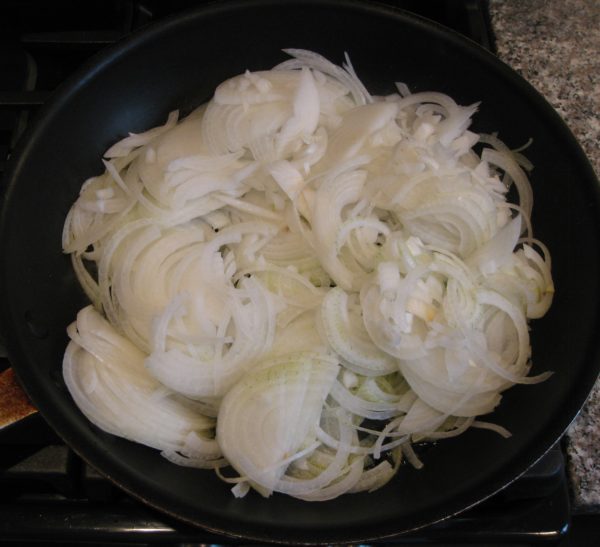
  2. Warm the olive oil in a 12 inch heavy-bottomed sauté pan with sloping sides.
  3. Add the sliced onion and ½ teaspoon of salt.
  4. Cook over medium heat, stirring often until the onions are soft and caramelized. The onions should take on a uniform golden, then light brown, color. There should not be any dark brown or dry spots. This will take between 45 and 50 minutes. If it takes longer don’t worry. If it seems to happen in less time, the heat is probably too high.
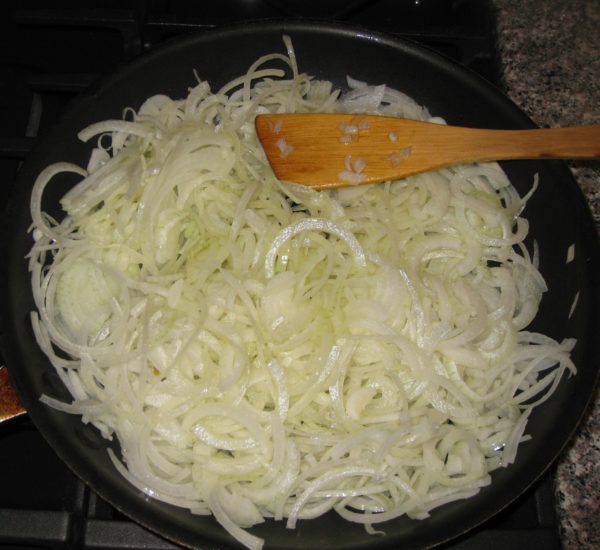
  5. This picture was taken 15 minutes after the onions were added.
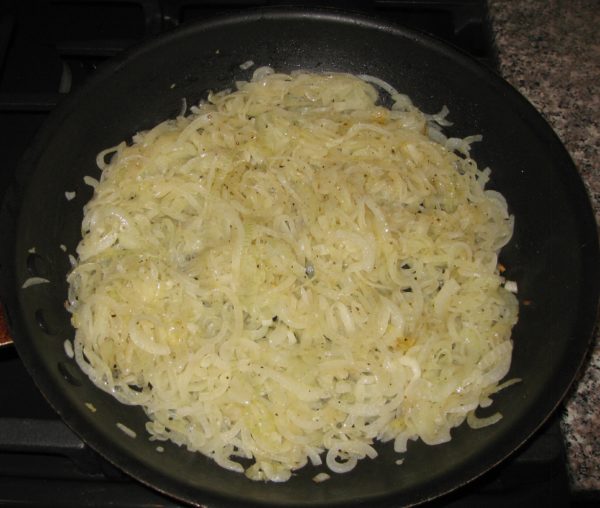
  6. This picture was taken 30 minutes after the onions were added.
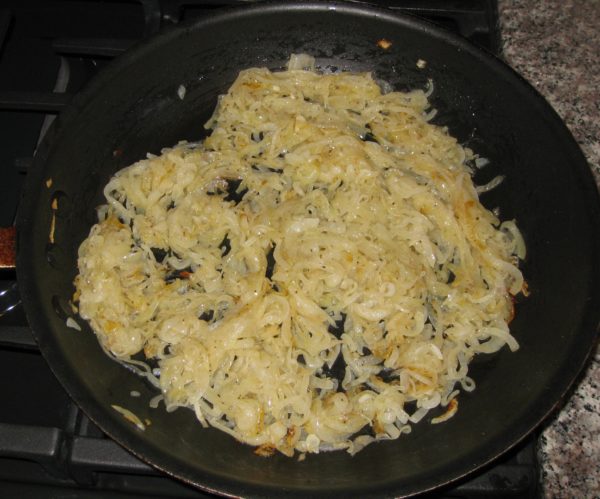
  7. This picture was taken 45 minutes after the onions were added.
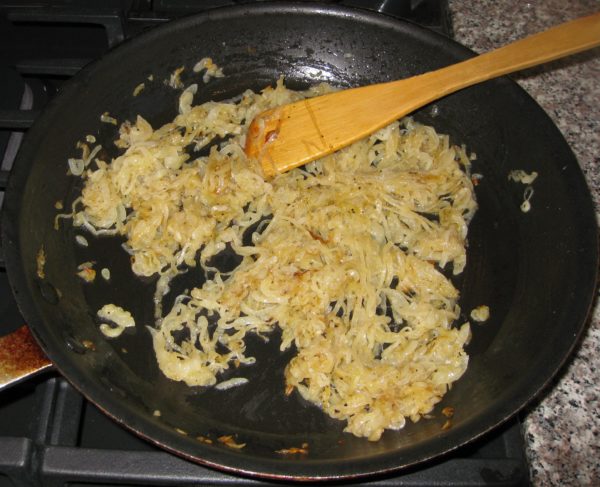
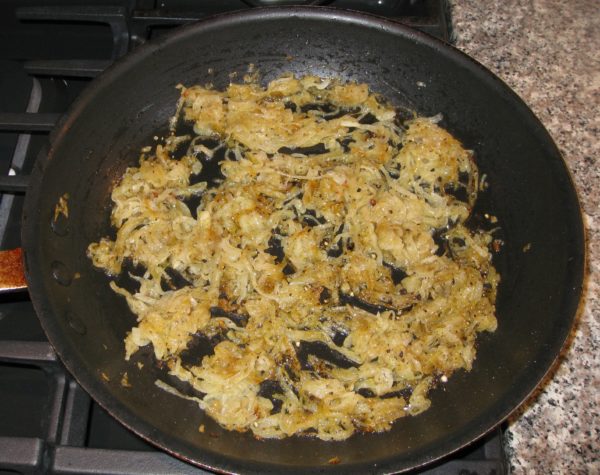
  8. This picture was taken 50 minutes after the onions were added. They are appropriately caramelized.
  9. While the onions are cooking, beat the eggs with a fork. Do not use an egg whip. The idea is not to beat in air but to uniformly combine the whites and yolks. Season with the remaining ¼ teaspoon of salt and freshly ground black pepper to taste.
  10. When the onions are fully caramelized, be sure there is an even slick of oil in the bottom of the pan. If not, add a tablespoon or so more.
  11. Turn the heat to medium high and evenly distribute the caramelized onions on the bottom of the sauté pan.
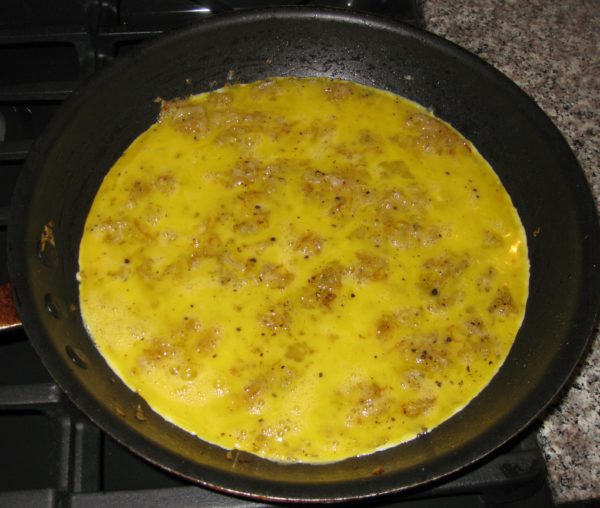
  12. Pour the beaten eggs on top of the onions, being sure to distribute the eggs evenly. DO NOT STIR THE EGGS once they are added to the pan. Immediately cover the pan and turn the heat to low.
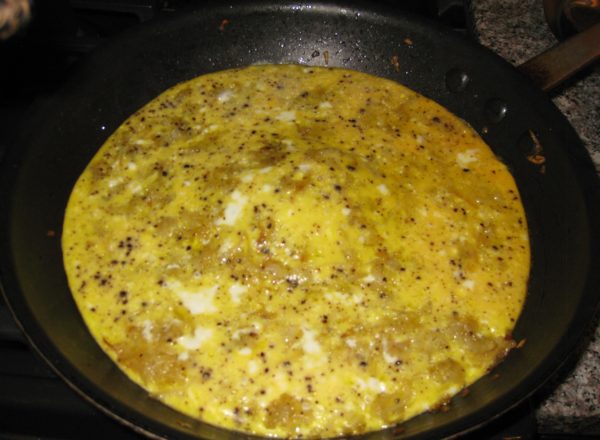
  13. Cook until the eggs are just set in the middle and golden brown on the bottom, approximately 30 minutes. Move the pan around so that the heat is evenly distributed, including putting the pan off-center occasionally so there is heat directly on the edges of the pan, not just concentrated in the middle.
  14. When the eggs are just set in the center, the frittata should release easily from the pan. Sometimes it is helpful to run a silicone spatula around the edge of the frittata to help it release.
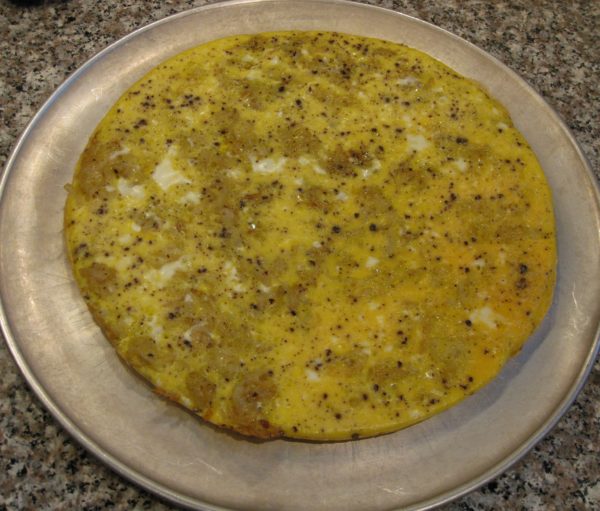
  15. Slide the frittata out of the pan and onto a large pizza pan.
  16. Invert the pan over the frittata.
  17. Grasp the sauté pan and pizza pan with both hands and flip them over in one quick motion.
  18. Put the sauté pan, with the now-upside-down frittata, back on the heat, uncovered, for about 5 minutes until the bottom of the frittata is golden brown.
  19. Slide the frittata onto a serving platter.
Recipe Notes

Copyright © 2017 by VillaSentieri.com. All rights reserved.
Share this Recipe