Mom’s Ravioli

September 27, 2017

My strongest olfactory memory of childhood is gradually waking up on Sunday morning to the smell (perfume is a better characterization as far as I’m concerned) of garlic being sautéed in olive oil.

That was how most Sundays started.

My mother would get up early and start making her long-simmered Southern Italian Tomato Sauce (referred to as Ragu or Sugo if one’s Italian roots were close, “Gravy” if one grew up in New York or nearby, and often just “Sauce”). We unceremoniously called it “Spaghetti Sauce” though it was used on much more than spaghetti!

I think the better part of my culinary-cultural history is represented by that sauce. Every Italian family’s sauce is different, even if stylistic similarities can be identified. The sauces made by my mother and her two sisters that I knew, Aunt Margie and Aunt Mamie, were clearly related but also different. Each was good but it’s not as if they didn’t deviate from my Grandmother’s recipe. They were similar in that garlic and meat were browned in oil; tomato products, water, and seasonings were added; and the whole thing simmered for hours. The meats varied, the tomato products (tomato paste, tomato puree, whole canned tomatoes, etc.) and the proportions of them definitely varied as did the seasonings and other aromatics.

My mother’s “Spaghetti Sauce” to call it by its “historic” name, a name that I no longer use, is, without doubt, my most precious culinary treasure. I have only ever given the recipe out twice. In the 1970’s I gave it to John Bowker and his wife Margaret Roper Bowker. John was the dean of Trinity College in Cambridge, England. Recently I gave it to Robert Reddington and John O’Malley in Palm Springs after Bob lamented the loss of the recipe for the long-simmered tomato sauce he learned to make while living in Chicago.

With my mother’s sauce as the near-constant backdrop to our Sunday dinners, the rest of the meal varied. The sauce could be served with spaghetti or some other cut of dry pasta, or with my mother’s home-made fettuccine, or with ravioli. Although my favorite pasta is gnocchi, we never had those on Sundays as my father didn’t like them. Gnocchi (always home-made) were reserved for a weeknight meal during the times that my father worked out of town.

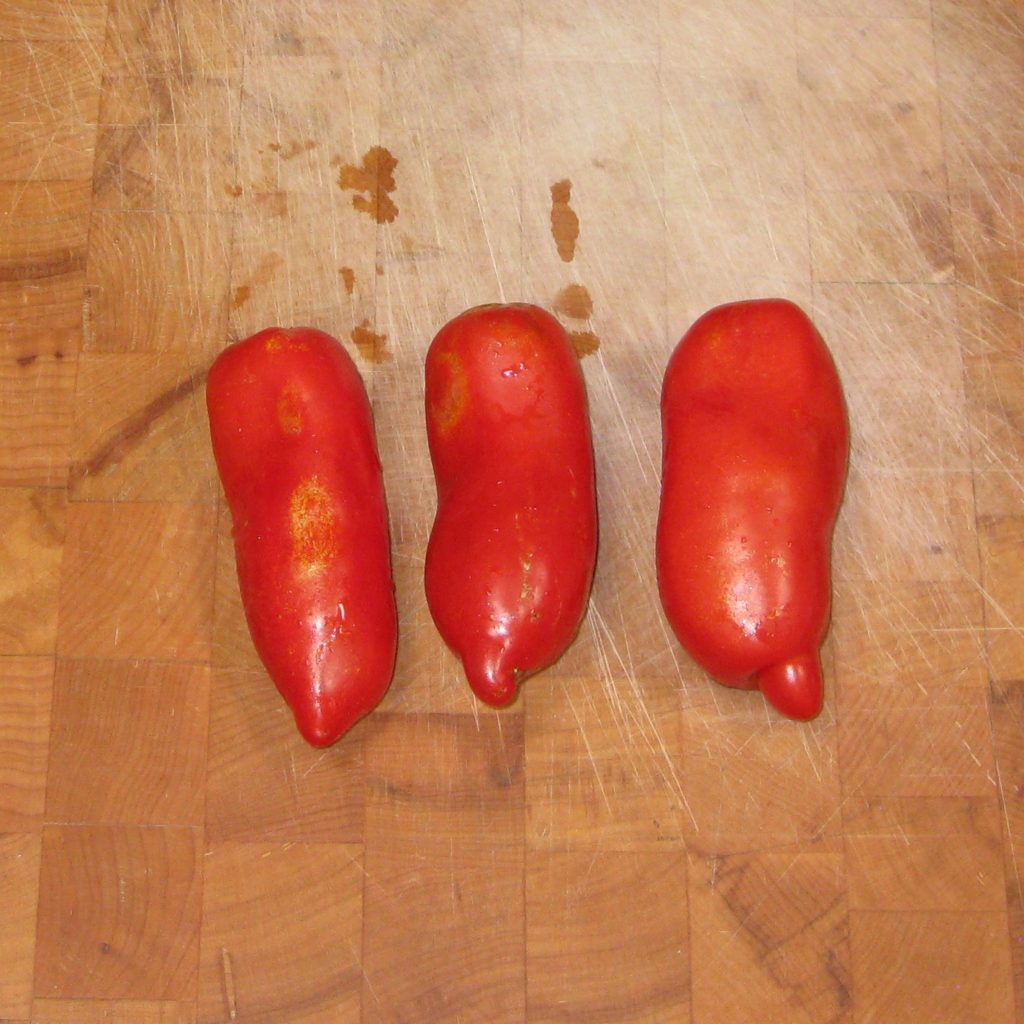
The sauce has an abundant amount of meat in it, pork, always cut in big pieces, never ground or chopped. Nonetheless, the pasta was often accompanied by my mother’s slow-cooked roast pork or maybe a roast chicken.

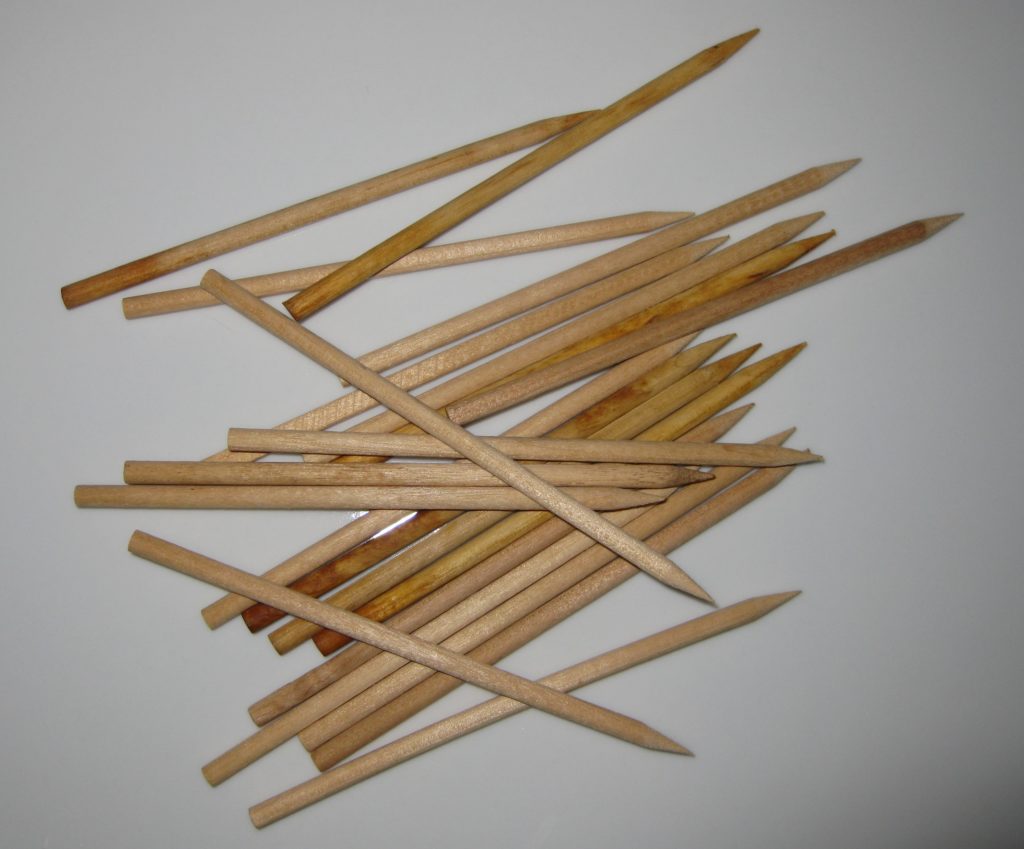
It seems incongruous now, but in the 1960s, before the widespread use of antibiotics, chickens were expensive! (I’m not in favor of the prophylactic use of antibiotics but I’m just saying that’s why chickens are relatively inexpensive now.) I still have a handful of my mother’s “City Chicken” sticks from the 1960s. They are round, pointed sticks slimmer than a pencil but thicker than bamboo skewers. Pieces of pork and veal would be skewered in alternating fashion on the sticks, breaded, and fried like chicken drumsticks. This was less expensive than chicken!!

City Chicken sticks

But back to Sundays…

Sometimes, after the sauce was bubbling away, my mother would make ravioli. Next to gnocchi, they are my favorite pasta, but manicotti and lasagna aren’t far behind.

We would eat our big meal around 1 PM on Sunday and my mother would get all of this done in time for that meal, including taking time to go to church, during which my Aunt Mamie, who lived upstairs, would be tasked with stirring the “Spaghetti Sauce.”

My mother’s (now my) ravioli mold.

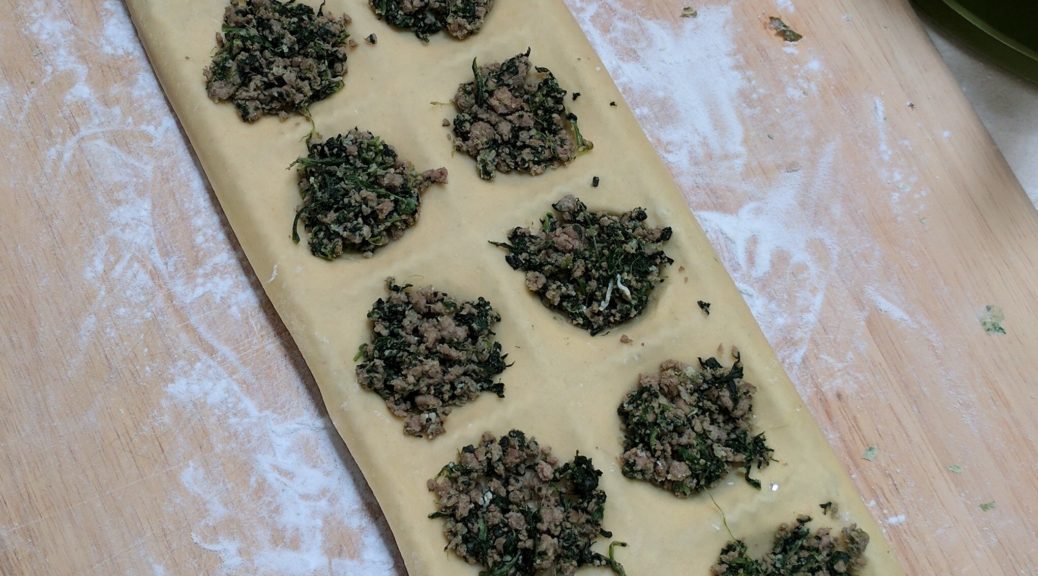
Making ravioli in a group is a lot more fun. I also find that making the ravioli on a different day from the day they are cooked and eaten means that I am not as tired and I enjoy them more. The pictures in this post are from a Sunday when I got together with Rich DePippo, Susan Vinci-Lucero, and my in-laws, Marisa and Frank Pieri, to make ravioli. I think we made about 30 dozen ravioli!


Follow us


Click HERE to join our mailing list and you’ll never miss a recipe again!

Print Recipe
Mom's Ravioli
The filling can be made a day in advance and refrigerated, tightly covered. Ravioli freeze well. To do so, lightly flour a sheet pan that will fit in your freezer and put the ravioli in a single layer. Freeze about 30-45 minutes, until firm. Quickly put the ravioli in a zipper-lock bag and return to the freezer. Repeat with the remaining ravioli. My mother always made her dough by hand but I use a kitchen mixer and the beater, not the dough hook. Years ago, ground meat was not labeled with the percent fat. My mother would select a cut of sirloin, have the butcher trim off all visible fat and then grind it. I find that 93% lean ground beef replicates the experience.
Votes: 0
Rating: 0
You:
Rate this recipe!
Prep Time 2 hours
Passive Time 30 minutes
Servings
people
Ingredients
Filling
Dough
Prep Time 2 hours
Passive Time 30 minutes
Servings
people
Ingredients
Filling
Dough
Votes: 0
Rating: 0
You:
Rate this recipe!
Instructions
Filling
  1. Put the frozen spinach in a small saucepan. Add a few tablespoons of water. Cover and cook, stirring occasionally, until the spinach is completely thawed.
  2. Pour the spinach into a large sieve.
  3. After the spinach has cooled enough to handle, squeeze handfuls of the spinach to remove as much liquid as possible.
  4. Heat the olive oil in a 12-inch sauté pan until shimmering. Add the beef.
  5. Cook over high heat until the liquid has evaporated, breaking up the meat while cooking.
  6. Reduce the heat to medium and add the garlic, 1 teaspoon of salt, and black pepper to taste. Continue to sauté for 2-3 minutes more.
  7. Add the spinach to the beef.
  8. Continue to cook over medium to medium-low heat while breaking up the spinach and completely combining it with the beef.
  9. When the beef and spinach are well combined and no obvious liquid remains in the pan, add the beaten egg. Stir well and cook two minutes more. The egg should completely incorporate into the filling and no longer be visible.
  10. Adjust salt and pepper.
  11. On low heat, add 1/4-1/3 cup of breadcrumbs and combine well to absorb any remaining liquid or oil. If necessary to absorb any remaining liquid, add another tablespoon or two of breadcrumbs. If you cooked off all the liquid when browning the beef, and used lean beef, 1/3 cup of breadcrumbs should be enough.
  12. Cool the filling to room temperature before filling the ravioli.
Dough
  1. Put the flour, egg, and egg whites in the bowl of an electric mixer outfitted with a paddle.
  2. Mix on low until combined.
  3. Add the water, a little at a time, until the dough just comes together. The dough should not be the slightest bit tacky. You may not need all the water.
  4. Remove the dough from the mixer and roll into a log. Cover with a kitchen towel and allow to rest for 15 to 30 minutes before rolling out.
Assembly
  1. Set up your pasta machine, either a hand crank version or an attachment for your mixer.
  2. Cut off a small handful of dough.
  3. Flatten the dough, dust with flour, and run it through the pasta machine on the thickest setting.
  4. If the dough is catching on the rollers it may be too wet. Sprinkle liberally with flour.
  5. Run the dough through the same setting one more time.
  6. Run the dough through the pasta machine narrowing the setting by one notch each time. If the dough is getting too long to cover much more than two lengths of the ravioli mold, cut off the excess and continue.
  7. When rolling out the dough, use slow, even motion. If the dough is not rolling out to the full width of the machine, or at least wide enough to cover the width of the ravioli mold, fold it in half crosswise and run it through the machine again on whatever the last setting was.
  8. If the dough is not rolling out smoothly, and the issue is not that it is too damp, run the dough through the machine again on the same setting.
  9. On most pasta machines with five settings for thickness, you will want to stop rolling out the dough on the next-to-thinnest setting.
  10. Put the rolled out dough on a lightly floured surface and cover with a kitchen towel. Repeat with 2 or 3 more portions of dough.
  11. Allow the remaining dough to rest, covered, while filling and cutting the first batch of ravioli.
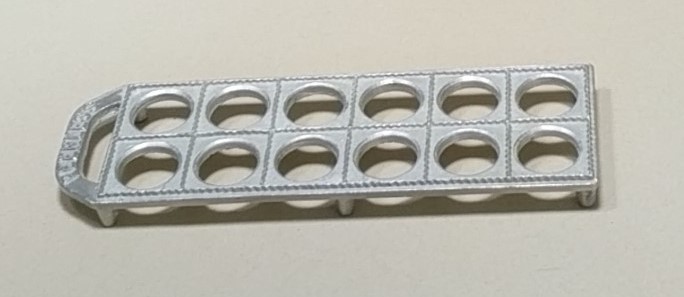
  12. To fill the ravioli, take the rolled out dough and lay it across the ravioli mold.
  13. Add a slightly rounded teaspoonful of filling to each ravioli. Do not overfill or the ravioli may break when being cooked.
  14. Fold the dough over the top.
  15. Lightly pat the top sheet of dough.
  16. Using a rolling pin, cut the dough along the zig-zag edges. Be careful to fully cut through the dough around the edges as well as between each raviolo.
  17. Remove the ravioli and place on a lightly floured surface. Cover lightly with a kitchen towel.
  18. Repeat with the remaining dough and filling.
  19. Cook, refrigerate, or freeze the ravioli.
Recipe Notes

Copyright © 2017 by VillaSentieri.com. All rights reserved.

Share this Recipe

New Mexican Green Chile Sauce

September 22, 2017

Those of you who haven’t spent time in New Mexico may not know that chile (definitely spelled with an “e”) has cult status in the state.

New Mexican food wouldn’t be the same without “red” or “green.” Chile, that is. Those are the standard sauces used in New Mexican cuisine.

When ordering most dishes in a New Mexican restaurant in Santa Fe, the first question from the server, if the customer hasn’t specified, is “Red or Green or Christmas?”

Just 70 miles away in Taos, the question is “Red or Green or Caribe?”

It’s not that you can’t get Christmas in Taos, which as you might have guessed is half red chile sauce and half green chile sauce, it’s that never, ever is Caribe an option in Santa Fe. It just isn’t. I believe this speaks to the development of related, but different, foodways in the historically isolated towns and villages of New Mexico.

The most famous of all New Mexico chile is Hatch. There are about six varieties of chile grown in Hatch but, if they’re grown there, they can all be labeled as Hatch Chile. The tiny village of Chimayó, just under 30 miles from Santa Fe in northern New Mexico, grows good chile, too.

When I buy roasted green chile at the Santa Fe Farmers Market, I usually head for the vendor selling chile from Chimayó. That’s exactly what I did last week to make a batch of Green Chile for this blog post (honestly, we don’t add the word “sauce” to the end as the context indicates whether one is talking about the sauce or the fruit. And, yes, chile is a fruit!). Chimayó has a multi-hundred year history of growing heirloom chile and I feel good supporting that history, if even in a very small way.

A typical chile-roasting set-up found throughout parking lots in New Mexico in the late summer.

I served that chile during a dinner party for a group of close friends. Among the ten of us, only one was born and raised in New Mexico, Pat Assimakis (aka Pat Paris if you’re a maître d’ and she’s ever made a reservation at your restaurant). I gave Pat a taste of my green chile, she thought for a second and said, “Chimayó?” She nailed it! It’s got a slightly different taste from Hatch chile.

New Mexicans have strong opinions about their chile, be it red or green. The usual divide is between those who put almost nothing but chile in their chile (see, you knew the first meant the fruit and the second meant the sauce, right?) except for a bit of onion and/or garlic and those who add herbs (like oregano) and spices (like cumin). I am firmly in the former camp. Onion and garlic help to round out the flavor but, to my taste, herbs and spices detract from the pure chile goodness.

The other divide is degree of heat. Back to the restaurant scenario above, a frequent question from the customer after the server says “Red or Green?” is “Which is hotter?” Restaurants stake out their territory, not only in how they make their chile, but in terms of which is hotter.

Since I’m a bit of a chile-head, given a choice between the medium-hot and the hot Chimayó chile at the Farmers Market, I opted for the hot. So, I was more than a little concerned when Doug Howe, one of the other friends at our dinner, and the first to ladle some green chile onto his plate, took three large spoonsful. Before I could warn him, he took a bite and was in agony. I relieved him of his green chile, putting it on my plate, instead. Pat and I sure enjoyed the chile, Doug not so much. As for the other seven diners, I’m not sure.

In case you missed it, here is my recipe for Red Chile.


Follow us


Click HERE to join our mailing list and you’ll never miss a recipe again!

Print Recipe
New Mexican Green Chile Sauce
This is classic New Mexican Green Chile. There are just a few aromatics and no herbs and spices to muddy the flavor. Removing the skin and seeds can be a chore as they want to stick to your fingers. Dipping the chile and your fingers in water makes the task a breeze however, you want to use that water as part of the sauce because all of the tasty liquid that collects inside the chile as it roasts would be lost otherwise.
Votes: 0
Rating: 0
You:
Rate this recipe!
Prep Time 30 minutes
Cook Time 45 minutes
Servings
cups
Ingredients
Prep Time 30 minutes
Cook Time 45 minutes
Servings
cups
Ingredients
Votes: 0
Rating: 0
You:
Rate this recipe!
Instructions
  1. Roasted green chile ready to be cleaned.
  2. Put two cups of water in a small bowl.
  3. Holding the chile over a bowl to catch any juice, use your fingers to remove the skin of the roasted chile. Most of the skin should slide off easily. You may need to work on a few bits here and there. Remove as much skin as possible but a few bits of stubbornly sticking skin aren’t a problem.
  4. Shake whatever skin you can from your fingers (it has a tendency to cling desperately to your fingers) then dip your fingers and the chile in the bowl of water to remove the clinging skin.
  5. Still holding the chile over a bowl, remove the stem end. You can usually do this by pinching the top of the chile but a pair of kitchen shears works well, too.
  6. Discard the stem end and any seeds that cling to it.
  7. Split the chile in half lengthwise. Again, this is pretty easy to do with a fingernail.
  8. Dip the chile into the bowl of water and scrape away the seeds.
  9. Put the cleaned chile into a clean bowl and repeat the process with the remaining chile.
  10. Cut the chile into long strips.
  11. Cut the chile crosswise into small squares
  12. Add any liquid that has collected in the bottom of the bowl from the chopped chile to the bowl of water.
  13. Strain out seeds and bits of flesh from the water using a three step process. Strain the water through a large sieve.
  14. Strain the liquid through a fine, small sieve.
  15. Strain the liquid through several layers of cheesecloth or a paper filter.
  16. Chop the onion.
  17. Mince the garlic.
  18. Combine ½ cup of chopped chile, onion, garlic, strained water, and salt in a saucepan. Bring the mixture to a boil and simmer for 20 minutes.
  19. Using an immersion blender or a regular blender puree the chile mixture. This will help to thicken the chile sauce without using a thickening agent.
  20. Add the remaining diced chile and two cups of water to the puree and simmer until the chile is soft to the bite, but not mushy, approximately 15-20 minutes, adjusting salt approximately 10 minutes into the simmer. If you used a regular blender in the previous step, use the water to rinse out the blender jar before adding it to the pot.
  21. The green chile can be refrigerated or frozen. It will become softer if frozen so best to cook it for a shorter time if it is going to be frozen.
Recipe Notes

Copyright © 2017 by VillaSentieri.com. All rights reserved.

Share this Recipe

Tiella (Southern Italian Vegetable and Pasta Casserole)

September 18, 2017

When I was growing up, we mostly socialized within the extended family plus a very few close family friends (that’s you, Joe and Betty Slivosky!).

It was a time (the 60’s) and place (small-town Western Pennsylvania) where it was rare to call in advance of a visit. One just showed up. This usually happened in the evening after dinner, though almost never on Monday or Thursday when the stores downtown were open until 9 PM and we dressed and went shopping after dinner.

Everyone would sit around (usually in the kitchen) drinking coffee (with caffeine), chatting…and smoking. Oh, the smoking! Occasionally the men would drink beer but unless it was a holiday or celebration of some sort, hard liquor was a rarity.

On Sundays, visiting frequently occurred (or at least started) in the afternoon and there might be two or three stops before heading home.

I can’t tell you how many times I heard the same stories. It’s one of the ways I developed a connection with family members, like my maternal grandparents, who died when I was very young.

To be sure, sometimes my cousin Donna and I would abandon the adults and pursue some childhood activity but we still hung out in the kitchen much of the time.

Often times the conversation would veer towards food; things my grandmother would make, the huge platters of cannoli one of my great aunts would make, what was eaten on holidays, and on and on.

There was the oft-repeated reminder of how my grandfather could come home late at night with a group of friends and how my grandmother would cook for them near midnight. There were stories of my grandmother cleaning and cooking chicken feet. My mother would talk about the time she killed a chicken in the basement and it got away from her and ran, headless, around the room. My father would remind everyone that the only food he didn’t like was gnocchi.

Food was a central feature of our lives.

So was conversation.

There were also times I would just sit in the kitchen and chat with my mother for hours. Relatives and food were common topics of conversation. There were dishes my grandmother made that I heard about over and over but never tasted because my mother never made them for some inexplicable reason. One of them was a quickly sautéed veal chop with a pan sauce made of the drippings in the pan, crushed canned tomatoes, peas, and seasonings. Back in the days when I cooked veal, I actually made it. Now I do it with pork chops.

The other dish that stands out in my memory from these conversations is Tiella. My mother talked of it frequently but never made it. The instructions were basic, a layer of pasta, a layer of potatoes, a layer of zucchini, and a can of tomatoes crushed by hand and poured on top. The whole thing was then baked. There wasn’t much of a discussion of which seasonings to use or proportions of ingredients. It was just assumed it would have garlic (of course it would have garlic) and the herbs that were commonly used in our family. Proportions…well…it just needed to look “right.”

For the number of times my mother rhapsodized about this dish, I can’t figure out why she never made it.

The first time I tried to make it was in the early 1990’s at our little house on Griffin Street in Santa Fe. That first time around, it didn’t live up to the hype, for sure, but it christened the house in an odd way.

In November 1992 my mother, my husband’s mother, and my husband’s grandmother traveled to Santa Fe with us for Thanksgiving week. We looked at property and fell for a little (1151 square foot) house on Griffin Street. My mother was terminally ill at the time. When we got back home, my mother insisted that we use her money for the down payment, which we did. She kept saying that she wanted to live long enough to return to that house in the spring. It didn’t happen. She died in early January.

All of the kitchen gear, china, and glassware for the house on Griffin came from my mother’s house. So, it was fitting that I should make this dish for the first time using my mother’s kitchenware in a house that we owned thanks to her.

It took me many years of working (off and on) on the seasonings and proportions to get it to taste great. (Well, I think it does.) The only real liberty I took with the dish is to use fresh tomatoes rather than canned when I make this in the summer.


Follow us


Click HERE to join our mailing list and you’ll never miss a recipe again!

Print Recipe
Tiella (Southern Italian Vegetable and Pasta Casserole)
This is a wonderful late summer dish when tomatoes are at their peak. If you make it at other times, use a 28 ounce can of whole tomatoes in place of the tomato puree and fresh tomatoes. Pour the liquid in the can over the potatoes instead of the puree. Crush the tomatoes by hand, add the seasonings described for fresh tomatoes, and arrange the crushed tomatoes on top.
Votes: 0
Rating: 0
You:
Rate this recipe!
Prep Time 1 hour
Cook Time 2 hours
Passive Time 30 minutes
Servings
people
Ingredients
Prep Time 1 hour
Cook Time 2 hours
Passive Time 30 minutes
Servings
people
Ingredients
Votes: 0
Rating: 0
You:
Rate this recipe!
Instructions
  1. Preheat the oven to 350°F.
  2. Combine the olive oil and crushed garlic in a small sauté pan. Sauté garlic until lightly browned. Remove the garlic and reserve the oil.
  3. Put the raw ditalini in the bottom of a deep, circular casserole, approximately 10 inches in diameter. The pasta should form a single layer with a fair amount of extra room for it to expand.
  4. Add 2 tablespoons of Parmesan cheese, ¼ of the minced garlic, and 2 tablespoons of the garlic oil and mix well.
  5. In a bowl, toss the sliced potatoes with half the rosemary, ⅓ of the oregano, ¼ of the basil, 2 tablespoons of Parmesan cheese, ¼ of the minced garlic, 2 tablespoons of the garlic oil, and a generous amount of salt and pepper.
  6. Arrange the potatoes neatly in overlapping layers on top of the ditalini. Do not wash the bowl.
  7. Season the tomato puree with salt and pour over the potatoes.
  8. In the same bowl used for the potatoes, toss the zucchini with the remaining oregano, ¼ of the basil, the remaining rosemary, 2 tablespoons of Parmesan cheese, ¼ of the minced garlic, 2 tablespoons of the garlic oil, and a generous amount of salt and pepper.
  9. Arrange the zucchini on top of the potatoes. Do not wash the bowl.
  10. Neatly arrange half the tomatoes on top of the zucchini. Season with half the remaining minced garlic, half the remaining basil, and salt and pepper.
  11. Arrange the remaining tomatoes on top and season with salt and pepper as well as the remaining garlic, basil, and all the parsley.
  12. Put the tiella in the preheated oven.
  13. Remove the crusts from several slices of day-old Italian or French bread. Whiz the bread in a food processor to make coarse crumbs.
  14. While the tiella bakes, toss the breadcrumbs with the remaining garlic oil in the bowl used for the potatoes and zucchini.
  15. After the tiella has baked for 90 minutes, sprinkle the oiled crumbs on top and bake till golden, approximately 30 minutes more.
  16. Allow to rest at least 30 minutes before serving. The tiella can be served warm or at room temperature. It can also be reheated in the oven briefly before serving, if desired.
Recipe Notes

Here’s the link for my recipe for homemade tomato puree (passata di pomodoro).

Copyright © 2017 by VillaSentieri.com. All rights reserved.

Share this Recipe

Angie’s Pickled Hot Peppers

September 13, 2017

With one set of grandparents and many relatives hailing from Southern Italy, hot peppers and foods containing hot peppers were staple features of the cuisine I grew up eating.

Hot sausage, with fennel seed, was frequently on our table and, since it was often homemade by Uncle Joe Medile, it could be as hot as we wanted. When it wasn’t Uncle Joe’s sausage, it would typically have been from Lopresti’s Market in Geistown, a suburb of Johnstown, PA.

Spicy foods more often showed up at lunch, though. There was spicy salumi, including Calabrese salami, capocollo (of which there are several types but in our house it was always the spicy one), and sopressata, among others.

There were hot banana peppers fried until tender, usually with onions. The fried peppers could be a condiment or they could be used as the filling for a sandwich. Fried hot pepper sandwiches are still one of my favorite lunchtime treats!

There were various pickled, spicy vegetables like giardineria and pickled peppers of various types. These were usually store-bought except for my cousin Angie’s pickled hot peppers.

Angie is the daughter of my mother’s oldest sister. Angie, however, was born six months before my mother. It’s kind of interesting to think about the fact that my grandmother was pregnant with my mother at the same time that my grandmother’s daughter was pregnant with Angie.

Despite their inverted ages, Angie always called my mother Aunt Theresa.

Angie’s mom, my Aunt Rosie, died at a young age. I never knew her. Aunt Rosie’s husband, Uncle Dominic lived with their other daughter, Marie.

Uncle Dominic grew vegetables, including hot peppers, in the back yard. He’s the one who taught me about fried hot pepper sandwiches for which I am eternally grateful!

Usually I would make Angie’s Pickled Hot Peppers with Italian Banana Peppers but fresh New Mexico Green Chile is far more abundant in Santa Fe than Banana Peppers and the substitution works just fine. Years past, when we lived in Chicago and grew lots of peppers, I would even make these with jalapeno peppers.

These peppers are a breeze to make, just some slicing and dicing and pulling together a quick pickle. No actual canning or processing is required. They will keep for months and months in the refrigerator.

The recipe calls for a peck of peppers. A peck is an interesting measure. It is eight dry quarts. A dry quart, however, is not the same as a liquid quart (unless you use the British Imperial system in which case a dry quart and a liquid quart are the same volume but not the same volume as any quart used in America).

Confused? Oh how I wish we used the metric system!!!

A dry quart is slightly larger than a liquid quart. Eight dry quarts equals 9 1/3 liquid quarts. If you go to a farmers market, chances are you’ve seen produce displayed in baskets that are one peck in size. Not to worry, though. First off, the measurements aren’t that critical for this recipe, so plus or minus a quart (dry or liquid) isn’t a big deal. Second, if you have any type of large container, pot, or bucket marked in liquid measure, just fill it up a little beyond the 9 (liquid) quart mark and you’ll be good to go.

If you’re buying peppers in the supermarket and don’t want to carry a bucket to measure a peck, I suggest buying approximately four pounds of banana peppers. I found that amount of New Mexico Green Chile came very close to a peck when I measured it out.


Follow us


Click HERE to join our mailing list and you’ll never miss a recipe again!

Print Recipe
Angie's Pickled Hot Peppers
Though usually made with hot Italian Banana Peppers, I made this batch with hot New Mexico Green Chile which is far easier to source in Santa Fe than are large quantities of Banana Peppers. Four pounds of peppers should come pretty close to a peck. A peck is 8 dry quarts which is the equivalent of 9 1/3 liquid quarts. If there isn’t enough pickling liquid to fully submerge the peppers, make a little extra following the proportions in the recipe. These peppers will keep well in the refrigerator for many months. Try to let them mellow at least a couple of days before eating them…if you can!
Votes: 0
Rating: 0
You:
Rate this recipe!
Prep Time 75 minutes
Passive Time 8 hours
Servings
quarts
Ingredients
Prep Time 75 minutes
Passive Time 8 hours
Servings
quarts
Ingredients
Votes: 0
Rating: 0
You:
Rate this recipe!
Instructions
  1. Wash and dry the peppers.
  2. Cut off the stem ends.
  3. Cut the peppers crosswise into rings a little more than 1/8 inch thick.
  4. Cut the celery into ¼ inch dice.
  5. In a non-reactive container large enough to hold all the ingredients, combine the vinegar, water, oil, garlic, salt, and oregano. Mix well.
  6. Add the sliced peppers and diced celery.
  7. Mix thoroughly. Cover and allow to sit at room temperature for 8 hours or overnight.
  8. Using a slotted spoon, ladle the peppers and celery into clean jars.
  9. Once the jars are filled, ladle the pickling liquid into the jars. Mix the liquid well with each ladleful so that you get the right proportions of vinegar/water and oil.
  10. If there is not quite enough liquid to cover the peppers make a small amount more using the same proportions.
  11. Cover and refrigerate until ready to use.
Recipe Notes

Copyright © 2017 by VillaSentieri.com. All rights reserved.

Share this Recipe

Pasta con Salsa Cruda (Pasta with Uncooked Tomato Sauce)

September 8, 2017

Pasta with a sauce of uncooked tomatoes, herbs and aromatics is one of the delights of late summer. While this is very easy to make, and only a few tomatoes are needed, the tomatoes must be vine-ripened.

If you have just one tomato plant you’ll probably have enough tomatoes to make a batch of Salsa Cruda. Farmers Market tomatoes are a good option this time of year, too.

Some of our tomato plants in front of the greenhouse and behind mesh to protect them from deer

I make this with our home-grown tomatoes which are always red but using some of the amazing heirloom tomatoes in colors of yellow, green, or purple available in farmers markets would make a dramatic sauce.

Colorful heirloom tomatoes on the bar at The Kirby Hotel in Douglas, Michigan: @thekirbyhotel

If you can’t get vine-ripe tomatoes, or you want to make a similar sauce at a time other than late summer, you can use two or three roasted red peppers in place of the tomatoes. I’ll be posting a recipe for roasted peppers next month, after tomato season is over. In a pinch, you can buy a jar of good-quality roasted peppers.

Although this recipe is not a traditional “family of origin” recipe it is one that I have been making for almost 30 years. I consider it to be one of my traditions.

While you can still get vine-ripened tomatoes, give this easy and delicious recipe a try.


Follow us


Click HERE to join our mailing list and you’ll never miss a recipe again!

Print Recipe
Pasta con Salsa Cruda (Pasta with Uncooked Tomato Sauce)
This makes enough sauce for one pound of pasta. Use pasta with a shape that will hold the sauce, such a small shells or fusilli. Although you can make the sauce in the time it takes the pasta water to come to a boil, it is better if the sauce is allowed to sit at room temperature for about an hour to allow the flavors to meld. Since the sauce is not hot, it is important to warm the serving bowl with boiling water just before using. I usually put some of the pasta-cooking water to warm the bowl. The optional aromatics (hot peppers, kalamata olives, and blue cheese) are really optional but definitely help to round out the flavor.
Votes: 0
Rating: 0
You:
Rate this recipe!
Prep Time 15 minutes
Cook Time 15 minutes
Passive Time 1 hour
Servings
people
Ingredients
Prep Time 15 minutes
Cook Time 15 minutes
Passive Time 1 hour
Servings
people
Ingredients
Votes: 0
Rating: 0
You:
Rate this recipe!
Instructions
  1. Coarsely chop the hot pepper.
  2. Coarsely chop the garlic.
  3. Combine olive oil, garlic, and hot peppers, if using, in the food processor.
  4. Process until finely chopped.
  5. Add basil, parsley, Parmesan cheese and Kalamata olives, if using.
  6. Pulse a few times to chop.
  7. Add tomatoes, blue cheese, if using, salt, and black pepper and pulse until finely chopped, but not pureed.
  8. There should definitely be some texture to the sauce.
  9. Bring three quarts of water to a rolling boil.
  10. Season the water with 1/3 cup of salt.
  11. Add the pasta and cook until al dente.
  12. When the pasta is done, reserve about ½ cup of the pasta-cooking liquid to thin the sauce if needed.
  13. Drain the pasta.
  14. Drain the hot water from the serving bowl. Add the pasta and sauce to the warmed bowl. Toss well.
  15. If needed, thin the sauce with some of the reserved pasta water. This will likely not be the case but it is always a good idea to have some pasta-cooking water available just in case.
Recipe Notes

Copyright © 2017 by VillaSentieri.com. All rights reserved.

Share this Recipe

Passata di Pomodoro (Homemade Tomato Puree)

September 4, 2017

Sometimes in the late summer my mother and Annie Castagnola would get together to “put up” tomatoes. I don’t really remember paying much attention to the process but I was fascinated by the jars and jars of red orbs sitting on an enamel table in Annie’s garage at the end of the day.

Annie lived in a jewel-box of a mid-century-modern house on a quiet residential street in Westmont, a suburb of Johnstown, PA where I grew up. She was always immaculately made-up, her hair coiffed, and frequently dressed in muumuus.

She was also a chain-smoker. There was a very large abalone shell on the coffee table on her side porch that served as a communal ashtray. I was always amazed at the number of cigarette butts that would collect in that shell over the course of a visit.

Though Annie was a very good cook, she was mostly known for her baking. Some of you may remember me mentioning her in an early blog about Totos, Italian Chocolate Spice Cookies.

Growing up we used a lot of canned tomatoes. My mother made her long-simmered Southern Italian Style Ragu most Sundays. Each batch used about a quart of canned tomatoes. The number of jars of tomatoes that my mother and Annie “put up” was nowhere near the 50 or so that would have been needed just to supply my family’s Sunday dinner table, let alone what Annie needed.

Those home-canned tomatoes, though, were a treat when they were used and a potent reminder of cultural heritage and a more agrarian family history.

These days I turn our home-grown tomatoes into passata (puree) rather than canning whole tomatoes. It’s easier. The results can be frozen successfully eliminating pressure canning at my 8000-foot elevation. And, since there aren’t enough home grown tomatoes to supply all of our tomato-product needs (canned tomatoes, tomato puree and tomato paste being the primary ones) I’ve opted for the most expedient option.

Though we had more tomato plants when we lived in Chicago, I still use the same field mix of canestrini, lunghi, and beefsteak tomatoes to make passata.

The canestrini, an heirloom variety, are grown from seeds that we brought back from Italy about 20 years ago. They were given to us by my husband’s Great Uncle Faliero (Great Aunt Fidalma’s husband). Every year, seeds are lovingly removed from several tomatoes, spread out on waxed paper, and allowed to dry. Since these are heirloom, and not hybrid, tomatoes, they breed true. The seeds are used to start the following year’s tomato seedlings.

Canestrini are meaty and don’t have an excess of jelly surrounding the seeds. They can also be ugly if one’s vision of a tomato is a perfectly formed red orb. The taste, however, is superior.

Canestrini tomatoes on the vine

The lunghi seeds are imported from Italy and are available domestically as are the beefsteak tomato seeds. Mostly we grow the beefsteak tomatoes for eating but there are always more than enough so they get put into the field mix for the passata.

Lunghi tomatoes

Making passata is really a breeze compared to canning whole tomatoes or making tomato paste. The tomatoes are washed, quartered, cored and coarsely chopped before being simmered into a pulp. They are then passed through an old-fashioned food mill, a step that only takes a few minutes, which eliminates the seeds and skin. They cook for about 2 ½ hours but it is mostly hands off other than the occasional stir.

Leaving the seeds and surrounding jelly in the chopped tomatoes means that the cooking time is a bit longer than it might otherwise be but there are two distinct advantages. Getting the tomatoes ready to cook is really quick. Perhaps more important, though, is that the jelly surrounding the seeds contains loads of naturally occurring glutamates which boost the savory “umami” quotient of the tomatoes.

If you have access to vine-ripe tomatoes, grab yourself 15 or 20 pounds and give this recipe a try. You won’t be sorry!

Click here for a video showing the process of making tomato puree.


Follow us


Click HERE to join our mailing list and you’ll never miss a recipe again!

Print Recipe
Passata di Pomodoro (Homemade Tomato Puree)
This easy-to-make tomato puree can be frozen for later use. It brings a blast of late-summer goodness to winter meals. Ten to 20 pounds of tomatoes is a good amount to start with. If you are planning on using more than 20 pounds, I would either divide the tomatoes among several pots or find an extra-wide rondeau (a wide shallow pot) so that there is enough surface area to foster evaporation.
Votes: 0
Rating: 0
You:
Rate this recipe!
Prep Time 20 minutes
Cook Time 3 hours
Servings
quart
Ingredients
Prep Time 20 minutes
Cook Time 3 hours
Servings
quart
Ingredients
Votes: 0
Rating: 0
You:
Rate this recipe!
Instructions
  1. Wash and dry the tomatoes.
  2. Cut the tomatoes into quarters from top to bottom.
  3. Remove the hard bit where the stem attaches and any bad areas.
  4. Coarsely chop the tomatoes.
  5. Put the tomatoes into a heavy-bottomed, non-reactive pot (such as stainless steel).
  6. Add one teaspoon of salt for every quart of chopped tomatoes.
  7. Cover the pot and bring to a boil over medium-high heat. This will take approximately 10-20 minutes depending on volume of tomatoes.
  8. Remove the cover. Stir the tomatoes.
  9. Boil gently, uncovered, for 2 ½ to 2 ¾ hours, stirring every 15-20 minutes. It takes a bit of practice to estimate how much to concentrate the tomatoes to get the desired thickness of puree but don’t sweat it, the tomatoes can be cooked further.
  10. Pass the cooked tomatoes through a food mill to remove skin and seeds.
  11. If the puree seems too thin, return it to the pot and cook it a bit longer after passing it through the food mill.
  12. Portion and freeze or use as desired.
Recipe Notes

A rondeau is useful if you are going to prepare more than 20 pounds of tomatoes as it provides more surface area for evaporation than a deep sauce pan.

A rondeau is a wide, shallow pot

Copyright © 2017 by VillaSentieri.com. All rights reserved.

Share this Recipe