Guyanese Curried Chickpeas (Channa Masala)

April 30, 2018

The largest ethnic group in Guyana is comprised of those of (East) Indian descent.  When I was there in the 1970s and 1980s, Indians represented just over half of the population.  As of the 2002 census, those of Indian descent represent just over 43 percent of the population.

Other demographic groups in Guyana include those of African, Chinese, Western European, and mixed descent.  Amerindians are now a very small percentage of the population.

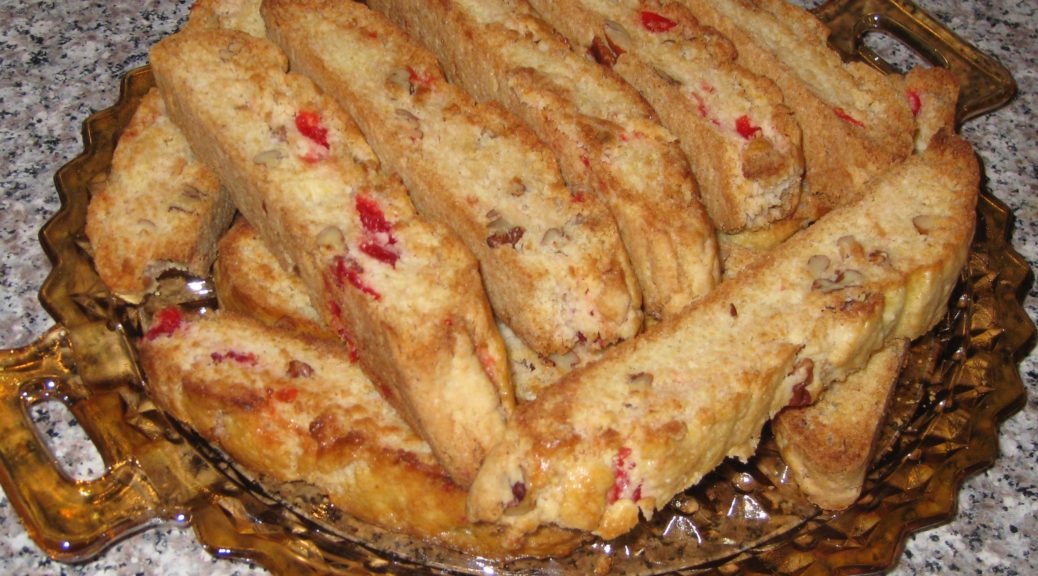
The cuisine of Guyana reflects its multicultural population.  Curry is very popular as is roti, Indian-style flatbread.  Chinese-style fried rice is a restaurant staple.  A typical Sunday dish is Portuguese-derived garlic pork.  British-style baked goods are popular, especially black cake around Christmastime.

The Guyana Supreme Court building (CC BY-SA 3.0, https://commons.wikimedia.org/w/index.php?curid=475676)

A quick internet search demonstrated to me that the restaurant scene in Guyana has changed dramatically since my visits there.  In the 70s and 80s, restaurants were, for the most part, very basic affairs.  There were just a few that rose above “basic” but even they were challenged to produce really good food because of the limitation on imported foodstuffs.


Click HERE to join our mailing list and you’ll never miss a recipe again!


Food prepared at home was generally of a better quality, and certainly displayed more variety, than what was available in restaurants “back then.”  And, while in any given household there may be more foods reflective of the particular demographics of that household, popular dishes like curry, fried rice, garlic pork, and black cake are prepared in pretty much every household.  They have really become Guyanese dishes, regardless of their ethnic origins.

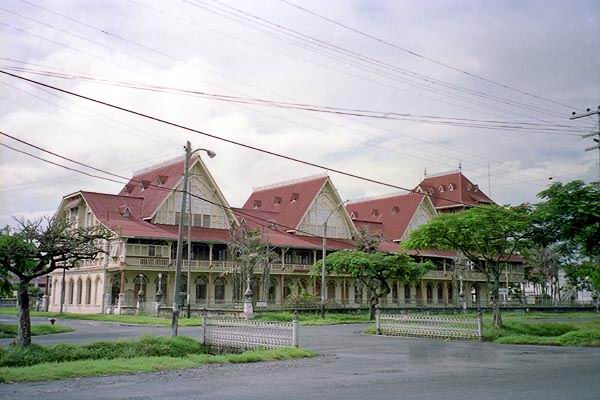
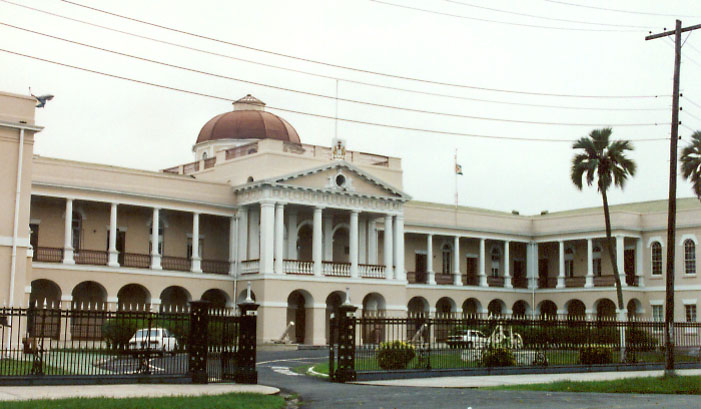
My last trip to Guyana was in early 1981.  I finished medical school around the end of January and went to Guyana to work on the psychiatric unit at the public hospital in Georgetown, the capital, before beginning my internship at the Hospital of the University of Pennsylvania in mid-June.  At that time there was one psychiatrist who worked for the government of Guyana and one psychiatrist in private practice.  The government psychiatrist, who lived a significant distance from Georgetown, was also responsible for overseeing the long-term psychiatric unit in Fort Canje, now referred to as the National Psychiatric Hospital.


Follow us on your social media platform of choice


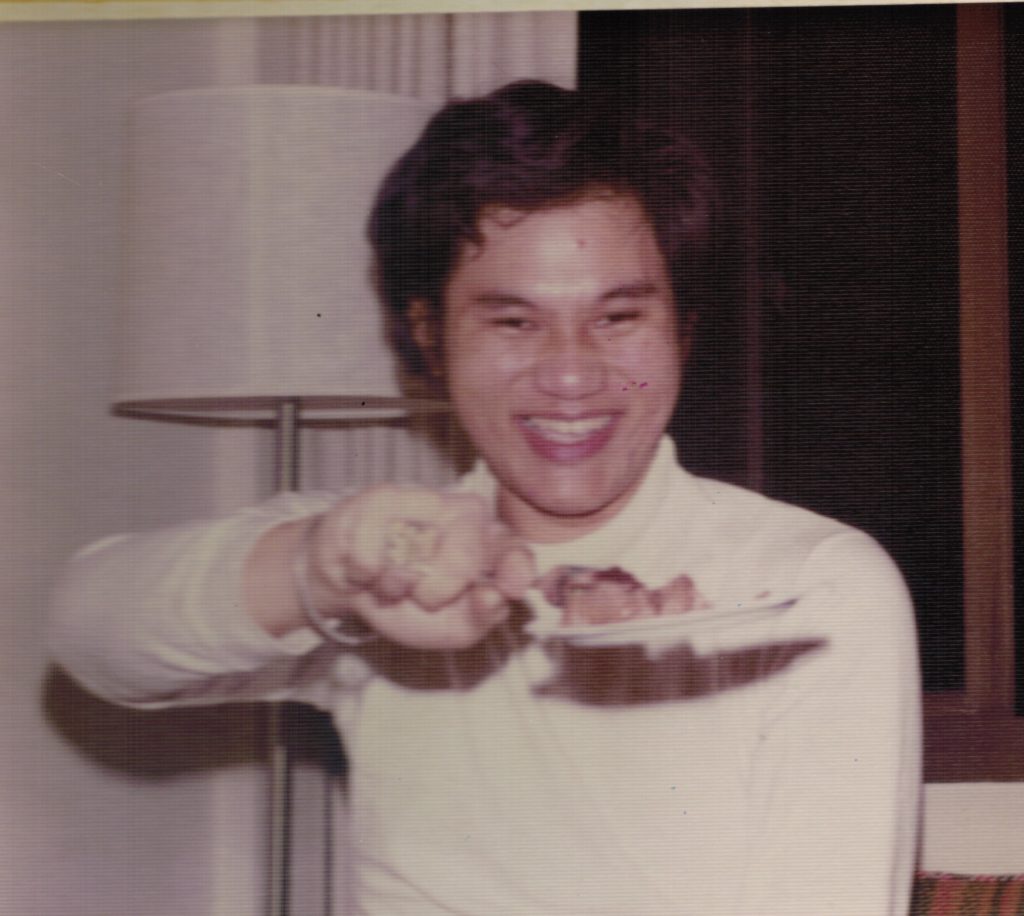
The day I arrived at the public hospital in Georgetown, the psychiatrist was a no-show.  He then made it clear that he had no intention of coming to the hospital for the duration of my stay.  At the age of 26, just having finished medical school and not having done an internship, let alone a residency, I became the de-facto psychiatrist for the public hospital!

The Guyana Parliament Building (CC BY-SA 3.0, https://commons.wikimedia.org/w/index.php?curid=475699)

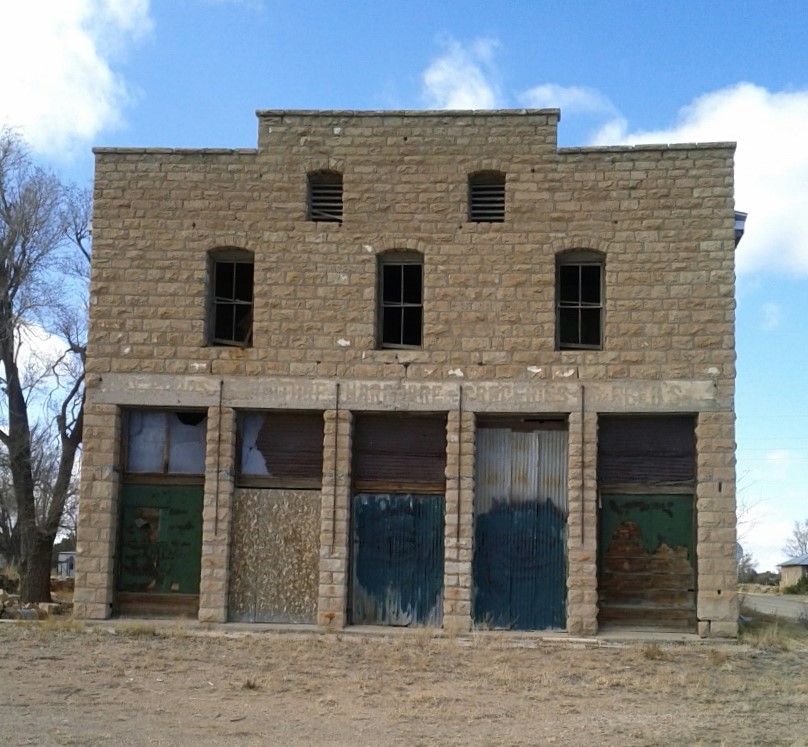
The psychiatric unit consisted of four rooms (plus two bathrooms) on the upper floor above the morgue.  The psychiatrist’s office (my office) was the entry point to the unit.  Behind the office was a very small nurses’ station.  There were two large wards, one on each side of the nurses’ station.  Each has eleven beds and no privacy.  One ward was for men and one for women.  Though we only had 22 beds, our census was often double that.  There was no option to add beds so patients often slept two to a bed.

In general, male patients were attended to by male nurses and female patients by female nurses.

There was also a very, very busy outpatient clinic staffed by myself and three social workers.

The male nurses started including me in some of their evening social gatherings.  I remember a few held at the home of one of the nurses who was of Indian descent.  We basically sat around talking, drinking rum, and eating.  My love of spicy Indian food was met with amazement.  The fact that I could eat incendiary atchar was sort of beyond belief.

Whenever these gatherings happened, it was just us guys.  Wives and girlfriends stayed away, even the wife of whomever was hosting the party (even though she would have prepared most if not all the food!).

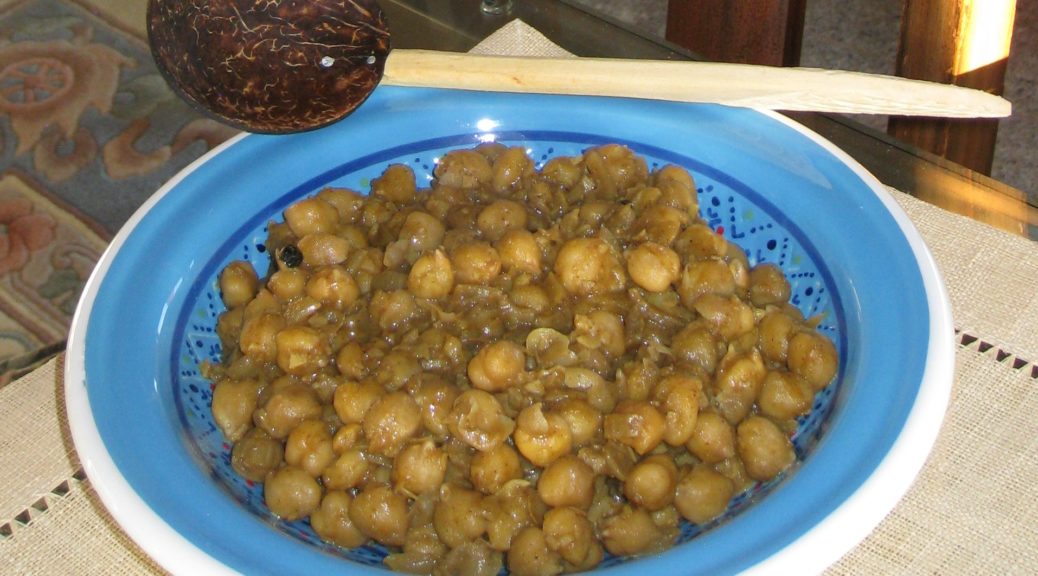
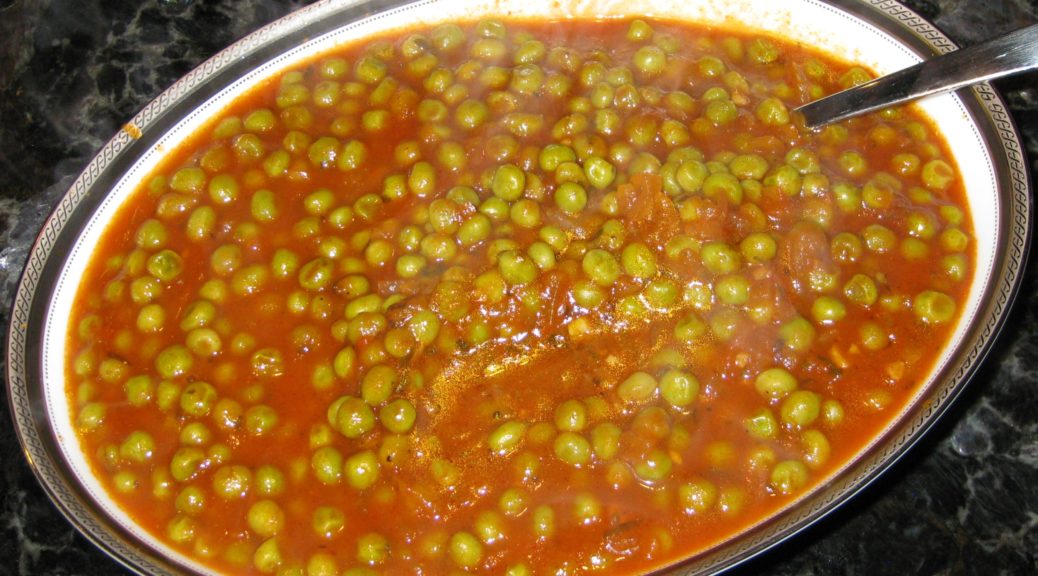
When I was in Guyana, pre-mixed curry powder was the norm in cooking.  This recipe reflects that tendency.  When I made Indian food frequently, I would keep one or two types of homemade curry powders on hand as a quick solution to a weeknight meal.  For this recipe, feel free to use a good quality commercial curry powder.

Print Recipe
Guyanese Curried Chickpeas
Two cans of chickpeas can be used instead of the 3 to 3 ½ cups of home cooked beans but home-cooked are so good, and so much better. If using canned chickpeas, taste the canning liquid to decide whether to use it or discard it and rinse the chickpeas. The curry should be basically dry at the end so do not put in too much liquid at the beginning. Although not strictly Guyanese, adding a tablespoon or so of minced ginger with the garlic is a welcome taste treat.
Votes: 8
Rating: 4.5
You:
Rate this recipe!
Prep Time 10 minutes
Cook Time 30 minutes
Servings
people
Ingredients
Prep Time 10 minutes
Cook Time 30 minutes
Servings
people
Ingredients
Votes: 8
Rating: 4.5
You:
Rate this recipe!
Instructions
  1. Sauté the onion in butter until translucent.
  2. Add the garlic and minced hot pepper.
  3. Continue sautéeing until the onion is golden and the garlic is fragrant.
  4. Add the curry powder.
  5. Sauté 2-3 minutes, stirring frequently, until the raw smell is gone.
  6. Add the liquid.
  7. Bring to a boil and simmer approximately 20 minutes to develop flavor.
  8. Add the chickpeas.
  9. Simmer 10-15 minutes, stirring frequently. The chickpeas should be almost dry by the end.
  10. Adjust salt and pepper while cooking.
  11. Off the heat and stir in the lime juice and serve
Recipe Notes

Copyright © 2018 by VillaSentieri.com. All rights reserved.

Share this Recipe

Chinese Roast Pork

April 25, 2018

Throughout junior year in college I predominantly ate Chinese, West Indian, and Sri Lankan food.  To be sure, I made Italian and a smattering of other cuisines but that year was really an intensive study in three cuisines.

My roommate, Ray Hugh, was from Guyana.  His grandparents emigrated from China to Guyana around 1870.  My grandparents emigrated from Italy (on my mother’s side) and Slovakia (on my father’s side) to the United States a few decades later.

Ray Hugh in 1975 from the first page of my 1975 scrapbook

I learned a lot about Chinese food, especially Hakka Chinese, from Ray.  We also went to Chinese restaurants regularly so my palate got accustomed to the different regional cuisines of China.  We spent six weeks the summer after junior year staying with his mother outside of London.  I learned a lot about Chinese (and West Indian) food from her.


Click HERE to join our mailing list and you’ll never miss a recipe again!


As for West Indian, my primary influences were, again, Ray Hugh, Valrie Tracey, and Gloria Lannaman.  Though located on the South American mainland, Guyana was administered (then called British Guiana) as part of the British West Indies and it definitely has a West Indian cultural heritage.

Valrie and Gloria were from Jamaica.  I posted my version of a recipe for Valrie’s Easter Bun a few weeks ago.  If I get in the right frame of mind, I’ll post my interpretations of her recipes for curry goat and for home-salted mackerel cooked in coconut milk.  Admittedly, these may be a stretch for most of my readers but they fulfill the blog’s goal of highlighting traditional recipes from around the world.

From Gloria, I got a wonderful pot roast recipe with allspice (called pimento in Jamaica) and a shockingly pink rum punch recipe.  I still use her technique for sautéing baked ham with caramelized onions and Scotch Bonnet peppers for a quick supper or served on crackers with cocktails.   These will all appear in due course.

Valrie Tracey in 1975, also from the first page of my 1975 scrapbook

As I’ve described several times, Nanacy and Reggie Rajapakse were my primary instructors in the art of Sri Lankan cooking…along with a couple of cookbooks by Charmaine Solomon, who Nanacy and Reggie knew.

For much of the summer that Ray and I spent with his mother near London, we explored the city almost every day.  We’d have breakfast, walk to the train station in New Malden, and take the train to London.  We’d be home for dinner, usually.  Lunch was frequently at a restaurant in Chinatown—you know, the Cantonese ones with roast pork, roast ducks, and other roasted animal parts hanging in the window.  That was where I honed my taste for Cantonese roast pork—minus the bright red food coloring.


Follow us on your social media platform of choice


In these restaurants, lunch was a bowl of rice and some sort of roasted meat, hacked to bite-size bits with a very heavy cleaver.  There was nary a vegetable in sight.  When I mentioned to Ray, once, that a vegetable would be nice, he walked over to the chef, who was putting together everyone’s lunch right inside the front window of the store, with rows of glistening roasted meat on hooks hanging in front of him.  The chef pulled a few greens from somewhere, dipped them in a bubbling cauldron of broth momentarily, and put them in my bowl along with the rice and roast pork.  He was very gracious about it but I realized that vegetables were not the point of a restaurant like this.  From then on I was happy to eat rice and roasted meat for lunch, choosing to balance out my diet at the other two meals of the day.

The third and final picture on the first page of one of my 1975 scrap book is this picture of me

Friday, July 4, 1975 was one of the days we did not go into London from Ray’s mother’s house.  Instead, we stayed home and made hamburgers and hot dogs (well, that being England and then being then, they were bangers, really) and a few of the usual trimmings.  Ray and I along with his mother and two sisters, and his younger sister’s boyfriend, Clive, sat outside in the charming little backyard (what the Brits call a “garden”) eating.  Clive asked what we were celebrating.  I told him we were celebrating the independence of the United States from Britain.  That didn’t go over really well but he was a good sport about it.

From that summer of eating Cantonese Roast Pork in London’s Chinatown, I got home wanting to be able to make it.  Ray and I roomed together senior year as well.  That’s when I perfected my recipe for roast pork.  It involves marinating strips of pork overnight then hanging them from hooks in the oven and roasting them.  It sounds fussy, but it’s really quite easy.

Stainless steel “s” hooks are the best for hanging the pork in the oven

This Cantonese-style roast pork is totally different from Ray’s Five Spice Roast Pork, which I like equally well.

Print Recipe
Chinese Roast Pork
This roast pork is not as red as the roast pork often seen in Chinese restaurants as it does not use artificial coloring. Thick-cut boneless pork chops work well. It is best for the meat to have a layer of fat to provide some moisture while roasting. The thin fat cap should not be removed. The difference in taste between Chinese rice wine, sake, and pale dry sherry is not really noticeable in this dish given the other very flavorful ingredients. Good quality Chinese rice wine can be difficult to find. I prefer a reasonably-priced, good-quality domestic Sake, such as Sho Chiku Bai. Do not use the unfiltered (nigori) sake, however.
Votes: 0
Rating: 0
You:
Rate this recipe!
Course Mains, Meats
Cuisine Chinese
Prep Time 15 minutes
Cook Time 1 hour
Passive Time 24 hours
Servings
people
Ingredients
Course Mains, Meats
Cuisine Chinese
Prep Time 15 minutes
Cook Time 1 hour
Passive Time 24 hours
Servings
people
Ingredients
Votes: 0
Rating: 0
You:
Rate this recipe!
Instructions
  1. Cut pork into 1½ x 1½ x 4 inch strips.
  2. Mince the garlic.
  3. Grate the ginger.
  4. Crush the star anise in a mortar.
  5. Combine the ginger, garlic, hoi sin sauce, crushed star anise, sake, soy sauce and honey. Mix well.
  6. Add the pork strips and toss to coat.
  7. Marinate the pork at least 2 hours, but preferably overnight turning once or twice.
  8. To roast, put one oven rack in the top position and another in the bottom position. Preheat the oven to 350°F.
  9. Hang each strip of pork from an "S" shaped hook on the top rack. Put a roasting pan below the pork, filled with water, to catch the drippings.
  10. Roast at 350°F for 30 minutes. Increase the temperature to 450°F and cook for another 20-25 minutes.
  11. Remove the pork strips from the oven. Slice them crosswise, approximately 1/3 inch thick. Pile the pork on a platter to serve.
Recipe Notes

Sho Chiku Bai sake is reasonably priced and good to drink as well as to cook with.

Hoisin sauce is available in Asian markets and many well-stocked supermarkets.

Copyright © 2018 by VillaSentieri.com. All rights reserved.

Share this Recipe

Mom’s Biscotti (aka Anise Toasts or Slice Cookies)

April 20, 2018

Growing up biscotti were not ubiquitous the way they are now.

Remember, this was before the coffee shop craze swept the country and when Italian food was viewed as “foreign.”

Sure, one could get biscotti in Italian specialty stores.  There was even a marginally passable supermarket version from Stella d’Oro.  (It still exists though the company has been sold many times.)

Stella d’Oro Biscotti (I just can’t bring myself to spell it incorrectly with an uppercase “D” and a lowercase “o”)

But mostly, biscotti were homemade.


Follow us on your social media platform of choice


My mother’s biscotti are a little softer on the inside than the standard biscotti today, which seem to have a crunch the whole way through.  She also made them much smaller than is now common, maybe three inches or so in length as opposed to six or eight.

The interesting ingredient in these biscotti is maraschino cherries.  The maraschino cherry as we Americans know it was a product of food science from the 1920’s and 30’s.  “Real” maraschino cherries, Marasca cherries from the Dalmatian coast of Croatia, pickled in salt water and preserved in Maraschino liqueur, are actually quite rare.  There are many versions of cherries preserved in liquor from throughout Europe, some clearly developed as substitutes for authentic maraschino cherries.

I remember eating these biscotti in the 1960’s so the recipe is at least that old, probably older.  It is unlikely, however, that these biscotti ever saw real maraschino cherries due to their rarity.

If this recipe dates to pre-prohibition, in which case it would have been from my grandmother or someone in her generation, it’s possible that some sort of cherry preserved in alcohol (on the order of a real maraschino cherry) was originally used.  I have no idea if the recipe is that old.

Since liquor-soaked cherries were outlawed during prohibition they would have been eliminated from this recipe even if it is that old.  Which brings us to a dichotomy in thinking about recipes that I often consider:  the difference between authentic and traditional.


Click HERE to join our mailing list and you’ll never miss a recipe again!


Is food authentically Italian if it’s prepared in Italy by an Italian but does not follow any traditional recipe?

If cioppino is made following a longstanding traditional Italian regional recipe but the cook substitutes seafood available in the United States for that available in Italy, is it authentic?

There is no doubt that these biscotti are traditional in my family, having been made for more than 50 years.  But what would make them authentic?  And for that matter, would it be authentically Italian or authentically Italian-American?

I suggest you mull that over while dunking biscotti in your morning caffe latte.

Print Recipe
Biscotti
In my family, these biscotti are traditionally made much shorter (after being cut crosswise) that is commonly the case now. For longer biscotti, form 6 logs approximately 9 ½ to 10 inches long before baking. For shorter biscotti, form 10-12 logs of the same length. The recipe is easily cut in half (which is what I did when making this batch).
Votes: 0
Rating: 0
You:
Rate this recipe!
Prep Time 45 minutes
Cook Time 2 hours
Passive Time 30 minutes
Servings
dozen large biscotti
Ingredients
Prep Time 45 minutes
Cook Time 2 hours
Passive Time 30 minutes
Servings
dozen large biscotti
Ingredients
Votes: 0
Rating: 0
You:
Rate this recipe!
Instructions
  1. Drain the cherries.
  2. Cut the cherries in quarters.
  3. Squeeze out excess liquid by gently pressing a small handful of cut cherries between your flat palms. Do not make a fist and do not smash the cherries. Reserve the cherries.
  4. In a very large bowl, mix flour, sugar, and baking powder using your hands.
  5. Make a well in the center.
  6. Add the eggs.
  7. Begin to incorporate some of the flour into the eggs working in a circular motion using your hands.
  8. Add the oil and butter and continue mixing.
  9. Add the milk and anise extract. Mix thoroughly.
  10. Add the cherries and nuts, if using.
  11. Fully incorporate the cherries and nuts.
  12. Form into six or twelve cylinders approximately 9 ½ inches long. Six cylinders will make biscotti that are quite long once cut crosswise. Twelve cylinders will make shorter biscotti.
  13. Bake the cylinders for 30 minutes at 350°F. You can line the sheet pan with parchment if you prefer.
  14. Brush the tops with beaten egg.
  15. Bake 5 to 10 minutes longer, until golden brown and the cylinders are cooked through. Larger cylinders will take longer to bake.
  16. Cool the baked cylinders on the baking pan on a cooling rack for approximately 10 minutes.
  17. Cut the baked cylinders crosswise on the diagonal into slices approximately 1 inch thick.
  18. Cool the slices completely.
  19. Lay the slices cut side down on a baking pan.
  20. Toast in the top rack of the oven at 450°F.
  21. Turn and toast the other side.
  22. Remove biscotti to a rack to cool.
Recipe Notes

Copyright © 2018 by VillaSentieri.com. All rights reserved.

Share this Recipe

Bertha’s Salsa

April 16, 2018

Bertha was born and raised in Duran, New Mexico.  She was one of 15 children.

If her family lived in Duran now they would constitute 50% of the population of 33 people (35 according to some reports).

With a few dozen residents, Duran doesn’t qualify as an actual ghost town but many of its buildings are abandoned.

One of many abandoned buildings in Duran. This was a general store and hotel adjacent to the railroad tracks.

Duran popped up in the very early 1900’s thanks to the railroad, a common occurrence in New Mexico.  Twenty years later the railroad moved it operations (repair shops, etc.) south to Carrizozo, dealing Duran, population 300 at its peak, a blow.


Click HERE to join our mailing list and you’ll never miss a recipe again!


In the 1930’s US 54 came right through Duran.  The highway traffic revived the town a bit.  In the early 1960’s however, I-25 opened about 60 miles away.  Traffic on US 54 dropped precipitously and Duran entered a downward spiral.

A sign without a purpose

Bertha has been our housekeeper in Alamogordo for the last five years.  As you may know, my husband is the Medical Director for Behavioral Health at the Gerald Champion Regional Medical Center in Alamogordo.

He’s in Alamogordo during the week and back home in Santa Fe on the weekends.

The fastest way from Santa Fe to Alamogordo involves US 54, so Frank and I know Duran well.  It’s almost the halfway point of the trip.

Another abandoned building

Bertha loves to cook.  She periodically leaves goodies in the fridge in Alamogordo.  This salsa appears frequently.  It’s an interesting recipe using canned tomatoes and garlic powder.  The canned tomatoes mean that it’s a year-round treat which does not require the red-ripe tomatoes of late summer.


Follow us on your social media platform of choice


I’m not sure why the garlic powder instead of fresh garlic but there are several dishes that I make that turn out better with garlic powder than with fresh garlic (like my mother’s roast turkey and chicken).  So, I didn’t play with Bertha’s recipe.

And yet another

Just whizz everything in the food processor and refrigerate for several hours for the flavors to blend and you’ve got an amazing salsa with almost no work.

The fire department is still in operation

Frank is leaving Alamogordo at the end of June.  We’re going to miss Bertha, her husband Miguel, and the surprise treats that occasionally appear in our refrigerator!

Print Recipe
Bertha's Salsa
Since this salsa doesn’t use fresh tomatoes it can be made year-round. Despite the use of canned tomatoes and garlic powder it tastes bright and fresh.
Votes: 0
Rating: 0
You:
Rate this recipe!
Prep Time 5 minutes
Passive Time 2 hours
Servings
cups
Ingredients
Prep Time 5 minutes
Passive Time 2 hours
Servings
cups
Ingredients
Votes: 0
Rating: 0
You:
Rate this recipe!
Instructions
  1. Cut the tops off the jalapenos.
  2. Put the jalapenos in a food processor and chop finely.
  3. Add the tomatoes and pulse until chunky.
  4. Remove from the food processor and add cilantro, salt, and garlic powder. Mix well.
  5. Add a bit of lemon or lime juice to perk up the flavor. The amount will depend on the tomatoes.
  6. Adjust salt and garlic powder.
  7. Refrigerate several hours to allow the flavors to blend.
Recipe Notes

Copyright © 2018 by VillaSentieri.com. All rights reserved.

Share this Recipe

Piselli in Umido (Peas in Tomato Sauce)

April 11, 2018

Italians have knack for combining a modest array of vegetables into an almost endless cannon of dishes, each of which is distinctive, even if the interrelationships of the various parts are obvious.

This dish of peas cooked in tomato sauce is from my husband’s paternal grandmother, Amerina Pieri.

I learned to make this from my mother-in-law, Marisa, Amerina’s daughter-in-law.


Follow us on your social media platform of choice


Everyone who makes it adds his or her own signature.  Mine is not exactly like my mother-in-law’s and I’m sure hers is not just like Zia (Aunt) Ida’s, Amerina’s daughter.

Interestingly, Nonni (as we all called her) used canned peas.  In talking with my father-in-law (who grew up eating this) and my mother-in-law, they were pretty sure Nonni would not have used canned peas in Italy unless she possibly canned them herself.  Somehow canned peas became the norm in America.

Amerina Pieri (aka Nonni or Nonni’merina) Christmas 2005

And, while canned peas produce a pretty good dish, I prefer something a little fresher.  Because really good fresh peas are available for only a few weeks a year at the Farmers Market in Santa Fe, I usually use frozen peas.

If the frozen peas haven’t been in your freezer so long that they start to dry out and freeze into a block they are superior to “fresh” peas except during the few weeks a year when they are really locally-grown and truly fresh.


Click HERE to join our mailing list and you’ll never miss a recipe again!


My mother-in-law usually uses canned tomato sauce when making this, as did Nonni (at least when she made it on this side of the Atlantic Ocean!).

I use tomato paste and water.  If you read the ingredient lists on cans of tomato sauce that you can buy in the United States, you will find that most are made from tomato paste and water, so why not just do it yourself?  Those few brands of tomato sauce that are not made from diluted tomato paste are a little too sour for my taste.  I would opt for a good-quality tomato puree instead.

My favorite brand of domestically produced tomato paste

Tomato paste has a richer flavor than tomato sauce or tomato puree.  I attribute this to the extra cooking that is needed to concentrate the tomatoes.  Those little cans provide the foundation of a taste that could otherwise only be achieved with hours of simmering.

Homemade tomato puree would be another good option if you want a fresher, more summery taste.  Here’s where you can find my recipe.


If you have a favorite family recipe and a bit of a story to tell, please email me at santafecook@villasentieri.com and we can discuss including it in the blog. I am expanding the scope of my blog to include traditional recipes from around the country and around the world. If you haven’t seen Bertha’s Flan or Melinda’s Drunken Prunes, take a look.  They will give you an idea of what I’m looking for.


Print Recipe
Piselli in Umido (Peas in Tomato Sauce)
Fresh or canned peas can be used in place of frozen. Fresh peas will take longer to cook. The canned peas should be cooked briefly to avoid overcooking. I like to rinse off frozen vegetables to remove any ice crystals on the exterior. I find the ice crystals can carry a “freezer” taste.
Votes: 0
Rating: 0
You:
Rate this recipe!
Course Sides, Vegetables
Cuisine Italian
Prep Time 10 minutes
Cook Time 75 minutes
Servings
people
Ingredients
Course Sides, Vegetables
Cuisine Italian
Prep Time 10 minutes
Cook Time 75 minutes
Servings
people
Ingredients
Votes: 0
Rating: 0
You:
Rate this recipe!
Instructions
  1. Sauté the onion, garlic, sage, parsley and ½ teaspoon of salt in the olive oil in a heavy-bottomed saucepan till the onion is translucent.
  2. Add the wine and cook, stirring frequently, until it evaporates.
  3. Add the tomato paste and sauté until it becomes slightly darker, 3-4 minutes.
  4. Add the water, sugar, bay leaf, rosemary, oregano, and salt and pepper to taste.
  5. Simmer, partially covered, until thickened, approximately 45 minutes.
  6. Adjust seasoning.
  7. Rinse the frozen peas under cool water to remove any ice crystals.
  8. Add the frozen peas to the sauce.
  9. Simmer approximately 15 minutes, adjusting seasoning once again, if needed.
Recipe Notes

Copyright © 2018 by VillaSentieri.com. All rights reserved.

Share this Recipe

Gnocchi di Patate (Potato Gnocchi)

April 4, 2018

My father didn’t like gnocchi.

As far as I know, it is the only food he refused to eat.

It was all about the texture.  Mind you, this is from a man who’s comfort food was a BIG bowl of cold mashed potatoes with buttermilk poured over top.

I understand the texture thing but for me the offending texture is slimy…like Jello (or cold mashed potatoes with buttermilk).

The next worst texture is hot cereal.  It’s not as bad as Jello but it’s not a favorite.  It took a long time for me to enjoy polenta because it has a texture just like hot cereal.  I think my dislike for hot cereal has diminished as I’ve gotten older and I can probably now keep Jello down, which as a kid wasn’t always the case.


Click HERE to join our mailing list and you’ll never miss a recipe again!


But gnocchi?  In the pantheon of foods, gnocchi reign supreme.  They are my favorite food.  Not to be morose, but they would be my death row meal (assuming a prison chef could make them like my mother with her pepperoni sauce!).

The pepperoni sauce is an interesting twist.

Since my father didn’t like gnocchi, we didn’t have them when he was home for dinner.  My father worked out of town from time to time, so there were weeknight meals where he wasn’t around.

The back of a fork is commonly used to imprint ridges on gnocchi but a gnocchi board does a much better job

My mother would freeze her Sunday sauce, which was made with large pieces of pork.  Sometimes a container of sauce wouldn’t have any meat.  A common Italian approach to adding a bit of protein to a meal of pasta with red sauce is to simmer some shelled hard-boiled eggs in the sauce for a little while and serve them with the pasta.

My mother did that, but she also would take pieces of pepperoni, pierce them with a fork in a few places, boil them for about 20 minutes to render some of the fat and to soften the meat, and then add them to sauce to simmer for half-an-hour or so.

That sauce, which only appeared on weeknights from leftover Sunday sauce is my favorite sauce for my favorite food!


Follow us on your social media platform of choice


Let’s face it, pepperoni is an American creation.  To be sure, it’s a riff on any number of Italian regional salame piccante (hot salami).  In fact, you can’t get a pepperoni pizza in Italy but you can get a pizza with slices of salame piccante.

It took a while for our Italian relatives to wrap their heads around pepperoni.  In Italian, pepperoni are peppers not a cured meat product.  The word is also plural, not singular.  Americans often adopt the plural form of an Italian word (whether changing the meaning or not) and then treat it like it’s singular.

Consider panini.  One sandwich is panino.  More than one are panini.  The same is true with gnoccho and gnocchi or raviolo and ravioli.  Americans tend to say paninis and raviolis (fingers on blackboard screeching sound) if they mean more than one.  We don’t really have a rule about this as far as I know.  It’s just random.  Or so it appears to me.

Italian, on the other hand, has a very clear rule when adopting foreign words.  The singular form of the word becomes the Italian word.  That word is use for both the singular and the plural, with the adjective changing to indicate more than one.

Take bar, for example.  The “Italian” word for bar is bar.  (This is a critical bit of information that one learns early when taking Italian lessons.)  If you’re going to the bar, in Italian you would say “il bar” (the bar).  If you’re going out for a night of pub-crawling to many bars you would say “i bar” (the bars).

Now, you might ask yourself, when you would ever eat just one gnoccho.  Gnocchi translates as dumplings.  So if you had a large American or Eastern European dumpling, it would be a gnoccho, and you might have just one.  Today, however, we are making small gnocchi, and one is never enough.


If you have a favorite family recipe and a bit of a story to tell, please email me at santafecook@villasentieri.com and we can discuss including it in the blog. I am expanding the scope of my blog to include traditional recipes from around the country and around the world. If you haven’t seen Bertha’s Flan or Melinda’s Drunken Prunes, take a look.  They will give you an idea of what I’m looking for.


Print Recipe
Gnocchi di Patate (Potato Gnocchi)
There are some very strong opinions about making gnocchi. The first is whether they should be very soft or somewhat firm. That preference tends to drive other decisions but sometimes in different directions. My husband’s Great Aunt Juliana liked soft gnocchi so she did not use eggs. She insisted that the gnocchi should be mixed while the potatoes were still hot, though other folks who like soft gnocchi use the potatoes after they’ve cooled and lost some of their moisture so less flour is needed. I like firmer gnocchi, so I use eggs. I also let the potatoes cool (as my mother did) because 1) it’s easier on the fingertips and 2) the trivial amount of moisture lost or not by cooling or not is no competition for the addition of eggs.
Votes: 0
Rating: 0
You:
Rate this recipe!
Prep Time 5 minutes
Cook Time 1 hour
Servings
people
Ingredients
Prep Time 5 minutes
Cook Time 1 hour
Servings
people
Ingredients
Votes: 0
Rating: 0
You:
Rate this recipe!
Instructions
  1. Scrub the potatoes.
  2. Put the potatoes in a large stockpot and cover with a generous amount of cold water. Bring to a rolling boil and cook until a knife can be easily inserted, approximately 20 minutes. This will depend on the potatoes and the altitude so begin testing after about 15-17 minutes.
  3. Remove the potatoes from the water and allow them to cool enough to peel, about 15 minutes.
  4. Meanwhile, put three cups of flour on the counter or a pasta board.
  5. Pass the peeled, but still warm, potatoes, through a ricer on top of the flour. Note: it is very difficult to rice cold potatoes so this step should be completed as quickly as possible after the potatoes have been removed from the water.
  6. Allow the potatoes to cool completely.
  7. Sprinkle the salt on the potatoes.
  8. Using your fingers, begin to mix in the flour.
  9. Add two eggs. Work in the eggs, incorporating more flour.
  10. Add the remaining two eggs and work in enough flour to make a dough that is just very slightly tacky. It will firm up a bit as the flour completely hydrates.
  11. Cut off a small piece of dough and roll it into a cylinder approximately 1/2 inch in diameter.
  12. After all the gnocchi have been rolled and cut bring a large pot of abundantly salted water to a rolling boil.
  13. Add some of the gnocchi, maybe 18-24 depending on the amount of water.
  14. As soon as the water returns to a full boil. Remove the gnocchi with a spider or slotted spoon.
  15. Put them in a serving bowl with a small amount of whatever sauce you are using on the bottom.
  16. Add more gnocchi to the boiling water.
  17. Meanwhile drizzle a bit more sauce on the gnocchi in the bowl and sprinkle with a bit of Parmigiano Reggiano cheese, if desired.
  18. Add each batch of gnocchi to the serving bowl, keeping it warm in a low oven and sprinkling each later with some sauce (and cheese, if desired).
  19. Once all the gnocchi have been added, gently stir the gnocchi to distribute the sauce and cheese.
  20. Serve immediately.
Recipe Notes

Copyright © 2018 by VillaSentieri.com. All rights reserved.

Share this Recipe