Carciofi e Patate (Artichokes and Potatoes)

January 13, 2021

January 7th is International Porchetta Day.

It was declared so by the participants in a charcuterie class at the Italian Culinary Institute in January 2019.

There is a private Facebook group of individuals who subscribe to the cult of porchetta.  We agree to make porchetta annually on January 7th.

The charcuterie class in question began on January 7, 2019, one week before my three-month Master of Italian Cuisine course began.  I made a point of getting to Italy early, really early, as I didn’t want to find myself in class with a sharp knife in my hand the day after landing, jetlagged from a 29-hour trip and an eight-hour time change.

A traditional porchetta at a street fair in Bagni di Lucca.

I arrived the evening of January 8th, almost a week before my course started. I was invited to go to dinner with the charcuterie class.  I described that first chaotic day in my first dispatch from Calabria.


Join our mailing list and you’ll never miss a recipe again!


The next day, Chef John invited me to sit in on the charcuterie class.  Although not officially part of the class, I shared meals and course time with the group.

When International Porchetta Day was declared, with the date matching the first day of the charcuterie course, I became a member.

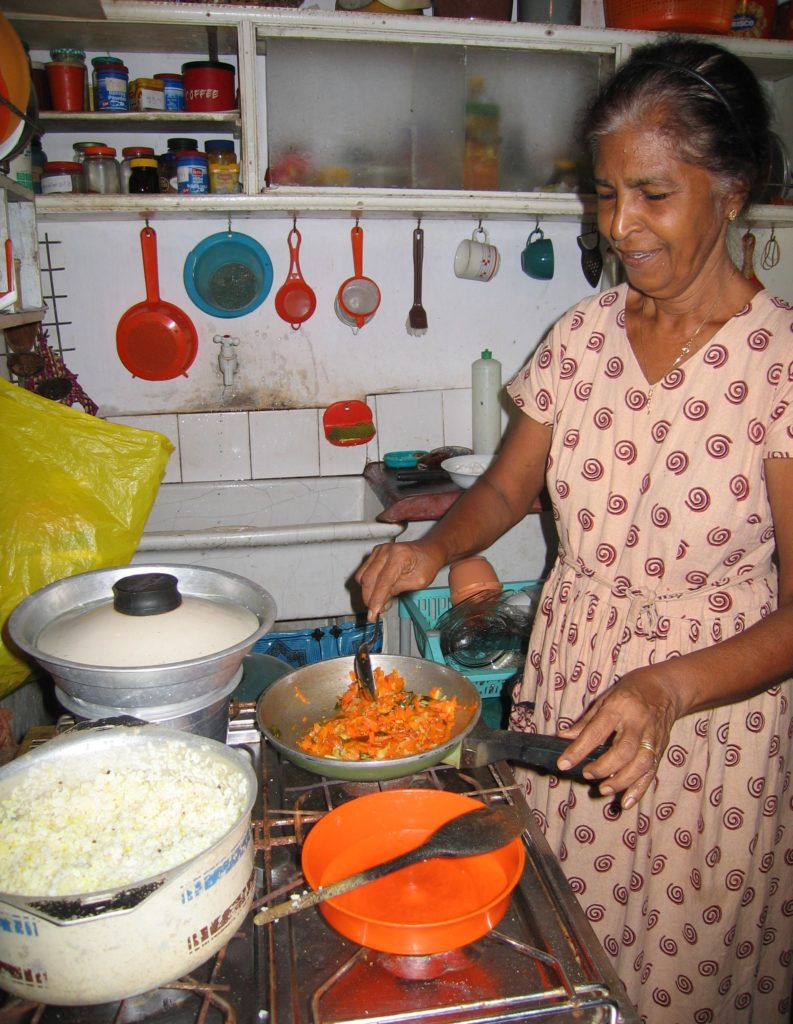
Traditionally porchetta is made with a whole pig, and not a small suckling pig, but a BIG one!

Roasted cauliflower is an easy and dramatic side dish.

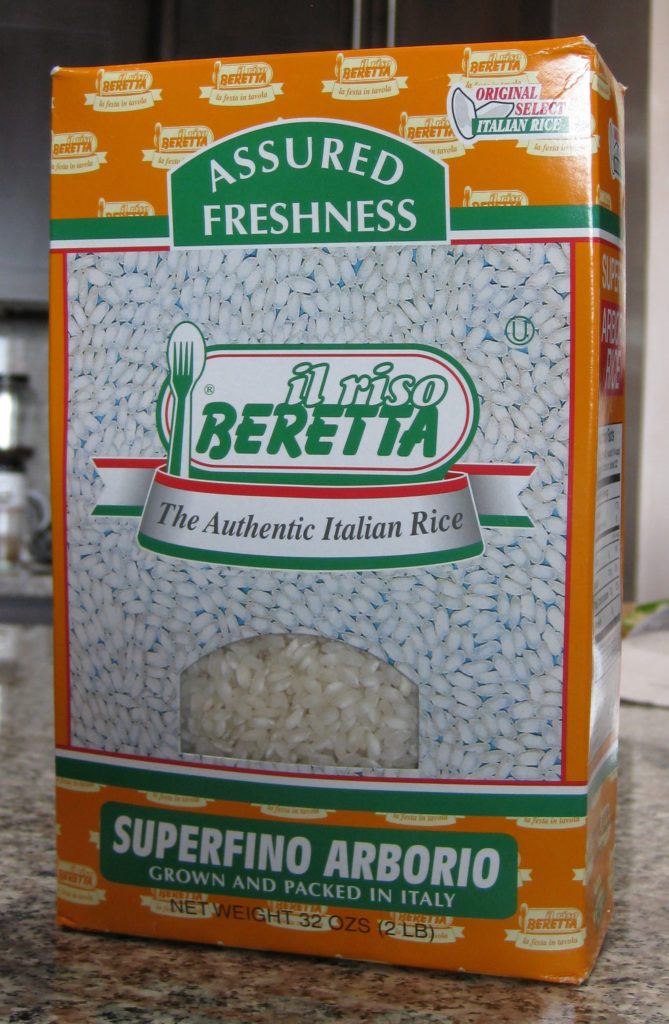
When porchetta is made at home, it’s done with a smaller cut of meat.  I use the shoulder, aka Boston Butt.  At the Italian Culinary Institute, they use two cuts, the capo collo and a pork belly.  The capo collo is a long muscle group in the shoulder that, in essence, is a large cylinder.  The shoulder, and by extension the capo collo, contain beautiful marbling that makes a luscious roast.

At the Italian Culinary Institute, the belly is rolled around the capo collo.  The fat of the belly protects the capo collo.  It also makes a beautiful presentation.  It also adds about 8 pounds to the weight of the roast.  So, unless you’re cooking for a very large crowd, using the shoulder alone will more than likely be ample.

Given the limitations of the lock-down in Palm Springs where I’ve been sheltering in place, six of us, members of our COVID Pod, celebrated International Porchetta Day.

My porchetta ready for the serving platter.

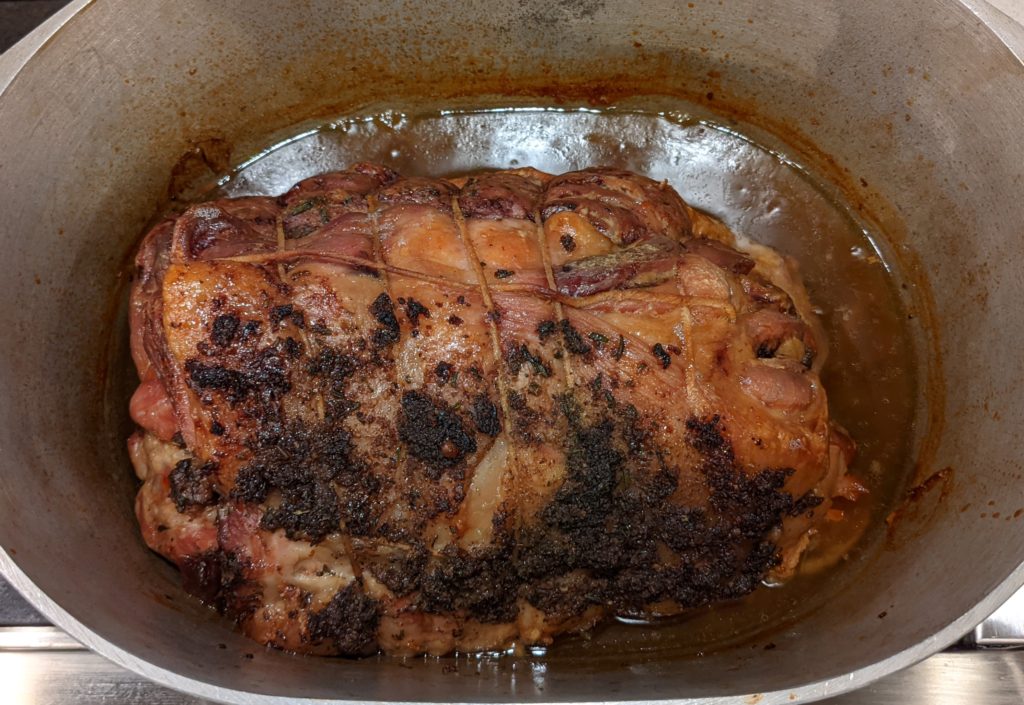
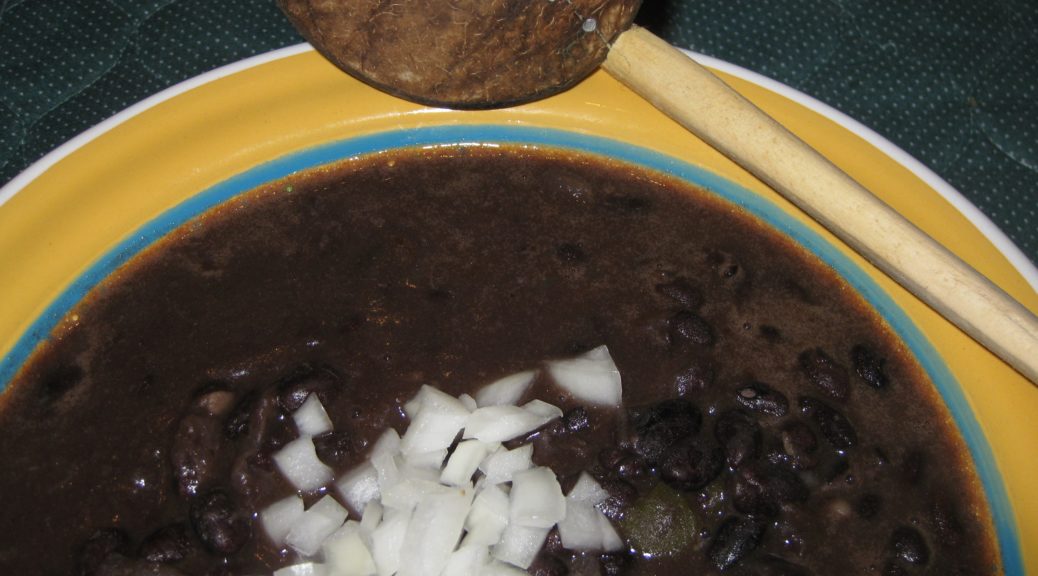
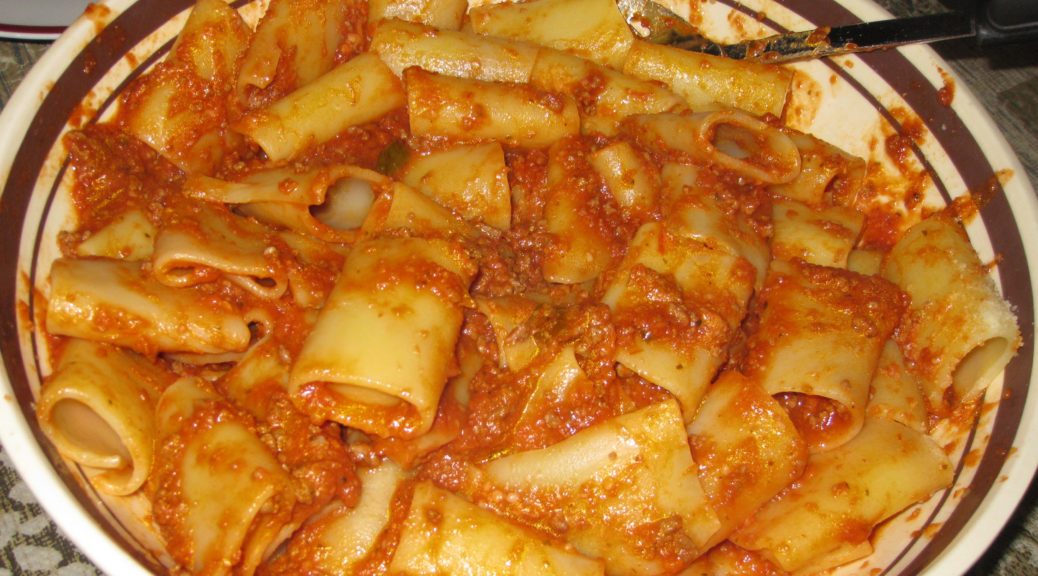
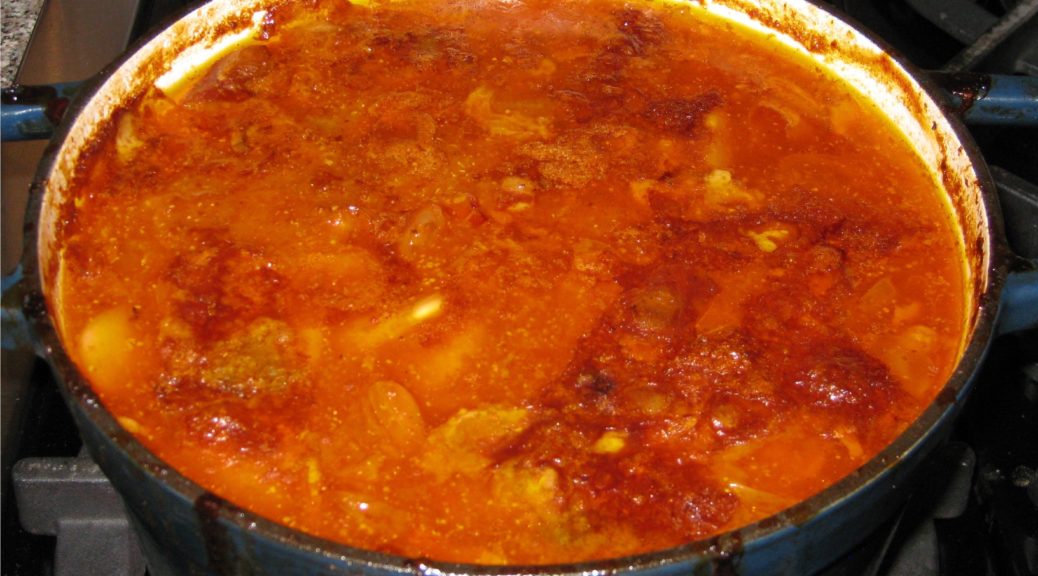
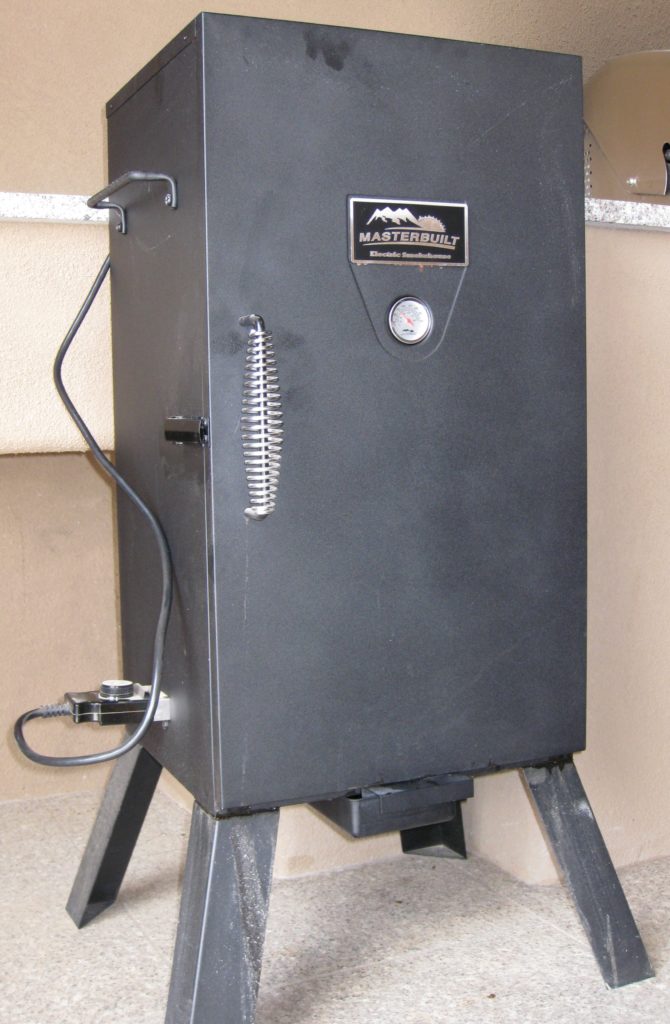
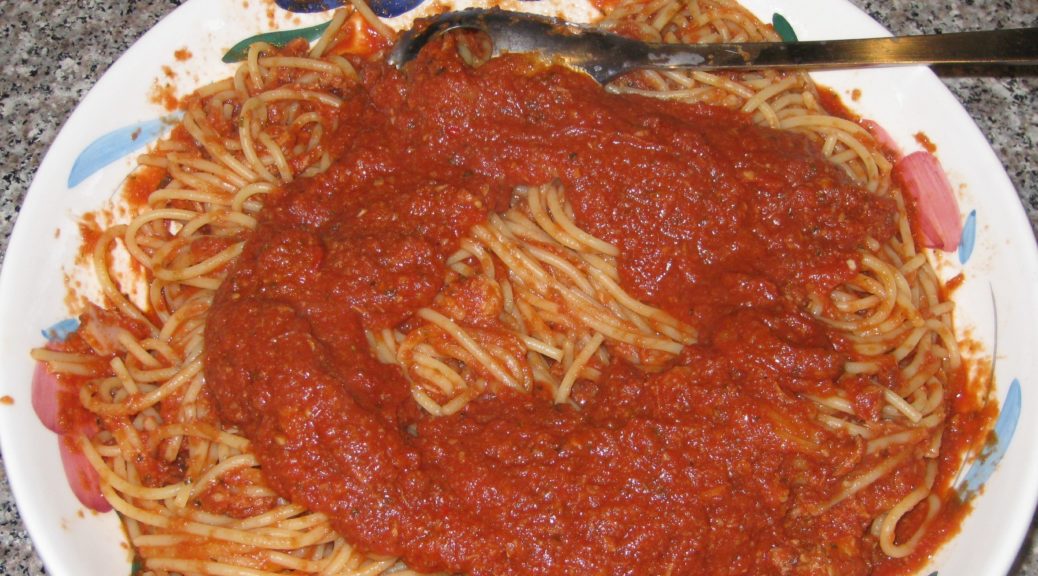
Porchetta was obviously the centerpiece of the meal and I made my traditional version.  Here’s a link to my Porchetta recipe.

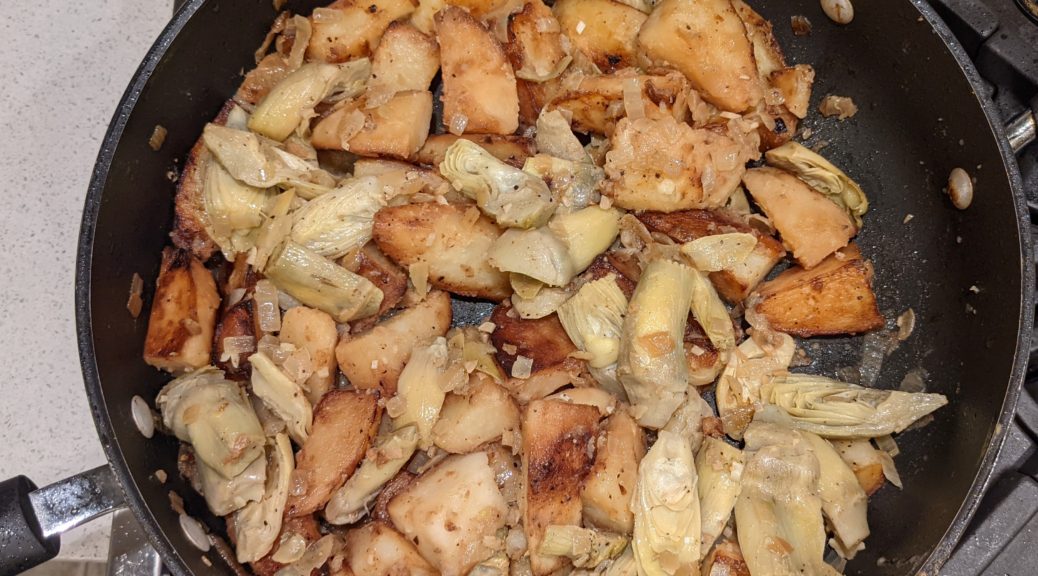
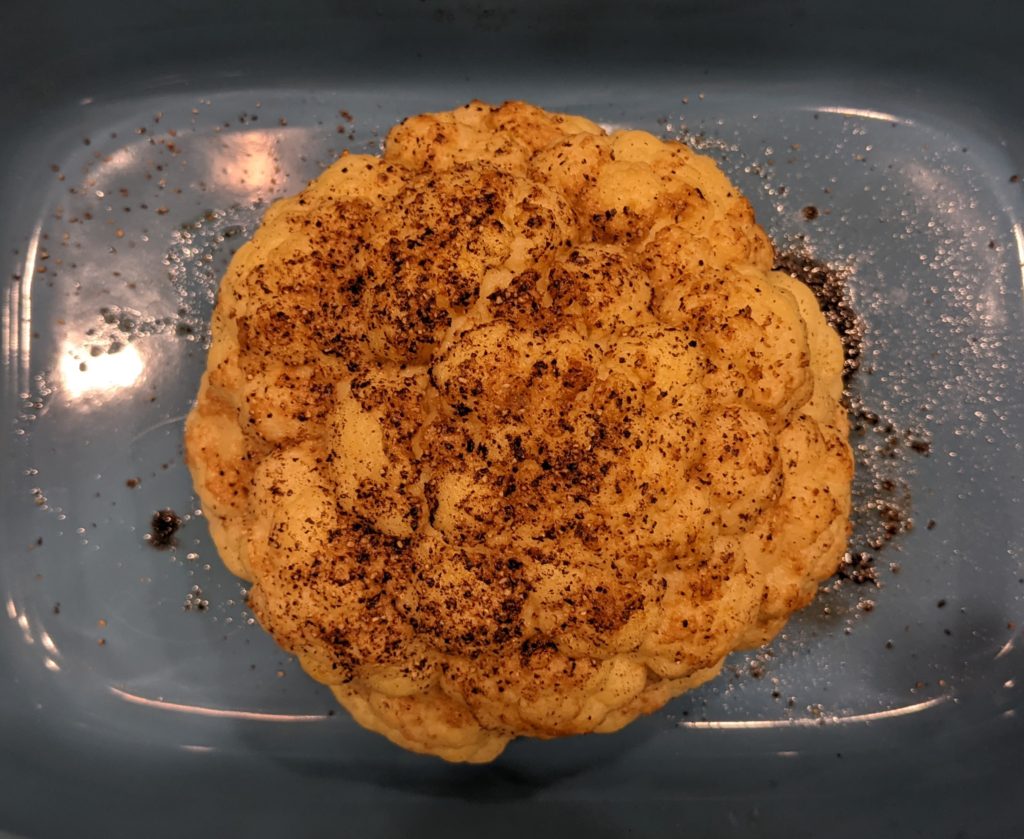
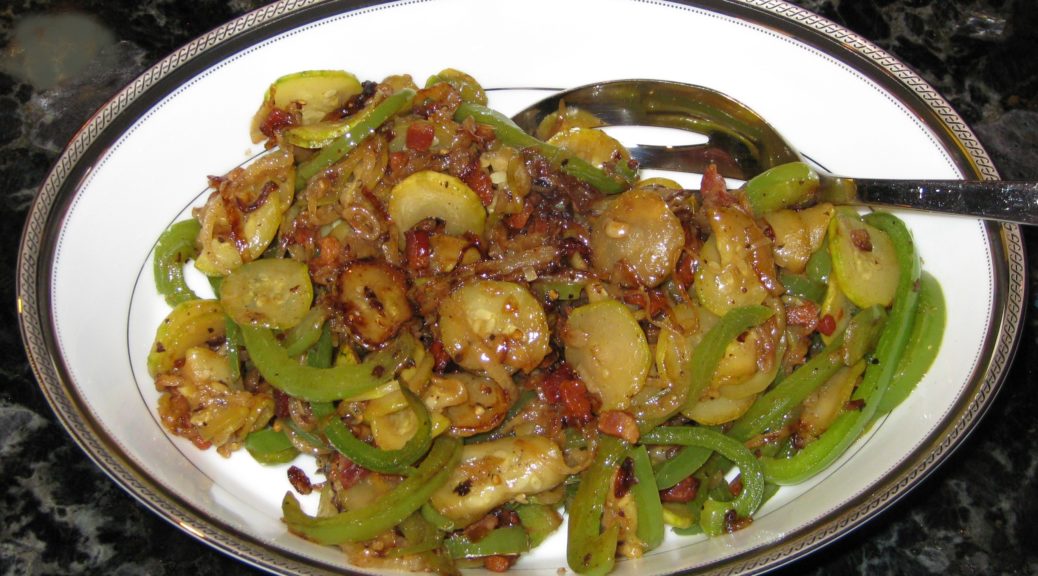
I focused on side dishes that would compliment the roast and settled on a whole roasted cauliflower and a Roman dish called Carciofi e Patate (artichokes and potatoes).  For dessert we had an Olive Oil Cake.


Follow us on your social media platform of choice


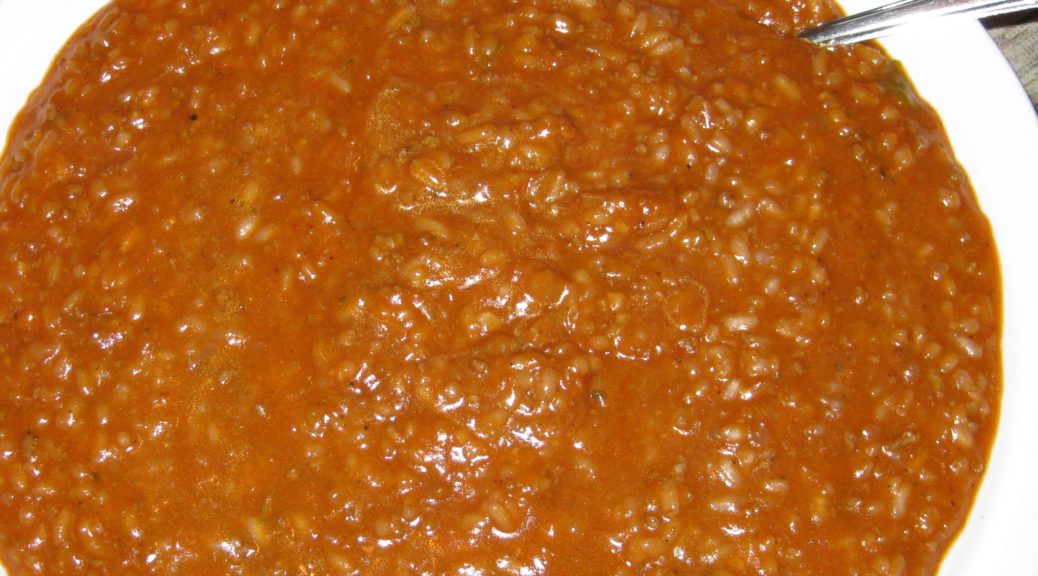
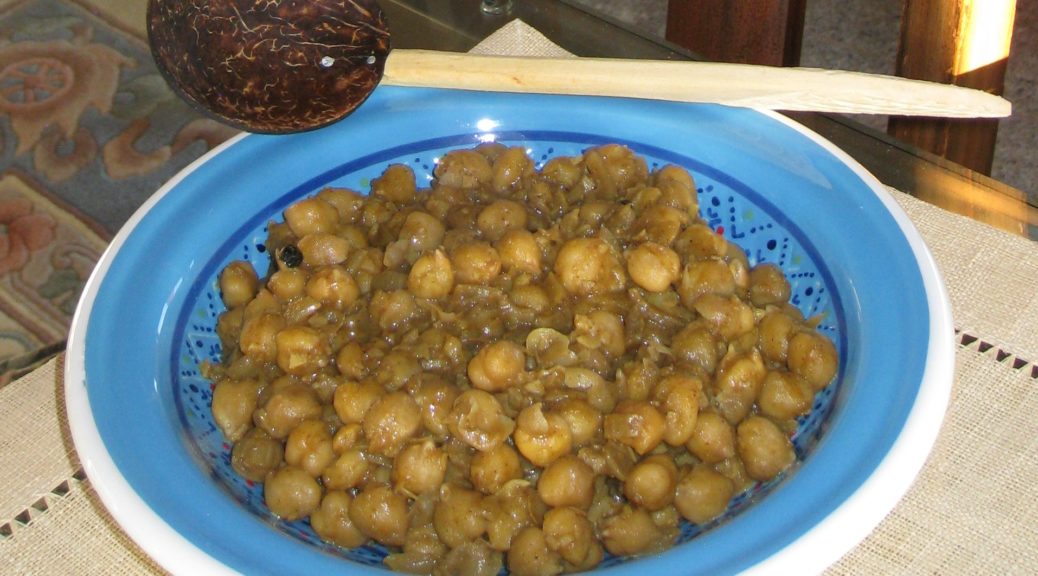
Carciofi e Patate is traditionally made with whole artichokes, lots of them!  In season, one can buy 12 artichokes for €1 in Italy!  That’s right, about 10¢ each!!! I once used 12 artichokes when I made the dish as part of Easter Dinner.  I spent more than $50 on artichokes for that one dish.  Clearly when Italians describe the dish as “economical” they have no idea about artichoke prices in the United States.

Artichokes in a market in Calabria.

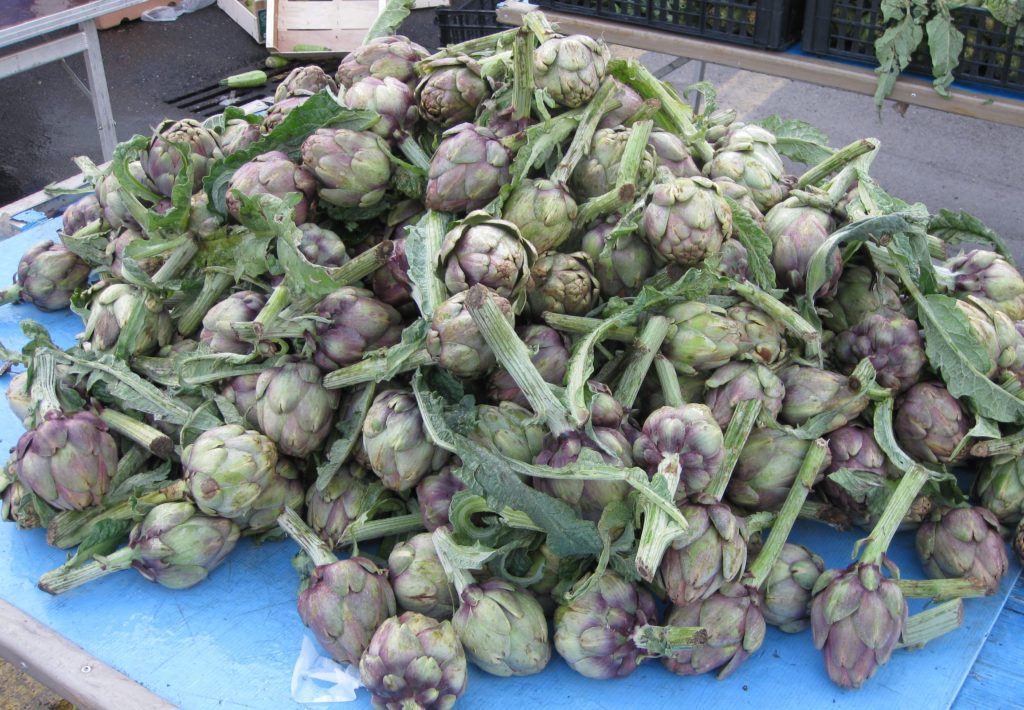
While I prefer the dish made with fresh artichokes, I won’t do that again until I’m in Italy during artichoke season.  Frozen artichokes work well and are much more budget-friendly.

Print Recipe
Carciofi e Patate (Artichokes and Potatoes)
Carciofi e Patate is a classic Roman recipe. It pairs well with most roasts.
Votes: 0
Rating: 0
You:
Rate this recipe!
Prep Time 20 minutes
Cook Time 45 minutes
Servings
people
Ingredients
Prep Time 20 minutes
Cook Time 45 minutes
Servings
people
Ingredients
Votes: 0
Rating: 0
You:
Rate this recipe!
Instructions
  1. Peel potatoes and cut in 8 wedges unless the potatoes are very large or very small.
  2. Brown the potatoes in the three tablespoons of extra-virgin olive oil in a large sauté pan over high heat.
  3. When the potatoes are well-browned, reduce the heat to medium. Add half the onions and garlic.
  4. Sauté until the onion is golden.
  5. Season with salt and freshly ground black pepper to taste. Add approximately ½ cup of water. Cover and cook on medium heat until cooked through, adding more water as needed, approximately 25 minutes. There should be no water left when the potatoes are cooked.
  6. Meanwhile, sauté the remaining onions and garlic in the remaining extra-virgin olive oil in a sauté pan.
  7. When the onions are golden, add the artichokes and salt and pepper to taste. Sauté briefly.
  8. Add white wine, cover and braise until barely tender, approximately 10 minutes. The artichokes will cook further with the potatoes so do not over-cook them.
  9. Add artichokes to the pan with the potatoes.
  10. Sauté, uncovered, about 10 minutes longer, to meld flavors. Adjust salt and pepper.
  11. Stir in parsley and serve.
Recipe Notes

Copyright © 2021 by Villa Sentieri, LLC. All rights reserved.

Share this Recipe

Sri Lankan Cashew Curry

August 29, 2018

I know I’ve posted a lot of Sri Lankan recipes recently.  I’m trying to post enough to create a Sri Lankan meal if my readers are interested.

Sri Lankan food is not common in the United States.  There are some Sri Lankan restaurants on Staten Island but I’ve never ventured to them when I’ve been in New York.  It’s not that I don’t want to, but it’s a bit of a hike to get there…and there are so many good restaurants in NYC that are easier to get to.

One of these days I’ll try some of the Sri Lankan restaurants in Los Angeles but for now I’ll have to settle on my own cooking.

Sri Lankan Arrack is made from the sap of coconut blossoms (Photo by SilentBobxy2 [CC BY-SA 3.0 (https://creativecommons.org/licenses/by-sa/3.0) or GFDL (http://www.gnu.org/copyleft/fdl.html)], from Wikimedia Commons)
If you like Indian, especially South Indian, and Thai food, chances are excellent that you will like Sri Lankan cooking.  I find the spices in Sri Lankan food to be more delicate than Indian with abundant use of super-aromatic spices like cardamom, cinnamon and cloves.

Join our mailing list and you’ll never miss a recipe again!

Curry leaves are an absolute delight, lending a taste and aroma that I can’t really describe.

Although native to Brazil, the cashew was transported to India by the Portuguese in the sixteenth century.  From there it spread throughout South Asia.  It is also commonly grown in Africa.

Cashews are an integral part of Sri Lankan cuisine.  Devilled cashews are a common nibble with cocktails.  Arrack is the classic distilled spirit of Sri Lanka, made from the sap of coconut blossoms.

In Sri Lanka, cashew curry is made from fresh cashews.  I’ve never seen fresh cashews in the United States.  Whole raw cashews work well if soaked in water for several hours, just like dried beans.

In my experience there are two basic styles of cashew curry in Sri Lanka, a dry one and one with gravy.  The one I have always made is with gravy.  The “gravy” is really seasoned coconut milk.

Follow us on your social media platform of choice


In years past, I would always make my own coconut milk from shredded coconut but now, with rare exception, I use coconut milk that I’ve purchased.  With a good quality coconut milk, such as Aroy-D it is really impossible to tell the difference when making a curry or other well-seasoned dish.

Aroy-D is an excellent brand of coconut milk

This is an especially easy dish to prepare as all the ingredients are simmered.  There’s no sautéing involved.  That makes it a great introduction to Sri Lankan cooking.  Serve it with rice to sop up all the wonderful gravy.

Print Recipe
Sri Lankan Cashew Curry
If using homemade coconut milk, use 3 cups of thin milk instead of 1 ½ cups purchased coconut milk and 1 ½ cups water. Long thin chilies, such as Cayenne or Thai Bird peppers would be appropriate for this dish.
Votes: 0
Rating: 0
You:
Rate this recipe!
Course Mains, Vegetarian
Cuisine Sri Lankan
Prep Time 15 minutes
Cook Time 1 hour
Passive Time 3 hours
Servings
people
Ingredients
Course Mains, Vegetarian
Cuisine Sri Lankan
Prep Time 15 minutes
Cook Time 1 hour
Passive Time 3 hours
Servings
people
Ingredients
Votes: 0
Rating: 0
You:
Rate this recipe!
Instructions
  1. Cover the cashews with water and allow to soak for 2-3 hours, or overnight in the refrigerator.
  2. Split and seed the chilies.
  3. Lightly crush the lemongrass. Peel off the tough outer layers and cut off the dark tough tops, leaving about 4 inches of softer inner pith.
  4. Put everything except cashews, thick coconut milk, and salt into a saucepan.
  5. Boil gently, uncovered, for about 10 minutes.
  6. Add drained, soaked cashews and simmer approximately 15-20 minutes.
  7. Add two teaspoons salt.
  8. Simmer until cashews are cooked but not mushy, approximately 10-20 minutes more.
  9. Add thick coconut milk.
  10. Taste and adjust salt.
  11. Simmer 5 minutes more.
Recipe Notes

Rampe (pandan, bai tuey, or bai toey) can be purchased frozen in Asian grocery stores.

Copyright © 2018 by Villa Sentieri, LLC. All rights reserved.

Share this Recipe

Risotto Friulano (Friuli-Style Risotto)

June 25, 2018

If you do an internet search on Risotto Friulano you will turn up more entries for risotto con lo sclopit than any other.

Sclopit (bladder campion in English) is native to large parts of Europe and beyond.  It is not native to the United States but grows abundantly from coast to coast. Its botanical name is Silene vulgaris.

The leaves of Silene vulgaris (sclopit in Friulan; bladder campion in English) are used in risotto (photo by D. Gordon E. Robertson [CC BY-SA 3.0 (https://creativecommons.org/licenses/by-sa/3.0) or GFDL (http://www.gnu.org/copyleft/fdl.html)], from Wikimedia Commons)
In my husband’s family, however, Risotto Friulano refers to risotto that is made with Salsa Friulano, a traditional tomato sauce made with ground meat, herbs and spices.  I’ve published two recipes for Salsa Friulano.  One is my mother-in-law’s and the other is Ivana’s, the wife of my mother-in-law’s cousin Olvino.  (By the way, I asked my mother-in-law about sclopit.  She’s never heard of it!)


Follow us on your social media platform of choice


My mother-in-law uses homemade chicken broth, and her Friulan tomato sauce for her Risotto Friulano.  Uncle Ray, her brother, uses canned beef broth instead of chicken broth.  Neither uses risotto rice, opting for long-grain rice, and neither really follows the common risotto technique of adding liquid slowly and allowing it to evaporate before the next addition.

We have long discussions about these differences.  While I don’t have a good explanation for the differences in technique other than cooking differences within their family, it’s my belief that the use of long-grain rice rather than short-grain “risotto” rice is a consequence of what was readily available when the family immigrated to the United States.

Sclopit leaves

I have a number of cookbooks from Friuli and all the recipes for risotto use what the Italians would call “riso per risotto,” rice for risotto.  It’s possible that this is a recent change in cooking habits in Friuli but I am more inclined to believe that the switch from risotto rice to long-grain rice happened in the United States, at least for my mother-in-law’s family.

Both my mother-in-law and Uncle Ray add enough liquid to their respective recipes for Risotto Friulano to make the final product pourable, like a traditional risotto.  Without the more starchy riso per risotto and the risotto technique, however, the result is not as creamy but still very good…and very traditional within the family.  Just ask my father-in-law, who is from Tuscany and not Friuli, whose Risotto Friulano he prefers!  (Hint, he’ll tell you mine tastes good, but…)


Join our mailing list and you’ll never miss a recipe again!


The most common types of rice for risotto are Arborio, Carnaroli, and Vialone Nano.  Arborio is the easiest to find and it is what I use most of the time.  Carnaroli and Vialone Nano are even more forgiving than Arborio as they are harder to overcook.  They are more difficult to source in American markets, however.

Arborio Rice is generally the easiest “riso per risotto” (risotto rice) to find in the United States

When I make Risotto Friulano, I follow standard risotto technique and use short-grain Italian rice.  I hope you enjoy it!

Print Recipe
Risotto Friulano (Friuli-Style Risotto)
My mother-in-law’s version of this is much simpler. She sautés long-grain rice in olive oil without any aromatics. She adds the sauce and then the broth. Broth is not added in small amounts but most of it is put in at once. Additional broth is added near the end If the rice can absorb it. Uncle Ray’s version is similar but with canned beef broth. Parmigiano is added at the end. If you’re going to make Marisa’s Mystical Meatballs, this is a wonderful use of the beef broth that will be created. See the Notes below for a link to the meatball recipe. If you are not using unsalted homemade broth, do not add salt as directed. Wait until the end and add salt to taste.
Votes: 0
Rating: 0
You:
Rate this recipe!
Prep Time 10 minutes
Cook Time 45 minutes
Servings
people
Ingredients
Prep Time 10 minutes
Cook Time 45 minutes
Servings
people
Ingredients
Votes: 0
Rating: 0
You:
Rate this recipe!
Instructions
  1. Bring the broth and the Salsa Friulana to a bare simmer in separate pots.
  2. Heat a two or three quart heavy-bottomed saucepan over medium-high heat. Add the olive oil.
  3. Briefly sauté the onion in the oil. As the liquid from the onion evaporates and the onion just begins to turn translucent, reduce the heat to medium add the garlic.
  4. x
  5. Sauté on medium until the onion is translucent. Do not brown the onion or garlic. You may need to reduce the heat.
  6. When the onion is translucent, return the heat to medium high and add the rice.
  7. Sauté for 3-5 minutes, until the rice grains are partially translucent. Do not brown the rice.
  8. The outer portion of the rice grains will get translucent while the inside will stay opaque white.
  9. Add the wine.
  10. Stir frequently, but not constantly, until the wine has totally evaporated. You will begin to see some starch leaching out of the rice. More and more of the starch will leach out as you cook the rice. This is what will make a creamy sauce.
  11. When the wine has evaporated, add one ladle of simmering broth, approximately 1/3 cup, and the salt. Stir thoroughly paying particular attention to loosening any spots where the starch seems to be sticking to the bottom of the pan. You don’t want to brown (or worse yet, burn) the starch.
  12. Cook, stirring frequently but not constantly, until the broth has evaporated.
  13. Keep repeating the process with 1/3 cup of broth, cooking, stirring, loosening any spots that are sticking, and allowing the liquid to evaporate, until you have used approximately 5 cups of the broth. The heat should stay as close as possible to medium high. The moderate boiling of the liquid will coax starch out of the rice to create the creaminess that is the hallmark of a good risotto.
  14. Add 1 ½ cups of Salsa Friulana and cook until some of the liquid has evaporated. It will not be possible to cook the rice until dry once the sauce is added.
  15. Season with black pepper to taste.
  16. Continue adding broth, one ladle at a time, until the rice is cooked and creamy but still al dente at the very center.
  17. Remove the rice from the heat. Stir in the Parmesan cheese then the remaining ½ cup of Salsa Friulana.
  18. Still off the heat, add hot broth, a little at a time, to create a creamy, pourable risotto, adding only as much as the starchy liquid in the risotto will absorb.
  19. Taste and adjust seasoning.
  20. Serve immediately. Pass additional Parmesan cheese at the table.
Recipe Notes

This is where you’ll find the recipe for Marisa’s Mystical Meatballs.

You can find my mother-in-law’s recipe for Salsa Friulana here and Ivana’s recipe here.

Copyright © 2018 by Villa Sentieri, LLC. All rights reserved.

Share this Recipe

Salsa Friulana di Marisa (Marisa’s Friulan Tomato Sauce)

June 11, 2018

Ma’s spaghetti sauce.  That’s what my husband calls it.

That’s pretty similar to what most of us of Italian heritage who grew up in the United States called the sauce that our mothers (yes, it was almost always the mothers) made most frequently.

It isn’t as if there aren’t more pasta sauces than one can count.  It’s just that for everyone I know of Italian heritage, there’s one that stands out above the rest.

For my husband’s family, this is the one.


Join our mailing list and you’ll never miss a recipe again!


It’s actually quite similar to Ivana’s sauce.  Ivana is married to my mother-in-law’s cousin Olvino.  Ivana grew up in Friuli but in a different town.  There are subtle differences in her sauce and my mother-in-law’s sauce, but if you read both recipes you’ll certainly see the similarities.

My mother-in-law doesn’t remember when she learned to make this sauce, or even if she learned from her mother or her aunt.  She does remember, however, that her father asked her how she could get married (she was engaged to my father-in-law) without knowing how to cook.

My mother- and father-in-law on their wedding day (apparently before she knew how to cook)

She got married, ultimately learned to cook, and then headed up the kitchen in Castleview, the restaurant that she and my father-in-law owned in Fox River Grove, Illinois.  The restaurant was named Castleview because it had a view of an adjacent…you guessed it…castle…well, sort of a castle.   For more information on the castle, you can look here.

The Bettendorf Castle in Fox River Grove, Illinois

By the time I came on the scene, it was difficult to catch more than a glimpse of the castle from the restaurant due to the growth of trees and other vegetation.

Another view of the Bettendorf Castle

My mother-in-law thought my version of her sauce was “pretty good.”  She did note that it was thicker than hers; probably because I cook it longer but also potentially due to a different brand of tomatoes.  If you want it thinner, cook it less or (my preference) just add more water or put a splash of pasta-cooking water in the bowl with the pasta and the sauce.  (Just between you and me, when I’m putting dinner on the table using my mother-in-law’s sauce, I usually boil it down a bit because it seems a little thin to me!)


Follow us on your social media platform of choice


In a few weeks I’ll be posting a recipe for Friulan Risotto that incorporates this sauce.  Stay tuned.

Print Recipe
Salsa Friulana di Marisa (Marisa's Friulan Tomato Sauce)
The amount of water needed will vary based on how thick the tomato puree is, how much liquid evaporates during cooking, and how thick or thin you like your sauce. Feel free to add more water during cooking if the mixture is becoming too thick. If the sauce is too thin uncover near the end of cooking and increase the heat to cook off more water.
Votes: 0
Rating: 0
You:
Rate this recipe!
Prep Time 20 minutes
Cook Time 3 hours
Servings
quarts
Ingredients
Prep Time 20 minutes
Cook Time 3 hours
Servings
quarts
Ingredients
Votes: 0
Rating: 0
You:
Rate this recipe!
Instructions
  1. Finely chop the parsley, carrots, celery, onion, and garlic in food processor.
  2. There should be a bit of texture to the mixture, not a puree. Reserve.
  3. Puree the crushed tomatoes in the food processor.
  4. Rinse the cans out with some of the water. Add the water to the pureed tomatoes. Reserve.
  5. Sauté the beef in the olive oil on high heat until no pink remains.
  6. Add the chopped vegetables.
  7. Sauté on high heat until all the liquid evaporates and then continue to sauté until the mixture darkens slightly and smells cooked.
  8. Add the wine and continue to cook until the wine has evaporated.
  9. Add the allspice, nutmeg, and cinnamon. Stir well.
  10. Add the tomato paste and sauté until it begins to smell sweet, approximately 5 minutes at medium-high heat.
  11. Meanwhile, rinse tomato paste can out with some of the water and add it to the pureed tomatoes.
  12. Add pureed tomatoes, bay leaf, oregano, basil and remaining water.
  13. Bring to a boil, reduce heat and simmer, partially covered for about 2 ½ hours, stirring every 20 minutes.
  14. After about an hour of cooking, begin to taste and adjust seasoning.
  15. Serve with the pasta of your choice.
Recipe Notes

Copyright © 2018 by Villa Sentieri, LLC. All rights reserved.

Share this Recipe

Smoky Baked Beans

June 1, 2018

In my first year of medical school (I know that only because of the apartment that I was living in at the time) my parents and my Aunt Ann came to visit for a weekend.  I’ve talked about Aunt Ann in previous blog posts, like this one that includes her recipe for Pineapple Cream Cheese Pie.  She was married to my father’s brother, Jano.

As often happened with my mother, the conversations frequently veered to food.  On this occasion, for some reason, my Aunt Mary’s baked beans.

Aunt Mary was really my mother’s Aunt Mary by marriage.  She was my Great Aunt Mary.  Actually, by the time I knew her, she wasn’t really my aunt, great or otherwise, because she and my mother’s Uncle Derp had gotten divorced.  Nonetheless, we all still called her Aunt Mary.  Well, really, due to some bizarre twist, we called her Aunt Mary Derp if we were referring to her in a conversation and it wasn’t otherwise clear which of the several Aunt Marys in the family was the one we meant.  Why we appended the name of her ex-husband to hers rather than using her last name, I’ll never know!!


Join our mailing list and you’ll never miss a recipe again!


In any case, my parents both talked about Aunt Mary’s baked beans.  They recalled that she baked them overnight.  My mother came up with a reasonable facsimile of what went into the beans.

We tried to do the initial boiling of the beans in a slow cooker while we went out for the day.  That was a failure.  On the low setting, the beans were still hard after hours and hours of cooking.  That got remedied by a quick boil on the stove.

My smoker has an adjustment for the heat output but not temperature, per se. If the wind or external temperature change, the internal smoker temperature changes, too.

We took the par-boiled beans and mixed them with all the other ingredients and put them in the oven overnight.  That was failure number two, but one we couldn’t recover from.  The long cooking period created a burnt taste in the beans given the high sugar content.  The beans hadn’t actually dried out but they must have gotten hot enough to start caramelizing the sugar.  The road from caramel to burnt isn’t long.  Unless one doesn’t get more than six hours sleep, we discovered that it wasn’t ideal to bake the beans overnight!

Eventually, I figured it out.  The recipe for my version of Aunt Mary’s Baked Beans now sits proudly on the hard drive of my computer along with two recipes of my own development.  I also have this great hack for doctoring canned baked beans that I learned from my cousin Shirley (it always generates requests for the recipe that I artfully dodge) but that isn’t actually written down anywhere.


Follow us on your social media platform of choice


Today, we’re going to focus on my recipe for baked beans cooked in a smoker.  I’ll also share a trick for making these in the oven if you don’t have a smoker.

When I make these, I put them on the bottom rack of my smoker, uncovered, with meat on the racks above.  Meat juices drip into the beans making them extra tasty!  The high humidity in the smoker keeps the uncovered beans from drying out.

Print Recipe
Smoky Baked Beans
Adding salt to the bean-soaking liquid is optional. It seasons them and also decreases the cooking time. I find it especially useful where I live as water boils at less than 198°F and beans take much longer to cook. If you don’t have a smoker, add 1 teaspoon of Liquid Smoke seasoning and cook the beans in the oven with a cover. As a reality check, if you’re paying close attention to the photos, you’ll notice that these are “adult” lima beans not baby lima beans. There must have been a run on baby lima beans when I went shopping for the ingredients for this recipe as none of the markets had them.
Votes: 0
Rating: 0
You:
Rate this recipe!
Prep Time 30 minutes
Cook Time 8 hours
Passive Time 12 hours
Servings
people
Ingredients
Prep Time 30 minutes
Cook Time 8 hours
Passive Time 12 hours
Servings
people
Ingredients
Votes: 0
Rating: 0
You:
Rate this recipe!
Instructions
  1. Wash and pick over the beans.
  2. Dissolve 1 ½ tablespoons salt, if using, in 2 quarts of water. Add the beans.
  3. Soak the beans for about 12 hours in the refrigerator.
  4. Drain and rinse the beans.
  5. Coarsely chop the red Bell pepper.
  6. In a blender jar, combine the Bell pepper with some of the 6 cups of water.
  7. Puree the Bell pepper.
  8. Add the chipotle pepper, if using, and puree again. Reserve the pepper puree.
  9. Sauté the bacon until golden.
  10. Add the onion and sauté until soft.
  11. Add the garlic and sauté until fragrant.
  12. Add the drained beans, pepper puree, remaining water, and bay leaves.
  13. Gently boil, partially covered until almost tender (1 to 2 hours). Add water from time to time if needed. The beans should be just barely covered with liquid at the end.
  14. Combine the ketchup, white wine, brown sugar, Worcestershire sauce, mustard, salt and black pepper.
  15. Stir the ketchup mixture into the cooked beans.
  16. Return to a simmer on the stovetop then bake (uncovered if using a smoker or covered if using the oven) at 225°F for six hours, stirring once or twice.
Recipe Notes

Copyright © 2018 by Villa Sentieri, LLC. All rights reserved.

Share this Recipe

Guyanese Curried Chickpeas (Channa Masala)

April 30, 2018

The largest ethnic group in Guyana is comprised of those of (East) Indian descent.  When I was there in the 1970s and 1980s, Indians represented just over half of the population.  As of the 2002 census, those of Indian descent represent just over 43 percent of the population.

Other demographic groups in Guyana include those of African, Chinese, Western European, and mixed descent.  Amerindians are now a very small percentage of the population.

The cuisine of Guyana reflects its multicultural population.  Curry is very popular as is roti, Indian-style flatbread.  Chinese-style fried rice is a restaurant staple.  A typical Sunday dish is Portuguese-derived garlic pork.  British-style baked goods are popular, especially black cake around Christmastime.

The Guyana Supreme Court building (CC BY-SA 3.0, https://commons.wikimedia.org/w/index.php?curid=475676)

A quick internet search demonstrated to me that the restaurant scene in Guyana has changed dramatically since my visits there.  In the 70s and 80s, restaurants were, for the most part, very basic affairs.  There were just a few that rose above “basic” but even they were challenged to produce really good food because of the limitation on imported foodstuffs.


Click HERE to join our mailing list and you’ll never miss a recipe again!


Food prepared at home was generally of a better quality, and certainly displayed more variety, than what was available in restaurants “back then.”  And, while in any given household there may be more foods reflective of the particular demographics of that household, popular dishes like curry, fried rice, garlic pork, and black cake are prepared in pretty much every household.  They have really become Guyanese dishes, regardless of their ethnic origins.

My last trip to Guyana was in early 1981.  I finished medical school around the end of January and went to Guyana to work on the psychiatric unit at the public hospital in Georgetown, the capital, before beginning my internship at the Hospital of the University of Pennsylvania in mid-June.  At that time there was one psychiatrist who worked for the government of Guyana and one psychiatrist in private practice.  The government psychiatrist, who lived a significant distance from Georgetown, was also responsible for overseeing the long-term psychiatric unit in Fort Canje, now referred to as the National Psychiatric Hospital.


Follow us on your social media platform of choice


The day I arrived at the public hospital in Georgetown, the psychiatrist was a no-show.  He then made it clear that he had no intention of coming to the hospital for the duration of my stay.  At the age of 26, just having finished medical school and not having done an internship, let alone a residency, I became the de-facto psychiatrist for the public hospital!

The Guyana Parliament Building (CC BY-SA 3.0, https://commons.wikimedia.org/w/index.php?curid=475699)

The psychiatric unit consisted of four rooms (plus two bathrooms) on the upper floor above the morgue.  The psychiatrist’s office (my office) was the entry point to the unit.  Behind the office was a very small nurses’ station.  There were two large wards, one on each side of the nurses’ station.  Each has eleven beds and no privacy.  One ward was for men and one for women.  Though we only had 22 beds, our census was often double that.  There was no option to add beds so patients often slept two to a bed.

In general, male patients were attended to by male nurses and female patients by female nurses.

There was also a very, very busy outpatient clinic staffed by myself and three social workers.

The male nurses started including me in some of their evening social gatherings.  I remember a few held at the home of one of the nurses who was of Indian descent.  We basically sat around talking, drinking rum, and eating.  My love of spicy Indian food was met with amazement.  The fact that I could eat incendiary atchar was sort of beyond belief.

Whenever these gatherings happened, it was just us guys.  Wives and girlfriends stayed away, even the wife of whomever was hosting the party (even though she would have prepared most if not all the food!).

When I was in Guyana, pre-mixed curry powder was the norm in cooking.  This recipe reflects that tendency.  When I made Indian food frequently, I would keep one or two types of homemade curry powders on hand as a quick solution to a weeknight meal.  For this recipe, feel free to use a good quality commercial curry powder.

Print Recipe
Guyanese Curried Chickpeas
Two cans of chickpeas can be used instead of the 3 to 3 ½ cups of home cooked beans but home-cooked are so good, and so much better. If using canned chickpeas, taste the canning liquid to decide whether to use it or discard it and rinse the chickpeas. The curry should be basically dry at the end so do not put in too much liquid at the beginning. Although not strictly Guyanese, adding a tablespoon or so of minced ginger with the garlic is a welcome taste treat.
Votes: 8
Rating: 4.5
You:
Rate this recipe!
Prep Time 10 minutes
Cook Time 30 minutes
Servings
people
Ingredients
Prep Time 10 minutes
Cook Time 30 minutes
Servings
people
Ingredients
Votes: 8
Rating: 4.5
You:
Rate this recipe!
Instructions
  1. Sauté the onion in butter until translucent.
  2. Add the garlic and minced hot pepper.
  3. Continue sautéeing until the onion is golden and the garlic is fragrant.
  4. Add the curry powder.
  5. Sauté 2-3 minutes, stirring frequently, until the raw smell is gone.
  6. Add the liquid.
  7. Bring to a boil and simmer approximately 20 minutes to develop flavor.
  8. Add the chickpeas.
  9. Simmer 10-15 minutes, stirring frequently. The chickpeas should be almost dry by the end.
  10. Adjust salt and pepper while cooking.
  11. Off the heat and stir in the lime juice and serve
Recipe Notes

Copyright © 2018 by VillaSentieri.com. All rights reserved.

Share this Recipe

Sri Lankan Zucchini and Peppers

February 28, 2018

As a freshman in college who made tentative forays into non-Western European cuisines, I was transformed into a person who couldn’t find a cuisine he wouldn’t try, and didn’t like, by the end of sophomore year.

Junior year was really an intensive study in cooking.  It’s the year I became a respectable Sri Lankan, Indian, Chinese, and West Indian cook.  There were many other cuisines that I dabbled in but those four formed the basis of what I cooked during the year.  By then I considered myself a good Italian cook but my repertory and skill level have expanded significantly since then.

Starting junior year, and for many years thereafter, Reggie and Nanacy Rajapakse taught me much of what I know of Sri Lankan food.  Several cookbooks by Charmaine Solomon, as well as the [Ceylon] Daily News Cookery Book, provided much additional guidance.  Several trips to Sri Lanka with Nanacy, many years later, confirmed to me that I had captured the taste of Sri Lankan food.

In 2005, I accompanied Nanacy Rajapakse to her nephew’s wedding. The groom (with flower on his lapel) and his family approach the wedding venue.

I understand that Sri Lankan food may be a stretch for some of my readers but I really want to introduce you to it.  As a starting point, I’ve selected a vegetable dish that pairs really well with a wide range of cuisines, Zucchini and Peppers with Fennel Seed and Cinnamon.


Follow us on your social media platform of choice


I actually made this a few weeks ago at an otherwise all-Italian meal.  It paired really well.  The dinner guests, all of whom were Italian, didn’t think for a moment that it wasn’t Italian!

The wedding ceremony

It’s an example of a style of cooking vegetables in Sri Lanka called tempering.  The vegetables are cut into relatively small pieces.  Aromatics (onion, garlic, ginger, etc.), depending on the dish, are first sautéed.  The vegetables and seasonings are added and everything is cooked relatively quickly, 10 minutes or so depending on the vegetable.

Most Sri Lankans are ethnically Sinhalese.  The next largest group are Tamils, followed by individuals of Arab descent (called Moors locally).  Typically, Sinhalese are Buddhist, Tamils are Hindu, and Moors are Muslim.  There is a smattering of others ethnic groups and religions.

A reception for the newlyweds, several days after the wedding. Nanacy is on the right and her sister Thilaka is on the left

Hindus and Buddhists in South Asia, are nominally vegetarian.  Muslims typically don’t eat pork.  This recipe, which is ethnically Sinhalese, includes bacon which 92% of the Island’s population theoretically would typically refrain from eating.  But they don’t!


Click HERE to join our mailing list and you’ll never miss a recipe again!


In fact, I found no shortage of meat (and meat-eaters) on my trips to Sri Lanka.  Even the most ubiquitous of condiments, pol sambola, contains flakes of dried fish which would typically be avoided by both Buddhists and Hindus.  Clearly there is some sort of “accommodation” that the Sri Lankans have made around the idea of being vegetarian because the local cuisine contains a lot of (very wonderful) meat and fish dishes.

On the other hand, it’s also an easy place to be vegetarian.  One of my trips to Sri Lanka coincided with one of my periods of vegetarianism (which I ultimately gave up for cultural and health reasons).  There was an array of vegetarian options available at every meal.

A view of the Indian Ocean not far from Thilaka’s house south of Colombo

The most difficult time came when neighbors of Nanacy’s sister Thilaka, with whom we were staying, invited me over for a lunch of “curry and rice” which, although it sounds innocent enough, means you’re in for a delightful meal and lots and lots of food.  On the other hand “short eats” refers to snack food.

The neighbors had gone all out!  There was a huge array of dishes, each more wonderful than the last.  It truly was the best food I ate in Sri Lanka.  I tried to just eat the vegetarian options but it was clear that my hosts were distraught, though they would never have said anything to me.

Thilaka tempering vegetables for dinner

I decided that the appropriate response to their generosity was to eat everything.  My hosts quickly became delighted (as did my taste buds)!  Only years later did I come to understand that in Sri Lanka (and many Theravada Buddhist countries of South East Asia) Buddhist monks are obliged to accept all food offered to them, even meat, unless they suspect the animal was slaughtered specifically for them.

Since I was most certainly not a monk, I’m sure they couldn’t understand why I was only eating the vegetarian dishes rather than everything that was offered to me.  In the end, it was a happy accommodation for everyone involved.


If you have a favorite family recipe and a bit of a story to tell, please email me at santafecook@villasentieri.com and we can discuss including it in the blog. I am expanding the scope of my blog to include traditional recipes from around the country and around the world. If you haven’t seen Bertha’s Flan or Melinda’s Drunken Prunes, take a look.  They will give you an idea of what I’m looking for.


Print Recipe
Sri Lankan Zucchini and Peppers
I learned to make this from Nanacy Rajapakse who is from Sri Lanka. Nanacy made it with bacon, and, while very good with bacon, it is also wonderful without. As a variation, cabbage, cut into ½ inch wide strips, can be substituted for the zucchini. Feel free to adjust the quantity of spices to your taste. Curry leaves can be difficult to obtain outside of large metropolitan areas with large South Asian or Southeast Asian populations. There is no substitute. If not available, just omit the curry leaves as I often do.
Votes: 0
Rating: 0
You:
Rate this recipe!
Course Sides, Vegetables
Cuisine Sri Lankan
Prep Time 15 minutes
Cook Time 15 minutes
Servings
people
Ingredients
Course Sides, Vegetables
Cuisine Sri Lankan
Prep Time 15 minutes
Cook Time 15 minutes
Servings
people
Ingredients
Votes: 0
Rating: 0
You:
Rate this recipe!
Instructions
  1. Peel and thinly slice the zucchini.
  2. Core and seed the peppers and cut into thin strips.
  3. Thinly slice the onion.
  4. Dice the bacon.
  5. Crush the fennel and cinnamon in mortar. Reserve.
  6. In a large sauté pan, fry the bacon until crisp.
  7. Remove and reserve the cooked bacon.
  8. Fry the onion in the rendered bacon fat until golden.
  9. When the onion is nearly done, add the crushed fennel seed and cinnamon along with the curry leaves, if using.
  10. Cook a few minutes longer to bloom the spices.
  11. Add the zucchini and peppers.
  12. Stir fry over high heat until the vegetables are pliable but still crunchy.
  13. Season with salt and pepper while cooking, tasting from time to time to adjust the seasoning. The dish is best with a bit of a bite from black pepper.
  14. Stir the cooked bacon into the vegetables after they have cooked.
Recipe Notes

Copyright © 2018 by VillaSentieri.com. All rights reserved.

Share this Recipe

Kidney Beans in Tomato Sauce

February 19, 2018

As you may have figured out by now, we live in a multi-generational household.

My husband’s parents live in our casita in Santa Fe.  Before we moved to Santa Fe, they lived in our coach house in Chicago.

Meals are usually communal affairs and, after many years, I’m learning to make some of my mother-in-law’s dishes that I’ve taken for granted for more than 20 years.

Though these beans could easily be the centerpiece of a vegetarian meal if you leave out the bacon, they usually accompany something more pleasing to carnivores (that would be my husband and my father-in-law).  For this rendition, I went back to the original recipe, with bacon, though usually my mother-in-law leaves it out and simply adds a few tablespoons of olive oil to sauté the onion and bell pepper.

My husband at two years of age with his parents

As I was learning to make these with my mother-in-law, I also learned that the recipe originally came from Lorraine, the wife of my brother-in-law’s godfather, Jack.  Lorraine is of Polish heritage but was married to Jack, a close friend of my father-in-law who moved to the USA from Italy.


Click HERE to join our mailing list and you’ll never miss a recipe again!


I’m totally confused by the heritage of these beans.  My mother-in-law says they’re Polish based on Lorraine.  I always thought of them as Italian because, until recently, I thought the recipe was from my mother-in-law’s family and, also, because the red sauce with bacon is pretty similar to an Italian-American adaptation of a classic Italian method for cooking green beans.  The bacon is a substitute for pancetta which is the same cut of meat as bacon but which is not smoked after it is cured.

I guess I’m going to have to go with my mother-in-law’s assertion that these are Polish though I can’t say I ever had anything like them among the Poles and other Eastern Europeans in my hometown of Johnstown, PA.  Really, though, that’s not definitive.  I’ve never had any potato cakes like my Slovak grandmother’s (unless they were made by one of her daughters-in-law, of which there were seven!).  That doesn’t make those potato cakes any less Slovak, though.

Red beans and tomatoes are a common combination internationally.  There are versions from New Orleans to Haiti to India to South America to Italy to name just a few.  To be sure, the seasonings vary tremendously but the basics, red beans and a tomato-based sauce, remain the same.


Follow us on your social media platform of choice


Fast forward to the 1970’s:  my husband (on the right) and his brother (on the left) with their parents

I’ve decided to keep this recipe in its original form, with canned beans and tomato sauce.  Although I keep an array of canned beans in my pantry for unexpected events I usually prefer to start with dry beans.  Most commercial brands of tomato sauce are made from tomato paste and water, with a bit of onion powder and garlic powder added.  In place of tomato sauce, I typically use tomato paste and water to achieve the same results.


If you have a favorite family recipe and a bit of a story to tell, please email me at santafecook@villasentieri.com and we can discuss including it in the blog. I am expanding the scope of my blog to include traditional recipes from around the country and around the world. If you haven’t seen Bertha’s Flan or Melinda’s Drunken Prunes, take a look.  They will give you an idea of what I’m looking for.


Print Recipe
Kidney Beans in Tomato Sauce
These beans can be made without the bacon, or with less bacon, in which case a few tablespoons of oil will need to be used to sauté the onion and bell pepper. If you want extra sauce just increase the amount of tomato sauce. You can sauté a clove or two of minced garlic with the onion and bell pepper if you would like. The liquid from the canned beans will improve the consistency of the sauce. Before using it, however, taste it to be sure that it does not have a metallic flavor which happens with some brands of beans. If so, drain and rinse the beans and add additional water in place of the liquid in the cans.
Votes: 5
Rating: 1.2
You:
Rate this recipe!
Prep Time 5 minutes
Cook Time 75 minutes
Servings
people
Ingredients
Prep Time 5 minutes
Cook Time 75 minutes
Servings
people
Ingredients
Votes: 5
Rating: 1.2
You:
Rate this recipe!
Instructions
  1. Dice the onion.
  2. Dice the bell pepper.
  3. Chop the bacon.
  4. Sauté the bacon until it begins to color, adding a small amount of oil if needed to keep it from sticking.
  5. Add the onion and bell pepper to the bacon.
  6. Sauté until the onion just begins to color and the pepper becomes a dull green and starts to soften. It may be necessary to cover the pan and/or add a tiny amount of water if the onion and/or pepper begin to get too brown.
  7. Add the beans and their liquid.
  8. Season with salt and pepper. Bring to a boil.
  9. Add tomato sauce and water.
  10. Simmer, partially covered, for approximately one hour, adding additional water if necessary.
  11. Taste and adjust seasoning while the beans are cooking.
Recipe Notes

Copyright © 2018 by VillaSentieri.com. All rights reserved.

Share this Recipe

Spaghetti with Tuna Sauce

January 17, 2018

Tomatoes…and tuna…not clams or squid…as a sauce for pasta…quite a challenge for me as a young adult!

Although pasta (spaghetti, really) with red sauce and clams or squid was in my wheelhouse as an adolescent, the idea of a red sauce with tuna was, most definitely, not!

My undergraduate advisor, and later my business partner when I set up my psychiatric practice in Philadelphia, Gene d’Aquili, was a first-generation American of Italian and French descent.  I frequently cooked at his home in Berwyn on Philadelphia’s Main Line.  (If you read the obituary link above, you will notice a comment about a sign that read “Fantasyland.”  I was the person who had that sign painted after years of Gene referring to his estate by that name.  I had the sign painted in Guyana on a trip when I was doing research for my doctoral dissertation and ended up on the Guyana Airways float for the Mashramani parade but that’s a whole other story!)

The 1981 Guyana Airways Mashramani float. I was supposed to represent one of the Canadian pilots.

Click HERE to join our mailing list and you’ll never miss a recipe again!


Gene’s father’s family was from Rome.  Gene’s grandparents emigrated to the United States with their four children, Gene’s father Guido, and Guido’s three sisters, very early in the 20th century.  One of the sisters died not long after coming to the United States.  The other two, Auntie Helen and Auntie Louise, are the reasons I now drink bourbon (Auntie Louise) and know a lot about traditional Roman cuisine (Auntie Helen).

The family home is now part of the American Embassy in Rome.  There are several buildings that are part of the American Embassy but I believe the palazzo pictured below was the one the d’Aquili family owned before coming to the United States.

One of the American Embassy buildings in Rome that I believe was the d’Aquili palazzo.

Follow us on your social media platform of choice


Gene’s father, Guido, was a fine artist of the New Hope School.  In a previous post, I included some pictures of some of the Old King Cole murals that he painted for a private club in Trenton, NJ.  Those murals ended up in the dining room of the carriage house I rented on the d’Aquili estate in Berwyn, PA when I was in medical school.

One of Gene’s ancestors was Antoniazzo Romano, a famous artist of the 15th century.  His father’s artistic bent is part of a long family tradition.

The Annunciation by Antoniazzo Romano

For one dinner at “Fantasyland,” really known as “Salus House,” Gene and his wife, Mary Lou, wanted to serve spaghetti with tuna sauce; a classically Italian dish but completely unknown to me at the time.

I winged it based on his description.  It was basically a simple tomato sauce (what we as Americans might call Marinara but what Italians would call Pomodoro) with tuna simmered into it.

It was good, and although many years went by before I made it again, it stuck in my memory.

I’ve tweaked the recipe over the years but it really hasn’t varied much from my initial foray into making spaghetti with tuna sauce based on Gene’s description.


If you have a favorite family recipe and a bit of a story to tell, please email me at santafecook@villasentieri.com and we can discuss including it in the blog. I am expanding the scope of my blog to include traditional recipes from around the country and around the world. If you haven’t seen Bertha’s Flan or Melinda’s Drunken Prunes, take a look.  They will give you an idea of what I’m looking for.


Print Recipe
Spaghetti with Tuna Sauce
Although mushrooms are not strictly traditional, their presence is not really noticeable and I think they add a bit of savoriness to the sauce. You can omit them if you wish. It is important to use good quality tuna to avoid any “tinny” taste. Italian Tonno is ideal but a good American brand will work fine. The small amount of sugar is intended to counteract the sourness that some canned tomatoes can have. Adjust up or down to your taste. The presence of the sugar should not be detectable, however.
Votes: 0
Rating: 0
You:
Rate this recipe!
Prep Time 15 minutes
Cook Time 1 hour
Servings
people
Ingredients
Prep Time 15 minutes
Cook Time 1 hour
Servings
people
Ingredients
Votes: 0
Rating: 0
You:
Rate this recipe!
Instructions
  1. Coarsely chop the carrot, celery, onion, mushrooms, garlic, and parsley.
  2. In a food processor finely mince the chopped vegetables.
  3. Heat the olive oil in a heavy-bottomed saucepan.
  4. Add the minced vegetables and sauté on medium high heat, stirring often, until golden.
  5. Add the red pepper and sauté a minute or two more.
  6. Add the wine and quickly evaporate, stirring often.
  7. Add the basil and oregano. Stir well.
  8. Add the tomato puree, water, sugar, 1 ½ teaspoons salt and black pepper to taste.
  9. Simmer uncovered approximately 30 minutes, stirring occasionally.
  10. Add the tuna and simmer 10 minutes more.
  11. Adjust seasoning.
  12. This makes enough to generously sauce one pound of spaghetti.
Recipe Notes

Copyright © 2018 by VillaSentieri.com. All rights reserved.

Share this Recipe

Cuban Black Beans

December 1, 2017

Black beans are ubiquitous on tables in Cuba.

Getting beans to the right texture and the liquid to the right thickness is almost an art form.

Food is scarce in Cuba…at least if you’re a Cuban paying in Cuban Pesos. Not so much if you’re paying in CUCs (Cuban Convertible Pesos), which is what foreigners use. The CUC is pegged to the US Dollar but if you change Dollars for CUCs you pay a 10% penalty as opposed to exchanging another currency, say the Euro, for CUCs.


Click HERE to follow us on Twitter


Prices in Cuban Pesos at a locals’ only market

One view of a locals’ only market
Another view of a locals’ only market

I visited a butcher shop in Havana which pretty much now only sells chicken; when chicken is available, that is. If you notice the door to the cooler is open. That’s because the cooler isn’t on because there’s no inventory.

A butcher shop in Havana

The butcher is just waiting around for chicken to arrive.

When that chicken does arrive, it will likely be frozen Tyson chicken from the United States. Even though, when this picture was taken, the US embargo of Cuba was in full force.

Most of the chicken in Cuba is frozen Tyson chicken from the United States

The same is true of hot sauce. If one asks for hot sauce at a restaurant in Cuba one is likely to get a bottle of Tabasco shipped in from Avery Island, Louisiana. Clearly there are exceptions to the embargo for some American companies!

If you pay in CUCs, the food available increases dramatically.

One stall in a multi-vendor market where prices are denominated in CUCs
Another stall in the same market
Locally prepared beverages in the CUC-denominated market

The disparity in prices for food purchased with Pesos vs CUCs is so large that average Cubans cannot afford to buy food with CUCs, even if they can get them. It takes 25 Cuban Pesos to buy one CUC. Paying in Pesos limits one to shopping in pretty-much locals’ only stores, with limited inventory where the products, like rice and beans, are sold at subsidized prices.

Rum is widely available regardless of the currency.  You’ll pay more if you’re a foreigner, however.

Havana Club is a popular brand of rum in Cuba
A well-stocked bar ready for the day’s customers
Cuban cigars for sale at the bar

After returning from the trip to Cuba in 2014, I tried but couldn’t get the texture of my “Cuban” black beans right. But then, my mother-in-law got a recipe from Beatriz (Betty) Scannapieco. Betty is from Cuba. She was in the exercise group my in-laws attend. Betty’s recipe, using a pressure cooker as is common in Cuba, works like a dream. It’s really pretty effortless, too. The green pepper, onion, and garlic add tremendous flavor but are removed after cooking leaving just beans and the silky cooking liquid.

I made three changes to Betty’s recipe. She called for 1 teaspoon of white wine. I use 1 tablespoon. Betty didn’t use tomato paste or black pepper but both are common ingredients in many Cuban black bean recipes.


Follow us


Click HERE to join our mailing list and you’ll never miss a recipe again!

Print Recipe
Cuban Black Beans
This recipe came from Beatriz (Betty) Scannapieco in my in-law’s exercise group. Betty is from Cuba. I added the tomato paste and black pepper to Betty’s recipe. I also increased the wine from 1 teaspoon to 1 tablespoon. It can be challenging to get the bell pepper, onion, and garlic out of the beans as they very soft after cooking. If you want to make it easier, you could tie them in cheesecloth.
Votes: 0
Rating: 0
You:
Rate this recipe!
Prep Time 10 minutes
Cook Time 1 1/4 hours
Servings
people
Ingredients
Prep Time 10 minutes
Cook Time 1 1/4 hours
Servings
people
Ingredients
Votes: 0
Rating: 0
You:
Rate this recipe!
Instructions
  1. Wash the beans.
  2. Cover beans with water by a couple of inches and soak overnight in the refrigerator.
  3. The next day, cut the bell pepper in half and remove ribs and seeds.
  4. Cut the onion into 4 or 6 wedges, but do not cut the whole way through the root end.
  5. Bruise the garlic by laying the blade of a chef's knife on top and gently pounding the knife blade.
  6. Drain the beans. Put the beans in a pressure cooker along with 3 ¼ cups of fresh water.
  7. Bring the beans to a boil, uncovered.
  8. Skim the foam from the beans then remove the pot from heat.
  9. Add the green pepper, onion, garlic and bay leaves to the beans.
  10. Put the lid on the pressure cooker and bring to 10 pounds pressure.
  11. Reduce heat and cook for 30 minutes.
  12. Remove the pressure cooker from heat and allow pressure to dissipate naturally.
  13. Uncover the pressure cooker.
  14. Add the olive oil, tomato paste (if using), wine, vinegar, salt and black pepper (if using).
  15. Bring to a boil uncovered and boil for 5 minutes.
  16. Remove from heat. Cool slightly and remove bell pepper, onion, bay leaves, and garlic.
  17. The beans can be served immediately but are better if refrigerated overnight.
  18. Serve the beans in a shallow bowl with pieces of finely diced raw onion in the center. Black beans are customarily accompanied by white rice.
Recipe Notes

Copyright © 2017 by VillaSentieri.com. All rights reserved.

Share this Recipe