Tag Archives: ciboitaliano

Pasta Fresca all’Uova (Fresh Egg Pasta)

Earlier today I sat down to write a blog post and recipe for Lasagne Bolognese.  Americans use the word Lasagna but in Italian the correct word for the dish is Lasagne, with an “e” on the end. 

After drafting a few paragraphs, I thought about the different component parts that were needed for the lasagne: Ragù Bolognese (for which I’ve posted two recipes), fresh pasta (for which I haven’t published a recipe), and besciamella (for which I also haven’t published a recipe).  Deciding that the post would be way too long if I needed to include two additional recipes, I decided to back up a bit and publish recipes for fresh pasta and besciamella and then get on to the business of publishing a recipe for Lasagne Bolognese. 
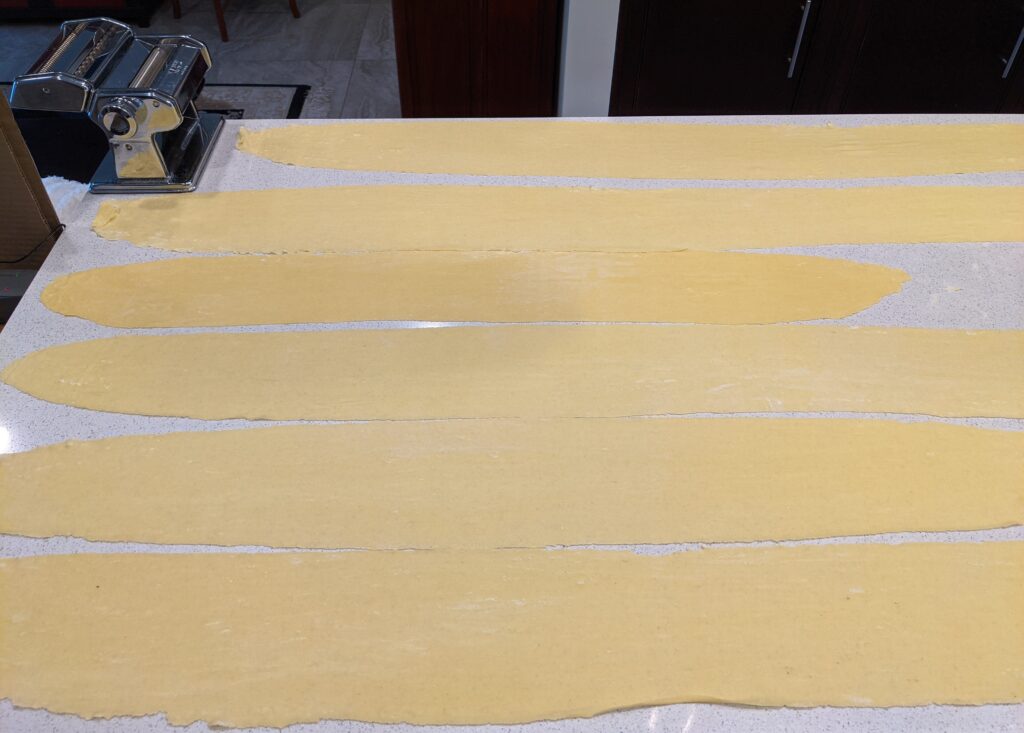
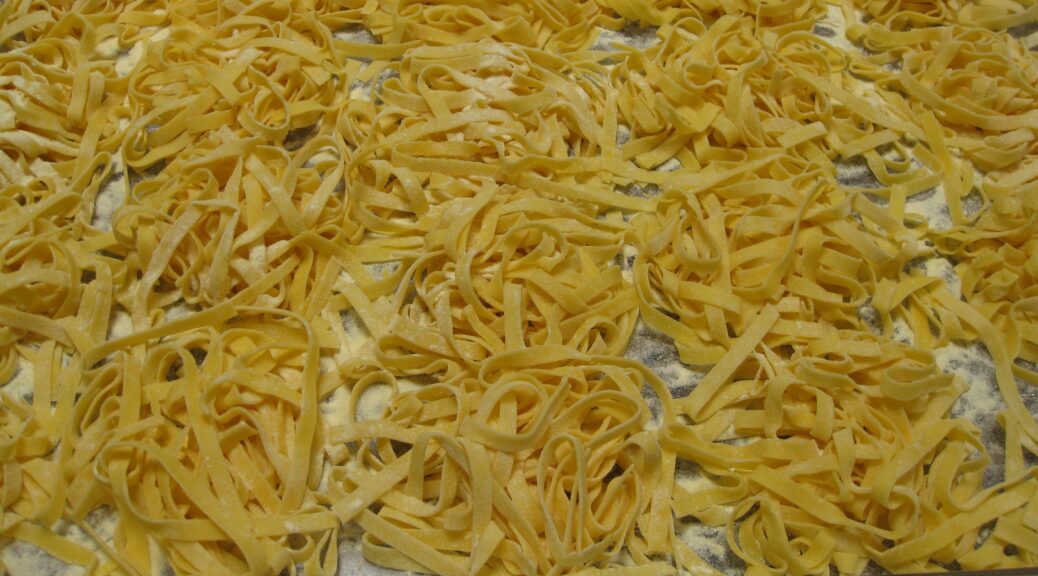
Given the amount of fresh pasta that I make, I’m surprised that I haven’t ever published a recipe.  It’s been on my list of recipes to publish for years now but it’s never happened, until now. 

Although I made fresh pasta before attending culinary school in Italy, it was in culinary school where I really became comfortable with the process.  The corollary is that my recipe for egg pasta uses Italian flour and is done in metric measures. 


Unless you’ve been making pasta for a long time (in which case why would you be reading this blog post), you should use a digital scale.  It will make the entire process nearly foolproof (and much easier). 
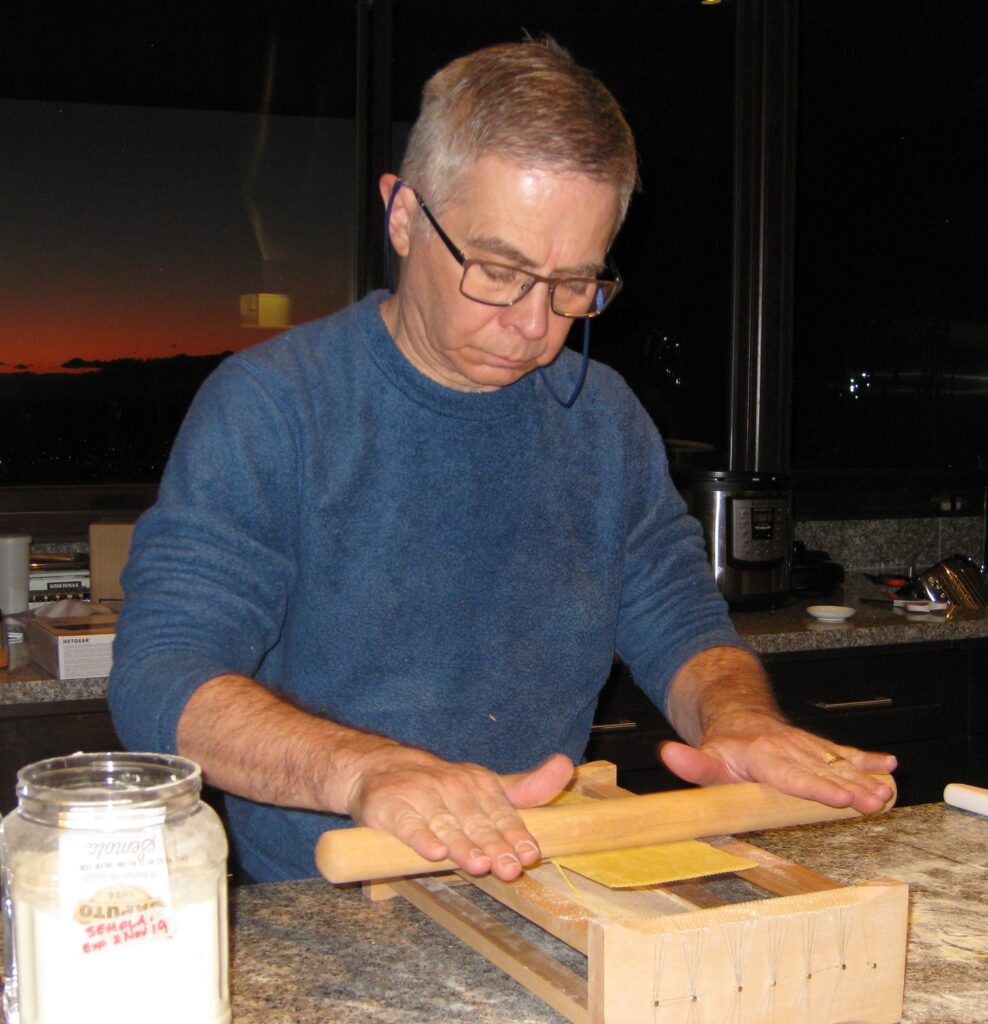
I also encourage you to turn your digital scale to the metric setting, even if you’re not comfortable with that system.  Set the scale to measure in “grams” and you’ll be all set. 

Italian flour is categorized by the fineness of the grind (00 being the finest) and the extensibility (stretchiness when mixed into dough), noted by W-values ranging from about W-90 to W-400.  Although not as precise, in terms familiar to Americans, all-purpose flour is more extensible than cake flour and bread flour is more extensible than all-purpose flour.  The issue is that there are no standards and there is considerable variability from one brand of flour to another.
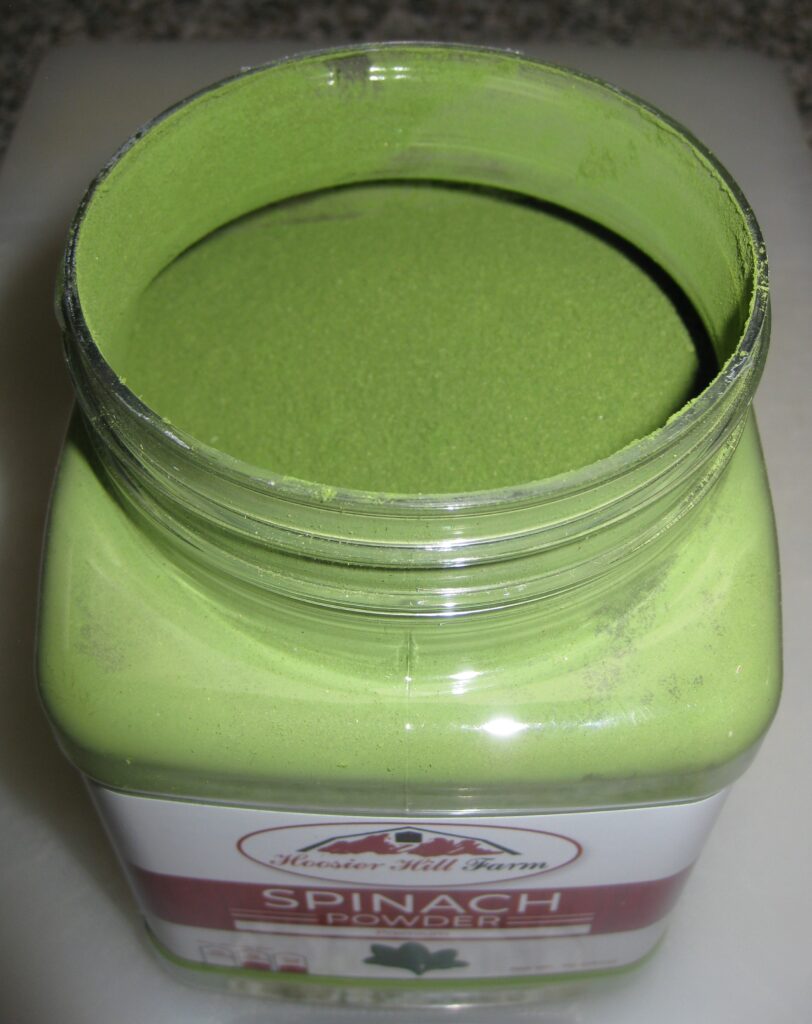
For this recipe, you want a 00 (double zero) flour with a W-value around 180 to 220.  My recommendation is to go online and buy Paolo Mariani flour for “Pasta Fresca.”  If you really get into making pasta and you develop a “feel” for the dough, you can begin to substitute other flours if necessary.  In the beginning, however, it is much easier to use a known product.

When I started this blog in 2017, I lived in Santa Fe, New Mexico at almost 8000 feet in elevation.  I became very sensitive to the effect of altitude on cooking and baking.  When I moved to Palm Springs, at almost sea level, I thought my days of making adjustments based on location were behind me.  Not so.  The dry air in Palm Springs means that many recipes need extra liquid.  This recipe is no exception.  Without adding more egg, I found that I was not able to incorporate all the flour the way I could when cooking in Italy. 
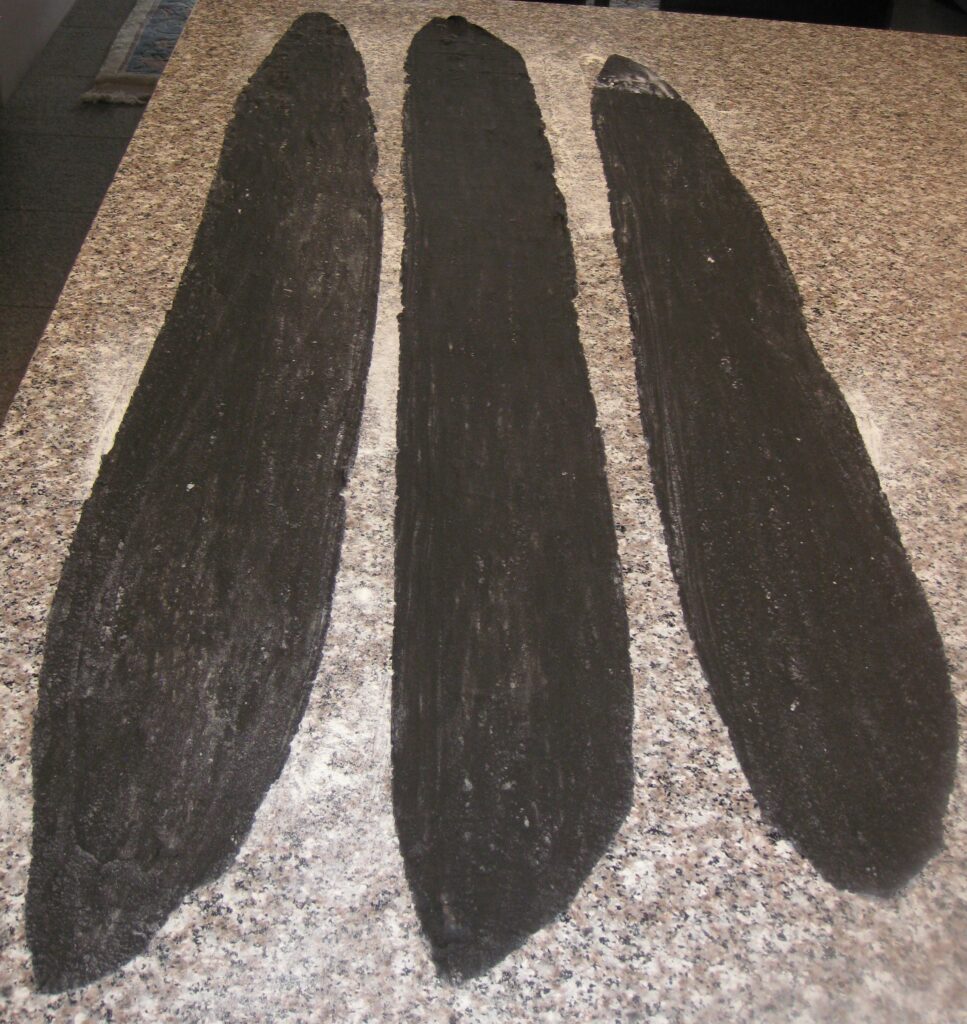
Print Recipe
Pasta Fresca all’Uova (Fresh Egg Pasta)
This is a general-purpose egg pasta that can be used in most any application that calls for rolled pasta. If you don’t have a scale that weighs very small quantities, use ¼ teaspoon salt instead of 2 grams. If you live in a very dry climate, like Palm Springs, increase the whole egg to 90 grams. To make red or green pasta, substitute 8 grams of beet or spinach powder for 8 grams of flour. To make black pasta, substitute 8 grams of nero di seppia (squid ink) for 8 grams of whole egg.
Votes: 0
Rating: 0
You:
Rate this recipe!
Prep Time 25 minutes
Passive Time 90 minutes
Servings
people
Ingredients
Prep Time 25 minutes
Passive Time 90 minutes
Servings
people
Ingredients
Votes: 0
Rating: 0
You:
Rate this recipe!
Instructions
  1. Mix the flour and salt in a large bowl.
  2. In a separate bowl, combine the whole egg and egg yolk, and gently mix together with a fork.
  3. Make a depression in the center of the flour. Add the egg mixture and begin to mix the flour into the egg with a fork. When the dough becomes too stiff for the fork, scrape everything onto a work surface.
  4. Change the fork for a bench scraper and your hand. Slide the scraper partway under the flour-egg mixture and then flip it over to bring the flour that was on the bottom to the top. Use your hand and the bench scraper to press the mixture together to fully combine the flour and egg.
  5. When the mixture becomes firm enough, you can stop using the bench scraper and use your hands to press and turn the dough until it is homogeneous. Use a pressing motion, not a kneading motion the way you would for bread. That is, press down on the mixture, not out and away from you.
  6. Once the dough is homogeneous, form it into a brick shape and wrap very tightly (and I mean very tightly) in plastic wrap. The pressure will further help the dough to hydrate. As an alternative to wrapping the dough in plastic wrap, you can vacuum seal it in a sous-vide bag.
  7. Allow the dough to rest at room temperature for 60 to 90 minutes, until it does not spring back quickly when gently depressed with a finger.
  8. Portion, roll, and cut as required for the recipe.
Recipe Notes

Tip: This dough cannot be rerolled as it will not bond well to itself after rolling.  Any scraps can be cut into irregular pieces, called maltagliati in Italian, air-dried for use in soup.

Copyright © 2025 by Villa Sentieri, LLC. All rights reserved.

Share this Recipe

Milk Chocolate Gelato (Gelato al Cioccolato al Latte)

16 September 2024

Even though I published a book on gelato, I’ve never posted a gelato recipe on my blog. 

Making gelato requires a few specialty ingredients and an “ice cream machine” known professionally as a batch freezer because it freezes batches of ice cream, gelato, and so forth.  None of these items is difficult to obtain but they are not found in most home kitchens.

My Italian batch freezer is a step up from the Cuisinart ice cream maker I started with over 20 years ago.

Perhaps you already have an ice cream machine, you know, one of those machines where you put the tub in the freezer for a day or so before churning the ice cream.  This is how I started my gelato journey more than 20 years ago. Though I haven’t used it in a while, I still have my original machine.  I’m also happy to say it makes good gelato!  The current version of this machine is still available for under $100. 

Gelato begins with a base of thickened milk.  Historically eggs were commonly used to make the base, creating what is essentially a custard.  While eggs are still used in some artisan Italian gelato they usually appear in two contexts.  One of these in gelato flavors where the taste of egg is important to the flavor profile of the gelato, such as zuppa inglese gelato.  The other use is in particular styles of gelato that have historically used substantial quantities of eggs for richness, such as a gelato style favored in Bologna.


 Join our mailing list and you’ll never miss a recipe again!


Most Italian gelato is now made from a custard base that is thickened with ingredients other than egg.  Think about making custard (or pudding depending on which version of English you speak) with cornstarch, tapioca, or arrowroot, to name a few.  Each of these can be used instead of eggs to make custard.  Have you ever used Bird’s Custard Powder?  The thickener is cornstarch. 

Traditionally gelato is portioned using spades rather than scoops.

Cornstarch and gelatin can be used to thicken a gelato base but they are not ideal from the standpoint of a professional gelato maker because the gelato does not have good keeping qualities.  This is where two other natural ingredients come in.  These are carob powder and guar.  Carob and guar are both legumes (beans).  They have been used as food for a very long time.  After drying, they are ground to powder and that’s it.  It’s not too dissimilar from making flour from grains of wheat. 

You have probably encountered carob used in candy, sometimes as a substitute for chocolate.  You are less likely to have encountered guar beans but they are used for food in large parts of the world.

Other than eggs, carob and guar are the only thickeners that I use when making gelato.  They are natural and not chemically derived.  There are other thickeners, such as xanthan gum and carrageenan, that are chemically produced.  I believe these thickeners don’t adhere to the spirit of artisan Italian gelato though they are commonly used in supermarket brands of gelato. 


Find out more about me and the books I’ve published at www.GaryMihalik.com


Have you ever gotten gelato at a gelateria in Italy?  If you did, you may have done what most Italians do which is to get multiple flavors.  Did you notice that all the different flavors of gelato have the same texture?  This is no accident.  Italians take their gelato seriously and believe that all gelato should have the same creamy texture.  Achieving a consistent texture depends on making sure that every gelato in the display case has the same serving temperature.  (This requires calculations that I won’t bore you with but the topic will be important if you become serious about creating your own gelato formulas). 

The serving temperature of gelato is determined in large part by the amount of solids dissolved in the gelato base.  Most of these solids are sugar.  Creating a gelato with the correct serving temperature means adjusting the amount of sugar in the recipe.  But it’s a little more complicated because of the issue of taste.  A watermelon gelato and a lemon gelato with the same amount of sugar would not both taste good.  Either the watermelon gelato would be too sweet or the lemon gelato would be too sour. 

Luckily, there are sugars other than table sugar (sucrose) that can be used to address this issue.  Glucose is less sweet than sucrose while fructose is sweeter than sucrose.  They also affect serving temperature differently than sucrose but that’s getting somewhat esoteric.  Using two or three sugars can get the right sweetness and the right serving temperature. 

For all the gelatos in my book, Mastering Artisan Italian Gelato, I’ve already done these calculations.  I’m mentioning this here to explain why this particular gelato calls for dextrose.  To make good gelato you need a good recipe and some basic equipment.  You only have to deal with mathematics and science if you want to create your own flavors. 

Who doesn’t enjoy gelato?

If you like gelato, I hope you give this recipe a try.  It’s not difficult but you will be rewarded with some of the best gelato you have ever tasted. 

Print Recipe
Milk Chocolate Gelato (Gelato al Cioccolato al Latte)
Dark chocolate can seem serious. Milk chocolate is quite the opposite. This gelato starts with dark chocolate but the proportion is less than is used in dark chocolate gelato. The lower percentage of chocolate and the higher percentage of dairy turn it into milk chocolate. You can buy guar gum, locust bean gum (carob), and dextrose online. Be sure to buy pure powdered dextrose, not anything labelled glucose or glucose syrup. Precision is important when making gelato, especially for ingredients like guar and carob that are used in small quantities. This will make approximately 1 quart (1 liter) of base. The recipe can be scaled up or down based on the capacity of your ice cream machine.
Votes: 0
Rating: 0
You:
Rate this recipe!
Cuisine Italian
Prep Time 20 minutes
Cook Time 50 minutes
Passive Time 24 hours
Servings
quarts
Ingredients
Cuisine Italian
Prep Time 20 minutes
Cook Time 50 minutes
Passive Time 24 hours
Servings
quarts
Ingredients
Votes: 0
Rating: 0
You:
Rate this recipe!
Instructions
  1. In a small bowl, combine the dextrose, guar gum, locust bean gum, and salt. Mix very well as locust bean gum and guar gum can clump if they are not thoroughly mixed with the dextrose. Reserve.
  2. Combine the milk and sucrose in a stainless-steel pot. Heat to 35°C (95°F), whisking occasionally.
  3. Add the chocolate and stir until melted, keeping the temperature below 45°C (113°F).
  4. Add the skim milk powder and whisk to dissolve completely.
  5. Continuing to heat the milk mixture, slowly sprinkle in the dextrose mixture, whisking constantly to avoid lumps and keeping the mixture below 45°C (113°F).
  6. After the dextrose mixture is fully incorporated, heat to 85°C (185°F), stirring constantly and scraping the bottom of the pot with a rubber spatula.
  7. Add the cream. Mix well. Heat to 75˚C (167°F) as the cream will have cooled the mixture, stirring constantly, and hold for 15 seconds.
  8. Chill quickly, preferably in an ice bath. Allow the base to mature overnight, covered and refrigerated at 4˚C (39°F) or less.
  9. Just before freezing the gelato, add water to return the base to the calculated batch weight.
  10. Blend with an immersion blender. Taste and adjust salt, if necessary.
  11. Freeze in a batch freezer according to manufacturer’s directions.
  12. Transfer the gelato from the batch freezer to a tub.
  13. Harden in a deep freezer at least 12 hours, or up to one month if tightly covered.
  14. About 15 minutes before serving the gelato, portion it into serving bowls and place the bowls in the refrigerator. This will allow the gelato to warm slightly.
Recipe Notes

I recommend weighing the stainless-steel pot when it is empty and recording the weight. That way, at step 9, when you add water to compensate for what evaporated when heating the base, you can simply add the weight of the pot to the intended weight of the mixture, which for a single batch is 1000 grams, and add water to reach that weight.

Copyright © 2024 by Villa Sentieri, LLC. All rights reserved.

Share this Recipe