Category Archives: Recipes

Traditional recipes for foods and beverages from around the world.

Sformato di Spinaci (Spinach Casserole)

January 13, 2017

The word sformato in Italian means deformed or shapeless.  When applied to food, standard Italian-English dictionaries often translate it as pie or soufflé. It is none of the above.

A sformato is most definitely not deformed or shapeless.  In fact, a food historian described a sformato as “something that was cooked in the mould [sic] and then extracted from it” (Alexandra Grigorieva, Naming Authenticity and Regional Italian Cuisine in Authenticity in the Kitchen: Proceedings of the Oxford Symposium on Food and Cookery 2005, edited by Richard Hosking).  Nor is a sformato really a pie or a soufflé as those terms are usually used.  It has no crust of any sort, as would a pie.  It is not puffy like a souffle.  Sometimes it doesn’t even contain eggs.

A sformato is most often made of vegetables, usually bound with some combination of eggs, cream, cheese, and/or béchamel (balsamella or besciamella in Italian), and cooked in a baking dish.  I think the best English translation of the word is casserole.

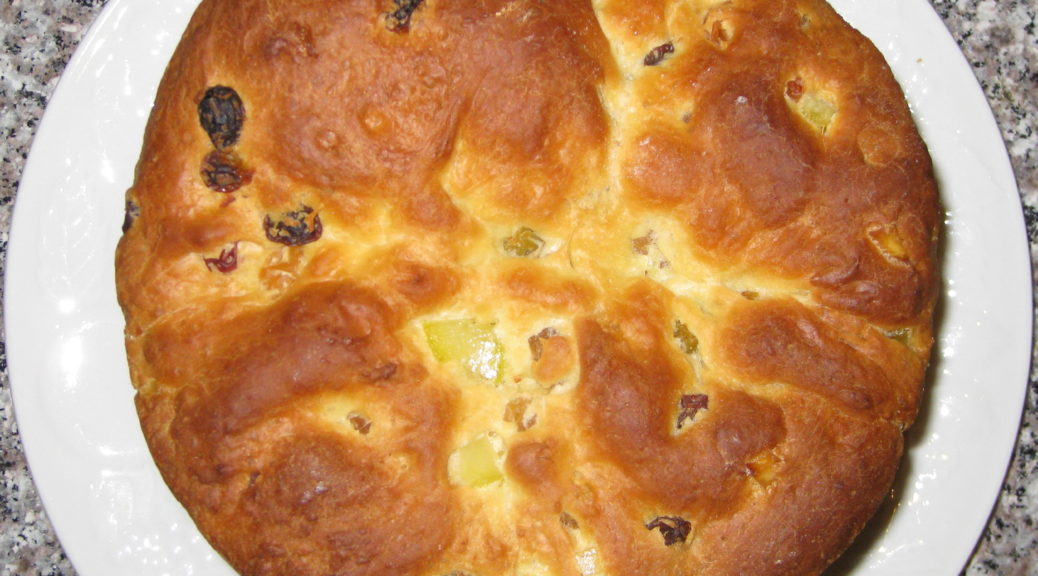
Sformato di Spinaci, spinach sformato (or, reluctantly, spinach casserole), is one of those dishes that has iconic status in my husband’s family.  Like Merluzzo in Umido, the recipe came from Italy with his grandmother whom we called Nonni.  Nonni is one of those made up words that sometimes take hold in a family based on the mispronunciations of little kids.  The Italian word for grandmother is Nonna.  However, Nonni is to Nonna as Gramma is to Grandmother.

Just as Pasta Ascuitta has only one meaning in my family, Sformato has only one meaning in my husband’s.  If you simply say “sformato,” everyone knows you mean spinach sformato, and not, for example, cauliflower sformato.

I first had sformato at Christmas Dinner at my in-law’s house in 1989.  Although I had been cooking northern Italian food since 1973 based largely on Marcella Hazan’s wonderful cookbooks, that Christmas was really the beginning of my learning to make some of my husband’s family’s northern Italian favorites.  It’s really a whole different taste profile from the southern Italian dishes I grew up with.

I’ve actually taken a heretical twist with my interpretation of Nonni’s sformato. I’ve added a little balsamella for moisture. This was most definitely not in the original, though it is not an uncommon addition to sformato. If you want to make the original version, just leave out the balsamella.  It will be a little drier.  You might want to not squeeze the spinach quite as tightly if you don’t include the balsamella.

Print Recipe
Sformato di Spinaci (Spinach Sformato or Spinach Casserole)
Nonni always made this with ground beef but Italian sausage, casing removed and crumbled, works really well (a bit of southern Italian heresy creeping in!). It can also be made without meat, but the amount of spinach should be increased by an additional 10 oz. to a total of 30 oz. I have occasionally used fresh spinach but, honestly, frozen chopped spinach works just fine. I doubt you could reliably tell the difference in a side-by-side comparison of fresh vs. frozen spinach in this dish.
Votes: 0
Rating: 0
You:
Rate this recipe!
Course Vegetables
Cuisine Italian
Prep Time 45 minutes
Cook Time 1 hour
Passive Time 15 minutes
Servings
people
Ingredients
For the spinach mixture
For the balsamella
Course Vegetables
Cuisine Italian
Prep Time 45 minutes
Cook Time 1 hour
Passive Time 15 minutes
Servings
people
Ingredients
For the spinach mixture
For the balsamella
Votes: 0
Rating: 0
You:
Rate this recipe!
Instructions
For the spinach mixture
  1. Cook the frozen spinach in a heavy bottomed sauce pan tightly covered until thawed, breaking up the spinach from time to time.
  2. As soon as the spinach is thawed, pour the contents of the pan into a fine mesh sieve and allow the spinach to drain and cool.
  3. When the spinach is cool enough to handle, squeeze small handfuls of the spinach to remove excess water.
  4. Cut through the mass of squeezed spinach about eight or ten times with a knife then rub it through your fingers to loosen it. It will be pretty tightly wadded up from squeezing out the liquid.
  5. Brown the ground beef or sausage in olive oil over medium heat. You want to get some really browned bits of meat for the flavor. Don't make the mistake of just cooking the meat until it is no longer pink.
  6. When the meat is nicely browned, add the onion and cook until golden and soft. Add the garlic and sauté until fragrant, about 1-2 minutes.
  7. Combine the meat mixture and spinach in a large mixing bowl. Season with salt and pepper and allow to cool briefly.
  8. Meanwhile, make the breadcrumbs by removing the crusts from a slice of two-day old home-style white bread. Tear the bread into pieces and whiz in a food processor until processed into evenly sized crumbs. Reserve.
  9. Melt the butter and toss with the breadcrumbs. Reserve.
  10. Make the balsamella (see directions below).
  11. Add the balsamella to the cooled meat and spinach mixture. Stir well, loosening up the spinach. When well combined, stir in the eggs. Be certain that the mixture is not so hot that it cooks the eggs.
  12. Reserve two tablespoons of the Parmesan cheese and mix the remainder into the spinach-meat-balsamella mixture.
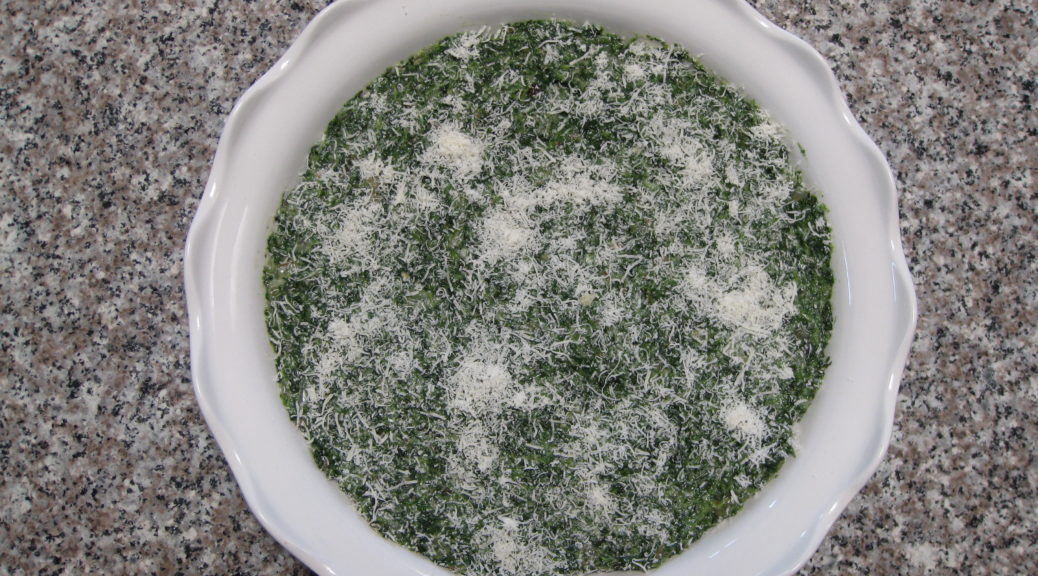
  13. Pour the spinach mixture into a buttered 9-inch round or 8-inch square baking dish. Sprinkle top with the buttered crumbs and reserved Parmesan cheese.
  14. Bake at 350°F for approximately 60 minutes or until golden brown.
  15. Cool about 10 minutes before cutting and serving.
For the balsamella
  1. Heat the milk in a small heavy-bottomed saucepan until bubbles begin to form around the edges. Do not bring the milk to a boil.
  2. Meanwhile, melt the butter in a saucepan and add the flour when the foam subsides. Cook for several minutes without browning.
  3. Add the milk, approximately two tablespoonsful at a time, mixing well after each addition. Adding the milk in small amounts should allow you to stir out any lumps before adding the next bit of milk.
  4. After all the milk has been added, bring to a boil and cook for one minute, until thickened.
  5. Remove from the heat and stir in the nutmeg.
Recipe Notes

This recipe doubles well.  If you want to cook a double recipe in a single pan, use a 9-inch by 13-inch baking dish.  Bake at 325°F rather than 350°F as it will brown too much around the outside before the inside is cooked.  If necessary, raise the heat to 375°F at the very end, and put the sformato on the top shelf of the oven, to brown the top.

If you want to use fresh spinach, use 2 pounds instead of the 20 ounces of frozen spinach.  Remove the stems.  Wash the spinach, shaking off most of the water.  Put the spinach in a heavy-bottomed Dutch oven with just the liquid clinging to the leaves.  Cook covered, over medium heat till fully wilted.  Drain and proceed as above with the exception that you will need to do much more chopping of the cooked and squeezed spinach than the eight to ten cuts suggested above.

Copyright © 2017 by VillaSentieri.com. All rights reserved.

Share this Recipe

Focaccia con Salvia (Focaccia with Sage)

January 9, 2017

I really enjoy baking.  There was a time when my Sunday morning routine included mixing up a batch of bread dough, then reading the New York Times and sipping coffee with our two Italian Greyhounds cuddled up next to me while the dough rose.  The bread would be ready for our main meal, which frequently was around 1 PM on Sunday but often got moved to the evening depending on what was happening that day.

I lost that routine somewhere along the way when work got too busy.  I still make bread frequently but I’ve lost the rhythm of baking every Sunday morning.

When I was growing up, my Aunt Margie baked bread rolls every week.  I’m not sure why, but I think it was on Thursdays. I remember little balls of rising dough, in neat rows, resting on top of the same cabinet, covered by the same cloth, every week.  As a child, I marveled at how they all were exactly the same size. It seemed impossible.

Those rolls were a staple of my childhood.  Lunch often consisted of hot Calabrese salami sandwiched inside one of those rolls.  Sometimes it was peanut butter and jelly.  Other times it was peanut butter and banana, a combination my Italian-born mother-in-law still doesn’t understand!

I still eat sandwiches of Calabrese salami for lunch on a regular basis. Some habits don’t die.  The sandwiches are often on my home-made bread baked in a loaf pan or on a split open chunk of focaccia, but unfortunately, not on Aunt Margie’s bread rolls.

Aunt Margie died a few years back.  Even though she had stopped baking rolls every week long before that, periodically she would ship me a box filled with her home-made bread rolls.  Some I put in the fridge, others went into the freezer.  A quick zap in the microwave, a few slices of salami, and I was re-living a favorite childhood memory.

Memories are funny, though. We never know what experiences will become favorite memories. We just have to take them as they come. Maybe the best we can do is to create experiences that will become favorite memories for others. We just never know what they’ll be.

Print Recipe
Focaccia con Salvia (Focaccia with Sage)
This is a sticky dough. Because of that, it is much easier to mix it using a mixer with a bread hook rather than doing it by hand. On a busy day, when I still want homemade focaccia with dinner, I allow my bread machine to make the dough. When the machine indicates the dough is ready, I just shape it and proceed as described below. I do a lot of baking so I buy dry yeast in one-pound packages rather than in those little envelopes. It doesn’t take many of those envelopes to equal the cost of a full pound of yeast so, even if you throw away a portion of the large package on the expiration date, you will probably have saved money. And who knows, all that yeast sitting in the fridge might just prompt you to bake more, which isn’t a bad thing after all.
Votes: 0
Rating: 0
You:
Rate this recipe!
Cuisine Italian
Prep Time 25 minutes
Cook Time 20 minutes
Passive Time 2 hours
Servings
loaf
Ingredients
Cuisine Italian
Prep Time 25 minutes
Cook Time 20 minutes
Passive Time 2 hours
Servings
loaf
Ingredients
Votes: 0
Rating: 0
You:
Rate this recipe!
Instructions
  1. Fill the bowl of an electric mixer with hot water. Put the dough hook in the water. Allow the bowl and hook to warm up for a few minutes while you prepare the other ingredients. When ready to proceed, drain and dry the bowl and hook.
  2. Add the 220 ml of warm water, yeast and one tablespoon of the flour to the warmed bowl. Using the dough hook, blend the ingredients briefly. Turn off the machine and allow the mixture to sit until it is bubbling and creamy.
  3. When creamy, approximately 10 minutes, add half the remaining flour and the chopped sage. Using the dough hook, mix to combine.
  4. With the mixer running, add the salt then drizzle in the olive oil. After the oil is incorporated add the remaining flour. Mix approximately 8-10 minutes. The dough should be soft and sticky.
  5. Oil a large bowl with olive oil.
  6. Remove the dough from the mixing bowl and shape into a ball. It is easier to do this if you rub some oil on your hands. Place the dough in the oiled bowl and roll it around a bit to coat it with oil.
  7. Put a piece of oiled waxed paper over the bowl and then cover the bowl with a towel. Allow the dough to rise until doubled.
  8. Punch the dough down and form into a ball once again.
  9. Oil a 12-14 inch round pizza pan with a little olive oil.
  10. Put the ball of dough on the pizza pan and begin to press down, using both hands, gently stretching the dough, rotating the pan as you go. The dough will spring back. After six or eight stretches, flip the dough over and repeat. Then, allow the dough to sit for five minutes. Repeat the stretching, flipping, and stretching again. The dough will not spring back quite as much and you’ll be able to get it stretched out a little more. You might have to repeat the stretching-flipping-stretching-waiting routine two or three more times until the dough is shaped into a 12-inch circle. It’s easier use a 14-inch pan because you can overstretch the dough a bit then allow it to spring back to the size you want.
  11. Using your fingertips, press the dough to create a bumpy surface.
  12. Cover the dough and allow it to rise until doubled. This will only take about 20-25 minutes. You can cover it with oiled waxed paper but if you have a deep dish pizza pan, you can just flip the pan upside down over the dough and skip the waxed paper altogether.
  13. While the dough is rising, heat the oven to 425°F.
  14. Make an egg wash by beating the egg with two teaspoons of water.
  15. When the dough has doubled, brush the top with egg wash. Arrange the sage leaves on top of the dough and brush each one with more egg wash.
  16. Bake the focaccia at 425°F until golden brown, 15-20 minutes.
  17. Slide the focaccia off of the pizza pan and onto a rack to cool.
Recipe Notes

If you want to try to mix this in a bread machine, consult the directions for your machine.  You can use what I do as a guide, however.  Combine the flour, salt and chopped sage.  Stir to combine. Put the water in the bottom of the bread pan (do not use warm water).  Put the flour mixture on top of the water.  Make a small well in the top of the flour with the back of a spoon.  Add the yeast to the well, being certain the yeast is above the level of the water. Drizzle the olive oil on top of the flour, not touching yeast.  Use the dough cycle.  When the dough cycle is complete, remove the dough, form into a ball, and proceed with step 9 above.

Copyright © 2017 by VillaSentieri.com. All rights reserved.

Share this Recipe

Merluzzo in Umido (Cod in Light Tomato Sauce)

January 4, 2017

The first time I had Merluzzo in Umido was November 1992.  My husband and I took my mother, his mother, and his fraternal grandmother to Santa Fe for a week over Thanksgiving.  At the time, we were living in Chicago.  We rented an ancient adobe house off Garcia Street.  The house didn’t have any central heat though it did have a frightening array of heating devices that included a kiva fireplace, a direct-vent gas heater in the living room, a portable electric heater in one of the bedrooms, wall-mounted electric radiant heaters in the bathrooms, and nothing in the kitchen.  If the oven wasn’t on, the kitchen was the coldest room in the house as it had three outside walls and a door that didn’t seal very well.

Of course, it was reported to be the coldest winter that Santa Fe had experienced in 100 years! In addition to cold, there was lots of snow. And there we were, in a drafty old adobe house with no central heat enjoying a week with the likes of The Golden Girls!

We had a blast.

We had been house hunting in Santa Fe since April of that year.  On that November trip we saw several houses we liked.  We spent a few evenings rating each of the houses on an array of factors using a spreadsheet.  (In my professional life, we would have called this a prioritization matrix or selection grid. It’s a technique I’ve taught to hundreds of health care professionals over several decades.)  One afternoon we all piled into the car to look at the two finalists in the property hunt.  We were uncertain which one to buy.  Not so the women.  A little house on Griffin Street was the undisputed, hands-down favorite.  Deal done!

We put in an offer and closed in January.  For most of December my mother kept saying that she wanted to go back to Santa Fe and stay in the house in the spring.  We did a bit of remodeling and moved into the house in March.  Unfortunately, my mother died in January, shortly before we closed on the house.  She never got to experience her dream of returning to Santa Fe.  We had that house for more than nine years before we moved into a much larger Santa Fe property in Ricardo-Legorreta-designed Zocalo.  After Zocalo, we built and moved into Villa Sentieri overlooking the city.

I frequently think of that trip.  It was memorable in so many ways.  We found our first house in Santa Fe.  I got to spend quality time with my mother in the last weeks of her life.  My husband and I had interviews to get our medical licenses in New Mexico.  (It’s the only time either of us has been personally interviewed for a medical license!).   And, I learned how to make Merluzzo in Umido, one of many recipes that my husband’s grandmother brought with her from Italy.

Print Recipe
Merluzzo in Umido (Cod in Light Tomato Sauce)
If possible, by large filets of cod and portion them at home. Three pounds is enough for eight people. The advantage of portioning the fish at home is that you can make some smaller pieces for individuals with smaller appetites. Cod is a perfect fish for this dish because it is forgiving in terms of being overcooked. However, any firm, white, non-oily fish will taste great. I used a 15-inch rondeau to cook the cod. It held the fish in a single layer. If you don’t have a pan large enough to hold the fish in one layer, make the sauce in a single sauté pan then divide it among two different pans to cook the fish.
Votes: 0
Rating: 0
You:
Rate this recipe!
Cuisine Italian
Prep Time 20 minutes
Cook Time 1 hour
Servings
people
Ingredients
Cuisine Italian
Prep Time 20 minutes
Cook Time 1 hour
Servings
people
Ingredients
Votes: 0
Rating: 0
You:
Rate this recipe!
Instructions
  1. Cut the cod into 8 to 10 serving pieces. Though you can cook whole filets, it will be easier to get the fish out of the pan if cut into portions.
  2. In rondeau large enough to hold the fish in one layer, sauté the onion and a sprinkling of salt in the olive oil until transparent and slightly golden but not brown.
  3. Add the garlic and sauté until fragrant, about 1 minute.
  4. Add parsley and some freshly ground black pepper. Sauté for a minute or two. The smell of parsley should become noticeably more potent. Do not brown the ingredients of the pan.
  5. Add the wine and cook briskly until the wine evaporates.
  6. Add the tomato paste. Sauté, stirring frequently, until it gets ever so slightly darker and begins to smell sweet. This will take 2-3 minutes.
  7. Add the water, oregano, basil and additional salt and pepper to taste. Boil gently, with the cover slightly askew for 20-30 minutes. The sauce will thicken. If it becomes too thick, add a little additional water. However, the juices from the fish will thin the sauce so it is better for the sauce to start out too thick rather than two thin. The sauce can be made ahead to this point.
  8. With the sauce at a medium boil, add the fish, skin side down. Season with salt and pepper. Cover the pot tightly and cook for approximately 20 minutes until the fish cooks through an flakes easily. The length of time will depend on the type of fish, thickness of the portions, and elevation. Do not turn the fish but occasionally spoon some of the sauce over the top of the cooking fish.
  9. Taste the sauce and adjust seasoning. If the sauce it too thick thin with a little water. If it is too thin, boil it briskly after removing the fish.
  10. Put the fish on a deep serving platter. Pour the sauce over the fish and serve.
Recipe Notes

Parsley stems can be bitter.  When adding parsley to a recipe, I only use the leaves and very tender stems.  To do this, I hold the end of the parsley stem in one hand and slide the stem between the thumb and finger of the other hand.  When my fingers reach the leaves, I pinch off the stem and discard it.  This makes quick work of the parsley and removes any chance of bitterness from the stems.

Copyright © 2017 by VillaSentieri.com.  All rights reserved.

Share this Recipe

Pasta Ascuitta (Angel Hair Pasta with Crispy Breadcrumbs)

December 30, 2016

Pasta ascuitta is the name given to a whole category of pasta dishes in Italy.  It means “dry pasta,” quite literally.  In reality, most of them are not really dry in the full sense of that word.  The category includes all kinds of pasta with almost any imaginable sauce.  Spaghetti and meatballs would be pasta ascuitta to an Italian (though the meatballs would be served as a separate course a discussed previously).  What makes pasta ascuitta “dry” is how it compares to the other category of pasta, “pasta in brodo,” or pasta in broth.

In contrast to pasta in brodo, pasta with sauce is dry, or “ascuitta.” Remember that in Italy the first course after the antipasto (which literally means before the pasta) is either pasta or soup or rice.  So, pasta in brodo is both a soup and a pasta.  A classic version in our house is tortellini in chicken broth. With appropriate Italian (not Italian-American) restraint it makes a great first course.  There might only be five or six tortellini in each bowl of broth.  It takes the edge off one’s hunger without filling one up before whatever comes next.

Growing up in my family, however, pasta ascuitta meant one and only one thing, the way many general terms come to have a specific meaning in a particular context.  Pasta ascuitta, to my family, meant angel hair pasta or spaghettini (not spaghetti), served with an abundant amount of breadcrumbs cooked in olive oil until crispy and flavored with anchovies.  Of everything that appeared on the table at Christmas Eve, pasta ascuitta was, and still is, my favorite.

As children, we called it sawdust spaghetti. I still do, sometimes.  I was chatting with my cousin Donna Meinecke the morning of Christmas Eve this year.  Our families spent most holidays together when we were growing up.  When she asked me what I was cooking, the first thing I said was “sawdust spaghetti.”  Enough said!  It was Christmas Eve, after all, and while I decided it was best not to introduce a table-full of unsuspecting guests to a soup of baccala (salted and dried cod) and tomatoes; a second pasta with a tomato sauce and squid tentacles; and stuffed squid, I had to serve pasta ascuitta.

If you were counting, you would have figured out that the first course of our family Christmas Eve dinner had two pastas and one soup.  This, of course, was after a massive antipasto and a large platter of steamed mussels but before the second course of breaded and pan-fried fish fillets, the aforementioned stuffed squid, and, in later years when the “no meat” rule in our family was relaxed, bracciole and homemade sausage.

I truly don’t remember what vegetables were served.  I do remember, however, that there was a huge platter of cookies for dessert.

Print Recipe
Pasta Ascuitta (Angel Hair Pasta with Crispy Breadcrumbs)
The genius of this dish, made from very humble ingredients, is the crunch of the salty breadcrumbs in contrast to the chew of the pasta. Even if you think you don’t like anchovies, give this dish a try. There is something irresistible about the salty, crunchy breadcrumbs packed with umami. If you’re still not convinced, try using half the amount of anchovies. I promise you, the next time you make this dish, you’ll follow the suggested amount. This may sound like a lot of oil but remember, it's the only "sauce" in the dish. It works out to about 2-3 tablespoons per serving. A food processor renders the job of making the breadcrumbs a breeze. Do not use packaged breadcrumbs. It is essential that they be large and soft, but made from bread that is a couple of days old for the proper texture. It is best to use bread that was baked in a pan rather than free-form as the ratio of soft, inner white crumb to crust will be greater. Many supermarkets carry a hearty artisan-style sliced sandwich bread if you don't have a good Italian bakery nearby and don't want to make your own. You want a dense crumb which this type of bread has. It will work just fine using the food processor method below.
Votes: 1
Rating: 5
You:
Rate this recipe!
Prep Time 20 minutes
Cook Time 40 minutes
Passive Time 48 hours
Servings
people
Ingredients
Prep Time 20 minutes
Cook Time 40 minutes
Passive Time 48 hours
Servings
people
Ingredients
Votes: 1
Rating: 5
You:
Rate this recipe!
Instructions
  1. Put the bread in a paper bag for two days at room temperature. This will allow the bread to become stale, but not hard.
  2. On serving day, make the breadcrumbs from the stale bread in one of two ways. Cut the bread into 1-inch-thick slices.
  3. Cut off the crust from each slice. Cut the slices into one inch cubes.
  4. Process the bread cubes in a food processor to yield coarse (but not chunky) crumbs.
  5. Without a food processor, cut the loaf in quarters and scoop out the center of the loaf. Using your hands, crumble the center of the loaf into coarse crumbs. Then using the teardrop-shaped holes of a grater, grate the white bread that is clinging to the crust.
  6. Measure out and reserve 6 cups of crumbs. Save any additional for another purpose.
  7. Bruise the garlic with the side of a chef's knife.
  8. Heat the olive oil in large, heavy skillet over medium heat. Sauté the garlic (if using) until dark golden, almost brown, then discard. Add bread crumbs to the oil and stir constantly till light golden.
  9. Push the breadcrumbs away from the center of the skillet and add anchovies and their oil. Working quickly so the breadcrumbs don't burn, heat and stir the anchovies, smashing and breaking them into bits. When the anchovies are in small bits, mix them into the crumbs. Season the crumbs with freshly ground black pepper. Continue cooking the breadcrumb-anchovy mixture, stirring constantly, breaking up any remaining bits of anchovy, until the breadcrumbs are crispy. Most of the crumbs will be golden brown but some will be darker. Be careful not to burn the crumbs. There will still be some visible bits of anchovy when the breadcrumbs have gotten crispy.
  10. Remove the skillet from the heat. If not using immediately, stir the anchovy-crumb mixture every few minutes for about 10 minutes so the crumbs on the bottom don't burn from the residual heat. Reserve the anchovy-breadcrumb mixture. Making the crumb mixture a few hours in advance makes the final put-together less stressful.
  11. Cook one pound of angel hair pasta or spaghettini in generously salted water until al dente. I usually use about 1/3 cup salt for six quarts of water. If the crumbs were browned earlier, warm them gently while the pasta cooks.
  12. When the pasta is finished, pour some of the pasta-cooking water into the serving bowl to warm it. Drain the pasta well but do not rinse.
  13. Toss the pasta with the crumbs. If the skillet is large enough, it is best to toss the breadcrumbs and pasta there. It will keep the pasta warmer. Season with a generous amount of black pepper. Taste and adjust salt. It is entirely likely that no additional salt will be needed.
  14. Empty the water from the serving bowl. Dry the bowl, pour in the pasta and serve. It is not traditional to serve cheese with this pasta.
Recipe Notes

If any pasta is leftover, the breadcrumbs will lose their crispiness but still taste great for a quick lunch (in our house, mostly eaten furtively in secret before someone else nabs it).  However, this pasta makes the foundation for a great frittata.  We won't be covering the making of a frittata for a while but stay tuned.

Copyright © 2016 by VillaSentieri.com. All rights reserved.

Share this Recipe

Pear, Celery and Arugula Salad with Lemon Dressing

December 26, 2016

I grew up in a family that put salad on the table at the same time as the rest of the meal.  I married into a family that does the same.  However, in the years between leaving home to go to college and getting married I most definitely converted to serving salad after the main part of the meal was over.  Notice, I didn’t say main course because the other change I made was thinking of the meal as comprising an antipasto (even if it is just a nibble of cheese and a cracker for a family meal) followed by, what Italians would call, the first course (il primo piatto) followed by a second course (il secondo piatto).

In an Italian meal, the first course is usually pasta, or soup, or risotto.  The second course  usually consists of meat or fish with several side dishes (contorni).  After that comes the salad.  Granted, there are exceptions to this sequence, even in Italy.  One of the most classic exceptions is serving Risotto alla Milanese with a breaded and fried veal chop.  OK, so these days, I try not to eat baby animals, so veal is pretty much off the menu at our house, but the point is Risotto alla Milanese is typically served with the meat, not before the meat.

The general rule that the sequence is antipasto, then first course, then second course, then salad was made abundantly clear when my Italian tutor had dinner at our house a few years ago.  For some reason, even though my in-laws grew up in Italy, we served spaghetti and meatballs (very good spaghetti and meatballs, mind you!).  Where it got interesting, however, is that we all ate the spaghetti and meatballs at the same time (for full disclosure, I didn’t touch my salad until afterwards).  My tutor, hailing from Italy however, ate her pasta first.  Only then did she put a meatball or two on her plate for her second course.  Only after that did she touch her salad!

When I am serving dinner for company, the salad always comes after the second course.  I’d rather not serve salad than serve it with the rest of the meal.  Salads, by design, have sharp dressings meant to cleanse the palate.  You can’t go back and forth between a subtly seasoned dish (whether it be pasta or fish or meat) and salad and do justice to the subtlety of the first.  The vinegar and/or lemon juice and/or mustard (and/or whatever else you put in your salad dressing) doesn’t allow that.  Forget what it does to the wine that you’ve paired with the dish!  If it’s just family, however, in the interest of domestic harmony, the salad goes on the table at the beginning.  I still don’t eat mine till the end but I can’t say the same for others.

Print Recipe
Pear, Celery and Arugula Salad with Lemon Dressing
Pears add a welcome freshness to this salad that is a perfect antidote to winter when so little really good fresh produce is available. This may be a lot of pear for some but the sweet juicy taste is a great contrast to the crunch of the celery and the peppery bite of the arugula.
Votes: 0
Rating: 0
You:
Rate this recipe!
Prep Time 15 minutes
Servings
people
Ingredients
Prep Time 15 minutes
Servings
people
Ingredients
Votes: 0
Rating: 0
You:
Rate this recipe!
Instructions
  1. Squeeze about half a fresh lemon to make 2 ½ tablespoons of juice. Allow the juice to sit, uncovered, at room temperature for about an hour before using it to dress the salad. The flavor of the juice will improve.
  2. Remove the top of the celery stalks, the part where the center stalk gets much thinner and smaller stalks come off the sides. Reserve these pieces for another use. Cut the remaining celery stalks on a long diagonal to create thin long pieces.
  3. Using a sharp knife or cheese paring knife, cut about 18 curls of Pecorino Romano cheese.
  4. Peel the pears and cut into quarters lengthwise. Core the pears. Slice into thin wedges.
  5. Combine the lemon juice and olive oil. Shake well to combine.
  6. Toss the arugula and celery with about 2/3 of the lemon-olive oil dressing. Season with salt and pepper to taste and toss again.
  7. Divide the arugula and celery onto six plates.
  8. Toss the pears in the remaining lemon-olive oil dressing. Arrange the pear slices and Pecorino Romano cheese on top of the arugula. Season with freshly ground black pepper. Serve immediately.
Recipe Notes

Copyright © 2016 by VillaSentieri.com.  All rights reserved.

Share this Recipe

Totos (Italian Chocolate Spice Cookies)

December 21, 2016

Homemade cookies and pastries were staples of my childhood.  Trays of cookies showed up for holidays, celebrations, weddings, funerals, and, sometimes, for no apparent reason.

My mother along with relatives and friends set up a cookie-making operation that went on every night for weeks leading up to my sister’s wedding.  The overseer was Annie Castagnola, a family friend.  She had a thin spiral-bound 3-inch-by-5-inch notebook of cookie recipes.  The notebook was the kind we used in grade school to write down our homework assignments.  Annie’s recipes were a curated collection gathered from a host of “old Italian women,” my grandmother included.

The little notebook was coveted by more than a few cooks.  Annie, however, did not share her recipes, even when those recipes came from relatives of the very people who were asking for them.  I know, my mother was one of those people who wanted some of her mother’s recipes.  Annie wouldn’t budge.  The situation got resolved, however, during the cookie-baking marathon for my sister’s wedding.  One night, Annie left her little notebook at our house overnight.  Nobody’s confessing, but there are a few cookie recipes in my mother’s recipe box (sitting on my bookcase) written in my twelve-year-old hand.

Annie died a while back.  Her little notebook is most likely gone forever and along with it the baking secrets of a whole group of “old Italian women.”

Of all the cookies that showed up throughout the year, my favorites were the various kinds of cakey cookies, my mom’s Genets, Aunt Margie’s aptly named “Colored Cookies,” and my cousin Angie Catanese’s Sesame Seed Cookies, to name a few.  These cakey cookies, which were not very sweet by American standards, were usually little balls but not always.  Genets are lemon flavored knots.  Colored Cookies are vanilla flavored balls, each made with four or five pinches of dough of different colors rolled together.  Sesame cookies are little logs, perfect for dunking into some Vin Santo.  For me, though, the best of these cakey cookies are Totos, little chocolate spice balls.

Print Recipe
Totos (Italian Chocolate Spice Cookies)
These little chocolate balls are intended to have a good kick from an array of spices. Lard is the traditional shortening to use. I render my own. If you need these to be vegetarian, or you just don't want to use lard, you can use solid vegetable shortening. Heck, you can even use clarified butter but that is way off the traditional scale!
Votes: 18
Rating: 3.83
You:
Rate this recipe!
Cuisine Italian
Prep Time 45 minutes
Cook Time 2 hours
Servings
dozen cookies
Ingredients
Cookies
Icing
Cuisine Italian
Prep Time 45 minutes
Cook Time 2 hours
Servings
dozen cookies
Ingredients
Cookies
Icing
Votes: 18
Rating: 3.83
You:
Rate this recipe!
Instructions
Cookies
  1. In a small saucepan, melt the lard over low heat. When just melted, remove the lard from the heat and allow to cool slightly.
  2. Meanwhile, combine the flour, cocoa, baking powder, baking soda, salt, cloves, cinnamon, allspice, and nutmeg together. Reserve.
  3. Make the icing and reserve.
  4. Put the sugar into a large mixing bowl. Add the cooled but still liquid lard and mix well until thoroughly combined. The mixture will be gritty. I recommend doing this by hand with a mixing spoon but you could use a portable electric mixer.
  5. Add the eggs one at a time to the sugar and lard mixture, mixing well after each addition. The sugar should dissolve as the eggs are added.
  6. Add the milk, honey, vanilla extract and lemon extract to the egg mixture. Mix until well combined.
  7. Add the reserved dry ingredients. At this point there really is no better option than to reach into the mixture with your hand and get everything well combined. The dough will be somewhat sticky. Be certain that all the dry bits are scraped off the bottom and sides of the bowl and combined into the dough.
  8. Roll the dough into walnut-sized balls. If you want to weigh the first few to get the size correct, they should be between 21 and 22 grams.
  9. Space the cookies several inches apart on ungreased cookie sheets. Bake at 375°F for 8-10 minutes until the cookies are very slightly browned on the bottom but still soft when touched. They have a tendency to crack as they bake. This is normal. You can bake two trays at a time, one in the lower third of the oven and one in the upper third. Be sure to switch the top and bottom cookie sheets after five minutes and also turn them front to back.
  10. As soon as you remove the cookies from the oven, carefully put them on cooling racks.
  11. Ice them immediately by holding a cookie with one hand and using the tip of your finger to spread a dollop of icing on the top half of each cookie. The icing should be a glaze, not a thick coating. Put the iced cookies on cooling racks to cool completely.
  12. Well wrapped, the cookies can be refrigerated for several weeks or frozen for several months.
Icing
  1. Melt the butter. Add the sugar, vanilla (or lemon) extract and 2 tablespoons of milk. Mix well. Add more milk, a teaspoon at a time, if needed, to make a thick icing that will hold its shape and spread well.
  2. It may be necessary to add a bit of milk from time to time if the icing stiffens up over the course of icing each batch of cookies as they come out of the oven.
Recipe Notes

Check out my method for rendering lard.

I prefer to grind my own spices using a small electric coffee grinder, except for the nutmeg, of course, for which I use a small grater. It is best to pass the ground spices through a small strainer to get out any small bits. If you don’t grind your own spices be sure to buy really fresh ground ones so the flavor is vibrant.

This recipe doesn’t involve any strenuous beating so the first few steps can easily be completed by hand with a sturdy mixing spoon rather than with a mixer. Similarly, after adding the dry ingredients, the dough only needs to be mixed enough to come together. This is easily (and traditionally) done with your hand though I suppose a dough hook would work, too.

Copyright © 2016 by VillaSentieri.com. All rights reserved.

Share this Recipe

Cannellini alla Toscana (Tuscan-Style White Kidney Beans)

December 16, 2016

These Tuscan-style white kidney beans are deceptively simple.  A lot of flavor is coaxed out of a few ingredients.  They are great on their own as a side dish or a vegetarian main dish.  They make wonderful pasta e fagioli (pasta and beans).  They freeze well so you can always have them on hand.  The flavor is so good, you won’t resort to canned beans again!

Quite typically, these beans would have been made in the fading embers of a fire, often left to cook overnight.  Although the contemporary version uses a standard kitchen oven, I made them in our wood-burning oven a while back.  It was a challenge to keep the temperature at 250-275ºF but in the end it was worth it.  There was a very subtle smoky flavor to the beans.

Buy the best quality and freshest dried cannellini beans you can find.  If the beans are old they may never completely tenderize.  I particularly like the Marcella Beans from Rancho Gordo.

Print Recipe
Cannellini alla Toscana
Votes: 0
Rating: 0
You:
Rate this recipe!
Cuisine Italian
Prep Time 15 minutes
Cook Time 3-5 hours
Passive Time 12 hours
Servings
people
Ingredients
Cuisine Italian
Prep Time 15 minutes
Cook Time 3-5 hours
Passive Time 12 hours
Servings
people
Ingredients
Votes: 0
Rating: 0
You:
Rate this recipe!
Instructions
  1. Pick over and wash the cannellini beans. Soak them in abundant water to cover, under refrigeration, for 6-8 hours or overnight.
  2. Drain the beans and put them in an earthenware bean pot or ovenproof casserole with a lid. Add water to just reach top of beans then add another 2 cups of water.
  3. Using the side of chef's knife, bruise the garlic.
  4. Add garlic, sage, bay leaf, peppercorns and olive oil to the beans. Cover and bake at 250ºF for 2 hours.
  5. Add the salt and stir well. Cover and cook the beans, stirring every 30-45 minutes, until they are creamy and not at all chalky. Do not overcook the beans or they will blow apart. This could take another one to three hours depending on the beans and your elevation.
Recipe Notes

The beans are best made a day or two in advance.  If not serving immediately, cool the beans to room temperature and refrigerate or freeze.  When ready to serve, warm the beans in a 250ºF oven.

Copyright © 2016 by VillaSentieri.com.  All rights reserved.

Share this Recipe

Panettone (Italian Sweet Bread with Citron and Raisins)

December 10, 2016

I have been planning the launch of this site for several years.  It’s going live shortly before Christmas, a time when Italians traditionally enjoy panettone.  Panettone for breakfast.  Panettone as a gift.  Panettone as a snack.  While there are wonderful commercially produced products, I prefer to make my own.

The fact that the site is going live now feels like a gift…to myself!  So, I’m making panettone!!!  One for me, and half-a-dozen for friends.

I’ve been making Panettone for almost 30 years.  This year I’m using candied citron from Italy.  I plan to try making my own candied citron from the wonderful Buddha’s Hand fruits available from the farmers’ market in Palm Springs, California where I spend time each winter using this recipe from David Lebovitz.  For now, though, I’ll be using the citron from Italy.

Print Recipe
Panettone
Panettone is a sweet bread from Italy, traditionally served around Christmas. It is enriched with eggs and butter and contains raisins and candied citron.
Votes: 0
Rating: 0
You:
Rate this recipe!
Course Sweet Breads
Cuisine Italian
Prep Time 30 minutes
Cook Time 1 hour
Passive Time 14 hours
Servings
loaves
Ingredients
Course Sweet Breads
Cuisine Italian
Prep Time 30 minutes
Cook Time 1 hour
Passive Time 14 hours
Servings
loaves
Ingredients
Votes: 0
Rating: 0
You:
Rate this recipe!
Instructions
  1. This is candied citron from Italy. The flavor is superior to the diced candied citron sold in supermarkets.
  2. If using large pieces of citron, cut them into batons approximately 1/4 inch on a side.
  3. After cutting batons of citron, or if using citron that is already diced, slice the citron into thin slices.
  4. Beat salt, sugar, eggs and egg yolks together. Reserve.
  5. Use a mixer with a dough hook. Put 1200 g flour in the bowl of the mixer. Add yeast and begin to mix. Add warm water and mix. Add egg mixture and mix. Slowly with the mixer running, add 225 grams of melted butter and orange oil or zest. Knead for approximately 10 minutes, scraping the side of the bowl a few times. Add citron and raisins and continue mixing till incorporated. The dough will be sticky.
  6. Butter the inside of a large bowl with 2 tablespoons of the softened butter. Place dough in the buttered bowl and be sure to butter the top with some of the melted butter. Cover dough with waxed paper and place a kitchen towel on top. Refrigerate overnight. It should have at least doubled by morning. In place of a large bowl, you can use a food-service container of approximately 7 quarts with a tight-fitting lid.
  7. Punch the dough down by hand. Cover again with waxed paper and towels and allow to rise at room temperature until doubled in bulk.
  8. Butter 3 cylindrical baking pans, approximately 7 inches in diameter, using 3 tablespoons of softened butter. Set the pans aside.
  9. Knead the dough by hand until smooth and the air bubbles have been worked out. Form into 3 balls and place each into one of the baking pans. Butter the tops with the remaining 1 tablespoon of butter.
  10. Cover with waxed paper and a towel. Allow to rise at room temperature until doubled (or a little more), approximately 45-60 minutes.
  11. Cut a deep cross in the top of each loaf. Bake at 350° F for 55-65 minutes. Use a cake tester to be sure that none of the dough clings to tester.
  12. Place on a cooling rack. Cool slightly and remove from the pans. Cool completely on the rack. Wrap tightly until ready to use.
Recipe Notes

Copyright © 2016 by VillaSentieri.com.  All rights reserved.

Share this Recipe