Calabacitas: A New Mexican Classic

August 21, 2017

Talk about a dish that simply wouldn’t exist in any recognizable form without new world crops, calabacitas is it! Squash, corn, and chile are all new world plants.

Calabacitas is Spanish for zucchini but is also the name given to a dish of zucchini, corn, and (usually) green chile.

Often served as a side dish, calabacitas makes an awesome burrito, too. Accompany it with some frijoles (and probably a tortilla or three) and you’ve got a great high-protein vegetarian dinner. Leave out the cheese and it’s vegan! Truth be told, I’m plus-minus on the cheese in any case. When serving this for company I usually sprinkle cheese on top as in this recipe, but if it’s just for “us,” cheese isn’t usually even a thought.

This is the time of year to serve the most sublime calabacitas possible as zucchini, corn, green chile, and tomatoes are all in the farmers’ market. But calabacitas is too good to be had only a few weeks a year and, honestly, versions made with frozen corn, canned tomatoes, and roasted green chile that you’ve squirreled away in your freezer along with the ever-present zucchini in the produce aisle are too good to pass up any time of year.
For me, calabacitas shares a serious failing with succotash. They are both great ideas in my estimation but the execution often falls flat.

When I set out to finally perfect a version of calabacitas that I felt comfortable serving, I thought back on all the less-than-perfect renditions I’d had since I first set foot in New Mexico in 1991.

The litany of offenses includes being too watery, being too rich, having huge chunks of zucchini that seem mismatched next to corn kernels, being under-seasoned and being aggressively seasoned.

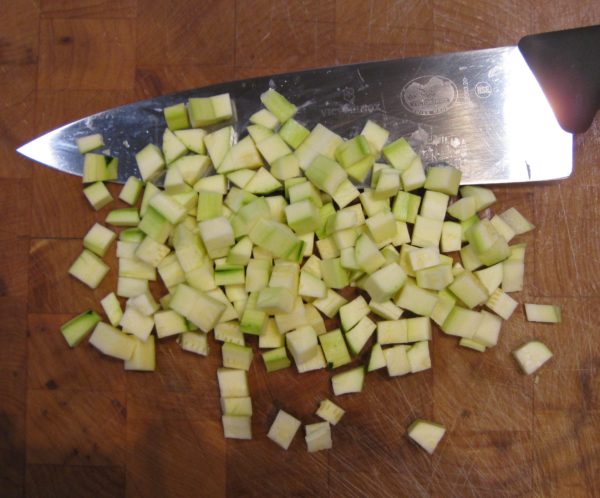
That set out a plan of action for me. The zucchini should be cut approximately the same size as corn kernels. There needed to be a minimum amount of liquid in the finished dish. Loads of cream or butter or cheese were out of the question. The seasoning should complement the vegetables, not assume control of the dish.

Zucchini (the namesake vegetable) and corn were a given. Pretty much everything else was up for grabs. Tomatoes, which are sometimes included, seemed right for color and a bit of acidic brightness that the zucchini and corn lack. They have the added bonus of being another New World crop. Roasted green chile, also sometimes included, was right for several reasons. It screamed “New Mexico,” it would add a bit of complimentary smokiness to the blend, and, honestly, I’m a chile-head.

My preference was for hot or extra-hot chile. This is wrong for several reasons. First, calabacitas is not traditionally a spicy dish. Second, after one of the dinners where I tested out my evolving recipe, one of the guests said that it was unfortunate that the entire “calabacitas conversation” that evening centered on how hot it was and not on how good it was.

In cooking I prefer to bow to tradition but if there’s ever a place where I butt heads with tradition, it’s in making dishes spicy. But I decided there and then that I should follow tradition and use mild chile in my calabacitas.

Finally I was on to the aromatics and seasoning. Onion and garlic are my go-to combination unless there is some compelling reason for one or the other (usually based on tradition). The herbs eluded me for a while. I really wanted to use Mexican Oregano (which isn’t actually oregano) because of its New World origins but it just seemed to overpower the dish. In the end, I decided that a modest amount of Mediterranean Oregano played best in the sandbox with the other ingredients.

Let me know what you think of my rendition of a New Mexico classic.


Follow us


Click HERE to join our mailing list and you’ll never miss a recipe again!
Print Recipe
Calabacitas: A New Mexican Classic
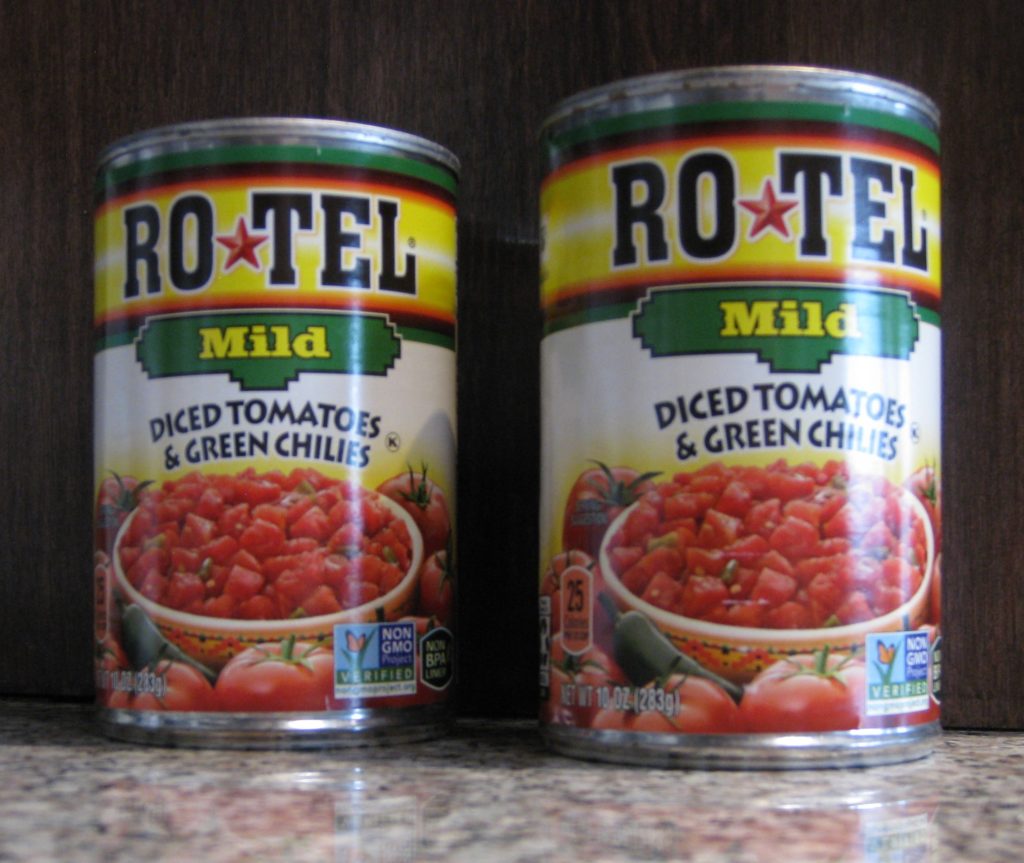
Traditionally calabacitas is not a spicy dish so it is best to use mild roasted green chile unless you and all your eaters are chile heads. Bacon fat gives a great flavor but olive oil or other vegetable oil is fine, too. Frozen corn works well as there are so many other flavors in the dish but using fresh corn cut off the cob is a definite treat. I prefer to thaw frozen corn before cooking. Ice crystals can sometimes carry a "freezer" taste and rinsing them off can eliminate it. Also, it is easier to time the cooking of the corn in combination with other ingredients if it is not frozen when cooking starts. Rotel packs tomatoes in 10 ounce cans and they’re a bit of a Southwestern classic in and of themselves. In a pinch feta cheese can be used instead of Cotija
Votes: 0
Rating: 0
You:
Rate this recipe!
Prep Time 40 minutes
Cook Time 30 minutes
Servings
people
Ingredients
Prep Time 40 minutes
Cook Time 30 minutes
Servings
people
Ingredients
Votes: 0
Rating: 0
You:
Rate this recipe!
Instructions
  1. Dice the zucchini.
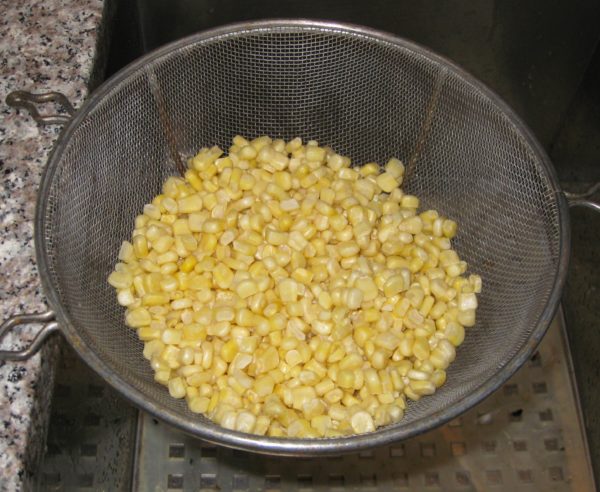
  2. Thaw the corn under running water.
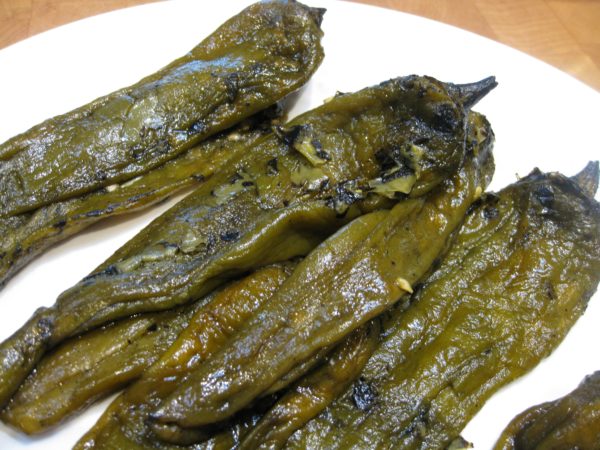
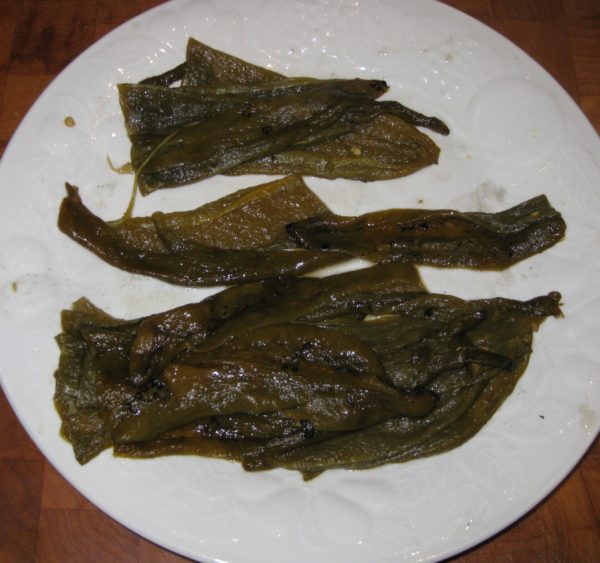
  3. Roasted New Mexico green chile.
  4. Peeled and seeded chile, ready to be chopped.
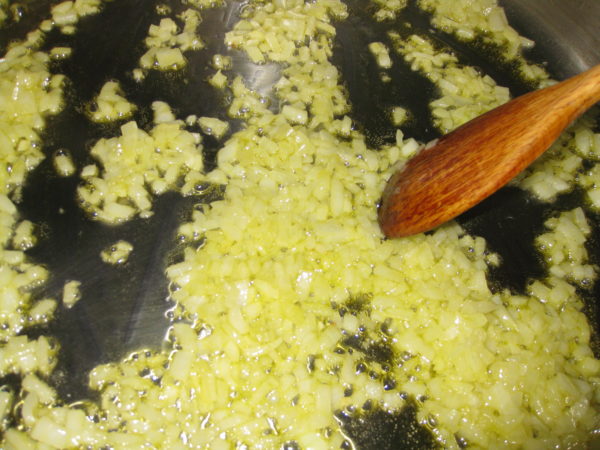
  5. Sauté the onion until translucent.
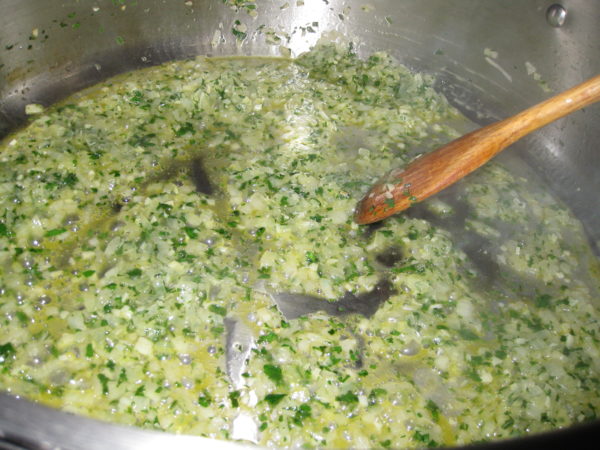
  6. Add the garlic and continue to cook until the onion is golden but not brown.
  7. Add the zucchini and sauté until the zucchini is hot.
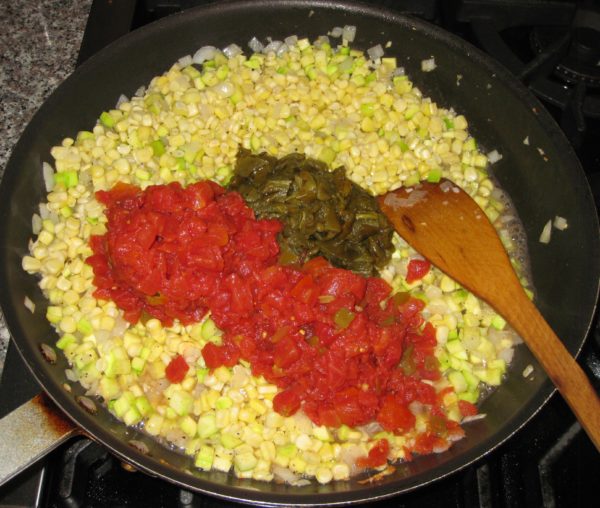
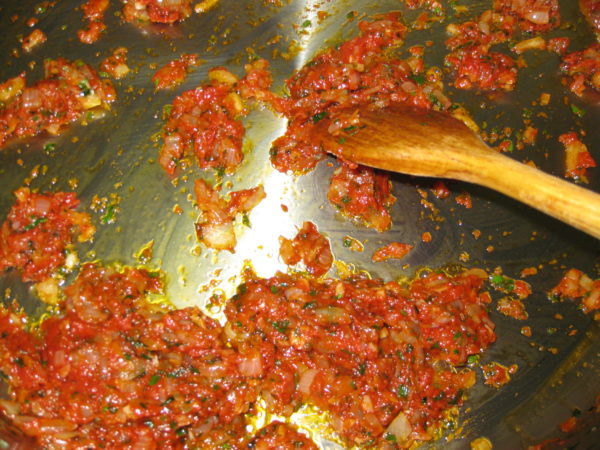
  8. Add the corn, green chile, tomatoes, oregano, salt, and pepper.
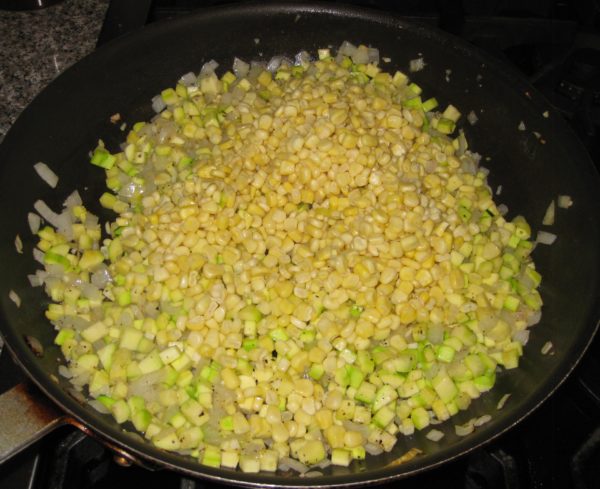
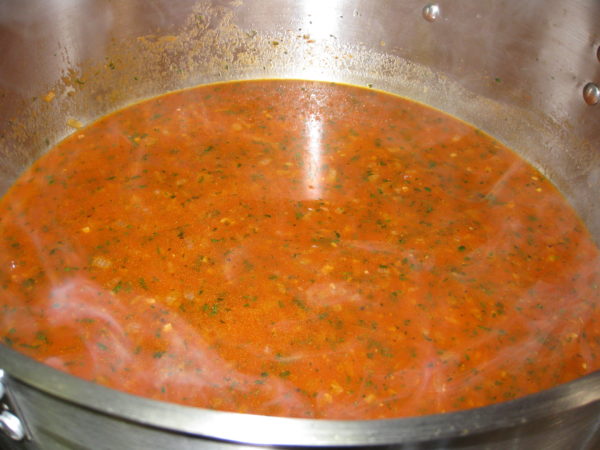
  9. Simmer until the liquid has evaporated and the zucchini and corn are cooked, about 10-15 minutes, depending on your preference.
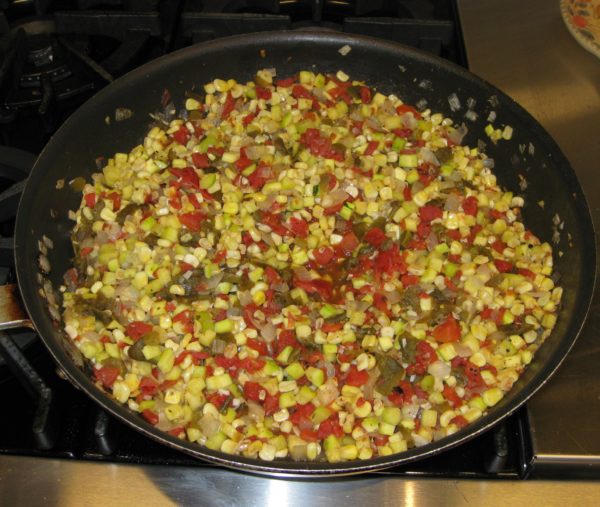
  10. Adjust oregano, salt and pepper in the last few minutes of cooking.
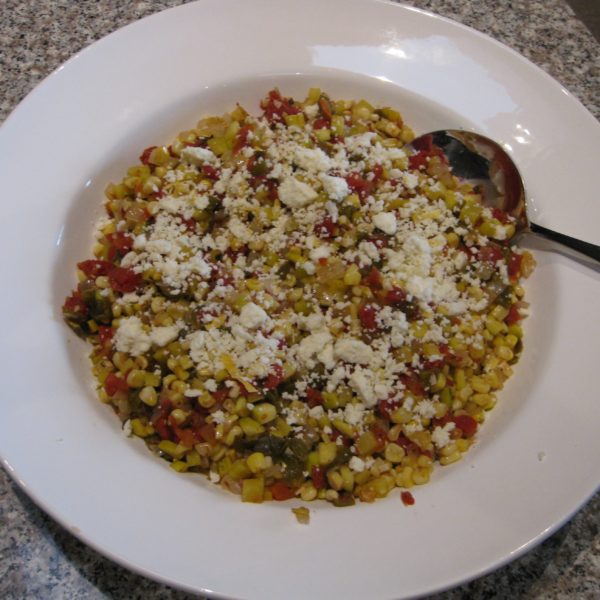
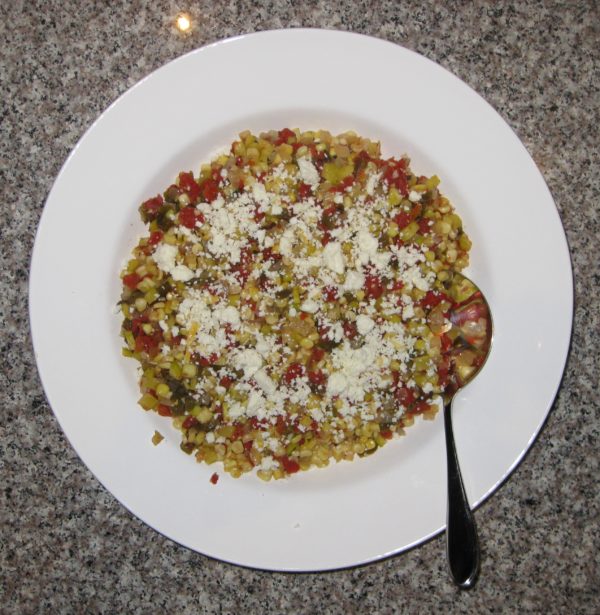
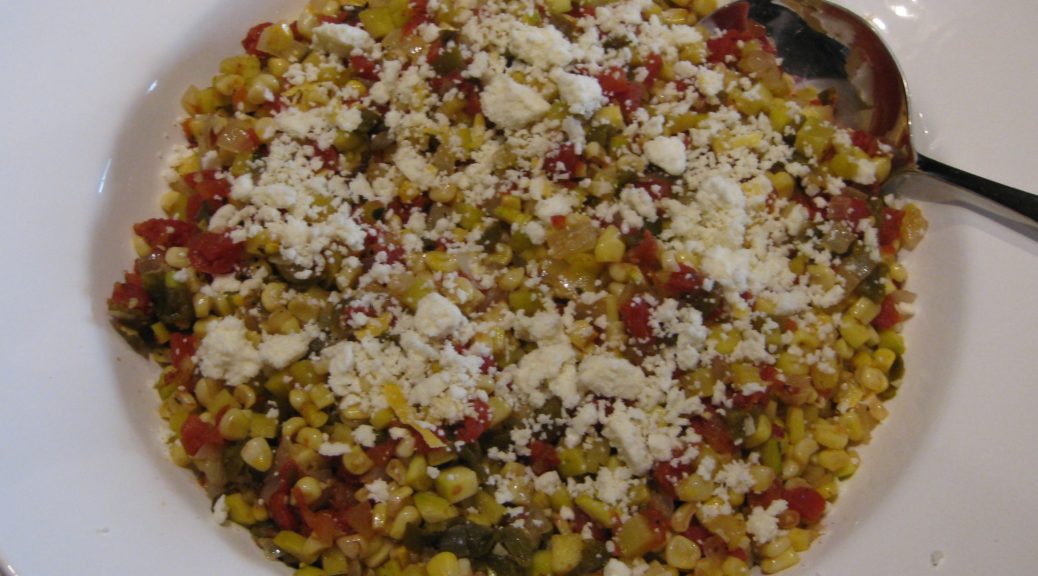
  11. Serve sprinkled with crumbled Cotija cheese.
Recipe Notes

Copyright © 2017 by VillaSentieri.com. All rights reserved.

Share this Recipe

Auntie Helen’s Roman Chicken Cacciatore

Pollo alla Cacciatora (Chicken Cacciatore, in English) means Chicken Hunter’s Style and there are as many styles as there are hunters and cooks.

I grew up eating a Southern Italian version in a red sauce with peppers and mushrooms.

This recipe, using anchovies and no vegetables, is from Rome and goes back to the late 1800’s at least.  I learned it from Auntie Helen.  Auntie Helen was actually the aunt of Eugene (Gene) d’Aquili, my undergraduate advisor at the University of Pennsylvania and the psychiatrist with whom I set up my psychiatric practice in Philadelphia many years later.

Gene’s grandparents left Rome around the turn of the 20th century and moved to Trenton, New Jersey with their four children, Guido, Helen, Louise and a fourth daughter who died shortly after the move.

Gene’s father, Guido, was an artist and part of what was sometimes referred to as the New Hope School after a town of the same name in Pennsylvania on the New Jersey border.  He painted a series of Old King Cole murals similar to the ones Maxfield Parrish painted for the St. Regis in New York City.

Those murals ended up on the walls of my dining room in Berwyn, Pennsylvania.  For several years, from early medical school until partway through my internship, I rented the carriage house on the d’Aquili estate in Berwyn.  The murals were installed in the dining room after the d’Aquili family purchased them from the social club in Trenton that had originally commissioned them.

Here are some pictures of the murals.

There is a blog that features the murals and information about them, if you’re interested.

Here is a picture of my parents, standing in front of one of the murals in my dining room.  I believe this was taken in May 1981 when I graduated medical school.

Auntie Helen and Auntie Louise never married.  They both became school teachers and lived in Morrisville, New Jersey until the early 1980’s when they moved into the carriage house on the d’Aquili estate that I vacated after I bought my first house.

Auntie Helen was a wonderful cook.  This recipe for pollo alla cacciatora came from her, and before her, from her mother.  Don’t let the anchovies put you off, even if you don’t like anchovies.  The “fishiness” cooks away leaving a savory, umami flavor.  I will bet you that none of your guests will guess that there are anchovies in this dish.

In addition to her other wonderful Italian specialties, including brodetto, panpeppato, and cheese bread, the last of which unfortunately I do not have a recipe, among others, Auntie Helen made some American dishes that were fashionable at the time including Impossible Tuna Pie!

I want to give a shout out to Julie Paradise for reintroducing me to Impossible Pies.  Julie is the master of the genre and her pecan version is going to end up on my table soon!


Follow us


Click HERE to join our mailing list and you’ll never miss a recipe again!

Print Recipe
Roman Chicken Cacciatore
As an alternative to cutting up a whole chicken, chicken parts can be used. Thighs work particularly well for the long, slow cooking technique. If using chicken parts, use about 3 pounds. This chicken goes well with polenta. I suggest using yellow cornmeal for a color contrast with the dark sauce. A link to my polenta recipe can be found in the Notes section following the recipe.
Votes: 0
Rating: 0
You:
Rate this recipe!
Course Mains, Poultry
Cuisine Italian
Prep Time 15 minutes
Cook Time 2 hours
Servings
people
Ingredients
Course Mains, Poultry
Cuisine Italian
Prep Time 15 minutes
Cook Time 2 hours
Servings
people
Ingredients
Votes: 0
Rating: 0
You:
Rate this recipe!
Instructions
  1. Cut the chicken into pieces, legs, thighs, and breasts. You can cut the breasts in half crosswise if you like. Reserve the back and wings for another use.
  2. Remove the skin from the chicken.
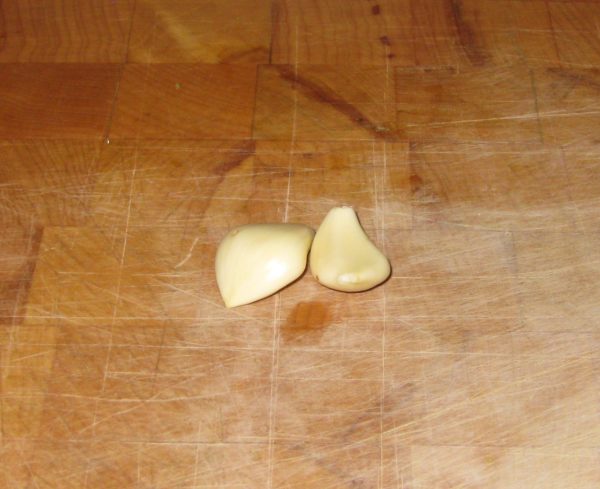
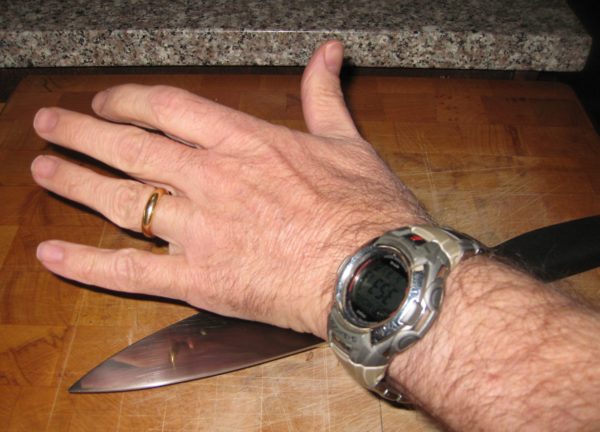
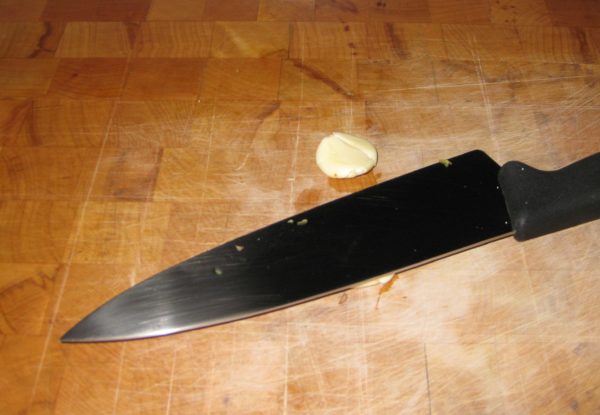
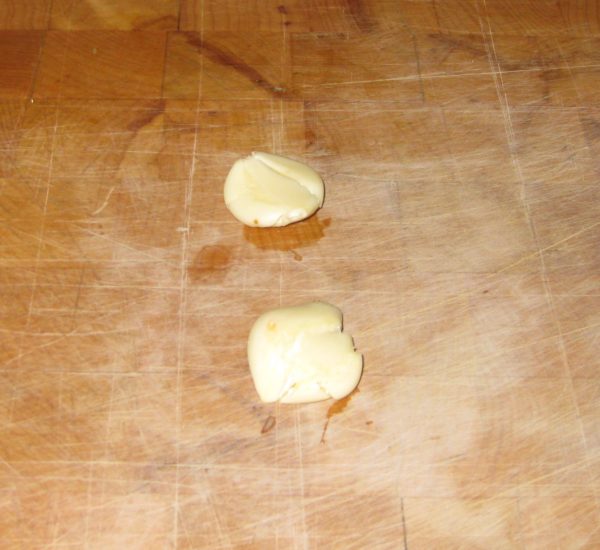
  3. Bruise the garlic with the side of a chef's knife.
  4. In a skillet large enough to comfortably hold the chicken, and that has a lid, heat the olive oil until it is almost smoking.
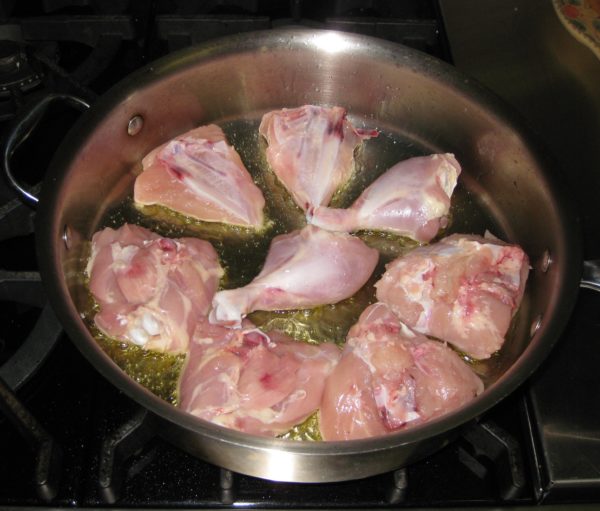
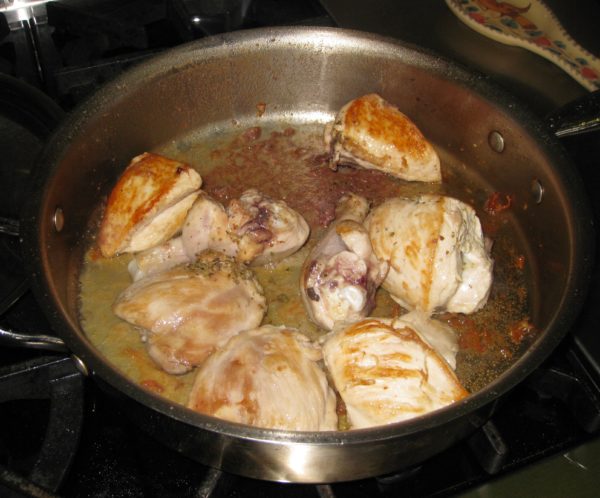
  5. Add the chicken. Do not disturb the chicken until it is crusted and releases easily from the pan, 4-5 minutes.
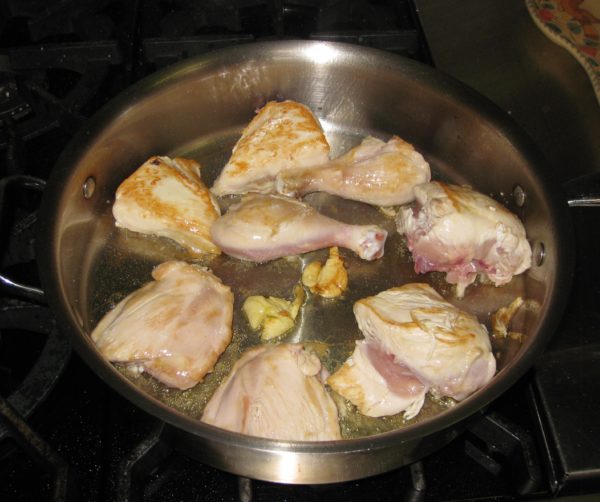
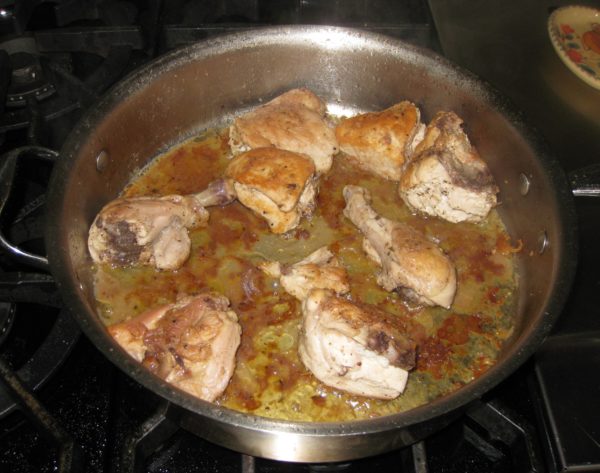
  6. Turn the chicken over. Add the bruised garlic to the pan. Brown the other side of the chicken, adjusting the heat as necessary to prevent the olive oil from smoking.
  7. If the garlic starts getting dark brown, remove it before it burns. Reserve the browned garlic, however.
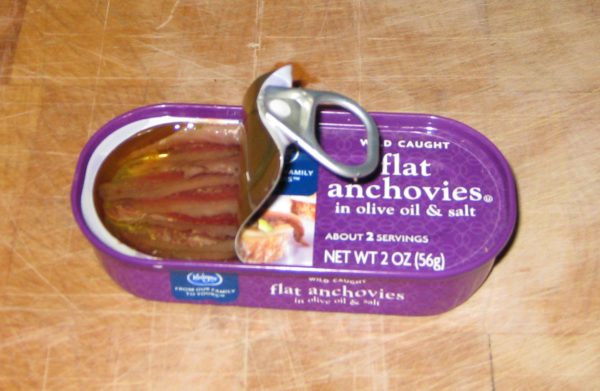
  8. When the chicken is well browned on all sides (legs don’t really have “sides” so you will need to turn them around a bit), add the anchovies and their oil. They will splatter a bit.
  9. Work the anchovies with a spoon so they start to disintegrate.
  10. Have the cover ready. Turn the heat to low. Add the water and quickly cover the pan to reduce splattering. Wait 2-3 minutes until the rapid sizzling has slowed down.
  11. Turn the chicken. Add the vinegar and return the browned garlic to the pan if you removed it earlier. If the water has evaporated when you remove the lid to add the vinegar, add another two tablespoons of water along with the vinegar and garlic. Add oregano and season with salt and pepper, to taste.
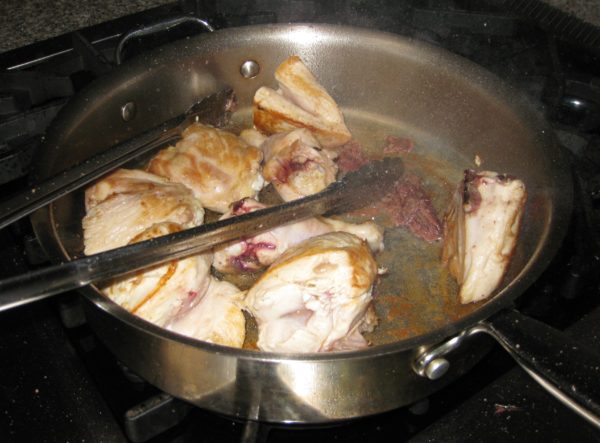
  12. Braise covered for 1 ½ to 2 hours on gentle heat, turning every 20-30 minutes. Add water, two tablespoons at a time, whenever the liquid in the pan has evaporated.
  13. Add an extra grinding of pepper before removing the chicken from the heat. Adjust salt if necessary.
Recipe Notes

Here is my recipe for Polenta.

Copyright © 2017 by VillaSentieri.com. All rights reserved.
Share this Recipe

Carne Adovada (Pork Braised in Red Chile Sauce)

July 14, 2017

I am a chile head.

I also like coaxing a tremendous amount of flavor out of a small number of ingredients (though I don’t shy away from recipes with long ingredient lists either!).

I am a big fan of dishes that can be made in advance and warmed up for serving.  Carne Adovada actually tastes better if it is refrigerated for a day or two.

For all of these reasons, Carne Adovada is an ideal dish for me.  It is, bar none, my favorite New Mexican dish.

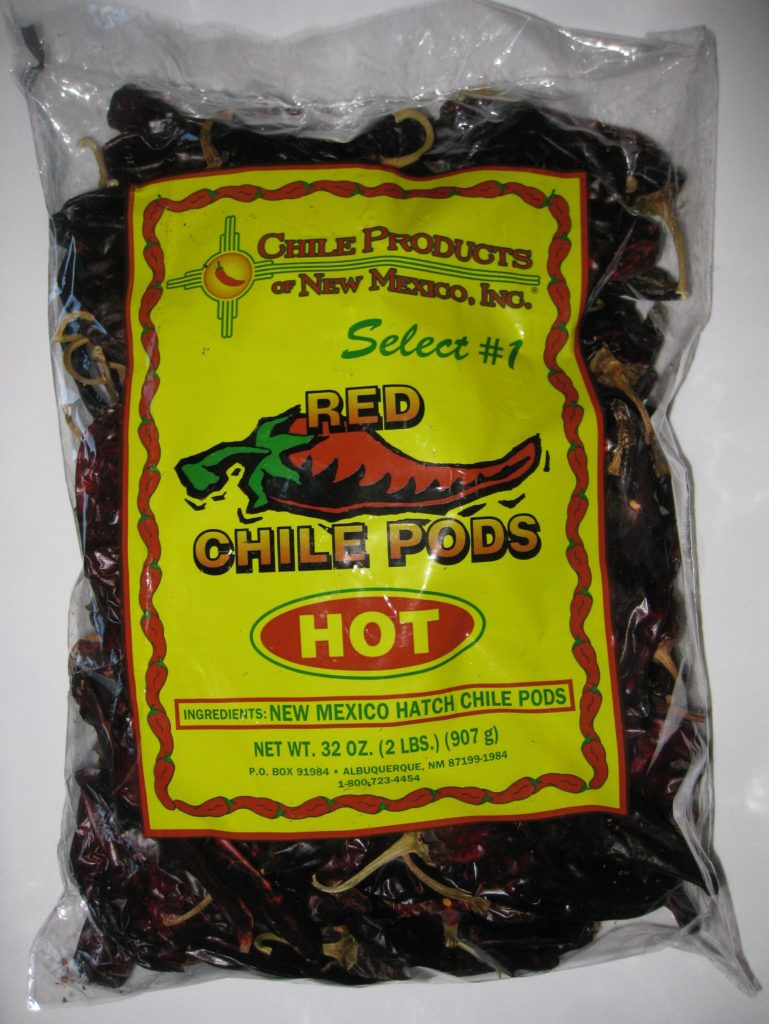
However, it isn’t necessary to use hot or extra-hot red chile.  If you’re not a fan of spicy foods, use mild or medium-hot chile.  What is critical is that you use actual New Mexico dried red chile.

New Mexican Red Chile Pods

Although I rode in a car along route 66 in the 1960s to visit an uncle in Los Angeles, I never spent any appreciable time in New Mexico until August 1991.   Just days into that week-long visit to Santa Fe, I had Carne Adovada at Maria’s Restaurant.

I was hooked!

I was also enchanted by Santa Fe, as was my husband.  By late 1992 we put in an offer on our first house in Santa Fe.  The offer was accepted and we closed in January 1993.  Thus began our love affair with Santa Fe.

We moved to Santa Fe full time in 2012 but we spent considerable time in Santa Fe every year until then (about ten times per year including all major holidays).

I was never happy with any Carne Adovada recipe that I tried, and I tried plenty, until I stumbled on a recipe from Al Lucero, the former owner of Maria’s Restaurant, in the program book for Santa Fe Wine and Chile Fiesta a number of years ago.

In times past, when a hog was butchered in the fall, some of the meat was preserved in red chile.  This chile-infused meat was later braised to become Carne Adovada.  I don’t know of anyone who cures pork this way any longer but many recipes for Carne Adovada call for marinating the pork overnight in the red chile.  This would seem to be closer to the traditional method, though simply marinating the meat would not produce the additional flavor that would come from actually curing the pork in the chile.  Some recipes, though a minority in my experience, call for the addition of vinegar to the marinade to try to achieve more of a “cured” or “fermented” flavor.

Al Lucero’s approach is different but definitely creates an extra layer of flavor.  The pork cubes are roasted first then braised in red chile.  Refrigerating the completed Carne Adovada for a day or two before serving improves the flavor even more.

What I especially like about Al’s method is that it does not introduce any non-traditional ingredients to the Carne Adovada.  Until I can taste Carne Adovada made from pork that is actually cured in red chile, I’m sticking with my tweaked version of Al’s method.

Click HERE to join our mailing list and you’ll never miss a recipe again!

Print Recipe
Carne Adovada (Braised Pork with Red Chile)
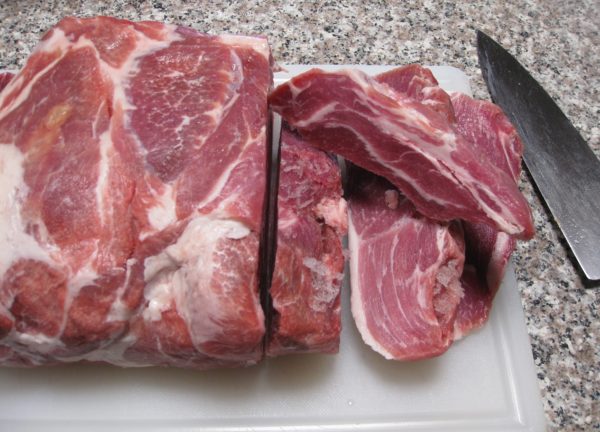
The purity of the chile flavor is key to Carne Adovada so I avoid putting in other seasonings such as onion and oregano that are sometimes called for. This recipe, based on a recipe of Al Lucero, the former owner of Maria’s Restaurant in Santa Fe, roasts the pork first for a depth of flavor not obtainable otherwise. Remove any large pieces of fat from the pork but thin layers of fat between the meat are needed to ensure moist and tender pork, so don’t remove it all. I frequently buy a bone-in pork shoulder (aka pork butt) and use the bone to make broth.
Votes: 0
Rating: 0
You:
Rate this recipe!
Course Mains, Meats
Prep Time 30 minutes
Cook Time 5 hours
Servings
people
Ingredients
Pork
Red Chile Sauce
Course Mains, Meats
Prep Time 30 minutes
Cook Time 5 hours
Servings
people
Ingredients
Pork
Red Chile Sauce
Votes: 0
Rating: 0
You:
Rate this recipe!
Instructions
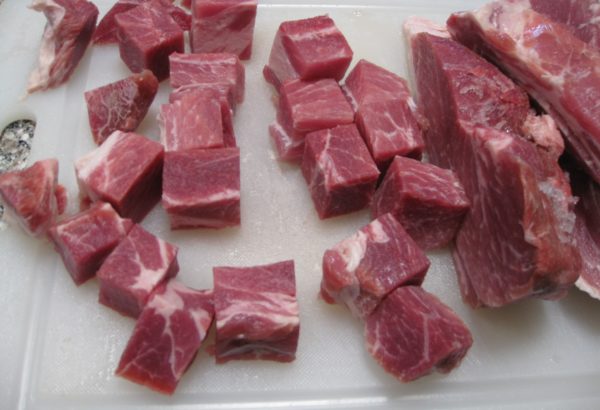
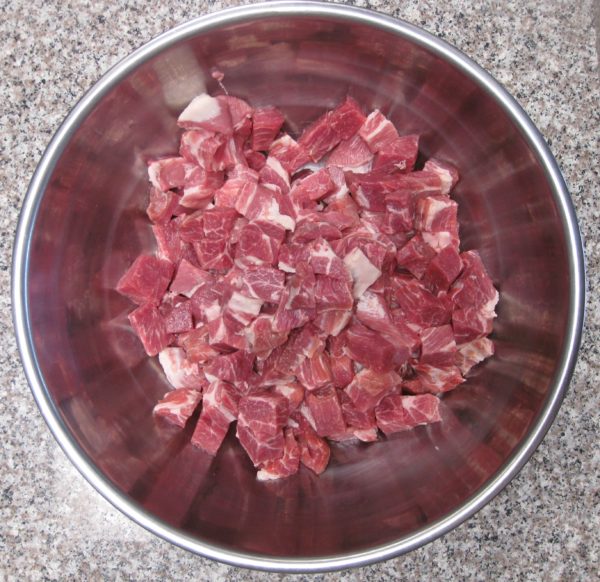
  1. Cut the pork into one inch cubes.
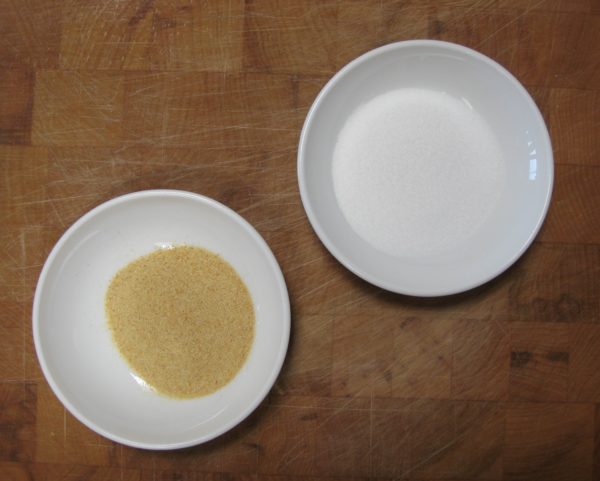
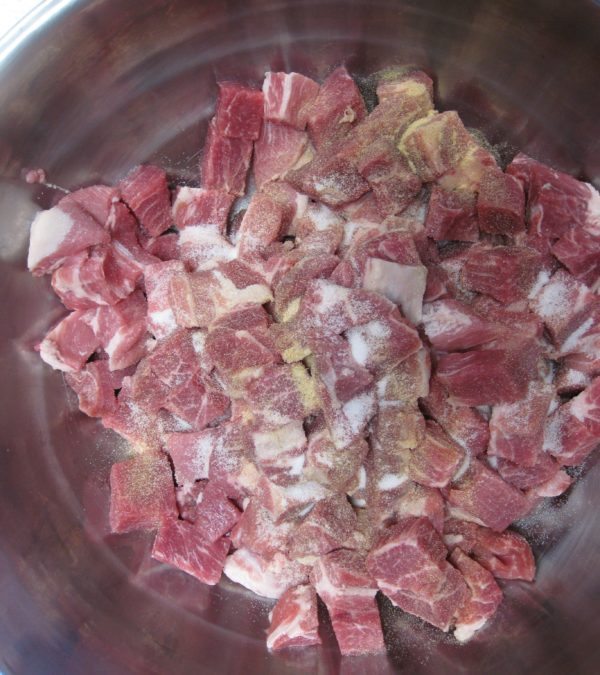
  2. Toss the pork with the garlic powder, and salt.
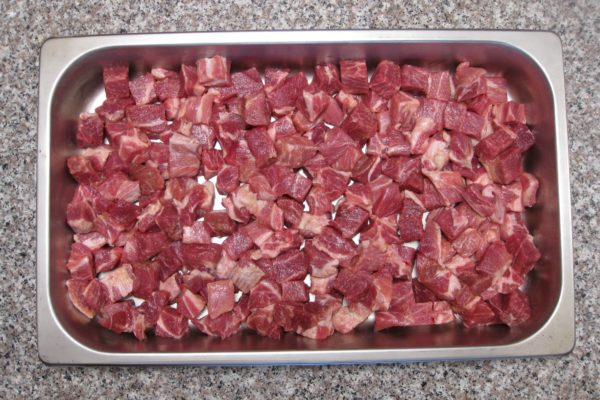
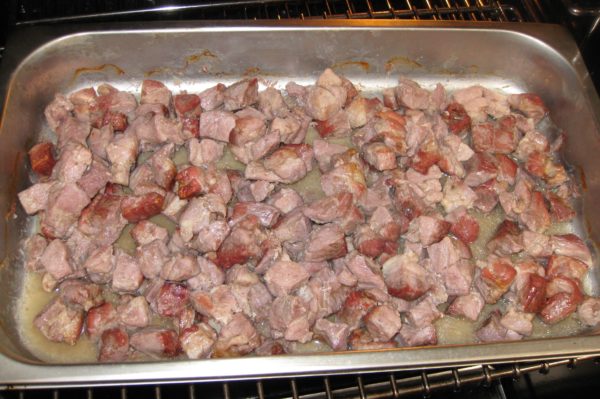
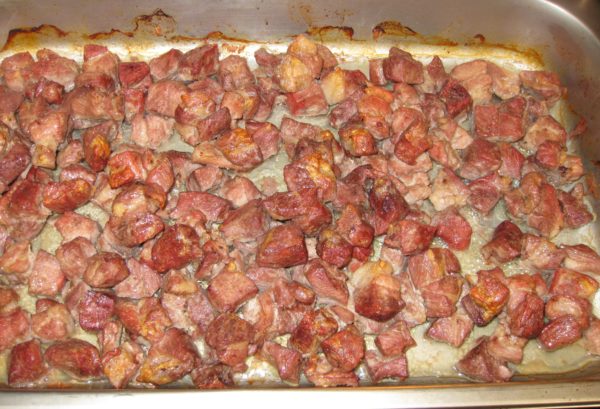
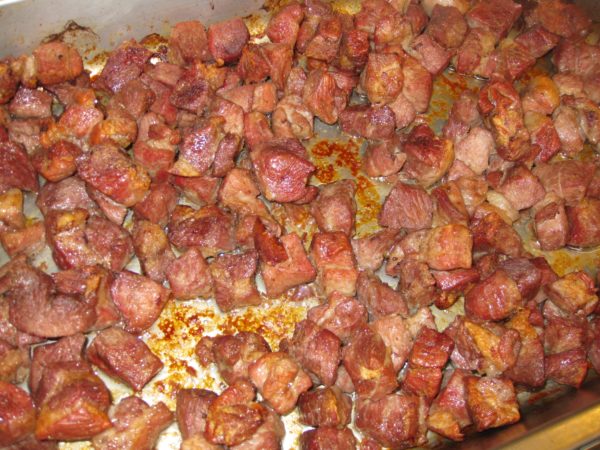
  3. Put the meat in a wide shallow baking/roasting pan that has a lid and roast at 450°F, uncovered, until well browned, turning every 20 minutes or so, approximately 90 minutes.
  4. While the pork is roasting, make the red chile sauce using the proportions of ingredients called for above and following the directions in the Red Chile blog post. See the "Notes" section below for the link. There is some rendered fat in the pan. Do not discard the fat, it carries lots of flavor and improves the mouth feel of the sauce.
  5. Beginning to brown.
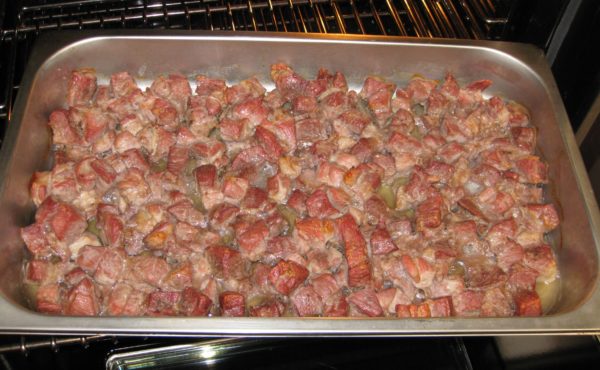
  6. Tossed after the top has browned.
  7. Almost brown enough.
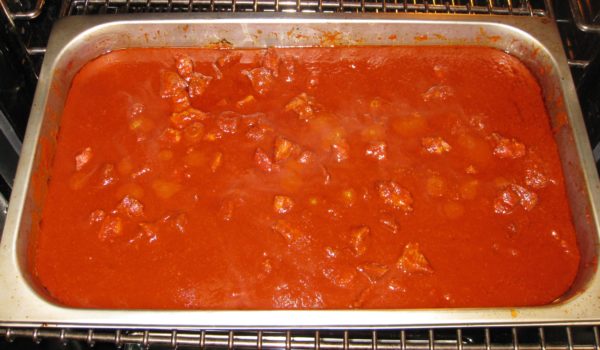
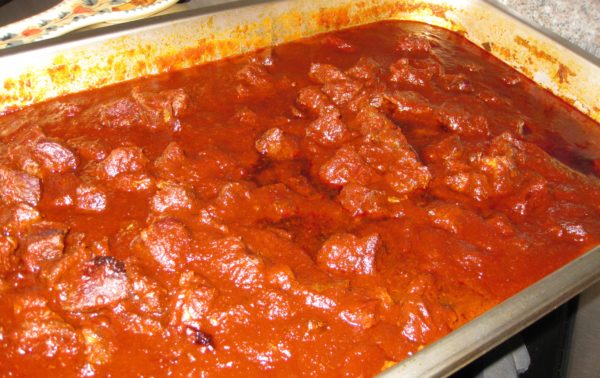
  8. Browned and ready for the chile. Note that the liquid has all evaporated and created a brown fond in the pan. This gives extra flavor.
  9. When pork is browned, add all the red chile sauce without draining any of the juices out of the pan.
  10. Cook, covered, at 250°F for approximately 3-4 hours or until meat is very tender, stirring occasionally.
  11. Remove the meat from the oven. Allow it to cool to room temperature.
  12. Cover tightly and refrigerate overnight.
  13. Reheat the carne adovada, covered, at 250°F for approximately 2 hours. If the sauce is not thick enough, reheat uncovered at a somewhat higher temperature until the sauce is thickened.
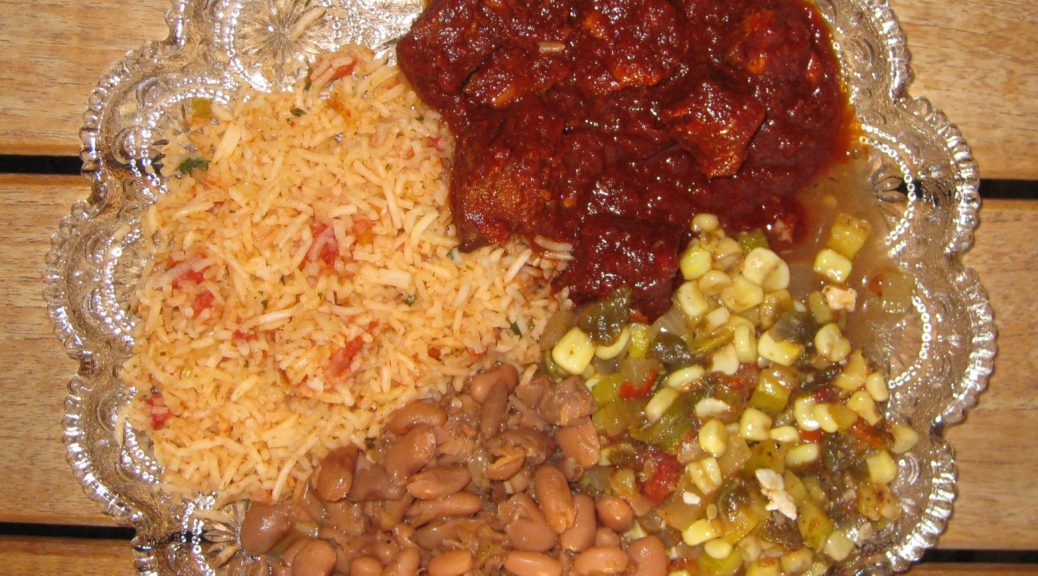
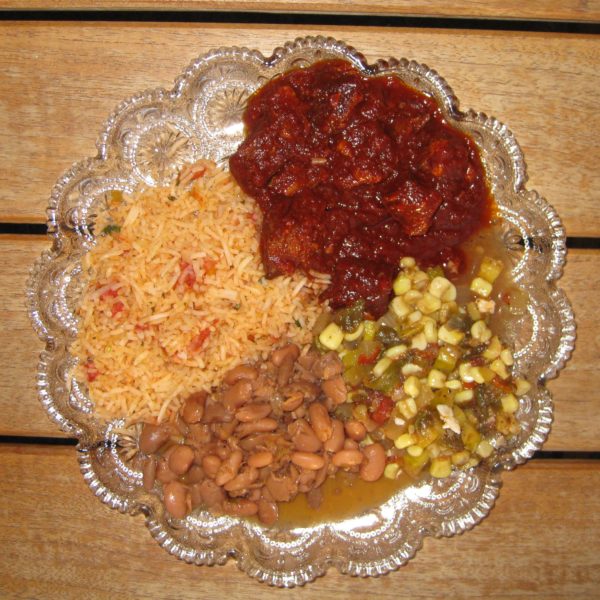
  14. This plate contains carne adovada, red rice, frijoles (beans), and calabacitas) (zucchini, corn, and roasted green chile).
Recipe Notes

Here's where you can find the directions for making Red Chile Sauce.

Copyright © 2017 by VillaSentieri.com. All rights reserved.
Share this Recipe

Frittata con Cipolle (Frittata with Onions)

July 10, 2017

American chefs frequently do not understand Italian food.  Many can produce technically excellent dishes that lack the Italian sensibility.

One common error is putting in too much.  Too much of most anything into most anything.  To be sure, there are many restaurants headed by American chefs that serve excellent Italian food but there are far more that just don’t get it.

The usual culprit is what Italians would call the First Course, Il Primo Piatto.  This is soup, pasta or rice that is served as a separate course before the the Second Course, Il Secondo Piatto (usually meat, fish, or other protein), which is usually accompanied by side dishes, Contorni, in Italian.

Pasta “specials” are quite prone to this phenomenon.  There are many otherwise excellent restaurants that think that if a little is good, more is better, when it comes to their pasta “specials.”  Because I love pasta, if I’m at a restaurant that has a pasta special I always ask what it is.  More often than not, I start yawning (well, not really) part way through the list of ingredients added to the pasta.  After more than 2 or 3 main ingredients (not counting things like garlic, olive oil, and a few herbs) it’s too much.  You don’t need shrimp, artichoke hearts, chopped tomato, diced onion, roasted peppers, capers, and olives.  It’s simply too much.  The distinctiveness of the ingredients is lost.

I’m ragging on pasta because that is the most common culprit at American restaurants featuring “Italian” food.  Risotto and polenta are prone to the same phenomenon, however.  The most common offense is that both of these dishes are turned into vehicles for butter, cream, and cheese.  That is not what an Italian would do.  In a typical Italian household, polenta is cornmeal, water and salt.  That’s it.  There’s not usually a pat of butter or a spoon of cheese in sight unless added at the table to the diner’s preference but even that is rare.  The polenta is a foil for whatever is served with it.  It is not meant to scream, “Look at me!”  That doesn’t mean it isn’t supposed to, or doesn’t, taste good.  It’s not intended to be so rich and filling that it tries to steal the spotlight or dampen one’s appetite for the rest of the meal.

Unlike polenta, which is meant to accompany other dishes, risotto is meant to stand on its own as a First Course before the Second Course.  Risotto alla Milanese is the only exception.  Traditionally Risotto alla Milanese accompanies a veal cutlet (in Milan, of course).  No other risotto would be served with the second course in an Italian meal.

I realize that most of the time we do not eat a formal Italian meal, even in a restaurant.  Most of us have either what would be the first course (pasta or risotto, usually) or the second course (meat or fish plus a side dish or two), preceded by some sort of antipasto (appetizer), which literally means “before the pasta.”  Even so a risotto that is a fat “bomb” overly laden with butter, cream and/or cheese, might be American but it is simply not Italian in its sensibility.

Frequently, the issue is clouded even more but the addition of too many ingredients to the risotto.  Look at the asparagus risotto from a few weeks ago.  There are no competing flavors:  a light broth to add some savoriness, a bit of Parmigiano Reggiano, and a dollop of butter.  This is a classically Italian risotto.

I guess I’m really beating this one.  I clearly have strong feelings about Italian food and what passes for Italian food in America.  Think purity of flavor and simplicity of ingredients.  If an ingredient doesn’t support the main ingredient it shouldn’t be added.  I believe Italian food is the original “ingredient-driven” cuisine.

Ok, off my soap box an on to a recipe; one that is the essence of simplicity.

I’m going to guess that most of you have not had a frittata.  It is a fluffy but firm egg dish, usually with some sort of vegetable included.  Sometimes a sprinkling of Parmigiano Reggiano or Pecorino Romano cheese is added but only if it supports the vegetable that is the star of the show.

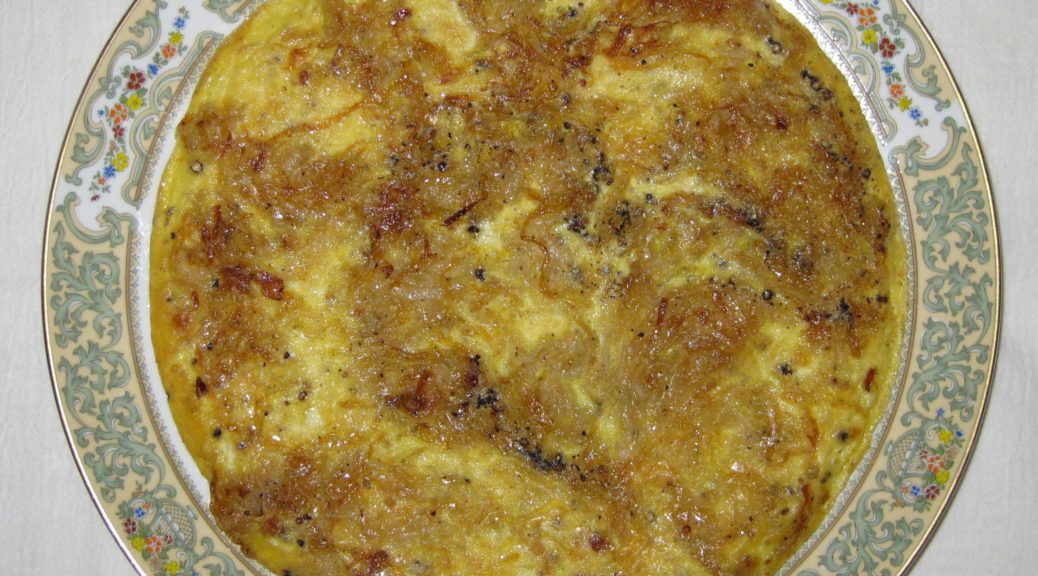
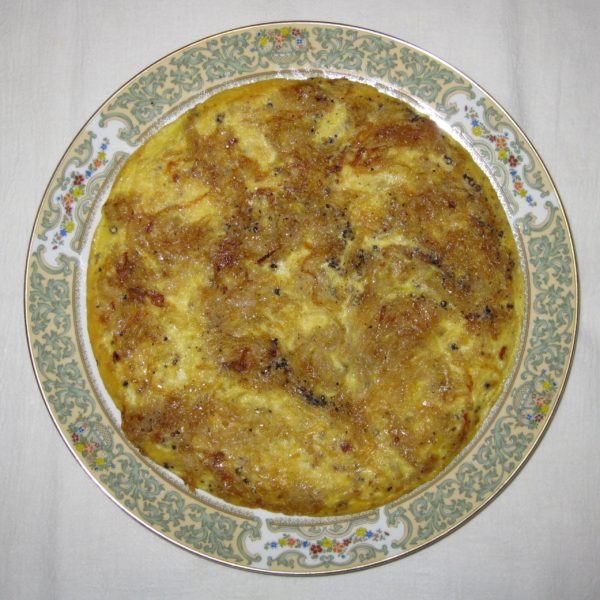
Today’s frittata is onion.  That’s it, onion.  Plus a little olive oil and salt and pepper.  The onion is cooked slowly until it caramelizes.  The onion in this recipe was cooked for 50 minutes.  You should plan on 45-50.  It is mostly hands off, though you do need to stir every few minutes.

Once the eggs are added, they are cooked slowly.  Unlike a French omelet where the eggs are barely set and there isn’t (supposed to be) a touch of brown, a frittata is intended to be firm, slightly brown, and puffed up and airy from the cooking style.

Although I have converted to making, almost exclusively, a classic Italian frittata, when I was in college I did it the way my Italian Grandmother did.  She included a pinch of baking powder and a bit of flour.  It was a little firmer than a classic frittata; more like a savory eggy cake.

That frittata, alternating with sandwiches of butter, onion and blue cheese on homemade bread (not on the same day), constitute my lunchtime memories from my junior year in college.


Click HERE to join our mailing list and you’ll never miss a recipe again!

Print Recipe
Frittata con Cipolle (Frittata with Onions)
I recommend NOT finishing the frittata under the broiler as called for by a number of food writers. First, it isn’t traditional. Second, if the frittata doesn’t slide out of the pan easily so that it can be flipped, you won’t be able to get it out of the pan to serve it after putting it under the broiler. I like using a good quality, heavy-bottomed, non-stick pan though a well-seasoned cast iron pan would work too. It is easier to get the frittata out of the pan if it has sloping sides rather that sides that are completely vertical. You can caramelize the onions several hours in advance and then complete the frittata later.
Votes: 0
Rating: 0
You:
Rate this recipe!
Prep Time 10 minutes
Cook Time 1 1/2 hours
Servings
people
Ingredients
Prep Time 10 minutes
Cook Time 1 1/2 hours
Servings
people
Ingredients
Votes: 0
Rating: 0
You:
Rate this recipe!
Instructions
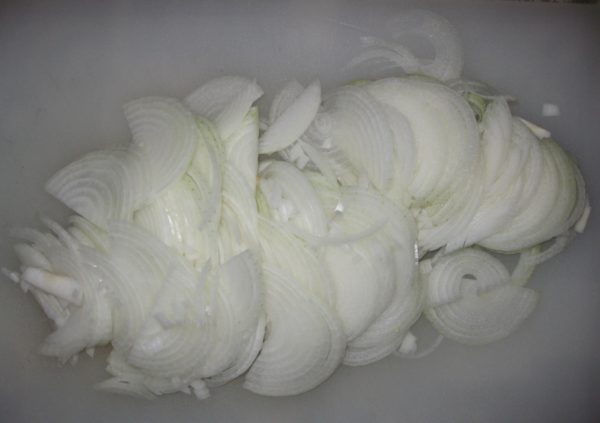
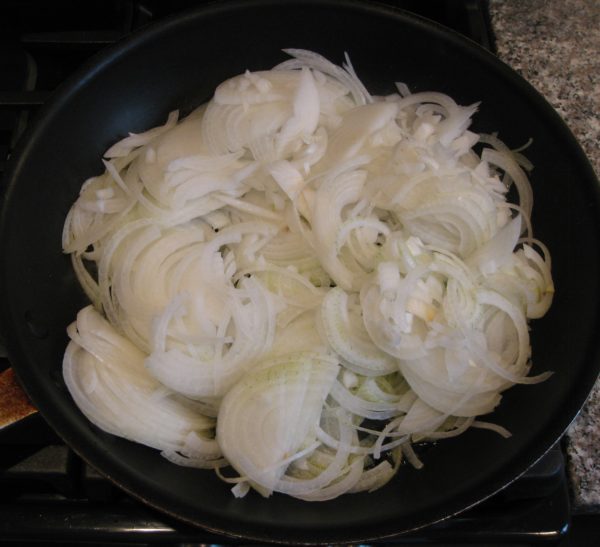
  1. Slice the onion in half from top to bottom then across into 1/8 inch thick half-rounds.
  2. Warm the olive oil in a 12 inch heavy-bottomed sauté pan with sloping sides.
  3. Add the sliced onion and ½ teaspoon of salt.
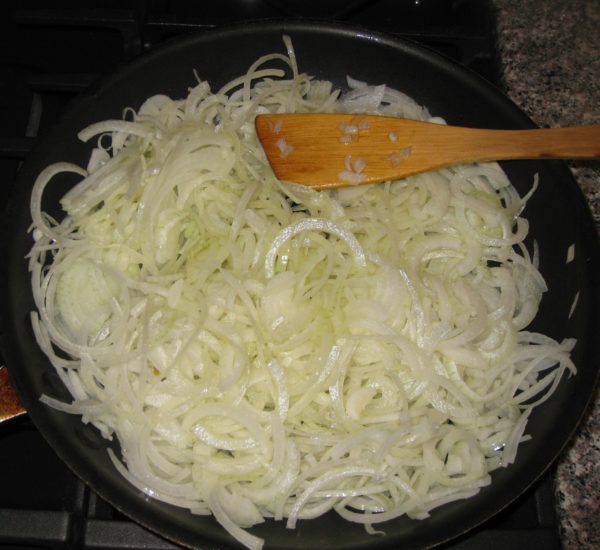
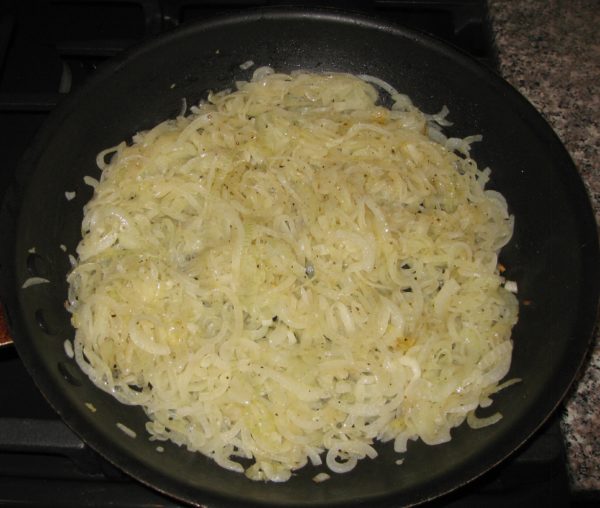
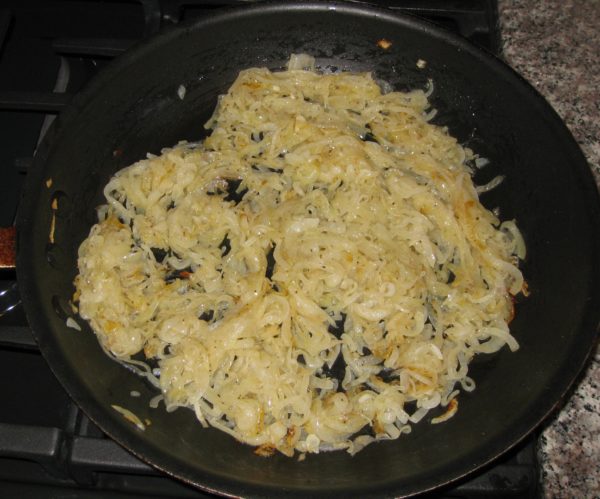
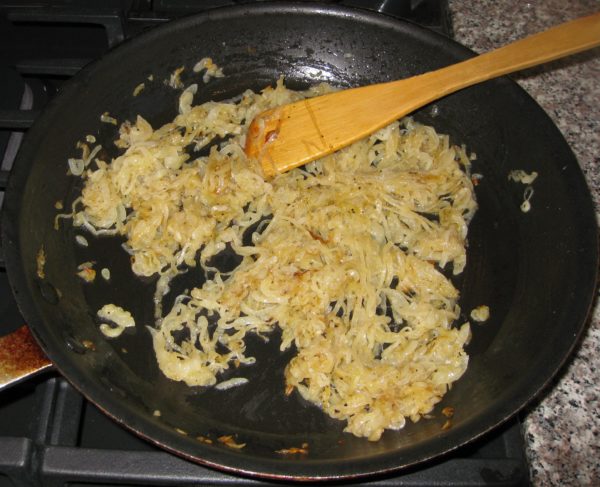
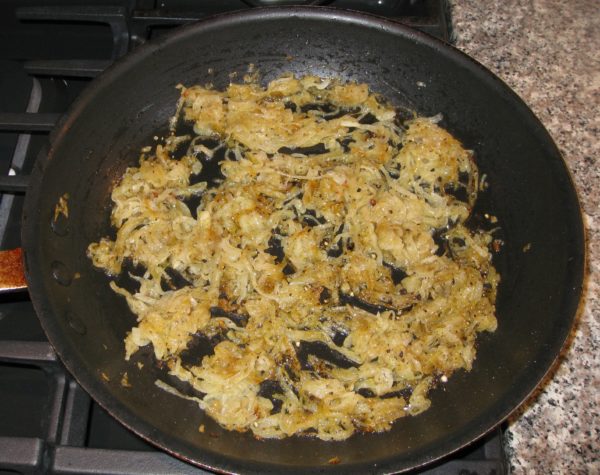
  4. Cook over medium heat, stirring often until the onions are soft and caramelized. The onions should take on a uniform golden, then light brown, color. There should not be any dark brown or dry spots. This will take between 45 and 50 minutes. If it takes longer don’t worry. If it seems to happen in less time, the heat is probably too high.
  5. This picture was taken 15 minutes after the onions were added.
  6. This picture was taken 30 minutes after the onions were added.
  7. This picture was taken 45 minutes after the onions were added.
  8. This picture was taken 50 minutes after the onions were added. They are appropriately caramelized.
  9. While the onions are cooking, beat the eggs with a fork. Do not use an egg whip. The idea is not to beat in air but to uniformly combine the whites and yolks. Season with the remaining ¼ teaspoon of salt and freshly ground black pepper to taste.
  10. When the onions are fully caramelized, be sure there is an even slick of oil in the bottom of the pan. If not, add a tablespoon or so more.
  11. Turn the heat to medium high and evenly distribute the caramelized onions on the bottom of the sauté pan.
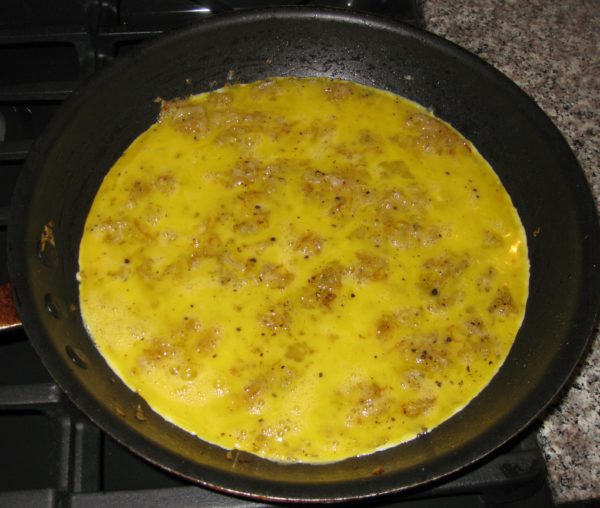
  12. Pour the beaten eggs on top of the onions, being sure to distribute the eggs evenly. DO NOT STIR THE EGGS once they are added to the pan. Immediately cover the pan and turn the heat to low.
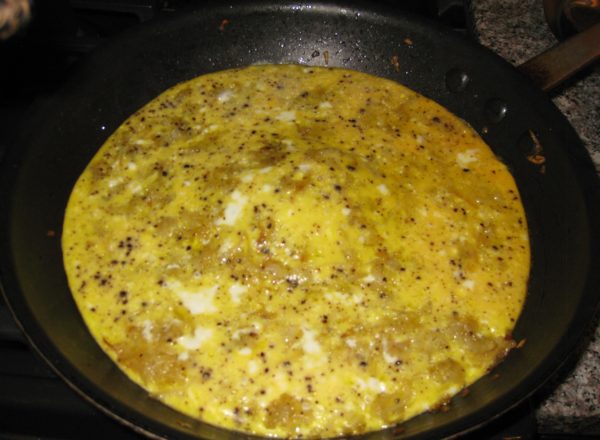
  13. Cook until the eggs are just set in the middle and golden brown on the bottom, approximately 30 minutes. Move the pan around so that the heat is evenly distributed, including putting the pan off-center occasionally so there is heat directly on the edges of the pan, not just concentrated in the middle.
  14. When the eggs are just set in the center, the frittata should release easily from the pan. Sometimes it is helpful to run a silicone spatula around the edge of the frittata to help it release.
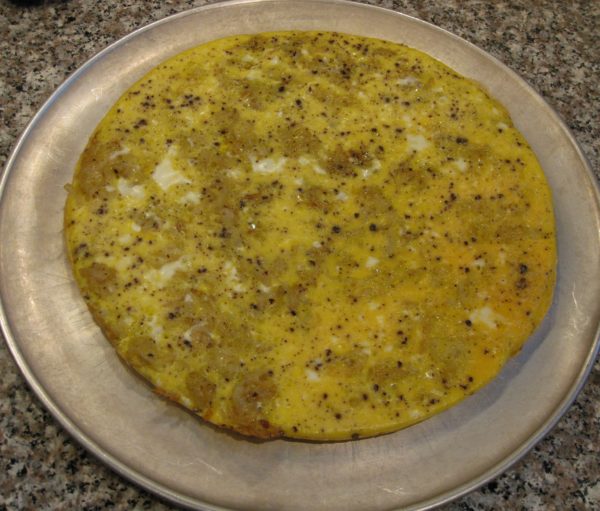
  15. Slide the frittata out of the pan and onto a large pizza pan.
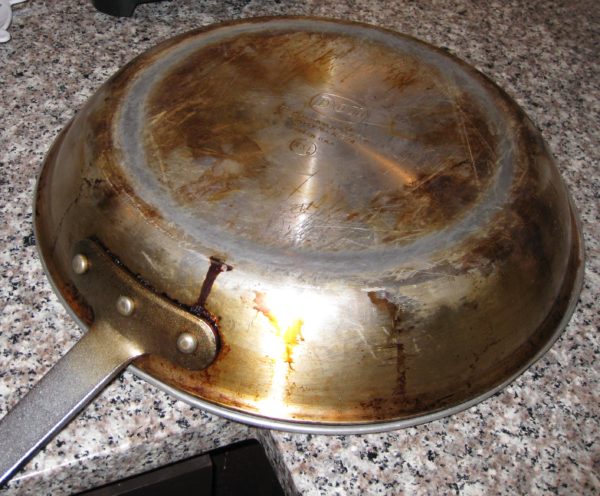
  16. Invert the pan over the frittata.
  17. Grasp the sauté pan and pizza pan with both hands and flip them over in one quick motion.
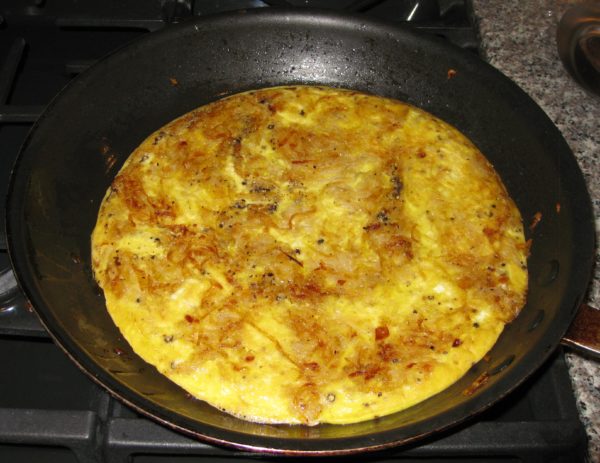
  18. Put the sauté pan, with the now-upside-down frittata, back on the heat, uncovered, for about 5 minutes until the bottom of the frittata is golden brown.
  19. Slide the frittata onto a serving platter.
Recipe Notes

Copyright © 2017 by VillaSentieri.com. All rights reserved.

Share this Recipe

Mom’s Slow-Braised Pork Chops

June 16, 2017

Just last week my mother-in-law breaded and quickly pan-fried pork chops for dinner.  They were tender, juicy and truly wonderful.

Now that grilling weather has finally reached Santa Fe, we’ll have pork chops quickly cooked on the grill throughout the summer.  I’ll even grill the occasional pork tenderloin seasoned with olive oil, garlic, lemon juice and rosemary.

I really enjoy juicy, quickly-cooked pork.  However, I also really, really enjoy the style of pork chops that I at while growing up:  thin-cut pork chops cooked slowly in a sauté pan until they are deep brown.

No doubt, this is an entirely different dish from cooking the chops just enough to reach that “magic” temperature of 140°F that the USDA says is “safe.”  It won’t be to everyone’s taste (what is?) but in the interest of presenting an array of very traditional dishes I’m including it.

Just a few nights ago while in Palm Springs, I was served thick-cut braised pork chops cooked by a good friend, John O’Malley, following a recipe from Marcella Hazan.  I use the same recipe from Marcella when I want to cook thick-cut chops for company (ever since John turned me onto it a while back).

Marcella was from Northern Italy, my mother’s family from far Southern Italy, but the two dishes share a style that highlights a common feature of traditional Italian cuisine.  That is, a cut of meat that could be cooked quickly is, instead, cooked slowly coaxing out more flavor and changing the texture in the process.

The realization of the similarity of these two dishes is like the experience I wrote about in April 2017 describing roast chicken I ate in Tuscany that tasted, for all the world, like the falling-apart roast chicken seasoned with garlic and rosemary that my mother made.

Quick cooking is just one style but reading contemporary recipes one would think it’s the only way to cook many cuts of meat.  We all agree that there are cuts that must be cooked long and slow for optimum texture: think Southern Pulled-Pork Barbecue, Hawaiian Roast Pig, Beef Brisket, or Pot Roast, for example.  I challenge you to find a contemporary recipe for roast chicken or sautéed pork chops that doesn’t call for the minimum cooking time and final temperature.  It’s as if we’ve forgotten that these meats can also be cooked low and slow for a qualitatively different dish.

Recording this kind of diversity traditional foodways is one of my main goals for this blog.

As I describe on the About page of this website, I’ve had the very good fortune to cook alongside incredible cooks from many different parts of the world but even that only begins to scratch the surface of traditional foods.  And while I’ve got recipes planned well into next year, I think it’s time to bring in other voices, other stories.

From time to time I am going to feature a blog post, and accompanying recipe, based on interviews with folks who have chosen to share a treasured family recipe and a story to go along with it.  There are several individuals who have volunteered to be in the vanguard of this effort.

If you have a family recipe that you’d like to share, send me an email or add a comment and I’ll follow up.

Click HERE to join our mailing list and you’ll never miss a recipe again!

Print Recipe
Mom's Slow-Braised Pork Chops
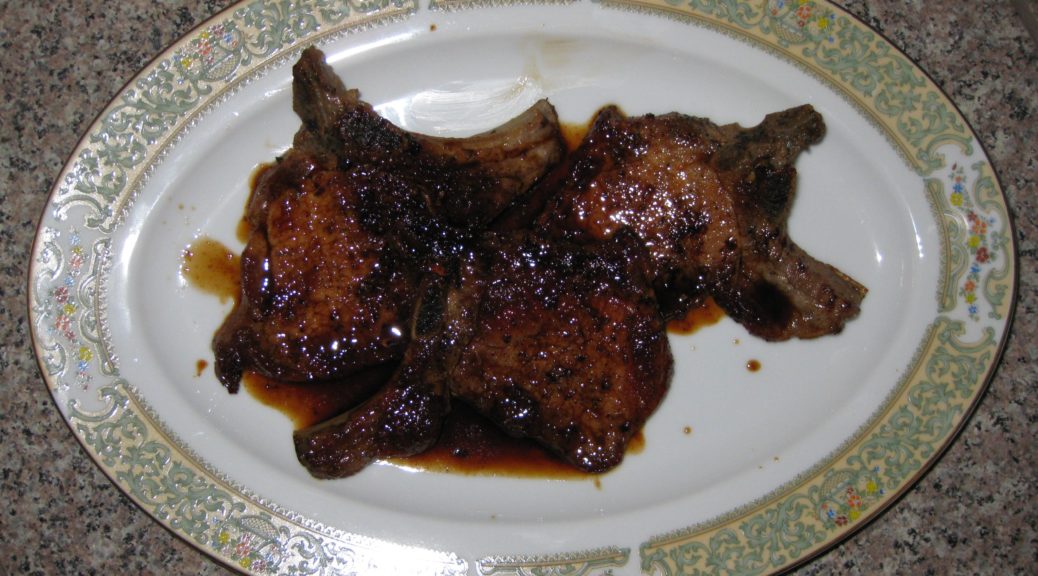
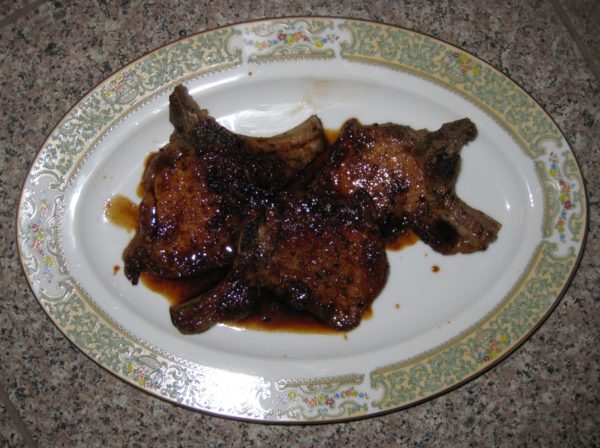
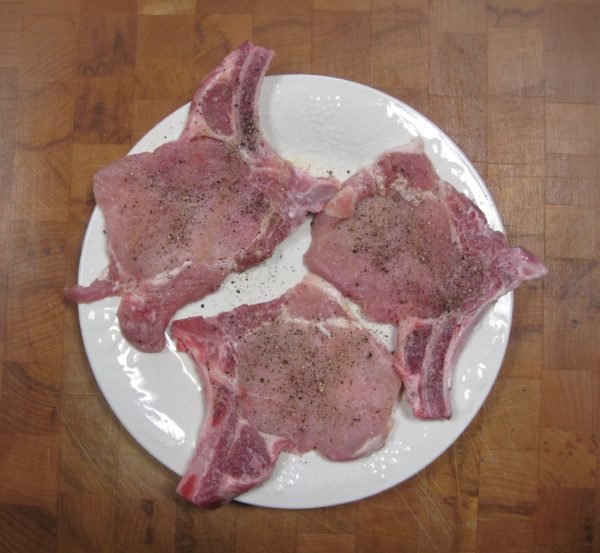
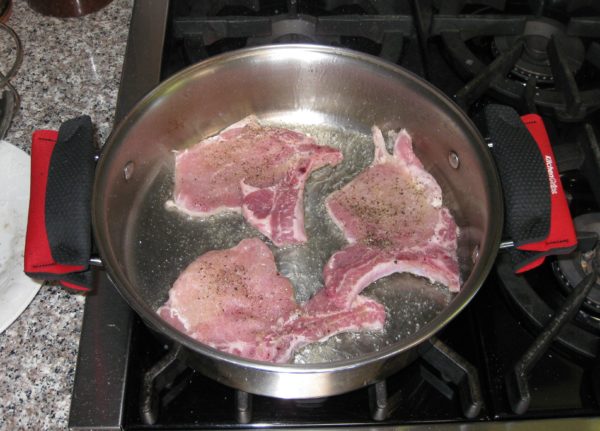
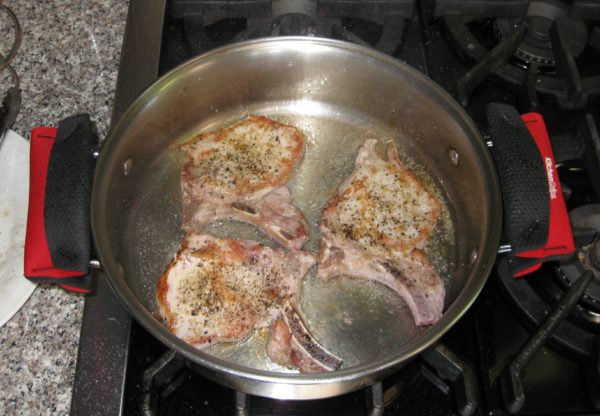
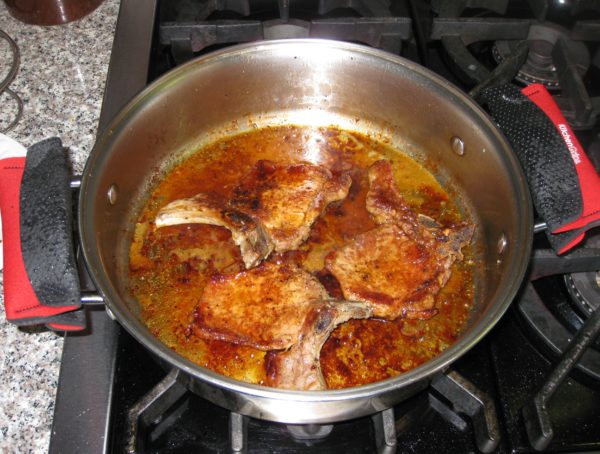
If these chops are being served as part of an Italian-style meal, preceded by pasta, rice or soup, and accompanied by several side dishes, one per person should be enough. Without a pasta course, an average eater could easily consume two of these and someone with a hearty appetite could eat three or four! A sauté pan with a very heavy bottom is needed to avoid hot spots. The chops will be cooked on low heat for most of the time and it is important that the pan conduct the heat well to avoid hot and cool spots for optimum browning. I prefer center-cut pork loin chops, these have a bit of loin and a bit of tenderloin, essentially the same cut as a T-bone steak. Loin chops (without the tenderloin), as shown in the pictures, work well too.
Votes: 0
Rating: 0
You:
Rate this recipe!
Course Mains, Meats
Cuisine Italian
Prep Time 5 minutes
Cook Time 2 hours
Servings
people
Ingredients
Course Mains, Meats
Cuisine Italian
Prep Time 5 minutes
Cook Time 2 hours
Servings
people
Ingredients
Votes: 0
Rating: 0
You:
Rate this recipe!
Instructions
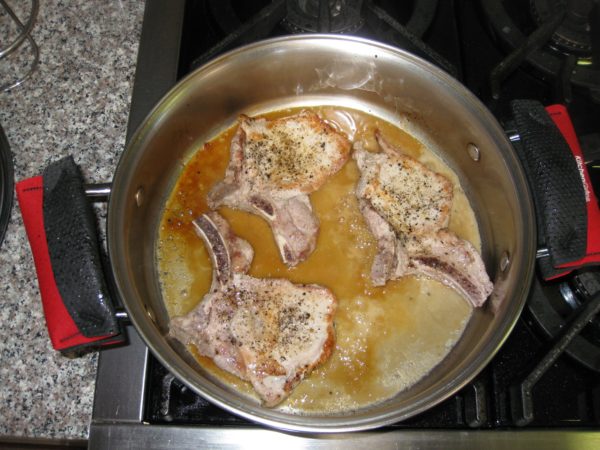
  1. Season the chops generously with salt, pepper and garlic powder.
  2. Using a sauté pan that has a very heavy bottom and that is large enough to hold the chops without crowding, heat the oil until it just begins to smoke over high heat.
  3. Add the chops and reduce heat to medium high.
  4. Cook the chops, undisturbed, until nicely browned, approximately 2 minutes.
  5. Turn the chops over. If the oil was very hot when the chops were added and if you didn't disturb them while they browned, they should easily release from the pan without sticking.
  6. Brown other side. Approximately 2 minutes.
  7. Turn the chops over. Have the cover ready. Add the wine, immediately cover the pan, and turn the heat to low.
  8. Cook, covered, until the wine evaporates, 15 minutes more or less.
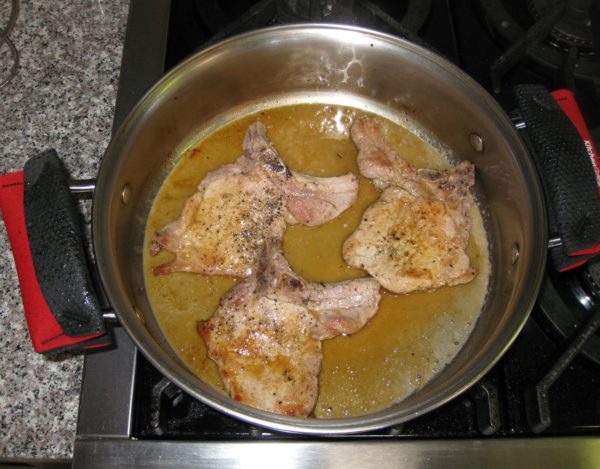
  9. After the wine evaporates the pan juices will start to brown. When they do, add 2-3 tablespoons of water and turn the chops over. Cook, covered, until the water evaporates and pan juices get a little bit darker.
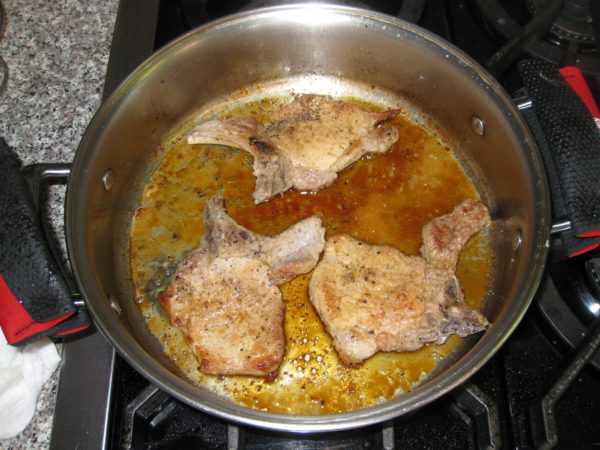
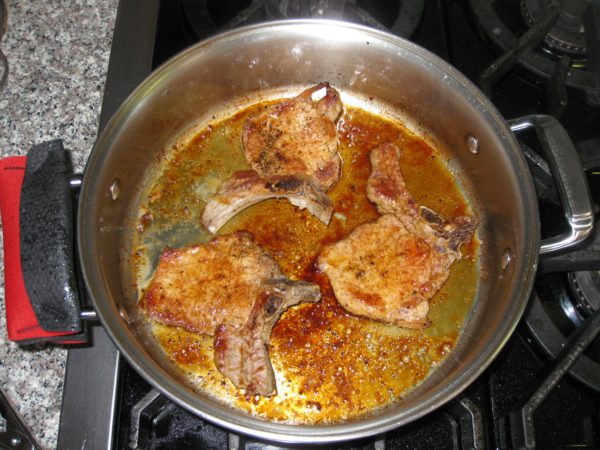
  10. Repeat this process until the chops are falling apart tender and the pan juices are a deep brown. This will take 1 ½ to 2 hours.
  11. At the end there should only be a couple of tablespoons of water plus the oil in the pan. Pour this sauce over the chops when serving. It should have a rich umami porky flavor.
Recipe Notes

I rarely use garlic powder. The dishes for which I consistently use garlic powder instead of fresh garlic are Italian slow-roasted poultry, the pork chops featured in this recipe, and steaks. I find that I just can’t get the flavor that I want from fresh garlic in these instances.

Copyright © 2017 by VillaSentieri.com. All rights reserved.

Share this Recipe

Croquetas de Jamon (Cuban Ham Croquettes)

May 1, 2017

In early 2014, my husband and I were lucky enough to go to Cuba with two close friends.  This was prior to the loosening up of restrictions on travel by Americans to the island nation.

Because of the guidelines governing such travel, we had to spend a significant portion of our time interacting with Cubans, not being tourists.  We visited a schools for the arts and music, toured cultural sites, attended lectures, saw a cigar factory, and met with some Cubans in their homes, among other activities.

All of Cuba is divided up into small units that are under the watchful eye of a trusted local who reports any unusual activities to the authorities.  These units could be a section of a street, for example, or a multi-unit building.  What turned out to be one of the most memorable events was meeting with the residents of one such building one evening in Cienfuegos.

The children put on a small performance, we had refreshments, then spent several hours chatting with the building’s residents.  It seemed to us that everyone was quite open, talking about the challenges, as well as the benefits (such as free education and health care) of life in Cuba.  In fact, while it seems that most Cubans we met were in favor of a more open society they were understandably very protective of their access to education and health care.

One man, seemed particularly open about the difficulties of life in Cuba.  This was surprising to us as his wife was the designated party operative responsible for overseeing this particular building.  Our suspicions seemed to be confirmed when he disappeared into their apartment shortly before the evening ended after his wife gave him “the look.”  As our vehicle was pulling away from the building, he ran out and waved us good-bye.  Clearly he had been banished from the meeting but kept a watchful eye from his apartment, exiting at just the right moment.

In addition to spending the major portion of our trip interacting with Cubans we were prohibited from actually going to the beach!  This was supposed to be an educational and cultural interchange, not fun.

Even more interesting is that, at the time, Americans were prohibited from buying Cuban cigars and rum.  Mind you, I’m not talking about bringing these items back to the United States which was definitely forbidden, but buying and using them while in Cuba.

This would seem to be a singularly difficult rule to enforce and I can’t say that anybody paid particular attention to it.  One of our most pleasant experiences was sitting at a park on the waterfront in Cienfuegos sipping rum (from plastic cups) smoking cigars and watching the sun set.

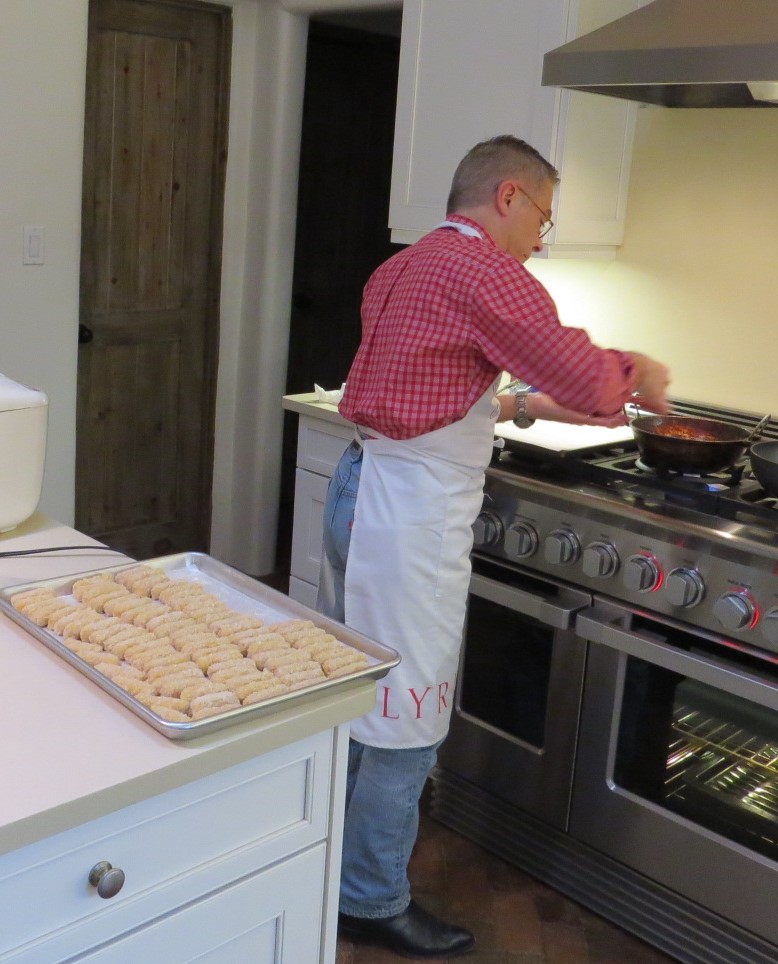
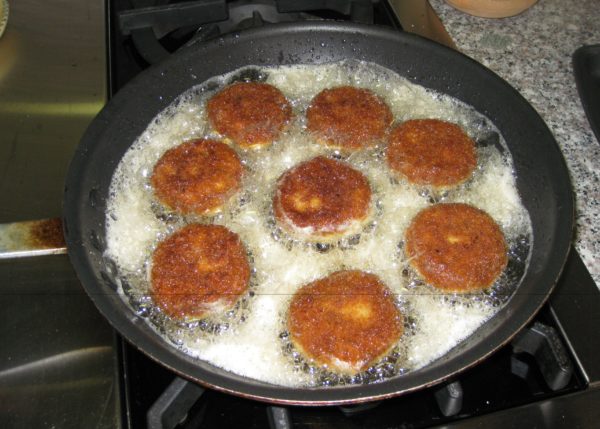
We ate a lot of croquetas in Cuba and drank a lot of rum punch, mojitos, and cariocas.  After we got back we pulled together a Cuban dinner with a few other friends.  I made the traditional finger-sized croquetas—seven dozen of them, actually!  Here is a picture of me frying them as well as a platter full of cooked ones along with some plantain chips and mojitos.

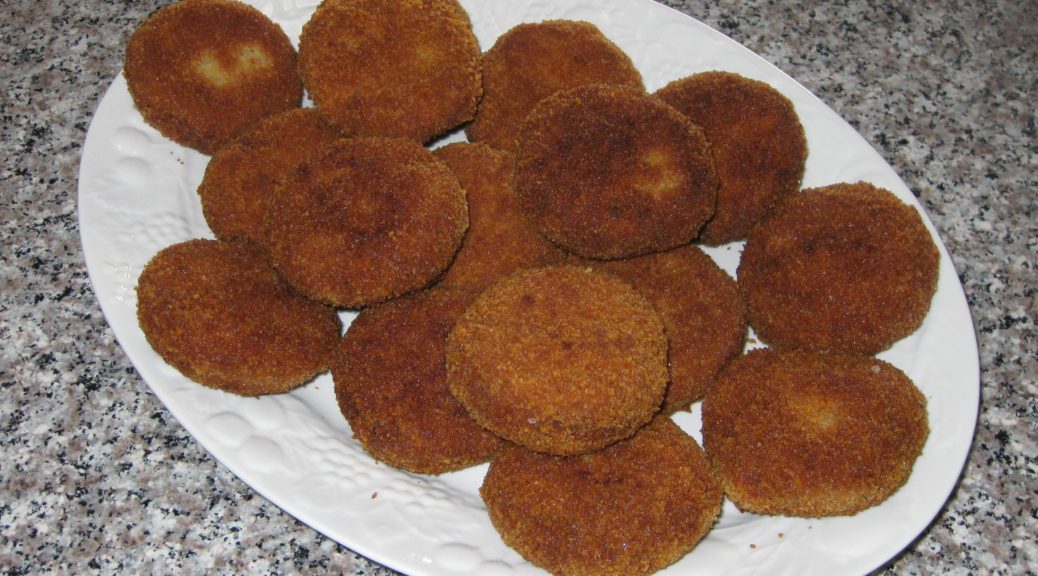
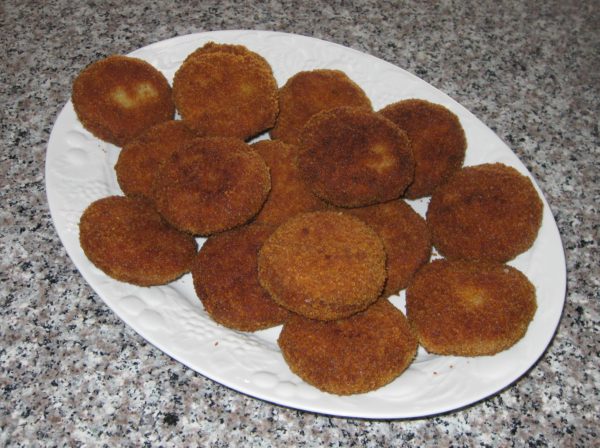
For this post, since I was cooking them as an entrée rather than as a nibble with cocktails, I made them larger.

Print Recipe
Croquetas de Jamon (Cuban Ham Croquettes)
Instead of ham, croquetas can be made with cooked fish, salted cod, or potatoes among other ingredients. Cracker crumbs are the standard coating used in Cuba but fine dry breadcrumbs will work fine. I really like using plain panko crumbs whizzed in the food processor to finely pulverize them. They give an amazing crunch! If you are making these to serve as nibbles, you should get seven dozen. If you are making larger croquetas to serve as a main course, this recipe will make 16. Two or three of the larger croquetas will serve one person depending on what else is being served.
Votes: 0
Rating: 0
You:
Rate this recipe!
Prep Time 1 hour
Cook Time 20 minutes
Passive Time 9 hours
Servings
people
Ingredients
Prep Time 1 hour
Cook Time 20 minutes
Passive Time 9 hours
Servings
people
Ingredients
Votes: 0
Rating: 0
You:
Rate this recipe!
Instructions
  1. If the ham was cooked with a sweet glaze, rinse the glaze off using warm water.
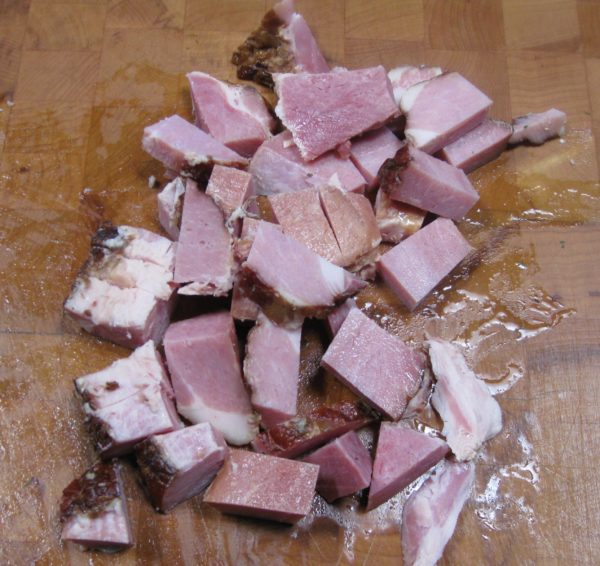
  2. Cut the ham into one-inch cubes.
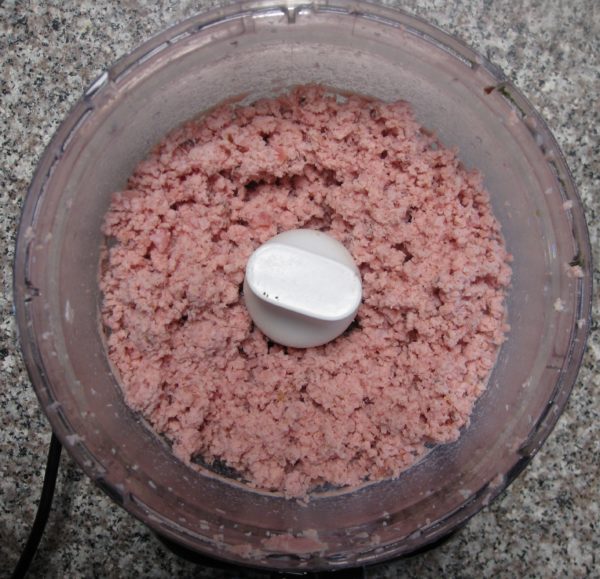
  3. Finely grind the ham in a food processor or meat grinder. Reserve the ground ham.
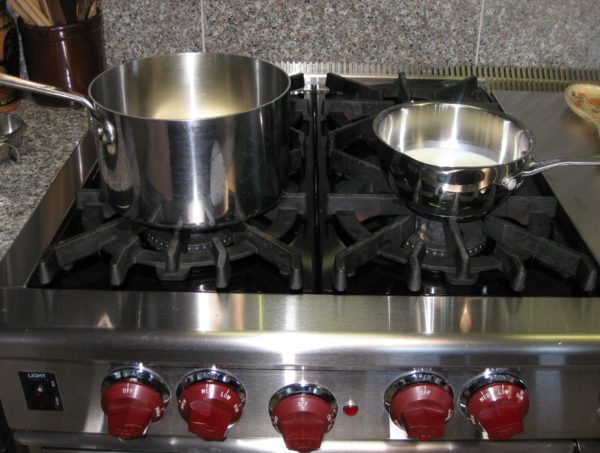
  4. Over medium heat, warm the milk in a small saucepan.
  5. Meanwhile, in a two-quart heavy bottomed pan, sauté the onion in butter on medium heat until soft, approximately 4-5 minutes.
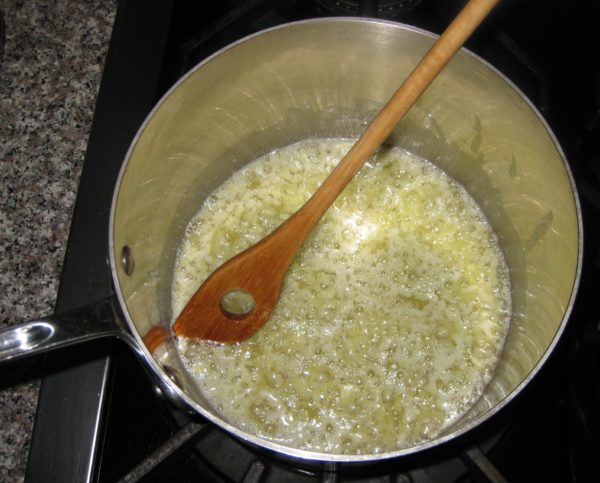
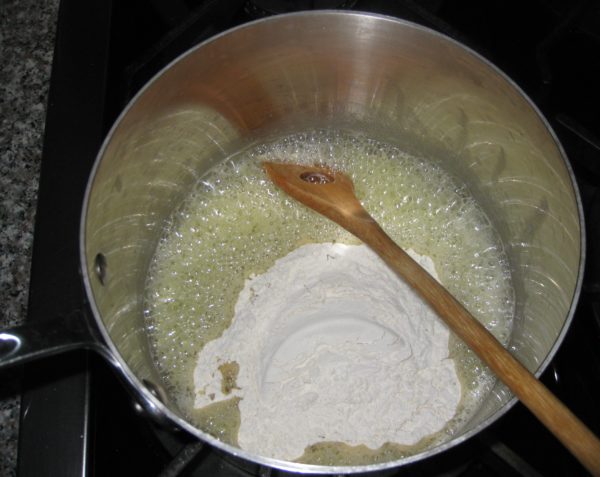
  6. Add the flour to the onion-butter mixture and cook for about two minutes, stirring constantly. Do not brown the flour.
  7. Note, the flour will appear golden from the combination of the butter and the onions.
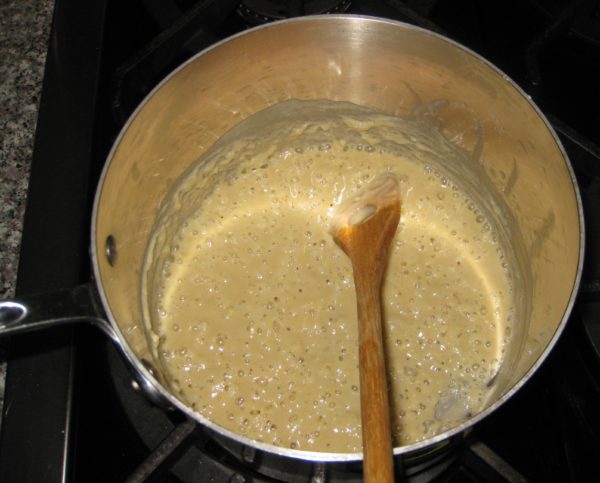
  8. Add about three tablespoons of the warm milk to the flour mixture. Stir well to fully incorporate. Continue adding about three tablespoons of warm milk at a time, stirring well after each addition, until all the milk has been incorporated. The mixture will form a rather heavy dough.
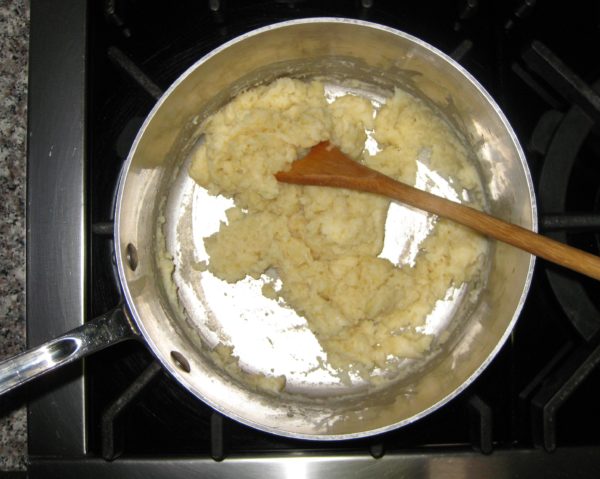
  9. Continue to cook the dough for 2-3 minutes, stirring constantly, without browning.
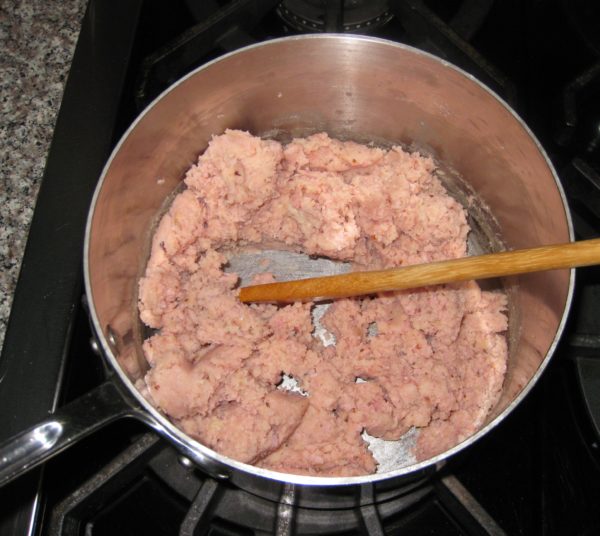
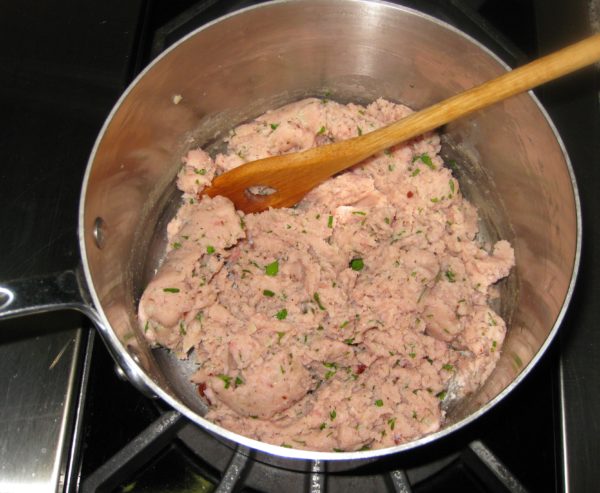
  10. Reduce the heat to low and stir in the ham. Keeping the mixture warm makes it much easier to blend the ham into the dough which would otherwise seize up with the addition of cold ham.
  11. Off the heat, stir in the nutmeg and parsley. Taste and adjust salt and pepper.
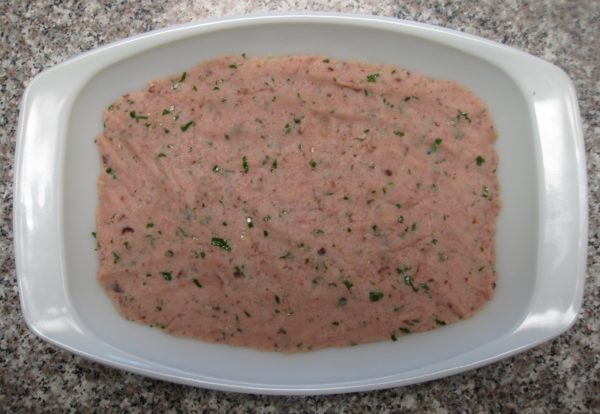
  12. Spread the mixture into a small oblong pan. Cool to room temperature uncovered.
  13. Cover and refrigerate until very cold, about six hours or overnight.
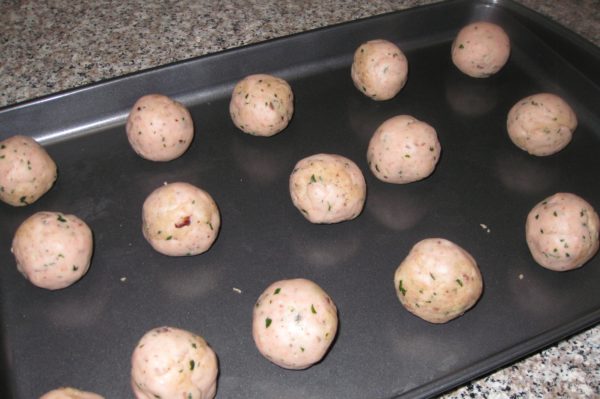
  14. Form the croquetas. If making small ones, roll portions of the dough into ½ inch diameter cylinders. Cut the cylinders into pieces about 2 inches long. If making larger croquetas, divide the mixture into 16 pieces. Roll each piece into a ball then flatten into a patty about ½ inch thick. Put the croquetas in a single layer on a cookie sheets. Refrigerate the croquetas until very cold.
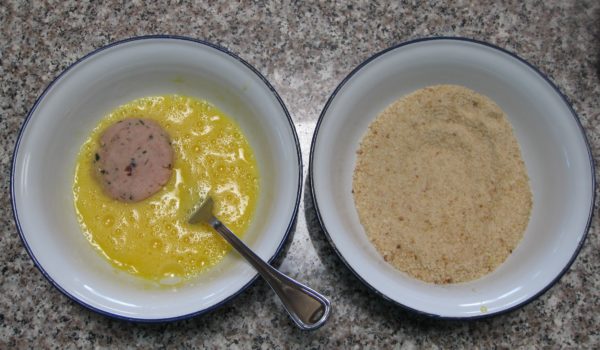
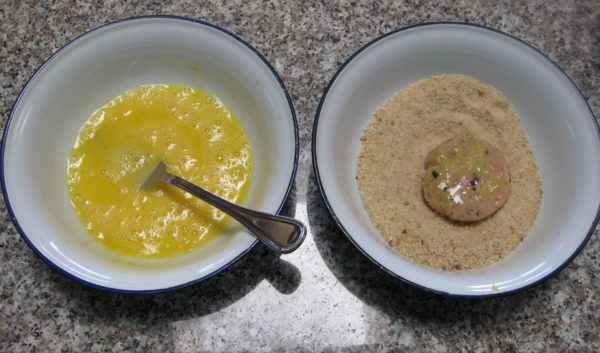
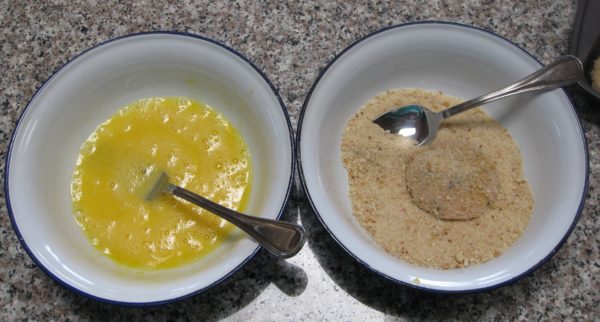
  15. To bread the croquetas, beat 3 eggs seasoned with ½ teaspoon of salt. Dip the croquettes in the beaten egg then roll in crumbs.
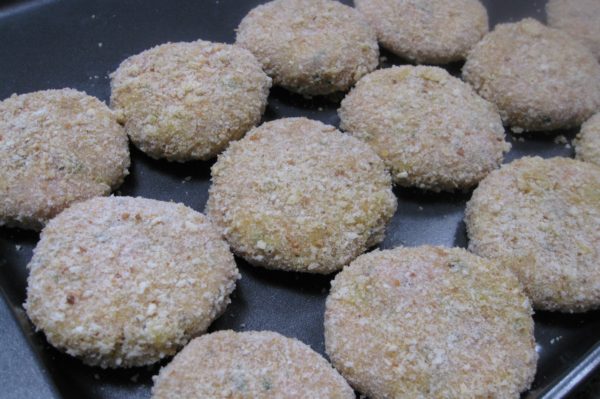
  16. Put the croquetas onto cookie sheets once again. Refrigerate until cold.
  17. Repeat the egg and crumb coating a second time. The second coating is necessary to get the traditional crunch. Refrigerate several hours or overnight.
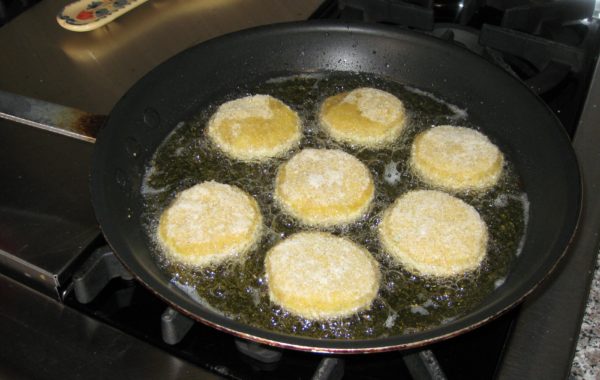
  18. Cook the croquetas in a deep fryer at 350°F until deep brown. Alternatively, put ½ inch of oil in a heavy bottomed frying pan. Bring the oil to 350°F. Fry the croquetas, turning once, until deeply browned. Drain briefly on absorbent paper. Keep the croquetas warm in a low oven until they are all fried.
  19. The croquetas ready to serve.
Recipe Notes

Copyright © 2017 by VillaSentieri.com. All rights reserved.

Share this Recipe

Italian Slow-Roasted Chicken or Turkey

April 21, 2017

For two countries that are geographically so close, Italy and France couldn’t be further apart on views of how to roast poultry.

The French typically roast quickly and at high temperature.

Italians are masters of the low and slow approach.

Italian roast chicken (or turkey, for that matter) literally falls apart.  The French version does not.  It’s a matter of style and technique, not quality or skill.

The usual style in the United States leans more toward France than Italy.  It’s the basis of the style of roasting described in most modern cookbooks and cooking magazines; higher temperatures rather than lower temperatures and yanking the bird out of the oven as soon as it reaches the minimum acceptable temperature to be “cooked” and “safe.”  Even when these magazines try to champion the approach of low and slow, they almost always miss the boat.  They miss the boat because they are still focused on the thermometer approach.

You can’t do low and slow if you’re focused on getting the bird out of the oven as soon as it hits the “safe” temperature.  Italian roast chicken is more like “pulled” chicken than the minimally cooked French version.  The whole mouthfeel is different.  So is the taste.

What I didn’t understand growing up is that my mother’s roast chicken and turkey drew from a broader Italian approach.

A few years ago we were in Tuscany having lunch with my husband’s Great Uncle Beppe and his family.

When the roast chicken was served, it was just like my mother’s!  Seasoned with garlic, rosemary, salt and pepper and roasted slowly, till it basically fell apart.

My mother’s mother came to the United States from Calabria around the turn of the 20th century at four years of age.  Here I was, nearly a century later in a province at the other end of the Italian peninsula eating chicken that could have been my mother’s, the way she learned it from her mother, who learned it from her mother.

I think that was a turning point for me in wanting to better understand Italian food traditions throughout the country and even throughout the Italian diaspora around the world.

Another amazing thing, when I think about it, is that my mother brined her chicken for an hour before cooking.  We’re talking the 1960’s here (probably the 1950’s too but I’m too young to remember that) way before brining was ever mentioned in cooking circles.  I can’t tell you why she did it or how it started but when I was learning to cook under her guidance, brining was always the first step for any recipe that included chicken.

Print Recipe
Italian Slow-Roasted Chicken or Turkey
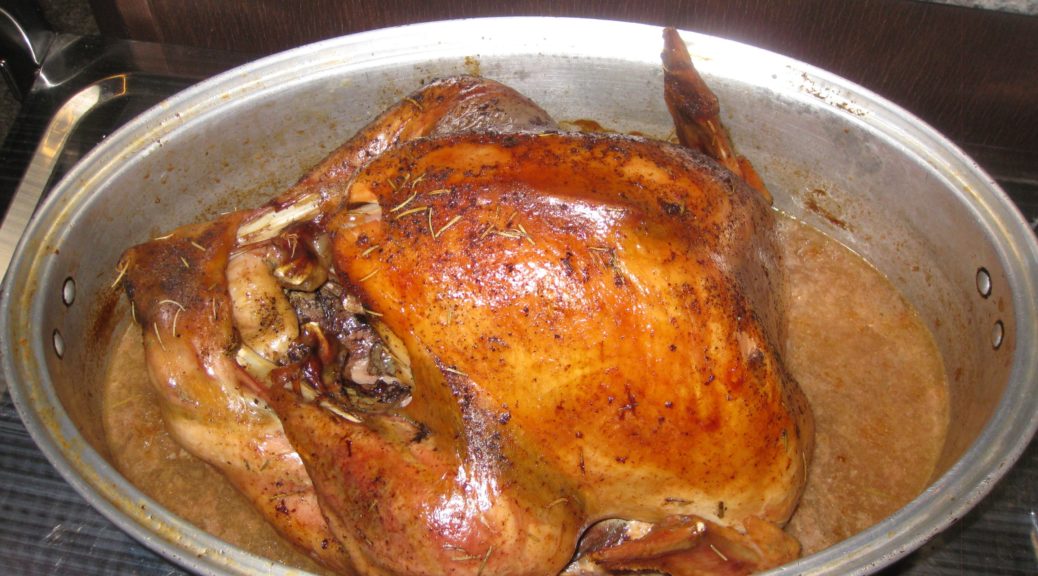
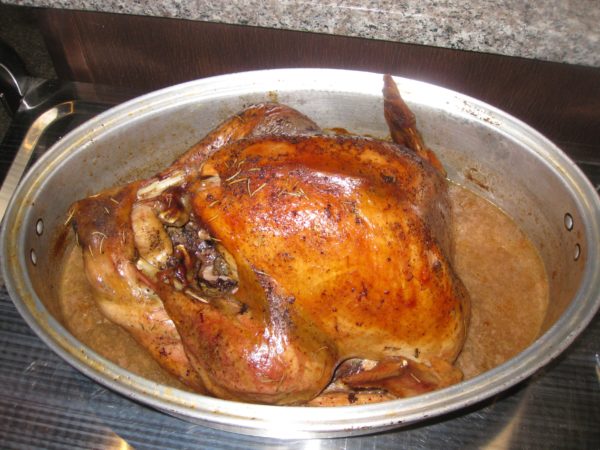
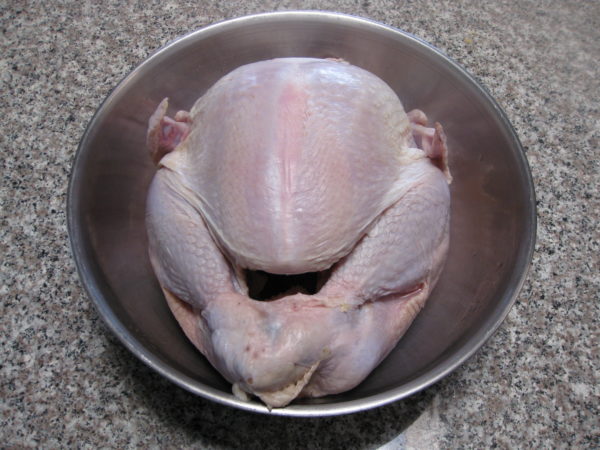
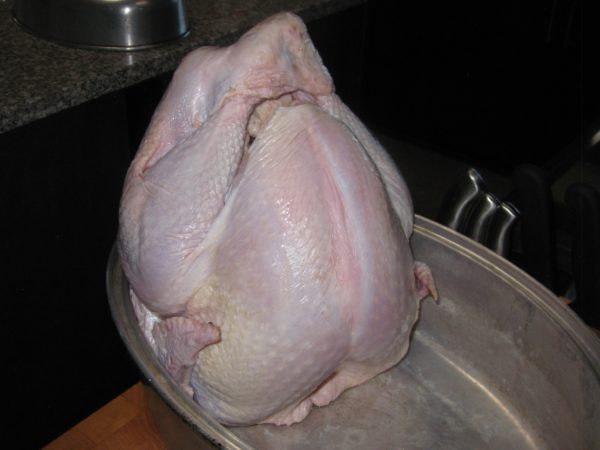
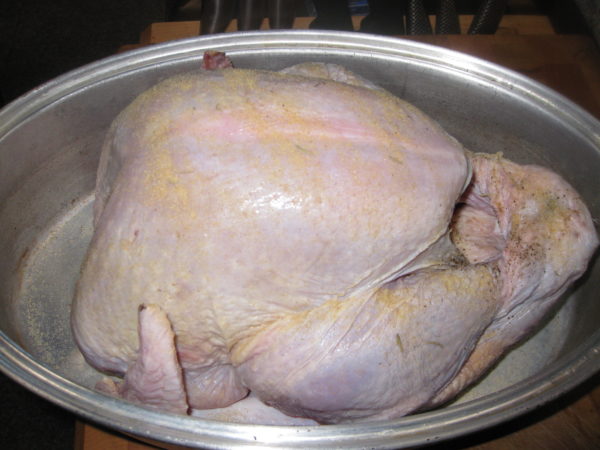
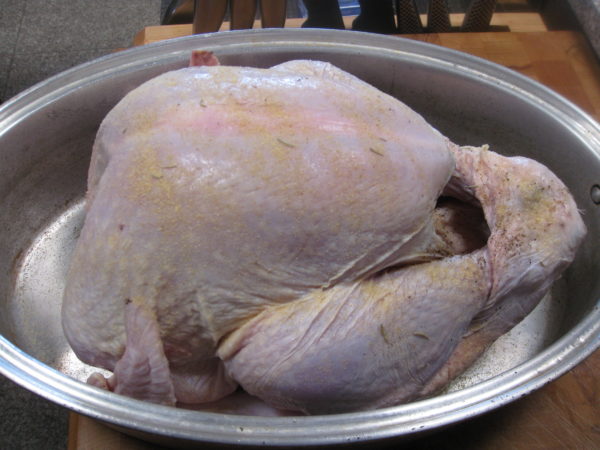
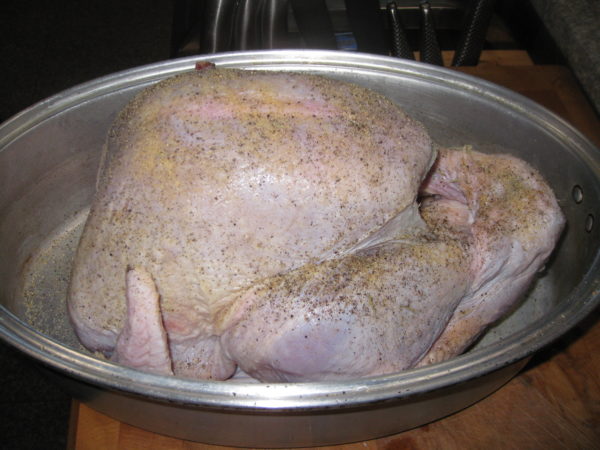
This is a no-recipe recipe. I never measure the seasonings. It’s really pretty hard to use an inappropriate amount. The cooking time is pretty forgiving, too. Until you get the hang of it, I suggest planning on the longer cooking time and the higher temperature. If the chicken or turkey is falling-apart tender before you’re ready for it, just reduce the oven to 150°F to keep the bird warm. My mother would usually brine the bird for about an hour before cooking. Time permitting, I do the same. This basic recipe works for everything from a three pound chicken to an 18 pound turkey. Just for a point of reference, the pictures feature a 12 pound turkey.
Votes: 0
Rating: 0
You:
Rate this recipe!
Course Mains, Poultry
Cuisine Italian
Prep Time 10 minutes
Cook Time 40 minutes per pound
Servings
people
Ingredients
Course Mains, Poultry
Cuisine Italian
Prep Time 10 minutes
Cook Time 40 minutes per pound
Servings
people
Ingredients
Votes: 0
Rating: 0
You:
Rate this recipe!
Instructions
  1. Brine the bird, if you like, for about an hour.
  2. Thoroughly rinse and dry the bird.
  3. Prop the bird with the cavity facing up. Generously season the inside of the bird with garlic powder, rosemary black pepper and salt. As a matter of habit, if I'm using dried rosemary, I always crust it with my fingers before sprinkling it on the bird.
  4. Put the bird in a roasting pan, breast up, preferably one able to hold the bird rather snugly. The roasting pan should have a tight-fitting cover.
  5. Generously season the outside of the bird with garlic powder, rosemary, black pepper and salt.
  6. Add water (or wine) to the bottom of the roasting pan not over the top of the bird. You don't want to displace the seasonings.
  7. Cover and roast at 350°F for 30 minutes. Reduce heat to 275°F to 300°F.
  8. After the first hour, baste the bird with the juices in the roasting pan about every 30-45 minutes. Be sure to tip the bird, or use a basting bulb, to remove the juices from the cavity and add them to the juices in the bottom of the roasting pan.
  9. Roast for a total of 30-40 minutes per pound (including the first half hour). The bird should just about be falling off the bone.
  10. If there is too much liquid in the bottom of the pan or if the bird is not brown enough, uncover the pan for the last 30 minutes or so.
Recipe Notes

Poultry cooked this way will not submit to carving in a photogenic Norman Rockwell manner. It’s just a different style. It would be like trying to cut delicate slices from pulled pork. It’s not going to happen. That said, the joints will usually separate easily and you can cut along the grain rather than against the grain to portion appropriate-sized pieces for serving.

Copyright © 2017 by VillaSentieri.com. All rights reserved.

Share this Recipe

Salsicce con Cardone (Sausage with Cardoons)

February 17, 2017

We made our move to multi-generational living in 1998 when my husband’s parents moved into the Coach House at our estate in Chicago, The Henry Rohkam House.  (There are a couple pictures of the main house in a prior post.)

Pretty quickly we settled into a routine of having meals together.  When we went to work, the dogs went to Grandma and Grandpa’s (21 feet away in the Coach House) for the day.

My husband started gardening with his father.  A large piece of our one-third-of-an-acre property in Chicago’s Lakeview neighborhood was turned over to cultivation.  We had grapes, strawberries, corn, tomatoes, eggplant, sweet peppers, radicchio, arugula, leaf lettuce, Swiss chard, okra, hot peppers of various types, an array of herbs and other vegetables that varied year by year.  The fruit trees never did very well.  The kiwi thrived but never bore fruit.  One of the four kiwi was accidentally injured and died.  In retrospect, it was probably the male plant (there were three female and one male plant), hence no fruit.

Every fall we canned and preserved foods in various ways.  We made jars of olives marinated in red wine vinegar and herbs from the garden.  We made herb-infused vinegar and olive oil.  We dried herbs for the winter.  We froze vats of tomato sauce.  I’ll admit to even freezing pesto which, while it doesn’t taste like its fresh-made cousin, is pretty awesome in the dead of a Chicago winter!

Some years there were enough strawberries to put up jam.  City squirrels can be quite bold, however.  I was standing alongside the garden one spring day when a squirrel, who had gone grocery shopping in our strawberry patch, literally ran over the top of my foot with a strawberry in his mouth on his way out of the produce isle.

The birds had Houdini-like skills.  Despite wrapping the grape arbor in yards of netting, the birds found their way in, decimated the grapes, and escaped.   The few grapes we were able to harvest were very sweet!

We built a temperature-controlled wine cellar in the basement of the Coach House.  My husband made wine for a few years but stopped when work got too busy.

I started cooking more often with my mother-in-law.  Every month or so, my husband’s grandmother, Noni, would come to visit for a weekend.  Noni was a marvelous cook.  Some dish always appeared during those weekends that I had never had before.  Sausage with Cardone was one of them.

For a vegetable that has been popular since the ancient Romans, I’m surprised I’d never hear of it.  I grew up eating sausage with peppers and onions.  Sometimes the sausage was cooked in a tomato sauce, sometimes not.  Cardone was a whole new thing!

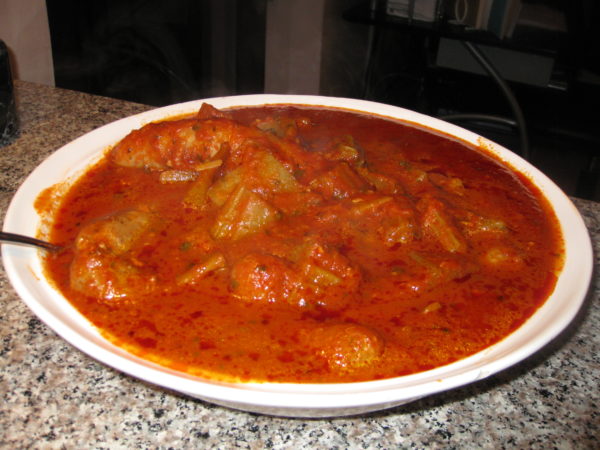
This goes really well with polenta but it’s equally good on its own.  Leftover sauce can be put on pasta or can accompany a frittata.  You may notice from the pictures that we didn’t use as much sausage as called for in the recipe.  We didn’t want leftover sausage but that didn’t mean we didn’t want leftover sauce!  Sadly, the cardone usually all gets eaten on the first go-around but on those rare occasions where it doesn’t, I like to use it as a sandwich filling for lunch.

Print Recipe
Salsicce con Cardone (Sausage with Cardoons)
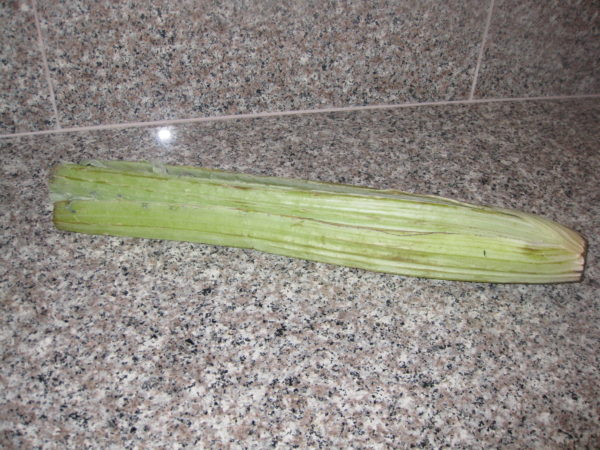
Cardone looks like oversized celery. It is giant, about 2 feet long as sold trimmed in the grocery store. It is related to the artichoke and was popular among the ancient Romans. Cardone should always be served cooked. Leaves should be removed and not eaten.
Votes: 0
Rating: 0
You:
Rate this recipe!
Course Mains, Meats
Cuisine Italian
Prep Time 15 minutes
Cook Time 2 1/2 hours
Servings
people
Ingredients
Course Mains, Meats
Cuisine Italian
Prep Time 15 minutes
Cook Time 2 1/2 hours
Servings
people
Ingredients
Votes: 0
Rating: 0
You:
Rate this recipe!
Instructions
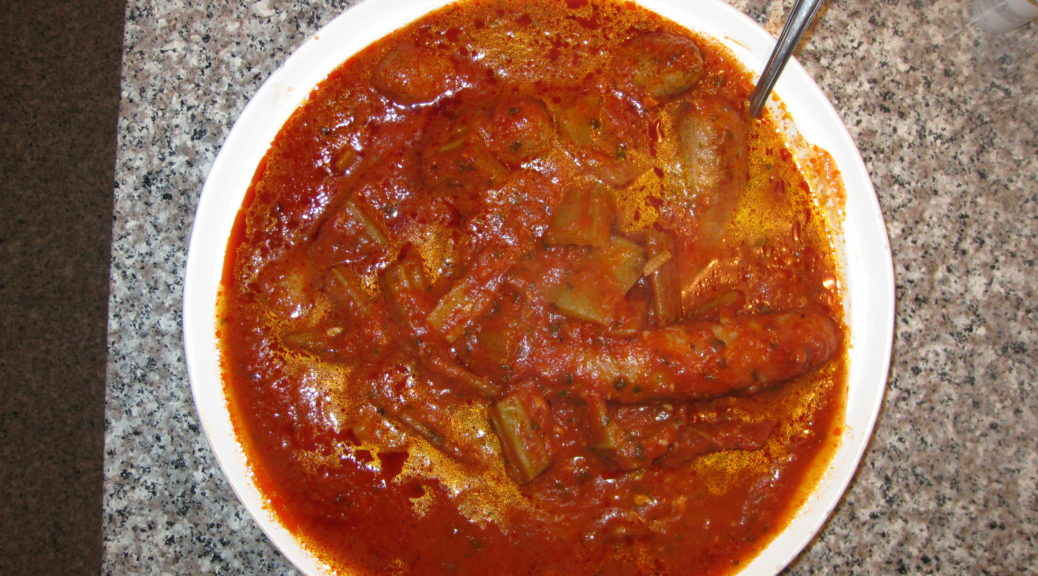
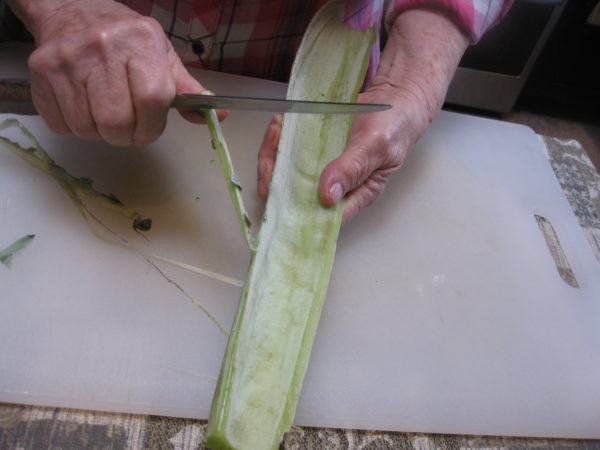
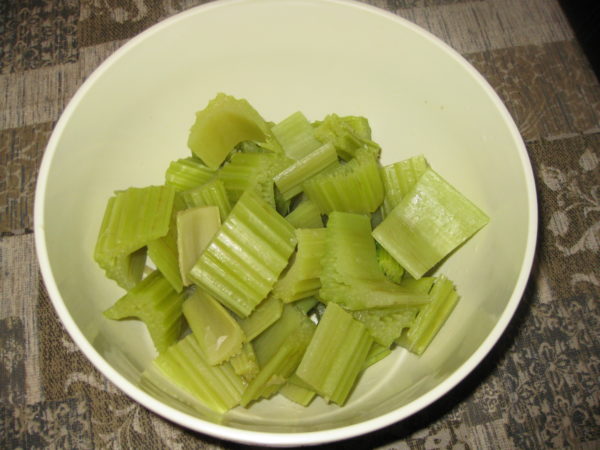
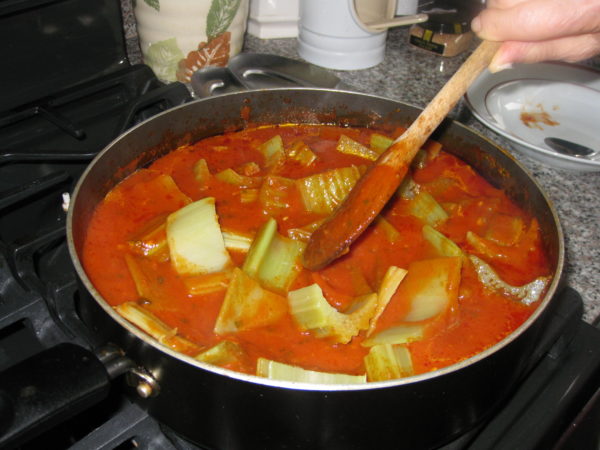
  1. The starting point: cardone from the market.
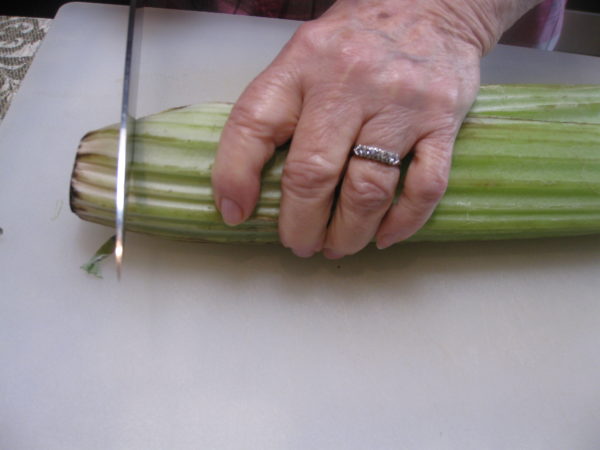
  2. Cut off the bottom of the cardone.
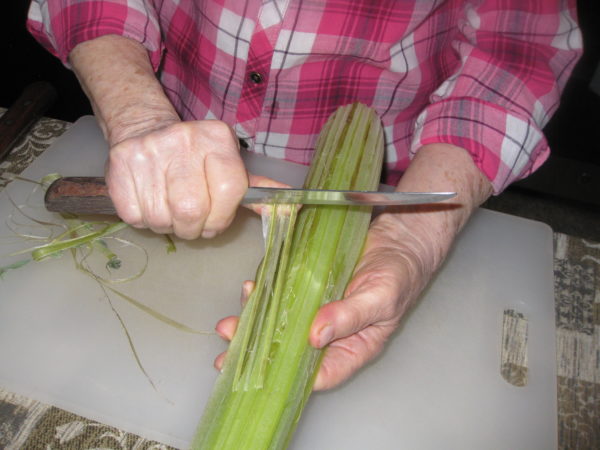
  3. Using a vegetable peeler (or knife if you are my mother-in-law), remove the leafy edges of the cardone.
  4. Remove any stringy parts of each rib.
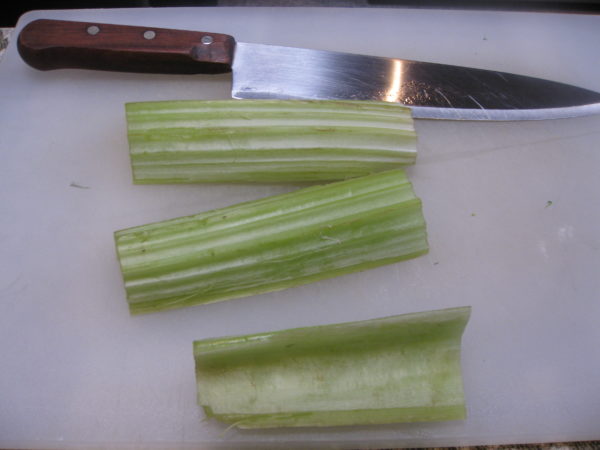
  5. Cut the ribs into pieces approximately 4 inch long. Wash well.
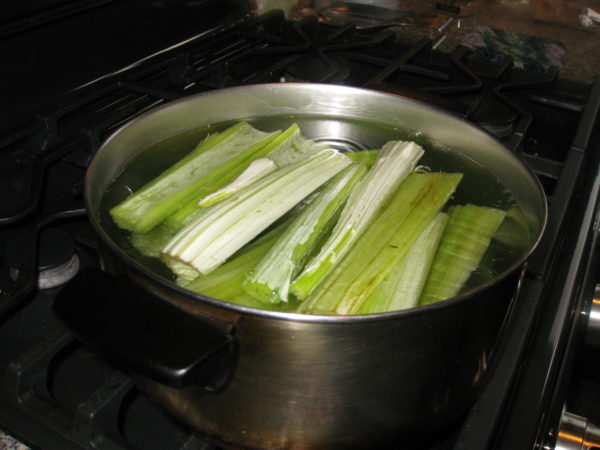
  6. Bring 3 quarts of water to a boil. Add 3 tablespoons of salt and a pinch of baking soda. Add the cardone and boil until you can pierce it relatively easily with the point of a sharp knife. Do not overcook the cardone as it will be cooked further with the sausage.
  7. Remove the cardone from the water. Stop cooking by putting the cardone in a bowl of ice water. When cold, cut into pieces approximately 1 ½ inches long and reserve.
  8. If the sausage is not in links, cut into pieces approximately 4-5 inches in length. Using the tines of a fork, pierce the skin of each piece of sausage in several places.
  9. Heat the olive oil in a large, heavy-bottomed sauté pan or a wide, shallow casserole. Add the sausage and brown well on all sides.
  10. Remove the sausage from the pan.
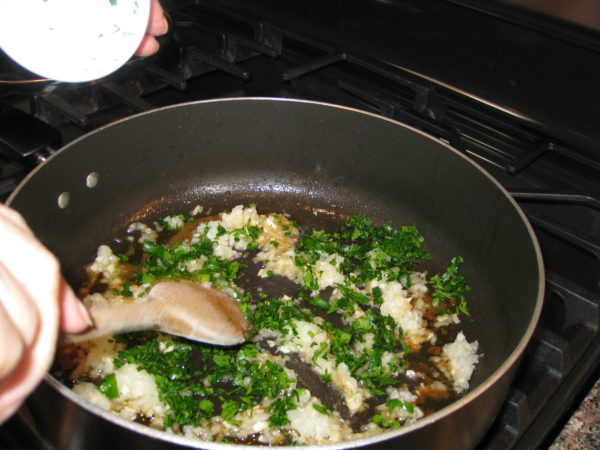
  11. Add the onions, garlic, parsley, and rosemary to the sausage drippings in the pan. Sauté until the onions are soft and golden.
  12. Add the wine, if using. Allow wine to mostly cook away then add tomato puree and water.
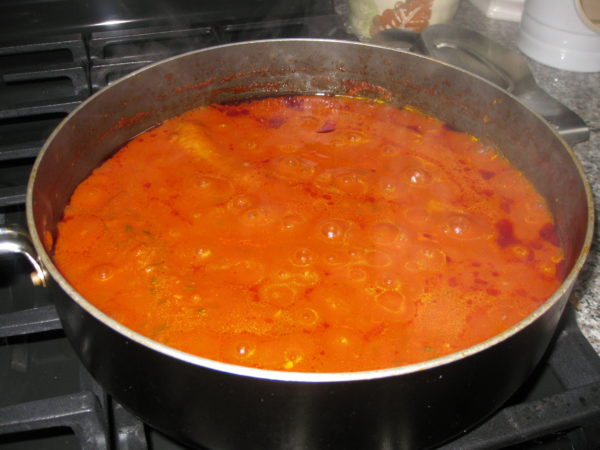
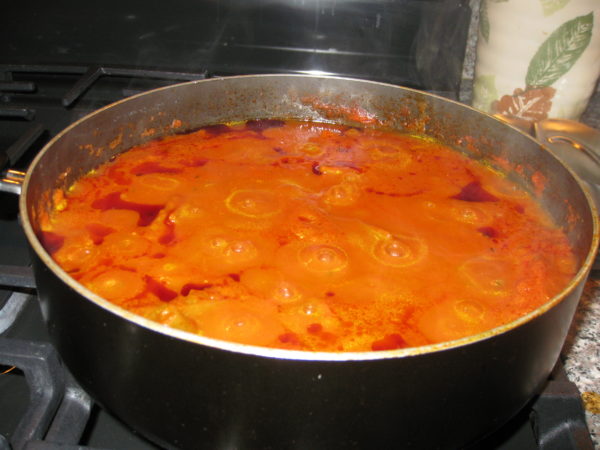
  13. Return the sausage to the pot with the sauce. Season with salt and freshly ground pepper. Simmer, partially covered, for about an hour.
  14. Add the cardone. Taste for seasoning. Simmer, partially covered, until the cardone is tender, approximately 30-45 minutes.
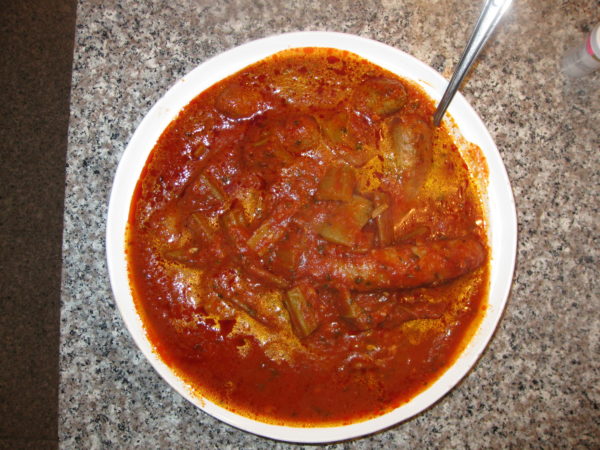
  15. Pour into a serving dish and bring to the table.
Recipe Notes

Copyright © 2017 by VillaSentieri.com. All rights reserved.

Share this Recipe

Pollo all’Uccelleto (Chicken Little Bird Style)

January 23, 2017

I first tasted this dish in Tuscany in the little hill town of Benabbio, in September 1996.  My husband’s great Great Aunt Fidalma, Zia Fidalma, made it with little birds, sparrows actually, that her husband, Faliero, had shot.

That was one of my most memorable meals in Italy.  My husband and I had traveled to Italy with his parents.  We stayed in a little hotel in the town of Fornoli where my father-in-law grew up.  We alternated meals at the homes of numerous relatives throughout the area.

It was wonderful sitting in Zia Fidalma’s kitchen watching her put together components of the meal in that seemingly effortless way that happens in homes throughout Italy.  We had sautéed mushroom caps.  Zia Fidalma foraged the mushrooms.  I remember them sitting in a shallow box on the kitchen counter.  She plucked a few out of the box, cleaned them.  They were quickly sautéed and seasoned with salt, pepper, and nepita.

I can’t get a consensus on the spelling of nepita.  I’ve seen it as gnebita, gnepita, and nepeta, among others.  It is a variety of catmint.  Zia Fidalma uses it to season mushrooms.  It is a magical combination.

We smuggled nepita seeds back from Tuscany on that visit, along with heirloom tomato seeds, both from Zio Faliero’s garden.  We’ve grown both ever since.  For 20-plus years we’ve had nepita; first in our garden in Chicago (at the Rohkam House, where we lived starting in January 1996) and then subsequently at Villa Sentieri, in Santa Fe.

The Rohkam House when we lived there.
The Rohkam House shortly after it was built in 1887.

There are only three components of that meal that I remember clearly, the mushrooms, the little birds, and the wedge of Parmigiano Reggiano brought out at the end of the meal for us to eat with fruit.  I know there was a pasta but I can’t remember what it was.  The same is true for the side dishes (contorni, in Italian).

My mother-in-law was in heaven with the little birds.  She was sitting across the table from me. The meal had become languorous by then and it wasn’t, somehow, inappropriate for me to pull out my video camera.  Remember those?  I’m talking about dedicated video cameras with cassettes for recording, not phones or cameras with video capability.

As she was reveling in her little birds (uccelleti, in Italian) I used my video camera to focus in on her.  First on her face, but then ultimately on just her lips.  Her lips filled the screen like the lips in the opening moments of the Rocky Horror Picture Show.  There were those lips, sucking in little bird parts then extruding cleaned bones.  Every now and then there was the occasional bit of bird shot that needed to be eliminated.

To this day, that video footage is a kind of kompromat in our family.  Thanks to President Trump for making that term common knowledge.  My mother-in-law hates that video footage.  I occasionally mention its existence and (vaguely) threaten to allow it to surface…as I did for this post but, in the end, in the interest of domestic harmony, did not.

Print Recipe
Pollo all'Uccelleto (Chicken Little Bird Style)
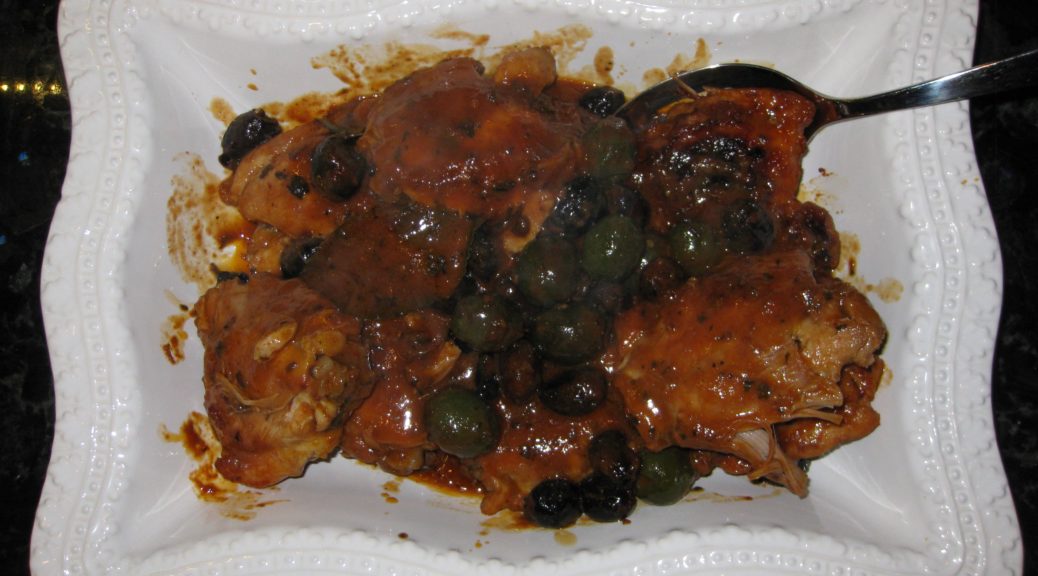
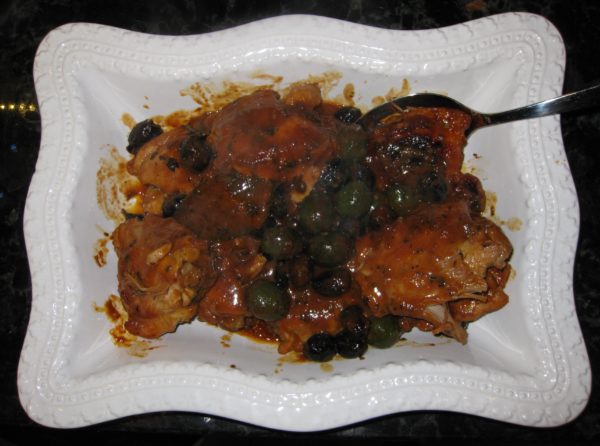
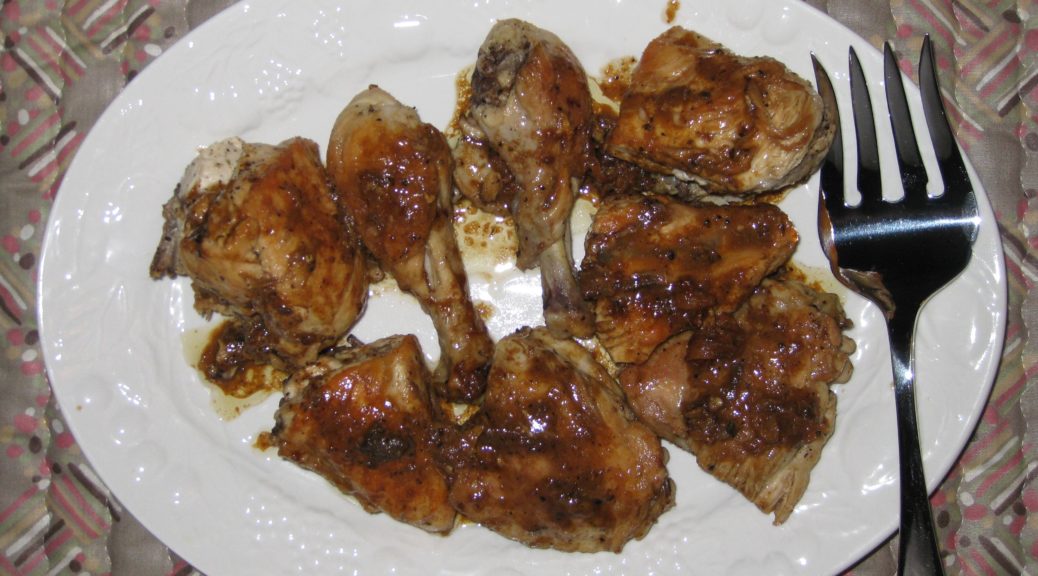
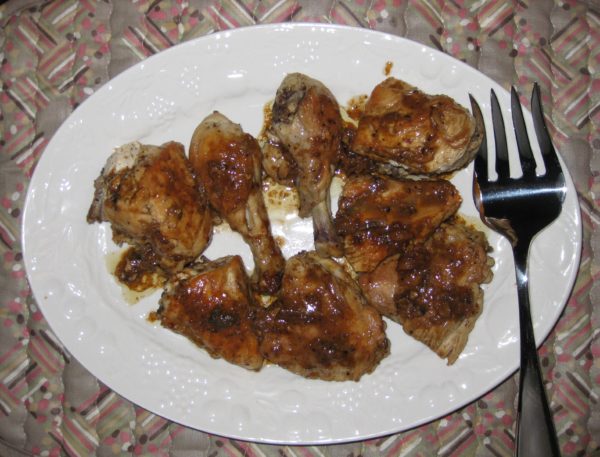
I first had this dish in Tuscany. It was made, literally, with little birds (blackbirds) bagged by my husband’s Great Uncle Faliero. Since little birds are not easily available in the US, I rendered the dish using chicken after returning from the 1996 trip to Italy. I called it “Chicken Little Bird Style” or “Pollo all’Uccelleto.” Much to my surprise, years later, I discovered that Italians do, in fact, refer to this preparation as “all’Uccelleto,” and use it on things other than little birds (chicken, for example). What simply started out as Uccelleti, “Little Birds,” became for me "Pollo all’Uccelleto," or “Chicken Little Bird Style.” From Great Aunt Fidalma’s kitchen to you is Chicken Little Bird Style. If you actually have little birds, by all means, give them a try. If not, chicken thighs are a great, if less gamey, substitute. Use good quality olives for this dish. If you don’t have access to an Italian market, I suggest using olives from the olive and antipasto bar that is common in many supermarkets these days. I usually use half oil-cured black olives and half green olives, such as castelvetrano. I prefer using olives with pits.
Votes: 0
Rating: 0
You:
Rate this recipe!
Course Poultry
Cuisine Italian
Prep Time 20 minutes
Cook Time 2 1/2 hours
Servings
people
Ingredients
Course Poultry
Cuisine Italian
Prep Time 20 minutes
Cook Time 2 1/2 hours
Servings
people
Ingredients
Votes: 0
Rating: 0
You:
Rate this recipe!
Instructions
  1. Remove the leaves from the rosemary and oregano.
  2. Mince the sage, rosemary, and oregano leaves. Reserve.
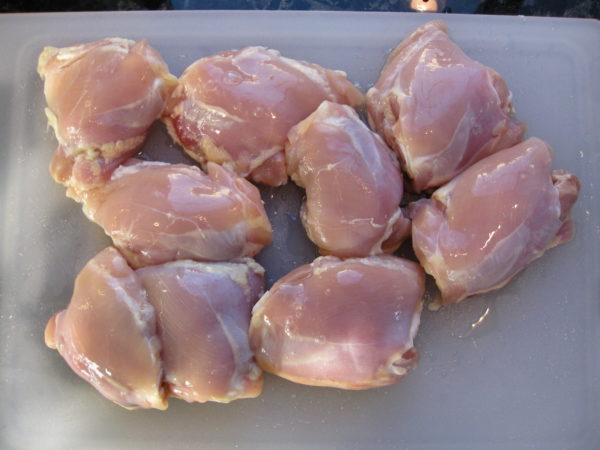
  3. Remove the skin from the chicken thighs and any large pieces of fat.
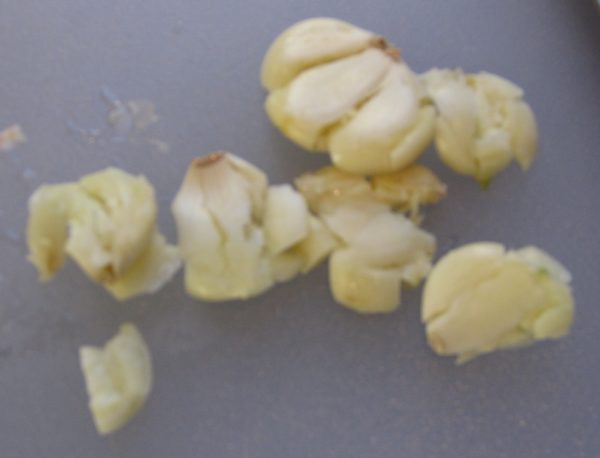
  4. Using the broad side of a chef’s knife, bruise (smash, really) the garlic cloves.
  5. In a heavy skillet large enough to hold the chicken thighs in a single layer, heat the olive oil.
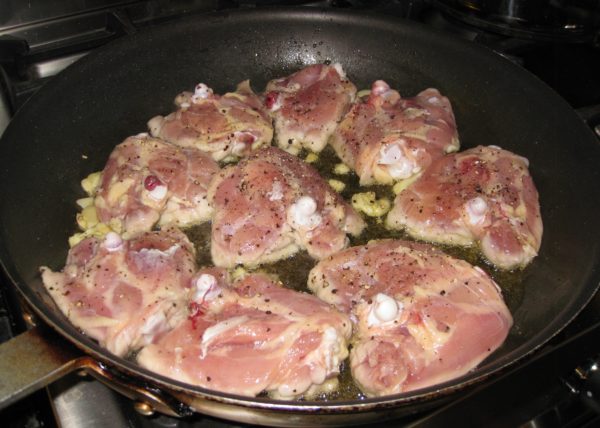
  6. When the oil is hot, add the chicken thighs and garlic. Season the chicken with salt and freshly ground black pepper to taste.
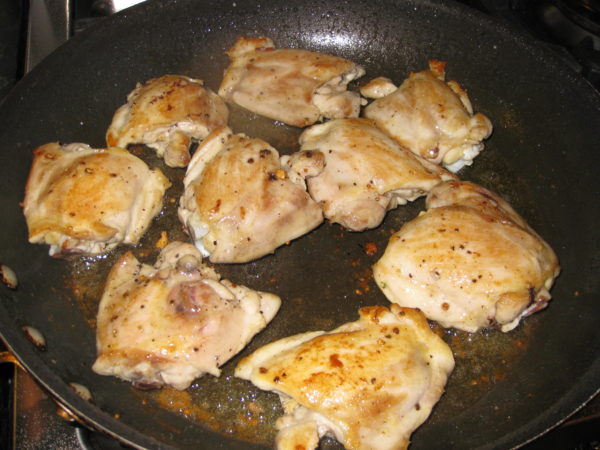
  7. Brown the chicken, turning several times. As the garlic cloves get dark brown, remove and discard them before they burn.
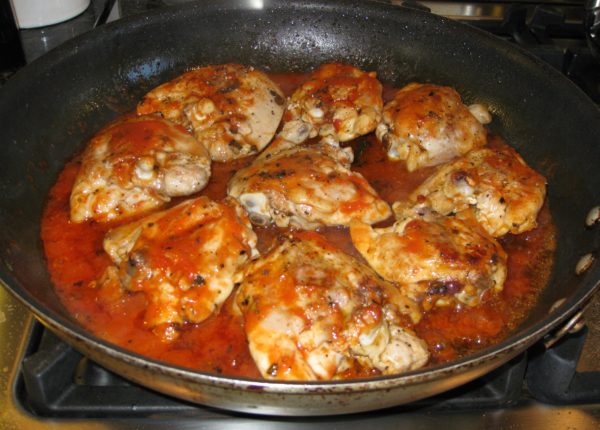
  8. When the chicken is brown, and all garlic has been removed, add the tomato sauce, bay leaves, minced herbs (rosemary, sage, and oregano) and crushed red pepper.
  9. Cover and cook over low heat, stirring occasionally and turning chicken over every 30 minutes or so, for approximately 1 hour.
  10. If the sauce gets too dry add a little white wine (or water) from time to time.
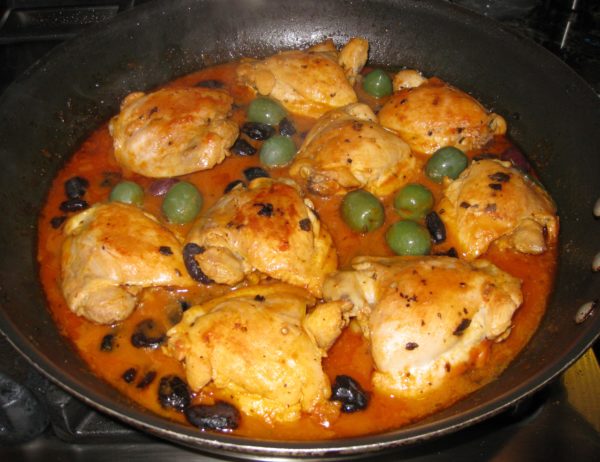
  11. After an hour, add the olives, cover, and continue cooking over low heat, stirring occasionally and turning chicken over every 30 minutes or so, for approximately 1 more hour.
  12. Taste and adjust salt and black pepper during the last half hour of cooking. The olives will be salty, so it's best to wait till they've cooked a while before adding more salt.
  13. When finished, the chicken should truly be “fall-apart” tender and the sauce should be mostly a red colored olive oil with just a tiny bit of tomato sauce.
Recipe Notes

I don’t usually use canned tomato sauce. I prefer to use tomato paste and water. For this dish I use tomato sauce because so little is needed and it’s consistent with what Great Aunt Fidalma did. If you want to use tomato paste, mix 1½ tablespoons of tomato paste with 6 tablespoons of water and use in place of the tomato sauce.

Copyright © 2017 by VillaSentieri.com. All rights reserved.
Share this Recipe

Merluzzo in Umido (Cod in Light Tomato Sauce)

January 4, 2017

The first time I had Merluzzo in Umido was November 1992.  My husband and I took my mother, his mother, and his fraternal grandmother to Santa Fe for a week over Thanksgiving.  At the time, we were living in Chicago.  We rented an ancient adobe house off Garcia Street.  The house didn’t have any central heat though it did have a frightening array of heating devices that included a kiva fireplace, a direct-vent gas heater in the living room, a portable electric heater in one of the bedrooms, wall-mounted electric radiant heaters in the bathrooms, and nothing in the kitchen.  If the oven wasn’t on, the kitchen was the coldest room in the house as it had three outside walls and a door that didn’t seal very well.

Of course, it was reported to be the coldest winter that Santa Fe had experienced in 100 years! In addition to cold, there was lots of snow. And there we were, in a drafty old adobe house with no central heat enjoying a week with the likes of The Golden Girls!

We had a blast.

We had been house hunting in Santa Fe since April of that year.  On that November trip we saw several houses we liked.  We spent a few evenings rating each of the houses on an array of factors using a spreadsheet.  (In my professional life, we would have called this a prioritization matrix or selection grid. It’s a technique I’ve taught to hundreds of health care professionals over several decades.)  One afternoon we all piled into the car to look at the two finalists in the property hunt.  We were uncertain which one to buy.  Not so the women.  A little house on Griffin Street was the undisputed, hands-down favorite.  Deal done!

We put in an offer and closed in January.  For most of December my mother kept saying that she wanted to go back to Santa Fe and stay in the house in the spring.  We did a bit of remodeling and moved into the house in March.  Unfortunately, my mother died in January, shortly before we closed on the house.  She never got to experience her dream of returning to Santa Fe.  We had that house for more than nine years before we moved into a much larger Santa Fe property in Ricardo-Legorreta-designed Zocalo.  After Zocalo, we built and moved into Villa Sentieri overlooking the city.

I frequently think of that trip.  It was memorable in so many ways.  We found our first house in Santa Fe.  I got to spend quality time with my mother in the last weeks of her life.  My husband and I had interviews to get our medical licenses in New Mexico.  (It’s the only time either of us has been personally interviewed for a medical license!).   And, I learned how to make Merluzzo in Umido, one of many recipes that my husband’s grandmother brought with her from Italy.

Print Recipe
Merluzzo in Umido (Cod in Light Tomato Sauce)
If possible, by large filets of cod and portion them at home. Three pounds is enough for eight people. The advantage of portioning the fish at home is that you can make some smaller pieces for individuals with smaller appetites. Cod is a perfect fish for this dish because it is forgiving in terms of being overcooked. However, any firm, white, non-oily fish will taste great. I used a 15-inch rondeau to cook the cod. It held the fish in a single layer. If you don’t have a pan large enough to hold the fish in one layer, make the sauce in a single sauté pan then divide it among two different pans to cook the fish.
Votes: 0
Rating: 0
You:
Rate this recipe!
Cuisine Italian
Prep Time 20 minutes
Cook Time 1 hour
Servings
people
Ingredients
Cuisine Italian
Prep Time 20 minutes
Cook Time 1 hour
Servings
people
Ingredients
Votes: 0
Rating: 0
You:
Rate this recipe!
Instructions
  1. Cut the cod into 8 to 10 serving pieces. Though you can cook whole filets, it will be easier to get the fish out of the pan if cut into portions.
  2. In rondeau large enough to hold the fish in one layer, sauté the onion and a sprinkling of salt in the olive oil until transparent and slightly golden but not brown.
  3. Add the garlic and sauté until fragrant, about 1 minute.
  4. Add parsley and some freshly ground black pepper. Sauté for a minute or two. The smell of parsley should become noticeably more potent. Do not brown the ingredients of the pan.
  5. Add the wine and cook briskly until the wine evaporates.
  6. Add the tomato paste. Sauté, stirring frequently, until it gets ever so slightly darker and begins to smell sweet. This will take 2-3 minutes.
  7. Add the water, oregano, basil and additional salt and pepper to taste. Boil gently, with the cover slightly askew for 20-30 minutes. The sauce will thicken. If it becomes too thick, add a little additional water. However, the juices from the fish will thin the sauce so it is better for the sauce to start out too thick rather than two thin. The sauce can be made ahead to this point.
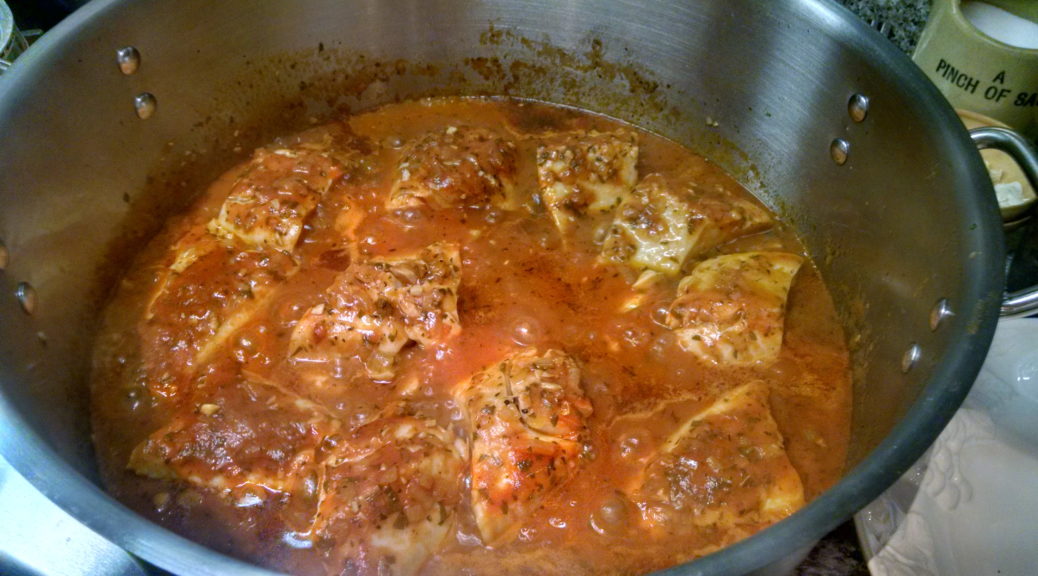
  8. With the sauce at a medium boil, add the fish, skin side down. Season with salt and pepper. Cover the pot tightly and cook for approximately 20 minutes until the fish cooks through an flakes easily. The length of time will depend on the type of fish, thickness of the portions, and elevation. Do not turn the fish but occasionally spoon some of the sauce over the top of the cooking fish.
  9. Taste the sauce and adjust seasoning. If the sauce it too thick thin with a little water. If it is too thin, boil it briskly after removing the fish.
  10. Put the fish on a deep serving platter. Pour the sauce over the fish and serve.
Recipe Notes

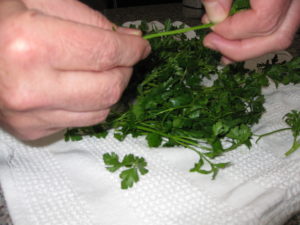
Parsley stems can be bitter.  When adding parsley to a recipe, I only use the leaves and very tender stems.  To do this, I hold the end of the parsley stem in one hand and slide the stem between the thumb and finger of the other hand.  When my fingers reach the leaves, I pinch off the stem and discard it.  This makes quick work of the parsley and removes any chance of bitterness from the stems.

Copyright © 2017 by VillaSentieri.com.  All rights reserved.

Share this Recipe