Category Archives: Recipes

Traditional recipes for foods and beverages from around the world.

Pollo alla Romana (Chicken with Sweet Peppers)

January 15, 2020

I will forever remember Ferragosto as the day the music died.

Ferragosto is celebrated on the fifteenth of August throughout Italy.  Originating during the Roman Empire, apparently in 18 BCE by Emperor Augustus, Ferragosto was originally held on August 1st.  Ultimately, the Catholic Church moved the date to August 15th to coincide with the Assumption, a “holy day of obligation,” thus imposing a secular holiday on a religious holy day.

Ferragosto is a day to feast.  It is also the day that the late-night revelry in the piazza of Bagni di Lucca comes to an end.


Join our mailing list and you’ll never miss a recipe again!


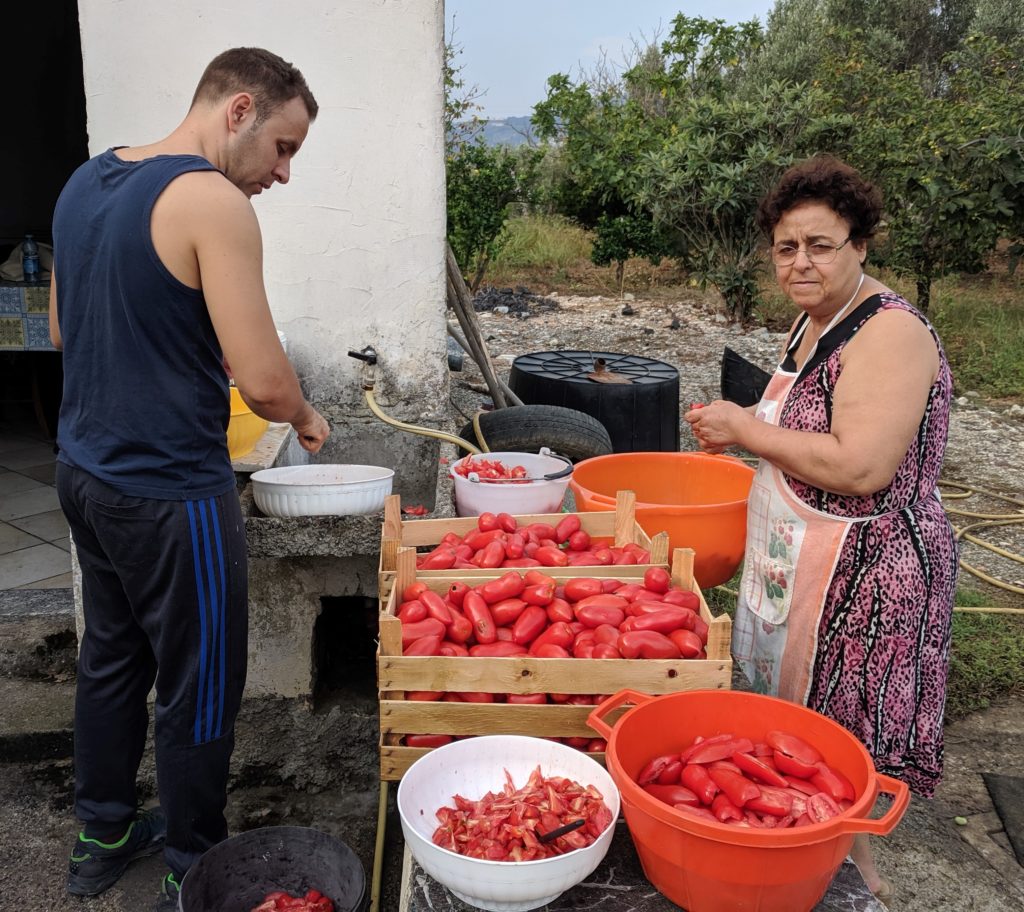
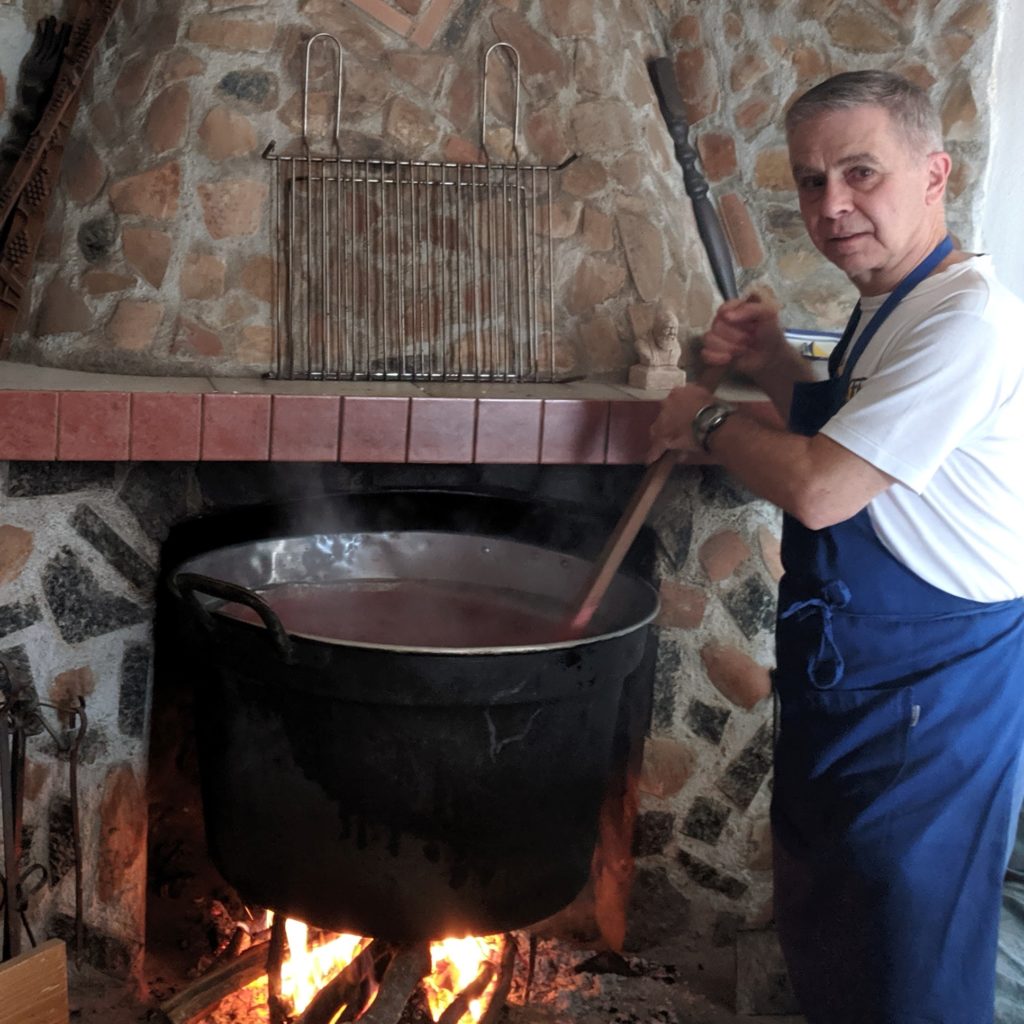
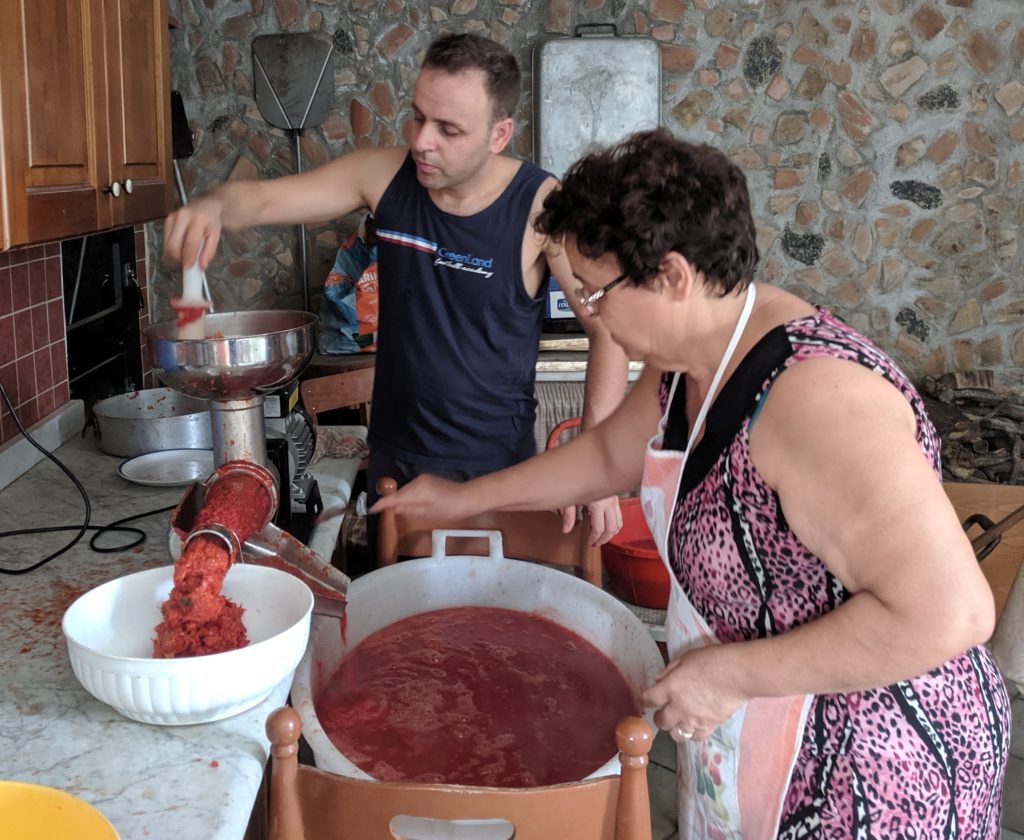
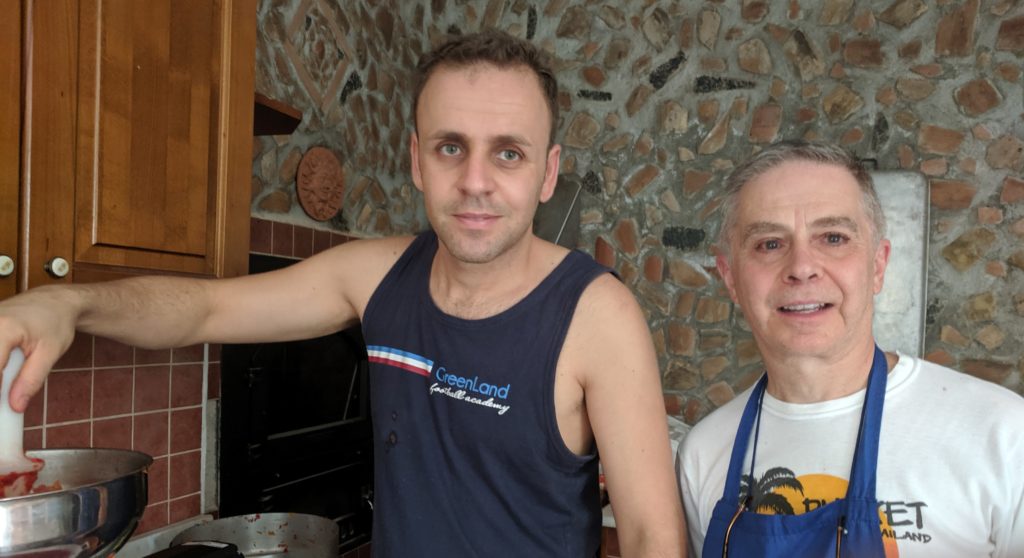
Those of you who have been following my blog for a while know that I spent the month of August 2019 in Tuscany cooking with Great Aunt Fidalma.

Cutting zucchini with Great Aunt Fidalma in her kitchen in Benabbio.

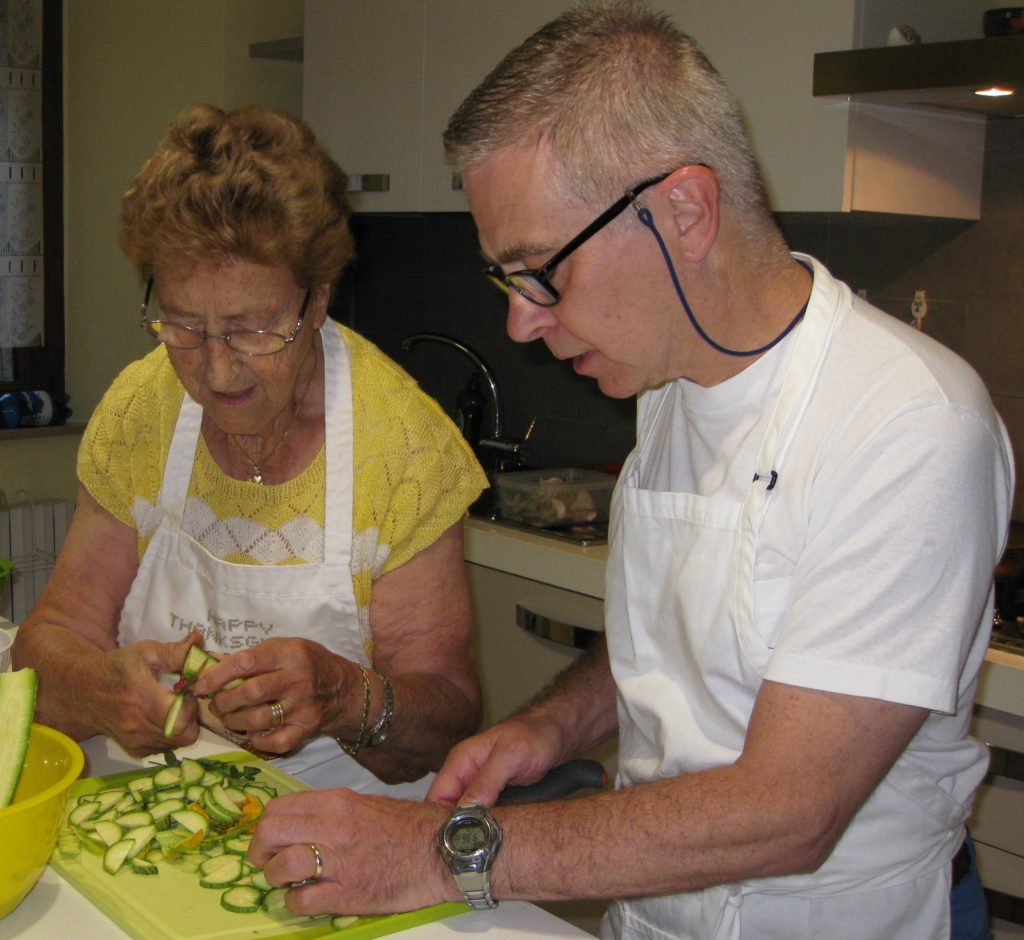
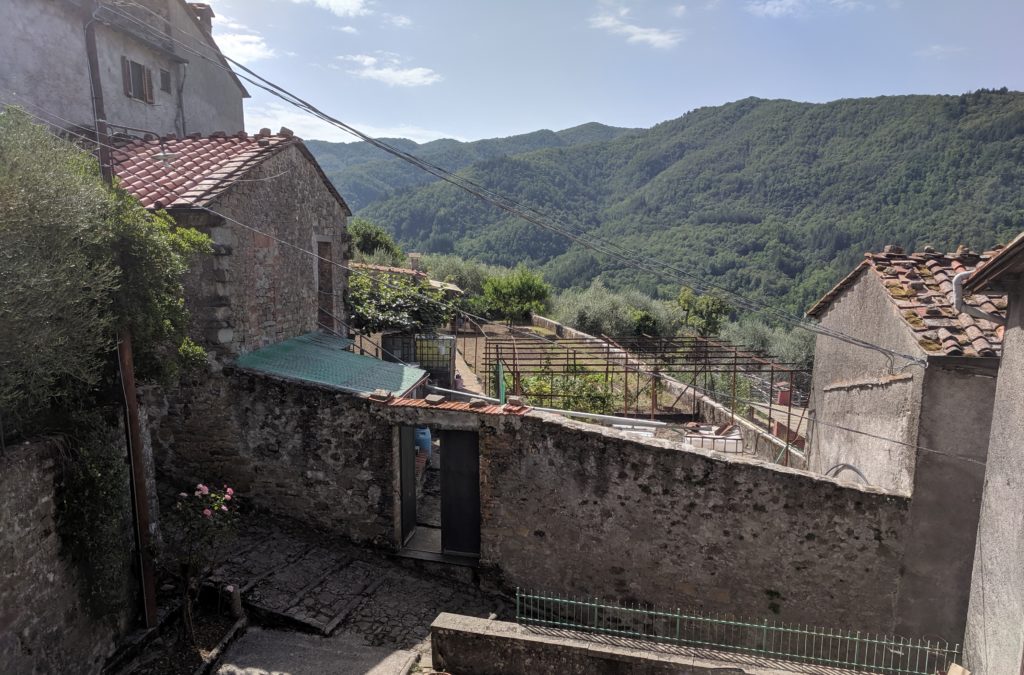
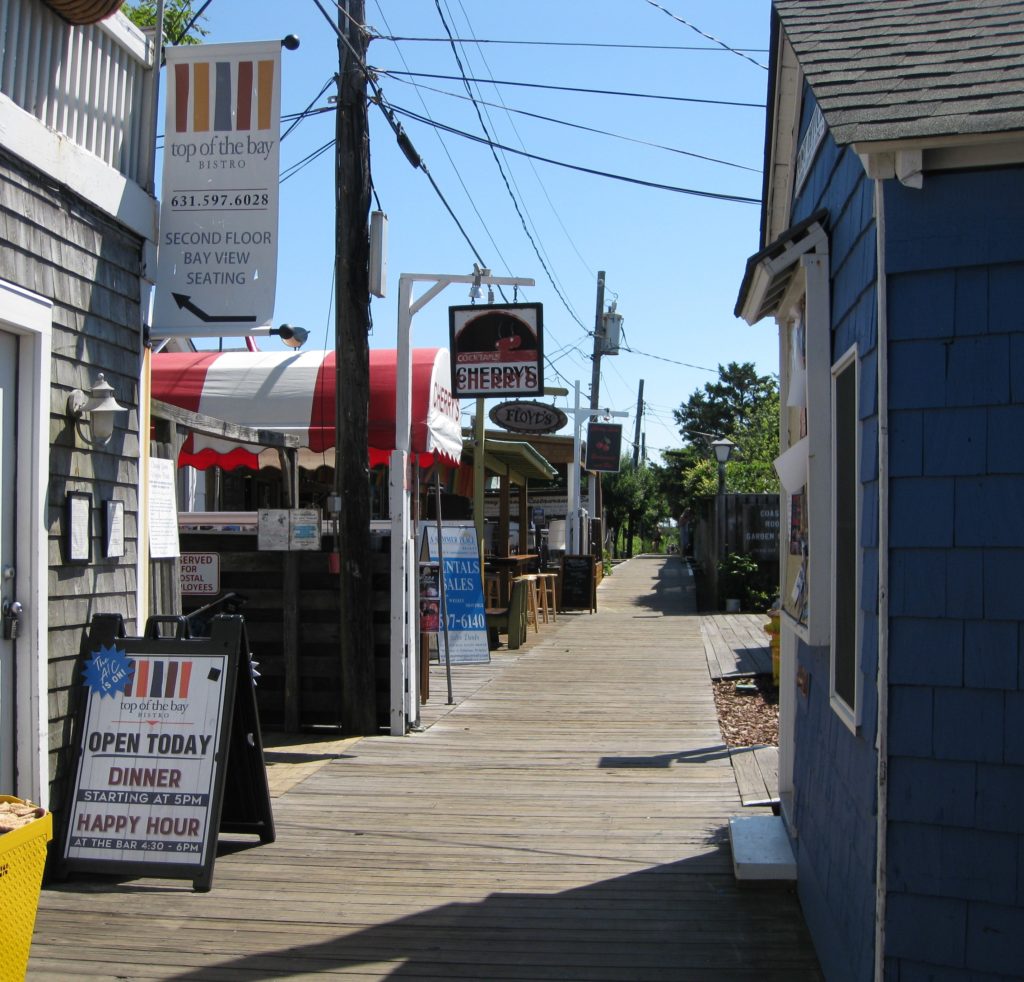
I rented a charming little apartment overlooking the piazza in Bagni di Lucca, a town near the village of Benabbio where Aunt Fidalma lives.

The piazza becomes the locus of loud music (70’s disco, karaoke, Italian pop) late into the night (or early into the morning depending on your perspective) on the weekends in August as well as during several August festival days.

A view from my terrace of the late-night revelry in the piazza of Bagni di Lucca.

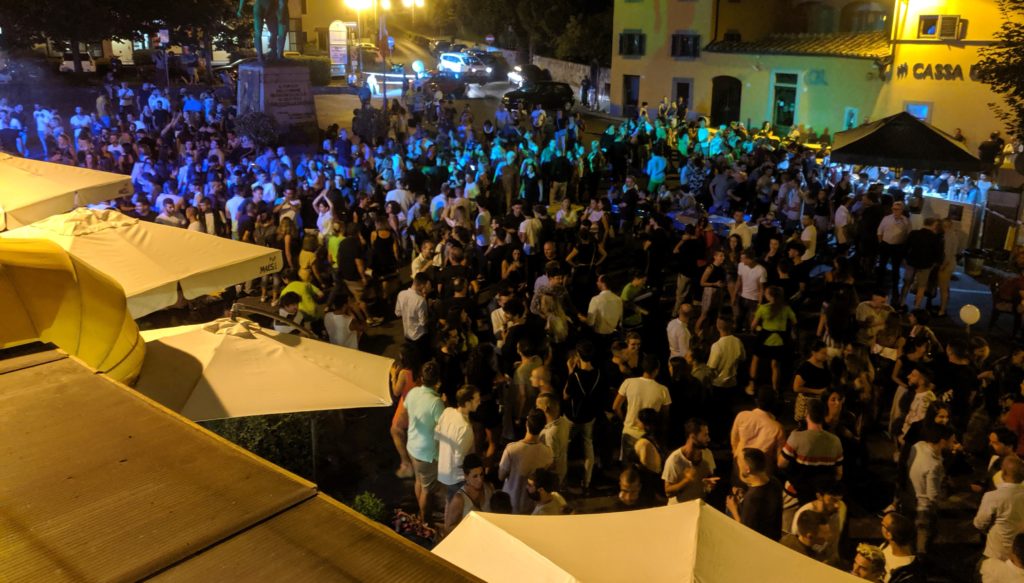
The music precludes sleep.  Even if one could find ear plugs sufficient to drown out the sound, the building, and thus the bed, vibrate to the bass.

Ferragosto, August 15th, is the end of the late-night music.


Follow us on your social media platform of choice


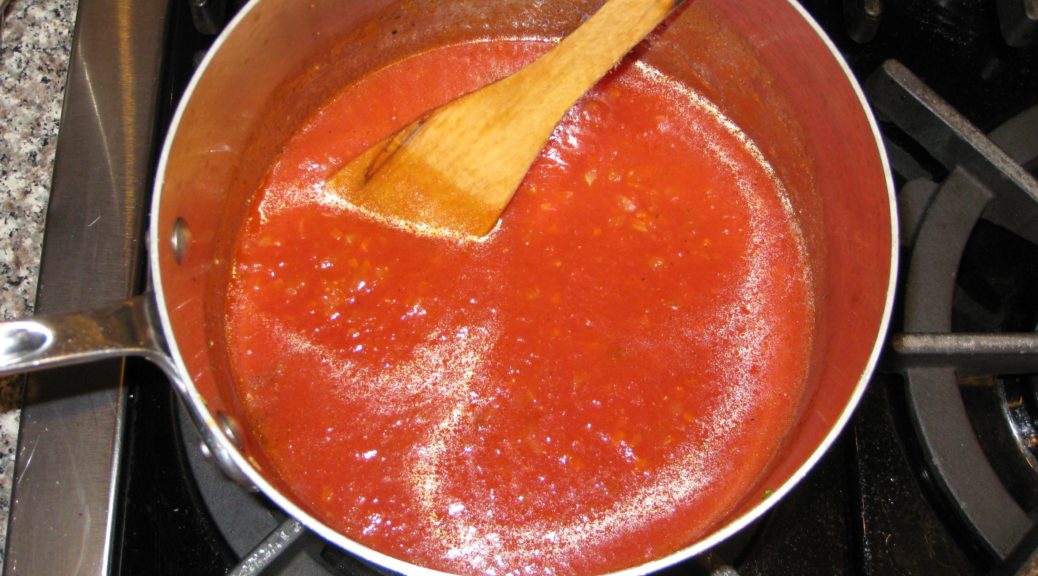
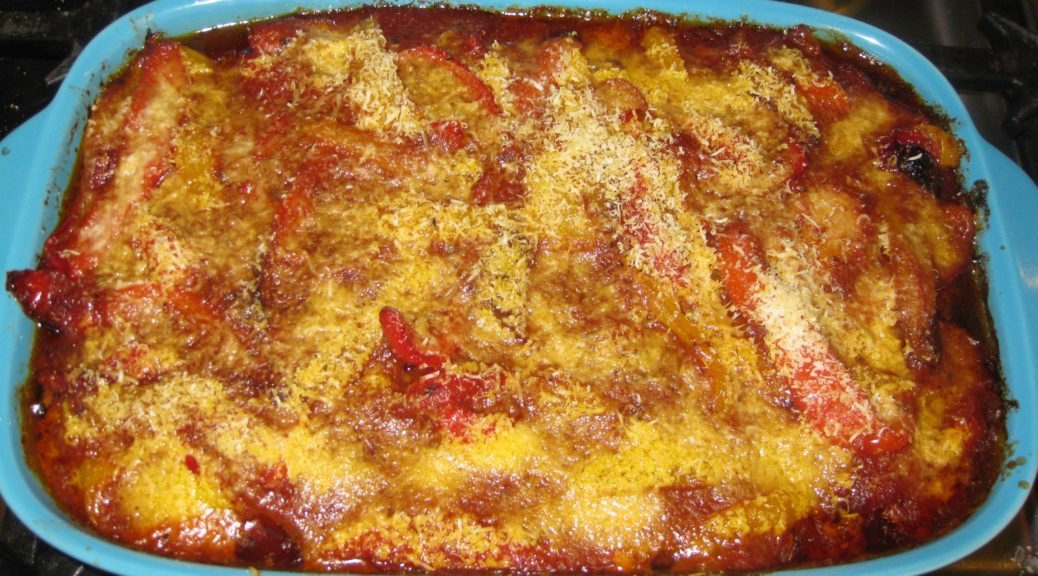
Today, January 15th, marks five months since Ferragosto.  Pollo alla Romana (also known as pollo con i peperoni [chicken with sweet peppers]) is traditionally served on Ferragosto.  Given the five-month anniversary, today seems like an appropriate day to post the recipe.

As you might guess from the name, Pollo alla Romana is from the area around Rome.  It is a simple dish made with chicken, sweet peppers (traditionally red and yellow ones) and tomatoes.  It can be cooked in the morning and served at room temperature later in the day making it a perfect summer dish.

It has become one of my go-to dishes for entertaining when I don’t want a lot of last-minute fuss to distract from enjoying cocktails with my guests.  Made earlier in the day, the dish reheats beautifully in the time it takes to drink a bourbon.

Print Recipe
Pollo alla Romana (Chicken with Sweet Peppers)
Traditionally this dish would be made with a cut-up chicken. I prefer to use just thighs as I think they take well to braising, which breasts don’t. You can use cut-up chicken parts if you prefer. When a dish says something should be fall-apart tender, I take that literally. It’s the way I grew up eating chicken cooked by my Italian-American mother. That means, for me, the chicken should braise in the liquid for at least 90 minutes if you’re close to sea level and longer if you're at a higher elevation. You can short-circuit that if you want but I think the texture of the dish will suffer.
Votes: 0
Rating: 0
You:
Rate this recipe!
Course Mains, Poultry
Cuisine Italian
Prep Time 30 minutes
Cook Time 2 1/2 hours
Servings
people
Ingredients
Course Mains, Poultry
Cuisine Italian
Prep Time 30 minutes
Cook Time 2 1/2 hours
Servings
people
Ingredients
Votes: 0
Rating: 0
You:
Rate this recipe!
Instructions
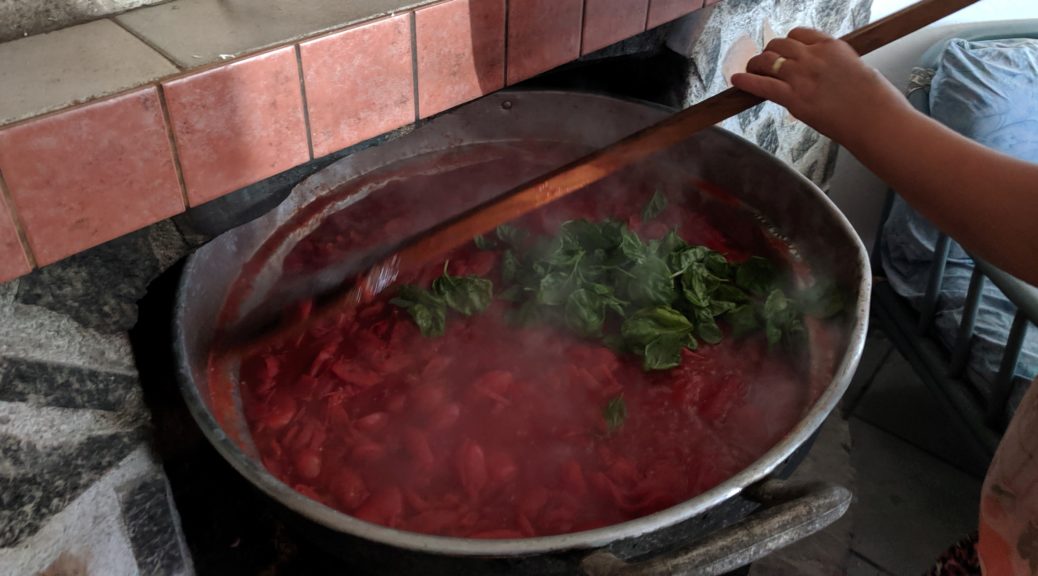
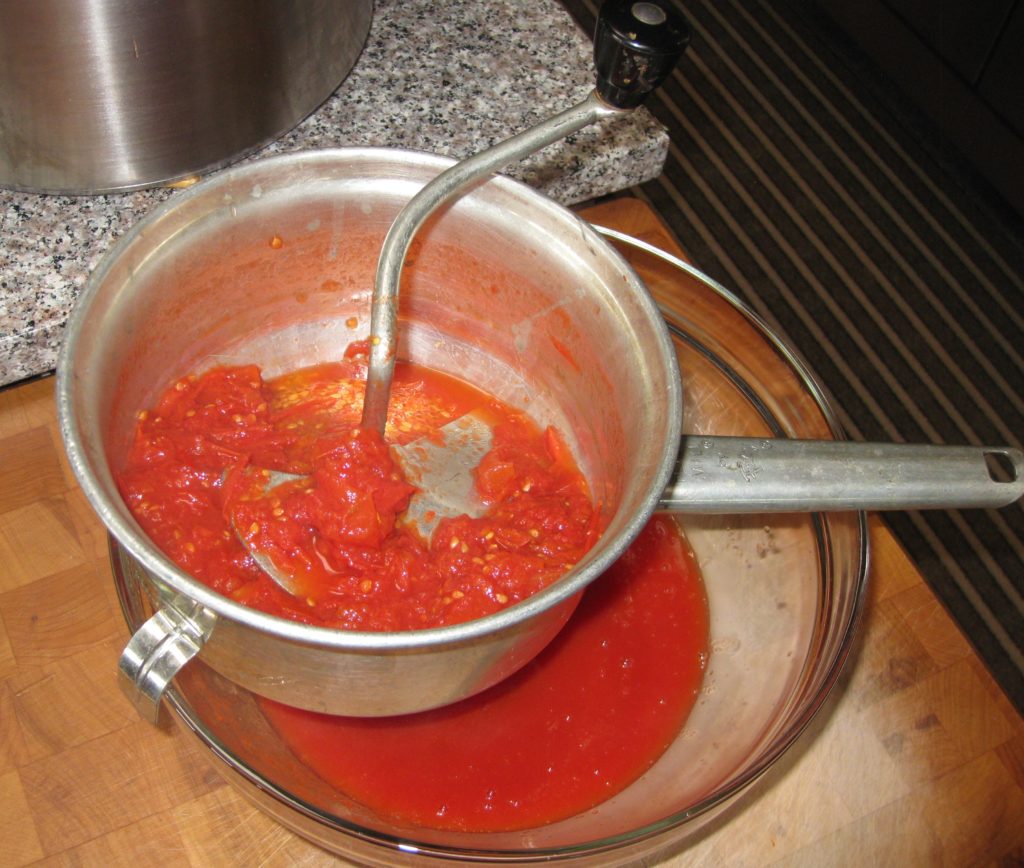
  1. Pass the can of tomatoes through a food mill to remove seeds and hard bits of tomato. Reserve the tomato puree.
  2. Slice the peppers into triangular pieces or thick strips.
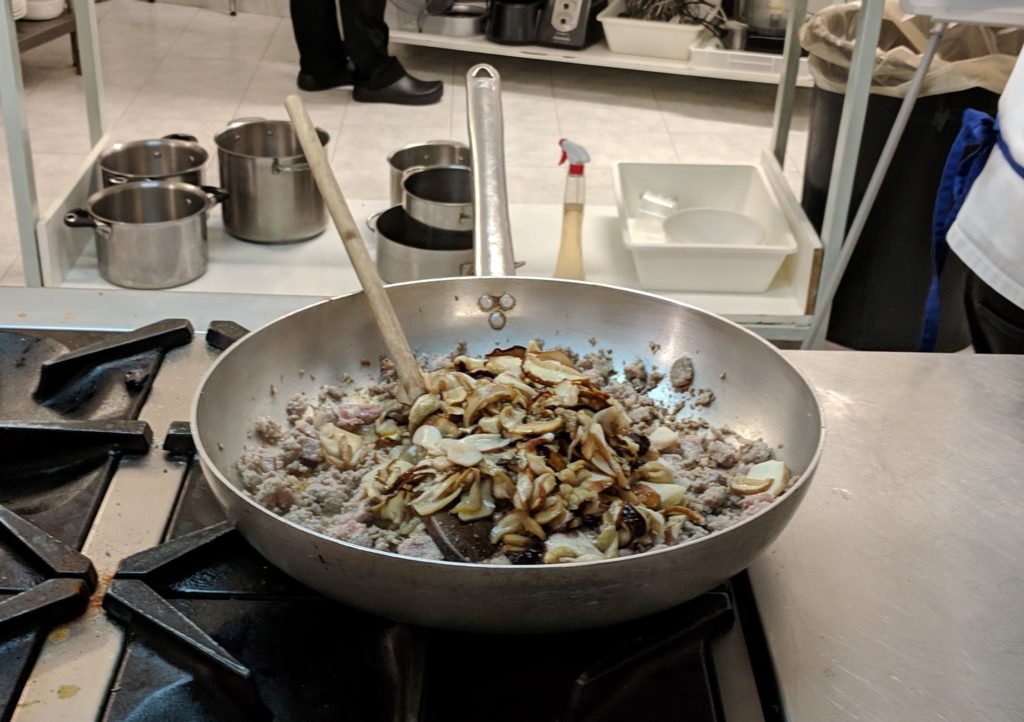
  3. Using a large heavy-bottomed sauté pan, sauté the garlic in the olive oil over medium heat until medium brown. Discard the garlic.
  4. Sauté the chicken in the garlic-flavored oil over high heat, starting skin side down to render additional fat from the skin, flipping twice, until well browned. Remove and reserve chicken.
  5. Add the peppers to the oil and sauté briefly over high heat to put a light char on some of them. Remove and reserve peppers.
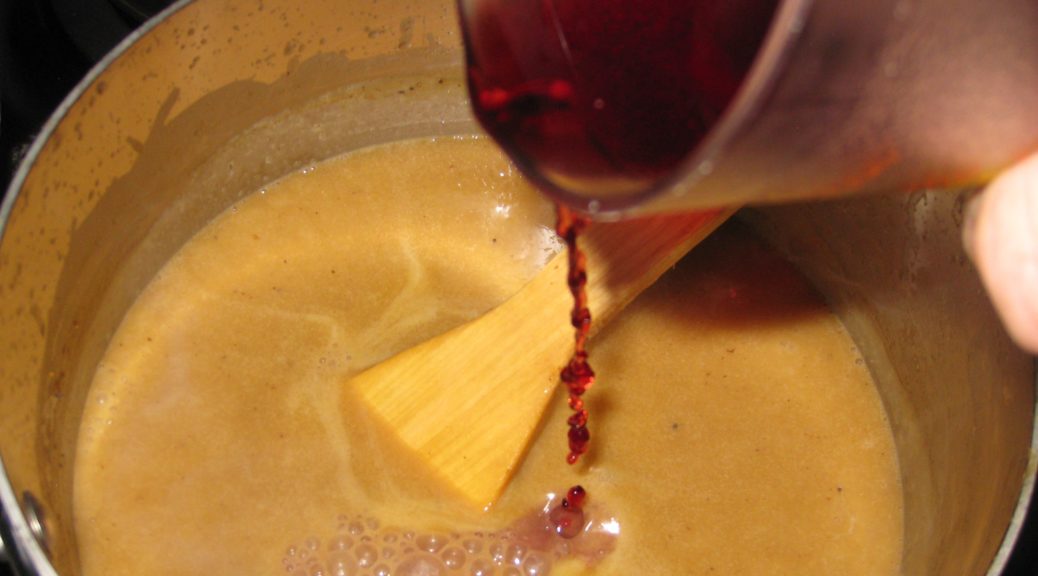
  6. Add the wine to the sauté pan, bring to a boil, and scrape up all the brown bits.
  7. After the wine evaporates, add the broth, tomato puree and oregano. Mix well.
  8. Add the chicken, skin side down, along with any accumulated juices. Season with salt and pepper.
  9. Simmer, partially covered, approximately 30 minutes (or, if you live at high altitude as I do, 60 minutes). Turn the chicken over. Remove and discard the skin (the skin adds lots of flavor as well as collagen to the sauce for a great mouth-feel so please use bone-in and skin-on thighs).
  10. Add the peppers and continue to braise, partially covered, for approximately another hour until the chicken is literally fall-apart tender. During cooking, taste and adjust salt, pepper, and oregano.
  11. Transfer the chicken and peppers to an oven-proof casserole.
  12. If the sauce is not thick, boil quickly to reduce it. Pour the sauce over the chicken.
  13. Sprinkle the top with Pecorino Romano cheese.
  14. Bake at 350°F to brown the top, approximately 15-20 minutes.
Recipe Notes

Copyright © 2020 by Villa Sentieri, LLC. All rights reserved.

Share this Recipe

Melanzane al Forno (Eggplant Baked with Parmesan Cheese)

January 4, 2020

Growing up I didn’t like eggplant.  I didn’t much care for zucchini, either.  Or kale.

Things are a whole lot different now.

As an adult, I basically haven’t met a vegetable I don’t like, though, naturally, I like some more than others.

As with zucchini, eggplants seem to defy the season.  They’re available year-round and the quality is consistent.  Just look for firm, shiny ones with no soft spots or wrinkled skin and you’re basically guaranteed of getting a good eggplant.

Eggplants on the vine (Photo: Joydeep / Wikimedia Commons / CC BY-SA 3.0).

Eggplant is a versatile vegetable.  It can be braised, baked, sautéed, fried and steamed … and probably cooked by any other method you can think of.


Join our mailing list and you’ll never miss a recipe again!


Eggplant will sop up any flavor that you pair with it.  It will also sop up large amounts of oil so one needs to be cautious about frying large pieces of eggplant in abundant oil.  Thin slices of eggplant can be floured and fried to great advantage, however.

Years ago, eggplant could be bitter but that trait has basically been bred out of the modern varieties one commonly encounters.  The bitterness led cooks to salt and drain the eggplant to remove bitter juices.  While this is no longer strictly necessary for control of bitterness it is still a great technique to reduce moisture content which is useful for some preparations.

Eggplants at the market in Italy.

America’s Test Kitchen (the organization behind Cook’s Illustrated and Cook’s Country) has developed a method for removing water from eggplant using the microwave.  I have lots of cooking equipment and have no qualms about using newer technology in place of older technology to simplify food prep.  However, I want the newer technology be a natural evolution from the older technology as a way to preserve (but improve) traditional food preparation.  For example, before food processors, one would “mush up” food as much as possible then put it through a sieve.  Food processors do a much better (and faster) job of “mushing,” sometimes to the point that the sieving step isn’t necessary.


Follow us on your social media platform of choice


To me, that’s evolutionary.  It’s a more efficient way of getting to the same outcome but staying true to the traditional method.  Blasting eggplant in the microwave in place of salting it is not.

Beautiful eggplants ready to be made into something yummy.

While I have great respect for the rigor of America’s Test Kitchen, some of their hacks and shortcuts really trouble me from the standpoint of maintaining and transmitting traditional foodways.  Using V-8 juice in minestrone in place of tomato is an example.

With salting, rather than microwaving, we’ll proceed to today’s recipe,  It’s a very straightforward baked eggplant with Parmigiano Reggiano cheese.  Somehow it manages to be WAY more than the sum of its parts.  I urge you to try it, even if you think you don’t like eggplant.

Print Recipe
Melanzane al Forno (Eggplant Baked with Parmesan Cheese)
Eggplant can absorb huge quantities of oil. This method of cooking limits the amount of oil the eggplant absorbs, making it lighter. The eggplant finishes its cooking in the oven, which eliminates last minute frying just before serving dinner. Individual portions can be made by cutting the eggplant into rounds that fit inside of small ramekins.
Votes: 0
Rating: 0
You:
Rate this recipe!
Course Sides, Vegetables
Cuisine Italian
Prep Time 30 minutes
Cook Time 1 hour
Passive Time 1 hour
Servings
people
Ingredients
Course Sides, Vegetables
Cuisine Italian
Prep Time 30 minutes
Cook Time 1 hour
Passive Time 1 hour
Servings
people
Ingredients
Votes: 0
Rating: 0
You:
Rate this recipe!
Instructions
  1. Peel the eggplant and cut crosswise into rounds ½ inch thick.
  2. Liberally salt the eggplant slices on both slides and put them in a colander.
  3. Set a weight on top of the egglant (such as a plate with a heavy can on top) and allow to drain for one hour.
  4. Meanwhile, gently sauté the garlic in the olive oil on low heat until the garlic is golden brown.
  5. Remove the oil from the heat. Discard the garlic and reserve the oil.
  6. Rinse the eggplant. Blot dry.
  7. Butter an ovenproof serving dish (or individual ramekins if making individual portions).
  8. Coat the bottom of a large sauté pan with 1-2 tablespoons of the garlic-flavored oil. A non-stick pan works best but a well-seasoned ordinary sauté pan will work fine. When the oil is very hot add one layer of eggplant slices. Cook until nicely browned being careful not to burn the eggplant which will make it bitter.
  9. When browned on one side turn the eggplant slices over. You may need to drizzle a little oil into the pan to keep the eggplant from sticking. The eggplant should still be firm in the center. It will complete its cooking in the oven.
  10. When the second side is brown put the eggplant in a buttered ovenproof serving dish, preferably one with a cover.
  11. Lightly salt the eggplant. Sprinkle with freshly ground black pepper to taste and some of the grated Parmigiano. Repeat layering eggplant, pepper and cheese until all the eggplant is used up.
  12. Finish with grated Parmigiano. Drizzle with the melted butter.
  13. Cover and bake at 350°F for approximately 30 minutes. Uncover and continue baking for 10-15 minutes to brown the top.
Recipe Notes

Copyright © 2020 by Villa Sentieri, LLC. All rights reserved.

Share this Recipe

Zucchini in Umido

December 19, 2019

I try to cook seasonally.

That means no stone fruit or corn on the cob in the winter.  For the most part that means no tomatoes either, though I do make an exception for cherry and grape tomatoes which seem to taste about the same year-round and provide a burst of color and sweetness—if not a robust tomato taste—in the dead of winter.

Certain things defy the season.  Take zucchini.  Yes, they’re the quintessential summer crop (sometimes growing to the size of baseball bats in the hands of inattentive growers) but they show up all year-round, much like bananas do.

Zucchini in Umido bubbling away on Zia Fidalma’s stove in Tuscany.

I know that means they get shipped from “somewhere else” when they’re not in season locally but, for the most part, they taste good all year (unlike, say, peaches which don’t usually taste good if not grown locally and in season).

There’s also a limit to the number of cold-season vegetables that one can eat through the winter.


Join our mailing list and you’ll never miss a recipe again!


Part of the problem is solved by canning, preserving, and freezing and, if not your own or a friend’s, commercially available canned, preserved, and frozen produce.  Let’s face it, eating seasonally traditionally included consuming all those products that were “put up” when they were at the height of season.

Maria making a large batch of tomato puree (passata) at her home in Calabria.

Though some of us conserve produce, few of us do enough to meet our needs throughout the lean winter months.  I have no objection to using good quality commercially “conserved” foods.  What I don’t use are convenience or premade foods.

Though I enjoy and prefer to make my own tomato puree (passata), we don’t produce enough of our own tomatoes to make a year’s supply (and I haven’t been overly impressed with what’s available in the market in sufficient and affordable quantity to make up the difference).

I do what I can, however, for example making passata when our tomatoes are at their best; candying citrus peels from the trees in our neighborhood in Palm Springs in the winter; making cherry leaf aperitif in the fall; and, in those rare years when Santa Fe has an abundance of peaches and apricots, making jam.

The early stages of making cherry leaf aperitif.

I “conserve” other produce as well like making hot chile oil (“olio santo”) when we have enough peperoncini, making limoncello and arancello from oranges and lemons in Palm Springs, and putting fresh (like cherries) and dried (like prunes) fruits in various types of spirits.


Follow us on your social media platform of choice


My prohibition on using “prepared foods,” though is pretty definite.  I’ll use good quality canned, peeled tomatoes from Italy but (unless my back is up against the wall as sometimes happens when I have limited shopping venues like when we’re on Fire Island) I don’t use canned commercial diced or crushed tomatoes or tomato puree.  My view, and, granted, it might be wrong, is that the best quality tomatoes go into the cans of “whole, peeled” tomatoes, not into the ones that are ground, diced, or pureed.

Making limoncello.

In a matter of minutes, a can of whole peeled tomatoes can be turned into any of the other products.  It also means that, other than tomato paste, I only need to stock up on one tomato product.  OK, OK, so I have two types of peeled, whole tomatoes.  Both are from Italy but one is San Marzano and the other is a plum tomato that’s not San Marzano.  I use the less expensive non-San-Marzano-but-still-Italian tomatoes when the dish I am making would be indistinguishable with either type.

In December, zucchini are a welcome addition to mealtime, a situation that is difficult to imagine during the fall harvest season when zucchini seem to be coming from all directions.

Print Recipe
Zucchini in Umido
Pommarola, a simple tomato sauce made with tomatoes, basil and garlic is ideal in this dish. See the notes section for a link to my Basic Tomato Sauce. If pommarola, or a similar simple tomato sauce is not available, substitute good-quality tomato puree. If using puree, I suggest adding a few basil leaves, finely chopped. Niepita is difficult to obtain outside of Italy but if you want to try to find seeds, look for it using the southern Italian name of "Mentuccia Romana" rather than the Tuscan name of niepita. Though the flavor is different, 1 teaspoon of dried oregano is a good alternative.
Votes: 0
Rating: 0
You:
Rate this recipe!
Course Sides, Vegetables
Cuisine Italian
Prep Time 15 minutes
Cook Time 30 minutes
Servings
persons
Ingredients
Course Sides, Vegetables
Cuisine Italian
Prep Time 15 minutes
Cook Time 30 minutes
Servings
persons
Ingredients
Votes: 0
Rating: 0
You:
Rate this recipe!
Instructions
  1. Partially peel the zucchini, leaving alternating stripes of peel and no peel.
  2. Cut the zucchini into largish pieces. You can do this by quartering them lengthwise and then cutting crosswise or by doing a rotating angular cut. You should have approximately 2 pounds of cut-up zucchini.
  3. Sauté the garlic in olive oil until it begins to color.
  4. Add zucchini. Season with salt, and pepper. Increase the heat to high and sauté until the garlic golden brown and the zucchini has turned from white to creamy in color, approximately 5 minutes.
  5. Add the tomato sauce, water, niepita, and salt and pepper to taste.
  6. Cook at a moderate boil, uncovered, until the sauce is thick and the zucchini is tender but not mushy. Adjust salt and pepper while cooking.
Recipe Notes

You can find my recipe for Basic Tomato Sauce here.

Copyright © 2019 by Villa Sentieri, LLC. All rights reserved.

Share this Recipe

Sancarlin: A Cheese Spread from Piemonte

December 13, 2019

Back at home, after spending five months in Italy this year expanding my culinary skills and repertoire, we settled on a technique to keep the process going.

Each month we randomly select a region of Italy by pulling a slip of paper out of a jar.  For a month, unless there is an overriding reason, I cook all our dinners using traditional recipes of that region.

Small, dried spicy red peppers (peperoncini) from our garden add zip to many dishes.

The first region we selected was Piemonte (Piedmont).

Piemonte is in far northwestern Italy.  It borders France and the cuisine shows a definite French influence.


Join our mailing list and you’ll never miss a recipe again!


Piemonte is one of the coldest regions of Italy.  Since the climate is not conducive to growing olives, animal fats, such as butter and lard are commonly used.  There are some dishes, however, that use olive oil based on historic trade between Piemonte and neighboring Liguria.

Piemontese foods tend to be hearty and rich, appropriate to the colder climate, especially in the mountainous areas.

Two of the Piemontese cookbooks that I relied on for the month of cooking Piemontese food.

Our month of eating the foods of Piemonte included:

  1. Bagna Cauda (anchovy, butter and olive oil dip for vegetables)
  2. Brasato di Manzo in Barolo (beef braised in barolo wine)
  3. Budino Freddo Gianduia (chocolate hazelnut cakes… literally “pudding”)
  4. Cipolline d’Ivrea (braised pearl onions with white wine and butter)
  5. La Panissa (risotto made with borlotti beans and some sort of cured meat)
  6. Patate ai Capperi (potatoes and capers)
  7. Peperoni e Pomodori alla Bagna Cauda (sweet peppers and tomatoes with anchovies)
  8. Polenta e Fontina in Torta (layers of sliced polenta and fontina cheese baked together)
  9. Pollo con Acciughe e Peperoni Arostiti (chicken with anchovies and roasted peppers)
  10. Pollo in Fricassea Bianca (chicken braised in milk)
  11. Risotto al Gorgonzola (risotto with gorgonzola cheese)
  12. Sancarlin (a cheese dip and/or sauce)
  13. Spinaci alla Piemontese (spinach with anchovies and garlic)
  14. Tajarin con Gorgonzola e Ricotta (long pasta with a sauce of ricotta and gorgonzola)
  15. Tajarin e Zucchine (long pasta with zucchini, garlic, and Grana Padano cheese)

As you’ll note, these are almost all substantial dishes.  And it’s not as if I purposely chose dishes that were hearty.  Almost all of the cuisine of Piemonte shares this characteristic.

Piemonte is famous for truffles.  I avoided dishes with truffles as they were out of season the month I cooked Piemontese food.  Good ones are also very expensive.  Plus, I ate mountains of them while at the Italian Culinary Institute this year.

Two excellent regional Italian cookbooks. It’s amazing how different the array of recipes is for the same region.

Piemonte is also known for hazelnuts and for the combination of hazelnuts and chocolate, the most famous brand of which is Nutella.  Note that the one Piemontese dessert that I made during the month (only one because I’m still working off the weight I gained over five months in Italy earlier this year!) is a combination of chocolate and hazelnuts which is generally known as gianduja or gianduia.


Follow us on your social media platform of choice


Piemonte is one of the great wine-producing regions of Italy.  It is known for Barolo, Barbaresco, and Asti, among others.

Sancarlin (Piemontese dialect for San Carlo) is a spread or dip made from cheese.  It’s great as part of an antipasto with grissini (breadsticks), another Piemontese food.

If you cannot find artisanal ricotta (check a cheese shop), Polly-O is among the best of the supermarket brands that I have tasted.

Sancarlin is also excellent tossed with diced boiled potatoes and served as a contorno (side dish).  How many times can I say “hearty” in the same blog post?

If any of the Piemontese dishes that I mentioned above interests you, and you’d like me to post a recipe, just leave a note in the comment section below and I’ll schedule it.

Though not traditional, goat cheese adds complexity to the Sancarlin that would otherwise be provided by the traditionally used sheep’s milk ricotta.

Print Recipe
Sancarlin: A Cheese Spread from Piemonte
Sancarlin is traditionally made with ricotta di pecora, sheep’s milk ricotta. It is nearly impossible to find sheep’s milk ricotta in the United States. You will get good results with a high-quality cow’s milk ricotta. Though not traditional, you can add an ounce or two of soft goat cheese to the recipe to increase the complexity of the dish. If you have access to sheep’s milk (which I don’t in northern New Mexico), and you feel ambitious, you can make your own ricotta! A link to my recipe is in the Notes section below. Adjust the amount of garlic and red pepper to taste. Serve with grissini, crostini, focaccia or tossed with boiled potatoes
Votes: 0
Rating: 0
You:
Rate this recipe!
Cuisine Italian
Prep Time 15 minutes
Servings
cup
Ingredients
Cuisine Italian
Prep Time 15 minutes
Servings
cup
Ingredients
Votes: 0
Rating: 0
You:
Rate this recipe!
Instructions
  1. Finely mince the garlic and combine with the olive oil. You can do this by processing the garlic and oil in a small food processor.
  2. If using the goat cheese, add it to the processor after the garlic has been minced and whiz to blend everything.
  3. Finely crush the red peppers and blend with the garlic mixture.
  4. Combine the garlic mixture with the ricotta and mix well.
  5. Adjust salt and pepper to taste.
  6. Refrigerate, tightly covered, for two days before using for the best flavor.
Recipe Notes

If you want to make your own ricotta, you can find my recipe here.

Copyright © 2019 by Villa Sentieri, LLC. All rights reserved.

Share this Recipe

Spiedini (Italian Skewered Meat and Vegetables)

November 20, 2019

Spiedini means skewers.  By extension it also refers to food cooked on skewers.

Zia Fidalma’s spiedini ready to be served. The extra cut-up vegetables were roasted along with the spiedini.

There is evidence that humans cooked food on skewers as far back as 300,000 years ago in an area that is encompassed by present-day Germany.

It’s an ancient cooking method.  So, it’s not surprising that food cooked on skewers is found almost everywhere.

Zia Fidalma cutting sausage for spiedini at her home in Benabbio.

During my month of cooking in Tuscany with Zia Fidalma this past August, spiedini were on the lesson plan.

But first, there was the shopping.  Onions and peppers came from the weekly market in Bagni di Lucca.  Pork and sausage came from her favorite local butcher.  Pancetta tesa came from yet another vendor.  The pantry staples, including olive oil from her own olive grove, were on the ready at home.


Join our mailing list and you’ll never miss a recipe again!


The sausage that Zia Fidalma used is Salsiccia Toscana, Tuscan Sausage.  It does NOT have fennel seed.  What it DOES have appeared to be a mystery, at least temporarily.

Pancetta Tesa produced in the Garfagnana area of Tuscany.

Butchers in Italy who make it say they don’t know because they buy the spice mix from a company.  Whether or not this is completely true is also unknown, to me at least.  Requests from friends and family in Tuscany also came up empty-handed.

A Google search, in Italian, turned up more useful information.  As expected, there is a range of ingredients.  Every recipe has salt and pepper.  Most have garlic (minced, chopped, or in one recipe, rubbed on one’s hands before one mixes the sausage!).  Many have a bit of wine, both white and red are called for.  I found one recipe that indicated that finely minced sage could be added if desired but NOT fennel!

Ingredients ready to be skewered in Zia Fidalma’s kitchen.

So, basically, Tuscan sausage is very sparingly flavored with salt, pepper, garlic and maybe a bit of wine.

For a traditional Tuscan taste for these spiedini, purchase (or make) an “Italian” sausage without fennel and without red pepper or paprika.  (Note, there is no such thing as “Italian” sausage in Italy.  Like most foods in Italy, sausage is hyper-local and varies from region to region, province to province, and often town to town.)

Zia Fidalma’s spiedini ready to be cooked.

Nobody is going to complain, however, if you use sausage with fennel seed as I had to do when I was unable to find sausage without fennel after trying four markets in Santa Fe.


Follow us on your social media platform of choice


Pancetta tesa (sometimes called pancetta stesa) may be more difficult to find than the correct sausage, however.  Pancetta tesa is flat, not rolled.  It is better to use for spiedini because it is easier to cut into shapes that facilitate skewering.

On the same day that I made spiedini with Zia Fidalma, we looked at a house for sale in her village. I’m still smitten by the house and the views and the idea of spending summers there!

While you might spend 30 to 45 minutes cutting up the meat and vegetables and threading them on a skewer, the cooking process is easy.  Feel free to experiment with the herbs, but I’ve called for the herbs that are most commonly used in Tuscan cooking.

Print Recipe
Spiedini (Italian Skewered Meat and Vegetables)
If you want a more elegant look, take the time to cut the ingredients to the same size, approximately 1-inch squares. For a more homestyle appearance, as shown in the pictures, some variability is fine as long as none of the pieces is extremely large or small. The exact sequence of how to skewer ingredients is up to you but I have provided a suggestion that worked well with the quantity of ingredients I had.
Votes: 0
Rating: 0
You:
Rate this recipe!
Course Mains, Meats
Cuisine Italian
Prep Time 45 minutes
Cook Time 30 minutes
Servings
people
Ingredients
Course Mains, Meats
Cuisine Italian
Prep Time 45 minutes
Cook Time 30 minutes
Servings
people
Ingredients
Votes: 0
Rating: 0
You:
Rate this recipe!
Instructions
  1. Cut each link of sausage into four pieces.
  2. Cut the pork into 24 pieces.
  3. Cut the pancetta tesa into 36 pieces
  4. Cut each pepper into 12 pieces.
  5. Separate the onion into layers and cut 36 pieces of onion about the same size as the pepper pieces
  6. Thread the meat and vegetables onto 12 skewers in the following order: Pepper, Pancetta, Onion, Pork, Pepper, Pancetta, Onion, Sausage, Pepper, Pancetta, Onion, Pork.
  7. On the bottom of a shallow roasting pan large enough to hold the skewers in a single layer, put the rosemary, sage, bay leaves, oregano, juniper berries and garlic.
  8. Put the skewers on top. Season generously with salt and pepper. Drizzle with olive oil.
  9. Roast at 400°F until the meat is cooked, approximately 20 to 30 minutes, basting occasionally with the oil from the pan.
  10. Arrange the skewers on a serving platter. Pour the oil over top being sure to add the cooked herbs and garlic. Serve immediately.
Recipe Notes

Copyright © 2019 by Villa Sentieri, LLC. All rights reserved.

Share this Recipe

Thanksgiving Gravy

November 7, 2019

I’m not much of a turkey person.

If it were up to me, I’d probably never make turkey, except for the fact that turkey is a GREAT excuse to make killer stuffing and gravy.

OK, OK, those of you who know me know that I’m enough of a traditionalist that I’d probably still make turkey on Thanksgiving, with or without stuffing and gravy, because it’s, well, traditional.

Turkey aside, though, I absolutely LOVE stuffing and I LOVE gravy.

After Thanksgiving, I carefully hide the leftover stuffing in the fridge and keep it all for myself.  There usually isn’t much leftover so I get maybe two days of snacking on cold stuffing.  And it has to be cold, not warm, with a bit of added salt because the taste of salt is dulled by the coldness of the stuffing.


Click HERE to join our mailing list and you’ll never miss a recipe again!


As for the gravy, when I was a kid, I liked gravy so much that I would stir enough into my mashed potatoes that they became runny and spread out over my plate!  I don’t do that anymore but I still love gravy.

I love gravy so much that I roast poultry specifically to make gravy then discard the poultry because I’ve browned it to a fare-thee-well to get a really flavorful gravy.  But I only do that once a year—on Thanksgiving—hence the name Thanksgiving gravy.

When I was growing up, my parents hosted Thanksgiving dinner.  My Aunt Margie and Uncle Joe hosted Christmas Eve dinner.

On Thanksgiving, while my mother and Aunt Margie were getting everything ready to bring to the table (everything included a full Italian meal with sausage, meatballs, lasagna, etcetera alongside a full traditional American Thanksgiving meal!) my Aunt Mamie would make gravy from the pan drippings.


Follow us on your social media platform of choice


From my current vantage point, however, there is a very limited amount of gravy that can be made that way, otherwise it doesn’t have enough meaty goodness.  Though I have to say that Aunt Mamie did a great job of making gravy.  Hers was the one that I most often stirred into my mashed potatoes.

The search for lots of meaty-tasting gravy is what got me started on the path of roasting poultry a few days in advance simply to make a brown stock to use as the base for my gravy.

I guess, in reality, my gravy is more of a variation on French brown sauce (Sauce Espagnole) with added pan drippings than traditional American-style gravy but it packs the flavor that I expect from good gravy.

If there’s any leftover gravy, I warm it with some cream and sautéed mushrooms and then gently reheat leftover turkey in the sauce.

Print Recipe
Thanksgiving Gravy
Roasting poultry to make a flavorful stock creates a gravy with an extra punch of flavor. Turkey wings and necks are ideal but chicken and Cornish hen work very well, too. Whatever poultry you use, cut it into lots of pieces to create more surface area for browning. I use a lot of Parmigiano Reggiano cheese and I put all the rinds in a container in the freezer. I use one whenever I make stock or broth, as I do for the stock for this gravy. It is not necessary to peel the onions and garlic.
Votes: 0
Rating: 0
You:
Rate this recipe!
Prep Time 30 minutes
Cook Time 11 hours
Passive Time 12 hours
Servings
cups
Ingredients
Brown Stock
Prep Time 30 minutes
Cook Time 11 hours
Passive Time 12 hours
Servings
cups
Ingredients
Brown Stock
Votes: 0
Rating: 0
You:
Rate this recipe!
Instructions
Brown Stock
  1. Cut the turkey or other poultry into chunks. Put the cut-up turkey into a heavy roasting pan. Mix with ¼ cup of extra-virgin olive oil. Season generously with garlic powder and salt.
  2. Roast the turkey at 425°F until dark brown, turning often, 1½ to 2 hours.
  3. Meanwhile, in a heavy-bottomed stock pot, large enough to hold all the ingredients, sauté the carrots and celery in ¼ cup of extra-virgin olive oil over high heat.
  4. As the carrots and celery begin to brown, add the onions and garlic.
  5. Continue cooking, adjusting heat to medium if necessary, to create nicely browned vegetables and fond without burning.
  6. When the vegetables are brown, add 1/2 cup of red wine and 1 cup of water to stop the cooking and set the pot aside until the turkey is ready.
  7. When the turkey is brown, add it and any pan drippings to the stockpot with the vegetables.
  8. Using some of the water, deglaze roasting pan and add the liquid to the stockpot. All these brown bits are important for flavor.
  9. Add the bay leaf, rosemary, sage, parsley, whole cloves, Parmigiano Reggiano cheese rind, if using, black pepper, and enough water to cover generously. Bring to a simmer and simmer, partially covered for six hours, stirring occasionally.
  10. Strain and refrigerate the stock. The stock may be made up to three days in advance.
Gravy
  1. Skim the fat from the top of the stock. Heat the fat to cook off any water. Measure ¾ cup of melted fat and reserve. Add butter, if necessary, to make ¾ cup.
  2. Gently boil the skimmed stock to reduce it to about six cups, if necessary.
  3. Meanwhile, in a heavy-bottomed saucepan, gently brown the flour in the fat from the stock.
  4. Add the six cups of hot stock, approximately ¾ cup at a time, stirring well after each addition, to avoid lumps.
  5. After all the stock has been added, bring to a simmer. Add the wine. Season with 1 teaspoon salt and pepper to taste. (The drippings from the turkey can be fairly salty so the gravy should be under-salted until the final adjustment of seasoning.)
  6. Simmer gently till thick, approximately 2 hours, stirring frequently. Set aside, covered, until the turkey is ready.
  7. After removing the turkey from the oven, deglaze the roasting pan with water. Skim the fat from the deglazing liquid. Pour the defatted drippings into gravy and simmer briefly to achieve the desired consistency. Adjust seasoning.
Recipe Notes

Copyright © 2019 by Villa Sentieri, LLC. All rights reserved.

Share this Recipe

Sunlight in a Bottle: Passata (Tomato Puree)

October 23, 2019

It’s been way over a month since I last wrote.  After leaving Tuscany for Calabria on August 31st, my plan was to continue to post about my new adventures at the Italian Culinary Institute.  As it turned out, I kept myself pretty busy and couldn’t quite find the time to post.  Knowing that my time was limited, I chose to spend as much of it as possible in the kitchen, which usually meant 12-plus hours per day, six or seven days per week.

There were some exceptions, like the Saturday I went to Maria’s house to make passata with her.

Maria and her son, Nicola, prep tomatoes for passata.

Maria works at the Institute, ostensibly as a dishwasher.  In reality she does much more.  Her wisdom and advice are frequently sought out by Institute staff on matters related to local food.  Maria assists in the kitchen during the meat-curing (salumi) courses.

Although I make passata at home, I’m self-taught.  It was exciting for me to see (and assist with) it being done in a traditional manner.

But first I had to find Maria’s house.

Stirring a cauldron of tomatoes.

Join our mailing list and you’ll never miss a recipe again!


Maria only speaks Italian.  My Italian is not good enough for anything resembling a real conversation though I can certainly manage restaurants, supermarkets, and food vendors well enough to get by.

Mariana, Chef Juan’s wife, chatted with Maria and told me that I should meet Maria at the Padre Pio mural.  Maria lives in the town of Stalettì, which is up the mountain from the Institute.  The directions were easy enough:  Go up.  When you get to Padre Pio, stop and wait for Maria.  If you get to the center of town, you’ve gone too far.

Maria and Nicola putting the cooked tomatoes through an electric food mill.

Up I went.  It was obvious I had gone too far when I hit a spot vaguely resembling a piazza onto which streets converged from many sides.  There was a fussball table sitting in the roadway and a group of older guys congregated in front of the local bar.  (Remember that a “bar” in Italy is traditionally a Coffee Bar.)

I mustered enough Italian to ask them where Padre Pio was.  They told me to go back in the direction from which I came and that I couldn’t miss it.

Nicola and I spattered with tomato puree.

Luckily Maria was in her car on the roadside waiting for me across the street from the GIANT Padre Pio STATUE.  I saw the statue on the way up but completely ignored it as I was looking for a mural.  Something got lost in translation.

Maria made a U-turn and I followed her down a side lane that opened led to a small farm with wonderful views of the mountains beyond.


Follow us on your social media platform of choice


Maria’s son, Nicola, was standing outside cutting tomatoes.  Maria introduced us then immediately began to cut tomatoes, too.  I opened my knife roll, got out my paring knife and began to cut tomatoes.  After all, there were six cases to cut and process.

A hand-crank food mill is a good option for making small quantities of passata.

We cut them in half, removed the core and dropped the halves into a bucket.  The cores were saved for the pig which will become Sopressata ‘round about January.

The tomato halves went into a big cauldron set over a wood fire.  Maria simmered them, with salt and some basil, until they were soft enough to go through an electric food mill.  The resulting liquid was put back into the cauldron and cooked until it was the right consistency.

Passata freezes well.

I’ve seen many videos and recipes for making passata that remove the seeds and jelly.  This definitely makes the process faster because extra liquid is removed at the beginning.  However, the jelly has a high concentration of naturally occurring glutamates that really enhance the flavor of the passata.  Like Maria, I always include the seeds and jelly.

Maria put the passata into jars, sealed them and put them under a blanket to cool slightly.  This is where a bit of controversy exists.  The USDA says it is never safe to can tomatoes or tomato puree at home without adding an acid, such as citric acid, because many tomatoes are not acidic enough to be canned safely relying on their own acidity.  The Italian Ministry of Health disagrees and provides directions for canning tomatoes in a boiling water bath without the addition of acid.

In practice, many Italians simply put the passata into jars, seal, and cover the jars with a blanket to allow them to cool slowly.  No boiling water bath is used at all.  While I’ve eaten many jars of passata that were canned this way, I wouldn’t recommend it.

Maria made about 100 jars the day I was there.  It wouldn’t be unusual for a family in Southern Italy to put up 300 jars of passata, essentially one per day for a year.  If you’re making less, as is almost certainly the case, freezing the passata works well.

If you find yourself with some vine-ripe tomatoes, especially plum tomatoes or a meaty heirloom variety, give this recipe a try.

Print Recipe
Sunlight in a Bottle: Passata (Tomato Puree)
Maria puts some fresh basil in with the tomatoes as do many Italian cooks. After going through the food mill, there are no flecks of basil to be found. Adding basil, however, is completely optional. Maria makes large quantities of passata and uses and electric food mill. For smaller quantities, up to several gallons, a hand-crank food mill works well. The passata will keep in the refrigerator for three days. It freezes well. If you choose to can it, you can find a link to recommended directions for canning in the Recipe Notes section, below.
Votes: 1
Rating: 5
You:
Rate this recipe!
Servings
Ingredients
Servings
Ingredients
Votes: 1
Rating: 5
You:
Rate this recipe!
Instructions
  1. Cut the tomatoes in half lengthwise. Remove the core and any hard, white pith. If you are using heirloom tomatoes rather than plum tomatoes, you may need to quarter them depending on size.
  2. Put the tomatoes in a heavy-bottomed pot.
  3. Heat gently until tomatoes release some liquid.
  4. After there is liquid in the bottom of the pot, increase the heat to bring the tomatoes to a boil.
  5. Add one basil leaf for each pound of tomatoes, if desired.
  6. Continue to boil, uncovered, until the pulp is soft enough to go through a food mill, approximately 1 hour.
  7. Put the tomatoes through a food mill, discarding seeds and skin.
  8. Add ½ teaspoon of salt per quart of pureed tomatoes.
  9. Return the tomato puree to the pot and continue to boil until thick and saucy.
Recipe Notes

You can find recommended directions for canning tomato puree here.

Copyright © 2019 by Villa Sentieri, LLC. All rights reserved.

Share this Recipe

Bread Pudding

July 3, 2019

It’s a Sunday morning in June.  I’m on the East Coast; Fire Island, New York to be exact.  I’m one-third of the way through a three-week stay on this slip of land south of Long Island.  To the north of Fire Island is the Great South Bay, which separates it from Long Island.  To the south is the Atlantic Ocean.

The Cherry Grove dock. It’s about 4 1/2 miles across the Great South Bay to Sayville on Long Island.

Whenever I’m here, I seem to channel my childhood as far as cooking goes.  I find myself turning (though not exclusively, mind you) to the foods I grew up eating and loving.  A few days ago for dinner I made Italian (OK, Italian-American) sausage with peppers and onions.

A view of downtown Cherry Grove.

Today I’m making my mother’s long-simmered Southern Italian Ragu (or Sugo or Tomato Sauce…or, because I’m in New York, Sunday Gravy).  Growing up, we NEVER called Tomato Sauce of any sort “Gravy!”  It was usually just “Sauce,” which we all knew meant mom’s or Aunt Margie’s or Aunt Mamie’s or some other Italian-American woman’s slow-cooked meat-and-tomato-based sauce for pasta.  And we NEVER EVER used the word “Sunday” as a modifier for “Sauce!”

A tortoise greeted me on a walk from Cherry Grove to The Pines one morning.

Join our mailing list and you’ll never miss a recipe again!

Sauce was Sauce, it was sacrosanct.  It wasn’t better or different or more elaborate because it was being made on Sunday.  If by some chance it were to be made on Thursday (which it usually wasn’t) it would still be made the same way.  To be sure, there was some variability in the meats that were used.  In my family’s version there were always big pieces of pork, preferably bone-in.  There could also be sausage (preferably hot), meatballs, and occasionally (and just for the cook) one chicken thigh (to “sweeten the sauce” as my mother would say).  Other than that, and the occasional appearance (or not) of an additional aromatic, like a small amount of minced onion or a hot pepper, the rest of the process was invariable.

Though there are some larger houses, many of the houses in Cherry Grove are small cottages.

I’m making Sauce today because, well, it’s Sunday and I’m on the East Coast, and because I LOVE it.  If I could, I’d find an AM radio and tune it to a station playing Polkas (Is that even possible?).  Aunt Mamie always did that on Sunday (despite being of Italian descent).  It’s one of those experiences from childhood that has had an outsized impact on me for some reason.  The memory is quite simple:  summertime, doors open , Aunt Mamie cooking, and her big green box radio sitting on a white enamel-topped free-standing kitchen cabinet near the door to her porch blaring out polka tunes.

The Tiki Bar can be a happening place during 2-4-1 happy hour!

Many of my fondest memories are in the summer with the doors open, what can I say?  It’s not like Aunt Mamie didn’t tune to polkas in the winter but that’s not what comes to mind!

One of the many boardwalks that make navigating Cherry Grove possible.

I’m also making Bread Pudding today.  One of those comfort-food desserts that I really enjoy.  I know I’ve mentioned this a time or three, but all of my favorite foods are carbohydrates.  All of my favorite desserts are based on moderately complex carbohydrates (flour and rice, usually) without lots of extra fat (like butter) and without being overly sweet.  Bread Pudding and Rice Pudding are near the top of the list.

Getting ready for the Fourth of July, a “house cat” is decked out with patriotic sunglasses.

Follow us on your social media platform of choice
         

Neither would be considered fit for company but I’m foisting the bread pudding on our dinner guests today with the option of some heavy cream poured on top.  I can always do a run to the store for gelato if I have a last-minute change of heart.  And, it would be a “run.”  There are no cars on this part of the island.  There are some motorized carts that ply the boardwalks that crisscross the community, providing the only means of navigating the town.  The carts are mostly used by contractors, businesses, trash pickup, the fire department, and the EMS.  Although a few residents use small carts or electric scooters to get around, the rest of us walk and use wagons to cart things that are too heavy to carry.

Looking south toward the Atlantic Ocean with deer in the distance.

It’s a pretty idyllic place to spend part of the summer.

A view toward the dock and Great South Bay from the Tiki Bar.

It can also be an exciting and unpredictable place.  Sunday afternoon an intense storm hit Long Island and Fire Island.  Trees and power lines were downed.  The storm put an end to internet service for more than forty-eight hours.  That’s the reason that this blog is getting posted a few days later than planned.

Part of the Cherry Grove Fire Department, an all-volunteer force.

Meanwhile, I’m eagerly anticipating the arrival of the next urge to cook something from my childhood!

Print Recipe
Bread Pudding
If the raisins or currants are not absolutely fresh and soft, cover them with hot water to plump up before adding them to the mixture. It is best if the bread is a few days old so that it has lost some of its moisture.
Votes: 0
Rating: 0
You:
Rate this recipe!
Cuisine American
Prep Time 15 minutes
Cook Time 80 minutes
Passive Time 60 minutes
Servings
people
Ingredients
Cuisine American
Prep Time 15 minutes
Cook Time 80 minutes
Passive Time 60 minutes
Servings
people
Ingredients
Votes: 0
Rating: 0
You:
Rate this recipe!
Instructions
  1. Beat eggs, sugar, vanilla, and cinnamon.
  2. Add milk and rum to the egg mixture and whisk to combine.
  3. Butter a three-quart ovenproof covered dish.
  4. Toss the bread cubes and raisins if using. Put the bread into the buttered dish. Pour milk and egg mixture on top.
  5. Grate nutmeg over the top. Dot lightly with butter.
  6. Cover and allow to sit at room temperature 30-60 minutes.
  7. Bake at 350°F, covered, for approximately 60 minutes. Uncover and bake an additional 20 minutes, or until brown on top.
  8. Serve warm or at room temperature. Pour a little heavy cream on top if desired.
Recipe Notes

Copyright © 2019 by Villa Sentieri, LLC. All rights reserved.

Share this Recipe

Basic Tomato Sauce

June 13, 2019

Basic Tomato Sauce isn’t sexy or exciting.

It’s a foundational ingredient that makes cooking a lot of other dishes much easier than they would otherwise be but, honestly, until a few months ago I never bothered to make it to have on hand.

That was a mistake!

That doesn’t mean that I didn’t have tomato sauces of various types in my freezer.  I almost always do but they’re fully prepared special-purpose sauces like my mother’s long-simmered Southern Italian Ragu or my mother-in-law’s Salsa Friulana.  If I needed a basic tomato sauce as the starting point for another sauce, I just did it in the moment.

That all changed as part of attending the Master of Italian Cuisine course at the Italian Culinary Institute (ICI).  We made a basic tomato sauce (dubbed Simple Tomato Sauce by Chef John) by the gallons…ok, by the liters!

It keeps well.  It freezes beautifully.  It can be used in its own right as a sauce for pasta or meat or fish.  Having it on hand allows you to whip up really tasty pasta sauces much more quickly.  Give my recipe for Lupara a look, for example.

Join our mailing list and you’ll never miss a recipe again!

Having foundational ingredients on hand has become more important since I returned from Italy.  In an effort to fully integrate what I learned, and to expand my knowledge even further, I’ve been cooking dinner every night that we’re not otherwise engaged.

As an extension, this month we started something new as a way to catalyze learning more about Italian Regional Cuisine.  We randomly select a Region of Italy by pulling a slip of paper out of an antique coffee jar.  Most of the meals for the month need to be from that Region.  This month’s Region is Piemonte.  July’s Region is Molise.

An antique coffee jar from my hometown of Johnstown, PA filled with slips of paper each containing the name of a Region of Italy.

I start by researching the foods of the region.  Waverley Root’s The Food of Italy is a big help but so are the introductions to many Italian regional cookbooks that I own.  Once I have a grasp of the traditional raw ingredients and the classic preparations of the region, I start to curate a list of dishes I want to make.  I go through my Italian regional cookbooks as well as Italian-language food websites to find multiple renditions of the dish then decide on how I will make it.

The dishes that I plan to make go on my calendar days in advance and get readjusted based on new ideas or ingredients from the market.  Sometimes a dish requires purchasing hard-to-find ingredients, like anchovies cured in salt (of which there is an 800 gram tin sitting in my kitchen right now) or amarena cherries preserved in syrup (1000 gram tin plus a smaller jar from a different company).

The Piemontese have a knack for putting anchovies into almost everything except dessert.  And if it doesn’t have anchovies, the dish probably has a bottle of Barolo, like the braised beef that I made a few days ago.

After cooking my way through Molise in July, I’ll be going to Italy for August and September.  In August I’ll be learning traditional Tuscan dishes from Great Aunt Fidalma.  September will find me be back at ICI for an guided independent study on food preservation.  I’ll resume cooking my way through the Regions of Italy in October.

Follow us on your social media platform of choice


Now that I’ve been convinced of the benefit of keeping foundational ingredients on hand, I’m upping my game.  In addition to Basic Tomato Sauce I’ve started keeping infused oils.  Currently, in squeeze bottles next to my stove, I have garlic oil and rosemary oil.  Sometimes I use these to provide a little extra squirt of flavor on a finished dish.  Sometimes I use them as I start sautéing ingredients.  At this moment, I also have some mint oil on hand that I made to drizzle on a risotto with fresh peas.

Infused oils at the ready next to my stove.

I am eagerly anticipating our fall harvest of hot peppers so that I can make peperoncino oil, which is sometimes called Olio Santo (Holy Oil) in Calabria.  Does that give you an inkling of the significance of hot peppers in the cooking of Calabria?

Although Olio Santo can be used within a few days of being made, it is better to let it age for a year.  That means I’ll have to make an extra-large batch in the fall so that I have a fully aged stash to hold me until the oil from the 2020 harvest of hot peppers is ready in 2021!

I modified the ICI recipe for Simple Tomato Sauce just a bit to make it my own.  I’ve changed the name to Basic Tomato Sauce.  That’s the version I’ve posted here.

Print Recipe
Basic Tomato Sauce
This makes enough sauce for about 1 kilogram (2-plus pounds of pasta). Most often this sauce is used as the base for other sauces. You can make it in larger quantities and freeze it for future use. While I prefer to pass the tomatoes through a food mill to remove the seeds and the occasional hard bit of tomato, you can skip this step. Just add the tomatoes to the sautéed vegetables, mashing them with a potato masher, and proceed as written. Since this sauce cooks quickly it is especially important that the vegetables be very finely diced.
Votes: 0
Rating: 0
You:
Rate this recipe!
Prep Time 15 minutes
Cook Time 30 minutes
Passive Time 15 minutes
Servings
quart (plus a bit more)
Ingredients
Prep Time 15 minutes
Cook Time 30 minutes
Passive Time 15 minutes
Servings
quart (plus a bit more)
Ingredients
Votes: 0
Rating: 0
You:
Rate this recipe!
Instructions
  1. Sweat the onion, carrot and celery, with a large pinch of salt, in the olive oil until soft and the onion is golden, without browning, approximately 15 minutes.
  2. Meanwhile, pass the tomatoes through a food mill.
  3. There should be very little residual in the food mill.
  4. Add the tomatoes to the vegetables. Season with salt and pepper.
  5. Simmer, partially covered approximately 15 minutes.
  6. Cool slightly and blend with an immersion blender or jar blender. Adjust salt and pepper.
Recipe Notes

Copyright © 2019 by Villa Sentieri, LLC. All rights reserved.

Share this Recipe

Lupara

May 29, 2019

A Lupara is an 8mm sawn-off shotgun favored by La Cosa Nostra.

It’s also the name of a pasta dish.

Lupara, the shotgun not the pasta. [Licensed from Bluedog, without changes].
Interestingly, if you search for lupara recipes online you’ll only find a few and you’ll be hard-pressed to discover much commonality among the recipes.  Some are spicy.  Some are not.  Some have sweet peppers.  Some do not.  Some have tomatoes.  Some do not.  And most of them will be made with spaghetti.

I learned to make lupara at the Italian Culinary Institute.  It was among the first pasta dishes demonstrated during the early days of the three-month course.  Made with short, cut pasta, like rigatoni, this rendition pays tribute to the shotgun for which it is named.

Lupara, the pasta not the shotgun, as prepared at the Italian Culinary Institute.

Join our mailing list and you’ll never miss a recipe again!

This dish makes use of a Basic Tomato Sauce, just tomatoes and a few aromatics cooked briefly.  You can make the tomato sauce in large batches and freeze it or you can make it as needed.  Although the sauce can be used on its own in some dishes, it is deliberately not aggressively seasoned.  This allows it to be used in a variety of preparations, with some final additional flavoring, without the sense that the same sauce is being used over and over.

I know this seems a little out of order, but I will publish the recipe for the Basic Tomato Sauce next week  For my first blog post since returning from Italy, I wanted to feature a dish that grabbed my attention.  This one did.  It’s got a great story and a great flavor.  Basic Tomato Sauce is good but it isn’t captivating (unlike a pasta dish named after the “Mob’s” favorite weapon!).  Basic Tomato Sause is meant to play a supporting role in most situations and that’s just not the type of recipe that I wanted to start with.

Lupara on the stove at the Italian Culinary Institute.

This version of Lupara is intended to be spicy but spicy means different things to different people.  There are two ways to build spice into this pasta.  You can use one or both of them.  The first method is to add dried, ground red pepper (peperoncino piccante in polvere, in Italian) during the final assembly of the pasta.  The other is to add thinly sliced fresh hot pepper (peperoncino fresco) when sautéing the sausage.  Getting authentic Italian peperoncino, powdered or fresh, is difficult in the States.  You can substitute Cayenne pepper for the ground one and a variety of long, red (always red!) chile, such as Thai or Cayenne, for the fresh.

Follow us on your social media platform of choice
         

This recipe also calls for fresh porcini mushrooms.  These can be a challenge to find.  Feel free to substitute thinly sliced portobello mushrooms.  Though the flavor won’t be exactly the same, the dish will still be yummy!  If you are lucky enough to find fresh porcini, I suggest buying a heap, thinly slicing them, and freezing them.  They can be used in all sorts of cooked dishes, especially Trifulata which will hit the blog in the near future…as soon as I can find fresh porcini!! (You might notice portobello mushrooms in the pictures.)

This recipe requires a small amount of sausage.  It’s not a major player though it does add a nice meaty background note to the sauce.  Pick a good quality Italian-style sausage, sweet or hot.  I think that sausage with fennel seed adds a nice flavor but that’s a matter of personal taste.

Buon appetito!!

Print Recipe
Lupara
A lupara is an 8-gauge sawn-off shotgun associated with La Cosa Nostra (the “Mob”). Rigatoni resemble the barrel of a lupara. Adjust heat level to your taste. If you can’t find Italian powdered peperoncino piccante, substitute Cayenne pepper. For a different type of heat, add some thinly-sliced hot red chile when sautéing the sausage, instead of, or in addition to, the powered chile. If you can’t find fresh porcini, substitute portobello mushrooms. It is really important to use a very good quality Italian rigatoni, preferably an artisanal variety that is thicker than the usual boxed rigatoni to get the most benefit out of sautéing the pasta. If you want to make half as much pasta, freeze half the sauce. The recipe for Basic Tomato Sauce will be posted next week.
Votes: 0
Rating: 0
You:
Rate this recipe!
Prep Time 30 minutes
Cook Time 30 minutes
Servings
people
Ingredients
Sauce
Assembly
For serving
Prep Time 30 minutes
Cook Time 30 minutes
Servings
people
Ingredients
Sauce
Assembly
For serving
Votes: 0
Rating: 0
You:
Rate this recipe!
Instructions
Sauce
  1. Using a heavy-bottomed pot, sauté the sausage in the olive oil until colored.
  2. Add the porcini, butter, and fresh peperoncini, if desired, and sauté 5-7 minutes. During this time, the sausage should brown much more and the mushrooms should give up much of their liquid and take on some color.
  3. Add the wine and evaporate completely over high heat.
  4. Add the broth, partially cover, and simmer until completely evaporated.
  5. Add the Basic Tomato Sauce, basil, and salt and pepper to taste. Simmer about 10 minutes. Reserve.
Assembly
  1. Bring three quarts of heavily salted water (according to the Italians, it should taste like the sea) to a boil.
  2. Meanwhile, sauté the garlic in the extra-virgin olive oil until light brown. Drain and reserve the oil.
  3. Cook the rigatoni just until it no longer has a crunch in the center but is still far from done.
  4. While the pasta is cooking, put the sauce in a large sauté pan and bring to a simmer along with peperoncino piccate to taste.
  5. Drain the rigatoni, saving at least one quart of the pasta-cooking liquid.
  6. Add the rigatoni to the sauce and increase the heat to medium to medium-high. Add pasta-cooking liquid, a ladle at a time, stirring the pasta frequently to finish cooking.
  7. After adding a ladle or two of the pasta-cooking liquid, add the cream. Continue adding pasta-cooking liquid as needed until the pasta is just al dente and coated with a thick sauce.
  8. Off the heat, mix in the Parmigiano Reggiano cheese, cream, and the reserved garlic oil. You may need to thin with a little more pasta-cooking liquid as the cheese will thicken and emulsify the sauce.
  9. Divide the pasta among serving bowls. Garnish each with a drizzle of extra-virgin olive oil and sprinklings of Pecorino Romano cheese and fresh basil chiffonade.
Recipe Notes

Here's my recipe for Basic Tomato Sauce.

Copyright © 2019 by Villa Sentieri, LLC. All rights reserved.

Share this Recipe