
August 1, 2018
Every year during late summer when I was in grade school we would pick elderberries. The “we” was myself, my cousin Donna Medile and our mutual friend Ricky Slivosky. Ricky’s dad, Joe, would take us on this adventure.
We’d go to various places in Stackhouse Park, aka the “woods” near our neighborhood. If you look at the map on the website link, you’ll see Fayette Street. It’s the street I lived on. It basically goes right into one of the walking paths into the “woods.” We never called it Stackhouse Park though everyone knew the name.
Join our mailing list and you’ll never miss a recipe again!
Joe Slivosky would take the elderberries to one of his relatives who would turn them into pies and jam. I can’t say that I actually cared much for either but I loved picking the berries. I also liked the idea that something we picked from the wild could be turned into something we ate.
Ever since then, the idea of preserving fruit, preferably fruit that I picked, by turning it into jams, jellies, preserves or by soaking it in alcohol, has fascinated me.
Santa Fe had a bumper crop of stone fruit in 2012. Peaches and apricots were everywhere. I made peach nectar, peach preserves, apricot preserves, apricot and lavender preserves, and apricot preserves with bourbon and brown sugar all from fruit I picked from friends’ trees. We are just finishing up the bounty of what I canned that year.
Two years ago, I made orange jam and lemon jam from citrus trees outside our house in Palm Springs.
Although guava jelly is my absolute favorite in the jam-jelly-preserve category I find it impossible to get really good guava jelly. Years ago, I would bring guava jelly back from Guyana where it was made by a friend of my college roommate’s father. It contained only guava juice, sugar, and lime juice and it tasted just like guava. Nothing I’ve had since compares to it.
Follow us on your social media platform of choice
![]()
![]()
![]()
Cherry jam is actually my second favorite, though, honestly, there isn’t anything in the jam-jelly-preserve category that I don’t like except traditional British orange marmalade, which I find too bitter.
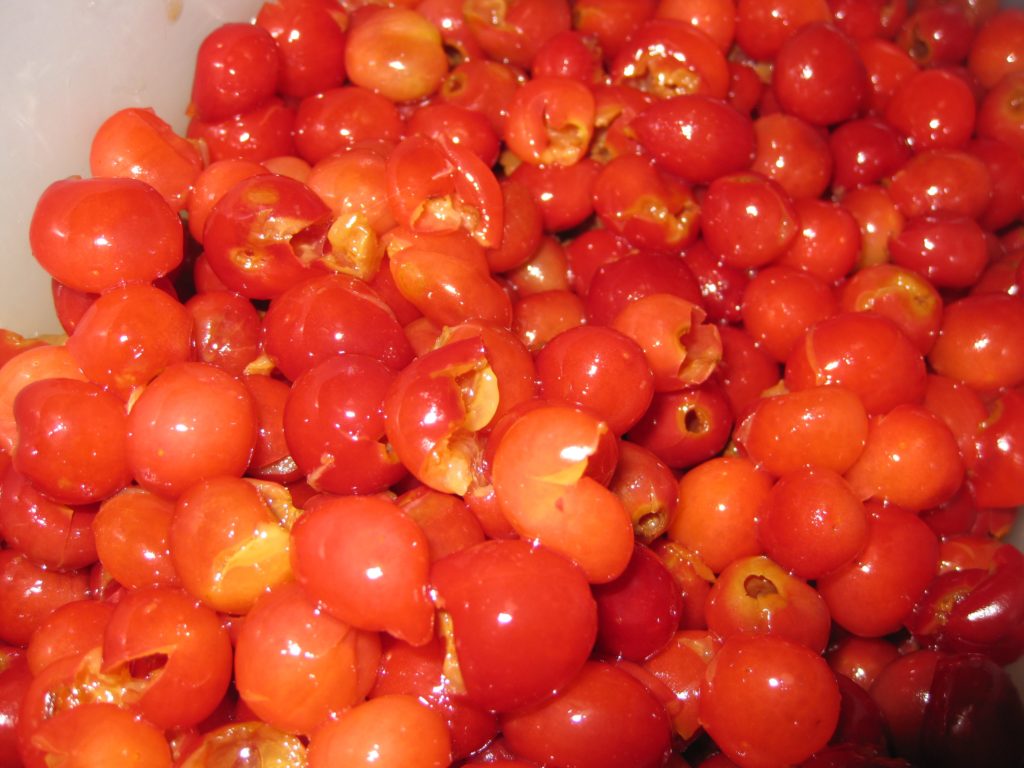
I was really excited when Rich DePippo’s cherry trees produced enough cherries for the birds, the squirrels, and us this year.
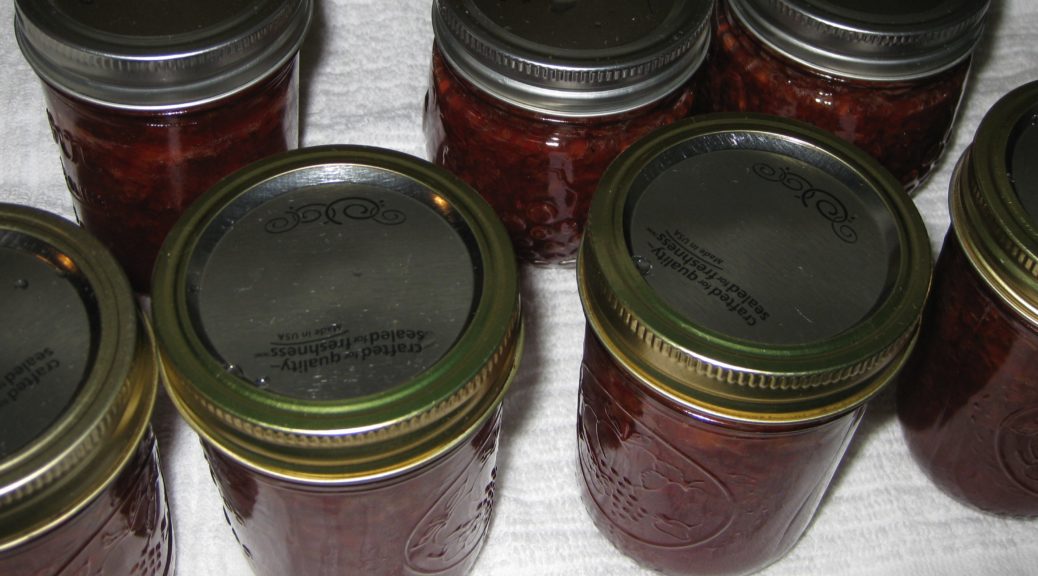
If you’re intimidated by the idea of canning, then don’t can the jam. Make a batch of it, which will be about six cups total. It’s really a breeze to make. When the jam is done, put it in nice jars and refrigerate. It’ll keep for a few months with no problem. You can also gift some of it to your friends, who will be amazed that you made it yourself.

| Prep Time | 45 minutes |
| Cook Time | 20 minutes |
| Passive Time | 6 hours |
| Servings |
cups
|
- 4 cups finely chopped pie or sour cherries from approximately 3 pounds of fruit
- 4 3/4 cups sugar
- 1 box fruit pectin regular not "low sugar"
Ingredients
|
|
- Put six clean, 1 cup jam jars into a large pot of water. Bring to a boil and reduce to low to keep the jars and the water hot.
- Put six new lids in a small saucepan of water. Bring to a simmer, reduce heat to low and keep warm.
- Pit the cherries.

- Put the cherries in a food processor and pulse until finely chopped. There should still be bits of fruit visible.

- Measure four cups of chopped cherries.
- Combine the chopped cherries and pectin in an 8 quart saucepan.

- Over high heat, bring the cherry mixture to a full, rolling boil; one that cannot be stirred down.

- Add the sugar all at once.

- Stir and bring the mixture to a full rolling boil as quickly as possible. Boil for one minute.

- Remove the jam from the heat.
- Skim off any foam.
- Remove the jars from the hot water. Turn the heat to high and bring the water to a boil.
- Ladle the jam into the hot jars filling to ¼ inch from the top.

- Put a lid and a band on each jar. Tighten until you just meet resistance. The lid must be loose enough to allow air to escape (but not allow water to enter) otherwise the jar will explode when being processed.
- When all the jars are full, lower them into the boiling water.

- Return the water to a boil and boil 10 minutes at sea level. If you are above 1000 feet in elevation, increase the processing time by the amount noted below.
- Remove the jars from the boiling water and tighten the lids. Do not overtighten or you may break the seal.

- Allow the jars to cool completely.
- When cool, the lids should all be concave or, if pressed, should stay concave. If the lids pop up in the center, refrigerate that jar as the seal is not adequate to protect the contents.
- Add the following time to the original 10-minute processing time based on altitude: 1000-3000 feet above sea level: 5 minutes; 3001-6000 feet above sea level: 10 minutes; 6001-8000 feet above sea level: 15 minutes; 8001-10,000 feet above sea level: 20 minutes
Copyright © 2018 by Villa Sentieri, LLC. All rights reserved.