Italian Roasted Peppers

May 28, 2018

I wish I had a pithy story to tell about roasted peppers.

I don’t really, except to say that after reviewing a dozen, or so, recipes to see how they compare with my method, I’ve discovered that NONE of them does it right.  (I know.  That sounds pretty narcissistic, doesn’t it?)

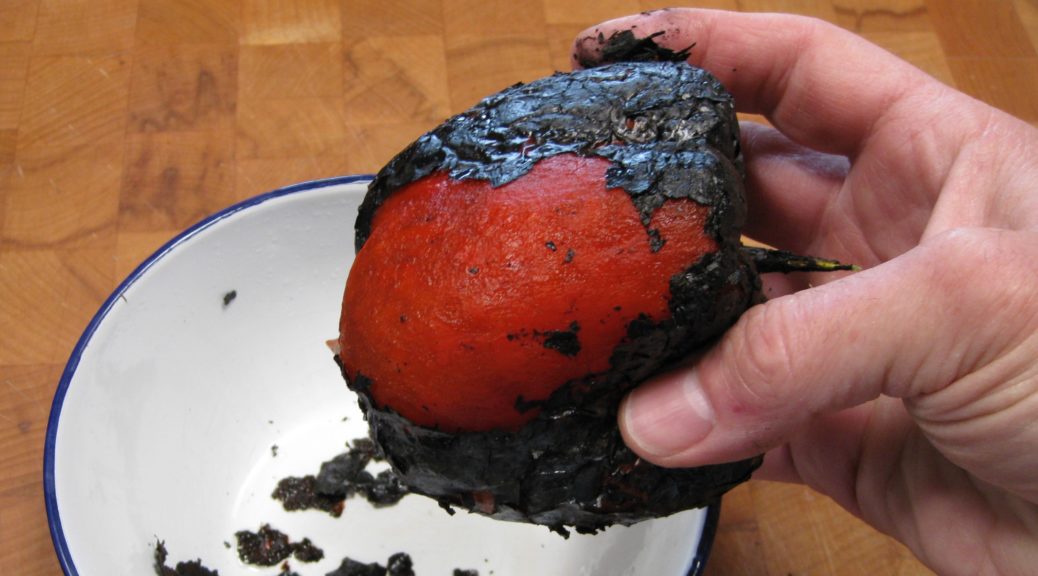
In a nutshell, you want to turn the skin jet black and you want to do it as quickly as possible.  Then you want to put them in a covered non-reactive container for about 10 minutes before peeling them.

The recipes that I found included the following (erroneous) steps:

1.      Roasting them in the oven.

2.      Cutting them before cooking.

3.      Cooking them too long.

4.      Not sufficiently blackening and blistering the skin.

5.      Putting them in a paper bag after roasting.

And don’t even get me started about putting oil on them before roasting!

Here’s the skinny…


Join our mailing list and you’ll never miss a recipe again!


The longer you cook them, the softer the flesh of the pepper becomes.  If you really want any structure at all, you want to get the blackening of the skin done quickly.

You really want the skin to be completely black.  First, this will cause the skin to peel off easily.  Second, it will add the smokiness that you want in a good roasted pepper.  No, they won’t taste burnt.  You will notice, if you give this recipe a try, that the places where the skin isn’t burnt won’t peel off very easily.

The main goals of cooking them fast and completely blackening the skin mean you really can’t roast them in the oven.  You need direct heat.

You don’t want to cut them because you won’t be able to rotate them sufficiently to blacken the skin all over.  They’re harder to handle if cut.  Besides, they’ll dry out.

Sometimes juice will leak out while the peppers are cooling.  If you put them in a paper bag, the bag will absorb the flavorful juice, and that would be a shame!

If I’m roasting one or two peppers, I’ll do it directly over the burner on a gas stove.  Oh, and for that one writer who suggested lining the burners with aluminum foil, get a life!  Not that much juice comes out of the peppers and what does is likely to get vaporized on the cast iron grate.  If a drop or two lands anywhere else on the stove, it’s just as likely to land in a spot that you can’t cover with aluminum foil as it is to land on the foil itself.


Follow us on your social media platform of choice


If I’m roasting more than a couple of peppers, I’ll do it on my gas grill.

You can use a broiler if you don’t have a gas stove or a gas grill, though I find the broiler a little less friendly to use.

As for heat, crank it up:  medium high on a burner, high on a gas grill.  The goal is to blacken the skin as quickly and as evenly as possible.  The longer it takes to do this (that is, the lower the heat) the more the flesh of the pepper will soften.  The pepper should hold its shape after roasting, not collapse.

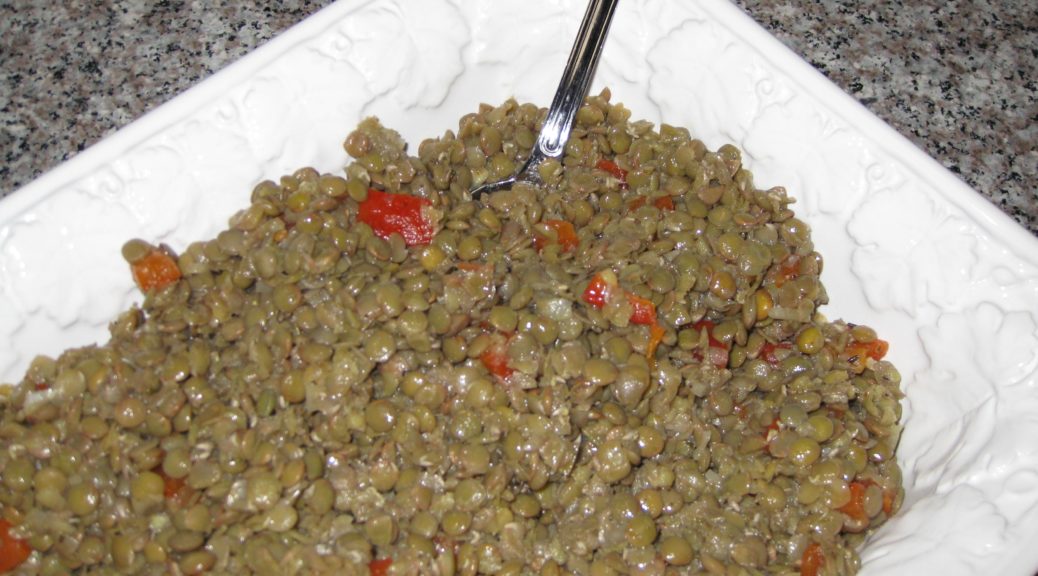
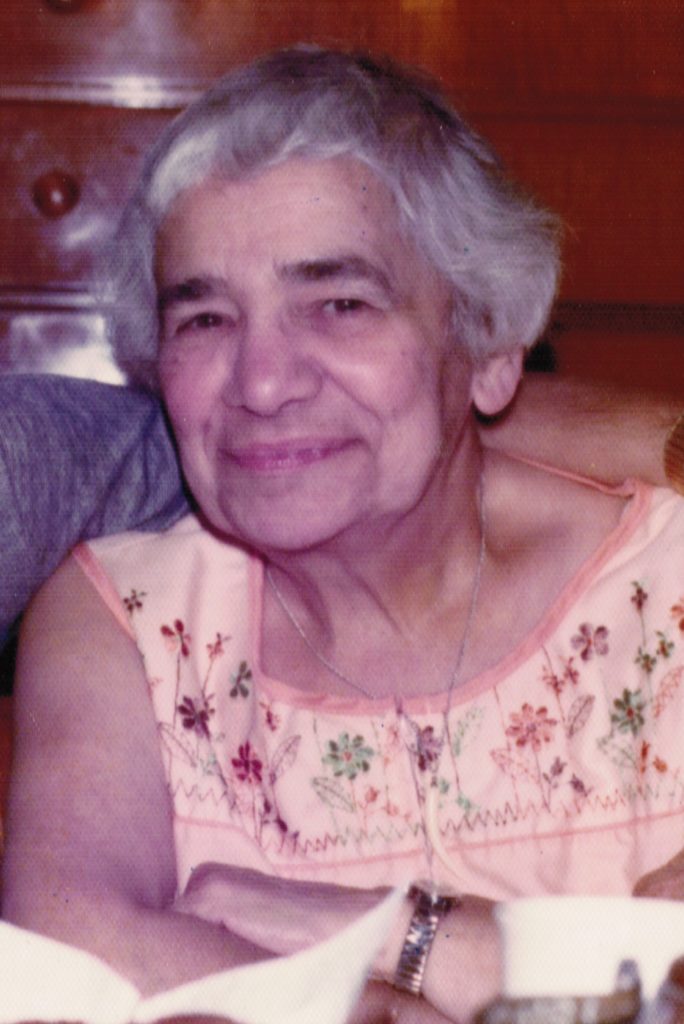
I use roasted peppers in lots of dishes.  Auntie Helen’s Lentil Salad is a good example.

The simplest way to use roasted peppers is to cut them in strips after peeling off the skin and toss them with a little extra virgin olive oil and salt.  They make an excellent side dish.  Since they’re served at room temperature they can be made in advance.  Using different colored peppers makes it festive.

If you like peppers, and you’ve never roasted your own, please give this recipe a try.  I think you’ll be surprised at how easy it is and how much better the peppers taste that the ones in the jar!

Print Recipe
Italian Roasted Peppers
Roast the peppers using direct heat, set as high as possible. For one or two peppers, I use the burners on my gas stove. For more, I use my gas grill. A broiler (gas or electric) works too. The directions below are for a gas burner but the same technique works for a gas grill and a gas or electric broiler. The pepper won’t obviously touch the heat source if using a grill or a broiler.
Votes: 0
Rating: 0
You:
Rate this recipe!
Course Sides, Vegetables
Cuisine Italian
Prep Time 10 minutes
Cook Time 10 minutes
Passive Time 10 minutes
Servings
or more
Ingredients
Course Sides, Vegetables
Cuisine Italian
Prep Time 10 minutes
Cook Time 10 minutes
Passive Time 10 minutes
Servings
or more
Ingredients
Votes: 0
Rating: 0
You:
Rate this recipe!
Instructions
  1. If using a gas burner, set the burner to medium high.
  2. Using long-handled tongs, put the pepper directly on the grate above the flame (where you would ordinarily set the pot).
  3. As the skin begins to blacken, move and rotate the pepper to get the skin evenly black.
  4. When the skin is evenly blackened, put the pepper in a non-reactive heat-proof bowl with a lid, such as one made from glass or enamel.
  5. Cover and allow to cool for 10 minutes.
  6. Rub off the skin. It helps to keep a bowl of water nearby to dip your fingers into to remove the skin that will inevitably stick to your fingers.
  7. Catch any juice that runs out of the peppers to add back once the peppers are peeled, cleaned, and cut.
  8. Cut the peppers in half from top to bottom. Remove the stem, ribs, and seeds.
  9. Use as directed in the recipe.
Recipe Notes

Copyright © 2018 by Villa Sentieri, LLC. All rights reserved.

Share this Recipe

Chinese Hot and Sour Soup

May 23, 2018

It is amazing how the culinary landscape of America has changed since I started cooking.  That was brought home to me in a very real way when I was getting ready to cook a multi-course Asian meal for Lunar New Year a few months ago.

In the early 1970s supermarkets carried only the barest minimum of “ethnic” ingredients.  I was attending the University of Pennsylvania and lived in West Philadelphia at the time.

For most Asian ingredients I would go to Philadelphia’s Chinatown.

For Japanese ingredients, I would go to a small Japanese-owned market in West Philly, a few blocks from the western edge of the main University campus.  I don’t remember a specific source for Indian or South Asian ingredients but I was able to cobble together what I needed from an array of stores.


Follow us on your social media platform of choice


There were also a few Asian stores in the Ninth Street Market.  Ninth Street is/was often referred to as the “Italian Market,” a name that was not in favor with locals at the time.  There was one store run by a Korean couple on Ninth Street where I could source an array of Asian ingredients.  It’s also where I went when I once needed a large quantity of fresh ginger root to make West Indian Ginger Beer.  After a few shopping trips where I bought enough ginger to supply a Chinese Restaurant for a week, one of the owners asked me, every time I went to the store, if I needed ginger!

When I got serious about cooking, starting junior year in college, I made weekly trips to Ninth Street and to the Pathmark Supermarket in suburban Broomall, PA.  Shopping in West Philly was an experience.  Except for the University, West Philadelphia, at the time, was an impoverished area.

I learned quickly how supermarkets adjust what they stock to the clientele.  Many items that I could easily find in a suburban supermarket were not readily available in West Philadelphia.  What was stocked was often of lesser quality, too.  Meat is a good example.  Some cuts were simply not available in the inner city and the quality of what was available was often inferior.

On the other hand, I could easily find some items in West Philly that were hard to come by in suburban markets in the 1970s.  Smoked ham hocks, pig tails, and turkey necks are good examples.


Join our mailing list and you’ll never miss a recipe again!


A background flavor note in many West Indian dishes is smoked meat; and I cooked a lot of West Indian food in college.  Most often I would use ham hocks, but some recipes specify other cuts.  I remember a peanut soup that I made that called for smoked pig tail.  Sourcing it was a breeze in West Philly.

Mainstream supermarkets now carry a much larger variety of “ethnic” ingredients, including fresh produce, than was the case in the 1970s.  I can even find smoked ham hocks and turkey necks in supermarkets in Santa Fe, though smoked pig tails are still hard to come by.  But if a whole pig’s head is needed, say, for example, to make head cheese, it is readily available in Hispanic markets.

While the array of food stuffs has improved dramatically since I started cooking.  Some things have deteriorated.

I had an incredible butcher on Ninth Street.  I’ve never been able to replace the personal service, quality, and variety of what I could get there.  I was just 19 when I started going to Ninth Street regularly.  When I needed goat for Jamaican Curried Goat, the butcher not only had the goat but cubed it to my specifications while I watched.

Down the block was a shop that sold poultry.  I once needed a Guinea Hen for dinner.  I selected the one I wanted from the pen.  She was taken in the back, and came back cleaned and wrapped in butcher paper.

Shopping for this year’s Lunar New Year Dinner was an education.  While I could get many basic ingredients in the supermarket, unlike the situation in the 1970s, I was unable to shop in a major city.  This put me at a distinct disadvantage for more esoteric ingredients.  Nonetheless, one can now make a respectable Chinese meal from ingredients available in the supermarket.  This is an amazing change from 45 years ago!

Print Recipe
Chinese Hot and Sour Soup
Make a rich chicken stock for this soup without any extraneous flavoring ingredients, though adding a few slices of ginger, to be strained out afterward, are welcome. If you have a ham bone or a piece of smoked ham, by all means add it. Though Westerners rarely seem to make stock from pork bones, you can add some when making the stock for a traditional Chinese touch.
Votes: 0
Rating: 0
You:
Rate this recipe!
Cuisine Chinese
Prep Time 20 minutes
Cook Time 20 minutes
Servings
people
Ingredients
Cuisine Chinese
Prep Time 20 minutes
Cook Time 20 minutes
Servings
people
Ingredients
Votes: 0
Rating: 0
You:
Rate this recipe!
Instructions
  1. Cover the mushrooms with hot water.
  2. Allow to soak for approximately 15 minutes, until soft.
  3. Meanwhile, bring the stock to a boil.
  4. When the mushrooms are softened, squeeze out excess water and remove the tough stem. Slice the mushroom caps into strips ¼ inch wide.
  5. Combine the vinegar, soy sauce, sugar and hot sauce.
  6. Add the vinegar mixture to the boiling stock. Boil 1 minute.
  7. Add salt to taste.
  8. Combine cornstarch and water. Mix thoroughly.
  9. Add cornstarch mixture to the boiling soup.
  10. After boiling 1 minute, add scallions, bean curd and mushrooms.
  11. Reduce heat and simmer 1-2 minutes.
  12. Add sesame oil.
  13. Gently beat the eggs with salt to taste.
  14. Slowly pour in the beaten eggs into the simmering soup while stirring gently.
  15. Serve immediately.
Recipe Notes

Copyright © 2018 by VillaSentieri.com. All rights reserved.

Share this Recipe

Auntie Helen’s Lentil Salad

May 18, 2018

Auntie Helen had a way with lentils.

In addition to making lentil salad for summer cook-outs, she taught me that cooked lentils, topped with homemade tomato sauce, make a great main (or side) dish for a cold winter’s day.

Auntie Helen liked her scotch.  On the rocks.  And she was not shy about quantity.

Auntie Louise liked gin.  Also on the rocks.  Also not shy about quantity.

It was mostly under their tutelage that I went from drinking Bourbon Manhattans (Old Grand Dad at the time) to Bourbon, also on the rocks.  This was somewhere around the age of 19.

Auntie Helen in 1976

I soon made the jump from Old Grand Dad to Jack Daniels, which remained my tipple of choice for decades.  Now I’ve branched out to a wide array of bourbons but always on the rocks and in respectable quantities.


Follow us on your social media platform of choice


Auntie Helen and Auntie Louise were born, shortly after the turn of the 20th century, in a palazzo in Rome, now part of the American Embassy.  After their parents lost everything for the second time (there was talk that the first time it happened, they were bailed out by one of the Stroganoffs) the family emigrated from Italy to America.  Their father, a Count in Italy, worked delivering bread in Trenton, NJ.

Auntie Helen and Auntie Louise both became schoolteachers.  Neither married.  They lived together their entire lives.

They had a sweet little house on Yardley Road, just steps from the Yardley town line, in Morrisville, New Jersey.  I spent many weekends at their house, a little over an hour from where I lived in Philadelphia.

Auntie Helen did the cooking.  Auntie Louise made drinks and helped to clean up.

Auntie Louise in 1976

Though they came from a background that was more privileged than most immigrants of the time, they had little by the time the family got to the United States.  They did what many immigrants did, they assimilated and became almost “hyper” American.  I never heard either of them speak a word of Italian.  And, while Auntie Helen cooked an array of Roman specialties, she also cooked a lot of American food, including Impossible Pies, more the savory ones than the sweet ones; homemade Pumpkin Chiffon Pie (the only thing she cooked that I didn’t like); and cheese and egg strata for brunch (with lots of bacon on the side!).


Join our mailing list and you’ll never miss a recipe again!


I recently found a series of Impossible Pie recipes that Auntie Helen wrote out for me.  I can’t promise that I’ll make each of them, but I will post the recipes, in her own handwriting.  If nothing else, they’ll be a bit of a time capsule.

Meanwhile, please enjoy my take on Auntie Helen’s lentil salad.

Print Recipe
Auntie Helen's Lentil Salad
Auntie Helen’s lentil salad was more of a general concept that a definitive recipe. Feel free to add other ingredients to this, like a handful of chopped black oil-cured olives, some sliced scallions, or a sprinkling of dry oregano. You can replace some of the olive oil with the oil from a can of anchovies or add a teaspoon of anchovy paste if you’d like. It will add an umami touch without tasting fishy.
Votes: 0
Rating: 0
You:
Rate this recipe!
Prep Time 30 minutes
Cook Time 30 minutes
Passive Time 8 hours
Servings
people
Ingredients
Prep Time 30 minutes
Cook Time 30 minutes
Passive Time 8 hours
Servings
people
Ingredients
Votes: 0
Rating: 0
You:
Rate this recipe!
Instructions
  1. Wash and pick over the lentils but do not soak them.
  2. Drain the lentils.
  3. Combine the lentils and water.
  4. Bring the lentils to a boil and gently boil until just tender, 10-15 minutes, or maybe a little more based on your elevation.
  5. Drain the lentils.
  6. Mix the hot lentils with the diced onion, oil, and rosemary. Stir well.
  7. Bury the bruised garlic clove in lentils.
  8. Loosely cover the lentils and cool at room temperature.
  9. When the lentils are cool, they can be refrigerated for up to three days before proceeding.
  10. To finish the lentil salad, remove the garlic clove and discard.
  11. Dice the roasted red pepper.
  12. Add the diced roasted red pepper, vinegar, salt and pepper. Mix well and chill thoroughly.
  13. Remove the lentil salad from the refrigerator approximately one hour before serving.
  14. Adjust salt and pepper before serving. Add more olive oil if the lentils seem dry.
Recipe Notes

Copyright © 2018 by VillaSentieri.com. All rights reserved.

Share this Recipe

Penne with Roasted Garlic Cream Sauce

May 14, 2018

I apologize!

In my inaugural messages, I clearly stated that I would publish traditional recipes, many (though not all) of them Italian, but with the emphasis on traditional.

I get really stoked by the idea of preserving traditional recipes in written form (even if it’s a bunch of zeroes and ones on a cloud server somewhere)!

I also truly appreciate new and innovative dishes…especially cakes, for some reason.  But my very strong preference if I’m going to work on perfecting and publishing a recipe is to focus on traditional recipes.  (I’m happy to eat good food of any type, traditional or not, that someone wants to serve me, however.)


Follow us on your social media platform of choice


My editorial calendar for this blog, including what I’ve published and what I currently have planned to publish, numbers 212 recipes.  The number keeps growing.  Most of these recipes are ones I listed (off the top of my head, so to speak) when I was planning the launch of the blog in late 2016.  The list came from simply thinking about my favorite recipes.  As I trawl through my recipe archive periodically, looking for recipes for particular events, or even just dinner, I usually come upon at least a few more recipes that get added to the list.

Two hotel pans hold a double batch, 4 pounds of penne, for a summer dinner party for the family from Tuscany

Windows says I have 4133 recipes saved in my recipe directory.  That does not count the hundreds of hand-written ones that I’ve not scanned in yet.

But I have to admit, not EVERYTHING I make is traditional.  I have this killer salmon recipe that I got from the New York Times that is now a regular on our table.  Almost any vegetable recipe by David Tanis is a winner in my book, well really ANY recipe by David Tanis, but he has a way with vegetables.  He has many make-ahead-and-heat-up-in-the-oven options that remove a lot of last minute work when putting dinner on the table, whether it be for 2 or 20!

In my defense, these are recipes that I think will become classics in a few decades just as many of the recipes that I started cooking 45 years ago in college have become classics for me.  I think if a recipe still tastes good after half a century it can be considered a classic…which is getting pretty close to traditional.

This is just a portion of the antipasto for the dinner for our Tuscan relatives

Think about all the things you ate 50 years ago that you don’t make any more, like fried bologna simmered in ketchup!  That actually is something that my very traditional mother put on the table in the 1960s!  Granted, it was a main course (and I use the term lightly) that could be whipped up in under half an hour after a day’s work.  The truth is, I actually liked it at the time.

I differentiate the fried bologna category of foods that I don’t make any more from the fried salami category of foods that I still love but that just have fallen off my rotation.  Have you ever had a sandwich of pan-fried salami?  If not, give it a try.  (Thinly slice the salami.  Make a cut from the middle to one edge, like the first cut of a pie, to reduce puckering.  Cook in a skillet over medium heat till lightly browned on each side.  No oil needed.  Pile on bread.  Enjoy…dripping fat and all!)


Join our mailing list and you’ll never miss a recipe again!


So why the apologia?

Today’s recipe isn’t traditional.  I developed it about four years ago for dinner for a large group of people.  It was such a hit, that I kept making it.  I even made it last summer for a dinner party for the family from Tuscany!  So, while it’s not really traditional (which I take to mean something with a cultural history, something that individuals from a particular culture and location make or made on a regular basis), it has a very traditional FLAVOR.

I made this penne for my father-in-law’s birthday party this past January. Everyone had clean plates!

In my mind it’s not a REAL (i.e. traditional) dish because I made it up.  On the other hand, the flavor profile makes it fit into an established canon of northern Italian food.  Italians would recognize it as Italian food, just not traditional Italian food.

Because it isn’t traditional, I hadn’t planned on publishing it.  I got a number of requests for the recipe after I mentioned it in one of my emails and decided that I should reconsider my initial decision.  There aren’t many photographs but the steps are not really complicated.  I know you can do it without all the usual photos.

Who knows, maybe in another 45 years it’ll become a classic!

Print Recipe
Penne with Roasted Garlic Cream Sauce
This takes some time to put together but once it’s assembled you can spend time with your guests while it cooks. The sauce has a luxurious amount of butter, about twice what would typically be used based on the amount of flour. This improves the flavor and mouth-feel of the sauce. Because I originally created this dish for an event in Alamogordo, New Mexico, I topped it with pistachios which are grown there. Chopped walnuts or whole pine nuts could be substituted. If you want to prepare the dish in advance, be sure to cool the pasta in a bowl of ice water. Mix the cooled pasta with cold white sauce and the other ingredients. Pour into a baking dish, cover tightly, and refrigerate. Allow the covered dish to sit at room temperature 60-90 minutes before baking.
Votes: 0
Rating: 0
You:
Rate this recipe!
Prep Time 2 hours
Cook Time 2 hours
Passive Time 2 hours
Servings
people
Ingredients
Balsamella (White Sauce)
Final Assembly
Prep Time 2 hours
Cook Time 2 hours
Passive Time 2 hours
Servings
people
Ingredients
Balsamella (White Sauce)
Final Assembly
Votes: 0
Rating: 0
You:
Rate this recipe!
Instructions
Balsamella (White Sauce)
  1. Put the garlic in a single layer in a small oven-proof dish with a tight-fitting lid. Alternatively, put the garlic on a sheet of heavy-duty aluminum foil.
  2. Sprinkle the garlic with olive oil.
  3. Put the lid on the dish, or fold up and seal the aluminum foil.
  4. Roast the garlic at 300°F until soft and golden brown, approximately 45 minutes, stirring occasionally.
  5. Put the garlic and any olive oil you can scrape out of the dish into a blender jar.
  6. Add 1 cup of the milk.
  7. Puree the garlic and milk. Reserve.
  8. Warm the remaining milk in a heavy-bottomed saucepan.
  9. Melt the butter in another heavy-bottomed saucepan over medium heat. Stir the flour into the butter.
  10. Cook for a few minutes on medium heat but do not allow flour to color.
  11. Stir in the warm milk, one ladleful at a time, incorporating well after each addition to avoid lumps.
  12. After about half the warm milk has been incorporated, add the pureed garlic mixture.
  13. Use some of the warm milk to rinse out the blender jar and add it to the pot. Stir well.
  14. Add the remaining milk to the pot along with the bay leaves, rosemary sprigs, and lemon zest.
  15. Bring to a boil over medium high heat stirring (nearly) constantly and cook until the sauce reaches the thickness of heavy cream, approximately 5 minutes.
  16. Strain the white sauce through a fine-mesh sieve.
  17. If not using the sauce immediately, cover it with plastic wrap, putting the plastic directly on the surface to prevent the formation of a skin, and refrigerate. [If you are going to prepare the casserole in advance, make sure the balsamella is cold before combining with the other ingredients.]
Final Assembly
  1. Put the frozen peas in a large sieve. Rinse with cool water to thaw the peas. Allow the peas to drain and completely thaw while proceeding with the recipe.
  2. Heat the olive oil in a large sauté pan over high heat.
  3. When the oil is hot, but not smoking, add the diced mushroom caps. Toss well.
  4. When the mushrooms have absorbed the oil, add 1 teaspoon of fine salt. Mix well.
  5. Turn the heat to medium low until the mushrooms begin to sweat.
  6. Turn the heat to high and continue sautéing until the liquid evaporates.
  7. Continue to cook until the mushroom pieces are browned in places.
  8. Season with black pepper. Add ham and cook 2-3 minutes.
  9. Remove from the heat and reserve.
  10. Bring a large pot of heavily salted water to a rolling boil. Add the pasta.
  11. Boil until the pasta is partially cooked. It should still be a little crunchy on the inside.
  12. If you are going to cook the casserole immediately, drain the pasta but do not rinse. If you are going to assemble the casserole in advance, drain the pasta and chill it in a bowl of ice water. When cold, drain well.
  13. Combine pasta, peas, mushroom and ham mixture, and balsamella. Mix well.
  14. Pour into a large buttered casserole. For this quantity, I use a full-size steam-table tray, also called a “hotel pan.”
  15. Put a sheet of parchment on top then cover the pan tightly with heavy-duty aluminum foil. You can skip the parchment if you are going to cook the casserole immediately. Food should not stay in extended contact with aluminum, hence the parchment paper if the dish is being assembled in advance.
  16. Either refrigerate or bake at 350°F until bubbly. Baking time will depend on whether the ingredients are hot or previously refrigerated and brought to room temperature, 1 ½ to 2 hours.
  17. Remove the foil and parchment. Sprinkle the top with Parmesan cheese and nuts.
  18. Place under the broiler, or on the top rack of an oven heated to 500°F, until the top is golden brown.
  19. Allow the casserole to rest at least 15 minutes before serving.
Recipe Notes

Copyright © 2018 by VillaSentieri.com. All rights reserved.

Share this Recipe

Stir-Fried Chicken with Cashews and Snow Peas

May 9, 2018

This is the year of the Dog.

It may be old news, but Lunar New Year was Friday, February 16, 2018.  We celebrated with close friends and a dinner menu with an extensive array of Asian dishes.  There are many traditional dishes for Lunar New Year depending on the country.  I chose to do a pan-Asian menu rather than focus on strictly traditional recipes from a single country.

Kifune Shrine, Kyoto, Japan (Photo by Avishek Kumar)

We were in Palm Springs for Lunar New Year.  The plan was to escape winter weather in Santa Fe which, as it turned out, was not very wintery after all, unlike what the East Coast experienced.


Follow us on your social media platform of choice


Sourcing Asian ingredients has become a real issue for me now that I don’t live in a major city.  The only Asian grocery store in Santa Fe, Talin Market, closed a few months ago though the original location is still open in Albuquerque.

Palm Springs only has two Asian markets that I can find.  Both are Filipino-owned and, although they stock an array of Asian goods, they really focus on Filipino foods.

Honen-in Temple, Kyoto, Japan (Photo by Avishek Kumar)

Amazon came to the rescue.  While I’d rather stand in the aisles of an Asian market reading and comparing packages of honest-to-goodness product, Amazon was a lifesaver.

There were eight of us for the Lunar New Year dinner.

The kitchen in our Palm Springs house is small, approximately 9 feet by 11 feet.  Turning out a multi-course meal requires a lot of planning and organization.   I divided the main part of the meal into four courses.  Each course included a complementary array of foods and different cooking methods.

We started with hors d’oeuvres and cocktails.  We ended with a simple, non-traditional dessert of gelato and fortune cookies, which I purchased.  I assumed nobody was going to be too into dessert after all the other food.

Fushimi Inari Shrine, Kyoto, Japan (Photo by Avishek Kumar)

Here’s the menu:

Hors d ’Oeuvres
Vegetable Dumplings with Soy-Vinegar Dipping Sauce
Steamed Edamame with Coarse Salt

First Course
Stir-Fried Chicken with Cashews and Snow Peas
Eggplant Hunan Style
Cambodian Fish with Bean Thread

Second Course
Korean Bulgogi
Indonesian Sweet Corn Patties
Szechuan Garlic Noodles

Third Course
Hot and Sour Soup

Fourth Course
Chinese Roast Pork
Japanese Carrot Salad
Mapo Tofu
Caramelized Tomatoes with Ginger and Vinegar


Join our mailing list and you’ll never miss a recipe again!


I recently published my recipe for Chinese Roast PorkHot and Sour Soup is coming up in a couple of weeks.  Today, however, we’re focusing on a Cantonese classic, Stir-Fried Chicken with Nuts and Vegetables, specifically cashews and snow peas.

This is a recipe that I started making during junior year in college.  It got tweaked a lot over that year.  By then I was comfortable with the end product and didn’t really do much with it… until this year.

I didn’t really change the recipe, though.  I changed the pan!

Shrine in Gion District, Kyoto, Japan (Photo by Avishek Kumar)

You’ve probably figured out that I’m prone to excess where kitchen equipment comes in.  I have four woks:  two carbon steel ones that date back to college and two that are a decade or so younger, one aluminum and one carbon steel.  Both of these are larger than the ones from my college days.

I always cook my stir-fries in a wok but this particular dish is always a problem due to the “velvet” coating on the chicken.  The coating always sticks to the wok.  I suspect I could eliminate that problem by using enough oil to deep fry the chicken but that wasn’t supposed to be the way to cook it.  So, I always just accepted the “sticking-chicken” problem.

Until now.

I used a large, non-stick skillet.

It worked like a charm!!!

I don’t think I’ll give up my woks any time soon but for this particular dish, non-stick is definitely the way to go.

Afterthought:  This recipe calls for MSG, though, of course, you can leave it out if you wish.  If you’re at all interested in the hype about the health effects of MSG, I suggest you read this article.

Print Recipe
Stir-Fried Chicken with Cashews and Snow Peas
Walnuts and either broccoli or green beans can be used instead of cashews and snow peas. The chicken can be marinated several hours in advance and refrigerated, tightly covered. If you wish, you can reduce or eliminate the MSG.
Votes: 0
Rating: 0
You:
Rate this recipe!
Course Mains, Poultry
Cuisine Chinese
Prep Time 20 minutes
Cook Time 15 minutes
Servings
people as part of a Chinese meal
Ingredients
Velvet Chicken
Sauce
Assembly
Course Mains, Poultry
Cuisine Chinese
Prep Time 20 minutes
Cook Time 15 minutes
Servings
people as part of a Chinese meal
Ingredients
Velvet Chicken
Sauce
Assembly
Votes: 0
Rating: 0
You:
Rate this recipe!
Instructions
Velvet Chicken
  1. Cut the chicken into ½ inch cubes.
  2. Put the chicken in a non-reactive dish.
  3. Sprinkle the chicken with salt, pepper, five spice powder and MSG. Mix well then let stand 20 minutes.
  4. Sprinkle the chicken with cornstarch and 4 teaspoons of oil. Mix well and let stand 20 minutes.
  5. Fold the egg white into the chicken. Let stand 30 minutes. If not using immediately, the chicken can be refrigerated, covered, for several hours at this point.
Sauce
  1. Combine all sauce ingredients, stir well and reserve.
Assembly
  1. Deep fry the nuts until golden. Once they start to color, they will cook rapidly. Careful attention is required to avoid burning them.
  2. When golden, remove the nuts from the oil and spread them on a paper towel to drain.
  3. Cut the tips off the snow peas.
  4. Using a large non-stick skillet, stir-fry the snow peas in 3 tablespoons of vegetable oil over high heat for about 30 seconds, until bright green. (You can use some of the oil used to fry the nuts if you wish.)
  5. Transfer the cooked snow peas to a plate to cool.
  6. In the same non-stick skillet, stir-fry the garlic and ginger over high heat, until fragrant, approximately 30 seconds, adding a few tablespoons more oil if needed.
  7. Add the chicken and stir-fry over high heat until just cooked through, approximately 2-3 minutes.
  8. Stir the sauce mixture to combine and add it to the chicken.
  9. Bring to a boil and cook until thickened, stirring constantly, approximately 1 minute.
  10. Stir in the cooked cashews and snow peas.
  11. Remove the pan from the heat and stir in the sesame oil.
  12. Serve immediately with steamed rice.
Recipe Notes

Copyright © 2018 by VillaSentieri.com. All rights reserved.

Share this Recipe

Aunt Margie’s Pasta è Ceci (Pasta and Chickpeas)

May 4, 2018

Beans and Macaroni. Pasta è Fagioli.  Even Pasta Fazool to quote Dean Martin.

It’s a classic combination and there are as many variations as there are cooks!  (Google returned 6,300,000 entries for “beans and macaroni,” 588,000 for “pasta è fagioli,” and 57,900 for “pasta fazool!”)

This is my interpretation of Aunt Margie’s, which she made with chickpeas.

At Aunt Margie’s 90th birthday party in September 2010.  From left to right, Aunt Margie’s grandson, Jim, me, Aunt Margie, my cousin Donna (Aunt Margie’s daughter)

It couldn’t be more different from my mother’s which was made with baby lima beans.

Aunt Margie’s was made with water and oil.  My mother’s had tomato sauce.


Follow us on your social media platform of choice


Aunt Margie’s was quite soupy.  My mother’s was just slightly “saucy.”

They grew up in the same house and learned to cook from the same mother.  I wish I had thought to ask either of them where their respective recipes came from and why they were so different.

My cousin Donna and I in the lobby of the Hilton Plaza in Miami Beach, 1970

One thing that both versions had in common, though, is that they were frequently served on Fridays, which our families observed as meatless back then.  (When Fridays were no longer meatless, my father joked that it was because the Vatican sold its fisheries.)

But Friday or no, pasta è fagioli, or, in this case, more specifically pasta è ceci (ceci means chickpeas), is consummate comfort food.  Admittedly, pasta è fagioli does not need to be meatless but it very often is.  (Actually, I made a non-meatless version earlier this week with guanciale, cured pork jowl.)


Click HERE to join our mailing list and you’ll never miss a recipe again!


Aunt Margie and Uncle Joe were like second parents to me.  I spent many (most?) summer days at Aunt Margie’s, getting there in the morning and staying until dinnertime or later.  My cousin, Donna, is nine months younger than I am.  Her neighbor Ricky Slivosky is nine months younger than she is.  The three of us hung out pretty much all summer.  That made Aunt Margie’s house the logical choice.

Aunt Margie got a little too much sun while we were staying at the Beau Rivage Resort in Miami Beach, 1971

Our families often vacationed together.  Florida was a favorite destination.  Once every 5 years Uncle Joe had 13 weeks of vacation (ahh, the glory days of American steel manufacturing…and collective bargaining).  Those years were likely to include a trip to California.

Aunt Margie really didn’t like vacations.  Several times I witnessed what I believe was an annual ritual.  Uncle Joe would be loading the suitcases in the trunk of the car and Aunt Margie would be standing beside him still trying to convince him to cancel the vacation.  Aunt Margie never won.

Beau Rivage Resort, Bal Harbour, Florida

Those vacations were always by car; two days to Florida and four days to California.  Aunt Margie ate the same lunch every day of every trip: bacon, lettuce, and tomato sandwiches on white toast, hold the mayo.  Only after we reached our destination did she resume a “regular” diet!

We always had fun and even Aunt Margie seemed to enjoy herself (a minor episode of seasickness, notwithstanding).

Aunt Margie getting seasick on the boat trip from Miami to the Bahamas, 1970

My father didn’t always go on vacation with us due to his work schedule.  He made it on the 1970 trip to Florida, which included several days in the Bahamas which we reached by boat from Miami.  The only food memory I have of that trip is going to an Italian restaurant in Freeport where the garlic bread was so garlicky that it was bitter.  The food itself must have been pretty good as we went back again.  Unfortunately, the garlic bread was just as bad the second time around.

Print Recipe
Aunt Margie's Pasta è Ceci (Pasta and Chickpeas)
Aunt Margie’s Pasta è Ceci was more soupy than my mother’s Pasta è Fagioli. It had no tomato sauce. This is my interpretation. I have made the liquid a little thicker by emulsifying the cheese and oil at the end. Aunt Margie never used wine. That is my addition. To prepare dry chickpeas, combine 1 pound of dry chickpeas, 7 cups of water, 1 tablespoon salt, 2 bruised garlic cloves, one bay leaf, ½ teaspoon whole black pepper, and a piece of Parmesan cheese rind. Cook in the Instant Pot for 15 minutes or simmer, partially covered, adding more water if needed, till tender but not mushy. If not using the Instant Pot, add the salt after about 15 minutes of simmering. Measure out 3 ½ cups of cooked chickpeas. Reserve the remainder for another use. Use the cooking liquid as described below. Aunt Margie's pasta è ceci was usually so soupy that it was served in bowls. Feel free to make yours as loose as you would like.
Votes: 1
Rating: 5
You:
Rate this recipe!
Prep Time 10 minutes
Cook Time 45 minutes
Servings
people
Ingredients
Prep Time 10 minutes
Cook Time 45 minutes
Servings
people
Ingredients
Votes: 1
Rating: 5
You:
Rate this recipe!
Instructions
  1. Measure out three cups of chickpea-cooking liquid or use the liquid from canned chickpeas adding water to make three cups.
  2. Combine chickpea liquid, white wine, diced onion, oregano and black pepper in a Dutch oven large enough to hold the cooked pasta comfortably. Bring to a boil and simmer approximately 20 minutes, until the onion is tender.
  3. Meanwhile, brown the garlic in 1/3 cup of olive oil over gentle heat.
  4. When the garlic is brown, remove it and reserve the oil.
  5. Cook the pasta in two quarts of heavily salted, boiling water until the pasta retains just a little crunch at the very center.
  6. Reserve at least two cups of the pasta-cooking water.
  7. Pour some of the remaining pasta-cooking water into the serving bowl to warm it while proceeding with the recipe.
  8. Drain the pasta and immediately add it to the seasoned chickpea-cooking liquid along with the chickpeas.
  9. Add the garlic-infused oil and salt and black pepper to taste.
  10. Simmer gently, covered, until the pasta is just al dente. Add some of the reserved pasta-cooking water as needed.
  11. When the pasta is al dente, add more of the reserved pasta-cooking water, if necessary, to make a slightly soupy mixture.
  12. Remove from the heat.
  13. Stir in the Romano cheese and 1/4 cup of olive oil to create a glossy sauce.
  14. Add a bit more of the pasta-cooking water if needed to thin the sauce as the combination of cheese and olive oil will create an emulsion that will thicken the sauce.
  15. Taste and adjust salt and pepper.
  16. Serve immediately with additional freshly grated Pecorino Romano cheese.
Recipe Notes

Copyright © 2018 by VillaSentieri.com. All rights reserved.

Share this Recipe