Sri Lankan Fish Croquettes

December 26, 2018

OK, I’m going out on a limb again posting another Sri Lankan recipe.

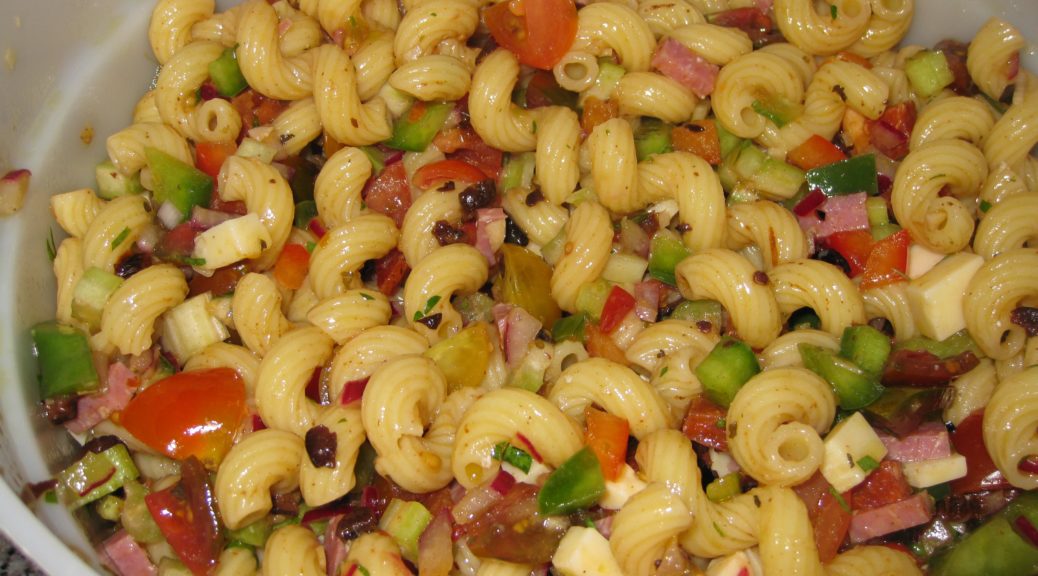
Whenever I do that, fewer people open the email and even fewer look at the recipe.  Sri Lankan food just doesn’t garner the interest (among my readers, at least) that Italian food does.  Interestingly (or not, perhaps) my cousin’s Marinated Pasta Salad from two weeks ago got the largest response ever!

Although a majority of my recipes are Italian, I am reluctant to post ONLY Italian recipes.  There are just so many things that I like to cook…and therefore want to share…that I want to keep my options open.  What happens, if for example if I choose to post only Italian recipes and then want to post my recipe for Bourbon Brown Sugar Apricot Jam?  That most certainly is NOT Italian.  (But it is so, so good!)


Join our mailing list and you’ll never miss a recipe again!


One possibility, I guess, would be to focus this blog on Italian food exclusively and to start a second blog that includes all the other foods I like to cook.  The majority of that food would end up being Asian with a smattering of Western Cuisines.  Bourbon Brown Sugar Apricot Jam would be just as out of place there as it would in an exclusively Italian-food-oriented blog. (And, I’m not sure I could keep two blogs going.)

Here’s my request:  Use the comment feature to let me know what you think about the options, or even come up with alternative suggestions, for how to focus the blog.  I plan to continue posting while I am in Italy for three months but that would be a great time to redesign the focus of the blog, if need be, and start fresh when I return.

Nanacy Rajapakse (left), who taught me the fundamentals of Sri Lankan cuisine, and her sister Thilaka in 2005.

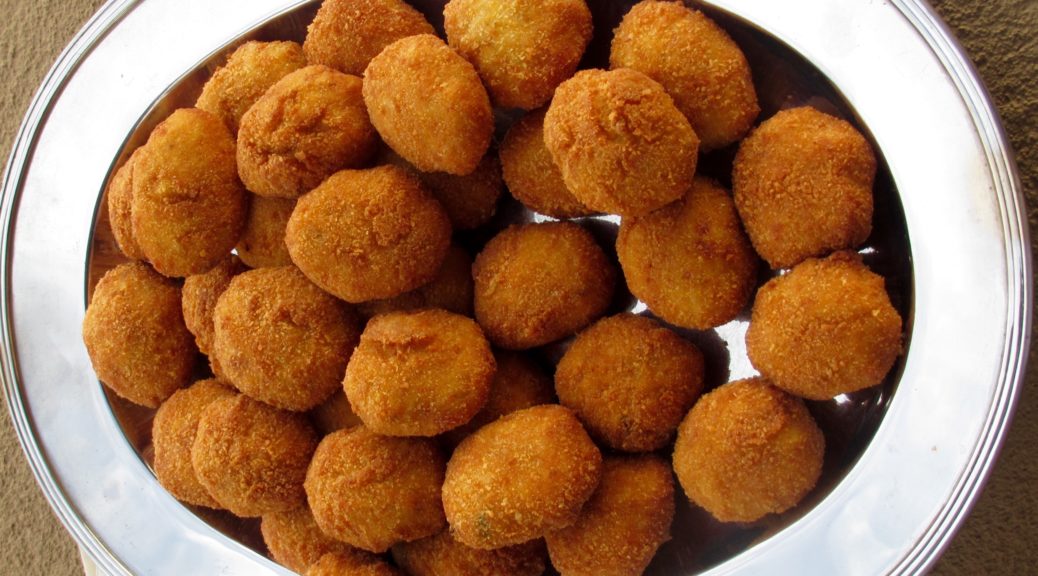
As for the Fish Croquettes, these are actually called Fish Cutlets in Sri Lanka but croquettes would be a more common term in the West.  I think you’ll find that they go really well with cocktails and, if you didn’t tell anyone they were Sri Lankan, nobody would be the wiser.


Follow us on your social media platform of choice


Over the next few months, I will post a few more of my favorite Sri Lankan recipes.  When I started doing this in the late summer, my plan was to post enough recipes for my readers to be able to put together a credible Sri Lankan meal, not that every dish I posted would need to be included but that I would have posted enough of an assortment of recipes to provide a good basis for selection.

Fishing boats in Sri Lanka

I am going to follow through on that plan in the coming months.  Upcoming recipes might include Beef Smoore, Devilled Cashews, Ghee Rice, Pol Sambol, Pork Badun, Beet Curry, Fish Curry, Pickled Lime, Pumpkin Curry, Tempered Cabbage and Peppers, and Wattalappam.  If you’ve got a favorite that you want me to post just let me know!

The blog will be an interesting juxtaposition over the next few months as I chronicle my culinary experience in Italy interspersed with Sri Lankan recipes.

Print Recipe
Sri Lankan Fish Croquettes
Although Tuna is a traditional fish used for cutlets, almost any type of fish will work. Good quality frozen tuna can be used in place of fresh. Curry leaves can be found in many Asian markets. There really is no substitute for them in terms of taste but if not having access to curry leaves is the only thing preventing you from trying this recipe, use another fresh green herb such as basil, thyme, or oregano. These may be served warm or at room temperature.
Votes: 0
Rating: 0
You:
Rate this recipe!
Prep Time 1 hour
Cook Time 1 1/2 hours
Passive Time 4 hours
Servings
croquettes
Ingredients
For the croquettes
For dredging and frying
Prep Time 1 hour
Cook Time 1 1/2 hours
Passive Time 4 hours
Servings
croquettes
Ingredients
For the croquettes
For dredging and frying
Votes: 0
Rating: 0
You:
Rate this recipe!
Instructions
  1. Peel the potatoes. Cut them into pieces approximately ¾ inch on a side.
  2. Put the cut potatoes in a steamer basket. Sprinkle with ground black pepper to taste.
  3. Steam the potatoes over boiling water until tender, 15-25 minutes.
  4. Put the cooked potatoes into a mixing bowl.
  5. Cut the fish into strips approximately 1 ½ inches wide.
  6. Put the fish in the steamer basket. Sprinkle with ground black pepper to taste.
  7. Steam the fish over boiling water until fully cooked and flaky, 10-20 minutes. If the fish has skin, remove it after steaming.
  8. Put the fish on a plate to cool.
  9. Coarsely chop the green chiles
  10. Grind the onions and green chile in a food processor.
  11. Sauté the ground onion mixture, curry leaves, and cumin in the oil until the onion is soft but not brown, 6-8 minutes.
  12. Coarsely mash the partially cooled potato.
  13. Add the fish to the potato and mash again. The mixture should not be completely smooth but there should not be any really large chunks.
  14. Add the onion mixture and salt to the mashed potatoes and fish. Mix well.
  15. Add the eggs and then enough breadcrumbs to bind the mixture. The amount of breadcrumbs needed will vary based on the moisture content. Use your judgement and opt for making the mixture a little loose rather than overly stiff.
  16. Refrigerate, covered, for several hours for the breadcrumbs to fully hydrate.
  17. Taste and adjust salt (and chile if you wish).
  18. Divide into 50 portions. Shape each into a slightly flattened oval shape.
Final Assembly
  1. Season the flour with salt and freshly ground black pepper to taste.
  2. Beat the four eggs lightly and season with salt and freshly ground black pepper to taste.
  3. Dredge each croquette in flour, then dip in the beaten egg, then roll in the breadcrumbs.
  4. Refrigerate, uncovered, at least one hour before frying.
  5. Deep fry the croquettes at 350°F to 375°F until golden brown.
  6. Drain on a rack set in a rimmed baking sheet.
Recipe Notes

Curry leaves have an alluring flavor that isn't really comparable to any other herb.  I recommend that you try to find them.  You will probably have extra left.  I suggest adding the whole fresh leaves to eggs before scrambling.

Fresh curry leaves

Copyright © 2018 by Villa Sentieri, LLC. All rights reserved.

Share this Recipe

Pizza di Patate (Potato Pizza)

December 19, 2018

I remember it clearly!  My love affair with Pizza di Patate began May 1992 in Rome.

All of my most favorite foods are carbohydrates:  pasta, bread stuffing, mashed potatoes, pierogi, soft pretzels, and homemade bread, among them.  The favorites among my favorites, though, combine two different carbohydrates in the same dish:  potato gnocchi, bubba (and its relative, potato pancakes), potato pierogi, homemade bread rolls stuffed with mashed potatoes and rubbed with olive oil and garlic, and, of course, potato pizza.

When I first tasted potato pizza in Rome it immediately entered the highest level of my carbohydrate pantheon.  I knew at some point I would need to learn to make it as I had never had anything like it in the States.  I still haven’t unless it’s come out of my pizza oven, though there is a new breed of Roman Pizzerias cropping up around the country dangling the possibility that one, serving pizza di patate, might settle in near where I live.

May of 1992 was the month my (now) husband and I were to celebrate our fifth anniversary.  I had been discussing with John Bowker, a friend, Anglican priest and the dean of Trinity College, Cambridge, England, coming to the UK for our anniversary.  John had offered to perform a wedding ceremony (still not legally binding, of course) following the Anglican rite in the Trinity College Chapel with the Trinity College Choir there to sing.

After much thought, we decided against going to Cambridge for the ceremony.  Although a few of our friends might have attended, we felt that most would not and we wanted to be surrounded by friends on that day.

Join our mailing list and you’ll never miss a recipe again!

We opted, instead, to have a ceremony performed at our house by John Fortunato, a friend and Episcopal deacon.  We had a calligrapher record our vows on parchment and signed by everyone present (in a nod to Quaker tradition) as an affirmation of our commitment to each other.

Invitation to our fifth anniversary and commitment ceremony

On our 25th anniversary, in 2012, we were actually married with 52 of our friends in attendance.  The wedding and reception were held in a private dining room at Del Posto in New York City.  But I digress…

In the early 1990’s Frank, my husband, and I were working full time but also attending Loyola University of Chicago studying for MBA degrees.  Loyola decided to offer MBA classes for the first time at its Rome campus in May 1992.  We jumped at the chance, leaving for Rome the day after our commitment ceremony.  We treated the trip like the honeymoon we had never had though by then we were very experienced world travelers.

Follow us on your social media platform of choice


A pleasant walk from the Loyola Campus (located in an old convent in Monte Mario) was a small shop that sold prepared Roman food and a dizzying array of pizza by the slice (pizza al taglio).  Most nights we went there for dinner then went back to our dorm room to study.  The shop had a few stools lined up along a narrow counter on one side but every patron, except us, picked up food to go.

A funny moment during our wedding ceremony in 2012

After a few days, our routine became clear to the shop owners.  As soon as we walked through the doorway, without asking a question, one of them reached for a bottle of local red wine and handed it to us.  We then ordered from the food on display and sat at the counter enjoying a wonderful meal.

Theirs was the first pizza di patate that I’d ever had.  I ate it all over Rome on that trip.

It took me at least five years to try to make it, and at least another five years to perfect it.  Now that we have a wood-burning oven in Santa Fe I almost always make at least one potato pizza on pizza nights (which don’t happen nearly often enough!).

Print Recipe
Pizza di Patate (Potato Pizza)
I first tasted this in Rome in 1992 and fell in love with it. There are numerous variations, such as using potatoes that have been shredded on the teardrop shaped holes of a grater or topping the pizza with cheese. This simple version is my favorite. Making the pizza in a rectangular pan most resembles Roman pizza al taglio. The dough can be divided to make two round pizzas approximately 12 inches in diameter. See the Notes section for instructions on making the dough in a bread machine as well as directions for making the dough in advance. You can use bread flour if you wish but the dough will be really springy from the gluten making it a bit more difficult to stretch out. If using bread flour it is really a good idea to refrigerate the dough as described below.
Votes: 0
Rating: 0
You:
Rate this recipe!
Prep Time 65 minutes
Cook Time 20 minutes
Passive Time 4 hours
Servings
people
Ingredients
Dough
Topping
Prep Time 65 minutes
Cook Time 20 minutes
Passive Time 4 hours
Servings
people
Ingredients
Dough
Topping
Votes: 0
Rating: 0
You:
Rate this recipe!
Instructions
  1. Warm the bowl and dough hook of an electric mixer with hot water. Drain and dry.
  2. Add the warm water and yeast to warmed bowl. Blend briefly.
  3. Allow the yeast and water to sit until creamy, approximately 10 minutes.
  4. Add about half the flour and mix to combine.
  5. With the motor running, add salt and drizzle in olive oil. Mix to combine.
  6. Add the remaining flour.
  7. Mix approximately 8-10 minutes after all the flour is added. The dough should be soft and slightly sticky.
  8. Place the dough in an oiled bowl or container. Oil the top of the dough. Cover the bowl and allow the dough to rise until doubled.
  9. Meanwhile, make the flavored oil. Sauté the bruised garlic in the oil over medium-low heat until light golden. Do not allow the garlic to turn brown.
  10. Allow the oil to cool for a few minutes. Add the rosemary. The oil should be warm to release the flavor of the rosemary but not so hot that the rosemary begins to sizzle.
  11. Allow the oil and rosemary to sit at room temperature to cool. When cool, remove and discard the garlic.
  12. When dough has doubled, punch it down to remove all air pockets.
  13. Using olive oil, oil an 11x17 inch rimmed baking sheet.
  14. Press the dough into the pan. Allowing the dough to rest for five or ten minutes midway through pressing it into the pan will allow the gluten to relax making it easier to shape the dough.
  15. Brush the dough lightly with some of the flavored olive oil.
  16. Cover the dough with an inverted rimmed baking sheet and allow it to rise until doubled.
  17. Meanwhile, scrub the potatoes and slice into very thin slices. A mandoline is best. If so, set it for 1/16 inch.
  18. Cover the potato slices with cool water to remove excess starch and to keep them from turning brown.
  19. When the dough has doubled, dry the potato slices thoroughly and put them on the top of the dough in a single layer that is slightly overlapping. You may have potato slices left over.
  20. Brush the top of the pizza with the remaining flavored olive oil and sprinkle liberally with coarse sea salt.
  21. Bake at 425°F for approximately 25 minutes, until the potatoes are tender and have golden edges and the dough is golden brown on the edges.
Recipe Notes

The dough can be made, with good results, in a bread machine on the dough cycle.  Though I don’t add sugar when making the dough by hand or with a mixer, the shorter rise cycles used by a bread machine work better with sugar.  Put the ingredients, above, into your bread machine following the manufacturers directions adding 1 tablespoon of sugar as well.  When the dough cycle is finished, press the dough into a pan, as described above, or refrigerate as described below.

If I have time, I prefer to make the dough a day or two in advance. After it has risen as described above, put the dough in an oiled container with a tight-fitting lid. Oil the top of the dough and refrigerate. Remove the dough from the refrigerator at least 5 hours before you plan on making the pizza. Punch down the dough just before making the pizza and proceed as above.

Copyright © 2018 by Villa Sentieri, LLC. All rights reserved.

Share this Recipe

Angie’s Marinated Pasta Salad

December 12, 2018

After driving a circuitous route for two days (I’ll explain why in a minute), I got home to Santa Fe from Palm Springs last Wednesday to a surprise.

My husband and I had plans to attend the holiday party for the Department of Psychiatry at the University of New Mexico, where he is Associate Professor, on Friday.  The surprise was that the party was a potluck and we had to bring a dish.

So, there I was on Wednesday evening, exhausted after two days of driving, with no prior knowledge that I had to produce a dish for a Friday event, coupled with the logistic challenge that I had to leave home around noon on Friday and ultimately make it to the party in Albuquerque by 7:00 PM with a dish in tow that I could neither refrigerate nor heat up!

It didn’t take long before I settled on my cousin Angie Catanese’s Marinated Pasta Salad.  This is a recipe that I’ve been making for about 45 years and it never fails to please.  It has so much stuff in it besides pasta that it’s almost a misnomer to just refer to it as a pasta salad!

Join our mailing list and you’ll never miss a recipe again!

I went grocery shopping on Thursday morning, assembled the salad Thursday afternoon, and the rest is history!

You might also enjoy my cousin Angie’s recipe for Pickled Hot Peppers.


The availability of pasta in many different shapes has ballooned over the decades. Cavatappi makes a great replacement for shells in this pasta salad.

Now, for an explanation as to why you haven’t heard from me in two months and what will be coming up for the blog…

In early October I went to Palm Springs to complete recipe testing for the Trio Restaurant Cookbook.  One can’t really test recipes for a cookbook at 8,000 feet in elevation so I spent five weeks in Palm Springs testing and finalizing over 125 recipes for the cookbook.  I had intended to continue posting to the blog during this time but very quickly found it impossible to fit in anything other than grocery shopping, recipe testing, and note-taking!

I got back to Santa Fe a few days before Thanksgiving then, less than a week after Thanksgiving was back on my way to California to go to the Consulate General of Italy in Los Angeles to apply for a visa.

In early January I am going to Italy to attend a three-month intensive course in Italian cuisine geared toward professional chefs at the Italian Culinary Institute.  Because I’ll be in Italy more than 90 days I need a visa.

Follow us on your social media platform of choice


My visa appointment was Friday and I was planning on spending the weekend in Palm Springs then driving back to Santa Fe on Tuesday.  The consular official said my visa would be ready by Tuesday so, rather than trust my luck (and my passport) to FedEx, I decided to drive back to Los Angeles to retrieve my passport.

It took me 3 hours and 45 minutes to drive the 122 miles from our home in Palm Springs to the consulate!  I got my passport in about 5 minutes then did some shopping at Eataly, conveniently located across the street from the Italian Consulate.  (I’d love to know who was responsible for securing THAT location!)  I then reversed course and started the drive back to Santa Fe, passing within a few miles of our home in Palm Springs where I had started the day.  I spent the night in Payson, Arizona then finished the drive Wednesday (which is when this story began).

The entrance to the Consulate General of Italy in Los Angeles which is conveniently located across the street from Eataly!

While I’m in Italy I will most likely be posting fewer recipes than usual.  I hope to chronicle some of my experiences at the Institute and pass on some tips and pointers on Italian food.  I hope you’ll stick with me during that time.  When I return, I’ll be back to my regular schedule of posting recipes.

Oh, and by the way, judging from how the pasta salad disappeared at the party, I think it was a hit!

Print Recipe
Angie’s Marinated Pasta Salad
There is so much “stuff” in this that it could easily be the basis of a light meal with just some bread and cheese. Angie’s original recipe called for shells but other types of medium-size pasta work just as well. In fact, I think the cavatappi are especially nice given their unusual shape. If you are making this when tomatoes are at their peak, use three medium-sized tomatoes in place of the cherry and grape tomatoes. You can use 2 cups of purchased Italian salad dressing instead of the homemade dressing if you’re so inclined, though the flavor will obviously be somewhat different.
Votes: 0
Rating: 0
You:
Rate this recipe!
Prep Time 1 hour
Cook Time 10 minutes
Passive Time 16 hours
Servings
people
Ingredients
Salad Ingredients
Dressing
Prep Time 1 hour
Cook Time 10 minutes
Passive Time 16 hours
Servings
people
Ingredients
Salad Ingredients
Dressing
Votes: 0
Rating: 0
You:
Rate this recipe!
Instructions
  1. In a large mixing bowl, combine all the dressing ingredients and set aside.
  2. Cook the pasta in abundantly salted water until just cooked but still slightly al dente.
  3. Meanwhile, cut-up all the ingredients.
  4. Onion
  5. Bell pepper
  6. Tomatoes
  7. Celery
  8. Genoa salami
  9. Pepperoni
  10. Provolone
  11. Oil-cured olives
  12. When the pasta is cooked, drain and rinse in cool water to stop cooking.
  13. Stir the pasta and diced onion into the dressing. Allow to cool to room temperature.
  14. When the pasta is cool, stir in all remaining ingredients.
  15. Refrigerate overnight before serving.
Recipe Notes

Copyright © 2018 by Villa Sentieri, LLC. All rights reserved.

Share this Recipe