Ricotta Fatta in Casa (Home-Made Ricotta)

March 25, 2020

I’ve been at home now for more than two weeks with just a weekly shopping trip to take me “off the mountain” as we say in our house.

This has given me ample time to catch up on some projects and start others.  It certainly gives me a lot more leeway to plan out a lot of cooking adventures.

Three days ago, I made 19 pounds of ‘ndjua.  It was a great project for a Sunday.  Well, these days, almost every day is like Sunday.

‘Nduja hanging in our wine room to age.

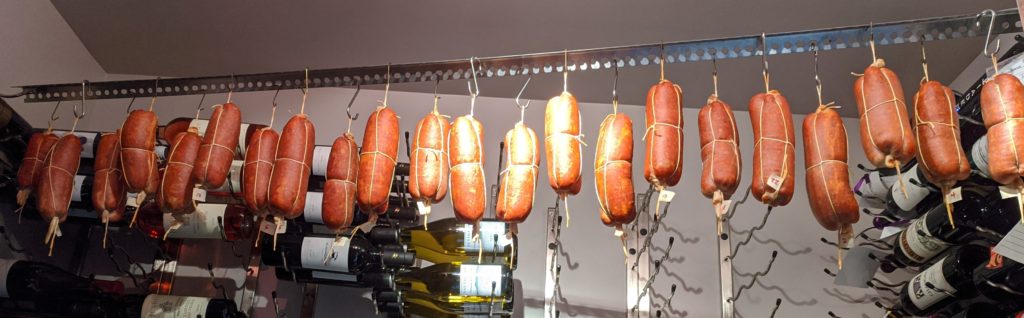
Making the ‘nduja, which is roughly 25% red pepper, wiped me out of the supply of peperoncino piccante in polvere (ground hot red pepper) that I brought back from Calabria in September.  In fact, I had to supplement with red pepper from India that I bought at an international food store in Las Vegas, NV a couple of months ago for just such an eventuality.


Join our mailing list and you’ll never miss a recipe again!


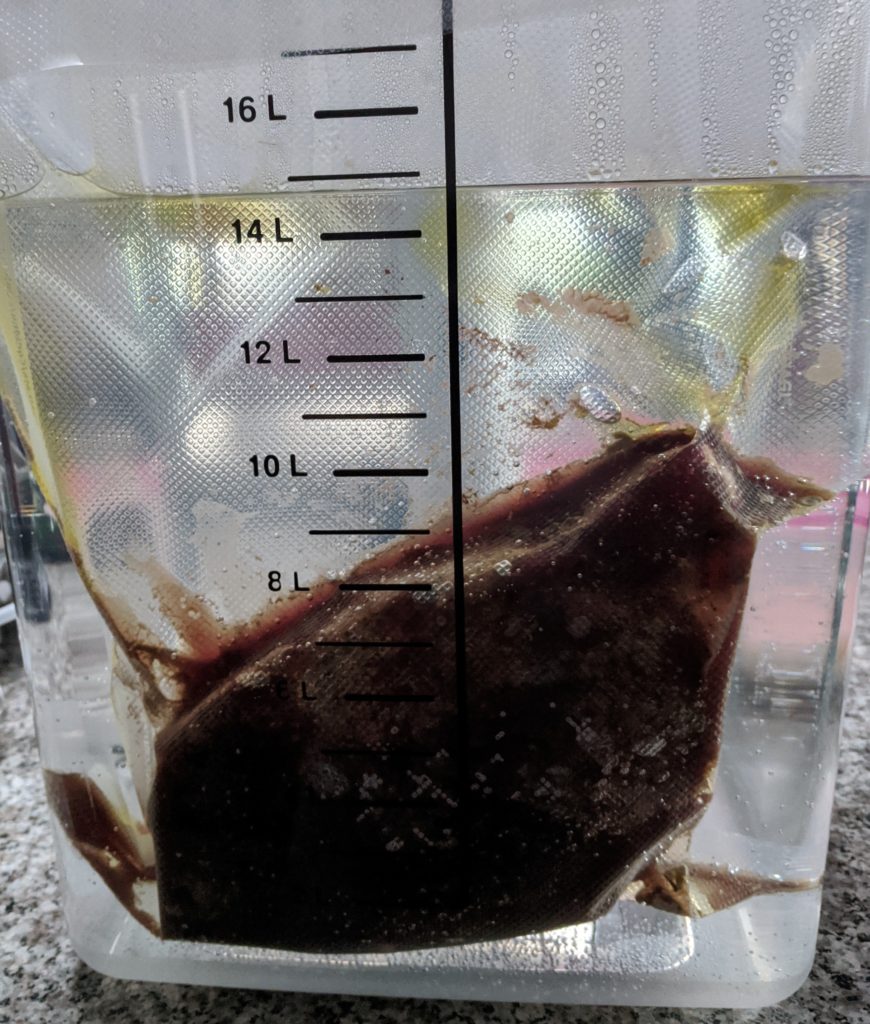
I’ve used up half of my supply of nero di seppia (cuttlefish ink… what, in America, we call squid ink except that it’s not from squid…it’s from cuttlefish), also brought back from Calabria.

The same is true for my lievito madre, powdered mother yeast.  It’s a combination of commercial yeast and “natural” yeast.  It’s sort of like a sourdough starter except that it’s not sour and you don’t keep the culture going.  You just use the powdered stuff as needed.

These are all common supermarket or open-air market items in Italy.

A view from the villa where we hope to spend the month of September.

We have plans to spend a month in a villa in Calabria this fall.  I have been honing my shopping list for months but I’m now concerned that the trip might not happen as planned.  It’s still a bit too early to know for sure but I’m getting myself mentally prepared for cancellation.

Meanwhile, I do what I love.  I cook.  Even if it means that I might use up precious supplies with the prospect that there may be no reasonable means of restocking in the near future.


Follow us on your social media platform of choice


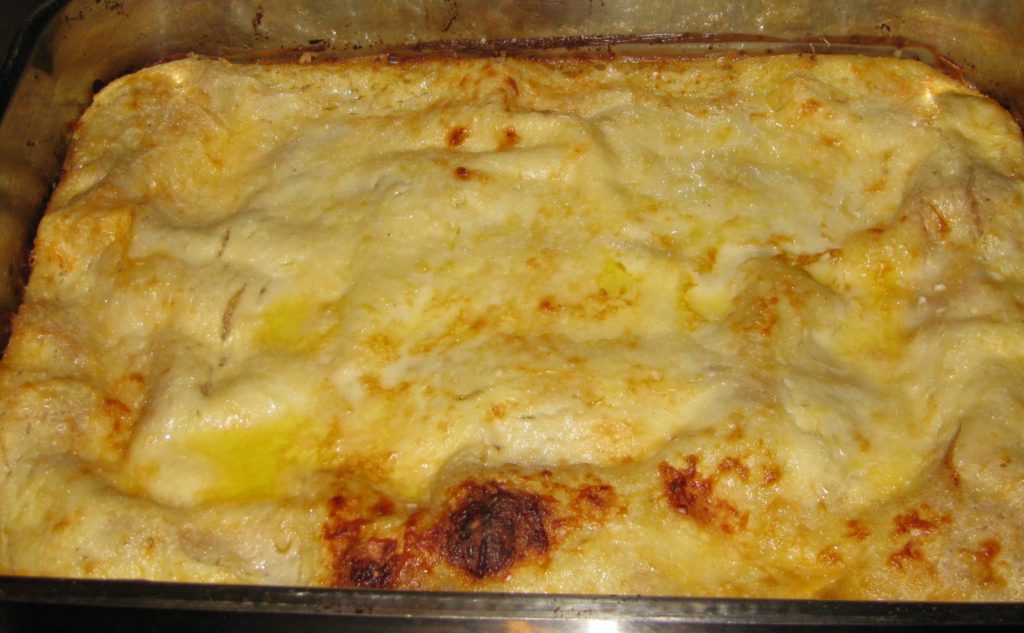
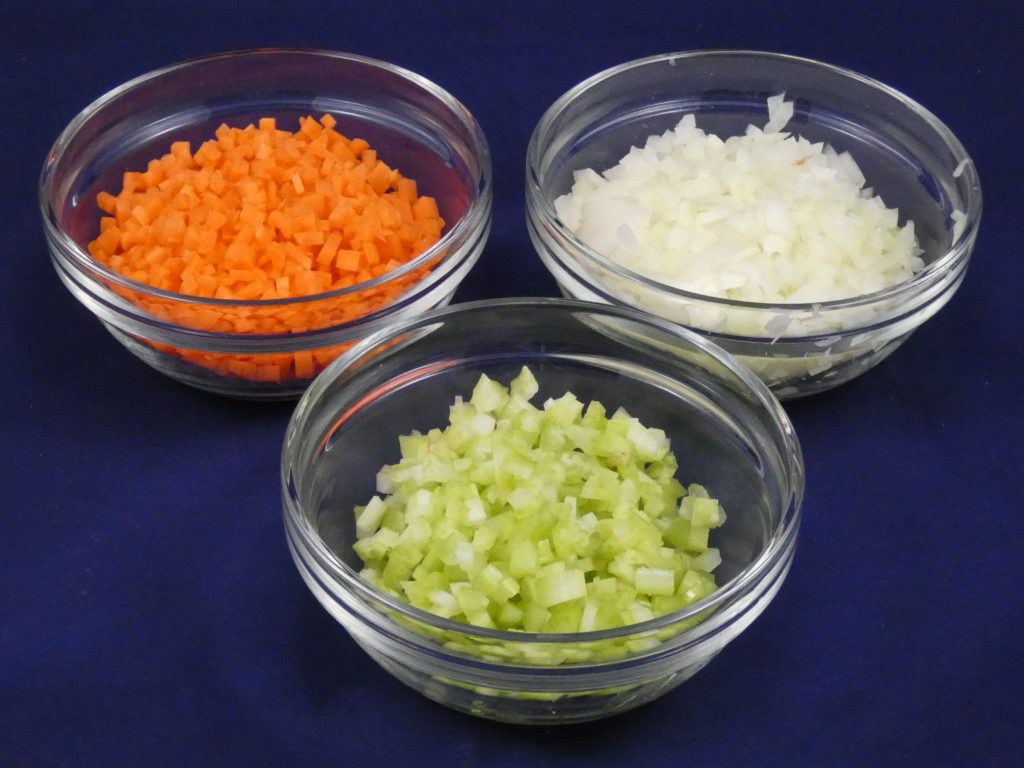
Two days ago, I made stuffed and rolled flank steak.  One day last week I made a batch of black pasta (with, ahem, cuttlefish ink) that I tossed with fresh scallops and mushrooms. I made a killer sous vide rib eye roast on Sunday.  It bobbed along, all seasoned up, in a vacuum sealed bag with my sous vide doing all the hard work while I made ‘nduja.

The ‘nduja was done, and hung, in time for me to pour a bourbon, take the roast out of the bag and sear it, and cook some veggies.

Rib eye cooked unattended sous vide while I made ‘nduja.

I’m comforted to know that in about two months there’ll be lots of ‘ndjua to enjoy.

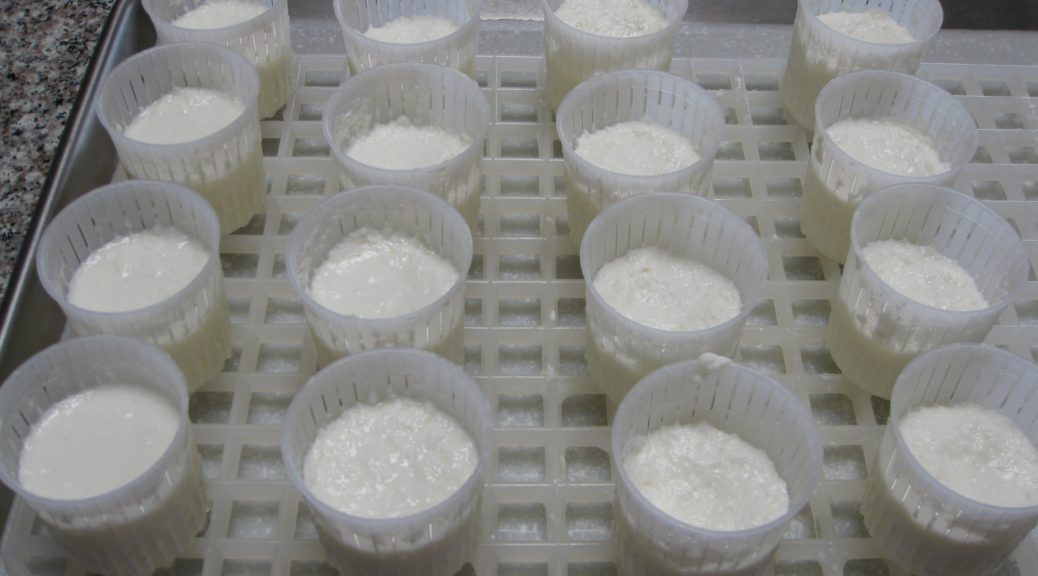
If you’re stuck at home, why not consider making something new—like ricotta.  All you need is milk, vinegar and salt (and, if you wish, a little cream).  Once you’ve made ricotta, you can drizzle it with honey and serve it for dessert or turn it into Sancarlin and serve it with some garlicky crostini.

Print Recipe
Ricotta Fatta in Casa (Home-made Ricotta)
You can replace the cream with an equal amount of whole milk but using cream improves the yield. Because the boiling point of water (and thus milk) is much lower where I live in Santa Fe, I target a temperature between 192°F and 195°F. At sea level, you can go up to 203°F. What you don’t want to do is to have bubbles break the surface of the milk, though there will be some foaming around the edges.
Votes: 0
Rating: 0
You:
Rate this recipe!
Cuisine Italian
Prep Time 15 minutes
Cook Time 20 minutes
Passive Time 30 minutes
Servings
pounds
Ingredients
Cuisine Italian
Prep Time 15 minutes
Cook Time 20 minutes
Passive Time 30 minutes
Servings
pounds
Ingredients
Votes: 0
Rating: 0
You:
Rate this recipe!
Instructions
  1. Warm the milk, cream, and salt in a heavy bottomed pan over medium heat.
  2. Stir occasionally until it reaches 170°F. Stir more frequently after that, and almost constantly once it reaches 185°F until the targt temperature is reached, 192°F or higher as described in the headnote.
  3. When it reaches the target temperature, add the vinegar and stir well. Turn off the heat and move the pot off the heating element. Even if you’re using a gas stove the grate will remain hot and can increase the temperature of the milk too much.
  4. Allow the milk to sit undisturbed. Curds should form a raft floating on top in 10 minutes. If curds do not form, add 1 tablespoon more vinegar, stir well, and wait 5-10 minutes more.
  5. Cut the curds into one-inch cubes with a knife.
  6. Lift the curds into cheese molds set on a grate to drain.
  7. Alternatively put the curds into a strainer lined with a double thickness of cheesecloth.
  8. Drain until the ricotta is as dry as desired based on how you plan to use it. The ricotta will be slightly stiffer once it is chilled so do not drain it too much.
  9. Once drained, the ricotta can be stored with the bottom sitting in a little of the whey to keep it moist. It will not reabsorb liquid once it has drained out.
Recipe Notes

Copyright © 2020 by Villa Sentieri, LLC. All rights reserved.

Share this Recipe

Crostini with Fava Beans and Arugula

March 18, 2020

A few weeks ago, our dinner group decided that the theme of our dinner would be dishes from my blog.  For complete disclosure, I recused myself from that decision.

Dating back to the beginning of our group, Santa Fe Ate, the name being both a play on what we do and how many we are [though recently we’ve been six due to a move out of state], Becky Gould has bid on appetizers.  There is the occasional exception but one can count on Becky to sate our hunger at the beginning of an evening with some artfully created appetizers.

Santa Fe Ate (minus two) our current configuration. (left to right: Pat Assimakis, Doug Howe, Gary Mihalik, Frank Pieri, Rich DePippo, Becky Gould)

Becky went through every one of my blog posts and came to the conclusion that I had not posted very many recipes for appetizers.


Join our mailing list and you’ll never miss a recipe again!


My review confirmed the same.

This post is the beginning of trying to rectify that situation.

Appetizers that Becky whipped up from the first edition 1950 Betty Crocker Cookbook for a dinner where all dishes had to come from that book.

Crostini are a favorite appetizer in our house.  The formula is infinitely adaptable.  It goes something like this:

  1. Toast bread, preferably a rustic Italian-style loaf or a baguette.
  2. Drizzle with good extra-virgin olive oil.
  3. Rub with the cut side of a clove of garlic.
  4. Add a topping of your choice.

Often, I stop at step three.  Toasted bread rubbed with garlic and extra-virgin olive oil is good without any embellishment.

If I’m not making many crostini, I’ll toast the bread in my 1967 General Electric Toast-R-Oven using the aluminum tray and the “top brown only” setting, flipping the bread once to toast both sides.  [Yes! I really do use a 53-year-old toaster oven.]

My 1967 General Electric Toast-R-Oven.

When making crostini for a crowd, I use the broiler and follow the same process of flipping the bread.


Follow us on your social media platform of choice


Choose toppings to suit your whim and the season.  Chopped fresh in-season tomatoes with a hint of basil is a classic topping as is coarsely mashed cooked cannellini beans with an extra drizzle of extra-virgin olive oil.

Becky’s spring rolls for a meal focused on “French Indochina 1920’s to 1930’s.”

Just last week I made crostini topped with goat cheese and spicy eggplant preserved in extra-virgin olive oil (melanzane piccante sott’olio) that I had made a few days earlier.

This particular combination of beans and arugula, zipped up with lemon, is very refreshing and a reminder that spring is not far away.


Print Recipe
Crostini with Fava Beans and Arugula
Frozen fava beans work well in this recipe. If you cannot get fava beans, substitute edamame. If using fava beans, you will need to start with more than one cup of shelled beans to have one cup of peeled beans after cooking.
Votes: 0
Rating: 0
You:
Rate this recipe!
Prep Time 20 minutes
Cook Time 10 minutes
Passive Time 6 hours
Servings
persons
Ingredients
Prep Time 20 minutes
Cook Time 10 minutes
Passive Time 6 hours
Servings
persons
Ingredients
Votes: 0
Rating: 0
You:
Rate this recipe!
Instructions
  1. Cook fava beans or edamame till tender, approximately 3-4 minutes. Drain and shock in ice water.
  2. If using fava beans, peel them.
  3. Coarsely chop the cooked beans in a small food processor.
  4. Remove half the beans and reserve.
  5. Coarsely chop 1/2 ounce of arugula by hand. Reserve.
  6. To the beans in the food processor, add 1/4 cup of olive oil, the remaining 1/2 ounce of arugula, mint leaves (if using), Pecorino Romano cheese, lemon zest, and lemon juice.
  7. Process until almost smooth.
  8. Combine puree with the coarsely chopped beans and arugula and mix by hand.
  9. Adjust salt, pepper, and lemon juice. Refrigerate several hours, or overnight, to allow flavors to blend.
  10. Return to room temperature before using.
  11. To serve, toast slices of baguette. Drizzle one side of the toasted bread with extra-virgin olive oil. Rub the bread with the cut side of a garlic clove, distributing the oil.
  12. Top each slice of bread with some of the bean mixture.
Recipe Notes

Copyright © 2020 by Villa Sentieri, LLC. All rights reserved.

Share this Recipe

Ragù alla Bolognese

March 11, 2020

I grew up eating exactly one type of tomato sauce for pasta: my mother’s long-simmered, Italian-American-but-based-on-Southern-Italian (Calabrese, to be exact) ragù.

OK, OK, I sometimes ate Aunt Margie’s or Aunt Mamie’s version of the same sauce but we’re talking very minor variations on a theme.

My mother made pasta other ways than with ragù, most commonly with beans as in pasta e fagioli.  But if we were going to eat pasta for pasta’s sake, not mixed with beans or in soup, it was ALWAYS served with her ragù.

My recipe for Lasagna Bolognese will be posted in a few weeks. Get ready by making Ragù alla Bolognese and putting it in the freezer!

When I went away to university at the age of 17 this is one of the first things that I learned to cook.  Well, sort of.  There’s a bit of a learning curve but even my first attempt was respectable.


Join our mailing list and you’ll never miss a recipe again!


I now make scores of tomato-based sauces on a regular basis but I keep going back to three of them over and over:

  1.   My mother’s ragù.
  2.   Ragù alla Bolognese.
  3.  Ragù del macellaio (the butcher’s ragù).

There are so many childhood memories attached to my mother’s ragù that I can’t imagine a time when it wouldn’t be my favorite.

As far as I’m concerned, Ragù alla Bolognese is the gold standard for those tomato-based pasta sauces made with ground meat.  (My mother’s ragù, on the other hand, is made with large pieces of pork.  Other meats can be added but the pork is always there.)

It is really important that the vegetables for Ragù alla Bolognese be cut in tiny dice, 1/8 on a side, often called brunoise.

Ragù del macellaio is very good but, as you might expect for a sauce linked to a butcher, it is made with an array of meats—pretty much anything you have.  I always end up with odds and ends of meat in my freezer, a bit of beef, a bit of pork, some sausage, a piece of chicken, some pancetta, and so forth.  I grind them all up and make the sauce.  The fact that it cooks, unattended, in a slow-cooker all day is an added bonus.

Just as there is an official Pesto alla Genovese recipe, there is an official Ragù alla Bolognese recipe that was codified in the 1980’s.  The ingredients go something like this:

  • 300 grams ground beef, preferably thin flank aka skirt (finta cartella in Italian)
  • 150 grams pancetta, minced
  • 50 grams carrot, minced
  • 50 grams celery, minced
  • 50 grams onion, minced
  • 30 grams triple-concentrated tomato paste
  • 1/2 glass red or white wine
  • 180 ml milk
  • olive oil
  • salt and pepper

Every family in Bologna probably has a slightly different version.


Follow us on your social media platform of choice


Some aspects of the recipe are notable.  There is no garlic.  There are no herbs.  The amount of tomato is quite modest.  Probably the biggest differences I see in credible recipes for Ragù alla Bolognese is whether or not to add milk or cream.  The official version clearly includes it but many otherwise solid recipes do not.

This is not a “tomatoey” sauce.  It’s really ground meat held together with a bit of tomato “binder.”

The version that I make most often varies somewhat from the official one.  I add a hint of garlic and more tomato.  I don’t typically use pancetta though it’s a great addition.  I never add milk or cream.

So, I’ve done it, I’ve laid down a gauntlet.  I’m advocating a recipe that’s not the official one.  I can tell you, however, that it’s darn good.

Give it a try and let me know what you think.

Print Recipe
Ragù alla Bolognese
I make garlic oil and keep it in a squeeze bottle by the stove. It comes in really handy for cooking and for flavoring finished dishes. You can use plain extra-virgin olive oil if you wish. In fact, that would be more traditional than garlic. For added flavor, sauté 150 grams of minced pancetta in the olive oil until the fat is rendered. Remove the cooked pancetta. Brown the meat in the oil. Add the cooked pancetta to the meat just before adding the wine. Ragù alla Bolognese should be served with a wide long pasta such as mafalde or linguine.
Votes: 0
Rating: 0
You:
Rate this recipe!
Prep Time 30 minutes
Cook Time 5 hours, mostly unattended
Servings
liters
Ingredients
Prep Time 30 minutes
Cook Time 5 hours, mostly unattended
Servings
liters
Ingredients
Votes: 0
Rating: 0
You:
Rate this recipe!
Instructions
  1. Heat the butter in a heavy-bottomed sauté pan. Add the celery, carrot, and onion.
  2. Sauté the celery, carrot, and onion in the butter until soft without browning. Reserve.
  3. Heat the garlic oil, or extra-virgin olive oil, in a heavy-bottomed sauce pan. Add the beef and pork, if using.
  4. While the meat is cooking, break it up into small bits.
  5. Sauté the beef and pork, if using, in the garlic oil until a lot of fond develops.
  6. Add the wine and boil it all away, loosening the fond from the bottom of the pan.
  7. Pass the canned tomatoes through a food mill.
  8. Add the sautéed vegetables, the tomatoes that have been passed through a food mill, and bay leaf, if using.
  9. Season with salt and pepper.
  10. Simmer 3 to 4 hours partially covered, stirring frequently, until reduced by 50%.
Recipe Notes

Copyright © 2020 by Villa Sentieri, LLC. All rights reserved.

Share this Recipe

Torta all’Arancia (Orange Polenta Upside-Down Cake)

March 4, 2020

Italy is lavished with citrus, more so in Southern Italy than Northern Italy.  Even in Tuscany, though, families traditionally use a limonaia to winter-over lemon trees grown in pots.

Potted lemon trees at a house in the village of Benabbio in Tuscany.

Citrus fruits feature prominently in Italian cuisine, especially in Southern Italy.  Calabria is responsible for about 25% of the citrus fruit produced in Italy.


Join our mailing list and you’ll never miss a recipe again!


A very short list of Italian foods that contain, or are made from citrus includes the famous limoncello liqueur and its orange-based cousin, arancello; panettone that is traditionally made with candied citron; lemon sorbetto (sorbet); an array of marmalades and jams; candied citrus peels of various types eaten as sweetmeats, sometimes coated in chocolate, as well as diced and incorporated into cakes; citrus salads, including an amazing Sicilian salad of oranges, fennel, onions and black olives; and the endless dishes where lemon juice is the basis of a pan sauce or salad dressing or, in lesser quantities, perks up other flavors without making itself known.

A rustic limonaia at a home in the village of Benabbio in Tuscany. It may be simple but it works beautifully.

Bergamot, most of which (and certainly the highest quality) comes from Calabria, is the defining flavor of Earl Grey Tea.  It is also used in an array of cosmetics and fragrances.

Maestro Paolo Caridi teaching a class at the Italian Culinary Institute.

Bergamot is also one of several citrus fruits used by Maestro Paolo Caridi to concoct the scrumptious citrus flavoring he uses in some of his pastries.  I’m itching to find a source of bergamot, which I understand grows in Palm Springs, California, to make a batch, having gotten his formula when I studied at the Italian Culinary Institute.


Follow us on your social media platform of choice


Being surrounded with citrus at our home in Palm Springs, I try to find ways to use the bounty.  It took me a while to come up with an orange cake (torta alle arance) that was everything I though an orange cake should be: a moist, not to sweet cake with a sturdy crumb and a distinct orange flavor.

A potted lemon tree on Great Aunt Fidalma’s terrace in Tuscany.

Print Recipe
Torta all'Arancia (Orange Polenta Upside-Down Cake)
Instead of cutting the oranges in slices, you can supreme them if you prefer the look of sections rather than slices. If possible, use the metric measures for the best results.
Votes: 0
Rating: 0
You:
Rate this recipe!
Cuisine Italian
Prep Time 45 minutes
Cook Time 1 hour
Passive Time 1 hour
Servings
people
Ingredients
Topping
Cake and Assembly
Cuisine Italian
Prep Time 45 minutes
Cook Time 1 hour
Passive Time 1 hour
Servings
people
Ingredients
Topping
Cake and Assembly
Votes: 0
Rating: 0
You:
Rate this recipe!
Instructions
Topping
  1. Grease a 10-inch x 2-inch circular cake pan with butter.
  2. Finely grate the zest of the three oranges without any of the white pith. A microplane grater work well. Reserve the zest and oranges separately.
  3. Combine brown sugar, butter, white sugar, and orange juice in a small pan. Heat, stirring frequently till butter is melted and sugar is dissolved. Raise heat and boil for 2 minutes, without stirring, until slightly thickened.
  4. Remove caramel syrup from the heat. Stir in the zest of three oranges. Pour the caramel on the bottom of the prepared pan. Allow to set for approximately 5 minutes, until cool.
  5. Meanwhile, slice the oranges approximately ¼ inch thick. Cut off all pith and rind. Remove the tough core from any slices that have it. Scissors work well for doing this.
  6. After the caramel has cooled for about 5 minutes, arrange orange slices over the caramel without overlapping. Cut slices as needed to fill in the larger gaps between the full slices.
Cake and Assembly
  1. Stir together the flour, cornmeal, baking powder and salt. Reserve.
  2. Beat the butter in an electric mixer until lightly creamed.
  3. Add the white sugar, then beat at high speed until light and fluffy, approximately 4 minutes.
  4. Add eggs, one at a time, beating on medium after each addition until the egg is combined.
  5. Mix in sour cream then vanilla and orange zest.
  6. With the mixer on low, add the flour mixture a little at a time and mix until almost combined. Finish mixing by hand.
  7. Spoon the batter over the orange slices in the prepared pa. Spread the batter and tap the pan to remove air bubbles.
  8. Bake at 350°F until a cake tester comes out clean, 50-55 minutes. Cool for 10 minutes in the pan.
  9. Using a knife, loosen the cake from the sides of the pan. Invert onto a serving dish. Cool completely.
Recipe Notes

Copyright © 2020 by Villa Sentieri, LLC. All rights reserved.

Share this Recipe