Aunt Ann’s Pineapple Cream Cheese Pie

June 30, 2017

I grew up at a time, and in a town, where people just dropped in, unannounced, to visit family and friends.

Some evenings we’d stay home.  Some evenings we’d go to town.  This was pretty much every Monday and Thursday when the stores were open until 9:00 PM.  And, mind you, we dressed to go to town!  Other evenings we’d visit family and friends.

Around the age of 5 or 6, when we went to Aunt Ann’s, I’d play with food.  Really.  And not at the table.  I don’t honestly know how this got started but Aunt Ann would spread out a vinyl tablecloth on the beige wall-to-wall carpet in her living room.  (Remember, this was around 1960!)  I would pull pots and pans and mixing bowls and other equipment (like box graters and spoons) out of her kitchen cabinets and haul my stash to the living room.

Aunt Ann circa 1965 at Grandma and Grandpa’s house

Then I’d raid the refrigerator for things like carrots, celery, and so forth.

I’d sit in the living room, on the tablecloth, grating vegetables and mixing things in the various pots and bowls.

My love of cooking has deep roots.

My love of peanut butter not so much.

For some reason, I despised peanut butter at that age.  (I know, that’s almost un-American!)  But just to keep things from being too quiet, Uncle Jano would sometimes walk towards me holding a jar of peanut butter and I would run like a vampire running from a wooden stake.

I don’t know what I thought was going to happen, but I had to escape from the peanut butter.

The ordeal usually ended with me face down on the sofa until Uncle Jano retreated…sometimes only to start again after I pulled my face out of the pillow.

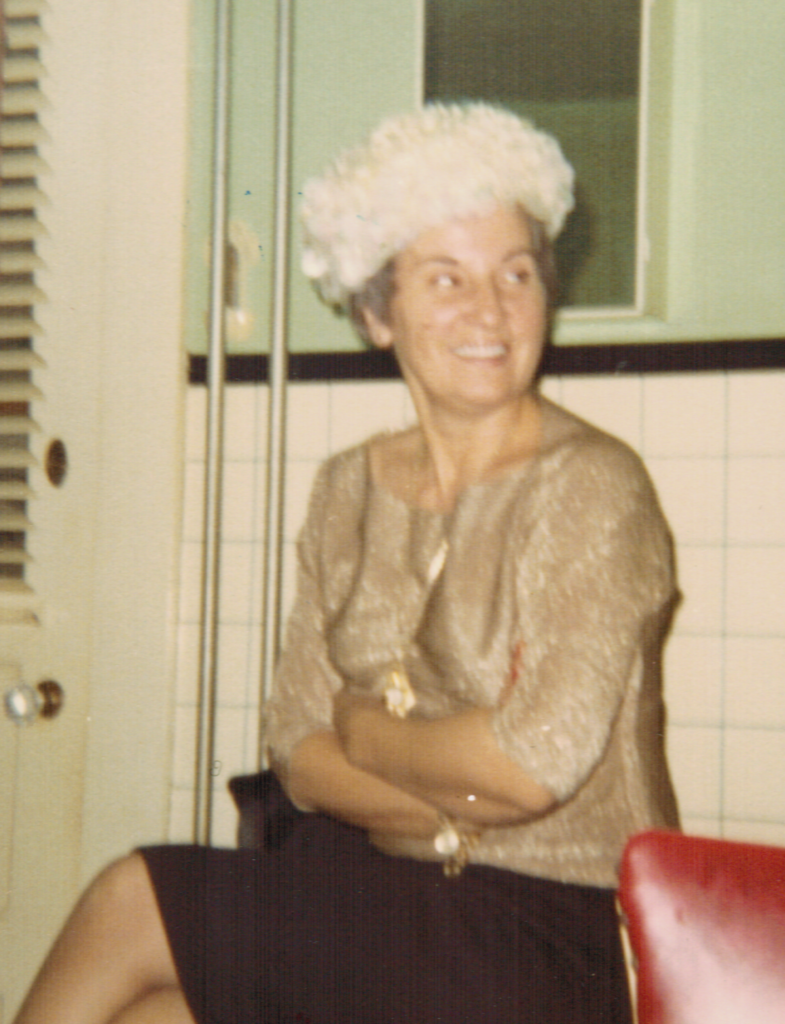
Aunt Ann and Uncle Jano were great fun.  But they were only Aunt Ann and Uncle Jano if you were related to them through Uncle Jano.  If you were related to them through Aunt Ann, they were Aunt Honey and Uncle John.

From left to right: Uncle Jano, my Grandfather, Uncle “Booty” and my Dad, circa 1965 on a Sunday at my Grandparent’s house

Aunt Ann was a great cook.  She was ethnically Russian and made lots of Russian and Eastern European food like mushroom soup, potato soup, kielbasa, chicken paprikash, pierogi, stuffed cabbage, and so forth.

She also made Italian food, which she learned from the wife of the local Mafia Boss who lived down the street.  (I had a colorful childhood.  What can I say?)

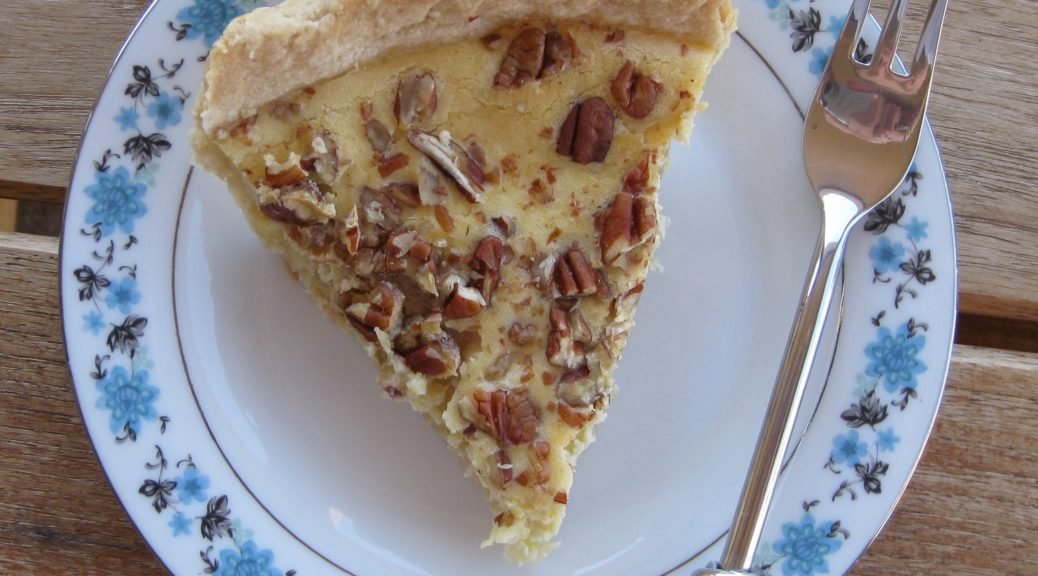
There were the occasional American dishes, like Rum Balls and Pineapple Cream Cheese Pie, too.

Years after those episodes of “cooking” on Aunt Ann’s living room floor, when I was in my teens and twenties, I was always on the lookout for pineapple cream cheese pie when we went to visit.

In an attempt to keep this manageable, I am not posting a recipe for pie crust just yet, but I will at a future date.  If you have a favorite pie crust recipe, by all means, make your own.  If not, buy prepared pie crust from the grocery store.  But whatever you do, give this recipe a try if it appeals to you.  It’s always a hit!

This one is just for fun: Aunt Ann (far left), Aunt Margie (in the back), my mom (far right), my sister and my cousin “Rocky” circa 1950

Click HERE to join our mailing list and you’ll never miss a recipe again!

Print Recipe
Aunt Ann's Pineapple Cream Cheese Pie
If you don’t have a favorite pie crust recipe, or if you aren’t comfortable making pie crust, buy prepared pie crust. Be sure to purchase NINE INCH DEEP DISH pie crust, however. If you are making your own pie crust, you can use a standard nine inch pie pan, deep dish is not necessary. The cream cheese filling is easier to make in a food processor though an electric mixer works, too. If you are using a mixer, the cream cheese will be much easier to mix if it is at room temperature. This is not critical if you are using a food processor.
Votes: 0
Rating: 0
You:
Rate this recipe!
Cuisine American
Prep Time 30 minutes
Cook Time 1 hour
Servings
pies
Ingredients
Cuisine American
Prep Time 30 minutes
Cook Time 1 hour
Servings
pies
Ingredients
Votes: 0
Rating: 0
You:
Rate this recipe!
Instructions
  1. Chop the nuts and reserve.
  2. If making your own crust, prepare and line two nine-inch pie pans. Refrigerate the crust-lined pans until the fillings are prepared.
  3. In a small heavy-bottomed saucepan, combine the crushed pineapple, cornstarch, and 1/2 cup of sugar.
  4. Stir until the lumps are gone. The mixture will become cloudy from the cornstarch but will become clear once cooked.
  5. Bring to a boil over medium-high heat, stirring constantly.
  6. Boil for approximately one minute, until thickened.
  7. Take the pan off the heat and allow the pineapple mixture to cool slightly.
  8. In a food processor or electric mixer, beat the cream cheese well.
  9. Add the remaining 1/2 cup sugar, milk, eggs and vanilla. Mix until the cream cheese is thoroughly combined, all the sugar is dissolved, and there are no lumps.
  10. Divide the pineapple filling between the two pie-crust-lined pie pans.
  11. Top each pie with half the cream cheese mixture.
  12. Scatter the chopped nuts on the pies.
  13. Bake at 350°F for approximately 60 to 65 minutes until the tops of the pies are just beginning to turn golden and the filling is set.
  14. Cool to room temperature before serving. The pies will sink somewhat as they cool.
Recipe Notes

Copyright © 2017 by VillaSentieri.com. All rights reserved.

Share this Recipe

Homemade Pizza

June 26, 2017

Before my bread machine it was my Kitchen Aid stand mixer.  Before my Kitchen Aid stand mixer it was my hands.  I have always enjoyed making bread.

Junior year in college was when my bead making got started in earnest.  That was the year that I lived in the International Residence Project at the University of Pennsylvania.  I was notified of my acceptance into the Project, a College House arrangement that occupied two floors of a high-rise dorm, late in my sophomore year.  Current and incoming residents of the Project met at a social event where I was introduced to the roommate to whom I had been assigned for the coming school year, Ray Hugh from Georgetown, Guyana.

Ray and I started hanging out together for the last part of sophomore year and found that we really hit it off.  Since we were both staying in Philadelphia for the summer, and since students could not stay in undergraduate dorms during the summer, we did what most undergrads did during the summer.  We sublet an apartment in Graduate Towers from graduate students who were not staying in Philadelphia for the summer but who, as graduate students, had year-long leases.

I had pretty regular hours working in a research lab for the summer but that left evenings and weekends free to explore cooking which Ray and I did together.  It quickly became clear that the kitchen in our apartment in the International Residence Project, which we would begin occupying in September, was going to need an upgrade.

At my request, my father made a five-foot long kitchen counter with a laminate top.  There was in integrated pull-out table that would seat two in the regular configuration but four when pulled out.  That counter became the epicenter of our cooking universe.  Set opposite the Pullman kitchen (three electric burners, an oven, an under-counter refrigerator, and an integrated sink) we had a very efficient kitchen set-up.  A deep shelving unit that I made housed equipment and several stacks of plastic milk crates held ingredients for which there otherwise would have been no space.

I made bread on that counter every week, kneading it by hand.

I made bread the way my Italian grandmother did.  Flour, water, salt, and yeast went into a big bowl.  The yeast was not proofed.  I mixed the ingredients by hand, adding more flour as needed.  Periodically I would rub the inside of the bowl with lard.  After enough flour had been added, I would put the dough on the counter and knead it for about ten minutes.  The dough would always rise twice, getting punched down and kneaded lightly after each rise, before being put in bread pans for the third and final rise before being baked.

Decades later I got my first Kitchen Aid stand mixer and started using that to make bread.  Good thing, too, because I was starting to have trouble with my joints from all the kneading necessary.

A few years ago I got my first bread machine, a Zojirushi BB-PAC20.  While I have no doubt that bread baked in an oven is better I also have no doubt that we would not eat anywhere as much homemade bread if I had to do all the mixing, rising, shaping, and baking unaided.

With less than five minutes’ work spent measuring ingredients, I can push a button and have bread a few hours later.  And I am completely at peace with the ingredients in my bread.  No sugar.  No high fructose corn syrup.  No dough conditioners.  No preservatives.  Nothing but flour, water, salt, olive oil and yeast!  The bread machine has more than paid for itself in savings.

My Zojirushi BB-PAC20 bread machine

I especially like the dough cycle.  As noted in a previous blog post, I use the dough cycle to make the dough for my focaccia.  A quick final rise after being shaped and the focaccia is ready for the oven.  The dough cycle also makes pizza dough in a snap.  I like to make it at least one day in advance and allow it to rise in the refrigerator.  Two days in advance is even better.

I still pretty much use the same recipe for bread dough that I followed in college though I’ve swapped out the lard for olive oil and modified the directions to suit mechanization instead of hands.  (Every now and then, I just get the urge to do it by hand, though!)

Usually I bake pizza in a wood-burning oven.  Since wood-burning ovens are not very common, the pizza featured in this post was baked in a conventional oven.  I don’t have a pizza stone since I don’t usually bake pizza in the oven.  All the better though, since I know few people who have pizza stones.   I simply went old school and used heavy aluminum pizza pans.  I didn’t even use the convection feature!

Our DoughPro wood-burning oven from Australia
Baking chamber above and fire chamber below

Until a few years ago I always cooked my pizza sauce.  Then I tried uncooked sauce as is often done in Naples and found that I really prefer it.  It has a fresher taste and it is really easy to make.  (Sorry mom!)

I usually use tomato puree because I like a smooth sauce but crushed tomatoes work well if you prefer a chunkier sauce.  You can also just whizz a can of whole peeled tomatoes in the blender or food processor to whatever degree of chunkiness or smoothness you want.

An array of tomato products

Print Recipe
Homemade Pizza
Make the dough at least one day before you plan to bake the pizzas. The dough will benefit from the slow rise in the refrigerator. Two days is even better. Be sure to put the balls of dough in containers that seal well to keep the dough from drying out and that are large enough to hold the dough after it rises. Remove the dough from the refrigerator the morning of the day you plan on making pizza. It will take 3-5 hours to warm up and rise. If you’re not ready to make pizza when the dough has doubled in bulk, just punch it down and allow it to rise again. The dough recipe makes enough for two 16 inch pizzas but the sauce is enough for four. Extra sauce will keep in the refrigerator for 4-5 days. Since I make so much bread, I buy dry yeast in bulk. You can substitute one envelop of yeast for the two teaspoons of yeast called for in the recipe. For the sauce, use tomato puree if you prefer a smoother sauce and crushed tomatoes if you prefer a slightly chunkier sauce. In either case, really good tomatoes are called for. Buy genuine San Marzano tomatoes imported from Italy, if possible. I find Cento to be a good brand and generally available in the markets in my area.
Votes: 0
Rating: 0
You:
Rate this recipe!
Prep Time 40 minutes
Cook Time 15 minutes (for each)
Passive Time 24 hours
Servings
pizzas
Ingredients
Pizza Dough
Pizza Sauce
Prep Time 40 minutes
Cook Time 15 minutes (for each)
Passive Time 24 hours
Servings
pizzas
Ingredients
Pizza Dough
Pizza Sauce
Votes: 0
Rating: 0
You:
Rate this recipe!
Instructions
Pizza Dough
  1. One or two days before you plan to bake the pizza, prepare the dough.
  2. You can use the dough cycle of a bread machine, the dough hook of a stand mixer, or you can make the dough by hand following the directions in the blog post.
  3. If using a bread machine, follow the manufacturer’s directions for the dough cycle.
  4. If using a stand mixer, put warm, not hot, water in the bowl of the mixer. Add four cups of flour, the yeast, and salt and begin to mix. Gradually pour in the olive oil. Add enough of the remaining flour to make a slightly tacky dough. Chances are you will need all of it. Allow the dough hook to knead the dough for 8-10 minutes.
  5. If making the dough by mixer or hand, oil the dough and place in an oiled bowl. Allow the dough to rise at room temperature until doubled in bulk, covered lightly with a kitchen towel.
  6. After the dough has doubled, or when the bread machine has completed the dough cycle, remove the dough and punch it down.
  7. Divide the dough in half and shape into two balls. Rub the surface of each ball with oil and put each one into a separate oiled bowl or LARGE plastic container.
  8. Cover tightly using plastic wrap if needed.
  9. Put the dough in the refrigerator until the morning of the day you plan to bake the pizza.
  10. On baking day, remove the dough from the refrigerator in the morning and allow it to sit at room temperature until doubled in bulk. This will take 3-5 hours (or maybe a bit longer if your refrigerator is really cold). If you are not ready to bake the pizza, just punch the dough down again and let it rest. It is better to err on the side of taking it out of the refrigerator too early rather than too late!
Pizza Sauce
  1. Mince the garlic.
  2. Combine all the ingredients for the sauce.
  3. Cover and refrigerate overnight to allow the flavors to mellow.
  4. Some brands of tomatoes can be a bit tart. Taste the sauce right before you use it and, if necessary, add up to ½ teaspoon of sugar but no more. (Some people consider this heresy but it is a common Italian technique to counter tomatoes that are too tart. Remember agricultural products vary and sometimes you need to use your judgment to correct a situation that is not addressed by the recipe.)
Assembly of Pizza
  1. Shred the mozzarella on the tear-drop shaped holes of a box grater. Reserve.
  2. Lightly dust a 16 inch round pizza pan with cornmeal.
  3. Put the dough on a metal pastry "board" or a second pizza pan and gently stretch it by pressing on it and moving your hands apart. The dough will spring back. Each time it will stay stretched a little more. After six to eight stretching motions, allow the dough to rest for several minutes to permit the gluten to relax. This will make it easier to stretch. I usually allow two or three such rest periods.
  4. Stretch dough into a 16” round.
  5. Flip the dough over onto the cornmeal-dusted pizza pan. (OK, I don't have the skill to stretch the dough by tossing it in the air and putting it on the pan so this is my hack. If you can toss pizza dough in the air, please give me a lesson!)
  6. Spread the sauce on dough to within one inch of the edge.
  7. Add toppings of your choice, if desired.
  8. Evenly sprinkle with shredded mozzarella.
  9. Bake the pizza at approximately 450°F until the edges are golden brown and the dough is fully cooked, approximately 12-15 minutes.
Recipe Notes

Copyright © 2017 by VillaSentieri.com.  All rights reserved.

Share this Recipe

New Mexican Red Chile Sauce

June 21, 2017

I come by a love of spicy food honestly.   I grew up in a family with a strong Southern Italian heritage and a love of spicy foods.  There was usually one, if not two, types of hot salami in the fridge.  My Uncle Joe Medile made the hot Italian sausage that we ate frequently and when my father said it wasn’t spicy enough, as he always did, the next batch was spicier still.  My cousin Angie put up hot peppers (her recipe is coming in the autumn).  Another Uncle ate sandwiches of fried hot peppers from his garden.  I still have hot salami in my fridge, and I make sausage and jarred hot peppers and eat fried pepper sandwiches!

I could go on but you get the picture.

In college, I fell in with a crowd of friends from all around the world, quite a number of whom were into fiery foods; foods so hot that they made anything with a European sensibility (like Italian food) seem like child’s play.

It wasn’t surprising that when I first ate New Mexican food in 1991, I was hooked by Red Chile and Green Chile.

New Mexican chile (and it is spelled chile, with an “e” on the end) at the most basic is a sauce.  Go into any New Mexican restaurant and order a burrito and the wait person, without missing a beat, will say “Red or Green?” unless you are in the know enough to have made your choice of chile part of the order in the first place.  The sauce will be poured over the burrito before serving.  If you are indecisive, you can have “Christmas” which will get you half red chile and half green chile.

New Mexican Chile has nothing in common with chili, whether it’s Tex-Mex, Cincinnati, or any other version.  There is Green Chile Stew which contains pork (usually) and is served in a bowl like, well, a stew.  But you won’t get Green Chile Stew if you ask for Green Chile.  You’ll get a sauce.

I’ve collected lots of Red Chile recipes from friends; eaten Red Chile scores, if not hundreds of times in restaurants; and researched Red Chile in old cookbooks.  I take a very traditional approach to what goes into my Red Chile, and it’s not much.

I think a traditional Red Chile should be made with ingredients that would have been available in the small, isolated farming communities in Northern New Mexico where the dish was perfected.  When I see recipes that purport to taste traditional, if not be traditional, that contain things like raisins, chipotle in adobo, and Asian fish sauce, I sigh.

Mind you, those ingredients, and other equally incongruous ingredients (like frozen orange juice concentrate!), might make a tasty sauce but it would not be New Mexican Red Chile!

Red Chile should taste of chile with other ingredients used in small quantities to complement the chile.   In my case those ingredients are garlic and salt.  Period!

New Mexican Red Chile Pods

Before the advent of refrigeration, Red Chile, which is made from dried fully ripened, i.e. red, chile pods, was eaten most of the year.  Green Chile, made from roasted, freshly harvested green chile pods, was eaten at harvest time.

Next month I’m going to post my favorite New Mexican recipe, Carne Adovada, slow-cooked pork cubes in an abundant amount of red chile sauce.  The Red Chile in this post is an integral part of the process.  If you want to give the Carne Adovada a try you might want to practice making Red Chile.  If you’re at a loss for what to do with it, consider using it as a sauce on steak, chops or scrambled eggs.  Pour it over mashed potatoes.  Make burritos and smother them in red chile.

Before moving to New Mexico full time, we spent almost every holiday in Santa Fe.  We always invited a large crowd of friends over for Thanksgiving dinner.  Since we would leave Santa Fe to return to Chicago on the Saturday or Sunday after Thanksgiving, leftovers became a problem.  We quickly developed the tradition of having all of our Thanksgiving guests back for dinner on Friday which consisted of leftovers.  The only new addition to the meal, though, was red chile which some of us, at least, used in place of gravy!

The uses for red chile are limited only by your imagination.


Click HERE to join our mailing list and you’ll never miss a recipe again!

Print Recipe
New Mexican Red Chile Sauce
Commercially available red chile pods are categorized by heat level: mild, medium, hot, and extra hot. As with any agricultural product, there is some variability. Look for certified New Mexico grown chile. The town of Hatch in Southern New Mexico is probably the most well know chile-growing region but Chimayo in Northern New Mexico grows some pretty awesome chile, too. If you can’t find New Mexican chile in the markets near you, you can order it on line. I think that using whole pods rather than ground chile (chile molido…NOT to be confused with chili powder!!!) makes for a better texture. See the note at the bottom for a method using ground red chile. Remember, ground New Mexico Red Chile only contains chile pods, nothing else!!! Recipes for Red Chile usually start by specifying a particular number of chile pods. However, many of the pods in any batch of chile are broken. My solution was to weigh the pods, after removing seeds and stems, so that I no longer had to guess about how much broken up chile pod equals one whole pod.
Votes: 0
Rating: 0
You:
Rate this recipe!
Prep Time 15 minutes
Cook Time 40 minutes
Passive Time 20 minutes
Servings
cups
Ingredients
Prep Time 15 minutes
Cook Time 40 minutes
Passive Time 20 minutes
Servings
cups
Ingredients
Votes: 0
Rating: 0
You:
Rate this recipe!
Instructions
  1. The starting point: whole dried chile pods.
  2. Break off the stem of each chile pod and empty out the seeds and pith. You might have to break the pod in one or two places to get out the seeds. Try not to break it into small pieces, however.
  3. The stems, seeds, and pith ready for the compost heap!
  4. Weigh out 1 ½ ounces of chile pods after stem, seeds, and pith have been removed.
  5. Put the chile in a bowl.
  6. Cover the chiles with very hot tap water.
  7. Steep the chiles in the hot water until softened, 15- 20 minutes.
  8. Lift the chiles out of the water and into a colander, attempting to leave as many of the seeds behind as possible. Despite your best efforts, there will still be some!
  9. Discard the water used to soften the chiles.
  10. Put the softened chiles, garlic, and 1 ¼ cups of fresh water in a blender.
  11. Puree until smooth, one to two minutes.
  12. Pour the chile puree into a saucepan.
  13. Use the remaining ¼ cup of water to rinse out the blender jar. Add this to the saucepan.
  14. Add the salt to the chile puree.
  15. Bring to a boil, reduce heat, and simmer uncovered till thickened, about 20-30 minutes.
  16. Adjust salt near the end of cooking.
Recipe Notes

Some cooks like to toast the chile pods in the oven. I have done this but I don’t believe it adds enough flavor to justify the extra work.

The water used to soak the chile can be bitter so I always discard it and use fresh water for making the sauce. The seeds and pith can also add a bitter note.  You’ll never get rid of all the seeds but eliminate as many as possible.

Chile Molido (Ground Chile or Chile Powder, not to be confused with Chili Powder!)

If you want to use ground New Mexico red chile pods (chile molido) rather than whole pods, first puree the garlic with some of the water. Add the garlic puree to the ground chile. Add the remaining water a little at a time, stirring well, to avoid lumps. Add the salt and proceed with simmering as described above.

Copyright © 2017 by VillaSentieri.com. All rights reserved.

Share this Recipe

Mom’s Slow-Braised Pork Chops

June 16, 2017

Just last week my mother-in-law breaded and quickly pan-fried pork chops for dinner.  They were tender, juicy and truly wonderful.

Now that grilling weather has finally reached Santa Fe, we’ll have pork chops quickly cooked on the grill throughout the summer.  I’ll even grill the occasional pork tenderloin seasoned with olive oil, garlic, lemon juice and rosemary.

I really enjoy juicy, quickly-cooked pork.  However, I also really, really enjoy the style of pork chops that I at while growing up:  thin-cut pork chops cooked slowly in a sauté pan until they are deep brown.

No doubt, this is an entirely different dish from cooking the chops just enough to reach that “magic” temperature of 140°F that the USDA says is “safe.”  It won’t be to everyone’s taste (what is?) but in the interest of presenting an array of very traditional dishes I’m including it.

Just a few nights ago while in Palm Springs, I was served thick-cut braised pork chops cooked by a good friend, John O’Malley, following a recipe from Marcella Hazan.  I use the same recipe from Marcella when I want to cook thick-cut chops for company (ever since John turned me onto it a while back).

Marcella was from Northern Italy, my mother’s family from far Southern Italy, but the two dishes share a style that highlights a common feature of traditional Italian cuisine.  That is, a cut of meat that could be cooked quickly is, instead, cooked slowly coaxing out more flavor and changing the texture in the process.

The realization of the similarity of these two dishes is like the experience I wrote about in April 2017 describing roast chicken I ate in Tuscany that tasted, for all the world, like the falling-apart roast chicken seasoned with garlic and rosemary that my mother made.

Quick cooking is just one style but reading contemporary recipes one would think it’s the only way to cook many cuts of meat.  We all agree that there are cuts that must be cooked long and slow for optimum texture: think Southern Pulled-Pork Barbecue, Hawaiian Roast Pig, Beef Brisket, or Pot Roast, for example.  I challenge you to find a contemporary recipe for roast chicken or sautéed pork chops that doesn’t call for the minimum cooking time and final temperature.  It’s as if we’ve forgotten that these meats can also be cooked low and slow for a qualitatively different dish.

Recording this kind of diversity traditional foodways is one of my main goals for this blog.

As I describe on the About page of this website, I’ve had the very good fortune to cook alongside incredible cooks from many different parts of the world but even that only begins to scratch the surface of traditional foods.  And while I’ve got recipes planned well into next year, I think it’s time to bring in other voices, other stories.

From time to time I am going to feature a blog post, and accompanying recipe, based on interviews with folks who have chosen to share a treasured family recipe and a story to go along with it.  There are several individuals who have volunteered to be in the vanguard of this effort.

If you have a family recipe that you’d like to share, send me an email or add a comment and I’ll follow up.

Click HERE to join our mailing list and you’ll never miss a recipe again!

Print Recipe
Mom's Slow-Braised Pork Chops
If these chops are being served as part of an Italian-style meal, preceded by pasta, rice or soup, and accompanied by several side dishes, one per person should be enough. Without a pasta course, an average eater could easily consume two of these and someone with a hearty appetite could eat three or four! A sauté pan with a very heavy bottom is needed to avoid hot spots. The chops will be cooked on low heat for most of the time and it is important that the pan conduct the heat well to avoid hot and cool spots for optimum browning. I prefer center-cut pork loin chops, these have a bit of loin and a bit of tenderloin, essentially the same cut as a T-bone steak. Loin chops (without the tenderloin), as shown in the pictures, work well too.
Votes: 0
Rating: 0
You:
Rate this recipe!
Course Mains, Meats
Cuisine Italian
Prep Time 5 minutes
Cook Time 2 hours
Servings
people
Ingredients
Course Mains, Meats
Cuisine Italian
Prep Time 5 minutes
Cook Time 2 hours
Servings
people
Ingredients
Votes: 0
Rating: 0
You:
Rate this recipe!
Instructions
  1. Season the chops generously with salt, pepper and garlic powder.
  2. Using a sauté pan that has a very heavy bottom and that is large enough to hold the chops without crowding, heat the oil until it just begins to smoke over high heat.
  3. Add the chops and reduce heat to medium high.
  4. Cook the chops, undisturbed, until nicely browned, approximately 2 minutes.
  5. Turn the chops over. If the oil was very hot when the chops were added and if you didn't disturb them while they browned, they should easily release from the pan without sticking.
  6. Brown other side. Approximately 2 minutes.
  7. Turn the chops over. Have the cover ready. Add the wine, immediately cover the pan, and turn the heat to low.
  8. Cook, covered, until the wine evaporates, 15 minutes more or less.
  9. After the wine evaporates the pan juices will start to brown. When they do, add 2-3 tablespoons of water and turn the chops over. Cook, covered, until the water evaporates and pan juices get a little bit darker.
  10. Repeat this process until the chops are falling apart tender and the pan juices are a deep brown. This will take 1 ½ to 2 hours.
  11. At the end there should only be a couple of tablespoons of water plus the oil in the pan. Pour this sauce over the chops when serving. It should have a rich umami porky flavor.
Recipe Notes

I rarely use garlic powder. The dishes for which I consistently use garlic powder instead of fresh garlic are Italian slow-roasted poultry, the pork chops featured in this recipe, and steaks. I find that I just can’t get the flavor that I want from fresh garlic in these instances.

Copyright © 2017 by VillaSentieri.com. All rights reserved.

Share this Recipe

Asparagus with Parmesan Cheese

June 12, 2017

I am writing this sitting on a beach in Akumal, Mexico about an hour south of Cancun by car.

On the beach in Akumal
Iguanas enjoying the beach in Akumal

Just a few days ago, I was at home in Santa Fe where the weather was just beginning to turn spring-like.  The week before that I was in Hawaii.

The view from our lanai in Kauai

By the time you’ll be reading this, I’ll be in Palm Springs, where, even today, the temperature is hitting 100°F!

On the patio in Palm Springs before the heat of the day

Needless to say, my sense of seasonality is out of whack at this point.

No matter the temperature or the weather, asparagus says spring!

Just a few days ago, I was eating grilled asparagus in Santa Fe.  Days before that I made an asparagus frittata, before that I cooked the asparagus that is featured in this post.

Asparagus isn’t something I remember much of before college and usually it was the mushy white stuff out of a can.  White asparagus can certainly be a delicacy but when it comes out of a can that’s an impossibility as far as I’m concerned.

College was a time of incredible culinary growth for me.  Growing up I ate wonderful food as my mother was a great cook.  Mostly, though, it was Italian, Slovak, and the American dishes that every kid in the United States grows up eating.

I didn’t learn to cook until freshman year in college.  I was lucky enough to live in a college house at the University of Pennsylvania that was housed on two floors of an otherwise upper class dormitory made up of apartments with kitchens.  The typical freshman dorms either had no kitchens whatsoever or had the most rudimentary cooking facilities shared by large numbers of students.  Since I had a kitchen, I only took out the minimum required meal contract: 10 meals per week.  Usually this meant I ate lunch and dinner in one of the dining halls Monday through Friday.  On weekends I cooked…and baked!

I called home every Sunday from the day I went away to college.  Occasionally there was a lapse, like the time when I was 31 and hadn’t called home in a couple weeks.  The first words out of my mother’s mouth when she heard me on the other end of the line were, “I was just about to put your picture on a milk carton.”  Point made!  [You may or may not know that “back then” the pictures of missing children were put on milk cartons in the hope that someone would recognize them and call the authorities.]

Besides just catching up on our lives, I got advice.  My father gave me advice on how to handle alcohol, what to do if I had too much (don’t lie down and don’t close your eyes, for example), sex, and other topics.

My mother walked me through the steps of how to cook whatever it was I planned on making for dinner that evening.  By the end of freshman year, I was a credible cook.

My gastronomic circle was not very big, however.  Early my freshman year the resident advisors, Dennis and Martha Law from Hong Kong, took a group of us to dinner in Chinatown.  It was exciting, having grown up in a town without a Chinese restaurant.  The tastes, however, were so…well…foreign that I didn’t like much of what was served.  I tasted everything but rarely had more than one bite till something landed on my plate that struck me the right way.  The serving platter made it down the table past two or three other people till Dennis saw me eating.  He commandeered the plate and put it in front of me to be sure I had enough to eat.

By the end of the year I was not only eating, and loving, Chinese food, I had developed a rudimentary understanding of the regional differences and learned the basics of Chinese cooking from Martha.

After my taste buds got over the shock of Chinese food, I started exploring other cuisines.  A favorite became Indian food at Maharaja just a few blocks from my dorm.  It turns out the restaurant was owned by the aunt of someone I now work with!  I believe it was the first Indian restaurant in Philadelphia.

Sophomore year I was not in the college house but had one roommate in a similar upper class dorm with a kitchen.  Meal contracts were only required of freshmen and I saw no point in eating in the dining hall.  The arrangement I struck with my roommate was that I would cook and he would clean up.  It turns out he would eat, and like, most anything so I was free to explore and experiment.

That set the stage for my junior year when I was admitted to another college house, the International Residence Project.  Half of the students were from the USA and half from anywhere else in the world.

My roommate, and best friend for many years, Ray Hugh, hailed from Guyana.  Valrie Tracey from Jamaica became the third member of a triumvirate that was pretty much inseparable for the rest of college.

Two married couples were our resident advisors, Ambrose and Najma Davis, and Reginald and Nanacy Rajapakese.  Ambrose was from Jamaica, Najma from Bangladesh, and Reggie and Nanacy from Sri Lanka.

Nanacy taught me how to make Sri Lankan food and I’m almost as comfortable making that as I am Italian.  I remained close friends with Nanacy and Reggie, even making several trips to Sri Lanka with Nanacy in the last few years, after Reggie’s death.

Ray and I have reconnected on Facebook which is rekindling many memories of the trips I made to Guyana and my experiences in learning to make Guyanese and Chinese food from Ray and his mother.  Ray’s grandparents on both sides emigrated from China to Guyana in the 1800’s.

Ray and I packed an incredible amount of cooking power into a tiny dormitory kitchen.  Without enough cabinet space to store ingredients, we had stacks and stacks of plastic milk delivery crates packed with an unimaginable assortment of ingredients from international food markets.

Our apartment became known as the place for midnight snacks and folks always came knocking on the door around then to see what we’d whipped up to nibble on.

That was the year I discovered that my stovetop Corning percolator made a serviceable stand-in for an asparagus steamer.


Asparagus steamer in a pinch!

Click HERE to join our mailing list and you’ll never miss a recipe again!

Print Recipe
Asparagus with Parmesan Cheese
Asparagus is best cooked in an asparagus steamer. This small-diameter, tall pot allows the bottom of the asparagus spears to boil in the water while the tender tips cook by steaming. When I was a college student and didn’t have an asparagus steamer I used my stovetop Corning Ware percolator. If you don’t have a steamer, or a reasonable substitute, I find it preferable to cook the asparagus in a microwave oven rather than to boil them. After rinsing off the asparagus, put the spears and whatever water clings to them in a microwave-safe dish with a cover. Cook in 1-2 minute increments, moving the spears around after each bout of zapping, until cooked but still a little “toothy” (and certainly not mushy).
Votes: 0
Rating: 0
You:
Rate this recipe!
Course Sides, Vegetables
Cuisine Italian
Prep Time 10 minutes
Cook Time 15 minutes
Servings
people
Ingredients
Course Sides, Vegetables
Cuisine Italian
Prep Time 10 minutes
Cook Time 15 minutes
Servings
people
Ingredients
Votes: 0
Rating: 0
You:
Rate this recipe!
Instructions
  1. Trim the tough ends off the asparagus. The “Notes” section below contains a link to a blog post describing how to do this.
  2. Crush the garlic with the side of a chef’s knife.
  3. Heat the olive oil in a small sauté pan over low heat. Add the garlic and sauté slowly until brown, pressing down on the garlic occasionally.
  4. Discard the garlic. Reserve the oil.
  5. Cook the asparagus until toothy, neither crunchy nor mushy. If you do this in an asparagus steamer, put about two inches of water in the bottom and bring to a boil. Lower in the basket with the asparagus. It will take 5-10 minutes, depending on the asparagus and your elevation, to cook the asparagus properly.
  6. Put the cooked asparagus in a warmed serving bowl.
  7. Add the garlic-infused olive oil and mix.
  8. Add the Parmigiano Reggiano cheese and the salt and freshly ground black pepper to taste. Mix well.
  9. Drizzle with lemon juice and serve.
Recipe Notes

You can find videos of prepping asparagus here.

Copyright © 2017 by VillaSentieri.com. All rights reserved.

Share this Recipe

Slovak Potato Cake (Baba or Bubba)

June 7, 2017

Baba was a favorite food in our house.  We often joked that my mother should open a shop selling pizza and baba.  We were convinced it would be a success, as were a number of family friends.

Although Johnstown, Pennsylvania, where I grew up, was originally founded by Germans (everyone, regardless of ethnic background, had sauerkraut, sausages, and pork on New Year’s Day), Italians and Eastern Europeans were among the largest ethnic groups when I lived there.  So, a “fusion” shop selling pizza and baba wasn’t so far-fetched!

Baba means old woman in Slovak.  I can’t tell you how it came to be applied to this very specific type of potato cake and whether it was just in our family or more widespread, though I suspect the latter.

Other than the crispy skin of our Thanksgiving turkey, this is the only food my sister and I fought over.  This, however, was three-way guerilla warfare also involving my father.  Crispy turkey skin has an immediacy about it.  It needs to be eaten right away, hot and crispy, or it loses its appeal.  The fight is right out there in the open, a virtual “land grab.”

Baba is different.  As good as it is freshly made, we all preferred it after a day or two.  Any leftover baba would be wrapped in aluminum foil and put in the oven, which had a pilot light way back then.  That kept it ever so slightly warmer than room temperature.  The baba would become chewy.

The natural tension that developed was between letting the baba mature till it had the optimum chewiness versus losing out entirely if someone else ate it first.

We all kept our eyes on the oven which was conveniently located at eye-level.  If it looked like the package had been disturbed, we could swing into action, grabbing what was left and eating it even if it didn’t have the optimum chew.  “Any baba is better than no baba” was definitely the operative mentality.

There was always the chance, however, that the first person to go for the baba would eat all of it, especially if there were only a few pieces left.

There was also the chance (sometimes turned into reality) that someone could deftly open the package, remove a piece of baba, close the package, and put it back in the oven it in a way that made it look undisturbed.  Well implemented, this was a strategy for getting more baba since others could be lulled into complacency thinking the cache of baba was still available to them for the taking.

The ingredients of baba are pretty standard potato cake fare, potatoes, onions, salt, pepper, flour and, depending on the cook, egg.  Two things make it unusual in my experience: caraway seed and the cooking method.  To be sure, Slovaks put caraway seed in lots of foods but I have yet to find a recipe for Slovak potato cakes that contains caraway seed.

As for cooking method, baba is cooked in the oven in a rimmed baking sheet.  Remembering that my grandparents raised seven sons, who in later years were augmented by daughters-in-law and grandchildren, baba was made in large quantities.  When there wasn’t enough batter to fill another baking sheet “to the thickness of your finger,” as my Aunt Mary would say, the remaining batter would be turned into individual potato “pancakes” in a frying pan in shallow oil.

The proportions given here will nicely fill an 11” by 17” baking sheet.  If you prefer to fry the potato cakes rather than bake them, by all means do!

Print Recipe
Slovak Potato Cake (Baba)
I remember watching my mother make this, and learning from her. Though it always tasted the same in the end, it seemed like the lack of precise measurements was an issue. My mother had no difficulty cooking her regular canon of Italian food without measurements. My suspicion is that the issue with Baba is that she didn’t make it all that often. I make it even less often (though I think that’s changing) which prompted me to carefully measure ingredients until I got a perfect batch and then stick with those measurements going forward. My mother put an egg in her Baba. My Aunt Mary did not. Aunt Mary, who lived next door to my Slovak grandparents for years, insists that Grandma never used egg. I have not tried it without the egg, being happy to stick with a recipe that works. Before food processors, the potatoes and onion were grated on the fine side of a box grater. The food processor eliminates the most tedious part of making Baba.
Votes: 0
Rating: 0
You:
Rate this recipe!
Prep Time 30 minutes
Cook Time 1 hour
Servings
people
Ingredients
Prep Time 30 minutes
Cook Time 1 hour
Servings
people
Ingredients
Votes: 0
Rating: 0
You:
Rate this recipe!
Instructions
  1. Peel the potatoes. Rinse and dry them and cut into 1 inch cubes.
  2. Weigh out 1600 grams (3 ½ pounds) of potato cubes.
  3. Cut onion into 1 inch chunks.
  4. In two or three batches, depending on the size of your food processor, thoroughly grind the potato and onion, putting some potato and some onion in each batch.
  5. Put the ground potatoes and onions into a large mixing bowl. Add the lightly beaten egg, salt, black pepper, and caraway seed.
  6. Mix well.
  7. Stir in about ¾ of the flour. Add enough of the remaining flour to thickly coat a spoon. Chances are you will need all the flour. If in doubt, just add it.
  8. Very, very generously grease an 11” x 17” x 1” baking sheet with lard. After you think you’ve used enough, add more! Remember, most potato cakes are fried. These are baked. They definitely need some fat for texture.
  9. Pour the batter into the prepared pan. Dot very generously with lard.
  10. Bake 425°F until browned on the bottom, about 30-40 minutes, turning the pan front to back after 20 minutes.
  11. When the bottom is brown, you’ll need to flip the Baba upside down. To do this, set another baking sheet of the same size on top of the Baba. The bottom of the baking sheet should be sitting on top of the Bubba.
  12. Flip the pans over. If you had enough lard in the pan, the Baba should release from the pan and be sitting, upside down, on the bottom of the other baking pan.
  13. Slide the Baba back into the original baking pan with the browned bottom now facing up.
  14. Bake another 20 minutes or so until browned on the bottom and thoroughly cooked.
  15. Turn out of the pan onto a large cutting board.
  16. Cut into 16 pieces. Serve warm or at room temperature.
Recipe Notes

Although you can use solid vegetable shortening in this recipe, I suggest you use lard for better taste and better health. You can find information about lard vs. vegetable shortening in this post.

Copyright © 2017 by VillaSentieri.com. All rights reserved.

Share this Recipe

White Bean Soup

June 2, 2017

The weather is turning warmer in fits and spurts here in Santa Fe as I write this in early-May.  I’m writing these posts a few weeks in advance due to upcoming travel.  Warm days and cold nights, alternating with cold days and colder nights make me think of soup.  Filling, warm, humble soup.

There are few soups that I like better than bean or lentil.

Although a ham bone is a classic way to start a bean soup, smoked turkey works well too.  I had a smoked turkey carcass in the freezer from a bird that I smoked a few months ago.  That and the combination of the cold weather made me think of making this classic American bean soup.  It made a really great dinner along with a platter of my grandmother’s potato cakes, the recipe for which will be appearing here in a few days.

This soup is assembled from very basic ingredients, many of which are almost always on hand.

With warm weather approaching, however, this will probably be the last time I serve such a hearty soup until autumn.

Which brings up an interesting topic: the effect weather has on our cooking and eating habits.  We tend to gravitate toward heartier, richer foods in the winter and lighter foods in warm weather.  Our caloric needs don’t really change appreciably from winter to summer so if we’re not gaining or losing weight, we’re probably eating about the same number of calories.  But it often doesn’t feel that way.

Eating seasonally is a good strategy for a number of reasons.  Locally grown, in-season, produce tastes better than produce shipped from far away.  Many fruits and vegetables start losing nutrients as soon as they are picked.  The shorter the time from farm field to table the more nutritious they are.

Did you ever think about what it takes to have “not from concentrate” orange juice available all year given that oranges are a seasonal crop?  Take a look here and here.  It will give you a sense of what is done to our industrialized food supply.  To be sure, we have ready access to more and cheaper food than has probably ever been the case in human history.  I’m not suggesting we abandon that, just that we become better informed consumers and make active choices about what we eat and why.

In addition to tasting better, and being more nutritious, eating seasonally brings back a sense of anticipation and, dare I say, romance, to eating.  Tomatoes are at their best in the summer so we eat lots of tomatoes then, for example.  Often times, lunch on Saturday in late summer will be thick slices of fresh tomato, fresh mozzarella cheese from The Old Windmill Dairy in Estancia, New Mexico, a few torn basil leaves from our garden, a sprinkle of salt and a drizzle of extra virgin olive oil along with some homemade bread to sop up all the juices.  Unless it’s from a can and going into something that’s cooked, you’ll rarely see a tomato in my kitchen the rest of the year.

The same sort of anticipation holds true with many other foods.  Some that come quickly to mind are zucchini blossoms (which I dip in batter and fry) and basil (which I turn into pesto and use to season quick-cooked tomato sauces all summer long but never use at other times of the year).

Seasonal eating isn’t limited to summer, however.  There are traditional winter crops and winter foods.  Cavolo nero, Tuscan kale, tastes better after a frost and is traditionally eaten in the late fall.  My mother-in-law pickles turnips each autumn which we eat in the winter made into a thick soup with cotechino, a Northern Italian sausage.

Traditionally, my mother-in-law’s pickled turnips would be made in the autumn.  That’s not only when the turnips are ready if you eat seasonally but that’s also when grapes are crushed and pressed for wine.  The turnips would be packed into a barrel with the solids left over from the grape pressing and allowed to ferment.  These days she makes a reasonable facsimile by simply pickling turnips in red wine vinegar though I keep hoping to find a winemaker in New Mexico who will sell me some crushed grapes to give the original recipe a try.

Red wine vinegar is always available, and mostly so are turnips.  Why don’t we make this at other times of the year?  Mostly it’s because of the association of pickled turnips (brovada) and cotechino with winter.  We try to maintain the seasonality even when we have the ability to circumvent it.  Doing that means there are always favorite foods to look forward to each season that we haven’t had in almost a year.

If it’s too warm where you live to have a hearty bowl of bean soup, tuck this recipe away for a few months and give it a try in the autumn.

Print Recipe
White Bean Soup
This white bean soup is easy to make and very nutritious. If you have the carcass of a smoked turkey or the bone from a baked ham, use my recipe for Roasted Turkey Broth, substituting the smoked turkey or ham bone, to make the broth for this soup. With a turkey carcass you definitely need to make broth otherwise you’d have lots of bones and bits in the final soup. While this isn’t the case with a large ham bone, I still prefer to make broth in advance so that I can skim off the fat. There is a link in the notes that follow this recipe to my recipe for Roasted Turkey Broth. Even if you don’t have a smoked turkey carcass or a ham bone you can make this soup. My supermarket sells various smoked turkey and pig parts. Just use them to make the broth. Be careful, though, as these products can be much smokier than a turkey or ham that was smoked to the right degree for eating. Failing all of that, use whatever broth you have on hand (or even water) to begin to cook the beans then add ¼ pound of chopped up bacon with the remaining ingredients.
Votes: 0
Rating: 0
You:
Rate this recipe!
Cuisine American
Prep Time 20 minutes
Cook Time 3 hours
Servings
people
Ingredients
Cuisine American
Prep Time 20 minutes
Cook Time 3 hours
Servings
people
Ingredients
Votes: 0
Rating: 0
You:
Rate this recipe!
Instructions
  1. Wash the beans. Cover with several inches of cold water. Refrigerate overnight.
  2. The next day, drain the beans.
  3. Combine the beans, broth, and bay leaf.
  4. Cover and bring to a boil.
  5. Cook, partially covered, at a medium boil for one hour, stirring occasionally.
  6. Meanwhile, prepare the other ingredients.
  7. Slice the carrots in quarters lengthwise.
  8. Cut the carrots crosswise into 1/4 inch pieces.
  9. Cut the celery into strips approximately the same size as the carrot strips.
  10. Cut the celery strips crosswise into 1/4 inch pieces.
  11. Dice the onion.
  12. Mince the garlic.
  13. Mince the parsley,
  14. Dig around in your freezer to find a Parmesan cheese rind that you froze with the intent of using in your next pot of soup.
  15. Ready a can of diced tomatoes.
  16. Combine all ingredients except the chopped ham or turkey with the partially cooked beans.
  17. Simmer, partially covered for another hour or two until beans are soft and vegetables are cooked. The cooking time will depend on the type of beans, their freshness, and your elevation.
  18. Adjust seasoning as needed while cooking.
  19. Add the chopped ham or smoked turkey during the last 10 minutes of cooking.
  20. Serve with grated Parmesan cheese, if you wish.
Recipe Notes

As good as this soup is when it is made, I prefer to let it cool then refrigerate it for at least a day before rewarming and serving.

To make the broth, substitute a ham bone or smoked turkey carcass (or other smoked meat) for the roasted turkey in my recipe for Roasted Turkey Broth.

Copyright © 2017 by VillaSentieri.com. All rights reserved.

Share this Recipe