Porchetta: A Festive Pork Roast from Italy

February 14, 2020

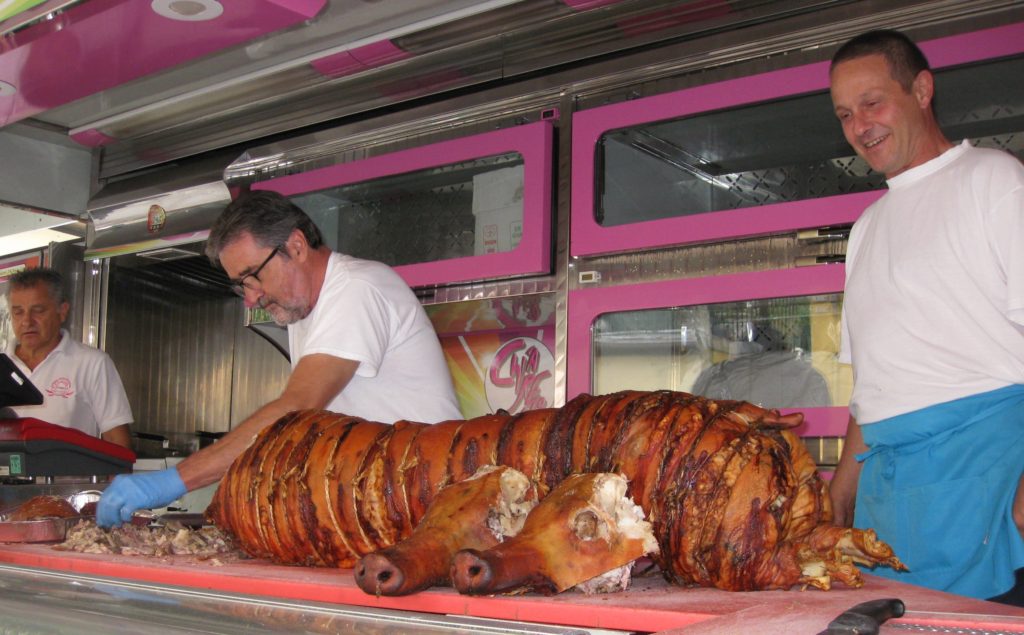
Porchetta is roast pork, but it’s no ordinary roast pork.  In its most traditional form, it is made from a whole pig, well-seasoned, and slowly roasted.

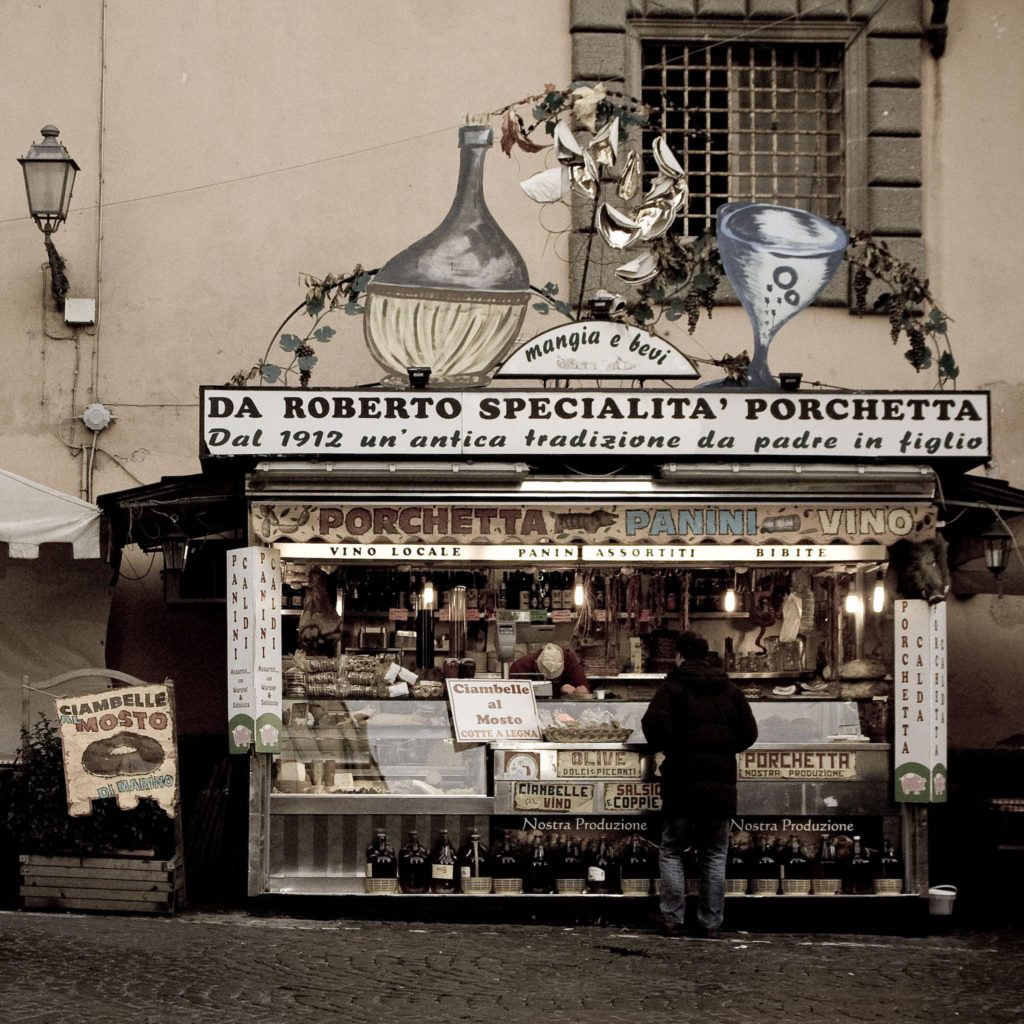
Porchetta can be found throughout Italy at festivals and street fairs, such as the one in Bagni di Lucca that I attended this past August.

Porchetta, made from a whole pig, at a festival in Bagni di Lucca.

Though there is some debate, Porchetta probably originated in Lazio in Central Italy.  Lazio is the region where Rome is located.


Follow us on your social media platform of choice


Seasonings vary with the region and often include some combination of garlic, rosemary, fennel, and black pepper.  Some regional variations include chopped entrails or liver in the mix.

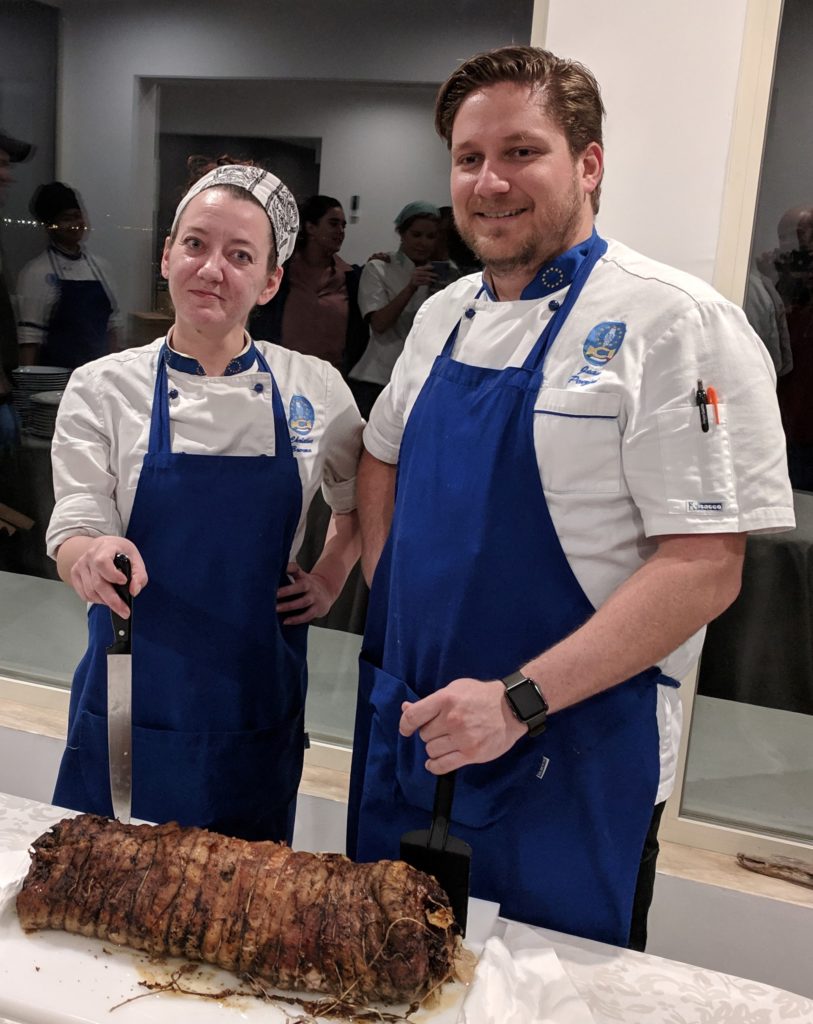
Perhaps the most unusual version of Porchetta that I’ve encountered is made at the Italian Culinary Institute in Stalettì, Calabria.  It is seasoned with salt and a large amount of truffle puree!

Chef Juan and Chef Chris about to carve a truffle-laden porchetta at the Italian Culinary Institute.

Most of us are not going to roast an entire pig which raises the question of what cut or cuts to use.  This is especially important as much of the mouth-feel of porchetta derives from the combination of fatty and lean meat inherent in using an entire pig.

One solution, that makes for an elegant presentation, is to roll a slab of pork belly around a lean pork loin and tie it.  This strategy allows one to cut neat slices that contain both lean and fatty meat.


Join our mailing list and you’ll never miss a recipe again!


Another solution is to use a cut of meat that inherently contains about 20% fat.  A pork shoulder fits the bill nicely.  The bone must be removed and the thickest parts of the meat butterflied before being seasoned and tied.  This cut of meat doesn’t create consistent slices as does the pork-belly-wrapped-around-a-pork-loin method.  It does, however, create supremely succulent meat, more so that the pork loin that’s encased in the pork belly.

A porchetta vendor in Rome. (Photo by Alessandro Pinna – Flickr, CC BY-SA 2.0, https://commons.wikimedia.org/w/index.php?curid=34665585)

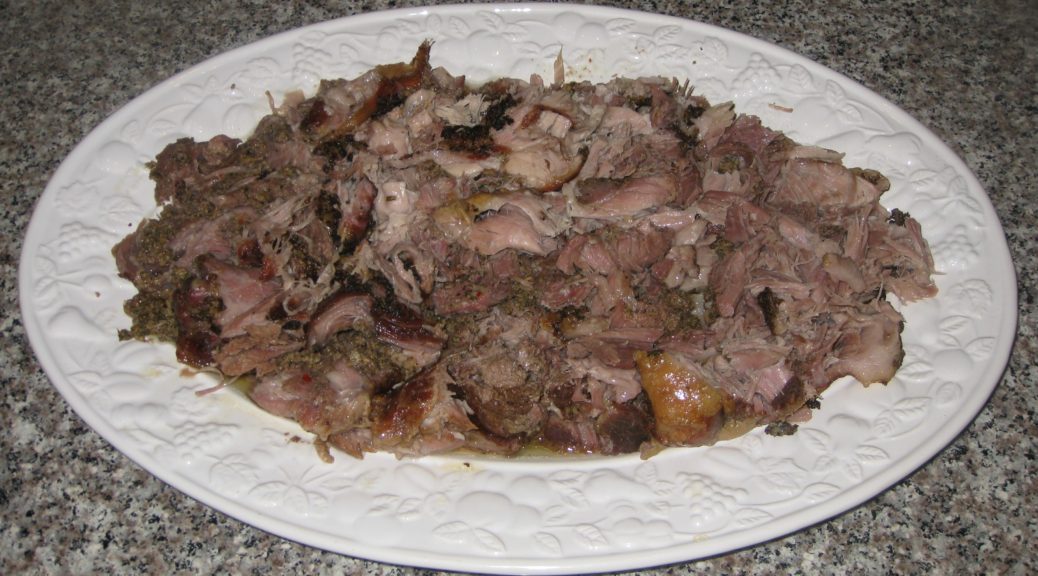
I lean towards the “pulled pork” version of porchetta, so slices aren’t really important to me.  I always opt for the boneless shoulder method and pull the cooked meat apart in large chunks.  Given the chance, though, I’d like to try a whole pig.

Print Recipe
Porchetta
The seasonings in this version of Porchetta closely adhere to what is used in central Italy. Be sure to spread the seasoning very evenly on the meat before rolling and tying.
Votes: 0
Rating: 0
You:
Rate this recipe!
Course Mains, Meats
Cuisine Italian
Prep Time 1 hour
Cook Time 10 hours
Passive Time 2 days
Servings
persons
Ingredients
For the initial seasoning
Final seasoning and cooking
Course Mains, Meats
Cuisine Italian
Prep Time 1 hour
Cook Time 10 hours
Passive Time 2 days
Servings
persons
Ingredients
For the initial seasoning
Final seasoning and cooking
Votes: 0
Rating: 0
You:
Rate this recipe!
Instructions
For the initial seasoning
  1. Crush fennel seeds in a mortar. Reserve.
  2. Puree the garlic and olive oil in a small blender jar.
  3. Add the crushed fennel seeds, salt, black pepper, rosemary, chile and enough olive oil to make a paste.
  4. Rub the paste over what will be the inside of the roast once it is rolled and tied.
  5. Roll up roast and tie with butcher’s twine.
  6. Put the tied roast, fat side up and seam down, into a non-reactive roasting pan and cover with plastic wrap.
  7. Put the cover on roasting pan (or cover tightly with aluminum foil) and refrigerate for 2 days.
Final seasoning and cooking
  1. Remove the pork from refrigerator about 60-90 minutes before roasting.
  2. Using a mortar and pestle, grind the fennel seeds.
  3. Add garlic and salt to the fennel and crust into a paste.
  4. Add black pepper and rosemary. Combine well.
  5. Rub spice mixture over the top of the roast.
  6. Pour the white wine into the bottom of the roasting pan.
  7. Cover the pan and roast at 250°F, for 10 hours, occasionally basting with pan juices after about 5 hours.
  8. Uncover the pan for the last hour of roasting. If necessary, but usually not, add a bit of water to the pan.
  9. Remove the roast from the roasting pan and place it on a serving platter. Pull the roast into chunks.
  10. Skim the fat from the pan drippings. Drizzle the pan drippings over the meat.
Recipe Notes

Copyright © 2020 by Villa Sentieri, LLC. All rights reserved.

Share this Recipe

Pizza di Patate (Potato Pizza)

December 19, 2018

I remember it clearly!  My love affair with Pizza di Patate began May 1992 in Rome.

All of my most favorite foods are carbohydrates:  pasta, bread stuffing, mashed potatoes, pierogi, soft pretzels, and homemade bread, among them.  The favorites among my favorites, though, combine two different carbohydrates in the same dish:  potato gnocchi, bubba (and its relative, potato pancakes), potato pierogi, homemade bread rolls stuffed with mashed potatoes and rubbed with olive oil and garlic, and, of course, potato pizza.

When I first tasted potato pizza in Rome it immediately entered the highest level of my carbohydrate pantheon.  I knew at some point I would need to learn to make it as I had never had anything like it in the States.  I still haven’t unless it’s come out of my pizza oven, though there is a new breed of Roman Pizzerias cropping up around the country dangling the possibility that one, serving pizza di patate, might settle in near where I live.

May of 1992 was the month my (now) husband and I were to celebrate our fifth anniversary.  I had been discussing with John Bowker, a friend, Anglican priest and the dean of Trinity College, Cambridge, England, coming to the UK for our anniversary.  John had offered to perform a wedding ceremony (still not legally binding, of course) following the Anglican rite in the Trinity College Chapel with the Trinity College Choir there to sing.

After much thought, we decided against going to Cambridge for the ceremony.  Although a few of our friends might have attended, we felt that most would not and we wanted to be surrounded by friends on that day.

Join our mailing list and you’ll never miss a recipe again!

We opted, instead, to have a ceremony performed at our house by John Fortunato, a friend and Episcopal deacon.  We had a calligrapher record our vows on parchment and signed by everyone present (in a nod to Quaker tradition) as an affirmation of our commitment to each other.

Invitation to our fifth anniversary and commitment ceremony

On our 25th anniversary, in 2012, we were actually married with 52 of our friends in attendance.  The wedding and reception were held in a private dining room at Del Posto in New York City.  But I digress…

In the early 1990’s Frank, my husband, and I were working full time but also attending Loyola University of Chicago studying for MBA degrees.  Loyola decided to offer MBA classes for the first time at its Rome campus in May 1992.  We jumped at the chance, leaving for Rome the day after our commitment ceremony.  We treated the trip like the honeymoon we had never had though by then we were very experienced world travelers.

Follow us on your social media platform of choice


A pleasant walk from the Loyola Campus (located in an old convent in Monte Mario) was a small shop that sold prepared Roman food and a dizzying array of pizza by the slice (pizza al taglio).  Most nights we went there for dinner then went back to our dorm room to study.  The shop had a few stools lined up along a narrow counter on one side but every patron, except us, picked up food to go.

A funny moment during our wedding ceremony in 2012

After a few days, our routine became clear to the shop owners.  As soon as we walked through the doorway, without asking a question, one of them reached for a bottle of local red wine and handed it to us.  We then ordered from the food on display and sat at the counter enjoying a wonderful meal.

Theirs was the first pizza di patate that I’d ever had.  I ate it all over Rome on that trip.

It took me at least five years to try to make it, and at least another five years to perfect it.  Now that we have a wood-burning oven in Santa Fe I almost always make at least one potato pizza on pizza nights (which don’t happen nearly often enough!).

Print Recipe
Pizza di Patate (Potato Pizza)
I first tasted this in Rome in 1992 and fell in love with it. There are numerous variations, such as using potatoes that have been shredded on the teardrop shaped holes of a grater or topping the pizza with cheese. This simple version is my favorite. Making the pizza in a rectangular pan most resembles Roman pizza al taglio. The dough can be divided to make two round pizzas approximately 12 inches in diameter. See the Notes section for instructions on making the dough in a bread machine as well as directions for making the dough in advance. You can use bread flour if you wish but the dough will be really springy from the gluten making it a bit more difficult to stretch out. If using bread flour it is really a good idea to refrigerate the dough as described below.
Votes: 0
Rating: 0
You:
Rate this recipe!
Prep Time 65 minutes
Cook Time 20 minutes
Passive Time 4 hours
Servings
people
Ingredients
Dough
Topping
Prep Time 65 minutes
Cook Time 20 minutes
Passive Time 4 hours
Servings
people
Ingredients
Dough
Topping
Votes: 0
Rating: 0
You:
Rate this recipe!
Instructions
  1. Warm the bowl and dough hook of an electric mixer with hot water. Drain and dry.
  2. Add the warm water and yeast to warmed bowl. Blend briefly.
  3. Allow the yeast and water to sit until creamy, approximately 10 minutes.
  4. Add about half the flour and mix to combine.
  5. With the motor running, add salt and drizzle in olive oil. Mix to combine.
  6. Add the remaining flour.
  7. Mix approximately 8-10 minutes after all the flour is added. The dough should be soft and slightly sticky.
  8. Place the dough in an oiled bowl or container. Oil the top of the dough. Cover the bowl and allow the dough to rise until doubled.
  9. Meanwhile, make the flavored oil. Sauté the bruised garlic in the oil over medium-low heat until light golden. Do not allow the garlic to turn brown.
  10. Allow the oil to cool for a few minutes. Add the rosemary. The oil should be warm to release the flavor of the rosemary but not so hot that the rosemary begins to sizzle.
  11. Allow the oil and rosemary to sit at room temperature to cool. When cool, remove and discard the garlic.
  12. When dough has doubled, punch it down to remove all air pockets.
  13. Using olive oil, oil an 11x17 inch rimmed baking sheet.
  14. Press the dough into the pan. Allowing the dough to rest for five or ten minutes midway through pressing it into the pan will allow the gluten to relax making it easier to shape the dough.
  15. Brush the dough lightly with some of the flavored olive oil.
  16. Cover the dough with an inverted rimmed baking sheet and allow it to rise until doubled.
  17. Meanwhile, scrub the potatoes and slice into very thin slices. A mandoline is best. If so, set it for 1/16 inch.
  18. Cover the potato slices with cool water to remove excess starch and to keep them from turning brown.
  19. When the dough has doubled, dry the potato slices thoroughly and put them on the top of the dough in a single layer that is slightly overlapping. You may have potato slices left over.
  20. Brush the top of the pizza with the remaining flavored olive oil and sprinkle liberally with coarse sea salt.
  21. Bake at 425°F for approximately 25 minutes, until the potatoes are tender and have golden edges and the dough is golden brown on the edges.
Recipe Notes

The dough can be made, with good results, in a bread machine on the dough cycle.  Though I don’t add sugar when making the dough by hand or with a mixer, the shorter rise cycles used by a bread machine work better with sugar.  Put the ingredients, above, into your bread machine following the manufacturers directions adding 1 tablespoon of sugar as well.  When the dough cycle is finished, press the dough into a pan, as described above, or refrigerate as described below.

If I have time, I prefer to make the dough a day or two in advance. After it has risen as described above, put the dough in an oiled container with a tight-fitting lid. Oil the top of the dough and refrigerate. Remove the dough from the refrigerator at least 5 hours before you plan on making the pizza. Punch down the dough just before making the pizza and proceed as above.

Copyright © 2018 by Villa Sentieri, LLC. All rights reserved.

Share this Recipe