Limoncello (Italian Lemon Liqueur)

March 13, 2017

I love mead, more so dry mead than sweet mead.  I first tasted mead at the age of 19 when my college roommate, Ray Hugh, and I visited his mother outside of London one summer.  For some reason, I never had it again but the experience stuck with me.  (I know you’re wondering how this is going to get around to Limoncello but read on!)

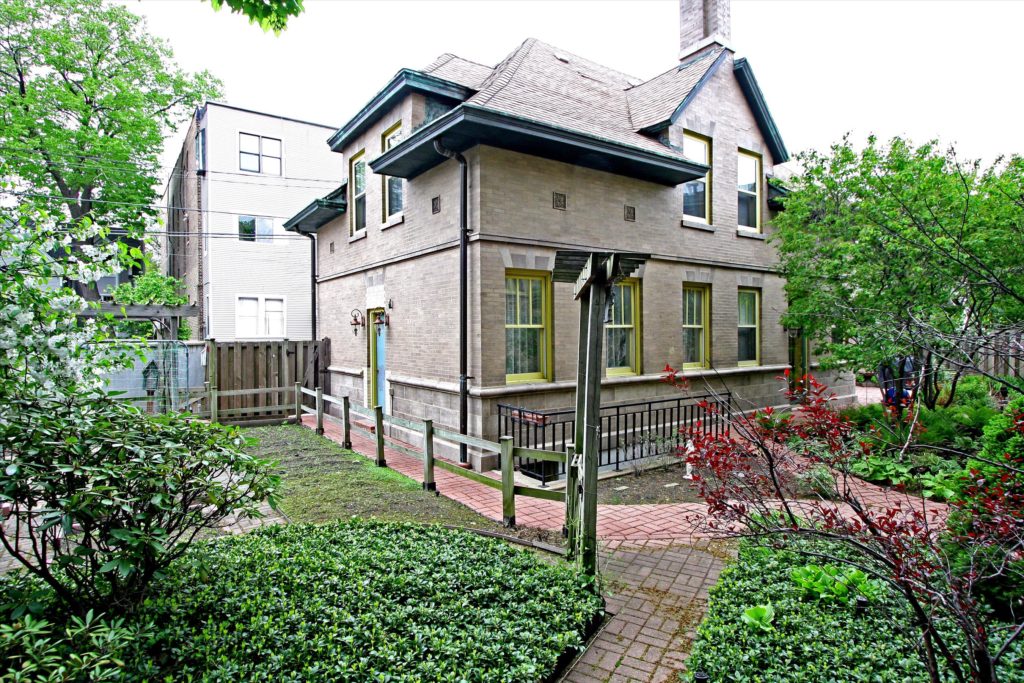
Fast forward to the late 1990’s when my husband began making wine at home.  We didn’t have a proper wine cellar at the time, though we ultimately built a temperature controlled wine cellar in the basement of the coach house at our estate on Oakdale Avenue in Chicago…right below the gear works that were once used to rotate the horse-drawn carriages on the floor above.

This is what the coach house looked like when we owned the property on Oakdale Avenue.

We had a whole row of five gallon carboys of grape juice bubbling away through air locks in our family room.  The wooden floors became stained purple.  Luckily we were planning on remodeling the room and tearing up the floor so it didn’t matter much.

The wine was surprisingly good.  We had both red and white.  We made labels for our “Rohkam House” wines that portrayed a picture of the house as it looked in the late 1880’s.  You can find that picture in a previous post.

After a few successes with wine, I asked Frank to make mead.  He settled on a recipe he fancied, though it was not entirely a traditional northern European mead.  It contained honey, of course, but the recipe specifically called for orange blossom honey which obviously has no connection to northern Europe.  The recipe also required some freshly squeezed orange juice instead of just water.  I was a bit skeptical about the non-traditional ingredients but…hey…I was finally getting my mead after all these years.

I found a beekeeper in Florida who would sell me five pounds of orange blossom honey from his own bees.  I ordered five pounds of honey.  I got fifty pounds sent overnight delivery!

It turns out that Muriel, the beekeeper, got two orders at the same time.  My order was for five pounds sent by UPS ground.  Someone else ordered 50 pounds sent express.  Muriel got the orders confused and we suddenly were in the business of making ten times as much mead as we had planned.

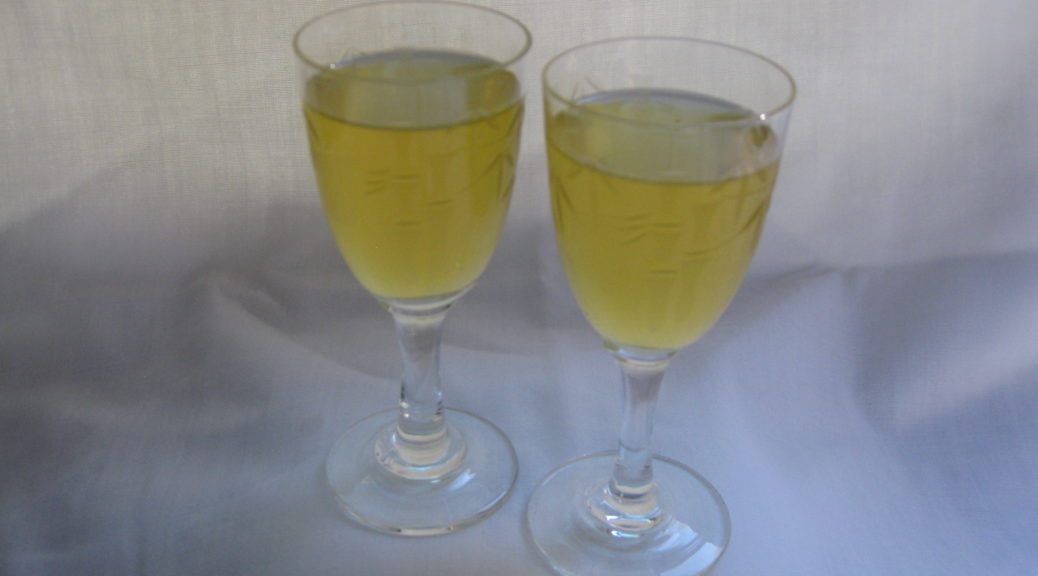
That also meant we needed ten time the number of oranges we had planned on to get enough juice.  I couldn’t bear to let those orange peels go to waste so I took out the recipe for limoncello that I got from relatives in Tuscany on our visit a couple of years earlier and decided to make it with orange zest instead of lemon zest.

I dubbed it arancello, using the Italian word for orange in the same way the Italian word for lemon is used to make the word limoncello.

I ultimately served it to friends and family visiting from Europe.  I explained what I had done to make it.  Not one of them had ever heard of anything like it but it was a hit.

Fast forward a decade or two and arancello started to be imported from Italy (often called orancello or orangecello).  While I can’t claim to have invented arancello, I am pretty sure it was not a common product when I got the idea to repurpose the family recipe for limoncello.

Oh, and that mead…it was pretty darn good.  We served it for many dinner parties in place of white wine.  Everyone thought it was wine.  It had that haunting floral quality so like a good Viognier.  Now that we have orange trees outside our door in Palm Springs maybe we can dig up that mead recipe again and make arancello as a buyproduct!

Print Recipe
Limoncello (Italian Lemon Liqueur)
While you will find recipes for Limoncello made with vodka, using higher proof alcohol yields a more consistent extraction of the flavor compounds. The higher the proof, the better. However, 190 proof alcohol is not available everywhere so I’ve adjusted this recipe to use 151 proof alcohol. The original recipe, which came from family in Tuscany, called for less than half the amount of lemon zest I've used here. Over successive versions for over the last 2 decades, I find I like these proportions best. Lemoncello does not keep indefinitely. It is best to use this within a year. Use the freshest lemons you can find for the most flavorful limoncello.
Votes: 0
Rating: 0
You:
Rate this recipe!
Course Beverages
Cuisine Italian
Prep Time 75 minutes
Passive Time 11 days
Servings
liters
Ingredients
Course Beverages
Cuisine Italian
Prep Time 75 minutes
Passive Time 11 days
Servings
liters
Ingredients
Votes: 0
Rating: 0
You:
Rate this recipe!
Instructions
  1. The starting point: lemons in the tree in Palm Springs.
  2. Using a vegetable peeler, carefully pare zest from lemons without including any of the white pith. Use a peeler that removes the zest in strips, not the zesters that remove little tiny curls.
  3. Weigh the zest.
  4. Combine the zest and alcohol in a large glass jar with a tight-fitting lid. I use a one-gallon jar, though something of approximately three quarts will work just fine.
  5. Put the jar out of direct sunlight in an area that is at comfortable room temperature for seven days. Swirl the contents of the jar daily. The alcohol will not cover the zest so it is important to mix up the contents at least once a day.
  6. On the fifth day, combine the sugar and water in another glass jar or non-reactive container. Stir or swirl several times a day until all the sugar is fully dissolved.
  7. After the zest has macerated for a week in the alcohol, add the sugar syrup.
  8. The limoncello will initially become cloudy as some of the sugar comes out of solution.
  9. Allow the lemon zest to steep in the alcohol-sugar syrup mixture for an additional 3-4 days, swirling once or twice daily.
  10. It will become mostly clear after a few days. Because of the amount of lemon oil in this limoncello, it may remain slightly cloudy.
  11. It is important to not over-extract the lemon zest or the limoncello may become bitter.
  12. Strain the limoncello. Discard the zest. Divide the limoncello into bottles with tight-fitting lids. I like to use 750 ml liquor bottles.
  13. Store for at least one week before using to allow the flavors to mellow.
  14. Limoncello is best served frosty cold, over an ice cube or two. I like to keep a bottle in the freezer. It may get cloudy but just shake it well before using.
Recipe Notes

Copyright © 2017 by VillaSentieri.com. All rights reserved.

Share this Recipe

Green Beans with Tomato Sauce and Bacon

February 27, 2017

Earlier this month I wrote about my “crunchy vegetable” phase of cooking back in the 1970’s.  One of the dishes I was reacting to was my mother’s green beans with tomato sauce and bacon.  Honestly, though, I can’t tell you why.  It was, bar none, my favorite vegetable dish growing up.  Why, when I started cooking in my late teens, I thought I could make it better by cooking the beans until they were just crunchy is beyond me.

Chalk it up to youthful indiscretion.

Americans served a lot of mushy vegetables back then, no doubt, but the reaction shouldn’t be to turn every vegetable crunchy.  But I was just learning to cook and had a lot to learn, not only about technique, but about understanding the essence of a dish.

The essence of this dish is the silky texture (most definitely not mushy) of the beans cooked for a couple of hours in tomato sauce.  The textural change is accompanied by a flavor change that is unobtainable by quickly cooking the ingredients.

It’s actually pretty difficult to turn these beans mushy unless you boil them too long before adding them to the tomato sauce.  The tomato sauce reacts with the beans to somehow inhibit the development of mushiness.  I’m not sure, but it think it might be the acid in the tomatoes.

That first four minute boil is critical, however.  One time, thinking I could eliminate a step, I tried putting the cut up beans in the sauce without parboiling them first.  Mistake!  Four hours later the beans were still not cooked properly!

Green beans cooked in tomato sauce is a classic Italian combination.  The use of bacon clearly signals that this is Italian-American, however.  Italian recipes might use pancetta but not bacon.  Smoked foods are uncommon in traditional Italian cuisine.  The few that appear really stand out.

Pancetta and bacon are made from the same cut, pork belly.  Both are cured but only bacon is smoked.  Although I’ve made other versions of green beans in tomato sauce that are traditional Italian, rather than Italian-American, I keep coming back to this one as my favorite.

Print Recipe
Green Beans with Tomato Sauce and Bacon
These long-simmered green beans in tomato sauce with bacon are an Italian-American favorite. The long, slow cooking is really essential to achieving the right texture and flavor. Although I've specified the amount of water in cups, when cooking with tomato paste my mother always measured water by the can. This dish would have had five tomato paste cans of water. She didn't quite fill them to the top so each can held about 5 1/2 ounces of water, or a little over three cups total. You may need to add more water, or to boil some away, to get a thick sauce.
Votes: 0
Rating: 0
You:
Rate this recipe!
Course Vegetables
Cuisine Italian
Prep Time 25 minutes
Cook Time 3 hours
Servings
people
Ingredients
Course Vegetables
Cuisine Italian
Prep Time 25 minutes
Cook Time 3 hours
Servings
people
Ingredients
Votes: 0
Rating: 0
You:
Rate this recipe!
Instructions
  1. Cut the bacon into matchstick-sized pieces.
  2. Mince the garlic.
  3. In a heavy-bottomed pot, large enough to ultimately hold the beans, gently sauté the bacon until golden brown.
  4. Add the minced garlic to the bacon and bacon drippings and sauté until fragrant and just beginning to turn golden, about one minute.
  5. Add the tomato paste and sauté until it turns a shade darker and smells sweet.
  6. Add the water, stirring to combine. Cover and bring to a boil.
  7. Reduce to a simmer. Add salt, freshly ground black pepper to taste, oregano and sugar. Simmer, partially covered, for 45-60 minutes, stirring occasionally.
  8. Meanwhile, cut the tips off the beans at a diagonal. Cut the beans into pieces about 2 to 2 ½ inches long, also on the diagonal.
  9. Wash the beans in several changes of cold water. Cover with water and allow the beans to soak for 15 to 20 minutes, to fully plump up with water before cooking.
  10. Bring a large pot of heavily salted water (at least 4 quarts of water and ¼ cup of salt) to a boil.
  11. Drain the beans, add to the boiling water, and return to a boil as quickly as possible.
  12. Boil until the beans are just beginning to get tender, approximately 4 minutes. They will cook much longer in the sauce so be careful not to overcook them at this point.
  13. Drain the beans and add to the tomato sauce, which should have been cooking for 45-60 minutes by this point.
  14. Simmer until the beans are silky, but not mushy. This can take 2 hours, plus or minus. Go by texture, not time. The beans should be silky but still have some body.
  15. Taste once or twice while cooking and adjust salt, pepper and, if you wish, oregano.
Recipe Notes

You can make the sauce and partially cook the beans in advance. After the beans have been boiled, quickly chill them in a bowl of ice water. Cool the cooked sauce to room temperature.  Drain and add the partially cooked beans to the sauce.  Refrigerate until ready to complete cooking.

Copyright © 2017 by VillaSentieri.com. All rights reserved.

Share this Recipe

Panettone (Italian Sweet Bread with Citron and Raisins)

December 10, 2016

I have been planning the launch of this site for several years.  It’s going live shortly before Christmas, a time when Italians traditionally enjoy panettone.  Panettone for breakfast.  Panettone as a gift.  Panettone as a snack.  While there are wonderful commercially produced products, I prefer to make my own.

The fact that the site is going live now feels like a gift…to myself!  So, I’m making panettone!!!  One for me, and half-a-dozen for friends.

I’ve been making Panettone for almost 30 years.  This year I’m using candied citron from Italy.  I plan to try making my own candied citron from the wonderful Buddha’s Hand fruits available from the farmers’ market in Palm Springs, California where I spend time each winter using this recipe from David Lebovitz.  For now, though, I’ll be using the citron from Italy.

Print Recipe
Panettone
Panettone is a sweet bread from Italy, traditionally served around Christmas. It is enriched with eggs and butter and contains raisins and candied citron.
Votes: 0
Rating: 0
You:
Rate this recipe!
Course Sweet Breads
Cuisine Italian
Prep Time 30 minutes
Cook Time 1 hour
Passive Time 14 hours
Servings
loaves
Ingredients
Course Sweet Breads
Cuisine Italian
Prep Time 30 minutes
Cook Time 1 hour
Passive Time 14 hours
Servings
loaves
Ingredients
Votes: 0
Rating: 0
You:
Rate this recipe!
Instructions
  1. This is candied citron from Italy. The flavor is superior to the diced candied citron sold in supermarkets.
  2. If using large pieces of citron, cut them into batons approximately 1/4 inch on a side.
  3. After cutting batons of citron, or if using citron that is already diced, slice the citron into thin slices.
  4. Beat salt, sugar, eggs and egg yolks together. Reserve.
  5. Use a mixer with a dough hook. Put 1200 g flour in the bowl of the mixer. Add yeast and begin to mix. Add warm water and mix. Add egg mixture and mix. Slowly with the mixer running, add 225 grams of melted butter and orange oil or zest. Knead for approximately 10 minutes, scraping the side of the bowl a few times. Add citron and raisins and continue mixing till incorporated. The dough will be sticky.
  6. Butter the inside of a large bowl with 2 tablespoons of the softened butter. Place dough in the buttered bowl and be sure to butter the top with some of the melted butter. Cover dough with waxed paper and place a kitchen towel on top. Refrigerate overnight. It should have at least doubled by morning. In place of a large bowl, you can use a food-service container of approximately 7 quarts with a tight-fitting lid.
  7. Punch the dough down by hand. Cover again with waxed paper and towels and allow to rise at room temperature until doubled in bulk.
  8. Butter 3 cylindrical baking pans, approximately 7 inches in diameter, using 3 tablespoons of softened butter. Set the pans aside.
  9. Knead the dough by hand until smooth and the air bubbles have been worked out. Form into 3 balls and place each into one of the baking pans. Butter the tops with the remaining 1 tablespoon of butter.
  10. Cover with waxed paper and a towel. Allow to rise at room temperature until doubled (or a little more), approximately 45-60 minutes.
  11. Cut a deep cross in the top of each loaf. Bake at 350° F for 55-65 minutes. Use a cake tester to be sure that none of the dough clings to tester.
  12. Place on a cooling rack. Cool slightly and remove from the pans. Cool completely on the rack. Wrap tightly until ready to use.
Recipe Notes

Copyright © 2016 by VillaSentieri.com.  All rights reserved.

Share this Recipe