Crostoli (Italian Fried Pastries)

December 26, 2017

I didn’t grow up eating crostoli.

That doesn’t mean we didn’t have our own version of fried dough.

Unlike crostoli, which are thin and crispy and leavened with baking powder, I grew up eating ovals of fried yeasted bread dough sprinkled with granulated sugar.

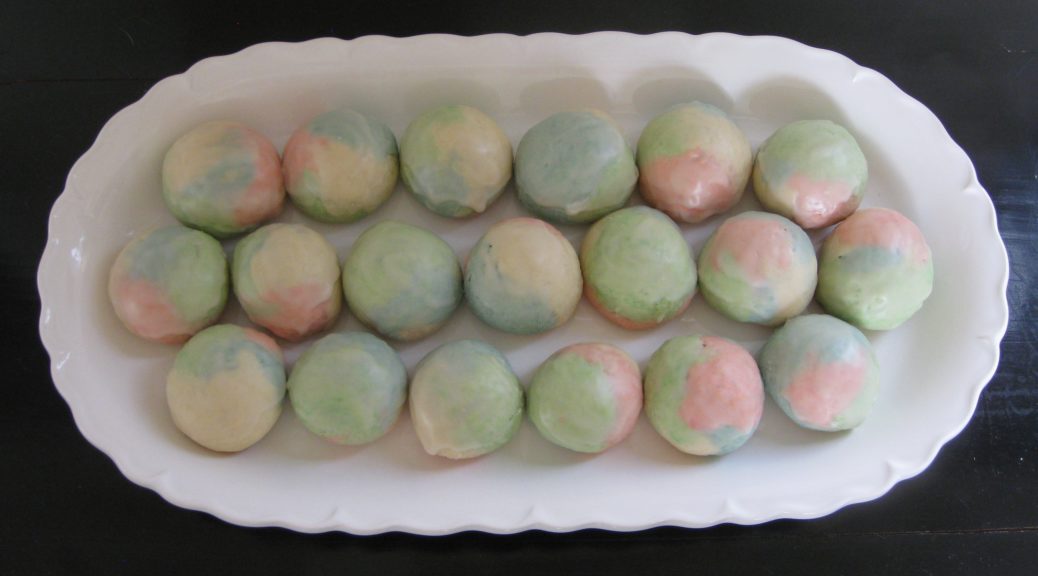
Frying bread dough and sprinkling it with granulated sugar is a common among Southern Italians. My mother had a name for it that I’ve never heard anywhere, it sounded something like “pitla.” I started doing some research. The word “pitta” is still used in Calabria, where my mother’s family originated, for various types of dough-based foods, including some that are quite flat. The word “pitta,” which I believe derives from the Greek word “pita,” became the word “pizza” in standard Italian. I’m guessing that “pitla” is a dialectical variation of “pitta.”


Click HERE to join our mailing list and you’ll never miss a recipe again!


One of the positive outcomes of doing research on Italian fried dough products is that I came across a wonderful Wikipedia page on fried dough from around the world.  Check it out here.

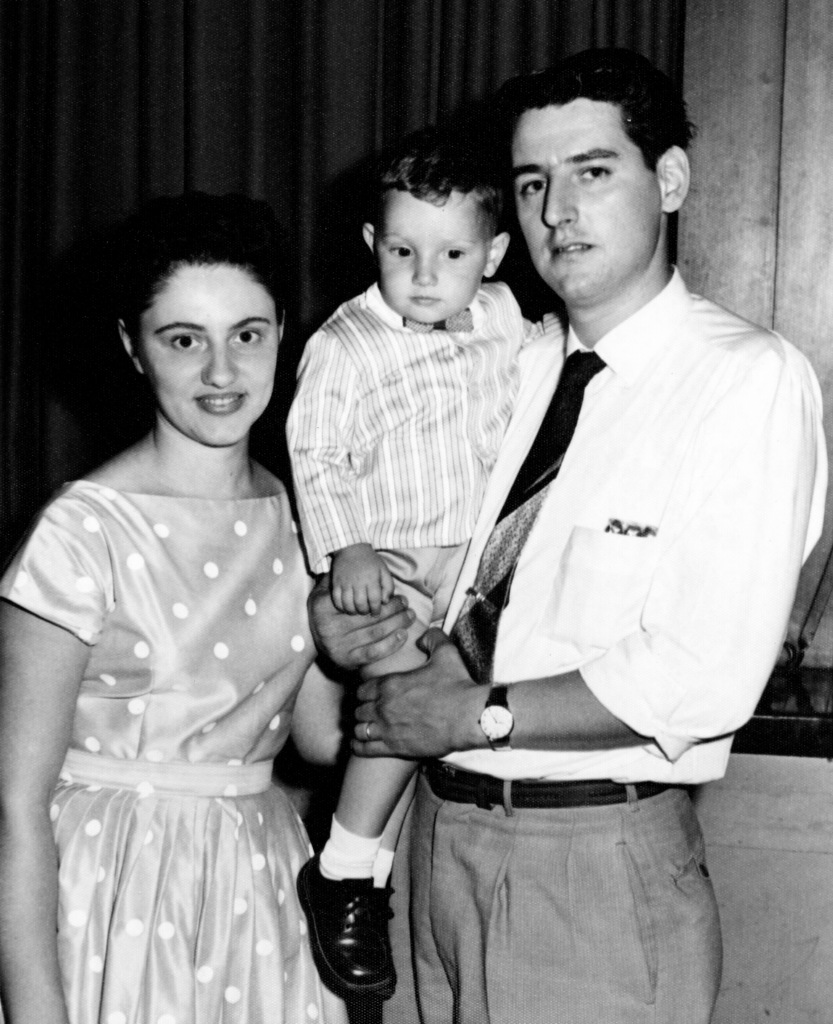
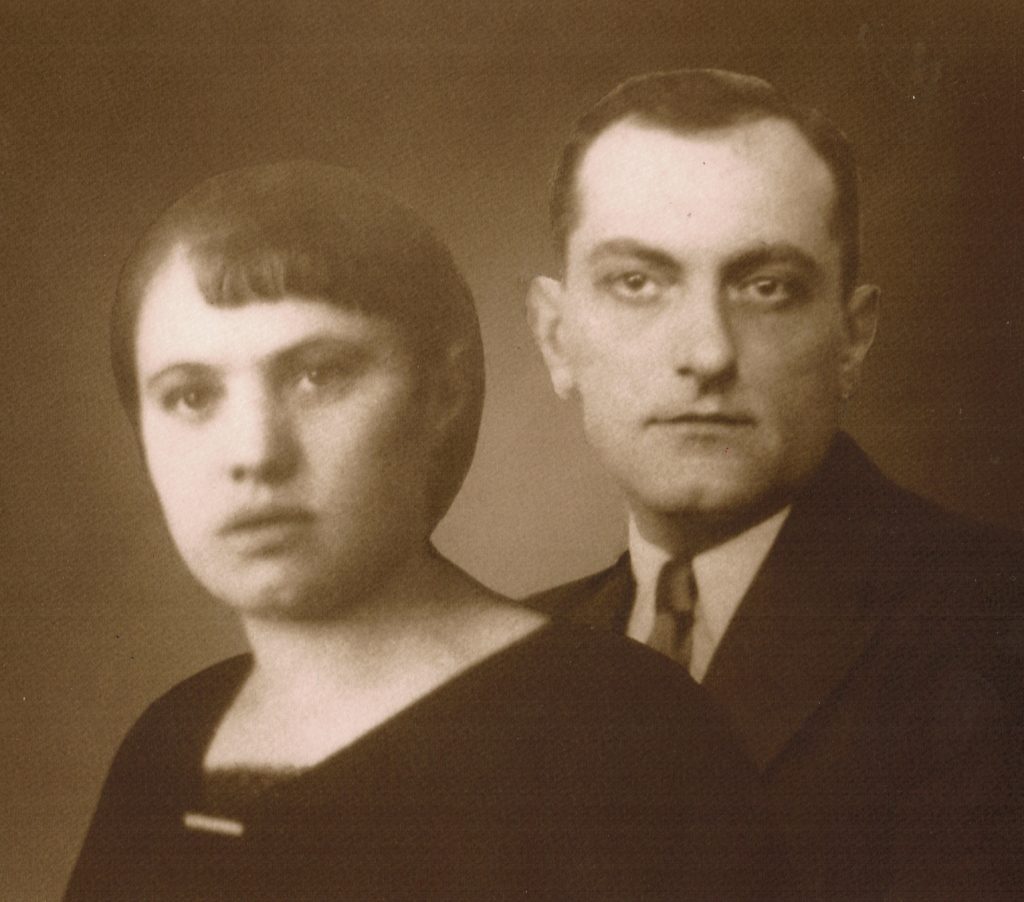
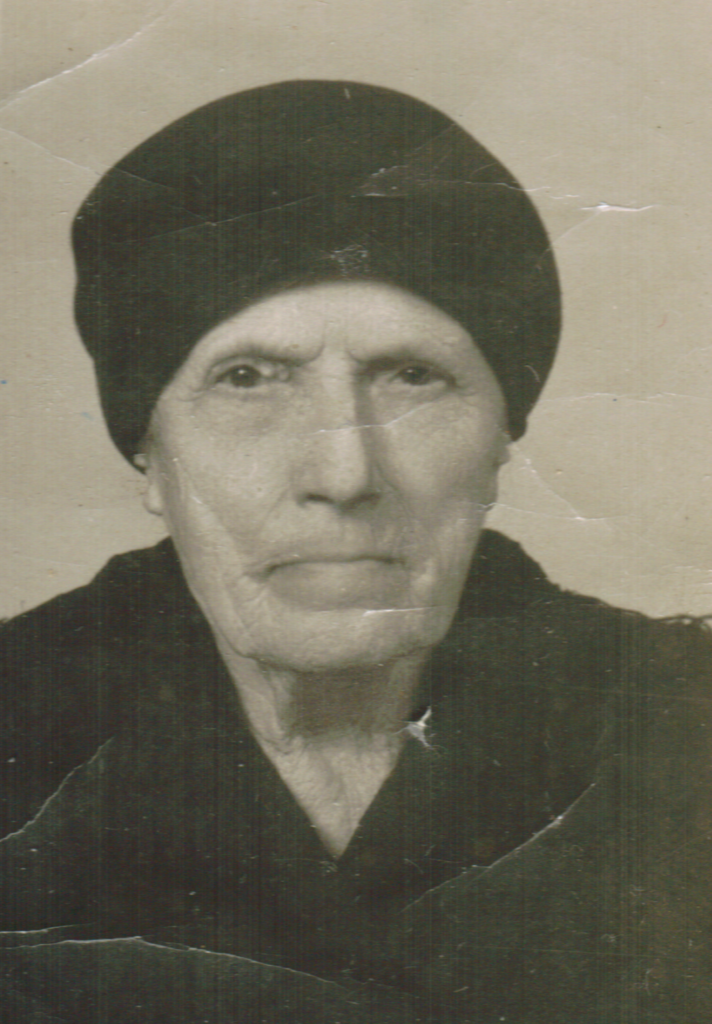
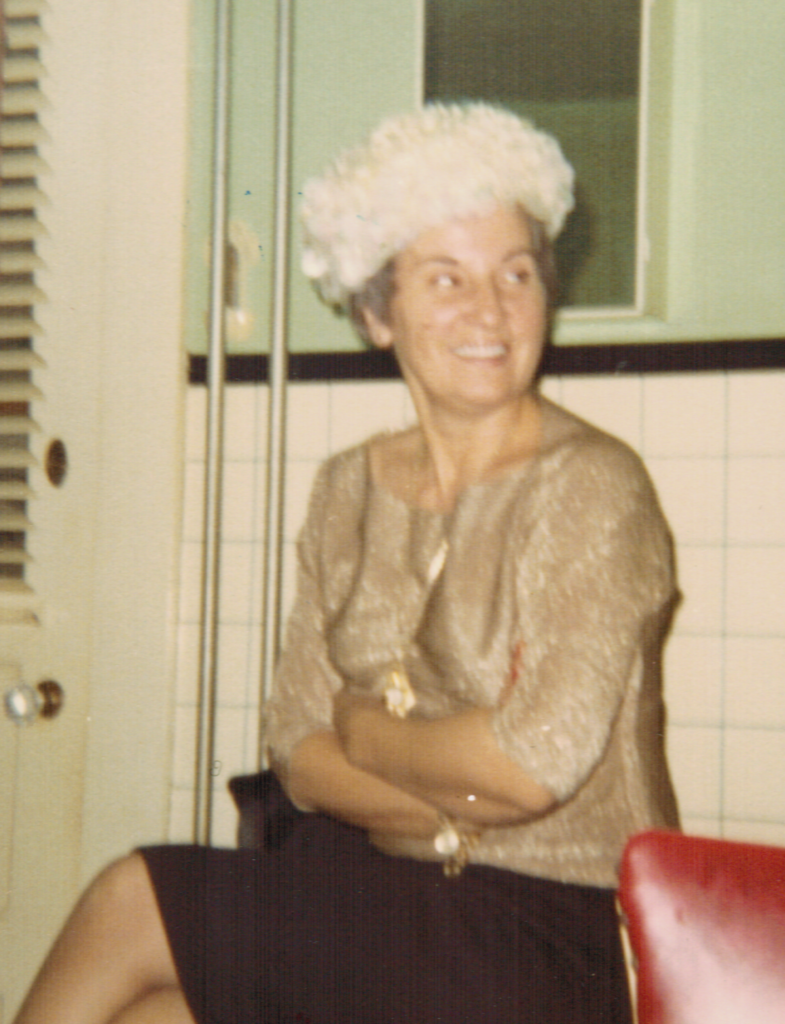
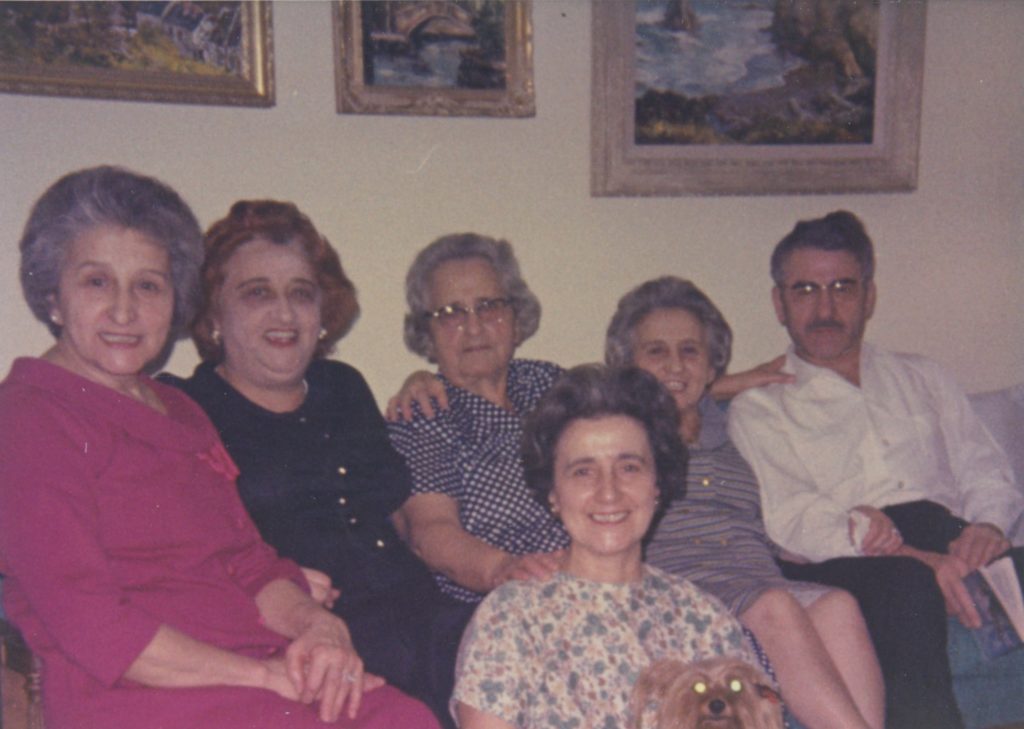
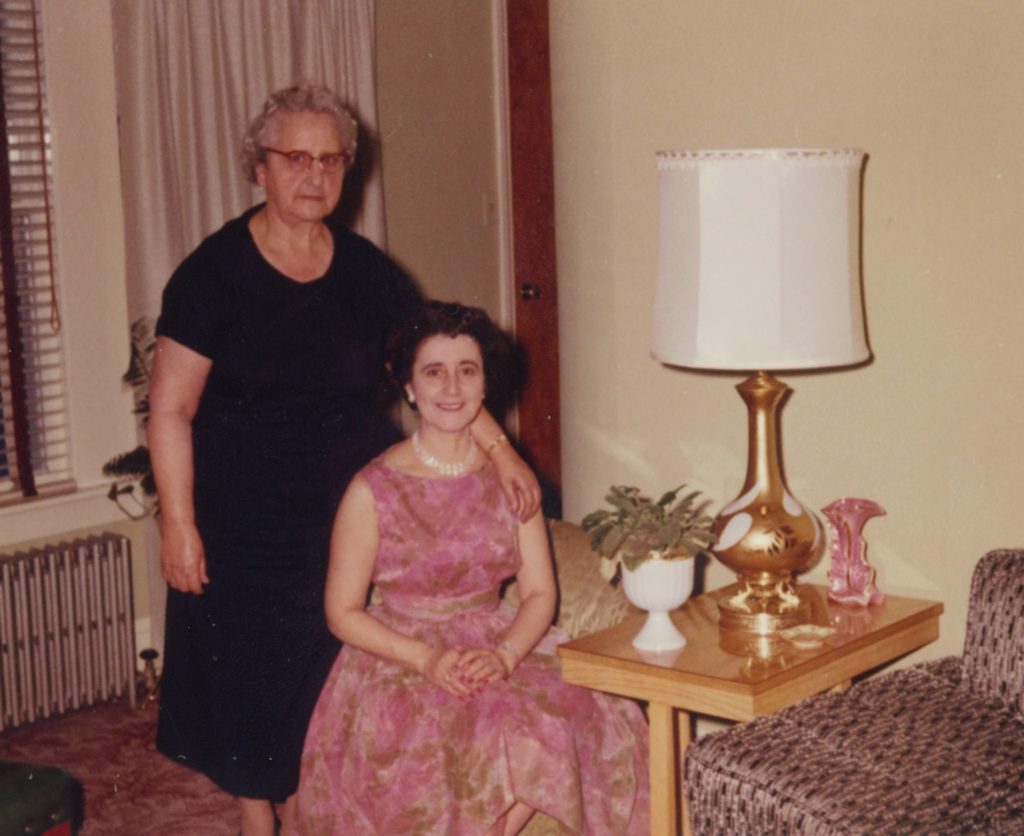
Crostoli (or crostui in the Friuli-Venezia-Giulia region of Italy where my mother-in-law was born) are traditionally served at Christmastime. My mother-in-law says that they would sometimes have them at other times of the year when they “wanted something sweet” that was simple to make.

My mother-in-law’s zig-zag pastry cutter

Not growing up eating crostoli, I asked my husband to tell me what he remembered.

I got two sentences:
“We always had them at Christmas.”
“They’re not my favorite.”

There you have it, the entirety of the crostoli story in 10 words.

I even waited a couple of days and asked him again if he remembered anything else about crostoli. “Nope” was the answer.

Now we’re up to 11 words.


Follow us on your social media platform of choice


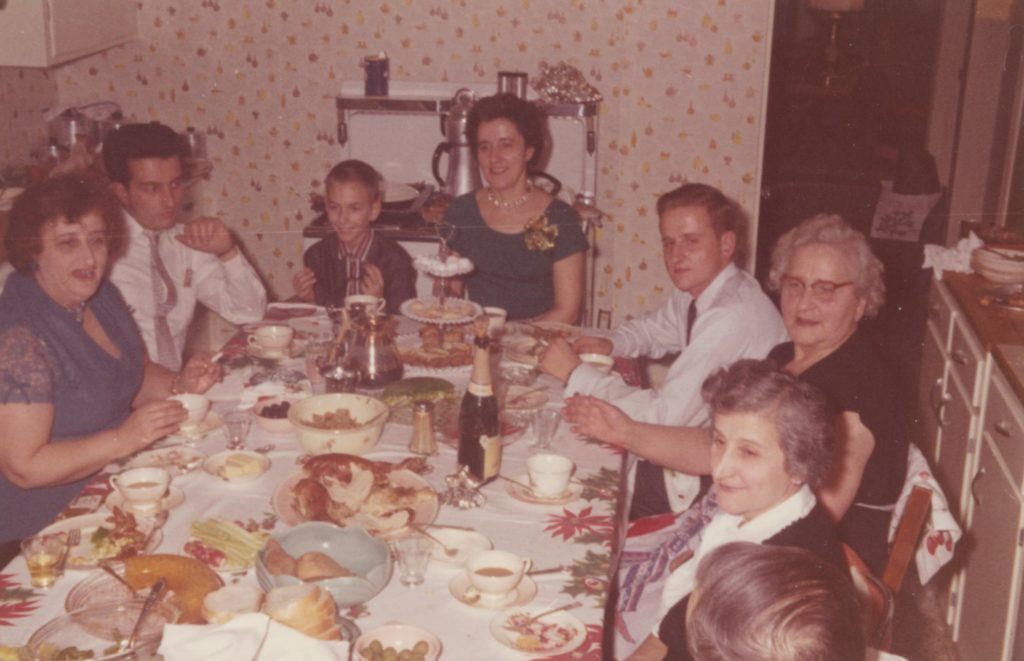
That might have been the end had it not been for Christmas Eve. The morning of Christmas Eve, after I mixed dough for panettone, my mother-in-law and I made up a batch of crostoli to take to Christmas Eve dinner at the home of our friends Rich DePippo and Doug Howe.

Rich’s grandfather was from Domegge di Cadore in the Veneto region of Italy, just next door to Friuli-Venezia-Giulia where my mother-in-law was born. In fact, Domegge is about 100 kilometers from Treppo Grande, my mother-in-law’s home town.

As it turns out, Rich and his mother, visiting for Christmas, also made crostoli the morning of Christmas Eve.

Using a Microplane grater makes fast work of zesting lemons

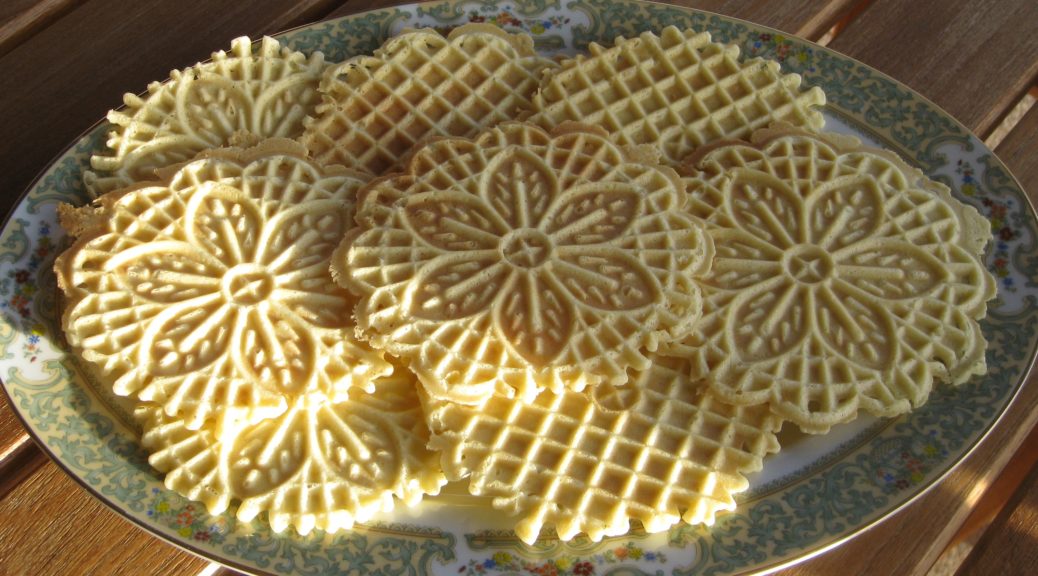
There were dueling crostoli served for dessert (along with pizzelle, nut roll, and biscochitos).

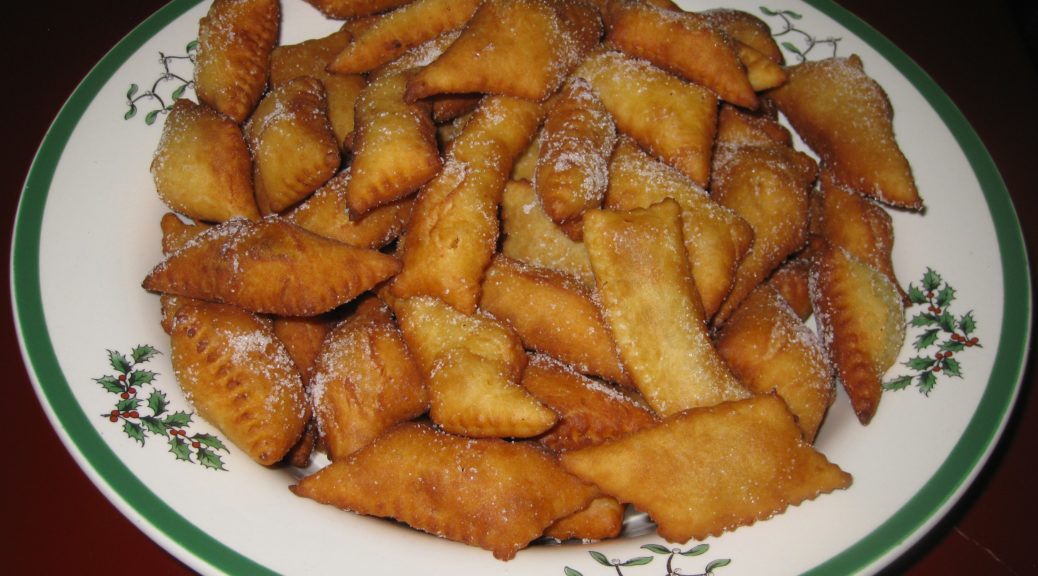
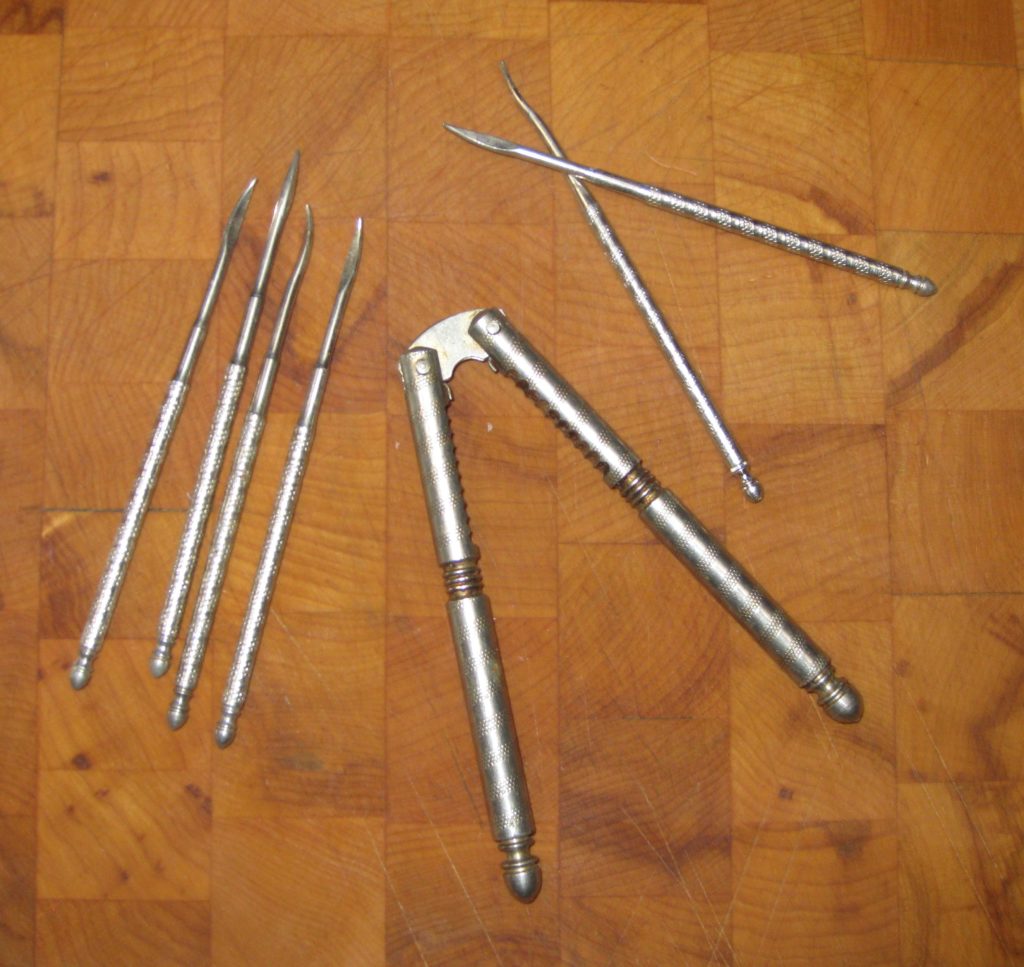
Rich’s were long and thin, with a slit cut in the middle through which one end of the dough was twisted before frying. This seems to be the most traditional shape that I’ve seen in my research, though Lidia Bastianich, who is also from very near where my mother-in-law was born, ties hers in a knot.

Having seen pictures of crostoli twisted and tied before embarking on making them with my mother-in-law, I asked her why hers were just left as irregular squares (well, quadrilaterals, really) of dough. That’s the way her mother made them was, of course, the first response. After which she added that she liked them to puff up, which they don’t do if they’re twisted or tied.

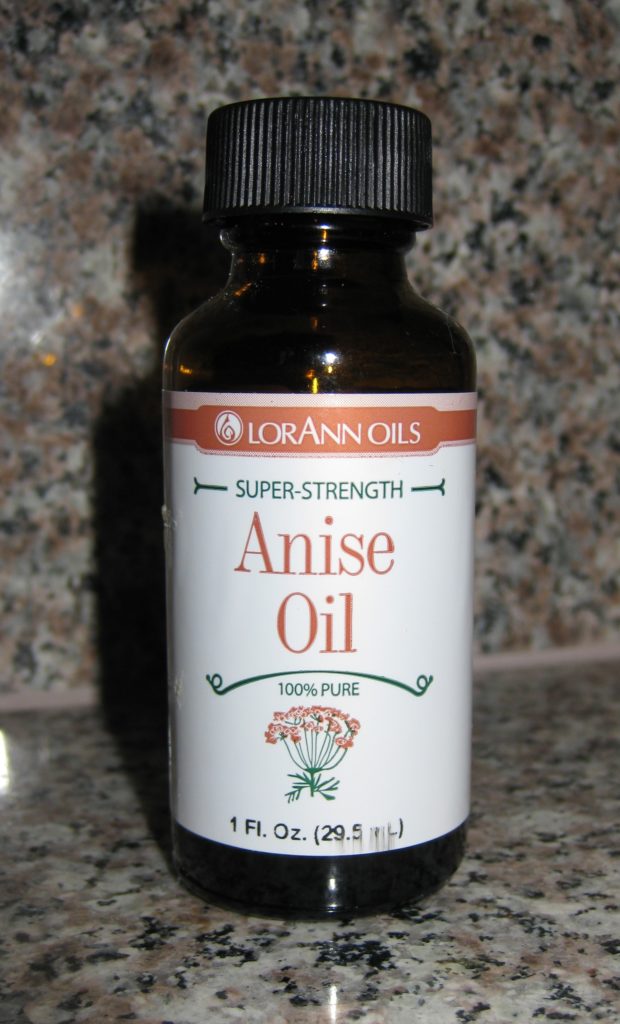
The other difference in the crostoli is that Rich used anisette to flavor his whereas my mother-in-law used lemon zest and vanilla.

The anisette was definitely a new twist. In researching crostoli, I’ve seen citrus, usually lemon or orange, as the most common flavoring.  Often vanilla is added; sometimes brandy or rum. Never have I run into a recipe with anisette. Hopefully Rich will weigh in on his family’s recipe for crostoli and how they came to use anisette for flavoring.

Meanwhile, enjoy!


If you have a favorite family recipe and a bit of a story to tell, please email me at santafecook@villasentieri.com and we can discuss including it in the blog. I am expanding the scope of my blog to include traditional recipes from around the country and around the world. If you haven’t seen Bertha’s Flan, it will give you an idea of what I’m looking for.


Print Recipe
Crostoli (Italian Fried Pastries)
Crostoli are pastries that re rolled thin, fried, and dusted with granulated sugar. Powdered sugar melts and becomes sticky so granulated sugar is traditional. Crostoli are usually larger than the ones shown here, something like 1 ½ inches by 3 or 4 inches. We made these smaller because they were being served as part of a dessert buffet at the end of a large meal.
Votes: 0
Rating: 0
You:
Rate this recipe!
Cuisine Italian
Prep Time 30 minutes
Cook Time 45 minutes
Servings
Cuisine Italian
Prep Time 30 minutes
Cook Time 45 minutes
Servings
Votes: 0
Rating: 0
You:
Rate this recipe!
Instructions
  1. Combine flour, sugar, baking powder, lemon zest and salt in a large bowl. Mix well.
  2. Make a well in the center and add eggs. Using a fork, begin to incorporate the flour.
  3. Add vanilla extract, lemon juice and incorporate.
  4. Add melted butter.
  5. Mix to form a soft, non-sticky dough.
  6. When the dough becomes too stiff to mix with a fork, use your hand. Do not over knead.
  7. Cut into four or five pieces.
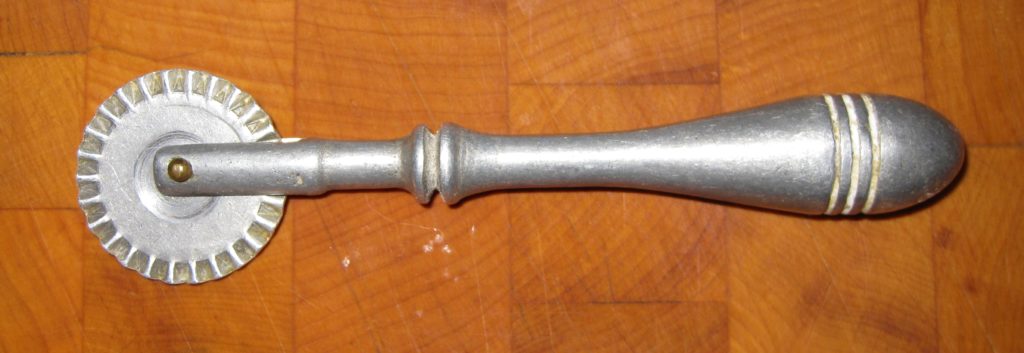
  8. Roll out less than 1/8 inch thick, dusting with a little flour as needed to keep the dough from sticking.
  9. Cut into rectangles, approximately 1 1/2 inches by 3 inches, with a zig-zag cutter.
  10. When all are cut, deep fry until brown. If you are not comfortable doing this from experience, use a thermometer and keep the oil at about 350 degrees Farenheit.
  11. Sprinkle with granulated sugar as soon as they are removed from the oil so the sugar sticks.
  12. They are best the same day but will stay fresh at least one day at room temperature, loosely covered.
Recipe Notes

Copyright © 2017 by VillaSentieri.com. All rights reserved.

Share this Recipe

Crostata di Noci (Italian Walnut Tart)

December 20, 2017

One evening in 1996 my husband and I were sitting with his parents in a dimly-lit bar in Venice. We were all chatting. I was drinking grappa, as was my father-in-law. Then the desire for dessert hit me. If you’ve spent any time in Italy you know that at no point in the day are you actually hungry. There’s just too much wonderful food around to not partake in it. So the desire for dessert had absolutely nothing to do with the need for more calories.

Going for something new, I selected Crostata di Noci. I was absolutely amazed by what I got.

The pastry was standard-issue Italian pasta frolla, a slightly sweet leavened crust that’s like a cross between shortbread cookies and a dense cake. The filling, however, tasted for all the world like nut roll, one of my favorite pastries but one that is also very time-consuming and frustrating to make.

In that instant, it all made sense. Nut roll hails from Eastern and Central Europe (as does another of my favorites, the poppy seed roll).  In northeast in Italy there is a lot of Eastern European influence. Suddenly, taking nut roll filling and putting it in a pasta frolla case meant I could have something that tasted just like a nut roll but without all the frustration of actually making nut roll.


Click HERE to join our mailing list and you’ll never miss a recipe again!


Now, Crostata di Noci will never actually replace “real” nut roll just like making bread in my bread machine won’t replace making bread by hand. But, with a bread machine, I have homemade bread every day which wouldn’t be the case if I had to make every loaf by hand. With less than half-an-hour’s active time, I can indulge my taste for nut roll any time I want!

Around the holidays nut rolls were ubiquitous in my home town but my mother and my Aunt Margie made the best nut rolls I have ever had. Largely this is because they both put in a large proportion of sweetened nuts to dough. Honestly, there was just enough dough to roll pinwheel fashion and hold the whole thing together. Many other nut rolls were bready by comparison.

To be sure, my mother’s filling differed from my Aunt Margie’s. I’m not sure how each of them came by their respective recipes but my suspicion is that Aunt Margie’s came from her mother or another Italian relative or friend because it contained orange juice. The use of citrus in various pastries is common in Italy. Pasta frolla, for example, is traditionally flavored with lemon zest and vanilla. I am guessing my mother’s recipe came from my father’s mother or someone on the Slovak side of my family because the liquid in the nuts was milk and not orange juice.


Follow us on your social media platform of choice


Separate from actually eating nut roll, there was this whole aura around making them (at least there was when I was young!). Buying shelled walnuts and using a food processor make quick work of preparing the nuts but in the 1960s, making nut roll started with my mother buying a large quantity of whole walnuts. We would sit around the table and crack the nuts open then extract the nutmeats. I still have the nutcracker and picks that we used.

My parents’ nutcracker and picks

After all the nuts were shelled, they needed to be ground. We did this in a hand-crank grinder of the same type used to grind meat for sausage. As a kid, I got to turn the crank on the grinder! I no longer have my mother’s grinder as it got rusty from being stored in the basement but I have my own that is pretty much identical. I got it when I was in college.

The hand-crank grinder I got while in college

After the excitement (well, as a kid it was pretty exciting!) of shelling and grinding the nuts we all kind of abandoned my mother who started the laborious process of actually making the nut rolls. That is definitely not a job for amateurs. The dough had to be very thin but just thick enough to contain the nuts. The nuts had to be moist, sweet, and generous in quantity compared to the amount of dough. Then the whole thing had to be rolled up and baked.

After my mother died, Aunt Margie started sending me nut roll every year. After Aunt Margie died, my cousin Donna (Aunt Margie’s daughter) picked up the nut roll mantle. The two nut rolls that I got this year will be carefully doled out over a few weeks, befitting their preciousness, starting on Christmas Eve!

This year’s nut roll from my cousin Donna.  Notice the large proportion of nuts to dough.

If you have a favorite family recipe and a bit of a story to tell, please email me at santafecook@villasentieri.com and we can discuss it. I am expanding the scope of my blog to include traditional recipes from around the country and around the world. Take a look at Bertha’s Flan.  It will give you an idea of what I’m looking for.


After returning from that trip to Venice I was determined to recreate Crostata di Noci. I whipped up a batch of Zia Fidalma’s pasta frolla and made a simple walnut filling with orange juice in a nod to the Italian origins of this particular pastry.

The first try was a winner and I haven’t really made any substantive changes in the recipe since. If one wanted a creamier filling, one could add a few tablespoons of butter but, honestly, the crostata is so rich that I haven’t felt the need to make it more so.

Until I tackle nut roll making 101 (which I swear I’m going to do one day soon!), I’ll have to settle for crostata di noci, and the occasional nut roll care package from my cousin!

Print Recipe
Crostata di Noci (Italian Walnut Tart)
Lightly sweetened ground walnuts fill an Italian pasta frolla crust in this Venetian dessert. If you’re not a fan of walnuts you could use other nuts. If you want to make the crostata extra festive, put a paper doily on top and sprinkle it with powdered sugar to get a pattern.
Votes: 0
Rating: 0
You:
Rate this recipe!
Cuisine Italian
Prep Time 40 minutes
Cook Time 45 minutes
Passive Time 30 minutes, plus cooling
Servings
people
Ingredients
Pasta Frolla
Nut Filling
Cuisine Italian
Prep Time 40 minutes
Cook Time 45 minutes
Passive Time 30 minutes, plus cooling
Servings
people
Ingredients
Pasta Frolla
Nut Filling
Votes: 0
Rating: 0
You:
Rate this recipe!
Instructions
Pasta Frolla
  1. Blend flour, sugar, baking powder, vanilla powder, salt and lemon zest in a food processor until combined.
  2. Add the cold butter, cut in pieces.
  3. Blend till well combined. The mixture in the food processor will appear to move as one mass though when you stop the processor you will see that it is not.
  4. Add the eggs and vanilla extract if you are using that instead of vanilla powder and blend till it almost forms a ball.
  5. Remove the pastry from the food processor and incorporate the final bits of flour by hand.
  6. Wrap the dough in waxed paper and refrigerate for about 30 minutes before using.
Nut Filling
  1. Combine all ingredients and mix well.
  2. Cover the nut filling and keep it at room temperature while rolling out the pasta frolla.
Assembly
  1. Roll out pasta frolla between sheets of waxed paper until it is just large enough to come up the sides of a 10" diameter by 1” tall tart pan with a removable bottom.
  2. Trim the edges of pastry even with the top of the tart pan.
  3. Add the filling and spread it out evenly.
  4. The filling should come just to the top of the tart pan.
  5. Bake the crostata at 350°F for approximately 45 minutes or until crust is golden brown.
  6. Cool and remove the sides of the tart pan.
  7. The crostata can be sprinkled with powdered sugar for serving and/or accompanied by lightly sweetened whipped cream.
Recipe Notes

Copyright © 2017 by VillaSentieri.com. All rights reserved.

Share this Recipe

Aunt Margie’s Colored Cookies

December 15, 2017

We called them “Colored Cookies.”

I’ve never seen them anywhere but in my hometown of Johnstown, Pennsylvania though I can’t believe they are unique to there.

Truth be told, I don’t think I’ve ever had them made by anyone besides Aunt Margie until I made them from her recipe.

Aunt Margie in 2004 with me on an architectural tour of Chicago by boat

Many of the Italian and Italian-American cookies that I grew up with were cake-like. A stiff batter of flour, sugar, eggs, and fat (lard and butter were the most common), leavened with baking powder, flavored in some way (vanilla, lemon, chocolate and spice, sesame, and so forth), rolled or shaped and baked, and usually iced with a thin powdered sugar-milk icing that would harden to a glaze.


Follow us on your social media platform of choice


Totos are a perfect example of the chocolate and spice variety.

Anginetti (Genets, as we called them in Italian-American-dialect-slang) also referred to as Lemon Knots, are lemon flavored. Although I’m devoting most of December to posting Italian-American pastry recipes, Anginetti won’t appear until next year.

Sesame Seed Cookies (which certain members of my family like to dip in wine) have no flavoring other than the sesame seeds they are rolled in before baking. These are coming next December, too.


Click HERE to join our mailing list and you’ll never miss a recipe again!


Colored Cookies are flavored with vanilla despite the riot of color that might suggest otherwise. There was a brief period of time, however, when Aunt Margie got creative (read iconoclastic) and used coconut extract instead of vanilla. Coconut and almond are my two favorite flavors when it comes to sweets, leagues beyond chocolate and vanilla as far as I’m concerned, but coconut-flavored colored cookies strayed too far from tradition for my taste. It didn’t keep me from eating them, however!

Colored Cookies

This is Aunt Margie’s original recipe. And if you flavor them with anything other than vanilla, please don’t tell me…just kidding!


If you have a favorite family recipe and a bit of a story to tell, please email me at santafecook@villasentieri.com and we can discuss it. I am expanding the scope of my blog to include traditional recipes from around the country and around the world. If you haven’t seen Bertha’s Flan, it will give you an idea of what I’m looking for.


I don’t use a lot of food coloring.  The only other exception in recent memory (other than these cookies) was Jim’s Hawaiian Guava Cake.  Take a look at my box of food coloring.  The number 39 is the price:  39 cents!  I’ve had it a long time, though I used up the red making the Guava Cake.


Print Recipe
Aunt Margie's Colored Cookies
Use a very good quality vanilla extract, not artificial vanilla flavoring, as that is the predominant flavor. The best way to mix these is using your hand. If you don’t start there, you’ll end up there so just use your hand from the beginning. Although Aunt Margie’s original instructions were to ice the cookies while still warm, that is very difficult to accomplish without assistance. You can ice them after you have baked all of them with no noticeable difference. It is best to use medium-weight shiny aluminum cookie sheets. Dark metal makes the bottoms too dark before the cookies have completely cooked. You can divide the dough into five parts and color the last one yellow. If you do so, you will need to use slightly less of each dough to make a cookie.
Votes: 0
Rating: 0
You:
Rate this recipe!
Cuisine Italian
Prep Time 1 hour
Cook Time 2 hours
Servings
dozen
Ingredients
Cookies
Icing
Cuisine Italian
Prep Time 1 hour
Cook Time 2 hours
Servings
dozen
Ingredients
Cookies
Icing
Votes: 0
Rating: 0
You:
Rate this recipe!
Instructions
Cookies
  1. Measure all the ingredients.
  2. Combine butter and sugar.
  3. Mix well using your hands.
  4. Add eggs one at a time mixing after each.
  5. Mix in salt and baking powder then add milk and vanilla.
  6. Combine well.
  7. Add flour and mix until a dough forms.
  8. Divide dough into four parts.
  9. Leave one part of dough white.
  10. Color the others pink, blue, and green.
  11. Take approximately 1 teaspoon of each dough and roll into a ball the “size of a walnut” according to Aunt Margie’s recipe. You will need to apply a bit of pressure, without smashing the colors together, to be sure that the different colored doughs have joined into one cookie. If not, the cookies will split during baking.
  12. Bake 350°F for 17-20 minutes until very light brown on the bottom and the top does not depress when touched lightly.
  13. Remove cookies from cookie sheet and put on a cooling rack.
  14. Using your finger, ice with powdered sugar icing while still warm.
Icing
  1. Combine powdered sugar, vanilla and milk. Stir to combine.
  2. Stir to combine.
  3. Thin with a small amount of milk if needed. The icing should be of a spreading consistency.
Recipe Notes

Copyright © 2017 by VillaSentieri.com. All rights reserved.

Share this Recipe

Grandma Mihalik’s Butter Cookies

December 11, 2017

When I was young, cookie season started in mid-December and continued until early January. Friends and family all had platters and trays of cookies on their tables, often of the multi-tiered variety. Each was carefully wrapped in plastic ready to be unwrapped when guests arrived. The platters were replenished after each group of guests left.

In my circle of family and friends, cookies usually fell into one of two categories, Italian-American or Slovak-American.

To be sure, there was some crossover.


Click HERE to follow us on Twitter


Nut rolls and poppy seed rolls are Slovak (well, OK, they’re really pretty much pan-Eastern European but since I grew up in a half-Slovak family we considered them to be Slovak even though we knew they were also made by the Poles, Ukrainians, Slovenians, and other Eastern Europeans in town) but they were made by the Italian side of my family as much as by the Slovak side.

There were also nut horns, butterballs, and thumbprints which defied ethnic baking boundaries.

However, flat, rolled cookies, like these butter cookies, were not usually made by Italian-Americans.  The totos that I wrote about last December and the colored cookies that are coming up later this week were not usually made by Slovak-Americans.


Click HERE to join our mailing list and you’ll never miss a recipe again!


This recipe came to me by way of Aunt Ann who was married to my father’s brother, Jano. She said it was Grandma’s recipe.

I remember eating these cookies and seeing them piled on my grandmother’s table over the holidays.

These cookies are similar to the sand tarts that are common in the central part of Pennsylvania where the Pennsylvania Dutch, of German extraction, historically lived. The big difference, though, is that the dough for these butter cookies is prepared more like a pie crust while the dough for sand tarts is prepared more like cake batter. That is, for these cookies, flour and sugar are cut into butter with a pastry blender whereas for sand tarts the butter and sugar are first creamed together.

There also are sand tarts that I think of as more Southern.  These are usually rolled into balls or formed into shapes and baked but not rolled thin like Pennsylvania Dutch sand tarts and my grandmother’s butter cookies.


Follow us


Print Recipe
Grandma Mihalik's Butter Cookies
The cookies should just be pale golden brown on the bottom. The color and weight of the cookie sheet significantly influence cooking. I find that shiny aluminum cookie sheets of medium weight work best. Dark metal will cause the bottom of the cookies to brown too much. Allow the cookies to rest for about 30 seconds before removing them from the cookie sheets. If you wait too long the cookies will lose their flexibility and are likely to break.
Votes: 0
Rating: 0
You:
Rate this recipe!
Cuisine Slovak
Prep Time 1 1/2 hours
Cook Time 1 hour
Passive Time 30 minutes
Servings
dozen
Ingredients
Cuisine Slovak
Prep Time 1 1/2 hours
Cook Time 1 hour
Passive Time 30 minutes
Servings
dozen
Ingredients
Votes: 0
Rating: 0
You:
Rate this recipe!
Instructions
  1. Combine cinnamon and three tablespoons sugar. Reserve.
  2. Grind the walnuts and reserve.
  3. Put the butter in a mixing bowl and leave at room temperature for about 30 minutes to soften slightly.
  4. Add 1 cup of sugar and flour to the butter.
  5. Mix with a pastry blender until little beads form.
  6. Add the cream and egg yolks and continue mixing with the pastry blender until a shaggy dough forms.
  7. Press into a log, cut in half (or quarters) and wrap in plastic wrap and refrigerate for 30 minutes.
  8. Roll a portion of dough between sheets of waxed paper to approximately 1/8 inch thick.
  9. Cut into shapes.
  10. Arrange on ungreased cookie sheets.
  11. If the dough starts to warm too much it will be difficult to get the cookies off the waxed paper. If this happens, put the rolled out dough, still between the waxed paper, in the refrigerator for a few of minutes.
  12. Brush with unbeaten egg whites.
  13. Sprinkle with ground walnuts
  14. Sprinkle with cinnamon sugar.
  15. Bake 350°F approximately 8-9 minutes or until light brown on the bottom.
  16. Remove from the cookie sheet almost immediately and cool on a wire rack.
Recipe Notes

Copyright © 2017 by VillaSentieri.com. All rights reserved.

Share this Recipe

Pizzelle (Italian Anise-Flavored Wafer Cookies)

December 6, 2017

Pizzelle punctuated my childhood.

Pizzelle were present at every holiday, birthday, wedding, and festive event as well as at random times throughout the year.

They usually came from Aunt Margie, though other folks made pizzelle, too.

My mother never did. Though she liked to bake, and made some wonderful pastries, pizzelle were not part of her repertoire.

The classic flavor is anise, though vanilla, and to a lesser extent lemon and orange, are common as well.

Aunt Margie would use pizzelle to make ice cream sandwiches. She would roll them around a tube to make faux cannoli. She would even roll them into ice cream cones. Of all the permutations, though, my favorite is just the classic, flat, crispy anise-flavored cookie.


Click HERE to join our mailing list and never miss another recipe again!


I don’t know anybody who doesn’t use an electric pizzelle iron these days but originally Aunt Margie used one of cast iron that was heated on the stove. It came from Berarducci Brothers in McKeesport, Pennsylvania and is most definitely iron, not aluminum. I have the pizzelle maker in its original box.

Aunt Margie’s original cast iron pizzelle maker

The original box for the pizzelle maker

Unfortunately Berarducci Brothers is no longer around. Not only did they manufacture stove-top and electric pizzelle irons, they made ravioli molds, crank-handle vegetable strainers, and an array of other culinary tools.

A modern pizzelle maker

In my experience, anise oil is essential. Anise extract simply does not pack enough flavor to give pizzelle the punch they need.

When I was young, anise oil came from the pharmacy. It was not uncommon in those days for pharmacies to routinely compound medications to a physician’s specific instructions. Compounding is now limited to a few specialty pharmacies but not so back then. Anise oil was commonly used to flavor what might otherwise be a noxious medication.

It was common practice among the Italian families in my hometown to go to the pharmacy to buy a bottle of anise oil. One upside, besides the easy availability of the stuff, is that it was pharmaceutical grade and, therefore, very pure.


Follow us


I tried that in Santa Fe after my mother-in-law kept failing to get enough anise flavor out of anise extract. We even have actual compounding pharmacies in Santa Fe as well as pharmacies that specialize in herbal and homeopathic medications that also make up their own medications. No dice. Not one of them carried anise oil.

Amazon to the rescue. There are other on-line sources, too, like the King Arthur Flour people. So, if you want to try your hand at pizzelle, get anise oil, not anise extract.  If you don’t like anise you could give vanilla, lemon, or orange a try.  If you do, I suggest the lemon and orange oils from Boyajian rather than extract.

The brand of Anise oil I have been using lately

Print Recipe
Pizzelle
Anise extract does not work well. Anise oil is an absolute requirement for the authentic taste. As with many "old Italian recipes" in my collection, this one provided a range of amounts of flour. 1 3/4 cups of all-purpose flour worked well and was pretty much right in the middle of the range. The batter will be quite stiff until the melted butter is stirred in.
Votes: 0
Rating: 0
You:
Rate this recipe!
Cuisine Italian
Prep Time 15 minutes
Cook Time 30 minutes
Passive Time 15 minutes
Servings
dozen
Ingredients
Cuisine Italian
Prep Time 15 minutes
Cook Time 30 minutes
Passive Time 15 minutes
Servings
dozen
Ingredients
Votes: 0
Rating: 0
You:
Rate this recipe!
Instructions
  1. Combine flour, salt, and baking powder.
  2. Mix well. Reserve.
  3. Combine eggs and sugar.
  4. Mix until well combined.
  5. Stir in vanilla and anise oil.
  6. Stir dry ingredients into egg-sugar mixture.
  7. Stir in melted butter.
  8. Lightly grease the pizzelle maker (with lard, preferably) before the first ones are baked. After the first, additional greasing is not needed.
  9. Add a rounded tablespoon of batter to the center of each shape, depending on the size of your iron.
  10. Cover and cook until light golden but not really brown. The length of time will vary based on the specifics of your pizzelle iron. With mine, it took 30-45 seconds per batch.
  11. Cool the pizzelle on racks.
  12. You can dust with powdered sugar if you'd like but I rarely do unless it's a really festive occasion.
Recipe Notes

Copyright © 2017 by VillaSentieri.com. All rights reserved.

Share this Recipe

Homemade Applesauce

November 3, 2017

I made applesauce for the first time the summer after my freshman year in college. Don’t ask me how or why I remember making applesauce that summer but the whole process is very clear in my mind. Cooking was still pretty new for me back then. Other than baking cakes, I doubt I cooked more than about four times before my freshman year.

I cooked about once a week throughout freshman year, usually on Sundays. As a freshman, I was required to use the dining service for 10 meals per week, which usually meant lunch and dinner, Monday through Friday. Saturdays I went to restaurants and cooked. It was truly a year of experimenting, not only with cooking but with entirely new cuisines and flavor profiles.


Follow us on Twitter:  Click HERE


A hand-crank food mill is a pretty unusual piece of equipment for a college student to have. I don’t remember where or when I bought it, possibly I bought it specifically to test out an applesauce recipe that had caught my attention. You can actually see the very same food mill in the pictures below. I still use it

Much to my mother’s dismay I did not go home for the summer after my freshman year. I landed a great summer job in a research lab working for Dr. Mary Catherine Glick (aka Susy), a very well-known researcher. I worked in that lab for the remainder of my undergraduate years.

Students could not stay in undergraduate dorms at the University of Pennsylvania during the summer, so staying in Philadelphia meant I had to find a place to sublet. One of the most common choices was to sublet in Graduate Towers. The graduate students who lived in Grad Towers had to rent for a full calendar year, even if they were not going to be in Philadelphia for the summer.

I sublet one bedroom of a two-bedroom apartment in Grad Towers. Other than a bathroom the apartment had a very small Pullman kitchen and a kitchen table with two chairs. There was nothing that resembled living room furniture, nor would there have been any place to put it.

Graduate Towers still standing but renamed to Sansom Place

The other occupant of the apartment was a graduate student who used the kitchen to “cook” exactly three things for dinner. One was a can of tuna fish with pickle relish (ok, so no cooking involved). The second was a single chicken breast boiled in unsalted water and doused with pickle relish. The third was boiled hot dogs with, you guessed it, pickle relish. He ate the same three foods for dinner, in strict rotation, for the entire summer as he had done for months (years?) leading up to that summer.

I on the other hand, freed from the obligation to eat at the University food service and with an almost totally unused kitchen, was making my mother’s long-cooked pasta sauce, baking fish, and making applesauce among other things.

Over the next few years I experimented with the applesauce, changing up the sweetener (white sugar, brown sugar, honey) and spices (nutmeg, cinnamon, allspice, cloves). In the end, I decided that simple was best to let the apple flavor shine through: white sugar (not too much) and cinnamon.


Here’s a short video of me making applesauce.


Little did I know, when I left home at the age of 17 to go to college that I would never spend a significant amount of time in the home I grew up in again. I worked for Susy for four summers in a row as well as most of the academic years in between. During my first year in medical school, I received a full scholarship for medical school and graduate school in anthropology, which I attended simultaneously. (Actually, I was awarded two scholarships and was able to return the one that had less-generous terms so that it could be awarded to another student.) The scholarship, however, stipulated that I could not take summers off, so I was in school eleven months per year. (I insisted on taking time for myself each August.)

Knowing I would never have a chance to be at my parents’ house for more than a few days at a time for the indefinite future, I was able to arrange my last 4-week medical school clinical rotation at the hospital in the town where I grew up. It was an anesthesia rotation. As it turns out, the Friday before the Monday I started there, the Anesthesia Department at the hospital held a retirement party for the nurse anesthetist who taught “open drop ether insufflation” to Robert Dunning Dripps.  Dr. Dripps was, a physician who subsequently became the first chairman of Anesthesiology at the University of Pennsylvania, where I was a student. Anesthesiology was not a recognized specialty in the 1940s when Dr. Dripps became chair. He was in the vanguard; one of a very small group of physicians who established the medical specialty of Anesthesiology.

I honestly wonder how my life would have been different had I not landed that first summer job with Susy. It’s the reason I stayed in Philadelphia rather than returning to Johnstown for the summer. It started a whole cascade of events that got me integrated in Philadelphia society, a very different scenario from being a transient student.

Let’s make some applesauce as we ponder the unknowable.


Follow us


Click HERE to join our mailing list and you’ll never miss a recipe again!

Print Recipe
Homemade Applesauce
The amount of sugar and cinnamon is up to personal taste, and partially dependent on the sweetness of the apples chosen. I used Rome and Golden Delicious apples, both are great for applesauce as they break down with cooking and have a very good apple fragrance. Feel free to substitute what is available. Apples that are good for applesauce include McIntosh, Jonathan, Jonagold, and Gravenstein. Leaving the peels on is not only easier but, if some of the apples have red skin, gives the applesauce a beautiful rosy color. The stems and seeds will give the applesauce a bitter taste and must be removed.
Votes: 0
Rating: 0
You:
Rate this recipe!
Course Fruit-based, Sides
Cuisine American
Prep Time 10 minutes
Cook Time 45 minutes
Servings
cups
Ingredients
Course Fruit-based, Sides
Cuisine American
Prep Time 10 minutes
Cook Time 45 minutes
Servings
cups
Ingredients
Votes: 0
Rating: 0
You:
Rate this recipe!
Instructions
  1. Wash the apples.
  2. Quarter the apples.
  3. Remove core and stems but do not peel.
  4. Cut each quarter into four pieces. The pieces should roughly be about an inch on a side.
  5. Put apples and apple juice in a heavy-bottomed pot.
  6. Cover and bring to a boil over high heat.
  7. Reduce heat to medium-high and continue to cook, stirring periodically, until the apples are soft, 20-40 minutes. Do not overcook the apples or they will begin to lose their flavor.
  8. There should only be the barest amount of liquid in the pot when the apples are finished cooking.
  9. Pass apples through a food mill.
  10. Add sugar and cinnamon to taste while the applesauce is still hot.
  11. Cool completely and refrigerate or freeze.
Recipe Notes

If you’re not certain if the apples are cooked enough, try to run a spoonful through the food mill. If they don’t crush easily, return the “test” apples to the pot and continue to cook the batch a little longer.

In the United States, cassia, a spice different from cinnamon, can legally be labeled cinnamon.  While cassia is good in its own right, it is much more assertive than true cinnamon.  If you can find whole Ceylon cinnamon give it a try.

Ceylon cinnamon

Copyright © 2017 by VillaSentieri.com. All rights reserved.

Share this Recipe

Melinda’s Drunken Prunes

October 30, 2017

Italians love to put things in alcohol.

In the short life of this blog, we’ve already covered limoncello, cherries in brandy, and liquore al lauro.

Of course, it’s entirely possible that I love to put things in alcohol. If so, I’m not alone!

Melinda Orlando and I started working together in early 1989 when I moved to Chicago and became the Medical Director (Chief Medical Officer in today’s terminology) of Chicago-Read Mental Health Center, at the time a 600-bed psychiatric hospital with approximately 7000 admissions per year.


Follow us on Instagram:  click HERE!


Melinda and I have worked together ever since. Most recently she and I were business partners in The Mihalik Group, LLC (TMG). Though we sold the company last year, we still do a limited amount of consulting.

In our twenty-odd years at TMG we traveled a lot and ate at a lot of restaurants. We frequently joked that we probably ate more dinners together during that time than either of us did with our spouses.

At Chicago-Read, Melinda and I bonded early-on over a love of good food, especially Italian. Chicago-Read was located adjacent to a large Italian-American community. There were some really good Italian restaurants, butchers, pasta shops, and grocery stores just minutes away. It wasn’t a struggle to maintain my weight in those days so eating lunch at one of the nearby restaurants happened often.

This recipe for drunken prunes came from Melinda’s Grandmother.

Melinda’s grandmother came to the US as a young wife with two children. A third, Melinda’s father, was born onboard the ship. After going through Ellis Island she traveled to Chicago by train to meet her husband.

At one point, Melinda’s grandmother rented an apartment on Grand Avenue and took in boarders. These were day laborers who were working to save enough to bring their families to this country. They slept on the floor of the apartment and used the toilet in the hall. Baths were taken by all at Hull House down the street. They paid “rent” and got sleeping space, breakfast (coffee and something baked) and dinner (always including pasta).

Melinda’s grandmother was frugal, eventually saving enough to buy a building in Elmwood Park, at the end of the trolley line out of the city. The building became home for her and her five children (her husband was out of the picture), a store (selling candy and cigarettes), and a “bar” (providing beer for a nickel and a free bowl of pasta). It had the only telephone booth in the area. Eventually there was a jukebox and it became a popular place on weekends.

Melinda’s grandmother served drunken prunes in a shot glass speared on a toothpick, with some of the grappa poured into the glass.

Melinda’s Grandmother, center, and her five children including Melinda’s father, far right

If not served at family events, the prunes generally accompanied a game of canasta among Grandma’s “women friends” and were intended to be nibbled on. Never were they eaten in a bite or two.  Seconds were rare, though they did occur.  (I’d love to know what the women said of those who had a second prune but that information is lost to history.)

Christmas at Melinda’s Grandmother’s house

Before canasta, there was always lunch, almost always pasta, and dessert, usually pound cake.  Occasionally the pound cake was used to sop up the grappa in the bottom of the shot glass if it wasn’t  consumed outright.  A glass (single, of course) of wine was sipped all afternoon.

Melinda’s Grandmother and Aunt Enes, the youngest of the five children. Enes and her husband gave up their house to live with Melinda’s Grandmother

Drunken prunes were only served in the winter, never in the summer. As to what took their place for those summer canasta games, we’ll just need to wait for the next installment from Melinda!


Follow us


Click HERE to join our mailing list and you’ll never miss a recipe again!

Print Recipe
Melinda's Drunken Prunes
The amount of sugar will vary based on personal preference. I suggest starting with the smaller quantity and then adjusting after a month. Once you find your “sweet spot” you can put all the sugar in at the beginning.
Votes: 0
Rating: 0
You:
Rate this recipe!
Cuisine Italian
Prep Time 5 minutes
Passive Time 4 months
Servings
quart
Ingredients
Cuisine Italian
Prep Time 5 minutes
Passive Time 4 months
Servings
quart
Ingredients
Votes: 0
Rating: 0
You:
Rate this recipe!
Instructions
  1. Place prunes in a one quart glass jar.
  2. Add 1/3 cup sugar.
  3. Add grappa.
  4. Cover tightly.
  5. Rotate the jar several times daily until the sugar dissolves.
  6. Store the prunes in a cool spot out of direct sunlight.
  7. After one month taste and add additional sugar to taste.
  8. Allow the prunes to age for at least four months total before serving.
  9. Serve the prunes individually in shot glasses with a toothpick. Pour some of the grappa over the prunes.
  10. Nibble on the prunes holding them with the toothpick and sip the prune-infused grappa, preferably while playing canasta.
Recipe Notes

Copyright © 2017 by VillaSentieri.com. All rights reserved.

Share this Recipe

Jim’s Hawaiian Guava Cake

October 25, 2017

“Aloha Mr. Van Sant.”

So began a 2003 email from Simon Rusconi, the Hotel Manager of the Sheraton Moana Surfrider Resort on Oahu.

Mr. Van Sant, Jim to the rest of us, had complimented the resort on its guava cake and Mr. Rusconi was writing to share the recipe.

Jim printed out the email and affixed it to an index card and put it in his recipe box. Late in 2016, the subject of the guava cake came up somehow at a dinner party at Jim and Bill’s house. Jim offered to share the recipe with me if I was interested.

I was, and I said that I’d make it for him. Shortly thereafter, the original recipe arrived in the mail still affixed to the index card. Not wanting to keep his original, I scanned it into my recipe database and returned the hardcopy.

Since Jim and Bill rent a home in Palm Springs just steps from our house, and since baking cakes at nearly 8000 feet where I live in New Mexico is an iffy proposition, at best, I said I’d bake the cake in Palm Springs. Every winter they rent the Oscar Mayer House. Yes, that Oscar Mayer!

We had a delightful luncheon at tables set up around their pool with guava cake for dessert.

The back of the Oscar Mayer house in Palm Springs, California
Inside the Oscar Mayer House
The front of the Oscar Mayer House

But that’s jumping ahead.

Receiving the recipe from Jim was merely the beginning. I became fascinated by guava cake without having even made one. Almost any recipe with the degree of cultural significance that guava cake seemed to garner grabs my attention. I did internet searches and combed through my Hawaiian cookbooks (of which I have a goodly number).

It appears that there are basically three variations of guava cake in Hawaii: Guava Chiffon Cake, Guava Spice Cake, and (plain old) Guava Cake. Recipes for the last often start with a box of cake mix and use Cool Whip in the cream cheese frosting.

From what my research has revealed, the original was a Guava Chiffon Cake invented by Herbert Matsuba, owner of the Dee Lite Bakery, in the early 1960s.

The popularity of the cake no doubt led to multiple copycat recipes, including those using a box of cake mix and Cool Whip aimed at the home cook.

The recipe from the Moana Surfrider was a Guava Spice Cake. I followed the recipe closely the first time except that I needed to find a substitute for frozen concentrated guava nectar which I was unable to find after scouring 10 grocery stores in Palm Springs and nearby desert towns.

I ultimately was able to source pure guava puree at a market catering to Hispanic shoppers. It had no sweeteners so I thought I might need to add sugar to the batter in a subsequent trial but for the first round I used the guava puree as a direct substitute for concentrated guava nectar.

Frozen Guava Puree, a much easier to find substitute for frozen concentrated guava nectar

The cake was good but everyone who tasted it failed to taste any guava. It really just tasted like a spice cake. Certainly it was not worth hours of searching for guava concentrate only to have the flavor masked by spices.

Other than guava chiffon cake, which was definitely not the same genre as the cake that Jim had at the Moana Surfrider, I could not find a recipe for plain guava cake that did not start with a box of cake mix. I decided to make the original recipe without the spices.

That did it! The guava flavor came through but something told me that Herbert, a professional baker, might have used something to amp up the guava flavor.

That started me on a search for natural guava extract. I found a wonderful extract made by Amoretti.

You can do without the Amoretti Guava Extract but not the red food coloring.

The next time I made the cake, I added a tiny bit of guava extract to the batter. I believe it enhanced the flavor but if one is not going to make a lot of guava cakes I would consider omitting the guava extract as it is expensive and very concentrated so a little bottle will last a long, long time.

For an everyday cake, I suggest baking it in a 9” x 13” x 2” rectangular pan. For a more special presentation, make a layer cake by dividing the batter between two 9” round pans. If you are doing the latter, make a double batch of cream cheese frosting. You’ll have a little left over but a single batch will not be enough. You could always whip up half a batch of batter and make guava cupcakes to use the extra frosting!

In honor of Oscar Mayer, in whose house we all came together over Jim’s Hawaiian Guava Cake, I recommend the following tribute. Who knew there were so many variations on the Oscar Mayer Wiener theme?


Follow us


Click HERE to join our mailing list and you’ll never miss a recipe again!

Print Recipe
Jim's Hawaiian Guava Cake
Because frozen, concentrated guava nectar is not readily available except in Hawaii, I standardized this recipe using frozen guava pulp which should be easy to find in large supermarkets or in markets catering to customers from Mexico, Central America, and the Caribbean. It is important that the cream cheese frosting be level so that the guava gel forms an even layer. If you are making a rectangular cake this means there will be a bit more frosting at the edges than in the middle. If you are making a round two-layer cake, I suggest cutting off the tops of the cakes to achieve a perfectly level appearance. Put the cakes cut side down to avoid having lots of crumbs working their way into the cream cheese frosting. Guava nectar can be purchased in cans or refrigerated. Guava pulp is frozen.
Votes: 0
Rating: 0
You:
Rate this recipe!
Prep Time 2 hours
Cook Time 1 hour
Passive Time 3 hours
Servings
people
Ingredients
Cake
Guava Gel
Cream Cheese Frosting (make a double batch for the round cake)
Prep Time 2 hours
Cook Time 1 hour
Passive Time 3 hours
Servings
people
Ingredients
Cake
Guava Gel
Cream Cheese Frosting (make a double batch for the round cake)
Votes: 0
Rating: 0
You:
Rate this recipe!
Instructions
Cake
  1. Butter and flour a 9 x 13 x 2 inch metal cake pan or two 9 inch round cake pans.
  2. Combine flour and baking soda. Reserve.
  3. Combine guava puree, guava nectar, guava extract and red food coloring. Reserve.
  4. Cream butter until light. Add sugar and cream until light and fluffy.
  5. Beat in eggs, one at a time, creaming well after each addition.
  6. On low, add dry ingredients alternating with wet ingredients, starting and ending with dry ingredients.
  7. For the rectangular pan: pour the batter into the prepared pan. Smooth the top. Rap the pan on the counter to release any air bubbles.
  8. Bake 350°F 40-45 minutes or until a tester comes out clean.
  9. Cool the cake in the pan then refrigerate.
  10. Frost with cream cheese frosting being careful to make the top of the frosting level. Refrigerate several hours to firm up the frosting.
  11. Top with guava gel and smooth out to the edges. Refrigerate several hours to set the frosting and gel.
  12. Bring the cake to room temperature before serving.
  13. For the round pans: Pour the batter into the prepared pans. Smooth the tops. Rap the pans on the counter to release any air bubbles.
  14. Bake 350°F 30-35 minutes or until a tester comes out clean.
  15. Cool the cakes in the pans for 10 minutes. Remove and cool completely on a wire rack.
  16. Wrap the cakes and refrigerate until cold, or up to one day.
  17. Slice the rounded tops of the cakes off to make them level.
  18. x
  19. Put one layer, cut-side-down on a platter.
  20. Put a layer of cream cheese frosting on the top of this layer.
  21. Pipe a rim of frosting around the edge to hold the guava gel. This does not need to be fancy as it will be smoothed out.
  22. Put just under ½ of the guava gel on top of the frosted bottom layer.
  23. Smooth the gel out to the piped edge.
  24. Top with the remaining cake, cut side down.
  25. Generously frost sides and top of the cake with cream cheese frosting.
  26. Pipe a decorative border around the edge of the top layer.
  27. Pour the remaining guava gel on top and smooth out to the edges.
  28. Refrigerate several hours to set the frosting and gel.
  29. Bring to room temperature before serving.
Guava Gel
  1. Put the cornstarch in a small heavy-bottomed sauce pan.
  2. Stir in the guava nectar, a little at a time, to dissolve the cornstarch without forming lumps.
  3. When dissolved, add the remaining guava nectar and sugar.
  4. Cook over medium heat, stirring constantly, until it comes to a full boil.
  5. Remove from heat and stir in red food coloring.
  6. Put a cloth on top of pan before putting cover back on to keep moisture from dripping back into the gel.
  7. After the gel reaches room temperature, refrigerate until cold.
Cream Cheese Frosting (make a double batch for the round cake)
  1. Chill the bowl and beaters for the whipped cream.
  2. Cream the cream cheese until light.
  3. Sprinkle in 1/3 cup of sugar and beat until light and fluffy.
  4. Mix in vanilla.
  5. In chilled bowl, beat the whipping cream until thick.
  6. Add 2 tablespoons of sugar and beat until the cream forms stiff peaks.
  7. Fold 1/3 of the whipped cream into the cream cheese to lighten it.
  8. Carefully, but thoroughly fold in the remainder of the whipped cream.
Recipe Notes

Copyright © 2017 by VillaSentieri.com. All rights reserved.

Share this Recipe

Cherries in Brandy

Italians love putting fruit in liquor. Cherries. Grapes. Prunes. The list goes on.

This practice meshes nicely with the Italian practice of making homemade cordials. (For example, see the post on homemade limoncello.) The liquor in which the fruit macerates becomes, in essence, a cordial that can be drunk on its own or with the fruit.

I learned to make cherries in liquor from my mother-in-law. She learned from her mother.  She even remembers  her grandmother making them. You can bet the chain of cherries in brandy goes back way further than that. She does grapes, too, in exactly the same way.

Here’s a picture of my in-laws with my (now) husband circa 1959. Pretty Italian, huh?

My mother-in-law hails from the little town of Treppo Grande way north of Venice. Treppo Grande is in Friuli which is known for its wine, especially white wines.

My mother-in-law’s parents circa 1929.

They also make a mean grappa in Friuli. After all, you’ve got to do something with all that leftover grape pomace from making wine.  It can be fermented one more time and distilled into an Italian version of white lightening.

My mother-in-law’s grandmother.

Actually preserving fruit in alcohol had a long tradition in Europe. Americans may be most familiar with the German tradition of Rumtopf. Traditionally, Rumtopf is made from an array of fruit, using the best of what ripens in sequence from early summer through early fall, mixed with over-proof rum and sugar. In addition to being made from a mixture of fruits, the proportion of sugar used in Rumtopf is much greater than would be used in Italian alcohol-preserved fruits.

Rumtopf makes a great topping for ice cream or cake. In college I even used it as the fruit layer in upside-down cake.

What a difference a few years makes. My in-laws with my husband (right) and (now) brother-in-law.

Cherries and grapes preserved in alcohol (we use brandy or grappa) will keep for years though at some point the texture starts to suffer. Traditionally, these fruits would be put up in the summer for consumption during Christmastime. Some years we make such a supply of them that we work through them for years afterwards.

Popping one of these cherries into a Manhattan is a real treat!

This is what our current stash of cherries and grapes in liquor looks like. We have “vintages” dating back a few years, including cherries that we picked from cherry trees belonging to Rich DePippo and Doug Howe as well as Bruce Donnell.

The traditional way to serve this is as a digestive after dinner. Put a few cherries or grapes in a cordial or shot glass and add a bit of the liquid from the jar. Drink the liquid then roll the fruit, one at a time, into your mouth. You’ll need to extrude the cherry pit after freeing it from the flesh.


Follow us


Click HERE to join our mailing list and you’ll never miss a recipe again!

Print Recipe
Cherries in Brandy
Use the best, peak season fruit you can find. Cherries and grapes work equally well in this recipe. The amount of sugar is a matter of preference but I find these proportions work well. We’ve made this using domestic brandy and French brandy. Honestly, I don’t think the price differential of imported brandy is justified. Grappa is also a traditional spirit but, again, you’d be looking for a pedestrian, but drinkable, grappa, not one of the über-expensive artisanal grappas. The recipe is infinitely expandable and very quick to pull together. If your jars are larger, just increase the sugar. I have collected an (almost) endless supply of these jars from French jams and use them over and over.
Votes: 0
Rating: 0
You:
Rate this recipe!
Course Miscellaneous
Cuisine Italian
Prep Time 10 minutes
Servings
persons
Ingredients
Course Miscellaneous
Cuisine Italian
Prep Time 10 minutes
Servings
persons
Ingredients
Votes: 0
Rating: 0
You:
Rate this recipe!
Instructions
  1. Wash the fruit and dry thoroughly.
  2. Remove the stems from the cherries.
  3. Put the fruit into the jar, fitting it in snugly but not smashing it.
  4. Add the sugar.
  5. Fill jar with brandy or grappa to cover the fruit.
  6. Put the lid on the jar.
  7. Turn the jar a few times a day until the sugar is fully dissolved.
  8. Put the jar in a cool, dark place and forget about it for 3-4 months.
  9. When ready to serve, put two cherries in a cordial glass along with some of the liquid.
Recipe Notes

Copyright © 2017 by VillaSentieri.com. All rights reserved.

Share this Recipe

Aunt Ann’s Pineapple Cream Cheese Pie

June 30, 2017

I grew up at a time, and in a town, where people just dropped in, unannounced, to visit family and friends.

Some evenings we’d stay home.  Some evenings we’d go to town.  This was pretty much every Monday and Thursday when the stores were open until 9:00 PM.  And, mind you, we dressed to go to town!  Other evenings we’d visit family and friends.

Around the age of 5 or 6, when we went to Aunt Ann’s, I’d play with food.  Really.  And not at the table.  I don’t honestly know how this got started but Aunt Ann would spread out a vinyl tablecloth on the beige wall-to-wall carpet in her living room.  (Remember, this was around 1960!)  I would pull pots and pans and mixing bowls and other equipment (like box graters and spoons) out of her kitchen cabinets and haul my stash to the living room.

Aunt Ann circa 1965 at Grandma and Grandpa’s house

Then I’d raid the refrigerator for things like carrots, celery, and so forth.

I’d sit in the living room, on the tablecloth, grating vegetables and mixing things in the various pots and bowls.

My love of cooking has deep roots.

My love of peanut butter not so much.

For some reason, I despised peanut butter at that age.  (I know, that’s almost un-American!)  But just to keep things from being too quiet, Uncle Jano would sometimes walk towards me holding a jar of peanut butter and I would run like a vampire running from a wooden stake.

I don’t know what I thought was going to happen, but I had to escape from the peanut butter.

The ordeal usually ended with me face down on the sofa until Uncle Jano retreated…sometimes only to start again after I pulled my face out of the pillow.

Aunt Ann and Uncle Jano were great fun.  But they were only Aunt Ann and Uncle Jano if you were related to them through Uncle Jano.  If you were related to them through Aunt Ann, they were Aunt Honey and Uncle John.

From left to right: Uncle Jano, my Grandfather, Uncle “Booty” and my Dad, circa 1965 on a Sunday at my Grandparent’s house

Aunt Ann was a great cook.  She was ethnically Russian and made lots of Russian and Eastern European food like mushroom soup, potato soup, kielbasa, chicken paprikash, pierogi, stuffed cabbage, and so forth.

She also made Italian food, which she learned from the wife of the local Mafia Boss who lived down the street.  (I had a colorful childhood.  What can I say?)

There were the occasional American dishes, like Rum Balls and Pineapple Cream Cheese Pie, too.

Years after those episodes of “cooking” on Aunt Ann’s living room floor, when I was in my teens and twenties, I was always on the lookout for pineapple cream cheese pie when we went to visit.

In an attempt to keep this manageable, I am not posting a recipe for pie crust just yet, but I will at a future date.  If you have a favorite pie crust recipe, by all means, make your own.  If not, buy prepared pie crust from the grocery store.  But whatever you do, give this recipe a try if it appeals to you.  It’s always a hit!

This one is just for fun: Aunt Ann (far left), Aunt Margie (in the back), my mom (far right), my sister and my cousin “Rocky” circa 1950

Click HERE to join our mailing list and you’ll never miss a recipe again!

Print Recipe
Aunt Ann's Pineapple Cream Cheese Pie
If you don’t have a favorite pie crust recipe, or if you aren’t comfortable making pie crust, buy prepared pie crust. Be sure to purchase NINE INCH DEEP DISH pie crust, however. If you are making your own pie crust, you can use a standard nine inch pie pan, deep dish is not necessary. The cream cheese filling is easier to make in a food processor though an electric mixer works, too. If you are using a mixer, the cream cheese will be much easier to mix if it is at room temperature. This is not critical if you are using a food processor.
Votes: 0
Rating: 0
You:
Rate this recipe!
Cuisine American
Prep Time 30 minutes
Cook Time 1 hour
Servings
pies
Ingredients
Cuisine American
Prep Time 30 minutes
Cook Time 1 hour
Servings
pies
Ingredients
Votes: 0
Rating: 0
You:
Rate this recipe!
Instructions
  1. Chop the nuts and reserve.
  2. If making your own crust, prepare and line two nine-inch pie pans. Refrigerate the crust-lined pans until the fillings are prepared.
  3. In a small heavy-bottomed saucepan, combine the crushed pineapple, cornstarch, and 1/2 cup of sugar.
  4. Stir until the lumps are gone. The mixture will become cloudy from the cornstarch but will become clear once cooked.
  5. Bring to a boil over medium-high heat, stirring constantly.
  6. Boil for approximately one minute, until thickened.
  7. Take the pan off the heat and allow the pineapple mixture to cool slightly.
  8. In a food processor or electric mixer, beat the cream cheese well.
  9. Add the remaining 1/2 cup sugar, milk, eggs and vanilla. Mix until the cream cheese is thoroughly combined, all the sugar is dissolved, and there are no lumps.
  10. Divide the pineapple filling between the two pie-crust-lined pie pans.
  11. Top each pie with half the cream cheese mixture.
  12. Scatter the chopped nuts on the pies.
  13. Bake at 350°F for approximately 60 to 65 minutes until the tops of the pies are just beginning to turn golden and the filling is set.
  14. Cool to room temperature before serving. The pies will sink somewhat as they cool.
Recipe Notes

Copyright © 2017 by VillaSentieri.com. All rights reserved.

Share this Recipe