Sformato di Zucchini (Italian Zucchini Bake)

September 15, 2021

A lot has happened in the seven months since my last blog post.  I’m sure you’ll understand why I haven’t posted in a while.

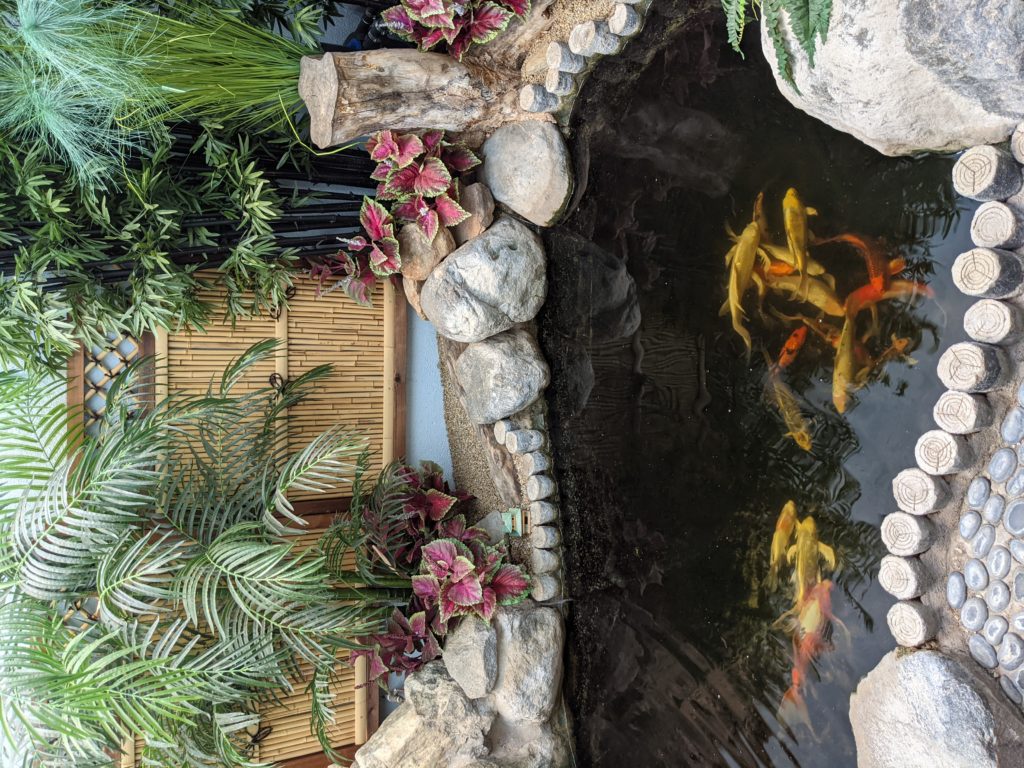
We’re no longer in Santa Fe!

That’s right, we’ve moved full time to Palm Springs, California.

An aerial view of the “new” Villa Sentieri, foreground, with the hiking trail just beyond, that prompted the name of the Villa.

It was, and remains, exceedingly difficult to have left all our close friends in Santa Fe but Palm Springs called to us.


Join our mailing list and you’ll never miss a recipe again!


We get two growing seasons each year.  Since we’re just a few hundred feet above sea level, I don’t need to be concerned about testing recipes at high altitude.  The weather is pretty darn great, too!

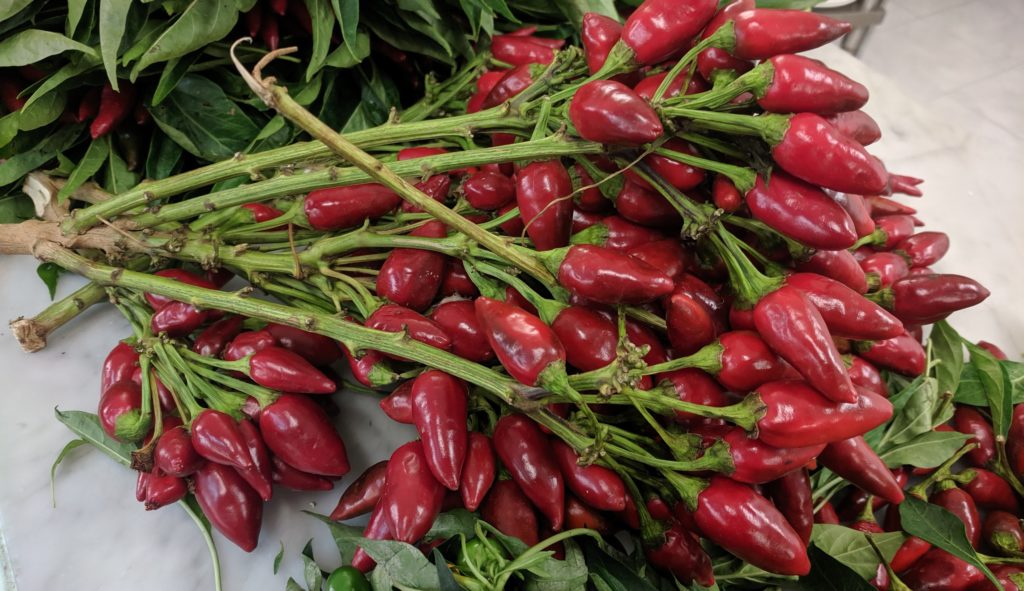
The variety of what we can grow here is amazing.  We have ten citrus trees, three fig trees and an apricot tree.  We’re considering adding a pomegranate tree.  We have table grapes trellised up a side wall.  There are four raised beds for herbs and vegetables.

Frank grew the most awesome tomatoes this year.  I have quite a stash of homemade passata (tomato puree) in the freezer.

Naso di Cane (Nose of the Dog) peppers from Calabria. Seeds I brought back in 2019 just got planted in our garden in Palm Springs. I’m hoping to make “Olio Santo” (Holy Oil, aka Hot Chile Oil) in a few months.

The timing of our seasons takes a bit of getting used to.  Our first season pretty much ended in June.  That’s probably the time that most of you were just getting started with your gardens.  Though the herbs have continued to grow through the summer heat, all the vegetables were done by the end of June.


Follow us on your social media platform of choice


Right now we have an abundance of fresh limes.  The other citrus trees have fruit but it won’t be ripe for a few more months.

The vegetable beds sat fallow for the summer.  Just a few days ago, Frank planted them with seeds for what will be our second harvest of the year.  That will take place in November and December.

The “new” Villa Sentieri has an interior atrium with a koi pond filled with 17 koi.

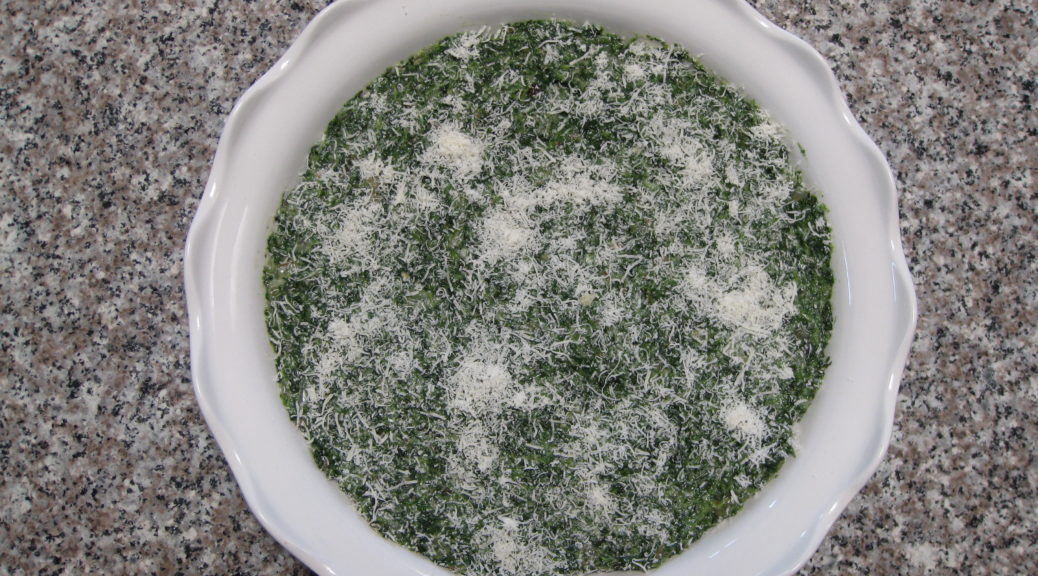
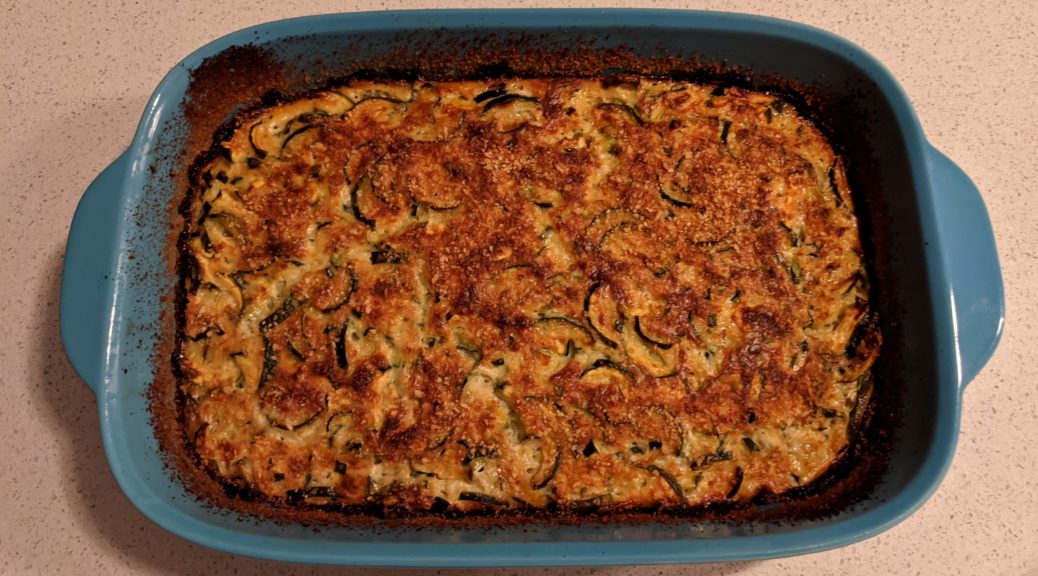
Though we’re not harvesting vegetables at the moment, this is the perfect time for zucchini in most of the country.  When there’s an abundance of zucchini, sformato is the answer.

Print Recipe
Sformato di Zucchini (Italian Zucchini Bake)
This was the first item that I cooked with Zia Fidalma at her home in Tuscany in August 2019. Green beans, cut in small pieces, can be prepared the same way except the beans are boiled and not sautéed. A combo of beans and zucchini is also possible. Zia does not usually add herbs to her sformato but since she had some niepita she added it. Though you’re not likely to have niepita (aka mentuccia romana), unless you grow your own, adding a small amount of marjoram or oregano is a welcome addition. If you don’t have fresh herbs, use a light sprinkling of dry herbs. In any case, herbs are totally optional.
Votes: 0
Rating: 0
You:
Rate this recipe!
Cuisine Italian
Prep Time 20 minutes
Cook Time 2 hours
Servings
people
Ingredients
Cuisine Italian
Prep Time 20 minutes
Cook Time 2 hours
Servings
people
Ingredients
Votes: 0
Rating: 0
You:
Rate this recipe!
Instructions
Besciamella
  1. In a small heavy-bottomed saucepan, melt the butter.
  2. Add the flour and sauté briefly until the raw smell is gone. Do not brown the flour.
  3. Add the milk a little at a time, stirring well after each addition to avoid lumps.
  4. After all the milk has been added, bring the mixture to a boil, stirring constantly and scraping the bottom of the pan. Boil for one minute.
  5. Remove from the heat and stir in the nutmeg.
  6. If not using immediately, pour the besciamella into a heat-proof bowl and cover with plastic wrap touching the surface to avoid the formation of a skin.
  7. Refrigerate if the besciamella will not be used within an hour or two.
Sformato
  1. Do not peel the zucchini. Cut off the stem ends and slice the zucchini lengthwise about 3/16 inch thick then crosswise the same thickness to make thick matchsticks.
  2. Sauté the garlic in the olive oil until fragrant.
  3. Add the cut zucchini, chopped flowers and minced niepita if using. Season with salt and pepper and sauté briskly until just barely tender.
  4. Mix the cooked zucchini with the besciamella, nutmeg, and Parmigiano.
  5. Stir in the eggs after the mixture is cool enough to not cook the eggs.
  6. Taste and adjust salt and black pepper.
  7. Butter a baking dish, approximately 7 ½” x 11”.
  8. Sprinkle the buttered dish with fine dry breadcrumbs.
  9. Pour the zucchini mixture into the prepared baking dish. It should be about ¾ inch thick.
  10. Bake at 400°F till very brown on top, approximately 90 minutes. Cool 10 minutes before cutting.
  11. Serve warm or at room temperature.
Recipe Notes

Copyright © 2021 by Villa Sentieri, LLC. All rights reserved.

Share this Recipe

Aunt Margie’s Colored Cookies

December 15, 2017

We called them “Colored Cookies.”

I’ve never seen them anywhere but in my hometown of Johnstown, Pennsylvania though I can’t believe they are unique to there.

Truth be told, I don’t think I’ve ever had them made by anyone besides Aunt Margie until I made them from her recipe.

Aunt Margie in 2004 with me on an architectural tour of Chicago by boat

Many of the Italian and Italian-American cookies that I grew up with were cake-like. A stiff batter of flour, sugar, eggs, and fat (lard and butter were the most common), leavened with baking powder, flavored in some way (vanilla, lemon, chocolate and spice, sesame, and so forth), rolled or shaped and baked, and usually iced with a thin powdered sugar-milk icing that would harden to a glaze.


Follow us on your social media platform of choice


Totos are a perfect example of the chocolate and spice variety.

Anginetti (Genets, as we called them in Italian-American-dialect-slang) also referred to as Lemon Knots, are lemon flavored. Although I’m devoting most of December to posting Italian-American pastry recipes, Anginetti won’t appear until next year.

Sesame Seed Cookies (which certain members of my family like to dip in wine) have no flavoring other than the sesame seeds they are rolled in before baking. These are coming next December, too.


Click HERE to join our mailing list and you’ll never miss a recipe again!


Colored Cookies are flavored with vanilla despite the riot of color that might suggest otherwise. There was a brief period of time, however, when Aunt Margie got creative (read iconoclastic) and used coconut extract instead of vanilla. Coconut and almond are my two favorite flavors when it comes to sweets, leagues beyond chocolate and vanilla as far as I’m concerned, but coconut-flavored colored cookies strayed too far from tradition for my taste. It didn’t keep me from eating them, however!

Colored Cookies

This is Aunt Margie’s original recipe. And if you flavor them with anything other than vanilla, please don’t tell me…just kidding!


If you have a favorite family recipe and a bit of a story to tell, please email me at santafecook@villasentieri.com and we can discuss it. I am expanding the scope of my blog to include traditional recipes from around the country and around the world. If you haven’t seen Bertha’s Flan, it will give you an idea of what I’m looking for.


I don’t use a lot of food coloring.  The only other exception in recent memory (other than these cookies) was Jim’s Hawaiian Guava Cake.  Take a look at my box of food coloring.  The number 39 is the price:  39 cents!  I’ve had it a long time, though I used up the red making the Guava Cake.


Print Recipe
Aunt Margie's Colored Cookies
Use a very good quality vanilla extract, not artificial vanilla flavoring, as that is the predominant flavor. The best way to mix these is using your hand. If you don’t start there, you’ll end up there so just use your hand from the beginning. Although Aunt Margie’s original instructions were to ice the cookies while still warm, that is very difficult to accomplish without assistance. You can ice them after you have baked all of them with no noticeable difference. It is best to use medium-weight shiny aluminum cookie sheets. Dark metal makes the bottoms too dark before the cookies have completely cooked. You can divide the dough into five parts and color the last one yellow. If you do so, you will need to use slightly less of each dough to make a cookie.
Votes: 0
Rating: 0
You:
Rate this recipe!
Cuisine Italian
Prep Time 1 hour
Cook Time 2 hours
Servings
dozen
Ingredients
Cookies
Icing
Cuisine Italian
Prep Time 1 hour
Cook Time 2 hours
Servings
dozen
Ingredients
Cookies
Icing
Votes: 0
Rating: 0
You:
Rate this recipe!
Instructions
Cookies
  1. Measure all the ingredients.
  2. Combine butter and sugar.
  3. Mix well using your hands.
  4. Add eggs one at a time mixing after each.
  5. Mix in salt and baking powder then add milk and vanilla.
  6. Combine well.
  7. Add flour and mix until a dough forms.
  8. Divide dough into four parts.
  9. Leave one part of dough white.
  10. Color the others pink, blue, and green.
  11. Take approximately 1 teaspoon of each dough and roll into a ball the “size of a walnut” according to Aunt Margie’s recipe. You will need to apply a bit of pressure, without smashing the colors together, to be sure that the different colored doughs have joined into one cookie. If not, the cookies will split during baking.
  12. Bake 350°F for 17-20 minutes until very light brown on the bottom and the top does not depress when touched lightly.
  13. Remove cookies from cookie sheet and put on a cooling rack.
  14. Using your finger, ice with powdered sugar icing while still warm.
Icing
  1. Combine powdered sugar, vanilla and milk. Stir to combine.
  2. Stir to combine.
  3. Thin with a small amount of milk if needed. The icing should be of a spreading consistency.
Recipe Notes

Copyright © 2017 by VillaSentieri.com. All rights reserved.

Share this Recipe

Julie’s Impossible Pecan Pie

October 16, 2017

Julie Paradise is the Queen of Impossible Pies.

Julie Paradise

I ate Impossible Pies back in the 1970s.   Savory Impossible Pies were a favorite of Auntie Helen. Auntie Helen was actually the aunt of Gene d’Aquili, my College Advisor. Ultimately, years later, I went into psychiatric practice with him. I spent lots of time with Gene and his family, including Auntie Helen, and her sister, Auntie Louise, from the early 1970s until the late 1980s when I left Philadelphia and moved to Tucson for a year before settling in Chicago. In a previous blog post, I talked about Auntie Helen and Auntie Louise.

Auntie Helen was especially fond of Impossible Tuna Pie. I have “her” recipe which exactly matches one I found on the internet a few months ago. I’m going to guess it was the one put out by the makers of Bisquick® way back in the day!

I’ve only ever had sweet impossible pies from Julie, but she says she makes savory ones too. Her take: “Green bean is delicious. Broccoli is fantastic and pretty. Zucchini is good.”

Julie is one of those folks who doesn’t like pie crust…and there are plenty of them. For her, Impossible Pies are the perfect solution.

On our recent visit to Julie and Gay’s home on Fire Island Julie made three Impossible Pies during a six-day stay. We ate every last crumb!

Deer near Gay and Julie’s deck eating geraniums out of my hand

Impossible Pies appear at the end of most every dinner that Gay and Julie host in Santa Fe and I wouldn’t want it any other way.

You’ve read my rants about the adverse health effects of hydrogenated and partially hydrogenated fats. That’s what baking mix (OK, let’s call it what it is, we’re really talking about Bisquick®) used to contain. I’m here to say: NO LONGER!

In prepping for making Julie’s Impossible Pecan Pie, I researched “baking mix” substitutes. There are many recipes available, all of which are very similar (flour, some sort of oil or fat, a bit of sugar, and baking powder). My plan was to make up a substitute rather than use the real thing because of my zero tolerance policy for hydrogenated and partially hydrogenated fats.

On a stroll through the supermarket, I saw the baking mix section and decided to take a look. That’s when I discovered that the good folks at Betty Crocker had changed the formula and replaced the partially hydrogenated fat with vegetable oil. I actually bought a box, intending to make all those things I had as a kid that were based on Bisquick and Auntie Helen’s Impossible Tuna Pie after making Julie’s Impossible Pecan Pie.

I looked at several other brands of baking mix and discovered that not all manufacturers are as enlightened as Betty. Partially hydrogenated fat was still a common ingredient in many of them. (There are also some specialty Bisquick products that contain—or may contain—based on the label, partially hydrogenated fats. It’s best to stick with what is labeled as the “Original” (which, of course it really isn’t) or the HeartSmart.

A funny thing happened with all this thinking about baking mix and baking mix substitutes. I realized that for all practical purposes, an Impossible Pie is like a Clafoutis! The only real difference is that the baking mix contains baking powder and the standard recipe for clafoutis does not. Given the variability of recipes from cook to cook, I guess it wouldn’t be unreasonable to call this a Pecan Clafoutis! And, as Julie says, a Clafoutis is best right out of the oven while an Impossible Pie is just fine at room temperature.

So, while I don’t often make Julia Child’s recipe for Clafoutis I think there are lots of Impossible Pies in my future.


Follow us


Click HERE to join our mailing list and you’ll never miss a recipe again!

Print Recipe
Julie's Impossible Pecan Pie
Although I used a mixer, as you’ll see in the pictures, a blender is easier and produces a smoother batter. Also, the original pie pan I chose was too small. You’ll see that I started putting everything into the 9-inch pan. I had to switch to a 10-inch deep dish pan! Although not part of Julie's original recipe, I've successfully added 1/4 teaspoon of almond essence to this pie. It's not enough to give the pie an almond flavor but it does amplify the nuttiness!
Votes: 0
Rating: 0
You:
Rate this recipe!
Cuisine American
Prep Time 15 minutes
Cook Time 1 hour
Servings
people
Ingredients
Cuisine American
Prep Time 15 minutes
Cook Time 1 hour
Servings
people
Ingredients
Votes: 0
Rating: 0
You:
Rate this recipe!
Instructions
  1. Prepare all the ingredients.
  2. Pecans
  3. Brown sugar
  4. Milk
  5. Corn syrup
  6. Eggs
  7. Baking mix
  8. Butter a 10-inch deep-dish pie pan.
  9. Add the pecans to the buttered pie pan and set aside.
  10. Put all remaining ingredients into a blender jar or mixing bowl and blend until thoroughly combined and no lumps remain. This will take approximately 15-20 seconds in a blender and at least one minute by electric mixer.
  11. Pour the batter over the pecans.
  12. Bake at 350°F for 50-55 minutes, until a knife inserted in the center comes out clean.
  13. Cool at least five minutes before serving or serve at room temperature.
Recipe Notes

Copyright © 2017 by VillaSentieri.com. All rights reserved.

Share this Recipe

Homemade Dumplings

May 19, 2017

It is unfathomable to me that someone could voluntarily go on a low carbohydrate diet.

Avoiding gluten, short of having full-blown celiac disease, is equally unthinkable.

All of my most favorite foods start with flour.

Some contain flour and potatoes.

Roughly in order these are Potato Gnocchi, my Slovak Grandmother’s Potato Cakes and a three-way tie between Pasta (of almost any sort), Dumplings, and my Aunt Mary’s Bread Rolls Stuffed with Mashed Potatoes and rubbed with garlic and oil.

Of those five foods, the only one I get on a regular basis is pasta.  I have pasta 3 or 4 (or 5 or 6) times per week.  I could probably have it every day and never tire of it.  A few days without pasta and I begin to have serious cravings.

Until just recently, I had a frenetic travel schedule for work.  One of the first things I would do upon landing in a city that I was likely to return to over and over for work was to find a really good restaurant, preferably an Italian restaurant or one with a goodly number of Italian dishes on the menu.  Failing that, I would look for a restaurant with an ingredient-driven menu that was not into precious or pretentious presentation!

Sometimes finding that restaurant was elusive and my pasta cravings would be in full swing by the time I got home.

Over the years, my mother-in-law has learned that the best thing she could make for dinner on a day when I’m returning from a trip is pasta.  Even if I’m not having pasta withdrawal symptoms, there are few foods that I would rather have.  Actually, there’s only one:  gnocchi, which truth be told, is just the Italian word for dumpling, which as you’ve noticed is on my list in its English form, too!

Sometimes the restaurants I’d find were so spot-on perfect that I would just work my way down the menu over successive trips.  In this category are the recently closed Dish Osteria in Pittsburgh, Bari Ristorante in Memphis, Antico in Chicago, and, until the recent change in the menu, Tre Soldi in Chicago.

Sometimes I’d find a chef whose cooking I really enjoyed, as happened with Bruce Bogartz in Knoxville a number of years ago.  My business partner and I followed Bruce through at least three different restaurants.  Sometimes we’d just walk in and sit down and Bruce would come over and say: “Can I just cook for you this evening?”  That would be the sum-total of ordering.

Sometimes my business partner and I would find a restaurant that would accommodate our cravings as happened in Harrisburg, Pennsylvania.  We’d usually get to the restaurant late on the day we came into town.  After a few trips, we got bold and asked for something that wasn’t on the menu.  Something simple.  Something Italian.  As I recall it was spaghetti with anchovies, garlic, olive oil and red pepper.  The chef accommodated us.  From then on, at least once during every trip to Harrisburg we asked for the same thing, sometimes we’d mix it up by asking for a bit of fennel seed to be added.  A salad of arugula with olive oil and lemon juice always rounded out the meal.

While it’s easy to find pasta on restaurant menus, it’s pretty difficult to find dumplings unless you’re in a dumpling culture like Eastern Europe.

After two trips to Prague, I discovered that it was basically impossible to just order dumplings.  I frequently found myself ordering some sort of “Hunter’s Plate” which had an array of cooked meats and, you guessed it, dumplings.

I ate the dumplings first.

Dumplings are a breeze to make.  And don’t even think about packaged baking mix.  (For the reasons why, see my post about hydrogenated fats.)

Unless you are seriously trying to avoid carbohydrates or gluten, give these a try.  They honestly take less than 10 minutes to whip up.  You could get a serious paper cut opening up a box of Bisq…er, biscuit mix, in less time!

Print Recipe
Homemade Dumplings
In order for the dumplings to cook properly, they need to be placed on top of food that is just submerged in the cooking liquid. A little bit of the dumpling will sink below the liquid but, basically, the dumplings should sit on top of the food and steam, rather than boil in the liquid itself. Growing up, the “food” below the dumplings was often kielbasa and sauerkraut. For this post it was turkey with mushrooms and peas in a light cream sauce due to the presence of leftover roast turkey in the fridge. Stir the contents of the pot before adding the dumplings as you won’t be able to do it afterwards. Prior to adding the dumplings, be certain that the heat keeps the liquid at a steady low boil with the lid tightly on the pot.
Votes: 0
Rating: 0
You:
Rate this recipe!
Course Sides
Cuisine American, Slovak
Prep Time 15 minutes
Cook Time 20 minutes
Servings
people
Ingredients
Course Sides
Cuisine American, Slovak
Prep Time 15 minutes
Cook Time 20 minutes
Servings
people
Ingredients
Votes: 0
Rating: 0
You:
Rate this recipe!
Instructions
  1. Lightly beat the egg and ¼ cup of milk. Reserve.
  2. Whisk together the flour, baking powder and salt.
  3. Using a pastry blender, cut the butter into the dry ingredients until there are “lumps” no bigger than flakes of oatmeal.
  4. Make a well in the center of the flour mixture. Add the beaten egg-milk mixture.
  5. Using a fork, gradually incorporate the flour into the liquid by starting in the center of the bowl and stirring in a circular manner, gradually widening the circle to incorporate more and more of the flour.
  6. When the batter will not incorporate more flour, add a few tablespoons of the remaining milk.
  7. Continue stirring and adding milk a few tablespoons at a time, until all the flour is incorporated and you have a fairly stiff but still somewhat sticky batter.
  8. Drop by rounded tablespoonsful on top of whatever you’re cooking in the liquid, such as sauerkraut, pot pie, etc.
  9. Cover tightly and cook 20 minutes without opening the lid. The contents of the pot should stay at a steady, low boil.
  10. Carefully scoop the dumplings onto a serving platter.
Recipe Notes

Copyright © 2017 by VillaSentieri.com. All rights reserved.

Share this Recipe

Sformato di Spinaci (Spinach Casserole)

January 13, 2017

The word sformato in Italian means deformed or shapeless.  When applied to food, standard Italian-English dictionaries often translate it as pie or soufflé. It is none of the above.

A sformato is most definitely not deformed or shapeless.  In fact, a food historian described a sformato as “something that was cooked in the mould [sic] and then extracted from it” (Alexandra Grigorieva, Naming Authenticity and Regional Italian Cuisine in Authenticity in the Kitchen: Proceedings of the Oxford Symposium on Food and Cookery 2005, edited by Richard Hosking).  Nor is a sformato really a pie or a soufflé as those terms are usually used.  It has no crust of any sort, as would a pie.  It is not puffy like a souffle.  Sometimes it doesn’t even contain eggs.

A sformato is most often made of vegetables, usually bound with some combination of eggs, cream, cheese, and/or béchamel (balsamella or besciamella in Italian), and cooked in a baking dish.  I think the best English translation of the word is casserole.

Sformato di Spinaci, spinach sformato (or, reluctantly, spinach casserole), is one of those dishes that has iconic status in my husband’s family.  Like Merluzzo in Umido, the recipe came from Italy with his grandmother whom we called Nonni.  Nonni is one of those made up words that sometimes take hold in a family based on the mispronunciations of little kids.  The Italian word for grandmother is Nonna.  However, Nonni is to Nonna as Gramma is to Grandmother.

Just as Pasta Ascuitta has only one meaning in my family, Sformato has only one meaning in my husband’s.  If you simply say “sformato,” everyone knows you mean spinach sformato, and not, for example, cauliflower sformato.

I first had sformato at Christmas Dinner at my in-law’s house in 1989.  Although I had been cooking northern Italian food since 1973 based largely on Marcella Hazan’s wonderful cookbooks, that Christmas was really the beginning of my learning to make some of my husband’s family’s northern Italian favorites.  It’s really a whole different taste profile from the southern Italian dishes I grew up with.

I’ve actually taken a heretical twist with my interpretation of Nonni’s sformato. I’ve added a little balsamella for moisture. This was most definitely not in the original, though it is not an uncommon addition to sformato. If you want to make the original version, just leave out the balsamella.  It will be a little drier.  You might want to not squeeze the spinach quite as tightly if you don’t include the balsamella.

Print Recipe
Sformato di Spinaci (Spinach Sformato or Spinach Casserole)
Nonni always made this with ground beef but Italian sausage, casing removed and crumbled, works really well (a bit of southern Italian heresy creeping in!). It can also be made without meat, but the amount of spinach should be increased by an additional 10 oz. to a total of 30 oz. I have occasionally used fresh spinach but, honestly, frozen chopped spinach works just fine. I doubt you could reliably tell the difference in a side-by-side comparison of fresh vs. frozen spinach in this dish.
Votes: 0
Rating: 0
You:
Rate this recipe!
Course Vegetables
Cuisine Italian
Prep Time 45 minutes
Cook Time 1 hour
Passive Time 15 minutes
Servings
people
Ingredients
For the spinach mixture
For the balsamella
Course Vegetables
Cuisine Italian
Prep Time 45 minutes
Cook Time 1 hour
Passive Time 15 minutes
Servings
people
Ingredients
For the spinach mixture
For the balsamella
Votes: 0
Rating: 0
You:
Rate this recipe!
Instructions
For the spinach mixture
  1. Cook the frozen spinach in a heavy bottomed sauce pan tightly covered until thawed, breaking up the spinach from time to time.
  2. As soon as the spinach is thawed, pour the contents of the pan into a fine mesh sieve and allow the spinach to drain and cool.
  3. When the spinach is cool enough to handle, squeeze small handfuls of the spinach to remove excess water.
  4. Cut through the mass of squeezed spinach about eight or ten times with a knife then rub it through your fingers to loosen it. It will be pretty tightly wadded up from squeezing out the liquid.
  5. Brown the ground beef or sausage in olive oil over medium heat. You want to get some really browned bits of meat for the flavor. Don't make the mistake of just cooking the meat until it is no longer pink.
  6. When the meat is nicely browned, add the onion and cook until golden and soft. Add the garlic and sauté until fragrant, about 1-2 minutes.
  7. Combine the meat mixture and spinach in a large mixing bowl. Season with salt and pepper and allow to cool briefly.
  8. Meanwhile, make the breadcrumbs by removing the crusts from a slice of two-day old home-style white bread. Tear the bread into pieces and whiz in a food processor until processed into evenly sized crumbs. Reserve.
  9. Melt the butter and toss with the breadcrumbs. Reserve.
  10. Make the balsamella (see directions below).
  11. Add the balsamella to the cooled meat and spinach mixture. Stir well, loosening up the spinach. When well combined, stir in the eggs. Be certain that the mixture is not so hot that it cooks the eggs.
  12. Reserve two tablespoons of the Parmesan cheese and mix the remainder into the spinach-meat-balsamella mixture.
  13. Pour the spinach mixture into a buttered 9-inch round or 8-inch square baking dish. Sprinkle top with the buttered crumbs and reserved Parmesan cheese.
  14. Bake at 350°F for approximately 60 minutes or until golden brown.
  15. Cool about 10 minutes before cutting and serving.
For the balsamella
  1. Heat the milk in a small heavy-bottomed saucepan until bubbles begin to form around the edges. Do not bring the milk to a boil.
  2. Meanwhile, melt the butter in a saucepan and add the flour when the foam subsides. Cook for several minutes without browning.
  3. Add the milk, approximately two tablespoonsful at a time, mixing well after each addition. Adding the milk in small amounts should allow you to stir out any lumps before adding the next bit of milk.
  4. After all the milk has been added, bring to a boil and cook for one minute, until thickened.
  5. Remove from the heat and stir in the nutmeg.
Recipe Notes

This recipe doubles well.  If you want to cook a double recipe in a single pan, use a 9-inch by 13-inch baking dish.  Bake at 325°F rather than 350°F as it will brown too much around the outside before the inside is cooked.  If necessary, raise the heat to 375°F at the very end, and put the sformato on the top shelf of the oven, to brown the top.

If you want to use fresh spinach, use 2 pounds instead of the 20 ounces of frozen spinach.  Remove the stems.  Wash the spinach, shaking off most of the water.  Put the spinach in a heavy-bottomed Dutch oven with just the liquid clinging to the leaves.  Cook covered, over medium heat till fully wilted.  Drain and proceed as above with the exception that you will need to do much more chopping of the cooked and squeezed spinach than the eight to ten cuts suggested above.

Copyright © 2017 by VillaSentieri.com. All rights reserved.

Share this Recipe