Melanzane al Forno (Eggplant Baked with Parmesan Cheese)

January 4, 2020

Growing up I didn’t like eggplant.  I didn’t much care for zucchini, either.  Or kale.

Things are a whole lot different now.

As an adult, I basically haven’t met a vegetable I don’t like, though, naturally, I like some more than others.

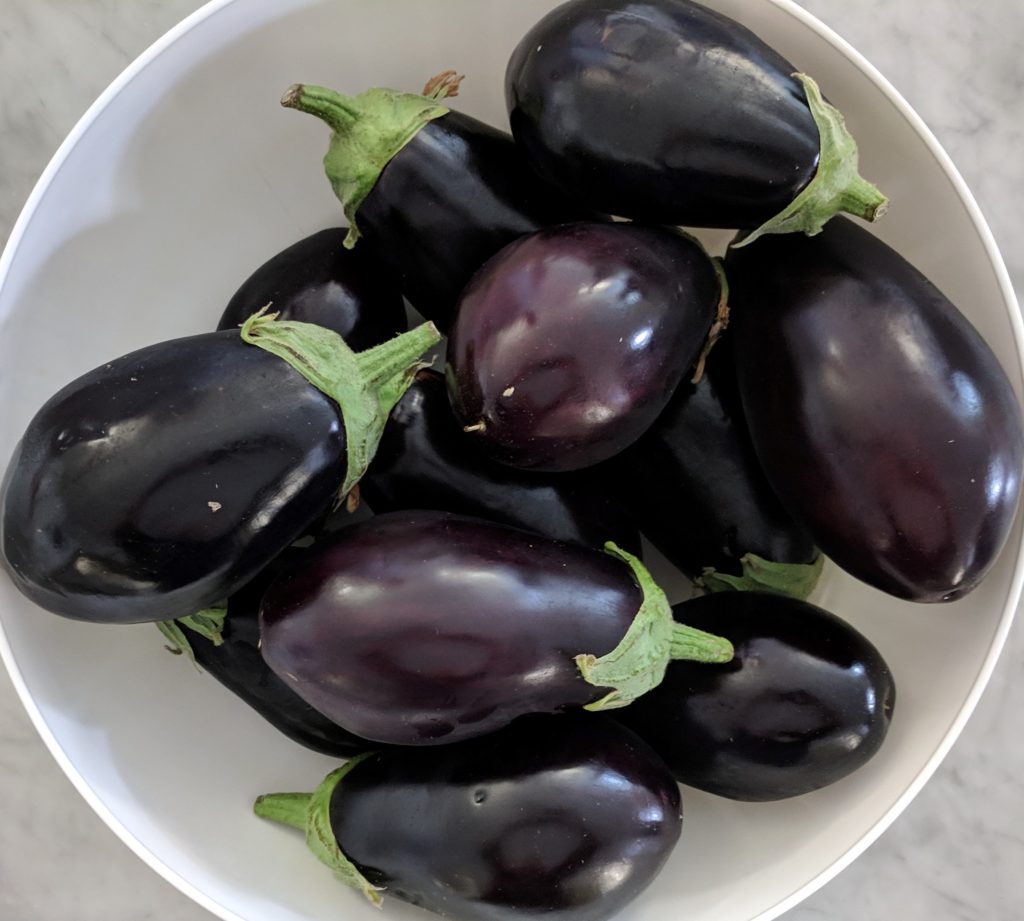
As with zucchini, eggplants seem to defy the season.  They’re available year-round and the quality is consistent.  Just look for firm, shiny ones with no soft spots or wrinkled skin and you’re basically guaranteed of getting a good eggplant.

Eggplants on the vine (Photo: Joydeep / Wikimedia Commons / CC BY-SA 3.0).

Eggplant is a versatile vegetable.  It can be braised, baked, sautéed, fried and steamed … and probably cooked by any other method you can think of.


Join our mailing list and you’ll never miss a recipe again!


Eggplant will sop up any flavor that you pair with it.  It will also sop up large amounts of oil so one needs to be cautious about frying large pieces of eggplant in abundant oil.  Thin slices of eggplant can be floured and fried to great advantage, however.

Years ago, eggplant could be bitter but that trait has basically been bred out of the modern varieties one commonly encounters.  The bitterness led cooks to salt and drain the eggplant to remove bitter juices.  While this is no longer strictly necessary for control of bitterness it is still a great technique to reduce moisture content which is useful for some preparations.

Eggplants at the market in Italy.

America’s Test Kitchen (the organization behind Cook’s Illustrated and Cook’s Country) has developed a method for removing water from eggplant using the microwave.  I have lots of cooking equipment and have no qualms about using newer technology in place of older technology to simplify food prep.  However, I want the newer technology be a natural evolution from the older technology as a way to preserve (but improve) traditional food preparation.  For example, before food processors, one would “mush up” food as much as possible then put it through a sieve.  Food processors do a much better (and faster) job of “mushing,” sometimes to the point that the sieving step isn’t necessary.


Follow us on your social media platform of choice


To me, that’s evolutionary.  It’s a more efficient way of getting to the same outcome but staying true to the traditional method.  Blasting eggplant in the microwave in place of salting it is not.

Beautiful eggplants ready to be made into something yummy.

While I have great respect for the rigor of America’s Test Kitchen, some of their hacks and shortcuts really trouble me from the standpoint of maintaining and transmitting traditional foodways.  Using V-8 juice in minestrone in place of tomato is an example.

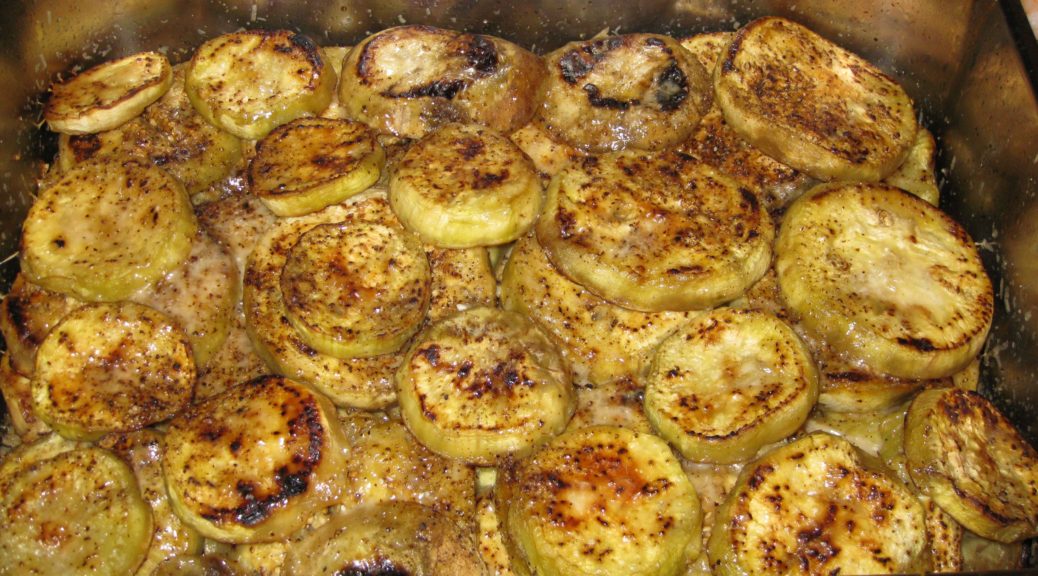
With salting, rather than microwaving, we’ll proceed to today’s recipe,  It’s a very straightforward baked eggplant with Parmigiano Reggiano cheese.  Somehow it manages to be WAY more than the sum of its parts.  I urge you to try it, even if you think you don’t like eggplant.

Print Recipe
Melanzane al Forno (Eggplant Baked with Parmesan Cheese)
Eggplant can absorb huge quantities of oil. This method of cooking limits the amount of oil the eggplant absorbs, making it lighter. The eggplant finishes its cooking in the oven, which eliminates last minute frying just before serving dinner. Individual portions can be made by cutting the eggplant into rounds that fit inside of small ramekins.
Votes: 0
Rating: 0
You:
Rate this recipe!
Course Sides, Vegetables
Cuisine Italian
Prep Time 30 minutes
Cook Time 1 hour
Passive Time 1 hour
Servings
people
Ingredients
Course Sides, Vegetables
Cuisine Italian
Prep Time 30 minutes
Cook Time 1 hour
Passive Time 1 hour
Servings
people
Ingredients
Votes: 0
Rating: 0
You:
Rate this recipe!
Instructions
  1. Peel the eggplant and cut crosswise into rounds ½ inch thick.
  2. Liberally salt the eggplant slices on both slides and put them in a colander.
  3. Set a weight on top of the egglant (such as a plate with a heavy can on top) and allow to drain for one hour.
  4. Meanwhile, gently sauté the garlic in the olive oil on low heat until the garlic is golden brown.
  5. Remove the oil from the heat. Discard the garlic and reserve the oil.
  6. Rinse the eggplant. Blot dry.
  7. Butter an ovenproof serving dish (or individual ramekins if making individual portions).
  8. Coat the bottom of a large sauté pan with 1-2 tablespoons of the garlic-flavored oil. A non-stick pan works best but a well-seasoned ordinary sauté pan will work fine. When the oil is very hot add one layer of eggplant slices. Cook until nicely browned being careful not to burn the eggplant which will make it bitter.
  9. When browned on one side turn the eggplant slices over. You may need to drizzle a little oil into the pan to keep the eggplant from sticking. The eggplant should still be firm in the center. It will complete its cooking in the oven.
  10. When the second side is brown put the eggplant in a buttered ovenproof serving dish, preferably one with a cover.
  11. Lightly salt the eggplant. Sprinkle with freshly ground black pepper to taste and some of the grated Parmigiano. Repeat layering eggplant, pepper and cheese until all the eggplant is used up.
  12. Finish with grated Parmigiano. Drizzle with the melted butter.
  13. Cover and bake at 350°F for approximately 30 minutes. Uncover and continue baking for 10-15 minutes to brown the top.
Recipe Notes

Copyright © 2020 by Villa Sentieri, LLC. All rights reserved.

Share this Recipe

Green Beans with Parmesan Cheese

August 7, 2017

It’s Saturday morning, August 5th and I’m sitting on an airplane writing this post.  I’m bound for Baltimore to visit the younger of my two nephews and his wife and their son.  I have meetings in Washington, DC on Monday and Tuesday so I’m taking this opportunity to visit.

The family members and relatives with whom I am closest are scattered around and I don’t see enough of any of them.

What does all of this have to do with green beans, you might ask?

Everything.

And nothing.

Food is my connector. It connects me to people and places. It evokes memories. It helps to create new ones. It’s a set of shared experiences.

I can’t make my mother’s long-simmered tomato sauce without evoking a slew of memories. My strongest olfactory memory from childhood is being gently awakened by the smell of garlic sizzling in olive oil on Sunday morning as my mother began to make tomato sauce for that day’s dinner. This is the sauce I am making on Sunday at my nephew’s house.

Most recipes that enter my repertory do so because of their connection with people and places. They document my personal history in edible form and cement memories of good times shared with family and friends. Many are family recipes, mine or those of people I know. Some are not, like the Italian Walnut Crostata I created to replicate one I had sitting at a little bar in Venice drinking grappa with my father-in-law in 1996.

That crostata has family connections of a sort. One of the favorite non-Italian desserts in our family is nut roll, brimming with ground sweetened walnuts and encased in just enough lightly sweet yeasted dough to hold it together as it is rolled and baked. While nut roll is more of a Central and Eastern European dessert, it was common in Johnstown, Pennsylvania where I grew up with people from a wide range of ethnic backgrounds.

My Aunt Margie’s nut roll filling is flavored with citrus, hewing toward the Italian, while my mother’s has milk and honey, pointing more towards Eastern Europe. I suspect, though cannot prove, that my Aunt Margie’s filling is more like her mother’s (my Italian grandmother) and my mother’s is more like my father’s mother’s (my Slovak grandmother).

Nut roll is a pastry that I truly miss but it is challenging to make and I have never tackled it despite having my mother’s and my Aunt Margie’s recipes. Except for the one time my cousin, Donna, made it and sent me some and the two times that Michael Alcenius sent me some he made using my Aunt Margie’s recipe, I have been in a nut roll blackout since Aunt Margie died.

The walnut crostata was a revelation. There, in an easy-to-make Italian sweet pastry crust (pasta frolla), was a filling of sweetened, ground walnuts. It wasn’t nut roll but it certainly evoked all the right taste sensations.

I used my husband’s Great Aunt Fidalma’s recipe for pasta frolla and Aunt Margie’s recipe for nut roll filling, to create a dessert that is both reminiscent of that night shooting grappa with my father-in-law in Venice and that preserves recipes from my family and my husband’s family.

Now that I’ve gotten my mouth (and maybe yours) watering for walnut crostata, we’re going to make green beans! I hope, though, that you have a better understanding for the reason this blog exists: to document and preserve traditional recipes along with some sort of a personal story or vignette.

Having just said that, I can’t tell you precisely where this recipe came from but it’s been in my repertory for decades. It is the essence of simplicity, a hallmark of much of Italian home cooking. It also lends itself to being made almost exclusively in advance, making it a perfect dish for a last-minute put-together when entertaining or making a more complicated main course.


Follow us


Click HERE to join our mailing list and you’ll never miss a recipe again!

Print Recipe
Green Beans with Parmesan Cheese
The beans can be cooked in advance and shocked in ice water to stop cooking. The garlic can be sautéed in olive oil in advance, too. Just before serving, heat the oil and toss the beans briefly to warm them. In a serving bowl toss the beans with Parmesan cheese, salt and pepper. This dish can easily be doubled or tripled. Adjust the amount of Parmesan cheese and garlic to your taste. The olive oil is an integral part of the “sauce” so be generous.
Votes: 0
Rating: 0
You:
Rate this recipe!
Course Sides, Vegetables
Cuisine Italian
Servings
Ingredients
Course Sides, Vegetables
Cuisine Italian
Servings
Ingredients
Votes: 0
Rating: 0
You:
Rate this recipe!
Instructions
  1. Wash the beans and cut off the ends. I like to cut the ends at an angle for a better appearance.
  2. Bring a large pot of salted water to a boil.
  3. Meanwhile, bruise the garlic with the side of a chef’s knife.
  4. Add the olive oil and garlic to a skillet, large enough to hold the beans, and heat on medium-low heat until the garlic begins to sizzle.
  5. Sauté, over low to medium-low heat until the garlic is golden.
  6. Remove and discard the garlic.
  7. Remove the oil from the heat.
  8. When the water comes to a boil, add the beans and boil until crisp-tender. This will take just a few minutes depending on the beans and your elevation. The beans should not be crunchy but they should have a distinct “toothiness” and almost squeak as you bite into them.
  9. Drain the beans.
  10. If preparing the beans in advance, shock in ice water.
  11. Add the drained beans to the garlic-flavored olive oil. Heat gently if the beans are cold.
  12. Off the heat, mix in the parmesan cheese, salt to taste, and a generous amount of freshly ground black pepper.
  13. Toss well and serve immediately.
Recipe Notes

Copyright © 2017 by VillaSentieri.com. All rights reserved.

Share this Recipe

Pasta al Pesto

May 15, 2017

Gardening at 8000 feet is challenging.  Even more so when you consider that we are sitting on almost solid rock.

There’s not much soil to begin with, just the barest of covering on a rocky foundation.  The piñon and juniper that surround us work their roots through little crevices in the rock that sits just inches below the surface.

What little soil there was in the area immediately surrounding our house was removed to level the building site.  The excavation was almost exclusively rock, one hundred truck loads were taken away.  Some rock was kept on site to create retaining walls around the property.

The corollary, however, is that there’s no dirt around the house to dig into to plant much of anything.  The landscaping that was done was exclusively within rock retaining walls or our front enclosed courtyard, where topsoil was brought in.  The first load of topsoil for the courtyard arrived April 2007, before we were ready to plant anything.  April is a windy month in New Mexico.  The winds started up one day and before evening every last speck of topsoil was blown to West Texas!

We could consider raised bed gardening but that would just invite the rabbits and deer to munch their way through our garden.  As it is, we’ve offered up several stands of ornamental grasses on the periphery of our landscaped area to the critters.  We seem to have reached a truce of some sort.  We let them eat the ones around the edges and, for the most part, they let the others alone.

We installed a greenhouse that allows us to extend the growing season by many months.  It also allows us to winter over a number of plants that would not survive in this climate.  The greenhouse also allows us to grow fig trees in large pots.  The first year we grew figs, they didn’t ripen.  It turns out that even though summer days are warm, the nights are cool enough that the fruit doesn’t ripen.  The following year we left the fig trees in the greenhouse throughout the summer, convinced that it would be too warm for them to thrive even with the automatic ventilation system.

Luckily, we were wrong.  The fig trees loved the heat.  Picking a ripe fig off of the tree and eating it immediately is amazing.  The only fresh fruit experience that would be superior, in my estimation, is a fresh-picked mango…and those trees won’t fit in our greenhouse!

We have one row of planter boxes outside the greenhouse.  We use these for plants, like tomatoes, that are not very attractive to deer and rabbits.  Salad greens, such as arugula, radicchio, and leaf lettuce grows in shallow trays on a raised shelf in the greenhouse.  Many pots of herbs also remain in the greenhouse year-round.  Everything else is planted in our interior courtyard, either in pots or in another row of planter boxes.

Depending on the type of plants, we start planting seeds in February.  Seedlings are transplanted once the risk of frost is minimal.

This year, we started too much basil from seed.  It needed to be thinned.  This created the opportunity for us to have pesto much earlier than would otherwise have been the case.  Usually it’s June before the basil plants have grown large enough that we can harvest leaves for pesto.

We had this pesto on April 30th, a day that measured more than 8 inches of snow at Villa Sentieri.  It was winter’s last hurrah and fresh pesto was a perfect way to welcome spring and say good-bye to winter.


Print Recipe
Pasta al Pesto
The classic basil-based pesto is Pesto alla Genovese. However, because the recipe and ingredients for Pesto alla Genovese are tightly regulated (for example, the basil must be grown in Genoa, Italy), I’ll refrain from calling this Pesto alla Genovese since it can’t meet those strict regulations. Try to use young, small basil leaves. If you must use larger ones, tear them into smaller pieces so they measure approximately the same way. Using olive oil from Liguria, where Pesto alla Genovese originated, is another of those difficult-to-meet requirements. Nonetheless, try to use a sweet, fruity olive oil rather than one that is spicy and pungent. Make the pesto as close to serving time as possible. I like to have all the ingredients measured, making the pesto after the pasta starts to a boil. If you’re wondering about the use of a food processor, that would not be permitted either but I doubt there are many of us that would make pesto if we had to use the traditional marble mortar and wooden pestle!
Votes: 0
Rating: 0
You:
Rate this recipe!
Prep Time 30 minutes
Cook Time 15 minutes
Passive Time 30 minutes
Servings
people
Ingredients
For the pesto
For the pasta
Prep Time 30 minutes
Cook Time 15 minutes
Passive Time 30 minutes
Servings
people
Ingredients
For the pesto
For the pasta
Votes: 0
Rating: 0
You:
Rate this recipe!
Instructions
  1. Pluck the basil leaves from the stems and measure 2 cups, lightly packed.
  2. Measure all the other ingredients. Pine nuts.
  3. Garlic.
  4. Parmigiano Reggiano and Pecorino Romano cheeses.
  5. Don't forget the extra-virgin olive oil and salt.
  6. Bring three quarts of water and 1/3 cup of salt to a rolling boil.
  7. While water comes to a boil and the pasta cooks, heat the serving bowl by placing it in a 150°F oven or partially filling it with boiling water.
  8. When the water comes to a boil, add the pasta. Return to a boil, stirring frequently.
  9. As the pasta boils, put the basil leaves, olive oil, pine nuts, garlic, and salt in a food processor. Puree the basil mixture, scraping down the sides of the bowl occasionally.
  10. When the pasta is almost al dente, pour the basil puree into the warmed serving bowl.
  11. Add the Parmigiano and Romano cheeses. Stir to combine.
  12. Remove ¼ of the boiling pasta-cooking water from the pot and stir into the pesto to loosen it.
  13. When the pasta is al dente, remove and reserve a cup of pasta cooking water.
  14. Drain the pasta. Do not rinse. Add the pasta to the serving bowl and toss to coat each strand.
  15. If the pesto seems a little thick, add a tablespoon or two of the reserved pasta-cooking water.
  16. Taste and adjust salt if necessary.
  17. The finished dish.
Recipe Notes

Copyright © 2017 by VillaSentieri.com. All rights reserved.

Share this Recipe

Pasta ai Funghi (Pasta with Mushrooms)

January 27, 2017

Growing up, pasta was almost always served with a long-cooked Southern Italian ragu.  Yes, there was the occasional sauce of vegetables sautéed in olive oil till they softened enough to make a sauce but those sauces were the exception to the rule.

These days, a long-cooked ragu is still the epitome of pasta cooking for me but far more often I make quicker sauces.  Pasta with mushrooms is one of them.

In my last post, I introduced nepita, an herb used in Italy that is really not commonly available in the US.  Nepita pairs really well with mushrooms.  The nepita that I use is from plants that we grow from seeds we brought back from Italy in 1996.  I’m so concerned that one day our nepita won’t make it through the winter and reappear in the spring that we’ve taken to backing it up the way other folks back up their data.

Over the years we’ve gifted nepita plants to friends who like to garden.  Should a disaster ever befall our nepita, there should still be a clone of it somewhere with enough seeds that we can germinate another plant or two.  For an herb that I’ve only known for 20 years, it’s become an integral part of my kitchen.

While there’s no real substitute for nepita, there are lots of herbs that go well with mushrooms.  In this rendition, I’ve called for basil and oregano, the combination that I usually use when I don’t have nepita.  Marjoram also works well, with or without a pinch of thyme, but marjoram is a relatively uncommon herb in Italian cooking.

Herbs are not a major player in this dish.  Though nepita is distinctive, there are so many layers of flavor from the dried porcini, onion, garlic, and marsala that the lack of nepita isn’t really a big deal.  Basil and oregano work well and, in fact, are what I used before that 1996 trip to Tuscany where I discovered nepita.

Pasta ai Funghi was one of the courses I served at my father-in-law’s birthday dinner last week.  Here are a couple of pictures of that dinner from our home in Palm Springs.


My father-in-law (left) and mother-in-law. Good friend, Gino Barcone is in between.
From left to right, John Berl, Bill Hoadley, and Bob Bauernschmitt.


Print Recipe
Pasta ai Funghi (Pasta with Mushrooms)
While many mushroom-based sauces for pasta contain cream and butter, this one uses only olive oil. It creates a beautiful, glossy sauce. The mushrooms can be prepared several hours in advance making this an ideal dish if you are cooking for company.
Votes: 0
Rating: 0
You:
Rate this recipe!
Prep Time 25 minutes
Cook Time 35 minutes
Servings
people
Ingredients
Prep Time 25 minutes
Cook Time 35 minutes
Servings
people
Ingredients
Votes: 0
Rating: 0
You:
Rate this recipe!
Instructions
  1. Soak porcini in enough warm water to just cover. When soft, about 15 minutes, squeeze excess water out of the mushrooms. Reserve the liquid. Finely chop the porcini.
  2. Clean the mushrooms by wiping them with a damp cloth.
  3. If you are using common white mushrooms, slice off the very bottom of the stem as it is usually a bit dry. There is no need to remove the rest of the stem, though.
  4. Turn each mushroom upside down and cut into 1/8 inch thick slices. If the mushrooms are really large, you might have to make a crosswise cut as well.
  5. Slice or cut other mushrooms into similar sized pieces. For example, cut large portobello mushrooms into long strips approximately 1/8 inch thick and then cut each strip into smaller pieces.
  6. If you are using oyster and/or enoki mushrooms cut them into slightly larger pieces and keep them separate as they require less cooking than most other mushrooms.
  7. Finely chop the onion and reserve.
  8. In a sauté pan large enough to hold the mushrooms and cooked pasta, heat the ¼ cup of olive oil, over high heat. When the oil is hot, add the finely chopped porcini. Sauté a minute or two until the porcini becomes aromatic, being careful not to burn them.
  9. Add the reserved porcini soaking liquid. Over high heat, quickly evaporate the liquid, stirring often.
  10. Once the liquid is evaporated, add all the cut-up mushrooms to the sauté pan, except for quick cooking types like enoki and oyster mushrooms. Sauté the mushrooms, still on high heat, stirring often until they have absorbed all the olive oil.
  11. Season liberally with salt and reduce the heat to medium low.
  12. Stir the mushrooms often until they begin to release their liquid. When they do, turn the heat to high and cook until all the liquid is evaporated, stirring often. Add freshly ground black pepper to taste.
  13. Continue sautéing the mushrooms until they just begin to brown. Now is the time to add any quick-cooking varieties of mushrooms, such as oyster and enoki, you may be using.
  14. Continue to sauté until of the mushrooms are nicely browned.
  15. When the mushrooms are brown, add the onion and crushed red pepper.
  16. Over medium heat, cook until the onion is soft and golden.
  17. Stir in the garlic and sauté for about one minute until it becomes fragrant.
  18. Stir in the oregano and basil, or, if you are lucky enough to have a stash, about 1 teaspoon of fresh nepita or ½ teaspoon of dried. Add the marsala. It will evaporate almost immediately.
  19. Remove the sauté pan from the heat until the pasta is ready. The mushrooms can be made several hours ahead to this point.
  20. Cook the pasta in well-salted water until al dente. Meanwhile gently warm the mushrooms if they were made ahead.
  21. When the pasta is cooked, remove about 1 cup of pasta-cooking liquid and reserve. Quickly drain the pasta. Do not rinse. Add the pasta to the warm mushrooms along with about ¼ cup of the reserved pasta-cooking liquid. Cook over low heat, stirring often for about one minute.
  22. Remove the pasta and mushrooms from the heat. Add the Parmigiano Reggiano cheese and stir to combine. Add 2 tablespoons of extra virgin olive oil and the truffle oil, if using. Stir to combine. The cheese and the starch in the pasta cooking liquid should help to emulsify the olive oil and water, creating a glossy sauce.
  23. If the pasta is too dry, add more pasta-cooking liquid, just don’t make it watery. The cheese, olive oil and water should hold together.
  24. Taste and adjust seasoning, if needed.
  25. Serve immediately, preferably in warmed pasta bowls. Pass additional freshly grated Parmesan cheese at the table.
Recipe Notes

I most often make this with ordinary white button mushrooms, especially if I am going to add the truffle oil. Using an array of different mushrooms, such as cremini, baby bella, oyster, and enoki makes a visually and texturally interesting dish, however.

When I make pasta, I always pour some of the pasta-cooking liquid into the serving bowl to warm it.

Copyright © 2017 by VillaSentieri.com. All rights reserved.

Share this Recipe