Julie’s Impossible Pecan Pie

October 16, 2017

Julie Paradise is the Queen of Impossible Pies.

Julie Paradise

I ate Impossible Pies back in the 1970s.   Savory Impossible Pies were a favorite of Auntie Helen. Auntie Helen was actually the aunt of Gene d’Aquili, my College Advisor. Ultimately, years later, I went into psychiatric practice with him. I spent lots of time with Gene and his family, including Auntie Helen, and her sister, Auntie Louise, from the early 1970s until the late 1980s when I left Philadelphia and moved to Tucson for a year before settling in Chicago. In a previous blog post, I talked about Auntie Helen and Auntie Louise.

Auntie Helen was especially fond of Impossible Tuna Pie. I have “her” recipe which exactly matches one I found on the internet a few months ago. I’m going to guess it was the one put out by the makers of Bisquick® way back in the day!

I’ve only ever had sweet impossible pies from Julie, but she says she makes savory ones too. Her take: “Green bean is delicious. Broccoli is fantastic and pretty. Zucchini is good.”

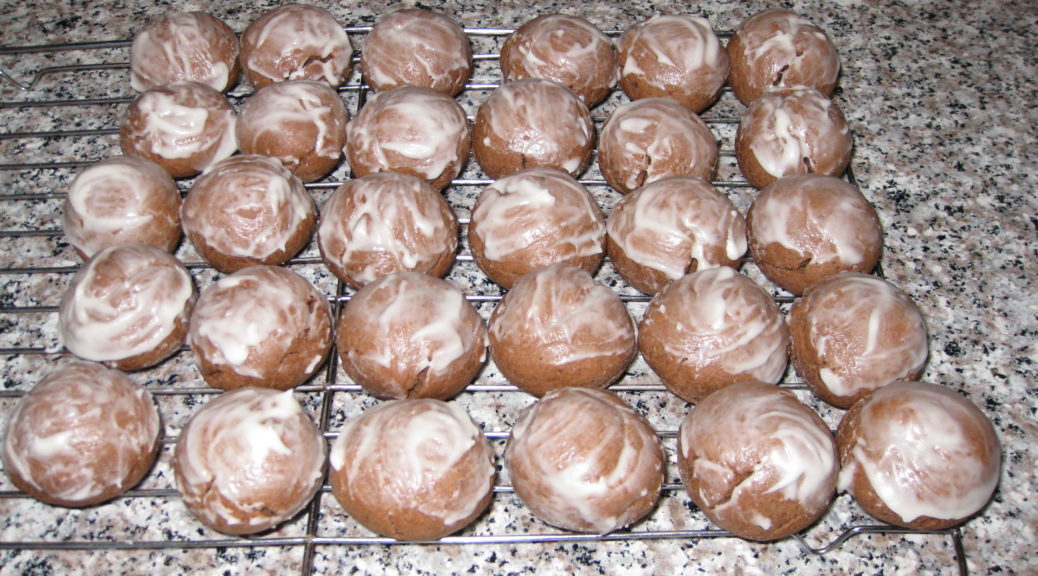
Julie is one of those folks who doesn’t like pie crust…and there are plenty of them. For her, Impossible Pies are the perfect solution.

On our recent visit to Julie and Gay’s home on Fire Island Julie made three Impossible Pies during a six-day stay. We ate every last crumb!

Deer near Gay and Julie’s deck eating geraniums out of my hand

Impossible Pies appear at the end of most every dinner that Gay and Julie host in Santa Fe and I wouldn’t want it any other way.

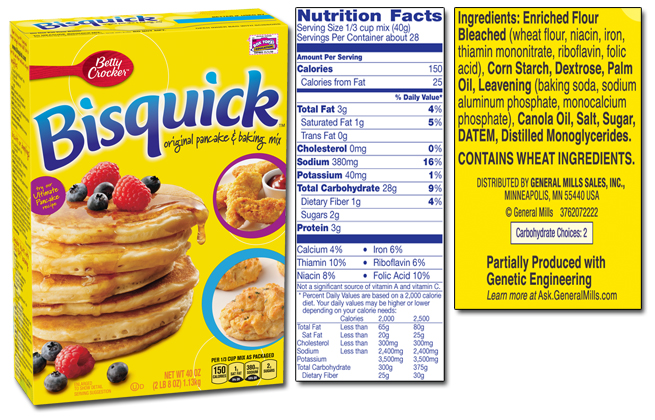
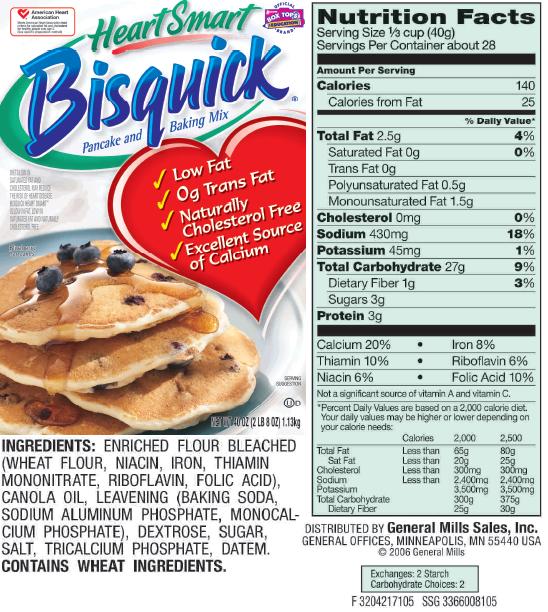
You’ve read my rants about the adverse health effects of hydrogenated and partially hydrogenated fats. That’s what baking mix (OK, let’s call it what it is, we’re really talking about Bisquick®) used to contain. I’m here to say: NO LONGER!

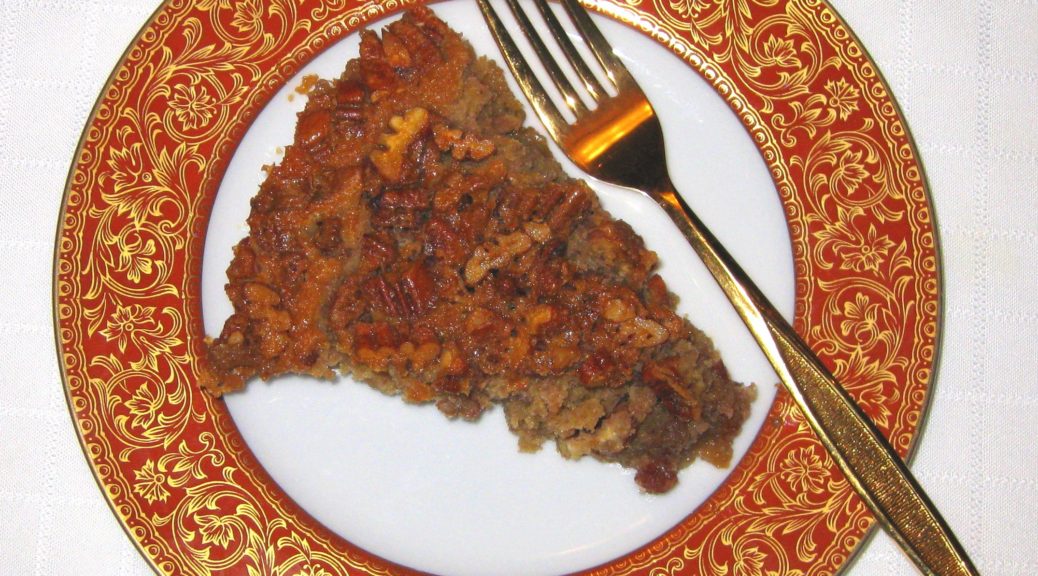
In prepping for making Julie’s Impossible Pecan Pie, I researched “baking mix” substitutes. There are many recipes available, all of which are very similar (flour, some sort of oil or fat, a bit of sugar, and baking powder). My plan was to make up a substitute rather than use the real thing because of my zero tolerance policy for hydrogenated and partially hydrogenated fats.

On a stroll through the supermarket, I saw the baking mix section and decided to take a look. That’s when I discovered that the good folks at Betty Crocker had changed the formula and replaced the partially hydrogenated fat with vegetable oil. I actually bought a box, intending to make all those things I had as a kid that were based on Bisquick and Auntie Helen’s Impossible Tuna Pie after making Julie’s Impossible Pecan Pie.

I looked at several other brands of baking mix and discovered that not all manufacturers are as enlightened as Betty. Partially hydrogenated fat was still a common ingredient in many of them. (There are also some specialty Bisquick products that contain—or may contain—based on the label, partially hydrogenated fats. It’s best to stick with what is labeled as the “Original” (which, of course it really isn’t) or the HeartSmart.

A funny thing happened with all this thinking about baking mix and baking mix substitutes. I realized that for all practical purposes, an Impossible Pie is like a Clafoutis! The only real difference is that the baking mix contains baking powder and the standard recipe for clafoutis does not. Given the variability of recipes from cook to cook, I guess it wouldn’t be unreasonable to call this a Pecan Clafoutis! And, as Julie says, a Clafoutis is best right out of the oven while an Impossible Pie is just fine at room temperature.

So, while I don’t often make Julia Child’s recipe for Clafoutis I think there are lots of Impossible Pies in my future.


Follow us


Click HERE to join our mailing list and you’ll never miss a recipe again!

Print Recipe
Julie's Impossible Pecan Pie
Although I used a mixer, as you’ll see in the pictures, a blender is easier and produces a smoother batter. Also, the original pie pan I chose was too small. You’ll see that I started putting everything into the 9-inch pan. I had to switch to a 10-inch deep dish pan! Although not part of Julie's original recipe, I've successfully added 1/4 teaspoon of almond essence to this pie. It's not enough to give the pie an almond flavor but it does amplify the nuttiness!
Votes: 0
Rating: 0
You:
Rate this recipe!
Cuisine American
Prep Time 15 minutes
Cook Time 1 hour
Servings
people
Ingredients
Cuisine American
Prep Time 15 minutes
Cook Time 1 hour
Servings
people
Ingredients
Votes: 0
Rating: 0
You:
Rate this recipe!
Instructions
  1. Prepare all the ingredients.
  2. Pecans
  3. Brown sugar
  4. Milk
  5. Corn syrup
  6. Eggs
  7. Baking mix
  8. Butter a 10-inch deep-dish pie pan.
  9. Add the pecans to the buttered pie pan and set aside.
  10. Put all remaining ingredients into a blender jar or mixing bowl and blend until thoroughly combined and no lumps remain. This will take approximately 15-20 seconds in a blender and at least one minute by electric mixer.
  11. Pour the batter over the pecans.
  12. Bake at 350°F for 50-55 minutes, until a knife inserted in the center comes out clean.
  13. Cool at least five minutes before serving or serve at room temperature.
Recipe Notes

Copyright © 2017 by VillaSentieri.com. All rights reserved.

Share this Recipe

Totos (Italian Chocolate Spice Cookies)

December 21, 2016

Homemade cookies and pastries were staples of my childhood.  Trays of cookies showed up for holidays, celebrations, weddings, funerals, and, sometimes, for no apparent reason.

My mother along with relatives and friends set up a cookie-making operation that went on every night for weeks leading up to my sister’s wedding.  The overseer was Annie Castagnola, a family friend.  She had a thin spiral-bound 3-inch-by-5-inch notebook of cookie recipes.  The notebook was the kind we used in grade school to write down our homework assignments.  Annie’s recipes were a curated collection gathered from a host of “old Italian women,” my grandmother included.

The little notebook was coveted by more than a few cooks.  Annie, however, did not share her recipes, even when those recipes came from relatives of the very people who were asking for them.  I know, my mother was one of those people who wanted some of her mother’s recipes.  Annie wouldn’t budge.  The situation got resolved, however, during the cookie-baking marathon for my sister’s wedding.  One night, Annie left her little notebook at our house overnight.  Nobody’s confessing, but there are a few cookie recipes in my mother’s recipe box (sitting on my bookcase) written in my twelve-year-old hand.

Annie died a while back.  Her little notebook is most likely gone forever and along with it the baking secrets of a whole group of “old Italian women.”

Of all the cookies that showed up throughout the year, my favorites were the various kinds of cakey cookies, my mom’s Genets, Aunt Margie’s aptly named “Colored Cookies,” and my cousin Angie Catanese’s Sesame Seed Cookies, to name a few.  These cakey cookies, which were not very sweet by American standards, were usually little balls but not always.  Genets are lemon flavored knots.  Colored Cookies are vanilla flavored balls, each made with four or five pinches of dough of different colors rolled together.  Sesame cookies are little logs, perfect for dunking into some Vin Santo.  For me, though, the best of these cakey cookies are Totos, little chocolate spice balls.

Print Recipe
Totos (Italian Chocolate Spice Cookies)
These little chocolate balls are intended to have a good kick from an array of spices. Lard is the traditional shortening to use. I render my own. If you need these to be vegetarian, or you just don't want to use lard, you can use solid vegetable shortening. Heck, you can even use clarified butter but that is way off the traditional scale!
Votes: 18
Rating: 3.83
You:
Rate this recipe!
Cuisine Italian
Prep Time 45 minutes
Cook Time 2 hours
Servings
dozen cookies
Ingredients
Cookies
Icing
Cuisine Italian
Prep Time 45 minutes
Cook Time 2 hours
Servings
dozen cookies
Ingredients
Cookies
Icing
Votes: 18
Rating: 3.83
You:
Rate this recipe!
Instructions
Cookies
  1. In a small saucepan, melt the lard over low heat. When just melted, remove the lard from the heat and allow to cool slightly.
  2. Meanwhile, combine the flour, cocoa, baking powder, baking soda, salt, cloves, cinnamon, allspice, and nutmeg together. Reserve.
  3. Make the icing and reserve.
  4. Put the sugar into a large mixing bowl. Add the cooled but still liquid lard and mix well until thoroughly combined. The mixture will be gritty. I recommend doing this by hand with a mixing spoon but you could use a portable electric mixer.
  5. Add the eggs one at a time to the sugar and lard mixture, mixing well after each addition. The sugar should dissolve as the eggs are added.
  6. Add the milk, honey, vanilla extract and lemon extract to the egg mixture. Mix until well combined.
  7. Add the reserved dry ingredients. At this point there really is no better option than to reach into the mixture with your hand and get everything well combined. The dough will be somewhat sticky. Be certain that all the dry bits are scraped off the bottom and sides of the bowl and combined into the dough.
  8. Roll the dough into walnut-sized balls. If you want to weigh the first few to get the size correct, they should be between 21 and 22 grams.
  9. Space the cookies several inches apart on ungreased cookie sheets. Bake at 375°F for 8-10 minutes until the cookies are very slightly browned on the bottom but still soft when touched. They have a tendency to crack as they bake. This is normal. You can bake two trays at a time, one in the lower third of the oven and one in the upper third. Be sure to switch the top and bottom cookie sheets after five minutes and also turn them front to back.
  10. As soon as you remove the cookies from the oven, carefully put them on cooling racks.
  11. Ice them immediately by holding a cookie with one hand and using the tip of your finger to spread a dollop of icing on the top half of each cookie. The icing should be a glaze, not a thick coating. Put the iced cookies on cooling racks to cool completely.
  12. Well wrapped, the cookies can be refrigerated for several weeks or frozen for several months.
Icing
  1. Melt the butter. Add the sugar, vanilla (or lemon) extract and 2 tablespoons of milk. Mix well. Add more milk, a teaspoon at a time, if needed, to make a thick icing that will hold its shape and spread well.
  2. It may be necessary to add a bit of milk from time to time if the icing stiffens up over the course of icing each batch of cookies as they come out of the oven.
Recipe Notes

Check out my method for rendering lard.

I prefer to grind my own spices using a small electric coffee grinder, except for the nutmeg, of course, for which I use a small grater. It is best to pass the ground spices through a small strainer to get out any small bits. If you don’t grind your own spices be sure to buy really fresh ground ones so the flavor is vibrant.

This recipe doesn’t involve any strenuous beating so the first few steps can easily be completed by hand with a sturdy mixing spoon rather than with a mixer. Similarly, after adding the dry ingredients, the dough only needs to be mixed enough to come together. This is easily (and traditionally) done with your hand though I suppose a dough hook would work, too.

Copyright © 2016 by VillaSentieri.com. All rights reserved.

Share this Recipe

Panettone (Italian Sweet Bread with Citron and Raisins)

December 10, 2016

I have been planning the launch of this site for several years.  It’s going live shortly before Christmas, a time when Italians traditionally enjoy panettone.  Panettone for breakfast.  Panettone as a gift.  Panettone as a snack.  While there are wonderful commercially produced products, I prefer to make my own.

The fact that the site is going live now feels like a gift…to myself!  So, I’m making panettone!!!  One for me, and half-a-dozen for friends.

I’ve been making Panettone for almost 30 years.  This year I’m using candied citron from Italy.  I plan to try making my own candied citron from the wonderful Buddha’s Hand fruits available from the farmers’ market in Palm Springs, California where I spend time each winter using this recipe from David Lebovitz.  For now, though, I’ll be using the citron from Italy.

Print Recipe
Panettone
Panettone is a sweet bread from Italy, traditionally served around Christmas. It is enriched with eggs and butter and contains raisins and candied citron.
Votes: 0
Rating: 0
You:
Rate this recipe!
Course Sweet Breads
Cuisine Italian
Prep Time 30 minutes
Cook Time 1 hour
Passive Time 14 hours
Servings
loaves
Ingredients
Course Sweet Breads
Cuisine Italian
Prep Time 30 minutes
Cook Time 1 hour
Passive Time 14 hours
Servings
loaves
Ingredients
Votes: 0
Rating: 0
You:
Rate this recipe!
Instructions
  1. This is candied citron from Italy. The flavor is superior to the diced candied citron sold in supermarkets.
  2. If using large pieces of citron, cut them into batons approximately 1/4 inch on a side.
  3. After cutting batons of citron, or if using citron that is already diced, slice the citron into thin slices.
  4. Beat salt, sugar, eggs and egg yolks together. Reserve.
  5. Use a mixer with a dough hook. Put 1200 g flour in the bowl of the mixer. Add yeast and begin to mix. Add warm water and mix. Add egg mixture and mix. Slowly with the mixer running, add 225 grams of melted butter and orange oil or zest. Knead for approximately 10 minutes, scraping the side of the bowl a few times. Add citron and raisins and continue mixing till incorporated. The dough will be sticky.
  6. Butter the inside of a large bowl with 2 tablespoons of the softened butter. Place dough in the buttered bowl and be sure to butter the top with some of the melted butter. Cover dough with waxed paper and place a kitchen towel on top. Refrigerate overnight. It should have at least doubled by morning. In place of a large bowl, you can use a food-service container of approximately 7 quarts with a tight-fitting lid.
  7. Punch the dough down by hand. Cover again with waxed paper and towels and allow to rise at room temperature until doubled in bulk.
  8. Butter 3 cylindrical baking pans, approximately 7 inches in diameter, using 3 tablespoons of softened butter. Set the pans aside.
  9. Knead the dough by hand until smooth and the air bubbles have been worked out. Form into 3 balls and place each into one of the baking pans. Butter the tops with the remaining 1 tablespoon of butter.
  10. Cover with waxed paper and a towel. Allow to rise at room temperature until doubled (or a little more), approximately 45-60 minutes.
  11. Cut a deep cross in the top of each loaf. Bake at 350° F for 55-65 minutes. Use a cake tester to be sure that none of the dough clings to tester.
  12. Place on a cooling rack. Cool slightly and remove from the pans. Cool completely on the rack. Wrap tightly until ready to use.
Recipe Notes

Copyright © 2016 by VillaSentieri.com.  All rights reserved.

Share this Recipe