Pollo allo Scarpariello (Chicken Shoemaker Style)

October 8, 2021

Unappetizing pictures!

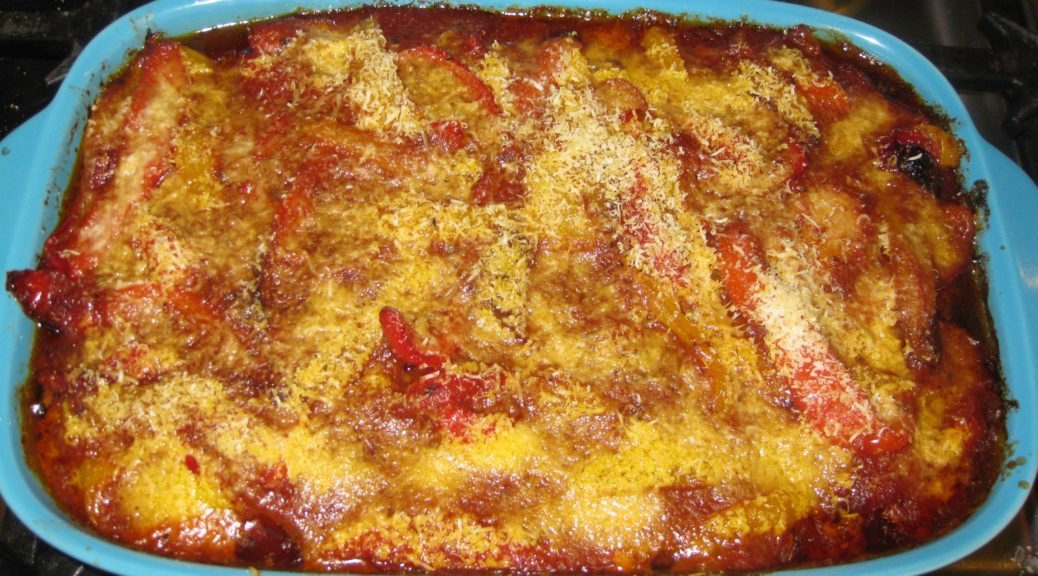
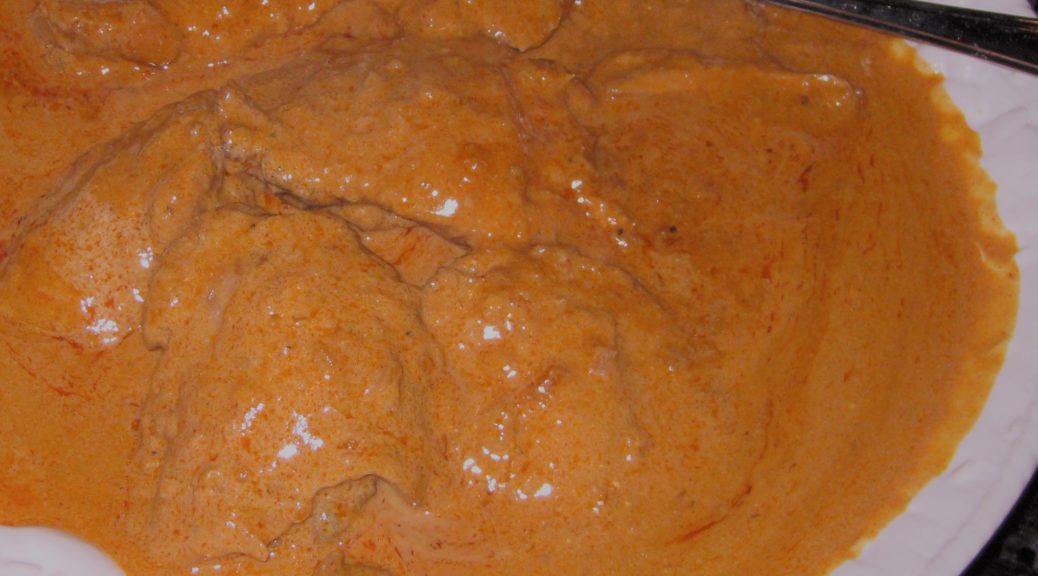
Sometimes really delicious food makes unappetizing pictures.

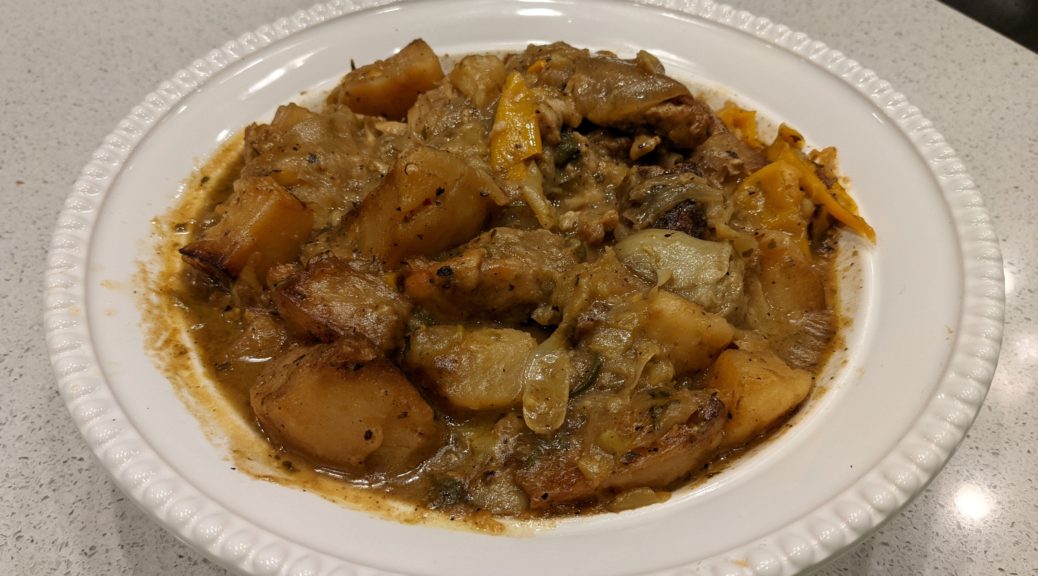
Take Chicken Scarpariello, for example.  By the time the chicken is unctuous, the potatoes creamy, and the sauce tangy the dish is unappetizingly brown (at least in a photograph).  I discovered this when looking at the photographs I had taken for this blog post.

This is really a shame because the taste is superb.

We’re several weeks into planting our new vegetable beds but these herbs have been going strong since March 2021. They were cut back drastically last week to encourage growth.

Brown food can be challenging to photograph, especially brown food in a brown sauce.  Food stylists might solve this problem by using barely cooked potatoes that look pale and peppers that are still yellow and green, not really cooked as required by the dish.  This doesn’t represent reality.  The dish, cooked properly, will never look like the photograph.  This is an approach that I think is inherently unfair.

I’m willing to admit that some of the problem relates to my picture-taking ability.  My photographic ability isn’t great but even that meager ability sometimes suffers because I’m hastily taking photographs as I’m trying to put the food on the table.


Follow us on your social media platform of choice


If I weren’t doing that, I could carefully plate a piece of chicken with the potatoes and peppers artfully arranged off to the side, lots of white space on the plate, and a few colorful garnishes or side dishes.  I could even wipe a little of the sauce off of the potatoes to make them lighter in color.  All this would mitigate the “brown problem” but it just isn’t practical because the food I post on the blog is something that I actually made to eat at the moment it is ready.

One of three vegetable beds beginning to sprout.  In the back, not in the bed, are four plants: rosemary, bay, chile pepper, and niepita.

I guess I could spend time carefully taking pictures and serve cold food but that approach wouldn’t last long in my household.

I could cook specifically for the blog and not worry about serving the food, at least not the day I cook it.  That would create a major leftover problem.  Besides, many dishes aren’t at their best when reheated.  On the other hand, many foods are better if made in advance.  So, I guess this is a partial solution to the problem that could work on a case-by-case basis depending on what the dish is.


Join our mailing list and you’ll never miss a recipe again!


I can think of other potential solutions but each has its problem.  This could include having a photographer arrange the plate and photograph it (presumably while I’m having dinner with the rest of the household).

We’re looking forward to a winter crop of tomatoes!

Alternatively, I could serve everyone then spend time arranging a plate to photograph, hoping to join the dinner table before everyone is finished.

I’ll keep working on a fix to the issue but, in the meantime, I encourage you to try this Italian-American dish.  It scales up easily so you can feed a crowd if you need to.  The leftovers are pretty incredible, too!

Greens for salad being started directly in the bed.

American websites, including the New York Times, usually say the name of this dish translates as Chicken Shoemaker Style.  However, you won’t find the word “scarpariello” in an Italian dictionary.  To be sure, the word “scarpa” means shoe but the Italian word for shoemaker is “calzolaio.”  Scarpariello, however, is the word for shoemaker in the Neapolitan dialect, which gives a clue as to which immigrant group might have been responsible for creating this Italian-American favorite.

Print Recipe
Pollo allo Scarpariello (Chicken Shoemaker Style)
Scarpariello means shoemaker in the Neapolitan dialect. This may give a clue as to the origins of this Italian-American favorite. The dish builds on a classic combination in the cooking of many regions of Italy: chicken cooked with wine and vinegar. The capers are optional. Use sweet or hot pickled peppers as you prefer or, if you want to spice it up, add some crushed red pepper when sautéing the garlic. If you don't have a stove-to-oven pot large enough to hold all the ingredients, do the browning in a large saute pan then assemble everything in a large baking dish.
Votes: 0
Rating: 0
You:
Rate this recipe!
Course Mains, Poultry
Prep Time 30 minutes
Cook Time 2 1/2 hours
Servings
people
Ingredients
Course Mains, Poultry
Prep Time 30 minutes
Cook Time 2 1/2 hours
Servings
people
Ingredients
Votes: 0
Rating: 0
You:
Rate this recipe!
Instructions
  1. Dredge the chicken in flour. Reserve.
  2. Peel the potaotes and cut in large chunks.
  3. Cut the Bell peppers in triangles
  4. Cut the onions in eighths
  5. In a large stove-to-oven pot, heat the olive oil. Brown the chicken, sausage, and potatoes. Do this in batches, if necessary.
  6. Remove everything from the pot. Cut the cooked sausage into 1 ½ inch long pieces.
  7. Add the garlic to the oil remaining in the pot and sauté until it is fragrant and golden.
  8. Add the bell pepper and onion, season with salt, and sauté until the onion is beginning to soften and turns gold and brown in spots.
  9. Add the rosemary and bay leaves and sauté briefly.
  10. Add the wine and deglaze.
  11. When wine is almost completely evaporated, return chicken, sausage, and potatoes to the pot along with any accumulated juices.
  12. Add about 1 cup of chicken broth and the vinegar along with the pickled peppers. Season well with salt, pepper, and oregano.
  13. Bring to a boil, cover, and put in the oven at 350°F.
  14. An hour later, stir the contents of the pot. Add the drained artichoke hearts and capers, if using. Add more broth if needed to keep the contents from sticking. Adjust the seasoning.
  15. Cook for another hour until chicken is very tender and potatoes are cooked through.
  16. Stir in parsley and serve.
Recipe Notes

Copyright © 2021 by Villa Sentieri, LLC. All rights reserved.

Share this Recipe

Pollo alla Romana (Chicken with Sweet Peppers)

January 15, 2020

I will forever remember Ferragosto as the day the music died.

Ferragosto is celebrated on the fifteenth of August throughout Italy.  Originating during the Roman Empire, apparently in 18 BCE by Emperor Augustus, Ferragosto was originally held on August 1st.  Ultimately, the Catholic Church moved the date to August 15th to coincide with the Assumption, a “holy day of obligation,” thus imposing a secular holiday on a religious holy day.

Ferragosto is a day to feast.  It is also the day that the late-night revelry in the piazza of Bagni di Lucca comes to an end.


Join our mailing list and you’ll never miss a recipe again!


Those of you who have been following my blog for a while know that I spent the month of August 2019 in Tuscany cooking with Great Aunt Fidalma.

Cutting zucchini with Great Aunt Fidalma in her kitchen in Benabbio.

I rented a charming little apartment overlooking the piazza in Bagni di Lucca, a town near the village of Benabbio where Aunt Fidalma lives.

The piazza becomes the locus of loud music (70’s disco, karaoke, Italian pop) late into the night (or early into the morning depending on your perspective) on the weekends in August as well as during several August festival days.

A view from my terrace of the late-night revelry in the piazza of Bagni di Lucca.

The music precludes sleep.  Even if one could find ear plugs sufficient to drown out the sound, the building, and thus the bed, vibrate to the bass.

Ferragosto, August 15th, is the end of the late-night music.


Follow us on your social media platform of choice


Today, January 15th, marks five months since Ferragosto.  Pollo alla Romana (also known as pollo con i peperoni [chicken with sweet peppers]) is traditionally served on Ferragosto.  Given the five-month anniversary, today seems like an appropriate day to post the recipe.

As you might guess from the name, Pollo alla Romana is from the area around Rome.  It is a simple dish made with chicken, sweet peppers (traditionally red and yellow ones) and tomatoes.  It can be cooked in the morning and served at room temperature later in the day making it a perfect summer dish.

It has become one of my go-to dishes for entertaining when I don’t want a lot of last-minute fuss to distract from enjoying cocktails with my guests.  Made earlier in the day, the dish reheats beautifully in the time it takes to drink a bourbon.

Print Recipe
Pollo alla Romana (Chicken with Sweet Peppers)
Traditionally this dish would be made with a cut-up chicken. I prefer to use just thighs as I think they take well to braising, which breasts don’t. You can use cut-up chicken parts if you prefer. When a dish says something should be fall-apart tender, I take that literally. It’s the way I grew up eating chicken cooked by my Italian-American mother. That means, for me, the chicken should braise in the liquid for at least 90 minutes if you’re close to sea level and longer if you're at a higher elevation. You can short-circuit that if you want but I think the texture of the dish will suffer.
Votes: 0
Rating: 0
You:
Rate this recipe!
Course Mains, Poultry
Cuisine Italian
Prep Time 30 minutes
Cook Time 2 1/2 hours
Servings
people
Ingredients
Course Mains, Poultry
Cuisine Italian
Prep Time 30 minutes
Cook Time 2 1/2 hours
Servings
people
Ingredients
Votes: 0
Rating: 0
You:
Rate this recipe!
Instructions
  1. Pass the can of tomatoes through a food mill to remove seeds and hard bits of tomato. Reserve the tomato puree.
  2. Slice the peppers into triangular pieces or thick strips.
  3. Using a large heavy-bottomed sauté pan, sauté the garlic in the olive oil over medium heat until medium brown. Discard the garlic.
  4. Sauté the chicken in the garlic-flavored oil over high heat, starting skin side down to render additional fat from the skin, flipping twice, until well browned. Remove and reserve chicken.
  5. Add the peppers to the oil and sauté briefly over high heat to put a light char on some of them. Remove and reserve peppers.
  6. Add the wine to the sauté pan, bring to a boil, and scrape up all the brown bits.
  7. After the wine evaporates, add the broth, tomato puree and oregano. Mix well.
  8. Add the chicken, skin side down, along with any accumulated juices. Season with salt and pepper.
  9. Simmer, partially covered, approximately 30 minutes (or, if you live at high altitude as I do, 60 minutes). Turn the chicken over. Remove and discard the skin (the skin adds lots of flavor as well as collagen to the sauce for a great mouth-feel so please use bone-in and skin-on thighs).
  10. Add the peppers and continue to braise, partially covered, for approximately another hour until the chicken is literally fall-apart tender. During cooking, taste and adjust salt, pepper, and oregano.
  11. Transfer the chicken and peppers to an oven-proof casserole.
  12. If the sauce is not thick, boil quickly to reduce it. Pour the sauce over the chicken.
  13. Sprinkle the top with Pecorino Romano cheese.
  14. Bake at 350°F to brown the top, approximately 15-20 minutes.
Recipe Notes

Copyright © 2020 by Villa Sentieri, LLC. All rights reserved.

Share this Recipe

Barbecued Chicken Thighs

July 25, 2018

For someone who tries to eat lower on the food chain, I sure love using my smoker.

Granted, I could smoke things like cheese and even some vegetables but meat is where the smoker really shines!

I’ve smoked pork shoulders, ribs, and turkey breasts, and I continue to expand my repertory, but I really enjoy smoking chicken thighs.

Smoking is often an all-day affair.  Sometimes it’s an all-night affair if one is smoking large enough pieces of meat.  So far, I’ve limited myself to smoking things that can go into the smoker at a reasonable time of the day.  I’m not one of those guys who wants to sit beside his smoker through the night with a cooler of beer at his side!

Join our mailing list and you’ll never miss a recipe again!

Chicken thighs cook in a relatively short period of time so they’re great when you want to limit attending to the smoker to just a few hours before dinnertime.

My smoker has an adjustment for the heat output but not temperature, per se. If the wind or external temperature change, the internal smoker temperature changes, too. Some day I’ll get a smoker with an actual thermostat but so far this one has served me well.

If you get a smoker with an automatic thermostat there would be almost no need to attend to the chicken thighs.  While I have a nice smoker, it doesn’t have a thermostat.  It has a control that puts out an adjustable but then constant amount of heat based on the setting similar to the way car heaters used to work before cars had real thermostats.  If the outdoor temperature or wind changes, the temperature inside the smoker will change due to the constant heat output.

Before I had a smoker, I used my gas grill to smoke.  It has a separate burner just for creating smoke from wood chips.  It has three other burners to actually cook the food plus a rotisserie burner.  Under many circumstances, the burner for the wood chips puts out enough heat to keep the grill at the proper smoking temperature.  When the weather turns cold, like the time I smoked a turkey on Thanksgiving, a little heat from one of the other burners is needed…just not a burner that’s actually under the food.

I sometimes use my gas grill to smoke things, including a whole turkey once.

This recipe makes use of two of my previously published recipes, my barbecue rub and my barbecue sauce.

Follow us on your social media platform of choice


If you don’t have a smoker (and I realize that most people don’t) you really can do these on a grill with indirect heat, either gas or charcoal.

Put on oven thermometer on the grate where you intend to put the chicken.  There should not be any heat coming from under that grate.  Heat up the opposite side of the grill using either gas or charcoal.  With a little experimentation, you’ll be able to keep the side of the grill, where the chicken will go, at the proper smoking temperature.  If your grill doesn’t have a separate place for wood chips, add some wood chips, soaked in water for 30 minutes, to the hot part of the grill from time to time.

Happy smoking!!! (Oh, and don’t forget the beer!)

Print Recipe
Barbecued Chicken Thighs
These chicken thighs are moist and fall-apart tender. See the Notes section for links to my recipes for barbecue rub and barbecue sauce. Professional kitchens often weigh liquids, hence the 4000 grams of water. 4000 grams would essentially be the same as 4 liters. The advantage of weighing the water, though, is that you can add ice to cool the brine down while still being exact about the quantity of water. This recipe scales easily.
Votes: 0
Rating: 0
You:
Rate this recipe!
Course Mains, Poultry
Cuisine American
Prep Time 40 minutes
Cook Time 4 hours
Passive Time 2 hours
Servings
people
Ingredients
Course Mains, Poultry
Cuisine American
Prep Time 40 minutes
Cook Time 4 hours
Passive Time 2 hours
Servings
people
Ingredients
Votes: 0
Rating: 0
You:
Rate this recipe!
Instructions
  1. Dissolve the salt in the water.
  2. Refrigerate the brine until cold. If you are weighing the water, you can add ice cubes to cool the brine quickly.
  3. Add the chicken thighs and weigh them down with a plate or a zipper lock bag full of water. Brine for two hours in the refrigerator.
  4. Remove the chicken thighs and pat them dry.
  5. Lay the chicken thighs skin-side down.
  6. Sprinkle liberally with garlic powder.
  7. Sprinkle with oregano.
  8. Sprinkle with barbecue rub.
  9. Wrap the skin around thigh, trying to enclose the meat as much as possible. Tie with twine.
  10. Rub the thighs generously with barbecue rub.
  11. Smoke at 225°F for 4 hours.
  12. Fifteen minutes before thighs are done, brush with barbecue sauce. Continue cooking for 15 more minutes.
Recipe Notes

Here is where you will find my recipe for barbecue rub and my recipe for barbecue sauce.

Copyright © 2018 by Villa Sentieri, LLC. All rights reserved.

Share this Recipe

Chicken Paprikash (Chicken with Paprika-Sour Cream Sauce)

November 13, 2017

I really don’t remember my Slovak grandmother doing much cooking. By the time I was old enough to pay attention to who was cooking, she was mostly just making the occasional pot of soup.

My Grandmother

My grandparents owned a semi-detached house and Uncle Frankie and Aunt Mary lived next door. Although they had separate front porches, they shared a back porch. Going back and forth was easy.


Follow us on Facebook:  Click HERE


Aunt Mary kept my grandparents well-supplied with food. My Aunt Ann pitched in from time to time as well.

My Grandfather

My grandparents were really keen on soup. I guess when you’re raising a family of seven sons through the Great Depression and its aftermath, on a steelworker’s income, preparing filling and budget-friendly food becomes a necessity.

After the early 1960s when my Uncle Gusty moved back to the United States from Japan with his wife and their children, all seven of my grandparents’ sons lived in Johnstown with their wives and children. Most of us would visit on Sunday afternoons arriving sometime after lunch and leaving before dinner.

My Grandfather and Father in the late 1960s. I used to wear the tie my dad is wearing to high school. I still have it! My father insisted that I tie a Full Windsor. Now I know where he got his preference!

Very frequently a large pot of soup would appear for anyone who needed a little something to hold him or her over till dinner. Often it would be potato soup or sour mushroom soup (made with dried mushrooms and spiked with a little vinegar). My father talked longingly about a sour cabbage soup called kissel which nobody was making any longer.

Other than soup, baba (sometimes written bubba), and sweets at the holidays, I don’t remember eating much at my grandparents’ house though I do remember my grandfather and my uncles consuming a fair amount of beer, and, on special holidays, shots of whiskey.

Me with my Grandparents in 1976

Most of the Slovak food that I ate was at home or at one of my uncle and aunt’s houses.

Chicken Paprikash is considered a Hungarian dish but it was common on the Slovak side of my family.  My grandfather was born in 1890 in a small town, Nitrianske Sucany, not too far from Bratislava, in what is now Slovakia.  My grandmother was born a few years later.  In 1909 when my grandfather came to America, he left what was then the Austro-Hungarian Empire.  Slovakia did not exist as a country.  Food diffuses with cultural contact (think about the popularity of Spam in both Hawaii and Korea which can be traced to the presence of the US military).  I suspect that’s how Chicken Paprikash became something made by my Slovak grandparents.

My version of Chicken Paprikash is a combination of my mother’s and my Aunt Ann’s. When I went to look up the recipe to make in preparation for this blog I discovered that I had never written it down! Luckily I remembered just how to do it.


Follow us


Click HERE to join our mailing list and you’ll never miss a recipe again!

Print Recipe
Chicken Paprikash
Using bone-in chicken with skin improves the flavor of the final dish. Flabby skin from braised chicken is not appetizing, however, so remove it near the end of cooking before putting the chicken in the finished sauce. Since paprika is the major flavor in this dish be sure to use fresh, high-quality paprika, preferably Hungarian. Sweet paprika was the norm in my family, not hot, and certainly not smoked which would totally change the flavor. You can use whatever chicken parts you prefer but I think the texture of slowly braised thighs is superior. Serve the chicken with buttered noodles or mashed potatoes, both of which go really well with the sour-cream-enhanced sauce.
Votes: 2
Rating: 5
You:
Rate this recipe!
Course Mains, Poultry
Cuisine Slovak
Prep Time 20 minutes
Cook Time 2 1/2 hours
Servings
people
Ingredients
Course Mains, Poultry
Cuisine Slovak
Prep Time 20 minutes
Cook Time 2 1/2 hours
Servings
people
Ingredients
Votes: 2
Rating: 5
You:
Rate this recipe!
Instructions
  1. Pat the chicken dry and season liberally with salt and pepper.
  2. Heat the oil in a large, heavy-bottomed sauté pan.
  3. Sauté the chicken on both sides, starting skin-side-down, until brown on both sides. Do not crowd the chicken. Do this in batches if necessary.
  4. Remove the browned chicken to a platter.
  5. Empty the oil from the pan and wipe clean.
  6. Add two tablespoons of butter. Sauté the diced onion until golden.
  7. Add the garlic and sauté until fragrant, approximately 1 minute.
  8. Add 3 tablespoons of paprika and sauté for approximately 15 seconds (paprika burns very easily).
  9. Add one cup of broth and mix well.
  10. Add the bay leaf, browned chicken pieces and any accumulated juices to the pan. Add additional salt and pepper to taste. Cover and braise on low until very tender, approximately 1 ½ hours being sure to taste for salt occasionally. Add additional broth if needed to keep the pan from drying out.
  11. About 15 minutes before the chicken is done, remove the skin and discard.
  12. When the chicken is fully cooked, remove it to a platter.
  13. Remove the bay leaf.
  14. Pour the cooking liquid, without straining, into a small pot and keep it warm on low heat. You can skim fat from the top of the cooking liquid if you would like.
  15. Wash and dry the pot used to cook the chicken. Melt the remaining 6 tablespoons of butter in that pot.
  16. Add the finely diced onion and sauté until golden.
  17. Add the flour and cook 2-3 minutes, until no longer raw.
  18. Add the remaining 1 tablespoon of paprika and sauté 15 seconds.
  19. With the flour-onion-paprika mixture on medium heat, begin to ladle in the reserved cooking liquid a little at a time, stirring well after each addition to avoid lumps.
  20. When all the cooking liquid has been incorporated, add any remaining chicken broth, if all of the original 2 cups was not used to braise the chicken.
  21. Bring to a boil and cook for one minute. The sauce should be quite thick. It will thin with the addition of sour cream. If the sauce is too thin, boil it longer as you will not be able to boil it once the sour cream has been added.
  22. Stir in the sour cream. Adjust salt and pepper. Add the chicken and heat gently without boiling.
Recipe Notes

Copyright © 2017 by VillaSentieri.com. All rights reserved.

Share this Recipe