Pasta con Salsa Cruda (Pasta with Uncooked Tomato Sauce)

September 8, 2017

Pasta with a sauce of uncooked tomatoes, herbs and aromatics is one of the delights of late summer. While this is very easy to make, and only a few tomatoes are needed, the tomatoes must be vine-ripened.

If you have just one tomato plant you’ll probably have enough tomatoes to make a batch of Salsa Cruda. Farmers Market tomatoes are a good option this time of year, too.

Some of our tomato plants in front of the greenhouse and behind mesh to protect them from deer

I make this with our home-grown tomatoes which are always red but using some of the amazing heirloom tomatoes in colors of yellow, green, or purple available in farmers markets would make a dramatic sauce.

Colorful heirloom tomatoes on the bar at The Kirby Hotel in Douglas, Michigan: @thekirbyhotel

If you can’t get vine-ripe tomatoes, or you want to make a similar sauce at a time other than late summer, you can use two or three roasted red peppers in place of the tomatoes. I’ll be posting a recipe for roasted peppers next month, after tomato season is over. In a pinch, you can buy a jar of good-quality roasted peppers.

Although this recipe is not a traditional “family of origin” recipe it is one that I have been making for almost 30 years. I consider it to be one of my traditions.

While you can still get vine-ripened tomatoes, give this easy and delicious recipe a try.


Follow us


Click HERE to join our mailing list and you’ll never miss a recipe again!

Print Recipe
Pasta con Salsa Cruda (Pasta with Uncooked Tomato Sauce)
This makes enough sauce for one pound of pasta. Use pasta with a shape that will hold the sauce, such a small shells or fusilli. Although you can make the sauce in the time it takes the pasta water to come to a boil, it is better if the sauce is allowed to sit at room temperature for about an hour to allow the flavors to meld. Since the sauce is not hot, it is important to warm the serving bowl with boiling water just before using. I usually put some of the pasta-cooking water to warm the bowl. The optional aromatics (hot peppers, kalamata olives, and blue cheese) are really optional but definitely help to round out the flavor.
Votes: 0
Rating: 0
You:
Rate this recipe!
Prep Time 15 minutes
Cook Time 15 minutes
Passive Time 1 hour
Servings
people
Ingredients
Prep Time 15 minutes
Cook Time 15 minutes
Passive Time 1 hour
Servings
people
Ingredients
Votes: 0
Rating: 0
You:
Rate this recipe!
Instructions
  1. Coarsely chop the hot pepper.
  2. Coarsely chop the garlic.
  3. Combine olive oil, garlic, and hot peppers, if using, in the food processor.
  4. Process until finely chopped.
  5. Add basil, parsley, Parmesan cheese and Kalamata olives, if using.
  6. Pulse a few times to chop.
  7. Add tomatoes, blue cheese, if using, salt, and black pepper and pulse until finely chopped, but not pureed.
  8. There should definitely be some texture to the sauce.
  9. Bring three quarts of water to a rolling boil.
  10. Season the water with 1/3 cup of salt.
  11. Add the pasta and cook until al dente.
  12. When the pasta is done, reserve about ½ cup of the pasta-cooking liquid to thin the sauce if needed.
  13. Drain the pasta.
  14. Drain the hot water from the serving bowl. Add the pasta and sauce to the warmed bowl. Toss well.
  15. If needed, thin the sauce with some of the reserved pasta water. This will likely not be the case but it is always a good idea to have some pasta-cooking water available just in case.
Recipe Notes

Copyright © 2017 by VillaSentieri.com. All rights reserved.

Share this Recipe

Green Beans with Parmesan Cheese

August 7, 2017

It’s Saturday morning, August 5th and I’m sitting on an airplane writing this post.  I’m bound for Baltimore to visit the younger of my two nephews and his wife and their son.  I have meetings in Washington, DC on Monday and Tuesday so I’m taking this opportunity to visit.

The family members and relatives with whom I am closest are scattered around and I don’t see enough of any of them.

What does all of this have to do with green beans, you might ask?

Everything.

And nothing.

Food is my connector. It connects me to people and places. It evokes memories. It helps to create new ones. It’s a set of shared experiences.

I can’t make my mother’s long-simmered tomato sauce without evoking a slew of memories. My strongest olfactory memory from childhood is being gently awakened by the smell of garlic sizzling in olive oil on Sunday morning as my mother began to make tomato sauce for that day’s dinner. This is the sauce I am making on Sunday at my nephew’s house.

Most recipes that enter my repertory do so because of their connection with people and places. They document my personal history in edible form and cement memories of good times shared with family and friends. Many are family recipes, mine or those of people I know. Some are not, like the Italian Walnut Crostata I created to replicate one I had sitting at a little bar in Venice drinking grappa with my father-in-law in 1996.

That crostata has family connections of a sort. One of the favorite non-Italian desserts in our family is nut roll, brimming with ground sweetened walnuts and encased in just enough lightly sweet yeasted dough to hold it together as it is rolled and baked. While nut roll is more of a Central and Eastern European dessert, it was common in Johnstown, Pennsylvania where I grew up with people from a wide range of ethnic backgrounds.

My Aunt Margie’s nut roll filling is flavored with citrus, hewing toward the Italian, while my mother’s has milk and honey, pointing more towards Eastern Europe. I suspect, though cannot prove, that my Aunt Margie’s filling is more like her mother’s (my Italian grandmother) and my mother’s is more like my father’s mother’s (my Slovak grandmother).

Nut roll is a pastry that I truly miss but it is challenging to make and I have never tackled it despite having my mother’s and my Aunt Margie’s recipes. Except for the one time my cousin, Donna, made it and sent me some and the two times that Michael Alcenius sent me some he made using my Aunt Margie’s recipe, I have been in a nut roll blackout since Aunt Margie died.

The walnut crostata was a revelation. There, in an easy-to-make Italian sweet pastry crust (pasta frolla), was a filling of sweetened, ground walnuts. It wasn’t nut roll but it certainly evoked all the right taste sensations.

I used my husband’s Great Aunt Fidalma’s recipe for pasta frolla and Aunt Margie’s recipe for nut roll filling, to create a dessert that is both reminiscent of that night shooting grappa with my father-in-law in Venice and that preserves recipes from my family and my husband’s family.

Now that I’ve gotten my mouth (and maybe yours) watering for walnut crostata, we’re going to make green beans! I hope, though, that you have a better understanding for the reason this blog exists: to document and preserve traditional recipes along with some sort of a personal story or vignette.

Having just said that, I can’t tell you precisely where this recipe came from but it’s been in my repertory for decades. It is the essence of simplicity, a hallmark of much of Italian home cooking. It also lends itself to being made almost exclusively in advance, making it a perfect dish for a last-minute put-together when entertaining or making a more complicated main course.


Follow us


Click HERE to join our mailing list and you’ll never miss a recipe again!

Print Recipe
Green Beans with Parmesan Cheese
The beans can be cooked in advance and shocked in ice water to stop cooking. The garlic can be sautéed in olive oil in advance, too. Just before serving, heat the oil and toss the beans briefly to warm them. In a serving bowl toss the beans with Parmesan cheese, salt and pepper. This dish can easily be doubled or tripled. Adjust the amount of Parmesan cheese and garlic to your taste. The olive oil is an integral part of the “sauce” so be generous.
Votes: 0
Rating: 0
You:
Rate this recipe!
Course Sides, Vegetables
Cuisine Italian
Servings
Ingredients
Course Sides, Vegetables
Cuisine Italian
Servings
Ingredients
Votes: 0
Rating: 0
You:
Rate this recipe!
Instructions
  1. Wash the beans and cut off the ends. I like to cut the ends at an angle for a better appearance.
  2. Bring a large pot of salted water to a boil.
  3. Meanwhile, bruise the garlic with the side of a chef’s knife.
  4. Add the olive oil and garlic to a skillet, large enough to hold the beans, and heat on medium-low heat until the garlic begins to sizzle.
  5. Sauté, over low to medium-low heat until the garlic is golden.
  6. Remove and discard the garlic.
  7. Remove the oil from the heat.
  8. When the water comes to a boil, add the beans and boil until crisp-tender. This will take just a few minutes depending on the beans and your elevation. The beans should not be crunchy but they should have a distinct “toothiness” and almost squeak as you bite into them.
  9. Drain the beans.
  10. If preparing the beans in advance, shock in ice water.
  11. Add the drained beans to the garlic-flavored olive oil. Heat gently if the beans are cold.
  12. Off the heat, mix in the parmesan cheese, salt to taste, and a generous amount of freshly ground black pepper.
  13. Toss well and serve immediately.
Recipe Notes

Copyright © 2017 by VillaSentieri.com. All rights reserved.

Share this Recipe

Frittata con Cipolle (Frittata with Onions)

July 10, 2017

American chefs frequently do not understand Italian food.  Many can produce technically excellent dishes that lack the Italian sensibility.

One common error is putting in too much.  Too much of most anything into most anything.  To be sure, there are many restaurants headed by American chefs that serve excellent Italian food but there are far more that just don’t get it.

The usual culprit is what Italians would call the First Course, Il Primo Piatto.  This is soup, pasta or rice that is served as a separate course before the the Second Course, Il Secondo Piatto (usually meat, fish, or other protein), which is usually accompanied by side dishes, Contorni, in Italian.
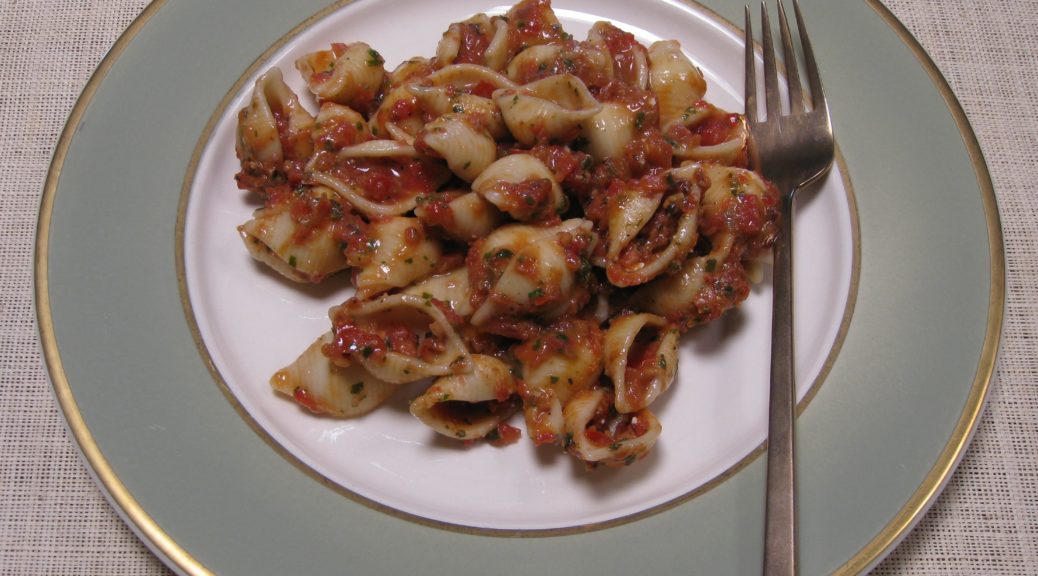
Pasta “specials” are quite prone to this phenomenon.  There are many otherwise excellent restaurants that think that if a little is good, more is better, when it comes to their pasta “specials.”  Because I love pasta, if I’m at a restaurant that has a pasta special I always ask what it is.  More often than not, I start yawning (well, not really) part way through the list of ingredients added to the pasta.  After more than 2 or 3 main ingredients (not counting things like garlic, olive oil, and a few herbs) it’s too much.  You don’t need shrimp, artichoke hearts, chopped tomato, diced onion, roasted peppers, capers, and olives.  It’s simply too much.  The distinctiveness of the ingredients is lost.

I’m ragging on pasta because that is the most common culprit at American restaurants featuring “Italian” food.  Risotto and polenta are prone to the same phenomenon, however.  The most common offense is that both of these dishes are turned into vehicles for butter, cream, and cheese.  That is not what an Italian would do.  In a typical Italian household, polenta is cornmeal, water and salt.  That’s it.  There’s not usually a pat of butter or a spoon of cheese in sight unless added at the table to the diner’s preference but even that is rare.  The polenta is a foil for whatever is served with it.  It is not meant to scream, “Look at me!”  That doesn’t mean it isn’t supposed to, or doesn’t, taste good.  It’s not intended to be so rich and filling that it tries to steal the spotlight or dampen one’s appetite for the rest of the meal.

Unlike polenta, which is meant to accompany other dishes, risotto is meant to stand on its own as a First Course before the Second Course.  Risotto alla Milanese is the only exception.  Traditionally Risotto alla Milanese accompanies a veal cutlet (in Milan, of course).  No other risotto would be served with the second course in an Italian meal.

I realize that most of the time we do not eat a formal Italian meal, even in a restaurant.  Most of us have either what would be the first course (pasta or risotto, usually) or the second course (meat or fish plus a side dish or two), preceded by some sort of antipasto (appetizer), which literally means “before the pasta.”  Even so a risotto that is a fat “bomb” overly laden with butter, cream and/or cheese, might be American but it is simply not Italian in its sensibility.

Frequently, the issue is clouded even more but the addition of too many ingredients to the risotto.  Look at the asparagus risotto from a few weeks ago.  There are no competing flavors:  a light broth to add some savoriness, a bit of Parmigiano Reggiano, and a dollop of butter.  This is a classically Italian risotto.

I guess I’m really beating this one.  I clearly have strong feelings about Italian food and what passes for Italian food in America.  Think purity of flavor and simplicity of ingredients.  If an ingredient doesn’t support the main ingredient it shouldn’t be added.  I believe Italian food is the original “ingredient-driven” cuisine.

Ok, off my soap box an on to a recipe; one that is the essence of simplicity.

I’m going to guess that most of you have not had a frittata.  It is a fluffy but firm egg dish, usually with some sort of vegetable included.  Sometimes a sprinkling of Parmigiano Reggiano or Pecorino Romano cheese is added but only if it supports the vegetable that is the star of the show.

Today’s frittata is onion.  That’s it, onion.  Plus a little olive oil and salt and pepper.  The onion is cooked slowly until it caramelizes.  The onion in this recipe was cooked for 50 minutes.  You should plan on 45-50.  It is mostly hands off, though you do need to stir every few minutes.

Once the eggs are added, they are cooked slowly.  Unlike a French omelet where the eggs are barely set and there isn’t (supposed to be) a touch of brown, a frittata is intended to be firm, slightly brown, and puffed up and airy from the cooking style.

Although I have converted to making, almost exclusively, a classic Italian frittata, when I was in college I did it the way my Italian Grandmother did.  She included a pinch of baking powder and a bit of flour.  It was a little firmer than a classic frittata; more like a savory eggy cake.

That frittata, alternating with sandwiches of butter, onion and blue cheese on homemade bread (not on the same day), constitute my lunchtime memories from my junior year in college.


Click HERE to join our mailing list and you’ll never miss a recipe again!

Print Recipe
Frittata con Cipolle (Frittata with Onions)
I recommend NOT finishing the frittata under the broiler as called for by a number of food writers. First, it isn’t traditional. Second, if the frittata doesn’t slide out of the pan easily so that it can be flipped, you won’t be able to get it out of the pan to serve it after putting it under the broiler. I like using a good quality, heavy-bottomed, non-stick pan though a well-seasoned cast iron pan would work too. It is easier to get the frittata out of the pan if it has sloping sides rather that sides that are completely vertical. You can caramelize the onions several hours in advance and then complete the frittata later.
Votes: 0
Rating: 0
You:
Rate this recipe!
Prep Time 10 minutes
Cook Time 1 1/2 hours
Servings
people
Ingredients
Prep Time 10 minutes
Cook Time 1 1/2 hours
Servings
people
Ingredients
Votes: 0
Rating: 0
You:
Rate this recipe!
Instructions
  1. Slice the onion in half from top to bottom then across into 1/8 inch thick half-rounds.
  2. Warm the olive oil in a 12 inch heavy-bottomed sauté pan with sloping sides.
  3. Add the sliced onion and ½ teaspoon of salt.
  4. Cook over medium heat, stirring often until the onions are soft and caramelized. The onions should take on a uniform golden, then light brown, color. There should not be any dark brown or dry spots. This will take between 45 and 50 minutes. If it takes longer don’t worry. If it seems to happen in less time, the heat is probably too high.
  5. This picture was taken 15 minutes after the onions were added.
  6. This picture was taken 30 minutes after the onions were added.
  7. This picture was taken 45 minutes after the onions were added.
  8. This picture was taken 50 minutes after the onions were added. They are appropriately caramelized.
  9. While the onions are cooking, beat the eggs with a fork. Do not use an egg whip. The idea is not to beat in air but to uniformly combine the whites and yolks. Season with the remaining ¼ teaspoon of salt and freshly ground black pepper to taste.
  10. When the onions are fully caramelized, be sure there is an even slick of oil in the bottom of the pan. If not, add a tablespoon or so more.
  11. Turn the heat to medium high and evenly distribute the caramelized onions on the bottom of the sauté pan.
  12. Pour the beaten eggs on top of the onions, being sure to distribute the eggs evenly. DO NOT STIR THE EGGS once they are added to the pan. Immediately cover the pan and turn the heat to low.
  13. Cook until the eggs are just set in the middle and golden brown on the bottom, approximately 30 minutes. Move the pan around so that the heat is evenly distributed, including putting the pan off-center occasionally so there is heat directly on the edges of the pan, not just concentrated in the middle.
  14. When the eggs are just set in the center, the frittata should release easily from the pan. Sometimes it is helpful to run a silicone spatula around the edge of the frittata to help it release.
  15. Slide the frittata out of the pan and onto a large pizza pan.
  16. Invert the pan over the frittata.
  17. Grasp the sauté pan and pizza pan with both hands and flip them over in one quick motion.
  18. Put the sauté pan, with the now-upside-down frittata, back on the heat, uncovered, for about 5 minutes until the bottom of the frittata is golden brown.
  19. Slide the frittata onto a serving platter.
Recipe Notes

Copyright © 2017 by VillaSentieri.com. All rights reserved.

Share this Recipe

Pasta with Silky Zucchini Sauce

July 5, 2017

Pasta tossed with a sauce of some sort of vegetable cooked in olive oil is an Italian classic.  My mother frequently used either eggplant or zucchini, cooked them until they became very soft, and then tossed them with pasta.

I have one very vivid memory of this dish and it goes back to the summer of 1992.

After my mother was diagnosed with metastatic lung cancer in early summer 1992, she came to live with us.  Until the last few days of her life in early January 1993, she took over our kitchen, a very comfortable role for her.

Over the years prior to her diagnosis, she had become friendly with our next door neighbor, Carla.  During the last six months of her life she and Carla spent hours every day visiting and chatting.  This was a wonderful arrangement as my husband, Frank, and I were working long hours.  (It also led, through a number of interesting steps, to Frank and I becoming the god-parents for one of Carla and Billy’s children a few years later.  But that’s a story for a different day.)

Frank had very long work hours a couple days per week.  He rarely got home before 10 PM on those days.  My mother and I would eat dinner earlier and then she would set aside his food.

But she did more than that.

When he got home, she always warmed up his dinner and then sat with him at the table while he ate.  She never let him eat alone.  Most likely, I was upstairs in bed.  Since I got up earlier than Frank, I tried to be in bed by 10 PM to watch the news and go to sleep.

For some reason, the plate of pasta with zucchini sitting on the counter one evening to be warmed up for Frank’s dinner, knowing my mother would sit with him as he ate, is the mental image I have of this dish.  I can’t make this without that image appearing in my mind.  I think somehow that dish, made of very humble ingredients, came to represent the best of my mother’s nurturing characteristics.

She was a fierce advocate for her children.  My sister and I both started school a year early because my mother thought we were intellectually ready (she was right) and she wasn’t going to take “no” for an answer from the school authorities.

Once, in second grade, my sister arrived home with the hem of her school uniform let down because one of the nuns thought it was too short.  My mother promptly hemmed it, even shorter, and sent my sister to school the next day without ever saying a word.  The hemline stayed put.

You didn’t mess with my mother where her children were concerned.

She continued cooking for us until less than a week before she died.

In those years we always gave a New Year’s Day party, a casual affair where people could come and relax and chat and eat.  The Soviet Union was officially dissolved December 25, 1991.  Most of 1992 saw the effects of the dissolution so the theme of our January 1, 1993 party was the dissolution of the Soviet Union.

For the party, my mother made 14 dozen stuffed cabbage rolls and 17 dozen potato pancakes!

She sat on the sofa throughout the entire party, chatting with everyone and being the life of the party.  The next day she took a turn for the worse and on the morning of January 6th she died.

Some of my best memories involve food, most of which was cooked by family and friends who are no longer with us.  Capturing and preserving those recipes is the way that I pay homage to them and to the culture and values they passed on to me.


Click HERE to join our mailing list and you’ll never miss a recipe again!

Print Recipe
Pasta with Silky Zucchini Sauce
Zucchini are cooked to a silky softness to make a luscious sauce for pasta. Finishing the pasta in the pan with the zucchini and adding some pasta-cooking liquid, Parmesan cheese, and a couple of glugs of olive oil creates glossy sauce with a wonderful mouthfeel. When choosing zucchini, pick small ones, preferably not more than about six inches long. They should be firm and have glossy skin. It will take about 4 or 5 to yield four cups of sliced zucchini. Crushed red pepper is completely optional. If you have fresh basil you can omit the dry basil and toss in a tablespoon or so of basil chiffonade when you combine the pasta with the zucchini.
Votes: 0
Rating: 0
You:
Rate this recipe!
Prep Time 15 minutes
Cook Time 1 hour
Servings
people
Ingredients
Prep Time 15 minutes
Cook Time 1 hour
Servings
people
Ingredients
Votes: 0
Rating: 0
You:
Rate this recipe!
Instructions
  1. Dice the onion.
  2. Peel the zucchini and slice approximately ¼ inch thick.
  3. Mince the garlic.
  4. In a large, heavy-bottomed sauté pan large enough to hold the pasta and sauce, sauté the onion and crushed red pepper, if using, over medium heat until the onion is golden and soft. Do not brown the onion.
  5. Add the zucchini. Toss to coat with oil. Season liberally with salt and freshly ground black pepper.
  6. Sauté on medium to medium high heat, adjusting from time to time to avoid browning the zucchini.
  7. Add the dry oregano and dry basil, if using, after about 20 minutes.
  8. Continue to sauté, stirring often, until the zucchini is quite soft, but still intact. It can turn golden but should not brown. Taste and adjust salt and pepper while the zucchini is cooking.
  9. Add the minced garlic and cook until fragrant, about 5 minutes longer.
  10. The dish can be prepared several hours in advance to this point. Simply take the sauté pan off the heat and cover it.
  11. Bring three quarts of water to a rolling boil. Add 1/3 cup salt. Add the pasta and cook at a full boil until the pasta is almost al dente. It should still be just the tiniest bit hard in the center.
  12. Reserve at least one cup of pasta-cooking liquid.
  13. Drain the pasta and add it to the zucchini in the sauté pan. Add about ½ cup of reserved pasta-cooking liquid and fresh basil, if using, and cook over medium heat at a light boil until the pasta is al dente. Add more pasta-cooking water as needed. There should be some liquid in the pan when the pasta is finished.
  14. Off the heat, stir in the Parmigiano Reggiano cheese and 2 tablespoons of extra virgin olive oil. Add a bit more pasta-cooking liquid if needed to emulsify the cheese and olive oil to create a glossy sauce that just clings to the pasta.
  15. Taste and adjust salt and pepper.
Recipe Notes

Copyright © 2017 by VillaSentieri.com. All rights reserved.

Share this Recipe

Homemade Pizza

June 26, 2017

Before my bread machine it was my Kitchen Aid stand mixer.  Before my Kitchen Aid stand mixer it was my hands.  I have always enjoyed making bread.

Junior year in college was when my bead making got started in earnest.  That was the year that I lived in the International Residence Project at the University of Pennsylvania.  I was notified of my acceptance into the Project, a College House arrangement that occupied two floors of a high-rise dorm, late in my sophomore year.  Current and incoming residents of the Project met at a social event where I was introduced to the roommate to whom I had been assigned for the coming school year, Ray Hugh from Georgetown, Guyana.

Ray and I started hanging out together for the last part of sophomore year and found that we really hit it off.  Since we were both staying in Philadelphia for the summer, and since students could not stay in undergraduate dorms during the summer, we did what most undergrads did during the summer.  We sublet an apartment in Graduate Towers from graduate students who were not staying in Philadelphia for the summer but who, as graduate students, had year-long leases.

I had pretty regular hours working in a research lab for the summer but that left evenings and weekends free to explore cooking which Ray and I did together.  It quickly became clear that the kitchen in our apartment in the International Residence Project, which we would begin occupying in September, was going to need an upgrade.

At my request, my father made a five-foot long kitchen counter with a laminate top.  There was in integrated pull-out table that would seat two in the regular configuration but four when pulled out.  That counter became the epicenter of our cooking universe.  Set opposite the Pullman kitchen (three electric burners, an oven, an under-counter refrigerator, and an integrated sink) we had a very efficient kitchen set-up.  A deep shelving unit that I made housed equipment and several stacks of plastic milk crates held ingredients for which there otherwise would have been no space.

I made bread on that counter every week, kneading it by hand.

I made bread the way my Italian grandmother did.  Flour, water, salt, and yeast went into a big bowl.  The yeast was not proofed.  I mixed the ingredients by hand, adding more flour as needed.  Periodically I would rub the inside of the bowl with lard.  After enough flour had been added, I would put the dough on the counter and knead it for about ten minutes.  The dough would always rise twice, getting punched down and kneaded lightly after each rise, before being put in bread pans for the third and final rise before being baked.

Decades later I got my first Kitchen Aid stand mixer and started using that to make bread.  Good thing, too, because I was starting to have trouble with my joints from all the kneading necessary.

A few years ago I got my first bread machine, a Zojirushi BB-PAC20.  While I have no doubt that bread baked in an oven is better I also have no doubt that we would not eat anywhere as much homemade bread if I had to do all the mixing, rising, shaping, and baking unaided.

With less than five minutes’ work spent measuring ingredients, I can push a button and have bread a few hours later.  And I am completely at peace with the ingredients in my bread.  No sugar.  No high fructose corn syrup.  No dough conditioners.  No preservatives.  Nothing but flour, water, salt, olive oil and yeast!  The bread machine has more than paid for itself in savings.

My Zojirushi BB-PAC20 bread machine

I especially like the dough cycle.  As noted in a previous blog post, I use the dough cycle to make the dough for my focaccia.  A quick final rise after being shaped and the focaccia is ready for the oven.  The dough cycle also makes pizza dough in a snap.  I like to make it at least one day in advance and allow it to rise in the refrigerator.  Two days in advance is even better.

I still pretty much use the same recipe for bread dough that I followed in college though I’ve swapped out the lard for olive oil and modified the directions to suit mechanization instead of hands.  (Every now and then, I just get the urge to do it by hand, though!)

Usually I bake pizza in a wood-burning oven.  Since wood-burning ovens are not very common, the pizza featured in this post was baked in a conventional oven.  I don’t have a pizza stone since I don’t usually bake pizza in the oven.  All the better though, since I know few people who have pizza stones.   I simply went old school and used heavy aluminum pizza pans.  I didn’t even use the convection feature!

Our DoughPro wood-burning oven from Australia
Baking chamber above and fire chamber below

Until a few years ago I always cooked my pizza sauce.  Then I tried uncooked sauce as is often done in Naples and found that I really prefer it.  It has a fresher taste and it is really easy to make.  (Sorry mom!)

I usually use tomato puree because I like a smooth sauce but crushed tomatoes work well if you prefer a chunkier sauce.  You can also just whizz a can of whole peeled tomatoes in the blender or food processor to whatever degree of chunkiness or smoothness you want.

An array of tomato products

Print Recipe
Homemade Pizza
Make the dough at least one day before you plan to bake the pizzas. The dough will benefit from the slow rise in the refrigerator. Two days is even better. Be sure to put the balls of dough in containers that seal well to keep the dough from drying out and that are large enough to hold the dough after it rises. Remove the dough from the refrigerator the morning of the day you plan on making pizza. It will take 3-5 hours to warm up and rise. If you’re not ready to make pizza when the dough has doubled in bulk, just punch it down and allow it to rise again. The dough recipe makes enough for two 16 inch pizzas but the sauce is enough for four. Extra sauce will keep in the refrigerator for 4-5 days. Since I make so much bread, I buy dry yeast in bulk. You can substitute one envelop of yeast for the two teaspoons of yeast called for in the recipe. For the sauce, use tomato puree if you prefer a smoother sauce and crushed tomatoes if you prefer a slightly chunkier sauce. In either case, really good tomatoes are called for. Buy genuine San Marzano tomatoes imported from Italy, if possible. I find Cento to be a good brand and generally available in the markets in my area.
Votes: 0
Rating: 0
You:
Rate this recipe!
Prep Time 40 minutes
Cook Time 15 minutes (for each)
Passive Time 24 hours
Servings
pizzas
Ingredients
Pizza Dough
Pizza Sauce
Prep Time 40 minutes
Cook Time 15 minutes (for each)
Passive Time 24 hours
Servings
pizzas
Ingredients
Pizza Dough
Pizza Sauce
Votes: 0
Rating: 0
You:
Rate this recipe!
Instructions
Pizza Dough
  1. One or two days before you plan to bake the pizza, prepare the dough.
  2. You can use the dough cycle of a bread machine, the dough hook of a stand mixer, or you can make the dough by hand following the directions in the blog post.
  3. If using a bread machine, follow the manufacturer’s directions for the dough cycle.
  4. If using a stand mixer, put warm, not hot, water in the bowl of the mixer. Add four cups of flour, the yeast, and salt and begin to mix. Gradually pour in the olive oil. Add enough of the remaining flour to make a slightly tacky dough. Chances are you will need all of it. Allow the dough hook to knead the dough for 8-10 minutes.
  5. If making the dough by mixer or hand, oil the dough and place in an oiled bowl. Allow the dough to rise at room temperature until doubled in bulk, covered lightly with a kitchen towel.
  6. After the dough has doubled, or when the bread machine has completed the dough cycle, remove the dough and punch it down.
  7. Divide the dough in half and shape into two balls. Rub the surface of each ball with oil and put each one into a separate oiled bowl or LARGE plastic container.
  8. Cover tightly using plastic wrap if needed.
  9. Put the dough in the refrigerator until the morning of the day you plan to bake the pizza.
  10. On baking day, remove the dough from the refrigerator in the morning and allow it to sit at room temperature until doubled in bulk. This will take 3-5 hours (or maybe a bit longer if your refrigerator is really cold). If you are not ready to bake the pizza, just punch the dough down again and let it rest. It is better to err on the side of taking it out of the refrigerator too early rather than too late!
Pizza Sauce
  1. Mince the garlic.
  2. Combine all the ingredients for the sauce.
  3. Cover and refrigerate overnight to allow the flavors to mellow.
  4. Some brands of tomatoes can be a bit tart. Taste the sauce right before you use it and, if necessary, add up to ½ teaspoon of sugar but no more. (Some people consider this heresy but it is a common Italian technique to counter tomatoes that are too tart. Remember agricultural products vary and sometimes you need to use your judgment to correct a situation that is not addressed by the recipe.)
Assembly of Pizza
  1. Shred the mozzarella on the tear-drop shaped holes of a box grater. Reserve.
  2. Lightly dust a 16 inch round pizza pan with cornmeal.
  3. Put the dough on a metal pastry "board" or a second pizza pan and gently stretch it by pressing on it and moving your hands apart. The dough will spring back. Each time it will stay stretched a little more. After six to eight stretching motions, allow the dough to rest for several minutes to permit the gluten to relax. This will make it easier to stretch. I usually allow two or three such rest periods.
  4. Stretch dough into a 16” round.
  5. Flip the dough over onto the cornmeal-dusted pizza pan. (OK, I don't have the skill to stretch the dough by tossing it in the air and putting it on the pan so this is my hack. If you can toss pizza dough in the air, please give me a lesson!)
  6. Spread the sauce on dough to within one inch of the edge.
  7. Add toppings of your choice, if desired.
  8. Evenly sprinkle with shredded mozzarella.
  9. Bake the pizza at approximately 450°F until the edges are golden brown and the dough is fully cooked, approximately 12-15 minutes.
Recipe Notes

Copyright © 2017 by VillaSentieri.com.  All rights reserved.

Share this Recipe

Orecchiette with Broccoli and Anchovies

May 10, 2017

A few times in my life I’ve been lucky enough to cook with my husband’s Great Aunt Fidalma.  It’s always been in my kitchen, though I keep hoping to make a trip to Tuscany to cook with her in her kitchen.

Zia Fidalma speaks Italian and German.  I speak English.  Though I studied German in high school and college, and at one point was passably able to translate scientific German, my command of spoken German (and at this point, scientific German) is hopeless.  I studied Italian for a while too, but the best I can do is read a menu, order in a restaurant, and find out where the restroom is.

So, cooking with Zia Fidalma starts with a language barrier but it doesn’t seem to matter.  Somehow we communicate.

Mostly that means Zia Fidalma speaks slowly in Italian emphasizing the words I am likely to understand most.

Like the time we were in my kitchen in Santa Fe preparing dinner for twelve.  The first course was spaghetti al pesto.  A pile of basil stalks from my father-in-law’s (Zia Fidalma’s nephew) garden were on the kitchen counter.  Zia Fidalma was plucking off basil leaves one at a time, inspecting each one.  At one point, she looked up at me holding a leaf and said “è brutta” (it’s ugly), clearly wanting my agreement to discard the less-than-perfect leaf.

One day at our home in Chicago, she was making risotto for lunch.  It had a very similar flavor profile to this pasta in that it contained broccoli, garlic and anchovies.

Zia Fidalma cranked up the 15,000 BTU burner to high.  She sizzled some minced garlic for a moment.  There was a vague hint of smoke coming from the pan.  She added the anchovies and stirred them about.  Smoke started to billow up.  She smiled knowingly.  She added the broccoli, undeterred.  Smoke continued.  She stirred.  I stood there horrified.  Then she lightly charred the broccoli.  I was even more horrified.  At long last some liquid went in and the rest of the risotto-making followed a familiar pattern.

I try to avoid smoking oil at all cost when cooking.  I was more than a little concerned about how the risotto would taste.

However, I have never had anything but fabulous food from Zia Fidalma, so I had to trust that this would be OK, too.

This wasn’t her first rodeo.  She’d been making risotto since before I was born.

In the end, all I can say is that the risotto was wonderful.  It had layers of flavor.  It provided an important lesson about how techniques different from what one would typically use can create incredible flavors.

So, if you see wisps of smoke coming from the pan as you singe the broccoli for this recipe, don’t fret.  Just raise a toast to Zia Fidalma, and enjoy!

Print Recipe
Orecchiette with Broccoli and Anchovies
My husband’s Great Aunt Fidalma, who lives in Tuscany, showed me how to cook the broccoli in this manner. Previously, I parboiled the florets and added them and the beans to the sautéed garlic and anchovies. This method adds layers of flavor that cannot be obtained by just boiling the broccoli. I prefer to use home-cooked kidney beans following my recipe for Cannellini alla Toscana. You can use either red or white (cannellini) beans but the red ones add more color contrast. As an alternative you can use one 15 ounce can of beans. Do not discard the liquid in the can as it will improve the body of the sauce.
Votes: 0
Rating: 0
You:
Rate this recipe!
Prep Time 15 minutes
Cook Time 30 minutes
Passive Time 15 minutes
Servings
people
Ingredients
Prep Time 15 minutes
Cook Time 30 minutes
Passive Time 15 minutes
Servings
people
Ingredients
Votes: 0
Rating: 0
You:
Rate this recipe!
Instructions
  1. Put 3 quarts of water and 1/3 cup salt in a 5 quart stockpot or Dutch oven. Bring to a boil over high heat.
  2. Meanwhile, cut the thick stems off the broccoli just below where the stems start to branch into individual florets.
  3. Cut the individual florets off the broccoli by cutting lengthwise through the stalk from top to bottom.
  4. Cut off any remaining stalk just below the floret. These tender stalks can be cut crosswise into one-half inch pieces and added to the florets.
  5. You can use some of the thicker stalks as well, if you wish. To do so, use a vegetable peeler to remove the tough outer skin. Dice the peeled stems into 1/3 inch cubes. Reserve these diced stalks separately from the florets and diced tender stalks.
  6. When the salted water comes to a boil, add the diced, peeled stalks, if using. Return to a boil and cook for 2-3 minutes until they just begin to get tender. Using a spider or large slotted spoon, remove the stalks from the water and plunge them into a bowl of ice water to stop cooking. When cool, drain in a colander.
  7. Keep the water on low heat so you can return it to a boil quickly when needed to cook the pasta.
  8. In a heavy-bottomed pan large enough to hold the finished dish, sauté the garlic over medium high heat until it turns fragrant, about 30 seconds.
  9. Add the anchovies and their oil and continue to sauté, breaking up the anchovies till they turn to a paste.
  10. Continue to cook until the anchovies darken slightly, about 1-2 minutes.
  11. Add the broccoli florets and diced tender stems. If using, add the partially cooked peeled stems. Season with salt and freshly ground black pepper.
  12. Sauté on high heat, stirring very frequently, until some of the broccoli florets just begin to singe, about 5 minutes.
  13. Add the crushed red pepper. Stir to combine.
  14. Add the wine and cover with a tight fitting lid. Cook over medium high heat till the florets are cooked through but not mushy, shaking the pan occasionally.
  15. If all the wine evaporates before the broccoli is cooked, ladle in a bit of the pasta cooking liquid and continue.
  16. When the broccoli is cooked, add the beans and their cooking liquid along with the oregano. Bring to a simmer over gentle heat.
  17. Meanwhile, return the pasta-cooking water to a rolling boil and add the pasta. Cook until the pasta is slightly shy of al dente. The pasta will finish cooking in the sauce.
  18. Put about ¾ cup of pasta cooking liquid into the beans. Reserve another cup of the liquid.
  19. Quickly drain the pasta and add to the beans. Stir well. Bring to a gentle boil, uncovered. Cook stirring occasionally until the pasta is al dente. Add as much of the reserved pasta-cooking liquid as needed to have enough sauce to coat the pasta and broccoli.
  20. The starch in the pasta-cooking liquid will add body to the sauce. One way to incorporate more of the pasta-cooking liquid is to cook the pasta over higher heat so that you can add, and boil off, more of the liquid, leaving the starch behind.
  21. When the pasta is cooked, remove the pan from the heat and stir in the Parmesan cheese and 1 teaspoon freshly ground black pepper. Taste and adjust salt after adding the cheese.
  22. Stir in the finishing extra-virgin olive oil. This will make the sauce glossy and add additional flavor.
  23. The starch from the pasta water and bean-cooking liquid along with the cheese should create an emulsion with the oil. You may need to add more of the reserved pasta-cooking liquid to loosen the sauce.
  24. Serve immediately. Pass extra Parmesan cheese at the table.
Recipe Notes

Copyright © 2017 by VillaSentieri.com. All rights reserved.

Share this Recipe

Pear, Celery and Arugula Salad with Lemon Dressing

December 26, 2016

I grew up in a family that put salad on the table at the same time as the rest of the meal.  I married into a family that does the same.  However, in the years between leaving home to go to college and getting married I most definitely converted to serving salad after the main part of the meal was over.  Notice, I didn’t say main course because the other change I made was thinking of the meal as comprising an antipasto (even if it is just a nibble of cheese and a cracker for a family meal) followed by, what Italians would call, the first course (il primo piatto) followed by a second course (il secondo piatto).

In an Italian meal, the first course is usually pasta, or soup, or risotto.  The second course  usually consists of meat or fish with several side dishes (contorni).  After that comes the salad.  Granted, there are exceptions to this sequence, even in Italy.  One of the most classic exceptions is serving Risotto alla Milanese with a breaded and fried veal chop.  OK, so these days, I try not to eat baby animals, so veal is pretty much off the menu at our house, but the point is Risotto alla Milanese is typically served with the meat, not before the meat.

The general rule that the sequence is antipasto, then first course, then second course, then salad was made abundantly clear when my Italian tutor had dinner at our house a few years ago.  For some reason, even though my in-laws grew up in Italy, we served spaghetti and meatballs (very good spaghetti and meatballs, mind you!).  Where it got interesting, however, is that we all ate the spaghetti and meatballs at the same time (for full disclosure, I didn’t touch my salad until afterwards).  My tutor, hailing from Italy however, ate her pasta first.  Only then did she put a meatball or two on her plate for her second course.  Only after that did she touch her salad!

When I am serving dinner for company, the salad always comes after the second course.  I’d rather not serve salad than serve it with the rest of the meal.  Salads, by design, have sharp dressings meant to cleanse the palate.  You can’t go back and forth between a subtly seasoned dish (whether it be pasta or fish or meat) and salad and do justice to the subtlety of the first.  The vinegar and/or lemon juice and/or mustard (and/or whatever else you put in your salad dressing) doesn’t allow that.  Forget what it does to the wine that you’ve paired with the dish!  If it’s just family, however, in the interest of domestic harmony, the salad goes on the table at the beginning.  I still don’t eat mine till the end but I can’t say the same for others.

Print Recipe
Pear, Celery and Arugula Salad with Lemon Dressing
Pears add a welcome freshness to this salad that is a perfect antidote to winter when so little really good fresh produce is available. This may be a lot of pear for some but the sweet juicy taste is a great contrast to the crunch of the celery and the peppery bite of the arugula.
Votes: 0
Rating: 0
You:
Rate this recipe!
Prep Time 15 minutes
Servings
people
Ingredients
Prep Time 15 minutes
Servings
people
Ingredients
Votes: 0
Rating: 0
You:
Rate this recipe!
Instructions
  1. Squeeze about half a fresh lemon to make 2 ½ tablespoons of juice. Allow the juice to sit, uncovered, at room temperature for about an hour before using it to dress the salad. The flavor of the juice will improve.
  2. Remove the top of the celery stalks, the part where the center stalk gets much thinner and smaller stalks come off the sides. Reserve these pieces for another use. Cut the remaining celery stalks on a long diagonal to create thin long pieces.
  3. Using a sharp knife or cheese paring knife, cut about 18 curls of Pecorino Romano cheese.
  4. Peel the pears and cut into quarters lengthwise. Core the pears. Slice into thin wedges.
  5. Combine the lemon juice and olive oil. Shake well to combine.
  6. Toss the arugula and celery with about 2/3 of the lemon-olive oil dressing. Season with salt and pepper to taste and toss again.
  7. Divide the arugula and celery onto six plates.
  8. Toss the pears in the remaining lemon-olive oil dressing. Arrange the pear slices and Pecorino Romano cheese on top of the arugula. Season with freshly ground black pepper. Serve immediately.
Recipe Notes

Copyright © 2016 by VillaSentieri.com.  All rights reserved.

Share this Recipe