Italian Slow-Roasted Chicken or Turkey

April 21, 2017

For two countries that are geographically so close, Italy and France couldn’t be further apart on views of how to roast poultry.

The French typically roast quickly and at high temperature.

Italians are masters of the low and slow approach.

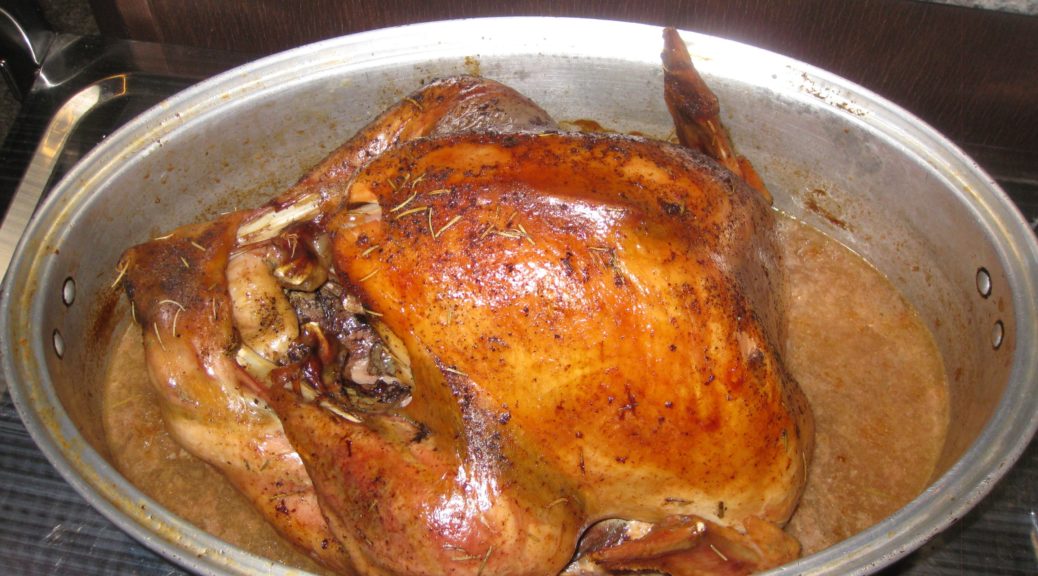
Italian roast chicken (or turkey, for that matter) literally falls apart.  The French version does not.  It’s a matter of style and technique, not quality or skill.

The usual style in the United States leans more toward France than Italy.  It’s the basis of the style of roasting described in most modern cookbooks and cooking magazines; higher temperatures rather than lower temperatures and yanking the bird out of the oven as soon as it reaches the minimum acceptable temperature to be “cooked” and “safe.”  Even when these magazines try to champion the approach of low and slow, they almost always miss the boat.  They miss the boat because they are still focused on the thermometer approach.

You can’t do low and slow if you’re focused on getting the bird out of the oven as soon as it hits the “safe” temperature.  Italian roast chicken is more like “pulled” chicken than the minimally cooked French version.  The whole mouthfeel is different.  So is the taste.

What I didn’t understand growing up is that my mother’s roast chicken and turkey drew from a broader Italian approach.

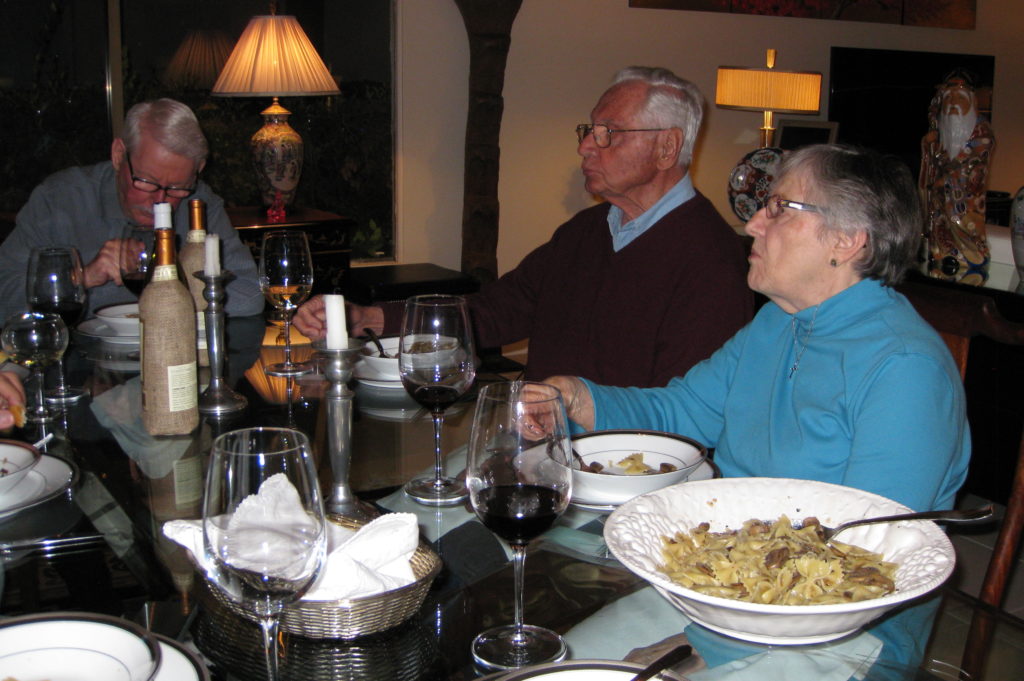
A few years ago we were in Tuscany having lunch with my husband’s Great Uncle Beppe and his family.

When the roast chicken was served, it was just like my mother’s!  Seasoned with garlic, rosemary, salt and pepper and roasted slowly, till it basically fell apart.

My mother’s mother came to the United States from Calabria around the turn of the 20th century at four years of age.  Here I was, nearly a century later in a province at the other end of the Italian peninsula eating chicken that could have been my mother’s, the way she learned it from her mother, who learned it from her mother.

I think that was a turning point for me in wanting to better understand Italian food traditions throughout the country and even throughout the Italian diaspora around the world.

Another amazing thing, when I think about it, is that my mother brined her chicken for an hour before cooking.  We’re talking the 1960’s here (probably the 1950’s too but I’m too young to remember that) way before brining was ever mentioned in cooking circles.  I can’t tell you why she did it or how it started but when I was learning to cook under her guidance, brining was always the first step for any recipe that included chicken.

Print Recipe
Italian Slow-Roasted Chicken or Turkey
This is a no-recipe recipe. I never measure the seasonings. It’s really pretty hard to use an inappropriate amount. The cooking time is pretty forgiving, too. Until you get the hang of it, I suggest planning on the longer cooking time and the higher temperature. If the chicken or turkey is falling-apart tender before you’re ready for it, just reduce the oven to 150°F to keep the bird warm. My mother would usually brine the bird for about an hour before cooking. Time permitting, I do the same. This basic recipe works for everything from a three pound chicken to an 18 pound turkey. Just for a point of reference, the pictures feature a 12 pound turkey.
Votes: 0
Rating: 0
You:
Rate this recipe!
Course Mains, Poultry
Cuisine Italian
Prep Time 10 minutes
Cook Time 40 minutes per pound
Servings
people
Ingredients
Course Mains, Poultry
Cuisine Italian
Prep Time 10 minutes
Cook Time 40 minutes per pound
Servings
people
Ingredients
Votes: 0
Rating: 0
You:
Rate this recipe!
Instructions
  1. Brine the bird, if you like, for about an hour.
  2. Thoroughly rinse and dry the bird.
  3. Prop the bird with the cavity facing up. Generously season the inside of the bird with garlic powder, rosemary black pepper and salt. As a matter of habit, if I'm using dried rosemary, I always crust it with my fingers before sprinkling it on the bird.
  4. Put the bird in a roasting pan, breast up, preferably one able to hold the bird rather snugly. The roasting pan should have a tight-fitting cover.
  5. Generously season the outside of the bird with garlic powder, rosemary, black pepper and salt.
  6. Add water (or wine) to the bottom of the roasting pan not over the top of the bird. You don't want to displace the seasonings.
  7. Cover and roast at 350°F for 30 minutes. Reduce heat to 275°F to 300°F.
  8. After the first hour, baste the bird with the juices in the roasting pan about every 30-45 minutes. Be sure to tip the bird, or use a basting bulb, to remove the juices from the cavity and add them to the juices in the bottom of the roasting pan.
  9. Roast for a total of 30-40 minutes per pound (including the first half hour). The bird should just about be falling off the bone.
  10. If there is too much liquid in the bottom of the pan or if the bird is not brown enough, uncover the pan for the last 30 minutes or so.
Recipe Notes

Poultry cooked this way will not submit to carving in a photogenic Norman Rockwell manner. It’s just a different style. It would be like trying to cut delicate slices from pulled pork. It’s not going to happen. That said, the joints will usually separate easily and you can cut along the grain rather than against the grain to portion appropriate-sized pieces for serving.

Copyright © 2017 by VillaSentieri.com. All rights reserved.

Share this Recipe

Home-Rendered Lard

April 18, 2017

Blame Upton Sinclair and Crisco.

The quality of baked goods hasn’t been as good since we abandoned lard in a wholesale way in the early 20th century in favor of partially hydrogenated vegetable shortening, with Crisco being the most recognized brand.

And our health has been the worse for it.

Study after study has shown that partially hydrogenated vegetable shortening, because of trans-fats, creates more cardiovascular disease than the animal fats, like lard and butter, it was meant to replace.

Most vegetable shortening was reformulated in the first decade of the 21st century to reduce the amount of partially hydrogenated fat but this still has not resolved all the health-related concerns.  There are two main reasons.  Many products still contain some partially hydrogenated fat.  It’s just that if there is less than half a gram per “serving” the manufacturer can list the amount as zero on the label.  The other reason is that the fully hydrogenated fats that have replaced most of the partially hydrogenated fats have been shown to alter metabolism in unpredictable ways.  It will likely take us decades to determine their true health consequences.

Several years ago I took a weeklong course at the Culinary Institute of America at Greystone in St. Helena, California.  Called “Healthy Kitchens, Healthy Lives” it was sponsored by Harvard University and the Culinary Institute of America.  It was a week of hands-on cooking, cooking demonstrations, and lectures aimed at health care professionals.  A major take-away point for me was one of the Harvard faculty emphasizing that there was “zero tolerance” for trans-fats.  It was as clear a statement on the issue as I had ever heard.

My solution (and it’s been my solution since the early 1980’s when there were enough studies about the effects of partially hydrogenated fats to convince me) is to only use either vegetable oils and fats, like olive oil, corn oil, canola oil or coconut oil, among others, or animal fats, like lard and butter.

I also try to maintain fidelity to the types of fats and oils that would be used traditionally in a given cuisine.  Thus, while I cook with coconut oil when making Indonesian food, for example, I won’t use it when I’m cooking Italian food.  For the same reason, I won’t use olive oil when I’m cooking Sri Lankan food.

As a youngster, I remember looking at a lot of hand-written recipes.  It was amazing to me to see how Crisco (and it really was Crisco at the time) came to replace what would obviously have been lard in a more traditional version of the recipe.  This is true for Totos, the Italian Chocolate Spice Cookies that were the subject of one of my first blog posts.

If I’ve convinced you that you don’t want to use solid vegetable shortening and you really want to try lard, you might ask why I’m suggesting that you render it rather than just buy lard from the supermarket.

Have you looked at the label of a block or tub of lard at the supermarket lately?

Well, it’s not just pure old lard any longer.  It’s lard and…you guessed it…hydrogenated lard!  There are also a number of preservatives thrown in for “good measure.”

You can, however, buy artisanal lard that only contains pure, rendered lard.  You may have a difficult time finding these products depending on where you live.  You’ll also pay dearly for them; something in the range of $20 to $24 per pound!

So, while I didn’t make a big deal out of the lard called for in my post on Totos, I’m suggesting now that you may want to render your own lard as a replacement for the solid vegetable shortening you’re currently using (both for your health and for the quality of your food) and because I will be posting a number of recipes where lard will be a key ingredient in the coming months.

I understand that rendering your own lard isn’t sexy.  Nobody is going to wax poetic about food containing lard the way they might for the perfect long-simmered Southern Italian ragu.  But it’s really not that difficult or time-consuming and having the best ingredients, not just the most convenient, will “up” your cooking game!

I started rendering lard for cooking my junior year in college.  (Kind of geeky, I know.)  I used it with abandon.  I had fried foods several times per week and every now and then I would make a complete meal of fried foods, what Italians call Frito Misto.

Unfortunately, I now accumulate extra weight in a way I didn’t in college.  So, I eat less fried food but when I do, I want it to taste great.  For that, there’s always lard.

Print Recipe
Home-Rendered Lard
Leaf fat is the best for rendering into lard but can be difficult to obtain. The next best is fatback. I’m lucky enough that I can buy good-quality pork fat from my local supermarket but I don’t really get to specify leaf fat versus fatback. However, an easy rule of thumb is, the firmer the fat, the better the lard. Don’t use soft caul fat for rendering lard. You want firm pieces of fat. Starting with some water in the pan allows the fat to begin to render without risk of browning. Rendering lard can take a few hours but it is mostly hands-off and yields a product that is superior to what is commercially available in supermarkets.
Votes: 0
Rating: 0
You:
Rate this recipe!
Course Miscellaneous
Cuisine General
Prep Time 20 minutes
Cook Time 3 hours
Passive Time 2 3/4 hours
Servings
Ingredients
Course Miscellaneous
Cuisine General
Prep Time 20 minutes
Cook Time 3 hours
Passive Time 2 3/4 hours
Servings
Ingredients
Votes: 0
Rating: 0
You:
Rate this recipe!
Instructions
  1. Remove any meat that is clinging to the fat as well as any discolored areas of fat.
  2. Cut the fat into long strips approximately ½ inch wide.
  3. Run the strips of fat through a meat grinder. If you don’t have a meat grinder, you can chop the fat by hand but this is very tedious.
  4. Put the ground fat and water into a heavy-bottomed pot.
  5. Cover the pot. Heat on low till some of the fat begins to render.
  6. Uncover the pot. Increase the heat to medium-low and cook, uncovered, stirring every 20 minutes or so until the fat is mostly rendered and the remaining bits of unrendered fat are just beginning to turn golden. This can take 2-3 hours.
  7. For the best quality pure white lard, do not brown any of the “cracklings” though a slight golden color is fine.
  8. Strain the lard into a metal container while still hot. Allow to cool uncovered then cover tightly and refrigerate.
  9. Lard will keep a very, very long time in the refrigerator.
Recipe Notes

Copyright © 2017 by VillaSentieri.com. All rights reserved.

Share this Recipe

Farfalle con Salsa di Piselli (Bowtie Pasta with Peas)

April 13, 2017

I’ve been silent for a while.  It wasn’t planned or anticipated.  Life just got in the way.  Mostly it was good stuff, though.  For example…

My husband’s birthday…a momentous one that ends in a zero…held at Trio Restaurant in Palm Springs.

A wedding (complete with a photo shoot using vintage hats!)  Congratulations Suzanne and Bob!!

A visit to the Trinity Site on one of the two days per year that it is open to the public.

Cooking at Palm Desert Food and Wine Festival.  Yep!  I got to cook at the Palm Desert Food and Wine Festival!!

That was a hoot!

The main events of the food and wine festival are held in a series of large tents on the top of a parking garage in Palm Desert.  The festival starts off on Friday with a multi-course, wine-paired James Beard Luncheon prepared by celebrity chefs.  The festival continues on Saturday and Sunday with The Grand Tasting and Chef Demonstrations.  There are other related events, such as special dinners, in the area, too.

There are three tents devoted to chef demonstrations.  Each demonstration runs for about an hour.  One demonstration per hour in each of three tents for two days is a lot of demonstrations.

Local chefs bring their own ingredients for their demonstrations and also prepare samples of the finished dish for about 100 audience participants.  Mostly what the local chefs really bring is their restaurant kitchen staff to do the work.

Celebrity Chefs have a whole different deal.  They submit their recipes.  The ingredients get purchased.  The commercial kitchen, set up in a tent on top of the parking garage, preps all the ingredients for their demonstrations and also prepares between 75 and 175 portions of the dish to be distributed to the audience.

I got to prepare food for The Beekman Boys, Stuart O’Keeffe, Zac Young, and Aarti Sequeira, among others.  The Beekman Boys, Josh and Brent, were gracious enough to come into the kitchen and chat with me during their Facebook Live post!  The post is below.

Hey everyone…we're live at the Palm Desert Food & Wine Show. Come take a peek behind the scenes…

Posted by Beekman 1802 Boys on Saturday, March 25, 2017


So, while I wasn’t posting recipes, for which I apologize, I was further pursuing my cooking goals.

After being in Palm Desert, where it was definitely spring, and returning to Santa Fe where it was definitely winter, I felt the need for something spring-like.  This pasta, with a sauce of spring-like peas, was exactly the thing!  Unless you have absolutely glorious peas from a local farmers’ market, I suggest using frozen peas.  This is exactly what I did to create a taste of spring in the Santa Fe winter!

Print Recipe
Farfalle con Salsa di Piselli (Bowtie Pasta with Peas)
If you have access to fresh peas from a farmers’ market please give them a try. If not, frozen peas work well. I’ve never had good luck with the “fresh” shelled peas in the supermarket. They always seem too starchy, and sometimes even musty tasting. Each pound of peas in the pod yields about 1 cup of shelled peas. For the 2 ¼ cups of peas needed for this recipe, I’d start with at least 2 ¼ pounds of peas in the pod. The vermouth adds an herbal quality and its slight bitterness balances the sweetness of the peas.
Votes: 0
Rating: 0
You:
Rate this recipe!
Prep Time 30 minutes
Cook Time 30 minutes
Servings
people
Ingredients
Prep Time 30 minutes
Cook Time 30 minutes
Servings
people
Ingredients
Votes: 0
Rating: 0
You:
Rate this recipe!
Instructions
  1. Combine the peas, thyme and water. Season with salt. Bring to a boil. If you are using frozen peas remove from the heat as soon as the water comes to a boil and continue with the next step. If you are using fresh peas, cook until the skins pop when bitten into and the peas are just cooked. This will take just a few minutes. The time is dependent on the peas so you’ll have to taste a pea about every 30 seconds so that you don’t overcook them.
  2. Remove ½ cup of the cooked peas from the cooking liquid. Rinse the peas under cool water to stop the cooking. Reserve the peas.
  3. Puree the remaining peas with the cooking liquid in a blender. Reserve the pea puree.
  4. Cut the pancetta into ¼ inch dice.
  5. In a wide, heavy-bottomed pan large enough to hold the cooked pasta comfortably, cook the pancetta over medium-low heat until crisp and brown. If the oil from the pancetta starts to smoke reduce the heat and add a tablespoon of water to quickly lower the temperature. It is important to brown the pancetta well, and to create browned bits in the bottom of the pan (without burning) to build flavor for the sauce.
  6. Remove the pancetta and reserve.
  7. Thinly slice the onion.
  8. Add the butter to the pan you just used to cook the pancetta. leaving in the rendered fat and browned bits. As soon as the butter melts, add the thinly-sliced onion and sauté until the onion is soft and golden brown.
  9. Add the vermouth to the sautéed onions. (Note, the recipe can be prepared several hours in advance up to this point. If doing so, as soon as you add the vermouth, remove the pan from the heat and cover tightly.)
  10. Bring the onion-vermouth mixture to a boil and boil rapidly until the vermouth has evaporated.
  11. Add the pureed peas, reduce heat to low, and gently warm the onion-pea puree mixture.
  12. Meanwhile cook the pasta in three quarts of heavily-salted, rapidly-boiling water. When the pasta is al dente, remove one cup of the cooking liquid and reserve.
  13. Drain the pasta and immediately add it to the warm onion-pea puree mixture.
  14. Increase heat to medium. Add the whole cooked peas, the pancetta, freshly ground black pepper to taste, and enough of the reserved pasta cooking liquid to make a sauce that just clings to the pasta. Cook for a minute or two to allow the sauce to bubble and thicken, stirring occasionally. Add more pasta cooking liquid as needed.
  15. Off the heat, add the Parmesan cheese. Stir well. Add a bit more pasta cooking water if the sauce becomes too thick after adding the Parmesan cheese.
  16. Add the fruity extra virgin olive oil, if using. Stir. Taste and adjust salt and pepper, if necessary.
Recipe Notes

Browning the pancetta and onions is critical to building flavor for the sauce.  It is better to use low heat than heat that is too high.  The starch in the pasta-cooking liquid helps to add body to the sauce.

Copyright © 2017 by VillaSentieri.com. All rights reserved.

Share this Recipe

Limoncello (Italian Lemon Liqueur)

March 13, 2017

I love mead, more so dry mead than sweet mead.  I first tasted mead at the age of 19 when my college roommate, Ray Hugh, and I visited his mother outside of London one summer.  For some reason, I never had it again but the experience stuck with me.  (I know you’re wondering how this is going to get around to Limoncello but read on!)

Fast forward to the late 1990’s when my husband began making wine at home.  We didn’t have a proper wine cellar at the time, though we ultimately built a temperature controlled wine cellar in the basement of the coach house at our estate on Oakdale Avenue in Chicago…right below the gear works that were once used to rotate the horse-drawn carriages on the floor above.

This is what the coach house looked like when we owned the property on Oakdale Avenue.

We had a whole row of five gallon carboys of grape juice bubbling away through air locks in our family room.  The wooden floors became stained purple.  Luckily we were planning on remodeling the room and tearing up the floor so it didn’t matter much.

The wine was surprisingly good.  We had both red and white.  We made labels for our “Rohkam House” wines that portrayed a picture of the house as it looked in the late 1880’s.  You can find that picture in a previous post.

After a few successes with wine, I asked Frank to make mead.  He settled on a recipe he fancied, though it was not entirely a traditional northern European mead.  It contained honey, of course, but the recipe specifically called for orange blossom honey which obviously has no connection to northern Europe.  The recipe also required some freshly squeezed orange juice instead of just water.  I was a bit skeptical about the non-traditional ingredients but…hey…I was finally getting my mead after all these years.

I found a beekeeper in Florida who would sell me five pounds of orange blossom honey from his own bees.  I ordered five pounds of honey.  I got fifty pounds sent overnight delivery!

It turns out that Muriel, the beekeeper, got two orders at the same time.  My order was for five pounds sent by UPS ground.  Someone else ordered 50 pounds sent express.  Muriel got the orders confused and we suddenly were in the business of making ten times as much mead as we had planned.

That also meant we needed ten time the number of oranges we had planned on to get enough juice.  I couldn’t bear to let those orange peels go to waste so I took out the recipe for limoncello that I got from relatives in Tuscany on our visit a couple of years earlier and decided to make it with orange zest instead of lemon zest.

I dubbed it arancello, using the Italian word for orange in the same way the Italian word for lemon is used to make the word limoncello.

I ultimately served it to friends and family visiting from Europe.  I explained what I had done to make it.  Not one of them had ever heard of anything like it but it was a hit.

Fast forward a decade or two and arancello started to be imported from Italy (often called orancello or orangecello).  While I can’t claim to have invented arancello, I am pretty sure it was not a common product when I got the idea to repurpose the family recipe for limoncello.

Oh, and that mead…it was pretty darn good.  We served it for many dinner parties in place of white wine.  Everyone thought it was wine.  It had that haunting floral quality so like a good Viognier.  Now that we have orange trees outside our door in Palm Springs maybe we can dig up that mead recipe again and make arancello as a buyproduct!

Print Recipe
Limoncello (Italian Lemon Liqueur)
While you will find recipes for Limoncello made with vodka, using higher proof alcohol yields a more consistent extraction of the flavor compounds. The higher the proof, the better. However, 190 proof alcohol is not available everywhere so I’ve adjusted this recipe to use 151 proof alcohol. The original recipe, which came from family in Tuscany, called for less than half the amount of lemon zest I've used here. Over successive versions for over the last 2 decades, I find I like these proportions best. Lemoncello does not keep indefinitely. It is best to use this within a year. Use the freshest lemons you can find for the most flavorful limoncello.
Votes: 0
Rating: 0
You:
Rate this recipe!
Course Beverages
Cuisine Italian
Prep Time 75 minutes
Passive Time 11 days
Servings
liters
Ingredients
Course Beverages
Cuisine Italian
Prep Time 75 minutes
Passive Time 11 days
Servings
liters
Ingredients
Votes: 0
Rating: 0
You:
Rate this recipe!
Instructions
  1. The starting point: lemons in the tree in Palm Springs.
  2. Using a vegetable peeler, carefully pare zest from lemons without including any of the white pith. Use a peeler that removes the zest in strips, not the zesters that remove little tiny curls.
  3. Weigh the zest.
  4. Combine the zest and alcohol in a large glass jar with a tight-fitting lid. I use a one-gallon jar, though something of approximately three quarts will work just fine.
  5. Put the jar out of direct sunlight in an area that is at comfortable room temperature for seven days. Swirl the contents of the jar daily. The alcohol will not cover the zest so it is important to mix up the contents at least once a day.
  6. On the fifth day, combine the sugar and water in another glass jar or non-reactive container. Stir or swirl several times a day until all the sugar is fully dissolved.
  7. After the zest has macerated for a week in the alcohol, add the sugar syrup.
  8. The limoncello will initially become cloudy as some of the sugar comes out of solution.
  9. Allow the lemon zest to steep in the alcohol-sugar syrup mixture for an additional 3-4 days, swirling once or twice daily.
  10. It will become mostly clear after a few days. Because of the amount of lemon oil in this limoncello, it may remain slightly cloudy.
  11. It is important to not over-extract the lemon zest or the limoncello may become bitter.
  12. Strain the limoncello. Discard the zest. Divide the limoncello into bottles with tight-fitting lids. I like to use 750 ml liquor bottles.
  13. Store for at least one week before using to allow the flavors to mellow.
  14. Limoncello is best served frosty cold, over an ice cube or two. I like to keep a bottle in the freezer. It may get cloudy but just shake it well before using.
Recipe Notes

Copyright © 2017 by VillaSentieri.com. All rights reserved.

Share this Recipe

Green Beans with Tomato Sauce and Bacon

February 27, 2017

Earlier this month I wrote about my “crunchy vegetable” phase of cooking back in the 1970’s.  One of the dishes I was reacting to was my mother’s green beans with tomato sauce and bacon.  Honestly, though, I can’t tell you why.  It was, bar none, my favorite vegetable dish growing up.  Why, when I started cooking in my late teens, I thought I could make it better by cooking the beans until they were just crunchy is beyond me.

Chalk it up to youthful indiscretion.

Americans served a lot of mushy vegetables back then, no doubt, but the reaction shouldn’t be to turn every vegetable crunchy.  But I was just learning to cook and had a lot to learn, not only about technique, but about understanding the essence of a dish.

The essence of this dish is the silky texture (most definitely not mushy) of the beans cooked for a couple of hours in tomato sauce.  The textural change is accompanied by a flavor change that is unobtainable by quickly cooking the ingredients.

It’s actually pretty difficult to turn these beans mushy unless you boil them too long before adding them to the tomato sauce.  The tomato sauce reacts with the beans to somehow inhibit the development of mushiness.  I’m not sure, but it think it might be the acid in the tomatoes.

That first four minute boil is critical, however.  One time, thinking I could eliminate a step, I tried putting the cut up beans in the sauce without parboiling them first.  Mistake!  Four hours later the beans were still not cooked properly!

Green beans cooked in tomato sauce is a classic Italian combination.  The use of bacon clearly signals that this is Italian-American, however.  Italian recipes might use pancetta but not bacon.  Smoked foods are uncommon in traditional Italian cuisine.  The few that appear really stand out.

Pancetta and bacon are made from the same cut, pork belly.  Both are cured but only bacon is smoked.  Although I’ve made other versions of green beans in tomato sauce that are traditional Italian, rather than Italian-American, I keep coming back to this one as my favorite.

Print Recipe
Green Beans with Tomato Sauce and Bacon
These long-simmered green beans in tomato sauce with bacon are an Italian-American favorite. The long, slow cooking is really essential to achieving the right texture and flavor. Although I've specified the amount of water in cups, when cooking with tomato paste my mother always measured water by the can. This dish would have had five tomato paste cans of water. She didn't quite fill them to the top so each can held about 5 1/2 ounces of water, or a little over three cups total. You may need to add more water, or to boil some away, to get a thick sauce.
Votes: 0
Rating: 0
You:
Rate this recipe!
Course Vegetables
Cuisine Italian
Prep Time 25 minutes
Cook Time 3 hours
Servings
people
Ingredients
Course Vegetables
Cuisine Italian
Prep Time 25 minutes
Cook Time 3 hours
Servings
people
Ingredients
Votes: 0
Rating: 0
You:
Rate this recipe!
Instructions
  1. Cut the bacon into matchstick-sized pieces.
  2. Mince the garlic.
  3. In a heavy-bottomed pot, large enough to ultimately hold the beans, gently sauté the bacon until golden brown.
  4. Add the minced garlic to the bacon and bacon drippings and sauté until fragrant and just beginning to turn golden, about one minute.
  5. Add the tomato paste and sauté until it turns a shade darker and smells sweet.
  6. Add the water, stirring to combine. Cover and bring to a boil.
  7. Reduce to a simmer. Add salt, freshly ground black pepper to taste, oregano and sugar. Simmer, partially covered, for 45-60 minutes, stirring occasionally.
  8. Meanwhile, cut the tips off the beans at a diagonal. Cut the beans into pieces about 2 to 2 ½ inches long, also on the diagonal.
  9. Wash the beans in several changes of cold water. Cover with water and allow the beans to soak for 15 to 20 minutes, to fully plump up with water before cooking.
  10. Bring a large pot of heavily salted water (at least 4 quarts of water and ¼ cup of salt) to a boil.
  11. Drain the beans, add to the boiling water, and return to a boil as quickly as possible.
  12. Boil until the beans are just beginning to get tender, approximately 4 minutes. They will cook much longer in the sauce so be careful not to overcook them at this point.
  13. Drain the beans and add to the tomato sauce, which should have been cooking for 45-60 minutes by this point.
  14. Simmer until the beans are silky, but not mushy. This can take 2 hours, plus or minus. Go by texture, not time. The beans should be silky but still have some body.
  15. Taste once or twice while cooking and adjust salt, pepper and, if you wish, oregano.
Recipe Notes

You can make the sauce and partially cook the beans in advance. After the beans have been boiled, quickly chill them in a bowl of ice water. Cool the cooked sauce to room temperature.  Drain and add the partially cooked beans to the sauce.  Refrigerate until ready to complete cooking.

Copyright © 2017 by VillaSentieri.com. All rights reserved.

Share this Recipe

Mom’s Pasta e Fagioli (Mom’s Pasta and Beans)

February 22, 2017

We didn’t eat a lot of prepared foods growing up.  In fact we almost never did.  OK, there were a few times in the early 60’s where I got to try out those recently-invented “TV Dinners.”

I was well into adulthood before I had a real appreciation for the quality of the homemade food that was put on our table every day.

My mother made putting great food on the table seem effortless.  I remember many Sunday mornings when I’d wake up to find her making ravioli from scratch for our big midday meal: cooking the beef and spinach filling, preparing the dough, rolling and filling the ravioli, all the while a big pot of tomato sauce bubbling away on the stove.  It was just a family Sunday dinner!

Weekday meals were usually less elaborate but no less delicious; maybe homemade sausage, pan-fried potatoes, and a vegetable or two or maybe pasta with sauce leftover from Sunday.  It was always fun to walk into the kitchen to find her making something I’d never had before; something that her mother used to make.  Sometimes that wasn’t even at a defined meal time.

Now I think I understand.  My mother died in 1993 and I bet I didn’t make her version of pasta e fagioli for 20 years after her death.  Then one day, the desire for it just struck me and there I was, in the kitchen, cooking.

It’s become part of my regular routine again after that long hiatus.  Sitting down to a bowl of my mother’s pasta e fagioli is comforting; almost as comforting as if she had made it for me.  There’s just something about the combination of pasta, beans and red sauce that I can’t explain.  It triggers an emotional bridge to what feels like an earlier time in my life.  I’m guessing something similar prompted my mother to occasionally whip up dishes from her youth that she hadn’t made in decades, if ever.

Print Recipe
Mom's Pasta e Fagioli (Mom's Pasta and Beans)
Follow the directions for Cannelini alla Toscana but use dried lima beans instead of cannellini and substitute ½ teaspoon of dried oregano and a sprig of fresh rosemary for the sage. There will be leftover beans that you can freeze or refrigerate for another use. You can also use two 15 ounce cans of Butter Beans in place of the home-cooked lima beans. Mom always used ditalini for this dish. These days, when you can find them (and it can be challenging) they have usually been upgraded from ditalini to ditali, though they are exactly what she used. More frequently, I use a slightly larger, but still rather small, pasta such as the mezzi rigatoni shown here.
Votes: 0
Rating: 0
You:
Rate this recipe!
Prep Time 15 minutes
Cook Time 1 1/2 hours
Servings
people
Ingredients
Prep Time 15 minutes
Cook Time 1 1/2 hours
Servings
people
Ingredients
Votes: 0
Rating: 0
You:
Rate this recipe!
Instructions
  1. Finely dice the onion. Sauté the onion in ¼ cup of olive oil until soft and golden.
  2. Add the crushed red pepper and sauté another minute.
  3. Add the tomato paste and sauté, stirring frequently until the tomato paste turns a shade darker and smells sweet, 2-3 minutes.
  4. Add the water, oregano, basil and salt and pepper to taste. Stir well to fully incorporate the tomato paste.
  5. Bring to a very low boil, partially covered, and cook 30-45 minutes stirring occasionally. Adjust seasoning as needed, tasting several times as the sauce cooks.
  6. Meanwhile, sauté the garlic in the remaining ¼ cup of olive oil very slowly until browned. Remove from the heat and reserve.
  7. The dish can be cooked several hours ahead to this point.
  8. Bring three quarts of water and three tablespoons of salt to a boil.
  9. While the water is heating, add the beans and their liquid to the tomato sauce, return to a simmer, and cook, partially covered till the pasta is ready.
  10. Cook pasta until it still has a small bit of chewy center. It will cook more in the sauce. Scoop out and reserve two cups of the pasta cooking liquid.
  11. Drain the pasta. Add the pasta to the tomato-bean mixture. Add the browned garlic and olive oil. Stir well, cover and cook on very low heat until the pasta is cooked but al dente and the sauce has thickened. Add some of the pasta cooking liquid as needed from time to time to create a smooth sauce.
  12. Off the heat stir in the Parmigiano Reggiano cheese. Taste and adjust seasoning.
  13. It is not unheard of for me to add an extra glug or two of olive oil at this point to get a luscious sauce. Stir and decide if another dash of pasta-cooking water is needed, as well.
Recipe Notes

Mezzi Rigatoni


Copyright © 2017 by VillaSentieri.com. All rights reserved.

Share this Recipe

Salsicce con Cardone (Sausage with Cardoons)

February 17, 2017

We made our move to multi-generational living in 1998 when my husband’s parents moved into the Coach House at our estate in Chicago, The Henry Rohkam House.  (There are a couple pictures of the main house in a prior post.)

Pretty quickly we settled into a routine of having meals together.  When we went to work, the dogs went to Grandma and Grandpa’s (21 feet away in the Coach House) for the day.

My husband started gardening with his father.  A large piece of our one-third-of-an-acre property in Chicago’s Lakeview neighborhood was turned over to cultivation.  We had grapes, strawberries, corn, tomatoes, eggplant, sweet peppers, radicchio, arugula, leaf lettuce, Swiss chard, okra, hot peppers of various types, an array of herbs and other vegetables that varied year by year.  The fruit trees never did very well.  The kiwi thrived but never bore fruit.  One of the four kiwi was accidentally injured and died.  In retrospect, it was probably the male plant (there were three female and one male plant), hence no fruit.

Every fall we canned and preserved foods in various ways.  We made jars of olives marinated in red wine vinegar and herbs from the garden.  We made herb-infused vinegar and olive oil.  We dried herbs for the winter.  We froze vats of tomato sauce.  I’ll admit to even freezing pesto which, while it doesn’t taste like its fresh-made cousin, is pretty awesome in the dead of a Chicago winter!

Some years there were enough strawberries to put up jam.  City squirrels can be quite bold, however.  I was standing alongside the garden one spring day when a squirrel, who had gone grocery shopping in our strawberry patch, literally ran over the top of my foot with a strawberry in his mouth on his way out of the produce isle.

The birds had Houdini-like skills.  Despite wrapping the grape arbor in yards of netting, the birds found their way in, decimated the grapes, and escaped.   The few grapes we were able to harvest were very sweet!

We built a temperature-controlled wine cellar in the basement of the Coach House.  My husband made wine for a few years but stopped when work got too busy.

I started cooking more often with my mother-in-law.  Every month or so, my husband’s grandmother, Noni, would come to visit for a weekend.  Noni was a marvelous cook.  Some dish always appeared during those weekends that I had never had before.  Sausage with Cardone was one of them.

For a vegetable that has been popular since the ancient Romans, I’m surprised I’d never hear of it.  I grew up eating sausage with peppers and onions.  Sometimes the sausage was cooked in a tomato sauce, sometimes not.  Cardone was a whole new thing!

This goes really well with polenta but it’s equally good on its own.  Leftover sauce can be put on pasta or can accompany a frittata.  You may notice from the pictures that we didn’t use as much sausage as called for in the recipe.  We didn’t want leftover sausage but that didn’t mean we didn’t want leftover sauce!  Sadly, the cardone usually all gets eaten on the first go-around but on those rare occasions where it doesn’t, I like to use it as a sandwich filling for lunch.

Print Recipe
Salsicce con Cardone (Sausage with Cardoons)
Cardone looks like oversized celery. It is giant, about 2 feet long as sold trimmed in the grocery store. It is related to the artichoke and was popular among the ancient Romans. Cardone should always be served cooked. Leaves should be removed and not eaten.
Votes: 0
Rating: 0
You:
Rate this recipe!
Course Mains, Meats
Cuisine Italian
Prep Time 15 minutes
Cook Time 2 1/2 hours
Servings
people
Ingredients
Course Mains, Meats
Cuisine Italian
Prep Time 15 minutes
Cook Time 2 1/2 hours
Servings
people
Ingredients
Votes: 0
Rating: 0
You:
Rate this recipe!
Instructions
  1. The starting point: cardone from the market.
  2. Cut off the bottom of the cardone.
  3. Using a vegetable peeler (or knife if you are my mother-in-law), remove the leafy edges of the cardone.
  4. Remove any stringy parts of each rib.
  5. Cut the ribs into pieces approximately 4 inch long. Wash well.
  6. Bring 3 quarts of water to a boil. Add 3 tablespoons of salt and a pinch of baking soda. Add the cardone and boil until you can pierce it relatively easily with the point of a sharp knife. Do not overcook the cardone as it will be cooked further with the sausage.
  7. Remove the cardone from the water. Stop cooking by putting the cardone in a bowl of ice water. When cold, cut into pieces approximately 1 ½ inches long and reserve.
  8. If the sausage is not in links, cut into pieces approximately 4-5 inches in length. Using the tines of a fork, pierce the skin of each piece of sausage in several places.
  9. Heat the olive oil in a large, heavy-bottomed sauté pan or a wide, shallow casserole. Add the sausage and brown well on all sides.
  10. Remove the sausage from the pan.
  11. Add the onions, garlic, parsley, and rosemary to the sausage drippings in the pan. Sauté until the onions are soft and golden.
  12. Add the wine, if using. Allow wine to mostly cook away then add tomato puree and water.
  13. Return the sausage to the pot with the sauce. Season with salt and freshly ground pepper. Simmer, partially covered, for about an hour.
  14. Add the cardone. Taste for seasoning. Simmer, partially covered, until the cardone is tender, approximately 30-45 minutes.
  15. Pour into a serving dish and bring to the table.
Recipe Notes

Copyright © 2017 by VillaSentieri.com. All rights reserved.

Share this Recipe

Rapini with Olive Oil, Garlic, and Red Pepper

February 13, 2017

On the whole, Italians like bitter greens.  In fact, Italians like bitter flavors in general.  For example, consider classic Italian digestifs of Fernet Branca and Ferrochina Bissleri.  Less bitter drinks include Cynar.

Rapini is a bitter green.  As with many foods, names vary.  Rapini can also be called Broccoli Raab, Broccoli Rabe, and Cime di Rape.  While some authorities say that Broccolini and Baby Broccoli are also Rapini, I have found that in American markets, these greens are usually less bitter than Rapini.  I suspect that a different variety of green is marketed under these names in the US.

Greens with olive oil, garlic and red pepper is a classic combination.  With the addition of some anchovies, it makes a wonderful sauce for pasta, especially orecchiette.

In 1989 I moved to Chicago to assume the position of Medical Director of  Chicago-Read Mental Health Center.  At the time, it was the second busiest psychiatric facility in the country.  (Only New York City had a busier psychiatric facility.)  The hospital was on the northwest side of Chicago close to both Italian and Polish neighborhoods so lunches with co-workers were always gastronomically rewarding.

I remember one lunch, early on in my tenure as Medical Director, at a nearby Italian restaurant.  The executive leadership team when out.  I ordered Rapini with Garlic and Oil for my antipasto.  What I got was an Italian-American sized portion of greens in a garlicky, surprisingly spicy broth with lots of bread on the side.

It was glorious.

This version is more restrained.  It is what we serve at home.  However, feel free to amp it up with more olive oil, garlic and red pepper if you’d like.  You can also leave a little more liquid in the dish to sop up with bread, if you’d like.

Print Recipe
Rapini with Olive Oil, Garlic, and Red Pepper
This dish can be made with Rapini, Broccoli Rabe, Cime di Rape, Broccolini, or Baby Broccoli. In the United States, Broccolini and Baby Broccoli seem to be less bitter than Rapini. Which to use is personal taste. It doesn’t take long to cook the greens in the boiling water. It is best to undercook them rather than overcook them as they get a second pass at the heat and can be cooked more if needed. Once the rapini are in the serving bowl I like to douse them with a few tablespoons of spicy extra-virgin olive oil for flavor. Heating olive oil tends to dull its flavor so it is almost always a good idea to add an extra bit of uncooked oil at the end.
Votes: 0
Rating: 0
You:
Rate this recipe!
Course Sides, Vegetables
Cuisine Italian
Prep Time 30 minutes
Cook Time 25 minutes
Servings
people
Ingredients
Course Sides, Vegetables
Cuisine Italian
Prep Time 30 minutes
Cook Time 25 minutes
Servings
people
Ingredients
Votes: 0
Rating: 0
You:
Rate this recipe!
Instructions
  1. The starting point: rapini from the market.
  2. Cut the very ends off the rapini stems.
  3. Find the part on the stem where it begins to branch in a major way. Cut crosswise at this point.
  4. If there are any little offshoots below the cut, remove them. Combine the little offshoots with the tops. Keep the bottom stems separate from the tops.
  5. Remove the outer layer of the peel from the bottom stems. To do this, look at the bottom of the stem. You’ll see a dark green layer surrounding a lighter green center. Insert a sharp paring knife into the stem just where the dark green ends.
  6. Grab the peel between your thumb and the knife and pull down to remove.
  7. Cut the peeled bottom stems into pieces approximately 1 ½ inches long.
  8. You do not need to peel or cut the tops.
  9. Bring three quarts of water to the boil. Add three tablespoons of salt.
  10. Put a bunch of ice cubes in a large mixing bowl add cover with water. Set the ice water aside.
  11. Add the stems to the boiling water. Return to a boil. Cook for 3½ to 4 minutes if you are near sea level but up to five minutes if you are at high elevation. They are done when they are toothy but have lost their crunch.
  12. Using a perforated ladle, remove the stems from the boiling water and put into the bowl of ice water to stop cooking.
  13. Add the tops to the boiling water. Return to a boil. Cook for about 2 minutes if you are near sea level but up to three minutes if you are at high elevation.
  14. Using a perforated ladle, remove the tops from the boiling water and add to the bowl of ice water along with the stem ends.
  15. Thinly slice the garlic crosswise and reserve.
  16. In a large sauté pan, heat 1/3 cup of olive oil over medium heat. Add the garlic, turn the heat to low, and sauté gently until the garlic is golden. Add crushed red pepper and continue to sauté until the garlic is light brown.
  17. Add the wine. The dish can be made ahead to this point. If doing so, immediately remove the garlic-wine mixture from the stove. The addition of the wine will stop the garlic from over-cooking. When resuming, or if you’re not taking a break at this point, bubble away the wine over medium heat until only oil is left in the pan.
  18. Drain the rapini.
  19. Add the rapini to the garlic and oil. Season with salt and freshly ground black pepper. Cover and cook briefly until heated through.
  20. If the rapini are not cooked enough to your taste, cook a bit longer. If necessary add a tablespoon or two of water.
  21. Adjust seasoning.
  22. Pour into a serving bowl and drizzle with a few tablespoons of olive oil. Serve immediately.
Recipe Notes

Copyright © 2017 by VillaSentieri.com. All rights reserved.

Share this Recipe

Cavolfiore alla Friulana (Cauliflower Friuli-Style)

February 1, 2017

I started cooking in the early 1970’s when most cooking authorities were trying to convince us that vegetables needed to be crunchy to be good.  No doubt, many vegetables served on American tables were gray, mushy and lifeless but not all vegetables, and certainly not all vegetable dishes, are meant to be toothy, let along crunchy.

I was having a conversation with friends over dinner in Palm Springs just last week about cooking .  They asked me when I started cooking and when I told them, the muscles on their faces froze ever so briefly which made me do a quick calculation.  I started cooking before they were born!  Which means, basically, I’ve seen a lot of food fads and crazes.  I try to avoid them.

I embrace new ingredients or, as is more often the case with “new” ingredients, old ingredients that are finally finding their way to our markets and are, therefore, new to us.  When I think about the ingredients that are available to me now compared to when I started cooking, the difference is staggering.

Honestly, though, the core of my cooking hasn’t changed.  I still focus on traditional foods.  I try to find dishes that have stood the test of time; dishes that have been made for a generation or two, if not a century or two.

Sometimes, though, food crazes get us to think about how we cook and cause us to make changes for the better.  Take crunchy vegetables.  I think American vegetable cookery started getting better when “everyone” was hyping crunchy vegetables.  It got us to think about what was on our plates and whether the essence of a particular vegetable dish was best presented with soft vegetables, crunchy vegetables, or something in between.

Not every vegetable dish is better with crunchy vegetables.  That took me a while to learn as a novice cook in the 1970s when I tried to convert every vegetable recipe to one with toothy vegetables.  They were not all successful.  Not only does texture change with more cooking, flavor does too.  Sometimes those flavor changes “make” the dish as much as the textural change.

This recipe is a good example, though it is not one that I was making in the 70’s.  The essence of the dish is slow-cooked cauliflower and onions that become sweet as the natural sugars caramelize and the cauliflower softens.

I learned to make this from my mother-in-law, who is from Friuli.  Friuli is northeast of Venice, adjacent to Slovenia.  The food definitely shows the influence of Eastern and Central Europe but more on that in upcoming posts.

Print Recipe
Cavolfiore alla Friulana (Cauliflower Friuli-Style)
This dish goes really well with roasted meat. It is a little on the sweet side because the sugars in the onion and cauliflower caramelize during the long, slow cooking. I especially like it with roast chicken or roast pork. Experiment with the cooking time to achieve different textures, but never crunchy. The cauliflower should be soft but not mushy. You can keep the florets more intact during the cooking by being gentle. You can also press down on them every now and then causing them to break up. Both styles are equally traditional. As you will see in the pictures, I opted for longer cooking to create more caramelization and the pressing motion to break the florets into small pieces.
Votes: 0
Rating: 0
You:
Rate this recipe!
Course Sides, Vegetables
Cuisine Italian
Prep Time 20 minutes
Cook Time 2 hours
Servings
people
Ingredients
Course Sides, Vegetables
Cuisine Italian
Prep Time 20 minutes
Cook Time 2 hours
Servings
people
Ingredients
Votes: 0
Rating: 0
You:
Rate this recipe!
Instructions
  1. Bring a large pot of heavily salted water to a boil.
  2. Meanwhile, cut off the base of stem of the cauliflower and remove the green leaves.
  3. Add the cauliflower to the boiling water and cook, uncovered, until it shows just a little resistance when pierced with the point of a knife. This will take between 6 and 10 minutes depending on the cauliflower and how far above sea level you are. When in doubt, opt for less cooking rather than more as you can compensate during the slow-cooking phase.
  4. Using a large slotted spoon, remove the cauliflower. Place it in a colander to drain.
  5. Meanwhile, in a large sauté pan, sauté the diced onion in olive oil (or butter) over medium-high heat. Season with salt. The salt will draw out moisture from the onion. As the moisture evaporates you will need to reduce the heat to medium-low to prevent the onion from browning.
  6. When the liquid has evaporated and the onion is beginning to soften, add the minced garlic, if you are using it. Continue to cook over low heat until the onion turns golden but not brown. This can easily take another 20-30 minutes.
  7. As the onion is cooking, cut the cooked cauliflower into florets.
  8. When the onion is golden, add the cauliflower. Season with salt and freshly ground black pepper. Cover and cook, stirring occasionally.
  9. Add a little wine or water from time to time, as needed, to keep the cauliflower from sticking. There really shouldn’t be any appreciable liquid in the bottom of the pan. Should that happen, uncover the pan slightly till the liquid evaporates.
  10. The florets will break apart as the cauliflower cooks. If you want small pieces, press down on the cauliflower from time to time while cooking. As the cauliflower cooks, taste a few times to adjust salt and pepper.
  11. The cauliflower will slowly darken through caramelization. How far you want to go is up to you. I went fairly far when cooking the cauliflower in these pictures. The cauliflower gets softer the longer it cooks but it also caramelizes more. Figure out the balance of texture and taste you like best.
Recipe Notes

Copyright © 2017 by VillaSentieri.com. All rights reserved.

Share this Recipe

Pasta ai Funghi (Pasta with Mushrooms)

January 27, 2017

Growing up, pasta was almost always served with a long-cooked Southern Italian ragu.  Yes, there was the occasional sauce of vegetables sautéed in olive oil till they softened enough to make a sauce but those sauces were the exception to the rule.

These days, a long-cooked ragu is still the epitome of pasta cooking for me but far more often I make quicker sauces.  Pasta with mushrooms is one of them.

In my last post, I introduced nepita, an herb used in Italy that is really not commonly available in the US.  Nepita pairs really well with mushrooms.  The nepita that I use is from plants that we grow from seeds we brought back from Italy in 1996.  I’m so concerned that one day our nepita won’t make it through the winter and reappear in the spring that we’ve taken to backing it up the way other folks back up their data.

Over the years we’ve gifted nepita plants to friends who like to garden.  Should a disaster ever befall our nepita, there should still be a clone of it somewhere with enough seeds that we can germinate another plant or two.  For an herb that I’ve only known for 20 years, it’s become an integral part of my kitchen.

While there’s no real substitute for nepita, there are lots of herbs that go well with mushrooms.  In this rendition, I’ve called for basil and oregano, the combination that I usually use when I don’t have nepita.  Marjoram also works well, with or without a pinch of thyme, but marjoram is a relatively uncommon herb in Italian cooking.

Herbs are not a major player in this dish.  Though nepita is distinctive, there are so many layers of flavor from the dried porcini, onion, garlic, and marsala that the lack of nepita isn’t really a big deal.  Basil and oregano work well and, in fact, are what I used before that 1996 trip to Tuscany where I discovered nepita.

Pasta ai Funghi was one of the courses I served at my father-in-law’s birthday dinner last week.  Here are a couple of pictures of that dinner from our home in Palm Springs.


My father-in-law (left) and mother-in-law. Good friend, Gino Barcone is in between.
From left to right, John Berl, Bill Hoadley, and Bob Bauernschmitt.


Print Recipe
Pasta ai Funghi (Pasta with Mushrooms)
While many mushroom-based sauces for pasta contain cream and butter, this one uses only olive oil. It creates a beautiful, glossy sauce. The mushrooms can be prepared several hours in advance making this an ideal dish if you are cooking for company.
Votes: 0
Rating: 0
You:
Rate this recipe!
Prep Time 25 minutes
Cook Time 35 minutes
Servings
people
Ingredients
Prep Time 25 minutes
Cook Time 35 minutes
Servings
people
Ingredients
Votes: 0
Rating: 0
You:
Rate this recipe!
Instructions
  1. Soak porcini in enough warm water to just cover. When soft, about 15 minutes, squeeze excess water out of the mushrooms. Reserve the liquid. Finely chop the porcini.
  2. Clean the mushrooms by wiping them with a damp cloth.
  3. If you are using common white mushrooms, slice off the very bottom of the stem as it is usually a bit dry. There is no need to remove the rest of the stem, though.
  4. Turn each mushroom upside down and cut into 1/8 inch thick slices. If the mushrooms are really large, you might have to make a crosswise cut as well.
  5. Slice or cut other mushrooms into similar sized pieces. For example, cut large portobello mushrooms into long strips approximately 1/8 inch thick and then cut each strip into smaller pieces.
  6. If you are using oyster and/or enoki mushrooms cut them into slightly larger pieces and keep them separate as they require less cooking than most other mushrooms.
  7. Finely chop the onion and reserve.
  8. In a sauté pan large enough to hold the mushrooms and cooked pasta, heat the ¼ cup of olive oil, over high heat. When the oil is hot, add the finely chopped porcini. Sauté a minute or two until the porcini becomes aromatic, being careful not to burn them.
  9. Add the reserved porcini soaking liquid. Over high heat, quickly evaporate the liquid, stirring often.
  10. Once the liquid is evaporated, add all the cut-up mushrooms to the sauté pan, except for quick cooking types like enoki and oyster mushrooms. Sauté the mushrooms, still on high heat, stirring often until they have absorbed all the olive oil.
  11. Season liberally with salt and reduce the heat to medium low.
  12. Stir the mushrooms often until they begin to release their liquid. When they do, turn the heat to high and cook until all the liquid is evaporated, stirring often. Add freshly ground black pepper to taste.
  13. Continue sautéing the mushrooms until they just begin to brown. Now is the time to add any quick-cooking varieties of mushrooms, such as oyster and enoki, you may be using.
  14. Continue to sauté until of the mushrooms are nicely browned.
  15. When the mushrooms are brown, add the onion and crushed red pepper.
  16. Over medium heat, cook until the onion is soft and golden.
  17. Stir in the garlic and sauté for about one minute until it becomes fragrant.
  18. Stir in the oregano and basil, or, if you are lucky enough to have a stash, about 1 teaspoon of fresh nepita or ½ teaspoon of dried. Add the marsala. It will evaporate almost immediately.
  19. Remove the sauté pan from the heat until the pasta is ready. The mushrooms can be made several hours ahead to this point.
  20. Cook the pasta in well-salted water until al dente. Meanwhile gently warm the mushrooms if they were made ahead.
  21. When the pasta is cooked, remove about 1 cup of pasta-cooking liquid and reserve. Quickly drain the pasta. Do not rinse. Add the pasta to the warm mushrooms along with about ¼ cup of the reserved pasta-cooking liquid. Cook over low heat, stirring often for about one minute.
  22. Remove the pasta and mushrooms from the heat. Add the Parmigiano Reggiano cheese and stir to combine. Add 2 tablespoons of extra virgin olive oil and the truffle oil, if using. Stir to combine. The cheese and the starch in the pasta cooking liquid should help to emulsify the olive oil and water, creating a glossy sauce.
  23. If the pasta is too dry, add more pasta-cooking liquid, just don’t make it watery. The cheese, olive oil and water should hold together.
  24. Taste and adjust seasoning, if needed.
  25. Serve immediately, preferably in warmed pasta bowls. Pass additional freshly grated Parmesan cheese at the table.
Recipe Notes

I most often make this with ordinary white button mushrooms, especially if I am going to add the truffle oil. Using an array of different mushrooms, such as cremini, baby bella, oyster, and enoki makes a visually and texturally interesting dish, however.

When I make pasta, I always pour some of the pasta-cooking liquid into the serving bowl to warm it.

Copyright © 2017 by VillaSentieri.com. All rights reserved.

Share this Recipe

A Passion for Traditional Recipes