Pasta al Pesto

May 15, 2017

Gardening at 8000 feet is challenging.  Even more so when you consider that we are sitting on almost solid rock.

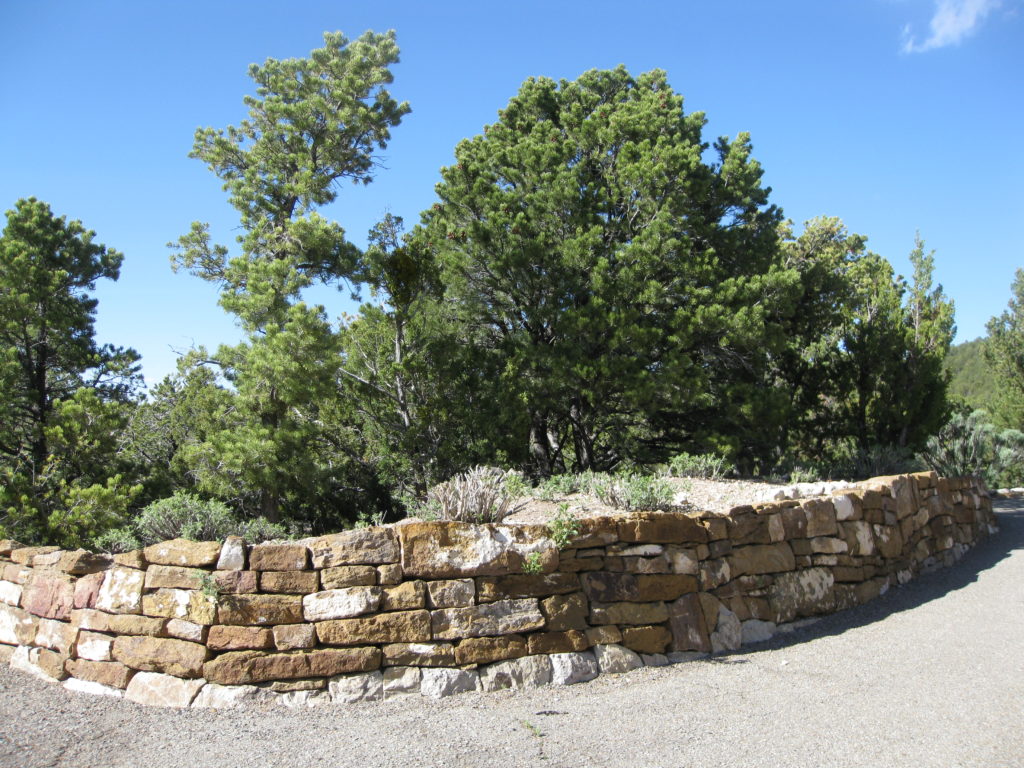
There’s not much soil to begin with, just the barest of covering on a rocky foundation.  The piñon and juniper that surround us work their roots through little crevices in the rock that sits just inches below the surface.

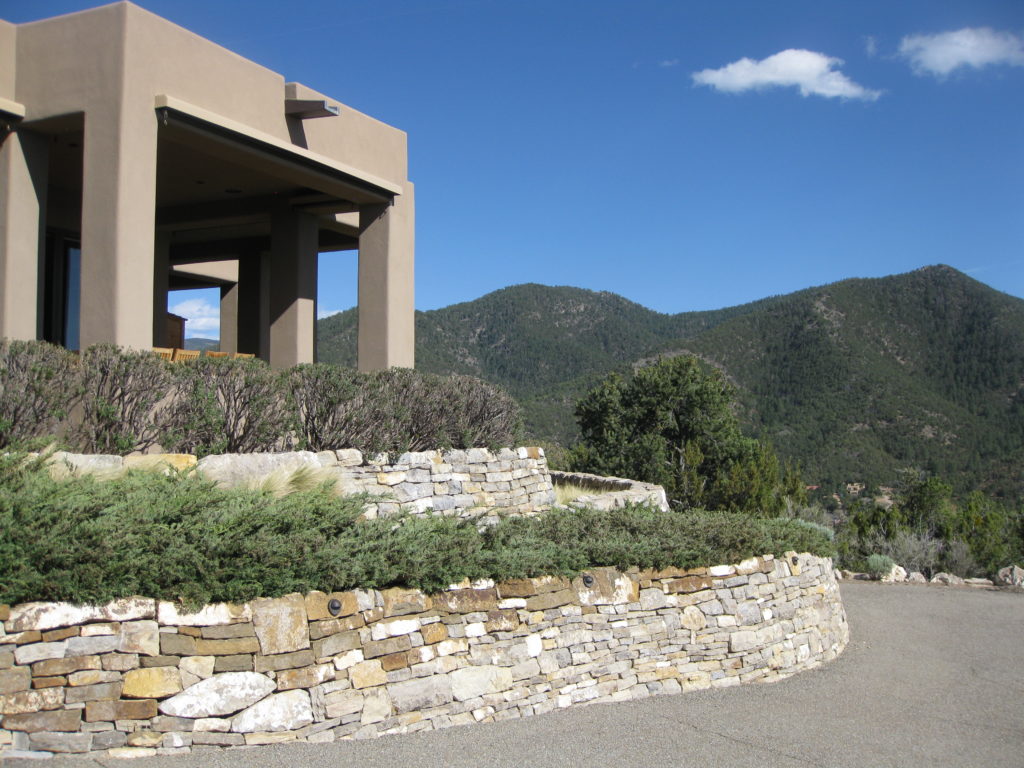
What little soil there was in the area immediately surrounding our house was removed to level the building site.  The excavation was almost exclusively rock, one hundred truck loads were taken away.  Some rock was kept on site to create retaining walls around the property.

The corollary, however, is that there’s no dirt around the house to dig into to plant much of anything.  The landscaping that was done was exclusively within rock retaining walls or our front enclosed courtyard, where topsoil was brought in.  The first load of topsoil for the courtyard arrived April 2007, before we were ready to plant anything.  April is a windy month in New Mexico.  The winds started up one day and before evening every last speck of topsoil was blown to West Texas!

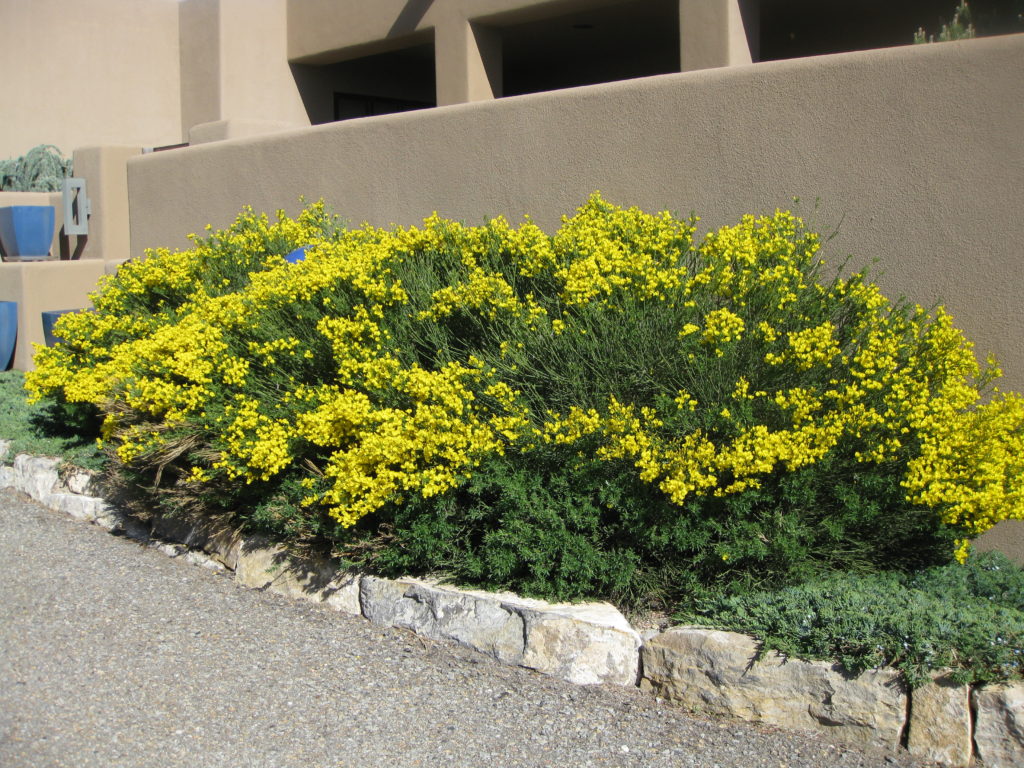
We could consider raised bed gardening but that would just invite the rabbits and deer to munch their way through our garden.  As it is, we’ve offered up several stands of ornamental grasses on the periphery of our landscaped area to the critters.  We seem to have reached a truce of some sort.  We let them eat the ones around the edges and, for the most part, they let the others alone.

We installed a greenhouse that allows us to extend the growing season by many months.  It also allows us to winter over a number of plants that would not survive in this climate.  The greenhouse also allows us to grow fig trees in large pots.  The first year we grew figs, they didn’t ripen.  It turns out that even though summer days are warm, the nights are cool enough that the fruit doesn’t ripen.  The following year we left the fig trees in the greenhouse throughout the summer, convinced that it would be too warm for them to thrive even with the automatic ventilation system.

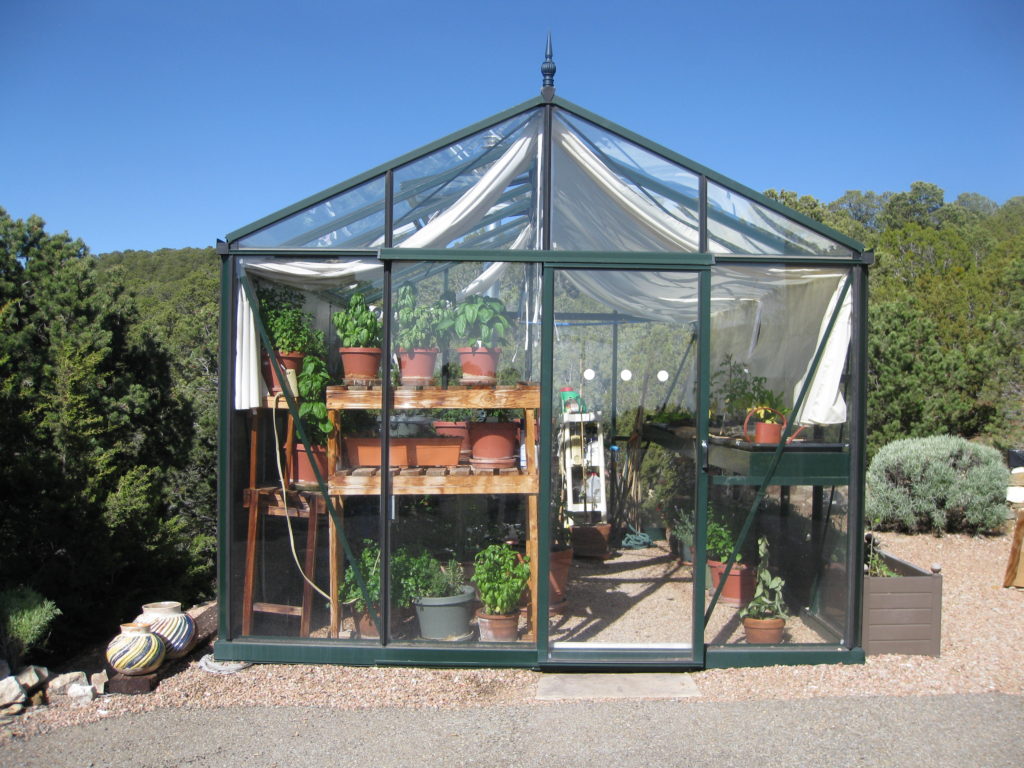
Luckily, we were wrong.  The fig trees loved the heat.  Picking a ripe fig off of the tree and eating it immediately is amazing.  The only fresh fruit experience that would be superior, in my estimation, is a fresh-picked mango…and those trees won’t fit in our greenhouse!

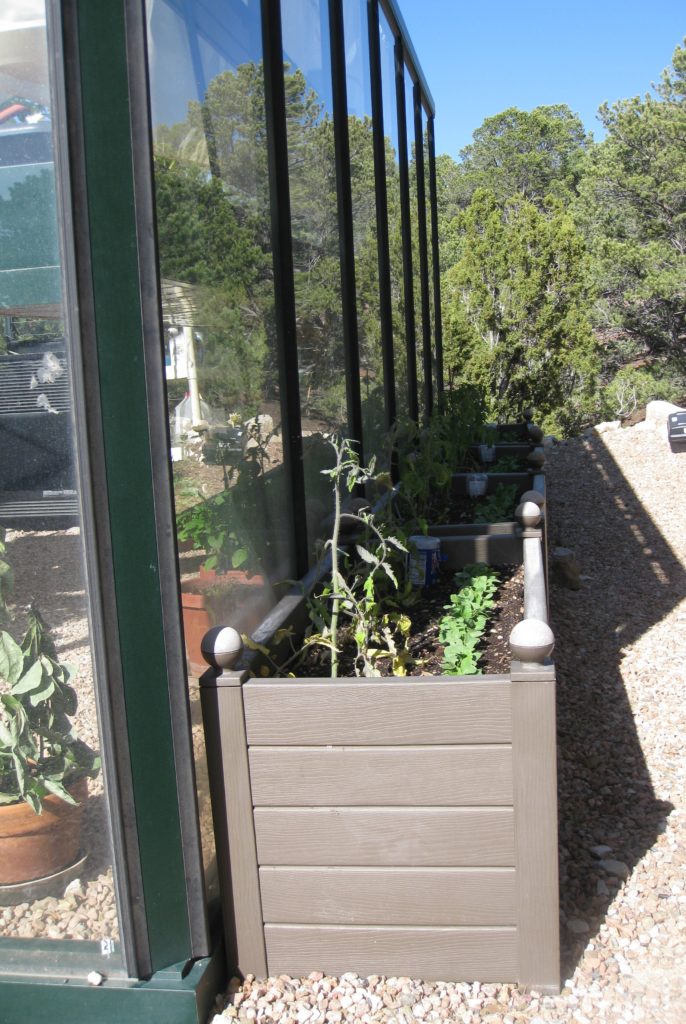
We have one row of planter boxes outside the greenhouse.  We use these for plants, like tomatoes, that are not very attractive to deer and rabbits.  Salad greens, such as arugula, radicchio, and leaf lettuce grows in shallow trays on a raised shelf in the greenhouse.  Many pots of herbs also remain in the greenhouse year-round.  Everything else is planted in our interior courtyard, either in pots or in another row of planter boxes.

Depending on the type of plants, we start planting seeds in February.  Seedlings are transplanted once the risk of frost is minimal.

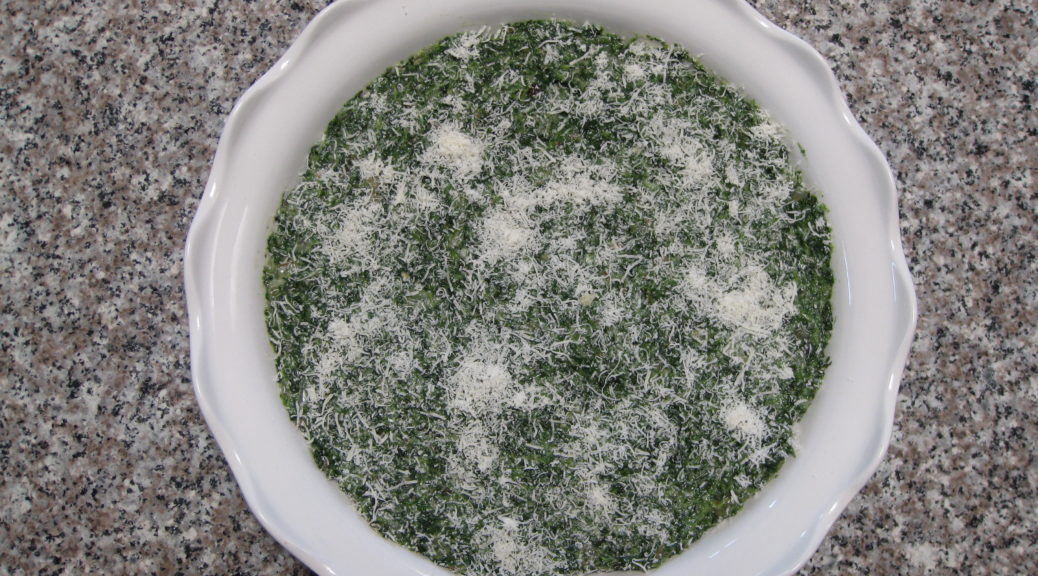
This year, we started too much basil from seed.  It needed to be thinned.  This created the opportunity for us to have pesto much earlier than would otherwise have been the case.  Usually it’s June before the basil plants have grown large enough that we can harvest leaves for pesto.

We had this pesto on April 30th, a day that measured more than 8 inches of snow at Villa Sentieri.  It was winter’s last hurrah and fresh pesto was a perfect way to welcome spring and say good-bye to winter.


Print Recipe
Pasta al Pesto
The classic basil-based pesto is Pesto alla Genovese. However, because the recipe and ingredients for Pesto alla Genovese are tightly regulated (for example, the basil must be grown in Genoa, Italy), I’ll refrain from calling this Pesto alla Genovese since it can’t meet those strict regulations. Try to use young, small basil leaves. If you must use larger ones, tear them into smaller pieces so they measure approximately the same way. Using olive oil from Liguria, where Pesto alla Genovese originated, is another of those difficult-to-meet requirements. Nonetheless, try to use a sweet, fruity olive oil rather than one that is spicy and pungent. Make the pesto as close to serving time as possible. I like to have all the ingredients measured, making the pesto after the pasta starts to a boil. If you’re wondering about the use of a food processor, that would not be permitted either but I doubt there are many of us that would make pesto if we had to use the traditional marble mortar and wooden pestle!
Votes: 0
Rating: 0
You:
Rate this recipe!
Prep Time 30 minutes
Cook Time 15 minutes
Passive Time 30 minutes
Servings
people
Ingredients
For the pesto
For the pasta
Prep Time 30 minutes
Cook Time 15 minutes
Passive Time 30 minutes
Servings
people
Ingredients
For the pesto
For the pasta
Votes: 0
Rating: 0
You:
Rate this recipe!
Instructions
  1. Pluck the basil leaves from the stems and measure 2 cups, lightly packed.
  2. Measure all the other ingredients. Pine nuts.
  3. Garlic.
  4. Parmigiano Reggiano and Pecorino Romano cheeses.
  5. Don't forget the extra-virgin olive oil and salt.
  6. Bring three quarts of water and 1/3 cup of salt to a rolling boil.
  7. While water comes to a boil and the pasta cooks, heat the serving bowl by placing it in a 150°F oven or partially filling it with boiling water.
  8. When the water comes to a boil, add the pasta. Return to a boil, stirring frequently.
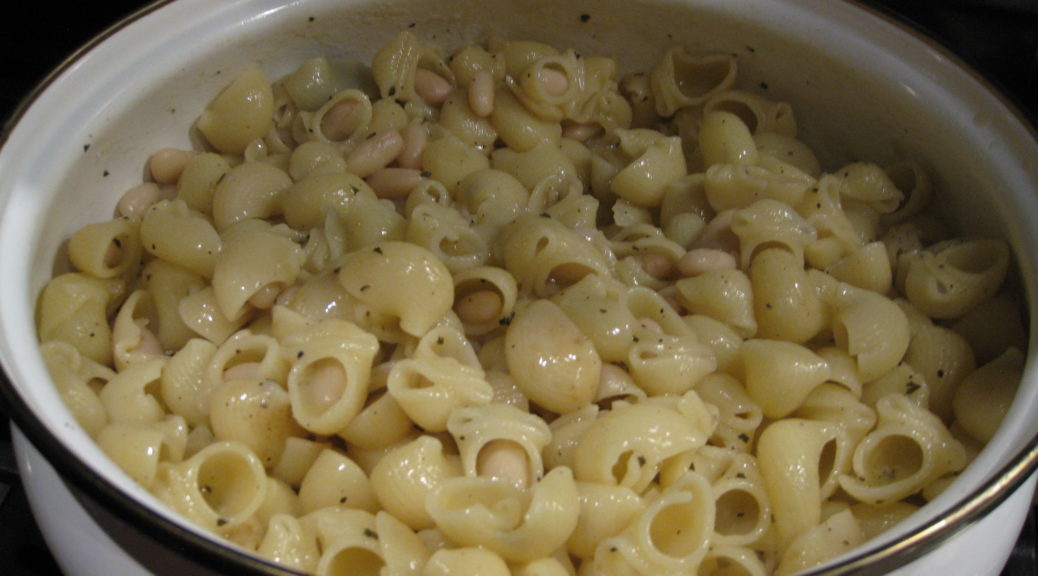
  9. As the pasta boils, put the basil leaves, olive oil, pine nuts, garlic, and salt in a food processor. Puree the basil mixture, scraping down the sides of the bowl occasionally.
  10. When the pasta is almost al dente, pour the basil puree into the warmed serving bowl.
  11. Add the Parmigiano and Romano cheeses. Stir to combine.
  12. Remove ¼ of the boiling pasta-cooking water from the pot and stir into the pesto to loosen it.
  13. When the pasta is al dente, remove and reserve a cup of pasta cooking water.
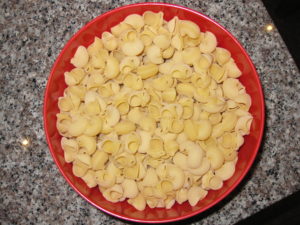
  14. Drain the pasta. Do not rinse. Add the pasta to the serving bowl and toss to coat each strand.
  15. If the pesto seems a little thick, add a tablespoon or two of the reserved pasta-cooking water.
  16. Taste and adjust salt if necessary.
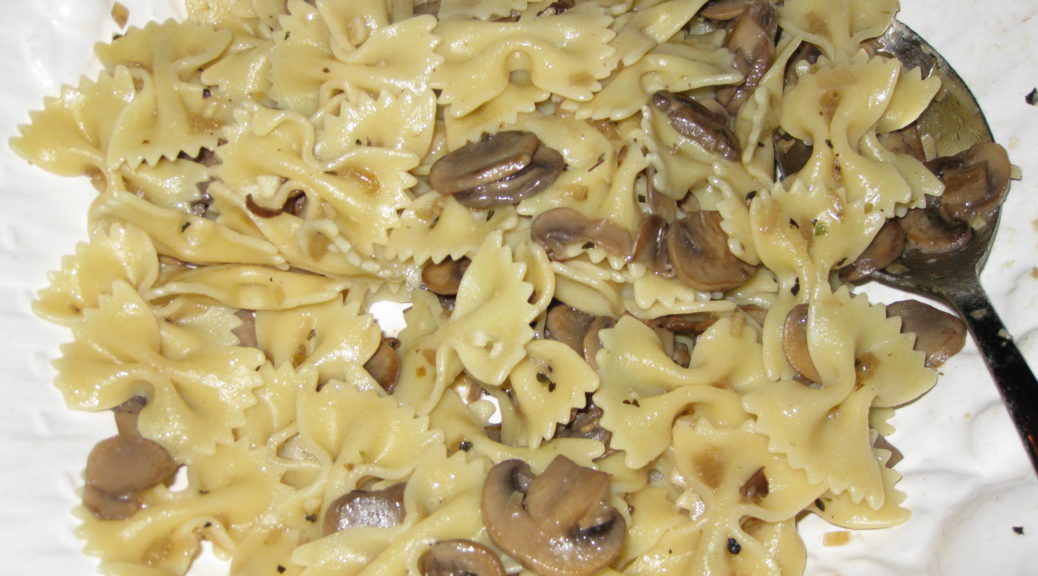
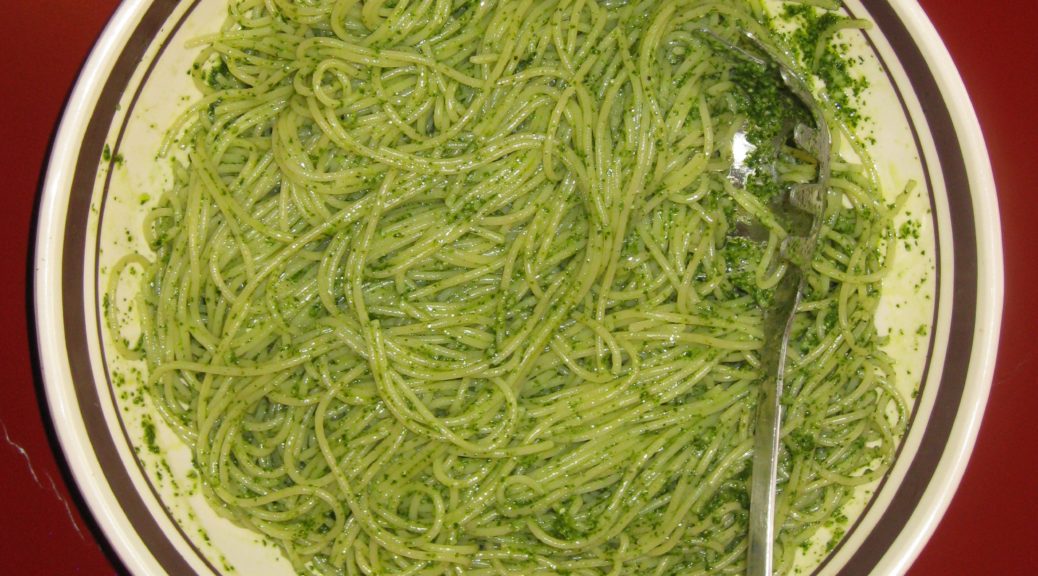
  17. The finished dish.
Recipe Notes

Copyright © 2017 by VillaSentieri.com. All rights reserved.

Share this Recipe

Orecchiette with Broccoli and Anchovies

May 10, 2017

A few times in my life I’ve been lucky enough to cook with my husband’s Great Aunt Fidalma.  It’s always been in my kitchen, though I keep hoping to make a trip to Tuscany to cook with her in her kitchen.

Zia Fidalma speaks Italian and German.  I speak English.  Though I studied German in high school and college, and at one point was passably able to translate scientific German, my command of spoken German (and at this point, scientific German) is hopeless.  I studied Italian for a while too, but the best I can do is read a menu, order in a restaurant, and find out where the restroom is.

So, cooking with Zia Fidalma starts with a language barrier but it doesn’t seem to matter.  Somehow we communicate.

Mostly that means Zia Fidalma speaks slowly in Italian emphasizing the words I am likely to understand most.

Like the time we were in my kitchen in Santa Fe preparing dinner for twelve.  The first course was spaghetti al pesto.  A pile of basil stalks from my father-in-law’s (Zia Fidalma’s nephew) garden were on the kitchen counter.  Zia Fidalma was plucking off basil leaves one at a time, inspecting each one.  At one point, she looked up at me holding a leaf and said “è brutta” (it’s ugly), clearly wanting my agreement to discard the less-than-perfect leaf.

One day at our home in Chicago, she was making risotto for lunch.  It had a very similar flavor profile to this pasta in that it contained broccoli, garlic and anchovies.

Zia Fidalma cranked up the 15,000 BTU burner to high.  She sizzled some minced garlic for a moment.  There was a vague hint of smoke coming from the pan.  She added the anchovies and stirred them about.  Smoke started to billow up.  She smiled knowingly.  She added the broccoli, undeterred.  Smoke continued.  She stirred.  I stood there horrified.  Then she lightly charred the broccoli.  I was even more horrified.  At long last some liquid went in and the rest of the risotto-making followed a familiar pattern.

I try to avoid smoking oil at all cost when cooking.  I was more than a little concerned about how the risotto would taste.

However, I have never had anything but fabulous food from Zia Fidalma, so I had to trust that this would be OK, too.

This wasn’t her first rodeo.  She’d been making risotto since before I was born.

In the end, all I can say is that the risotto was wonderful.  It had layers of flavor.  It provided an important lesson about how techniques different from what one would typically use can create incredible flavors.

So, if you see wisps of smoke coming from the pan as you singe the broccoli for this recipe, don’t fret.  Just raise a toast to Zia Fidalma, and enjoy!

Print Recipe
Orecchiette with Broccoli and Anchovies
My husband’s Great Aunt Fidalma, who lives in Tuscany, showed me how to cook the broccoli in this manner. Previously, I parboiled the florets and added them and the beans to the sautéed garlic and anchovies. This method adds layers of flavor that cannot be obtained by just boiling the broccoli. I prefer to use home-cooked kidney beans following my recipe for Cannellini alla Toscana. You can use either red or white (cannellini) beans but the red ones add more color contrast. As an alternative you can use one 15 ounce can of beans. Do not discard the liquid in the can as it will improve the body of the sauce.
Votes: 0
Rating: 0
You:
Rate this recipe!
Prep Time 15 minutes
Cook Time 30 minutes
Passive Time 15 minutes
Servings
people
Ingredients
Prep Time 15 minutes
Cook Time 30 minutes
Passive Time 15 minutes
Servings
people
Ingredients
Votes: 0
Rating: 0
You:
Rate this recipe!
Instructions
  1. Put 3 quarts of water and 1/3 cup salt in a 5 quart stockpot or Dutch oven. Bring to a boil over high heat.
  2. Meanwhile, cut the thick stems off the broccoli just below where the stems start to branch into individual florets.
  3. Cut the individual florets off the broccoli by cutting lengthwise through the stalk from top to bottom.
  4. Cut off any remaining stalk just below the floret. These tender stalks can be cut crosswise into one-half inch pieces and added to the florets.
  5. You can use some of the thicker stalks as well, if you wish. To do so, use a vegetable peeler to remove the tough outer skin. Dice the peeled stems into 1/3 inch cubes. Reserve these diced stalks separately from the florets and diced tender stalks.
  6. When the salted water comes to a boil, add the diced, peeled stalks, if using. Return to a boil and cook for 2-3 minutes until they just begin to get tender. Using a spider or large slotted spoon, remove the stalks from the water and plunge them into a bowl of ice water to stop cooking. When cool, drain in a colander.
  7. Keep the water on low heat so you can return it to a boil quickly when needed to cook the pasta.
  8. In a heavy-bottomed pan large enough to hold the finished dish, sauté the garlic over medium high heat until it turns fragrant, about 30 seconds.
  9. Add the anchovies and their oil and continue to sauté, breaking up the anchovies till they turn to a paste.
  10. Continue to cook until the anchovies darken slightly, about 1-2 minutes.
  11. Add the broccoli florets and diced tender stems. If using, add the partially cooked peeled stems. Season with salt and freshly ground black pepper.
  12. Sauté on high heat, stirring very frequently, until some of the broccoli florets just begin to singe, about 5 minutes.
  13. Add the crushed red pepper. Stir to combine.
  14. Add the wine and cover with a tight fitting lid. Cook over medium high heat till the florets are cooked through but not mushy, shaking the pan occasionally.
  15. If all the wine evaporates before the broccoli is cooked, ladle in a bit of the pasta cooking liquid and continue.
  16. When the broccoli is cooked, add the beans and their cooking liquid along with the oregano. Bring to a simmer over gentle heat.
  17. Meanwhile, return the pasta-cooking water to a rolling boil and add the pasta. Cook until the pasta is slightly shy of al dente. The pasta will finish cooking in the sauce.
  18. Put about ¾ cup of pasta cooking liquid into the beans. Reserve another cup of the liquid.
  19. Quickly drain the pasta and add to the beans. Stir well. Bring to a gentle boil, uncovered. Cook stirring occasionally until the pasta is al dente. Add as much of the reserved pasta-cooking liquid as needed to have enough sauce to coat the pasta and broccoli.
  20. The starch in the pasta-cooking liquid will add body to the sauce. One way to incorporate more of the pasta-cooking liquid is to cook the pasta over higher heat so that you can add, and boil off, more of the liquid, leaving the starch behind.
  21. When the pasta is cooked, remove the pan from the heat and stir in the Parmesan cheese and 1 teaspoon freshly ground black pepper. Taste and adjust salt after adding the cheese.
  22. Stir in the finishing extra-virgin olive oil. This will make the sauce glossy and add additional flavor.
  23. The starch from the pasta water and bean-cooking liquid along with the cheese should create an emulsion with the oil. You may need to add more of the reserved pasta-cooking liquid to loosen the sauce.
  24. Serve immediately. Pass extra Parmesan cheese at the table.
Recipe Notes

Copyright © 2017 by VillaSentieri.com. All rights reserved.

Share this Recipe

Mom’s Pasta e Fagioli (Mom’s Pasta and Beans)

February 22, 2017

We didn’t eat a lot of prepared foods growing up.  In fact we almost never did.  OK, there were a few times in the early 60’s where I got to try out those recently-invented “TV Dinners.”

I was well into adulthood before I had a real appreciation for the quality of the homemade food that was put on our table every day.

My mother made putting great food on the table seem effortless.  I remember many Sunday mornings when I’d wake up to find her making ravioli from scratch for our big midday meal: cooking the beef and spinach filling, preparing the dough, rolling and filling the ravioli, all the while a big pot of tomato sauce bubbling away on the stove.  It was just a family Sunday dinner!

Weekday meals were usually less elaborate but no less delicious; maybe homemade sausage, pan-fried potatoes, and a vegetable or two or maybe pasta with sauce leftover from Sunday.  It was always fun to walk into the kitchen to find her making something I’d never had before; something that her mother used to make.  Sometimes that wasn’t even at a defined meal time.

Now I think I understand.  My mother died in 1993 and I bet I didn’t make her version of pasta e fagioli for 20 years after her death.  Then one day, the desire for it just struck me and there I was, in the kitchen, cooking.

It’s become part of my regular routine again after that long hiatus.  Sitting down to a bowl of my mother’s pasta e fagioli is comforting; almost as comforting as if she had made it for me.  There’s just something about the combination of pasta, beans and red sauce that I can’t explain.  It triggers an emotional bridge to what feels like an earlier time in my life.  I’m guessing something similar prompted my mother to occasionally whip up dishes from her youth that she hadn’t made in decades, if ever.

Print Recipe
Mom's Pasta e Fagioli (Mom's Pasta and Beans)
Follow the directions for Cannelini alla Toscana but use dried lima beans instead of cannellini and substitute ½ teaspoon of dried oregano and a sprig of fresh rosemary for the sage. There will be leftover beans that you can freeze or refrigerate for another use. You can also use two 15 ounce cans of Butter Beans in place of the home-cooked lima beans. Mom always used ditalini for this dish. These days, when you can find them (and it can be challenging) they have usually been upgraded from ditalini to ditali, though they are exactly what she used. More frequently, I use a slightly larger, but still rather small, pasta such as the mezzi rigatoni shown here.
Votes: 0
Rating: 0
You:
Rate this recipe!
Prep Time 15 minutes
Cook Time 1 1/2 hours
Servings
people
Ingredients
Prep Time 15 minutes
Cook Time 1 1/2 hours
Servings
people
Ingredients
Votes: 0
Rating: 0
You:
Rate this recipe!
Instructions
  1. Finely dice the onion. Sauté the onion in ¼ cup of olive oil until soft and golden.
  2. Add the crushed red pepper and sauté another minute.
  3. Add the tomato paste and sauté, stirring frequently until the tomato paste turns a shade darker and smells sweet, 2-3 minutes.
  4. Add the water, oregano, basil and salt and pepper to taste. Stir well to fully incorporate the tomato paste.
  5. Bring to a very low boil, partially covered, and cook 30-45 minutes stirring occasionally. Adjust seasoning as needed, tasting several times as the sauce cooks.
  6. Meanwhile, sauté the garlic in the remaining ¼ cup of olive oil very slowly until browned. Remove from the heat and reserve.
  7. The dish can be cooked several hours ahead to this point.
  8. Bring three quarts of water and three tablespoons of salt to a boil.
  9. While the water is heating, add the beans and their liquid to the tomato sauce, return to a simmer, and cook, partially covered till the pasta is ready.
  10. Cook pasta until it still has a small bit of chewy center. It will cook more in the sauce. Scoop out and reserve two cups of the pasta cooking liquid.
  11. Drain the pasta. Add the pasta to the tomato-bean mixture. Add the browned garlic and olive oil. Stir well, cover and cook on very low heat until the pasta is cooked but al dente and the sauce has thickened. Add some of the pasta cooking liquid as needed from time to time to create a smooth sauce.
  12. Off the heat stir in the Parmigiano Reggiano cheese. Taste and adjust seasoning.
  13. It is not unheard of for me to add an extra glug or two of olive oil at this point to get a luscious sauce. Stir and decide if another dash of pasta-cooking water is needed, as well.
Recipe Notes

Mezzi Rigatoni


Copyright © 2017 by VillaSentieri.com. All rights reserved.

Share this Recipe

Salsicce con Cardone (Sausage with Cardoons)

February 17, 2017

We made our move to multi-generational living in 1998 when my husband’s parents moved into the Coach House at our estate in Chicago, The Henry Rohkam House.  (There are a couple pictures of the main house in a prior post.)

Pretty quickly we settled into a routine of having meals together.  When we went to work, the dogs went to Grandma and Grandpa’s (21 feet away in the Coach House) for the day.

My husband started gardening with his father.  A large piece of our one-third-of-an-acre property in Chicago’s Lakeview neighborhood was turned over to cultivation.  We had grapes, strawberries, corn, tomatoes, eggplant, sweet peppers, radicchio, arugula, leaf lettuce, Swiss chard, okra, hot peppers of various types, an array of herbs and other vegetables that varied year by year.  The fruit trees never did very well.  The kiwi thrived but never bore fruit.  One of the four kiwi was accidentally injured and died.  In retrospect, it was probably the male plant (there were three female and one male plant), hence no fruit.

Every fall we canned and preserved foods in various ways.  We made jars of olives marinated in red wine vinegar and herbs from the garden.  We made herb-infused vinegar and olive oil.  We dried herbs for the winter.  We froze vats of tomato sauce.  I’ll admit to even freezing pesto which, while it doesn’t taste like its fresh-made cousin, is pretty awesome in the dead of a Chicago winter!

Some years there were enough strawberries to put up jam.  City squirrels can be quite bold, however.  I was standing alongside the garden one spring day when a squirrel, who had gone grocery shopping in our strawberry patch, literally ran over the top of my foot with a strawberry in his mouth on his way out of the produce isle.

The birds had Houdini-like skills.  Despite wrapping the grape arbor in yards of netting, the birds found their way in, decimated the grapes, and escaped.   The few grapes we were able to harvest were very sweet!

We built a temperature-controlled wine cellar in the basement of the Coach House.  My husband made wine for a few years but stopped when work got too busy.

I started cooking more often with my mother-in-law.  Every month or so, my husband’s grandmother, Noni, would come to visit for a weekend.  Noni was a marvelous cook.  Some dish always appeared during those weekends that I had never had before.  Sausage with Cardone was one of them.

For a vegetable that has been popular since the ancient Romans, I’m surprised I’d never hear of it.  I grew up eating sausage with peppers and onions.  Sometimes the sausage was cooked in a tomato sauce, sometimes not.  Cardone was a whole new thing!

This goes really well with polenta but it’s equally good on its own.  Leftover sauce can be put on pasta or can accompany a frittata.  You may notice from the pictures that we didn’t use as much sausage as called for in the recipe.  We didn’t want leftover sausage but that didn’t mean we didn’t want leftover sauce!  Sadly, the cardone usually all gets eaten on the first go-around but on those rare occasions where it doesn’t, I like to use it as a sandwich filling for lunch.

Print Recipe
Salsicce con Cardone (Sausage with Cardoons)
Cardone looks like oversized celery. It is giant, about 2 feet long as sold trimmed in the grocery store. It is related to the artichoke and was popular among the ancient Romans. Cardone should always be served cooked. Leaves should be removed and not eaten.
Votes: 0
Rating: 0
You:
Rate this recipe!
Course Mains, Meats
Cuisine Italian
Prep Time 15 minutes
Cook Time 2 1/2 hours
Servings
people
Ingredients
Course Mains, Meats
Cuisine Italian
Prep Time 15 minutes
Cook Time 2 1/2 hours
Servings
people
Ingredients
Votes: 0
Rating: 0
You:
Rate this recipe!
Instructions
  1. The starting point: cardone from the market.
  2. Cut off the bottom of the cardone.
  3. Using a vegetable peeler (or knife if you are my mother-in-law), remove the leafy edges of the cardone.
  4. Remove any stringy parts of each rib.
  5. Cut the ribs into pieces approximately 4 inch long. Wash well.
  6. Bring 3 quarts of water to a boil. Add 3 tablespoons of salt and a pinch of baking soda. Add the cardone and boil until you can pierce it relatively easily with the point of a sharp knife. Do not overcook the cardone as it will be cooked further with the sausage.
  7. Remove the cardone from the water. Stop cooking by putting the cardone in a bowl of ice water. When cold, cut into pieces approximately 1 ½ inches long and reserve.
  8. If the sausage is not in links, cut into pieces approximately 4-5 inches in length. Using the tines of a fork, pierce the skin of each piece of sausage in several places.
  9. Heat the olive oil in a large, heavy-bottomed sauté pan or a wide, shallow casserole. Add the sausage and brown well on all sides.
  10. Remove the sausage from the pan.
  11. Add the onions, garlic, parsley, and rosemary to the sausage drippings in the pan. Sauté until the onions are soft and golden.
  12. Add the wine, if using. Allow wine to mostly cook away then add tomato puree and water.
  13. Return the sausage to the pot with the sauce. Season with salt and freshly ground pepper. Simmer, partially covered, for about an hour.
  14. Add the cardone. Taste for seasoning. Simmer, partially covered, until the cardone is tender, approximately 30-45 minutes.
  15. Pour into a serving dish and bring to the table.
Recipe Notes

Copyright © 2017 by VillaSentieri.com. All rights reserved.

Share this Recipe

Rapini with Olive Oil, Garlic, and Red Pepper

February 13, 2017

On the whole, Italians like bitter greens.  In fact, Italians like bitter flavors in general.  For example, consider classic Italian digestifs of Fernet Branca and Ferrochina Bissleri.  Less bitter drinks include Cynar.

Rapini is a bitter green.  As with many foods, names vary.  Rapini can also be called Broccoli Raab, Broccoli Rabe, and Cime di Rape.  While some authorities say that Broccolini and Baby Broccoli are also Rapini, I have found that in American markets, these greens are usually less bitter than Rapini.  I suspect that a different variety of green is marketed under these names in the US.

Greens with olive oil, garlic and red pepper is a classic combination.  With the addition of some anchovies, it makes a wonderful sauce for pasta, especially orecchiette.

In 1989 I moved to Chicago to assume the position of Medical Director of  Chicago-Read Mental Health Center.  At the time, it was the second busiest psychiatric facility in the country.  (Only New York City had a busier psychiatric facility.)  The hospital was on the northwest side of Chicago close to both Italian and Polish neighborhoods so lunches with co-workers were always gastronomically rewarding.

I remember one lunch, early on in my tenure as Medical Director, at a nearby Italian restaurant.  The executive leadership team when out.  I ordered Rapini with Garlic and Oil for my antipasto.  What I got was an Italian-American sized portion of greens in a garlicky, surprisingly spicy broth with lots of bread on the side.

It was glorious.

This version is more restrained.  It is what we serve at home.  However, feel free to amp it up with more olive oil, garlic and red pepper if you’d like.  You can also leave a little more liquid in the dish to sop up with bread, if you’d like.

Print Recipe
Rapini with Olive Oil, Garlic, and Red Pepper
This dish can be made with Rapini, Broccoli Rabe, Cime di Rape, Broccolini, or Baby Broccoli. In the United States, Broccolini and Baby Broccoli seem to be less bitter than Rapini. Which to use is personal taste. It doesn’t take long to cook the greens in the boiling water. It is best to undercook them rather than overcook them as they get a second pass at the heat and can be cooked more if needed. Once the rapini are in the serving bowl I like to douse them with a few tablespoons of spicy extra-virgin olive oil for flavor. Heating olive oil tends to dull its flavor so it is almost always a good idea to add an extra bit of uncooked oil at the end.
Votes: 0
Rating: 0
You:
Rate this recipe!
Course Sides, Vegetables
Cuisine Italian
Prep Time 30 minutes
Cook Time 25 minutes
Servings
people
Ingredients
Course Sides, Vegetables
Cuisine Italian
Prep Time 30 minutes
Cook Time 25 minutes
Servings
people
Ingredients
Votes: 0
Rating: 0
You:
Rate this recipe!
Instructions
  1. The starting point: rapini from the market.
  2. Cut the very ends off the rapini stems.
  3. Find the part on the stem where it begins to branch in a major way. Cut crosswise at this point.
  4. If there are any little offshoots below the cut, remove them. Combine the little offshoots with the tops. Keep the bottom stems separate from the tops.
  5. Remove the outer layer of the peel from the bottom stems. To do this, look at the bottom of the stem. You’ll see a dark green layer surrounding a lighter green center. Insert a sharp paring knife into the stem just where the dark green ends.
  6. Grab the peel between your thumb and the knife and pull down to remove.
  7. Cut the peeled bottom stems into pieces approximately 1 ½ inches long.
  8. You do not need to peel or cut the tops.
  9. Bring three quarts of water to the boil. Add three tablespoons of salt.
  10. Put a bunch of ice cubes in a large mixing bowl add cover with water. Set the ice water aside.
  11. Add the stems to the boiling water. Return to a boil. Cook for 3½ to 4 minutes if you are near sea level but up to five minutes if you are at high elevation. They are done when they are toothy but have lost their crunch.
  12. Using a perforated ladle, remove the stems from the boiling water and put into the bowl of ice water to stop cooking.
  13. Add the tops to the boiling water. Return to a boil. Cook for about 2 minutes if you are near sea level but up to three minutes if you are at high elevation.
  14. Using a perforated ladle, remove the tops from the boiling water and add to the bowl of ice water along with the stem ends.
  15. Thinly slice the garlic crosswise and reserve.
  16. In a large sauté pan, heat 1/3 cup of olive oil over medium heat. Add the garlic, turn the heat to low, and sauté gently until the garlic is golden. Add crushed red pepper and continue to sauté until the garlic is light brown.
  17. Add the wine. The dish can be made ahead to this point. If doing so, immediately remove the garlic-wine mixture from the stove. The addition of the wine will stop the garlic from over-cooking. When resuming, or if you’re not taking a break at this point, bubble away the wine over medium heat until only oil is left in the pan.
  18. Drain the rapini.
  19. Add the rapini to the garlic and oil. Season with salt and freshly ground black pepper. Cover and cook briefly until heated through.
  20. If the rapini are not cooked enough to your taste, cook a bit longer. If necessary add a tablespoon or two of water.
  21. Adjust seasoning.
  22. Pour into a serving bowl and drizzle with a few tablespoons of olive oil. Serve immediately.
Recipe Notes

Copyright © 2017 by VillaSentieri.com. All rights reserved.

Share this Recipe

Cavolfiore alla Friulana (Cauliflower Friuli-Style)

February 1, 2017

I started cooking in the early 1970’s when most cooking authorities were trying to convince us that vegetables needed to be crunchy to be good.  No doubt, many vegetables served on American tables were gray, mushy and lifeless but not all vegetables, and certainly not all vegetable dishes, are meant to be toothy, let along crunchy.

I was having a conversation with friends over dinner in Palm Springs just last week about cooking .  They asked me when I started cooking and when I told them, the muscles on their faces froze ever so briefly which made me do a quick calculation.  I started cooking before they were born!  Which means, basically, I’ve seen a lot of food fads and crazes.  I try to avoid them.

I embrace new ingredients or, as is more often the case with “new” ingredients, old ingredients that are finally finding their way to our markets and are, therefore, new to us.  When I think about the ingredients that are available to me now compared to when I started cooking, the difference is staggering.

Honestly, though, the core of my cooking hasn’t changed.  I still focus on traditional foods.  I try to find dishes that have stood the test of time; dishes that have been made for a generation or two, if not a century or two.

Sometimes, though, food crazes get us to think about how we cook and cause us to make changes for the better.  Take crunchy vegetables.  I think American vegetable cookery started getting better when “everyone” was hyping crunchy vegetables.  It got us to think about what was on our plates and whether the essence of a particular vegetable dish was best presented with soft vegetables, crunchy vegetables, or something in between.

Not every vegetable dish is better with crunchy vegetables.  That took me a while to learn as a novice cook in the 1970s when I tried to convert every vegetable recipe to one with toothy vegetables.  They were not all successful.  Not only does texture change with more cooking, flavor does too.  Sometimes those flavor changes “make” the dish as much as the textural change.

This recipe is a good example, though it is not one that I was making in the 70’s.  The essence of the dish is slow-cooked cauliflower and onions that become sweet as the natural sugars caramelize and the cauliflower softens.

I learned to make this from my mother-in-law, who is from Friuli.  Friuli is northeast of Venice, adjacent to Slovenia.  The food definitely shows the influence of Eastern and Central Europe but more on that in upcoming posts.

Print Recipe
Cavolfiore alla Friulana (Cauliflower Friuli-Style)
This dish goes really well with roasted meat. It is a little on the sweet side because the sugars in the onion and cauliflower caramelize during the long, slow cooking. I especially like it with roast chicken or roast pork. Experiment with the cooking time to achieve different textures, but never crunchy. The cauliflower should be soft but not mushy. You can keep the florets more intact during the cooking by being gentle. You can also press down on them every now and then causing them to break up. Both styles are equally traditional. As you will see in the pictures, I opted for longer cooking to create more caramelization and the pressing motion to break the florets into small pieces.
Votes: 0
Rating: 0
You:
Rate this recipe!
Course Sides, Vegetables
Cuisine Italian
Prep Time 20 minutes
Cook Time 2 hours
Servings
people
Ingredients
Course Sides, Vegetables
Cuisine Italian
Prep Time 20 minutes
Cook Time 2 hours
Servings
people
Ingredients
Votes: 0
Rating: 0
You:
Rate this recipe!
Instructions
  1. Bring a large pot of heavily salted water to a boil.
  2. Meanwhile, cut off the base of stem of the cauliflower and remove the green leaves.
  3. Add the cauliflower to the boiling water and cook, uncovered, until it shows just a little resistance when pierced with the point of a knife. This will take between 6 and 10 minutes depending on the cauliflower and how far above sea level you are. When in doubt, opt for less cooking rather than more as you can compensate during the slow-cooking phase.
  4. Using a large slotted spoon, remove the cauliflower. Place it in a colander to drain.
  5. Meanwhile, in a large sauté pan, sauté the diced onion in olive oil (or butter) over medium-high heat. Season with salt. The salt will draw out moisture from the onion. As the moisture evaporates you will need to reduce the heat to medium-low to prevent the onion from browning.
  6. When the liquid has evaporated and the onion is beginning to soften, add the minced garlic, if you are using it. Continue to cook over low heat until the onion turns golden but not brown. This can easily take another 20-30 minutes.
  7. As the onion is cooking, cut the cooked cauliflower into florets.
  8. When the onion is golden, add the cauliflower. Season with salt and freshly ground black pepper. Cover and cook, stirring occasionally.
  9. Add a little wine or water from time to time, as needed, to keep the cauliflower from sticking. There really shouldn’t be any appreciable liquid in the bottom of the pan. Should that happen, uncover the pan slightly till the liquid evaporates.
  10. The florets will break apart as the cauliflower cooks. If you want small pieces, press down on the cauliflower from time to time while cooking. As the cauliflower cooks, taste a few times to adjust salt and pepper.
  11. The cauliflower will slowly darken through caramelization. How far you want to go is up to you. I went fairly far when cooking the cauliflower in these pictures. The cauliflower gets softer the longer it cooks but it also caramelizes more. Figure out the balance of texture and taste you like best.
Recipe Notes

Copyright © 2017 by VillaSentieri.com. All rights reserved.

Share this Recipe

Pasta ai Funghi (Pasta with Mushrooms)

January 27, 2017

Growing up, pasta was almost always served with a long-cooked Southern Italian ragu.  Yes, there was the occasional sauce of vegetables sautéed in olive oil till they softened enough to make a sauce but those sauces were the exception to the rule.

These days, a long-cooked ragu is still the epitome of pasta cooking for me but far more often I make quicker sauces.  Pasta with mushrooms is one of them.

In my last post, I introduced nepita, an herb used in Italy that is really not commonly available in the US.  Nepita pairs really well with mushrooms.  The nepita that I use is from plants that we grow from seeds we brought back from Italy in 1996.  I’m so concerned that one day our nepita won’t make it through the winter and reappear in the spring that we’ve taken to backing it up the way other folks back up their data.

Over the years we’ve gifted nepita plants to friends who like to garden.  Should a disaster ever befall our nepita, there should still be a clone of it somewhere with enough seeds that we can germinate another plant or two.  For an herb that I’ve only known for 20 years, it’s become an integral part of my kitchen.

While there’s no real substitute for nepita, there are lots of herbs that go well with mushrooms.  In this rendition, I’ve called for basil and oregano, the combination that I usually use when I don’t have nepita.  Marjoram also works well, with or without a pinch of thyme, but marjoram is a relatively uncommon herb in Italian cooking.

Herbs are not a major player in this dish.  Though nepita is distinctive, there are so many layers of flavor from the dried porcini, onion, garlic, and marsala that the lack of nepita isn’t really a big deal.  Basil and oregano work well and, in fact, are what I used before that 1996 trip to Tuscany where I discovered nepita.

Pasta ai Funghi was one of the courses I served at my father-in-law’s birthday dinner last week.  Here are a couple of pictures of that dinner from our home in Palm Springs.


My father-in-law (left) and mother-in-law. Good friend, Gino Barcone is in between.
From left to right, John Berl, Bill Hoadley, and Bob Bauernschmitt.


Print Recipe
Pasta ai Funghi (Pasta with Mushrooms)
While many mushroom-based sauces for pasta contain cream and butter, this one uses only olive oil. It creates a beautiful, glossy sauce. The mushrooms can be prepared several hours in advance making this an ideal dish if you are cooking for company.
Votes: 0
Rating: 0
You:
Rate this recipe!
Prep Time 25 minutes
Cook Time 35 minutes
Servings
people
Ingredients
Prep Time 25 minutes
Cook Time 35 minutes
Servings
people
Ingredients
Votes: 0
Rating: 0
You:
Rate this recipe!
Instructions
  1. Soak porcini in enough warm water to just cover. When soft, about 15 minutes, squeeze excess water out of the mushrooms. Reserve the liquid. Finely chop the porcini.
  2. Clean the mushrooms by wiping them with a damp cloth.
  3. If you are using common white mushrooms, slice off the very bottom of the stem as it is usually a bit dry. There is no need to remove the rest of the stem, though.
  4. Turn each mushroom upside down and cut into 1/8 inch thick slices. If the mushrooms are really large, you might have to make a crosswise cut as well.
  5. Slice or cut other mushrooms into similar sized pieces. For example, cut large portobello mushrooms into long strips approximately 1/8 inch thick and then cut each strip into smaller pieces.
  6. If you are using oyster and/or enoki mushrooms cut them into slightly larger pieces and keep them separate as they require less cooking than most other mushrooms.
  7. Finely chop the onion and reserve.
  8. In a sauté pan large enough to hold the mushrooms and cooked pasta, heat the ¼ cup of olive oil, over high heat. When the oil is hot, add the finely chopped porcini. Sauté a minute or two until the porcini becomes aromatic, being careful not to burn them.
  9. Add the reserved porcini soaking liquid. Over high heat, quickly evaporate the liquid, stirring often.
  10. Once the liquid is evaporated, add all the cut-up mushrooms to the sauté pan, except for quick cooking types like enoki and oyster mushrooms. Sauté the mushrooms, still on high heat, stirring often until they have absorbed all the olive oil.
  11. Season liberally with salt and reduce the heat to medium low.
  12. Stir the mushrooms often until they begin to release their liquid. When they do, turn the heat to high and cook until all the liquid is evaporated, stirring often. Add freshly ground black pepper to taste.
  13. Continue sautéing the mushrooms until they just begin to brown. Now is the time to add any quick-cooking varieties of mushrooms, such as oyster and enoki, you may be using.
  14. Continue to sauté until of the mushrooms are nicely browned.
  15. When the mushrooms are brown, add the onion and crushed red pepper.
  16. Over medium heat, cook until the onion is soft and golden.
  17. Stir in the garlic and sauté for about one minute until it becomes fragrant.
  18. Stir in the oregano and basil, or, if you are lucky enough to have a stash, about 1 teaspoon of fresh nepita or ½ teaspoon of dried. Add the marsala. It will evaporate almost immediately.
  19. Remove the sauté pan from the heat until the pasta is ready. The mushrooms can be made several hours ahead to this point.
  20. Cook the pasta in well-salted water until al dente. Meanwhile gently warm the mushrooms if they were made ahead.
  21. When the pasta is cooked, remove about 1 cup of pasta-cooking liquid and reserve. Quickly drain the pasta. Do not rinse. Add the pasta to the warm mushrooms along with about ¼ cup of the reserved pasta-cooking liquid. Cook over low heat, stirring often for about one minute.
  22. Remove the pasta and mushrooms from the heat. Add the Parmigiano Reggiano cheese and stir to combine. Add 2 tablespoons of extra virgin olive oil and the truffle oil, if using. Stir to combine. The cheese and the starch in the pasta cooking liquid should help to emulsify the olive oil and water, creating a glossy sauce.
  23. If the pasta is too dry, add more pasta-cooking liquid, just don’t make it watery. The cheese, olive oil and water should hold together.
  24. Taste and adjust seasoning, if needed.
  25. Serve immediately, preferably in warmed pasta bowls. Pass additional freshly grated Parmesan cheese at the table.
Recipe Notes

I most often make this with ordinary white button mushrooms, especially if I am going to add the truffle oil. Using an array of different mushrooms, such as cremini, baby bella, oyster, and enoki makes a visually and texturally interesting dish, however.

When I make pasta, I always pour some of the pasta-cooking liquid into the serving bowl to warm it.

Copyright © 2017 by VillaSentieri.com. All rights reserved.

Share this Recipe

Pollo all’Uccelleto (Chicken Little Bird Style)

January 23, 2017

I first tasted this dish in Tuscany in the little hill town of Benabbio, in September 1996.  My husband’s great Great Aunt Fidalma, Zia Fidalma, made it with little birds, sparrows actually, that her husband, Faliero, had shot.

That was one of my most memorable meals in Italy.  My husband and I had traveled to Italy with his parents.  We stayed in a little hotel in the town of Fornoli where my father-in-law grew up.  We alternated meals at the homes of numerous relatives throughout the area.

It was wonderful sitting in Zia Fidalma’s kitchen watching her put together components of the meal in that seemingly effortless way that happens in homes throughout Italy.  We had sautéed mushroom caps.  Zia Fidalma foraged the mushrooms.  I remember them sitting in a shallow box on the kitchen counter.  She plucked a few out of the box, cleaned them.  They were quickly sautéed and seasoned with salt, pepper, and nepita.

I can’t get a consensus on the spelling of nepita.  I’ve seen it as gnebita, gnepita, and nepeta, among others.  It is a variety of catmint.  Zia Fidalma uses it to season mushrooms.  It is a magical combination.

We smuggled nepita seeds back from Tuscany on that visit, along with heirloom tomato seeds, both from Zio Faliero’s garden.  We’ve grown both ever since.  For 20-plus years we’ve had nepita; first in our garden in Chicago (at the Rohkam House, where we lived starting in January 1996) and then subsequently at Villa Sentieri, in Santa Fe.

The Rohkam House when we lived there.
The Rohkam House shortly after it was built in 1887.

There are only three components of that meal that I remember clearly, the mushrooms, the little birds, and the wedge of Parmigiano Reggiano brought out at the end of the meal for us to eat with fruit.  I know there was a pasta but I can’t remember what it was.  The same is true for the side dishes (contorni, in Italian).

My mother-in-law was in heaven with the little birds.  She was sitting across the table from me. The meal had become languorous by then and it wasn’t, somehow, inappropriate for me to pull out my video camera.  Remember those?  I’m talking about dedicated video cameras with cassettes for recording, not phones or cameras with video capability.

As she was reveling in her little birds (uccelleti, in Italian) I used my video camera to focus in on her.  First on her face, but then ultimately on just her lips.  Her lips filled the screen like the lips in the opening moments of the Rocky Horror Picture Show.  There were those lips, sucking in little bird parts then extruding cleaned bones.  Every now and then there was the occasional bit of bird shot that needed to be eliminated.

To this day, that video footage is a kind of kompromat in our family.  Thanks to President Trump for making that term common knowledge.  My mother-in-law hates that video footage.  I occasionally mention its existence and (vaguely) threaten to allow it to surface…as I did for this post but, in the end, in the interest of domestic harmony, did not.

Print Recipe
Pollo all'Uccelleto (Chicken Little Bird Style)
I first had this dish in Tuscany. It was made, literally, with little birds (blackbirds) bagged by my husband’s Great Uncle Faliero. Since little birds are not easily available in the US, I rendered the dish using chicken after returning from the 1996 trip to Italy. I called it “Chicken Little Bird Style” or “Pollo all’Uccelleto.” Much to my surprise, years later, I discovered that Italians do, in fact, refer to this preparation as “all’Uccelleto,” and use it on things other than little birds (chicken, for example). What simply started out as Uccelleti, “Little Birds,” became for me "Pollo all’Uccelleto," or “Chicken Little Bird Style.” From Great Aunt Fidalma’s kitchen to you is Chicken Little Bird Style. If you actually have little birds, by all means, give them a try. If not, chicken thighs are a great, if less gamey, substitute. Use good quality olives for this dish. If you don’t have access to an Italian market, I suggest using olives from the olive and antipasto bar that is common in many supermarkets these days. I usually use half oil-cured black olives and half green olives, such as castelvetrano. I prefer using olives with pits.
Votes: 0
Rating: 0
You:
Rate this recipe!
Course Poultry
Cuisine Italian
Prep Time 20 minutes
Cook Time 2 1/2 hours
Servings
people
Ingredients
Course Poultry
Cuisine Italian
Prep Time 20 minutes
Cook Time 2 1/2 hours
Servings
people
Ingredients
Votes: 0
Rating: 0
You:
Rate this recipe!
Instructions
  1. Remove the leaves from the rosemary and oregano.
  2. Mince the sage, rosemary, and oregano leaves. Reserve.
  3. Remove the skin from the chicken thighs and any large pieces of fat.
  4. Using the broad side of a chef’s knife, bruise (smash, really) the garlic cloves.
  5. In a heavy skillet large enough to hold the chicken thighs in a single layer, heat the olive oil.
  6. When the oil is hot, add the chicken thighs and garlic. Season the chicken with salt and freshly ground black pepper to taste.
  7. Brown the chicken, turning several times. As the garlic cloves get dark brown, remove and discard them before they burn.
  8. When the chicken is brown, and all garlic has been removed, add the tomato sauce, bay leaves, minced herbs (rosemary, sage, and oregano) and crushed red pepper.
  9. Cover and cook over low heat, stirring occasionally and turning chicken over every 30 minutes or so, for approximately 1 hour.
  10. If the sauce gets too dry add a little white wine (or water) from time to time.
  11. After an hour, add the olives, cover, and continue cooking over low heat, stirring occasionally and turning chicken over every 30 minutes or so, for approximately 1 more hour.
  12. Taste and adjust salt and black pepper during the last half hour of cooking. The olives will be salty, so it's best to wait till they've cooked a while before adding more salt.
  13. When finished, the chicken should truly be “fall-apart” tender and the sauce should be mostly a red colored olive oil with just a tiny bit of tomato sauce.
Recipe Notes

I don’t usually use canned tomato sauce. I prefer to use tomato paste and water. For this dish I use tomato sauce because so little is needed and it’s consistent with what Great Aunt Fidalma did. If you want to use tomato paste, mix 1½ tablespoons of tomato paste with 6 tablespoons of water and use in place of the tomato sauce.

Copyright © 2017 by VillaSentieri.com. All rights reserved.

Share this Recipe

Pasta e Fagioli (Pasta and Beans)

January 18, 2017

Talk about comfort food!  Pasta e Fagioli (pasta and beans) hits the spot (for me, at least!).

There are endless variations.  White kidney beans, red kidney beans, chick peas, butter beans, fava beans, for example.  Ditalini, mezzi rigatoni, lumaconi, orecchiette, linguine, and more.  Not to mention the possibilities of tomato sauce, anchovies, broccoli, rapini, and escarole.  I could go on but you get the point.  You could mix and match just those ingredients and come up with hundreds of different combinations.

Growing up, my mother made only one version that I recall.  It featured butter beans, tomato sauce and ditalini.  The amount of liquid was equivalent to pasta with a red sauce.  My Aunt Margie, my mom’s sister, made hers with chick peas and ditalini, no tomato sauce, and it was definitely more of a soup.  My guess is that my grandmother made both versions, and probably others, but my mom and my aunt each settled on one for their cooking repertory.

Then there’s a version that I learned from a work colleague, Louis Evangelista, more than thirty years ago.  He learned it from his Sicilian grandfather.  It features linguine, red kidney beans, escarole, red pepper, and an abundant amount of garlic.

Then there’s orecchiette with kidney beans, broccoli and anchovy.

But we’re not making any of these today.  We’re doing a simple version with kidney beans and lumaconi.  The others will make their appearance in the coming months.

Lumaconi is a wonderful pasta shape for pasta e fagioli.  Lumaconi means snails.  Look at the picture below and you’ll see the resemblance.  What’s so cool about using lumaconi is that the beans naturally slip inside the cooked pasta for the perfect mouthful of beans and pasta!

If you use red kidney beans rather than white, the contrast between the bean and pasta will look startlingly like real snails.  This might not be a good thing depending on your audience!

I strongly encourage you to start with dry beans rather than canned.  Follow the recipe for Cannellini alla Toscana using either white or red kidney beans.  For something as hands-off as putting a pot of beans in the oven you’ll be rewarded with enough beans for two, if not three, meals plus a taste profile that is infinitely superior to canned beans.

This last point was hammered home to me a few months ago.  We were in Alamogordo with Pat and Becky, friends from Santa Fe.  We spent the day at White Sands National Monument sledding down the dunes followed by lunch in Ruidoso before returning to our little house in Alamogordo (the house is another story for another day).

We didn’t feel like going out, not that there are many places to go out to in Alamogordo unless you count Chili’s, which, inexplicably, is my husband’s favorite restaurant in town.  Besides, we made the requisite pilgrimage to Chili’s the night before.

So, a couple of cans of kidney beans later, I was making pasta e fagioli.  It was good, no doubt.  But it had been a very long time since I had used canned beans (even though there is an entire phalanx of canned beans in my pantry).  I was actually startled by the difference in taste and texture, having grown so accustomed to using home-cooked beans.

However, by all means, if using canned beans is the difference between trying this dish, and not.  Go for it!  You might want to throw an extra bit of herbs in the pot at the beginning, like a bay leaf and some sage, but it’s not really essential.

Let me know what you think of the recipe.  And for those of you who have your own favorite version of pasta e fagioli, let me know what it is.

Print Recipe
Pasta e Fagioli (Pasta and Beans)
The difference in taste and texture between home-cooked beans and canned beans is dramatic. I recommend cooking either red or white kidney beans using the Cannellini alla Toscana recipe. While I always keep canned beans on hand for emergencies, my freezer is also always stocked with a variety of cooked beans. Whenever I make Cannellini alla Toscana, I freeze leftover beans in portions of 1 ½ cups of beans covered in whatever cooking liquid is left. I never discard any of the cooking liquid. Ideally, you should have enough cooking liquid to cover the beans for the first part of the cooking, before adding the pasta and some pasta-cooking liquid. If you are using canned beans, two 15 oz. cans of beans is the right amount. Do not discard the liquid in the can. It will help to thicken the sauce.
Votes: 0
Rating: 0
You:
Rate this recipe!
Prep Time 15 minutes
Cook Time 40 minutes
Servings
people
Ingredients
Prep Time 15 minutes
Cook Time 40 minutes
Servings
people
Ingredients
Votes: 0
Rating: 0
You:
Rate this recipe!
Instructions
  1. Combine the beans and their liquid, onion, basil, and red pepper, and freshly ground black pepper to taste in a heavy-bottomed pot large enough to contain the cooked pasta and beans. If the bean cooking liquid and wine does not cover the beans, add water to just cover.
  2. Simmer, partially covered approximately twenty minutes. Taste for salt after about 10 minutes. Remember that the pasta will be well salted and you will be adding Parmigiano so best not to over-salt at this point.
  3. Meanwhile, bruise the garlic with the side of a knife.
  4. Sauté the garlic in the olive oil very slowly until browned. Garlic should be quite brown but not burnt which would make it bitter. Remove and discard garlic. Reserve the garlic-flavored oil.
  5. Cook pasta in 4 quarts of abundantly salted water. The pasta will finish cooking with the beans, so there should still be a small core of hard pasta in the center.
  6. Just before draining the pasta, scoop out and reserve about two cups of the pasta cooking liquid.
  7. If you will not be serving the pasta e fagioli in the cooking pot, pour some of the cooking water into the serving bowl to warm it while you finish cooking the pasta and beans.
  8. Drain the pasta but leave some water clinging. That is, there is no need to shake the colander. Add the pasta to the bean mixture. Stir to combine. Add the garlic oil. Mix well.
  9. Cover tightly and cook over very low heat for approximately 10-15 minutes stirring occasionally until the pasta is cooked through but still ad dente. Add a little of the reserved pasta water from time to time if needed. When the pasta is finished there should be just enough water remaining to create a sauce.
  10. Off the heat, stir in the Parmigiano Reggiano.
  11. The combination of the cheese and the starch from both the bean cooking liquid and the pasta cooking liquid should create a glossy sauce.
  12. You might want to stir in an extra tablespoon or two of extra virgin olive oil both for the flavor and to help emulsify the sauce. Taste and adjust salt and pepper if needed.
  13. If not serving the pasta in the cooking pot, drain and dry the warmed serving bowl and pour in the pasta.
  14. Serve the pasta e fagioli with additional freshly grated Parmigiano Reggiano cheese and crushed red pepper.
Recipe Notes

More than other seasonings, quantities of dried red pepper are mere suggestions. Different types of red peppers vary in their heat and flavor profile. Different people have different tolerances for the heat of peppers. If I were making this dish for only myself, I would add at least a teaspoon of crushed red pepper and I’d probably still add more at the table. The suggested ¼ teaspoon is a modest amount that should not cause difficulty, even for individuals with a low tolerance for spiciness. However, make sure that you use one of the more traditional types of crushed red peppers, or even the whole dried Italian peppers that I used in this recipe. Do not make the mistake of using a dried version of one of the super-hot peppers (like bhut jalokia or naga jalokia or even Habanero or Scotch Bonnet) without understanding the heat level they pack!

Copyright © 2017 by VillaSentieri.com. All rights reserved.

Share this Recipe

Sformato di Spinaci (Spinach Casserole)

January 13, 2017

The word sformato in Italian means deformed or shapeless.  When applied to food, standard Italian-English dictionaries often translate it as pie or soufflé. It is none of the above.

A sformato is most definitely not deformed or shapeless.  In fact, a food historian described a sformato as “something that was cooked in the mould [sic] and then extracted from it” (Alexandra Grigorieva, Naming Authenticity and Regional Italian Cuisine in Authenticity in the Kitchen: Proceedings of the Oxford Symposium on Food and Cookery 2005, edited by Richard Hosking).  Nor is a sformato really a pie or a soufflé as those terms are usually used.  It has no crust of any sort, as would a pie.  It is not puffy like a souffle.  Sometimes it doesn’t even contain eggs.

A sformato is most often made of vegetables, usually bound with some combination of eggs, cream, cheese, and/or béchamel (balsamella or besciamella in Italian), and cooked in a baking dish.  I think the best English translation of the word is casserole.

Sformato di Spinaci, spinach sformato (or, reluctantly, spinach casserole), is one of those dishes that has iconic status in my husband’s family.  Like Merluzzo in Umido, the recipe came from Italy with his grandmother whom we called Nonni.  Nonni is one of those made up words that sometimes take hold in a family based on the mispronunciations of little kids.  The Italian word for grandmother is Nonna.  However, Nonni is to Nonna as Gramma is to Grandmother.

Just as Pasta Ascuitta has only one meaning in my family, Sformato has only one meaning in my husband’s.  If you simply say “sformato,” everyone knows you mean spinach sformato, and not, for example, cauliflower sformato.

I first had sformato at Christmas Dinner at my in-law’s house in 1989.  Although I had been cooking northern Italian food since 1973 based largely on Marcella Hazan’s wonderful cookbooks, that Christmas was really the beginning of my learning to make some of my husband’s family’s northern Italian favorites.  It’s really a whole different taste profile from the southern Italian dishes I grew up with.

I’ve actually taken a heretical twist with my interpretation of Nonni’s sformato. I’ve added a little balsamella for moisture. This was most definitely not in the original, though it is not an uncommon addition to sformato. If you want to make the original version, just leave out the balsamella.  It will be a little drier.  You might want to not squeeze the spinach quite as tightly if you don’t include the balsamella.

Print Recipe
Sformato di Spinaci (Spinach Sformato or Spinach Casserole)
Nonni always made this with ground beef but Italian sausage, casing removed and crumbled, works really well (a bit of southern Italian heresy creeping in!). It can also be made without meat, but the amount of spinach should be increased by an additional 10 oz. to a total of 30 oz. I have occasionally used fresh spinach but, honestly, frozen chopped spinach works just fine. I doubt you could reliably tell the difference in a side-by-side comparison of fresh vs. frozen spinach in this dish.
Votes: 0
Rating: 0
You:
Rate this recipe!
Course Vegetables
Cuisine Italian
Prep Time 45 minutes
Cook Time 1 hour
Passive Time 15 minutes
Servings
people
Ingredients
For the spinach mixture
For the balsamella
Course Vegetables
Cuisine Italian
Prep Time 45 minutes
Cook Time 1 hour
Passive Time 15 minutes
Servings
people
Ingredients
For the spinach mixture
For the balsamella
Votes: 0
Rating: 0
You:
Rate this recipe!
Instructions
For the spinach mixture
  1. Cook the frozen spinach in a heavy bottomed sauce pan tightly covered until thawed, breaking up the spinach from time to time.
  2. As soon as the spinach is thawed, pour the contents of the pan into a fine mesh sieve and allow the spinach to drain and cool.
  3. When the spinach is cool enough to handle, squeeze small handfuls of the spinach to remove excess water.
  4. Cut through the mass of squeezed spinach about eight or ten times with a knife then rub it through your fingers to loosen it. It will be pretty tightly wadded up from squeezing out the liquid.
  5. Brown the ground beef or sausage in olive oil over medium heat. You want to get some really browned bits of meat for the flavor. Don't make the mistake of just cooking the meat until it is no longer pink.
  6. When the meat is nicely browned, add the onion and cook until golden and soft. Add the garlic and sauté until fragrant, about 1-2 minutes.
  7. Combine the meat mixture and spinach in a large mixing bowl. Season with salt and pepper and allow to cool briefly.
  8. Meanwhile, make the breadcrumbs by removing the crusts from a slice of two-day old home-style white bread. Tear the bread into pieces and whiz in a food processor until processed into evenly sized crumbs. Reserve.
  9. Melt the butter and toss with the breadcrumbs. Reserve.
  10. Make the balsamella (see directions below).
  11. Add the balsamella to the cooled meat and spinach mixture. Stir well, loosening up the spinach. When well combined, stir in the eggs. Be certain that the mixture is not so hot that it cooks the eggs.
  12. Reserve two tablespoons of the Parmesan cheese and mix the remainder into the spinach-meat-balsamella mixture.
  13. Pour the spinach mixture into a buttered 9-inch round or 8-inch square baking dish. Sprinkle top with the buttered crumbs and reserved Parmesan cheese.
  14. Bake at 350°F for approximately 60 minutes or until golden brown.
  15. Cool about 10 minutes before cutting and serving.
For the balsamella
  1. Heat the milk in a small heavy-bottomed saucepan until bubbles begin to form around the edges. Do not bring the milk to a boil.
  2. Meanwhile, melt the butter in a saucepan and add the flour when the foam subsides. Cook for several minutes without browning.
  3. Add the milk, approximately two tablespoonsful at a time, mixing well after each addition. Adding the milk in small amounts should allow you to stir out any lumps before adding the next bit of milk.
  4. After all the milk has been added, bring to a boil and cook for one minute, until thickened.
  5. Remove from the heat and stir in the nutmeg.
Recipe Notes

This recipe doubles well.  If you want to cook a double recipe in a single pan, use a 9-inch by 13-inch baking dish.  Bake at 325°F rather than 350°F as it will brown too much around the outside before the inside is cooked.  If necessary, raise the heat to 375°F at the very end, and put the sformato on the top shelf of the oven, to brown the top.

If you want to use fresh spinach, use 2 pounds instead of the 20 ounces of frozen spinach.  Remove the stems.  Wash the spinach, shaking off most of the water.  Put the spinach in a heavy-bottomed Dutch oven with just the liquid clinging to the leaves.  Cook covered, over medium heat till fully wilted.  Drain and proceed as above with the exception that you will need to do much more chopping of the cooked and squeezed spinach than the eight to ten cuts suggested above.

Copyright © 2017 by VillaSentieri.com. All rights reserved.

Share this Recipe