Fresh Corn Sautéed in Butter

August 16, 2017

I moved full-time from Chicago to Santa Fe in early 2012. I still get asked if I miss anything about Chicago. I think Chicago is a wonderful city but, honestly, the only things I miss are related to food. I miss really good Italian restaurants and I miss the abundance of specialty food shopping.

Go backwards to the late 80’s when I moved from Philadelphia to Chicago (with a one-year stint in Tucson in-between). It was pretty easy for me to find replacements for favorite restaurants and specialty food shopping. It was all but impossible to replace New Jersey farm stands and especially fresh corn, Silver Queen Corn, to be exact.

There I was in the heartland, awash in corn and soybeans, and there was no really good corn-on-the-cob to be had. It was a sad, sad day when I realized something as simple as good corn-on-the cob was basically gone from my table.

To be sure, I bought and cooked corn-on-the-cob but it was never the same.

Not only is Silver Queen an amazing variety of corn but farm stands in New Jersey (at least way back then) were set up on the road alongside the farm. The corn was on the stalk mere hours before it was sold. It was ultra-fresh.

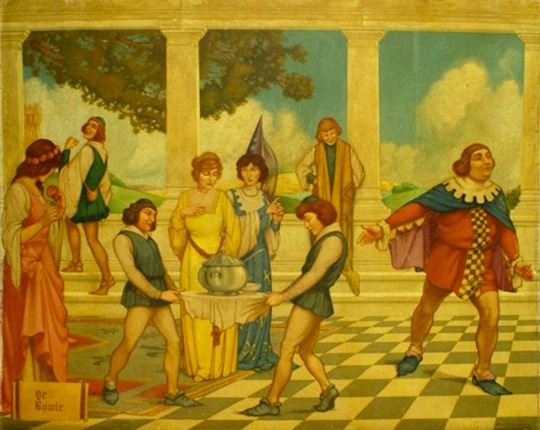
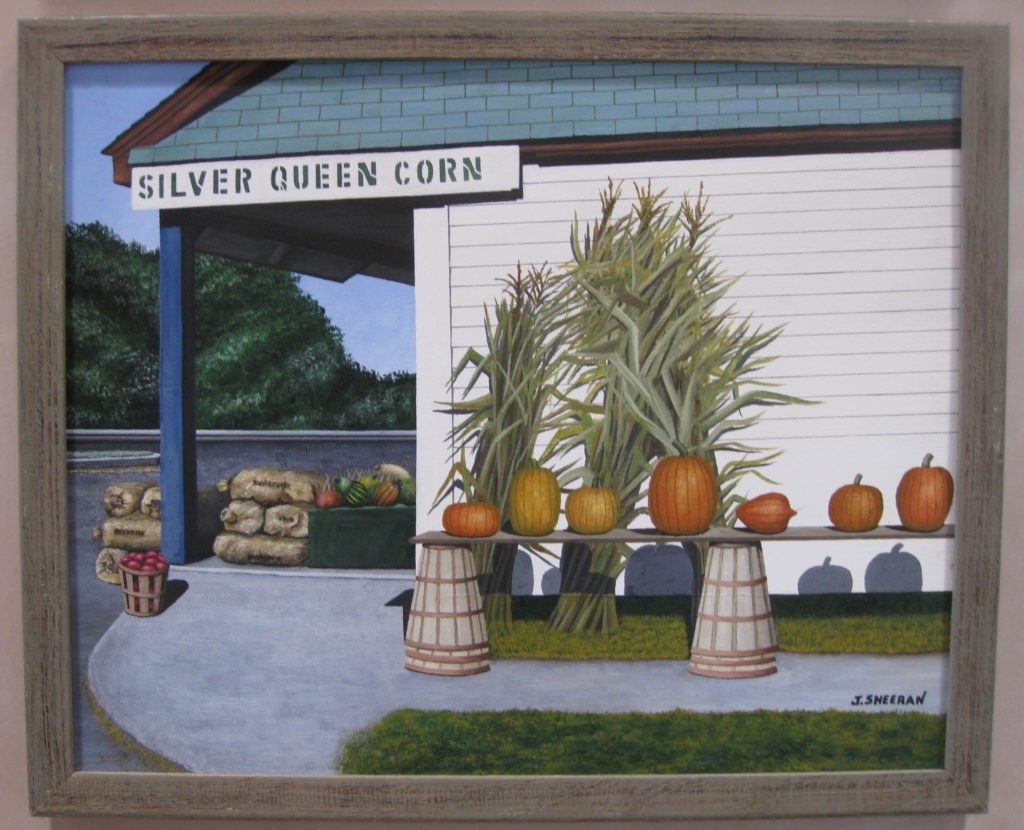
I was actually so enamored of Silver Queen Corn when I lived in Philadelphia that I bought an amateur piece of art simply because of the subject matter. See below.

Then, one day, Jim Nutter prepared corn in a Southern style that compensated for the absence of Silver Queen Corn in my life: Corn Fried in Butter.  I always refer to this as Corn Sautéed in Butter but a Southern cook would most likely refer to it as “fried.”

The method came from his husband’s mother, Mildred Burgess Hamill. Mrs. Burgess, as she was known, ruled her kitchen. One of the very few times Phil Burgess was allowed to help his mother in the kitchen, it was shucking corn for this dish.

The dish is pure simplicity: corn and butter, seasoned with salt and pepper. Sure, you can gussie it up with cream or spice it up with jalapeno peppers but I like it best in its pure state. This two-ingredient recipe (salt and pepper don’t count, really, as ingredients) goes beyond the sum of its parts. I can’t explain why. It just does.

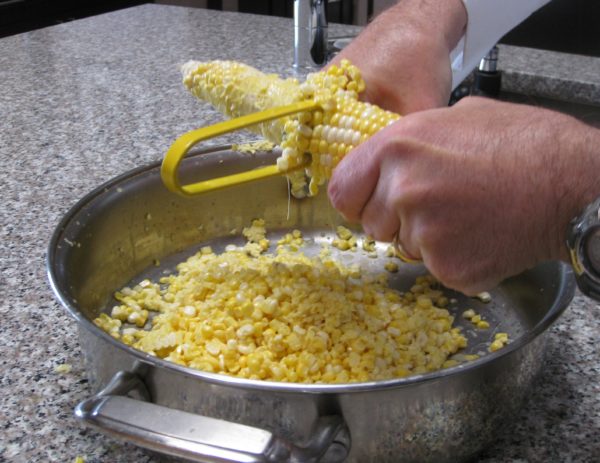
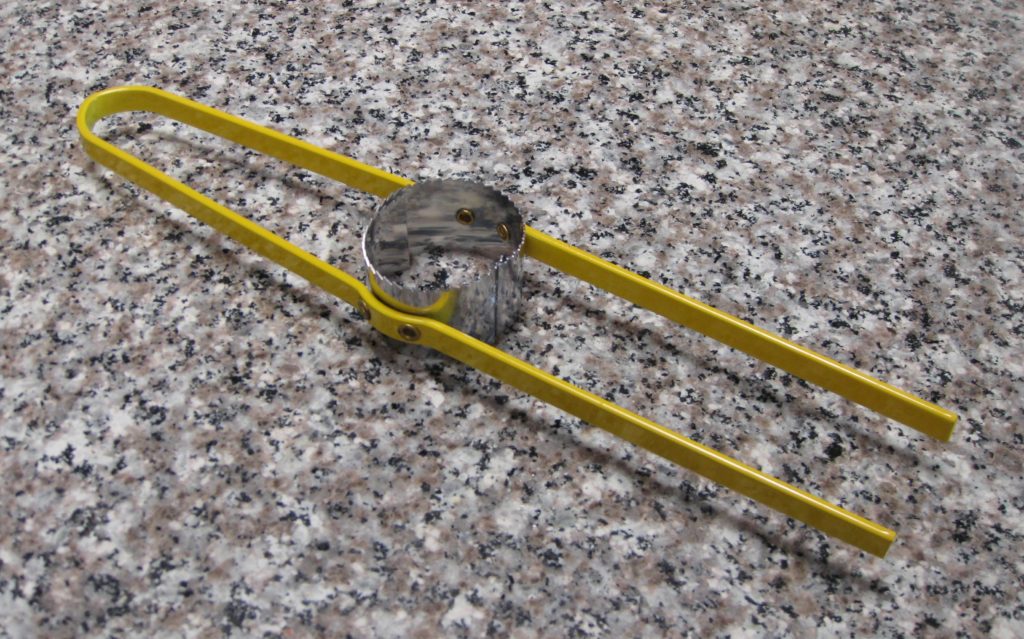
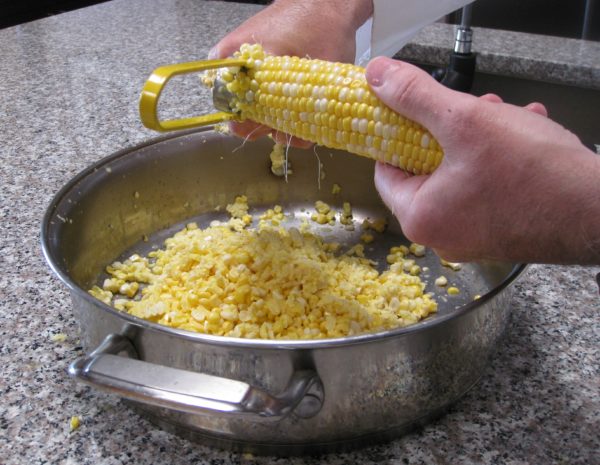
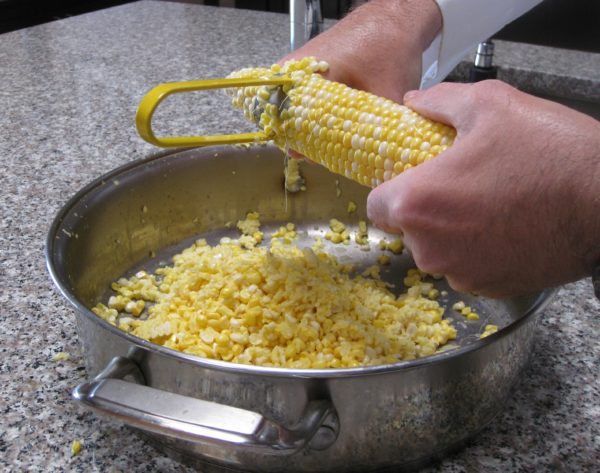
Traditionally, Italians did not eat much fresh corn. Polenta, yes (in the north) but fresh corn, rarely. I made this dish 20-some years ago when my husband’s Great Aunt Fidalma and Great Uncle Faliero were visiting Chicago from Tuscany. Not only did they like it, but Zia Fidalma was fascinated by the tool I used to remove the corn kernels. After seeing me do one ear of corn, she decided to take over and do all the remaining ones!

A nifty tool for cutting kernels off the cob

Follow us


Click HERE to join our mailing list and you’ll never miss a recipe again!

Print Recipe
Fresh Corn Sautéed in Butter
This is an elegant way to serve fresh corn that preserves all of its peak-of-season goodness. You can make it extra-rich by adding a few tablespoons of heavy cream and stirring to incorporate just before removing the corn from the heat, if you would like. You can also change up the flavor profile by adding a finely diced jalapeno pepper at the beginning, as Jim Nutter often does. A pinch of sugar sometimes helps to improve the flavor if the corn is not farm-stand fresh. Some Southern cooks might cook this longer but since really fresh corn tastes good raw, long cooking is not necessary.
Votes: 0
Rating: 0
You:
Rate this recipe!
Course Sides, Vegetables
Cuisine American
Prep Time 15 minutes
Cook Time 10 minutes
Servings
people
Ingredients
Course Sides, Vegetables
Cuisine American
Prep Time 15 minutes
Cook Time 10 minutes
Servings
people
Ingredients
Votes: 0
Rating: 0
You:
Rate this recipe!
Instructions
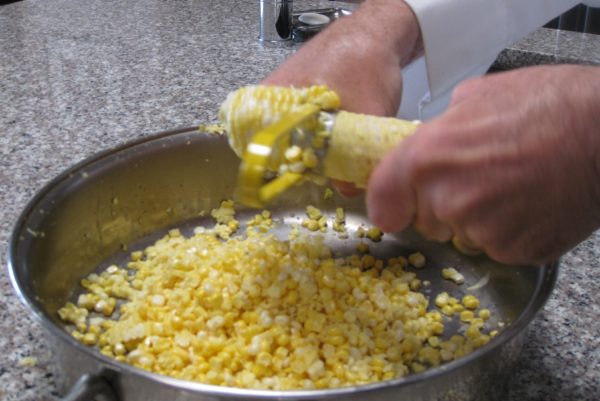
  1. Cut the corn kernels off the cobs.
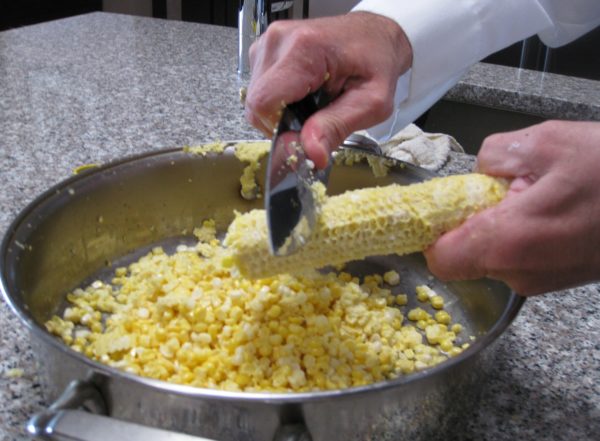
  2. Scrape the cobs with a knife to release any juice.
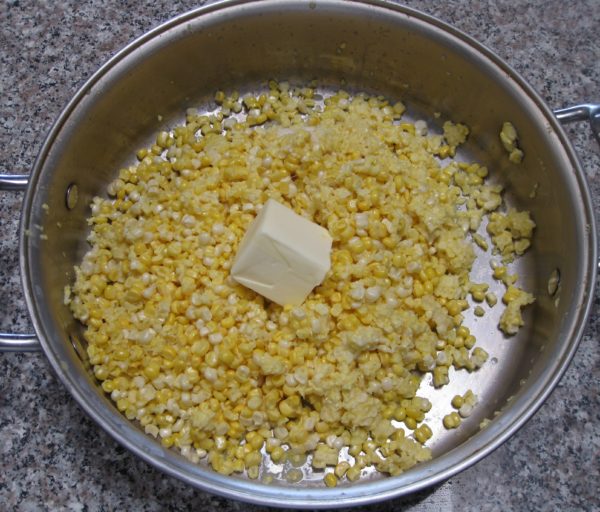
  3. Put the corn and butter in a heavy-bottomed sauté pan.
  4. Season with salt and pepper to taste.
  5. Heat gently to warm the corn and butter.
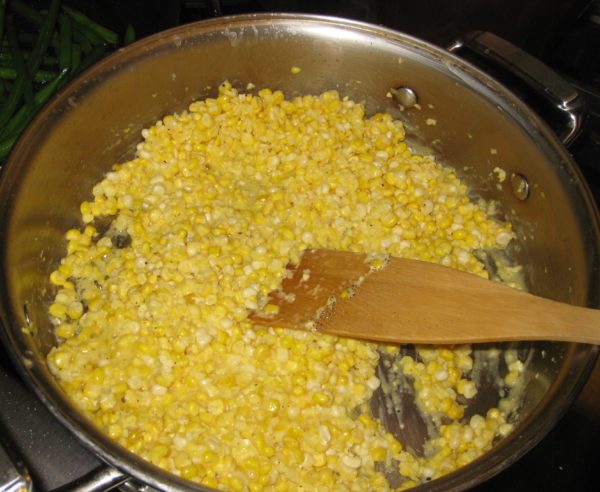
  6. Cook on medium for approximately 3-5 minutes after the butter melts and the corn “starts dancing” in the butter, stirring frequently. Do not brown the corn or butter.
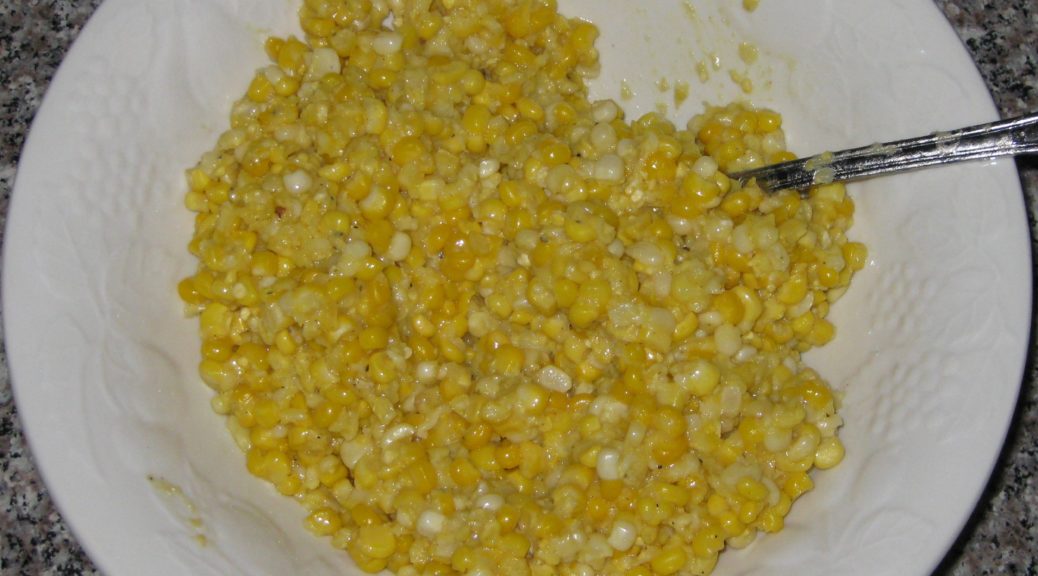
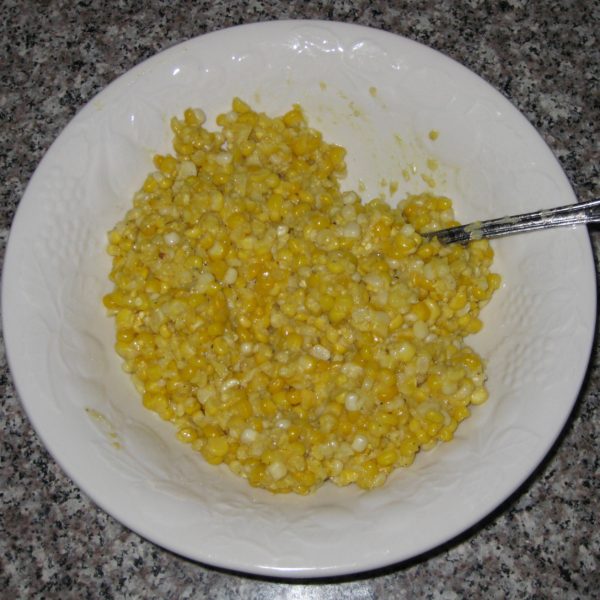
  7. The finished dish: Corn Fried in Butter.
Recipe Notes

Copyright © 2017 by VillaSentieri.com. All rights reserved.

Share this Recipe

Green Beans with Parmesan Cheese

August 7, 2017

It’s Saturday morning, August 5th and I’m sitting on an airplane writing this post.  I’m bound for Baltimore to visit the younger of my two nephews and his wife and their son.  I have meetings in Washington, DC on Monday and Tuesday so I’m taking this opportunity to visit.

The family members and relatives with whom I am closest are scattered around and I don’t see enough of any of them.

What does all of this have to do with green beans, you might ask?

Everything.

And nothing.

Food is my connector. It connects me to people and places. It evokes memories. It helps to create new ones. It’s a set of shared experiences.

I can’t make my mother’s long-simmered tomato sauce without evoking a slew of memories. My strongest olfactory memory from childhood is being gently awakened by the smell of garlic sizzling in olive oil on Sunday morning as my mother began to make tomato sauce for that day’s dinner. This is the sauce I am making on Sunday at my nephew’s house.

Most recipes that enter my repertory do so because of their connection with people and places. They document my personal history in edible form and cement memories of good times shared with family and friends. Many are family recipes, mine or those of people I know. Some are not, like the Italian Walnut Crostata I created to replicate one I had sitting at a little bar in Venice drinking grappa with my father-in-law in 1996.

That crostata has family connections of a sort. One of the favorite non-Italian desserts in our family is nut roll, brimming with ground sweetened walnuts and encased in just enough lightly sweet yeasted dough to hold it together as it is rolled and baked. While nut roll is more of a Central and Eastern European dessert, it was common in Johnstown, Pennsylvania where I grew up with people from a wide range of ethnic backgrounds.

My Aunt Margie’s nut roll filling is flavored with citrus, hewing toward the Italian, while my mother’s has milk and honey, pointing more towards Eastern Europe. I suspect, though cannot prove, that my Aunt Margie’s filling is more like her mother’s (my Italian grandmother) and my mother’s is more like my father’s mother’s (my Slovak grandmother).

Nut roll is a pastry that I truly miss but it is challenging to make and I have never tackled it despite having my mother’s and my Aunt Margie’s recipes. Except for the one time my cousin, Donna, made it and sent me some and the two times that Michael Alcenius sent me some he made using my Aunt Margie’s recipe, I have been in a nut roll blackout since Aunt Margie died.

The walnut crostata was a revelation. There, in an easy-to-make Italian sweet pastry crust (pasta frolla), was a filling of sweetened, ground walnuts. It wasn’t nut roll but it certainly evoked all the right taste sensations.

I used my husband’s Great Aunt Fidalma’s recipe for pasta frolla and Aunt Margie’s recipe for nut roll filling, to create a dessert that is both reminiscent of that night shooting grappa with my father-in-law in Venice and that preserves recipes from my family and my husband’s family.

Now that I’ve gotten my mouth (and maybe yours) watering for walnut crostata, we’re going to make green beans! I hope, though, that you have a better understanding for the reason this blog exists: to document and preserve traditional recipes along with some sort of a personal story or vignette.

Having just said that, I can’t tell you precisely where this recipe came from but it’s been in my repertory for decades. It is the essence of simplicity, a hallmark of much of Italian home cooking. It also lends itself to being made almost exclusively in advance, making it a perfect dish for a last-minute put-together when entertaining or making a more complicated main course.


Follow us


Click HERE to join our mailing list and you’ll never miss a recipe again!

Print Recipe
Green Beans with Parmesan Cheese
The beans can be cooked in advance and shocked in ice water to stop cooking. The garlic can be sautéed in olive oil in advance, too. Just before serving, heat the oil and toss the beans briefly to warm them. In a serving bowl toss the beans with Parmesan cheese, salt and pepper. This dish can easily be doubled or tripled. Adjust the amount of Parmesan cheese and garlic to your taste. The olive oil is an integral part of the “sauce” so be generous.
Votes: 0
Rating: 0
You:
Rate this recipe!
Course Sides, Vegetables
Cuisine Italian
Servings
Ingredients
Course Sides, Vegetables
Cuisine Italian
Servings
Ingredients
Votes: 0
Rating: 0
You:
Rate this recipe!
Instructions
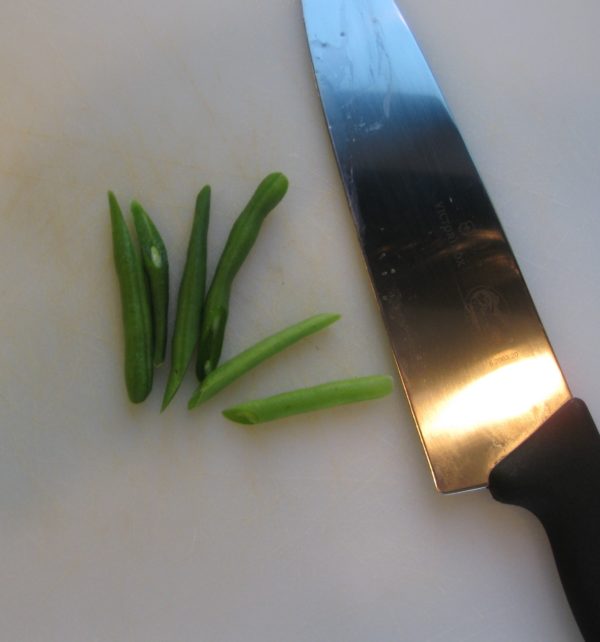
  1. Wash the beans and cut off the ends. I like to cut the ends at an angle for a better appearance.
  2. Bring a large pot of salted water to a boil.
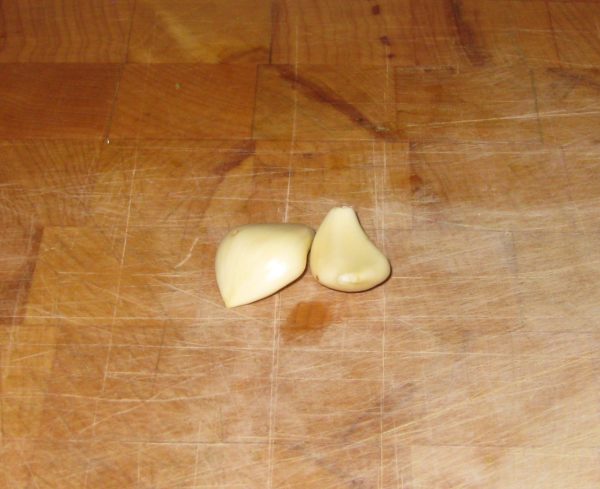
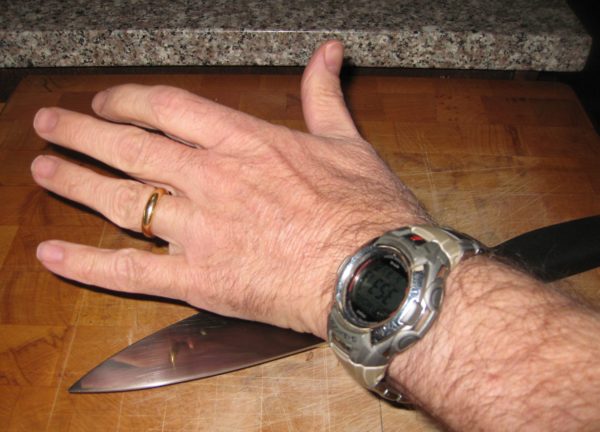
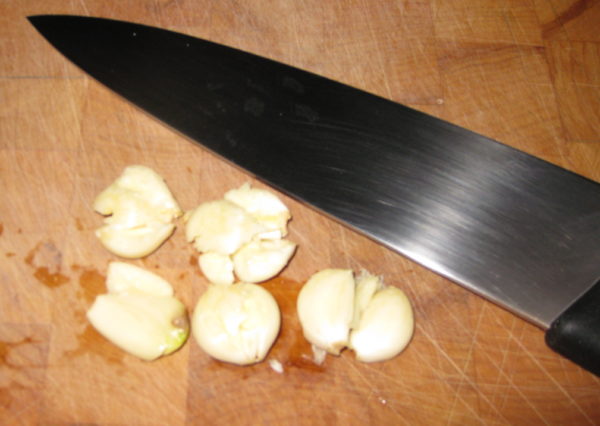
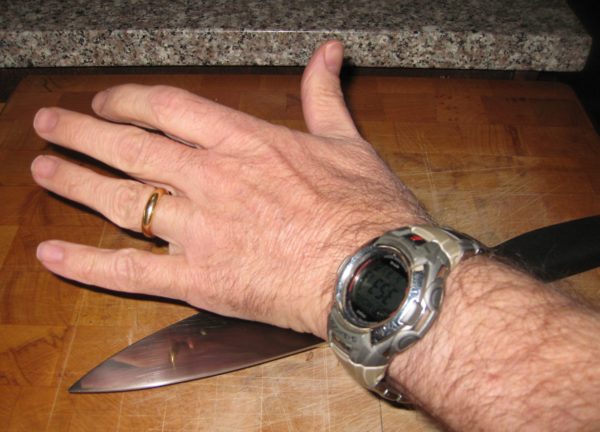
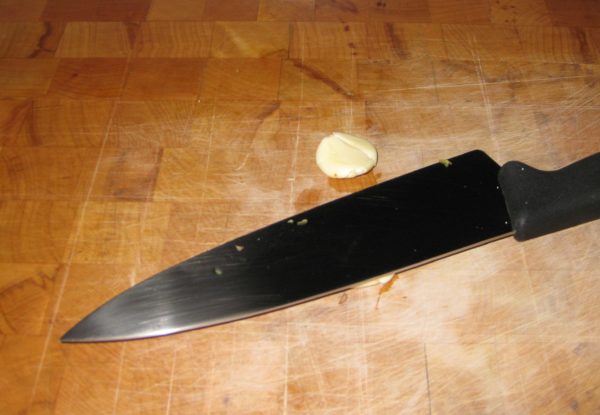
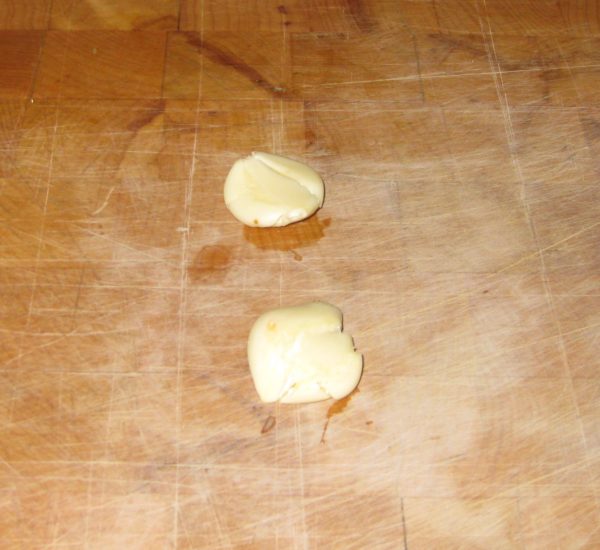
  3. Meanwhile, bruise the garlic with the side of a chef’s knife.
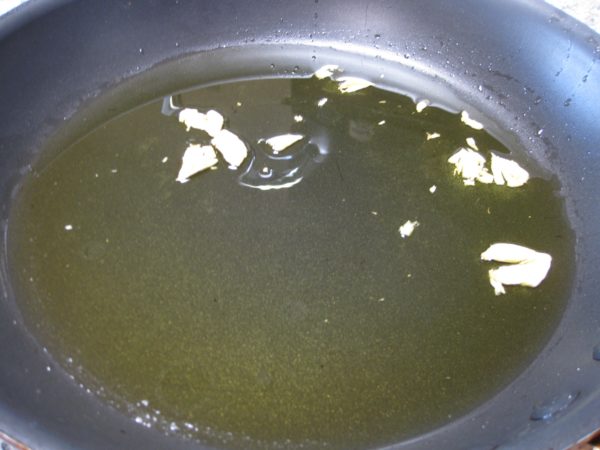
  4. Add the olive oil and garlic to a skillet, large enough to hold the beans, and heat on medium-low heat until the garlic begins to sizzle.
  5. Sauté, over low to medium-low heat until the garlic is golden.
  6. Remove and discard the garlic.
  7. Remove the oil from the heat.
  8. When the water comes to a boil, add the beans and boil until crisp-tender. This will take just a few minutes depending on the beans and your elevation. The beans should not be crunchy but they should have a distinct “toothiness” and almost squeak as you bite into them.
  9. Drain the beans.
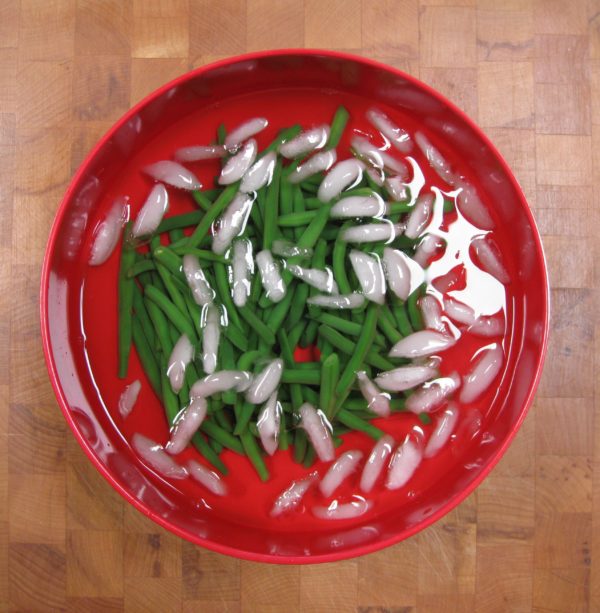
  10. If preparing the beans in advance, shock in ice water.
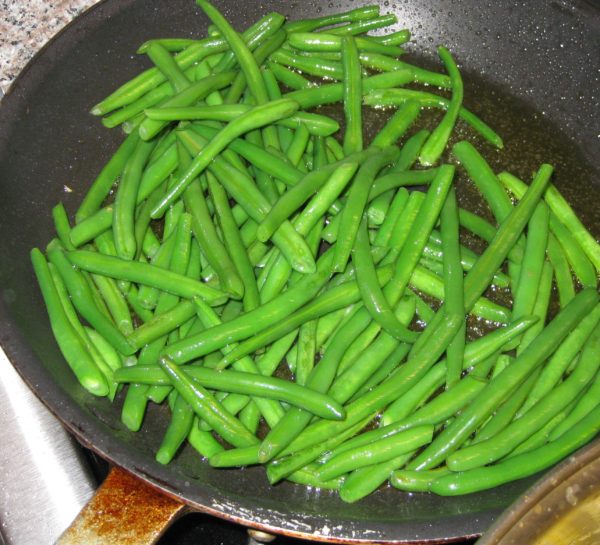
  11. Add the drained beans to the garlic-flavored olive oil. Heat gently if the beans are cold.
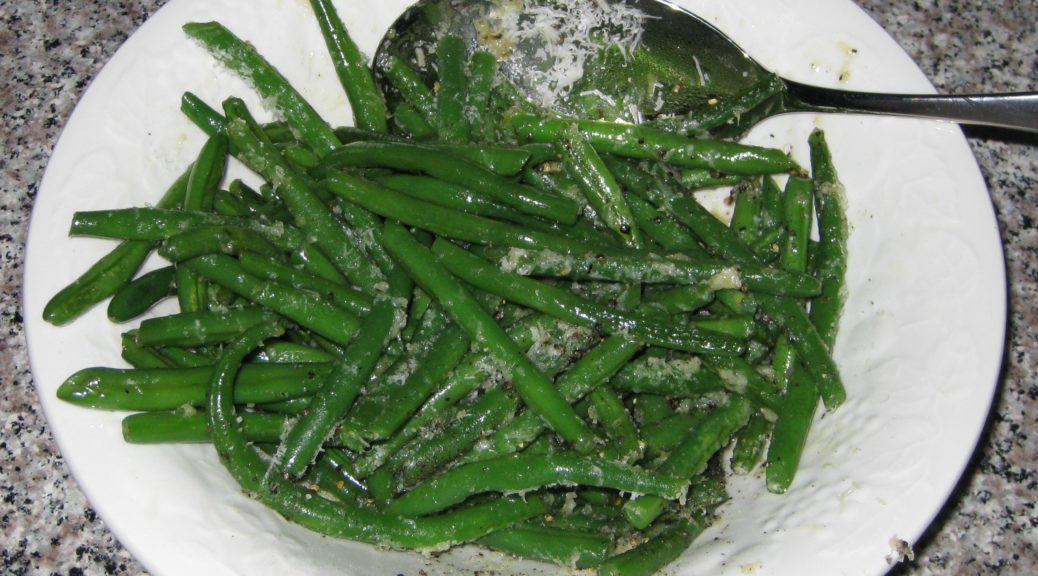
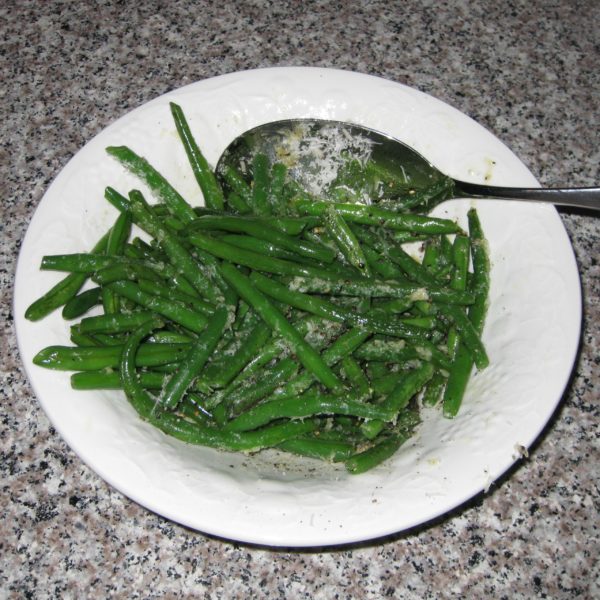
  12. Off the heat, mix in the parmesan cheese, salt to taste, and a generous amount of freshly ground black pepper.
  13. Toss well and serve immediately.
Recipe Notes

Copyright © 2017 by VillaSentieri.com. All rights reserved.

Share this Recipe

Auntie Helen’s Roman Chicken Cacciatore

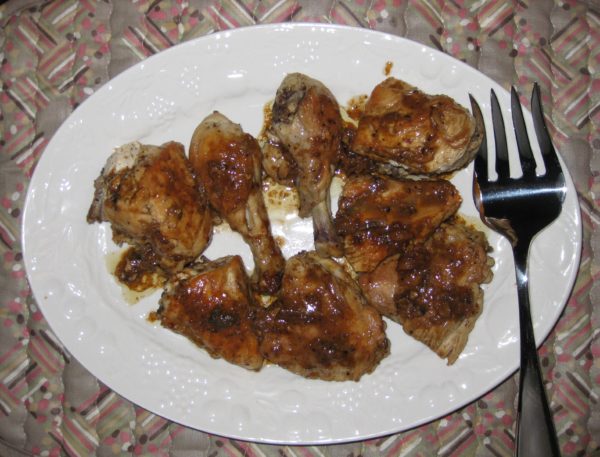
Pollo alla Cacciatora (Chicken Cacciatore, in English) means Chicken Hunter’s Style and there are as many styles as there are hunters and cooks.

I grew up eating a Southern Italian version in a red sauce with peppers and mushrooms.

This recipe, using anchovies and no vegetables, is from Rome and goes back to the late 1800’s at least.  I learned it from Auntie Helen.  Auntie Helen was actually the aunt of Eugene (Gene) d’Aquili, my undergraduate advisor at the University of Pennsylvania and the psychiatrist with whom I set up my psychiatric practice in Philadelphia many years later.

Gene’s grandparents left Rome around the turn of the 20th century and moved to Trenton, New Jersey with their four children, Guido, Helen, Louise and a fourth daughter who died shortly after the move.

Gene’s father, Guido, was an artist and part of what was sometimes referred to as the New Hope School after a town of the same name in Pennsylvania on the New Jersey border.  He painted a series of Old King Cole murals similar to the ones Maxfield Parrish painted for the St. Regis in New York City.

Those murals ended up on the walls of my dining room in Berwyn, Pennsylvania.  For several years, from early medical school until partway through my internship, I rented the carriage house on the d’Aquili estate in Berwyn.  The murals were installed in the dining room after the d’Aquili family purchased them from the social club in Trenton that had originally commissioned them.

Here are some pictures of the murals.

There is a blog that features the murals and information about them, if you’re interested.

Here is a picture of my parents, standing in front of one of the murals in my dining room.  I believe this was taken in May 1981 when I graduated medical school.

Auntie Helen and Auntie Louise never married.  They both became school teachers and lived in Morrisville, New Jersey until the early 1980’s when they moved into the carriage house on the d’Aquili estate that I vacated after I bought my first house.

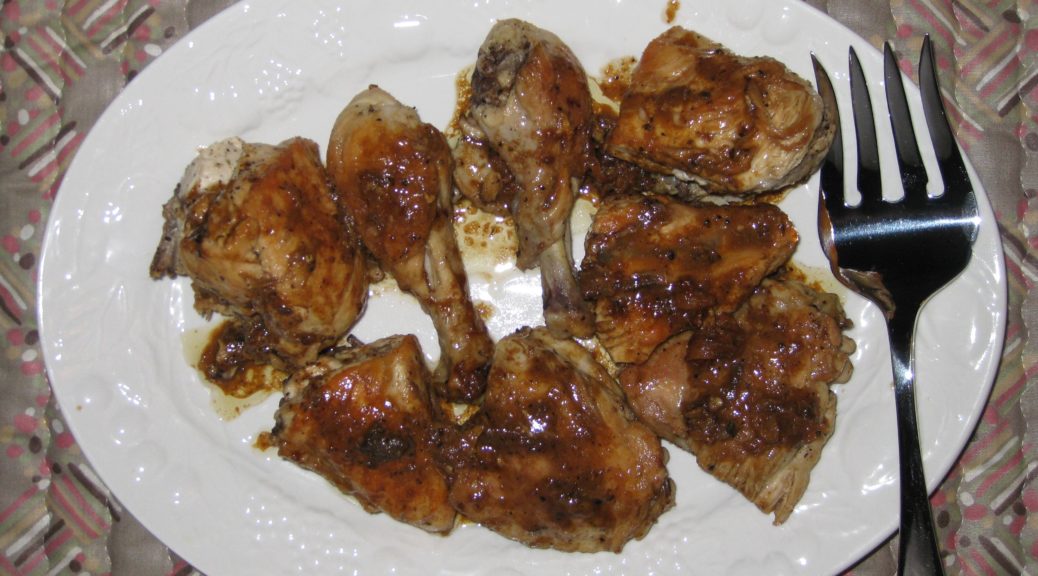
Auntie Helen was a wonderful cook.  This recipe for pollo alla cacciatora came from her, and before her, from her mother.  Don’t let the anchovies put you off, even if you don’t like anchovies.  The “fishiness” cooks away leaving a savory, umami flavor.  I will bet you that none of your guests will guess that there are anchovies in this dish.

In addition to her other wonderful Italian specialties, including brodetto, panpeppato, and cheese bread, the last of which unfortunately I do not have a recipe, among others, Auntie Helen made some American dishes that were fashionable at the time including Impossible Tuna Pie!

I want to give a shout out to Julie Paradise for reintroducing me to Impossible Pies.  Julie is the master of the genre and her pecan version is going to end up on my table soon!


Follow us


Click HERE to join our mailing list and you’ll never miss a recipe again!

Print Recipe
Roman Chicken Cacciatore
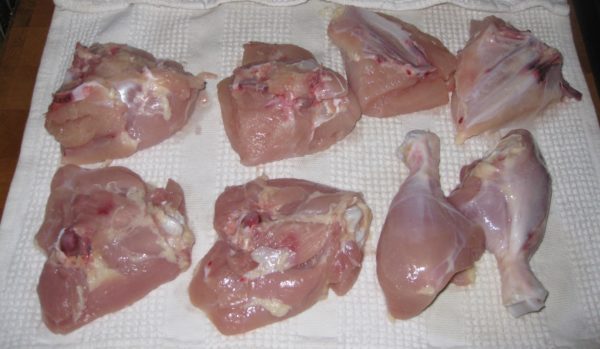
As an alternative to cutting up a whole chicken, chicken parts can be used. Thighs work particularly well for the long, slow cooking technique. If using chicken parts, use about 3 pounds. This chicken goes well with polenta. I suggest using yellow cornmeal for a color contrast with the dark sauce. A link to my polenta recipe can be found in the Notes section following the recipe.
Votes: 0
Rating: 0
You:
Rate this recipe!
Course Mains, Poultry
Cuisine Italian
Prep Time 15 minutes
Cook Time 2 hours
Servings
people
Ingredients
Course Mains, Poultry
Cuisine Italian
Prep Time 15 minutes
Cook Time 2 hours
Servings
people
Ingredients
Votes: 0
Rating: 0
You:
Rate this recipe!
Instructions
  1. Cut the chicken into pieces, legs, thighs, and breasts. You can cut the breasts in half crosswise if you like. Reserve the back and wings for another use.
  2. Remove the skin from the chicken.
  3. Bruise the garlic with the side of a chef's knife.
  4. In a skillet large enough to comfortably hold the chicken, and that has a lid, heat the olive oil until it is almost smoking.
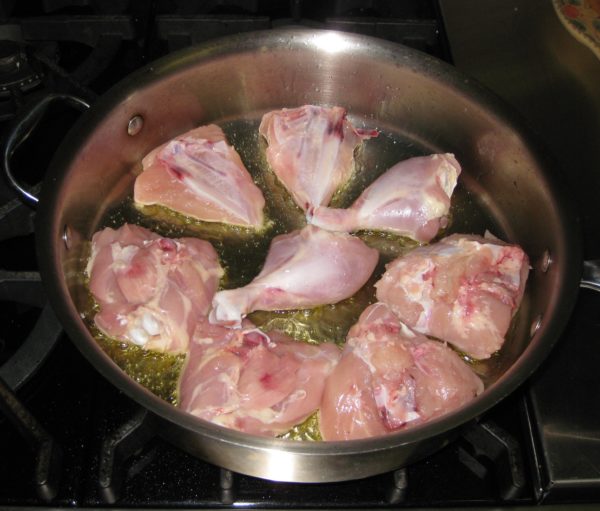
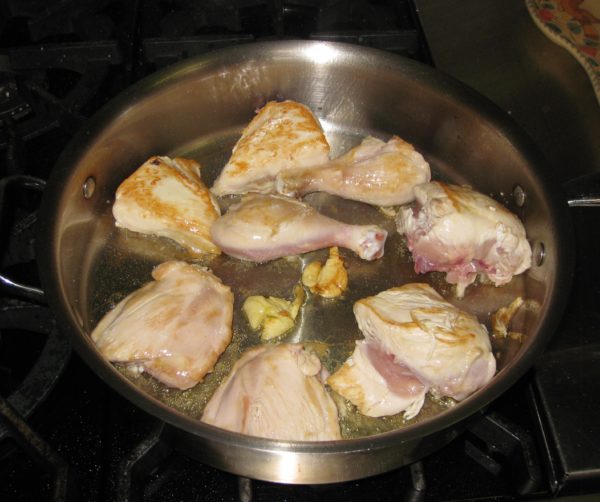
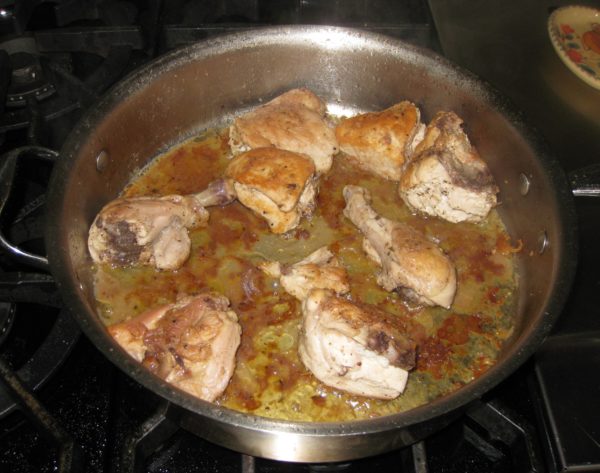
  5. Add the chicken. Do not disturb the chicken until it is crusted and releases easily from the pan, 4-5 minutes.
  6. Turn the chicken over. Add the bruised garlic to the pan. Brown the other side of the chicken, adjusting the heat as necessary to prevent the olive oil from smoking.
  7. If the garlic starts getting dark brown, remove it before it burns. Reserve the browned garlic, however.
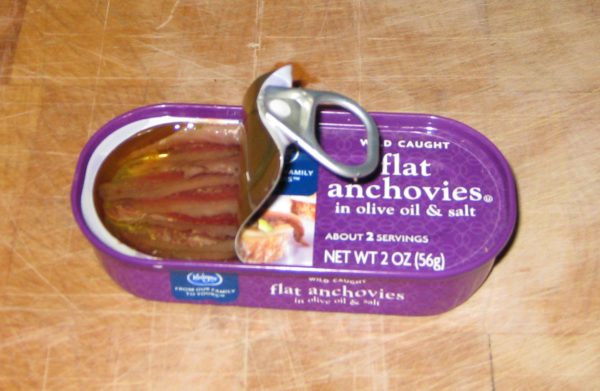
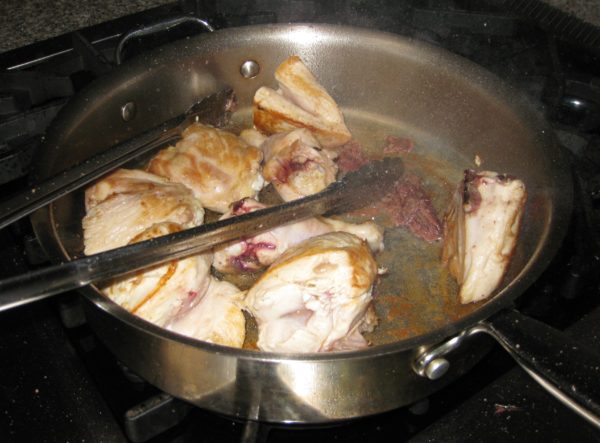
  8. When the chicken is well browned on all sides (legs don’t really have “sides” so you will need to turn them around a bit), add the anchovies and their oil. They will splatter a bit.
  9. Work the anchovies with a spoon so they start to disintegrate.
  10. Have the cover ready. Turn the heat to low. Add the water and quickly cover the pan to reduce splattering. Wait 2-3 minutes until the rapid sizzling has slowed down.
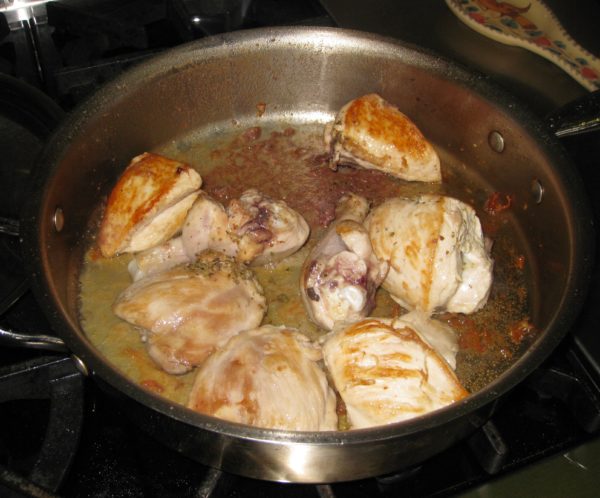
  11. Turn the chicken. Add the vinegar and return the browned garlic to the pan if you removed it earlier. If the water has evaporated when you remove the lid to add the vinegar, add another two tablespoons of water along with the vinegar and garlic. Add oregano and season with salt and pepper, to taste.
  12. Braise covered for 1 ½ to 2 hours on gentle heat, turning every 20-30 minutes. Add water, two tablespoons at a time, whenever the liquid in the pan has evaporated.
  13. Add an extra grinding of pepper before removing the chicken from the heat. Adjust salt if necessary.
Recipe Notes

Here is my recipe for Polenta.

Copyright © 2017 by VillaSentieri.com. All rights reserved.

Share this Recipe

Mom’s Potatoes with Tomato Sauce

July 19, 2017

Pasta.  Potatoes.  Bread.

I crave carbohydrates.  I can go about three to four days without eating pasta before I start to really crave it.

Funny, because we only had pasta about once or twice a week while I was growing up.

We did, however, have potatoes on many of the intervening days.

Sometimes we’d have gnocchi (little pasta dumplings made with potatoes and flour) or pierogi (pasta stuffed with potatoes)!  Though there are many other pierogi fillings, potato and cheese was the preferred variation in our house.

Once, when I hadn’t been home from college for a while, I asked my mom to make either pierogi or baba (sometimes Anglicized to bubba) for me for dinner.  She made both.  There wasn’t a piece of meat in sight.  She knew me all too well.  Meanwhile, the two college friends who came home with me were aghast at the absence of meat…and vegetables for that matter!

Americans, by and large, are not protein deficient so the occasional meal without meat or another major protein source isn’t an issue.

My mom’s potatoes with tomato sauce were usually served alongside sausage.  Typically, it would be hot Italian fennel sausage that was browned in a skillet then braised slowly with some water to tenderize it.

If we were having kielbasa, the second most common sausage in our house, my mom would make a version of these potatoes without the tomato sauce.  She’d get the potatoes good and brown and then cover the pan for a bit to trap the moisture and tenderize the potatoes without making them mushy.

Since my mom made a big pot of slow-cooked Southern Italian sugo most every Sunday, there was a ready supply of homemade tomato sauce for these potatoes.  In my house, unfortunately, I don’t make that kind of sauce often enough (though I plan on changing that) and it always seems like a luxury to use some of it for these potatoes as opposed to putting the sauce on pasta.

I have found, however, that my uncooked pizza sauce works well.  In a pinch canned or bottled tomato puree is good too (or even one of those 8 ounce cans of tomato “sauce”).  If using canned puree, add a pinch or two of oregano for flavor.

While Italian versions of potatoes cooked in tomato sauce usually end up being more “saucy,” this Italian-American version turns the tomato sauce into little more than a coating on the potatoes.


Follow us


Click HERE to join our mailing list and you’ll never miss a recipe again!

Print Recipe
Mom's Potatoes with Tomato Sauce
This variation on home-fried potatoes was common in our house. Cooking potatoes in tomato sauce is very Italian but this variation, which includes bell pepper and onion, and where the tomato sauce is basically cooked away, is more Italian-American. The tomato sauce could be leftover homemade pasta sauce (without meat) or pizza sauce. It can also be canned tomato puree. If using puree, I suggest adding a few pinches of dried oregano for flavor.
Votes: 0
Rating: 0
You:
Rate this recipe!
Prep Time 15 minutes
Cook Time 75 minutes
Servings
people
Ingredients
Prep Time 15 minutes
Cook Time 75 minutes
Servings
people
Ingredients
Votes: 0
Rating: 0
You:
Rate this recipe!
Instructions
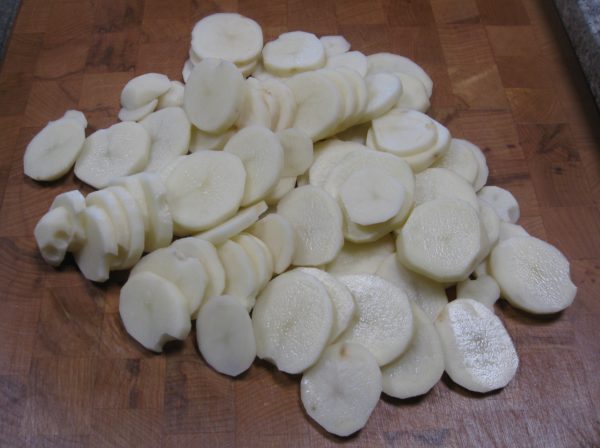
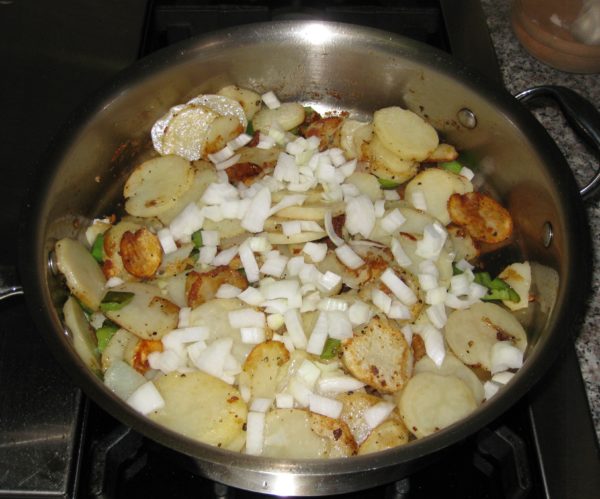
  1. Peel the potatoes. Cut them crosswise into ¼ inch thick slices.
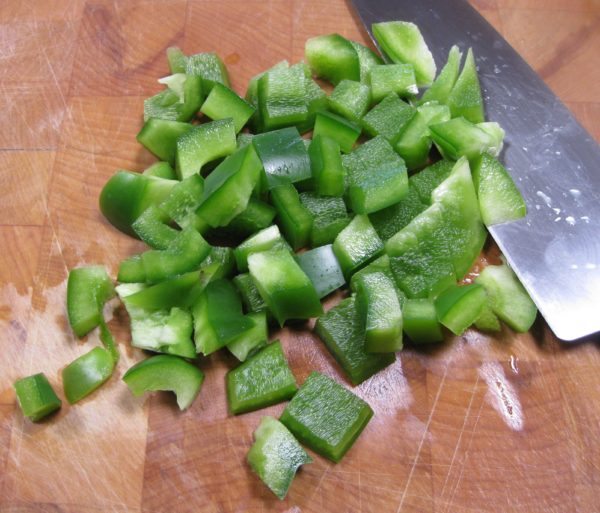
  2. Cut the bell pepper into 1/3 inch dice.
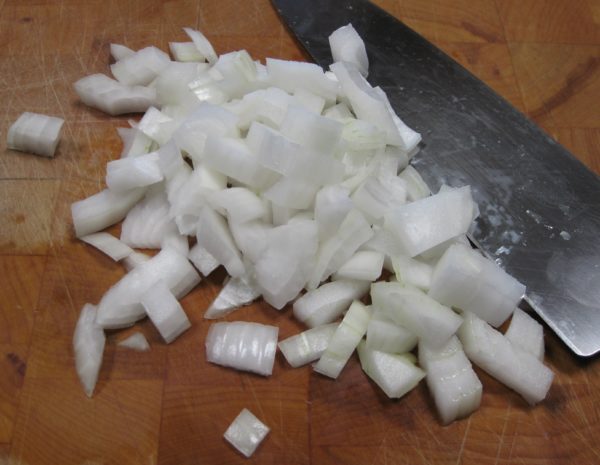
  3. Dice the onion.
  4. Heat oil over medium-high heat in a 12 inch skillet.
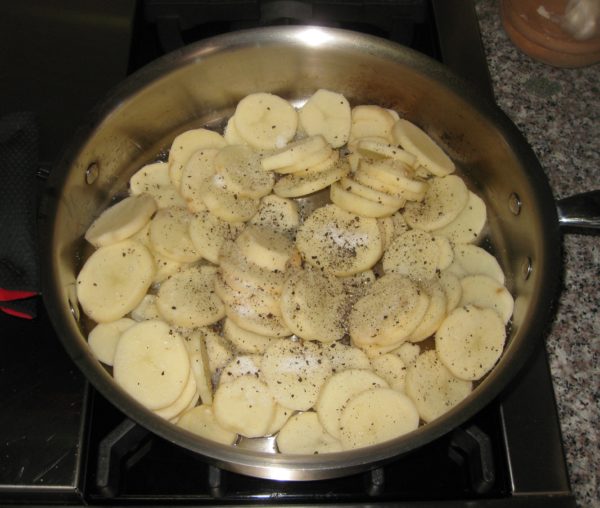
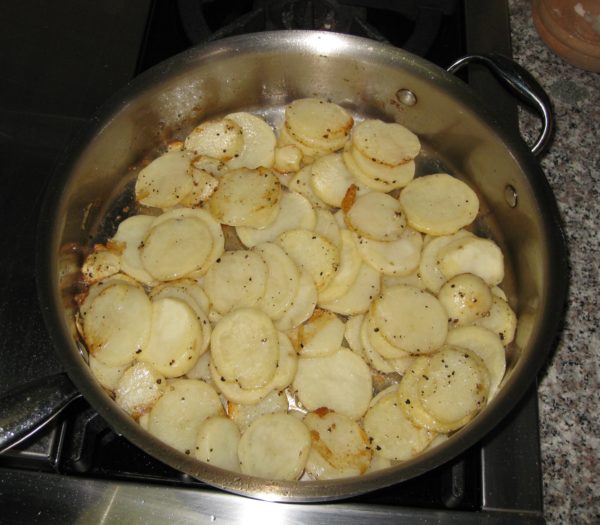
  5. When the oil is hot, add the potatoes. The potatoes should start sizzling immediately. Season the potatoes with 1 teaspoon of salt and a generous amount of freshly ground black pepper. Do not stir the potatoes just yet.
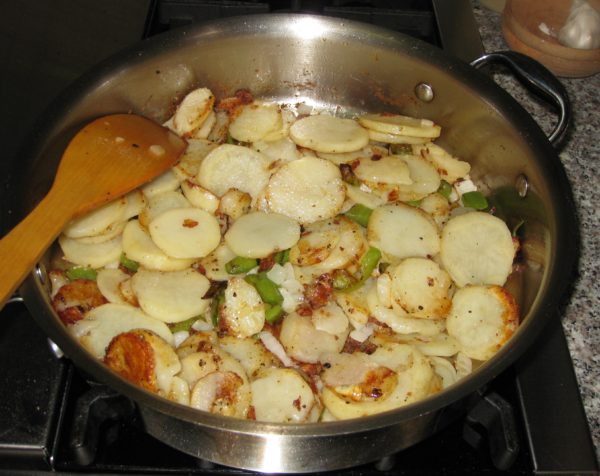
  6. Allow the potatoes to brown on the bottom.
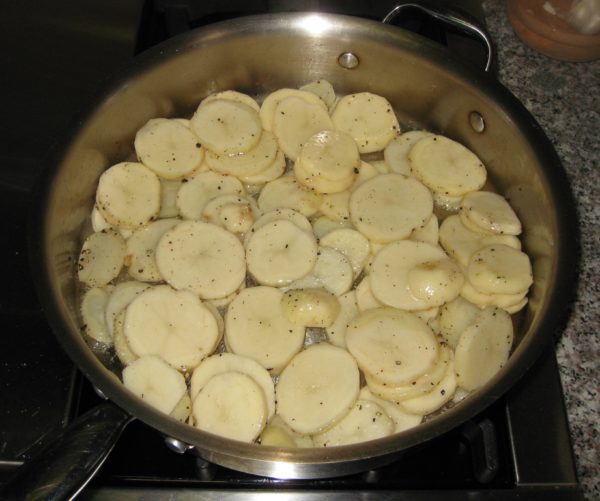
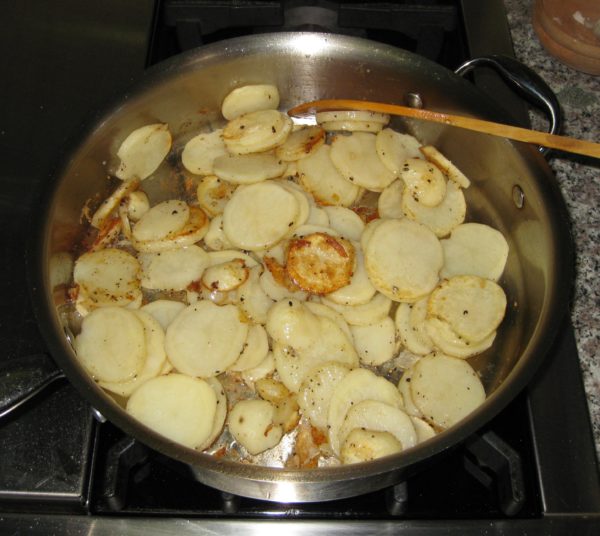
  7. These are getting browner on the bottom but not ready to turn yet.
  8. When the potatoes on the bottom have turned golden brown, use a spatula to flip and separate them.
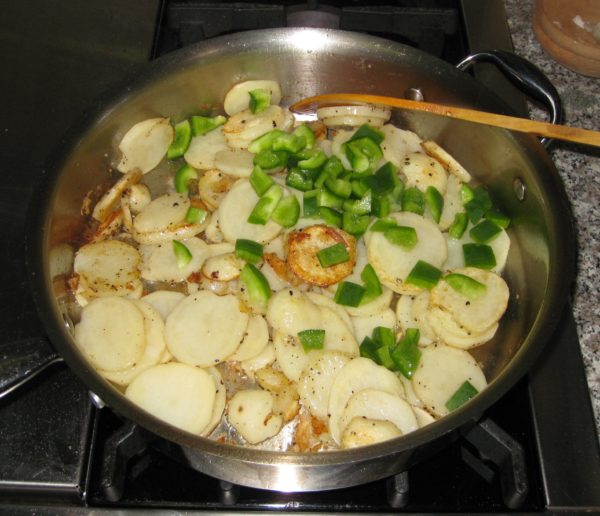
  9. When approximately 1/3 of the potatoes are browned, add the bell pepper.
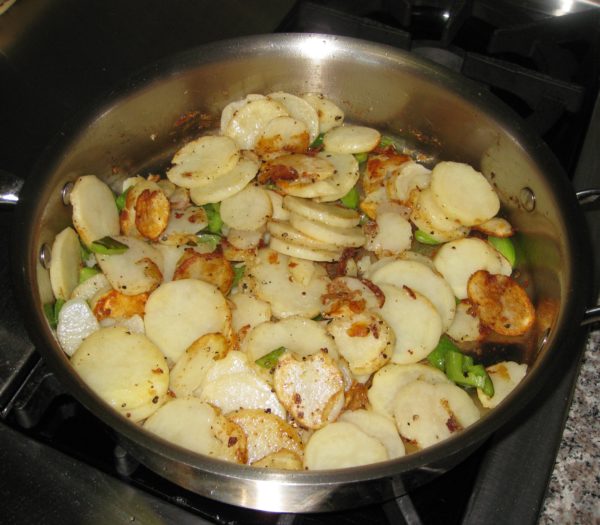
  10. Continue cooking, allowing the potatoes on the bottom to brown more before flipping and separating, until about ½ of the potatoes are browned and the bell pepper is just beginning to char.
  11. Add the onion.
  12. Continue cooking until the potatoes are nicely browned and the onion is golden. Adjust the heat as needed to prevent the potatoes and onions from burning, though a few dark spots won’t be a problem.
  13. Taste and adjust salt and pepper.
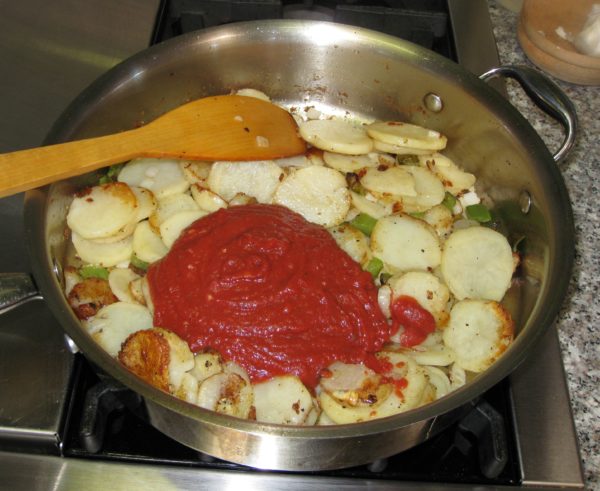
  14. Add the tomato sauce to the potatoes. Mix well.
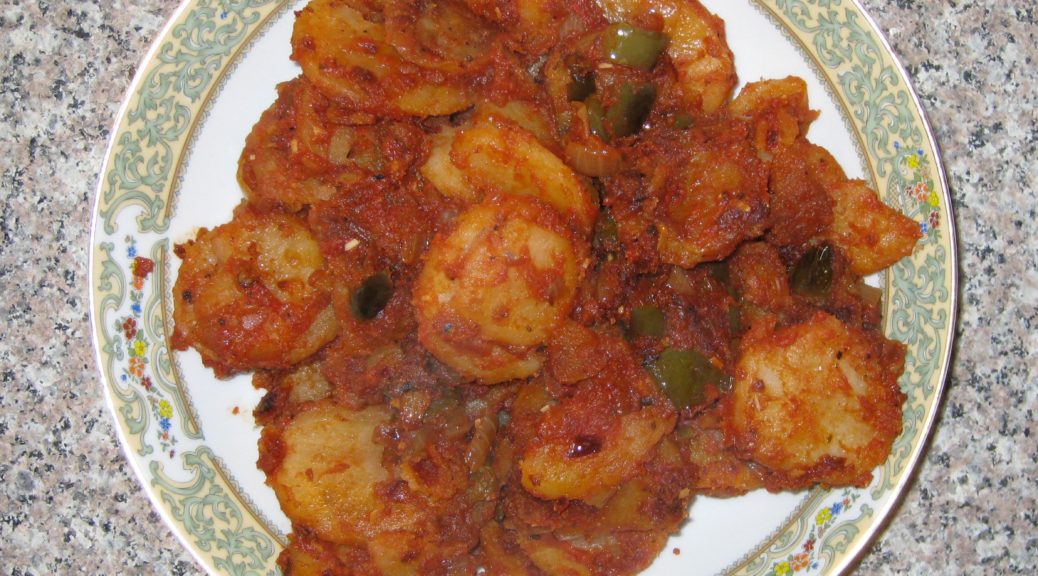
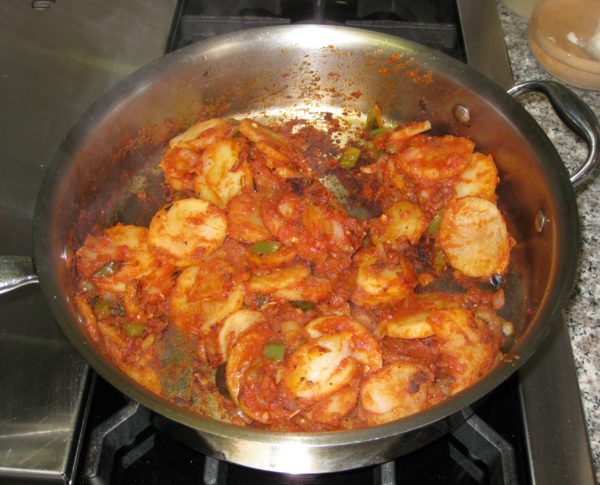
  15. Reduce the heat to low and cook, uncovered, until the potatoes are tender, but not mushy, stirring occasionally. Approximately 45-60 minutes more. The tomato sauce should have pretty much completely evaporated, leaving the potatoes coated in red.
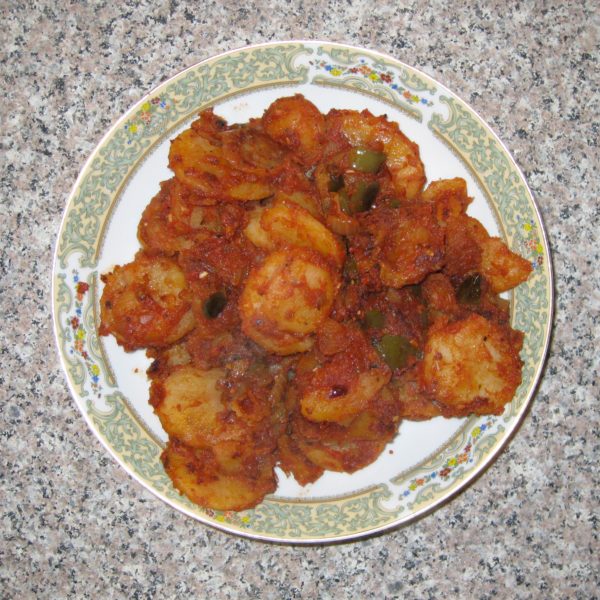
  16. The potatoes ready to serve.
Recipe Notes

Copyright © 2017 by VillaSentieri.com. All rights reserved.

Share this Recipe

Frittata con Cipolle (Frittata with Onions)

July 10, 2017

American chefs frequently do not understand Italian food.  Many can produce technically excellent dishes that lack the Italian sensibility.

One common error is putting in too much.  Too much of most anything into most anything.  To be sure, there are many restaurants headed by American chefs that serve excellent Italian food but there are far more that just don’t get it.

The usual culprit is what Italians would call the First Course, Il Primo Piatto.  This is soup, pasta or rice that is served as a separate course before the the Second Course, Il Secondo Piatto (usually meat, fish, or other protein), which is usually accompanied by side dishes, Contorni, in Italian.

Pasta “specials” are quite prone to this phenomenon.  There are many otherwise excellent restaurants that think that if a little is good, more is better, when it comes to their pasta “specials.”  Because I love pasta, if I’m at a restaurant that has a pasta special I always ask what it is.  More often than not, I start yawning (well, not really) part way through the list of ingredients added to the pasta.  After more than 2 or 3 main ingredients (not counting things like garlic, olive oil, and a few herbs) it’s too much.  You don’t need shrimp, artichoke hearts, chopped tomato, diced onion, roasted peppers, capers, and olives.  It’s simply too much.  The distinctiveness of the ingredients is lost.

I’m ragging on pasta because that is the most common culprit at American restaurants featuring “Italian” food.  Risotto and polenta are prone to the same phenomenon, however.  The most common offense is that both of these dishes are turned into vehicles for butter, cream, and cheese.  That is not what an Italian would do.  In a typical Italian household, polenta is cornmeal, water and salt.  That’s it.  There’s not usually a pat of butter or a spoon of cheese in sight unless added at the table to the diner’s preference but even that is rare.  The polenta is a foil for whatever is served with it.  It is not meant to scream, “Look at me!”  That doesn’t mean it isn’t supposed to, or doesn’t, taste good.  It’s not intended to be so rich and filling that it tries to steal the spotlight or dampen one’s appetite for the rest of the meal.

Unlike polenta, which is meant to accompany other dishes, risotto is meant to stand on its own as a First Course before the Second Course.  Risotto alla Milanese is the only exception.  Traditionally Risotto alla Milanese accompanies a veal cutlet (in Milan, of course).  No other risotto would be served with the second course in an Italian meal.

I realize that most of the time we do not eat a formal Italian meal, even in a restaurant.  Most of us have either what would be the first course (pasta or risotto, usually) or the second course (meat or fish plus a side dish or two), preceded by some sort of antipasto (appetizer), which literally means “before the pasta.”  Even so a risotto that is a fat “bomb” overly laden with butter, cream and/or cheese, might be American but it is simply not Italian in its sensibility.

Frequently, the issue is clouded even more but the addition of too many ingredients to the risotto.  Look at the asparagus risotto from a few weeks ago.  There are no competing flavors:  a light broth to add some savoriness, a bit of Parmigiano Reggiano, and a dollop of butter.  This is a classically Italian risotto.

I guess I’m really beating this one.  I clearly have strong feelings about Italian food and what passes for Italian food in America.  Think purity of flavor and simplicity of ingredients.  If an ingredient doesn’t support the main ingredient it shouldn’t be added.  I believe Italian food is the original “ingredient-driven” cuisine.

Ok, off my soap box an on to a recipe; one that is the essence of simplicity.

I’m going to guess that most of you have not had a frittata.  It is a fluffy but firm egg dish, usually with some sort of vegetable included.  Sometimes a sprinkling of Parmigiano Reggiano or Pecorino Romano cheese is added but only if it supports the vegetable that is the star of the show.

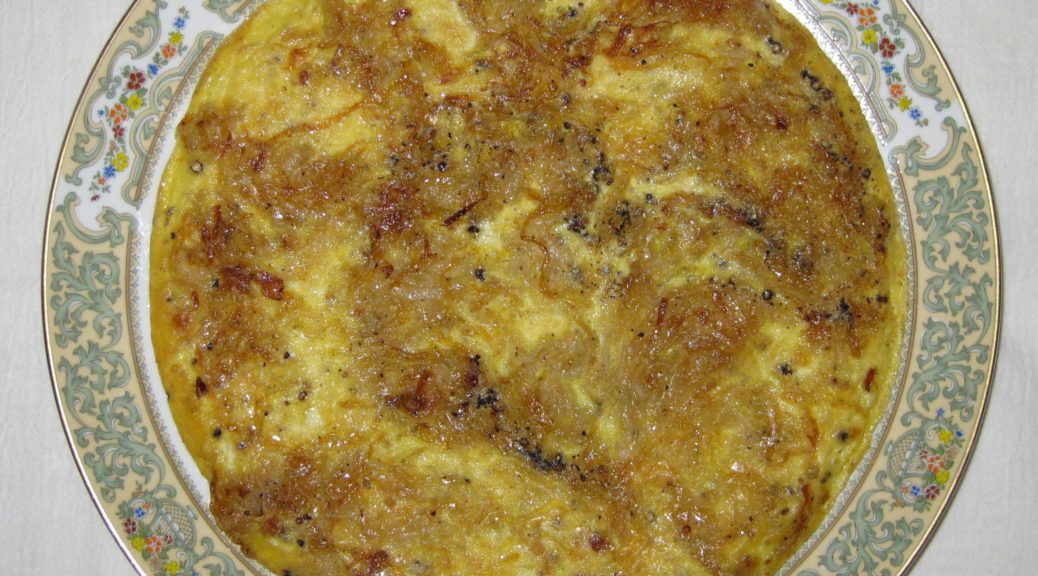
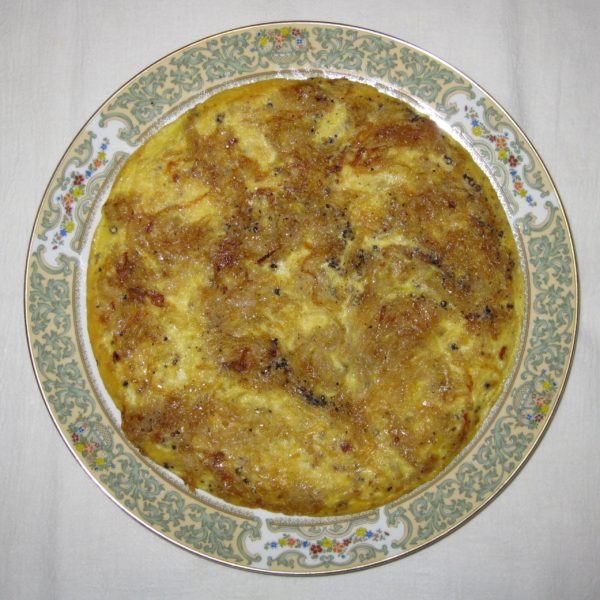
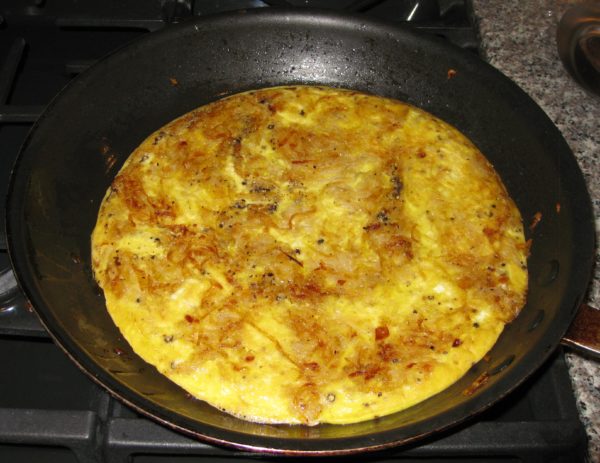
Today’s frittata is onion.  That’s it, onion.  Plus a little olive oil and salt and pepper.  The onion is cooked slowly until it caramelizes.  The onion in this recipe was cooked for 50 minutes.  You should plan on 45-50.  It is mostly hands off, though you do need to stir every few minutes.

Once the eggs are added, they are cooked slowly.  Unlike a French omelet where the eggs are barely set and there isn’t (supposed to be) a touch of brown, a frittata is intended to be firm, slightly brown, and puffed up and airy from the cooking style.

Although I have converted to making, almost exclusively, a classic Italian frittata, when I was in college I did it the way my Italian Grandmother did.  She included a pinch of baking powder and a bit of flour.  It was a little firmer than a classic frittata; more like a savory eggy cake.

That frittata, alternating with sandwiches of butter, onion and blue cheese on homemade bread (not on the same day), constitute my lunchtime memories from my junior year in college.


Click HERE to join our mailing list and you’ll never miss a recipe again!

Print Recipe
Frittata con Cipolle (Frittata with Onions)
I recommend NOT finishing the frittata under the broiler as called for by a number of food writers. First, it isn’t traditional. Second, if the frittata doesn’t slide out of the pan easily so that it can be flipped, you won’t be able to get it out of the pan to serve it after putting it under the broiler. I like using a good quality, heavy-bottomed, non-stick pan though a well-seasoned cast iron pan would work too. It is easier to get the frittata out of the pan if it has sloping sides rather that sides that are completely vertical. You can caramelize the onions several hours in advance and then complete the frittata later.
Votes: 0
Rating: 0
You:
Rate this recipe!
Prep Time 10 minutes
Cook Time 1 1/2 hours
Servings
people
Ingredients
Prep Time 10 minutes
Cook Time 1 1/2 hours
Servings
people
Ingredients
Votes: 0
Rating: 0
You:
Rate this recipe!
Instructions
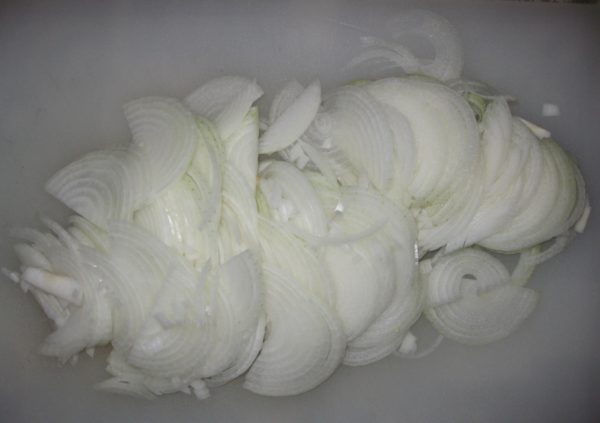
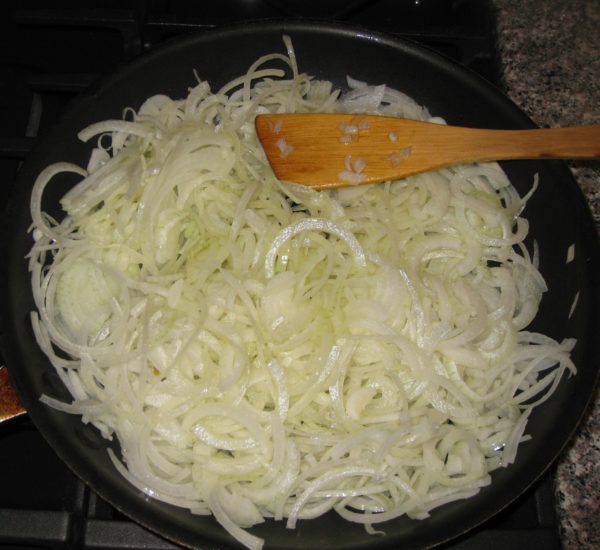
  1. Slice the onion in half from top to bottom then across into 1/8 inch thick half-rounds.
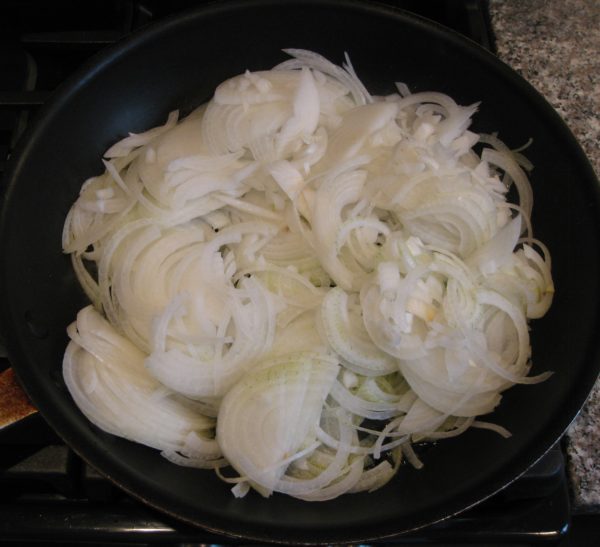
  2. Warm the olive oil in a 12 inch heavy-bottomed sauté pan with sloping sides.
  3. Add the sliced onion and ½ teaspoon of salt.
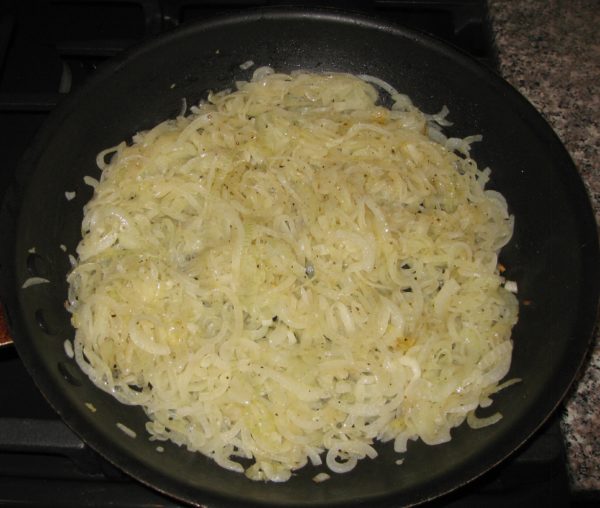
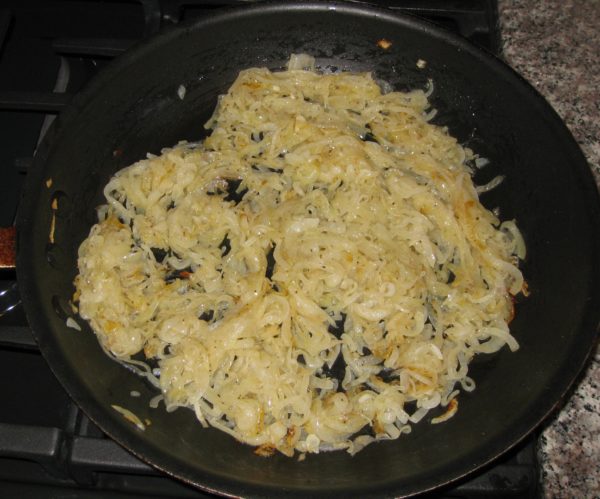
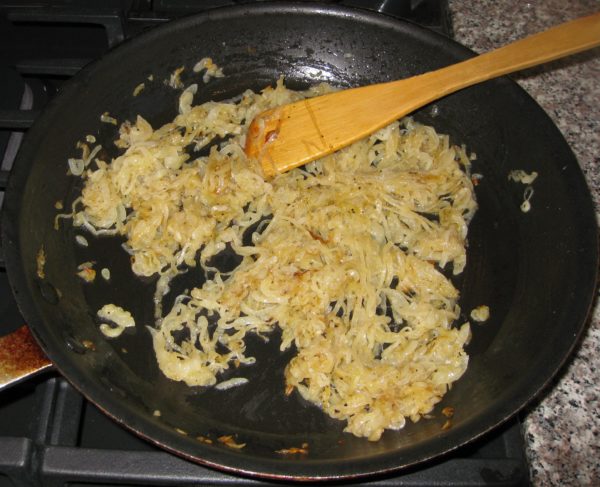
  4. Cook over medium heat, stirring often until the onions are soft and caramelized. The onions should take on a uniform golden, then light brown, color. There should not be any dark brown or dry spots. This will take between 45 and 50 minutes. If it takes longer don’t worry. If it seems to happen in less time, the heat is probably too high.
  5. This picture was taken 15 minutes after the onions were added.
  6. This picture was taken 30 minutes after the onions were added.
  7. This picture was taken 45 minutes after the onions were added.
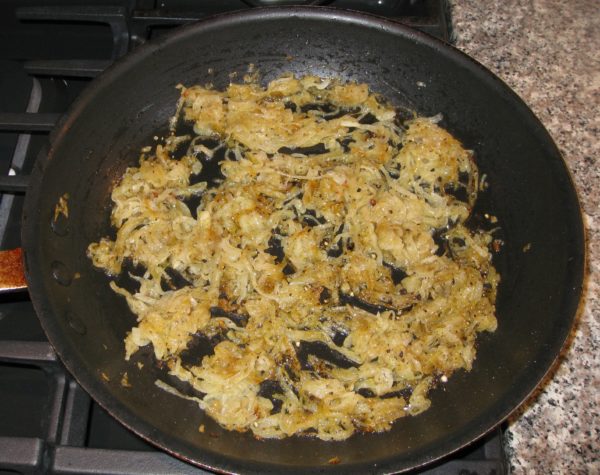
  8. This picture was taken 50 minutes after the onions were added. They are appropriately caramelized.
  9. While the onions are cooking, beat the eggs with a fork. Do not use an egg whip. The idea is not to beat in air but to uniformly combine the whites and yolks. Season with the remaining ¼ teaspoon of salt and freshly ground black pepper to taste.
  10. When the onions are fully caramelized, be sure there is an even slick of oil in the bottom of the pan. If not, add a tablespoon or so more.
  11. Turn the heat to medium high and evenly distribute the caramelized onions on the bottom of the sauté pan.
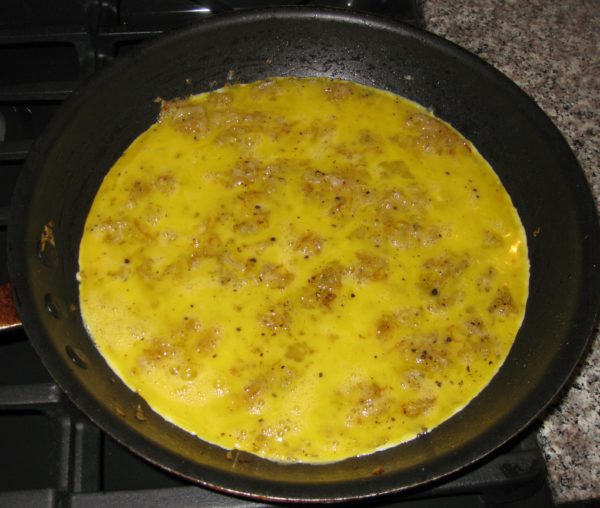
  12. Pour the beaten eggs on top of the onions, being sure to distribute the eggs evenly. DO NOT STIR THE EGGS once they are added to the pan. Immediately cover the pan and turn the heat to low.
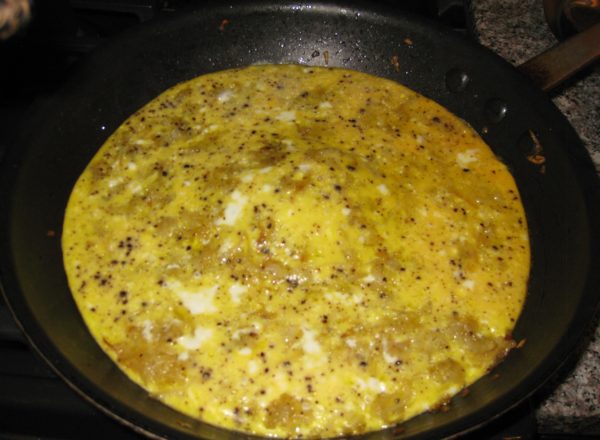
  13. Cook until the eggs are just set in the middle and golden brown on the bottom, approximately 30 minutes. Move the pan around so that the heat is evenly distributed, including putting the pan off-center occasionally so there is heat directly on the edges of the pan, not just concentrated in the middle.
  14. When the eggs are just set in the center, the frittata should release easily from the pan. Sometimes it is helpful to run a silicone spatula around the edge of the frittata to help it release.
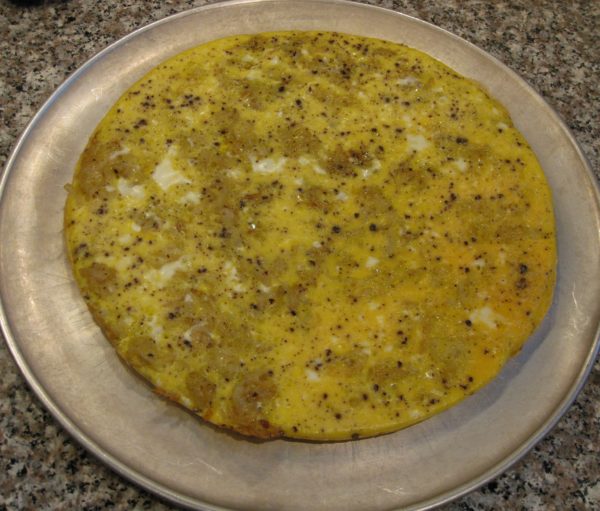
  15. Slide the frittata out of the pan and onto a large pizza pan.
  16. Invert the pan over the frittata.
  17. Grasp the sauté pan and pizza pan with both hands and flip them over in one quick motion.
  18. Put the sauté pan, with the now-upside-down frittata, back on the heat, uncovered, for about 5 minutes until the bottom of the frittata is golden brown.
  19. Slide the frittata onto a serving platter.
Recipe Notes

Copyright © 2017 by VillaSentieri.com. All rights reserved.
Share this Recipe

Pasta with Silky Zucchini Sauce

July 5, 2017

Pasta tossed with a sauce of some sort of vegetable cooked in olive oil is an Italian classic.  My mother frequently used either eggplant or zucchini, cooked them until they became very soft, and then tossed them with pasta.

I have one very vivid memory of this dish and it goes back to the summer of 1992.

After my mother was diagnosed with metastatic lung cancer in early summer 1992, she came to live with us.  Until the last few days of her life in early January 1993, she took over our kitchen, a very comfortable role for her.

Over the years prior to her diagnosis, she had become friendly with our next door neighbor, Carla.  During the last six months of her life she and Carla spent hours every day visiting and chatting.  This was a wonderful arrangement as my husband, Frank, and I were working long hours.  (It also led, through a number of interesting steps, to Frank and I becoming the god-parents for one of Carla and Billy’s children a few years later.  But that’s a story for a different day.)

Frank had very long work hours a couple days per week.  He rarely got home before 10 PM on those days.  My mother and I would eat dinner earlier and then she would set aside his food.

But she did more than that.

When he got home, she always warmed up his dinner and then sat with him at the table while he ate.  She never let him eat alone.  Most likely, I was upstairs in bed.  Since I got up earlier than Frank, I tried to be in bed by 10 PM to watch the news and go to sleep.

For some reason, the plate of pasta with zucchini sitting on the counter one evening to be warmed up for Frank’s dinner, knowing my mother would sit with him as he ate, is the mental image I have of this dish.  I can’t make this without that image appearing in my mind.  I think somehow that dish, made of very humble ingredients, came to represent the best of my mother’s nurturing characteristics.

She was a fierce advocate for her children.  My sister and I both started school a year early because my mother thought we were intellectually ready (she was right) and she wasn’t going to take “no” for an answer from the school authorities.

Once, in second grade, my sister arrived home with the hem of her school uniform let down because one of the nuns thought it was too short.  My mother promptly hemmed it, even shorter, and sent my sister to school the next day without ever saying a word.  The hemline stayed put.

You didn’t mess with my mother where her children were concerned.

She continued cooking for us until less than a week before she died.

In those years we always gave a New Year’s Day party, a casual affair where people could come and relax and chat and eat.  The Soviet Union was officially dissolved December 25, 1991.  Most of 1992 saw the effects of the dissolution so the theme of our January 1, 1993 party was the dissolution of the Soviet Union.

For the party, my mother made 14 dozen stuffed cabbage rolls and 17 dozen potato pancakes!

She sat on the sofa throughout the entire party, chatting with everyone and being the life of the party.  The next day she took a turn for the worse and on the morning of January 6th she died.

Some of my best memories involve food, most of which was cooked by family and friends who are no longer with us.  Capturing and preserving those recipes is the way that I pay homage to them and to the culture and values they passed on to me.


Click HERE to join our mailing list and you’ll never miss a recipe again!

Print Recipe
Pasta with Silky Zucchini Sauce
Zucchini are cooked to a silky softness to make a luscious sauce for pasta. Finishing the pasta in the pan with the zucchini and adding some pasta-cooking liquid, Parmesan cheese, and a couple of glugs of olive oil creates glossy sauce with a wonderful mouthfeel. When choosing zucchini, pick small ones, preferably not more than about six inches long. They should be firm and have glossy skin. It will take about 4 or 5 to yield four cups of sliced zucchini. Crushed red pepper is completely optional. If you have fresh basil you can omit the dry basil and toss in a tablespoon or so of basil chiffonade when you combine the pasta with the zucchini.
Votes: 0
Rating: 0
You:
Rate this recipe!
Prep Time 15 minutes
Cook Time 1 hour
Servings
people
Ingredients
Prep Time 15 minutes
Cook Time 1 hour
Servings
people
Ingredients
Votes: 0
Rating: 0
You:
Rate this recipe!
Instructions
  1. Dice the onion.
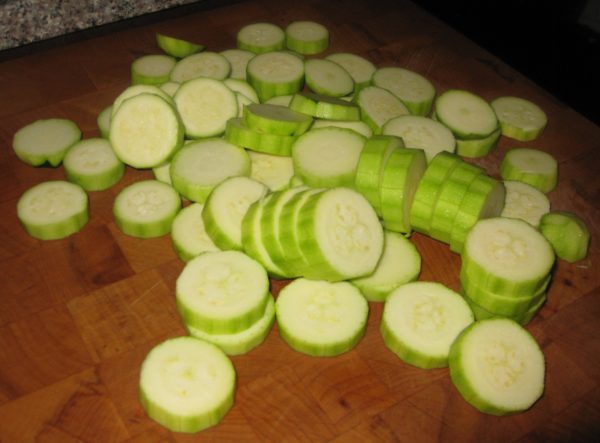
  2. Peel the zucchini and slice approximately ¼ inch thick.
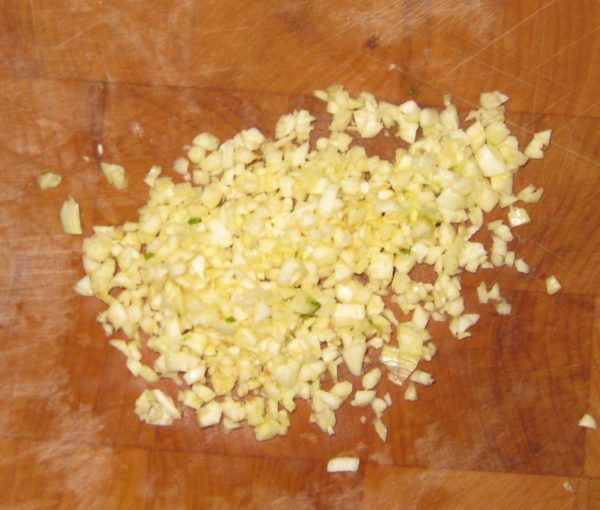
  3. Mince the garlic.
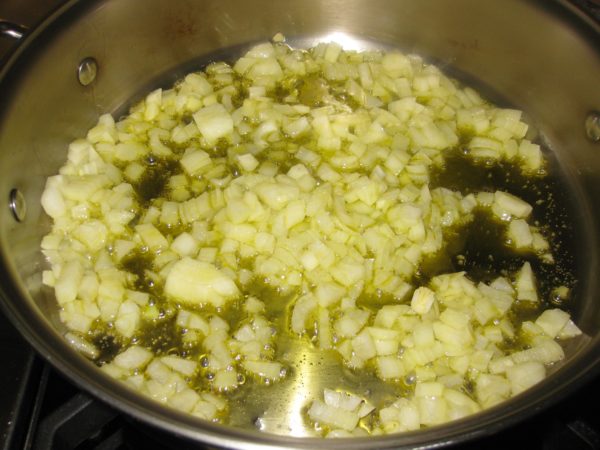
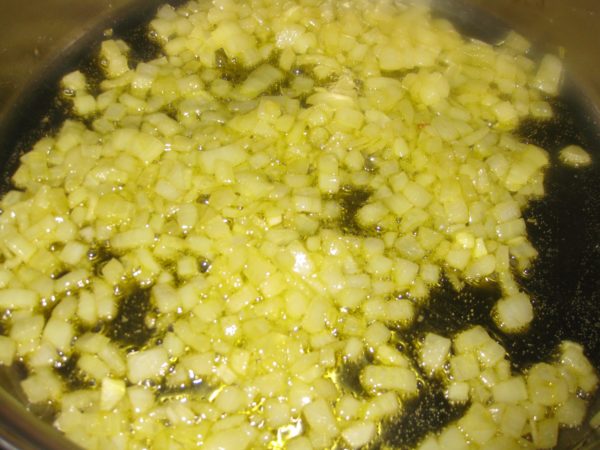
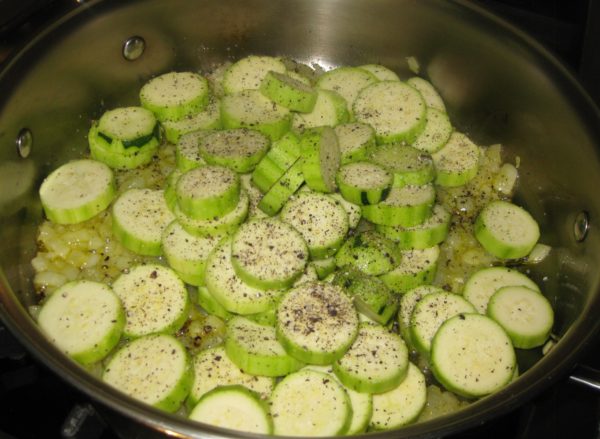
  4. In a large, heavy-bottomed sauté pan large enough to hold the pasta and sauce, sauté the onion and crushed red pepper, if using, over medium heat until the onion is golden and soft. Do not brown the onion.
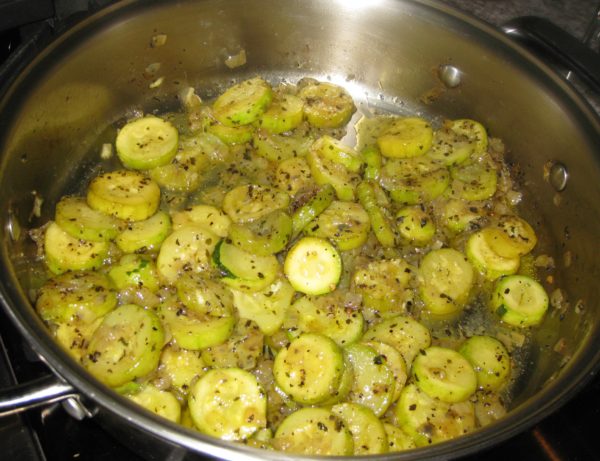
  5. Add the zucchini. Toss to coat with oil. Season liberally with salt and freshly ground black pepper.
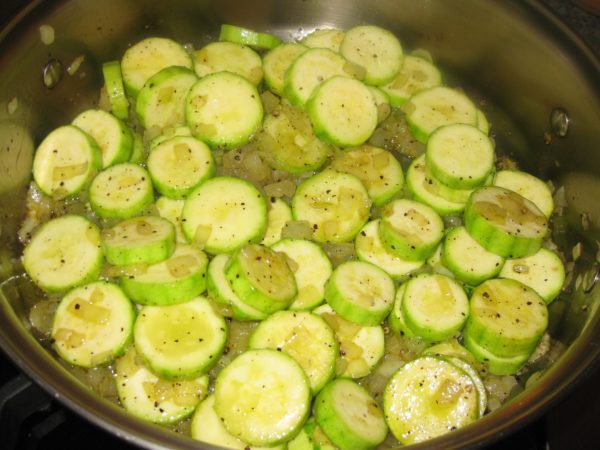
  6. Sauté on medium to medium high heat, adjusting from time to time to avoid browning the zucchini.
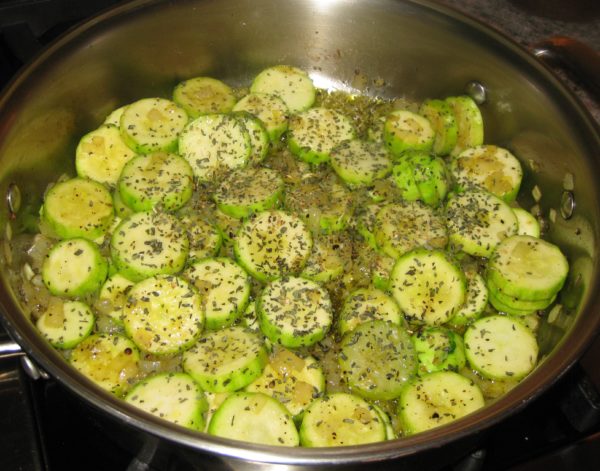
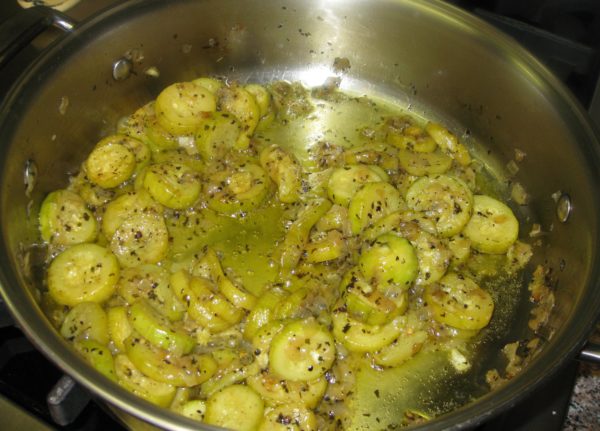
  7. Add the dry oregano and dry basil, if using, after about 20 minutes.
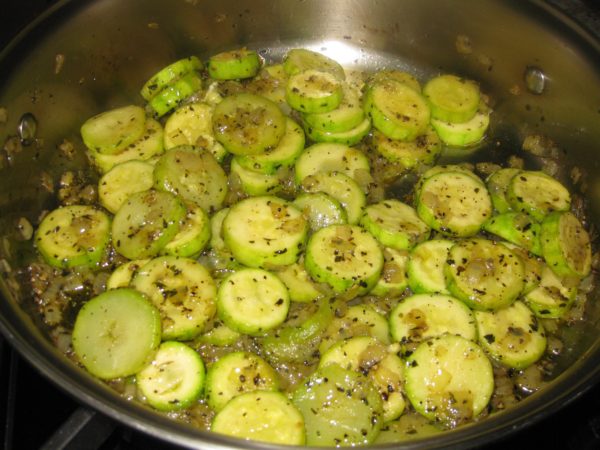
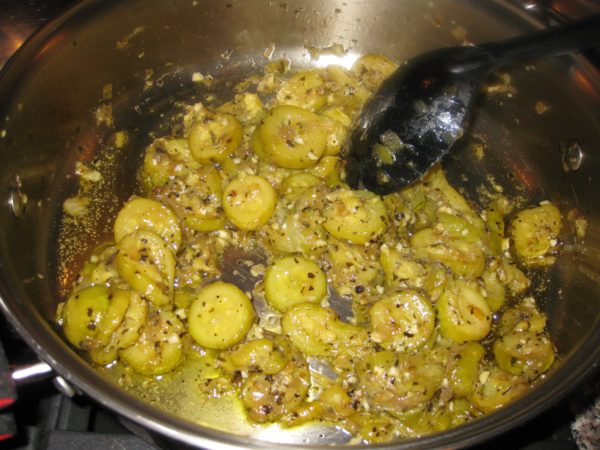
  8. Continue to sauté, stirring often, until the zucchini is quite soft, but still intact. It can turn golden but should not brown. Taste and adjust salt and pepper while the zucchini is cooking.
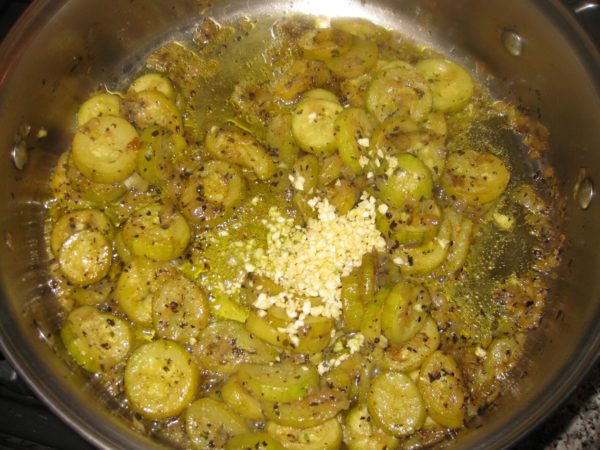
  9. Add the minced garlic and cook until fragrant, about 5 minutes longer.
  10. The dish can be prepared several hours in advance to this point. Simply take the sauté pan off the heat and cover it.
  11. Bring three quarts of water to a rolling boil. Add 1/3 cup salt. Add the pasta and cook at a full boil until the pasta is almost al dente. It should still be just the tiniest bit hard in the center.
  12. Reserve at least one cup of pasta-cooking liquid.
  13. Drain the pasta and add it to the zucchini in the sauté pan. Add about ½ cup of reserved pasta-cooking liquid and fresh basil, if using, and cook over medium heat at a light boil until the pasta is al dente. Add more pasta-cooking water as needed. There should be some liquid in the pan when the pasta is finished.
  14. Off the heat, stir in the Parmigiano Reggiano cheese and 2 tablespoons of extra virgin olive oil. Add a bit more pasta-cooking liquid if needed to emulsify the cheese and olive oil to create a glossy sauce that just clings to the pasta.
  15. Taste and adjust salt and pepper.
Recipe Notes

Copyright © 2017 by VillaSentieri.com. All rights reserved.
Share this Recipe

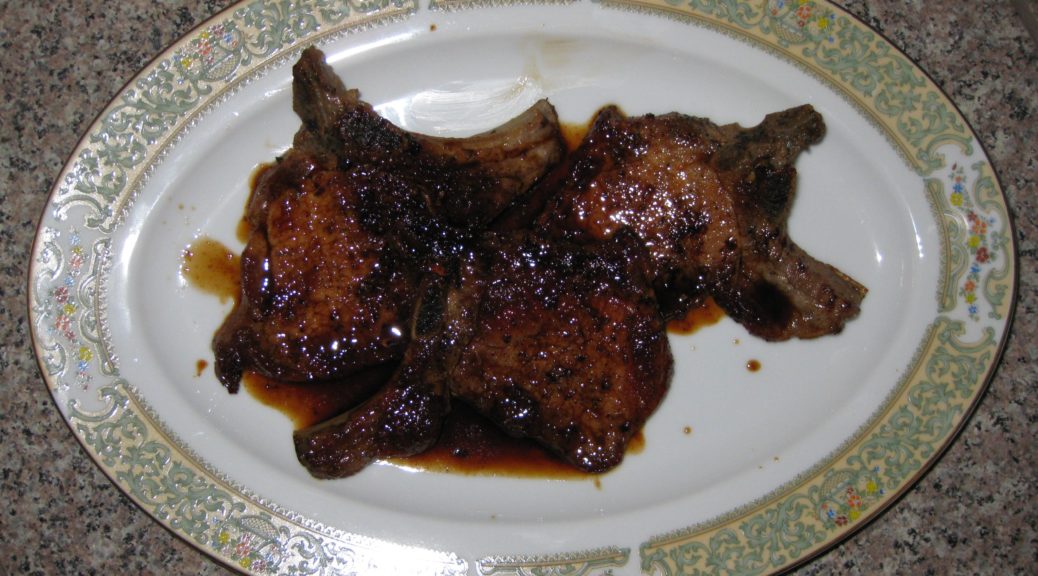
Mom’s Slow-Braised Pork Chops

June 16, 2017

Just last week my mother-in-law breaded and quickly pan-fried pork chops for dinner.  They were tender, juicy and truly wonderful.

Now that grilling weather has finally reached Santa Fe, we’ll have pork chops quickly cooked on the grill throughout the summer.  I’ll even grill the occasional pork tenderloin seasoned with olive oil, garlic, lemon juice and rosemary.

I really enjoy juicy, quickly-cooked pork.  However, I also really, really enjoy the style of pork chops that I at while growing up:  thin-cut pork chops cooked slowly in a sauté pan until they are deep brown.

No doubt, this is an entirely different dish from cooking the chops just enough to reach that “magic” temperature of 140°F that the USDA says is “safe.”  It won’t be to everyone’s taste (what is?) but in the interest of presenting an array of very traditional dishes I’m including it.

Just a few nights ago while in Palm Springs, I was served thick-cut braised pork chops cooked by a good friend, John O’Malley, following a recipe from Marcella Hazan.  I use the same recipe from Marcella when I want to cook thick-cut chops for company (ever since John turned me onto it a while back).

Marcella was from Northern Italy, my mother’s family from far Southern Italy, but the two dishes share a style that highlights a common feature of traditional Italian cuisine.  That is, a cut of meat that could be cooked quickly is, instead, cooked slowly coaxing out more flavor and changing the texture in the process.

The realization of the similarity of these two dishes is like the experience I wrote about in April 2017 describing roast chicken I ate in Tuscany that tasted, for all the world, like the falling-apart roast chicken seasoned with garlic and rosemary that my mother made.

Quick cooking is just one style but reading contemporary recipes one would think it’s the only way to cook many cuts of meat.  We all agree that there are cuts that must be cooked long and slow for optimum texture: think Southern Pulled-Pork Barbecue, Hawaiian Roast Pig, Beef Brisket, or Pot Roast, for example.  I challenge you to find a contemporary recipe for roast chicken or sautéed pork chops that doesn’t call for the minimum cooking time and final temperature.  It’s as if we’ve forgotten that these meats can also be cooked low and slow for a qualitatively different dish.

Recording this kind of diversity traditional foodways is one of my main goals for this blog.

As I describe on the About page of this website, I’ve had the very good fortune to cook alongside incredible cooks from many different parts of the world but even that only begins to scratch the surface of traditional foods.  And while I’ve got recipes planned well into next year, I think it’s time to bring in other voices, other stories.

From time to time I am going to feature a blog post, and accompanying recipe, based on interviews with folks who have chosen to share a treasured family recipe and a story to go along with it.  There are several individuals who have volunteered to be in the vanguard of this effort.

If you have a family recipe that you’d like to share, send me an email or add a comment and I’ll follow up.

Click HERE to join our mailing list and you’ll never miss a recipe again!

Print Recipe
Mom's Slow-Braised Pork Chops
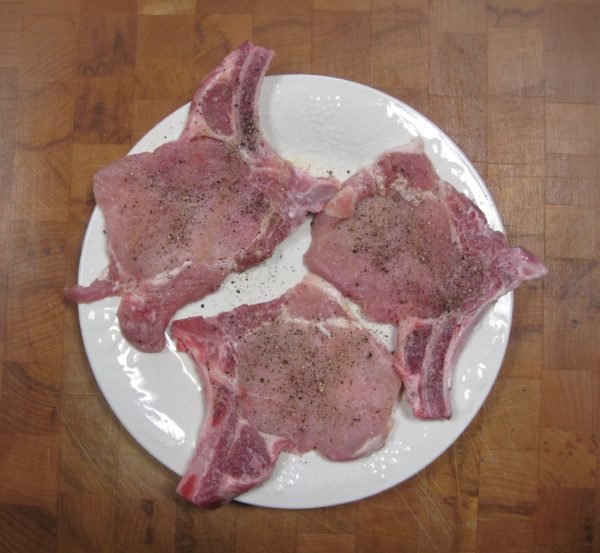
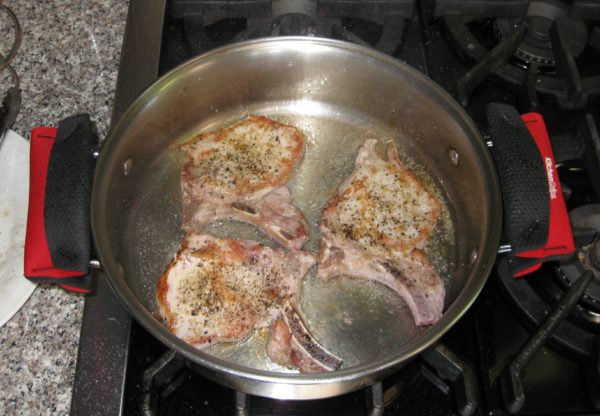
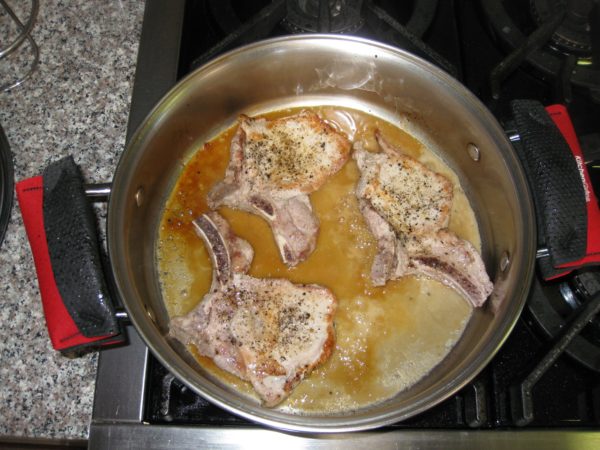
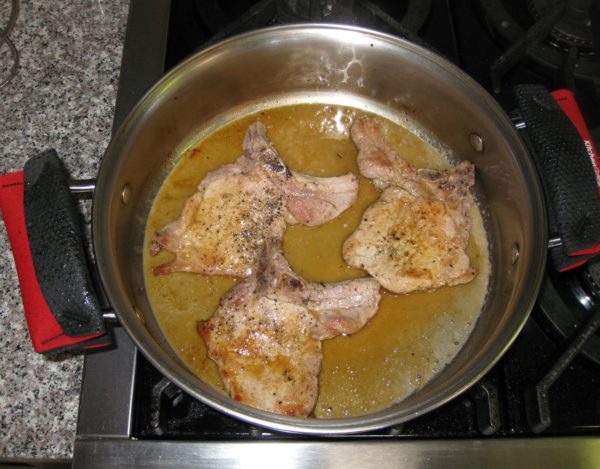
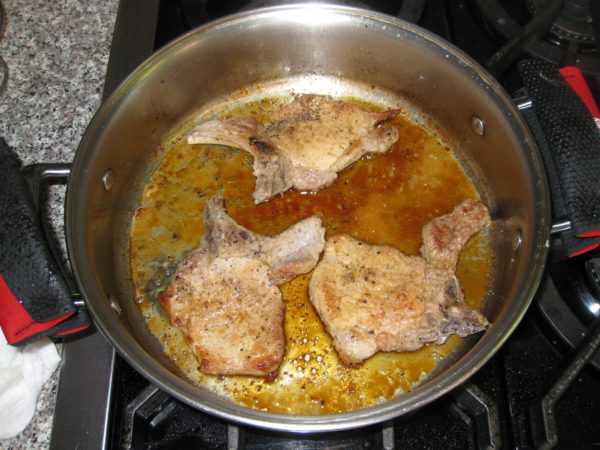
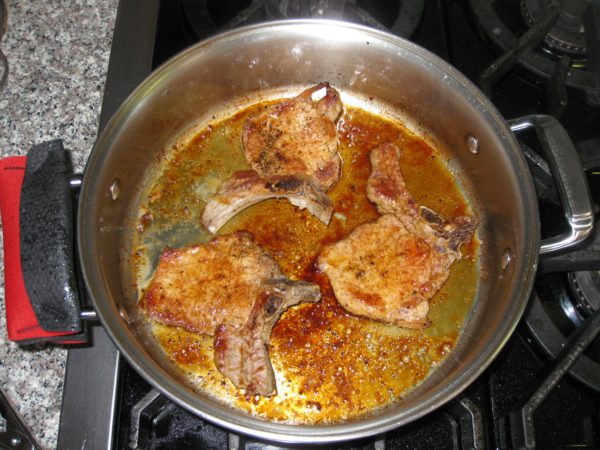
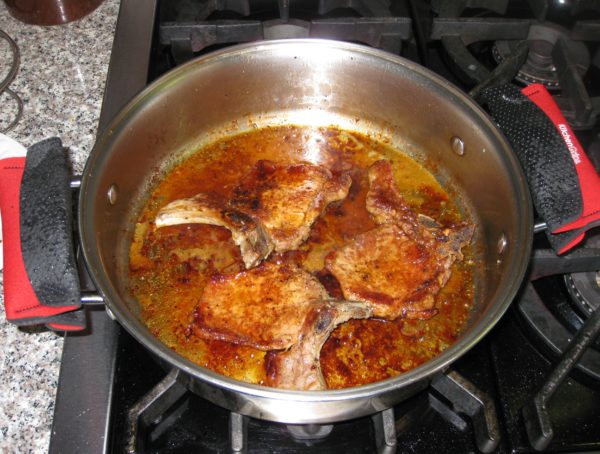
If these chops are being served as part of an Italian-style meal, preceded by pasta, rice or soup, and accompanied by several side dishes, one per person should be enough. Without a pasta course, an average eater could easily consume two of these and someone with a hearty appetite could eat three or four! A sauté pan with a very heavy bottom is needed to avoid hot spots. The chops will be cooked on low heat for most of the time and it is important that the pan conduct the heat well to avoid hot and cool spots for optimum browning. I prefer center-cut pork loin chops, these have a bit of loin and a bit of tenderloin, essentially the same cut as a T-bone steak. Loin chops (without the tenderloin), as shown in the pictures, work well too.
Votes: 0
Rating: 0
You:
Rate this recipe!
Course Mains, Meats
Cuisine Italian
Prep Time 5 minutes
Cook Time 2 hours
Servings
people
Ingredients
Course Mains, Meats
Cuisine Italian
Prep Time 5 minutes
Cook Time 2 hours
Servings
people
Ingredients
Votes: 0
Rating: 0
You:
Rate this recipe!
Instructions
  1. Season the chops generously with salt, pepper and garlic powder.
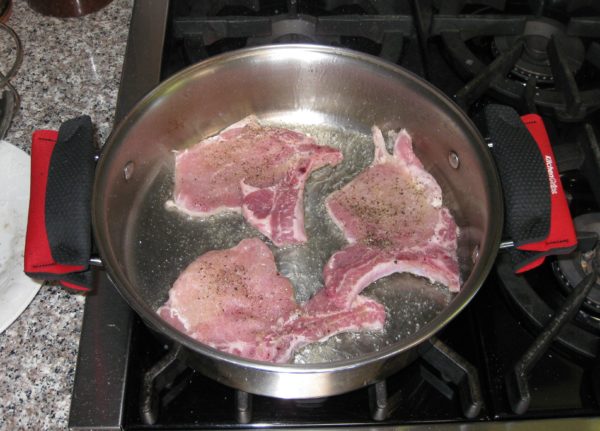
  2. Using a sauté pan that has a very heavy bottom and that is large enough to hold the chops without crowding, heat the oil until it just begins to smoke over high heat.
  3. Add the chops and reduce heat to medium high.
  4. Cook the chops, undisturbed, until nicely browned, approximately 2 minutes.
  5. Turn the chops over. If the oil was very hot when the chops were added and if you didn't disturb them while they browned, they should easily release from the pan without sticking.
  6. Brown other side. Approximately 2 minutes.
  7. Turn the chops over. Have the cover ready. Add the wine, immediately cover the pan, and turn the heat to low.
  8. Cook, covered, until the wine evaporates, 15 minutes more or less.
  9. After the wine evaporates the pan juices will start to brown. When they do, add 2-3 tablespoons of water and turn the chops over. Cook, covered, until the water evaporates and pan juices get a little bit darker.
  10. Repeat this process until the chops are falling apart tender and the pan juices are a deep brown. This will take 1 ½ to 2 hours.
  11. At the end there should only be a couple of tablespoons of water plus the oil in the pan. Pour this sauce over the chops when serving. It should have a rich umami porky flavor.
Recipe Notes

I rarely use garlic powder. The dishes for which I consistently use garlic powder instead of fresh garlic are Italian slow-roasted poultry, the pork chops featured in this recipe, and steaks. I find that I just can’t get the flavor that I want from fresh garlic in these instances.

Copyright © 2017 by VillaSentieri.com. All rights reserved.
Share this Recipe

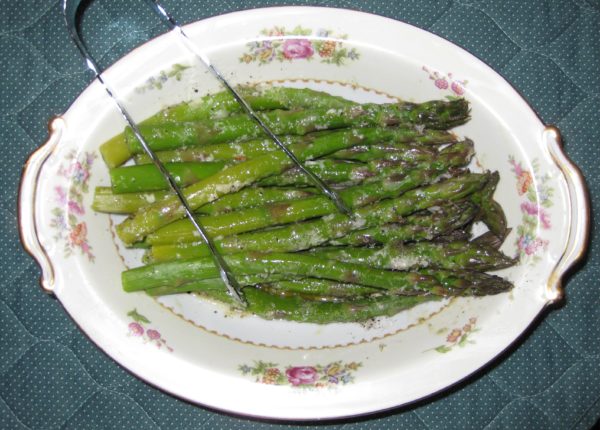
Asparagus with Parmesan Cheese

June 12, 2017

I am writing this sitting on a beach in Akumal, Mexico about an hour south of Cancun by car.

On the beach in Akumal
Iguanas enjoying the beach in Akumal

Just a few days ago, I was at home in Santa Fe where the weather was just beginning to turn spring-like.  The week before that I was in Hawaii.

The view from our lanai in Kauai

By the time you’ll be reading this, I’ll be in Palm Springs, where, even today, the temperature is hitting 100°F!

On the patio in Palm Springs before the heat of the day

Needless to say, my sense of seasonality is out of whack at this point.

No matter the temperature or the weather, asparagus says spring!

Just a few days ago, I was eating grilled asparagus in Santa Fe.  Days before that I made an asparagus frittata, before that I cooked the asparagus that is featured in this post.

Asparagus isn’t something I remember much of before college and usually it was the mushy white stuff out of a can.  White asparagus can certainly be a delicacy but when it comes out of a can that’s an impossibility as far as I’m concerned.

College was a time of incredible culinary growth for me.  Growing up I ate wonderful food as my mother was a great cook.  Mostly, though, it was Italian, Slovak, and the American dishes that every kid in the United States grows up eating.

I didn’t learn to cook until freshman year in college.  I was lucky enough to live in a college house at the University of Pennsylvania that was housed on two floors of an otherwise upper class dormitory made up of apartments with kitchens.  The typical freshman dorms either had no kitchens whatsoever or had the most rudimentary cooking facilities shared by large numbers of students.  Since I had a kitchen, I only took out the minimum required meal contract: 10 meals per week.  Usually this meant I ate lunch and dinner in one of the dining halls Monday through Friday.  On weekends I cooked…and baked!

I called home every Sunday from the day I went away to college.  Occasionally there was a lapse, like the time when I was 31 and hadn’t called home in a couple weeks.  The first words out of my mother’s mouth when she heard me on the other end of the line were, “I was just about to put your picture on a milk carton.”  Point made!  [You may or may not know that “back then” the pictures of missing children were put on milk cartons in the hope that someone would recognize them and call the authorities.]

Besides just catching up on our lives, I got advice.  My father gave me advice on how to handle alcohol, what to do if I had too much (don’t lie down and don’t close your eyes, for example), sex, and other topics.

My mother walked me through the steps of how to cook whatever it was I planned on making for dinner that evening.  By the end of freshman year, I was a credible cook.

My gastronomic circle was not very big, however.  Early my freshman year the resident advisors, Dennis and Martha Law from Hong Kong, took a group of us to dinner in Chinatown.  It was exciting, having grown up in a town without a Chinese restaurant.  The tastes, however, were so…well…foreign that I didn’t like much of what was served.  I tasted everything but rarely had more than one bite till something landed on my plate that struck me the right way.  The serving platter made it down the table past two or three other people till Dennis saw me eating.  He commandeered the plate and put it in front of me to be sure I had enough to eat.

By the end of the year I was not only eating, and loving, Chinese food, I had developed a rudimentary understanding of the regional differences and learned the basics of Chinese cooking from Martha.

After my taste buds got over the shock of Chinese food, I started exploring other cuisines.  A favorite became Indian food at Maharaja just a few blocks from my dorm.  It turns out the restaurant was owned by the aunt of someone I now work with!  I believe it was the first Indian restaurant in Philadelphia.

Sophomore year I was not in the college house but had one roommate in a similar upper class dorm with a kitchen.  Meal contracts were only required of freshmen and I saw no point in eating in the dining hall.  The arrangement I struck with my roommate was that I would cook and he would clean up.  It turns out he would eat, and like, most anything so I was free to explore and experiment.

That set the stage for my junior year when I was admitted to another college house, the International Residence Project.  Half of the students were from the USA and half from anywhere else in the world.

My roommate, and best friend for many years, Ray Hugh, hailed from Guyana.  Valrie Tracey from Jamaica became the third member of a triumvirate that was pretty much inseparable for the rest of college.

Two married couples were our resident advisors, Ambrose and Najma Davis, and Reginald and Nanacy Rajapakese.  Ambrose was from Jamaica, Najma from Bangladesh, and Reggie and Nanacy from Sri Lanka.

Nanacy taught me how to make Sri Lankan food and I’m almost as comfortable making that as I am Italian.  I remained close friends with Nanacy and Reggie, even making several trips to Sri Lanka with Nanacy in the last few years, after Reggie’s death.

Ray and I have reconnected on Facebook which is rekindling many memories of the trips I made to Guyana and my experiences in learning to make Guyanese and Chinese food from Ray and his mother.  Ray’s grandparents on both sides emigrated from China to Guyana in the 1800’s.

Ray and I packed an incredible amount of cooking power into a tiny dormitory kitchen.  Without enough cabinet space to store ingredients, we had stacks and stacks of plastic milk delivery crates packed with an unimaginable assortment of ingredients from international food markets.

Our apartment became known as the place for midnight snacks and folks always came knocking on the door around then to see what we’d whipped up to nibble on.

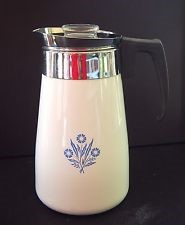
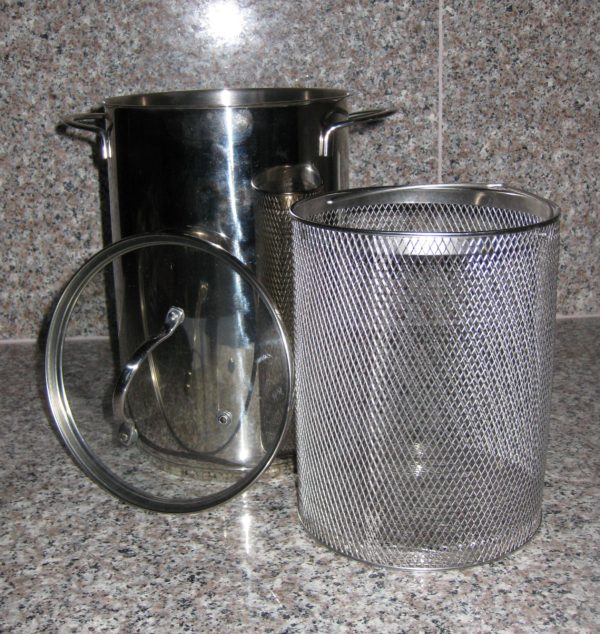
That was the year I discovered that my stovetop Corning percolator made a serviceable stand-in for an asparagus steamer.


Asparagus steamer in a pinch!

Click HERE to join our mailing list and you’ll never miss a recipe again!

Print Recipe
Asparagus with Parmesan Cheese
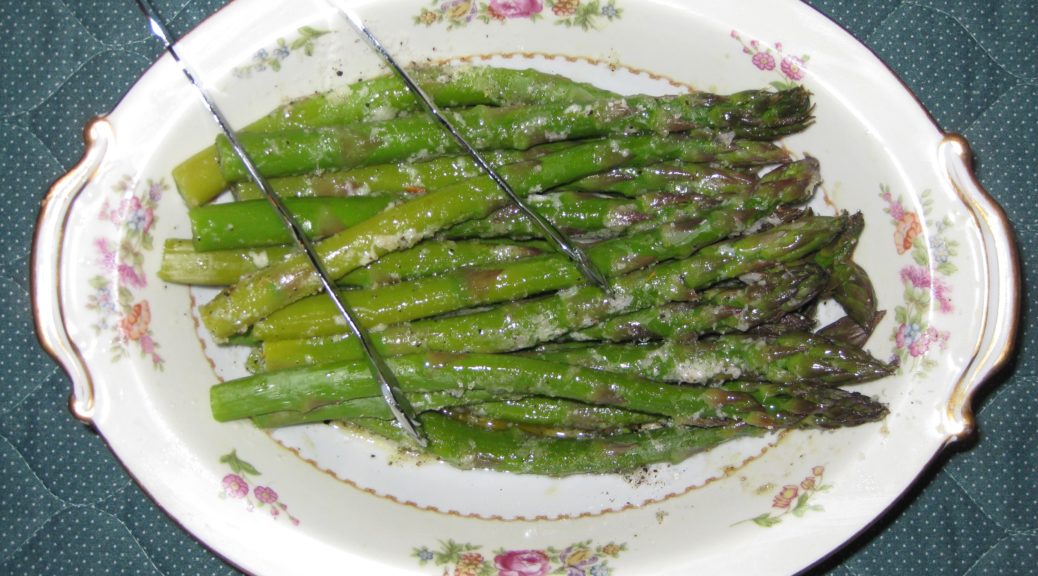
Asparagus is best cooked in an asparagus steamer. This small-diameter, tall pot allows the bottom of the asparagus spears to boil in the water while the tender tips cook by steaming. When I was a college student and didn’t have an asparagus steamer I used my stovetop Corning Ware percolator. If you don’t have a steamer, or a reasonable substitute, I find it preferable to cook the asparagus in a microwave oven rather than to boil them. After rinsing off the asparagus, put the spears and whatever water clings to them in a microwave-safe dish with a cover. Cook in 1-2 minute increments, moving the spears around after each bout of zapping, until cooked but still a little “toothy” (and certainly not mushy).
Votes: 0
Rating: 0
You:
Rate this recipe!
Course Sides, Vegetables
Cuisine Italian
Prep Time 10 minutes
Cook Time 15 minutes
Servings
people
Ingredients
Course Sides, Vegetables
Cuisine Italian
Prep Time 10 minutes
Cook Time 15 minutes
Servings
people
Ingredients
Votes: 0
Rating: 0
You:
Rate this recipe!
Instructions
  1. Trim the tough ends off the asparagus. The “Notes” section below contains a link to a blog post describing how to do this.
  2. Crush the garlic with the side of a chef’s knife.
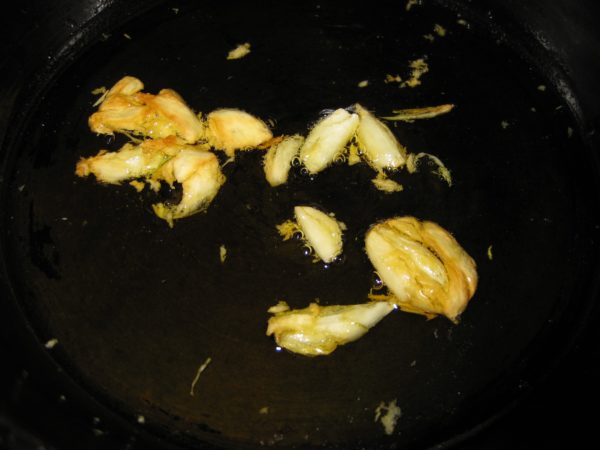
  3. Heat the olive oil in a small sauté pan over low heat. Add the garlic and sauté slowly until brown, pressing down on the garlic occasionally.
  4. Discard the garlic. Reserve the oil.
  5. Cook the asparagus until toothy, neither crunchy nor mushy. If you do this in an asparagus steamer, put about two inches of water in the bottom and bring to a boil. Lower in the basket with the asparagus. It will take 5-10 minutes, depending on the asparagus and your elevation, to cook the asparagus properly.
  6. Put the cooked asparagus in a warmed serving bowl.
  7. Add the garlic-infused olive oil and mix.
  8. Add the Parmigiano Reggiano cheese and the salt and freshly ground black pepper to taste. Mix well.
  9. Drizzle with lemon juice and serve.
Recipe Notes

You can find videos of prepping asparagus here.

Copyright © 2017 by VillaSentieri.com. All rights reserved.

Share this Recipe

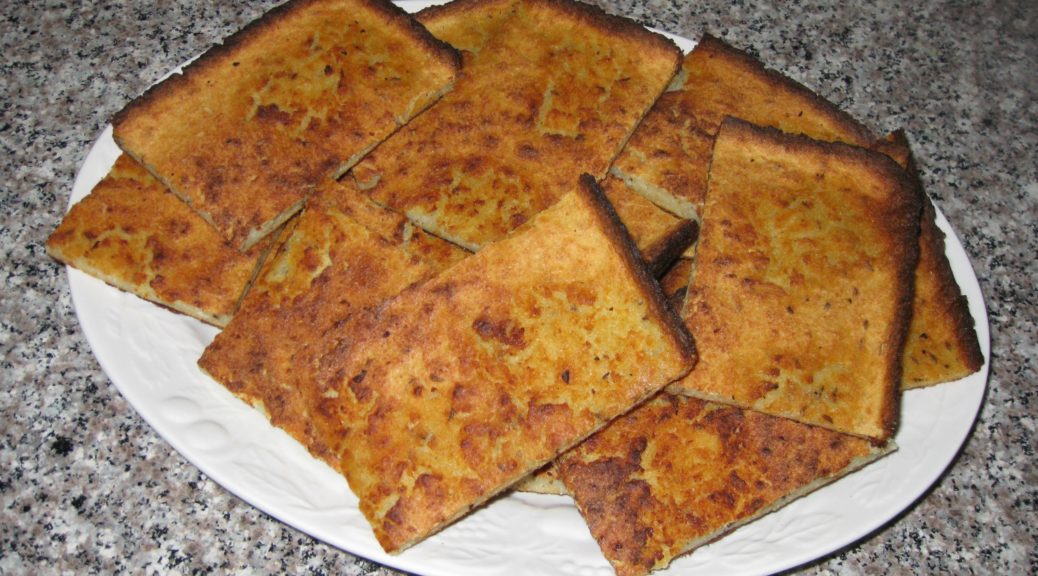
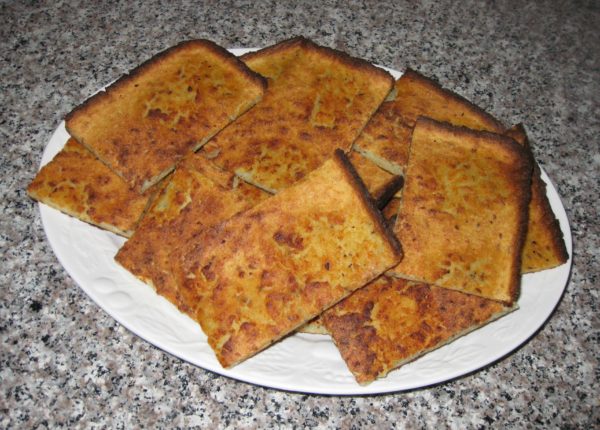
Slovak Potato Cake (Baba or Bubba)

June 7, 2017

Baba was a favorite food in our house.  We often joked that my mother should open a shop selling pizza and baba.  We were convinced it would be a success, as were a number of family friends.

Although Johnstown, Pennsylvania, where I grew up, was originally founded by Germans (everyone, regardless of ethnic background, had sauerkraut, sausages, and pork on New Year’s Day), Italians and Eastern Europeans were among the largest ethnic groups when I lived there.  So, a “fusion” shop selling pizza and baba wasn’t so far-fetched!

Baba means old woman in Slovak.  I can’t tell you how it came to be applied to this very specific type of potato cake and whether it was just in our family or more widespread, though I suspect the latter.

Other than the crispy skin of our Thanksgiving turkey, this is the only food my sister and I fought over.  This, however, was three-way guerilla warfare also involving my father.  Crispy turkey skin has an immediacy about it.  It needs to be eaten right away, hot and crispy, or it loses its appeal.  The fight is right out there in the open, a virtual “land grab.”

Baba is different.  As good as it is freshly made, we all preferred it after a day or two.  Any leftover baba would be wrapped in aluminum foil and put in the oven, which had a pilot light way back then.  That kept it ever so slightly warmer than room temperature.  The baba would become chewy.

The natural tension that developed was between letting the baba mature till it had the optimum chewiness versus losing out entirely if someone else ate it first.

We all kept our eyes on the oven which was conveniently located at eye-level.  If it looked like the package had been disturbed, we could swing into action, grabbing what was left and eating it even if it didn’t have the optimum chew.  “Any baba is better than no baba” was definitely the operative mentality.

There was always the chance, however, that the first person to go for the baba would eat all of it, especially if there were only a few pieces left.

There was also the chance (sometimes turned into reality) that someone could deftly open the package, remove a piece of baba, close the package, and put it back in the oven it in a way that made it look undisturbed.  Well implemented, this was a strategy for getting more baba since others could be lulled into complacency thinking the cache of baba was still available to them for the taking.

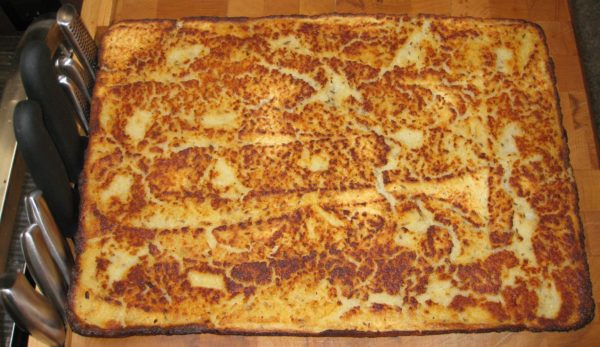
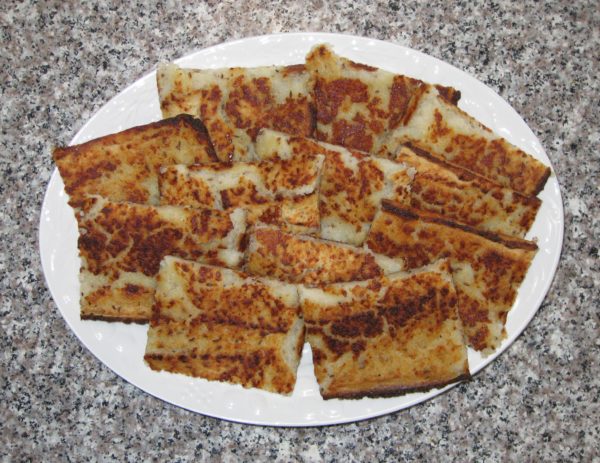
The ingredients of baba are pretty standard potato cake fare, potatoes, onions, salt, pepper, flour and, depending on the cook, egg.  Two things make it unusual in my experience: caraway seed and the cooking method.  To be sure, Slovaks put caraway seed in lots of foods but I have yet to find a recipe for Slovak potato cakes that contains caraway seed.

As for cooking method, baba is cooked in the oven in a rimmed baking sheet.  Remembering that my grandparents raised seven sons, who in later years were augmented by daughters-in-law and grandchildren, baba was made in large quantities.  When there wasn’t enough batter to fill another baking sheet “to the thickness of your finger,” as my Aunt Mary would say, the remaining batter would be turned into individual potato “pancakes” in a frying pan in shallow oil.

The proportions given here will nicely fill an 11” by 17” baking sheet.  If you prefer to fry the potato cakes rather than bake them, by all means do!

Print Recipe
Slovak Potato Cake (Baba)
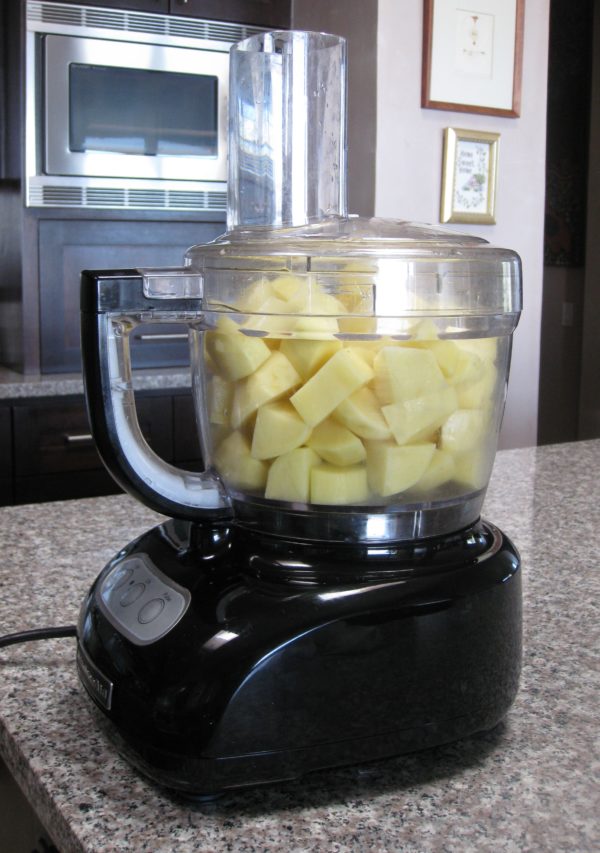
I remember watching my mother make this, and learning from her. Though it always tasted the same in the end, it seemed like the lack of precise measurements was an issue. My mother had no difficulty cooking her regular canon of Italian food without measurements. My suspicion is that the issue with Baba is that she didn’t make it all that often. I make it even less often (though I think that’s changing) which prompted me to carefully measure ingredients until I got a perfect batch and then stick with those measurements going forward. My mother put an egg in her Baba. My Aunt Mary did not. Aunt Mary, who lived next door to my Slovak grandparents for years, insists that Grandma never used egg. I have not tried it without the egg, being happy to stick with a recipe that works. Before food processors, the potatoes and onion were grated on the fine side of a box grater. The food processor eliminates the most tedious part of making Baba.
Votes: 0
Rating: 0
You:
Rate this recipe!
Prep Time 30 minutes
Cook Time 1 hour
Servings
people
Ingredients
Prep Time 30 minutes
Cook Time 1 hour
Servings
people
Ingredients
Votes: 0
Rating: 0
You:
Rate this recipe!
Instructions
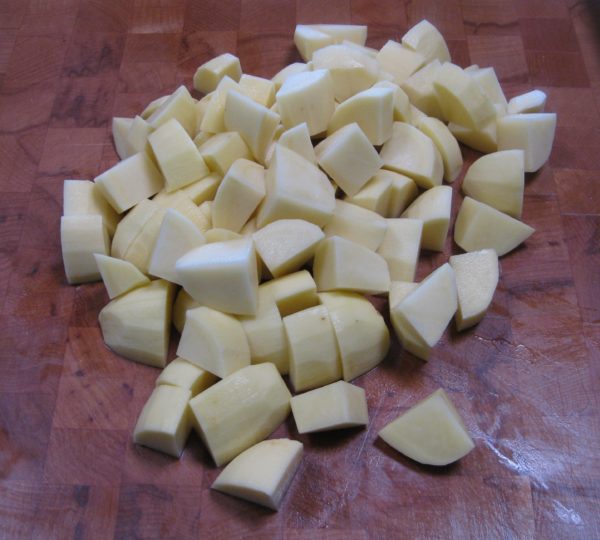
  1. Peel the potatoes. Rinse and dry them and cut into 1 inch cubes.
  2. Weigh out 1600 grams (3 ½ pounds) of potato cubes.
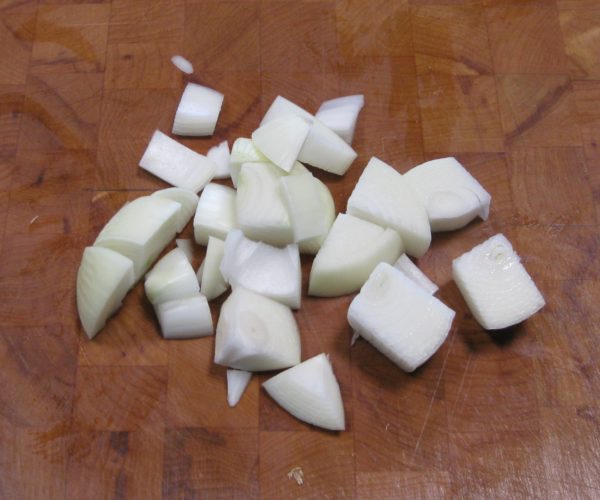
  3. Cut onion into 1 inch chunks.
  4. In two or three batches, depending on the size of your food processor, thoroughly grind the potato and onion, putting some potato and some onion in each batch.
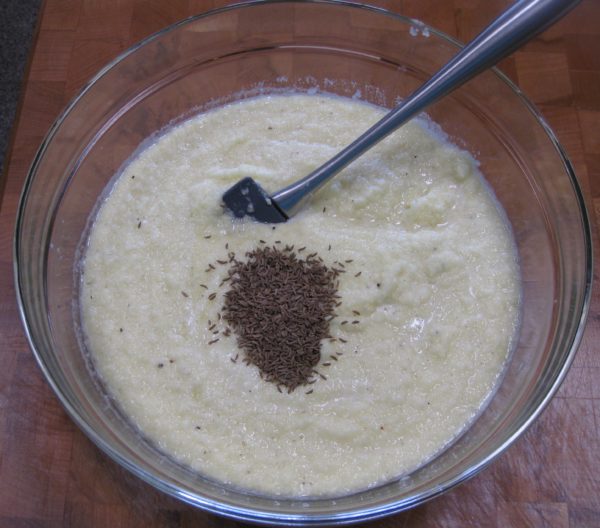
  5. Put the ground potatoes and onions into a large mixing bowl. Add the lightly beaten egg, salt, black pepper, and caraway seed.
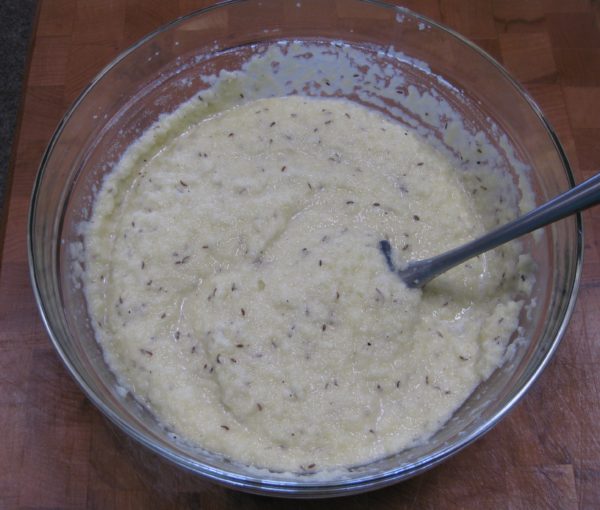
  6. Mix well.
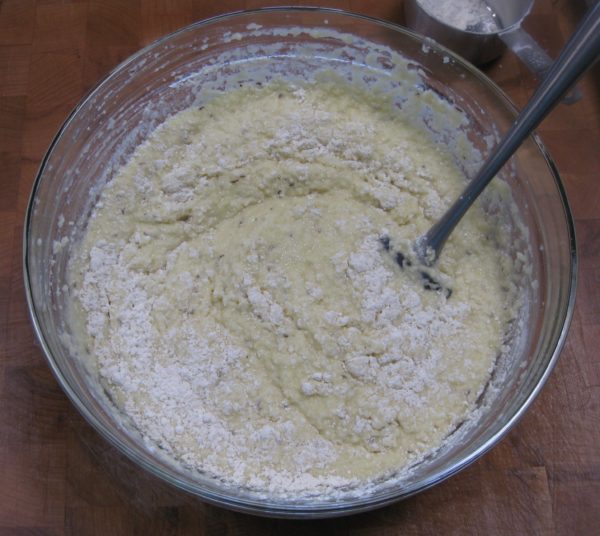
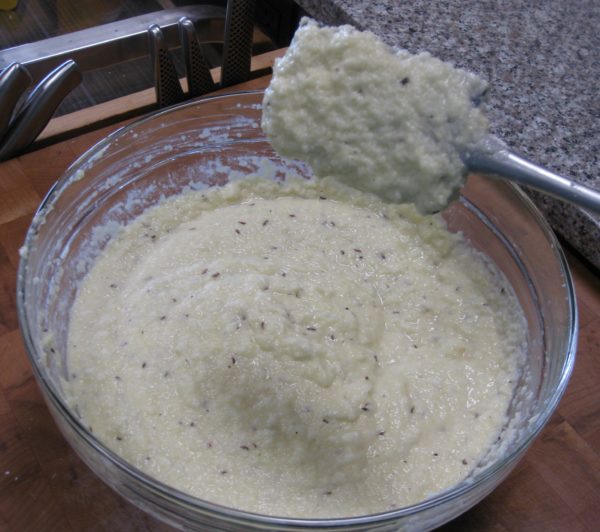
  7. Stir in about ¾ of the flour. Add enough of the remaining flour to thickly coat a spoon. Chances are you will need all the flour. If in doubt, just add it.
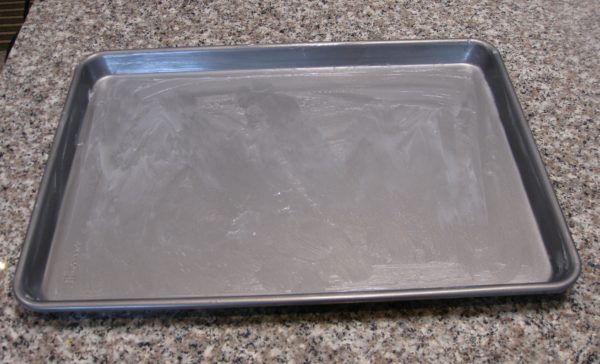
  8. Very, very generously grease an 11” x 17” x 1” baking sheet with lard. After you think you’ve used enough, add more! Remember, most potato cakes are fried. These are baked. They definitely need some fat for texture.
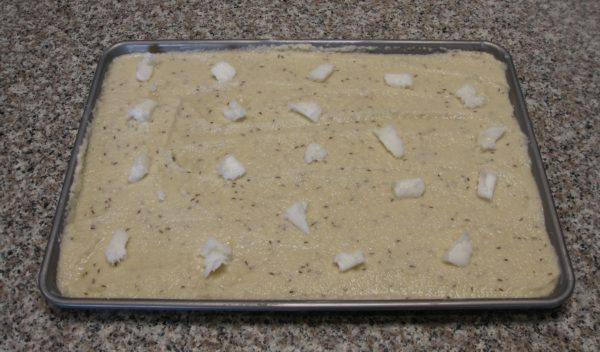
  9. Pour the batter into the prepared pan. Dot very generously with lard.
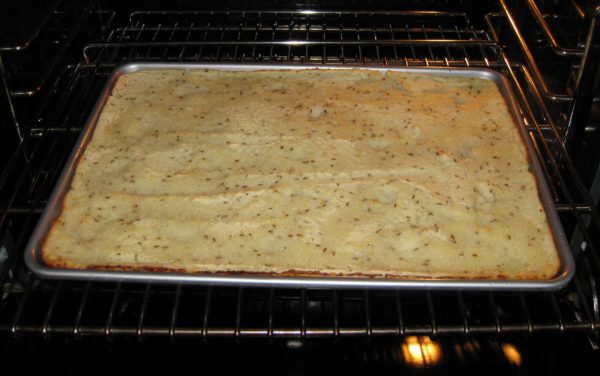
  10. Bake 425°F until browned on the bottom, about 30-40 minutes, turning the pan front to back after 20 minutes.
  11. When the bottom is brown, you’ll need to flip the Baba upside down. To do this, set another baking sheet of the same size on top of the Baba. The bottom of the baking sheet should be sitting on top of the Bubba.
  12. Flip the pans over. If you had enough lard in the pan, the Baba should release from the pan and be sitting, upside down, on the bottom of the other baking pan.
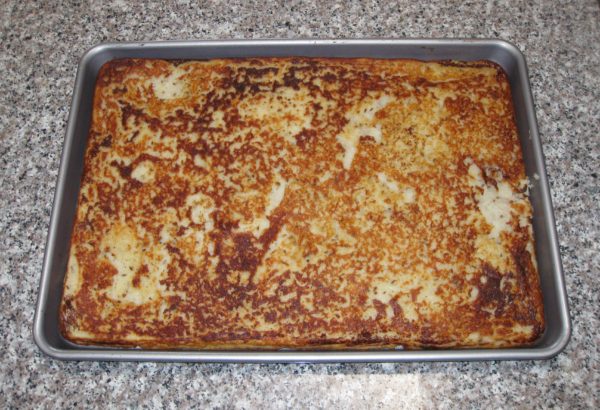
  13. Slide the Baba back into the original baking pan with the browned bottom now facing up.
  14. Bake another 20 minutes or so until browned on the bottom and thoroughly cooked.
  15. Turn out of the pan onto a large cutting board.
  16. Cut into 16 pieces. Serve warm or at room temperature.
Recipe Notes

Although you can use solid vegetable shortening in this recipe, I suggest you use lard for better taste and better health. You can find information about lard vs. vegetable shortening in this post.

Copyright © 2017 by VillaSentieri.com. All rights reserved.
Share this Recipe

White Bean Soup

June 2, 2017

The weather is turning warmer in fits and spurts here in Santa Fe as I write this in early-May.  I’m writing these posts a few weeks in advance due to upcoming travel.  Warm days and cold nights, alternating with cold days and colder nights make me think of soup.  Filling, warm, humble soup.

There are few soups that I like better than bean or lentil.

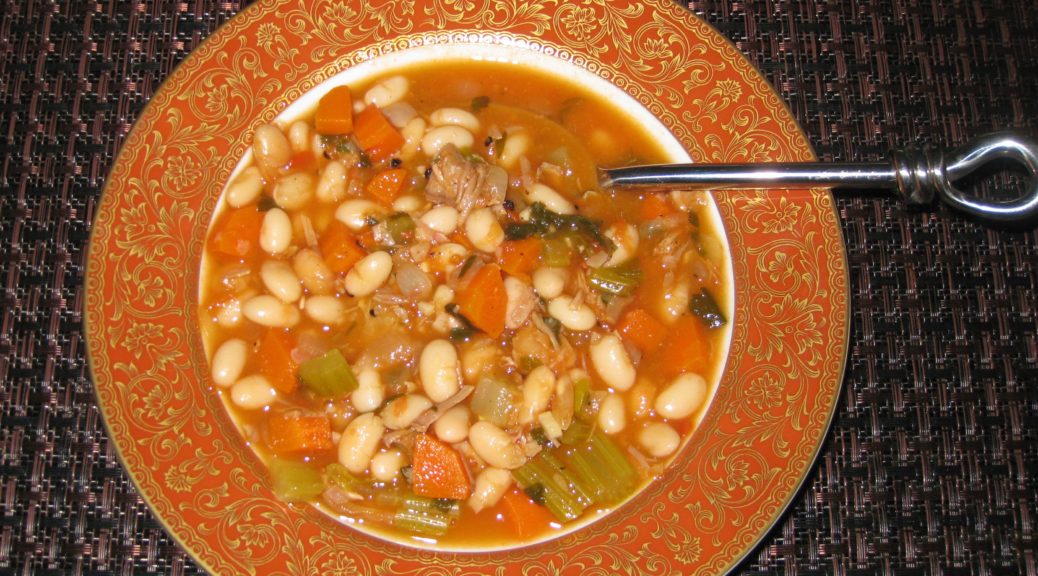
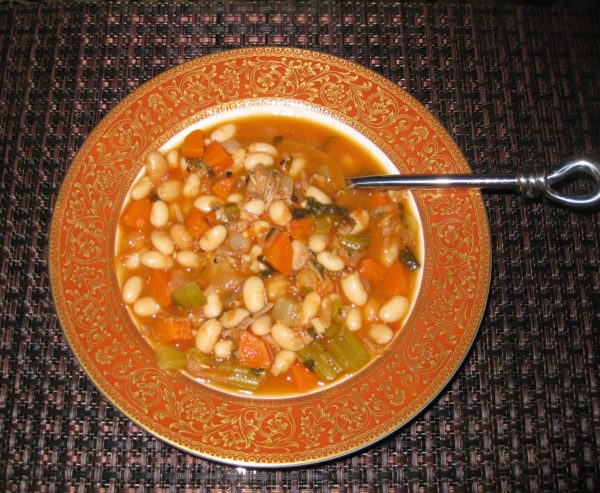
Although a ham bone is a classic way to start a bean soup, smoked turkey works well too.  I had a smoked turkey carcass in the freezer from a bird that I smoked a few months ago.  That and the combination of the cold weather made me think of making this classic American bean soup.  It made a really great dinner along with a platter of my grandmother’s potato cakes, the recipe for which will be appearing here in a few days.

This soup is assembled from very basic ingredients, many of which are almost always on hand.

With warm weather approaching, however, this will probably be the last time I serve such a hearty soup until autumn.

Which brings up an interesting topic: the effect weather has on our cooking and eating habits.  We tend to gravitate toward heartier, richer foods in the winter and lighter foods in warm weather.  Our caloric needs don’t really change appreciably from winter to summer so if we’re not gaining or losing weight, we’re probably eating about the same number of calories.  But it often doesn’t feel that way.

Eating seasonally is a good strategy for a number of reasons.  Locally grown, in-season, produce tastes better than produce shipped from far away.  Many fruits and vegetables start losing nutrients as soon as they are picked.  The shorter the time from farm field to table the more nutritious they are.

Did you ever think about what it takes to have “not from concentrate” orange juice available all year given that oranges are a seasonal crop?  Take a look here and here.  It will give you a sense of what is done to our industrialized food supply.  To be sure, we have ready access to more and cheaper food than has probably ever been the case in human history.  I’m not suggesting we abandon that, just that we become better informed consumers and make active choices about what we eat and why.

In addition to tasting better, and being more nutritious, eating seasonally brings back a sense of anticipation and, dare I say, romance, to eating.  Tomatoes are at their best in the summer so we eat lots of tomatoes then, for example.  Often times, lunch on Saturday in late summer will be thick slices of fresh tomato, fresh mozzarella cheese from The Old Windmill Dairy in Estancia, New Mexico, a few torn basil leaves from our garden, a sprinkle of salt and a drizzle of extra virgin olive oil along with some homemade bread to sop up all the juices.  Unless it’s from a can and going into something that’s cooked, you’ll rarely see a tomato in my kitchen the rest of the year.

The same sort of anticipation holds true with many other foods.  Some that come quickly to mind are zucchini blossoms (which I dip in batter and fry) and basil (which I turn into pesto and use to season quick-cooked tomato sauces all summer long but never use at other times of the year).

Seasonal eating isn’t limited to summer, however.  There are traditional winter crops and winter foods.  Cavolo nero, Tuscan kale, tastes better after a frost and is traditionally eaten in the late fall.  My mother-in-law pickles turnips each autumn which we eat in the winter made into a thick soup with cotechino, a Northern Italian sausage.

Traditionally, my mother-in-law’s pickled turnips would be made in the autumn.  That’s not only when the turnips are ready if you eat seasonally but that’s also when grapes are crushed and pressed for wine.  The turnips would be packed into a barrel with the solids left over from the grape pressing and allowed to ferment.  These days she makes a reasonable facsimile by simply pickling turnips in red wine vinegar though I keep hoping to find a winemaker in New Mexico who will sell me some crushed grapes to give the original recipe a try.

Red wine vinegar is always available, and mostly so are turnips.  Why don’t we make this at other times of the year?  Mostly it’s because of the association of pickled turnips (brovada) and cotechino with winter.  We try to maintain the seasonality even when we have the ability to circumvent it.  Doing that means there are always favorite foods to look forward to each season that we haven’t had in almost a year.

If it’s too warm where you live to have a hearty bowl of bean soup, tuck this recipe away for a few months and give it a try in the autumn.

Print Recipe
White Bean Soup
This white bean soup is easy to make and very nutritious. If you have the carcass of a smoked turkey or the bone from a baked ham, use my recipe for Roasted Turkey Broth, substituting the smoked turkey or ham bone, to make the broth for this soup. With a turkey carcass you definitely need to make broth otherwise you’d have lots of bones and bits in the final soup. While this isn’t the case with a large ham bone, I still prefer to make broth in advance so that I can skim off the fat. There is a link in the notes that follow this recipe to my recipe for Roasted Turkey Broth. Even if you don’t have a smoked turkey carcass or a ham bone you can make this soup. My supermarket sells various smoked turkey and pig parts. Just use them to make the broth. Be careful, though, as these products can be much smokier than a turkey or ham that was smoked to the right degree for eating. Failing all of that, use whatever broth you have on hand (or even water) to begin to cook the beans then add ¼ pound of chopped up bacon with the remaining ingredients.
Votes: 0
Rating: 0
You:
Rate this recipe!
Cuisine American
Prep Time 20 minutes
Cook Time 3 hours
Servings
people
Ingredients
Cuisine American
Prep Time 20 minutes
Cook Time 3 hours
Servings
people
Ingredients
Votes: 0
Rating: 0
You:
Rate this recipe!
Instructions
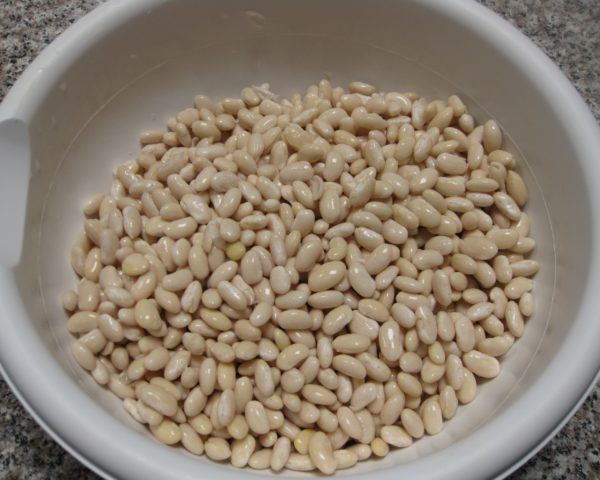
  1. Wash the beans. Cover with several inches of cold water. Refrigerate overnight.
  2. The next day, drain the beans.
  3. Combine the beans, broth, and bay leaf.
  4. Cover and bring to a boil.
  5. Cook, partially covered, at a medium boil for one hour, stirring occasionally.
  6. Meanwhile, prepare the other ingredients.
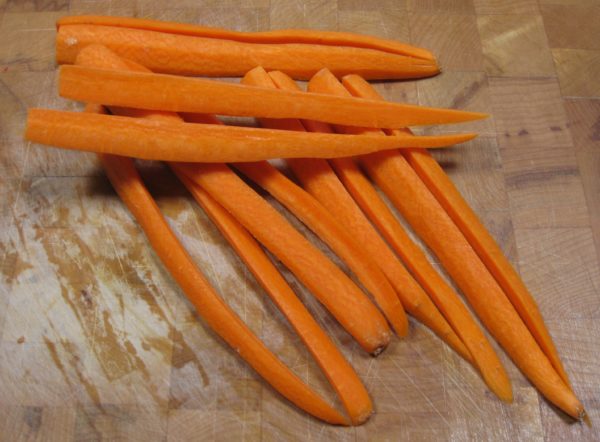
  7. Slice the carrots in quarters lengthwise.
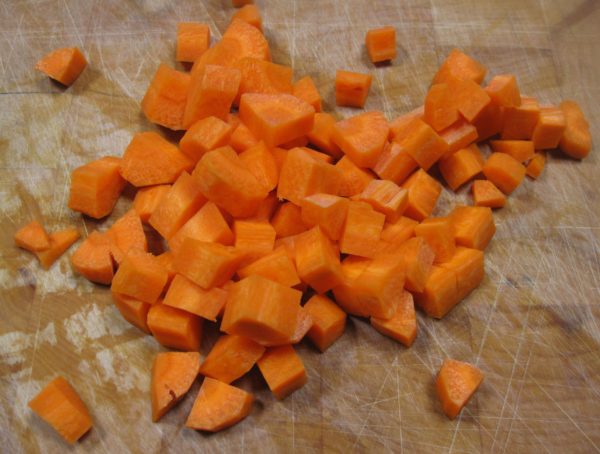
  8. Cut the carrots crosswise into 1/4 inch pieces.
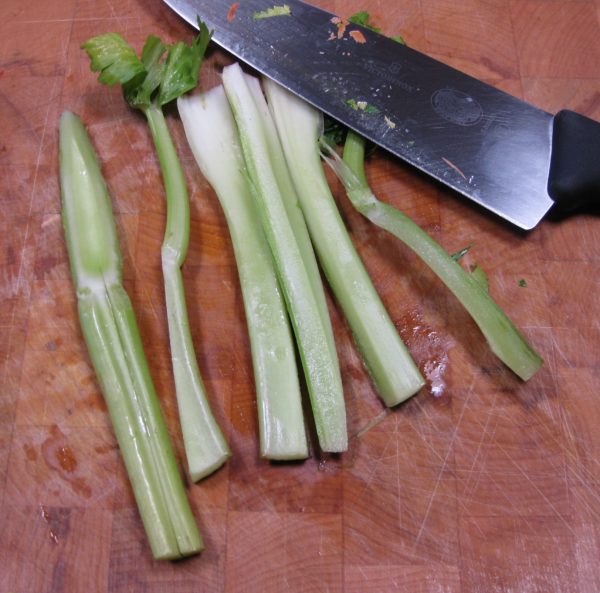
  9. Cut the celery into strips approximately the same size as the carrot strips.
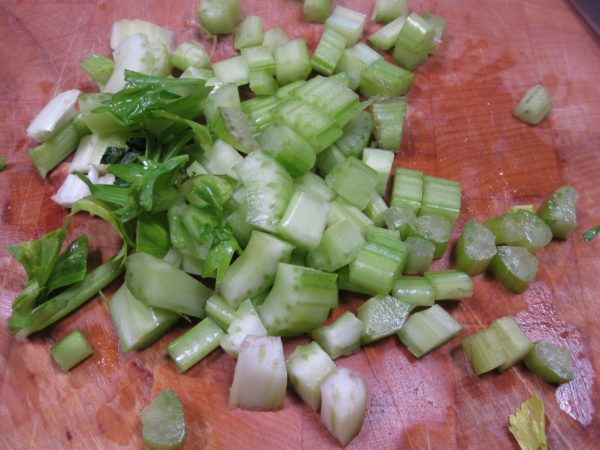
  10. Cut the celery strips crosswise into 1/4 inch pieces.
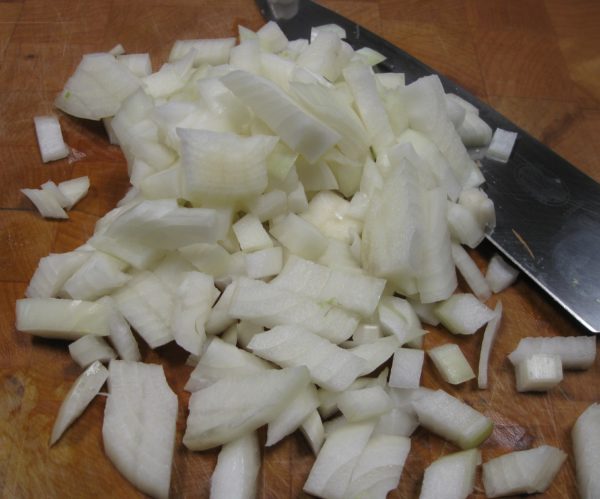
  11. Dice the onion.
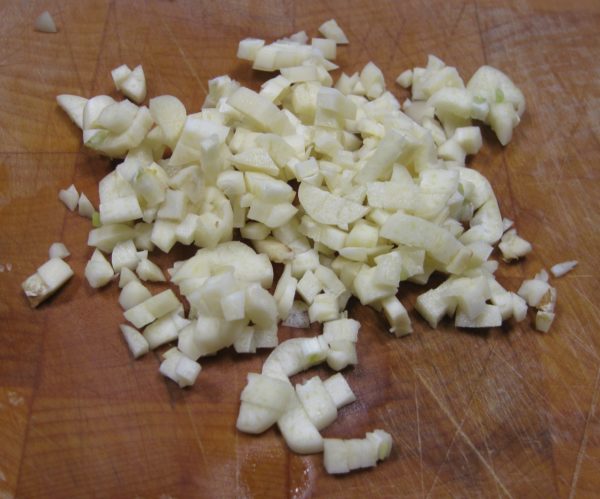
  12. Mince the garlic.
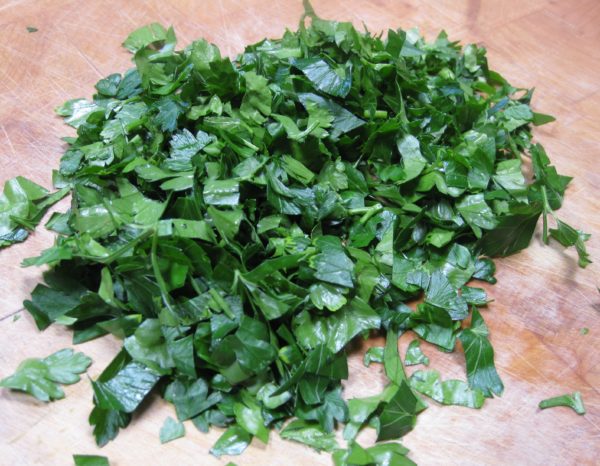
  13. Mince the parsley,
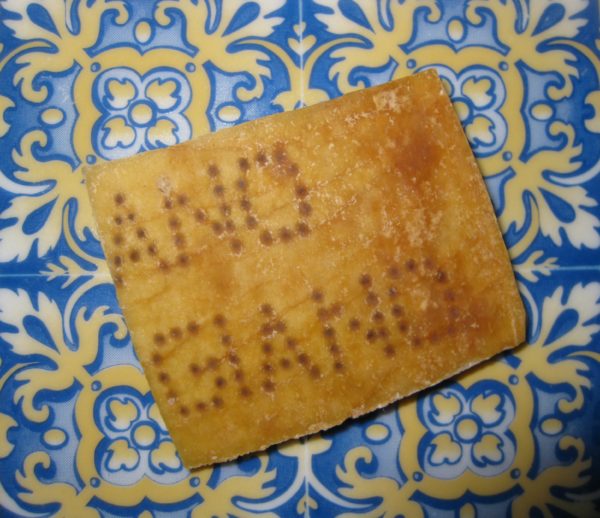
  14. Dig around in your freezer to find a Parmesan cheese rind that you froze with the intent of using in your next pot of soup.
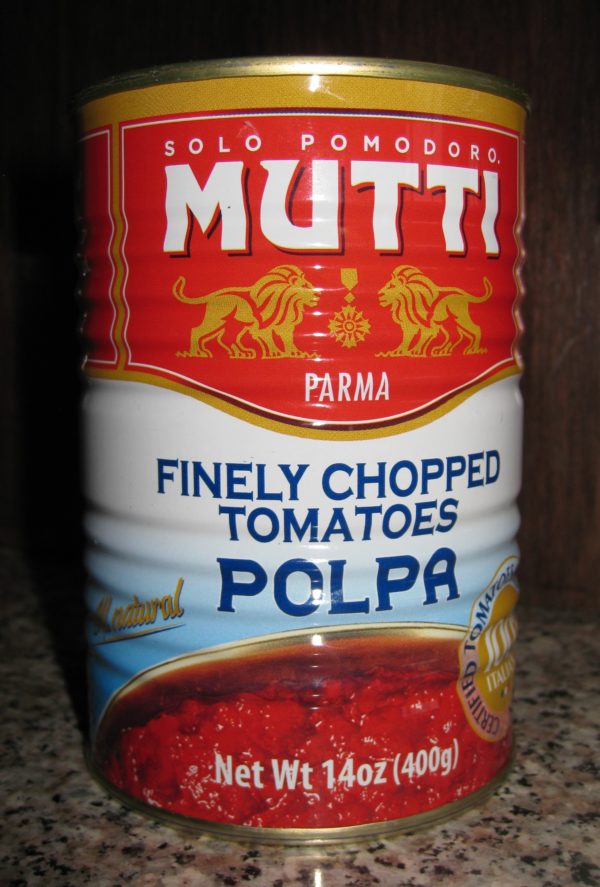
  15. Ready a can of diced tomatoes.
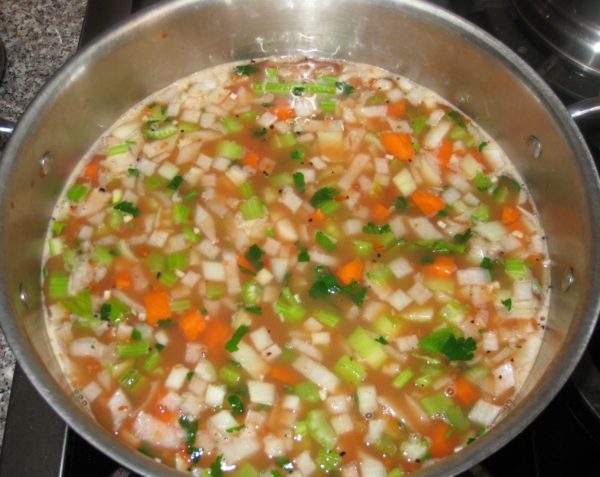
  16. Combine all ingredients except the chopped ham or turkey with the partially cooked beans.
  17. Simmer, partially covered for another hour or two until beans are soft and vegetables are cooked. The cooking time will depend on the type of beans, their freshness, and your elevation.
  18. Adjust seasoning as needed while cooking.
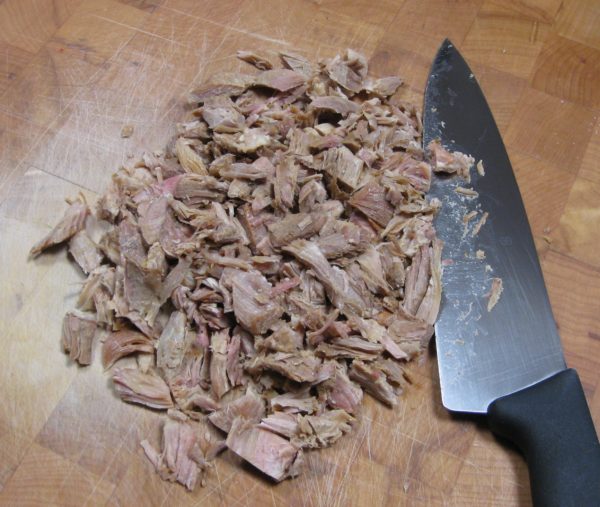
  19. Add the chopped ham or smoked turkey during the last 10 minutes of cooking.
  20. Serve with grated Parmesan cheese, if you wish.
Recipe Notes

As good as this soup is when it is made, I prefer to let it cool then refrigerate it for at least a day before rewarming and serving.

To make the broth, substitute a ham bone or smoked turkey carcass (or other smoked meat) for the roasted turkey in my recipe for Roasted Turkey Broth.

Copyright © 2017 by VillaSentieri.com. All rights reserved.
Share this Recipe