I also like coaxing a tremendous amount of flavor out of a small number of ingredients (though I don’t shy away from recipes with long ingredient lists either!).
I am a big fan of dishes that can be made in advance and warmed up for serving. Carne Adovada actually tastes better if it is refrigerated for a day or two.
For all of these reasons, Carne Adovada is an ideal dish for me. It is, bar none, my favorite New Mexican dish.
However, it isn’t necessary to use hot or extra-hot red chile. If you’re not a fan of spicy foods, use mild or medium-hot chile. Whatis critical is that you use actual New Mexico dried red chile.
New Mexican Red Chile Pods
Although I rode in a car along route 66 in the 1960s to visit an uncle in Los Angeles, I never spent any appreciable time in New Mexico until August 1991. Just days into that week-long visit to Santa Fe, I had Carne Adovada at Maria’s Restaurant.
I was hooked!
I was also enchanted by Santa Fe, as was my husband. By late 1992 we put in an offer on our first house in Santa Fe. The offer was accepted and we closed in January 1993. Thus began our love affair with Santa Fe.
We moved to Santa Fe full time in 2012 but we spent considerable time in Santa Fe every year until then (about ten times per year including all major holidays).
I was never happy with any Carne Adovada recipe that I tried, and I tried plenty, until I stumbled on a recipe from Al Lucero, the former owner of Maria’s Restaurant, in the program book for Santa Fe Wine and Chile Fiesta a number of years ago.
In times past, when a hog was butchered in the fall, some of the meat was preserved in red chile. This chile-infused meat was later braised to become Carne Adovada. I don’t know of anyone who cures pork this way any longer but many recipes for Carne Adovada call for marinating the pork overnight in the red chile. This would seem to be closer to the traditional method, though simply marinating the meat would not produce the additional flavor that would come from actually curing the pork in the chile. Some recipes, though a minority in my experience, call for the addition of vinegar to the marinade to try to achieve more of a “cured” or “fermented” flavor.
Al Lucero’s approach is different but definitely creates an extra layer of flavor. The pork cubes are roasted first then braised in red chile. Refrigerating the completed Carne Adovada for a day or two before serving improves the flavor even more.
What I especially like about Al’s method is that it does not introduce any non-traditional ingredients to the Carne Adovada. Until I can taste Carne Adovada made from pork that is actually cured in red chile, I’m sticking with my tweaked version of Al’s method.
Click HERE to join our mailing list and you’ll never miss a recipe again!
Print Recipe
Carne Adovada (Braised Pork with Red Chile)
The purity of the chile flavor is key to Carne Adovada so I avoid putting in other seasonings such as onion and oregano that are sometimes called for. This recipe, based on a recipe of Al Lucero, the former owner of Maria’s Restaurant in Santa Fe, roasts the pork first for a depth of flavor not obtainable otherwise. Remove any large pieces of fat from the pork but thin layers of fat between the meat are needed to ensure moist and tender pork, so don’t remove it all. I frequently buy a bone-in pork shoulder (aka pork butt) and use the bone to make broth.
Put the meat in a wide shallow baking/roasting pan that has a lid and roast at 450°F, uncovered, until well browned, turning every 20 minutes or so, approximately 90 minutes.
While the pork is roasting, make the red chile sauce using the proportions of ingredients called for above and following the directions in the Red Chile blog post. See the "Notes" section below for the link. There is some rendered fat in the pan. Do not discard the fat, it carries lots of flavor and improves the mouth feel of the sauce.
Beginning to brown.
Tossed after the top has browned.
Almost brown enough.
Browned and ready for the chile. Note that the liquid has all evaporated and created a brown fond in the pan. This gives extra flavor.
When pork is browned, add all the red chile sauce without draining any of the juices out of the pan.
Cook, covered, at 250°F for approximately 3-4 hours or until meat is very tender, stirring occasionally.
Remove the meat from the oven. Allow it to cool to room temperature.
Cover tightly and refrigerate overnight.
Reheat the carne adovada, covered, at 250°F for approximately 2 hours. If the sauce is not thick enough, reheat uncovered at a somewhat higher temperature until the sauce is thickened.
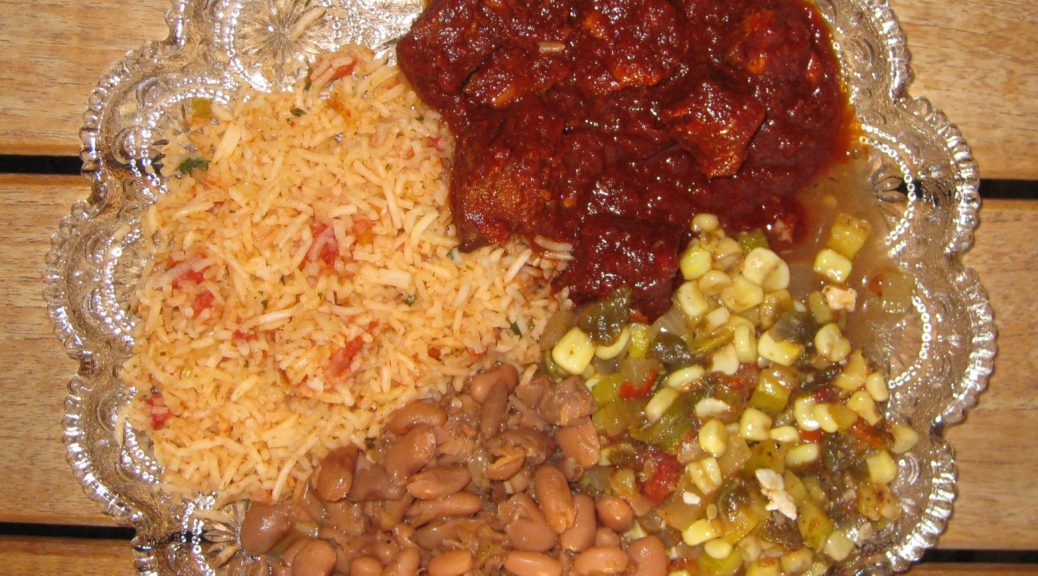
This plate contains carne adovada, red rice, frijoles (beans), and calabacitas) (zucchini, corn, and roasted green chile).
Recipe Notes
Here's where you can find the directions for making Red Chile Sauce.
Pasta tossed with a sauce of some sort of vegetable cooked in olive oil is an Italian classic. My mother frequently used either eggplant or zucchini, cooked them until they became very soft, and then tossed them with pasta.
I have one very vivid memory of this dish and it goes back to the summer of 1992.
After my mother was diagnosed with metastatic lung cancer in early summer 1992, she came to live with us. Until the last few days of her life in early January 1993, she took over our kitchen, a very comfortable role for her.
Over the years prior to her diagnosis, she had become friendly with our next door neighbor, Carla. During the last six months of her life she and Carla spent hours every day visiting and chatting. This was a wonderful arrangement as my husband, Frank, and I were working long hours. (It also led, through a number of interesting steps, to Frank and I becoming the god-parents for one of Carla and Billy’s children a few years later. But that’s a story for a different day.)
Frank had very long work hours a couple days per week. He rarely got home before 10 PM on those days. My mother and I would eat dinner earlier and then she would set aside his food.
But she did more than that.
When he got home, she always warmed up his dinner and then sat with him at the table while he ate. She never let him eat alone. Most likely, I was upstairs in bed. Since I got up earlier than Frank, I tried to be in bed by 10 PM to watch the news and go to sleep.
For some reason, the plate of pasta with zucchini sitting on the counter one evening to be warmed up for Frank’s dinner, knowing my mother would sit with him as he ate, is the mental image I have of this dish. I can’t make this without that image appearing in my mind. I think somehow that dish, made of very humble ingredients, came to represent the best of my mother’s nurturing characteristics.
She was a fierce advocate for her children. My sister and I both started school a year early because my mother thought we were intellectually ready (she was right) and she wasn’t going to take “no” for an answer from the school authorities.
Once, in second grade, my sister arrived home with the hem of her school uniform let down because one of the nuns thought it was too short. My mother promptly hemmed it, even shorter, and sent my sister to school the next day without ever saying a word. The hemline stayed put.
You didn’t mess with my mother where her children were concerned.
She continued cooking for us until less than a week before she died.
In those years we always gave a New Year’s Day party, a casual affair where people could come and relax and chat and eat. The Soviet Union was officially dissolved December 25, 1991. Most of 1992 saw the effects of the dissolution so the theme of our January 1, 1993 party was the dissolution of the Soviet Union.
For the party, my mother made 14 dozen stuffed cabbage rolls and 17 dozen potato pancakes!
She sat on the sofa throughout the entire party, chatting with everyone and being the life of the party. The next day she took a turn for the worse and on the morning of January 6th she died.
Some of my best memories involve food, most of which was cooked by family and friends who are no longer with us. Capturing and preserving those recipes is the way that I pay homage to them and to the culture and values they passed on to me.
Click HERE to join our mailing list and you’ll never miss a recipe again!
Print Recipe
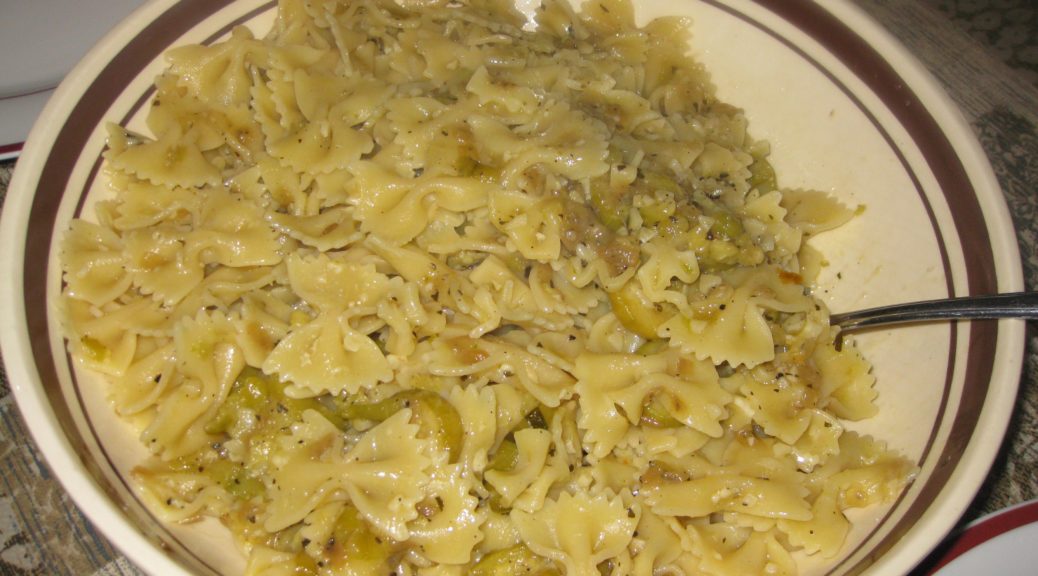
Pasta with Silky Zucchini Sauce
Zucchini are cooked to a silky softness to make a luscious sauce for pasta. Finishing the pasta in the pan with the zucchini and adding some pasta-cooking liquid, Parmesan cheese, and a couple of glugs of olive oil creates glossy sauce with a wonderful mouthfeel. When choosing zucchini, pick small ones, preferably not more than about six inches long. They should be firm and have glossy skin. It will take about 4 or 5 to yield four cups of sliced zucchini. Crushed red pepper is completely optional. If you have fresh basil you can omit the dry basil and toss in a tablespoon or so of basil chiffonade when you combine the pasta with the zucchini.
Peel the zucchini and slice approximately ¼ inch thick.
Mince the garlic.
In a large, heavy-bottomed sauté pan large enough to hold the pasta and sauce, sauté the onion and crushed red pepper, if using, over medium heat until the onion is golden and soft. Do not brown the onion.
Add the zucchini. Toss to coat with oil. Season liberally with salt and freshly ground black pepper.
Sauté on medium to medium high heat, adjusting from time to time to avoid browning the zucchini.
Add the dry oregano and dry basil, if using, after about 20 minutes.
Continue to sauté, stirring often, until the zucchini is quite soft, but still intact. It can turn golden but should not brown. Taste and adjust salt and pepper while the zucchini is cooking.
Add the minced garlic and cook until fragrant, about 5 minutes longer.
The dish can be prepared several hours in advance to this point. Simply take the sauté pan off the heat and cover it.
Bring three quarts of water to a rolling boil. Add 1/3 cup salt. Add the pasta and cook at a full boil until the pasta is almost al dente. It should still be just the tiniest bit hard in the center.
Reserve at least one cup of pasta-cooking liquid.
Drain the pasta and add it to the zucchini in the sauté pan. Add about ½ cup of reserved pasta-cooking liquid and fresh basil, if using, and cook over medium heat at a light boil until the pasta is al dente. Add more pasta-cooking water as needed. There should be some liquid in the pan when the pasta is finished.
Off the heat, stir in the Parmigiano Reggiano cheese and 2 tablespoons of extra virgin olive oil. Add a bit more pasta-cooking liquid if needed to emulsify the cheese and olive oil to create a glossy sauce that just clings to the pasta.
Before my bread machine it was my Kitchen Aid stand mixer. Before my Kitchen Aid stand mixer it was my hands. I have always enjoyed making bread.
Junior year in college was when my bead making got started in earnest. That was the year that I lived in the International Residence Project at the University of Pennsylvania. I was notified of my acceptance into the Project, a College House arrangement that occupied two floors of a high-rise dorm, late in my sophomore year. Current and incoming residents of the Project met at a social event where I was introduced to the roommate to whom I had been assigned for the coming school year, Ray Hugh from Georgetown, Guyana.
Ray and I started hanging out together for the last part of sophomore year and found that we really hit it off. Since we were both staying in Philadelphia for the summer, and since students could not stay in undergraduate dorms during the summer, we did what most undergrads did during the summer. We sublet an apartment in Graduate Towers from graduate students who were not staying in Philadelphia for the summer but who, as graduate students, had year-long leases.
I had pretty regular hours working in a research lab for the summer but that left evenings and weekends free to explore cooking which Ray and I did together. It quickly became clear that the kitchen in our apartment in the International Residence Project, which we would begin occupying in September, was going to need an upgrade.
At my request, my father made a five-foot long kitchen counter with a laminate top. There was in integrated pull-out table that would seat two in the regular configuration but four when pulled out. That counter became the epicenter of our cooking universe. Set opposite the Pullman kitchen (three electric burners, an oven, an under-counter refrigerator, and an integrated sink) we had a very efficient kitchen set-up. A deep shelving unit that I made housed equipment and several stacks of plastic milk crates held ingredients for which there otherwise would have been no space.
I made bread on that counter every week, kneading it by hand.
I made bread the way my Italian grandmother did. Flour, water, salt, and yeast went into a big bowl. The yeast was not proofed. I mixed the ingredients by hand, adding more flour as needed. Periodically I would rub the inside of the bowl with lard. After enough flour had been added, I would put the dough on the counter and knead it for about ten minutes. The dough would always rise twice, getting punched down and kneaded lightly after each rise, before being put in bread pans for the third and final rise before being baked.
Decades later I got my first Kitchen Aid stand mixer and started using that to make bread. Good thing, too, because I was starting to have trouble with my joints from all the kneading necessary.
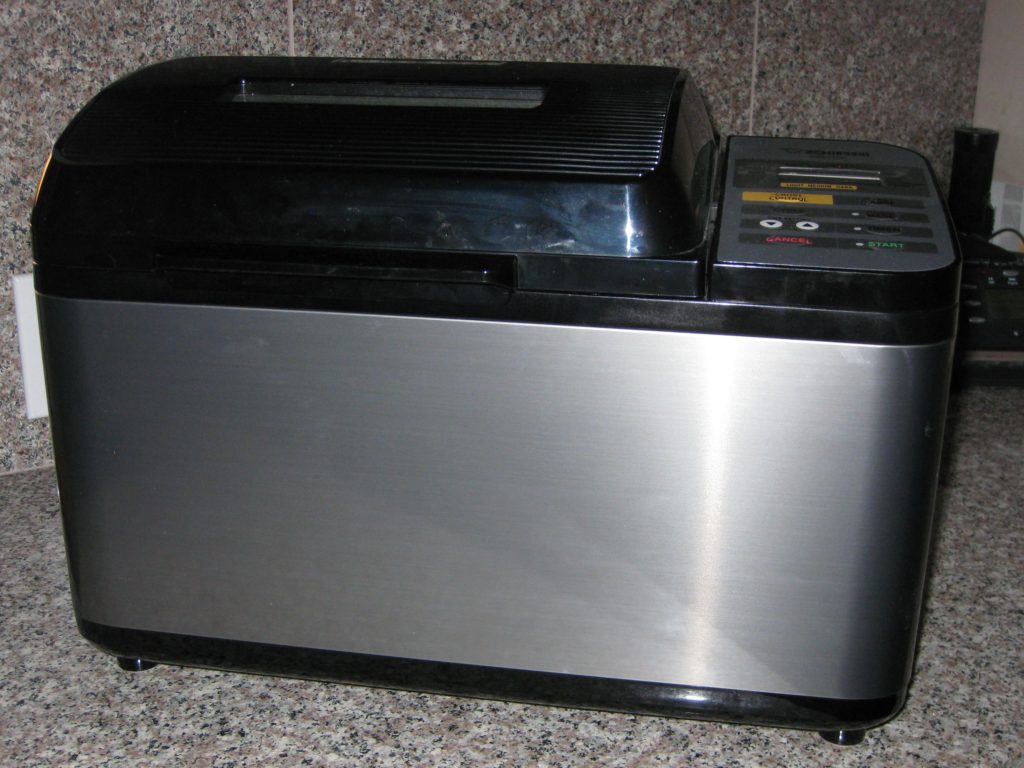
A few years ago I got my first bread machine, a Zojirushi BB-PAC20. While I have no doubt that bread baked in an oven is better I also have no doubt that we would not eat anywhere as much homemade bread if I had to do all the mixing, rising, shaping, and baking unaided.
With less than five minutes’ work spent measuring ingredients, I can push a button and have bread a few hours later. And I am completely at peace with the ingredients in my bread. No sugar. No high fructose corn syrup. No dough conditioners. No preservatives. Nothing but flour, water, salt, olive oil and yeast! The bread machine has more than paid for itself in savings.
My Zojirushi BB-PAC20 bread machine
I especially like the dough cycle. As noted in a previous blog post, I use the dough cycle to make the dough for my focaccia. A quick final rise after being shaped and the focaccia is ready for the oven. The dough cycle also makes pizza dough in a snap. I like to make it at least one day in advance and allow it to rise in the refrigerator. Two days in advance is even better.
I still pretty much use the same recipe for bread dough that I followed in college though I’ve swapped out the lard for olive oil and modified the directions to suit mechanization instead of hands. (Every now and then, I just get the urge to do it by hand, though!)
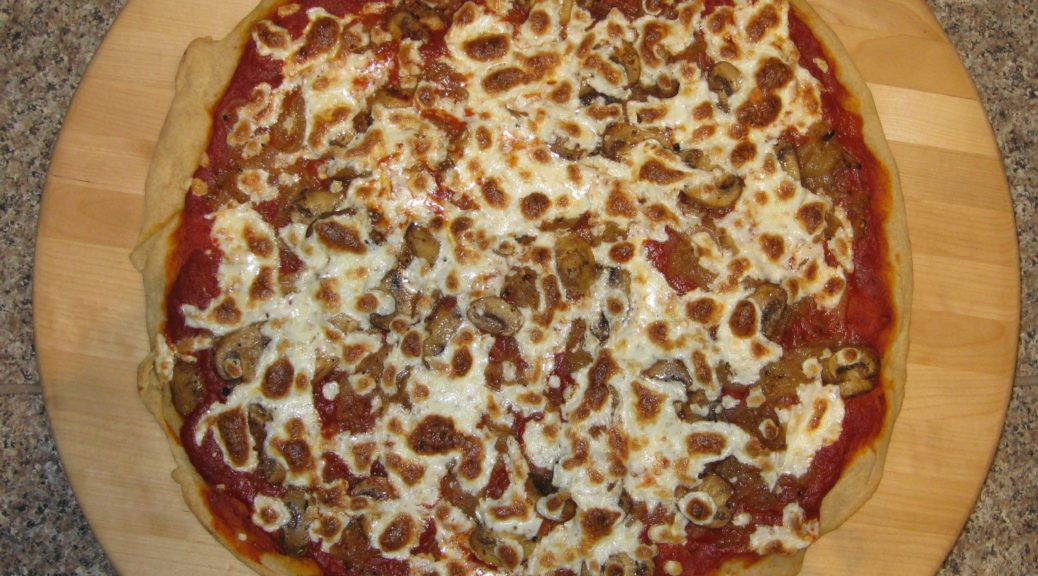
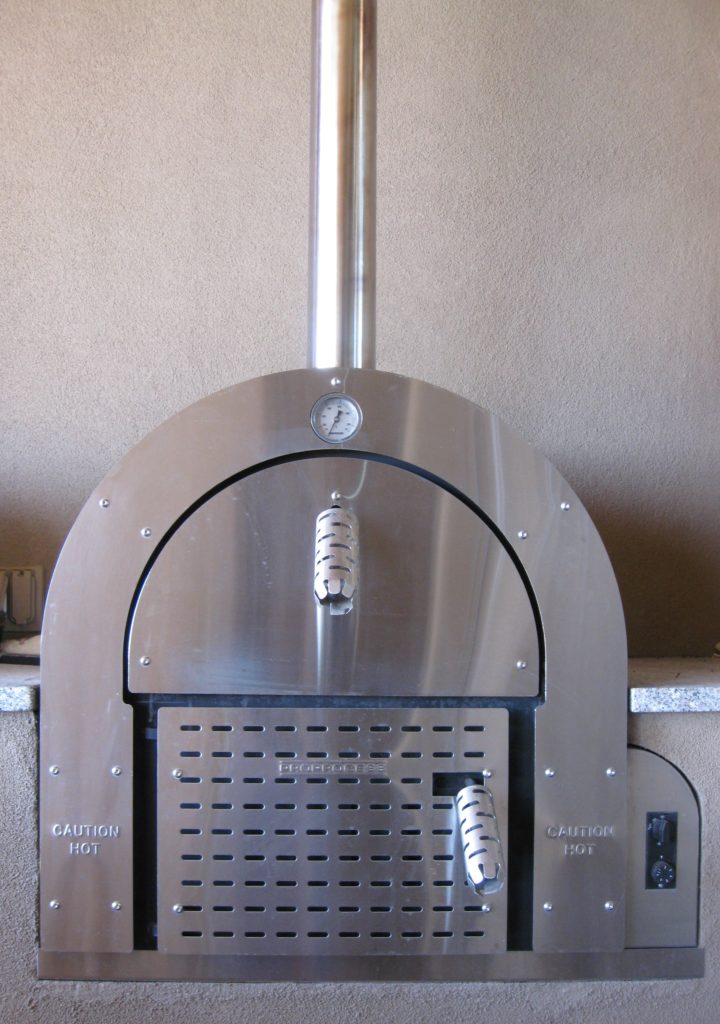
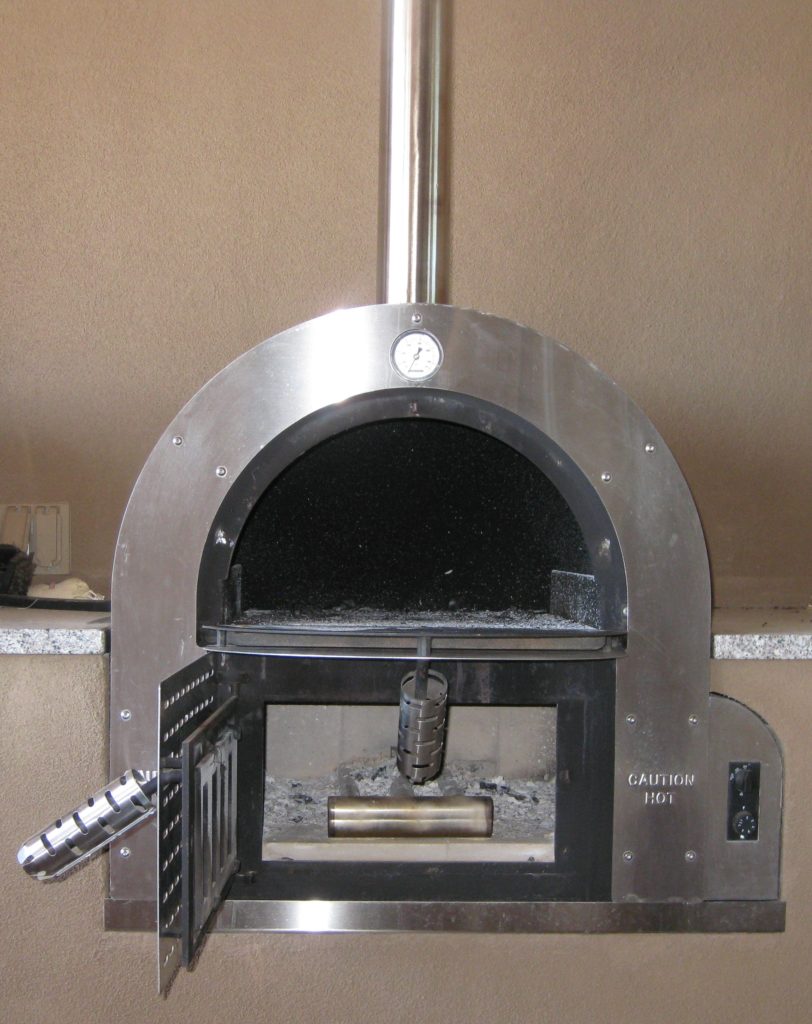
Usually I bake pizza in a wood-burning oven. Since wood-burning ovens are not very common, the pizza featured in this post was baked in a conventional oven. I don’t have a pizza stone since I don’t usually bake pizza in the oven. All the better though, since I know few people who have pizza stones. I simply went old school and used heavy aluminum pizza pans. I didn’t even use the convection feature!
Our DoughPro wood-burning oven from AustraliaBaking chamber above and fire chamber below
Until a few years ago I always cooked my pizza sauce. Then I tried uncooked sauce as is often done in Naples and found that I really prefer it. It has a fresher taste and it is really easy to make. (Sorry mom!)
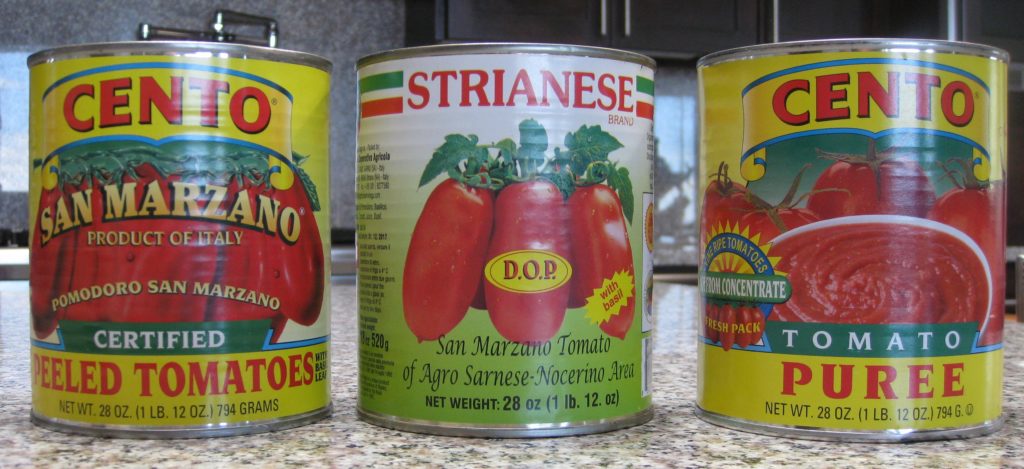
I usually use tomato puree because I like a smooth sauce but crushed tomatoes work well if you prefer a chunkier sauce. You can also just whizz a can of whole peeled tomatoes in the blender or food processor to whatever degree of chunkiness or smoothness you want.
An array of tomato products
Print Recipe
Homemade Pizza
Make the dough at least one day before you plan to bake the pizzas. The dough will benefit from the slow rise in the refrigerator. Two days is even better. Be sure to put the balls of dough in containers that seal well to keep the dough from drying out and that are large enough to hold the dough after it rises. Remove the dough from the refrigerator the morning of the day you plan on making pizza. It will take 3-5 hours to warm up and rise. If you’re not ready to make pizza when the dough has doubled in bulk, just punch it down and allow it to rise again. The dough recipe makes enough for two 16 inch pizzas but the sauce is enough for four. Extra sauce will keep in the refrigerator for 4-5 days. Since I make so much bread, I buy dry yeast in bulk. You can substitute one envelop of yeast for the two teaspoons of yeast called for in the recipe. For the sauce, use tomato puree if you prefer a smoother sauce and crushed tomatoes if you prefer a slightly chunkier sauce. In either case, really good tomatoes are called for. Buy genuine San Marzano tomatoes imported from Italy, if possible. I find Cento to be a good brand and generally available in the markets in my area.
One or two days before you plan to bake the pizza, prepare the dough.
You can use the dough cycle of a bread machine, the dough hook of a stand mixer, or you can make the dough by hand following the directions in the blog post.
If using a bread machine, follow the manufacturer’s directions for the dough cycle.
If using a stand mixer, put warm, not hot, water in the bowl of the mixer. Add four cups of flour, the yeast, and salt and begin to mix. Gradually pour in the olive oil. Add enough of the remaining flour to make a slightly tacky dough. Chances are you will need all of it. Allow the dough hook to knead the dough for 8-10 minutes.
If making the dough by mixer or hand, oil the dough and place in an oiled bowl. Allow the dough to rise at room temperature until doubled in bulk, covered lightly with a kitchen towel.
After the dough has doubled, or when the bread machine has completed the dough cycle, remove the dough and punch it down.
Divide the dough in half and shape into two balls. Rub the surface of each ball with oil and put each one into a separate oiled bowl or LARGE plastic container.
Cover tightly using plastic wrap if needed.
Put the dough in the refrigerator until the morning of the day you plan to bake the pizza.
On baking day, remove the dough from the refrigerator in the morning and allow it to sit at room temperature until doubled in bulk. This will take 3-5 hours (or maybe a bit longer if your refrigerator is really cold). If you are not ready to bake the pizza, just punch the dough down again and let it rest. It is better to err on the side of taking it out of the refrigerator too early rather than too late!
Pizza Sauce
Mince the garlic.
Combine all the ingredients for the sauce.
Cover and refrigerate overnight to allow the flavors to mellow.
Some brands of tomatoes can be a bit tart. Taste the sauce right before you use it and, if necessary, add up to ½ teaspoon of sugar but no more. (Some people consider this heresy but it is a common Italian technique to counter tomatoes that are too tart. Remember agricultural products vary and sometimes you need to use your judgment to correct a situation that is not addressed by the recipe.)
Assembly of Pizza
Shred the mozzarella on the tear-drop shaped holes of a box grater. Reserve.
Lightly dust a 16 inch round pizza pan with cornmeal.
Put the dough on a metal pastry "board" or a second pizza pan and gently stretch it by pressing on it and moving your hands apart. The dough will spring back. Each time it will stay stretched a little more. After six to eight stretching motions, allow the dough to rest for several minutes to permit the gluten to relax. This will make it easier to stretch. I usually allow two or three such rest periods.
Stretch dough into a 16” round.
Flip the dough over onto the cornmeal-dusted pizza pan. (OK, I don't have the skill to stretch the dough by tossing it in the air and putting it on the pan so this is my hack. If you can toss pizza dough in the air, please give me a lesson!)
Spread the sauce on dough to within one inch of the edge.
Add toppings of your choice, if desired.
Evenly sprinkle with shredded mozzarella.
Bake the pizza at approximately 450°F until the edges are golden brown and the dough is fully cooked, approximately 12-15 minutes.
I am writing this sitting on a beach in Akumal, Mexico about an hour south of Cancun by car.
On the beach in AkumalIguanas enjoying the beach in Akumal
Just a few days ago, I was at home in Santa Fe where the weather was just beginning to turn spring-like. The week before that I was in Hawaii.
The view from our lanai in Kauai
By the time you’ll be reading this, I’ll be in Palm Springs, where, even today, the temperature is hitting 100°F!
On the patio in Palm Springs before the heat of the day
Needless to say, my sense of seasonality is out of whack at this point.
No matter the temperature or the weather, asparagus says spring!
Just a few days ago, I was eating grilled asparagus in Santa Fe. Days before that I made an asparagus frittata, before that I cooked the asparagus that is featured in this post.
Asparagus isn’t something I remember much of before college and usually it was the mushy white stuff out of a can. White asparagus can certainly be a delicacy but when it comes out of a can that’s an impossibility as far as I’m concerned.
College was a time of incredible culinary growth for me. Growing up I ate wonderful food as my mother was a great cook. Mostly, though, it was Italian, Slovak, and the American dishes that every kid in the United States grows up eating.
I didn’t learn to cook until freshman year in college. I was lucky enough to live in a college house at the University of Pennsylvania that was housed on two floors of an otherwise upper class dormitory made up of apartments with kitchens. The typical freshman dorms either had no kitchens whatsoever or had the most rudimentary cooking facilities shared by large numbers of students. Since I had a kitchen, I only took out the minimum required meal contract: 10 meals per week. Usually this meant I ate lunch and dinner in one of the dining halls Monday through Friday. On weekends I cooked…and baked!
I called home every Sunday from the day I went away to college. Occasionally there was a lapse, like the time when I was 31 and hadn’t called home in a couple weeks. The first words out of my mother’s mouth when she heard me on the other end of the line were, “I was just about to put your picture on a milk carton.” Point made! [You may or may not know that “back then” the pictures of missing children were put on milk cartons in the hope that someone would recognize them and call the authorities.]
Besides just catching up on our lives, I got advice. My father gave me advice on how to handle alcohol, what to do if I had too much (don’t lie down and don’t close your eyes, for example), sex, and other topics.
My mother walked me through the steps of how to cook whatever it was I planned on making for dinner that evening. By the end of freshman year, I was a credible cook.
My gastronomic circle was not very big, however. Early my freshman year the resident advisors, Dennis and Martha Law from Hong Kong, took a group of us to dinner in Chinatown. It was exciting, having grown up in a town without a Chinese restaurant. The tastes, however, were so…well…foreign that I didn’t like much of what was served. I tasted everything but rarely had more than one bite till something landed on my plate that struck me the right way. The serving platter made it down the table past two or three other people till Dennis saw me eating. He commandeered the plate and put it in front of me to be sure I had enough to eat.
By the end of the year I was not only eating, and loving, Chinese food, I had developed a rudimentary understanding of the regional differences and learned the basics of Chinese cooking from Martha.
After my taste buds got over the shock of Chinese food, I started exploring other cuisines. A favorite became Indian food at Maharaja just a few blocks from my dorm. It turns out the restaurant was owned by the aunt of someone I now work with! I believe it was the first Indian restaurant in Philadelphia.
Sophomore year I was not in the college house but had one roommate in a similar upper class dorm with a kitchen. Meal contracts were only required of freshmen and I saw no point in eating in the dining hall. The arrangement I struck with my roommate was that I would cook and he would clean up. It turns out he would eat, and like, most anything so I was free to explore and experiment.
That set the stage for my junior year when I was admitted to another college house, the International Residence Project. Half of the students were from the USA and half from anywhere else in the world.
My roommate, and best friend for many years, Ray Hugh, hailed from Guyana. Valrie Tracey from Jamaica became the third member of a triumvirate that was pretty much inseparable for the rest of college.
Two married couples were our resident advisors, Ambrose and Najma Davis, and Reginald and Nanacy Rajapakese. Ambrose was from Jamaica, Najma from Bangladesh, and Reggie and Nanacy from Sri Lanka.
Nanacy taught me how to make Sri Lankan food and I’m almost as comfortable making that as I am Italian. I remained close friends with Nanacy and Reggie, even making several trips to Sri Lanka with Nanacy in the last few years, after Reggie’s death.
Ray and I have reconnected on Facebook which is rekindling many memories of the trips I made to Guyana and my experiences in learning to make Guyanese and Chinese food from Ray and his mother. Ray’s grandparents on both sides emigrated from China to Guyana in the 1800’s.
Ray and I packed an incredible amount of cooking power into a tiny dormitory kitchen. Without enough cabinet space to store ingredients, we had stacks and stacks of plastic milk delivery crates packed with an unimaginable assortment of ingredients from international food markets.
Our apartment became known as the place for midnight snacks and folks always came knocking on the door around then to see what we’d whipped up to nibble on.
That was the year I discovered that my stovetop Corning percolator made a serviceable stand-in for an asparagus steamer.
Asparagus steamer in a pinch!
Click HERE to join our mailing list and you’ll never miss a recipe again!
Print Recipe
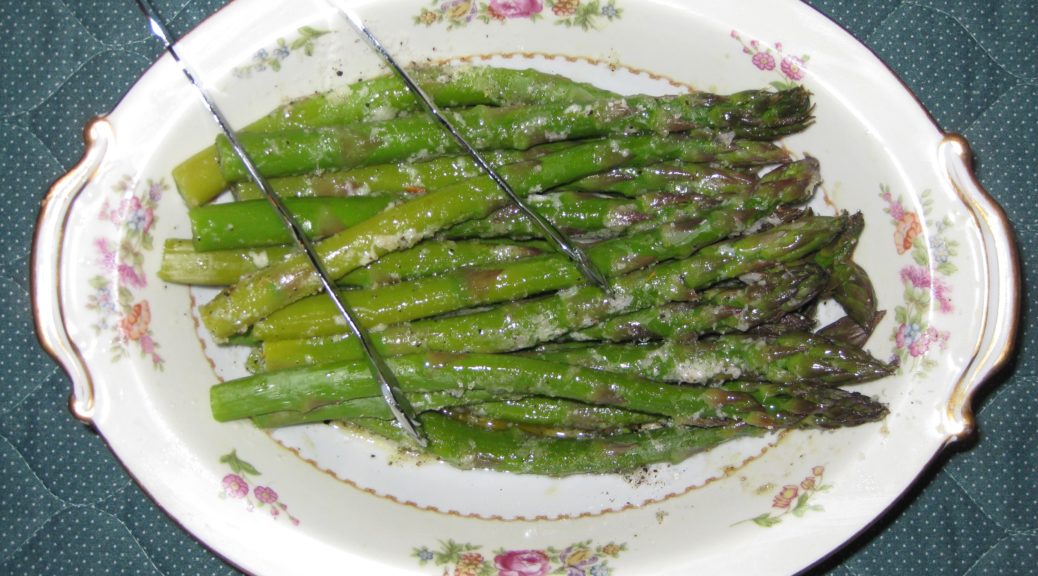
Asparagus with Parmesan Cheese
Asparagus is best cooked in an asparagus steamer. This small-diameter, tall pot allows the bottom of the asparagus spears to boil in the water while the tender tips cook by steaming. When I was a college student and didn’t have an asparagus steamer I used my stovetop Corning Ware percolator. If you don’t have a steamer, or a reasonable substitute, I find it preferable to cook the asparagus in a microwave oven rather than to boil them. After rinsing off the asparagus, put the spears and whatever water clings to them in a microwave-safe dish with a cover. Cook in 1-2 minute increments, moving the spears around after each bout of zapping, until cooked but still a little “toothy” (and certainly not mushy).
Trim the tough ends off the asparagus. The “Notes” section below contains a link to a blog post describing how to do this.
Crush the garlic with the side of a chef’s knife.
Heat the olive oil in a small sauté pan over low heat. Add the garlic and sauté slowly until brown, pressing down on the garlic occasionally.
Discard the garlic. Reserve the oil.
Cook the asparagus until toothy, neither crunchy nor mushy. If you do this in an asparagus steamer, put about two inches of water in the bottom and bring to a boil. Lower in the basket with the asparagus. It will take 5-10 minutes, depending on the asparagus and your elevation, to cook the asparagus properly.
Put the cooked asparagus in a warmed serving bowl.
Add the garlic-infused olive oil and mix.
Add the Parmigiano Reggiano cheese and the salt and freshly ground black pepper to taste. Mix well.
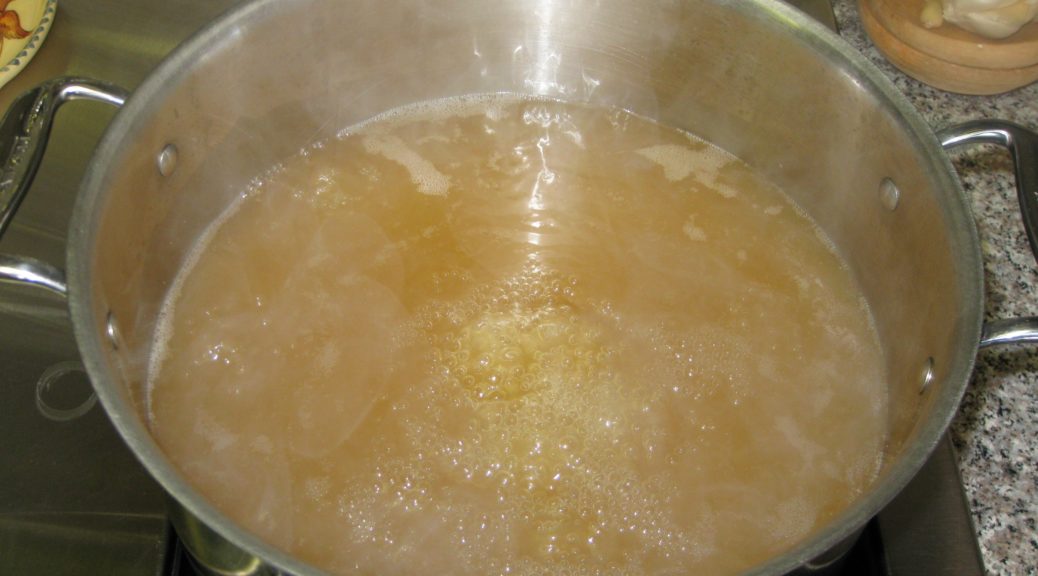
The weather is turning warmer in fits and spurts here in Santa Fe as I write this in early-May. I’m writing these posts a few weeks in advance due to upcoming travel. Warm days and cold nights, alternating with cold days and colder nights make me think of soup. Filling, warm, humble soup.
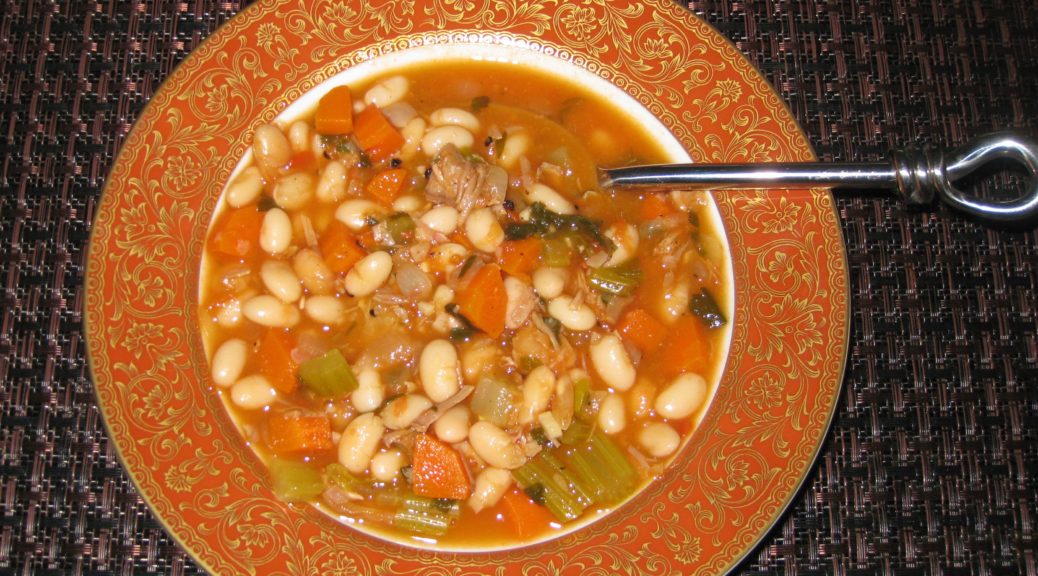
There are few soups that I like better than bean or lentil.
Although a ham bone is a classic way to start a bean soup, smoked turkey works well too. I had a smoked turkey carcass in the freezer from a bird that I smoked a few months ago. That and the combination of the cold weather made me think of making this classic American bean soup. It made a really great dinner along with a platter of my grandmother’s potato cakes, the recipe for which will be appearing here in a few days.
This soup is assembled from very basic ingredients, many of which are almost always on hand.
With warm weather approaching, however, this will probably be the last time I serve such a hearty soup until autumn.
Which brings up an interesting topic: the effect weather has on our cooking and eating habits. We tend to gravitate toward heartier, richer foods in the winter and lighter foods in warm weather. Our caloric needs don’t really change appreciably from winter to summer so if we’re not gaining or losing weight, we’re probably eating about the same number of calories. But it often doesn’t feel that way.
Eating seasonally is a good strategy for a number of reasons. Locally grown, in-season, produce tastes better than produce shipped from far away. Many fruits and vegetables start losing nutrients as soon as they are picked. The shorter the time from farm field to table the more nutritious they are.
Did you ever think about what it takes to have “not from concentrate” orange juice available all year given that oranges are a seasonal crop? Take a look here and here. It will give you a sense of what is done to our industrialized food supply. To be sure, we have ready access to more and cheaper food than has probably ever been the case in human history. I’m not suggesting we abandon that, just that we become better informed consumers and make active choices about what we eat and why.
In addition to tasting better, and being more nutritious, eating seasonally brings back a sense of anticipation and, dare I say, romance, to eating. Tomatoes are at their best in the summer so we eat lots of tomatoes then, for example. Often times, lunch on Saturday in late summer will be thick slices of fresh tomato, fresh mozzarella cheese from The Old Windmill Dairy in Estancia, New Mexico, a few torn basil leaves from our garden, a sprinkle of salt and a drizzle of extra virgin olive oil along with some homemade bread to sop up all the juices. Unless it’s from a can and going into something that’s cooked, you’ll rarely see a tomato in my kitchen the rest of the year.
The same sort of anticipation holds true with many other foods. Some that come quickly to mind are zucchini blossoms (which I dip in batter and fry) and basil (which I turn into pesto and use to season quick-cooked tomato sauces all summer long but never use at other times of the year).
Seasonal eating isn’t limited to summer, however. There are traditional winter crops and winter foods. Cavolo nero, Tuscan kale, tastes better after a frost and is traditionally eaten in the late fall. My mother-in-law pickles turnips each autumn which we eat in the winter made into a thick soup with cotechino, a Northern Italian sausage.
Traditionally, my mother-in-law’s pickled turnips would be made in the autumn. That’s not only when the turnips are ready if you eat seasonally but that’s also when grapes are crushed and pressed for wine. The turnips would be packed into a barrel with the solids left over from the grape pressing and allowed to ferment. These days she makes a reasonable facsimile by simply pickling turnips in red wine vinegar though I keep hoping to find a winemaker in New Mexico who will sell me some crushed grapes to give the original recipe a try.
Red wine vinegar is always available, and mostly so are turnips. Why don’t we make this at other times of the year? Mostly it’s because of the association of pickled turnips (brovada) and cotechino with winter. We try to maintain the seasonality even when we have the ability to circumvent it. Doing that means there are always favorite foods to look forward to each season that we haven’t had in almost a year.
If it’s too warm where you live to have a hearty bowl of bean soup, tuck this recipe away for a few months and give it a try in the autumn.
Print Recipe
White Bean Soup
This white bean soup is easy to make and very nutritious. If you have the carcass of a smoked turkey or the bone from a baked ham, use my recipe for Roasted Turkey Broth, substituting the smoked turkey or ham bone, to make the broth for this soup. With a turkey carcass you definitely need to make broth otherwise you’d have lots of bones and bits in the final soup. While this isn’t the case with a large ham bone, I still prefer to make broth in advance so that I can skim off the fat. There is a link in the notes that follow this recipe to my recipe for Roasted Turkey Broth. Even if you don’t have a smoked turkey carcass or a ham bone you can make this soup. My supermarket sells various smoked turkey and pig parts. Just use them to make the broth. Be careful, though, as these products can be much smokier than a turkey or ham that was smoked to the right degree for eating. Failing all of that, use whatever broth you have on hand (or even water) to begin to cook the beans then add ¼ pound of chopped up bacon with the remaining ingredients.
Wash the beans. Cover with several inches of cold water. Refrigerate overnight.
The next day, drain the beans.
Combine the beans, broth, and bay leaf.
Cover and bring to a boil.
Cook, partially covered, at a medium boil for one hour, stirring occasionally.
Meanwhile, prepare the other ingredients.
Slice the carrots in quarters lengthwise.
Cut the carrots crosswise into 1/4 inch pieces.
Cut the celery into strips approximately the same size as the carrot strips.
Cut the celery strips crosswise into 1/4 inch pieces.
Dice the onion.
Mince the garlic.
Mince the parsley,
Dig around in your freezer to find a Parmesan cheese rind that you froze with the intent of using in your next pot of soup.
Ready a can of diced tomatoes.
Combine all ingredients except the chopped ham or turkey with the partially cooked beans.
Simmer, partially covered for another hour or two until beans are soft and vegetables are cooked. The cooking time will depend on the type of beans, their freshness, and your elevation.
Adjust seasoning as needed while cooking.
Add the chopped ham or smoked turkey during the last 10 minutes of cooking.
Serve with grated Parmesan cheese, if you wish.
Recipe Notes
As good as this soup is when it is made, I prefer to let it cool then refrigerate it for at least a day before rewarming and serving.
To make the broth, substitute a ham bone or smoked turkey carcass (or other smoked meat) for the roasted turkey in my recipe for Roasted Turkey Broth.
If my mother said she was making “soup” without any qualifiers, it meant her beef noodle soup.
She would cook a good-sized piece of beef in her soup pot along with large pieces of carrot, celery and potato till the meat was falling apart.
She would cook thin egg noodles separately.
To serve the soup, everyone would get a bowl of broth with pieces of carrot, celery and potato. The large piece of beef would be in its own serving bowl and the noodles in another.
At the table, everyone added beef (shredding it with a serving fork) and noodles to their bowl of broth for the ultimate customization.
I haven’t had soup this way since my mother died. I actually don’t ever remember being served soup in the same manner by anyone else, anywhere, ever. If you’ve ever heard of, or had, soup being served this way, I’d really like to hear about it.
The other soup my mother made frequently was what is sometimes called “Italian Wedding Soup.” It is a rich chicken broth with pieces of chicken, small meatballs, carrots, celery, pasta (typically, acini de pepe), and escarole.
Occasionally my mother would make Slovak Mushroom Soup, with dried mushrooms and potatoes, or Potato Soup with potatoes, milk and onions. More often, however, we’d get these when visiting my grandparents. Early on, my grandmother would make soup, but when she got older, Aunt Ann or Aunt Mary would make it and bring it to my grandparents’ house.
On a Sunday, when my father, his six brothers, and all of their spouses and children would visit my grandparents, a lot of soup could be consumed. Mind you, there was no guarantee that there would be soup, but if there was, it needed to be an industrial quantity.
In the winter, my grandmother would keep the soup in a big pot in the root cellar in the basement. It was the same root cellar where she would make sour cabbage but that was before I was born. I know because my father and all of my uncles never tired of talking about my grandmother’s sour cabbage soup, or kissel. They bemoaned the fact that nobody made it any longer. I don’t have her recipe and while I can find recipes for soups that sound similar, none of them sounds exactly like the soup my father described.
Today’s soup, however, is not one that I grew up eating. As I mentioned in an earlier post, my mother thought the carcass of a roasted turkey wasn’t intended to be reused. I first had turkey noodle soup, made with roasted turkey leftovers, when I was in college. The soup was made by Mary Lou d’Aquili, the wife of my college advisor and, many years later, the person with whom I went into psychiatric practice, Eugene d’Aquili.
Ever since then, I’ve turned the bones of most roasts into broth.
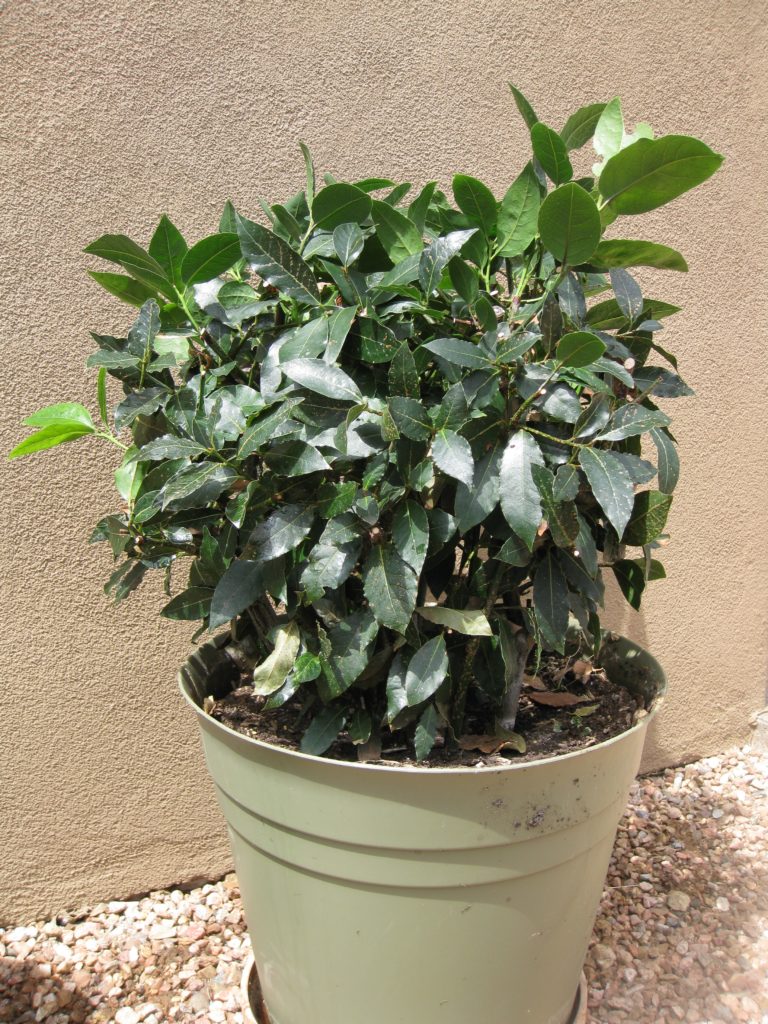
We have an array of fresh herbs year round thanks to the greenhouse. I have totally given up dried bay leaves in favor of fresh ones. They’re really easy to grow and the taste is incredible. California bay leaves are stronger than Mediterranean bay leaves so if the balance of flavors in a dish is critical, and you’re using the former, opt for about half the amount called for in the recipe. For most dishes, it’s not a critical distinction, however, and you can just substitute California for Mediterranean bay leaves.
Here’s a picture of our Bay Laurel plant, pruned down and ready to start its seasonal growth spurt. In the fall I’ll harvest the leaves to make an Italian Bay Laurel Liqueur, Liquore al Lauro or Liquore Alloro.
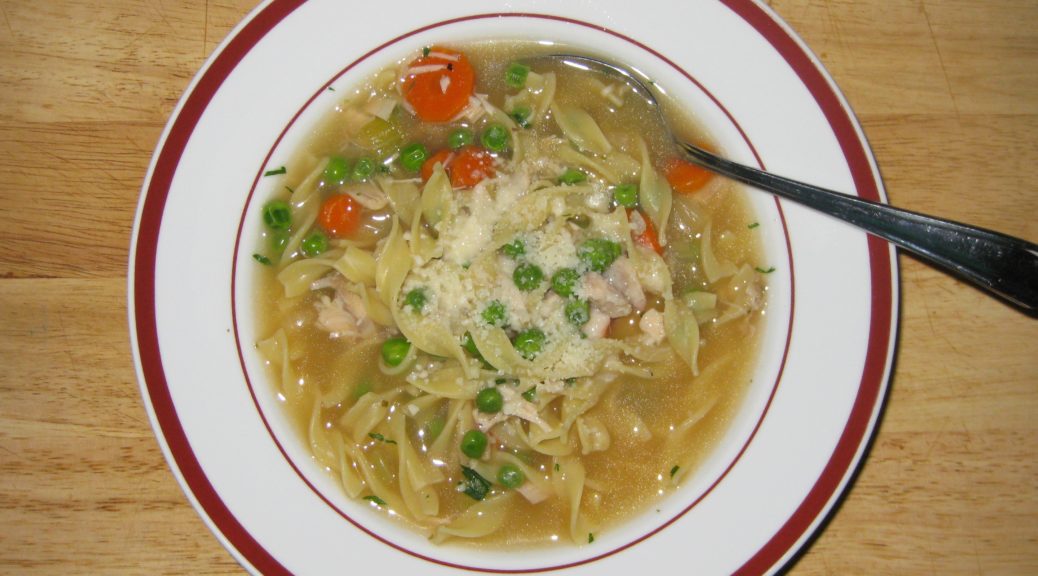
The following recipe for Turkey Noodle Soup starts with the Roasted Turkey Broth I posted a few weeks ago.
Print Recipe
Turkey Noodle Soup
Save the bones, skin and shreds of meat from a roast turkey to make broth for soup. You can freeze the bones and make the broth later. You can also make the broth and freeze for future use. What you don’t want to do is to freeze the turkey noodle soup. I prefer not to freeze the soup, as the vegetables become too soft. If you must, however, freeze it before adding the noodles and peas. I keep a container of Parmesan cheese rinds in the freezer so that I always have them available to add to soup or other dishes to amplify the savoriness.
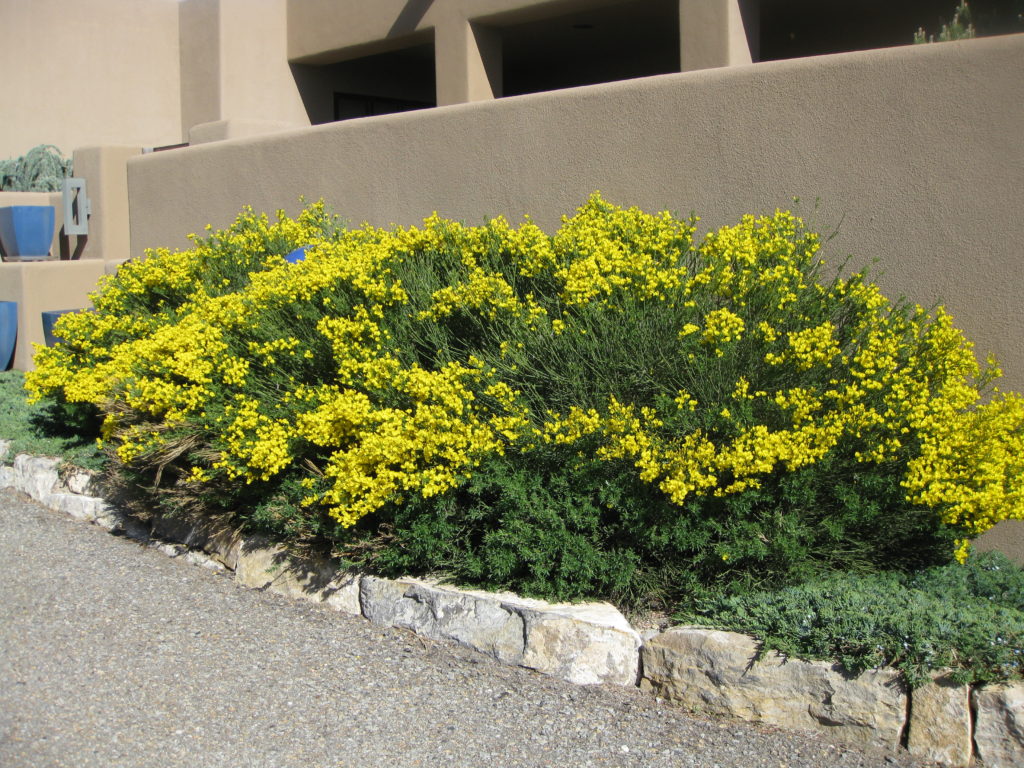
Gardening at 8000 feet is challenging. Even more so when you consider that we are sitting on almost solid rock.
There’s not much soil to begin with, just the barest of covering on a rocky foundation. The piñon and juniper that surround us work their roots through little crevices in the rock that sits just inches below the surface.
What little soil there was in the area immediately surrounding our house was removed to level the building site. The excavation was almost exclusively rock, one hundred truck loads were taken away. Some rock was kept on site to create retaining walls around the property.
The corollary, however, is that there’s no dirt around the house to dig into to plant much of anything. The landscaping that was done was exclusively within rock retaining walls or our front enclosed courtyard, where topsoil was brought in. The first load of topsoil for the courtyard arrived April 2007, before we were ready to plant anything. April is a windy month in New Mexico. The winds started up one day and before evening every last speck of topsoil was blown to West Texas!
We could consider raised bed gardening but that would just invite the rabbits and deer to munch their way through our garden. As it is, we’ve offered up several stands of ornamental grasses on the periphery of our landscaped area to the critters. We seem to have reached a truce of some sort. We let them eat the ones around the edges and, for the most part, they let the others alone.
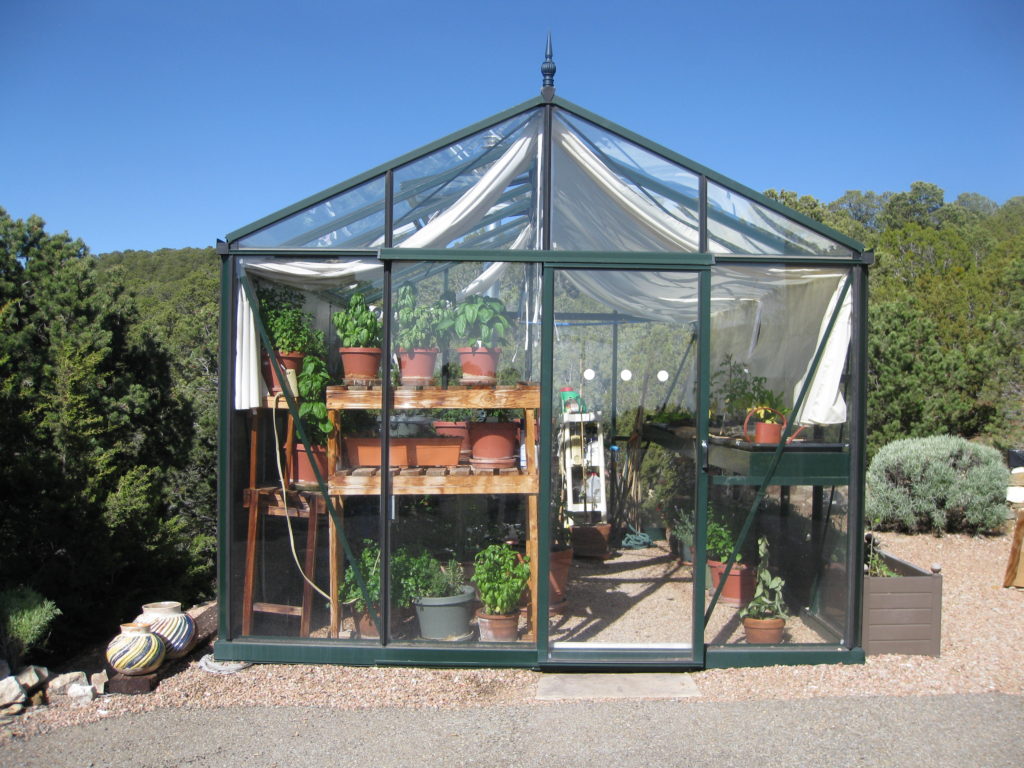
We installed a greenhouse that allows us to extend the growing season by many months. It also allows us to winter over a number of plants that would not survive in this climate. The greenhouse also allows us to grow fig trees in large pots. The first year we grew figs, they didn’t ripen. It turns out that even though summer days are warm, the nights are cool enough that the fruit doesn’t ripen. The following year we left the fig trees in the greenhouse throughout the summer, convinced that it would be too warm for them to thrive even with the automatic ventilation system.
Luckily, we were wrong. The fig trees loved the heat. Picking a ripe fig off of the tree and eating it immediately is amazing. The only fresh fruit experience that would be superior, in my estimation, is a fresh-picked mango…and those trees won’t fit in our greenhouse!
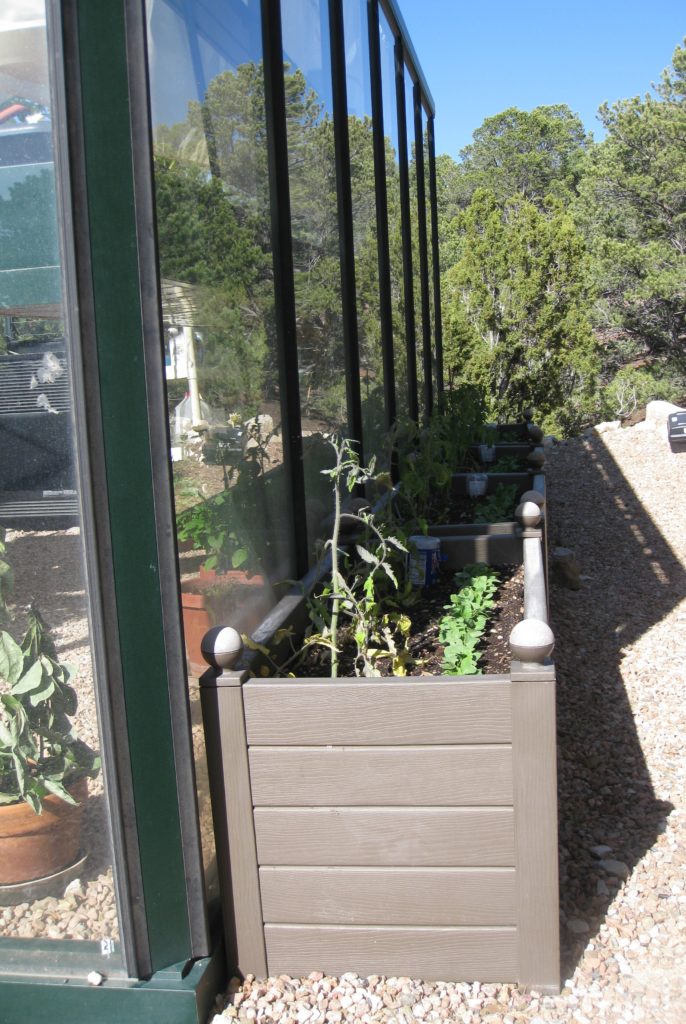
We have one row of planter boxes outside the greenhouse. We use these for plants, like tomatoes, that are not very attractive to deer and rabbits. Salad greens, such as arugula, radicchio, and leaf lettuce grows in shallow trays on a raised shelf in the greenhouse. Many pots of herbs also remain in the greenhouse year-round. Everything else is planted in our interior courtyard, either in pots or in another row of planter boxes.
Depending on the type of plants, we start planting seeds in February. Seedlings are transplanted once the risk of frost is minimal.
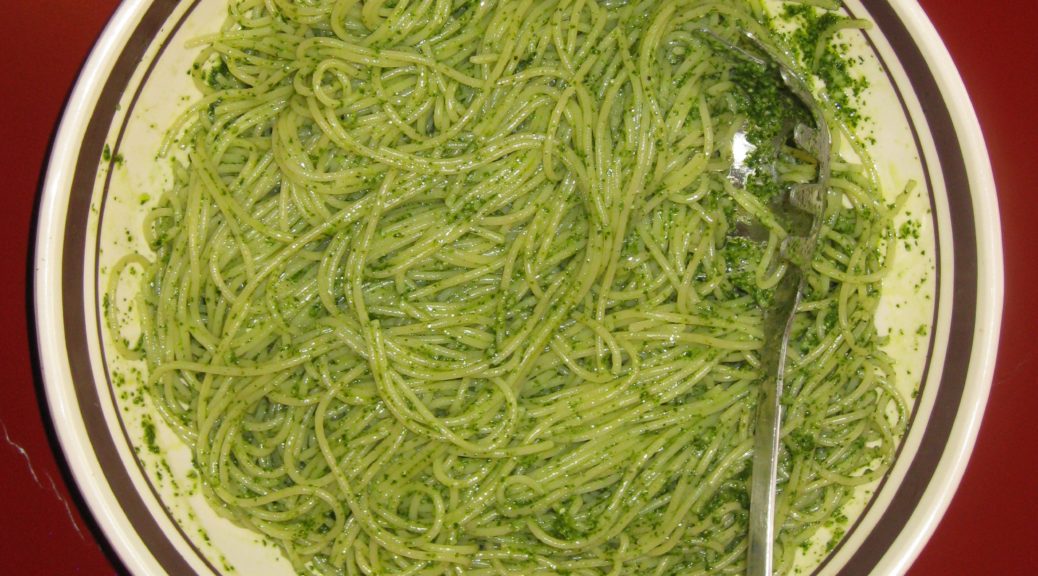
This year, we started too much basil from seed. It needed to be thinned. This created the opportunity for us to have pesto much earlier than would otherwise have been the case. Usually it’s June before the basil plants have grown large enough that we can harvest leaves for pesto.
We had this pesto on April 30th, a day that measured more than 8 inches of snow at Villa Sentieri. It was winter’s last hurrah and fresh pesto was a perfect way to welcome spring and say good-bye to winter.
Print Recipe
Pasta al Pesto
The classic basil-based pesto is Pesto alla Genovese. However, because the recipe and ingredients for Pesto alla Genovese are tightly regulated (for example, the basil must be grown in Genoa, Italy), I’ll refrain from calling this Pesto alla Genovese since it can’t meet those strict regulations. Try to use young, small basil leaves. If you must use larger ones, tear them into smaller pieces so they measure approximately the same way. Using olive oil from Liguria, where Pesto alla Genovese originated, is another of those difficult-to-meet requirements. Nonetheless, try to use a sweet, fruity olive oil rather than one that is spicy and pungent. Make the pesto as close to serving time as possible. I like to have all the ingredients measured, making the pesto after the pasta starts to a boil. If you’re wondering about the use of a food processor, that would not be permitted either but I doubt there are many of us that would make pesto if we had to use the traditional marble mortar and wooden pestle!
Pluck the basil leaves from the stems and measure 2 cups, lightly packed.
Measure all the other ingredients. Pine nuts.
Garlic.
Parmigiano Reggiano and Pecorino Romano cheeses.
Don't forget the extra-virgin olive oil and salt.
Bring three quarts of water and 1/3 cup of salt to a rolling boil.
While water comes to a boil and the pasta cooks, heat the serving bowl by placing it in a 150°F oven or partially filling it with boiling water.
When the water comes to a boil, add the pasta. Return to a boil, stirring frequently.
As the pasta boils, put the basil leaves, olive oil, pine nuts, garlic, and salt in a food processor. Puree the basil mixture, scraping down the sides of the bowl occasionally.
When the pasta is almost al dente, pour the basil puree into the warmed serving bowl.
Add the Parmigiano and Romano cheeses. Stir to combine.
Remove ¼ of the boiling pasta-cooking water from the pot and stir into the pesto to loosen it.
When the pasta is al dente, remove and reserve a cup of pasta cooking water.
Drain the pasta. Do not rinse. Add the pasta to the serving bowl and toss to coat each strand.
If the pesto seems a little thick, add a tablespoon or two of the reserved pasta-cooking water.
A few times in my life I’ve been lucky enough to cook with my husband’s Great Aunt Fidalma. It’s always been in my kitchen, though I keep hoping to make a trip to Tuscany to cook with her in her kitchen.
Zia Fidalma speaks Italian and German. I speak English. Though I studied German in high school and college, and at one point was passably able to translate scientific German, my command of spoken German (and at this point, scientific German) is hopeless. I studied Italian for a while too, but the best I can do is read a menu, order in a restaurant, and find out where the restroom is.
So, cooking with Zia Fidalma starts with a language barrier but it doesn’t seem to matter. Somehow we communicate.
Mostly that means Zia Fidalma speaks slowly in Italian emphasizing the words I am likely to understand most.
Like the time we were in my kitchen in Santa Fe preparing dinner for twelve. The first course was spaghetti al pesto. A pile of basil stalks from my father-in-law’s (Zia Fidalma’s nephew) garden were on the kitchen counter. Zia Fidalma was plucking off basil leaves one at a time, inspecting each one. At one point, she looked up at me holding a leaf and said “è brutta” (it’s ugly), clearly wanting my agreement to discard the less-than-perfect leaf.
One day at our home in Chicago, she was making risotto for lunch. It had a very similar flavor profile to this pasta in that it contained broccoli, garlic and anchovies.
Zia Fidalma cranked up the 15,000 BTU burner to high. She sizzled some minced garlic for a moment. There was a vague hint of smoke coming from the pan. She added the anchovies and stirred them about. Smoke started to billow up. She smiled knowingly. She added the broccoli, undeterred. Smoke continued. She stirred. I stood there horrified. Then she lightly charred the broccoli. I was even more horrified. At long last some liquid went in and the rest of the risotto-making followed a familiar pattern.
I try to avoid smoking oil at all cost when cooking. I was more than a little concerned about how the risotto would taste.
However, I have never had anything but fabulous food from Zia Fidalma, so I had to trust that this would be OK, too.
This wasn’t her first rodeo. She’d been making risotto since before I was born.
In the end, all I can say is that the risotto was wonderful. It had layers of flavor. It provided an important lesson about how techniques different from what one would typically use can create incredible flavors.
So, if you see wisps of smoke coming from the pan as you singe the broccoli for this recipe, don’t fret. Just raise a toast to Zia Fidalma, and enjoy!
Print Recipe
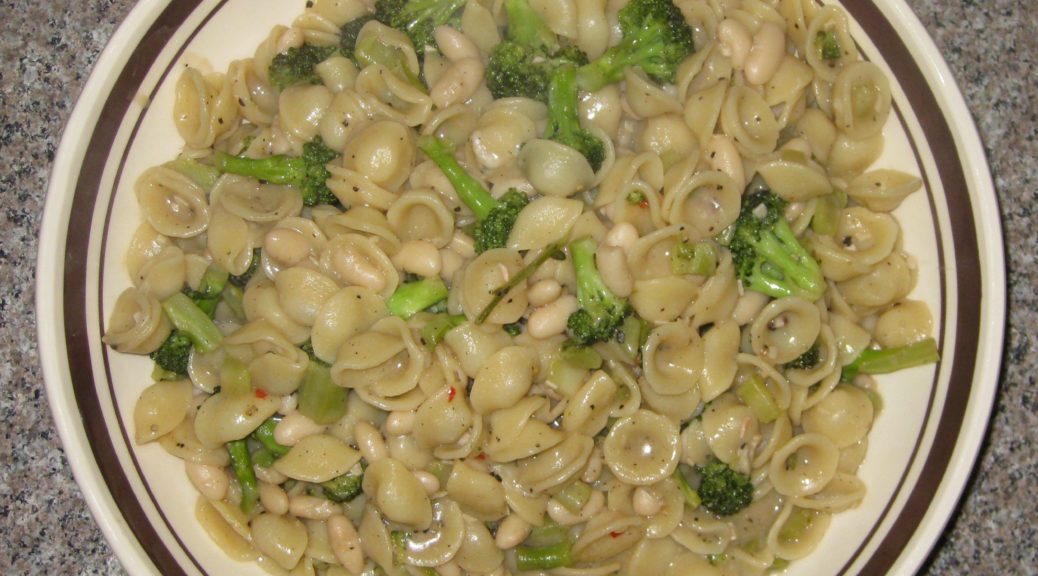
Orecchiette with Broccoli and Anchovies
My husband’s Great Aunt Fidalma, who lives in Tuscany, showed me how to cook the broccoli in this manner. Previously, I parboiled the florets and added them and the beans to the sautéed garlic and anchovies. This method adds layers of flavor that cannot be obtained by just boiling the broccoli. I prefer to use home-cooked kidney beans following my recipe for Cannellini alla Toscana. You can use either red or white (cannellini) beans but the red ones add more color contrast. As an alternative you can use one 15 ounce can of beans. Do not discard the liquid in the can as it will improve the body of the sauce.
Put 3 quarts of water and 1/3 cup salt in a 5 quart stockpot or Dutch oven. Bring to a boil over high heat.
Meanwhile, cut the thick stems off the broccoli just below where the stems start to branch into individual florets.
Cut the individual florets off the broccoli by cutting lengthwise through the stalk from top to bottom.
Cut off any remaining stalk just below the floret. These tender stalks can be cut crosswise into one-half inch pieces and added to the florets.
You can use some of the thicker stalks as well, if you wish. To do so, use a vegetable peeler to remove the tough outer skin. Dice the peeled stems into 1/3 inch cubes. Reserve these diced stalks separately from the florets and diced tender stalks.
When the salted water comes to a boil, add the diced, peeled stalks, if using. Return to a boil and cook for 2-3 minutes until they just begin to get tender. Using a spider or large slotted spoon, remove the stalks from the water and plunge them into a bowl of ice water to stop cooking. When cool, drain in a colander.
Keep the water on low heat so you can return it to a boil quickly when needed to cook the pasta.
In a heavy-bottomed pan large enough to hold the finished dish, sauté the garlic over medium high heat until it turns fragrant, about 30 seconds.
Add the anchovies and their oil and continue to sauté, breaking up the anchovies till they turn to a paste.
Continue to cook until the anchovies darken slightly, about 1-2 minutes.
Add the broccoli florets and diced tender stems. If using, add the partially cooked peeled stems. Season with salt and freshly ground black pepper.
Sauté on high heat, stirring very frequently, until some of the broccoli florets just begin to singe, about 5 minutes.
Add the crushed red pepper. Stir to combine.
Add the wine and cover with a tight fitting lid. Cook over medium high heat till the florets are cooked through but not mushy, shaking the pan occasionally.
If all the wine evaporates before the broccoli is cooked, ladle in a bit of the pasta cooking liquid and continue.
When the broccoli is cooked, add the beans and their cooking liquid along with the oregano. Bring to a simmer over gentle heat.
Meanwhile, return the pasta-cooking water to a rolling boil and add the pasta. Cook until the pasta is slightly shy of al dente. The pasta will finish cooking in the sauce.
Put about ¾ cup of pasta cooking liquid into the beans. Reserve another cup of the liquid.
Quickly drain the pasta and add to the beans. Stir well. Bring to a gentle boil, uncovered. Cook stirring occasionally until the pasta is al dente. Add as much of the reserved pasta-cooking liquid as needed to have enough sauce to coat the pasta and broccoli.
The starch in the pasta-cooking liquid will add body to the sauce. One way to incorporate more of the pasta-cooking liquid is to cook the pasta over higher heat so that you can add, and boil off, more of the liquid, leaving the starch behind.
When the pasta is cooked, remove the pan from the heat and stir in the Parmesan cheese and 1 teaspoon freshly ground black pepper. Taste and adjust salt after adding the cheese.
Stir in the finishing extra-virgin olive oil. This will make the sauce glossy and add additional flavor.
The starch from the pasta water and bean-cooking liquid along with the cheese should create an emulsion with the oil. You may need to add more of the reserved pasta-cooking liquid to loosen the sauce.
Serve immediately. Pass extra Parmesan cheese at the table.
I grew up in a house where there was absolutely no use for the carcass from a roasted turkey. Other than my sister and I fighting over who got the crispy skin from the turkey breast, the skin went into the trash heap too.
You might imagine my surprise when, in college, I discovered that people actually did things with carcasses from roast turkey, like make broth to be used for turkey noodle soup.
To be sure, my recipe for turkey noodle soup will be posted later this month but in the meantime I would encourage you to make broth from the bones of most any roast, be it turkey, chicken, duck, pork, or beef. Then, be creative with how to use it.
Broths made from roasted meat bones and bits of meat have a really savory quality that you won’t get from a broth made with uncooked meat. You can’t always use them interchangeably so think about how the roasted-meat savoriness will play off the other flavors in the dish.
Roasted meat broths usually work well in hearty soups, for example, or as the liquid in a pot of Southwestern style cooked beans. Frozen in small containers or ice cube trays, you can use the broth as the liquid for a quick pan sauce or to enrich gravy.
In fact, when I make gravy for Thanksgiving, I start by roasting a couple of Cornish game hens or a few pounds of chicken or turkey wings until they are very, very brown. I use the roasted meat and some vegetables to make a rich, dark brown broth. I concentrate the broth even more by boiling it down to about 3-4 cups. While the turkey is roasting, I use the broth to make gravy, which I simmer for a couple of hours until it’s silky. When the turkey is cooked, I deglaze the pan, skim the fat off, strain out the solids, and add the liquid to the gravy that has been bubbling away for a couple of hours. By the time the turkey has rested and been carved, the gravy has reduced, again, to the right consistency. The gravy is rich and savory and, more importantly, there’s enough to smother everyone’s mashed potatoes and turkey. Doing it this way also removes the last-minute rush of actually making gravy on-the-spot from the pan drippings while you’re trying to get the meal on the table.
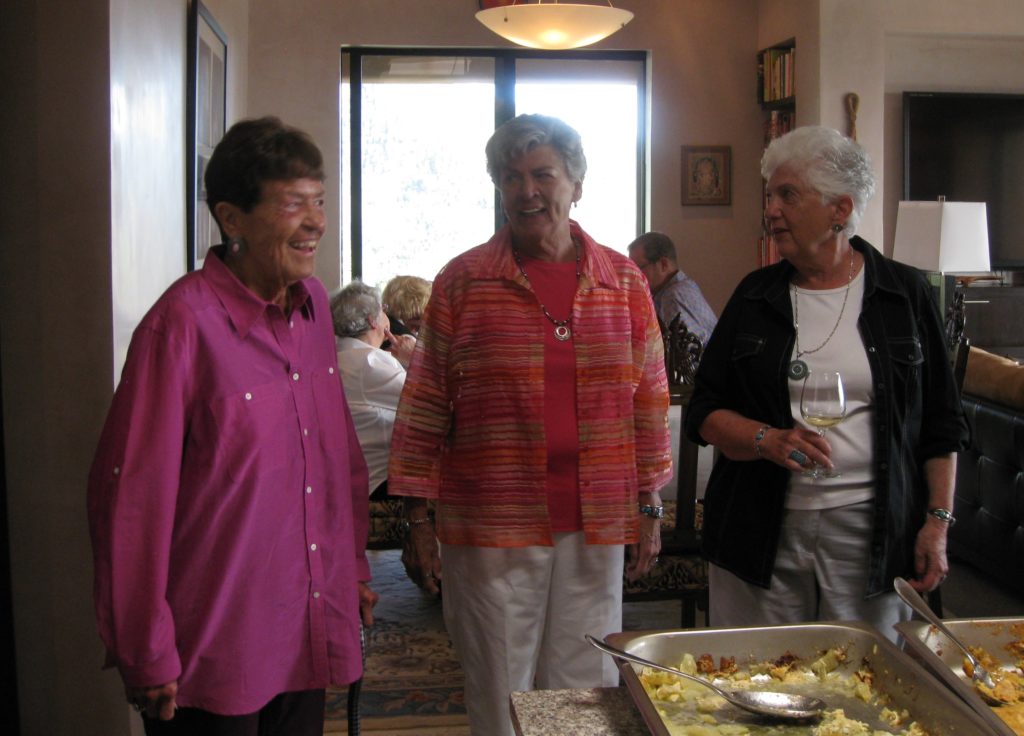
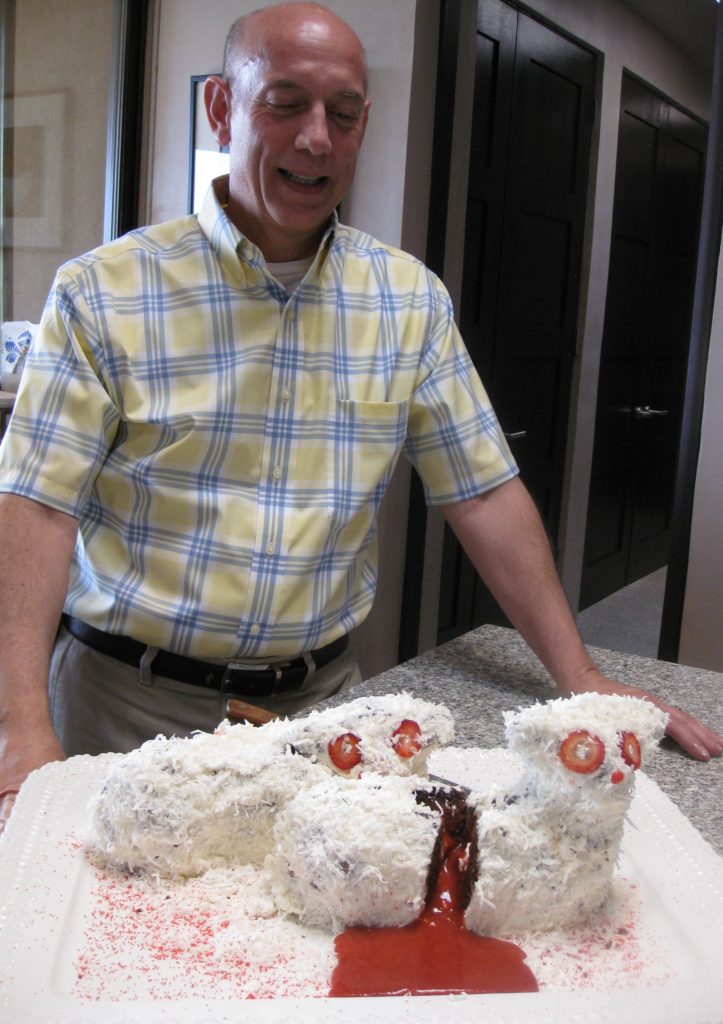
You might ask why I am dealing with a roasted turkey in spring rather than November. Easter Dinner! In addition to ham, I always make turkey since some of our friends don’t eat critters with more than two legs. So, just for fun, here are a few pictures from Easter, complete with the bleeding lamb cake we always have for dessert.
I have a couple of different types of fat separators. One is the more common style that resembles a small watering can with a spout that draws from the bottom of the liquid. My preferred one, however, has an opening on the very bottom. You just pour in the liquid, allow the fat to rise to the top, and squeeze the handle. The opening opens and out pours the fat-free liquid from the bottom. You can find a picture of it on my equipment page.
Print Recipe
Roasted Turkey Broth
Unless I need an absolutely clear broth, I prefer to use the pressure cooker. It gets the job done in an hour of cooking and makes a more flavorful broth than simmering it on the stove. However, the broth is somewhat cloudy. If you don’t want to use a pressure cooker and you don’t want to have to think about a pot on the stove, make the broth in a slow-cooker for 6-8 hours. If your pressure cooker or slow-cooker won’t accommodate 3½ quarts of water, use as much as you can and then dilute the final product to 3 quarts.
Bring to a boil, reduce the heat, and simmer for 4-6 hours, stirring occasionally. Alternatively, cook at 10 pounds pressure for one hour or in a slow-cooker on low for 6-8 hours.
Strain the broth.
Because the broth will likely develop a gelatin-like quality on cooling, I suggest removing the fat using a fat separator while the broth is still warm.
Add water to make three quarts.
Recipe Notes
I never add salt to any broth that I make unless I am making it for a specific purpose and I can plan for the final product. Broth with salt can make a dish too salty if the liquid needs to be reduced. The salt in a broth can also slow down the tenderization of dried beans. This might not be much of an issue at lower elevations but at 8000 feet getting dried beans to soften can be a challenge and anything that hinders the process is to be avoided.
Earlier this month I wrote about my “crunchy vegetable” phase of cooking back in the 1970’s. One of the dishes I was reacting to was my mother’s green beans with tomato sauce and bacon. Honestly, though, I can’t tell you why. It was, bar none, my favorite vegetable dish growing up. Why, when I started cooking in my late teens, I thought I could make it better by cooking the beans until they were just crunchy is beyond me.
Chalk it up to youthful indiscretion.
Americans served a lot of mushy vegetables back then, no doubt, but the reaction shouldn’t be to turn every vegetable crunchy. But I was just learning to cook and had a lot to learn, not only about technique, but about understanding the essence of a dish.
The essence of this dish is the silky texture (most definitely not mushy) of the beans cooked for a couple of hours in tomato sauce. The textural change is accompanied by a flavor change that is unobtainable by quickly cooking the ingredients.
It’s actually pretty difficult to turn these beans mushy unless you boil them too long before adding them to the tomato sauce. The tomato sauce reacts with the beans to somehow inhibit the development of mushiness. I’m not sure, but it think it might be the acid in the tomatoes.
That first four minute boil is critical, however. One time, thinking I could eliminate a step, I tried putting the cut up beans in the sauce without parboiling them first. Mistake! Four hours later the beans were still not cooked properly!
Green beans cooked in tomato sauce is a classic Italian combination. The use of bacon clearly signals that this is Italian-American, however. Italian recipes might use pancetta but not bacon. Smoked foods are uncommon in traditional Italian cuisine. The few that appear really stand out.
Pancetta and bacon are made from the same cut, pork belly. Both are cured but only bacon is smoked. Although I’ve made other versions of green beans in tomato sauce that are traditional Italian, rather than Italian-American, I keep coming back to this one as my favorite.
Print Recipe
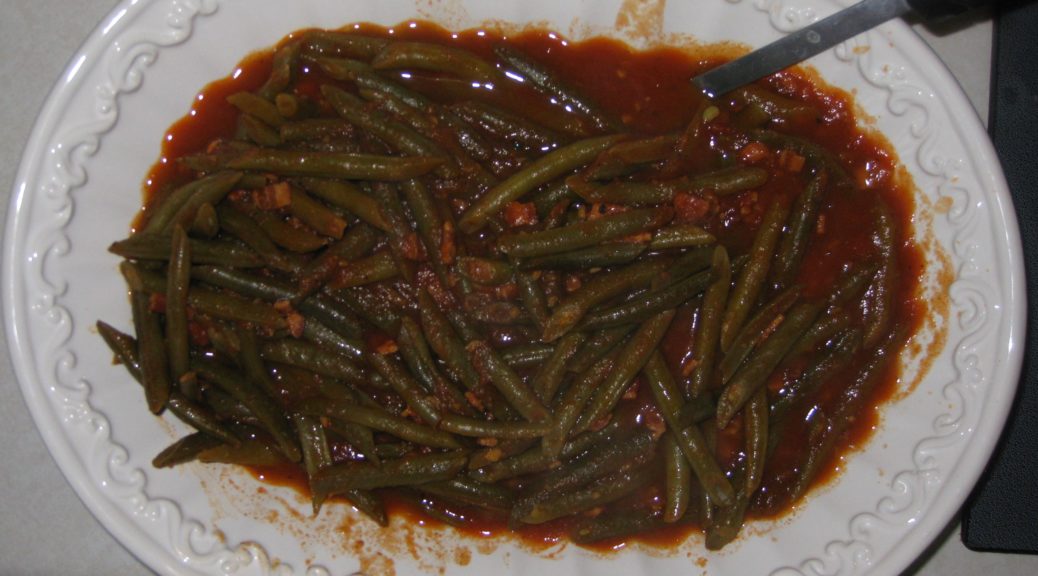
Green Beans with Tomato Sauce and Bacon
These long-simmered green beans in tomato sauce with bacon are an Italian-American favorite. The long, slow cooking is really essential to achieving the right texture and flavor. Although I've specified the amount of water in cups, when cooking with tomato paste my mother always measured water by the can. This dish would have had five tomato paste cans of water. She didn't quite fill them to the top so each can held about 5 1/2 ounces of water, or a little over three cups total. You may need to add more water, or to boil some away, to get a thick sauce.
In a heavy-bottomed pot, large enough to ultimately hold the beans, gently sauté the bacon until golden brown.
Add the minced garlic to the bacon and bacon drippings and sauté until fragrant and just beginning to turn golden, about one minute.
Add the tomato paste and sauté until it turns a shade darker and smells sweet.
Add the water, stirring to combine. Cover and bring to a boil.
Reduce to a simmer. Add salt, freshly ground black pepper to taste, oregano and sugar. Simmer, partially covered, for 45-60 minutes, stirring occasionally.
Meanwhile, cut the tips off the beans at a diagonal. Cut the beans into pieces about 2 to 2 ½ inches long, also on the diagonal.
Wash the beans in several changes of cold water. Cover with water and allow the beans to soak for 15 to 20 minutes, to fully plump up with water before cooking.
Bring a large pot of heavily salted water (at least 4 quarts of water and ¼ cup of salt) to a boil.
Drain the beans, add to the boiling water, and return to a boil as quickly as possible.
Boil until the beans are just beginning to get tender, approximately 4 minutes. They will cook much longer in the sauce so be careful not to overcook them at this point.
Drain the beans and add to the tomato sauce, which should have been cooking for 45-60 minutes by this point.
Simmer until the beans are silky, but not mushy. This can take 2 hours, plus or minus. Go by texture, not time. The beans should be silky but still have some body.
Taste once or twice while cooking and adjust salt, pepper and, if you wish, oregano.
Recipe Notes
You can make the sauce and partially cook the beans in advance. After the beans have been boiled, quickly chill them in a bowl of ice water. Cool the cooked sauce to room temperature. Drain and add the partially cooked beans to the sauce. Refrigerate until ready to complete cooking.