Eduardo’s Chimichurri

October 20, 2017

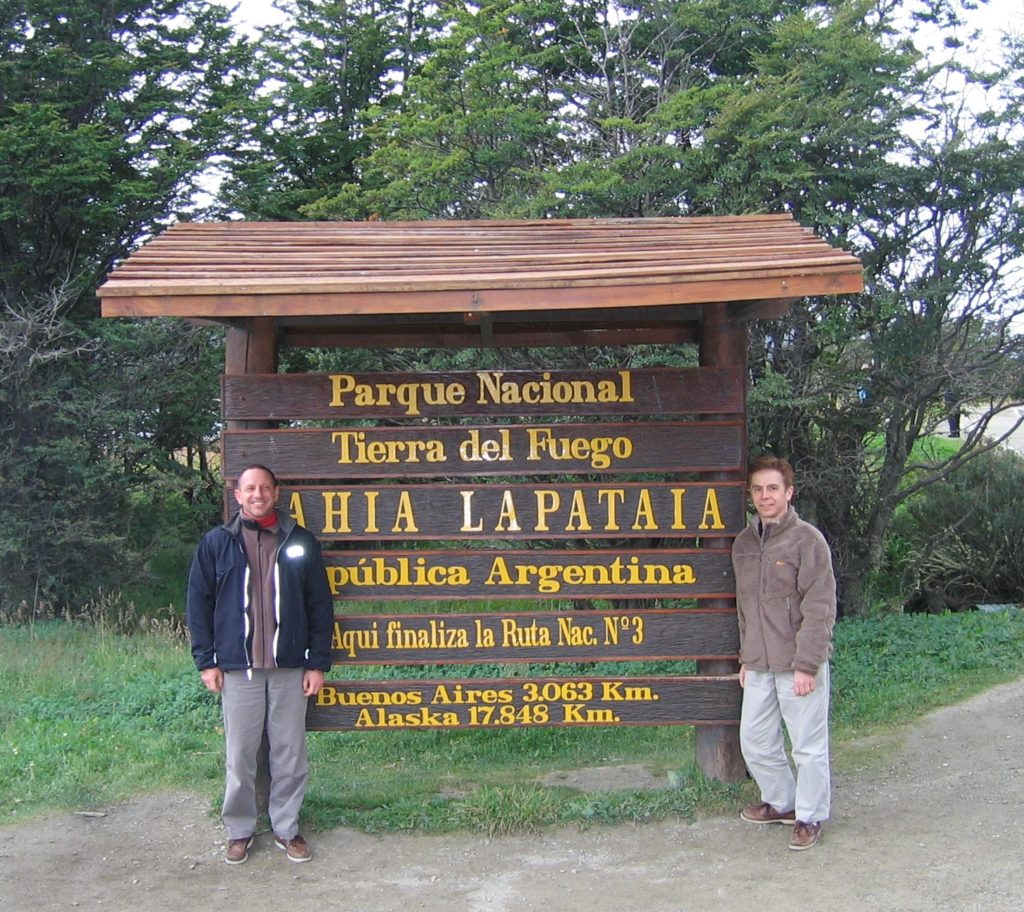
We’ve been to Argentina at least three times. Once as part of a trip to explore wine country in Chile and Argentina, once as part of a trip to Antarctica for which the ship left from Tierra del Fuego, and once with my in-laws to visit relatives who lived in Patagonia.

Tierra del Fuego, the starting point for our Antarctic adventure!
Penguins
Icebergs really are blue!

On each trip we spent some time in Buenos Aires, some more than others. And on each trip we did the Argentine thing of eating copious quantities of meat.

Eateries abound selling meats of various types cooked over live charcoal. The less fancy, but no less good, ones are often outdoor affairs with pots of chimichurri on each table. Often, the maestro de parrilla (grill master) is standing just feet away tending several large parrillas (grills) brimming with various cuts of meat. One of our most memorable meals of grilled meats was at just such a place in the suburbs of Buenos Aires with a friend from the States who married an Argentine and moved to Buenos Aires.

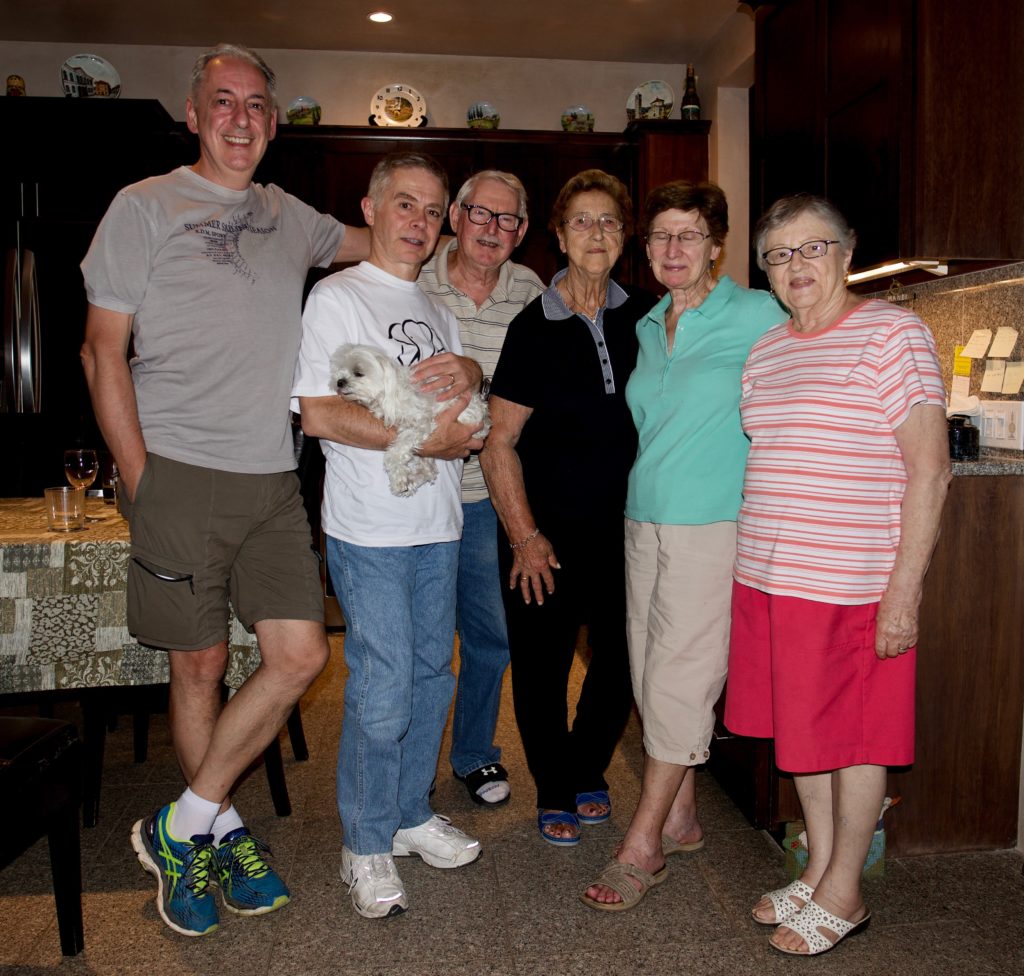
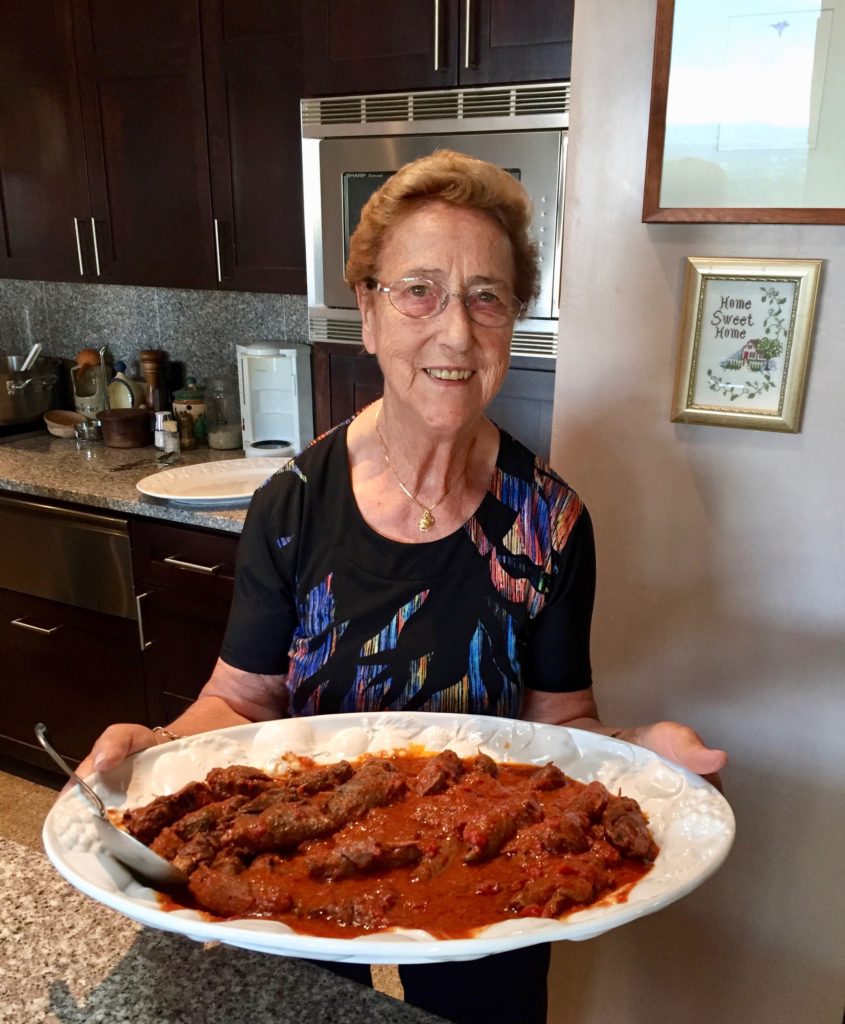
I developed a true appreciation for the extent to which Argentines love meat, however, at several family dinners at my husband’s Great Uncle Duilio and Great Aunt Juliana’s house in Puerto Madryn, Patagonia. Duilio is Fidalma’s brother. I’ve mentioned Fidalma several times in this blog.

We spent a week in Puerto Madryn and had two Sunday dinners with Duilio’s family (daughters, sons-in-law, and grandchildren).

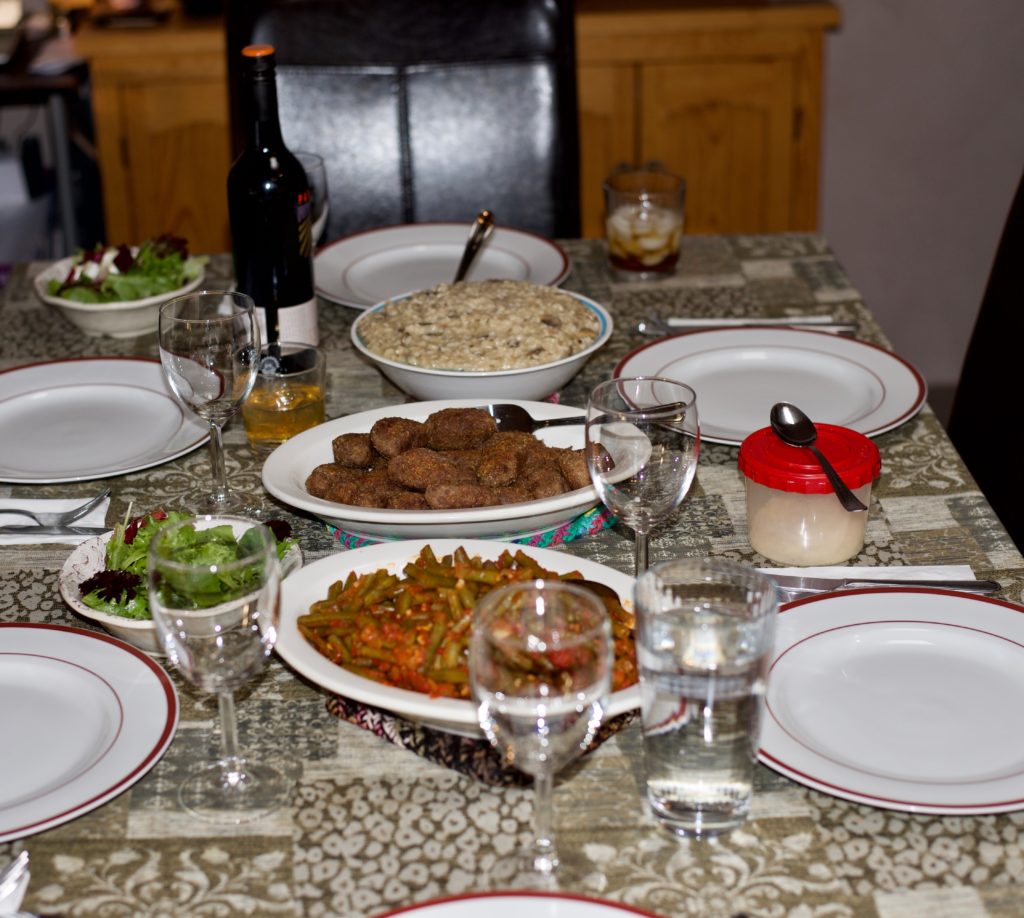
To accommodate large family gatherings, one of Duilio’s daughters converted an outbuilding to host bacchanalian feasts. There was a large indoor parilla with grill racks, an iron cross to hold an entire lamb near the charcoal, and a hook to hold a cauldron over the heat. There was another parilla just outside the door, in the courtyard. The rest of the interior space was given over to a very, very long table and chairs.

Indoor parilla with a whole lamb and sausages

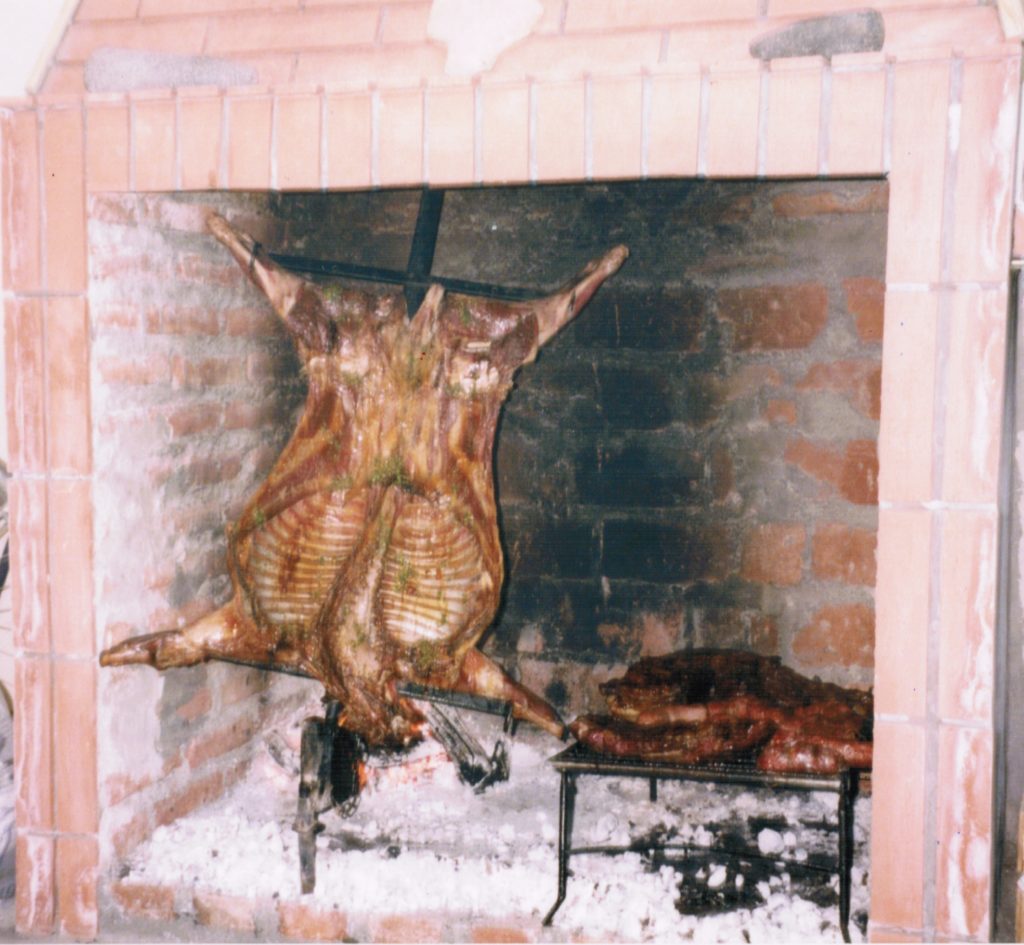
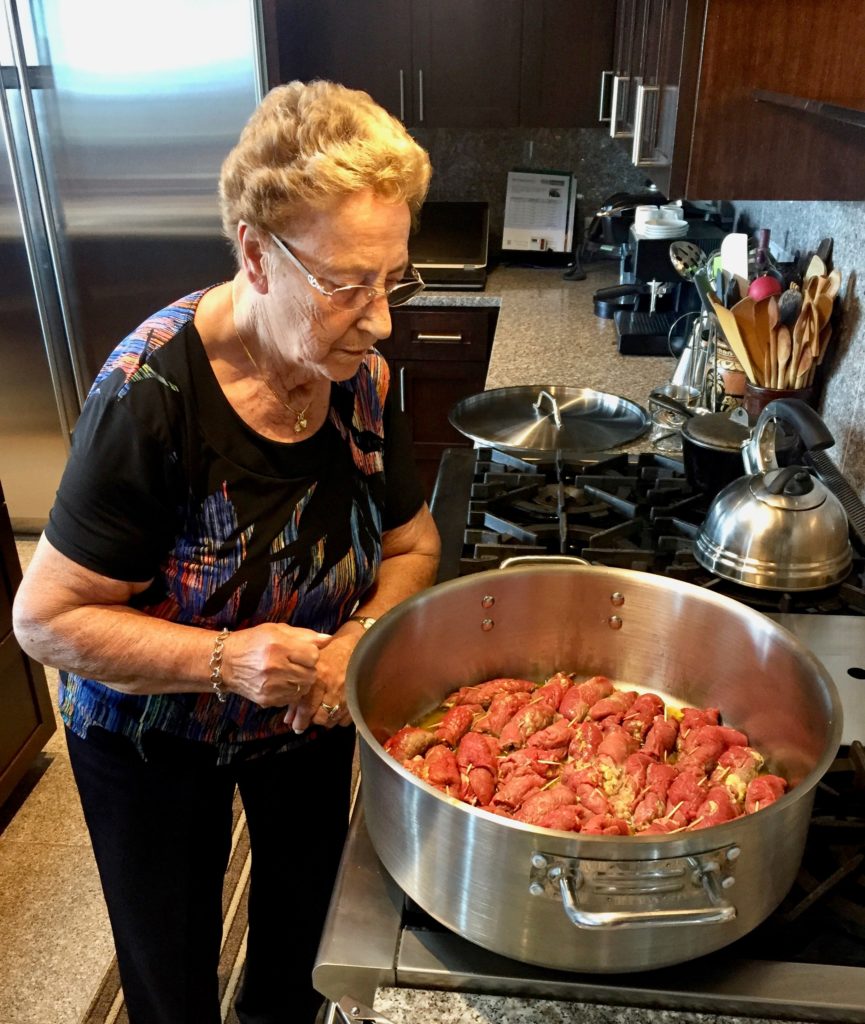
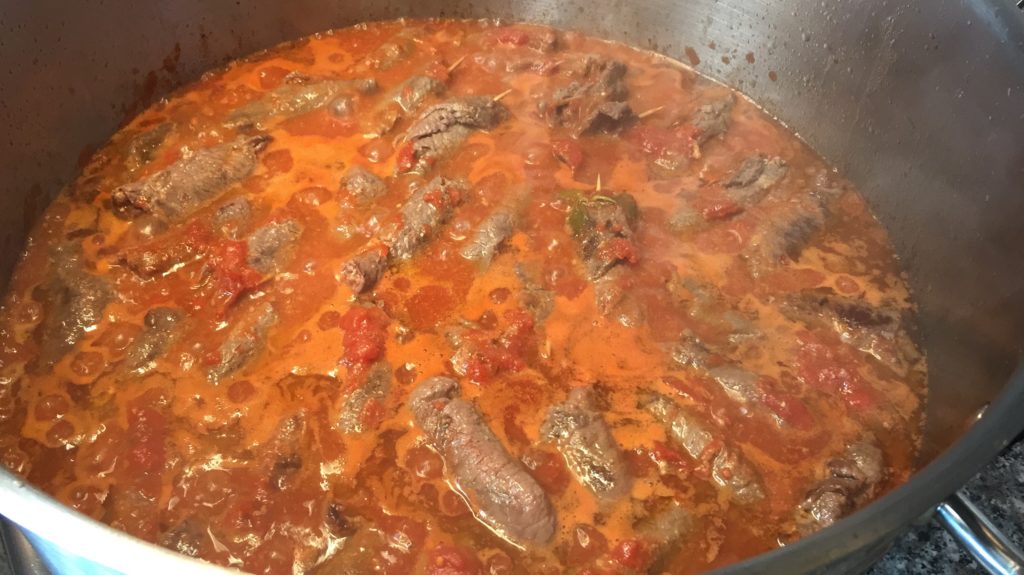
When we arrived for the second Sunday dinner, Eduardo, one of Duilio’s sons-in-law was frying 15 kilos (that’s 33 pounds!) of calamari in a large cauldron set over a fire in the indoor parilla. This was just to keep us from getting restless and hungry as the rest of the meal was prepared.

Outdoor parilla with chicken and brochettes

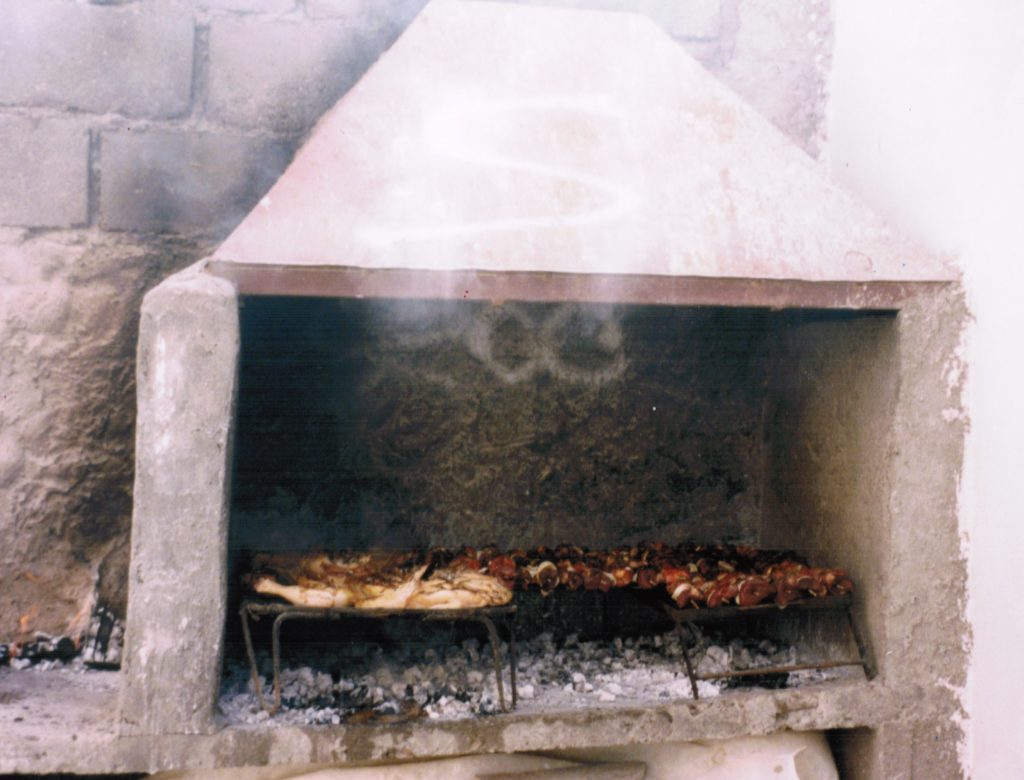
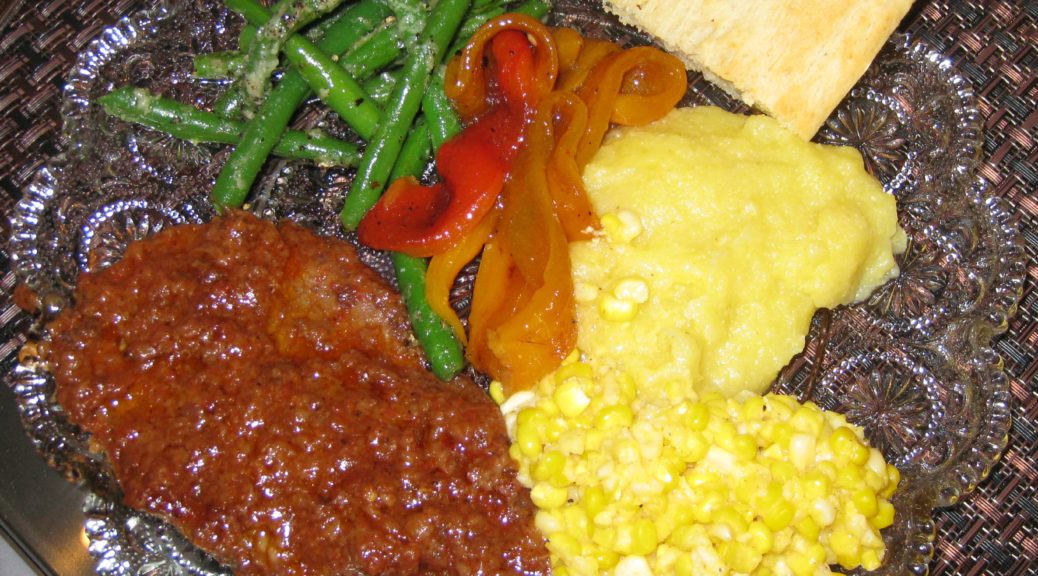
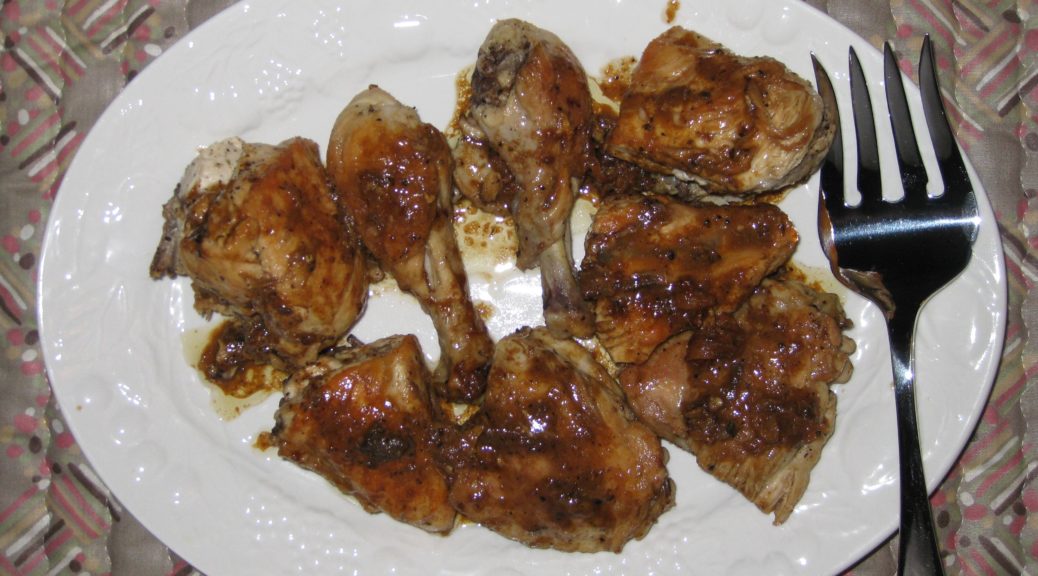
When we sat down to eat, the first course was grilled chicken. The grilled chicken course was followed by grilled sausages. The grilled sausages were followed by grilled lamb. The grilled lamb was followed by grilled beef.

Yep, each course was a different meat!

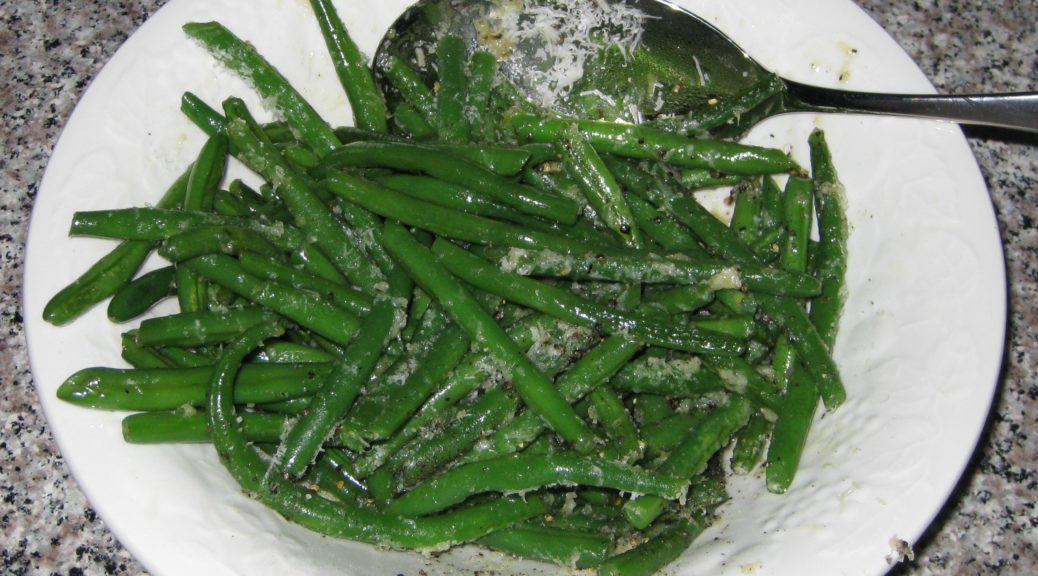
Truth be told, there were some vegetables on the table. But that doesn’t mean they were eaten by most of the family and the quantity certainly paled in comparison to the herd of animals that made its way onto the table in succession.

The seating arrangement was in strict age progression. Duilio and Juliana sat at the head. On either side of them sat my husband’s parents. Next to them on opposite sides of the table was where my husband and I were seated. After that came Dulio and Juliana’s daughters and their husbands. The remainder of the table was filled with grandchildren.

The vegetables started at “our” end of the table. Duilio and Juliana, as well as my in-laws and the two of us actually put vegetables on our plates. Duilio and Juliana’s daughters took a bite or two, as I recall. The sons-in-law and grandchildren wanted nothing to do with anything that was suspiciously related to a root!

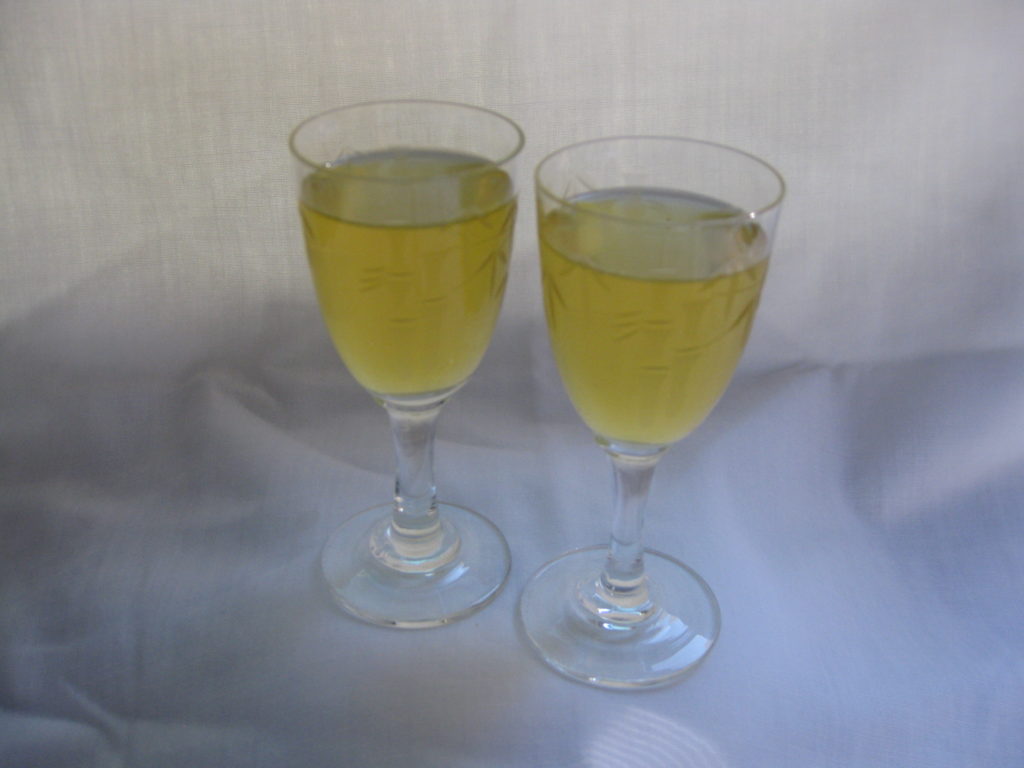
And there you have it. Course after course of meat, no veggies for the “true” Argentines, a bit of dessert, and the obligatory cup of mate passed around the table.

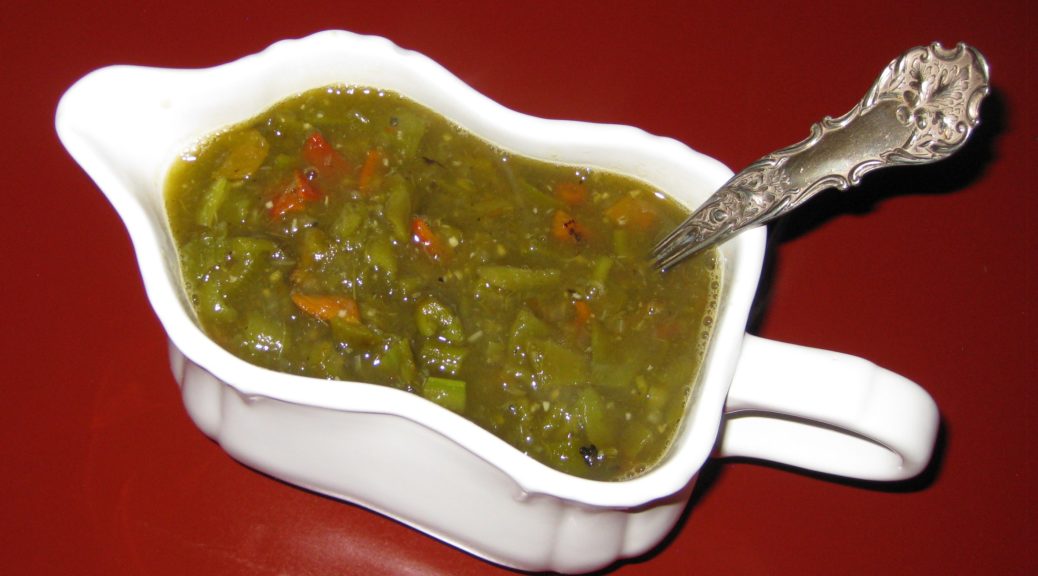
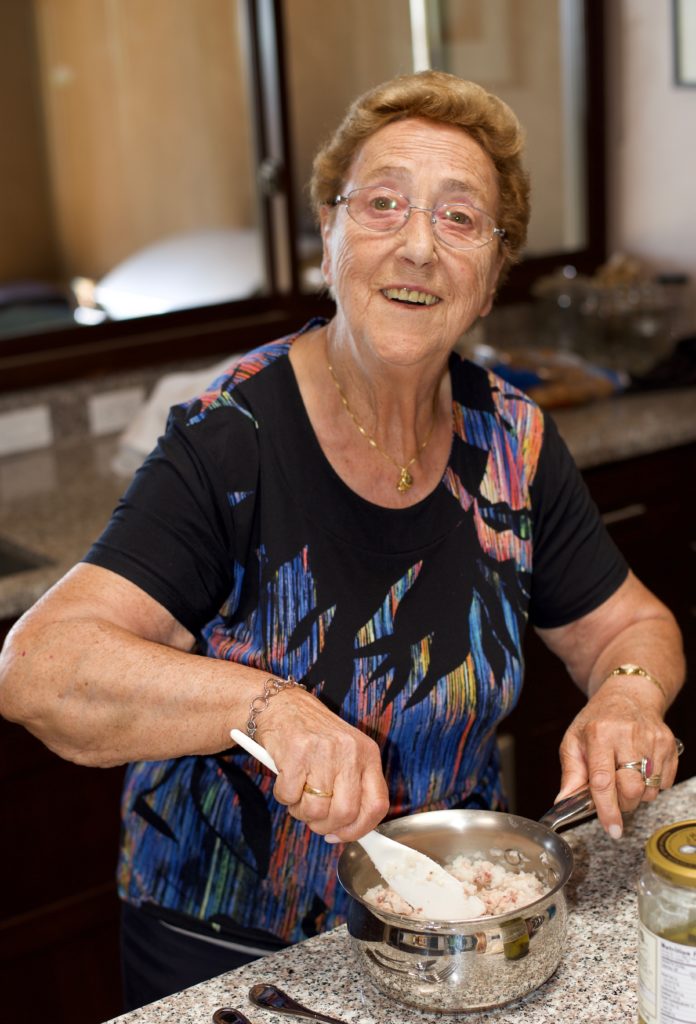
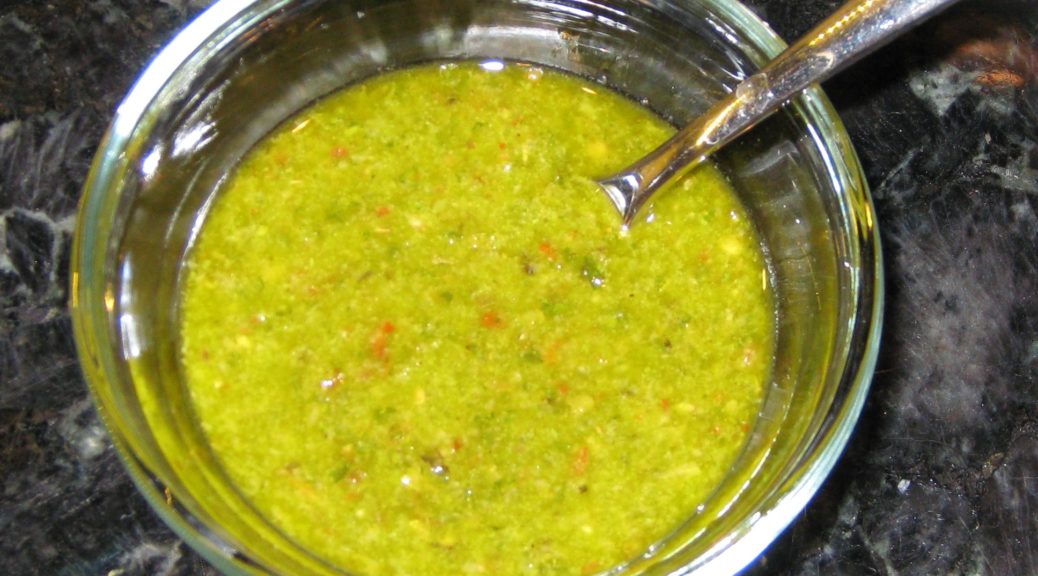
Eduardo cooked all the food magnificently. This is his chimichurri recipe. It contains a few ingredients that might seem unusual but since his family has been in Argentina for many generations who am I to argue?

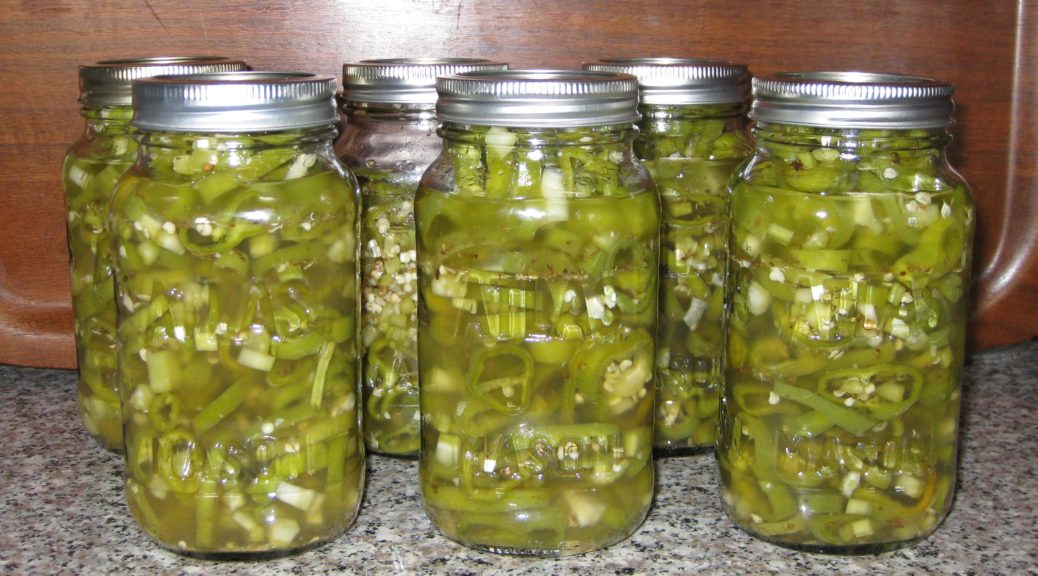
In addition to serving as the typical condiment for grilled meat, chimichurri is also as a marinade for the same meat. It will keep a week in the refrigerator so be sure to make enough to both marinate the meat and serve as a condiment.


Follow us


Click HERE to join our mailing list and you’ll never miss a recipe again!

Print Recipe
Eduardo's Chimichurri
While a few of the ingredients may seem unusual, Eduardo’s family has lived in Argentina for several generations so I don’t doubt the traditional nature of this recipe. Make extra and use some to marinate the meat before cooking. Pass the remainder at the table. You can use either red or white wine vinegar but I prefer white as it does not dull the bright green color of the herbs.
Votes: 0
Rating: 0
You:
Rate this recipe!
Prep Time 20 minutes
Passive Time 3 hours
Servings
cups
Ingredients
Prep Time 20 minutes
Passive Time 3 hours
Servings
cups
Ingredients
Votes: 0
Rating: 0
You:
Rate this recipe!
Instructions
  1. In a jar with a tight-fitting lid large enough to hold the finished sauce, combine the mustard and water.
  2. Allow the mustard-water mixture to stand approximately 7-10 minutes to develop the mustard’s flavor.
  3. Meanwhile, in a small blender jar, combine the garlic and one-half of the olive oil. Blend until garlic is finely minced.
  4. Add the basil to the garlic-oil mixture and blend again until basil is finely chopped but not pureed.
  5. Add the garlic-oil-basil mixture to the mustard mixture.
  6. Combine the remaining oil and parsley in the blender jar and blend until parsley is finely chopped but not pureed.
  7. Add the parsley-oil mixture to the herb mixture.
  8. Use the wine to rinse out the blender jar and then add it to the herb mixture.
  9. Add all other ingredients. Mix well.
  10. X
  11. Cover and allow the chimichurri to sit at room temperature for approximately three hours to develop flavor.
  12. The chimichurri can be refrigerated, tightly covered, for up to a week.
Recipe Notes

Copyright © 2017 by VillaSentieri.com. All rights reserved.

Share this Recipe

Mom’s Ravioli

September 27, 2017

My strongest olfactory memory of childhood is gradually waking up on Sunday morning to the smell (perfume is a better characterization as far as I’m concerned) of garlic being sautéed in olive oil.

That was how most Sundays started.

My mother would get up early and start making her long-simmered Southern Italian Tomato Sauce (referred to as Ragu or Sugo if one’s Italian roots were close, “Gravy” if one grew up in New York or nearby, and often just “Sauce”). We unceremoniously called it “Spaghetti Sauce” though it was used on much more than spaghetti!

I think the better part of my culinary-cultural history is represented by that sauce. Every Italian family’s sauce is different, even if stylistic similarities can be identified. The sauces made by my mother and her two sisters that I knew, Aunt Margie and Aunt Mamie, were clearly related but also different. Each was good but it’s not as if they didn’t deviate from my Grandmother’s recipe. They were similar in that garlic and meat were browned in oil; tomato products, water, and seasonings were added; and the whole thing simmered for hours. The meats varied, the tomato products (tomato paste, tomato puree, whole canned tomatoes, etc.) and the proportions of them definitely varied as did the seasonings and other aromatics.

My mother’s “Spaghetti Sauce” to call it by its “historic” name, a name that I no longer use, is, without doubt, my most precious culinary treasure. I have only ever given the recipe out twice. In the 1970’s I gave it to John Bowker and his wife Margaret Roper Bowker. John was the dean of Trinity College in Cambridge, England. Recently I gave it to Robert Reddington and John O’Malley in Palm Springs after Bob lamented the loss of the recipe for the long-simmered tomato sauce he learned to make while living in Chicago.

With my mother’s sauce as the near-constant backdrop to our Sunday dinners, the rest of the meal varied. The sauce could be served with spaghetti or some other cut of dry pasta, or with my mother’s home-made fettuccine, or with ravioli. Although my favorite pasta is gnocchi, we never had those on Sundays as my father didn’t like them. Gnocchi (always home-made) were reserved for a weeknight meal during the times that my father worked out of town.

The sauce has an abundant amount of meat in it, pork, always cut in big pieces, never ground or chopped. Nonetheless, the pasta was often accompanied by my mother’s slow-cooked roast pork or maybe a roast chicken.

It seems incongruous now, but in the 1960s, before the widespread use of antibiotics, chickens were expensive! (I’m not in favor of the prophylactic use of antibiotics but I’m just saying that’s why chickens are relatively inexpensive now.) I still have a handful of my mother’s “City Chicken” sticks from the 1960s. They are round, pointed sticks slimmer than a pencil but thicker than bamboo skewers. Pieces of pork and veal would be skewered in alternating fashion on the sticks, breaded, and fried like chicken drumsticks. This was less expensive than chicken!!

City Chicken sticks

But back to Sundays…

Sometimes, after the sauce was bubbling away, my mother would make ravioli. Next to gnocchi, they are my favorite pasta, but manicotti and lasagna aren’t far behind.

We would eat our big meal around 1 PM on Sunday and my mother would get all of this done in time for that meal, including taking time to go to church, during which my Aunt Mamie, who lived upstairs, would be tasked with stirring the “Spaghetti Sauce.”

My mother’s (now my) ravioli mold.

Making ravioli in a group is a lot more fun. I also find that making the ravioli on a different day from the day they are cooked and eaten means that I am not as tired and I enjoy them more. The pictures in this post are from a Sunday when I got together with Rich DePippo, Susan Vinci-Lucero, and my in-laws, Marisa and Frank Pieri, to make ravioli. I think we made about 30 dozen ravioli!


Follow us


Click HERE to join our mailing list and you’ll never miss a recipe again!

Print Recipe
Mom's Ravioli
The filling can be made a day in advance and refrigerated, tightly covered. Ravioli freeze well. To do so, lightly flour a sheet pan that will fit in your freezer and put the ravioli in a single layer. Freeze about 30-45 minutes, until firm. Quickly put the ravioli in a zipper-lock bag and return to the freezer. Repeat with the remaining ravioli. My mother always made her dough by hand but I use a kitchen mixer and the beater, not the dough hook. Years ago, ground meat was not labeled with the percent fat. My mother would select a cut of sirloin, have the butcher trim off all visible fat and then grind it. I find that 93% lean ground beef replicates the experience.
Votes: 0
Rating: 0
You:
Rate this recipe!
Prep Time 2 hours
Passive Time 30 minutes
Servings
people
Ingredients
Filling
Dough
Prep Time 2 hours
Passive Time 30 minutes
Servings
people
Ingredients
Filling
Dough
Votes: 0
Rating: 0
You:
Rate this recipe!
Instructions
Filling
  1. Put the frozen spinach in a small saucepan. Add a few tablespoons of water. Cover and cook, stirring occasionally, until the spinach is completely thawed.
  2. Pour the spinach into a large sieve.
  3. After the spinach has cooled enough to handle, squeeze handfuls of the spinach to remove as much liquid as possible.
  4. Heat the olive oil in a 12-inch sauté pan until shimmering. Add the beef.
  5. Cook over high heat until the liquid has evaporated, breaking up the meat while cooking.
  6. Reduce the heat to medium and add the garlic, 1 teaspoon of salt, and black pepper to taste. Continue to sauté for 2-3 minutes more.
  7. Add the spinach to the beef.
  8. Continue to cook over medium to medium-low heat while breaking up the spinach and completely combining it with the beef.
  9. When the beef and spinach are well combined and no obvious liquid remains in the pan, add the beaten egg. Stir well and cook two minutes more. The egg should completely incorporate into the filling and no longer be visible.
  10. Adjust salt and pepper.
  11. On low heat, add 1/4-1/3 cup of breadcrumbs and combine well to absorb any remaining liquid or oil. If necessary to absorb any remaining liquid, add another tablespoon or two of breadcrumbs. If you cooked off all the liquid when browning the beef, and used lean beef, 1/3 cup of breadcrumbs should be enough.
  12. Cool the filling to room temperature before filling the ravioli.
Dough
  1. Put the flour, egg, and egg whites in the bowl of an electric mixer outfitted with a paddle.
  2. Mix on low until combined.
  3. Add the water, a little at a time, until the dough just comes together. The dough should not be the slightest bit tacky. You may not need all the water.
  4. Remove the dough from the mixer and roll into a log. Cover with a kitchen towel and allow to rest for 15 to 30 minutes before rolling out.
Assembly
  1. Set up your pasta machine, either a hand crank version or an attachment for your mixer.
  2. Cut off a small handful of dough.
  3. Flatten the dough, dust with flour, and run it through the pasta machine on the thickest setting.
  4. If the dough is catching on the rollers it may be too wet. Sprinkle liberally with flour.
  5. Run the dough through the same setting one more time.
  6. Run the dough through the pasta machine narrowing the setting by one notch each time. If the dough is getting too long to cover much more than two lengths of the ravioli mold, cut off the excess and continue.
  7. When rolling out the dough, use slow, even motion. If the dough is not rolling out to the full width of the machine, or at least wide enough to cover the width of the ravioli mold, fold it in half crosswise and run it through the machine again on whatever the last setting was.
  8. If the dough is not rolling out smoothly, and the issue is not that it is too damp, run the dough through the machine again on the same setting.
  9. On most pasta machines with five settings for thickness, you will want to stop rolling out the dough on the next-to-thinnest setting.
  10. Put the rolled out dough on a lightly floured surface and cover with a kitchen towel. Repeat with 2 or 3 more portions of dough.
  11. Allow the remaining dough to rest, covered, while filling and cutting the first batch of ravioli.
  12. To fill the ravioli, take the rolled out dough and lay it across the ravioli mold.
  13. Add a slightly rounded teaspoonful of filling to each ravioli. Do not overfill or the ravioli may break when being cooked.
  14. Fold the dough over the top.
  15. Lightly pat the top sheet of dough.
  16. Using a rolling pin, cut the dough along the zig-zag edges. Be careful to fully cut through the dough around the edges as well as between each raviolo.
  17. Remove the ravioli and place on a lightly floured surface. Cover lightly with a kitchen towel.
  18. Repeat with the remaining dough and filling.
  19. Cook, refrigerate, or freeze the ravioli.
Recipe Notes

Copyright © 2017 by VillaSentieri.com. All rights reserved.

Share this Recipe

New Mexican Green Chile Sauce

September 22, 2017

Those of you who haven’t spent time in New Mexico may not know that chile (definitely spelled with an “e”) has cult status in the state.

New Mexican food wouldn’t be the same without “red” or “green.” Chile, that is. Those are the standard sauces used in New Mexican cuisine.

When ordering most dishes in a New Mexican restaurant in Santa Fe, the first question from the server, if the customer hasn’t specified, is “Red or Green or Christmas?”

Just 70 miles away in Taos, the question is “Red or Green or Caribe?”

It’s not that you can’t get Christmas in Taos, which as you might have guessed is half red chile sauce and half green chile sauce, it’s that never, ever is Caribe an option in Santa Fe. It just isn’t. I believe this speaks to the development of related, but different, foodways in the historically isolated towns and villages of New Mexico.

The most famous of all New Mexico chile is Hatch. There are about six varieties of chile grown in Hatch but, if they’re grown there, they can all be labeled as Hatch Chile. The tiny village of Chimayó, just under 30 miles from Santa Fe in northern New Mexico, grows good chile, too.

When I buy roasted green chile at the Santa Fe Farmers Market, I usually head for the vendor selling chile from Chimayó. That’s exactly what I did last week to make a batch of Green Chile for this blog post (honestly, we don’t add the word “sauce” to the end as the context indicates whether one is talking about the sauce or the fruit. And, yes, chile is a fruit!). Chimayó has a multi-hundred year history of growing heirloom chile and I feel good supporting that history, if even in a very small way.

A typical chile-roasting set-up found throughout parking lots in New Mexico in the late summer.

I served that chile during a dinner party for a group of close friends. Among the ten of us, only one was born and raised in New Mexico, Pat Assimakis (aka Pat Paris if you’re a maître d’ and she’s ever made a reservation at your restaurant). I gave Pat a taste of my green chile, she thought for a second and said, “Chimayó?” She nailed it! It’s got a slightly different taste from Hatch chile.

New Mexicans have strong opinions about their chile, be it red or green. The usual divide is between those who put almost nothing but chile in their chile (see, you knew the first meant the fruit and the second meant the sauce, right?) except for a bit of onion and/or garlic and those who add herbs (like oregano) and spices (like cumin). I am firmly in the former camp. Onion and garlic help to round out the flavor but, to my taste, herbs and spices detract from the pure chile goodness.

The other divide is degree of heat. Back to the restaurant scenario above, a frequent question from the customer after the server says “Red or Green?” is “Which is hotter?” Restaurants stake out their territory, not only in how they make their chile, but in terms of which is hotter.

Since I’m a bit of a chile-head, given a choice between the medium-hot and the hot Chimayó chile at the Farmers Market, I opted for the hot. So, I was more than a little concerned when Doug Howe, one of the other friends at our dinner, and the first to ladle some green chile onto his plate, took three large spoonsful. Before I could warn him, he took a bite and was in agony. I relieved him of his green chile, putting it on my plate, instead. Pat and I sure enjoyed the chile, Doug not so much. As for the other seven diners, I’m not sure.

In case you missed it, here is my recipe for Red Chile.


Follow us


Click HERE to join our mailing list and you’ll never miss a recipe again!

Print Recipe
New Mexican Green Chile Sauce
This is classic New Mexican Green Chile. There are just a few aromatics and no herbs and spices to muddy the flavor. Removing the skin and seeds can be a chore as they want to stick to your fingers. Dipping the chile and your fingers in water makes the task a breeze however, you want to use that water as part of the sauce because all of the tasty liquid that collects inside the chile as it roasts would be lost otherwise.
Votes: 0
Rating: 0
You:
Rate this recipe!
Prep Time 30 minutes
Cook Time 45 minutes
Servings
cups
Ingredients
Prep Time 30 minutes
Cook Time 45 minutes
Servings
cups
Ingredients
Votes: 0
Rating: 0
You:
Rate this recipe!
Instructions
  1. Roasted green chile ready to be cleaned.
  2. Put two cups of water in a small bowl.
  3. Holding the chile over a bowl to catch any juice, use your fingers to remove the skin of the roasted chile. Most of the skin should slide off easily. You may need to work on a few bits here and there. Remove as much skin as possible but a few bits of stubbornly sticking skin aren’t a problem.
  4. Shake whatever skin you can from your fingers (it has a tendency to cling desperately to your fingers) then dip your fingers and the chile in the bowl of water to remove the clinging skin.
  5. Still holding the chile over a bowl, remove the stem end. You can usually do this by pinching the top of the chile but a pair of kitchen shears works well, too.
  6. Discard the stem end and any seeds that cling to it.
  7. Split the chile in half lengthwise. Again, this is pretty easy to do with a fingernail.
  8. Dip the chile into the bowl of water and scrape away the seeds.
  9. Put the cleaned chile into a clean bowl and repeat the process with the remaining chile.
  10. Cut the chile into long strips.
  11. Cut the chile crosswise into small squares
  12. Add any liquid that has collected in the bottom of the bowl from the chopped chile to the bowl of water.
  13. Strain out seeds and bits of flesh from the water using a three step process. Strain the water through a large sieve.
  14. Strain the liquid through a fine, small sieve.
  15. Strain the liquid through several layers of cheesecloth or a paper filter.
  16. Chop the onion.
  17. Mince the garlic.
  18. Combine ½ cup of chopped chile, onion, garlic, strained water, and salt in a saucepan. Bring the mixture to a boil and simmer for 20 minutes.
  19. Using an immersion blender or a regular blender puree the chile mixture. This will help to thicken the chile sauce without using a thickening agent.
  20. Add the remaining diced chile and two cups of water to the puree and simmer until the chile is soft to the bite, but not mushy, approximately 15-20 minutes, adjusting salt approximately 10 minutes into the simmer. If you used a regular blender in the previous step, use the water to rinse out the blender jar before adding it to the pot.
  21. The green chile can be refrigerated or frozen. It will become softer if frozen so best to cook it for a shorter time if it is going to be frozen.
Recipe Notes

Copyright © 2017 by VillaSentieri.com. All rights reserved.

Share this Recipe

Tiella (Southern Italian Vegetable and Pasta Casserole)

September 18, 2017

When I was growing up, we mostly socialized within the extended family plus a very few close family friends (that’s you, Joe and Betty Slivosky!).

It was a time (the 60’s) and place (small-town Western Pennsylvania) where it was rare to call in advance of a visit. One just showed up. This usually happened in the evening after dinner, though almost never on Monday or Thursday when the stores downtown were open until 9 PM and we dressed and went shopping after dinner.

Everyone would sit around (usually in the kitchen) drinking coffee (with caffeine), chatting…and smoking. Oh, the smoking! Occasionally the men would drink beer but unless it was a holiday or celebration of some sort, hard liquor was a rarity.

On Sundays, visiting frequently occurred (or at least started) in the afternoon and there might be two or three stops before heading home.

I can’t tell you how many times I heard the same stories. It’s one of the ways I developed a connection with family members, like my maternal grandparents, who died when I was very young.

To be sure, sometimes my cousin Donna and I would abandon the adults and pursue some childhood activity but we still hung out in the kitchen much of the time.

Often times the conversation would veer towards food; things my grandmother would make, the huge platters of cannoli one of my great aunts would make, what was eaten on holidays, and on and on.

There was the oft-repeated reminder of how my grandfather could come home late at night with a group of friends and how my grandmother would cook for them near midnight. There were stories of my grandmother cleaning and cooking chicken feet. My mother would talk about the time she killed a chicken in the basement and it got away from her and ran, headless, around the room. My father would remind everyone that the only food he didn’t like was gnocchi.

Food was a central feature of our lives.

So was conversation.

There were also times I would just sit in the kitchen and chat with my mother for hours. Relatives and food were common topics of conversation. There were dishes my grandmother made that I heard about over and over but never tasted because my mother never made them for some inexplicable reason. One of them was a quickly sautéed veal chop with a pan sauce made of the drippings in the pan, crushed canned tomatoes, peas, and seasonings. Back in the days when I cooked veal, I actually made it. Now I do it with pork chops.

The other dish that stands out in my memory from these conversations is Tiella. My mother talked of it frequently but never made it. The instructions were basic, a layer of pasta, a layer of potatoes, a layer of zucchini, and a can of tomatoes crushed by hand and poured on top. The whole thing was then baked. There wasn’t much of a discussion of which seasonings to use or proportions of ingredients. It was just assumed it would have garlic (of course it would have garlic) and the herbs that were commonly used in our family. Proportions…well…it just needed to look “right.”

For the number of times my mother rhapsodized about this dish, I can’t figure out why she never made it.

The first time I tried to make it was in the early 1990’s at our little house on Griffin Street in Santa Fe. That first time around, it didn’t live up to the hype, for sure, but it christened the house in an odd way.

In November 1992 my mother, my husband’s mother, and my husband’s grandmother traveled to Santa Fe with us for Thanksgiving week. We looked at property and fell for a little (1151 square foot) house on Griffin Street. My mother was terminally ill at the time. When we got back home, my mother insisted that we use her money for the down payment, which we did. She kept saying that she wanted to live long enough to return to that house in the spring. It didn’t happen. She died in early January.

All of the kitchen gear, china, and glassware for the house on Griffin came from my mother’s house. So, it was fitting that I should make this dish for the first time using my mother’s kitchenware in a house that we owned thanks to her.

It took me many years of working (off and on) on the seasonings and proportions to get it to taste great. (Well, I think it does.) The only real liberty I took with the dish is to use fresh tomatoes rather than canned when I make this in the summer.


Follow us


Click HERE to join our mailing list and you’ll never miss a recipe again!

Print Recipe
Tiella (Southern Italian Vegetable and Pasta Casserole)
This is a wonderful late summer dish when tomatoes are at their peak. If you make it at other times, use a 28 ounce can of whole tomatoes in place of the tomato puree and fresh tomatoes. Pour the liquid in the can over the potatoes instead of the puree. Crush the tomatoes by hand, add the seasonings described for fresh tomatoes, and arrange the crushed tomatoes on top.
Votes: 0
Rating: 0
You:
Rate this recipe!
Prep Time 1 hour
Cook Time 2 hours
Passive Time 30 minutes
Servings
people
Ingredients
Prep Time 1 hour
Cook Time 2 hours
Passive Time 30 minutes
Servings
people
Ingredients
Votes: 0
Rating: 0
You:
Rate this recipe!
Instructions
  1. Preheat the oven to 350°F.
  2. Combine the olive oil and crushed garlic in a small sauté pan. Sauté garlic until lightly browned. Remove the garlic and reserve the oil.
  3. Put the raw ditalini in the bottom of a deep, circular casserole, approximately 10 inches in diameter. The pasta should form a single layer with a fair amount of extra room for it to expand.
  4. Add 2 tablespoons of Parmesan cheese, ¼ of the minced garlic, and 2 tablespoons of the garlic oil and mix well.
  5. In a bowl, toss the sliced potatoes with half the rosemary, ⅓ of the oregano, ¼ of the basil, 2 tablespoons of Parmesan cheese, ¼ of the minced garlic, 2 tablespoons of the garlic oil, and a generous amount of salt and pepper.
  6. Arrange the potatoes neatly in overlapping layers on top of the ditalini. Do not wash the bowl.
  7. Season the tomato puree with salt and pour over the potatoes.
  8. In the same bowl used for the potatoes, toss the zucchini with the remaining oregano, ¼ of the basil, the remaining rosemary, 2 tablespoons of Parmesan cheese, ¼ of the minced garlic, 2 tablespoons of the garlic oil, and a generous amount of salt and pepper.
  9. Arrange the zucchini on top of the potatoes. Do not wash the bowl.
  10. Neatly arrange half the tomatoes on top of the zucchini. Season with half the remaining minced garlic, half the remaining basil, and salt and pepper.
  11. Arrange the remaining tomatoes on top and season with salt and pepper as well as the remaining garlic, basil, and all the parsley.
  12. Put the tiella in the preheated oven.
  13. Remove the crusts from several slices of day-old Italian or French bread. Whiz the bread in a food processor to make coarse crumbs.
  14. While the tiella bakes, toss the breadcrumbs with the remaining garlic oil in the bowl used for the potatoes and zucchini.
  15. After the tiella has baked for 90 minutes, sprinkle the oiled crumbs on top and bake till golden, approximately 30 minutes more.
  16. Allow to rest at least 30 minutes before serving. The tiella can be served warm or at room temperature. It can also be reheated in the oven briefly before serving, if desired.
Recipe Notes

Here’s the link for my recipe for homemade tomato puree (passata di pomodoro).

Copyright © 2017 by VillaSentieri.com. All rights reserved.

Share this Recipe

Angie’s Pickled Hot Peppers

September 13, 2017

With one set of grandparents and many relatives hailing from Southern Italy, hot peppers and foods containing hot peppers were staple features of the cuisine I grew up eating.

Hot sausage, with fennel seed, was frequently on our table and, since it was often homemade by Uncle Joe Medile, it could be as hot as we wanted. When it wasn’t Uncle Joe’s sausage, it would typically have been from Lopresti’s Market in Geistown, a suburb of Johnstown, PA.

Spicy foods more often showed up at lunch, though. There was spicy salumi, including Calabrese salami, capocollo (of which there are several types but in our house it was always the spicy one), and sopressata, among others.

There were hot banana peppers fried until tender, usually with onions. The fried peppers could be a condiment or they could be used as the filling for a sandwich. Fried hot pepper sandwiches are still one of my favorite lunchtime treats!

There were various pickled, spicy vegetables like giardineria and pickled peppers of various types. These were usually store-bought except for my cousin Angie’s pickled hot peppers.

Angie is the daughter of my mother’s oldest sister. Angie, however, was born six months before my mother. It’s kind of interesting to think about the fact that my grandmother was pregnant with my mother at the same time that my grandmother’s daughter was pregnant with Angie.

Despite their inverted ages, Angie always called my mother Aunt Theresa.

Angie’s mom, my Aunt Rosie, died at a young age. I never knew her. Aunt Rosie’s husband, Uncle Dominic lived with their other daughter, Marie.

Uncle Dominic grew vegetables, including hot peppers, in the back yard. He’s the one who taught me about fried hot pepper sandwiches for which I am eternally grateful!

Usually I would make Angie’s Pickled Hot Peppers with Italian Banana Peppers but fresh New Mexico Green Chile is far more abundant in Santa Fe than Banana Peppers and the substitution works just fine. Years past, when we lived in Chicago and grew lots of peppers, I would even make these with jalapeno peppers.

These peppers are a breeze to make, just some slicing and dicing and pulling together a quick pickle. No actual canning or processing is required. They will keep for months and months in the refrigerator.

The recipe calls for a peck of peppers. A peck is an interesting measure. It is eight dry quarts. A dry quart, however, is not the same as a liquid quart (unless you use the British Imperial system in which case a dry quart and a liquid quart are the same volume but not the same volume as any quart used in America).

Confused? Oh how I wish we used the metric system!!!

A dry quart is slightly larger than a liquid quart. Eight dry quarts equals 9 1/3 liquid quarts. If you go to a farmers market, chances are you’ve seen produce displayed in baskets that are one peck in size. Not to worry, though. First off, the measurements aren’t that critical for this recipe, so plus or minus a quart (dry or liquid) isn’t a big deal. Second, if you have any type of large container, pot, or bucket marked in liquid measure, just fill it up a little beyond the 9 (liquid) quart mark and you’ll be good to go.

If you’re buying peppers in the supermarket and don’t want to carry a bucket to measure a peck, I suggest buying approximately four pounds of banana peppers. I found that amount of New Mexico Green Chile came very close to a peck when I measured it out.


Follow us


Click HERE to join our mailing list and you’ll never miss a recipe again!

Print Recipe
Angie's Pickled Hot Peppers
Though usually made with hot Italian Banana Peppers, I made this batch with hot New Mexico Green Chile which is far easier to source in Santa Fe than are large quantities of Banana Peppers. Four pounds of peppers should come pretty close to a peck. A peck is 8 dry quarts which is the equivalent of 9 1/3 liquid quarts. If there isn’t enough pickling liquid to fully submerge the peppers, make a little extra following the proportions in the recipe. These peppers will keep well in the refrigerator for many months. Try to let them mellow at least a couple of days before eating them…if you can!
Votes: 0
Rating: 0
You:
Rate this recipe!
Prep Time 75 minutes
Passive Time 8 hours
Servings
quarts
Ingredients
Prep Time 75 minutes
Passive Time 8 hours
Servings
quarts
Ingredients
Votes: 0
Rating: 0
You:
Rate this recipe!
Instructions
  1. Wash and dry the peppers.
  2. Cut off the stem ends.
  3. Cut the peppers crosswise into rings a little more than 1/8 inch thick.
  4. Cut the celery into ¼ inch dice.
  5. In a non-reactive container large enough to hold all the ingredients, combine the vinegar, water, oil, garlic, salt, and oregano. Mix well.
  6. Add the sliced peppers and diced celery.
  7. Mix thoroughly. Cover and allow to sit at room temperature for 8 hours or overnight.
  8. Using a slotted spoon, ladle the peppers and celery into clean jars.
  9. Once the jars are filled, ladle the pickling liquid into the jars. Mix the liquid well with each ladleful so that you get the right proportions of vinegar/water and oil.
  10. If there is not quite enough liquid to cover the peppers make a small amount more using the same proportions.
  11. Cover and refrigerate until ready to use.
Recipe Notes

Copyright © 2017 by VillaSentieri.com. All rights reserved.

Share this Recipe

Pasta con Salsa Cruda (Pasta with Uncooked Tomato Sauce)

September 8, 2017

Pasta with a sauce of uncooked tomatoes, herbs and aromatics is one of the delights of late summer. While this is very easy to make, and only a few tomatoes are needed, the tomatoes must be vine-ripened.

If you have just one tomato plant you’ll probably have enough tomatoes to make a batch of Salsa Cruda. Farmers Market tomatoes are a good option this time of year, too.

Some of our tomato plants in front of the greenhouse and behind mesh to protect them from deer

I make this with our home-grown tomatoes which are always red but using some of the amazing heirloom tomatoes in colors of yellow, green, or purple available in farmers markets would make a dramatic sauce.

Colorful heirloom tomatoes on the bar at The Kirby Hotel in Douglas, Michigan: @thekirbyhotel

If you can’t get vine-ripe tomatoes, or you want to make a similar sauce at a time other than late summer, you can use two or three roasted red peppers in place of the tomatoes. I’ll be posting a recipe for roasted peppers next month, after tomato season is over. In a pinch, you can buy a jar of good-quality roasted peppers.

Although this recipe is not a traditional “family of origin” recipe it is one that I have been making for almost 30 years. I consider it to be one of my traditions.

While you can still get vine-ripened tomatoes, give this easy and delicious recipe a try.


Follow us


Click HERE to join our mailing list and you’ll never miss a recipe again!

Print Recipe
Pasta con Salsa Cruda (Pasta with Uncooked Tomato Sauce)
This makes enough sauce for one pound of pasta. Use pasta with a shape that will hold the sauce, such a small shells or fusilli. Although you can make the sauce in the time it takes the pasta water to come to a boil, it is better if the sauce is allowed to sit at room temperature for about an hour to allow the flavors to meld. Since the sauce is not hot, it is important to warm the serving bowl with boiling water just before using. I usually put some of the pasta-cooking water to warm the bowl. The optional aromatics (hot peppers, kalamata olives, and blue cheese) are really optional but definitely help to round out the flavor.
Votes: 0
Rating: 0
You:
Rate this recipe!
Prep Time 15 minutes
Cook Time 15 minutes
Passive Time 1 hour
Servings
people
Ingredients
Prep Time 15 minutes
Cook Time 15 minutes
Passive Time 1 hour
Servings
people
Ingredients
Votes: 0
Rating: 0
You:
Rate this recipe!
Instructions
  1. Coarsely chop the hot pepper.
  2. Coarsely chop the garlic.
  3. Combine olive oil, garlic, and hot peppers, if using, in the food processor.
  4. Process until finely chopped.
  5. Add basil, parsley, Parmesan cheese and Kalamata olives, if using.
  6. Pulse a few times to chop.
  7. Add tomatoes, blue cheese, if using, salt, and black pepper and pulse until finely chopped, but not pureed.
  8. There should definitely be some texture to the sauce.
  9. Bring three quarts of water to a rolling boil.
  10. Season the water with 1/3 cup of salt.
  11. Add the pasta and cook until al dente.
  12. When the pasta is done, reserve about ½ cup of the pasta-cooking liquid to thin the sauce if needed.
  13. Drain the pasta.
  14. Drain the hot water from the serving bowl. Add the pasta and sauce to the warmed bowl. Toss well.
  15. If needed, thin the sauce with some of the reserved pasta water. This will likely not be the case but it is always a good idea to have some pasta-cooking water available just in case.
Recipe Notes

Copyright © 2017 by VillaSentieri.com. All rights reserved.

Share this Recipe

Carne di Manzo in Umido (Thinly Sliced Beef in Tomato Caper Sauce)

August 30, 2017

As I am writing this, my husband’s Great Aunt Fidalma and cousin Massimo are visiting us from Tuscany. We’ve had quite a week of eating and drinking.  Every night, actually, was something like a party. At the lowest head count we were 6, but more often 9, and once 20!

From left to right: Massimo, me (holding Abby), my father-in-law, Zia Fidalma, Zia Ida, my mother-in-law.

Last night I fried a bunch of zucchini flowers to accompany cocktails. Zia Fidalma made little elongated meatballs (polpette) with ground beef and mortadella seasoned with onions, garlic, and herbs. I made risotto with mushrooms and my mother-in-law made long-simmered green beans in tomato sauce, something like my green beans in tomato sauce with bacon.

Risotto with Mushrooms, Meatballs, Green Beans in Tomato Sauce

While we were sitting at the table after dinner doing what Italians do (talking about growing food, talking about preparing food, talking about food we’ve eaten, and talking about the next meal) Zia Fidalma started to describe a dish of thinly sliced beef cooked in tomato sauce with capers.

“Carne di Manzo in Umido!” I said.  She concurred.

I told her that Carne di Manzo in Umido was, in fact, the long-planned blog post for Wednesday.

It is a dish I had at her home in Tuscany about 20 years ago. I wrote down the recipe in a combination of English and Italian and American and Metric measures sitting at her kitchen table. It took me a while to get it right but I think I’ve nailed it.

Here’s a quick rundown of the food we’ve had over the past week:

August 23rd: Pasta with Zucchini, Chicken Thighs braised in Red Wine and Balsamic Vinegar, Salad, Cherries in Brandy, Homemade Limoncello, and Homemade Bay Leaf Liqueur (being posted in October).

Cherries in Brandy
Homemade Limoncello

August 24th: Tiella (being posted in September), Grilled Hot and Sweet Italian Sausage, Grilled Broccolini drizzled with Olive Oil, and more Cherries in Brandy, Homemade Limoncello, and Homemade Bay Leaf Liqueur.

August 25th: Zia Fidalma’s Rouladen (German, I know, but Zia Fidalma lived in Germany for many years), Mashed Potatoes, Corn on the Cob and, you guessed it, more Cherries in Brandy, Homemade Limoncello, and Homemade Bay Leaf Liqueur.

Zia Fidalma making the filling for her rouladen
A watchful eye on the cooking rouladen
Rouladen bubbling away
Zia Fidalma and a platter of rouladen
Me making mashed potatoes (with a side of bourbon)

August 26th (for 20 people): A Massive Antipasto Platter thanks to cousins Paul and Kim Phillips (and a shopping spree at Cheesemongers of Santa Fe), Baked Penne with Ham, Peas, Mushrooms and Roasted Garlic Besciamella, Porchetta, Corn Sautéed in Butter, Sformato di Spinaci, and Italian Almond Torta with Raspberries and Plum Crostata (thanks to Rich DePippo). Then there were those ever-present Cherries in Brandy, Homemade Limoncello, and Homemade Bay Leaf Liqueur.

Kim and Paul fortify themselves at the Santa Fe Farmers Market before heading off to a marathon shopping session at Cheesemongers of Santa Fe
Antipasto
A bit more antipasto
Baked Penne with Ham, Peas, Mushrooms and Roasted Garlic Besciamella
Porchetta
Sformato di Spinaci
Almond Torta with Raspberries and Plum Crostata

August 27th brought some sanity as we had leftovers from the 26th. (We could still feed a small army with the remains of Paul and Kim’s Antipasto Shopping Spree.)

August 28th: As described above, meatballs, risotto, and green beans.

I neglected to mention that we went through cases of wine and then there was a dark chocolate cake from Chocolate Maven Bakery in Santa Fe that kept making its appearance most nights right before we broke out those cherries.

Dark Chocolate Cake from Chocolate Maven Bakery

Eating will slow down a bit now that the relatives have left. As I finish writing this the house is perfumed from a large pot of chicken broth that will get portioned and frozen ready to be pulled out of the freezer in the coming weeks for wave after wave of risotto made with the freshest vegetables the market has to offer.


Follow us


Click HERE to join our mailing list and you’ll never miss a recipe again!

Print Recipe
Carne di Manzo in Umido
Thinly sliced beef is browned and then simmered in the barest amount of tomato sauce with an array of herbs. A bit of capers round out the flavors.
Votes: 0
Rating: 0
You:
Rate this recipe!
Course Mains, Meats
Cuisine Italian
Prep Time 20 minutes
Cook Time 2 hours
Passive Time 1 hour
Servings
people
Ingredients
Course Mains, Meats
Cuisine Italian
Prep Time 20 minutes
Cook Time 2 hours
Passive Time 1 hour
Servings
people
Ingredients
Votes: 0
Rating: 0
You:
Rate this recipe!
Instructions
  1. Herbs, clockwise from top right: nepita, bay leaf, sage, rosemary, oregano.
  2. Combine the flour and 1 ½ teaspoons of salt. Mix well.
  3. Pound the steak lightly with a mallet.
  4. Season the steak with salt and pepper. Cut the pieces in half if they are too large after pounding.
  5. Dredge the steak in the seasoned flour and reserve. It is best to do this about an hour in advance as the flour will adhere to the meat better.
  6. Bruise the garlic with the side of a large chef’s knife.
  7. Put a thin film of olive oil on the bottom of a very large sauté pan. Heat over medium high heat.
  8. When hot, add as much of the beef as will fit without crowding in a single layer. Add half the garlic.
  9. Sauté the meat and garlic until the meat is browned on both sides.
  10. Remove the browned meat to a platter. Repeat with the remaining meat and garlic, in however many batches are needed.
  11. If the garlic starts to turn dark brown, remove it or it will become bitter.
  12. When all the meat is browned return it to the pan with any accumulated juices. Leave the cooking oil in the pan.
  13. Try to arrange the meat so that the pieces overlap rather than putting one piece of meat directly on top of another.
  14. Add all the other ingredients except the capers.
  15. Cover and simmer gently until meat is tender flipping the meat every 20 minutes or so. It will take at about one and one-half to two hours to get the meat tender depending on the cut and your elevation.
  16. Add water from time to time if the sauce boils away.
  17. Rinse the salt off the capers and add them during last five minutes of cooking. Taste and adjust salt and pepper.
  18. There should be a very small amount of sauce along with oil that is red from the tomato. Do not remove the oil, it adds significantly to the mouthfeel of the sauce.
Recipe Notes

Copyright © 2017 by VillaSentieri.com. All rights reserved.

Share this Recipe

Calabacitas: A New Mexican Classic

August 21, 2017

Talk about a dish that simply wouldn’t exist in any recognizable form without new world crops, calabacitas is it! Squash, corn, and chile are all new world plants.

Calabacitas is Spanish for zucchini but is also the name given to a dish of zucchini, corn, and (usually) green chile.

Often served as a side dish, calabacitas makes an awesome burrito, too. Accompany it with some frijoles (and probably a tortilla or three) and you’ve got a great high-protein vegetarian dinner. Leave out the cheese and it’s vegan! Truth be told, I’m plus-minus on the cheese in any case. When serving this for company I usually sprinkle cheese on top as in this recipe, but if it’s just for “us,” cheese isn’t usually even a thought.

This is the time of year to serve the most sublime calabacitas possible as zucchini, corn, green chile, and tomatoes are all in the farmers’ market. But calabacitas is too good to be had only a few weeks a year and, honestly, versions made with frozen corn, canned tomatoes, and roasted green chile that you’ve squirreled away in your freezer along with the ever-present zucchini in the produce aisle are too good to pass up any time of year.

For me, calabacitas shares a serious failing with succotash. They are both great ideas in my estimation but the execution often falls flat.

When I set out to finally perfect a version of calabacitas that I felt comfortable serving, I thought back on all the less-than-perfect renditions I’d had since I first set foot in New Mexico in 1991.

The litany of offenses includes being too watery, being too rich, having huge chunks of zucchini that seem mismatched next to corn kernels, being under-seasoned and being aggressively seasoned.

That set out a plan of action for me. The zucchini should be cut approximately the same size as corn kernels. There needed to be a minimum amount of liquid in the finished dish. Loads of cream or butter or cheese were out of the question. The seasoning should complement the vegetables, not assume control of the dish.

Zucchini (the namesake vegetable) and corn were a given. Pretty much everything else was up for grabs. Tomatoes, which are sometimes included, seemed right for color and a bit of acidic brightness that the zucchini and corn lack. They have the added bonus of being another New World crop. Roasted green chile, also sometimes included, was right for several reasons. It screamed “New Mexico,” it would add a bit of complimentary smokiness to the blend, and, honestly, I’m a chile-head.

My preference was for hot or extra-hot chile. This is wrong for several reasons. First, calabacitas is not traditionally a spicy dish. Second, after one of the dinners where I tested out my evolving recipe, one of the guests said that it was unfortunate that the entire “calabacitas conversation” that evening centered on how hot it was and not on how good it was.

In cooking I prefer to bow to tradition but if there’s ever a place where I butt heads with tradition, it’s in making dishes spicy. But I decided there and then that I should follow tradition and use mild chile in my calabacitas.

Finally I was on to the aromatics and seasoning. Onion and garlic are my go-to combination unless there is some compelling reason for one or the other (usually based on tradition). The herbs eluded me for a while. I really wanted to use Mexican Oregano (which isn’t actually oregano) because of its New World origins but it just seemed to overpower the dish. In the end, I decided that a modest amount of Mediterranean Oregano played best in the sandbox with the other ingredients.

Let me know what you think of my rendition of a New Mexico classic.


Follow us


Click HERE to join our mailing list and you’ll never miss a recipe again!

Print Recipe
Calabacitas: A New Mexican Classic
Traditionally calabacitas is not a spicy dish so it is best to use mild roasted green chile unless you and all your eaters are chile heads. Bacon fat gives a great flavor but olive oil or other vegetable oil is fine, too. Frozen corn works well as there are so many other flavors in the dish but using fresh corn cut off the cob is a definite treat. I prefer to thaw frozen corn before cooking. Ice crystals can sometimes carry a "freezer" taste and rinsing them off can eliminate it. Also, it is easier to time the cooking of the corn in combination with other ingredients if it is not frozen when cooking starts. Rotel packs tomatoes in 10 ounce cans and they’re a bit of a Southwestern classic in and of themselves. In a pinch feta cheese can be used instead of Cotija
Votes: 0
Rating: 0
You:
Rate this recipe!
Prep Time 40 minutes
Cook Time 30 minutes
Servings
people
Ingredients
Prep Time 40 minutes
Cook Time 30 minutes
Servings
people
Ingredients
Votes: 0
Rating: 0
You:
Rate this recipe!
Instructions
  1. Dice the zucchini.
  2. Thaw the corn under running water.
  3. Roasted New Mexico green chile.
  4. Peeled and seeded chile, ready to be chopped.
  5. Sauté the onion until translucent.
  6. Add the garlic and continue to cook until the onion is golden but not brown.
  7. Add the zucchini and sauté until the zucchini is hot.
  8. Add the corn, green chile, tomatoes, oregano, salt, and pepper.
  9. Simmer until the liquid has evaporated and the zucchini and corn are cooked, about 10-15 minutes, depending on your preference.
  10. Adjust oregano, salt and pepper in the last few minutes of cooking.
  11. Serve sprinkled with crumbled Cotija cheese.
Recipe Notes

Copyright © 2017 by VillaSentieri.com. All rights reserved.

Share this Recipe

Green Beans with Parmesan Cheese

August 7, 2017

It’s Saturday morning, August 5th and I’m sitting on an airplane writing this post.  I’m bound for Baltimore to visit the younger of my two nephews and his wife and their son.  I have meetings in Washington, DC on Monday and Tuesday so I’m taking this opportunity to visit.

The family members and relatives with whom I am closest are scattered around and I don’t see enough of any of them.

What does all of this have to do with green beans, you might ask?

Everything.

And nothing.

Food is my connector. It connects me to people and places. It evokes memories. It helps to create new ones. It’s a set of shared experiences.

I can’t make my mother’s long-simmered tomato sauce without evoking a slew of memories. My strongest olfactory memory from childhood is being gently awakened by the smell of garlic sizzling in olive oil on Sunday morning as my mother began to make tomato sauce for that day’s dinner. This is the sauce I am making on Sunday at my nephew’s house.

Most recipes that enter my repertory do so because of their connection with people and places. They document my personal history in edible form and cement memories of good times shared with family and friends. Many are family recipes, mine or those of people I know. Some are not, like the Italian Walnut Crostata I created to replicate one I had sitting at a little bar in Venice drinking grappa with my father-in-law in 1996.

That crostata has family connections of a sort. One of the favorite non-Italian desserts in our family is nut roll, brimming with ground sweetened walnuts and encased in just enough lightly sweet yeasted dough to hold it together as it is rolled and baked. While nut roll is more of a Central and Eastern European dessert, it was common in Johnstown, Pennsylvania where I grew up with people from a wide range of ethnic backgrounds.

My Aunt Margie’s nut roll filling is flavored with citrus, hewing toward the Italian, while my mother’s has milk and honey, pointing more towards Eastern Europe. I suspect, though cannot prove, that my Aunt Margie’s filling is more like her mother’s (my Italian grandmother) and my mother’s is more like my father’s mother’s (my Slovak grandmother).

Nut roll is a pastry that I truly miss but it is challenging to make and I have never tackled it despite having my mother’s and my Aunt Margie’s recipes. Except for the one time my cousin, Donna, made it and sent me some and the two times that Michael Alcenius sent me some he made using my Aunt Margie’s recipe, I have been in a nut roll blackout since Aunt Margie died.

The walnut crostata was a revelation. There, in an easy-to-make Italian sweet pastry crust (pasta frolla), was a filling of sweetened, ground walnuts. It wasn’t nut roll but it certainly evoked all the right taste sensations.

I used my husband’s Great Aunt Fidalma’s recipe for pasta frolla and Aunt Margie’s recipe for nut roll filling, to create a dessert that is both reminiscent of that night shooting grappa with my father-in-law in Venice and that preserves recipes from my family and my husband’s family.

Now that I’ve gotten my mouth (and maybe yours) watering for walnut crostata, we’re going to make green beans! I hope, though, that you have a better understanding for the reason this blog exists: to document and preserve traditional recipes along with some sort of a personal story or vignette.

Having just said that, I can’t tell you precisely where this recipe came from but it’s been in my repertory for decades. It is the essence of simplicity, a hallmark of much of Italian home cooking. It also lends itself to being made almost exclusively in advance, making it a perfect dish for a last-minute put-together when entertaining or making a more complicated main course.


Follow us


Click HERE to join our mailing list and you’ll never miss a recipe again!

Print Recipe
Green Beans with Parmesan Cheese
The beans can be cooked in advance and shocked in ice water to stop cooking. The garlic can be sautéed in olive oil in advance, too. Just before serving, heat the oil and toss the beans briefly to warm them. In a serving bowl toss the beans with Parmesan cheese, salt and pepper. This dish can easily be doubled or tripled. Adjust the amount of Parmesan cheese and garlic to your taste. The olive oil is an integral part of the “sauce” so be generous.
Votes: 0
Rating: 0
You:
Rate this recipe!
Course Sides, Vegetables
Cuisine Italian
Servings
Ingredients
Course Sides, Vegetables
Cuisine Italian
Servings
Ingredients
Votes: 0
Rating: 0
You:
Rate this recipe!
Instructions
  1. Wash the beans and cut off the ends. I like to cut the ends at an angle for a better appearance.
  2. Bring a large pot of salted water to a boil.
  3. Meanwhile, bruise the garlic with the side of a chef’s knife.
  4. Add the olive oil and garlic to a skillet, large enough to hold the beans, and heat on medium-low heat until the garlic begins to sizzle.
  5. Sauté, over low to medium-low heat until the garlic is golden.
  6. Remove and discard the garlic.
  7. Remove the oil from the heat.
  8. When the water comes to a boil, add the beans and boil until crisp-tender. This will take just a few minutes depending on the beans and your elevation. The beans should not be crunchy but they should have a distinct “toothiness” and almost squeak as you bite into them.
  9. Drain the beans.
  10. If preparing the beans in advance, shock in ice water.
  11. Add the drained beans to the garlic-flavored olive oil. Heat gently if the beans are cold.
  12. Off the heat, mix in the parmesan cheese, salt to taste, and a generous amount of freshly ground black pepper.
  13. Toss well and serve immediately.
Recipe Notes

Copyright © 2017 by VillaSentieri.com. All rights reserved.

Share this Recipe

Auntie Helen’s Roman Chicken Cacciatore

Pollo alla Cacciatora (Chicken Cacciatore, in English) means Chicken Hunter’s Style and there are as many styles as there are hunters and cooks.

I grew up eating a Southern Italian version in a red sauce with peppers and mushrooms.

This recipe, using anchovies and no vegetables, is from Rome and goes back to the late 1800’s at least.  I learned it from Auntie Helen.  Auntie Helen was actually the aunt of Eugene (Gene) d’Aquili, my undergraduate advisor at the University of Pennsylvania and the psychiatrist with whom I set up my psychiatric practice in Philadelphia many years later.

Gene’s grandparents left Rome around the turn of the 20th century and moved to Trenton, New Jersey with their four children, Guido, Helen, Louise and a fourth daughter who died shortly after the move.

Gene’s father, Guido, was an artist and part of what was sometimes referred to as the New Hope School after a town of the same name in Pennsylvania on the New Jersey border.  He painted a series of Old King Cole murals similar to the ones Maxfield Parrish painted for the St. Regis in New York City.

Those murals ended up on the walls of my dining room in Berwyn, Pennsylvania.  For several years, from early medical school until partway through my internship, I rented the carriage house on the d’Aquili estate in Berwyn.  The murals were installed in the dining room after the d’Aquili family purchased them from the social club in Trenton that had originally commissioned them.

Here are some pictures of the murals.

There is a blog that features the murals and information about them, if you’re interested.

Here is a picture of my parents, standing in front of one of the murals in my dining room.  I believe this was taken in May 1981 when I graduated medical school.

Auntie Helen and Auntie Louise never married.  They both became school teachers and lived in Morrisville, New Jersey until the early 1980’s when they moved into the carriage house on the d’Aquili estate that I vacated after I bought my first house.

Auntie Helen was a wonderful cook.  This recipe for pollo alla cacciatora came from her, and before her, from her mother.  Don’t let the anchovies put you off, even if you don’t like anchovies.  The “fishiness” cooks away leaving a savory, umami flavor.  I will bet you that none of your guests will guess that there are anchovies in this dish.

In addition to her other wonderful Italian specialties, including brodetto, panpeppato, and cheese bread, the last of which unfortunately I do not have a recipe, among others, Auntie Helen made some American dishes that were fashionable at the time including Impossible Tuna Pie!

I want to give a shout out to Julie Paradise for reintroducing me to Impossible Pies.  Julie is the master of the genre and her pecan version is going to end up on my table soon!


Follow us


Click HERE to join our mailing list and you’ll never miss a recipe again!

Print Recipe
Roman Chicken Cacciatore
As an alternative to cutting up a whole chicken, chicken parts can be used. Thighs work particularly well for the long, slow cooking technique. If using chicken parts, use about 3 pounds. This chicken goes well with polenta. I suggest using yellow cornmeal for a color contrast with the dark sauce. A link to my polenta recipe can be found in the Notes section following the recipe.
Votes: 0
Rating: 0
You:
Rate this recipe!
Course Mains, Poultry
Cuisine Italian
Prep Time 15 minutes
Cook Time 2 hours
Servings
people
Ingredients
Course Mains, Poultry
Cuisine Italian
Prep Time 15 minutes
Cook Time 2 hours
Servings
people
Ingredients
Votes: 0
Rating: 0
You:
Rate this recipe!
Instructions
  1. Cut the chicken into pieces, legs, thighs, and breasts. You can cut the breasts in half crosswise if you like. Reserve the back and wings for another use.
  2. Remove the skin from the chicken.
  3. Bruise the garlic with the side of a chef's knife.
  4. In a skillet large enough to comfortably hold the chicken, and that has a lid, heat the olive oil until it is almost smoking.
  5. Add the chicken. Do not disturb the chicken until it is crusted and releases easily from the pan, 4-5 minutes.
  6. Turn the chicken over. Add the bruised garlic to the pan. Brown the other side of the chicken, adjusting the heat as necessary to prevent the olive oil from smoking.
  7. If the garlic starts getting dark brown, remove it before it burns. Reserve the browned garlic, however.
  8. When the chicken is well browned on all sides (legs don’t really have “sides” so you will need to turn them around a bit), add the anchovies and their oil. They will splatter a bit.
  9. Work the anchovies with a spoon so they start to disintegrate.
  10. Have the cover ready. Turn the heat to low. Add the water and quickly cover the pan to reduce splattering. Wait 2-3 minutes until the rapid sizzling has slowed down.
  11. Turn the chicken. Add the vinegar and return the browned garlic to the pan if you removed it earlier. If the water has evaporated when you remove the lid to add the vinegar, add another two tablespoons of water along with the vinegar and garlic. Add oregano and season with salt and pepper, to taste.
  12. Braise covered for 1 ½ to 2 hours on gentle heat, turning every 20-30 minutes. Add water, two tablespoons at a time, whenever the liquid in the pan has evaporated.
  13. Add an extra grinding of pepper before removing the chicken from the heat. Adjust salt if necessary.
Recipe Notes

Here is my recipe for Polenta.

Copyright © 2017 by VillaSentieri.com. All rights reserved.

Share this Recipe