Risotto with Butternut Squash

February 22, 2018

Risotto isn’t really a recipe.  It’s a technique.

Yes, there are a few quintessentially classic risotti for which precise instructions are needed (like Risotto alla Milanese) but, in general, you can adapt the technique to use an array of vegetables and other ingredients.

Risotto with Asparagus is a good example of a risotto where the vegetables are pre-cooked and added near the end.  The same can be done with both peas and mushrooms, for example.

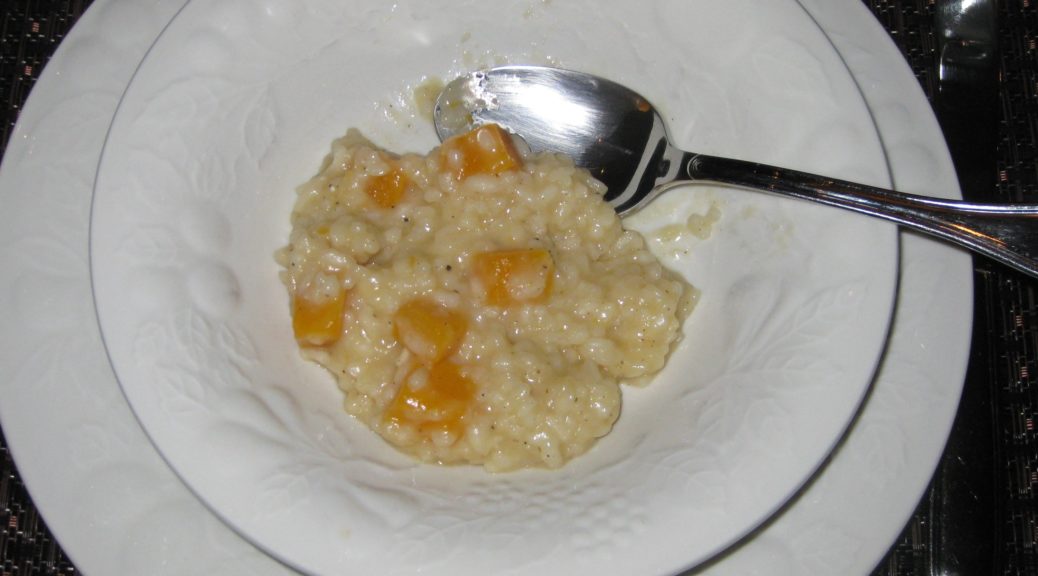
Risotto with Butternut Squash is an example of a risotto where the vegetables are added at the beginning and complete their cooking as the rice cooks.  Though you wouldn’t think it would work, Risotto with Zucchini works the same way, as long as the zucchini are cut into thick slices.


Click HERE to join our mailing list and you’ll never miss a recipe again!


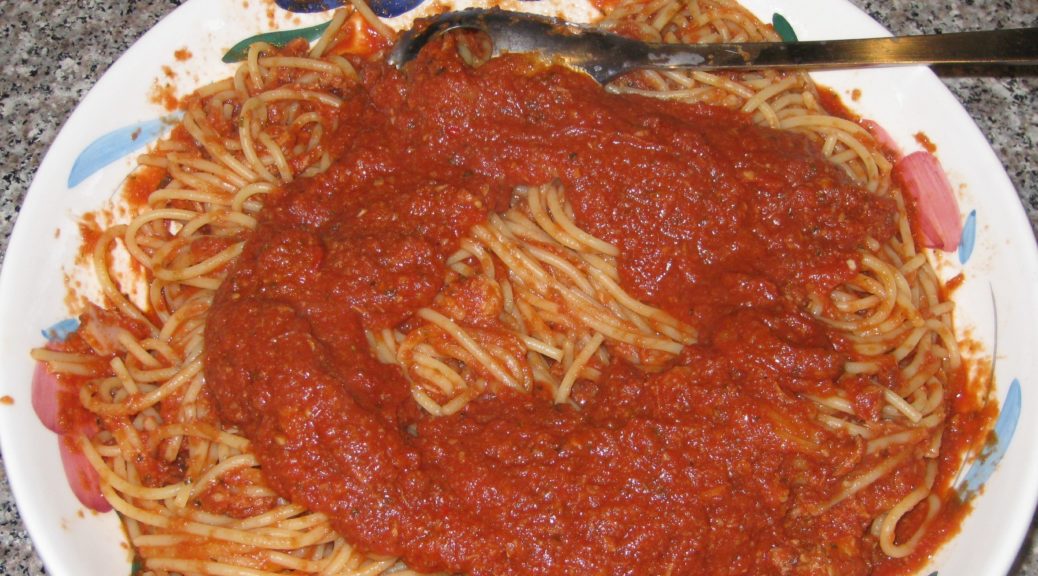
In a traditional Italian meal, risotto, pasta, and soup are all considered the same course:  the first course (Il Primo Piatto).  The first course follows the antipasto (which means, literally, before the pasta).  Il Primo Piatto is followed by the second course (Il Secondo Piatto), consisting of fish, meat, or poultry and accompanied by several side dishes (contorni).  The first and second courses have almost equal weight in an Italian meal; very different from an American meal.

While restaurants often par-cook a risotto so that it can be quickly finished for service, I find that cooking a risotto at home is best done “in the moment.”  That means I only make risotto for a small group when everyone can hang out in the kitchen during the 45 minutes, or so, that it takes to cook.  That pretty much consumes the cocktail hour.  Because of this, for me, risotto is a dish for family or very close friends.


Follow us on your social media platform of choice


Risotto isn’t something I grew up eating.  It is traditionally a Northern Italian dish.  I also don’t remember Auntie Helen, who was from Rome, making risotto either.

As with much of Northern Italian cooking, my first introduction was through Marcella Hazan’s The Classic Italian Cookbook.  Beyond that, my Italian repertoire grew based on trips to Italy, cooking with Italian friends, and ultimately, marrying into my husband’s very Northern Italian family.

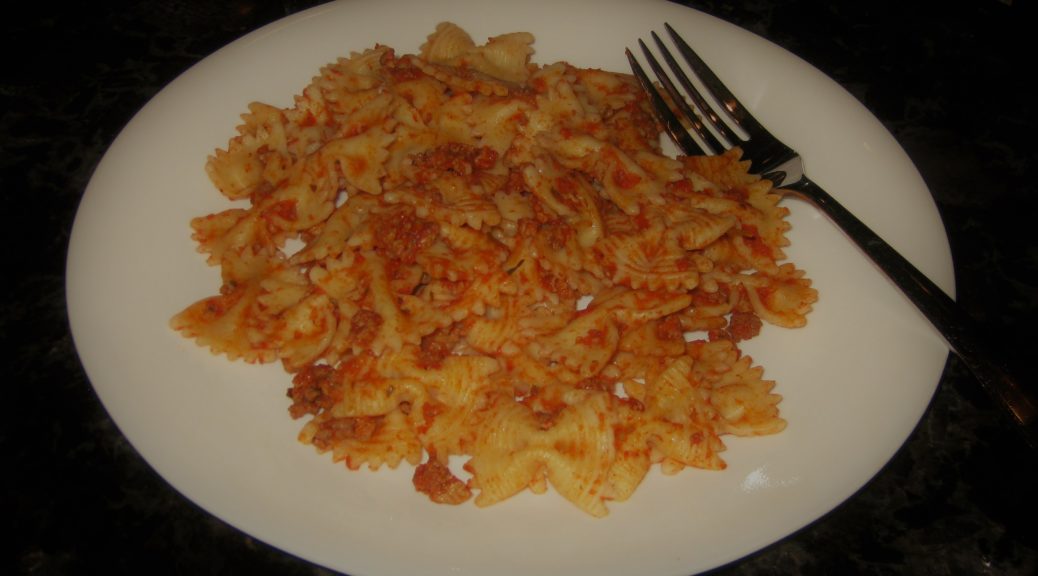
Risotto with butternut squash is a wonderful dish for late fall and winter.


If you have a favorite family recipe and a bit of a story to tell, please email me at santafecook@villasentieri.com and we can discuss including it in the blog. I am expanding the scope of my blog to include traditional recipes from around the country and around the world. If you haven’t seen Bertha’s Flan or Melinda’s Drunken Prunes, take a look.  They will give you an idea of what I’m looking for.


It is important to use what the Italians would call “riso per risotto” (rice for risotto).  The rice used for risotto is short-grained.  It can absorb a lot of liquid, turning creamy in the process while still maintaining the ideal “al dente,” (toothy) quality at the very core.  The most commonly available types of rice for risotto are Arborio, Carnaroli, and Vialone Nano.   Far and away, Arborio is the most common.

Since creaminess is the goal, rice used for risotto shouldn’t be washed.  The little extra starch on the grains will improve the texture.

A well-made risotto gets almost all of its creamy texture from the cooking method, not from the addition of butter, cheese, or cream.  To be sure, a bit of butter and Parmigiano Reggiano cheese are almost always added at the end but this should be for flavor, not to compensate for poor technique.

My most common quibble with risotto made in the United States is that it is overly rich with butter and cheese and (heaven forbid) sometimes cream.

To coax creaminess out of the rice, broth is added in small amounts and completely cooked off before the next bit is added.  In general, the amount of broth I add each time is no more than 1/3 the quantity of rice I start with.  For example, if I’m using one cup of rice, I add no more than 1/3 cup of broth each time liquid is needed.  The rice should be stirred frequently, but not constantly.

Print Recipe
Risotto with Butternut Squash
Broth for risotto should be light in flavor, not a heavy stock. The broth should add the barest amount of background flavor but allow the other ingredients in the risotto to shine. Risotto uses a lot of broth. It is important that the broth have minimal salt so as not to result in an overly salty dish. I never salt my homemade broth for this reason. If it seems that you will run out of broth before the risotto has finished cooking, put some water on to heat. It is important that all liquid added to the risotto be at a simmer.
Votes: 0
Rating: 0
You:
Rate this recipe!
Prep Time 15 minutes
Cook Time 45 minutes
Servings
people
Ingredients
Prep Time 15 minutes
Cook Time 45 minutes
Servings
people
Ingredients
Votes: 0
Rating: 0
You:
Rate this recipe!
Instructions
  1. Bring the broth to a simmer.
  2. Meanwhile, heat a three or four quart heavy-bottomed saucepan over medium high heat. Add the olive oil.
  3. When the oil is hot, add the onion and garlic.
  4. Sauté, stirring frequently until the onion softens and turns translucent. Do not brown the onion. You may need to reduce the heat.
  5. When the onion is soft, return the heat to medium high and add the butternut squash.
  6. Sauté, stirring often, until the squash starts to soften, about five minutes. Be careful not to brown the onion or garlic.
  7. Add 1/3 cup of wine and immediately cover the pot. Cook another five minutes, stirring occasionally.
  8. Remove the cover and cook off any remaining wine.
  9. With the heat still on medium high, add the rice.
  10. Continue cooking, stirring frequently, until the outer portion of the rice becomes translucent while the inside remains opaque white.
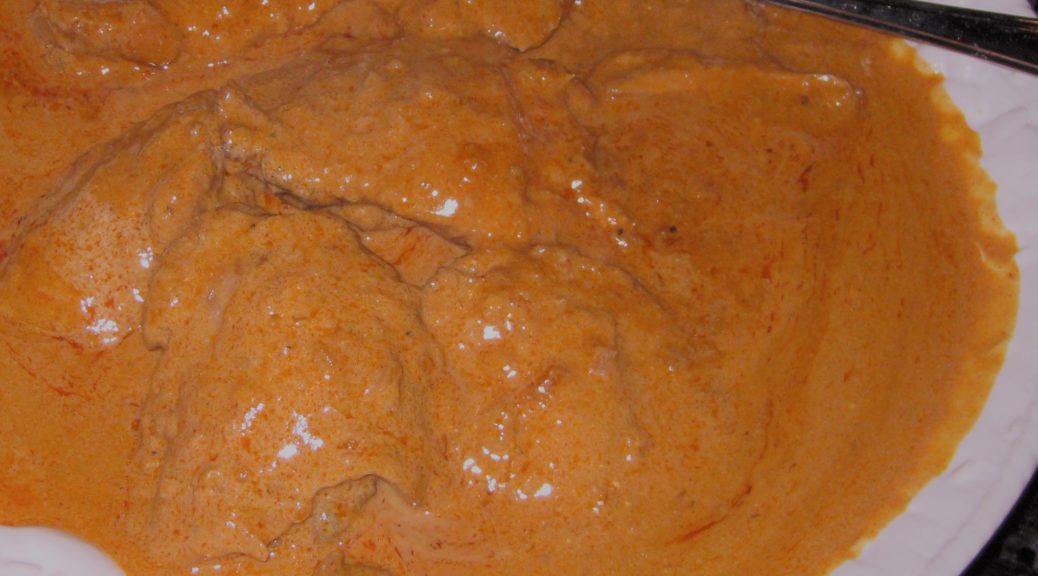
  11. Add the remaining 2/3 cup of wine. Stir frequently, but not constantly, until the wine has totally evaporated. You will begin to see some starch leaching out of the rice. More and more of the starch will leach out as you cook the rice. This is what will make a creamy sauce, not a large quantity of butter, cheese, or cream.
  12. When the wine has evaporated, add a scant ½ cup of simmering broth. Stir thoroughly paying particular attention to loosening any spots where the starch seems to be sticking to the bottom of the pan. You don’t want to brown (or worse yet, burn) the starch.
  13. Stir frequently, but not constantly, until the broth has evaporated.
  14. If the broth is unsalted, as I recommend, you can add a teaspoon of salt to the rice as you begin to add broth. If the broth contains salt, I recommend not adding salt until the end.
  15. Keep repeating the process with a scant ½ cup of broth, cooking, stirring, and loosening any spots that are sticking until each addition of broth evaporates. The heat should stay as close as possible to medium high. The moderate boiling of the liquid will coax starch out of the rice to create the creaminess that is the hallmark of a good risotto.
  16. Add the sage after about 20 minutes of cooking.
  17. Begin tasting the rice for doneness at the same time. It will probably still be quite crunchy at the very core. Until you get the hang of it, I suggest testing a rice grain each time you add more broth so you develop a sense of how quickly the texture changes.
  18. Continue cooking, adding simmering broth or water as needed, until the rice is al dente. Once the rice is cooked, add another 1/2 cup of simmering broth, stir, and then immediately remove the rice from the heat.
  19. Off the heat, stir in the butter and Parmesan cheese.
  20. Stir in enough additional simmering broth or water to create a creamy “sauce.” The starch that you have coaxed out of the rice, plus the modest amount of butter and cheese, should allow you to add at least another ½ cup of liquid, possibly more.
  21. Taste and add salt and freshly ground black pepper to taste.
Recipe Notes

Check out the introduction to my recipe for Risotto with Asparagus for more information on making risotto.

Copyright © 2018 by VillaSentieri.com. All rights reserved.

Share this Recipe

Spaghetti with Tuna Sauce

January 17, 2018

Tomatoes…and tuna…not clams or squid…as a sauce for pasta…quite a challenge for me as a young adult!

Although pasta (spaghetti, really) with red sauce and clams or squid was in my wheelhouse as an adolescent, the idea of a red sauce with tuna was, most definitely, not!

My undergraduate advisor, and later my business partner when I set up my psychiatric practice in Philadelphia, Gene d’Aquili, was a first-generation American of Italian and French descent.  I frequently cooked at his home in Berwyn on Philadelphia’s Main Line.  (If you read the obituary link above, you will notice a comment about a sign that read “Fantasyland.”  I was the person who had that sign painted after years of Gene referring to his estate by that name.  I had the sign painted in Guyana on a trip when I was doing research for my doctoral dissertation and ended up on the Guyana Airways float for the Mashramani parade but that’s a whole other story!)

The 1981 Guyana Airways Mashramani float. I was supposed to represent one of the Canadian pilots.

Click HERE to join our mailing list and you’ll never miss a recipe again!


Gene’s father’s family was from Rome.  Gene’s grandparents emigrated to the United States with their four children, Gene’s father Guido, and Guido’s three sisters, very early in the 20th century.  One of the sisters died not long after coming to the United States.  The other two, Auntie Helen and Auntie Louise, are the reasons I now drink bourbon (Auntie Louise) and know a lot about traditional Roman cuisine (Auntie Helen).

The family home is now part of the American Embassy in Rome.  There are several buildings that are part of the American Embassy but I believe the palazzo pictured below was the one the d’Aquili family owned before coming to the United States.

One of the American Embassy buildings in Rome that I believe was the d’Aquili palazzo.

Follow us on your social media platform of choice


Gene’s father, Guido, was a fine artist of the New Hope School.  In a previous post, I included some pictures of some of the Old King Cole murals that he painted for a private club in Trenton, NJ.  Those murals ended up in the dining room of the carriage house I rented on the d’Aquili estate in Berwyn, PA when I was in medical school.

One of Gene’s ancestors was Antoniazzo Romano, a famous artist of the 15th century.  His father’s artistic bent is part of a long family tradition.

The Annunciation by Antoniazzo Romano

For one dinner at “Fantasyland,” really known as “Salus House,” Gene and his wife, Mary Lou, wanted to serve spaghetti with tuna sauce; a classically Italian dish but completely unknown to me at the time.

I winged it based on his description.  It was basically a simple tomato sauce (what we as Americans might call Marinara but what Italians would call Pomodoro) with tuna simmered into it.

It was good, and although many years went by before I made it again, it stuck in my memory.

I’ve tweaked the recipe over the years but it really hasn’t varied much from my initial foray into making spaghetti with tuna sauce based on Gene’s description.


If you have a favorite family recipe and a bit of a story to tell, please email me at santafecook@villasentieri.com and we can discuss including it in the blog. I am expanding the scope of my blog to include traditional recipes from around the country and around the world. If you haven’t seen Bertha’s Flan or Melinda’s Drunken Prunes, take a look.  They will give you an idea of what I’m looking for.


Print Recipe
Spaghetti with Tuna Sauce
Although mushrooms are not strictly traditional, their presence is not really noticeable and I think they add a bit of savoriness to the sauce. You can omit them if you wish. It is important to use good quality tuna to avoid any “tinny” taste. Italian Tonno is ideal but a good American brand will work fine. The small amount of sugar is intended to counteract the sourness that some canned tomatoes can have. Adjust up or down to your taste. The presence of the sugar should not be detectable, however.
Votes: 0
Rating: 0
You:
Rate this recipe!
Prep Time 15 minutes
Cook Time 1 hour
Servings
people
Ingredients
Prep Time 15 minutes
Cook Time 1 hour
Servings
people
Ingredients
Votes: 0
Rating: 0
You:
Rate this recipe!
Instructions
  1. Coarsely chop the carrot, celery, onion, mushrooms, garlic, and parsley.
  2. In a food processor finely mince the chopped vegetables.
  3. Heat the olive oil in a heavy-bottomed saucepan.
  4. Add the minced vegetables and sauté on medium high heat, stirring often, until golden.
  5. Add the red pepper and sauté a minute or two more.
  6. Add the wine and quickly evaporate, stirring often.
  7. Add the basil and oregano. Stir well.
  8. Add the tomato puree, water, sugar, 1 ½ teaspoons salt and black pepper to taste.
  9. Simmer uncovered approximately 30 minutes, stirring occasionally.
  10. Add the tuna and simmer 10 minutes more.
  11. Adjust seasoning.
  12. This makes enough to generously sauce one pound of spaghetti.
Recipe Notes

Copyright © 2018 by VillaSentieri.com. All rights reserved.

Share this Recipe

Roman Beans and Kale

January 12, 2018

I don’t remember my mother making Roman Beans and Kale till I was in my late teens.

The first time she made it, I remember her talking about her mother making it.  For something she really liked, she waited an awfully long time to make it.  But then, again, I did the same thing with her pasta è fagioli.

There were some dishes from her childhood that she talked about but never made.  Tiella is the one that I remember most.  It took me multiple tries over many years to recreate it from her description.

Roman beans and kale might seem a little unusual to many American palates due to the length of time the kale is cooked.  There is a point where it becomes silky but most definitely not mushy.  Southerners, though, would find the kale in this recipe cooked in a familiar way.  It is much like the Southern low-and-slow style of cooking greens of various types, such as collards or mustard greens, until they achieve the requisite tenderness.

A bunch of kale

Follow us on your social media platform of choice


Texture is an important part of this dish. The beans should yield but not be falling apart.  The kale should not provide any resistance the way it would if it were just quickly sautéed.  The pasta, however, should be al dente.

Roman beans

Beans, kale and pasta are all pretty mellow-tasting in my estimation.  The garlic, olive oil, and Parmesan cheese are what give this dish its flavor oomph!  At the table, I add crushed red pepper but it shouldn’t be cooked into the dish.

Roman beans are also called Borlotti or Cranberry beans.  Depending on where you live you might have to order them.  In a pinch, though, you could use pinto beans or Anasazi beans.  (If you’re a bean savant, you’ll notice that I used Anasazi beans as I was unable to find Roman beans after searching market shelves in two different cities for a couple of months.  Though I could have gotten them online, I didn’t think the huge price premium was worth it.)

Anasazi beans

My mother’s approach to cooking most foods was definitely low and slow.  It’s classically Italian and so NOT French, which often aims for “high and fast!”  Though culinary education is now more inclusive and not so heavily French, we have a strong cultural bias away from slow, leisurely cooking due to the strong French influence of the past decades.  There are exceptions however, largely based on strong regional traditions, barbecue, for example.  But for the most part, mainstream America, and certainly mainstream American food and cooking publications, just don’t “get” low and slow.


Click HERE to join our mailing list and you’ll never miss a recipe again!


There are some foods that don’t benefit from low and slow, at least when cooked traditionally; steaks for instance.  My mother’s approach to these was that they should be well done, even though that state was achieved quickly.  In our house steaks were most often seasoned with olive oil, garlic, oregano, basil, salt and pepper and broiled.  I think it’s a wonderful flavor combination.  But it wasn’t until my late teens that I developed an appreciation for rare beef.

I remember one meal where my sister and I cooked the steaks for ourselves and our dad.  They were medium rare, as I recall.  Even though our mom didn’t have a hand in cooking them (and cooked her own steak well done) she spent the entire meal feeling like she had served us bad food.  The fact that we liked it didn’t seem to matter.  She had very definite opinions about what constituted good food, and something that was bleeding onto the plate didn’t fit!


If you have a favorite family recipe and a bit of a story to tell, please email me at santafecook@villasentieri.com and we can discuss including it in the blog. I am expanding the scope of my blog to include traditional recipes from around the country and around the world. If you haven’t seen Bertha’s Flan or Melinda’s Drunken Prunes, take a look.  They will give you an idea of what I’m looking for.


Recently I bought sous vide equipment.  I haven’t tried it yet but I’m itching to do so.  Steaks will be first.  The food gets vacuum sealed and then cooked slowly…for hours…in a hot water bath that is maintained at the temperature one wants the food to achieve.  The meat is cooked uniformly throughout…low and slow!  For steaks, one would want to quickly sear the outside before serving but many foods, like fish, poached eggs, and even hollandaise sauce can be used right out of the water bath.

For now, though, let’s try a slow-cooked pot of beans and greens…Italian style!!

Print Recipe
Roman Beans and Kale
The beans should be cooked through but not falling apart. The kale should take on a silky texture but not be mushy. The pasta should still be a bit “toothy." This is even better if made a day or two in advance and refrigerated. If you are doing this, you will want to undercook the pasta so that it is not too soft after the dish is reheated for serving. Alternately, you can omit the pasta when mixing the beans and kale, then add it when reheating. Depending on where you live, you might not be able to find Roman beans. Roman beans are also called Cranberry or Borlotti beans. If you can’t find Roman beans, you can substitute Pinto or Anasazi beans.
Votes: 1
Rating: 5
You:
Rate this recipe!
Prep Time 15 minutes
Cook Time 2 1/2 hours
Servings
people
Ingredients
Prep Time 15 minutes
Cook Time 2 1/2 hours
Servings
people
Ingredients
Votes: 1
Rating: 5
You:
Rate this recipe!
Instructions
  1. Rinse and pick over the beans.
  2. Cover the beans with six cups of water.
  3. Simmer the beans until almost fully cooked, adding 2 teaspoons of salt and black pepper to taste after the beans have cooked for an hour. If necessary, add a bit of boiling water from time to time to keep the beans just submerged. The beans will cook for about 10-15 minutes more after the kale is added so don't overcook them.
  4. Meanwhile, cut out the center ribs of the kale.
  5. Kale ribs about to be discarded.
  6. Cut the leaves crosswise into large pieces.
  7. Rinse and drain the kale.
  8. Bring a quart of salted water to a boil.
  9. Add the kale. The kale should quickly wilt enough to be covered by water. If not add a bit more water to just cover the kale.
  10. Simmer the kale, covered, stirring occasionally, until cooked to a silky texture, approximately 1 hour.
  11. While the kale is cooking, crush the garlic with the side of a chef's knife.
  12. Slowly brown the garlic in the olive oil.
  13. Once the garlic has browned, remove the oil from the heat. Discard the garlic. Reserve the garlic-infused oil.
  14. If using pasta, bring two quarts of water seasoned with 1/4 cup of salt to a rolling boil.
  15. When the pasta-cooking water comes to a boil, add the pasta. At the same time, add the kale and its cooking water to the beans. Keep the beans and kale at a simmer.
  16. Cook the pasta in boiling water until it is still a little crunchy on the inside.
  17. Drain the pasta and add it to the pot with the beans and kale.
  18. Add the garlic-infused oil.
  19. Taste and adjust seasoning.
  20. Cook everything, uncovered, until the pasta is al dente, just a few minutes longer.
  21. Serve with grated Parmigiano Reggiano cheese.
Recipe Notes

Copyright © 2018 by VillaSentieri.com. All rights reserved.

Share this Recipe

Spaghettini con Acciughe (Spaghettini with Anchovies)

January 1, 2018

In our house pasta mostly was dressed with a red sauce, specifically my mother’s long-simmered Southern Italian-style sauce.  In Western Pennsylvania, we called it “sauce” or sometimes “spaghetti sauce” though it was used on much more than spaghetti.  Further east, in Philadelphia, New York, and New Jersey the term “gravy” was common, but not where I lived.

Now I mostly use the Italian word “sugo” which is a general term for sauce, though commonly used for a tomato-based sauce.  The word ragù definitely connotes a tomato-based sauce, specifically with meat.  It also happens to be a trademarked name, though with a different accent mark on the last letter:  Ragú.

I found it interesting that Ragú was started in 1937 in Rochester, New York by Assunta and Giovanni Cantisano, Italian immigrants who sold the sauce from their front porch.  In 1969, the company was sold to Chesebrough-Pond’s.  The brand became the best-selling pasta sauce in the country and ultimately achieved a reported 60% share of the pasta sauce market in the United States.


Click HERE to join our mailing list and you’ll never miss a recipe again!


Purchased pasta sauce was something that NEVER entered our house!

When pasta wasn’t served with a red sauce, it was typically served as Pasta è Fagioli (Pasta and Beans) and, once a year, on Christmas Eve, with crispy breadcrumbs and anchovies.  You can find my mother’s recipe for Pasta è Fagioli here and mine here.  In the coming months you’ll get my Aunt Margie’s recipe and Louis Evangelista’s recipe for Pasta è Fagioli.

Although not something I grew up with, a simple sauce of anchovies, garlic and olive oil is now a favorite in my household.

My recipe is adapted from one by G. J. Gillotti (whose family also hails from Calabria) in Our Most Treasured Recipes, published in 1993 by the Morning Star Lodge of the Order of Italian Sons and Daughters of America.  The sauce comes together from pantry staples in the time it takes to bring the pasta water to a boil.


Follow us on your social media platform of choice


Morning Star Lodge is in Pittsburgh, about 70 miles from my hometown of Johnstown, PA.  If you’ve been following my blog, you know I have both Italian and Slovak roots.  There are lots of people of Italian and Eastern European extraction in Western Pennsylvania.  I found it interesting to peruse the pages of this ostensibly Italian cookbook.  Among many Italian and Italian-American favorites are Eastern European dishes like holubki (stuffed cabbage), sweet sour kielbasa, and pierogi casserole.  This speaks to the melting pot that is Western Pennsylvania!


If you’ve gotten this far, I hope you’re interested in trying this recipe but I fear there are many of you who hear the word anchovy and stop cold in your tracks.  If any of you are still reading, however, I would encourage you to try this recipe.  The anchovies provide a background savory note but really are not front and center!


If you have a favorite family recipe and a bit of a story to tell, please email me at santafecook@villasentieri.com and we can discuss including it in the blog. I am expanding the scope of my blog to include traditional recipes from around the country and around the world. If you haven’t seen Bertha’s Flan or Melinda’s Drunken Prunes, take a look.  They will give you an idea of what I’m looking for.


Print Recipe
Spaghettini con Acciughe (Spaghettini with Anchovies)
Buy good quality anchovies packed in olive oil. The difference in price between low-end and high-end anchovies is not that much but the difference in taste is astounding. Good anchovies will have only the slightest smell “of the sea” when you open the can. After cooking, they will fade into the background leaving a savory (umami) note without any fishiness. Italians rarely use cheese in dishes that contain fish. I prefer spaghettini in this dish. Spaghettini is thinner than spaghetti but thicker than angel hair (vermicelli).
Votes: 0
Rating: 0
You:
Rate this recipe!
Prep Time 15 minutes
Cook Time 40 minutes
Servings
people
Ingredients
Prep Time 15 minutes
Cook Time 40 minutes
Servings
people
Ingredients
Votes: 0
Rating: 0
You:
Rate this recipe!
Instructions
  1. In a small frying pan gently sauté garlic in olive oil until golden brown.
  2. Add the fennel seed, red pepper, oregano, and basil and cook for approximately 30 seconds.
  3. Add the anchovies and their oil.
  4. Cook gently, stirring frequently, until anchovies disintegrate. This will only take a few minutes.
  5. Add white wine and simmer gently till most of the wine has evaporated and the anchovies have thoroughly disintegrated. Remove the pan from the heat.
  6. Meanwhile cook pasta in 3 quarts of boiling water seasoned with 1/3 cup of salt until just al dente.
  7. As the pasta nears completion, use some of the pasta water to warm the serving bowl. This is important as the egg will cook in the hot pasta and if the bowl is cold, the pasta will lose too much heat to do this effectively.
  8. Just before draining the pasta, reheat the olive oil-anchovy mixture on medium-low.
  9. Drain pasta, reserving at least one cup of the pasta-cooking water.
  10. Drain and quickly dry the warmed serving bowl.
  11. Put half of the olive oil-anchovy mixture in the warmed serving bowl.
  12. Add the drained pasta.
  13. Top with the remaining olive-oil anchovy mixture.
  14. Toss pasta.
  15. Add black pepper and beaten egg. Toss until well mixed.
  16. In a leap of faith, add about ½ cup of the reserved (still hot) pasta-cooking water. Toss well.
  17. Drizzle in approximately ¼ cup of finishing olive oil. Toss well.
  18. Add more pasta-cooking water, if needed, to make a glossy sauce. You probably can’t go wrong with adding at least another ¼ cup of pasta-cooking water.
Recipe Notes

Copyright © 2018 by VillaSentieri.com. All rights reserved.

Share this Recipe

Cannellini and Fennel Soup

January 3, 2018

A few years ago I was at a party and struck up an interesting conversation with a couple of guys originally from the East Coast.  One of the guys was of Italian heritage and the conversation turned to food, naturally!

He described a soup he grew up eating that included fennel stalks as well as the bulb.

It caught my interest because I’d not encountered a recipe that used the stalks before; some of the fronds, yes, but not the stalks.  It always seems like such a waste to me to throw them out as they contain so much flavor.

But they’re tough!


Click HERE to join our mailing list and you’ll never miss a recipe again!


In this soup, the stalks are pureed in a food processor and added to the diced bulb and some cannellini beans.

Fennel bulb and stalks. For most preparations only the white bulb is used. This soup uses the stalks, too.

It is wonderfully flavorful, completely vegetarian, and comes together in a snap.

If you have some of my Cannellini alla Toscana lurking in your freezer, by all means use them in the soup.  If not, canned cannellini will work just fine.

As for the guys who gave me the recipe, I can’t find anyone who knows who they might be.  I’ve talked to the hosts of the party and they’re stumped.  I always like to include a personal interest story along with each recipe and I’ve truly exhausted what I know about this particular version of this soup.


Follow us on your social media platform of choice


From my research, however, I can tell you that this appears to be a popular soup in Italy given the number of recipe variations I was able to turn up written in Italian.  Most contain meat, such as speck, and other vegetables, such as carrots and celery.  One even contains seaweed!  None of the recipes is quite as simple as this one…and I love the simplicity.

Give it a try and let me know what you think.


If you have a favorite family recipe and a bit of a story to tell, please email me at santafecook@villasentieri.com and we can discuss including it in the blog. I am expanding the scope of my blog to include traditional recipes from around the country and around the world. If you haven’t seen Bertha’s Flan or Melinda’s Drunken Prunes, take a look.  They will give you an idea of what I’m looking for.


Print Recipe
Cannellini and Fennel Soup
This is one of the very few recipes I have seen that uses the stalks of the fennel plant, not just the bulb. Adding the stalks and fronds really intensifies the fennel flavor. You can substitute 4 cans (approximately 15 ounces each) of cannellini beans in place of the home-cooked beans. See the notes section, below, for a link to the Cannellini alla Toscana recipe. You can easily cut this recipe in half.
Votes: 0
Rating: 0
You:
Rate this recipe!
Cuisine Italian
Prep Time 20 minutes
Cook Time 1 hour
Servings
people
Ingredients
Cuisine Italian
Prep Time 20 minutes
Cook Time 1 hour
Servings
people
Ingredients
Votes: 0
Rating: 0
You:
Rate this recipe!
Instructions
  1. Cut the stalks and fronds off the fennel.
  2. Coarsely chop the stalks.
  3. Grind the chopped stalks and fronds in a food processor. Reserve.
  4. Dice the fennel bulbs.
  5. Mince the garlic.
  6. Sauté the garlic in the olive oil until fragrant.
  7. Add the diced fennel. Season with salt. Sauté approximately 5 minutes.
  8. Add the wine. Cover the pot and cook until the fennel begins to soften.
  9. Add the cooking liquid from the cannellini (but not the beans) adding water if necessary to cover the fennel. Simmer until the fennel is almost completely cooked.
  10. Add the cannellini. Simmer 10 minutes.
  11. Add the ground fennel stalks and fronds and salt and pepper to taste.
  12. Season with salt and pepper.
  13. Simmer for 15 minutes, until fennel is tender but not mushy.
  14. Serve with grated Parmigiano Reggiano cheese.
Recipe Notes

Here’s where you can find the recipe for Cannellini alla Toscana.

Copyright © 2018 by VillaSentieri.com. All rights reserved.

Share this Recipe

Slow-Cooked Pork Roast with Sauerkraut and Sausage

December 29, 2017

I grew up in Johnstown, PA. The town was founded by a Swiss German immigrant, Joseph Schantz in 1800. Over the years, in various documents, recorders anglicized his last name, most commonly rendering it “Johns,” a name the family ultimately adopted. The name of the town was ultimately changed from Schantzstadt to Johnstown.

Johnstown Panorama (Photo by Greg Hume)

I can’t say there was much of a noticeable German influence when I was growing up in the 1950s to 1970s, except for one: New Year’s Day dinner.

Regardless of one’s ethnic background, the most common dinner on New Year’s Day was “Pork and Sauerkraut.” It was commonly acknowledged that this was a nod to Johnstown’s German heritage. And, much like black-eyed peas in the South, was viewed as a way to bring good luck to the coming year.

As you might expect, recipes for pork and sauerkraut vary. Sauerkraut and a large cut of pork are, obviously, essential. Sausages of some sort are common, as are dumplings.


Click HERE to join our mailing list and you’ll never miss a recipe again!


The recipe that I use is close to what my mother made except that I enhance the seasonings in the sauerkraut along more Germanic lines, with onion, carrot, apple, and juniper berries. My mother’s was more basic and similar to the way the Slovak side of my family prepared sauerkraut. My cousin Angie, of Italian heritage, added a brown gravy to hers, which also has Germanic roots.

The Inclined Plane goes from downtown Johnstown to the suburb of Westmont (Photo by Greg Hume)

Long and slow cooking is essential as much for pull-apart-tender pork as it is to mellow out the sauerkraut. Among Central and Eastern Europeans, sauerkraut tends to be cooked for several hours to tenderize it and tame its sour bite.

Kielbasa was a favorite sausage in our house and was always included in pork and sauerkraut. It was always locally made and never procured from large national meatpackers. Often times, other sausages, such as bockwurst or bratwurst, would also be added. But kielbasa was king in pork and sauerkraut and, in the sausage pantheon, second only to hot Italian sausage in our house.


Follow us on your social media platform of choice


The kielbasa that we ate on a regular basis was made from pork, or pork and beef, but venison kielbasa was common too. The first day of deer-hunting season was a public school holiday. You can imagine the importance of venison.

Some of the hunters would have their venison (or some of it, at least) turned into kielbasa, flavored with garlic and smoked. I remember on several occasions going with my father to have work done on the car in late December. The service station had a big platter of meats, cheeses, and pickles laid out for customers to nibble on. Among the offerings was venison kielbasa made from a deer that the owner of the service station had shot.

One of my resolutions for the new year is to find a small, artisanal purveyor of kielbasa that’s as good as what I remember from childhood.


If you have a favorite family recipe and a bit of a story to tell, please email me at santafecook@villasentieri.com and we can discuss including it in the blog. I am expanding the scope of my blog to include traditional recipes from around the country and around the world. If you haven’t seen the post on Melinda’s Drunken Prunes, it will give you an idea of what I’m looking for.


Print Recipe
Slow-Cooked Pork Roast with Sauerkraut and Sausage
Saueraut from the refrigerated section of the market is usually of better quality than canned, especially if the sauerkraut is from an artisinal producer. Draining the sauerkraut and rinsing it well under cool water will produce a more mellow taste. If you want dumplings with this (and who wouldn't?), remove the meat from the pan and keep warm while cooking dumplings on top of the sauerkraut on the stovetop. See the notes section below for my recipe for dumplings.
Votes: 0
Rating: 0
You:
Rate this recipe!
Course Mains, Meats
Cuisine German
Prep Time 20 m
Cook Time 6 1/2 hours
Servings
people
Ingredients
Course Mains, Meats
Cuisine German
Prep Time 20 m
Cook Time 6 1/2 hours
Servings
people
Ingredients
Votes: 0
Rating: 0
You:
Rate this recipe!
Instructions
  1. Cut the cloves of garlic, top to bottom, into approximately 4-6 slivers each.
  2. Pierce the pork around the outside about 1 inch deep with the tip of a sharp knife.
  3. Insert slivers of garlic into the slits
  4. Season the pork generously with salt and pepper.
  5. Brown the pork in a heavy Dutch oven using the oil.
  6. Add white wine, cover tightly, and transfer to oven at 350°F.
  7. After one hour, reduce heat to 225°F.
  8. Slice the onions in half top-to-bottom then cut crosswise into thin slices.
  9. Shred the carrot on the tear-drop side of a box grater.
  10. Cut the apple into small dice.
  11. After the pork has been cooking for a total of about 3 hours, drain and rinse the sauerkraut.
  12. Slowly sauté the onion in the butter or bacon fat until caramelized, approximately 20 minutes.
  13. Add the shredded carrot and diced apple and sauté until heated through.
  14. Add sauerkraut, juniper berries, caraway seeds, bay leaf, and black pepper to taste.
  15. Add water and bring to a boil.
  16. Add the boiling sauerkraut to the pork after the pork has cooked for a total of four hours (1 hour at 350°F plus 3 hours at 225°F).
  17. An hour later nestle the kielbasa and other sausage into the sauerkraut.
  18. Continue to cook, covered, until the pork is fall-off-the-bone tender. Approximately 1-2 more hours.
  19. Remove the pork and sausages.
  20. Skim fat from the top of the sauerkraut.
  21. Put the Dutch oven on the stove and cook dumplings on top of the sauerkraut if desired.
  22. Meanwhile, pull the pork into big chunks. Keep the pork and sausages warm.
  23. Serve the sauerkraut in a separate bowl, or use it to surround the pork and sausages.
Recipe Notes

This is where you can find my recipe for dumplings.

Copyright © 2017 by VillaSentieri.com. All rights reserved.

Share this Recipe

Cuban Black Beans

December 1, 2017

Black beans are ubiquitous on tables in Cuba.

Getting beans to the right texture and the liquid to the right thickness is almost an art form.

Food is scarce in Cuba…at least if you’re a Cuban paying in Cuban Pesos. Not so much if you’re paying in CUCs (Cuban Convertible Pesos), which is what foreigners use. The CUC is pegged to the US Dollar but if you change Dollars for CUCs you pay a 10% penalty as opposed to exchanging another currency, say the Euro, for CUCs.


Click HERE to follow us on Twitter


Prices in Cuban Pesos at a locals’ only market

One view of a locals’ only market
Another view of a locals’ only market

I visited a butcher shop in Havana which pretty much now only sells chicken; when chicken is available, that is. If you notice the door to the cooler is open. That’s because the cooler isn’t on because there’s no inventory.

A butcher shop in Havana

The butcher is just waiting around for chicken to arrive.

When that chicken does arrive, it will likely be frozen Tyson chicken from the United States. Even though, when this picture was taken, the US embargo of Cuba was in full force.

Most of the chicken in Cuba is frozen Tyson chicken from the United States

The same is true of hot sauce. If one asks for hot sauce at a restaurant in Cuba one is likely to get a bottle of Tabasco shipped in from Avery Island, Louisiana. Clearly there are exceptions to the embargo for some American companies!

If you pay in CUCs, the food available increases dramatically.

One stall in a multi-vendor market where prices are denominated in CUCs
Another stall in the same market
Locally prepared beverages in the CUC-denominated market

The disparity in prices for food purchased with Pesos vs CUCs is so large that average Cubans cannot afford to buy food with CUCs, even if they can get them. It takes 25 Cuban Pesos to buy one CUC. Paying in Pesos limits one to shopping in pretty-much locals’ only stores, with limited inventory where the products, like rice and beans, are sold at subsidized prices.

Rum is widely available regardless of the currency.  You’ll pay more if you’re a foreigner, however.

Havana Club is a popular brand of rum in Cuba
A well-stocked bar ready for the day’s customers
Cuban cigars for sale at the bar

After returning from the trip to Cuba in 2014, I tried but couldn’t get the texture of my “Cuban” black beans right. But then, my mother-in-law got a recipe from Beatriz (Betty) Scannapieco. Betty is from Cuba. She was in the exercise group my in-laws attend. Betty’s recipe, using a pressure cooker as is common in Cuba, works like a dream. It’s really pretty effortless, too. The green pepper, onion, and garlic add tremendous flavor but are removed after cooking leaving just beans and the silky cooking liquid.

I made three changes to Betty’s recipe. She called for 1 teaspoon of white wine. I use 1 tablespoon. Betty didn’t use tomato paste or black pepper but both are common ingredients in many Cuban black bean recipes.


Follow us


Click HERE to join our mailing list and you’ll never miss a recipe again!

Print Recipe
Cuban Black Beans
This recipe came from Beatriz (Betty) Scannapieco in my in-law’s exercise group. Betty is from Cuba. I added the tomato paste and black pepper to Betty’s recipe. I also increased the wine from 1 teaspoon to 1 tablespoon. It can be challenging to get the bell pepper, onion, and garlic out of the beans as they very soft after cooking. If you want to make it easier, you could tie them in cheesecloth.
Votes: 0
Rating: 0
You:
Rate this recipe!
Prep Time 10 minutes
Cook Time 1 1/4 hours
Servings
people
Ingredients
Prep Time 10 minutes
Cook Time 1 1/4 hours
Servings
people
Ingredients
Votes: 0
Rating: 0
You:
Rate this recipe!
Instructions
  1. Wash the beans.
  2. Cover beans with water by a couple of inches and soak overnight in the refrigerator.
  3. The next day, cut the bell pepper in half and remove ribs and seeds.
  4. Cut the onion into 4 or 6 wedges, but do not cut the whole way through the root end.
  5. Bruise the garlic by laying the blade of a chef's knife on top and gently pounding the knife blade.
  6. Drain the beans. Put the beans in a pressure cooker along with 3 ¼ cups of fresh water.
  7. Bring the beans to a boil, uncovered.
  8. Skim the foam from the beans then remove the pot from heat.
  9. Add the green pepper, onion, garlic and bay leaves to the beans.
  10. Put the lid on the pressure cooker and bring to 10 pounds pressure.
  11. Reduce heat and cook for 30 minutes.
  12. Remove the pressure cooker from heat and allow pressure to dissipate naturally.
  13. Uncover the pressure cooker.
  14. Add the olive oil, tomato paste (if using), wine, vinegar, salt and black pepper (if using).
  15. Bring to a boil uncovered and boil for 5 minutes.
  16. Remove from heat. Cool slightly and remove bell pepper, onion, bay leaves, and garlic.
  17. The beans can be served immediately but are better if refrigerated overnight.
  18. Serve the beans in a shallow bowl with pieces of finely diced raw onion in the center. Black beans are customarily accompanied by white rice.
Recipe Notes

Copyright © 2017 by VillaSentieri.com. All rights reserved.

Share this Recipe

Salsa Friulana d’Ivana (Ivana’s Friulan Tomato Sauce)

November 17, 2017

My mother-in-law grew up in the town of Treppo Grande in the Italian province of Friuli. Friuli is in northeastern Italy. It is the major portion of the region of Friuli-Venezia Giulia.

Her father and two uncles lived with their families in three houses that wrapped around a courtyard. Her grandmother lived in the same complex. The extended family included numerous cousins.

Another uncle moved to the United States with his wife and their son early on.  Two more children were born to them in the US.


Follow us on Twitter:  click HERE


At the age of 12, shortly after the end of World War II my mother-in-law, her brother (our Uncle Ray), and mother came to the States. Her father had been in the US working with the intention of bringing over the family but then the war broke out and the family could not be reunited until it ended.

One set of cousins stayed in Treppo Grande.  Another set of cousins moved to France.

In 1990 the “cousins,” as the US contingent called themselves, hatched a plan to organize a group trip to their hometown of Treppo Grande and to Digoin, France where the other set of “courtyard cousins” lived.

Naturally, planning for the trip required many “meetings” among the cousins; meetings that were fueled with copious amounts of food and alcohol interspersed with a little “business!”

The trip happened in August 1991. My husband and I went along with the “cousins” and their spouses.

The “United States” cousins and three of four spouses in Treppo Grande along with Carolina Fabbro, a friend of my mother-in-law’s mother.  She died a few years ago at more than 100 years of age.

We first met up in Paris for a day or two and did some sightseeing.

Afterwards, we were picked up in a small bus that had been arranged by Olvino, one of the original “courtyard cousins” who lived in Digoin. As I recall, the driver only spoke French. Among us we spoke English, Italian, Friulan (the language of Friuli), and a smattering of Spanish and German, but no French. Thankfully the driver knew where he was going and, for all other needs, we managed to communicate in some rudimentary, but effective, manner.

Interesting to me was that the vehicle had graph paper that kept a running record of the bus’s speed. Apparently the driver could be asked to produce the graph paper by the police and could be fined if it showed that he had exceeded the speed limit. Can you imagine that happening in the United States???

I was also fascinated when we stopped for lunch. The driver had a glass of wine. I will repeat that.  This professional bus driver had a glass of wine with lunch then got behind the wheel. Apparently, he was legally permitted to have one, just one, glass of wine and still drive.

Admittedly, one glass of wine is not going to get anyone’s blood alcohol level close to a level that produces intoxication but it pointed out that 1) the French are highly (overly?) regulated and 2) Europeans have a more relaxed approach to alcohol (probably to life in general, actually!).

I had a similar experience in 1994 when I did several consulting gigs in Europe. I frequently had lunch with physicians from the hospitals where I was consulting. Everyone (yes, everyone) had a glass of wine or beer with lunch and then went back to the hospital to work.

But I digress.

We spent several fun days in Digoin, where the local cousins had rented out a small hall, with a kitchen, because none of them had a house big enough to host all of us, and all of them, for meals.

There must have been six banquet tables shaped into a “U” around which we all sat. The crowd included not only those of us from the States, but the cousins who lived in Digoin along with their significant others, their children, and their children’s significant others.

Conversations frequently included four languages. The “cousins” typically spoke Friulan with each other. From there, the conversation would get translated into Italian, English, and French so that everyone could understand anything of interest to the group.

I don’t remember what we ate for dinner the first night except for the pasta which was sauced with a red sauce made by Ivana, Olvino’s wife.

I was transported by that sauce.

Tomato sauces in Friuli are different from the rest of Italy in that they have noticeable amounts of “warm” spices such as cinnamon, cloves, and nutmeg.  My mother-in-law makes a sauce similar to the one that Ivana makes but there are differences. For example, hers includes only beef. Today’s recipe, however, is a tribute to Ivana.

This is my interpretation of Ivana’s recipe. Since the original recipe contained a list of ingredients but no quantities, I had to figure out what worked.


Follow us


Click HERE to join our mailing list and you’ll never miss a recipe again!

Print Recipe
Salsa Friulana d'Ivana (Ivana's Friulan Tomato Sauce)
There should be a little bit of red-tinged oil floating on top of the sauce to improve the mouthfeel of the pasta—just a little. If you cannot find lean ground pork, you may want to grind your own. An actual meat grinder will work better than a food processor but if you’re using a food processor be careful not to grind the meat too finely. For the beef, I suggest using 93% lean. This recipe makes enough sauce for approximately 4 pounds of pasta. Extra sauce freezes well.
Votes: 0
Rating: 0
You:
Rate this recipe!
Prep Time 30 minutes
Cook Time 3 hours
Servings
cups
Ingredients
Prep Time 30 minutes
Cook Time 3 hours
Servings
cups
Ingredients
Votes: 0
Rating: 0
You:
Rate this recipe!
Instructions
  1. If using canned tomatoes rather than crushed tomatoes or tomato puree, pass the tomatoes through a food mill and reserve.
  2. Grind the pork if you cannot get ground pork in your market.
  3. Grind the garlic, onion, and parsley in a food processor. If you used a food processor for the pork, there is no need to clean it. Alternatively, chop them very, very finely by hand.
  4. Heat the olive oil in a heavy bottomed Dutch oven.
  5. Add the garlic-onion-parsley mixture. Sauté until the raw smell is gone.
  6. Add the ground beef and pork and sauté on high heat until the meat is browned.
  7. Add the tomato puree or crushed tomatoes.
  8. Add all remaining ingredients.
  9. Sage
  10. Rosemary
  11. Basil
  12. Bay leaves
  13. Cinnamon
  14. Cloves
  15. Nutmeg
  16. Simmer gently, partially covered, stirring frequently for approximately 2 ½ hours.
  17. Adjust salt and pepper during cooking.
  18. Toss approximately 1/4 of the sauce with one pound of cooked pasta.
Recipe Notes

Copyright © 2017 by VillaSentieri.com. All rights reserved.

Share this Recipe

Chicken Paprikash (Chicken with Paprika-Sour Cream Sauce)

November 13, 2017

I really don’t remember my Slovak grandmother doing much cooking. By the time I was old enough to pay attention to who was cooking, she was mostly just making the occasional pot of soup.

My Grandmother

My grandparents owned a semi-detached house and Uncle Frankie and Aunt Mary lived next door. Although they had separate front porches, they shared a back porch. Going back and forth was easy.


Follow us on Facebook:  Click HERE


Aunt Mary kept my grandparents well-supplied with food. My Aunt Ann pitched in from time to time as well.

My Grandfather

My grandparents were really keen on soup. I guess when you’re raising a family of seven sons through the Great Depression and its aftermath, on a steelworker’s income, preparing filling and budget-friendly food becomes a necessity.

After the early 1960s when my Uncle Gusty moved back to the United States from Japan with his wife and their children, all seven of my grandparents’ sons lived in Johnstown with their wives and children. Most of us would visit on Sunday afternoons arriving sometime after lunch and leaving before dinner.

My Grandfather and Father in the late 1960s. I used to wear the tie my dad is wearing to high school. I still have it! My father insisted that I tie a Full Windsor. Now I know where he got his preference!

Very frequently a large pot of soup would appear for anyone who needed a little something to hold him or her over till dinner. Often it would be potato soup or sour mushroom soup (made with dried mushrooms and spiked with a little vinegar). My father talked longingly about a sour cabbage soup called kissel which nobody was making any longer.

Other than soup, baba (sometimes written bubba), and sweets at the holidays, I don’t remember eating much at my grandparents’ house though I do remember my grandfather and my uncles consuming a fair amount of beer, and, on special holidays, shots of whiskey.

Me with my Grandparents in 1976

Most of the Slovak food that I ate was at home or at one of my uncle and aunt’s houses.

Chicken Paprikash is considered a Hungarian dish but it was common on the Slovak side of my family.  My grandfather was born in 1890 in a small town, Nitrianske Sucany, not too far from Bratislava, in what is now Slovakia.  My grandmother was born a few years later.  In 1909 when my grandfather came to America, he left what was then the Austro-Hungarian Empire.  Slovakia did not exist as a country.  Food diffuses with cultural contact (think about the popularity of Spam in both Hawaii and Korea which can be traced to the presence of the US military).  I suspect that’s how Chicken Paprikash became something made by my Slovak grandparents.

My version of Chicken Paprikash is a combination of my mother’s and my Aunt Ann’s. When I went to look up the recipe to make in preparation for this blog I discovered that I had never written it down! Luckily I remembered just how to do it.


Follow us


Click HERE to join our mailing list and you’ll never miss a recipe again!

Print Recipe
Chicken Paprikash
Using bone-in chicken with skin improves the flavor of the final dish. Flabby skin from braised chicken is not appetizing, however, so remove it near the end of cooking before putting the chicken in the finished sauce. Since paprika is the major flavor in this dish be sure to use fresh, high-quality paprika, preferably Hungarian. Sweet paprika was the norm in my family, not hot, and certainly not smoked which would totally change the flavor. You can use whatever chicken parts you prefer but I think the texture of slowly braised thighs is superior. Serve the chicken with buttered noodles or mashed potatoes, both of which go really well with the sour-cream-enhanced sauce.
Votes: 2
Rating: 5
You:
Rate this recipe!
Course Mains, Poultry
Cuisine Slovak
Prep Time 20 minutes
Cook Time 2 1/2 hours
Servings
people
Ingredients
Course Mains, Poultry
Cuisine Slovak
Prep Time 20 minutes
Cook Time 2 1/2 hours
Servings
people
Ingredients
Votes: 2
Rating: 5
You:
Rate this recipe!
Instructions
  1. Pat the chicken dry and season liberally with salt and pepper.
  2. Heat the oil in a large, heavy-bottomed sauté pan.
  3. Sauté the chicken on both sides, starting skin-side-down, until brown on both sides. Do not crowd the chicken. Do this in batches if necessary.
  4. Remove the browned chicken to a platter.
  5. Empty the oil from the pan and wipe clean.
  6. Add two tablespoons of butter. Sauté the diced onion until golden.
  7. Add the garlic and sauté until fragrant, approximately 1 minute.
  8. Add 3 tablespoons of paprika and sauté for approximately 15 seconds (paprika burns very easily).
  9. Add one cup of broth and mix well.
  10. Add the bay leaf, browned chicken pieces and any accumulated juices to the pan. Add additional salt and pepper to taste. Cover and braise on low until very tender, approximately 1 ½ hours being sure to taste for salt occasionally. Add additional broth if needed to keep the pan from drying out.
  11. About 15 minutes before the chicken is done, remove the skin and discard.
  12. When the chicken is fully cooked, remove it to a platter.
  13. Remove the bay leaf.
  14. Pour the cooking liquid, without straining, into a small pot and keep it warm on low heat. You can skim fat from the top of the cooking liquid if you would like.
  15. Wash and dry the pot used to cook the chicken. Melt the remaining 6 tablespoons of butter in that pot.
  16. Add the finely diced onion and sauté until golden.
  17. Add the flour and cook 2-3 minutes, until no longer raw.
  18. Add the remaining 1 tablespoon of paprika and sauté 15 seconds.
  19. With the flour-onion-paprika mixture on medium heat, begin to ladle in the reserved cooking liquid a little at a time, stirring well after each addition to avoid lumps.
  20. When all the cooking liquid has been incorporated, add any remaining chicken broth, if all of the original 2 cups was not used to braise the chicken.
  21. Bring to a boil and cook for one minute. The sauce should be quite thick. It will thin with the addition of sour cream. If the sauce is too thin, boil it longer as you will not be able to boil it once the sour cream has been added.
  22. Stir in the sour cream. Adjust salt and pepper. Add the chicken and heat gently without boiling.
Recipe Notes

Copyright © 2017 by VillaSentieri.com. All rights reserved.

Share this Recipe

Spaghetti Aglio, Olio, e Pepperoncino (Spaghetti with Garlic, Oil and Red Pepper)

November 8, 2017

How many Italian pasta sauces can you think of that do not include olive oil and garlic?

Precious few, I would guess!

This dish, classically Roman, elevates those two ingredients to center stage. You cannot hide bad olive oil or poorly cooked garlic in this dish. There are very few other flavors.

But simplicity has its virtues. It’s really hard to go wrong with this dish unless you use bad olive oil or not-so-stellar cheese or you burn the garlic.


Follow us on Facebook:  Click HERE


You can make a case for cooking the garlic for a whole range of times, from mere seconds up until it is dark brown. For many years I even cooked three different batches of garlic, one until brown, one until golden, and one until just fragrant. There is an interesting depth of flavor from doing so but it’s not the classic technique.

My point is, unless you burn the garlic and make it bitter, you won’t ruin the dish. You may prefer the flavor of the garlic when it is more or less brown but that’s just a preference not an absolute.

These little Italian peppers (“pepperoncino”) pack a nice flavor, not just heat

My recipe diverges from the classic Roman recipe in two places.

While making dinner, I’m usually chatting…with my in-laws (on most nights), with my husband (when he’s not away on business), or with guests. While I know I can time everything to be ready at exactly the right moment, I ask, why stress about it? So, yes, I can time the sautéing of the garlic to be just right when the pasta is ready but there’s an easier way.

I get the garlic to exactly the spot I want and then stop the cooking by taking the pan off the heat and adding a splash of wine (or water, if you must). That’s not classically Roman but it sure makes it much easier to have a conversation and a cocktail or three while making dinner. As soon as I plan on draining the pasta, I turn the heat on under the garlic oil and boil away the liquid I’ve added. Let’s face it, how often do we get to stop time with no consequences?

The second divergence from classic technique is that I add cheese to the pasta while mixing it with the garlic oil rather than just adding it at the table. In my mind there is no doubt that this pasta needs cheese. Adding it at the final stage of preparation allows me to create a glossy sauce where there would otherwise only be garlic oil. Not that that is bad, but I’ve made a bit of a reputation for myself by turning out glossy sauces where there would often only be oil.

It’s not hard. It just takes a bit of practice and some understanding (minimal) of the chemistry involved. And let’s face it, if the sauce isn’t glossy, you’re the only one who’s going to know. Again, there’s no penalty involved!

A brand of pasta that I really like

In Italy this pasta is often prepared and eaten after a night of over-indulging in alcohol. At least that’s the reputation it has. However, this was a common dish put on the dinner table when I was growing up. It’s easy, quick, filling, and darn good. Oh, and for an entirely different flavor, try butter in place of the olive oil!


Follow us


Click HERE to join our mailing list and you’ll never miss a recipe again!

Print Recipe
Spaghetti Aglio, Olio, e Pepperoncino (Spaghetti with Garlic, Oil and Red Pepper)
I like to reduce last minute work, so I prep the garlic oil in advance and stop the cooking with a splash of wine. You can use water, if you wish, or, if you are sautéing the garlic as the pasta is cooking, some of the pasta-cooking liquid. As the pasta is nearing completion, I reheat the garlic oil, quickly boiling off the wine, and proceed. Use more or less garlic, to your taste. The same is true with the red pepper. For myself, I would use at least double this amount but that would be way too much for other folks.
Votes: 0
Rating: 0
You:
Rate this recipe!
Prep Time 15 minutes
Cook Time 20 minutes
Servings
people
Ingredients
Prep Time 15 minutes
Cook Time 20 minutes
Servings
people
Ingredients
Votes: 0
Rating: 0
You:
Rate this recipe!
Instructions
  1. Slice off the hard base of each garlic clove.
  2. Cut the cloves in half top to bottom.
  3. Cut each half-clove of garlic crosswise into very thin slivers.
  4. In a sauté pan large enough to hold all the cooked spaghetti comfortably heat 1/3 cup of olive oil over gentle heat.
  5. Add the slivered garlic and sauté slowly and gently until golden brown. This should take 10-15 minutes if the heat is low enough.
  6. Add the red pepper and black pepper and sauté for another minute.
  7. Add the wine to stop cooking and remove the pan from the heat.
  8. Bring 2 ½ quarts of water to a boil. Season with ¼ cup of salt.
  9. Boil the spaghetti about two minutes less than the package indicates is needed for al dente.
  10. As the pasta is nearing completion, reheat the garlic oil.
  11. Just before removing the pasta from the boiling water, add 1 cup of pasta-cooking liquid to the garlic oil and turn the heat to medium high.
  12. Reserve another cup of pasta-cooking liquid then drain the pasta.
  13. Add the drained pasta to the pan with the garlic oil.
  14. Cook over medium to medium-high heat, stirring frequently, until the pasta is al dente. Add some of the reserved pasta-cooking liquid from time to time as needed.
  15. When the pasta is al dente, remove the pan from the heat. Sprinkle the parmesan cheese and parsley on top.
  16. Mix well to create a sauce by melting the cheese and emulsifying the oil and water. Add more of the pasta-cooking water, if needed, to coat the pasta.
  17. Stir in the 3 tablespoons of fruity or peppery extra-virgin olive oil for finishing.
  18. Serve immediately with extra Parmesan cheese.
Recipe Notes

Since olive oil loses much of its distinctive flavor from heating, adding some at the end, when the dish is off the heat, improves the flavor. Usually I keep several types of olive oil that I just use for finishing in this way. They tend to have different flavor profiles. Usually I have a peppery one and a buttery one on hand. These oils are used in small quantities so their higher price tag is worth the flavor they add.

Copyright © 2017 by VillaSentieri.com. All rights reserved.

Share this Recipe