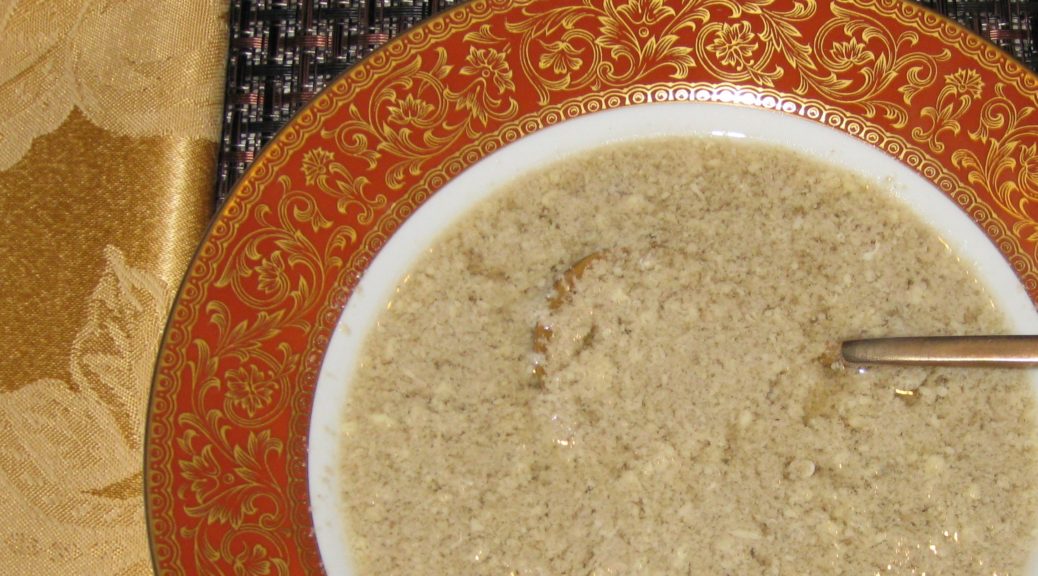
The name of this Italian soup, Stracciatella, comes from the Italian verb meaning “to shred,” a reference to the strands of egg in the soup.
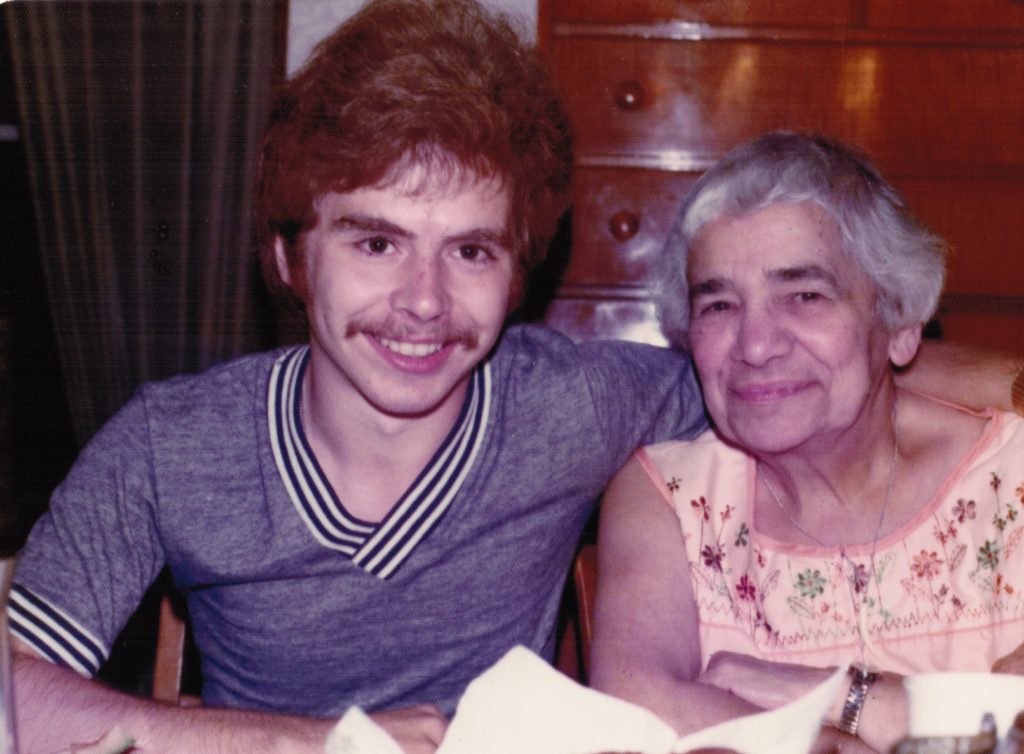
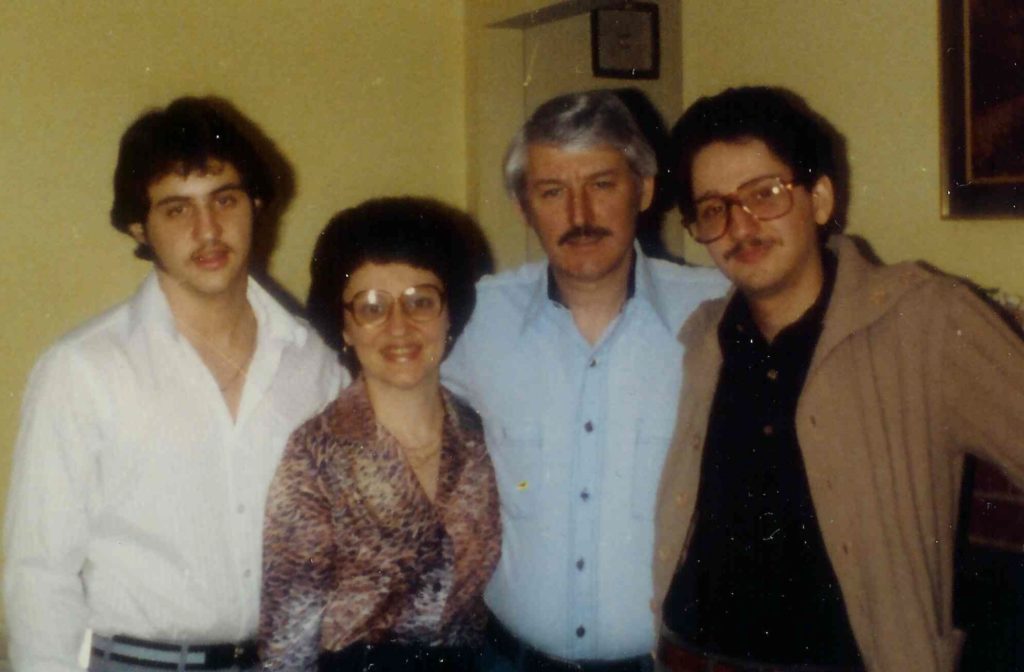
I learned to make this from Auntie Helen d’Aquili when I was in college.
Auntie Helen and I in 1976. Can you believe my hair!!!
It’s really simple to make but, like so many Italian dishes, it relies on few ingredients that must be of high quality. In this case the broth is absolutely paramount as is high-quality Italian imported Parmigiano Reggiano cheese.
Follow us on your social media platform of choice
I have a few friends in Santa Fe who raise chickens and I am occasionally gifted with freshly laid eggs but good supermarket eggs are usually what I use.
I’ll let you in on a little domestic struggle, however. I want to raise chickens. My husband doesn’t. So far, he’s winning the struggle but I haven’t given up. His excuses are pretty lame as far as I’m concerned. The most common one is that chickens will attract coyote.
HELLO! We live in the forest. We are surrounded by coyote and other wildlife. Just an hour ago, while sitting at my desk getting ready to write this blog, a big deer walked through the paved area in front of our house gnawing down our landscaping like it was a salad bar.
Click HERE to join our mailing list and you’ll never miss a recipe again!
Most summer nights we hear the coyote yipping as go hunting. They are mere yards from our house. I don’t think a few chickens will bring them any closer than the already abundant rabbits currently do. We just need to build a coyote-proof chicken enclosure. There’s a great how-to right here (Frank! Frank, are you listening?).
Frank seems pretty happy in this selfie we took on Kauai. Chickens roam everywhere on Kauai. I think that is part of Frank’s happiness though he has yet to admit it.
Homemade broth is essential. Chicken or beef broth are both standard choices, though Auntie Helen used beef. You can make an excellent beef broth as part of the process of making Marisa’s Mystical Meatballs. In fact, this soup would make an excellent first course followed by the meatballs and accompanied by a vegetable or two and some rice.
If you have a favorite family recipe and a bit of a story to tell, please email me at santafecook@villasentieri.com and we can discuss including it in the blog. I am expanding the scope of my blog to include traditional recipes from around the country and around the world. If you haven’t seen Bertha’s Flan or Melinda’s Drunken Prunes, take a look. They will give you an idea of what I’m looking for.
Print Recipe
Stracciatella (Italian Egg Drop Soup)
This classic Italian soup requires top-notch broth and Parmigiano Reggiano cheese. Homemade broth is essential. See the Notes section, below, for a link to my blog post that contains instructions on making a wonderfully flavorful beef broth.
As a freshman in college who made tentative forays into non-Western European cuisines, I was transformed into a person who couldn’t find a cuisine he wouldn’t try, and didn’t like, by the end of sophomore year.
Junior year was really an intensive study in cooking. It’s the year I became a respectable Sri Lankan, Indian, Chinese, and West Indian cook. There were many other cuisines that I dabbled in but those four formed the basis of what I cooked during the year. By then I considered myself a good Italian cook but my repertory and skill level have expanded significantly since then.
Starting junior year, and for many years thereafter, Reggie and Nanacy Rajapakse taught me much of what I know of Sri Lankan food. Several cookbooks by Charmaine Solomon, as well as the [Ceylon] Daily News Cookery Book, provided much additional guidance. Several trips to Sri Lanka with Nanacy, many years later, confirmed to me that I had captured the taste of Sri Lankan food.
In 2005, I accompanied Nanacy Rajapakse to her nephew’s wedding. The groom (with flower on his lapel) and his family approach the wedding venue.
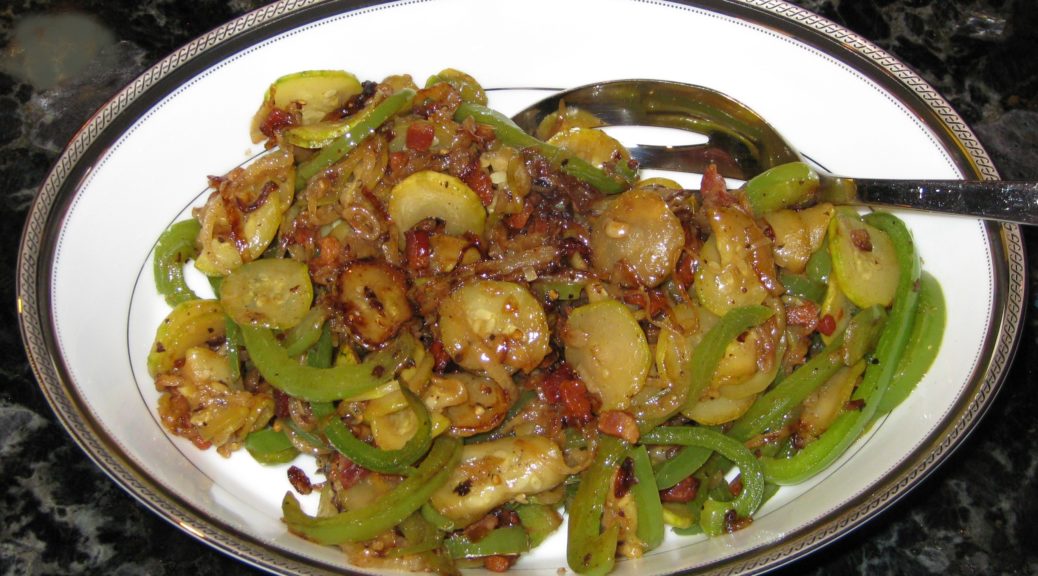
I understand that Sri Lankan food may be a stretch for some of my readers but I really want to introduce you to it. As a starting point, I’ve selected a vegetable dish that pairs really well with a wide range of cuisines, Zucchini and Peppers with Fennel Seed and Cinnamon.
Follow us on your social media platform of choice
I actually made this a few weeks ago at an otherwise all-Italian meal. It paired really well. The dinner guests, all of whom were Italian, didn’t think for a moment that it wasn’t Italian!
The wedding ceremony
It’s an example of a style of cooking vegetables in Sri Lanka called tempering. The vegetables are cut into relatively small pieces. Aromatics (onion, garlic, ginger, etc.), depending on the dish, are first sautéed. The vegetables and seasonings are added and everything is cooked relatively quickly, 10 minutes or so depending on the vegetable.
Most Sri Lankans are ethnically Sinhalese. The next largest group are Tamils, followed by individuals of Arab descent (called Moors locally). Typically, Sinhalese are Buddhist, Tamils are Hindu, and Moors are Muslim. There is a smattering of others ethnic groups and religions.
A reception for the newlyweds, several days after the wedding. Nanacy is on the right and her sister Thilaka is on the left
Hindus and Buddhists in South Asia, are nominally vegetarian. Muslims typically don’t eat pork. This recipe, which is ethnically Sinhalese, includes bacon which 92% of the Island’s population theoretically would typically refrain from eating. But they don’t!
Click HERE to join our mailing list and you’ll never miss a recipe again!
In fact, I found no shortage of meat (and meat-eaters) on my trips to Sri Lanka. Even the most ubiquitous of condiments, pol sambola, contains flakes of dried fish which would typically be avoided by both Buddhists and Hindus. Clearly there is some sort of “accommodation” that the Sri Lankans have made around the idea of being vegetarian because the local cuisine contains a lot of (very wonderful) meat and fish dishes.
On the other hand, it’s also an easy place to be vegetarian. One of my trips to Sri Lanka coincided with one of my periods of vegetarianism (which I ultimately gave up for cultural and health reasons). There was an array of vegetarian options available at every meal.
A view of the Indian Ocean not far from Thilaka’s house south of Colombo
The most difficult time came when neighbors of Nanacy’s sister Thilaka, with whom we were staying, invited me over for a lunch of “curry and rice” which, although it sounds innocent enough, means you’re in for a delightful meal and lots and lots of food. On the other hand “short eats” refers to snack food.
The neighbors had gone all out! There was a huge array of dishes, each more wonderful than the last. It truly was the best food I ate in Sri Lanka. I tried to just eat the vegetarian options but it was clear that my hosts were distraught, though they would never have said anything to me.
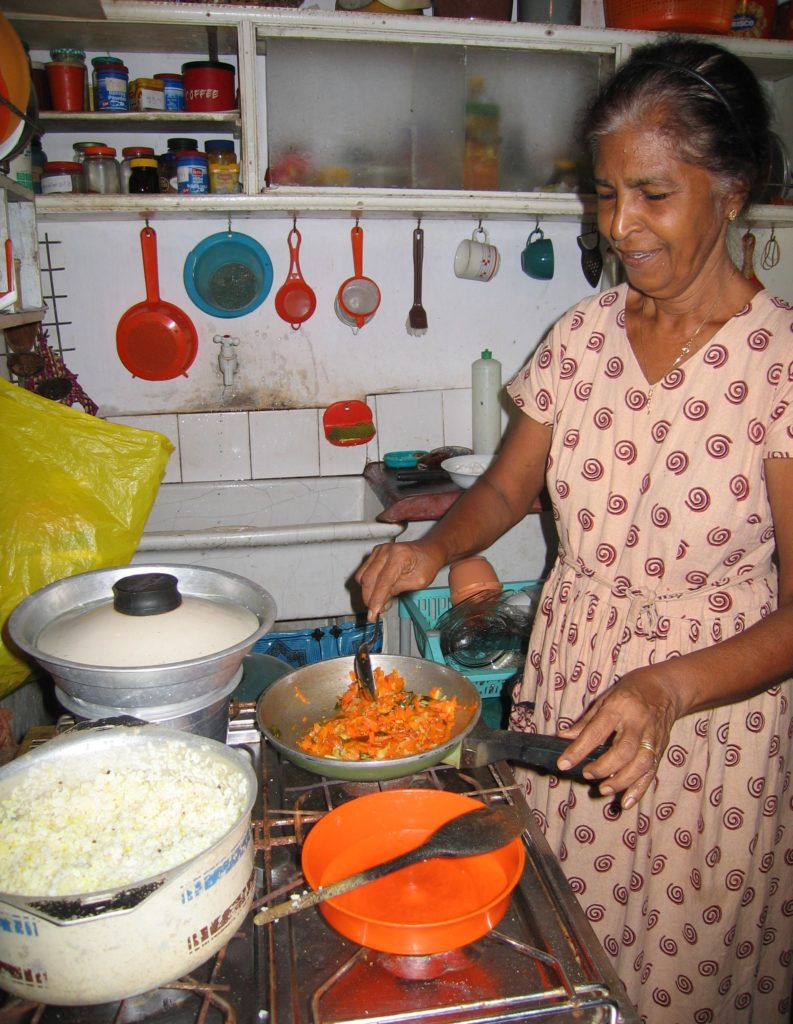
Thilaka tempering vegetables for dinner
I decided that the appropriate response to their generosity was to eat everything. My hosts quickly became delighted (as did my taste buds)! Only years later did I come to understand that in Sri Lanka (and many Theravada Buddhist countries of South East Asia) Buddhist monks are obliged to accept all food offered to them, even meat, unless they suspect the animal was slaughtered specifically for them.
Since I was most certainly not a monk, I’m sure they couldn’t understand why I was only eating the vegetarian dishes rather than everything that was offered to me. In the end, it was a happy accommodation for everyone involved.
If you have a favorite family recipe and a bit of a story to tell, please email me at santafecook@villasentieri.com and we can discuss including it in the blog. I am expanding the scope of my blog to include traditional recipes from around the country and around the world. If you haven’t seen Bertha’s Flan or Melinda’s Drunken Prunes, take a look. They will give you an idea of what I’m looking for.
Print Recipe
Sri Lankan Zucchini and Peppers
I learned to make this from Nanacy Rajapakse who is from Sri Lanka. Nanacy made it with bacon, and, while very good with bacon, it is also wonderful without. As a variation, cabbage, cut into ½ inch wide strips, can be substituted for the zucchini. Feel free to adjust the quantity of spices to your taste. Curry leaves can be difficult to obtain outside of large metropolitan areas with large South Asian or Southeast Asian populations. There is no substitute. If not available, just omit the curry leaves as I often do.
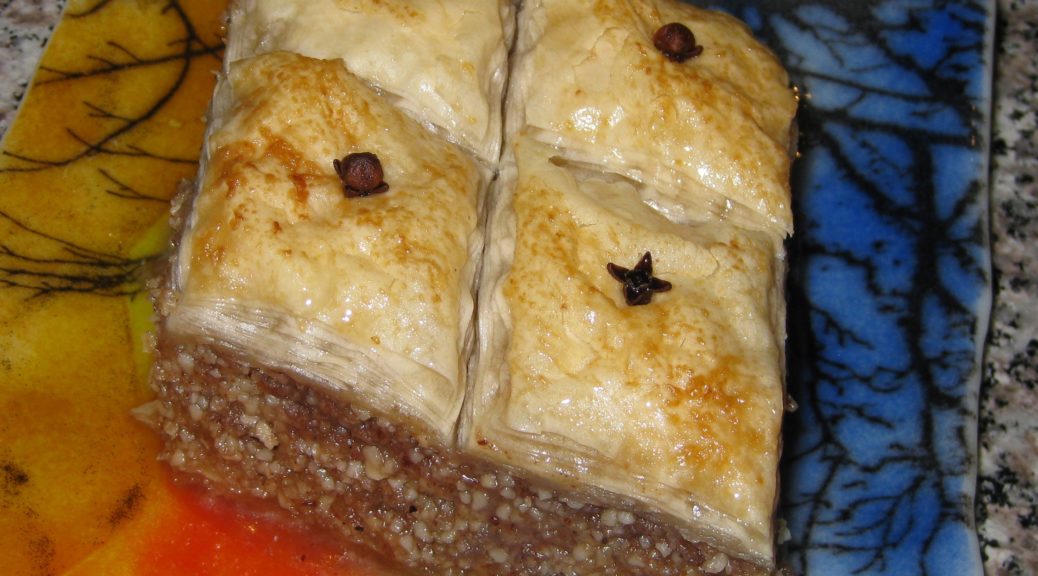
Syrup desserts are popular from the Eastern Mediterranean through the Arabian Peninsula. Among syrup desserts, baklava is one of my favorites.
I rarely make baklava but the first time I did was junior year in college. That same recipe is the one that I still make.
Styles of baklava vary. More nuts. Less nuts. More syrup. Less syrup. Different aromatics. While I like them all, I tend towards the more Arabic preparations which, in my experience, include more nuts and syrup than their more restrained Greek counterparts.
Perhaps that’s why a friend, of Greek heritage, said that my baklava didn’t look like anything a Greek ever made! Admittedly, however, the recipe came from a Greek and I think I have been true to the recipe but, hey, I’m not Greek so who am I to say what could have come out of a Greek kitchen.
Click HERE to join our mailing list and you’ll never miss a recipe again!
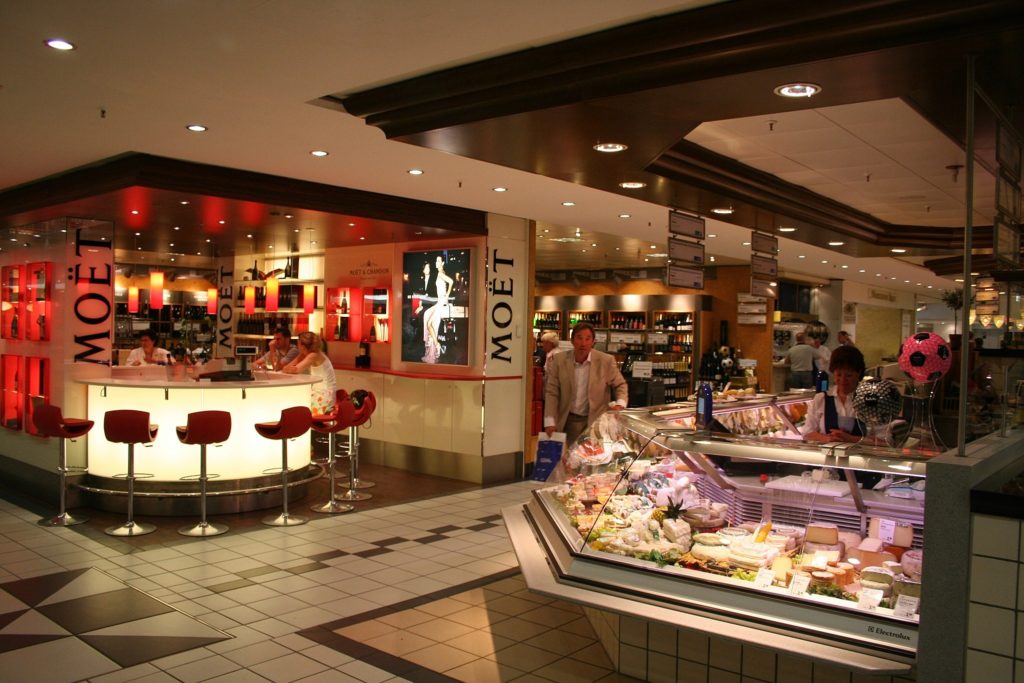
I spent much of 2010 living in Dubai. The consulting company that I started in the mid 1990’s landed a contract with the United Arab Emirates Ministry of Health in late 2009. In January 2010 I moved to Dubai.
A view of one part of the kitchen in my Dubai apartment
Shopping for food in Dubai is just amazing. The sheer number of expats (at the time it was estimated that 95% of the people living in Dubai were expats!) means that the supermarkets are truly multinational affairs, even the relatively small ones.
It was rare that I could not find brands with which I was familiar. I’m sure expats from almost every country had the same experience. The supermarkets were stocked with brands from around the world. It truly was the most amazing grocery shopping I have ever experienced outside of the food halls at Harrods and KaDeWe. But remember, Harrods and KaDeWe are most decidedly upscale affairs. In Dubai I was just going to the (plain, ordinary) supermarket!
A small section of the food hall at KaDeWe in Berlin (By Blorg (Own work) [GFDL (http://www.gnu.org/copyleft/fdl.html), CC-BY-SA-3.0 (http://creativecommons.org/licenses/by-sa/3.0/)], via Wikimedia Commons)I spend a week in Germany during the summer of 2010, right in the middle of my Dubai experience. I found shopping in German supermarkets to be a much more “foreign” affair than shopping in the supermarkets in Dubai. Rarely was there a brand I recognized in Germany. Shopping involved intense reading of labels because I was not familiar with the products and their contents…or their quality.
A view of the Arabian Gulf and the man-made Palm Jumeriah Island in the distance from my apartment
Produce in Dubai could be hit or miss due to the distance most of it traveled. Although there was a nascent horticultural industry in Dubai, I could never find truly local produce. On several occasions I tried to find a store that purported to sell local produce but my driver could never locate it, even with the address!
Follow us on your social media platform of choice
The closest we had to “local” produce was from Iran, the source of Romaine lettuce and cauliflower, as I recall, among other produce. Considering that Iran and the United Arab Emirates are only 90 miles away at their closest point, and considering how far produce can travel in North America from fields in California to the Northeast, 90 miles really counts as local, even if there is an international border among two not-so-friendly countries involved!
Another view from the apartment looking at Dubai Marina
In the supermarkets, prepared food counters overflowed with Middle Eastern items and my fridge was always stocked with hummus, pita with zatar, olives, and other meze.
I also had access to world-class syrup desserts, including baklava!!!
Another fascinating aspect of most of larger supermarkets in Dubai was the existence of a room at the back that was usually labeled with something like “Pork for Non-Muslims.” In this space once could find the most amazing cured pork products from Italy, Spain, and Europe in general!
Dubai Marina at ground level
Alas, items containing alcohol were difficult to obtain. This included vanilla extract. The available non-alcohol-based “extract” was just not the same. Luckily vinegar was just as good, even if it was labeled “Grape Vinegar” rather than “Wine Vinegar!”
I hope you enjoy this baklava. Just don’t make it for a Greek friend!
If you have a favorite family recipe and a bit of a story to tell, please email me at santafecook@villasentieri.com and we can discuss including it in the blog. I am expanding the scope of my blog to include traditional recipes from around the country and around the world. If you haven’t seen Bertha’s Flan or Melinda’s Drunken Prunes, take a look. They will give you an idea of what I’m looking for.
Print Recipe
Baklava with Walnuts and Almonds
Try to find phyllo that is either 9” x 13” or 18” x 13”. If it’s the latter, cut the stack of sheets in half to make them all 9” x 13”. I have found that covering the stack of phyllo with a damp towel, as some authors recommend, after you remove every sheet isn’t necessary if you move quickly. However, before you start, moisten a dish towel and keep it handy in case there are any breaks in the action, in which case you should definitely cover the stack of unused phyllo. While it is not essential to clarify the butter, removing the milk solids will prevent uneven browning of the top of the baklava.
Spread a layer of nuts, approximately 1 cup, on top of the phyllo.
Cover with a sheet of phyllo, brushing it with butter.
Repeat 1 cup of nuts covered with one sheet of phyllo until all the nuts have been used up.
Top with all the remaining sheets of phyllo individually adding them and brushing each sheet with butter.
Score the top few sheets of phyllo in a diamond pattern. Cut from one corner to the opposite corner.
Make three more rows of cuts, evenly spaced, in each direction parallel to the first cut for a total of 7 cuts.
Repeat in the opposite direction.
Put a clove in the center of each diamond.
Sprinkle the top lightly with water to reduce curling while baking.
Bake 350°F for 1½ hours, until golden.
Pour hot honey syrup over the hot baklava as it comes from the oven.
The baklava is best if allowed to sit at room temperature, uncovered for about a day before serving.
Syrup
As the baklava is nearing completion, make the syrup.
Combine lemon zest, sugar, water, cinnamon, and cloves in a heavy-bottomed sauce pan.
Bring to a boil, lower heat and continue cooking without stirring until syrupy, approximately 15 minutes. (218°F to 220°F if you want to measure using a candy thermometer.)
Stir honey into hot syrup.
Remove from the heat.
Using a small strainer, remove the solids.
Reheat the syrup immediately before removing the baklava from the oven.
As you may have figured out by now, we live in a multi-generational household.
My husband’s parents live in our casita in Santa Fe. Before we moved to Santa Fe, they lived in our coach house in Chicago.
Meals are usually communal affairs and, after many years, I’m learning to make some of my mother-in-law’s dishes that I’ve taken for granted for more than 20 years.
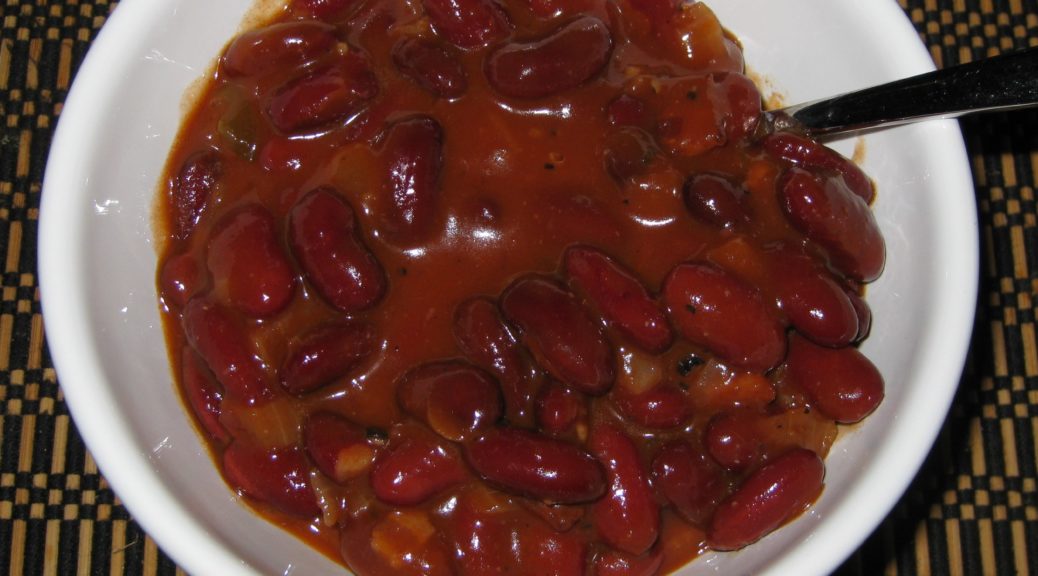
Though these beans could easily be the centerpiece of a vegetarian meal if you leave out the bacon, they usually accompany something more pleasing to carnivores (that would be my husband and my father-in-law). For this rendition, I went back to the original recipe, with bacon, though usually my mother-in-law leaves it out and simply adds a few tablespoons of olive oil to sauté the onion and bell pepper.
My husband at two years of age with his parents
As I was learning to make these with my mother-in-law, I also learned that the recipe originally came from Lorraine, the wife of my brother-in-law’s godfather, Jack. Lorraine is of Polish heritage but was married to Jack, a close friend of my father-in-law who moved to the USA from Italy.
Click HERE to join our mailing list and you’ll never miss a recipe again!
I’m totally confused by the heritage of these beans. My mother-in-law says they’re Polish based on Lorraine. I always thought of them as Italian because, until recently, I thought the recipe was from my mother-in-law’s family and, also, because the red sauce with bacon is pretty similar to an Italian-American adaptation of a classic Italian method for cooking green beans. The bacon is a substitute for pancetta which is the same cut of meat as bacon but which is not smoked after it is cured.
I guess I’m going to have to go with my mother-in-law’s assertion that these are Polish though I can’t say I ever had anything like them among the Poles and other Eastern Europeans in my hometown of Johnstown, PA. Really, though, that’s not definitive. I’ve never had any potato cakes like my Slovak grandmother’s (unless they were made by one of her daughters-in-law, of which there were seven!). That doesn’t make those potato cakes any less Slovak, though.
Red beans and tomatoes are a common combination internationally. There are versions from New Orleans to Haiti to India to South America to Italy to name just a few. To be sure, the seasonings vary tremendously but the basics, red beans and a tomato-based sauce, remain the same.
Follow us on your social media platform of choice
Fast forward to the 1970’s: my husband (on the right) and his brother (on the left) with their parents
I’ve decided to keep this recipe in its original form, with canned beans and tomato sauce. Although I keep an array of canned beans in my pantry for unexpected events I usually prefer to start with dry beans. Most commercial brands of tomato sauce are made from tomato paste and water, with a bit of onion powder and garlic powder added. In place of tomato sauce, I typically use tomato paste and water to achieve the same results.
If you have a favorite family recipe and a bit of a story to tell, please email me at santafecook@villasentieri.com and we can discuss including it in the blog. I am expanding the scope of my blog to include traditional recipes from around the country and around the world. If you haven’t seen Bertha’s Flan or Melinda’s Drunken Prunes, take a look. They will give you an idea of what I’m looking for.
Print Recipe
Kidney Beans in Tomato Sauce
These beans can be made without the bacon, or with less bacon, in which case a few tablespoons of oil will need to be used to sauté the onion and bell pepper. If you want extra sauce just increase the amount of tomato sauce. You can sauté a clove or two of minced garlic with the onion and bell pepper if you would like. The liquid from the canned beans will improve the consistency of the sauce. Before using it, however, taste it to be sure that it does not have a metallic flavor which happens with some brands of beans. If so, drain and rinse the beans and add additional water in place of the liquid in the cans.
Sauté the bacon until it begins to color, adding a small amount of oil if needed to keep it from sticking.
Add the onion and bell pepper to the bacon.
Sauté until the onion just begins to color and the pepper becomes a dull green and starts to soften. It may be necessary to cover the pan and/or add a tiny amount of water if the onion and/or pepper begin to get too brown.
Add the beans and their liquid.
Season with salt and pepper. Bring to a boil.
Add tomato sauce and water.
Simmer, partially covered, for approximately one hour, adding additional water if necessary.
Taste and adjust seasoning while the beans are cooking.
Growing up, Sunday dinner almost always included some sort of pasta with my mother’s long-simmered Southern Italian sugo.
The sauce was made with large pieces of pork which were always served on the side. In addition, there might be meatballs, simmered in the sauce after being fried to a deep brown. Sometimes, actually, much more often than sometimes, there would be veal cutlets. This was back in the day when people didn’t really think about how veal was produced…or maybe it was produced more humanely back then. I’m not sure.
Sometimes a pork roast would accompany the pasta. Occasionally, though not often, the pork roast would be accompanied by potatoes and there wouldn’t be pasta on the table.
A Sunday without pasta, though, was quite unusual in my parents’ house.
Click HERE to join our mailing list and you’ll never miss a recipe again!
The pasta could have been homemade linguine or fettuccine, which my mother and her sister, my Aunt Margie, made on a regular basis and then dried and stored in large rectangular aluminum tins that once held baccala (salted cod).
Those tins had a myriad of uses, from protecting pasta and cookies to storing recipes and papers. Even though they were made of an inert metal, they had to be thoroughly scrubbed and allowed to air out, uncovered, for weeks to rid them of the smell of baccala.
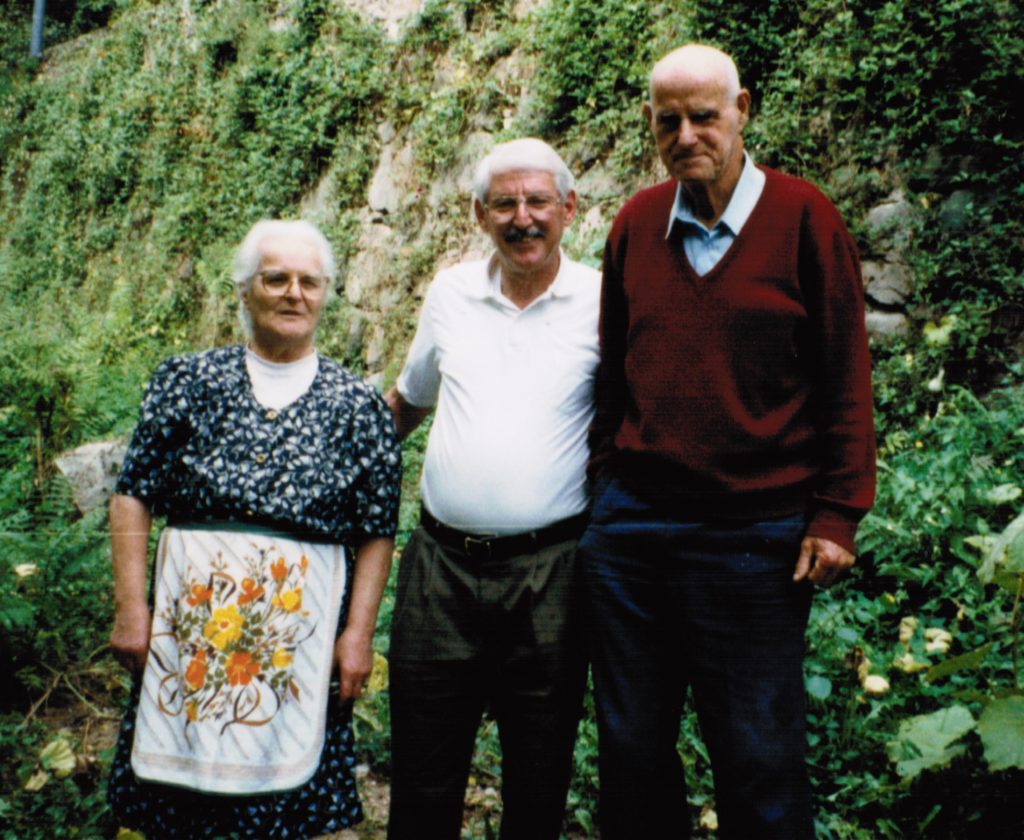
My mother learned her style of Southern Italian cooking from her mother, Angelina (far left). No doubt she learned it from her mother (center).
Sometimes the Sunday pasta was homemade ravioli, never was it gnocchi as my father didn’t like gnocchi. Those were reserved for dinners when my father was out of town.
Usually, though, the pasta was dried pasta from a box: spaghetti, rigatoni, wagon wheels, fettuccine, and so forth. Dried pasta is really a different sort of pasta with some different uses than fresh pasta (even if the fresh pasta is dried before use as mom and Aunt Margie often did).
Follow us on your social media platform of choice
I know many of you have heard me say this, but roasts in our house were much more similar in texture to pulled pork than the typical French-American style of “just-how-little-can-we-cook-this-hunk-of-meat-and-say-it’s-done” type of roast.
A huge advantage of this style of cooking is that you can know in advance when it will be done because it’s really the clock that counts, not the thermometer. I don’t like making an American style roast for a dinner party. It makes me crazy.
I don’t get to enjoy cocktails and I don’t get to enjoy the first course because I’m focused on when the thermometer might say the roast is done. While the temperature to be achieved is precise, the time is not.
On the other hand, the Italian style of roasting eliminates all of these problems because the meat is not “just barely cooked enough.” The collagen begins to liquefy and the roast becomes unctuous.
If you haven’t experienced this style of roast, give it a try. If you like it, look up my recipe for Italian Slow-Roasted Chicken or Turkey for the poultry equivalent.
If you have a favorite family recipe and a bit of a story to tell, please email me at santafecook@villasentieri.com and we can discuss including it in the blog. I am expanding the scope of my blog to include traditional recipes from around the country and around the world. If you haven’t seen Bertha’s Flan or Melinda’s Drunken Prunes, take a look. They will give you an idea of what I’m looking for.
Print Recipe
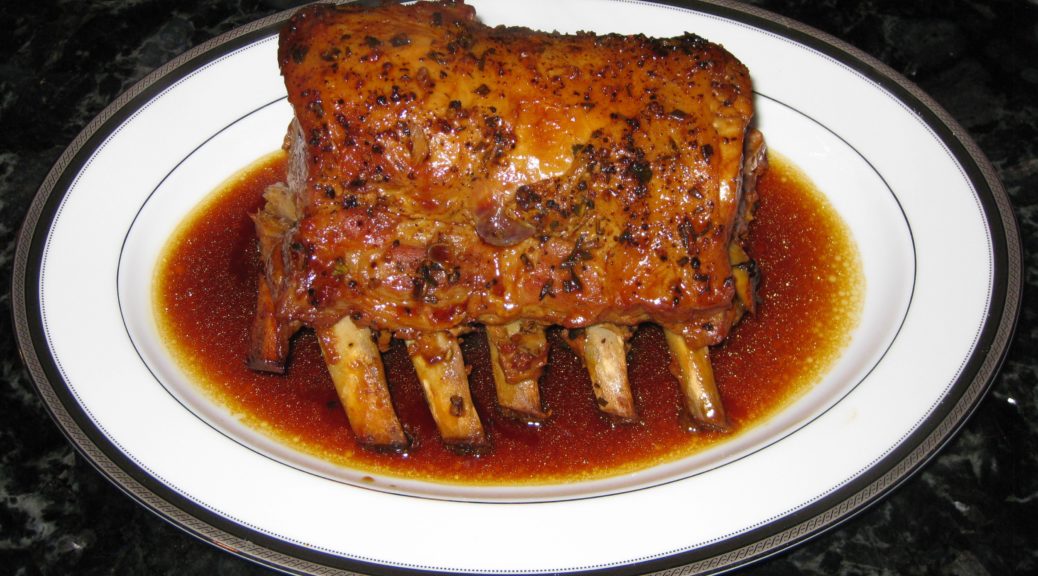
Mom's Slow-Roasted Pork
I have an assortment of blue spatterware roasting pans which are perfect for this type of roast. I also have an array of heavy stainless steel, aluminum, and enameled cast-iron roasters. The more important issue is using a roasting pan of the right size to hold the roast without crowding (it shouldn’t touch the sides or top of the roaster) or without too much empty space. The initial cooking at higher temperature not only browns the roast, it helps it to reach the optimum temperature for collagen to break down to produce that pull-apart texture. You can easily increase the size of the roast. With a 4 to 5 pound roast, you would probably need to add another 45 minutes to 1 ½ hours to the roasting time.
Plunge a paring knife into the pork at intervals to make small pockets about 1 inch deep. Space the pockets out around the roast.
Put a piece of garlic and some of the fresh rosemary into each pocket.
Some of the rosemary will invariably stick to the fat cap. Don’t sweat it, just try to get most of it in the slits.
Put the roast into a roasting pan that is just large enough to hold it.
Generously season the roast with salt and pepper.
Pour the wine (or water) into the bottom of the roasting pan.
Roast, uncovered, at 375°F until the roast is browned a little, 45-60 minutes.
Baste with pan juices.
Cover and continue to roast at 275-300°F for about another three hours, basting with the pan juices every 30-45 minutes or so.
The pan juices will dry up. Be careful not to burn the bits on the bottom of the pan, but allow them to brown before adding another ¼ cup of water or so. After two or three cycles of this, the pan juices will be a luscious dark brown.
Remove the roast from the pan. Allow to cool for 10 minutes.
To serve, pull the roast into large pieces. Don’t even try to slice it. It’s not supposed to slice.
Pour a little of the pan juices on top. Pass the rest.
These meatballs are really mystical if you consider the sway they hold on my husband, his brother, and his father. They go wild for these meatballs.
Well, wild in that very restrained Northern Italian way.
If they were Southern Italian, where a dinner conversation can seem like a minor riot, their meatball response would barely register on the scale. It would signal almost utter disregard for the meatballs.
But that, in fact, is not the case. The meatballs hold some sort of magical, mystical charm.
Marisa, of course, is my mother-in-law and these are her meatballs. She considers them quite unusual, having learned to make them from her mother and basically not remembering any other relatives or friends making something similar.
And, as meatballs, they ARE unusual!
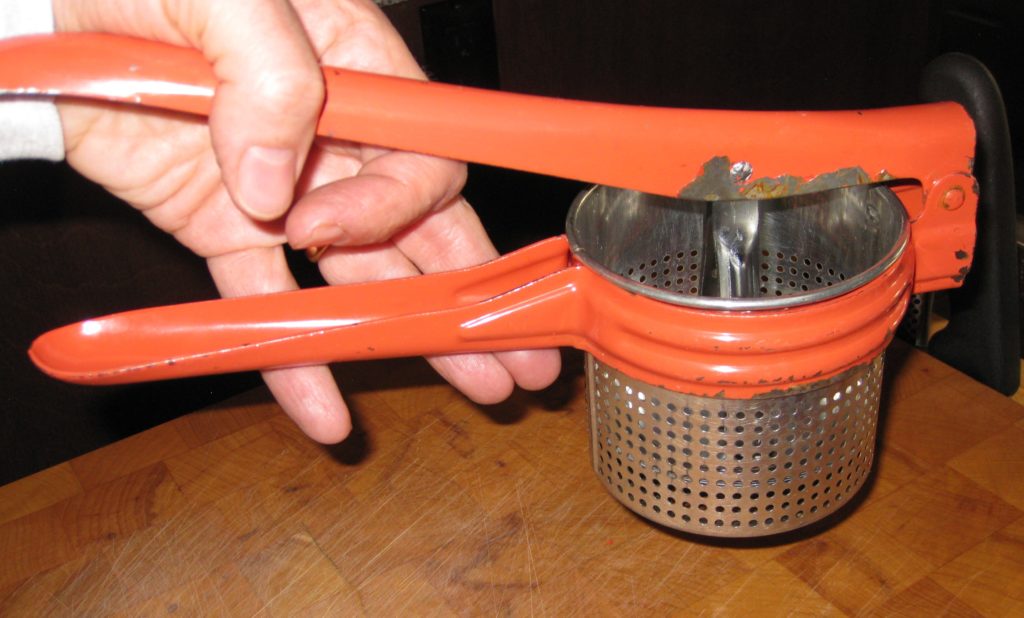
An old-fashioned ricer is still an indispensable piece of kitchen equipment. Make sure yours is very sturdy. Many new ones are not.
Click HERE to join our mailing list and you’ll never miss a recipe again!
But here’s a secret that I haven’t told anyone yet. They really AREN’T meatballs. They’re croquettes! Crocchette in Italian.
There, I said it. Marisa’s Mystical Meatballs aren’t really meatballs. But everybody in the family calls them “Ma’s Meatballs.” “Ma’s Croquettes” doesn’t have the same alliterative allure, even if it’s more accurate.
My mother-in-law and father-in-law celebrating his birthday.
When I did a Google search for crocchette, Google turned up about 1,730,000 results in 0.51 seconds. When I searched for crocchette patate e carne (potato and meat croquettes), Google returned 1,500,000 results in 0.72 seconds.
And that was doing searches in Italian!
I found a Japanese woman who seems to have the same relationship to her mother’s meat and potato croquettes (korokke) as my husband and his family have to his mother’s.
Follow us on your social media platform of choice
The meat for these “meatballs” (a word I’ll use in deference to my husband and his family of origin) is boiled before being finely chopped. This presents a perfect opportunity to make a really nice beef broth. You don’t have to do that, of course, but since you’re going to be boiling the meat anyhow, and since it only takes a few extra minutes to throw some aromatics into the pot, why not!
The broth from the meat for the specific batch of meatballs shown in this blog is sitting in the freezer ready to be turned into Auntie Helen’s Stracciatella, which will be coming up on the blog next month.
If you have a favorite family recipe and a bit of a story to tell, please email me at santafecook@villasentieri.com and we can discuss including it in the blog. I am expanding the scope of my blog to include traditional recipes from around the country and around the world. If you haven’t seen Bertha’s Flan or Melinda’s Drunken Prunes, take a look. They will give you an idea of what I’m looking for.
Print Recipe
Marisa's Mystical Meatballs
Marisa says she usually uses cross-cut beef shank for the meatballs. When we made them, she also had a piece of beef she bought for soup so we used both. In the end, we got ½ pound of cooked beef, with fat and gristle removed. Adjust the proportion of the other ingredients if you get substantially more or less cooked beef. If you want to use just cross-cut beef shank, I would try about 2 ½-3 lbs. The beef is boiled and then finely chopped to make the meatballs, giving you the opportunity to make a really nice beef broth with just a few minutes more work.
Growing up I never really understood why this was called Wedding Soup. It was NEVER served at weddings.
It was mostly served at home, unceremoniously.
The fact that it was unceremonious is a shame. It is a wonderful soup and, being honest, takes a bit of work to pull together. Both the soup, and the soup-maker, in my estimation, deserve a bit of attention.
Although it takes some work, it doesn’t require much in the way of heard-earned skills like frosting a cake or making pie crust. It’s just a bit of slogging through a series of steps.
This is a beloved soup among Americans of Italian descent. Interestingly, my in-laws who are actually from Italy had never heard of it until I made it for this blog!
Click HERE to join our mailing list and you’ll never miss a recipe again!
But back to the “wedding” part. I did a bit of internet research (thanks Google!). Actually, I hesitate to call it “research.” I’m old school. I remember when doing research meant hours upon hours spent in libraries looking at actual hardcopy materials. It almost doesn’t seem fair to sit on my sofa with my laptop and read materials served up by Google based on natural language questions and call it research.
The “natural language” part is interesting too. In the “old” days, if you found an article that was relevant to the research topic, you would look at the articles referenced by the author and find, potentially, other relevant articles. But they would all be older than the first article. This is where the “Science Citation Index” came into play.
The Index was a series of periodically published volumes that listed all the articles that cited a particular article in their bibliography. With the Science Citation Index, you could start with a relevant article and then work forwards finding all the newer articles that had cited that article.
Now I just tell Google what I’m interested in and I get a bunch of (almost always) relevant “hits!” Google is even nice enough to tell me how many hits there are and what fraction of a second it took Google to identify them.
Even when I’m researching a biomedical topic I sit on my sofa with my laptop and search the National Library of Medicine. The search language is a bit more arcane than the natural language used by Google but it still feels like cheating compared to slogging around a library. I can even have the full article delivered to my laptop so I don’t have to figure out what library has the publication I need.
Follow us on your social media platform of choice
So, what did I learn from my Google search?
It appears (at least it’s a plausible theory) that Wedding Soup is an inaccurate translation of Minestra Maritata or Married Soup; apparently so-named because of the way the different ingredients marry together so well.
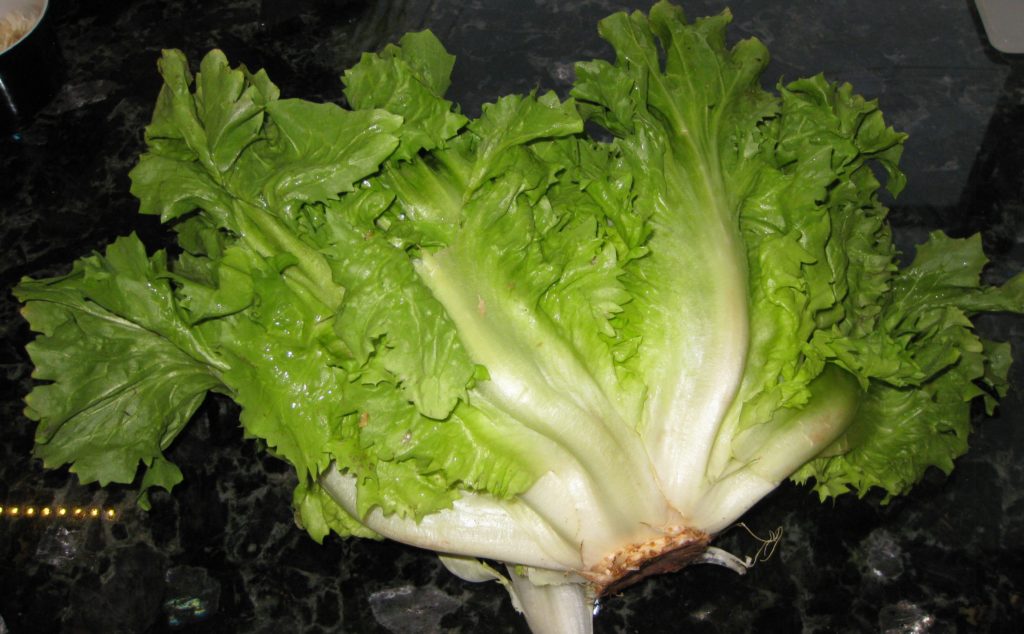
I’m guessing that many Americans with no affiliation to Italy have never had escarole.
Interestingly, my husband’s Tuscan grandmother would use up small amounts of different types of dried pasta, perhaps putting them into a soup or serving them with a simple sauce. She referred to this as Pasta Maritata because she was marrying the different types of pasta to create a dish.
If this theory is correct, I am perplexed by the inaccurate translation but, be that as it may, the soup is wonderful. I urge you to give it a try.
I like breaking up the work over two days, especially since I like to make a long-simmered broth as the base of the soup. My mother didn’t do this. Once the chicken was cooked, it was removed and shredded and the broth was used without additional simmering to make the soup. It shaves about 3 hours off of the prep time. But, since making broth is mostly hands off, and the improvement in flavor is dramatic, I simmer everything a bit longer before straining and discarding the solids.
If you have a favorite family recipe and a bit of a story to tell, please email me at santafecook@villasentieri.com and we can discuss including it in the blog. I am expanding the scope of my blog to include traditional recipes from around the country and around the world. If you haven’t seen Bertha’s Flan or Melinda’s Drunken Prunes, take a look. They will give you an idea of what I’m looking for.
Print Recipe
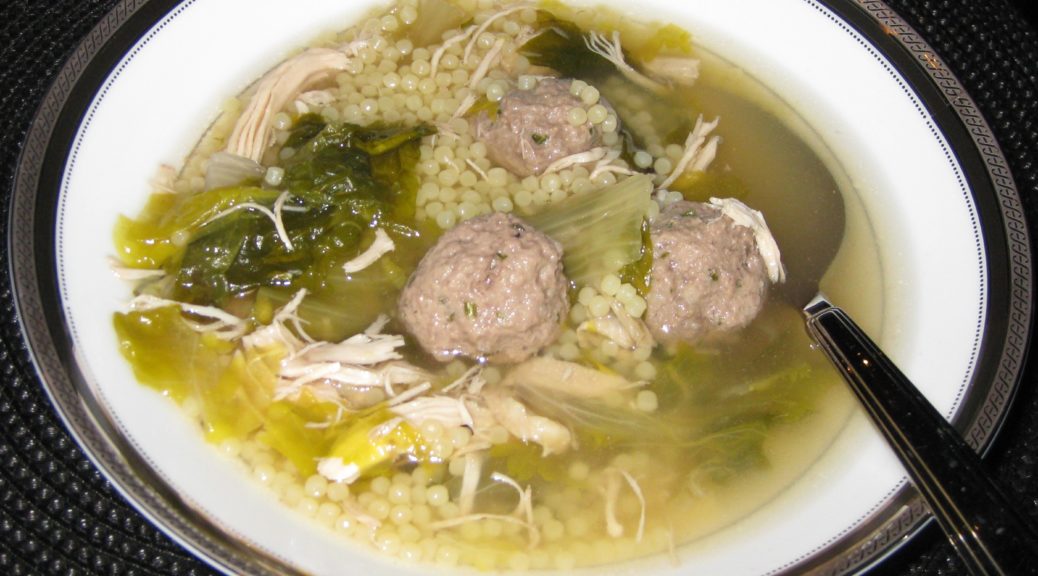
Italian Wedding Soup
If you don’t want to use the white center of the escarole, start with two heads and just use the dark green parts. The pale inner portion can be served in a salad or cooked in a number of ways. I like to divide up the work over two days, making the broth on the first day and the remainder on the second day. It’s perfectly feasible to do it all on the same day, however. I always keep a stash of rinds from Parmigiano Reggiano and Pecorino cheeses in the freezer. They add great flavor to broths, beans, and an array of other dishes.
Cut the chicken into breast halves, legs, thighs, and wings. Cut the back into 2 or three pieces. Reserve the liver for another use but chop the remaining giblets.
Slice the onions. There's really no need to peel them first.
Same with the garlic, no need to peel. It all gets strained out in the end.
Combine all ingredients in a large stock pot. Cover and bring to a boil. Reduce heat, and simmer, partially covered for two hours.
After two hours, remove the breasts, legs, and thighs. Continue to simmer the broth.
Remove the meat from the bones. Return the chicken bones and skin to the broth.
Continue to simmer the broth for another two hours, adjusting seasoning as needed.
Meanwhile, shred the breast meat and refrigerate.
Reserve the leg and thigh meat for another use.
After the broth has finished cooking, cool it for several hours. Strain and discard the solids. Allow the broth to come to room temperature and refrigerate.
Alternatively, immediately strain and discard the solids and proceed as below.
Meatballs
Put all the ingredients except the bread into a mixing bowl.
Cut the crusts from the bread.
Cover the bread with warm water for 3-4 minutes.
Squeeze some of the water from the bread.
Add the bread to the mixing bowl.
Mix with your hands, until thoroughly combined and no streaks of white from the bread remain visible.
As you are mixing add a bit of the bread soaking water from time to time (about a quarter cup or so total) to keep the mixture moist but not wet.
The mixture should become tacky from the effects of the water and the mixing on the proteins in the meat. The tackiness will help the meatballs hold together for the same reason that sausage doesn’t fall apart when the casing is removed.
With damp hands, roll the mixture into approximately 50 meatballs. Keeping your hands moist will enable you to create a smooth surface on the meatballs. If there are visible cracks, the meatballs will split when cooking.
Final assembly
Skim the fat from the broth. Add water to make 6 quarts of broth. Bring the broth to a boil.
Meanwhile, coarsely chop the escarole.
As the broth comes to a boil, adjust the salt and pepper.
Add the chopped escarole. Return to a boil and cook at a moderate boil for approximately 5 minutes.
Add the meatballs. Return to a boil and boil gently, so the meatballs don’t break, for 10-12 minutes.
Add the shredded white meat chicken and return to a gentle boil.
Adjust salt and pepper. At this point, slightly over-salt the soup as the dry pasta will reduce the saltiness of the soup. The soup can be made ahead to this point. Return to a boil and add the pasta just before serving.
Add the pasta and boil gently until pasta is cooked, approximately 10 minutes.
Adjust salt and pepper.
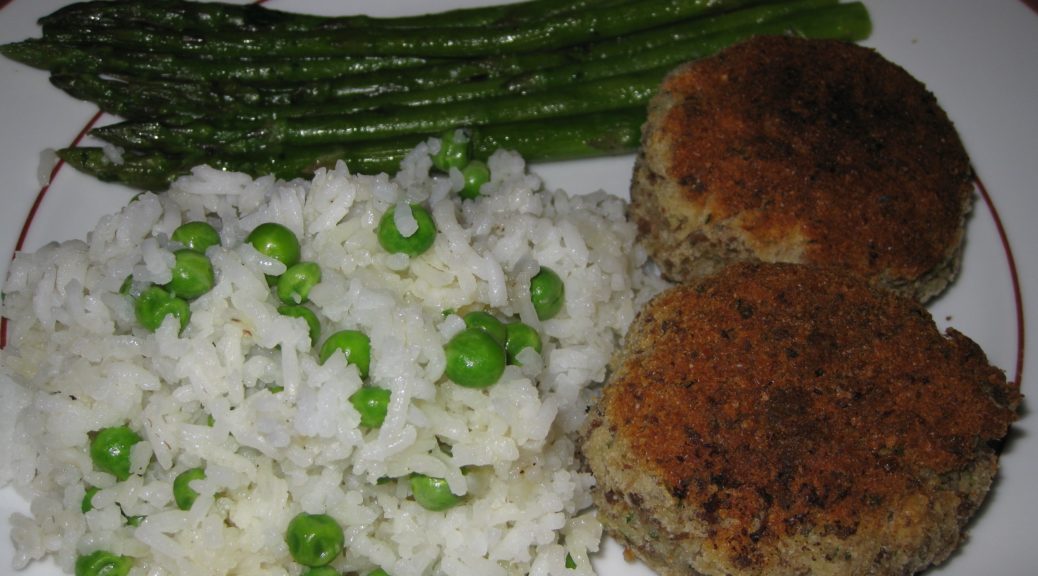
Serve with freshly grated Parmigiano Reggiano cheese.
Torta di Riso is an Italian specialty. It is basically a rice pudding baked inside of a pastry crust; a Rice Tart, so to speak.
I first had Torta di Riso more than 20 years ago while visiting Italy with my husband and his parents.
We ate meals at the homes of many relatives. I often arrived with a spiral-bound notebook to jot down the inevitable recipes that would be discussed around the table or the recipes I begged for after being served something wonderful. That notebook is a mashup of American and Metric measures and English and Italian words for ingredients. It became a bible of sorts for recreating many of the dishes I ate on that trip.
Click HERE to join our mailing list and you’ll never miss a recipe again!
My father-in-law’s Zia (Aunt) Mery made the first Torta di Riso that I ever tasted. Her recipe is below (adapted for American measures).
After having it at Zio (Uncle) Beppe and Zia Mery’s house, I started noticing Torta di Riso in many places in Tuscany.
My father-in-law with his Uncle Beppe and Aunt Mery, from whom this recipe for Torta di Riso originated in their garden in Tuscany, 1994.
Alkermes liqueur originated in Tuscany so it is particularly appropriate to use it as the liqueur in Torta di Riso. Alkermes is nearly impossible to find in the United States, however. One can make a perfectly traditional Torta di Riso using rum in place of Alkermes but the resulting confection won’t be pink.
According to CooksInfo, “Alchermes was invented in the Frati Convent at Santa Maria Novella in Florence. Its making was kept secret, but the recipe was reputedly stolen by spies from the nearby city of Siena, which Florence was often at war with.”
Follow us on your social media platform of choice
Recipes for alkermes (also spelled alchermes) are closely guarded but the process basically involves infusing alcohol with spices and flavorings like cinnamon, cloves, vanilla, nutmeg, mace, cardamom, star anise, rosewater, and orange zest. The red color comes from cochineal, an insect that is the foundation for natural red food coloring. The resulting infused alcohol is sweetened and diluted with water.
The pastry crust is pasta frolla, a slightly sweetened pastry, leavened with baking powder, and often flavored with vanilla and lemon zest. This is Mery’s recipe for pasta frolla but I also have one from Zia Fidalma that makes about half the quantity.
Torta di Riso was a big hit at my father-in-law’s birthday dinner last week. So were the cocktails, wine, and champagne!
If you don’t have access to Alkermes, you can use rum. In fact, torta di riso is not always pink. Many that I saw in Italy were white.
If you want to try to make your own Alkermes you can find a recipe here. Amazon even sells the dried cochineal insects that provide the traditional scarlet color.
If you have a favorite family recipe and a bit of a story to tell, please email me at santafecook@villasentieri.com and we can discuss including it in the blog. I am expanding the scope of my blog to include traditional recipes from around the country and around the world. If you haven’t seen Bertha’s Flan or Melinda’s Drunken Prunes, take a look. They will give you an idea of what I’m looking for.
Print Recipe
Torta di Riso (Italian Rice Tart)
This classic Italian dessert is basically a rice pudding baked inside of a pastry crust. Alkermes is a traditional Tuscan liqueur used in a number of sweets, including torta di riso, for its color and spice-like flavor. If you don’t have Alkermes, use rum. Not all versions of torta di riso are brightly colored. Vanilla powder is a natural vanilla product, not artificial. Use vanilla extract if vanilla powder is not available.
Blend the flour, sugar, baking powder, vanilla powder, salt and lemon zest in a food processor until combined.
Add the butter, cut in pieces, and blend till well combined.
Add the eggs and blend till the pastry almost forms a ball.
Remove the pastry from the food processor and use your hands to press everything into a single ball.
Wrap the pastry in waxed paper and refrigerate for an hour before using.
Rice
Wash and drain the rice.
Combine the rice, water and milk in a heavy-bottomed sauce pan.
Bring the rice to a boil.
Cover the rice and simmer, stirring frequently, until cooked and the liquid is almost completely absorbed. If the rice does not have the consistency of thick oatmeal, add a bit more milk at the end to make it creamy.
Mix the sugar, lemon zest, and Alkermes and/or rum into the rice.
Pour the rice into a bowl and cool, uncovered, stirring occasionally.
Assembly and Baking
Cut off a small piece of the pastry to make a lattice top and refrigerate.
Roll the remaining pastry between waxed paper, turning often, until it is large enough to cover the bottom and sides of a 10 inch springform pan.
Line a 10" springform pan with the pasta frolla.
Cut the pastry even with the top of the pan. Add the scraps to the pastry you have reserved for the lattice.
Beat the egg and egg yolks to combine.
Stir the beaten eggs into the cooled rice.
Pour the rice into the pastry lined pan.
Roll out the pastry reserved for the lattice.
Cut seven or eight strips, approximately 1/2 inch wide.
Arrange the strips into a lattice on top of the rice. Cut off the excess.
Roll the pastry lining the sides of the pan down to the top of the rice and form a decorative edge.
Bake at 350°F until the crust is lightly browned and the rice is barely jiggley in the center, approximately 30-45 minutes.
My father liked soup. Actually, my father really, really liked soup. Every few weeks my mother would make beef noodle soup as it was one of my dad’s favorites. Beef noodle is the soup we had most often. Goulash was the “stew” we had most often. In fact, I don’t remember my mother ever making an American-style beef stew.
The first American-style beef stew that I ever made was from a recipe that my sister started using after she got married. It was definitely not one of our family recipes, though it was good.
After the beef noodle soup that my mother made on a regular basis, other soups were just occasional affairs, though soups of various types appeared often on our table.
Click HERE to join our mailing list and you’ll never miss a recipe again!
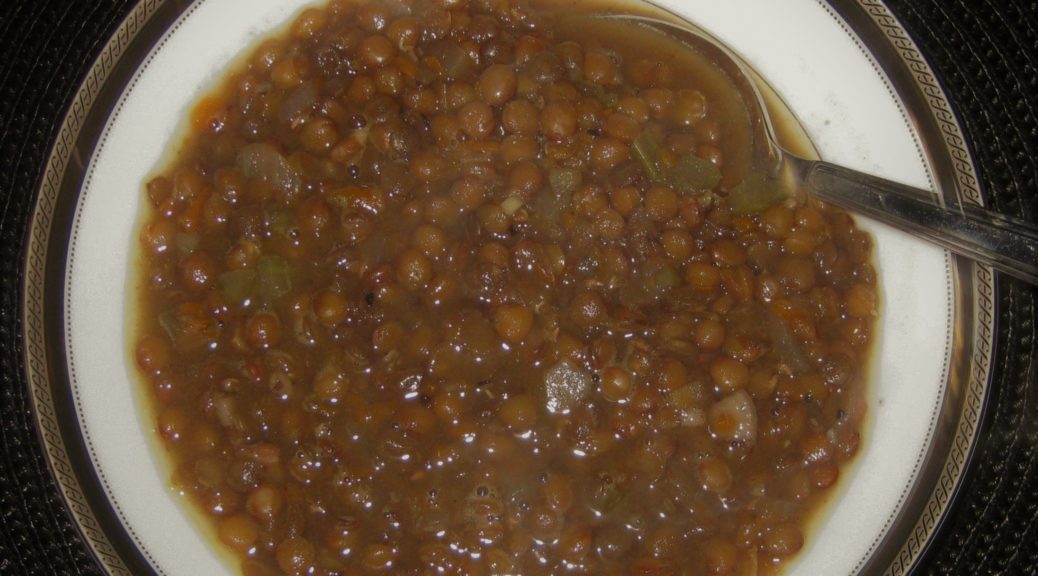
Italian “Wedding” Soup was a favorite but not something that we had more than a three or four times a year. Everyone in the family really loved Wedding Soup but, honestly, it’s a lot of work. It’s coming to the blog next month but today we have my Mom’s Lentil Soup.
My parents in 1981
Let’s face it, lentil soup isn’t something people swoon over. At best it is good comfort food. That’s exactly what this is for me.
It’s also easy to make. A few minutes of chopping and some stirring off-and-on are rewarded with a really good pot of soup.
My mother’s lentil soup was unusual in that she put enough black pepper into it to create a distinct bite. The first time I tasted it, as an adolescent, I was surprised by how peppery it was but I loved it. Whether or not you add that much black pepper is entirely your choice but, in my mind, it’s the black pepper that sets my mother’s lentil soup apart from the pack.
Follow us on your social media platform of choice
Consistent with my mom’s low-and-slow philosophy, this soup is cooked longer that would be typical, for the average American cook at least. Despite the long cooking, the lentils remain intact though soft. They don’t really fall apart the way that dry beans might.
This soup freezes well so a big batch shouldn’t be a problem.
While a ham bone makes great lentil soup, it’s not something that most households have on a regular basis but a handful of baked ham or a few ounces of bacon make an awfully tasty soup.
If you have a favorite family recipe and a bit of a story to tell, please email me at santafecook@villasentieri.com and we can discuss including it in the blog. I am expanding the scope of my blog to include traditional recipes from around the country and around the world. If you haven’t seen Bertha’s Flan or Melinda’s Drunken Prunes, take a look. They will give you an idea of what I’m looking for.
Print Recipe
Mom's Lentil Soup
When my mother made this soup, she added enough black pepper to give it a distinct bite. The addition of a bay leaf is my only modification of the original recipe.
Yes, there are a few quintessentially classic risotti for which precise instructions are needed (like Risotto alla Milanese) but, in general, you can adapt the technique to use an array of vegetables and other ingredients.
Risotto with Asparagus is a good example of a risotto where the vegetables are pre-cooked and added near the end. The same can be done with both peas and mushrooms, for example.
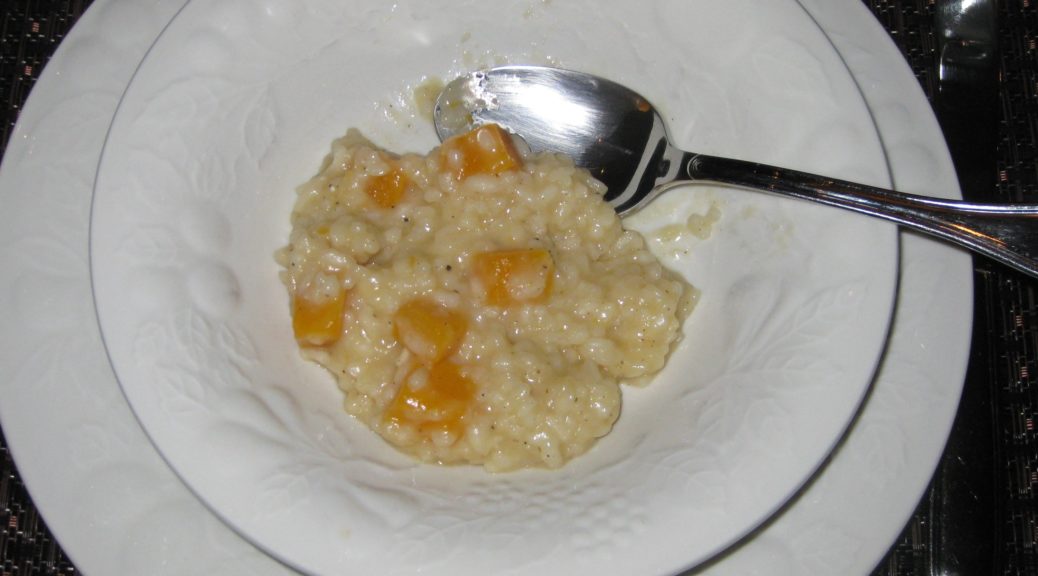
Risotto with Butternut Squash is an example of a risotto where the vegetables are added at the beginning and complete their cooking as the rice cooks. Though you wouldn’t think it would work, Risotto with Zucchini works the same way, as long as the zucchini are cut into thick slices.
Click HERE to join our mailing list and you’ll never miss a recipe again!
In a traditional Italian meal, risotto, pasta, and soup are all considered the same course: the first course (Il Primo Piatto). The first course follows the antipasto (which means, literally, before the pasta). Il Primo Piatto is followed by the second course (Il Secondo Piatto), consisting of fish, meat, or poultry and accompanied by several side dishes (contorni). The first and second courses have almost equal weight in an Italian meal; very different from an American meal.
While restaurants often par-cook a risotto so that it can be quickly finished for service, I find that cooking a risotto at home is best done “in the moment.” That means I only make risotto for a small group when everyone can hang out in the kitchen during the 45 minutes, or so, that it takes to cook. That pretty much consumes the cocktail hour. Because of this, for me, risotto is a dish for family or very close friends.
Follow us on your social media platform of choice
Risotto isn’t something I grew up eating. It is traditionally a Northern Italian dish. I also don’t remember Auntie Helen, who was from Rome, making risotto either.
As with much of Northern Italian cooking, my first introduction was through Marcella Hazan’s The Classic Italian Cookbook. Beyond that, my Italian repertoire grew based on trips to Italy, cooking with Italian friends, and ultimately, marrying into my husband’s very Northern Italian family.
Risotto with butternut squash is a wonderful dish for late fall and winter.
If you have a favorite family recipe and a bit of a story to tell, please email me at santafecook@villasentieri.com and we can discuss including it in the blog. I am expanding the scope of my blog to include traditional recipes from around the country and around the world. If you haven’t seen Bertha’s Flan or Melinda’s Drunken Prunes, take a look. They will give you an idea of what I’m looking for.
It is important to use what the Italians would call “riso per risotto” (rice for risotto). The rice used for risotto is short-grained. It can absorb a lot of liquid, turning creamy in the process while still maintaining the ideal “al dente,” (toothy) quality at the very core. The most commonly available types of rice for risotto are Arborio, Carnaroli, and Vialone Nano. Far and away, Arborio is the most common.
Since creaminess is the goal, rice used for risotto shouldn’t be washed. The little extra starch on the grains will improve the texture.
A well-made risotto gets almost all of its creamy texture from the cooking method, not from the addition of butter, cheese, or cream. To be sure, a bit of butter and Parmigiano Reggiano cheese are almost always added at the end but this should be for flavor, not to compensate for poor technique.
My most common quibble with risotto made in the United States is that it is overly rich with butter and cheese and (heaven forbid) sometimes cream.
To coax creaminess out of the rice, broth is added in small amounts and completely cooked off before the next bit is added. In general, the amount of broth I add each time is no more than 1/3 the quantity of rice I start with. For example, if I’m using one cup of rice, I add no more than 1/3 cup of broth each time liquid is needed. The rice should be stirred frequently, but not constantly.
Print Recipe
Risotto with Butternut Squash
Broth for risotto should be light in flavor, not a heavy stock. The broth should add the barest amount of background flavor but allow the other ingredients in the risotto to shine. Risotto uses a lot of broth. It is important that the broth have minimal salt so as not to result in an overly salty dish. I never salt my homemade broth for this reason. If it seems that you will run out of broth before the risotto has finished cooking, put some water on to heat. It is important that all liquid added to the risotto be at a simmer.
Meanwhile, heat a three or four quart heavy-bottomed saucepan over medium high heat. Add the olive oil.
When the oil is hot, add the onion and garlic.
Sauté, stirring frequently until the onion softens and turns translucent. Do not brown the onion. You may need to reduce the heat.
When the onion is soft, return the heat to medium high and add the butternut squash.
Sauté, stirring often, until the squash starts to soften, about five minutes. Be careful not to brown the onion or garlic.
Add 1/3 cup of wine and immediately cover the pot. Cook another five minutes, stirring occasionally.
Remove the cover and cook off any remaining wine.
With the heat still on medium high, add the rice.
Continue cooking, stirring frequently, until the outer portion of the rice becomes translucent while the inside remains opaque white.
Add the remaining 2/3 cup of wine. Stir frequently, but not constantly, until the wine has totally evaporated. You will begin to see some starch leaching out of the rice. More and more of the starch will leach out as you cook the rice. This is what will make a creamy sauce, not a large quantity of butter, cheese, or cream.
When the wine has evaporated, add a scant ½ cup of simmering broth. Stir thoroughly paying particular attention to loosening any spots where the starch seems to be sticking to the bottom of the pan. You don’t want to brown (or worse yet, burn) the starch.
Stir frequently, but not constantly, until the broth has evaporated.
If the broth is unsalted, as I recommend, you can add a teaspoon of salt to the rice as you begin to add broth. If the broth contains salt, I recommend not adding salt until the end.
Keep repeating the process with a scant ½ cup of broth, cooking, stirring, and loosening any spots that are sticking until each addition of broth evaporates. The heat should stay as close as possible to medium high. The moderate boiling of the liquid will coax starch out of the rice to create the creaminess that is the hallmark of a good risotto.
Add the sage after about 20 minutes of cooking.
Begin tasting the rice for doneness at the same time. It will probably still be quite crunchy at the very core. Until you get the hang of it, I suggest testing a rice grain each time you add more broth so you develop a sense of how quickly the texture changes.
Continue cooking, adding simmering broth or water as needed, until the rice is al dente. Once the rice is cooked, add another 1/2 cup of simmering broth, stir, and then immediately remove the rice from the heat.
Off the heat, stir in the butter and Parmesan cheese.
Stir in enough additional simmering broth or water to create a creamy “sauce.” The starch that you have coaxed out of the rice, plus the modest amount of butter and cheese, should allow you to add at least another ½ cup of liquid, possibly more.
Taste and add salt and freshly ground black pepper to taste.
Recipe Notes
Check out the introduction to my recipe for Risotto with Asparagus for more information on making risotto.


")
")
")
")
")
")
")


")
")
")
")
")
")
")
")
")
")


")
")
")
")
")
")
")
")
")
")
")
")
")
")
")
")
")
")
")


")
")
")
")
")
")
")
")
")

")
")
")
")
")
")
")
")
")
")
")


")
")
")
")
")
")
")
")
")
")
")
")
")
")
")
")
")

")
")
")
")
")
")
")

")
")
")
")
")
")
")
")
")
")
")
")
")
")


")
")
")
")
")
")
")
")
")
")
")
")
")
")
")
")
")

")
")
")
")
")


")
")
")
")
")
")