Auntie Helen’s Lentil Salad

May 18, 2018

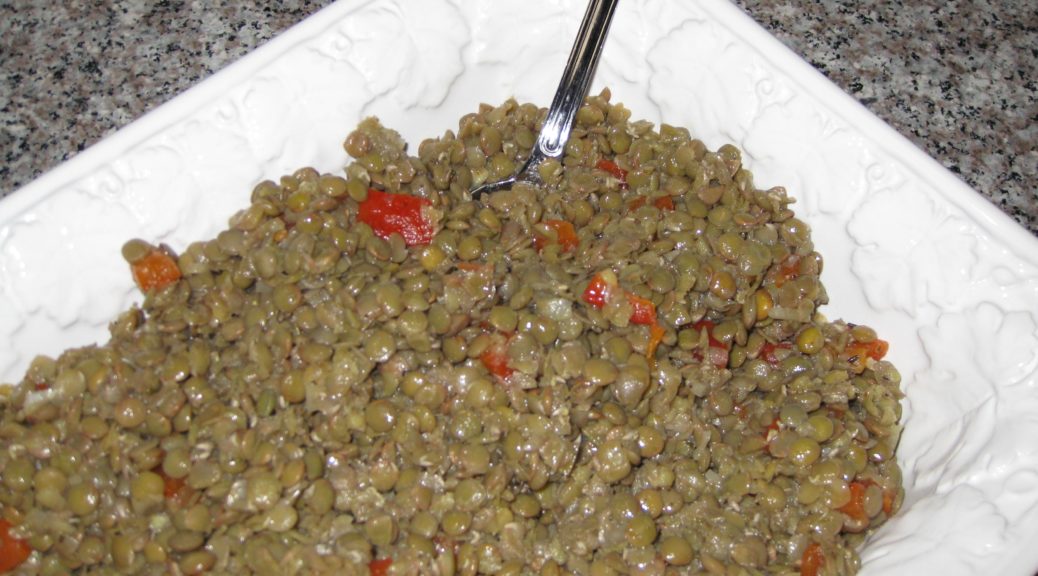
Auntie Helen had a way with lentils.

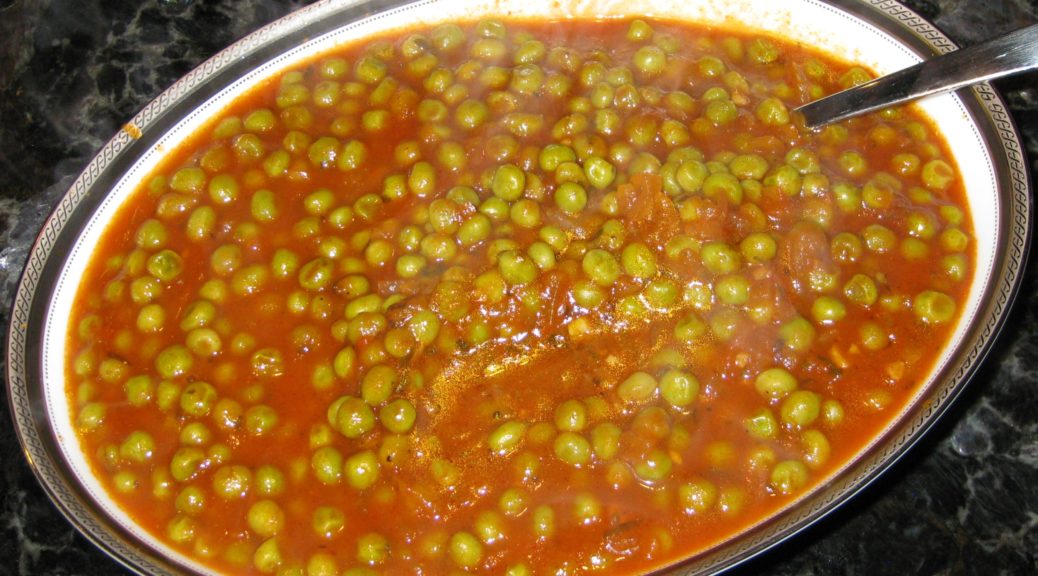
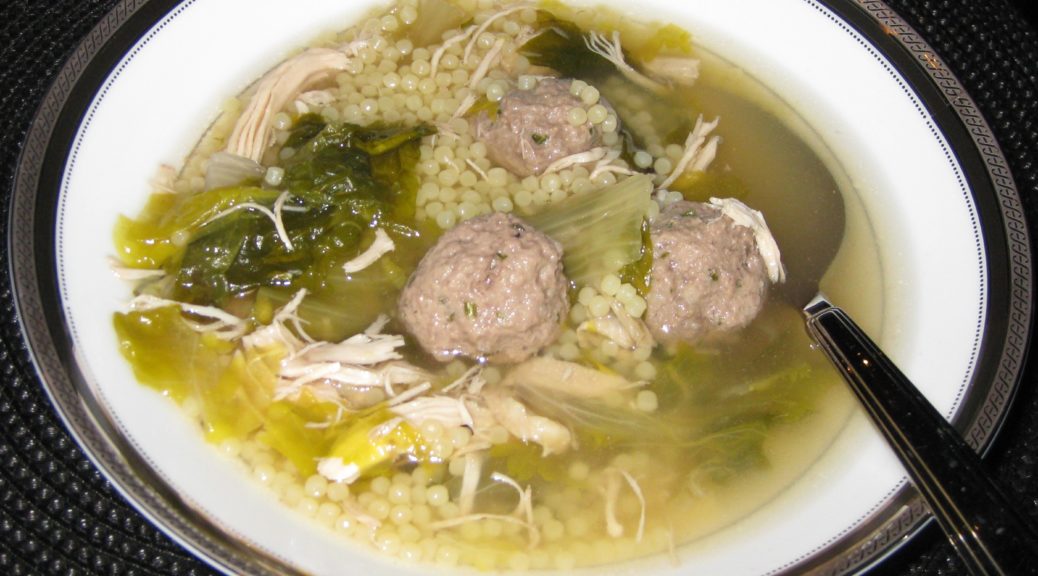
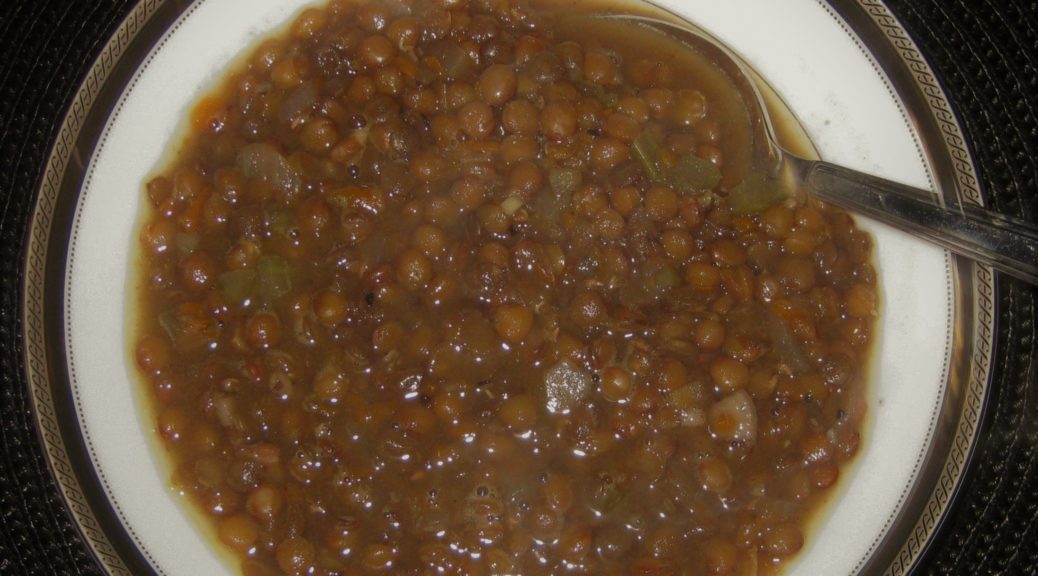
In addition to making lentil salad for summer cook-outs, she taught me that cooked lentils, topped with homemade tomato sauce, make a great main (or side) dish for a cold winter’s day.

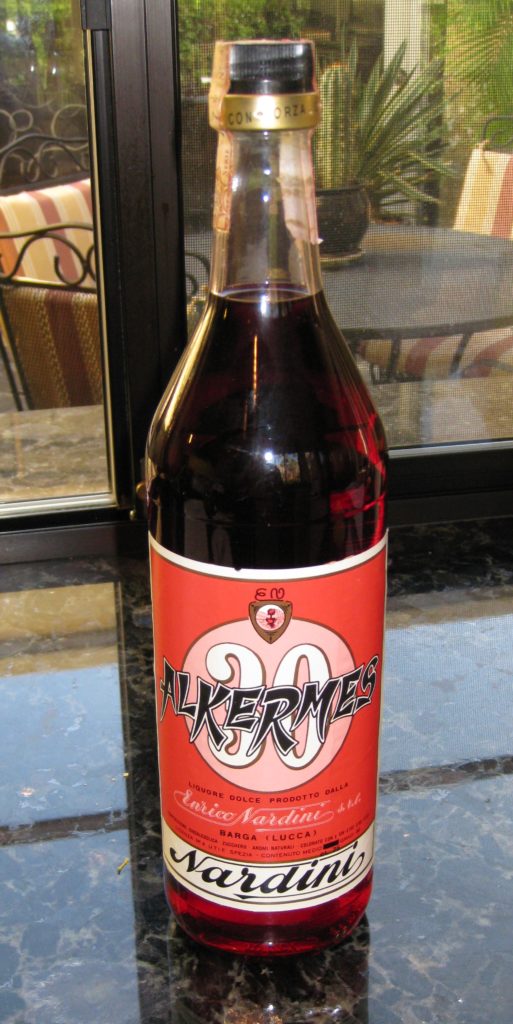
Auntie Helen liked her scotch.  On the rocks.  And she was not shy about quantity.

Auntie Louise liked gin.  Also on the rocks.  Also not shy about quantity.

It was mostly under their tutelage that I went from drinking Bourbon Manhattans (Old Grand Dad at the time) to Bourbon, also on the rocks.  This was somewhere around the age of 19.

Auntie Helen in 1976

I soon made the jump from Old Grand Dad to Jack Daniels, which remained my tipple of choice for decades.  Now I’ve branched out to a wide array of bourbons but always on the rocks and in respectable quantities.


Follow us on your social media platform of choice


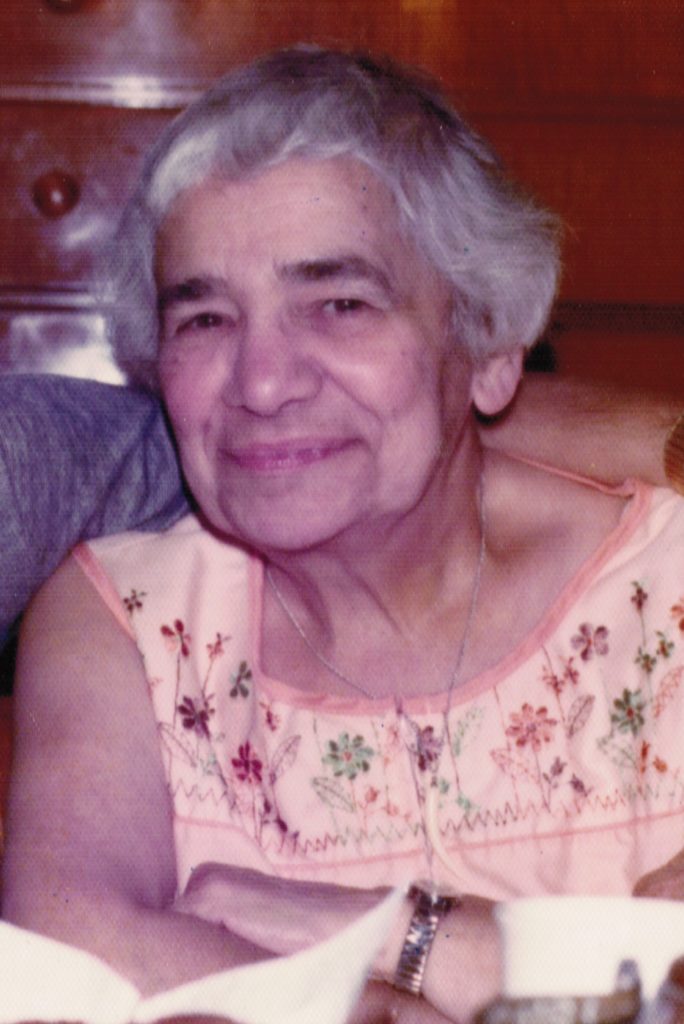
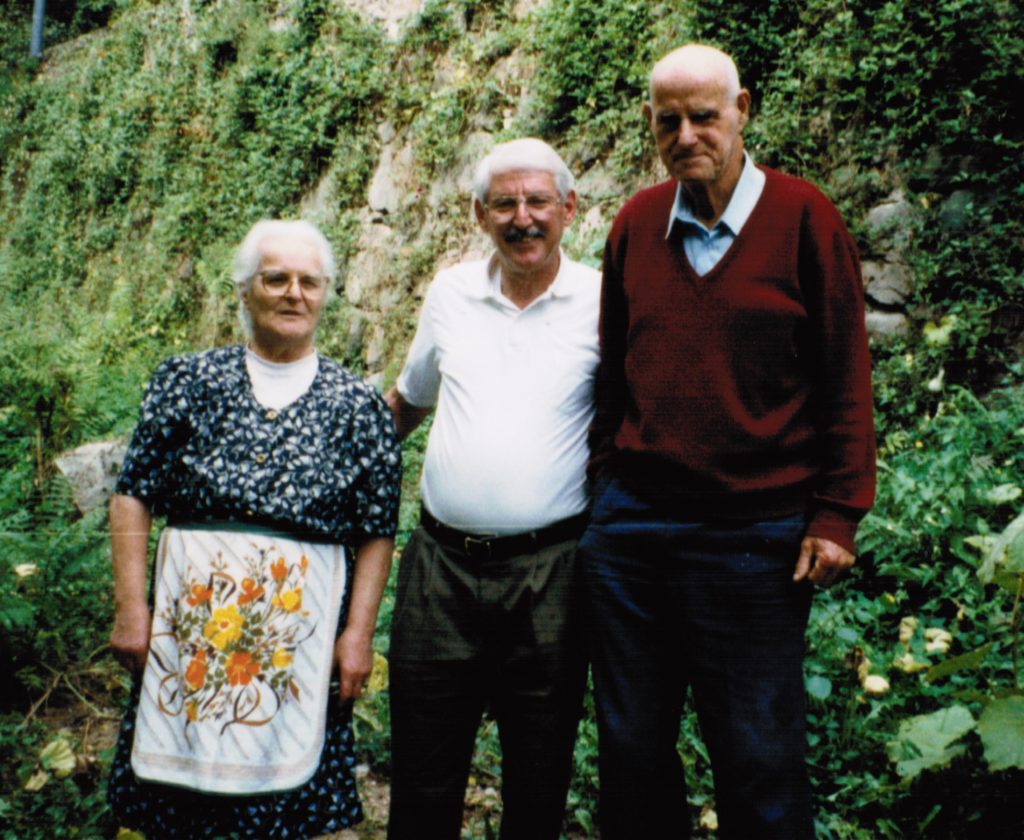
Auntie Helen and Auntie Louise were born, shortly after the turn of the 20th century, in a palazzo in Rome, now part of the American Embassy.  After their parents lost everything for the second time (there was talk that the first time it happened, they were bailed out by one of the Stroganoffs) the family emigrated from Italy to America.  Their father, a Count in Italy, worked delivering bread in Trenton, NJ.

Auntie Helen and Auntie Louise both became schoolteachers.  Neither married.  They lived together their entire lives.

They had a sweet little house on Yardley Road, just steps from the Yardley town line, in Morrisville, New Jersey.  I spent many weekends at their house, a little over an hour from where I lived in Philadelphia.

Auntie Helen did the cooking.  Auntie Louise made drinks and helped to clean up.

Auntie Louise in 1976

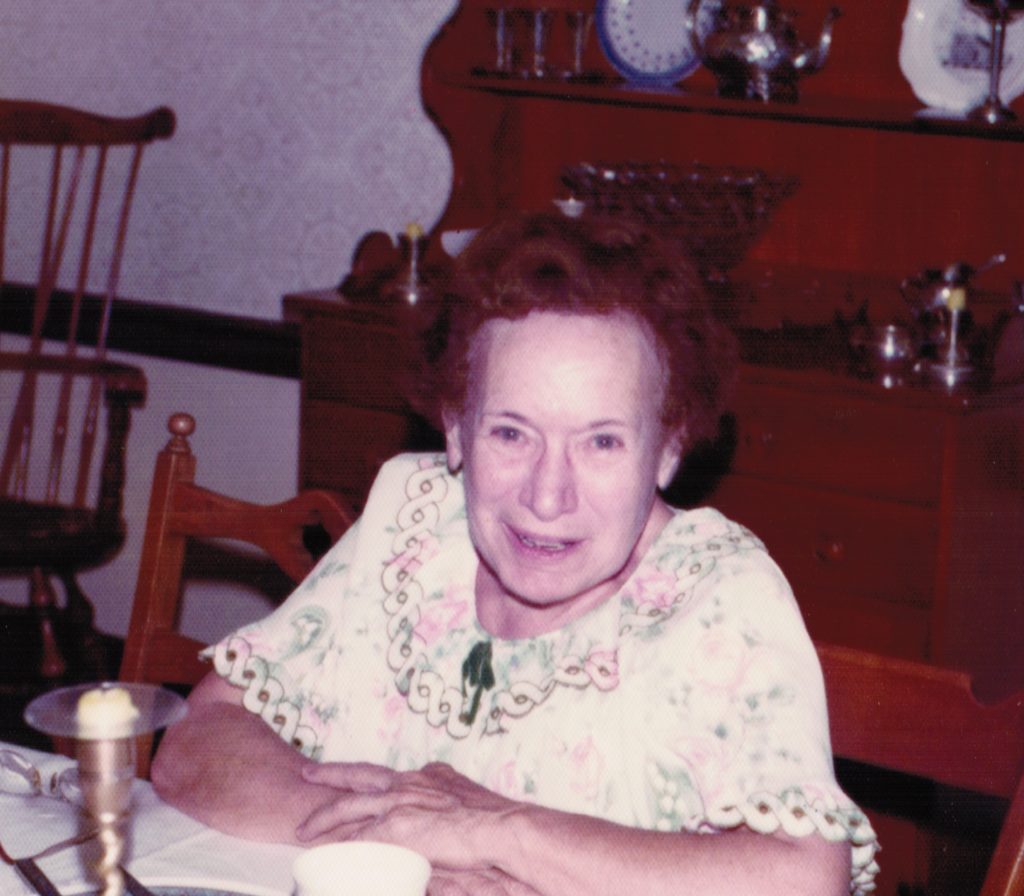
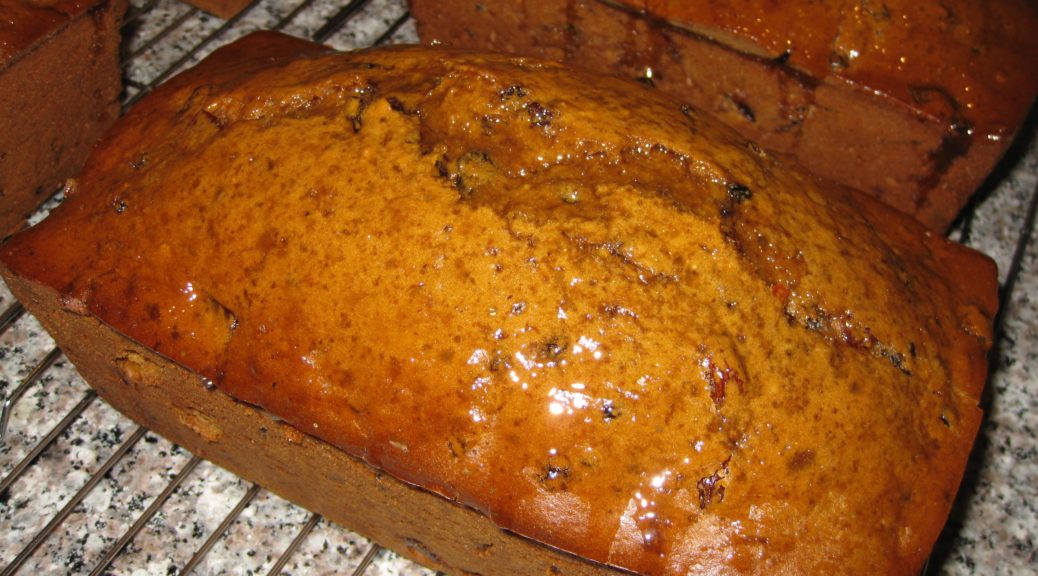
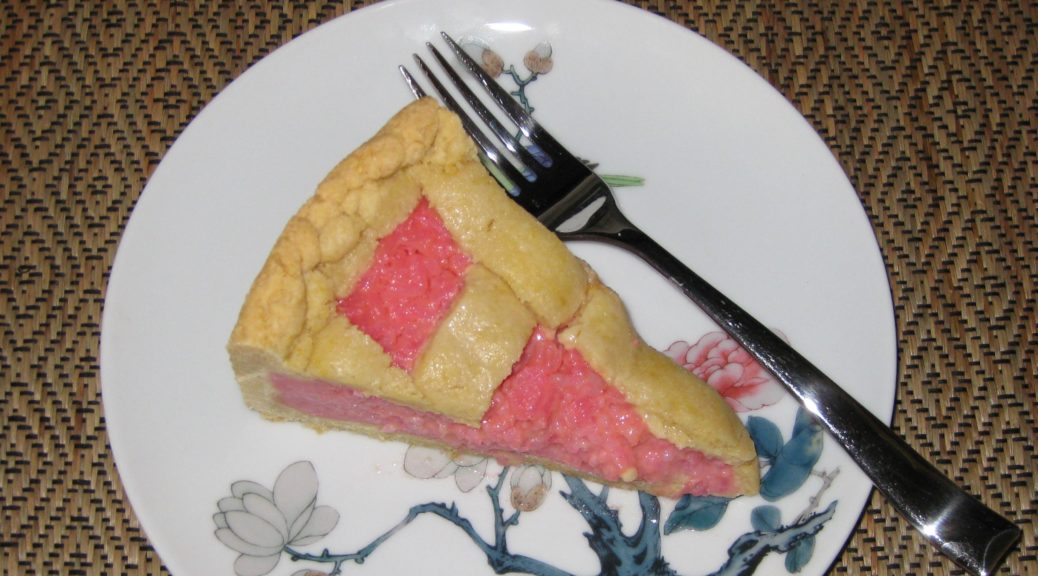
Though they came from a background that was more privileged than most immigrants of the time, they had little by the time the family got to the United States.  They did what many immigrants did, they assimilated and became almost “hyper” American.  I never heard either of them speak a word of Italian.  And, while Auntie Helen cooked an array of Roman specialties, she also cooked a lot of American food, including Impossible Pies, more the savory ones than the sweet ones; homemade Pumpkin Chiffon Pie (the only thing she cooked that I didn’t like); and cheese and egg strata for brunch (with lots of bacon on the side!).


Join our mailing list and you’ll never miss a recipe again!


I recently found a series of Impossible Pie recipes that Auntie Helen wrote out for me.  I can’t promise that I’ll make each of them, but I will post the recipes, in her own handwriting.  If nothing else, they’ll be a bit of a time capsule.

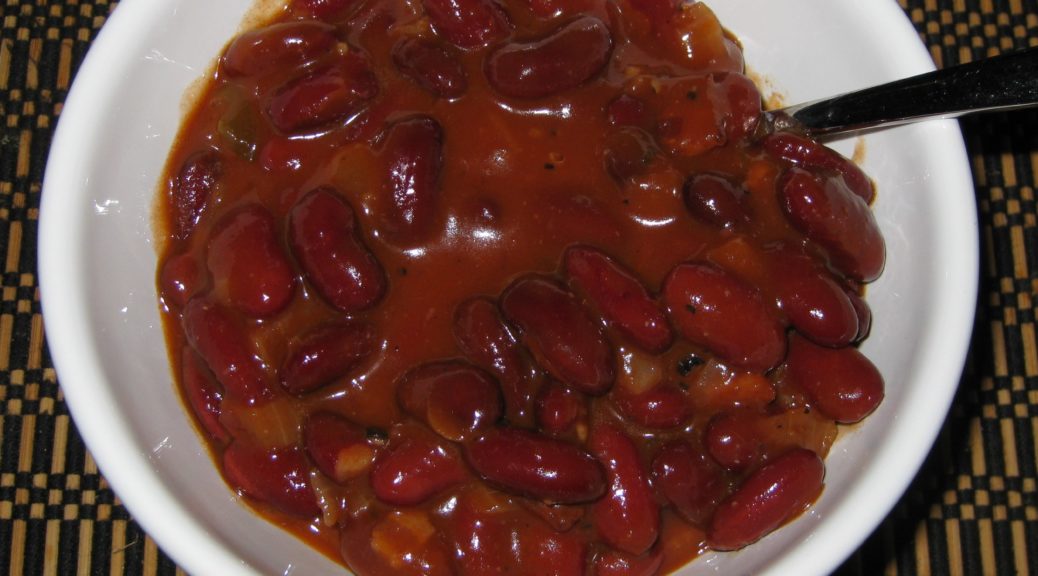
Meanwhile, please enjoy my take on Auntie Helen’s lentil salad.

Print Recipe
Auntie Helen's Lentil Salad
Auntie Helen’s lentil salad was more of a general concept that a definitive recipe. Feel free to add other ingredients to this, like a handful of chopped black oil-cured olives, some sliced scallions, or a sprinkling of dry oregano. You can replace some of the olive oil with the oil from a can of anchovies or add a teaspoon of anchovy paste if you’d like. It will add an umami touch without tasting fishy.
Votes: 0
Rating: 0
You:
Rate this recipe!
Prep Time 30 minutes
Cook Time 30 minutes
Passive Time 8 hours
Servings
people
Ingredients
Prep Time 30 minutes
Cook Time 30 minutes
Passive Time 8 hours
Servings
people
Ingredients
Votes: 0
Rating: 0
You:
Rate this recipe!
Instructions
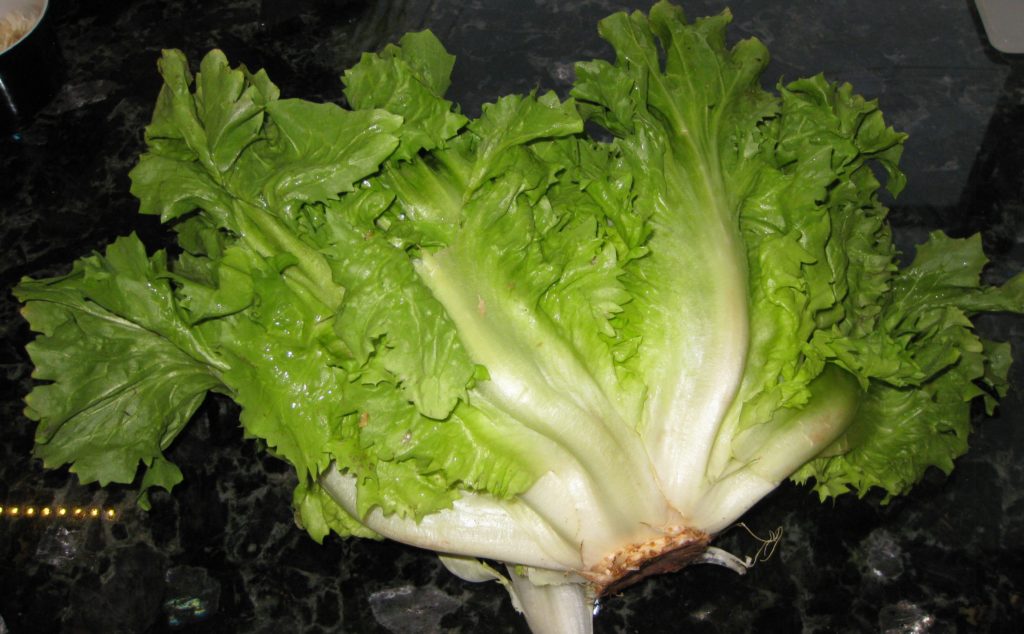
  1. Wash and pick over the lentils but do not soak them.
  2. Drain the lentils.
  3. Combine the lentils and water.
  4. Bring the lentils to a boil and gently boil until just tender, 10-15 minutes, or maybe a little more based on your elevation.
  5. Drain the lentils.
  6. Mix the hot lentils with the diced onion, oil, and rosemary. Stir well.
  7. Bury the bruised garlic clove in lentils.
  8. Loosely cover the lentils and cool at room temperature.
  9. When the lentils are cool, they can be refrigerated for up to three days before proceeding.
  10. To finish the lentil salad, remove the garlic clove and discard.
  11. Dice the roasted red pepper.
  12. Add the diced roasted red pepper, vinegar, salt and pepper. Mix well and chill thoroughly.
  13. Remove the lentil salad from the refrigerator approximately one hour before serving.
  14. Adjust salt and pepper before serving. Add more olive oil if the lentils seem dry.
Recipe Notes

Copyright © 2018 by VillaSentieri.com. All rights reserved.

Share this Recipe

Stir-Fried Chicken with Cashews and Snow Peas

May 9, 2018

This is the year of the Dog.

It may be old news, but Lunar New Year was Friday, February 16, 2018.  We celebrated with close friends and a dinner menu with an extensive array of Asian dishes.  There are many traditional dishes for Lunar New Year depending on the country.  I chose to do a pan-Asian menu rather than focus on strictly traditional recipes from a single country.

Kifune Shrine, Kyoto, Japan (Photo by Avishek Kumar)

We were in Palm Springs for Lunar New Year.  The plan was to escape winter weather in Santa Fe which, as it turned out, was not very wintery after all, unlike what the East Coast experienced.


Follow us on your social media platform of choice


Sourcing Asian ingredients has become a real issue for me now that I don’t live in a major city.  The only Asian grocery store in Santa Fe, Talin Market, closed a few months ago though the original location is still open in Albuquerque.

Palm Springs only has two Asian markets that I can find.  Both are Filipino-owned and, although they stock an array of Asian goods, they really focus on Filipino foods.

Honen-in Temple, Kyoto, Japan (Photo by Avishek Kumar)

Amazon came to the rescue.  While I’d rather stand in the aisles of an Asian market reading and comparing packages of honest-to-goodness product, Amazon was a lifesaver.

There were eight of us for the Lunar New Year dinner.

The kitchen in our Palm Springs house is small, approximately 9 feet by 11 feet.  Turning out a multi-course meal requires a lot of planning and organization.   I divided the main part of the meal into four courses.  Each course included a complementary array of foods and different cooking methods.

We started with hors d’oeuvres and cocktails.  We ended with a simple, non-traditional dessert of gelato and fortune cookies, which I purchased.  I assumed nobody was going to be too into dessert after all the other food.

Fushimi Inari Shrine, Kyoto, Japan (Photo by Avishek Kumar)

Here’s the menu:

Hors d ’Oeuvres
Vegetable Dumplings with Soy-Vinegar Dipping Sauce
Steamed Edamame with Coarse Salt

First Course
Stir-Fried Chicken with Cashews and Snow Peas
Eggplant Hunan Style
Cambodian Fish with Bean Thread

Second Course
Korean Bulgogi
Indonesian Sweet Corn Patties
Szechuan Garlic Noodles

Third Course
Hot and Sour Soup

Fourth Course
Chinese Roast Pork
Japanese Carrot Salad
Mapo Tofu
Caramelized Tomatoes with Ginger and Vinegar


Join our mailing list and you’ll never miss a recipe again!


I recently published my recipe for Chinese Roast PorkHot and Sour Soup is coming up in a couple of weeks.  Today, however, we’re focusing on a Cantonese classic, Stir-Fried Chicken with Nuts and Vegetables, specifically cashews and snow peas.

This is a recipe that I started making during junior year in college.  It got tweaked a lot over that year.  By then I was comfortable with the end product and didn’t really do much with it… until this year.

I didn’t really change the recipe, though.  I changed the pan!

Shrine in Gion District, Kyoto, Japan (Photo by Avishek Kumar)

You’ve probably figured out that I’m prone to excess where kitchen equipment comes in.  I have four woks:  two carbon steel ones that date back to college and two that are a decade or so younger, one aluminum and one carbon steel.  Both of these are larger than the ones from my college days.

I always cook my stir-fries in a wok but this particular dish is always a problem due to the “velvet” coating on the chicken.  The coating always sticks to the wok.  I suspect I could eliminate that problem by using enough oil to deep fry the chicken but that wasn’t supposed to be the way to cook it.  So, I always just accepted the “sticking-chicken” problem.

Until now.

I used a large, non-stick skillet.

It worked like a charm!!!

I don’t think I’ll give up my woks any time soon but for this particular dish, non-stick is definitely the way to go.

Afterthought:  This recipe calls for MSG, though, of course, you can leave it out if you wish.  If you’re at all interested in the hype about the health effects of MSG, I suggest you read this article.

Print Recipe
Stir-Fried Chicken with Cashews and Snow Peas
Walnuts and either broccoli or green beans can be used instead of cashews and snow peas. The chicken can be marinated several hours in advance and refrigerated, tightly covered. If you wish, you can reduce or eliminate the MSG.
Votes: 0
Rating: 0
You:
Rate this recipe!
Course Mains, Poultry
Cuisine Chinese
Prep Time 20 minutes
Cook Time 15 minutes
Servings
people as part of a Chinese meal
Ingredients
Velvet Chicken
Sauce
Assembly
Course Mains, Poultry
Cuisine Chinese
Prep Time 20 minutes
Cook Time 15 minutes
Servings
people as part of a Chinese meal
Ingredients
Velvet Chicken
Sauce
Assembly
Votes: 0
Rating: 0
You:
Rate this recipe!
Instructions
Velvet Chicken
  1. Cut the chicken into ½ inch cubes.
  2. Put the chicken in a non-reactive dish.
  3. Sprinkle the chicken with salt, pepper, five spice powder and MSG. Mix well then let stand 20 minutes.
  4. Sprinkle the chicken with cornstarch and 4 teaspoons of oil. Mix well and let stand 20 minutes.
  5. Fold the egg white into the chicken. Let stand 30 minutes. If not using immediately, the chicken can be refrigerated, covered, for several hours at this point.
Sauce
  1. Combine all sauce ingredients, stir well and reserve.
Assembly
  1. Deep fry the nuts until golden. Once they start to color, they will cook rapidly. Careful attention is required to avoid burning them.
  2. When golden, remove the nuts from the oil and spread them on a paper towel to drain.
  3. Cut the tips off the snow peas.
  4. Using a large non-stick skillet, stir-fry the snow peas in 3 tablespoons of vegetable oil over high heat for about 30 seconds, until bright green. (You can use some of the oil used to fry the nuts if you wish.)
  5. Transfer the cooked snow peas to a plate to cool.
  6. In the same non-stick skillet, stir-fry the garlic and ginger over high heat, until fragrant, approximately 30 seconds, adding a few tablespoons more oil if needed.
  7. Add the chicken and stir-fry over high heat until just cooked through, approximately 2-3 minutes.
  8. Stir the sauce mixture to combine and add it to the chicken.
  9. Bring to a boil and cook until thickened, stirring constantly, approximately 1 minute.
  10. Stir in the cooked cashews and snow peas.
  11. Remove the pan from the heat and stir in the sesame oil.
  12. Serve immediately with steamed rice.
Recipe Notes

Copyright © 2018 by VillaSentieri.com. All rights reserved.

Share this Recipe

Piselli in Umido (Peas in Tomato Sauce)

April 11, 2018

Italians have knack for combining a modest array of vegetables into an almost endless cannon of dishes, each of which is distinctive, even if the interrelationships of the various parts are obvious.

This dish of peas cooked in tomato sauce is from my husband’s paternal grandmother, Amerina Pieri.

I learned to make this from my mother-in-law, Marisa, Amerina’s daughter-in-law.


Follow us on your social media platform of choice


Everyone who makes it adds his or her own signature.  Mine is not exactly like my mother-in-law’s and I’m sure hers is not just like Zia (Aunt) Ida’s, Amerina’s daughter.

Interestingly, Nonni (as we all called her) used canned peas.  In talking with my father-in-law (who grew up eating this) and my mother-in-law, they were pretty sure Nonni would not have used canned peas in Italy unless she possibly canned them herself.  Somehow canned peas became the norm in America.

Amerina Pieri (aka Nonni or Nonni’merina) Christmas 2005

And, while canned peas produce a pretty good dish, I prefer something a little fresher.  Because really good fresh peas are available for only a few weeks a year at the Farmers Market in Santa Fe, I usually use frozen peas.

If the frozen peas haven’t been in your freezer so long that they start to dry out and freeze into a block they are superior to “fresh” peas except during the few weeks a year when they are really locally-grown and truly fresh.


Click HERE to join our mailing list and you’ll never miss a recipe again!


My mother-in-law usually uses canned tomato sauce when making this, as did Nonni (at least when she made it on this side of the Atlantic Ocean!).

I use tomato paste and water.  If you read the ingredient lists on cans of tomato sauce that you can buy in the United States, you will find that most are made from tomato paste and water, so why not just do it yourself?  Those few brands of tomato sauce that are not made from diluted tomato paste are a little too sour for my taste.  I would opt for a good-quality tomato puree instead.

My favorite brand of domestically produced tomato paste

Tomato paste has a richer flavor than tomato sauce or tomato puree.  I attribute this to the extra cooking that is needed to concentrate the tomatoes.  Those little cans provide the foundation of a taste that could otherwise only be achieved with hours of simmering.

Homemade tomato puree would be another good option if you want a fresher, more summery taste.  Here’s where you can find my recipe.


If you have a favorite family recipe and a bit of a story to tell, please email me at santafecook@villasentieri.com and we can discuss including it in the blog. I am expanding the scope of my blog to include traditional recipes from around the country and around the world. If you haven’t seen Bertha’s Flan or Melinda’s Drunken Prunes, take a look.  They will give you an idea of what I’m looking for.


Print Recipe
Piselli in Umido (Peas in Tomato Sauce)
Fresh or canned peas can be used in place of frozen. Fresh peas will take longer to cook. The canned peas should be cooked briefly to avoid overcooking. I like to rinse off frozen vegetables to remove any ice crystals on the exterior. I find the ice crystals can carry a “freezer” taste.
Votes: 0
Rating: 0
You:
Rate this recipe!
Course Sides, Vegetables
Cuisine Italian
Prep Time 10 minutes
Cook Time 75 minutes
Servings
people
Ingredients
Course Sides, Vegetables
Cuisine Italian
Prep Time 10 minutes
Cook Time 75 minutes
Servings
people
Ingredients
Votes: 0
Rating: 0
You:
Rate this recipe!
Instructions
  1. Sauté the onion, garlic, sage, parsley and ½ teaspoon of salt in the olive oil in a heavy-bottomed saucepan till the onion is translucent.
  2. Add the wine and cook, stirring frequently, until it evaporates.
  3. Add the tomato paste and sauté until it becomes slightly darker, 3-4 minutes.
  4. Add the water, sugar, bay leaf, rosemary, oregano, and salt and pepper to taste.
  5. Simmer, partially covered, until thickened, approximately 45 minutes.
  6. Adjust seasoning.
  7. Rinse the frozen peas under cool water to remove any ice crystals.
  8. Add the frozen peas to the sauce.
  9. Simmer approximately 15 minutes, adjusting seasoning once again, if needed.
Recipe Notes

Copyright © 2018 by VillaSentieri.com. All rights reserved.

Share this Recipe

Jamaican Easter Bread (Bun)

March 23, 2018

Google and Wikipedia and Bing have all let me down!

Often when I’m writing a blog, I’ll do a search or two to shore up some facts.

In this instance, I was trying to find a picture of a product and to confirm my understanding of exactly what it is.  That product is New Sugar.

My searches turned up nothing.

Back in college, I would buy new sugar on trips to the West Indies.  The stuff I bought was sold in cans.  It was dark brown, partially crystalized and partially a thick liquid.  It was not as dark or as thick as molasses.  My recollection is that new sugar is basically sugar cane juice boiled down until it thickens and some of the sugar crystallizes.

It’s what my recipe for Jamaican Easter Bread (aka “Bun”) calls for.


Click HERE to join our mailing list and you’ll never miss a recipe again!


Long ago, when my meager supplies of new sugar were exhausted and I was no longer going to the West Indies on a regular basis, I created a substitute for new sugar that fooled even my Jamaican friends.  (Hint, it’s in the recipe below.)

If my recipes contain a substitute for a difficult-to-find ingredient, I like to make the substitution clear and to provide directions on how to use the original ingredient if available.

In my blog entries, I try to provide some sort of personal or cultural or social context for each recipe.  In this instance, I wanted to highlight new sugar.

I was about to give up when I tried different search terms.  I had only known it as New Sugar, but, finally, searching on “Wet Sugar” got me one website that had what I was looking for.

The website confirmed my understanding of what new sugar, aka wet sugar, is:  boiled sugar cane juice.  It also confirmed that it is much more difficult to find than it was 30-50 years ago.  I hate to admit it, but I was buying new sugar more than 40 years ago!

My recipe for Bun (that’s really what it’s called in Jamaica…just Bun) came from Valrie Tracey a Jamaican friend from college.  Valrie and I and my roommate, Ray Hugh from Guyana, were close friends in college.  Though I’ve lost touch with Valrie, Ray and I are still in touch via Facebook.  And, yes, her name is spelled Valrie, apparently due to an error on her birth certificate as her parents intended for her name to be Valerie!


Follow us on your social media platform of choice


In addition to new sugar, Valrie’s recipe called for “Mixed Spice,” a commonly used mixture in the cooking of Britain and many former British colonies.  I don’t like using spice combinations that I haven’t made myself, like pumpkin pie spice or curry powder.  If the brand goes out of existence or changes its formula one can’t recreate the dish exactly the same way again.  For that reason, starting in college, I worked out my own formulas for spice mixtures that I used on a regular basis.

Valrie Tracey in 1975

Rather than have you make a batch of Mixed Spice before making a batch of Bun, I added the individual spices, in the correct amounts, to the recipe.

After resurrecting this recipe from one of my two 5 x 7 metal index card boxes of recipes that I started back in college and sharing the Bun with a number of friends, I began to seriously wonder why I hadn’t made it in over 40 years!

I can assure you, I won’t wait long to make it again.

I like to toast the Bun and add some butter and jam but in Jamaica it would often be served with a wedge of cheese.  However you serve it, I’m certain you’ll enjoy it.


If you have a favorite family recipe and a bit of a story to tell, please email me at santafecook@villasentieri.com and we can discuss including it in the blog. I am expanding the scope of my blog to include traditional recipes from around the country and around the world. If you haven’t seen Bertha’s Flan or Melinda’s Drunken Prunes, take a look.  They will give you an idea of what I’m looking for.


Print Recipe
Jamaican Easter Bread (Bun)
If you can find new sugar (also known as wet sugar) you can use 2 ½ cups of new sugar in place of the brown sugar and molasses. The dough for this version of Bun is quite wet, more like cake batter than bread dough. When I was making this back in college days and had to mix it by hand, I added enough flour to make a dough that could be kneaded. With a stand mixer, I allow the mixture to be wet. You might want to try both variations and see which you prefer.
Votes: 0
Rating: 0
You:
Rate this recipe!
Course Sweet Breads
Cuisine West Indian
Prep Time 30 minutes
Cook Time 90 minutes
Passive Time 2 hours
Servings
loaves
Ingredients
Bread
Glaze
Course Sweet Breads
Cuisine West Indian
Prep Time 30 minutes
Cook Time 90 minutes
Passive Time 2 hours
Servings
loaves
Ingredients
Bread
Glaze
Votes: 0
Rating: 0
You:
Rate this recipe!
Instructions
Bread
  1. Scald the milk by heating over medium high heat, stirring frequently to prevent a skin from forming, until bubbles begin to foam up around the side.
  2. Allow the milk to become lukewarm (approximately 110°F).
  3. Combine lukewarm milk, yeast, 1 teaspoon of sugar from the amount above, and 1 pound of flour in the bowl of a mixer.
  4. Using the paddle, mix well then allow the sponge to sit, covered, until it doubles in bulk.
  5. After the sponge has doubled, mix in 1/3 of the remaining flour and 1/3 of the remaining sugar.
  6. When combined, add the butter, molasses and all the spices and flavorings. Mix well.
  7. Add ½ of the remaining flour and ½ of the remaining sugar. Mix well.
  8. Add the eggs and mix well.
  9. Add the remaining flour and sugar. Mix for about 10 minutes on medium speed.
  10. Mix in the fruit.
  11. Divide the batter into 4 well-buttered 8” x 4” bread pans. Cover and sit at room temperature for about an hour. The batter will not really rise but the yeast is the only leavening so it needs to have time to make air bubbles that can expand and leaven the bread.
  12. Bake at 300°F for approximately 90 minutes, until a tester comes out clean.
Glaze
  1. When the bread is nearing completion, make the glaze by bringing the sugar and water to a boil and simmering a few minutes until syrupy.
  2. As soon as the bun comes out of the oven, brush some of the glaze on top. Allow to cool 10 minutes in the pans.
  3. Remove the bun from the pans and brush with more glaze. Allow to cool another 10 minutes.
  4. Brush with remaining glaze and cool completely.
Recipe Notes

Copyright © 2018 by VillaSentieri.com. All rights reserved.

Share this Recipe

Philadelphia-Style Tomato Pie

March 14, 2018

Like many psychiatry residents, I used to moonlight to make extra money.

The money was good and the work was usually not difficult.  Many moonlighting jobs required being on-premises overnight.  Most of the time, this usually just involved sleeping but, again, not always.

One of my easier moonlighting jobs was at a private psychiatric hospital in the Philadelphia suburbs.  I had to do the histories, physicals, and psychiatric evaluations on the newly admitted patients and then be available for any issues that came up during my shift.  Usually I got to sleep all night.

This was in stark contrast to one of my other moonlighting jobs at the crisis service that covered a swath of northeast Philadelphia.  The patients were more acute and admissions unplanned.  Sleep was elusive.


Follow us on your social media platform of choice


One morning as I was finishing up some work on one of the units at the private psychiatric hospital I spied a pizza box in the staff lounge, clearly intended for anyone who wanted to have some.

I opened the box and was presented with my first tomato pie, basically a focaccia topped with a prodigious amount of a jam-like tomato sauce.  There was no cheese and there were no toppings.

I had never heard of tomato pie like this.  Sometimes the term tomato pie was applied to a run-of-the mill pizza, usually by my Uncle Joe, but this was a whole different creation.

Not only was it naked, except for the tomato sauce, the sauce was very dense (almost like tomato paste) and thickly applied to the dough.

Good quality tomato puree is essential for this sauce. I prefer imported Italian tomato puree, called passato (or passata) (both are correct) di pomodoro

Growing up, a regular mid-morning Sunday snack (after church and before our major meal of the day around 1:00 or so) was a bowl of my mother’s long-simmered tomato sauce that was almost always bubbling away on the stove on Sunday mornings and a stack of bread to dip into it.   Italian bread was preferred but I’d make do with American “slice” bread if need be…often six slices…to hold me over until mealtime.

Tomato pie was heaven-made for someone like me.  It was bread and sauce in an easy-to-eat package.  No bowl or dipping required.


Click HERE to join our mailing list and you’ll never miss a recipe again!


It’s pretty astounding to realize that I had lived in Philadelphia for about 11 years before encountering my first tomato pie.  I don’t really understand why.  Two of the bastions of Philadelphia tomato pie are on Ninth Street, an area that I started going to my freshman year in college.

This article provides some interesting background on Philly-style Tomato Pie.

I’m a big fan of making dough for pizza and focaccia in my bread machine.  If you don’t have a bread machine, use a mixer with a dough hook.  Failing that, some elbow grease and a smooth kitchen counter will do the trick.


If you have a favorite family recipe and a bit of a story to tell, please email me at santafecook@villasentieri.com and we can discuss including it in the blog. I am expanding the scope of my blog to include traditional recipes from around the country and around the world. If you haven’t seen Bertha’s Flan or Melinda’s Drunken Prunes, take a look.  They will give you an idea of what I’m looking for.


Print Recipe
Philadelphia-Style Tomato Pie
Tomato Pie is a thick crust pizza dough topped with copious amounts of very thick tomato sauce. No cheese is put on the pie before baking. Some folks sprinkle grated Pecorino on the finished pie. It is usually served at room temperature. If the garlic taste in the sauce is too strong for you, the garlic can be sautéed in a small amount of olive oil before mixing into the tomato puree mixture. It is best to make the sauce a day in advance and refrigerate it. If you don’t have a bread machine, mix the dough in a mixer with a dough hook for about 10 minutes after the dough comes together. You can also mix it by hand which will give you a bit of an upper-body workout.
Votes: 2
Rating: 5
You:
Rate this recipe!
Prep Time 15 minutes
Cook Time 35 minutes
Passive Time 24 hours
Servings
pieces
Ingredients
Sauce
Dough
Assembly
Prep Time 15 minutes
Cook Time 35 minutes
Passive Time 24 hours
Servings
pieces
Ingredients
Sauce
Dough
Assembly
Votes: 2
Rating: 5
You:
Rate this recipe!
Instructions
Sauce
  1. Grate the garlic on a Microplane grater or crush to a paste.
  2. Combine all the ingredients for the sauce.
  3. Cover the sauce and refrigerate overnight.
  4. Before using, taste and adjust seasoning.
Dough
  1. Prepare the dough using the dough cycle of the bread machine.
  2. At the end of the cycle put the dough into an oiled bowl or covered container and allow to rise until doubled.
Assembly
  1. Oil a half-sheet pan (13" x 18") with a few tablespoons of olive oil.
  2. Stretch dough into the pan.
  3. The dough will spring back. Stretch it out then allow it to rest a few minutes. Stretch more, then allow it to rest a few minutes. With resting in between stretches, the gluten will relax and the dough won't spring back.
  4. Cover the pan. I invert another half-sheet pan on top.
  5. Allow to rise until doubled, approximately 30 minutes.
  6. Spread all of the sauce on top.
  7. Bake at 350°F until crust is browned and sauce is thick, approximately 35-45 minutes.
  8. Cool in the pan.
  9. Cut into squares and serve at room temperature.
  10. Sprinkle with grated Pecorino cheese, if desired, once cool.
Recipe Notes

Copyright © 2018 by VillaSentieri.com. All rights reserved.

Share this Recipe

Baklava with Walnuts and Almonds

February 23, 2018

Syrup desserts are popular from the Eastern Mediterranean through the Arabian Peninsula.  Among syrup desserts, baklava is one of my favorites.

I rarely make baklava but the first time I did was junior year in college.  That same recipe is the one that I still make.

Styles of baklava vary.  More nuts.  Less nuts.  More syrup.  Less syrup.  Different aromatics.  While I like them all, I tend towards the more Arabic preparations which, in my experience, include more nuts and syrup than their more restrained Greek counterparts.

Perhaps that’s why a friend, of Greek heritage, said that my baklava didn’t look like anything a Greek ever made!  Admittedly, however, the recipe came from a Greek and I think I have been true to the recipe but, hey, I’m not Greek so who am I to say what could have come out of a Greek kitchen.


Click HERE to join our mailing list and you’ll never miss a recipe again!


I spent much of 2010 living in Dubai.  The consulting company that I started in the mid 1990’s landed a contract with the United Arab Emirates Ministry of Health in late 2009.  In January 2010 I moved to Dubai.

A view of one part of the kitchen in my Dubai apartment

Shopping for food in Dubai is just amazing.  The sheer number of expats (at the time it was estimated that 95% of the people living in Dubai were expats!) means that the supermarkets are truly multinational affairs, even the relatively small ones.

It was rare that I could not find brands with which I was familiar.  I’m sure expats from almost every country had the same experience.  The supermarkets were stocked with brands from around the world.  It truly was the most amazing grocery shopping I have ever experienced outside of the food halls at Harrods and KaDeWe.  But remember, Harrods and KaDeWe are most decidedly upscale affairs.  In Dubai I was just going to the (plain, ordinary) supermarket!

A small section of the food hall at KaDeWe in Berlin (By Blorg (Own work) [GFDL (http://www.gnu.org/copyleft/fdl.html), CC-BY-SA-3.0 (http://creativecommons.org/licenses/by-sa/3.0/)], via Wikimedia Commons)
I spend a week in Germany during the summer of 2010, right in the middle of my Dubai experience.  I found shopping in German supermarkets to be a much more “foreign” affair than shopping in the supermarkets in Dubai.  Rarely was there a brand I recognized in Germany.  Shopping involved intense reading of labels because I was not familiar with the products and their contents…or their quality.

A view of the Arabian Gulf and the man-made Palm Jumeriah Island in the distance from my apartment

Produce in Dubai could be hit or miss due to the distance most of it traveled.  Although there was a nascent horticultural industry in Dubai, I could never find truly local produce.  On several occasions I tried to find a store that purported to sell local produce but my driver could never locate it, even with the address!


Follow us on your social media platform of choice


The closest we had to “local” produce was from Iran, the source of Romaine lettuce and cauliflower, as I recall, among other produce.  Considering that Iran and the United Arab Emirates are only 90 miles away at their closest point, and considering how far produce can travel in North America from fields in California to the Northeast, 90 miles really counts as local, even if there is an international border among two not-so-friendly countries involved!

Another view from the apartment looking at Dubai Marina

In the supermarkets, prepared food counters overflowed with Middle Eastern items and my fridge was always stocked with hummus, pita with zatar, olives, and other meze.

I also had access to world-class syrup desserts, including baklava!!!

Another fascinating aspect of most of larger supermarkets in Dubai was the existence of a room at the back that was usually labeled with something like “Pork for Non-Muslims.”  In this space once could find the most amazing cured pork products from Italy, Spain, and Europe in general!

Dubai Marina at ground level

Alas, items containing alcohol were difficult to obtain.  This included vanilla extract.  The available non-alcohol-based “extract” was just not the same.  Luckily vinegar was just as good, even if it was labeled “Grape Vinegar” rather than “Wine Vinegar!”

I hope you enjoy this baklava.  Just don’t make it for a Greek friend!


If you have a favorite family recipe and a bit of a story to tell, please email me at santafecook@villasentieri.com and we can discuss including it in the blog. I am expanding the scope of my blog to include traditional recipes from around the country and around the world. If you haven’t seen Bertha’s Flan or Melinda’s Drunken Prunes, take a look.  They will give you an idea of what I’m looking for.


Print Recipe
Baklava with Walnuts and Almonds
Try to find phyllo that is either 9” x 13” or 18” x 13”. If it’s the latter, cut the stack of sheets in half to make them all 9” x 13”. I have found that covering the stack of phyllo with a damp towel, as some authors recommend, after you remove every sheet isn’t necessary if you move quickly. However, before you start, moisten a dish towel and keep it handy in case there are any breaks in the action, in which case you should definitely cover the stack of unused phyllo. While it is not essential to clarify the butter, removing the milk solids will prevent uneven browning of the top of the baklava.
Votes: 0
Rating: 0
You:
Rate this recipe!
Prep Time 1 hour
Cook Time 1 1/2 hours
Passive Time 24 hours
Servings
pieces
Ingredients
Bakalva
Syrup
Prep Time 1 hour
Cook Time 1 1/2 hours
Passive Time 24 hours
Servings
pieces
Ingredients
Bakalva
Syrup
Votes: 0
Rating: 0
You:
Rate this recipe!
Instructions
Baklava
  1. Clarify the butter.
  2. Finely grind the almonds and walnuts.
  3. Mix nuts, cinnamon, allspice and sugar.
  4. Brush a 9-inch b 13-inch baking pan with butter.
  5. Lay a sheet of phyllo and brush it with butter.
  6. Repeat until 12 sheets have been used.
  7. Spread a layer of nuts, approximately 1 cup, on top of the phyllo.
  8. Cover with a sheet of phyllo, brushing it with butter.
  9. Repeat 1 cup of nuts covered with one sheet of phyllo until all the nuts have been used up.
  10. Top with all the remaining sheets of phyllo individually adding them and brushing each sheet with butter.
  11. Score the top few sheets of phyllo in a diamond pattern. Cut from one corner to the opposite corner.
  12. Make three more rows of cuts, evenly spaced, in each direction parallel to the first cut for a total of 7 cuts.
  13. Repeat in the opposite direction.
  14. Put a clove in the center of each diamond.
  15. Sprinkle the top lightly with water to reduce curling while baking.
  16. Bake 350°F for 1½ hours, until golden.
  17. Pour hot honey syrup over the hot baklava as it comes from the oven.
  18. The baklava is best if allowed to sit at room temperature, uncovered for about a day before serving.
Syrup
  1. As the baklava is nearing completion, make the syrup.
  2. Combine lemon zest, sugar, water, cinnamon, and cloves in a heavy-bottomed sauce pan.
  3. Bring to a boil, lower heat and continue cooking without stirring until syrupy, approximately 15 minutes. (218°F to 220°F if you want to measure using a candy thermometer.)
  4. Stir honey into hot syrup.
  5. Remove from the heat.
  6. Using a small strainer, remove the solids.
  7. Reheat the syrup immediately before removing the baklava from the oven.
  8. Stir in lemon juice and rum or brandy.
Recipe Notes

Copyright © 2018 by VillaSentieri.com. All rights reserved.

Share this Recipe

Kidney Beans in Tomato Sauce

February 19, 2018

As you may have figured out by now, we live in a multi-generational household.

My husband’s parents live in our casita in Santa Fe.  Before we moved to Santa Fe, they lived in our coach house in Chicago.

Meals are usually communal affairs and, after many years, I’m learning to make some of my mother-in-law’s dishes that I’ve taken for granted for more than 20 years.

Though these beans could easily be the centerpiece of a vegetarian meal if you leave out the bacon, they usually accompany something more pleasing to carnivores (that would be my husband and my father-in-law).  For this rendition, I went back to the original recipe, with bacon, though usually my mother-in-law leaves it out and simply adds a few tablespoons of olive oil to sauté the onion and bell pepper.

My husband at two years of age with his parents

As I was learning to make these with my mother-in-law, I also learned that the recipe originally came from Lorraine, the wife of my brother-in-law’s godfather, Jack.  Lorraine is of Polish heritage but was married to Jack, a close friend of my father-in-law who moved to the USA from Italy.


Click HERE to join our mailing list and you’ll never miss a recipe again!


I’m totally confused by the heritage of these beans.  My mother-in-law says they’re Polish based on Lorraine.  I always thought of them as Italian because, until recently, I thought the recipe was from my mother-in-law’s family and, also, because the red sauce with bacon is pretty similar to an Italian-American adaptation of a classic Italian method for cooking green beans.  The bacon is a substitute for pancetta which is the same cut of meat as bacon but which is not smoked after it is cured.

I guess I’m going to have to go with my mother-in-law’s assertion that these are Polish though I can’t say I ever had anything like them among the Poles and other Eastern Europeans in my hometown of Johnstown, PA.  Really, though, that’s not definitive.  I’ve never had any potato cakes like my Slovak grandmother’s (unless they were made by one of her daughters-in-law, of which there were seven!).  That doesn’t make those potato cakes any less Slovak, though.

Red beans and tomatoes are a common combination internationally.  There are versions from New Orleans to Haiti to India to South America to Italy to name just a few.  To be sure, the seasonings vary tremendously but the basics, red beans and a tomato-based sauce, remain the same.


Follow us on your social media platform of choice


Fast forward to the 1970’s:  my husband (on the right) and his brother (on the left) with their parents

I’ve decided to keep this recipe in its original form, with canned beans and tomato sauce.  Although I keep an array of canned beans in my pantry for unexpected events I usually prefer to start with dry beans.  Most commercial brands of tomato sauce are made from tomato paste and water, with a bit of onion powder and garlic powder added.  In place of tomato sauce, I typically use tomato paste and water to achieve the same results.


If you have a favorite family recipe and a bit of a story to tell, please email me at santafecook@villasentieri.com and we can discuss including it in the blog. I am expanding the scope of my blog to include traditional recipes from around the country and around the world. If you haven’t seen Bertha’s Flan or Melinda’s Drunken Prunes, take a look.  They will give you an idea of what I’m looking for.


Print Recipe
Kidney Beans in Tomato Sauce
These beans can be made without the bacon, or with less bacon, in which case a few tablespoons of oil will need to be used to sauté the onion and bell pepper. If you want extra sauce just increase the amount of tomato sauce. You can sauté a clove or two of minced garlic with the onion and bell pepper if you would like. The liquid from the canned beans will improve the consistency of the sauce. Before using it, however, taste it to be sure that it does not have a metallic flavor which happens with some brands of beans. If so, drain and rinse the beans and add additional water in place of the liquid in the cans.
Votes: 5
Rating: 1.2
You:
Rate this recipe!
Prep Time 5 minutes
Cook Time 75 minutes
Servings
people
Ingredients
Prep Time 5 minutes
Cook Time 75 minutes
Servings
people
Ingredients
Votes: 5
Rating: 1.2
You:
Rate this recipe!
Instructions
  1. Dice the onion.
  2. Dice the bell pepper.
  3. Chop the bacon.
  4. Sauté the bacon until it begins to color, adding a small amount of oil if needed to keep it from sticking.
  5. Add the onion and bell pepper to the bacon.
  6. Sauté until the onion just begins to color and the pepper becomes a dull green and starts to soften. It may be necessary to cover the pan and/or add a tiny amount of water if the onion and/or pepper begin to get too brown.
  7. Add the beans and their liquid.
  8. Season with salt and pepper. Bring to a boil.
  9. Add tomato sauce and water.
  10. Simmer, partially covered, for approximately one hour, adding additional water if necessary.
  11. Taste and adjust seasoning while the beans are cooking.
Recipe Notes

Copyright © 2018 by VillaSentieri.com. All rights reserved.

Share this Recipe

Italian Wedding Soup

February 5, 2018

Growing up I never really understood why this was called Wedding Soup.  It was NEVER served at weddings.

It was mostly served at home, unceremoniously.

The fact that it was unceremonious is a shame.  It is a wonderful soup and, being honest, takes a bit of work to pull together.  Both the soup, and the soup-maker, in my estimation, deserve a bit of attention.

Although it takes some work, it doesn’t require much in the way of heard-earned skills like frosting a cake or making pie crust.  It’s just a bit of slogging through a series of steps.

This is a beloved soup among Americans of Italian descent.  Interestingly, my in-laws who are actually from Italy had never heard of it until I made it for this blog!


Click HERE to join our mailing list and you’ll never miss a recipe again!


But back to the “wedding” part.  I did a bit of internet research (thanks Google!).  Actually, I hesitate to call it “research.”  I’m old school.  I remember when doing research meant hours upon hours spent in libraries looking at actual hardcopy materials.  It almost doesn’t seem fair to sit on my sofa with my laptop and read materials served up by Google based on natural language questions and call it research.

The “natural language” part is interesting too.  In the “old” days, if you found an article that was relevant to the research topic, you would look at the articles referenced by the author and find, potentially, other relevant articles.  But they would all be older than the first article.  This is where the “Science Citation Index” came into play.

The Index was a series of periodically published volumes that listed all the articles that cited a particular article in their bibliography.  With the Science Citation Index, you could start with a relevant article and then work forwards finding all the newer articles that had cited that article.

Now I just tell Google what I’m interested in and I get a bunch of (almost always) relevant “hits!”  Google is even nice enough to tell me how many hits there are and what fraction of a second it took Google to identify them.

Even when I’m researching a biomedical topic I sit on my sofa with my laptop and search the National Library of Medicine.  The search language is a bit more arcane than the natural language used by Google but it still feels like cheating compared to slogging around a library.  I can even have the full article delivered to my laptop so I don’t have to figure out what library has the publication I need.


Follow us on your social media platform of choice


So, what did I learn from my Google search?

It appears (at least it’s a plausible theory) that Wedding Soup is an inaccurate translation of Minestra Maritata or Married Soup; apparently so-named because of the way the different ingredients marry together so well.

I’m guessing that many Americans with no affiliation to Italy have never had escarole.

Interestingly, my husband’s Tuscan grandmother would use up small amounts of different types of dried pasta, perhaps putting them into a soup or serving them with a simple sauce.  She referred to this as Pasta Maritata because she was marrying the different types of pasta to create a dish.

If this theory is correct, I am perplexed by the inaccurate translation but, be that as it may, the soup is wonderful.  I urge you to give it a try.

I like breaking up the work over two days, especially since I like to make a long-simmered broth as the base of the soup.  My mother didn’t do this.  Once the chicken was cooked, it was removed and shredded and the broth was used without additional simmering to make the soup.  It shaves about 3 hours off of the prep time.  But, since making broth is mostly hands off, and the improvement in flavor is dramatic, I simmer everything a bit longer before straining and discarding the solids.


If you have a favorite family recipe and a bit of a story to tell, please email me at santafecook@villasentieri.com and we can discuss including it in the blog. I am expanding the scope of my blog to include traditional recipes from around the country and around the world. If you haven’t seen Bertha’s Flan or Melinda’s Drunken Prunes, take a look.  They will give you an idea of what I’m looking for.


Print Recipe
Italian Wedding Soup
If you don’t want to use the white center of the escarole, start with two heads and just use the dark green parts. The pale inner portion can be served in a salad or cooked in a number of ways. I like to divide up the work over two days, making the broth on the first day and the remainder on the second day. It’s perfectly feasible to do it all on the same day, however. I always keep a stash of rinds from Parmigiano Reggiano and Pecorino cheeses in the freezer. They add great flavor to broths, beans, and an array of other dishes.
Votes: 0
Rating: 0
You:
Rate this recipe!
Cuisine Italian
Prep Time 1 hour
Cook Time 5 hours
Passive Time 2 hours
Servings
people
Ingredients
Broth and Chicken
Meatballs
Final assembly
Cuisine Italian
Prep Time 1 hour
Cook Time 5 hours
Passive Time 2 hours
Servings
people
Ingredients
Broth and Chicken
Meatballs
Final assembly
Votes: 0
Rating: 0
You:
Rate this recipe!
Instructions
Broth and Chicken
  1. Cut the chicken into breast halves, legs, thighs, and wings. Cut the back into 2 or three pieces. Reserve the liver for another use but chop the remaining giblets.
  2. Slice the onions. There's really no need to peel them first.
  3. Same with the garlic, no need to peel. It all gets strained out in the end.
  4. Combine all ingredients in a large stock pot. Cover and bring to a boil. Reduce heat, and simmer, partially covered for two hours.
  5. After two hours, remove the breasts, legs, and thighs. Continue to simmer the broth.
  6. Remove the meat from the bones. Return the chicken bones and skin to the broth.
  7. Continue to simmer the broth for another two hours, adjusting seasoning as needed.
  8. Meanwhile, shred the breast meat and refrigerate.
  9. Reserve the leg and thigh meat for another use.
  10. After the broth has finished cooking, cool it for several hours. Strain and discard the solids. Allow the broth to come to room temperature and refrigerate.
  11. Alternatively, immediately strain and discard the solids and proceed as below.
Meatballs
  1. Put all the ingredients except the bread into a mixing bowl.
  2. Cut the crusts from the bread.
  3. Cover the bread with warm water for 3-4 minutes.
  4. Squeeze some of the water from the bread.
  5. Add the bread to the mixing bowl.
  6. Mix with your hands, until thoroughly combined and no streaks of white from the bread remain visible.
  7. As you are mixing add a bit of the bread soaking water from time to time (about a quarter cup or so total) to keep the mixture moist but not wet.
  8. The mixture should become tacky from the effects of the water and the mixing on the proteins in the meat. The tackiness will help the meatballs hold together for the same reason that sausage doesn’t fall apart when the casing is removed.
  9. With damp hands, roll the mixture into approximately 50 meatballs. Keeping your hands moist will enable you to create a smooth surface on the meatballs. If there are visible cracks, the meatballs will split when cooking.
Final assembly
  1. Skim the fat from the broth. Add water to make 6 quarts of broth. Bring the broth to a boil.
  2. Meanwhile, coarsely chop the escarole.
  3. As the broth comes to a boil, adjust the salt and pepper.
  4. Add the chopped escarole. Return to a boil and cook at a moderate boil for approximately 5 minutes.
  5. Add the meatballs. Return to a boil and boil gently, so the meatballs don’t break, for 10-12 minutes.
  6. Add the shredded white meat chicken and return to a gentle boil.
  7. Adjust salt and pepper. At this point, slightly over-salt the soup as the dry pasta will reduce the saltiness of the soup. The soup can be made ahead to this point. Return to a boil and add the pasta just before serving.
  8. Add the pasta and boil gently until pasta is cooked, approximately 10 minutes.
  9. Adjust salt and pepper.
  10. Serve with freshly grated Parmigiano Reggiano cheese.
Recipe Notes

Copyright © 2018 by VillaSentieri.com. All rights reserved.

Share this Recipe

Torta di Riso (Italian Rice Tart)

January 31, 2018

Torta di Riso is an Italian specialty.  It is basically a rice pudding baked inside of a pastry crust; a Rice Tart, so to speak.

I first had Torta di Riso more than 20 years ago while visiting Italy with my husband and his parents.

We ate meals at the homes of many relatives.  I often arrived with a spiral-bound notebook to jot down the inevitable recipes that would be discussed around the table or the recipes I begged for after being served something wonderful.  That notebook is a mashup of American and Metric measures and English and Italian words for ingredients.  It became a bible of sorts for recreating many of the dishes I ate on that trip.


Click HERE to join our mailing list and you’ll never miss a recipe again!


My father-in-law’s Zia (Aunt) Mery made the first Torta di Riso that I ever tasted.  Her recipe is below (adapted for American measures).

After having it at Zio (Uncle) Beppe and Zia Mery’s house, I started noticing Torta di Riso in many places in Tuscany.

My father-in-law with his Uncle Beppe and Aunt Mery, from whom this recipe for Torta di Riso originated in their garden in Tuscany, 1994.

Alkermes liqueur originated in Tuscany so it is particularly appropriate to use it as the liqueur in Torta di Riso.  Alkermes is nearly impossible to find in the United States, however.  One can make a perfectly traditional Torta di Riso using rum in place of Alkermes but the resulting confection won’t be pink.

According to CooksInfo, “Alchermes was invented in the Frati Convent at Santa Maria Novella in Florence. Its making was kept secret, but the recipe was reputedly stolen by spies from the nearby city of Siena, which Florence was often at war with.”


Follow us on your social media platform of choice


Recipes for alkermes (also spelled alchermes) are closely guarded but the process basically involves infusing alcohol with spices and flavorings like cinnamon, cloves, vanilla, nutmeg, mace, cardamom, star anise, rosewater, and orange zest.  The red color comes from cochineal, an insect that is the foundation for natural red food coloring.  The resulting infused alcohol is sweetened and diluted with water.

The pastry crust is pasta frolla, a slightly sweetened pastry, leavened with baking powder, and often flavored with vanilla and lemon zest.  This is Mery’s recipe for pasta frolla but I also have one from Zia Fidalma that makes about half the quantity.

Torta di Riso was a big hit at my father-in-law’s birthday dinner last week. So were the cocktails, wine, and champagne!

If you don’t have access to Alkermes, you can use rum.  In fact, torta di riso is not always pink.  Many that I saw in Italy were white.

If you want to try to make your own Alkermes you can find a recipe here.  Amazon even sells the dried cochineal insects that provide the traditional scarlet color.


If you have a favorite family recipe and a bit of a story to tell, please email me at santafecook@villasentieri.com and we can discuss including it in the blog. I am expanding the scope of my blog to include traditional recipes from around the country and around the world. If you haven’t seen Bertha’s Flan or Melinda’s Drunken Prunes, take a look.  They will give you an idea of what I’m looking for.


Print Recipe
Torta di Riso (Italian Rice Tart)
This classic Italian dessert is basically a rice pudding baked inside of a pastry crust. Alkermes is a traditional Tuscan liqueur used in a number of sweets, including torta di riso, for its color and spice-like flavor. If you don’t have Alkermes, use rum. Not all versions of torta di riso are brightly colored. Vanilla powder is a natural vanilla product, not artificial. Use vanilla extract if vanilla powder is not available.
Votes: 0
Rating: 0
You:
Rate this recipe!
Cuisine Italian
Prep Time 30 minutes
Cook Time 75 minutes
Passive Time 30 minutes
Servings
people
Ingredients
Pasta Frolla
Rice
Cuisine Italian
Prep Time 30 minutes
Cook Time 75 minutes
Passive Time 30 minutes
Servings
people
Ingredients
Pasta Frolla
Rice
Votes: 0
Rating: 0
You:
Rate this recipe!
Instructions
Pasta Frolla
  1. Blend the flour, sugar, baking powder, vanilla powder, salt and lemon zest in a food processor until combined.
  2. Add the butter, cut in pieces, and blend till well combined.
  3. Add the eggs and blend till the pastry almost forms a ball.
  4. Remove the pastry from the food processor and use your hands to press everything into a single ball.
  5. Wrap the pastry in waxed paper and refrigerate for an hour before using.
Rice
  1. Wash and drain the rice.
  2. Combine the rice, water and milk in a heavy-bottomed sauce pan.
  3. Bring the rice to a boil.
  4. Cover the rice and simmer, stirring frequently, until cooked and the liquid is almost completely absorbed. If the rice does not have the consistency of thick oatmeal, add a bit more milk at the end to make it creamy.
  5. Mix the sugar, lemon zest, and Alkermes and/or rum into the rice.
  6. Pour the rice into a bowl and cool, uncovered, stirring occasionally.
Assembly and Baking
  1. Cut off a small piece of the pastry to make a lattice top and refrigerate.
  2. Roll the remaining pastry between waxed paper, turning often, until it is large enough to cover the bottom and sides of a 10 inch springform pan.
  3. Line a 10" springform pan with the pasta frolla.
  4. Cut the pastry even with the top of the pan. Add the scraps to the pastry you have reserved for the lattice.
  5. Beat the egg and egg yolks to combine.
  6. Stir the beaten eggs into the cooled rice.
  7. Pour the rice into the pastry lined pan.
  8. Roll out the pastry reserved for the lattice.
  9. Cut seven or eight strips, approximately 1/2 inch wide.
  10. Arrange the strips into a lattice on top of the rice. Cut off the excess.
  11. Roll the pastry lining the sides of the pan down to the top of the rice and form a decorative edge.
  12. Bake at 350°F until the crust is lightly browned and the rice is barely jiggley in the center, approximately 30-45 minutes.
  13. Cool on a rack for approximately 20 minutes.
  14. Remove the side of the pan and cool completely.
Recipe Notes

Copyright © 2018 by VillaSentieri.com. All rights reserved.

Share this Recipe

Mom’s Lentil Soup

January 26, 2018

My father liked soup.  Actually, my father really, really liked soup.  Every few weeks my mother would make beef noodle soup as it was one of my dad’s favorites.  Beef noodle is the soup we had most often.  Goulash was the “stew” we had most often.  In fact, I don’t remember my mother ever making an American-style beef stew.

The first American-style beef stew that I ever made was from a recipe that my sister started using after she got married.  It was definitely not one of our family recipes, though it was good.

After the beef noodle soup that my mother made on a regular basis, other soups were just occasional affairs, though soups of various types appeared often on our table.


Click HERE to join our mailing list and you’ll never miss a recipe again!


Italian “Wedding” Soup was a favorite but not something that we had more than a three or four times a year.  Everyone in the family really loved Wedding Soup but, honestly, it’s a lot of work.  It’s coming to the blog next month but today we have my Mom’s Lentil Soup.

My parents in 1981

Let’s face it, lentil soup isn’t something people swoon over.  At best it is good comfort food.  That’s exactly what this is for me.

It’s also easy to make.  A few minutes of chopping and some stirring off-and-on are rewarded with a really good pot of soup.

My mother’s lentil soup was unusual in that she put enough black pepper into it to create a distinct bite.  The first time I tasted it, as an adolescent, I was surprised by how peppery it was but I loved it.   Whether or not you add that much black pepper is entirely your choice but, in my mind, it’s the black pepper that sets my mother’s lentil soup apart from the pack.


Follow us on your social media platform of choice


Consistent with my mom’s low-and-slow philosophy, this soup is cooked longer that would be typical, for the average American cook at least.  Despite the long cooking, the lentils remain intact though soft.  They don’t really fall apart the way that dry beans might.

This soup freezes well so a big batch shouldn’t be a problem.

While a ham bone makes great lentil soup, it’s not something that most households have on a regular basis but a handful of baked ham or a few ounces of bacon make an awfully tasty soup.


If you have a favorite family recipe and a bit of a story to tell, please email me at santafecook@villasentieri.com and we can discuss including it in the blog. I am expanding the scope of my blog to include traditional recipes from around the country and around the world. If you haven’t seen Bertha’s Flan or Melinda’s Drunken Prunes, take a look.  They will give you an idea of what I’m looking for.


Print Recipe
Mom's Lentil Soup
When my mother made this soup, she added enough black pepper to give it a distinct bite. The addition of a bay leaf is my only modification of the original recipe.
Votes: 0
Rating: 0
You:
Rate this recipe!
Cuisine American
Prep Time 10 minutes
Cook Time 2 1/2 hours
Servings
people
Ingredients
Cuisine American
Prep Time 10 minutes
Cook Time 2 1/2 hours
Servings
people
Ingredients
Votes: 0
Rating: 0
You:
Rate this recipe!
Instructions
  1. Wash and pick over the lentils then drain.
  2. Shred the carrot on the tear-drop side of a box grater.
  3. Put all the ingredients in a large stock pot.
  4. Cover and bring to a boil.
  5. Reduce heat and simmer partially covered for 2 to 2½ hours.
  6. Adjust salt and pepper to taste.
  7. The soup should be thick and the lentils soft but intact.
Recipe Notes

Copyright © 2018 by VillaSentieri.com. All rights reserved.

Share this Recipe