Kidney Beans in Tomato Sauce

February 19, 2018

As you may have figured out by now, we live in a multi-generational household.

My husband’s parents live in our casita in Santa Fe.  Before we moved to Santa Fe, they lived in our coach house in Chicago.

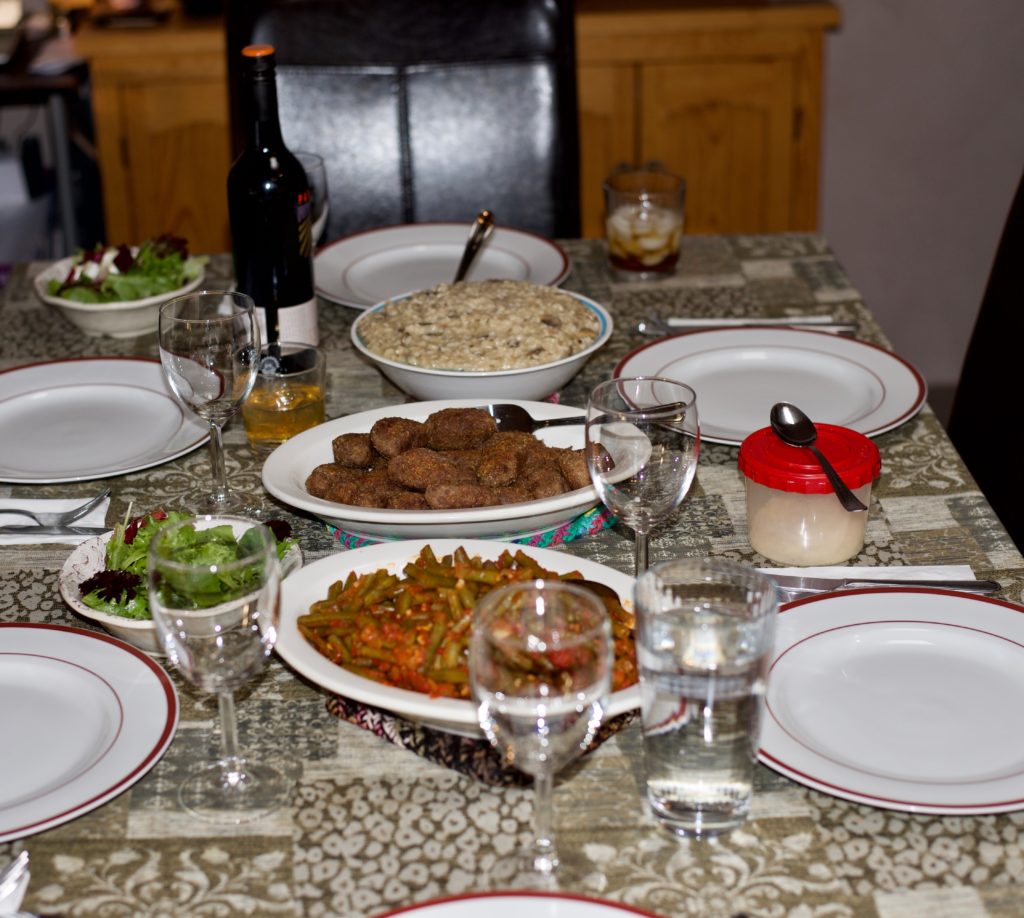
Meals are usually communal affairs and, after many years, I’m learning to make some of my mother-in-law’s dishes that I’ve taken for granted for more than 20 years.

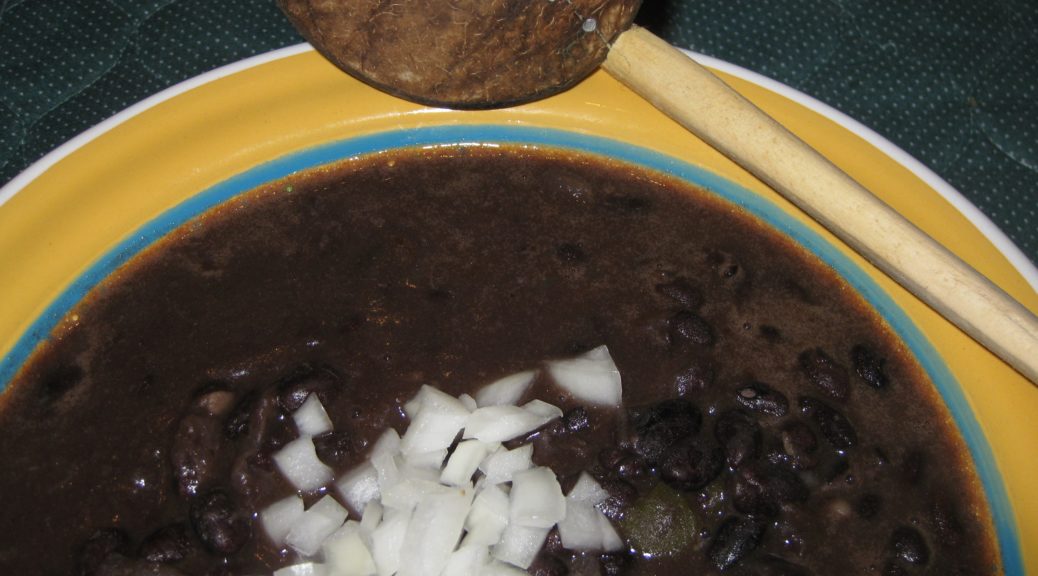
Though these beans could easily be the centerpiece of a vegetarian meal if you leave out the bacon, they usually accompany something more pleasing to carnivores (that would be my husband and my father-in-law).  For this rendition, I went back to the original recipe, with bacon, though usually my mother-in-law leaves it out and simply adds a few tablespoons of olive oil to sauté the onion and bell pepper.

My husband at two years of age with his parents

As I was learning to make these with my mother-in-law, I also learned that the recipe originally came from Lorraine, the wife of my brother-in-law’s godfather, Jack.  Lorraine is of Polish heritage but was married to Jack, a close friend of my father-in-law who moved to the USA from Italy.


Click HERE to join our mailing list and you’ll never miss a recipe again!


I’m totally confused by the heritage of these beans.  My mother-in-law says they’re Polish based on Lorraine.  I always thought of them as Italian because, until recently, I thought the recipe was from my mother-in-law’s family and, also, because the red sauce with bacon is pretty similar to an Italian-American adaptation of a classic Italian method for cooking green beans.  The bacon is a substitute for pancetta which is the same cut of meat as bacon but which is not smoked after it is cured.

I guess I’m going to have to go with my mother-in-law’s assertion that these are Polish though I can’t say I ever had anything like them among the Poles and other Eastern Europeans in my hometown of Johnstown, PA.  Really, though, that’s not definitive.  I’ve never had any potato cakes like my Slovak grandmother’s (unless they were made by one of her daughters-in-law, of which there were seven!).  That doesn’t make those potato cakes any less Slovak, though.

Red beans and tomatoes are a common combination internationally.  There are versions from New Orleans to Haiti to India to South America to Italy to name just a few.  To be sure, the seasonings vary tremendously but the basics, red beans and a tomato-based sauce, remain the same.


Follow us on your social media platform of choice


Fast forward to the 1970’s:  my husband (on the right) and his brother (on the left) with their parents

I’ve decided to keep this recipe in its original form, with canned beans and tomato sauce.  Although I keep an array of canned beans in my pantry for unexpected events I usually prefer to start with dry beans.  Most commercial brands of tomato sauce are made from tomato paste and water, with a bit of onion powder and garlic powder added.  In place of tomato sauce, I typically use tomato paste and water to achieve the same results.


If you have a favorite family recipe and a bit of a story to tell, please email me at santafecook@villasentieri.com and we can discuss including it in the blog. I am expanding the scope of my blog to include traditional recipes from around the country and around the world. If you haven’t seen Bertha’s Flan or Melinda’s Drunken Prunes, take a look.  They will give you an idea of what I’m looking for.


Print Recipe
Kidney Beans in Tomato Sauce
These beans can be made without the bacon, or with less bacon, in which case a few tablespoons of oil will need to be used to sauté the onion and bell pepper. If you want extra sauce just increase the amount of tomato sauce. You can sauté a clove or two of minced garlic with the onion and bell pepper if you would like. The liquid from the canned beans will improve the consistency of the sauce. Before using it, however, taste it to be sure that it does not have a metallic flavor which happens with some brands of beans. If so, drain and rinse the beans and add additional water in place of the liquid in the cans.
Votes: 5
Rating: 1.2
You:
Rate this recipe!
Prep Time 5 minutes
Cook Time 75 minutes
Servings
people
Ingredients
Prep Time 5 minutes
Cook Time 75 minutes
Servings
people
Ingredients
Votes: 5
Rating: 1.2
You:
Rate this recipe!
Instructions
  1. Dice the onion.
  2. Dice the bell pepper.
  3. Chop the bacon.
  4. Sauté the bacon until it begins to color, adding a small amount of oil if needed to keep it from sticking.
  5. Add the onion and bell pepper to the bacon.
  6. Sauté until the onion just begins to color and the pepper becomes a dull green and starts to soften. It may be necessary to cover the pan and/or add a tiny amount of water if the onion and/or pepper begin to get too brown.
  7. Add the beans and their liquid.
  8. Season with salt and pepper. Bring to a boil.
  9. Add tomato sauce and water.
  10. Simmer, partially covered, for approximately one hour, adding additional water if necessary.
  11. Taste and adjust seasoning while the beans are cooking.
Recipe Notes

Copyright © 2018 by VillaSentieri.com. All rights reserved.

Share this Recipe

Mom’s Slow-Roasted Pork

February 14, 2018

Growing up, Sunday dinner almost always included some sort of pasta with my mother’s long-simmered Southern Italian sugo.

The sauce was made with large pieces of pork which were always served on the side.  In addition, there might be meatballs, simmered in the sauce after being fried to a deep brown.  Sometimes, actually, much more often than sometimes, there would be veal cutlets.  This was back in the day when people didn’t really think about how veal was produced…or maybe it was produced more humanely back then.  I’m not sure.

Sometimes a pork roast would accompany the pasta.  Occasionally, though not often, the pork roast would be accompanied by potatoes and there wouldn’t be pasta on the table.

A Sunday without pasta, though, was quite unusual in my parents’ house.


Click HERE to join our mailing list and you’ll never miss a recipe again!


The pasta could have been homemade linguine or fettuccine, which my mother and her sister, my Aunt Margie, made on a regular basis and then dried and stored in large rectangular aluminum tins that once held baccala (salted cod).

Those tins had a myriad of uses, from protecting pasta and cookies to storing recipes and papers.  Even though they were made of an inert metal, they had to be thoroughly scrubbed and allowed to air out, uncovered, for weeks to rid them of the smell of baccala.

My mother learned her style of Southern Italian cooking from her mother, Angelina (far left). No doubt she learned it from her mother (center).

Sometimes the Sunday pasta was homemade ravioli, never was it gnocchi as my father didn’t like gnocchi.  Those were reserved for dinners when my father was out of town.

Usually, though, the pasta was dried pasta from a box: spaghetti, rigatoni, wagon wheels, fettuccine, and so forth.  Dried pasta is really a different sort of pasta with some different uses than fresh pasta (even if the fresh pasta is dried before use as mom and Aunt Margie often did).


Follow us on your social media platform of choice


I know many of you have heard me say this, but roasts in our house were much more similar in texture to pulled pork than the typical French-American style of “just-how-little-can-we-cook-this-hunk-of-meat-and-say-it’s-done” type of roast.

A huge advantage of this style of cooking is that you can know in advance when it will be done because it’s really the clock that counts, not the thermometer.  I don’t like making an American style roast for a dinner party.  It makes me crazy.

I don’t get to enjoy cocktails and I don’t get to enjoy the first course because I’m focused on when the thermometer might say the roast is done.  While the temperature to be achieved is precise, the time is not.

On the other hand, the Italian style of roasting eliminates all of these problems because the meat is not “just barely cooked enough.”  The collagen begins to liquefy and the roast becomes unctuous.

If you haven’t experienced this style of roast, give it a try.  If you like it, look up my recipe for Italian Slow-Roasted Chicken or Turkey for the poultry equivalent.


If you have a favorite family recipe and a bit of a story to tell, please email me at santafecook@villasentieri.com and we can discuss including it in the blog. I am expanding the scope of my blog to include traditional recipes from around the country and around the world. If you haven’t seen Bertha’s Flan or Melinda’s Drunken Prunes, take a look.  They will give you an idea of what I’m looking for.


Print Recipe
Mom's Slow-Roasted Pork
I have an assortment of blue spatterware roasting pans which are perfect for this type of roast. I also have an array of heavy stainless steel, aluminum, and enameled cast-iron roasters. The more important issue is using a roasting pan of the right size to hold the roast without crowding (it shouldn’t touch the sides or top of the roaster) or without too much empty space. The initial cooking at higher temperature not only browns the roast, it helps it to reach the optimum temperature for collagen to break down to produce that pull-apart texture. You can easily increase the size of the roast. With a 4 to 5 pound roast, you would probably need to add another 45 minutes to 1 ½ hours to the roasting time.
Votes: 0
Rating: 0
You:
Rate this recipe!
Course Mains, Meats
Cuisine Italian
Prep Time 15 minutes
Cook Time 4 hours
Servings
people
Ingredients
Course Mains, Meats
Cuisine Italian
Prep Time 15 minutes
Cook Time 4 hours
Servings
people
Ingredients
Votes: 0
Rating: 0
You:
Rate this recipe!
Instructions
  1. Cut the garlic cloves into 3 to 4 slivers each.
  2. Plunge a paring knife into the pork at intervals to make small pockets about 1 inch deep. Space the pockets out around the roast.
  3. Put a piece of garlic and some of the fresh rosemary into each pocket.
  4. Some of the rosemary will invariably stick to the fat cap. Don’t sweat it, just try to get most of it in the slits.
  5. Put the roast into a roasting pan that is just large enough to hold it.
  6. Generously season the roast with salt and pepper.
  7. Pour the wine (or water) into the bottom of the roasting pan.
  8. Roast, uncovered, at 375°F until the roast is browned a little, 45-60 minutes.
  9. Baste with pan juices.
  10. Cover and continue to roast at 275-300°F for about another three hours, basting with the pan juices every 30-45 minutes or so.
  11. The pan juices will dry up. Be careful not to burn the bits on the bottom of the pan, but allow them to brown before adding another ¼ cup of water or so. After two or three cycles of this, the pan juices will be a luscious dark brown.
  12. Remove the roast from the pan. Allow to cool for 10 minutes.
  13. To serve, pull the roast into large pieces. Don’t even try to slice it. It’s not supposed to slice.
  14. Pour a little of the pan juices on top. Pass the rest.
Recipe Notes

Copyright © 2018 by VillaSentieri.com. All rights reserved.

Share this Recipe

Marisa’s Mystical Meatballs

February 9, 2018

These meatballs are really mystical if you consider the sway they hold on my husband, his brother, and his father.  They go wild for these meatballs.

Well, wild in that very restrained Northern Italian way.

If they were Southern Italian, where a dinner conversation can seem like a minor riot, their meatball response would barely register on the scale.  It would signal almost utter disregard for the meatballs.

But that, in fact, is not the case.  The meatballs hold some sort of magical, mystical charm.

Marisa, of course, is my mother-in-law and these are her meatballs.  She considers them quite unusual, having learned to make them from her mother and basically not remembering any other relatives or friends making something similar.

And, as meatballs, they ARE unusual!

An old-fashioned ricer is still an indispensable piece of kitchen equipment. Make sure yours is very sturdy. Many new ones are not.

Click HERE to join our mailing list and you’ll never miss a recipe again!


But here’s a secret that I haven’t told anyone yet.  They really AREN’T meatballs.  They’re croquettes!  Crocchette in Italian.

There, I said it.  Marisa’s Mystical Meatballs aren’t really meatballs.  But everybody in the family calls them “Ma’s Meatballs.”  “Ma’s Croquettes” doesn’t have the same alliterative allure, even if it’s more accurate.

My mother-in-law and father-in-law celebrating his birthday.

When I did a Google search for crocchette, Google turned up about 1,730,000 results in 0.51 seconds.  When I searched for crocchette patate e carne (potato and meat croquettes), Google returned 1,500,000 results in 0.72 seconds.

And that was doing searches in Italian!

I found a Japanese woman who seems to have the same relationship to her mother’s meat and potato croquettes (korokke) as my husband and his family have to his mother’s.


Follow us on your social media platform of choice


The meat for these “meatballs” (a word I’ll use in deference to my husband and his family of origin) is boiled before being finely chopped.  This presents a perfect opportunity to make a really nice beef broth.  You don’t have to do that, of course, but since you’re going to be boiling the meat anyhow, and since it only takes a few extra minutes to throw some aromatics into the pot, why not!

The broth from the meat for the specific batch of meatballs shown in this blog is sitting in the freezer ready to be turned into Auntie Helen’s Stracciatella, which will be coming up on the blog next month.


If you have a favorite family recipe and a bit of a story to tell, please email me at santafecook@villasentieri.com and we can discuss including it in the blog. I am expanding the scope of my blog to include traditional recipes from around the country and around the world. If you haven’t seen Bertha’s Flan or Melinda’s Drunken Prunes, take a look.  They will give you an idea of what I’m looking for.


Print Recipe
Marisa's Mystical Meatballs
Marisa says she usually uses cross-cut beef shank for the meatballs. When we made them, she also had a piece of beef she bought for soup so we used both. In the end, we got ½ pound of cooked beef, with fat and gristle removed. Adjust the proportion of the other ingredients if you get substantially more or less cooked beef. If you want to use just cross-cut beef shank, I would try about 2 ½-3 lbs. The beef is boiled and then finely chopped to make the meatballs, giving you the opportunity to make a really nice beef broth with just a few minutes more work.
Votes: 0
Rating: 0
You:
Rate this recipe!
Prep Time 30 minutes
Cook Time 6 hours
Servings
meatballs
Ingredients
Beef and Broth
Meatballs
Prep Time 30 minutes
Cook Time 6 hours
Servings
meatballs
Ingredients
Beef and Broth
Meatballs
Votes: 0
Rating: 0
You:
Rate this recipe!
Instructions
Beef and Broth
  1. Cross-cut beef shank.
  2. Put the meat and all other broth ingredients in a large stock pot.
  3. Cover with abundant cold water.
  4. Bring to a boil, reduce heat and simmer, partially covered, for 4-6 hours, until the meat is very tender.
  5. Remove and cool the beef.
  6. Strain the broth and reserve for another use.
Meatballs
  1. Remove fat, gristle and bone from beef. You should have approximately ½ pound of cooked beef.
  2. Cook the unpeeled potatoes in boiling water until you can easily pierce them with the tines of a long fork or paring knife, 20-25 minutes.
  3. Remove the potatoes from the water and allow to cool for about 10 minutes.
  4. Meanwhile, mince the garlic or grate it on a microplane grater.
  5. Combine beef, parsley and garlic in a food processor. Process until finely chopped.
  6. Peel the slightly cooled potatoes. If they are too cool it will be difficult to rice them.
  7. Pass the potatoes through a ricer.
  8. Combine the beef mixture with the potatoes, nutmeg, allspice, salt and black pepper.
  9. Mix well with a large spoon or your hands.
  10. Add the lightly beaten eggs.
  11. Mix well using your hands.
  12. Form the mixture into 16 balls and then flatten them slightly.
  13. Lightly roll the meatballs in fine dry breadcrumbs.
  14. Pour ⅛ inch of oil into a large sauté pan.
  15. Heat the oil on medium-high heat.
  16. Fry the meatballs in two batches, on medium-high, flipping once, until brown.
  17. Drain on paper towels.
  18. Serve warm or at room temperature.
Recipe Notes

Copyright © 2018 by VillaSentieri.com. All rights reserved.

Share this Recipe

Roman Beans and Kale

January 12, 2018

I don’t remember my mother making Roman Beans and Kale till I was in my late teens.

The first time she made it, I remember her talking about her mother making it.  For something she really liked, she waited an awfully long time to make it.  But then, again, I did the same thing with her pasta è fagioli.

There were some dishes from her childhood that she talked about but never made.  Tiella is the one that I remember most.  It took me multiple tries over many years to recreate it from her description.

Roman beans and kale might seem a little unusual to many American palates due to the length of time the kale is cooked.  There is a point where it becomes silky but most definitely not mushy.  Southerners, though, would find the kale in this recipe cooked in a familiar way.  It is much like the Southern low-and-slow style of cooking greens of various types, such as collards or mustard greens, until they achieve the requisite tenderness.

A bunch of kale

Follow us on your social media platform of choice


Texture is an important part of this dish. The beans should yield but not be falling apart.  The kale should not provide any resistance the way it would if it were just quickly sautéed.  The pasta, however, should be al dente.

Roman beans

Beans, kale and pasta are all pretty mellow-tasting in my estimation.  The garlic, olive oil, and Parmesan cheese are what give this dish its flavor oomph!  At the table, I add crushed red pepper but it shouldn’t be cooked into the dish.

Roman beans are also called Borlotti or Cranberry beans.  Depending on where you live you might have to order them.  In a pinch, though, you could use pinto beans or Anasazi beans.  (If you’re a bean savant, you’ll notice that I used Anasazi beans as I was unable to find Roman beans after searching market shelves in two different cities for a couple of months.  Though I could have gotten them online, I didn’t think the huge price premium was worth it.)

Anasazi beans

My mother’s approach to cooking most foods was definitely low and slow.  It’s classically Italian and so NOT French, which often aims for “high and fast!”  Though culinary education is now more inclusive and not so heavily French, we have a strong cultural bias away from slow, leisurely cooking due to the strong French influence of the past decades.  There are exceptions however, largely based on strong regional traditions, barbecue, for example.  But for the most part, mainstream America, and certainly mainstream American food and cooking publications, just don’t “get” low and slow.


Click HERE to join our mailing list and you’ll never miss a recipe again!


There are some foods that don’t benefit from low and slow, at least when cooked traditionally; steaks for instance.  My mother’s approach to these was that they should be well done, even though that state was achieved quickly.  In our house steaks were most often seasoned with olive oil, garlic, oregano, basil, salt and pepper and broiled.  I think it’s a wonderful flavor combination.  But it wasn’t until my late teens that I developed an appreciation for rare beef.

I remember one meal where my sister and I cooked the steaks for ourselves and our dad.  They were medium rare, as I recall.  Even though our mom didn’t have a hand in cooking them (and cooked her own steak well done) she spent the entire meal feeling like she had served us bad food.  The fact that we liked it didn’t seem to matter.  She had very definite opinions about what constituted good food, and something that was bleeding onto the plate didn’t fit!


If you have a favorite family recipe and a bit of a story to tell, please email me at santafecook@villasentieri.com and we can discuss including it in the blog. I am expanding the scope of my blog to include traditional recipes from around the country and around the world. If you haven’t seen Bertha’s Flan or Melinda’s Drunken Prunes, take a look.  They will give you an idea of what I’m looking for.


Recently I bought sous vide equipment.  I haven’t tried it yet but I’m itching to do so.  Steaks will be first.  The food gets vacuum sealed and then cooked slowly…for hours…in a hot water bath that is maintained at the temperature one wants the food to achieve.  The meat is cooked uniformly throughout…low and slow!  For steaks, one would want to quickly sear the outside before serving but many foods, like fish, poached eggs, and even hollandaise sauce can be used right out of the water bath.

For now, though, let’s try a slow-cooked pot of beans and greens…Italian style!!

Print Recipe
Roman Beans and Kale
The beans should be cooked through but not falling apart. The kale should take on a silky texture but not be mushy. The pasta should still be a bit “toothy." This is even better if made a day or two in advance and refrigerated. If you are doing this, you will want to undercook the pasta so that it is not too soft after the dish is reheated for serving. Alternately, you can omit the pasta when mixing the beans and kale, then add it when reheating. Depending on where you live, you might not be able to find Roman beans. Roman beans are also called Cranberry or Borlotti beans. If you can’t find Roman beans, you can substitute Pinto or Anasazi beans.
Votes: 1
Rating: 5
You:
Rate this recipe!
Prep Time 15 minutes
Cook Time 2 1/2 hours
Servings
people
Ingredients
Prep Time 15 minutes
Cook Time 2 1/2 hours
Servings
people
Ingredients
Votes: 1
Rating: 5
You:
Rate this recipe!
Instructions
  1. Rinse and pick over the beans.
  2. Cover the beans with six cups of water.
  3. Simmer the beans until almost fully cooked, adding 2 teaspoons of salt and black pepper to taste after the beans have cooked for an hour. If necessary, add a bit of boiling water from time to time to keep the beans just submerged. The beans will cook for about 10-15 minutes more after the kale is added so don't overcook them.
  4. Meanwhile, cut out the center ribs of the kale.
  5. Kale ribs about to be discarded.
  6. Cut the leaves crosswise into large pieces.
  7. Rinse and drain the kale.
  8. Bring a quart of salted water to a boil.
  9. Add the kale. The kale should quickly wilt enough to be covered by water. If not add a bit more water to just cover the kale.
  10. Simmer the kale, covered, stirring occasionally, until cooked to a silky texture, approximately 1 hour.
  11. While the kale is cooking, crush the garlic with the side of a chef's knife.
  12. Slowly brown the garlic in the olive oil.
  13. Once the garlic has browned, remove the oil from the heat. Discard the garlic. Reserve the garlic-infused oil.
  14. If using pasta, bring two quarts of water seasoned with 1/4 cup of salt to a rolling boil.
  15. When the pasta-cooking water comes to a boil, add the pasta. At the same time, add the kale and its cooking water to the beans. Keep the beans and kale at a simmer.
  16. Cook the pasta in boiling water until it is still a little crunchy on the inside.
  17. Drain the pasta and add it to the pot with the beans and kale.
  18. Add the garlic-infused oil.
  19. Taste and adjust seasoning.
  20. Cook everything, uncovered, until the pasta is al dente, just a few minutes longer.
  21. Serve with grated Parmigiano Reggiano cheese.
Recipe Notes

Copyright © 2018 by VillaSentieri.com. All rights reserved.

Share this Recipe

Slow-Cooked Pork Roast with Sauerkraut and Sausage

December 29, 2017

I grew up in Johnstown, PA. The town was founded by a Swiss German immigrant, Joseph Schantz in 1800. Over the years, in various documents, recorders anglicized his last name, most commonly rendering it “Johns,” a name the family ultimately adopted. The name of the town was ultimately changed from Schantzstadt to Johnstown.

Johnstown Panorama (Photo by Greg Hume)

I can’t say there was much of a noticeable German influence when I was growing up in the 1950s to 1970s, except for one: New Year’s Day dinner.

Regardless of one’s ethnic background, the most common dinner on New Year’s Day was “Pork and Sauerkraut.” It was commonly acknowledged that this was a nod to Johnstown’s German heritage. And, much like black-eyed peas in the South, was viewed as a way to bring good luck to the coming year.

As you might expect, recipes for pork and sauerkraut vary. Sauerkraut and a large cut of pork are, obviously, essential. Sausages of some sort are common, as are dumplings.


Click HERE to join our mailing list and you’ll never miss a recipe again!


The recipe that I use is close to what my mother made except that I enhance the seasonings in the sauerkraut along more Germanic lines, with onion, carrot, apple, and juniper berries. My mother’s was more basic and similar to the way the Slovak side of my family prepared sauerkraut. My cousin Angie, of Italian heritage, added a brown gravy to hers, which also has Germanic roots.

The Inclined Plane goes from downtown Johnstown to the suburb of Westmont (Photo by Greg Hume)

Long and slow cooking is essential as much for pull-apart-tender pork as it is to mellow out the sauerkraut. Among Central and Eastern Europeans, sauerkraut tends to be cooked for several hours to tenderize it and tame its sour bite.

Kielbasa was a favorite sausage in our house and was always included in pork and sauerkraut. It was always locally made and never procured from large national meatpackers. Often times, other sausages, such as bockwurst or bratwurst, would also be added. But kielbasa was king in pork and sauerkraut and, in the sausage pantheon, second only to hot Italian sausage in our house.


Follow us on your social media platform of choice


The kielbasa that we ate on a regular basis was made from pork, or pork and beef, but venison kielbasa was common too. The first day of deer-hunting season was a public school holiday. You can imagine the importance of venison.

Some of the hunters would have their venison (or some of it, at least) turned into kielbasa, flavored with garlic and smoked. I remember on several occasions going with my father to have work done on the car in late December. The service station had a big platter of meats, cheeses, and pickles laid out for customers to nibble on. Among the offerings was venison kielbasa made from a deer that the owner of the service station had shot.

One of my resolutions for the new year is to find a small, artisanal purveyor of kielbasa that’s as good as what I remember from childhood.


If you have a favorite family recipe and a bit of a story to tell, please email me at santafecook@villasentieri.com and we can discuss including it in the blog. I am expanding the scope of my blog to include traditional recipes from around the country and around the world. If you haven’t seen the post on Melinda’s Drunken Prunes, it will give you an idea of what I’m looking for.


Print Recipe
Slow-Cooked Pork Roast with Sauerkraut and Sausage
Saueraut from the refrigerated section of the market is usually of better quality than canned, especially if the sauerkraut is from an artisinal producer. Draining the sauerkraut and rinsing it well under cool water will produce a more mellow taste. If you want dumplings with this (and who wouldn't?), remove the meat from the pan and keep warm while cooking dumplings on top of the sauerkraut on the stovetop. See the notes section below for my recipe for dumplings.
Votes: 0
Rating: 0
You:
Rate this recipe!
Course Mains, Meats
Cuisine German
Prep Time 20 m
Cook Time 6 1/2 hours
Servings
people
Ingredients
Course Mains, Meats
Cuisine German
Prep Time 20 m
Cook Time 6 1/2 hours
Servings
people
Ingredients
Votes: 0
Rating: 0
You:
Rate this recipe!
Instructions
  1. Cut the cloves of garlic, top to bottom, into approximately 4-6 slivers each.
  2. Pierce the pork around the outside about 1 inch deep with the tip of a sharp knife.
  3. Insert slivers of garlic into the slits
  4. Season the pork generously with salt and pepper.
  5. Brown the pork in a heavy Dutch oven using the oil.
  6. Add white wine, cover tightly, and transfer to oven at 350°F.
  7. After one hour, reduce heat to 225°F.
  8. Slice the onions in half top-to-bottom then cut crosswise into thin slices.
  9. Shred the carrot on the tear-drop side of a box grater.
  10. Cut the apple into small dice.
  11. After the pork has been cooking for a total of about 3 hours, drain and rinse the sauerkraut.
  12. Slowly sauté the onion in the butter or bacon fat until caramelized, approximately 20 minutes.
  13. Add the shredded carrot and diced apple and sauté until heated through.
  14. Add sauerkraut, juniper berries, caraway seeds, bay leaf, and black pepper to taste.
  15. Add water and bring to a boil.
  16. Add the boiling sauerkraut to the pork after the pork has cooked for a total of four hours (1 hour at 350°F plus 3 hours at 225°F).
  17. An hour later nestle the kielbasa and other sausage into the sauerkraut.
  18. Continue to cook, covered, until the pork is fall-off-the-bone tender. Approximately 1-2 more hours.
  19. Remove the pork and sausages.
  20. Skim fat from the top of the sauerkraut.
  21. Put the Dutch oven on the stove and cook dumplings on top of the sauerkraut if desired.
  22. Meanwhile, pull the pork into big chunks. Keep the pork and sausages warm.
  23. Serve the sauerkraut in a separate bowl, or use it to surround the pork and sausages.
Recipe Notes

This is where you can find my recipe for dumplings.

Copyright © 2017 by VillaSentieri.com. All rights reserved.

Share this Recipe

Cuban Black Beans

December 1, 2017

Black beans are ubiquitous on tables in Cuba.

Getting beans to the right texture and the liquid to the right thickness is almost an art form.

Food is scarce in Cuba…at least if you’re a Cuban paying in Cuban Pesos. Not so much if you’re paying in CUCs (Cuban Convertible Pesos), which is what foreigners use. The CUC is pegged to the US Dollar but if you change Dollars for CUCs you pay a 10% penalty as opposed to exchanging another currency, say the Euro, for CUCs.


Click HERE to follow us on Twitter


Prices in Cuban Pesos at a locals’ only market

One view of a locals’ only market
Another view of a locals’ only market

I visited a butcher shop in Havana which pretty much now only sells chicken; when chicken is available, that is. If you notice the door to the cooler is open. That’s because the cooler isn’t on because there’s no inventory.

A butcher shop in Havana

The butcher is just waiting around for chicken to arrive.

When that chicken does arrive, it will likely be frozen Tyson chicken from the United States. Even though, when this picture was taken, the US embargo of Cuba was in full force.

Most of the chicken in Cuba is frozen Tyson chicken from the United States

The same is true of hot sauce. If one asks for hot sauce at a restaurant in Cuba one is likely to get a bottle of Tabasco shipped in from Avery Island, Louisiana. Clearly there are exceptions to the embargo for some American companies!

If you pay in CUCs, the food available increases dramatically.

One stall in a multi-vendor market where prices are denominated in CUCs
Another stall in the same market
Locally prepared beverages in the CUC-denominated market

The disparity in prices for food purchased with Pesos vs CUCs is so large that average Cubans cannot afford to buy food with CUCs, even if they can get them. It takes 25 Cuban Pesos to buy one CUC. Paying in Pesos limits one to shopping in pretty-much locals’ only stores, with limited inventory where the products, like rice and beans, are sold at subsidized prices.

Rum is widely available regardless of the currency.  You’ll pay more if you’re a foreigner, however.

Havana Club is a popular brand of rum in Cuba
A well-stocked bar ready for the day’s customers
Cuban cigars for sale at the bar

After returning from the trip to Cuba in 2014, I tried but couldn’t get the texture of my “Cuban” black beans right. But then, my mother-in-law got a recipe from Beatriz (Betty) Scannapieco. Betty is from Cuba. She was in the exercise group my in-laws attend. Betty’s recipe, using a pressure cooker as is common in Cuba, works like a dream. It’s really pretty effortless, too. The green pepper, onion, and garlic add tremendous flavor but are removed after cooking leaving just beans and the silky cooking liquid.

I made three changes to Betty’s recipe. She called for 1 teaspoon of white wine. I use 1 tablespoon. Betty didn’t use tomato paste or black pepper but both are common ingredients in many Cuban black bean recipes.


Follow us


Click HERE to join our mailing list and you’ll never miss a recipe again!

Print Recipe
Cuban Black Beans
This recipe came from Beatriz (Betty) Scannapieco in my in-law’s exercise group. Betty is from Cuba. I added the tomato paste and black pepper to Betty’s recipe. I also increased the wine from 1 teaspoon to 1 tablespoon. It can be challenging to get the bell pepper, onion, and garlic out of the beans as they very soft after cooking. If you want to make it easier, you could tie them in cheesecloth.
Votes: 0
Rating: 0
You:
Rate this recipe!
Prep Time 10 minutes
Cook Time 1 1/4 hours
Servings
people
Ingredients
Prep Time 10 minutes
Cook Time 1 1/4 hours
Servings
people
Ingredients
Votes: 0
Rating: 0
You:
Rate this recipe!
Instructions
  1. Wash the beans.
  2. Cover beans with water by a couple of inches and soak overnight in the refrigerator.
  3. The next day, cut the bell pepper in half and remove ribs and seeds.
  4. Cut the onion into 4 or 6 wedges, but do not cut the whole way through the root end.
  5. Bruise the garlic by laying the blade of a chef's knife on top and gently pounding the knife blade.
  6. Drain the beans. Put the beans in a pressure cooker along with 3 ¼ cups of fresh water.
  7. Bring the beans to a boil, uncovered.
  8. Skim the foam from the beans then remove the pot from heat.
  9. Add the green pepper, onion, garlic and bay leaves to the beans.
  10. Put the lid on the pressure cooker and bring to 10 pounds pressure.
  11. Reduce heat and cook for 30 minutes.
  12. Remove the pressure cooker from heat and allow pressure to dissipate naturally.
  13. Uncover the pressure cooker.
  14. Add the olive oil, tomato paste (if using), wine, vinegar, salt and black pepper (if using).
  15. Bring to a boil uncovered and boil for 5 minutes.
  16. Remove from heat. Cool slightly and remove bell pepper, onion, bay leaves, and garlic.
  17. The beans can be served immediately but are better if refrigerated overnight.
  18. Serve the beans in a shallow bowl with pieces of finely diced raw onion in the center. Black beans are customarily accompanied by white rice.
Recipe Notes

Copyright © 2017 by VillaSentieri.com. All rights reserved.

Share this Recipe

Chinese Five-Spice Roast Pork

November 22, 2017

My food horizons expanded slowly during freshman and sophomore years in college. I was exposed to Chinese food through Dennis and Martha Law, a graduate student couple from Hong Kong who were the resident advisors in my college house during freshman year. I got exposed to Indian food thanks to the proximity to my dorm of the now long-gone Maharaja Indian Restaurant.

As sophomore year came to a close things were about to get kicked up a notch, to steal a phrase from Emeril Lagasse.


Click HERE to follow us on Facebook


In spring of sophomore year I applied to live in the International Residence Project, another of the University of Pennsylvania’s college houses, during my junior year.

I was accepted into the program and invited to a “meet and greet” with the other students later that semester. The resident advisors were Ambrose and Najma Davis and Reginald (Reggie) and Nanacy Rajapakse. Ambrose was from Jamaica, Najma from Bangladesh and Reggie and Nanacy (whose name was often Anglicized to Nancy) from Sri Lanka.

At the “meet and greet” I was introduced to Ray Hugh, who was to be my roommate. Ray, of Hakka Chinese ancestry, hailed from Guyana. We started hanging out together for the remainder of the semester and then, since we were both staying in Philadelphia for the summer, decided to find a summer sublet together.

Ray and his father, Dr. Hugh, in Georgetown, Guyana, 1974

As I had done the previous summer, we sublet an apartment in Graduate Towers (as discussed in my post on Homemade Applesauce).


Click HERE to join our mailing list and you’ll never miss a recipe again!


Then we started cooking! Guyanese food. Chinese food. Italian food. Indian food. The list went on.

The number of cuisines we cooked exploded beginning in junior year when we moved into the International Residence Project. We got recipes from other residents in the Project who came from all around the world. I (very tentatively) started my cookbook collection which now numbers close to 5000 volumes.

Ray (front center) with from right to left, his mother, sister Fay, sister Shelly, and Shelly’s boyfriend Clive in the suburbs of London, 1975

Some dishes we made became regulars (like this roast pork). Others we made once for the sheer challenge.

Ray’s mom’s Crispy Duck was in the latter camp. Mrs. Hugh sent us a sheaf of recipes carefully typed out on onion skin paper. Her recipe for plain white rice, included in those pages, was my tutorial on making steamed white rice.  I followed that recipe consistently, with unfailingly perfect results, until we moved to Santa Fe where the elevation, and its effect on cooking, rendered the directions unusable.

Included in that same sheaf of recipes was Crispy Duck. We started with a whole duck, head and feet included, which we purchased on Ninth Street in Philadelphia. The duck was hung for 24 hours from a hook we screwed into the ceiling while we carefully lacquered it, repeatedly, with a mixture of soy sauce and other ingredients, before roasting.

Me (left) and Ray with Crispy Duck in the early stage, hanging from the ceiling in our dorm apartment, 1975

Compared to the duck, this pork is a breeze. Though Ray, with whom I am still in contact, now recommends marinating it for a day (refrigerated!) if possible, when we were in college the marinating occurred in an hour as the meat was coming to room temperature. I also think that he often used garlic powder rather than fresh garlic. Actually, I think garlic powder works really well to season chicken to be roasted or steaks to be broiled. As I recall, it was pretty tasty on this pork, too.

Everything in this pork is classically Chinese, except, of course, the rum! Likely a rice-based spirit would be used in China but in Guyana the Chinese used rum. Let’s face it, fusion food happens everywhere! Besides, the rum “plays” really nicely with the five spice powder and brown sugar.

Five spice powder is the main flavor and it is important that you use a good quality brand. Not all five-spice powders are created equal. If you don’t have a Chinatown near you, there’s always Amazon. That’s what I did. Despite the existence of a good Asian grocery store in Santa Fe, the five-spice powder that I bought there was not up to my standards.


Follow us


Print Recipe
Chinese Five-Spice Roast Pork
Boneless pork shoulder steaks work well because they contain some fat to keep the meat moist. However, because shoulder steaks contain different muscle groups the texture can change from bite to bite. Well-marbled pork chops with a little fat cap around the edge would work, too. If using bone-in chops, I would use 3 pounds rather than 2 ½ pounds. Be sure to use a good quality five spice powder.
Votes: 0
Rating: 0
You:
Rate this recipe!
Course Mains, Meats
Cuisine Chinese, West Indian
Prep Time 15 minutes
Cook Time 20 minutes
Passive Time 24 hours
Servings
people
Ingredients
Course Mains, Meats
Cuisine Chinese, West Indian
Prep Time 15 minutes
Cook Time 20 minutes
Passive Time 24 hours
Servings
people
Ingredients
Votes: 0
Rating: 0
You:
Rate this recipe!
Instructions
  1. Five spice powder
  2. Combine all ingredients except the pork. Mix well.
  3. Boneless pork shoulder steaks
  4. Add the pork and toss to coat with the marinade.
  5. Marinate the pork in the refrigerator for 24 hours if possible. Turn the pork once or twice while marinating.
  6. One hour before cooking the pork, remove it from the marinade and put it in a single layer in a heavy roasting pan.
  7. Allow the pork to come to room temperature for an hour.
  8. Meanwhile, boil the marinade quickly until it is reduced to approximately 4 tablespoons.
  9. Cool the marinade and pour it over the pork.
  10. Preheat the broiler.
  11. Put the pan with the meat approximately 8 inches below the broiler.
  12. Cook the pork, turning once or twice, until just cooked through, 15-20 minutes.
  13. Allow the pork to rest 10 minutes before carving into bite-size pieces.
Recipe Notes

Unlike the brown sugar typically available in the United States, which is a mixture of white sugar and molasses, the brown sugar available in Guyana is actually a less refined sugar, hence the brown color.  There's not enough brown sugar in this recipe to make a difference so feel free to use standard American brown sugar.  Closer to what is available in Guyana is this brown sugar packaged for the Korean market that I bought in an Asian grocery store, and this brown sugar that I purchased in Ecuador.

Brown sugar packaged for the Korean market but bought in the United States

Brown sugar purchased in Ecuador

Copyright © 2017 by VillaSentieri.com. All rights reserved.

Share this Recipe

Chicken Paprikash (Chicken with Paprika-Sour Cream Sauce)

November 13, 2017

I really don’t remember my Slovak grandmother doing much cooking. By the time I was old enough to pay attention to who was cooking, she was mostly just making the occasional pot of soup.

My Grandmother

My grandparents owned a semi-detached house and Uncle Frankie and Aunt Mary lived next door. Although they had separate front porches, they shared a back porch. Going back and forth was easy.


Follow us on Facebook:  Click HERE


Aunt Mary kept my grandparents well-supplied with food. My Aunt Ann pitched in from time to time as well.

My Grandfather

My grandparents were really keen on soup. I guess when you’re raising a family of seven sons through the Great Depression and its aftermath, on a steelworker’s income, preparing filling and budget-friendly food becomes a necessity.

After the early 1960s when my Uncle Gusty moved back to the United States from Japan with his wife and their children, all seven of my grandparents’ sons lived in Johnstown with their wives and children. Most of us would visit on Sunday afternoons arriving sometime after lunch and leaving before dinner.

My Grandfather and Father in the late 1960s. I used to wear the tie my dad is wearing to high school. I still have it! My father insisted that I tie a Full Windsor. Now I know where he got his preference!

Very frequently a large pot of soup would appear for anyone who needed a little something to hold him or her over till dinner. Often it would be potato soup or sour mushroom soup (made with dried mushrooms and spiked with a little vinegar). My father talked longingly about a sour cabbage soup called kissel which nobody was making any longer.

Other than soup, baba (sometimes written bubba), and sweets at the holidays, I don’t remember eating much at my grandparents’ house though I do remember my grandfather and my uncles consuming a fair amount of beer, and, on special holidays, shots of whiskey.

Me with my Grandparents in 1976

Most of the Slovak food that I ate was at home or at one of my uncle and aunt’s houses.

Chicken Paprikash is considered a Hungarian dish but it was common on the Slovak side of my family.  My grandfather was born in 1890 in a small town, Nitrianske Sucany, not too far from Bratislava, in what is now Slovakia.  My grandmother was born a few years later.  In 1909 when my grandfather came to America, he left what was then the Austro-Hungarian Empire.  Slovakia did not exist as a country.  Food diffuses with cultural contact (think about the popularity of Spam in both Hawaii and Korea which can be traced to the presence of the US military).  I suspect that’s how Chicken Paprikash became something made by my Slovak grandparents.

My version of Chicken Paprikash is a combination of my mother’s and my Aunt Ann’s. When I went to look up the recipe to make in preparation for this blog I discovered that I had never written it down! Luckily I remembered just how to do it.


Follow us


Click HERE to join our mailing list and you’ll never miss a recipe again!

Print Recipe
Chicken Paprikash
Using bone-in chicken with skin improves the flavor of the final dish. Flabby skin from braised chicken is not appetizing, however, so remove it near the end of cooking before putting the chicken in the finished sauce. Since paprika is the major flavor in this dish be sure to use fresh, high-quality paprika, preferably Hungarian. Sweet paprika was the norm in my family, not hot, and certainly not smoked which would totally change the flavor. You can use whatever chicken parts you prefer but I think the texture of slowly braised thighs is superior. Serve the chicken with buttered noodles or mashed potatoes, both of which go really well with the sour-cream-enhanced sauce.
Votes: 2
Rating: 5
You:
Rate this recipe!
Course Mains, Poultry
Cuisine Slovak
Prep Time 20 minutes
Cook Time 2 1/2 hours
Servings
people
Ingredients
Course Mains, Poultry
Cuisine Slovak
Prep Time 20 minutes
Cook Time 2 1/2 hours
Servings
people
Ingredients
Votes: 2
Rating: 5
You:
Rate this recipe!
Instructions
  1. Pat the chicken dry and season liberally with salt and pepper.
  2. Heat the oil in a large, heavy-bottomed sauté pan.
  3. Sauté the chicken on both sides, starting skin-side-down, until brown on both sides. Do not crowd the chicken. Do this in batches if necessary.
  4. Remove the browned chicken to a platter.
  5. Empty the oil from the pan and wipe clean.
  6. Add two tablespoons of butter. Sauté the diced onion until golden.
  7. Add the garlic and sauté until fragrant, approximately 1 minute.
  8. Add 3 tablespoons of paprika and sauté for approximately 15 seconds (paprika burns very easily).
  9. Add one cup of broth and mix well.
  10. Add the bay leaf, browned chicken pieces and any accumulated juices to the pan. Add additional salt and pepper to taste. Cover and braise on low until very tender, approximately 1 ½ hours being sure to taste for salt occasionally. Add additional broth if needed to keep the pan from drying out.
  11. About 15 minutes before the chicken is done, remove the skin and discard.
  12. When the chicken is fully cooked, remove it to a platter.
  13. Remove the bay leaf.
  14. Pour the cooking liquid, without straining, into a small pot and keep it warm on low heat. You can skim fat from the top of the cooking liquid if you would like.
  15. Wash and dry the pot used to cook the chicken. Melt the remaining 6 tablespoons of butter in that pot.
  16. Add the finely diced onion and sauté until golden.
  17. Add the flour and cook 2-3 minutes, until no longer raw.
  18. Add the remaining 1 tablespoon of paprika and sauté 15 seconds.
  19. With the flour-onion-paprika mixture on medium heat, begin to ladle in the reserved cooking liquid a little at a time, stirring well after each addition to avoid lumps.
  20. When all the cooking liquid has been incorporated, add any remaining chicken broth, if all of the original 2 cups was not used to braise the chicken.
  21. Bring to a boil and cook for one minute. The sauce should be quite thick. It will thin with the addition of sour cream. If the sauce is too thin, boil it longer as you will not be able to boil it once the sour cream has been added.
  22. Stir in the sour cream. Adjust salt and pepper. Add the chicken and heat gently without boiling.
Recipe Notes

Copyright © 2017 by VillaSentieri.com. All rights reserved.

Share this Recipe

Tiella (Southern Italian Vegetable and Pasta Casserole)

September 18, 2017

When I was growing up, we mostly socialized within the extended family plus a very few close family friends (that’s you, Joe and Betty Slivosky!).

It was a time (the 60’s) and place (small-town Western Pennsylvania) where it was rare to call in advance of a visit. One just showed up. This usually happened in the evening after dinner, though almost never on Monday or Thursday when the stores downtown were open until 9 PM and we dressed and went shopping after dinner.

Everyone would sit around (usually in the kitchen) drinking coffee (with caffeine), chatting…and smoking. Oh, the smoking! Occasionally the men would drink beer but unless it was a holiday or celebration of some sort, hard liquor was a rarity.

On Sundays, visiting frequently occurred (or at least started) in the afternoon and there might be two or three stops before heading home.

I can’t tell you how many times I heard the same stories. It’s one of the ways I developed a connection with family members, like my maternal grandparents, who died when I was very young.

To be sure, sometimes my cousin Donna and I would abandon the adults and pursue some childhood activity but we still hung out in the kitchen much of the time.

Often times the conversation would veer towards food; things my grandmother would make, the huge platters of cannoli one of my great aunts would make, what was eaten on holidays, and on and on.

There was the oft-repeated reminder of how my grandfather could come home late at night with a group of friends and how my grandmother would cook for them near midnight. There were stories of my grandmother cleaning and cooking chicken feet. My mother would talk about the time she killed a chicken in the basement and it got away from her and ran, headless, around the room. My father would remind everyone that the only food he didn’t like was gnocchi.

Food was a central feature of our lives.

So was conversation.

There were also times I would just sit in the kitchen and chat with my mother for hours. Relatives and food were common topics of conversation. There were dishes my grandmother made that I heard about over and over but never tasted because my mother never made them for some inexplicable reason. One of them was a quickly sautéed veal chop with a pan sauce made of the drippings in the pan, crushed canned tomatoes, peas, and seasonings. Back in the days when I cooked veal, I actually made it. Now I do it with pork chops.

The other dish that stands out in my memory from these conversations is Tiella. My mother talked of it frequently but never made it. The instructions were basic, a layer of pasta, a layer of potatoes, a layer of zucchini, and a can of tomatoes crushed by hand and poured on top. The whole thing was then baked. There wasn’t much of a discussion of which seasonings to use or proportions of ingredients. It was just assumed it would have garlic (of course it would have garlic) and the herbs that were commonly used in our family. Proportions…well…it just needed to look “right.”

For the number of times my mother rhapsodized about this dish, I can’t figure out why she never made it.

The first time I tried to make it was in the early 1990’s at our little house on Griffin Street in Santa Fe. That first time around, it didn’t live up to the hype, for sure, but it christened the house in an odd way.

In November 1992 my mother, my husband’s mother, and my husband’s grandmother traveled to Santa Fe with us for Thanksgiving week. We looked at property and fell for a little (1151 square foot) house on Griffin Street. My mother was terminally ill at the time. When we got back home, my mother insisted that we use her money for the down payment, which we did. She kept saying that she wanted to live long enough to return to that house in the spring. It didn’t happen. She died in early January.

All of the kitchen gear, china, and glassware for the house on Griffin came from my mother’s house. So, it was fitting that I should make this dish for the first time using my mother’s kitchenware in a house that we owned thanks to her.

It took me many years of working (off and on) on the seasonings and proportions to get it to taste great. (Well, I think it does.) The only real liberty I took with the dish is to use fresh tomatoes rather than canned when I make this in the summer.


Follow us


Click HERE to join our mailing list and you’ll never miss a recipe again!

Print Recipe
Tiella (Southern Italian Vegetable and Pasta Casserole)
This is a wonderful late summer dish when tomatoes are at their peak. If you make it at other times, use a 28 ounce can of whole tomatoes in place of the tomato puree and fresh tomatoes. Pour the liquid in the can over the potatoes instead of the puree. Crush the tomatoes by hand, add the seasonings described for fresh tomatoes, and arrange the crushed tomatoes on top.
Votes: 0
Rating: 0
You:
Rate this recipe!
Prep Time 1 hour
Cook Time 2 hours
Passive Time 30 minutes
Servings
people
Ingredients
Prep Time 1 hour
Cook Time 2 hours
Passive Time 30 minutes
Servings
people
Ingredients
Votes: 0
Rating: 0
You:
Rate this recipe!
Instructions
  1. Preheat the oven to 350°F.
  2. Combine the olive oil and crushed garlic in a small sauté pan. Sauté garlic until lightly browned. Remove the garlic and reserve the oil.
  3. Put the raw ditalini in the bottom of a deep, circular casserole, approximately 10 inches in diameter. The pasta should form a single layer with a fair amount of extra room for it to expand.
  4. Add 2 tablespoons of Parmesan cheese, ¼ of the minced garlic, and 2 tablespoons of the garlic oil and mix well.
  5. In a bowl, toss the sliced potatoes with half the rosemary, ⅓ of the oregano, ¼ of the basil, 2 tablespoons of Parmesan cheese, ¼ of the minced garlic, 2 tablespoons of the garlic oil, and a generous amount of salt and pepper.
  6. Arrange the potatoes neatly in overlapping layers on top of the ditalini. Do not wash the bowl.
  7. Season the tomato puree with salt and pour over the potatoes.
  8. In the same bowl used for the potatoes, toss the zucchini with the remaining oregano, ¼ of the basil, the remaining rosemary, 2 tablespoons of Parmesan cheese, ¼ of the minced garlic, 2 tablespoons of the garlic oil, and a generous amount of salt and pepper.
  9. Arrange the zucchini on top of the potatoes. Do not wash the bowl.
  10. Neatly arrange half the tomatoes on top of the zucchini. Season with half the remaining minced garlic, half the remaining basil, and salt and pepper.
  11. Arrange the remaining tomatoes on top and season with salt and pepper as well as the remaining garlic, basil, and all the parsley.
  12. Put the tiella in the preheated oven.
  13. Remove the crusts from several slices of day-old Italian or French bread. Whiz the bread in a food processor to make coarse crumbs.
  14. While the tiella bakes, toss the breadcrumbs with the remaining garlic oil in the bowl used for the potatoes and zucchini.
  15. After the tiella has baked for 90 minutes, sprinkle the oiled crumbs on top and bake till golden, approximately 30 minutes more.
  16. Allow to rest at least 30 minutes before serving. The tiella can be served warm or at room temperature. It can also be reheated in the oven briefly before serving, if desired.
Recipe Notes

Here’s the link for my recipe for homemade tomato puree (passata di pomodoro).

Copyright © 2017 by VillaSentieri.com. All rights reserved.

Share this Recipe

Carne di Manzo in Umido (Thinly Sliced Beef in Tomato Caper Sauce)

August 30, 2017

As I am writing this, my husband’s Great Aunt Fidalma and cousin Massimo are visiting us from Tuscany. We’ve had quite a week of eating and drinking.  Every night, actually, was something like a party. At the lowest head count we were 6, but more often 9, and once 20!

From left to right: Massimo, me (holding Abby), my father-in-law, Zia Fidalma, Zia Ida, my mother-in-law.

Last night I fried a bunch of zucchini flowers to accompany cocktails. Zia Fidalma made little elongated meatballs (polpette) with ground beef and mortadella seasoned with onions, garlic, and herbs. I made risotto with mushrooms and my mother-in-law made long-simmered green beans in tomato sauce, something like my green beans in tomato sauce with bacon.

Risotto with Mushrooms, Meatballs, Green Beans in Tomato Sauce

While we were sitting at the table after dinner doing what Italians do (talking about growing food, talking about preparing food, talking about food we’ve eaten, and talking about the next meal) Zia Fidalma started to describe a dish of thinly sliced beef cooked in tomato sauce with capers.

“Carne di Manzo in Umido!” I said.  She concurred.

I told her that Carne di Manzo in Umido was, in fact, the long-planned blog post for Wednesday.

It is a dish I had at her home in Tuscany about 20 years ago. I wrote down the recipe in a combination of English and Italian and American and Metric measures sitting at her kitchen table. It took me a while to get it right but I think I’ve nailed it.

Here’s a quick rundown of the food we’ve had over the past week:

August 23rd: Pasta with Zucchini, Chicken Thighs braised in Red Wine and Balsamic Vinegar, Salad, Cherries in Brandy, Homemade Limoncello, and Homemade Bay Leaf Liqueur (being posted in October).

Cherries in Brandy
Homemade Limoncello

August 24th: Tiella (being posted in September), Grilled Hot and Sweet Italian Sausage, Grilled Broccolini drizzled with Olive Oil, and more Cherries in Brandy, Homemade Limoncello, and Homemade Bay Leaf Liqueur.

August 25th: Zia Fidalma’s Rouladen (German, I know, but Zia Fidalma lived in Germany for many years), Mashed Potatoes, Corn on the Cob and, you guessed it, more Cherries in Brandy, Homemade Limoncello, and Homemade Bay Leaf Liqueur.

Zia Fidalma making the filling for her rouladen
A watchful eye on the cooking rouladen
Rouladen bubbling away
Zia Fidalma and a platter of rouladen
Me making mashed potatoes (with a side of bourbon)

August 26th (for 20 people): A Massive Antipasto Platter thanks to cousins Paul and Kim Phillips (and a shopping spree at Cheesemongers of Santa Fe), Baked Penne with Ham, Peas, Mushrooms and Roasted Garlic Besciamella, Porchetta, Corn Sautéed in Butter, Sformato di Spinaci, and Italian Almond Torta with Raspberries and Plum Crostata (thanks to Rich DePippo). Then there were those ever-present Cherries in Brandy, Homemade Limoncello, and Homemade Bay Leaf Liqueur.

Kim and Paul fortify themselves at the Santa Fe Farmers Market before heading off to a marathon shopping session at Cheesemongers of Santa Fe
Antipasto
A bit more antipasto
Baked Penne with Ham, Peas, Mushrooms and Roasted Garlic Besciamella
Porchetta
Sformato di Spinaci
Almond Torta with Raspberries and Plum Crostata

August 27th brought some sanity as we had leftovers from the 26th. (We could still feed a small army with the remains of Paul and Kim’s Antipasto Shopping Spree.)

August 28th: As described above, meatballs, risotto, and green beans.

I neglected to mention that we went through cases of wine and then there was a dark chocolate cake from Chocolate Maven Bakery in Santa Fe that kept making its appearance most nights right before we broke out those cherries.

Dark Chocolate Cake from Chocolate Maven Bakery

Eating will slow down a bit now that the relatives have left. As I finish writing this the house is perfumed from a large pot of chicken broth that will get portioned and frozen ready to be pulled out of the freezer in the coming weeks for wave after wave of risotto made with the freshest vegetables the market has to offer.


Follow us


Click HERE to join our mailing list and you’ll never miss a recipe again!

Print Recipe
Carne di Manzo in Umido
Thinly sliced beef is browned and then simmered in the barest amount of tomato sauce with an array of herbs. A bit of capers round out the flavors.
Votes: 0
Rating: 0
You:
Rate this recipe!
Course Mains, Meats
Cuisine Italian
Prep Time 20 minutes
Cook Time 2 hours
Passive Time 1 hour
Servings
people
Ingredients
Course Mains, Meats
Cuisine Italian
Prep Time 20 minutes
Cook Time 2 hours
Passive Time 1 hour
Servings
people
Ingredients
Votes: 0
Rating: 0
You:
Rate this recipe!
Instructions
  1. Herbs, clockwise from top right: nepita, bay leaf, sage, rosemary, oregano.
  2. Combine the flour and 1 ½ teaspoons of salt. Mix well.
  3. Pound the steak lightly with a mallet.
  4. Season the steak with salt and pepper. Cut the pieces in half if they are too large after pounding.
  5. Dredge the steak in the seasoned flour and reserve. It is best to do this about an hour in advance as the flour will adhere to the meat better.
  6. Bruise the garlic with the side of a large chef’s knife.
  7. Put a thin film of olive oil on the bottom of a very large sauté pan. Heat over medium high heat.
  8. When hot, add as much of the beef as will fit without crowding in a single layer. Add half the garlic.
  9. Sauté the meat and garlic until the meat is browned on both sides.
  10. Remove the browned meat to a platter. Repeat with the remaining meat and garlic, in however many batches are needed.
  11. If the garlic starts to turn dark brown, remove it or it will become bitter.
  12. When all the meat is browned return it to the pan with any accumulated juices. Leave the cooking oil in the pan.
  13. Try to arrange the meat so that the pieces overlap rather than putting one piece of meat directly on top of another.
  14. Add all the other ingredients except the capers.
  15. Cover and simmer gently until meat is tender flipping the meat every 20 minutes or so. It will take at about one and one-half to two hours to get the meat tender depending on the cut and your elevation.
  16. Add water from time to time if the sauce boils away.
  17. Rinse the salt off the capers and add them during last five minutes of cooking. Taste and adjust salt and pepper.
  18. There should be a very small amount of sauce along with oil that is red from the tomato. Do not remove the oil, it adds significantly to the mouthfeel of the sauce.
Recipe Notes

Copyright © 2017 by VillaSentieri.com. All rights reserved.

Share this Recipe